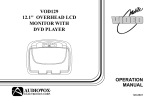
1
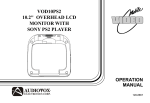
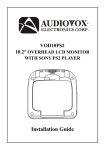
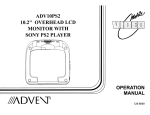
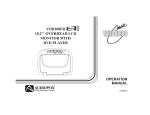
VOD10PS2
10.2" OVERHEAD LCD
MONITOR WITH
SONY PS2 PLAYER
MENU / ENTER
OPERATION
MANUAL
128-8667A
Important Notice
Installation of overhead products requires careful planning and preparation. Be extremely careful when working on a vehicle with side
curtain air bags. Do not route wires near any portion of the side curtain air bag assemblies. This includes any anchor points in A, B, C or
D pillars of the vehicle. Routing wires in these areas or running wires by the side curtain air bags can prevent the side curtain air bag from
fully deploying which can result in personal injury to vehicle occupants. If you have any questions regarding wire routing in a vehicle,
please contact Audiovox Technical Support at 1-800-225-6074.
When connecting power and ground in a mobile video installation ensure that the ACC wire is fused at the point where it is connected to
the vehicle ACC wiring. Failure to do so can result in damage to the vehicle if a short circuit develops between the vehicle connection
point and the mobile video product.
An LCD panel and/or video monitor may be installed in a motor vehicle and visible to the driver if the LCD panel or video monitor is used
for vehicle information, system control, rear or side observation or navigation. If the LCD panel or video monitor is used for television
reception, video or DVD play, the LCD panel or video monitor must be installed so that these features will only function when the vehicle is
in “park” or when the vehicle's parking brake is applied.
An LCD panel or video monitor used for television reception, video or DVD play that operates when the vehicle is in gear or when the
parking brake is not applied must be installed to the rear of the driver's seat where it will not be visible, directly or indirectly, to the operator
of the motor vehicle.
Warnings
• Do not use any solvents or cleaning materials when cleaning the video monitor.
• Do not use any abrasive cleaners, they may scratch the screen.
• Use only a lightly dampened lint free cloth to wipe the screen if it is dirty.
• Lock the LCD screen in the fully closed position when not in use.
• Before putting on headphones always adjust the volume setting to the lowest position.
• Remember to leave the dome light switch in the off or auto positions when the vehicle is unattended, as the dome lights, if left on, can drain
the vehicle's battery.
• Do not put pressure on the screen.
• Caution children to avoid touching or scratching the screen, as it may become dirty or damaged.
Licensed under one or more of the following patents: Patent NOS. 5,775,762; 5,927,784; and 6,678,892
PlayStationÒ2 is a registered trademark of Sony Corporation
FEATURES
Congratulations
Congratulations on your purchase of the AUDIOVOX
VOD10PS2 Player with Drop-Down Video / Monitor. The
VOD10PS2 has been designed to give you and your family
many years of video entertainment in the mobile
environment. Please read the directions that follow to
familiarize yourself with the product to ensure that you obtain
the best results from your equipment.
Please note: Installation options vary, see the individual
owner's manuals for each component in your system to
obtain a full understanding of each component's operation.
Safety Precaution
For safety reasons, when changing video media it is
recommended that the vehicle is not in motion, and that you
do not allow children to unfasten seat-belts to change video
media or make any adjustments to the system. System
adjustments can be accomplished using the remote control,
while seat-belts remain fastened. Enjoy your AUDIOVOX
entertainment system but remember the safety of all
passengers remains the number one priority.
3
•
10.2” TFT (Thin Film Transistor) Active Matrix LCD
(Liquid Crystal Display) Monitor
•
Built-in SONY PlayStation2 game console
•
2 SONY PlayStation2 Wireless Game Controllers
•
Full Function Remote Control
•
OSD (On Screen Display) for Control of Picture Quality
and Functions
•
Infrared Transmitter for IR Wireless Headphones
•
2 wireless IR headphones
•
Audio/Video Source Inputs (PS2, AV1, AUX)
•
A/V output via RCA pigtail
•
Dome Lights with 3-Position Switch
•
Built-in 16 Channel Frequency Wireless FM Modulator
•
Screen Mode Selection (4:3, 16:9)
•
Backlit Controls
•
Plays DVD, CD and SONY PlayStation2 Games
QUICK START GUIDE
1.
Insert batteries into the PlayStation2 game controllers and the remote control. Game controller transceivers are
preinstalled when the unit is shipped.
2. Turn the vehicle on. Running this unit on battery power (accessory key setting) will drain the battery.
3. Press the screen release button to lower the LCD screen. Swing the screen back to allow the PlayStation2 to drop
down.
4. Push the PlayStation2 release button to drop down the PlayStation2.
5. Press the (open) button on the PlayStation2 to open the PlayStation2 disc cover.
6. Insert a DVD or PlayStation2 game onto the spindle and press gently to seat the disc on the spindle.
7. Close the disc cover on the PlayStation2 by pressing down gently on the center of the cover.
8. Return the PlayStation2 to its docked position.
9. Turn the VOD10PS2 on by pressing the power button.
NOTE: If a blue screen is present, press the green RESET key on the remote control or the PlayStation2.
10. If a DVD is played press the PLAY key on the remote control, or the “X” key on the game controller or the
Menu/Enter key on the front of the overhead unit.
4
QUICK START GUIDE (Cont)
11. When using the wireless headphones install the batteries in each headphone. Turn the volume to minimum before
turning them on. Once they are turned on, place them on your head (pay attention to R/L earpieces) and slowly
adjust the volume to a comfortable listening level.
12. When listening to the system over the vehicle radio:
a. Using the remote control:
i. to turn on the FM modulator by pressing FMM ON/OFF
ii. Select an FM frequency by pressing FMM Select.
iii. Tune the vehicle radio to the FM frequency selected.
b. Using the MENU/ENTER Key on the front of the unit:
i. Press MENU/ENTER.
ii. Use the q (down) key to highlight FMM, press MENU/ENTER.
iii. Use the q(down) or p (up) key to select FMM ON.
iv. Press MENU/ENTER to select FMM ON.
v. To select the frequency press MENU/ENTER.
vi. Use the q (down) key to highlight FMM and press MENU/ENTER.
vii. Use the q (down) key to highlight FMM SELECT and press MENU/ENTER.
viii.Use the q(down) p (up) u (right) or t (left) keys to select an FM frequency.
(NOTE: For best sound quality select an FM Frequency that is not used in the area you will be driving.)
ix. Press MENU/ENTER to set the FM frequency.
x. Tune your vehicle radio to the frequency just set in the steps above.
xi. Adjust the volume of the vehicle radio to a comfortable listening level.
5
QUICK START GUIDE (Cont)
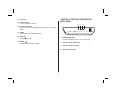
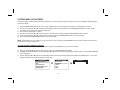
Using the Control Panel
To access the Control Panel press the dark gray DISPLAY or dark gray SELECT button. The Control Panel (Below) can be
used to navigate the DVD disc. Refer to figure below:
Pressing the dark gray DISPLAY or dark gray SELECT button again will cause the Control Panel to change its position on
the screen. Pressing the DISPLAY or SELECT button a third time will turn off the Control Panel. Use the dark directional
buttons (q p u t ) to select an icon. When the desired icon is selected, press the button.
NOTE: The Control Panel may appear at the end of some DVD movies.
For complete instructions regarding the functions provided by the Control Panel refer to the PlayStation2 User’s Guide.
6
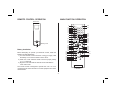
CONTROLS AND INDICATORS DIAGRAM (FRONT VIEW)
1. SOURCE Button (S)
Use to select the sources: PS2, AV1 and AUX.
7
6
5 4
3
2
2. CURSOR Buttons (pqt u)
Use these buttons to access menu selections on the screen.
1
3. MENU/ENTER Button
Use this button to access SYSTEM MENU and select system
menu items.
MENU / ENTER
4. Infrared Transmitter and Sensor
Transmits audio to wireless headphones, allows the remote
control to operate the unit and to control other accessories in the
system.
13
14
8
9
10
15
MEMORY CARD
FORCE LINK
MEMORY CARD
RESET
I/
5. POWER Button ( )
Used to turn the system on/off (standby).
16
6. Dome Lights
Provide additional interior illumination.
FORCE LINK
7. Three Position Dome Light Switch
ON - Turns on the dome lights. (Do not leave switch on when
vehicle is off.)
OFF - The dome lights will not turn on in this position.
AUTO - Automatically switches on the dome lights in
conjunction with the vehicle's interior illumination.
11
8. PlayStation2 CONSOLE
12
9. MEMORY CARD SLOT 1 & MEMORY CARD SLOT 2
(Memory Cards not supplied)
10. PS2 WIRELESS CONTROLLER TRANSCEIVERS
(Transceivers supplied)
7
CONTROL FUNCTION DESCRIPTION
(SIDE VIEW)
11. LCD Panel
12. Screen Release
Press to release the screen.
1 2
13. LCD Cut Off Switch
Used to turn off the LCD backlit when the LCD is in the closed
position.
3 4
R AUDIO L
VIDEO
14. OPEN
Push to open the PlayStation2 tray.
15. OPEN ()
The disc tray opens.
1. HEADPHONE JACK
For wired headphone with a 1/8” (3.5mm) plug.
16. RESET (
)
ON/Standby and RESET indicator.
2. Auxiliary Audio Right Input
3. Auxiliary Audio Left Input
4. Auxiliary Video Input
8
REMOTE CONTROL OPERATION
MAIN FUNCTION OPERATION
Back View
OPEN/
CLOSE
RESET
P1
P36
AUDIO
P2
P3
P4
P5
P6
P7
SHUFFLE
1
2
3
4
5
6
7
8
SUBTITLE REPEAT
SLOW
CLEAR
SCAN
PREV
9
TIME
0
P8
P9
PLAY
NEXT
PAUSE
A-B
STOP
P10
DISPLAY
MENU
TOP MENU
RETURN
P11
P12
P34
P33
P32
P31
P30
P29
P28
P27
P26
P13
Battery Cover
P35
ANGLE PROGRAM
ENTER
Battery Installation
M1
M2
M3
M4
Before attempting to operate your Remote Control, install the
batteries as described below.
1) Turn the Remote Control face down. Using your finger, slide
the battery cover off in the direction of the arrow.
2) Install Two “AAA” batteries. Make sure that proper polarity
(+ or -) is observed.
3) Align the cover tabs with the remote control and slide the
cover until it locks.
The remote control is designed to operate the unit. It is not a
universal remote control and will not control equipment from other
manufacturers.
M5
M6
M7
M8
P14
P15
P16
P17
P18
P19
P20
P25
L1
L3
R3
R1
SELECT
START
L2
R2
MUTE
VOLUME
PIX
FMM ON/OFF
SYSTEM
MENU
FMM SELECT
SOURCE
IR ON/OFF
DISPLAY
M10
M9
ENTER
DVD /PLAYSTATION
9
P24
P23
P22
P21
M11
REMOTE CONTROL FUNCTIONS
The remote control is divided into two sections, Dark Gray buttons on the top, which control the built-in PlayStaion2 and Light Gray
buttons on the bottom of the remote control, that control the other functions of the unit.
PLAYSTATION CONTROLS (P1-P36) (Dark Gray Buttons)
NOTE: PlayStation2 controls (refer to the SONY PlayStation2 manual for details).
P1. OPEN/CLOSE
Not used on this model.
P2. AUDIO
Displays and changes DVD audio options.
P3. SHUFFLE
Starts playback of titles or chapters in random order.
P4. ANGLE
Displays and changes DVD viewing angle options.
P5. PROGRAM
Displays the Program Setup screen.
P6. SUBTITLE
Displays and changes DVD subtitle options.
P7. REPEAT
Selects repeated playback of all the titles on the disc, or one title or chapter.
10
P8. SLOW ( / )
Changes to slow-motion playback. (Forward or Reverse)
P9. SCAN ( / )
Fast forwards or fast reverses playback on the screen to locate a particular scene.
P10. PLAY
Starts playback.
P11. DISPLAY
Displays the Control Panel of the PlayStation2.
P12. TOP MENU
Displays the disc menu of DVD-Video discs. The content varies from disc to disc.
P13.
BUTTON: DVD MENU
Selects the item to be changed.
P14. ENTER
Executes the item selected on the DVD disc menu or the on-screen Control Panel.
P15.
BUTTON: TITLE MENU
Selects the title to be played.
P16. DIRECTIONAL BUTTONS: CURSOR CONTROL
Use these buttons to access the menu selection on the screen.
P17. L3 BUTTON
Displays Subtitle Options to select the subtitle language and/or turn it on or off.
11
P18. L1 BUTTON
Previous (9), press to return to the previous chapter or track.
P19. L2 BUTTON
Search ( ) using fast reverse or fast forward playback.
P20. SELECT
Displays the control panel of the PlayStation2.
P21 START
Press to Play/Pause disc playback.
P22. R2 BUTTON
Search ( ) using forward playback.
P23. R1 BUTTON
Next (:) press to skip to the next chapter or track.
P24. R3 BUTTON
Displays Audio Options, press the language changes.
P25.
BUTTON: ENTER
P26.
BUTTON: CANCEL /<(Stop)
P27. MENU
Displays the disc menu of DVD-Video discs. The content of the menu varies from disc to disc.
P28. RETURN
Returns to the previously selected screen within the disc menu of DVD-Video discs.
12
P29. PAUSE
Pauses and resumes playback.
P30. STOP
Stops playback.
P31. PREVIOUS (9) / NEXT (:)
Returns to the beginning of the current or previous chapter/Skips to the beginning of the next chapter.
P32. A-B REPEAT
Specifies a scene for playback and starts playback of the scene that has been set.
P33. CLEAR
Clears selected numbers or playback modes.
P34. TIME
Displays the current title or chapter number and the elapsed or remaining time.
P35. NUMBER 0~9
Used to select numerical items displayed on the screen.
P36 STANDBY / RESET
Used to turn on, reset, and set the PlayStation2 console in standby mode. On :Press Once. Reset :Press for about one second.
Standby mode :Press and Hold down for more than three seconds.
OVERHEAD MONITOR CONTROLS (M1-M11) (Light Gray Buttons))
M1. POWER
Press this button to turn the unit ON and OFF.
13
M2. MUTE
Press this button to mute the audio. Pressing the button again restores the sound to the previously set level.
M3. FMM ON/OFF
Turns the wireless FM Modulator ON or OFF.
M4. SYSTEM MENU
Allows the user to access the main system menu for picture controls, FM Modulator Select, screen mode etc.
M5. FMM SELECT
Selects the FM Modulator Frequency.
M6. SOURCE
Each time the button is pressed, the audio/video source will change: PS2, AV1 and AUX.
M7. IR ON/OFF
Turns the Infrared Transmitter power ON/OFF for IR Wireless Headphones.
M8. DISPLAY
Press to display OSD information.
M9. ENTER
Used to execute a selected setting or menu option.
M10. CURSOR BUTTON (pqt u)
Use these buttons to access system menu selections on the screen.
M11. VOLUME ( – PIX + )
Each time this button is pressed, the OSD will display the “adjustment bars” for BRIGHTNESS, CONTRAST, COLOR or TINT.
Once the desired adjustment bar is displayed, use the ("+" / "–") buttons to adjust the setting. The display will automatically
turn off if no adjustments are made after 6 seconds, or if any other button is pressed.
14
WIRELESS CONTROLLER (2.4GHz)
Carefully read the information before use. For detailed connection and
usage methods, refer to the Owner’s Manual for the PIayStation2 system.
HOW TO USE
Battery Installation:
The wireless controller uses two “AA” batteries.
1. Turn your controller upside down and remove the lid on the bottom by pressing against
the lip and pulling the lid away.
2. Insert the batteries as indicated in the controller.
3. Once the batteries are inserted, put the lid back in its place and cover the batteries.
Safety Precaution: Follow the battery manufacturer’s instructions as well as
there important safety tips. Do not open or mutilate batteries as they might leak
dangerous chemicals.
The wireless transceivers are pre-installed in the controller ports on your PlayStation2 system.
Turning On the Controller:
ON/OFF Switch
1. Turn on your PlayStation2 system. Press the green reset button on the remote control if
the PlayStation2 does not come on when the main unit is turned on.
2 Place the ON/OFF switch for your controller, which is located between the dual analog
joy sticks, to ON. The POWER LED will illuminate green.
3. Once the controller has been powered on, the PlayStation2 will recognize the wireless
controller. The MODE LED indicator will illuminate red on the wireless controller, indicating
the connection between the wireless controller and the receiver. The green Rx LED on the
PlayStation2 transceiver will illuminate a steady green.
15
POWER LED
MODE LED
Sleep Mode:
START button
Your controller will automatically go into Sleep Mode after approximately three minutes
if not used. The MODE LED indicator will go off. To reactivate the controller, you have
a choice to press the START button or press down on one of the joy sticks on the controller.
Your controller will automatically synchronize with the receiver in the PS 2 unit.
Turning Off the Controller:
Place the ON/OFF switch on the controller to OFF if it will not be used for
a long period of time to preserve battery life.
Joy Sticks
If Your Controller Does Not Synchronize:
1. If the red MODE LED indicator on your wireless controller does not activate, switch the controller off, wait three seconds, and switch it
back on using the ON/OFF switch on the front of the controller.
2. If this does not activate the red MODE LED, switch the controller back off. Turn off your PlayStation2 console and remove the wireless
receiver(s). After this is done, reconnect the receivers, turn on your PlayStation2 console and turn your controllers back on.
3. If this does not activate the red MODE LED, check the batteries and replace as needed.
4. After checking and/or replacing the batteries, repeat step 2 for activation.
Low Power Warning Function:
Under low battery conditions, the MODE LED will flash and the vibration motors will automatically turn off.
Vibration:
Games with the vibration feature will enable the vibration in the controller. Vibration can not be disabled.
Safety Precaution: Stop using this unit immediately if you begin to feel tired or if you begin to feel discomfort or
pain during use. Do not use the vibration function if you have an ailment or injury to the bones, joints or muscles
of your hands or arms.
16
SYSTEM MENU ADJUSTMENT
The System Menu contains features and options that let you customize your system to change the screen mode display, OSD language
and source default.
1)
2)
3)
4)
5)
6)
Press the MENU/ENTER button on unit to enter System Menu, the main page of the system menu will appear on screen.
Use the cursor buttons p or q to select the desired item in the main page and press the MENU/ENTER button to select. (Items
selected in the menu will have a green background)
The sub menu will appear on screen.
Use the cursor buttons p or q to select an item in the sub menu and then press the MENU/ENTER button to select.
Use the cursor buttons t or u to adjust picture control and press the MENU/ENTER button to confirm setting.
Press and hold the MENU/ENTER button to exit System Menu.
NOTE: System Menu can be controlled via unit and remote control. Press the SYSTEM MENU button for access. (Items selected in the
menu will have a green background)
PICTURE CONTROL (REMOTE CONTROL)
When watching a DVD or playing a game, the picture quality can be adjusted to suit your personal taste.
1)
2)
3)
Press the SYSTEM MENU button on the remote control, the SYSTEM MENU will appear.
Highlight PICTURE CONTROL using the light gray p or q buttons and press the light gray ENTER button. The PICTURE CONTROL
menu will appear.
Use the light gray p or q buttons to highlight the picture control to be changed and press the light gray ENTER button. The control
setting for that picture control will appear on the screen.
SYSTEM MENU
PICTURE CONTROL
FMM
PICTURE CONTROL
BRIGHTNESS
CONTRAST
OSD LANGUAGE
SOURCE DEFAULT PS2
SCREEN MODE
COLOR
TINT
RESET
17
16
CONTRAST
4)
5)
6)
Use light gray t or u buttons to change the picture control setting.
To change another picture control setting press the SYSTEM MENU button and select another picture control using the light gray
p or q buttons. Repeat step 4 to change the picture control setting.
To reset the picture control settings to the factory default settings, enter the picture control menu and use the light gray q button to
highlight RESET and press the light gray ENTER button.
NOTE: The light gray PIX control and light gray VOLUME and + buttons on the remote control can also be used to adjust the picture
control settings. When using this method highlight RESET and press the or + button to reset the picture controls to factory default
settings.)
FMM
FMM ON/OFF options - Turns the wireless FM Modulator on or off.
1)
Press the SYSTEM MENU on the remote control, the following screen will appear:
SYSTEM MENU
PICTURE CONTROL
FMM
OSD LANGUAGE
SOURCE DEFAULT PS2
SCREEN MODE
2)
Use the light gray q (down) arrow on the remote control to highlight FMM as shown below:
SYSTEM MENU
PICTURE CONTROL
FMM
OSD LANGUAGE
SOURCE DEFAULT PS2
SCREEN MODE
18
3) Press the light gray ENTER button on the remote control and the following screen will appear:
FMM
FMM ON
FMM OFF
FMM SELECT
4) Use the light gray p (up) or q (down) arrow on the remote control to highlight FMM ON and press the light gray ENTER button to
turn the FM Modulator on.
FMM SELECT
1) Repeat steps 1 through 3 above and highlight FMM SELECT
2) Use the light gray q (down) arrow on the remote control to highlight FMM SELECT and press the ENTER button, the following
screen will appear.
FMM SELECT
89.7 MHz
88.1 MHz
89.9 MHz
88.3 MHz
90.1 MHz
88.5 MHz
90.3 MHz
88.7 MHz
90.5 MHz
88.9 MHz
90.7 MHz
89.1 MHz
90.9 MHz
89.3 MHz
91.1 MHz
89.5 MHz
3)
Use the light gray p (up) q (down) t (left) u (right) buttons on the remote control to select a frequency not used by a radio station
in the area. Press the light gray ENTER button to select the highlighted frequency.
NOTE: The menu will time out after a short period, or press the SYSTEM MENU button to turn off the menu.
19
OSD LANGUAGE
This allows the user to select the language for the on-screen display. The user can either select English, Spanish, French, German for the
OSD language.
SYSTEM MENU
OSD LANGUAGE
ENGLISH
SPANISH
FRENCH
GERMAN
PICTURE CONTROL
FMM
OSD LANGUAGE
SOURCE DEFAULT PS2
SCREEN MODE
SOURCE DEFAULT PS2
This allows the user to set the system default source to PS2 (via System Menu).
NOTE:
• If selected default source is set to PS2 every time the unit’s power is cycled with the source set to something other then PS2, the unit will power
up and automatically switch the source over to PS2
• Unit will be set to Last Source on as the default mode of operation.
• Selection of Source default can only be made from within the system menu.
SYSTEM MENU
PICTURE CONTROL
FMM
OSD LANGUAGE
SOURCE DEFAULT PS2
SCREEN MODE
SOURCE DEFAULT PS2
ON
OFF
SCREEN MODE
This allows the user to change the screen format (aspect ratio 4:3, 16:9).
To select the screen aspect ratio format highlight SCREEN MODE and press MENU/ENTER button to enter the submenu. Then press the
Cursor button p or q to select from 4:3 or 16:9. Press MENU/ENTER button to confirm the setting.
SYSTEM MENU
PICTURE CONTROL
FMM
OSD LANGUAGE
SOURCE DEFAULT PS2
SCREEN MODE
SCREEN MODE
4:3
16:9
20
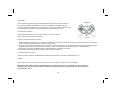
TURNING THE UNIT ON OR OFF
1. Pushing in the Screen Release button will unlock the LCD screen and it will drop down slightly. Pivot the screen downward until a
comfortable viewing angle is reached. The hinge friction will hold the screen in position while the system is in use.
2. Pressing the power button* on the unit or the remote control will turn the system on and off. When in use the internal backlighting will
illuminate the controls.
3. After the unit has been turned on and is displaying a picture, adjust the viewing angle, by pivoting the screen to optimize the picture quality.
4. Remember to turn the unit off and pivot the LCD to the locked position when not in use.
Power
ON/OFF
Button
Remote Sensor
Infrared Transmitter
MENU / ENTER
Screen Release
21
OVERHEAD DOME LIGHTS
The Dome Lights integrated into the unit are controlled by a three position slide switch. Sliding the switch to the ON position will turn
the lights ON. The OFF position will prevent the lights from turning ON with the vehicle's interior lighting, and the auto position will allow the
lights to turn ON and OFF with the vehicle's interior lighting. Refer to the Installation Guide for wire connections. Do not leave the vehicle
unattended with the dome light switch in the ON position, as this could result in a discharged battery.
ACCESSORIES
WIRELESS HEADPHONES
The unit includes a built-in infrared transmitter for use with the supplied wireless headphones. The headphone volume is adjusted using
the controls on each headset. Any number of wireless headphones may be used but they must be used within a line of sight from the
transmitter, as infrared transmissions, like visible light travel only in a straight line. See the documentation accompanying your wireless
headphones.
WIRED HEADPHONES (OPTIONAL)
There is one 1/8” headphone jack on the unit that can be used with any standard wired stereo headphones with a 1/8” plug. This jack is
controlled by the volume up/down buttons on the remote control or the t (left) u (right) buttons on the overhead.
22
SOURCE FEATURE
AV1
The AV1 input may be connected to a external video source, video game system, or other audio / video devices. To access the
audio / video inputs, turn the unit on and press the S (source) button or the Source button on the remote control until "AV1" is
displayed on the screen. Turn the video source component on with its power button or remote control and it is now ready to play
the audio and video signals from the source connected .
NOTE: The AV1 source is available only if pre-installed during your video product installation.
AUX
The AUX input (located on th right side of the unit) may be connected to a external video source, video game system, or other audio / video
devices. To access the audio / video inputs, turn the unit on and press the S (source) button or the Source button on the remote control until
"AUX" is displayed on the screen.
PS2
Press the source button until the screen displays PS2.
Press (
) RESET on unit/remote control to turn ON the PS2 Console.
23
TROUBLESHOOTING
SOLUTION
PROBLEM
IR remote inoperative
Verify that the batteries in the remote are fresh.
Verify that the remote sensor eye is not obstructed.
Disc won't play
Insert a disc with the label side facing up.
Check the type of disc you put into disc tray. This PS2 only plays PS2 GAMES, DVDs,
audio CDs.
Both the unit and the disc are coded by region. If the region codes don’t match, the
disc can’t be played.
Make sure screen source is set to PS2.
Play starts, but then stops immediately
The disc is dirty. Clean it.
Condensation has formed. Allow player to dry out.
No sound or distorted sound
Make sure your DVD is connected properly. Make sure all cables are securely
inserted into the appropriate jacks.
Make sure the Modulator is ON and the Frequency selected on the unit matches
the frequency set on the radio.
Make sure that unit is using Single Channel Headphones or Dual Channel
Headphones set to channel A.
For wireless headphones make sure the batteries are fresh.
Can’t advance through a movie
It can’t advance through the opening credits and warning information that appear
at the beginning of movies because the disc is programmed to prohibit that action.
24
SOLUTION
PROBLEM
Not allowed at the moment
The feature or action cannot be completed at this time because:
1. The disc’s software restricts it.
2. The disc’s software doesn’t support the feature (e.g., angles)
3. The feature is not available at the moment.
4. 4 title or chapter number that is out of range.
Picture is distorted
The disc might be damaged. Try another disc.
It is normal for some distortion to appear during forward or reverse scan.
No forward or reverse scan
Some discs have sections that prohibit rapid scanning or title and chapter skip.
If you try to skip through the warning information and credits at the beginning of a
movie, you won’t be able to. This part of the movie is often programmed to prohibit
skipping through it.
Service and Repair
Warranty on all components in this system ( VOD10PS2, Remote Control, Game Controllers and built-in Sony PlayStation2) is handled
by Audiovox Electronics Corporation. For service call 1-800-225-6074.
25
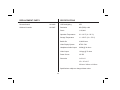
REPLACEMENT PARTS
SPECIFICATIONS
Remote Control
136-4926
LCD Backlighting
LED
Wireless Controller
136-5007
Resolution
800 (RGB) x 480
Pixels
1,152,000
Operation Temperature
32 ~131º F (0 ~ 50º C)
Storage Temperature
-4 ~ 158º F (-20 ~ 70º C)
Backlit life
10,000 Hours
Video Display System
NTSC / PAL
Headphone Audio Output
0.03W @ 32 ohms
Video Output
1.0Vp-p @ 75 ohms
Power Source
12V DC
Dimension
LxWxH
12" x 12" x 2.5"
315mm x 315mm x 64.5mm
Specifications subject to change without notice.
26
AUDIOVOX LIMITED WARRANTY
Applies to Audiovox Mobile Video Products
AUDIOVOX ELECTRONICS CORP. (the Company) warrants to the original retail purchaser of this product that, should this product or any part
thereof (except game controllers), under normal use and conditions, be proven defective in material or workmanship within 36 months from the date of
original purchase, such defect(s) will be repaired or replaced with reconditioned product (at the Company's option) without charge for parts and repair
labor. A game controller, if supplied, is similarly warranted for (90) days.
To obtain repair or replacement within the terms of this Warranty, the product is to be delivered with proof of warranty coverage (e.g. dated bill of sale),
specification of defect(s), transportation prepaid, to the Company at the address shown below.
This Warranty does not extend to the elimination of externally generated static or noise, to correction of antenna problems, to costs incurred for
installation, removal or reinstallation of the product, or to damage to digital memory/media devices, gaming devices, discs, speakers, accessories, or
vehicle electrical systems.
This Warranty does not apply to any product or part thereof which, in the opinion of the Company, has suffered or been damaged through alteration,
improper installation, mishandling, misuse, neglect, accident, or by removal or defacement of the factory serial number/bar code label(s). THE
EXTENT OF THE COMPANY'S LIABILITY UNDER THIS WARRANTY IS LIMITED TO THE REPAIR OR REPLACEMENT PROVIDED ABOVE AND,
IN NO EVENT, SHALL THE COMPANY'S LIABILITY EXCEED THE PURCHASE PRICE PAID BY PURCHASER FOR THE PRODUCT.
This Warranty is in lieu of all other express warranties or liabilities. ANY IMPLIED WARRANTIES, INCLUDING ANY IMPLIED WARRANTY OF
MERCHANTABILITY, SHALL BE LIMITED TO THE DURATION OF THIS WRITTEN WARRANTY. ANY ACTION FOR BREACH OF ANY
WARRANTY HEREUNDER INCLUDING ANY IMPLIED WARRANTY OF MERCHANTABILITY MUST BE BROUGHT WITH IN A PERIOD NOT
EXCEEDING 12 MONTHS AFTER EXPIRATION OF THE WARRANTY. IN NO CASE SHALL THE COMPANY BE LIABLE FOR ANY
CONSEQUENTIAL OR INCIDENTAL DAMAGES FOR BREACH OF THIS OR ANY OTHER WARRANTY. No person or representative is authorized
to assume for the Company any liability other than expressed herein in connection with the sale of this product.
Some states do not allow limitations on how long an implied warranty lasts or the exclusion or limitation of incidental or consequential damage so the
above limitations or exclusions may not apply to you. This Warranty gives you specific legal rights and you may also have other rights which vary from
state to state.
Audiovox Electronics Corporation, 150 Marcus Blvd., Hauppauge, New York 11788 l 1-800-645-4994
27
128-5148F
© 2010 AUDIOVOX,150 Marcus Blvd. Hauppauge, NY 11788
128-8667A