1
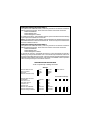
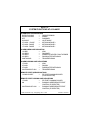
Model APS-775
Owner's Manual
3 Button Remote Start Security System With
Plug-In Shock Sensor & Starter Disable
FEATURES:
2 Three Button Programmable RF Transmitters
Three Channel Code Learning Receiver
Anti Code Grabbing Technology
Remote Panic In All Modes
Protected Valet/Override
Remote Start Safety Control Switch
Safe Start RF Control (Double Push Of RF Transmitter)
Selectable Automatic Timed Start Mode
7 Function LED, Arming, Armed, Disarmed, Valet, Zones 1, 2, & 3
Intrusion Alert With Memory
Audible Arm, Disarm, Defect Zone, And Intrusion Indications
Instant Siren Activation All Entry Points
Starter Disable When Armed
True Last Door Arming
Defective Zone By-Pass
On Command RF Chirp Delete
Mini Six Tone Siren
Two Stage Shock Sensor
Selectable Run Time 10 or 15 Minutes
OPTIONS:
Remote Trunk Release
Remote Keyless Entry
Illuminated entry
Remote Power Window Control
Remote Garage Door Interface
Multiple Vehicle Capable
CAUTION ! Be certain that the vehicle is outdoors before using this or any remote
vehicle starting device. A running engine produces dangerous carbon
monoxide fumes which can be harmful or fatal if prolonged exposure
occurs. DO NOT remote start the vehicle if it is garaged.
Page 1
Your APS-775 Remote Start Alarm System has many features and available options some of
which are selected at time of installation. For your reference, the list on page 7 of this
manual shows what features and options have been installed. Consult your installing dealer
for options that may have been installed and are not listed.
ARMING THE SYSTEM - ACTIVE:
1. Turn the engine off, exit the vehicle, and close all doors, hood and trunk.
2. Press and release the Arm/Disarm button of your key chain transmitter one time.
The parking lights will flash once, the siren will chirp once, and the dash mounted LED will
begin to flash slowly confirming the system is armed. If you have the optional door
lock/unlock circuit installed, the doors will lock.
Note: If the siren chirped three times, then you have left a door, hood, or trunk ajar. Simply
closing that opening will provide full protection. If your vehicle has delayed interior
lighting, you may also get three chirps when arming. Once the light turns off, you will
hear one chirp confirming full arming. If the siren did not sound when arming, then the
chirps have been turned off. Refer to the section on "Eliminating the Arm/Disarm
Chirps" shown later in this manual.
SILENT ARMING - ACTIVE:
1. Turn the engine off, exit the vehicle, and close all doors, hood and trunk.
2. Press and hold the Arm/Disarm button of your key chain transmitter for two seconds.
The parking lights will flash once, and the dash mounted LED will begin to flash slowly
confirming the system is armed. The siren will not chirp. If you have the optional door lock/
unlock circuit installed, the doors will lock.
Note: If the siren chirps three times, then you have left a door, hood, or trunk ajar. Simply
closing that opening will provide full protection. If your vehicle has delayed interior
lighting, you may also get three chirps when arming. Once the light turns off, you will
hear one chirp confirming full arming.
ARMING THE SYSTEM - PASSIVE (AUTOMATIC)
If the passive arming feature has been selected:
1. Turn the engine off, exit the vehicle, and close all doors, hood and trunk.
The dash mounted LED will begin to flash rapidly indicating that the 30 second passive
arming timer has begun. If the LED does not begin to flash rapidly, then you have left a door,
hood, or trunk ajar. Closing this entry point will allow the arming cycle will begin. If any entry
point is opened during the 30 second arming cycle, arming will be suspended. When all
entry points are closed, the arming cycle will begin again.
At the end of the 30 seconds, the parking lights will flash once, the siren will chirp once, and
the dash mounted LED will begin to flash slowly confirming the system is armed. If the siren
did not sound when arming, then the chirps have been turned off. Refer to the section on
"Eliminating the Arm/Disarm Chirps" shown later in this manual. Passive door locking is a
selectable feature. If you have the optional door lock/unlock circuit installed, the doors may
or may not lock passively depending upon the setup during installation.
PROTECTION WHILE THE SYSTEM IS ARMED:
Opening any protected entry point, hood, trunk, or doors will cause the alarm to trigger
immediately. The siren will sound and the parking lights will flash for 30 seconds, then stop
and continue to monitor all protected entry points. If the thief left the door opened, the unit
Page 2
will sound for six 30 second cycles then shut down, isolate the triggered zone and continue
to protect all other zones.
Whenever the system is armed, the dash mounted LED will slowly flash. This serves as a
visual deterrent to a potential thief. This LED is a very low current light emitting diode, and will
not cause the battery to drain even if left unattended for long periods of time.
Whenever the system is triggered, the vehicle's parking lights will flash for the full siren
sounding period. Optional - whenever the system is triggered, the interior courtesy light will
flash for the full siren sounding period.
Whenever the system is armed, the vehicle starter circuit is disabled, and the vehicle will not
start with the ignition key.
Whenever the system is armed, any strong impact to the vehicle will cause the shock
detector to trigger the alarm. Any lesser impact will cause the pre-detect stage of the shock
sensor to emit a few short series of warning tones from the siren.
DISARMING THE SYSTEM
As you approach the vehicle, press and release the Arm/Disarm button on the keychain
transmitter.
The parking lights will flash two times, the siren will chirp twice, and the dash mounted LED
will turn off.
If you have the optional door lock/unlock circuit installed, the doors will unlock. If you have the
optional entry illumination circuit installed, the interior light will turn on for 30 seconds or until
the ignition key is switched on.
Note: If the passive arming mode was selected at time of installation, the dash mounted LED
will start flashing rapidly indicating that the system is rearming. Opening any door will
suspend the automatic arming.
If the parking lights flashed three times, and the siren chirps four times, this indicates that the
alarm system was triggered during your absence. Before turning on the ignition key, examine
the dash mounted LED's flash pattern. The number of flashes identifies the triggered zone.
For additional information, refer to INTRUSION WARNING SIGNALS found later in this manual.
If the siren did not sound upon disarm, then the chirps have been turned off. Refer to the
section titled ELIMINATINGTHEARM/DISARM CHIRPS.
SILENT DISARMING
1. As you approach the vehicle, press and hold the Arm/Disarm button of your key chain
transmitter for two seconds.
The parking lights will flash twice, and the dash mounted LED will turn off confirming that the
system is disarmed. The siren will not chirp. If you have the optional door lock/unlock circuit
installed, the doors will unlock. If you have the optional entry illumination circuit installed, the
interior light will turn on for 30 seconds or until the ignition key is switched on.
Note: If the passive arming mode was selected at time of installation, the dash mounted LED
will start flashing rapidly indicating that the system is rearming. Opening any door will
suspend the automatic arming.
If the parking lights flashed three times, and the siren chirps four times, this indicates that the
alarm system had been triggered in your absence. Before turning on the ignition key, examine
the dash mounted LED's flash pattern. The number of flashes identifies the triggered zone.
For additional information, refer to INTRUSION WARNING SIGNALS found later in this manual.
Page 3
INTRUSION WARNING SIGNAL
This system will inform you if an intrusion attempt has occurred while you were away from
the vehicle. Upon disarm, the siren will chirp 4 times and the parking lights will flash 3 times.
Enter the vehicle and before turning on the ignition switch, observe the LED flash pattern.
If the LED flashes one time...pause, one time...pause etc., then an intrusion attempt was
made by impact or a strong vibration that the shock sensor detected. Check the vehicle for
possible damage to the glass or body panels.
If the LED flashes two times...pause, two times...pause etc., then an intrusion attempt was
made to open the hood, trunk, or by an accessory triggering device. Check the vehicle for
indications of forced entry to these openings.
If the LED flashes three times...pause, three times...pause etc., then an intrusion attempt
was made to the vehicle doors. Check all doors for indications of forced entry.
Note: The LED intrusion warning indications are stored in the system's memory and will be
erased when the ignition switch is turned on.
VALET/SYSTEM OVERRIDE SWITCH
The valet switch allows you to temporarily by-pass all alarm functions, eliminating the need to
hand your keychain transmitter to parking attendants or garage mechanics. When the system
is in the valet mode, all alarm functions are by-passed, however the remote panic feature, and
the optional remote door lock/unlock will remain operational. To enter the valet mode:
1. Start with the valet switch in the "off" position
2. Turn the ignition switch to the "on" position.
3. Within 10 seconds of step 2, move the valet switch to the "on" position.
The dash mounted LED will turn on solid indicating that the valet mode has successfully been
entered.
To return to the normal, (alarm mode), operation, move the valet switch to the "off" position
any time the ignition switch is in the "on" position.
Note: In the event that you lose your keychain transmitter or the transmitter fails to operate
the alarm system, the valet switch can be used to disarm the alarm. To disarm the alarm:
1. Open the door with the vehicle door key. (The siren will sound)
2. Turn the ignition switch to the "on" position.
3. Move the valet/override switch to the "on" position.
The system will disarm and the vehicle can be operated normally.
Always remember to move the valet switch to the "off" position to ensure the vehicle
remains protected at all times.
ELIMINATING THE NORMAL ARM/DISARM CHIRPS
You can selectively eliminate the normal arm & disarm chirps by holding the transmitter button
slightly longer when arming or disarming. This will prevent the siren chirps for one arm or
disarm cycle. If you find this inconvenient and wish to eliminate these chirps permanently,
1. Start with the valet switch in the 'off" position.
2. Turn the ignition switch 'on" then 'off".
3. Within 10 seconds of turning off the ignition, move the valet switch 'on", "off', "on", "off",
"on", "off".
4. If the chirps were on before you started, the siren will emit 2 short chirps indicating that
the chirps are now off. If the chirps were off before you started, the siren will emit one
Page 4
short chirp indicating that the chirps are now on.
NOTE: If the vehicle battery is disconnected then reconnected, the unit will return to the default
setting of chirps on. Repeat the above procedure to eliminate the arm/disarm chirps.
REMOTE PANIC OPERATION
The arm/disarm button of your keychain transmitter also serves as a panic switch and will turn
the alarm on from the maximum operating range of the transmitter. In an emergency situation,
to use the panic feature, press and hold the arm/disarm button of your keychain transmitter for
3 seconds. This will cause the lights to flash, the siren to sound, and if the optional interior
illumination circuit was installed, the interior light will flash.
To disengage the panic feature, press and release the arm/disarm button. If you do not shut off
the panic feature, the system will time out and shut off automatically after 30 seconds.
During this mode, all normal transmitter functions are operational.
SAFETY (Red Handled ) CONTROL SWITCH
The control switch allows you to temporarily disable the remote starting function of your
APS-775. To disable the unit, move the red handled control switch to the off position.
The control switch also allows you to select between 2 hour start up and 4 hour start up when
using the automatic start up timer mode. The factory preset start up time for this mode is every
4 hours. To select between 2 or 4 hour start up timer:
1. Begin with the control switch in the on position
2. Turn the ignition switch on then off
3. Within 10 seconds, move the control switch off, on, off, on (2 switch cycles) to select a
2 hour start timer. After 10 seconds expire, the parking lights will flash and the siren will
chirp 2 times confirming that the two hour start cycle is set. Or, within 10 seconds move
the control switch off, on, off, on, off, on, off, on (4 switch cycles) to select a 4 hour start
timer. The parking lights will flash and the siren will chirp 4 times confirming that the 4 hour
start timer is set.
REMOTE STARTING THE VEHICLE
The APS-775 WILL NOT start the vehicle if any one of the following conditions exists:
1. The Vehicle Hood Is Opened.
2. The Gear Selector Is In Any Gear Other Then Park.
3. The Brake Is Depressed.
4. The Safety Control Switch Is In The Off Position.
CAUTION ! Be certain that the vehicle is outdoors before using this or any remote vehicle
starting device. A running engine produces dangerous carbon monoxide fumes
which can be harmful or fatal if prolonged exposure occurs. DO NOT remote start
the vehicle if it is garaged.
To Remote Start The Vehicle:
Press and release channel 2 of your keychain transmitter two times within 2 seconds. The
vehicle will start and remain running for the pre-programmed 10 or 15 minutes. As a visual
indication, the parking lights will flash or turn on depending on the programming set up by your
installation center.
When you arrive at your vehicle, disarm the alarm system by pressing and releasing the
Page 5
arm/disarm button of your keychain transmitter. Enter the vehicle and turn the ignition key to
the on position.
CAUTION ! Do not turn the key to the start position. This will cause the starter motor to
engage with the already running engine which could result in damage. Step on
the brake pedal to disengage the remote start unit. The vehicle will continue to
run but now on it's own power.
NOTE: The engine will stop running before the expiration of the pre-programmed run timer if
you complete any of the following:
1. Press and release channel 2 of your keychain transmitter two times within 2 seconds.
2. Depress the brake pedal.
3. Open the hood.
4. Move the red handled control switch to the off position.
5. Race the engine to above 4000 RPM.
OPERATING ON AUTOMATIC START UP TIMER MODE
The APS-775 has the ability to automatically start the vehicle every 2 or 4 hours over a
48 hour period. This feature is especially useful in cold climates where the only means to
keep the engine and engine fluids warm is to periodically start the engine.
CAUTION ! Be certain that the vehicle is outdoors before using this or any remote vehicle
starting device. A running engine produces dangerous carbon monoxide fumes
which can be harmful or fatal if prolonged exposure occurs. DO NOT remote
start the vehicle if it is garaged.
TO BEGIN THE AUTOMATIC START UP TIMER
1. Turn the ignition key on then off.
2. Within 10 seconds, activate the RF start command two times. (Push the second channel
button of your keychain transmitter 4 times).
The parking lights will flash and the siren will chirp 4 times indicating the timed start mode is
activated.
The vehicle, on a 2 or 4 hour interval basis, will automatically start, run for the pre-programmed
time (10 of 15 minutes), and then shut off. This will continue for 48 hours.
NOTE: The automatic start up timer can also be initiated from the keychain transmitter. To do
this:
1. Start the vehicle using the keychain transmitter by pressing and releasing the second
channel transmitter button 2 times.
2. Shut off the vehicle using the keychain transmitter by pressing and releasing the second
channel transmitter button 2 times.
3. Within 10 seconds of step 2, activate the RF start command two times. (Push the second
channel button of your keychain transmitter 4 times).
The parking lights will flash and the siren will chirp 4 times indicating the timed start mode is
activated.
CANCELING THE AUTOMATIC START UP TIMER
To cancel the automatic start up timer do one of the following;
1. Start the vehicle manually with the use of the ignition key and depress the brake pedal.
2. Remote start the vehicle using your keychain RF transmitter.
Page 6
ADDITIONAL REMOTE FUNCTION CHANNEL 2
The system has an additional feature, ( Channel 2) ,that can be connected to a number of
different optional accessories. Some of the more common uses for this channel are:
Remote Trunk Release
Remote Window Close
Remote Garage Door Interface
To operate the accessory associated with channel 2, press and hold the channel 2 button(s)
of your keychain transmitter for four seconds.
NOTE: The feature that has been added to channel 2 will always be operated using the same
transmitter button that controls the remote start unit. There is no way to move the channel 2
function to a different channel.
ADDITIONAL REMOTE FUNCTION CHANNEL 3
The system has an additional feature, ( Channel 3) ,that can be connected to a number of
different optional accessories. Some of the more common uses for this channel are:
Remote Trunk Release
Remote Window Close
Remote Garage Door Interface
To operate the accessory associated with channel 3, press and release the channel 3
button(s) of your keychain transmitter. Note: The channel 3 output will remain active for as
long as the transmitter button(s) are held. Certain accessories may take advantage of the
extended output capability of this channel. Check with your installation center for operation
of the accessory that may be connected to channel 3.
FEATUREAND FUNCTION SETTINGS
To Be Completed By Installing Technician
Settings
Remote Start Function
Door Lock Time
Run Time
Remote Activation Chirp
1 Sec
Pulse
10 Min.
On
3.5 Sec
Steady
15 Min.
Off
1 Sec L/Dbl. UL
Transmitter Button(s)
Remote Alarm Function
Arm/Disarm
Auto Door Lock
Auto Door Unlock
Passive Lock
Passive Arm
Remote Trunk Release
Remote Window Close
Remote Garage Interface
Channel 1
On
On
On
On
Channel 2
Channel 2
Channel 2
Page 7
N.A.
Off
Off
Off
Off
Channel 3
Channel 3
Channel 3
1
2
3
4
1
1
1
2
2
2
3
3
3
4
4
4
APS-775
SYSTEM FUNCTIONS AT A GLANCE
ALARM DASH LED INDICATORS
RAPID FLASHING
=
PASSIVE ARMING
SLOW FLASHING
=
ARMED
OFF
=
DISARMED
ON SOLID
=
VALET MODE
3 FLASH... PAUSE
=
INTRUSION ZONE 3
2 FLASH...PAUSE
=
INTRUSION ZONE 2
1 FLASH...PAUSE
=
INTRUSION ZONE 1
ALARM SIREN CHIRP INDICATION
1 CHIRP*
=
ARM
2 CHIRPS*
=
DISARMED
3 CHIRPS
=
ARMING WITH ENTRY POINT OPENED
4 CHIRPS
=
DISARM AFTER INTRUSION
CONTINUOUS
=
TRIGGERED/PANIC
ALARM PARKING LAMP INDICATIONS
1 FLASH
=
ARM
2 FLASH
=
DISARM
3 FLASH
=
DISARM AFTER INTRUSION
CONTINUOUS FLASH
=
TRIGGERED/PANIC
REMOTE START SIREN INDICATIONS
1 LONG/1SHORT
=
RF START COMMAND ISSUED
(IF SELECTED ON)
REMOTE START PARKING LAMP INDICATIONS
1 FLASH
=
RF START COMMAND ISSUED
ON
=
RUNNING UNDER REMOTE START
CONTROL (IF SELECTED)
CONTINUOUS FLASH
=
RUNNING UNDER REMOTE START
CONTROL (IF SELECTED)
© 1998 Audiovox Corp., Hauppauge, N.Y. 11788
Page 8
Form No. 128-5321