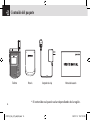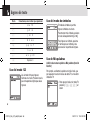
1
USER’S MANUAL C3b Thank you for choosing the Pantech C3b, our latest GSM mobile phone. The C3b has many features that will enhance your mobile experience. From its light weight and reliability, to the builtin camera with flash, we know you will enjoy all the features the C3b has to offer. The C3b user guide contains important information about using your handset. Please read the manual thoroughly, pay attention to the warranty on the back page and be alert to the exclusions and limitations of your warranty, related to the use of unauthorized components. NOTE Some information in this User Manual may differ from your phone, depending on your software version and network provider. 1 070210_C3B_EN_at&t_(00)�‚�¬.indd 1 2007.2.10 12:38:14 PM Phone Specifications Design Clamshell phone with internal and external TFT displays. •Flash LED(Light) •Photo album Displays Dimensions & Weight •1.52” internal LCD •1.0” external LCD •True TFT color display •Supports up to 262K colors within 128 x 128 pixels •6 lines for text in basic mode with 16-pixel font •Two programmable (“Soft”) selection keys [[] and []]; four-way scroll/selection ([o]) key •List and grid menu •Weight : 71.8 g •Dimensions : 69 mm x 43 mm x 20.4 mm Melodies Yamaha 64 poly sound. MP3 ringtones Camera Power Management (Performance) Battery Type Standard Lithium-Ion (Li-ion) Capacity Standby Time Talk Time Up to 930 mAh Up to 250 hours 3 hours Operating Frequency •GSM 850 and PCS 1900 networks in North America, South America, Europe, Africa, and Asia-Pacific where these networks are supported. •Automatic band switching. VGA CMOS built-in Camera. •Resolution up to 640 x 480 (307,200 pixels) •Self-timer function (5 seconds or 10 seconds) •Internal and external displays function as viewfinders 2 070210_C3B_EN_at&t_(00)�‚�¬.indd 2 2007.2.10 12:38:14 PM Pantech C3b at a glance Earpiece External display Internal display Camera Flash (LCD mode)/Flashlight Four-way menu navigation/ special menu shortcut key (write new message, IM, address book, My Stuff) Camera OK key (Menu confirm key) Left Soft key Right Soft key DiaI key Call accept Voicemail Power on/off Alphanumeric keys Vibrate mode Cancel/back/text Clear/ edit exit key Calendar Headset jack Volume up (camera)/ down(flashlight/backlight) Menu Scroll Microphone 3 070210_C3B_EN_at&t_(00)�‚�¬.indd 3 2007.2.10 12:38:16 PM Quick & Easy Keys [ ] Left Right n o 4 Functions Perform the functions shown at the bottom line of the display by using these Soft keys. Scroll through the menu options in Menu mode. In Standby mode: Left key [l]: Access My Stuff menu Up key [u]: Access Write New message menu Right key [r]: Access Instant Messaging menu Down key [d]: Access Address Book list menu In Standby mode, press to launch the MEdia Net directly. Select a menu function or store user-input information, such as names. Also use this key for confirmation (as the [OK ] key). c Deletes characters from the display, or returns to the previous menu. If pressed briefly in Standby mode, opens Calendar view. s Makes or receives a call. If pressed in Standby mode, displays the Recent calls list. If pressed and held in Standby mode, redials the last number called. e Ends the current call. If pressed and held in Menu mode, cancels user input 1 and returns to Standby mode. If pressed and held, outside Menu mode, switches your phone on/off. If pressed and held in Standby mode, connects to the voicemail server automatically. 070210_C3B_EN_at&t_(00)�‚�¬.indd 4 2007.2.10 12:38:18 PM Quick & Easy Keys 0~9 Functions Enters numbers, letters or special characters. If pressed in Standby mode, displays the dialing screen. * If pressed and held in Standby mode, enters or exits from Vibrate mode. If pressed and held in Text input mode, displays the Symbol input screen. If pressed in Predictive text input mode, switches to Word search mode. 0 Enters an international dialing prefix(011, +). In Text input mode, enters the space character. zx Adjusts the earpiece volume in calls, and moves the cursor upwards or downwards in menus. If your phone is opened while in Standby mode, controls the key tone volume. In Standby mode, turn Camera preview mode on or off by pressing and holding the side up-volume key. When the flip is closed, press the side down key to turn the backlight on, and press and hold to turn flashlight on or off. 5 070210_C3B_EN_at&t_(00)�‚�¬.indd 5 2007.2.10 12:38:18 PM Contents 6 Getting started Basic functions Package contents .................................................................14 SIM card.................................................................................15 About your SIM card ...............................................................15 Installing/Removing your SIM card .........................................15 Changeable Cover ................................................................15 Removing cover......................................................................15 Attaching cover .......................................................................15 Battery ...................................................................................16 Inserting your battery ..............................................................16 Removing your battery ...........................................................16 Charging your battery .............................................................16 Internal & external displays .................................................17 Internal display .......................................................................17 Internal display icons ..............................................................17 Automatic display off ..............................................................20 Selecting functions and options .........................................21 Selecting functions and options when your phone is open.....21 Selecting functions and options when your phone is closed ..21 Side key special functions ......................................................22 Keypad lock ..........................................................................22 To lock the keypad ..................................................................22 To unlock the keypad ..............................................................22 Switching your phone on or off ..........................................24 To switch your phone on .........................................................24 To switch your phone off .........................................................24 Making and ending a call .....................................................24 To make a call.........................................................................24 To end a call ...........................................................................24 To make a call using Call Logs ...............................................24 To make a call using Entry......................................................25 To make an International call ..................................................25 Answering a call ...................................................................26 To speed-dial from Entry.........................................................26 To make an emergency call ....................................................26 To answer a call ......................................................................26 To reply to a missed call .........................................................26 To reject a call.........................................................................27 To answer a second call .........................................................27 To switch between two calls ...................................................27 To end the current call ............................................................27 Options during a call ............................................................27 To adjust the call volume ........................................................27 To switch your microphone off (Mute) or on (Speak) ..............27 •To switch your phone’s microphone off ...............................27 070210_C3B_EN_at&t_(00)�‚�¬.indd 6 2007.2.10 12:38:18 PM Contents •To switch your phone’s microphone back on ......................28 To put a call on hold, and return to a held call ........................28 •To put a call on hold ............................................................28 •To return to a held call.........................................................28 •To make a call while you are on a call ................................28 •To switch between two calls ................................................28 •To end a call ........................................................................28 Transferring a call ...................................................................28 Multi-party calls.......................................................................29 •To make a multi-party call ...................................................29 •To add a new person to a multi-party call ...........................29 •To add a caller to a multi-party call .....................................29 •To view the status of multi-party call participants ................29 •To answer or make a second call during a multi-party call .29 •To have a private conversation with one participant ...........29 •To remove one participant from a multi-party-call ...............30 Searching for a number in Address Book during a call...........30 •To search for a name or group in Address Book .................30 •To find a name manually in Address Book ..........................30 •To view the highlighted entry in Address Book....................30 Using DTMF tones..................................................................31 Reading or writing a message during a call............................31 Retrieving Call in Headset/Handsfree/Phone .........................31 Using your headset ..............................................................31 Selecting menu functions ....................................................32 Moving within your phone’s menu and submenu functions ....32 Using the Shortcut Key in Standby Mode ...............................32 Entering text..........................................................................33 Input mode..............................................................................33 T9 mode .................................................................................33 ABC mode ..............................................................................33 123 mode................................................................................33 Symbol mode..........................................................................33 My Words ...............................................................................33 Spell........................................................................................33 To change Text input mode.....................................................34 To insert a space ....................................................................34 Scrolling ..................................................................................34 Clearing letters and words ......................................................34 Returning to the previous screen............................................34 Using T9 mode .......................................................................35 Using ABC mode ....................................................................35 Changing case........................................................................35 Using 123 mode .....................................................................36 Using Symbol mode ...............................................................36 Using My Words .....................................................................36 7 070210_C3B_EN_at&t_(00)�‚�¬.indd 7 2007.2.10 12:38:18 PM Contents Applications 8 Camera ..................................................................................40 Take a Photo...........................................................................40 •Taking photos when your phone is open.............................40 Using your camera options .....................................................41 •The Preview mode ..............................................................41 Photo Album ...........................................................................42 •Viewing the saved photos ...................................................42 •Using the photo options ......................................................42 Settings...................................................................................43 Messaging .............................................................................43 Text Message .........................................................................43 Multimedia Message...............................................................43 Receiving a new message......................................................44 Managing memory ..................................................................44 Write New ...............................................................................45 •Text Message ......................................................................45 •Multimedia Message ...........................................................46 Inbox .......................................................................................49 IM............................................................................................50 •Starting Instant Messenger .................................................50 •Viewing the Conversation Log ............................................51 Sent ........................................................................................51 070210_C3B_EN_at&t_(00)�‚�¬.indd 8 Outbox ....................................................................................51 Draft ........................................................................................52 Browser Msg...........................................................................52 Voicemail ................................................................................52 Templates ...............................................................................52 Settings...................................................................................53 •Common Settings ...............................................................53 •Text Message ......................................................................53 •Multimedia Message ...........................................................54 •Voice Mail............................................................................54 •Browser SL Message ..........................................................54 Memory Info............................................................................55 Recent Calls ..........................................................................55 Missed Calls ...........................................................................55 Received Calls........................................................................56 Dialed Calls ............................................................................56 Delete Call Logs .....................................................................57 Call Time.................................................................................57 GPRS Info ..............................................................................57 MEdia Net ..............................................................................58 MEdia Net Home ....................................................................58 OTA Settings Service..............................................................58 •WAP/OTA Provisioning .......................................................58 2007.2.10 12:38:19 PM Contents Bookmarks..............................................................................58 Go to URL...............................................................................59 Profiles....................................................................................59 Cache .....................................................................................60 •Cache Mode........................................................................60 •Clear Cache ........................................................................60 Security Certifications .............................................................61 Version....................................................................................61 AT&T Mall ..............................................................................61 Shop Tones.............................................................................61 Shop Games...........................................................................61 Shop Graphics ........................................................................61 Shop Multimedia .....................................................................61 Shop Applications ...................................................................62 MEdia Net Home ....................................................................62 Mobile Email..........................................................................62 Starting Mobile Email..............................................................62 My Stuff .................................................................................63 DRM/Forward Lock.................................................................63 Games & Apps........................................................................63 •Shop Games .......................................................................63 •Games ................................................................................63 Audio ......................................................................................63 •Shop Tones .........................................................................63 •Audio ...................................................................................63 Graphics .................................................................................64 •Shop Graphics ....................................................................64 •Graphics..............................................................................64 Photo Album ...........................................................................65 •Viewing the saved photos ...................................................65 •Using the Photo Options .....................................................65 Other Files ..............................................................................66 Tools .......................................................................................66 •Alarm...................................................................................66 •Calendar .............................................................................67 •Notepad ..............................................................................68 •Voice Memo ........................................................................69 •World Time ..........................................................................69 •Calculator ............................................................................70 •Converter ............................................................................70 •Stopwatch ...........................................................................70 •SIM Tool Kit .........................................................................71 Memory Status .......................................................................71 Address Book .......................................................................71 Contact List.............................................................................71 Add Contact ............................................................................72 9 070210_C3B_EN_at&t_(00)�‚�¬.indd 9 2007.2.10 12:38:19 PM Contents Speed Dial ..............................................................................72 •To set Speed Dial ................................................................72 •To add to Speed Dial...........................................................72 •To edit Speed Dial ...............................................................73 •To remove from Speed Dial ................................................73 •To set Speed Dial in Contact List ........................................73 Group......................................................................................73 My Business Card ..................................................................74 Memory in Use .......................................................................74 Delete All ................................................................................74 Copy All ..................................................................................74 My Phone Number..................................................................74 Memory Info............................................................................74 Service Numbers ....................................................................74 Settings .................................................................................75 Display ....................................................................................75 •Shop Graphics ....................................................................75 •Main Screen ........................................................................75 •Greeting ..............................................................................75 •Contrast ..............................................................................75 •Backlight .............................................................................75 Audio ......................................................................................76 •Shop Tones .........................................................................76 •Ringtone..............................................................................76 Volume....................................................................................76 •Alert Tones ..........................................................................76 •Key Tone .............................................................................77 •Flip Open Tone....................................................................77 •Sound Effects......................................................................77 Call .........................................................................................77 •Call Forward........................................................................78 •Answer Type .......................................................................79 •Auto Redial .........................................................................79 •Call Waiting .........................................................................79 •Caller ID ..............................................................................79 Phone .....................................................................................80 •Language ............................................................................80 •Time & Date ........................................................................80 •Flight Mode .........................................................................80 Connectivity ............................................................................80 •Bluetooth .............................................................................80 •Paired Device......................................................................81 •Outgoing call device............................................................83 •Visibility ...............................................................................83 •Name ..................................................................................83 •Address ...............................................................................83 10 070210_C3B_EN_at&t_(00)�‚�¬.indd 10 2007.2.10 12:38:19 PM Contents Security...................................................................................83 •PIN1 Check .........................................................................84 •Change PIN1 ......................................................................84 •Phone Lock .........................................................................84 •Change Password...............................................................84 •Phone Barring .....................................................................84 •Fixed Dialing (Fixed Dialing Numbers) ...............................85 •Change PIN2 ......................................................................85 •Network Barring ..................................................................85 •Closed User Group (CUG) ..................................................85 Software Version ....................................................................85 Reset ......................................................................................86 TTY .........................................................................................86 Appendix Menu tree...............................................................................88 Access codes........................................................................90 Troubleshooting checklist ...................................................91 Performance and safety .......................................................92 Glossary ................................................................................93 FCC & Industry Canada Regulatory Compliance ..............95 Safety Precautions ...............................................................97 Warranty ................................................................................99 11 070210_C3B_EN_at&t_(00)�‚�¬.indd 11 2007.2.10 12:38:19 PM 12 070210_C3B_EN_at&t_(00)�‚�¬.indd 12 2007.2.10 12:38:19 PM Getting Started 1. Package Contents 2. SIM Card 3. Changeable Cover 4. Battery 5. Internal & External Displays 6. Selecting Functions and Options 7. Keypad Lock 070210_C3B_EN_at&t_(00)�‚�¬.indd 13 1 2007.2.10 12:38:20 PM Package Contents Phone 14 070210_C3B_EN_at&t_(00)�‚�¬.indd 14 Battery Travel charger User’s Manual * The actual contents may vary depending on your region. 2007.2.10 12:38:21 PM SIM Card & Changeable Cover About your SIM card Removing cover When you subscribe to your network operator, you receive a SIM (Subscriber Identity Module) card containing your registration information, PIN code, etc. Like a credit card, it should be kept secure and handled carefully. Do not bend, scratch or expose it to moisture. Avoid static electricity. To avoid corrupting your SIM card’s memory, always switch off your phone before removing or inserting your SIM card. Pull down the flip cover in the direction of the arrows shown in the picture. Tip An easier way to do this is to hold your phone upside Installing/Removing your SIM card ❶ Remove the battery from your phone by pushing and lifting it as shown below. down, and use your thumbs to push the flip cover up, in the direction of the arrows as shown in the picture. Attaching cover Insert the ridges on each side of the cover with the slots on the phone in the direction of the arrows shown in the picture. Snap in place. ❷ If the SIM slot is empty, insert the SIM card into the slot. ❸ To remove your SIM card, push the SIM card in the arrow direction as shown below. 070210_C3B_EN_at&t_(00)�‚�¬.indd 15 NOTE Since the Front Deco (A-Deco) is a changeable cover, it may get detached if you drop your phone or subject it to shock. If this occurs, reattach the cover before you use your phone. 15 2007.2.10 12:38:25 PM Battery Inserting your battery Put the contacts of the battery into the hole located at the bottom of the unit, as shown in the following picture. Press the upper side of the battery until you hear the “click”. When your battery is fully charged, remove the adapter connection from the outlet, then disconnect the adapter from your phone by pressing the adapter’s side buttons and pulling the adapter away from your phone, as shown below. Removing your battery Push the battery-lock key up and remove the battery. Charging your battery Your phone uses a Li-Ion battery. Make sure to use an authorized battery and charger only. For more details, please inquire at your nearest dealer. You can use your phone when the battery is being recharged. When the battery is inserted in your phone, open the protective cover located on the bottom of your phone and connect the charger adapter, as shown below. A suitable adapter is supplied with your phone. 16 070210_C3B_EN_at&t_(00)�‚�¬.indd 16 Tip Your phone is powered by a Lithium Ion (Li-Ion) battery. This means that, unlike other forms of battery technology, you can recharge your battery while some charge remains without reducing your phone’s autonomy due to the “battery memory effect” inherent in those technologies. •Do not use a damaged battery or charger. •Use your battery for the specified purpose only. •The closer you are to your network’s base station, the longer your phone usage time because less battery power is consumed for the connection. •The battery recharging time varies depending on the remaining battery capacity and the battery and charger type you use. 2007.2.10 12:38:31 PM Battery & Internal & External Displays •Battery life inevitably shortens over time. •Use an authorized battery and charger only. •Since overcharging may shorten battery life, remove the phone from its charger once it is fully charged. Unplug the charger, once charging is complete. Leaving the battery in hot or cold places, especially inside a car in summer or winter, may reduce the capacity and life of the battery. Always keep the battery within normal temperatures. •Do not put your battery into contact with conductive objects. •Dispose of and recycle used batteries in accordance with local regulations. Do not dispose of batteries by burning; they may explode. •Do not use an unauthorized charger. •To prevent injury or burns, ensure that no metal objects come into contact with the + and – terminals of the battery. Icon(s) Internal & External Displays Your phone has two displays (internal and external). Icons at the top of the internal display indicate your phone’s status. Internal display Icon area Text and graphic area Displays the following information in Standby mode: Textural and graphical information showing Network Name, Time and Date, or a Greeting put in by the user. Soft keys Internal display icons Depending on your phone’s status, the following icons may appear at the top of the internal display. Description Received signal strength. The greater the number of bars, the stronger the signal. 070210_C3B_EN_at&t_(00)�‚�¬.indd 17 17 2007.2.10 12:38:34 PM Internal & External Displays Icon(s) Description A call is being made. Your phone is outside the network coverage area; you cannot make or receive calls. You have received one or more voice messages. WAP is connected. You have received one or more text, multimedia or e-mail messages. is displayed if the text message memory is full. A GPRS signal is available. is displayed when there is an active GPRS session. Call-forwarding feature is activated. Flight mode is activated. Alarm is set. 18 070210_C3B_EN_at&t_(00)�‚�¬.indd 18 2007.2.10 12:38:36 PM Internal & External Displays Icon(s) Description You have set the alert type for incoming call to ring only. You have set the alert type for incoming call to ring ascent (volume increases over the duration of the ring). You have set the alert type for incoming call to ring and vibrate. You have set the alert type for incoming call to vibrate then ring. You have set the alert type for incoming call to silent. You have set the alert type for incoming call to vibrate only. Headset is connected. Battery level. The bar indicates the available battery charge. If your battery charge is low, displayed. is A message is being received. 19 070210_C3B_EN_at&t_(00)�‚�¬.indd 19 2007.2.10 12:38:37 PM Internal & External Displays Icon(s) Description A message is being sent. Speakerphone mode is activated. You have received a new browser message. This icon is displayed until the message is loaded. Available, Away, Invisible Status of AIM Online, Away, Busy, Offline Status of Windows Live Messenger Available, Busy, Invisible Status of YAHOO You have received one or more IM messages This becomes set when Bluetooth function is activated. This becomes set when Bluetooth Headset/Handsfree are connected. 20 070210_C3B_EN_at&t_(00)�‚�¬.indd 20 2007.2.10 12:38:39 PM Internal & External Displays & Selecting functions and options Automatic display off If you do not press any key for ten seconds (dependent on the user setting) while the internal and external displays are dimmed, the internal display turns off automatically to save power. To restore the display, press any key. Selecting functions and options Your phone offers several convenient ways for you to select the phone function you want. You can access all of your phone’s functions when it is open. Selecting functions and options when your phone is open Your phone offers many phone operating and customization functions arranged in menus and sub-menus. Each menu and sub-menu allows you to view and change the settings of the particular function. You access these functions using the left and right selection (“Soft”) keys when your phone is open. Soft key functions change depending on the current context. The label or icon in the bottom line of the display, above the Soft keys, shows each key’s current function. To display the functions and options available, or 070210_C3B_EN_at&t_(00)�‚�¬.indd 21 select the one required: ❶ Press the left or right Soft key as appropriate. ❷ To select the function that is displayed or option that is highlighted, press the Soft key [[] or the [o] key. NOTE In some functions, you may be asked to enter a password or PIN. Enter the required code then press the [o] key. ❸ To highlight the next option on a list, press the [u/d] key. ❹ To move back to the previous function or option on a list, press the [c] key. ❺ To return to the Standby mode, press the [e] key. Selecting functions and options when your phone is closed You can use some functions even though the phone is closed. Here are functions of the side keys when the phone flip is closed: - Press to adjust the earpiece volume up. - Press once to turn the ring off for an incoming call. - Press and hold to reject an incoming call. - Press and hold to turn the camera on/off, while the flip is closed. Press once to take a picture. 21 2007.2.10 12:38:39 PM Selecting functions and options & Keypad Lock •Adjusts the earpiece volume. z Side Up •Turns the melody off if pressed when you receive an incoming call and the flip is closed. •Rejects the incoming call if pressed and held when you receive an incoming call and the flip is closed. •Turns the camera capture mode on/off, if pressed and held. •Press to adjust the earpiece volume down. x Side Down •Press once to turn off the ring for an incoming call. •Press and hold to reject an incoming call. •Press once to turn the backlight on, while the flip is closed. Flash Light: To turn ON the flash light, press and hold the Side Down [x] key. Press once to turn it OFF. Keypad Lock To lock the keypad Keypad lock prevents accidental pressing of the keys. Press the [Menu] Soft key then select [*] key within 3 seconds. To unlock the keypad Press the [Unlock] Soft key then select [*] key within 5 seconds to unlock the keypad •Press and hold to turn on the flash light. Press once to turn it off. Side Key Special Functions 22 Snap Shot: To initiate the camera function when the folder is closed, press and hold the side [z] key. Press the side [z] key again to take a photo. The image is saved in the album. This function makes it easy to take a self portrait. Flash Light: To turn ON the flash light, press and hold the side 070210_C3B_EN_at&t_(00)�‚�¬.indd 22 2007.2.10 12:38:39 PM Basic functions 1. Switching your phone on or off 2. Making and ending a call 3. Answering a call 4. Options during a call 5. Using your headset 6. Selecting menu functions 7. Entering text 070210_C3B_EN_at&t_(00)�‚�¬.indd 23 2 2007.2.10 12:38:40 PM Switching your phone on or off & Making and ending a call To switch your phone on ❶ Open the phone. ❷ Press and hold the power on/off key until your phone switches on. ❸ If you are asked to input your PIN (Personal Identification Number), enter your SIM card’s PIN and press the [o] key. (For further details, see Security on page 83.) Your phone starts to search for an available network and the current date and time is shown on the internal and external displays. Once connected to the network, you can make and receive calls. NOTE If a malfunction occurs while you use your phone or it is not turned on, remove the battery then insert it again after 5 to 10 seconds. Making and ending a call To make a call Enter the area code and phone number from Standby mode, then press the [s] key. To clear the last digit displayed, press the [c] key. To clear the all digits displayed, press and hold the [c] key. NOTE If you have turned the [Auto Redial] option on (For further details, see Auto Redial on page 79.), your phone will attempt to make a call automatically for up to 10 times if it is not answered. To end a call To switch your phone off Press the [e] key in the normal way. To terminate all active calls at the same time while you are in multi-party call, select [Options] and then select [End All Calls]. Once the call is completed, a call summary (displaying the recipient’s name or number, and the call length) is displayed. Press and hold the [e] key until the power-off animation is displayed. To make a call using Call Logs NOTE To change the language if you are switching on your phone for the first time, select the Language menu option. (For further details, see Language on page 80.) 24 070210_C3B_EN_at&t_(00)�‚�¬.indd 24 Your phone logs up to 30 dialed, received and missed call numbers. The last call number is saved in the first position. 2007.2.10 12:38:40 PM Making and ending a call If you dial the same number more than once, only the latest occurrence is saved. ❶ Press the [s] key to display the Call Logs list of dialed, received or missed call numbers in reverse chronological order. ❷ Press the [z/x] key or the [u/d] key to select a number. ❸ Press the [s] key to dial the selected number. (For further details, see 3. Recent Calls on page 56.) To make an International call ❶ Press and hold the [0] key for the international prefix until the ‘+’ character appears on the display, or type the outgoing national code that follows 011 (if the network supports it). ❷ Type the country code, area code, and phone number that you want to call. ❸ Press the [s] key. NOTE To redial the last number in the Call Logs list, press and hold the [s] key. To make a call using Entry You can store frequently used names and phone numbers, called Entry, in your SIM card or your phone’s memory. Therefore; you do not have to remember all your phone numbers; simply select the name to recall the associated number. ❶ Press the [d] key to see the Contact List. ❷ Select a number from Contact List. ❸ Press the [s] key to dial. (For further details, see 8. Address Book on page 71.) 25 070210_C3B_EN_at&t_(00)�‚�¬.indd 25 2007.2.10 12:38:41 PM Answering a call To speed-dial from Entry Press and hold the Speed Dial number to make a call using the number you have saved. For example, press and hold the [5] key to dial a number which you have saved as “5” in your Speed Dial list. (For further details, see Speed Dial on page 72.) To make an emergency call You can make emergency calls even if your phone does not have a SIM card. ❶ Select Emergency Number, or press the [SOS] Soft key if your phone does not have a SIM card. ❷ Press the [s] key. To answer a call When you receive a call, your phone rings (or vibrates). If the caller can be identified, the caller’s phone number is displayed (or the caller’s name, if it is stored in your entry). NOTE This function is network and subscription dependent, and may not be available in all areas. 26 ❶ To answer a call, open your phone. ❷ If your phone is already open, press the [s] key. 070210_C3B_EN_at&t_(00)�‚�¬.indd 26 NOTE If your answer type is set to [Any Key], you can answer calls by pressing any key except the [e] key. While the flip is closed, you can press any side key to stop the ring, or press and hold any side key to reject the call. To reply to a missed call If the incoming call could not be answered, a missed call message is shown on your phone’s display to remind you of the call you have missed. NOTE This function is network and subscription dependent, and may not be available in all areas. To reply to a missed call, do the following. ❶ Keep your phone open. ❷ Press the [View] Soft key to display the list of missed calls. ❸ If necessary, scroll to highlight the number you want by pressing the [u/d] l key. ❹ Press the [s] key to call. Press the [c] key or [e] key to close the ‘missed call’ notification message. 2007.2.10 12:38:41 PM Answering a call & Options during a call To reject a call •If your phone is open, press the [e] key or the [Reject] Soft key. •If your phone is closed, press and hold the [z/x] key during the incoming call. The caller hears a Voice mail. To answer a second call You can answer an incoming call while you have a call in progress, if your network service provider supports this service and you have activated the Call Waiting option. (For further details, see Call Waiting on page 79.) You will be notified of an incoming call by a ‘call waiting’ tone. Press the [s] key. The first call is automatically put on hold. To switch between two calls Press the [Swap] Soft key. To end the current call Press the [s] key. The call on hold is automatically reconnected to you. 070210_C3B_EN_at&t_(00)�‚�¬.indd 27 Options during a call To adjust the call volume To adjust the earpiece volume during a call, do one of the following. •To increase the call volume during a call, press the [z] volume key on the left side of your phone. •To decrease the call volume during a call, press the [x] volume key on the left side of your phone. •In Standby mode with the folder open, adjust the ringtone volume by using the [z/x] keys. To switch your microphone off (Mute) or on (Speak) You can temporarily switch your phone’s microphone off so that the person you talk to on your phone cannot hear you. For example, you may wish to say something to another person in the room but do not want the person calling to hear you. To switch your phone’s microphone off Press the [Mute] Soft key, or press [Options] then select [Mute]. 27 2007.2.10 12:38:41 PM Options during a call To switch your phone’s microphone back on Press the [Unmute] Soft key, or press [Options] then select [Unmute]. up in Address Book entry. ❷ Press the [s] key to dial the second call. The first call is automatically put on hold. To switch between two calls To put a call on hold, and return to a held call Press the [Swap] Soft key. The current call is put on hold and the held call is reactivated so that you can continue your conversation with the caller. You can put a call on hold whenever you want. You can make another call while you have a call in progress if your network service provider supports this service. One call is active, while the other is on hold. You can also switch between the calls. To end a call Press the [s] key in the normal way. To terminate all active calls at the same time while you are in multi-party call, select [Options] and then select [End All Calls]. To put a call on hold Transferring a call Press the [Options] Soft key then select [Hold], or press the [s] key. The callers name and icon are grayed while the call is on hold. You can transfer or connect the current call to the held call if your network service provider supports this service, so that callers can talk to each other. You will be disconnected from both of them. ❶ During a call, make or answer a call in the normal way then press the [Options] Soft key. ❷ Press the [u/d] key to highlight the [Transfer] option then press the [Select] Soft key or [o] key. The two callers will be connected to each other. To return to a held call Press the [Options] Soft key then select [Resume], or press the [s] key again. To make a call while you are on a call ❶ Enter the phone number that you want to dial or look it 28 070210_C3B_EN_at&t_(00)�‚�¬.indd 28 2007.2.10 12:38:42 PM Options during a call Multi-party calls A multi-party call feature is a network service that allows up to six people to take part in a multi-party or conference call simultaneously. For further details, contact your service provider. To make a multi-party call ❶ Call the first participant in the normal way. ❷ Call the second participant in the normal way. The first call is automatically put on hold. ❸ To join the first participant to a multi-party call, press the [Options] Soft key then select the [Join All] option. ❹ Press the [o] key To add a new person to a multi-party call ❶ Call the person in the normal way. ❷ Press the [Options] Soft key then select the [Join All] option. ❸ Press the [o] key. To add a caller to a multi-party call Press the [Options] Soft key then select the [Join All] option. 070210_C3B_EN_at&t_(00)�‚�¬.indd 29 To view the status of multi-party call participants Press the [l/r] key. An icon indicates whether the remote party is participating in the multi-party call (‘Far Multiparty’) or on hold (‘Far Hold’.) To answer or make a second call during a multi-party call ❶ Place the multi-party call on hold by pressing the [Options] Soft key then selecting the [Hold All Calls] option. ❷ Answer or make a call in the normal way. ❸ To reactivate the multi-party call on hold, press the [Swap] Soft key. ❹ To end the multi-party call, press the [e] key or close the flip. To have a private conversation with one participant ❶ Press the [Options] Soft key then select the [Private] option. ❷ Press the [o] key. ❸ Press the [u/d] key to highlight the participant you want then press the [o] key. Now you can talk privately with 29 2007.2.10 12:38:42 PM Options during a call that person. ❹ The other participants can continue the conversation with each other. ❺ To return to the multi-party call, press the [Options] Soft key then select the [Join All] option. ❻ Press the [o] key. All of the multi-party call participants can now hear each other. To remove one participant from a multiparty-call ❶ Press the [Options] Soft key then select the [Exclude] option. ❷ Press the [u/d] key to highlight the participant then press the [o] key. The call ends with that participant, but you can continue to talk with the other participants. End the multi-party call by closing your phone or pressing the [e] key. Searching for a number in Address Book during a call ❶ Press the [Options] Soft key. ❷ If necessary, press the [u/d] key to highlight the [Contact List] option. ❸ Press the [o] key. ❹ The entries are displayed. To search for a name or group in Address Book Enter the first letters of the name for Name Search, or the first letters of the group for Group Search. The entries are displayed starting with the first entry matching your input. To find a name manually in Address Book Press the [u/d] key. To view the highlighted entry in Address Book Press the [o] key. (For further details, see 8. Address Book on page 71.) 30 070210_C3B_EN_at&t_(00)�‚�¬.indd 30 2007.2.10 12:38:42 PM Options during a call & Using your headset Using DTMF tones You can turn the DTMF key tones off or on during a call. When the [DTMF Off] option is selected, your phone does not transmit the key tones. It allows you to press keys without hearing any key tones during calls. To communicate with answering machines or computerized telephone systems, you must select the [DTMF On] option. Reading or writing a message during a call You can read or write a message during a phone call. ❶ Press the [Options] Soft key. ❷ Press the [u/d] key to highlight the [Messaging] option then press the [o] key. •To read a received message, select the Inbox subcommand then scroll to the message that you want to read. •To write a new message, select the Write New subcommand then press the [o] key. (For further details, see Write New on page 45.) NOTE During a call, you can only send text messages. Multimedia messages cannot be sent, but can be saved. 070210_C3B_EN_at&t_(00)�‚�¬.indd 31 Retrieving Call in Headset/ Handsfree/Phone This function becomes available when Bluetooth Headset/ Handsfree are connected during a call. To talk using the Bluetooth Headset/Handset during a phone, select [Option] -> [Retrieve Call in Headset/Handsfree]. On the other hand, selecting . [Option] -> [Retrieve Call in Phone] allows you to talk using the phone again. NOTE While you are on a call using your mobile phone, a certain button of the Bluetooth Headset/Handsfree allows you to talk using the Bluetooth Headset/Handsfree. Using your headset You can send or receive a call using your headset. When you connect your headset to the jack located at the top of your phone, the button on the headset works as follows: •While in Standby mode, press the button once to list recent calls. •While in Standby mode, press the button twice to redial the last call. •Press the button once to receive a call. •Press the button once to end the call. 31 2007.2.10 12:38:43 PM Selecting menu functions Displaying your phone’s menu functions. To display your phone’s menu functions, press the [Menu] Soft key ([[]) in Standby mode. Moving within your phone’s menu and submenu functions To move within your phone’s functions and select the function or value you want, press the following keys. Key 32 Function Soft key [[] Goes to the main menu in Standby mode. [l], [r] key Moves within the main menu. [u], [d] key Searches for the sub-menu. Moves within the main menu. [o] key Goes to the sub-menu. Goes to the MEdia Net Home menu in Standby mode. [z], [x] key Moves the cursor upwards or downwards in the menu. NOTE You can input the menu function number to access the submenu function quickly. For details of the menu tree listing all menu function and subfunction numbers, see 1. Menu Tree on page 88. 070210_C3B_EN_at&t_(00)�‚�¬.indd 32 NOTE Press the [c] key to return to the previous menu. Type the menu number to access the sub-menu quickly. Using the Shortcut Key in Standby Mode Key Menu selected if pressed Soft key [[] Displays menu If pressed and held Menu Soft key []] Activates Camera [r] key Navigation [l] key Navigation [u] key Navigation [d] key Navigation Displays IM Displays My Stuff Displays Write New screen Displays Address Book list [o] key Displays WAP browser WAP [c] key Displays Calendar Monthly View [s] key Displays Recent Calls Redials last call [e] key Power On/Off 2007.2.10 12:38:43 PM Selecting menu functions & Entering text Key Menu selected if pressed If pressed and held [1] key Connect to the voice-mail server [*] key Enter or exit from Vibrate mode Entering text Input mode On many occasions you need to input text in your phone such as: storing the name in your Address Book, writing a new message, creating a greeting, or scheduling events on your calendar. You can select from the following methods (modes) of inputting text in your phone. conventional ABC mode (see below). ABC mode In this mode, you input the letter you want by pressing the keypad once to select the first letter on the key, twice to select the second letter on the key, three times to select the third letter on the key and so on until the letter you want appears. 123 mode You can input numbers in this mode. Symbol mode You can input special characters like Greek letters, currency units, or a period mark in this mode. T9 mode My Words You can input a letter using only one keystroke per letter. The keypad has more than one letter on it – when you press the [5] key once, J, K or L may be displayed. The T9 mode automatically compares your keystrokes with an internal linguistic dictionary to determine the correct word, thus requiring far fewer keystrokes than the Manage the words that you have added to the dictionary. You can edit and delete the words. Spell Edit the suggested word by using text input (ABC, 123 or Symbol mode) for T9 Text Input only. 33 070210_C3B_EN_at&t_(00)�‚�¬.indd 33 2007.2.10 12:38:44 PM Entering text To change text input mode When you are in an area where you can input text, the text input mode indicator is displayed at the bottom of your screen. Example: Typing a Text Message. ← The page number icon and the number of remaining characters that you can type ← Editing area are in 123 mode or Symbol mode, press and hold the [0] key to add a space. Scrolling To move the cursor to the left or right within the text, press the scroll [l/r] key. To move the cursor up or down among the lines, press the scroll ([u/d]) key. NOTE By pressing the [z/x] key, the cursor can be moved very quickly to the beginning or the end of the text. Clearing letters and words To clear the letter to the left of the cursor, press the [c] key. To clear all of the letters in the editor box, press and hold the [c] key. ↑ ↑ Editor options The current text input mode ❶ Press the Soft key []] that indicates the current Textinput mode. ❷ Toggle to the mode you want to use by pressing the Soft key []] again as many times as necessary. To insert a space 34 To insert a space between words, press the [0] key. If you 070210_C3B_EN_at&t_(00)�‚�¬.indd 34 Returning to the previous screen When the text input field is empty, press the [c] key to return to the previous screen. Tip Use the following procedures to change the text input mode quickly in English mode (the Alphabet or Predictive mode): Key Function Press and hold the [*] key Displays the symbol screen. Returns to the previous screen in Symbol mode. Press the [0] key Enters a space character. 2007.2.10 12:38:45 PM Entering text Key Function Deletes characters one by one. After Press the [c] key deleting all the characters, returns to the previous screen. Press and hold the Deletes all the characters and moves the cursor to the beginning of the input [c] key screen. Using T9 mode In the T9 alphabet Editor, most commonly used words appear as you input the text. ❶ Press the keys numbered [2] to [9] to input text. For example, press [4][3][5][5][6] in sequence to input ‘hello’. The word you are typing appears on the display. It may likely change with each key you press. ❷ Enter the whole word before editing or deleting any keystrokes. ❸ Upon searching a word, input the next text. ❹ If the search fails, press [*] key to search which text can be typed in. Your phone displays the most commonly 070210_C3B_EN_at&t_(00)�‚�¬.indd 35 used choices first. ❺ Continue entering the next word. Using ABC mode When typing in ABC mode, press the key labeled with the target letter once for the first letter; press it twice for the second letter, and so on. Example: To display the letter “C”, quickly press the [2] key three times. To display the letter “K”, press the [5] key twice. This method is called Multitap typing. NOTE The cursor moves to the right when you press a different key. When entering the same letter twice or a different letter on the same key, just press the [Right] scroll key or wait a few seconds for the cursor to move to the right automatically, and then enter the next letter. Refer to the table below for more information about the characters available. The characters vary depending on the text input language. Changing case To change the case of the next letter that you type, press the [#] key. There are three cases: 35 2007.2.10 12:38:47 PM Entering text Using 123 mode •Lowercase (no indicator) •Initial capital ( ) •Capital lock ( ) Use the 123 mode to type numbers into the text. Press the key that corresponds to the digit that you want to type. [English] Key Characters, in displayed order 1 1 : @ ‘ ! ? - , . 2 a b c 2 3 d e f 3 4 g h i 4 5 j k l 5 6 m n o 6 7 p q r s 7 8 t u v 8 9 w x y z 9 0 Space 0 Using Symbol mode The symbol mode allows you to enter symbols into your text. To display more symbols, press the scroll key ([u/d]). To input a symbol, press the number for a symbol, and the symbol appears in the input screen. Using My Words 36 070210_C3B_EN_at&t_(00)�‚�¬.indd 36 Adding a new word to My Words (Spell function) For example, let’s input ‘lode’ which is not stored in the T9 2007.2.10 12:38:51 PM Entering text database, in the T9 alphabet editor. •To add ‘lode’ in T9 mode, press [5], [6], [3], [3] in order. •After pressing [5], [6], [3], [3] in order, you will see the [Spell] Soft key at the bottom left side of the screen. •When you press the [Spell] soft key, the Add Word editor appears. Then input ‘lode’ in ABC mode, and press [o]. NOTE The Add Word editor does not support T9 mode because it only stores the users’ desired words in the T9 database. •Now, this word is stored in the T9 database. To input ‘lode,’ just press [5], [6], [3], [3] in order in 070210_C3B_EN_at&t_(00)�‚�¬.indd 37 T9 mode. Deleting a word from My Words (Delete function) •Press the [Options] Soft key in the T9 alphabet editor. Select My Words, and press [o]. •Select a word to delete with the Navigation key, then press the [Options] Soft key. Select 2.Delete, and press [o] to delete the word from the My Words list. Deleting all words from My Words (Delete All function) •Press the [Options] Soft key in the T9 alphabet editor. Select My Words, and press [o]. 37 2007.2.10 12:38:57 PM Entering text •Press the [Options] Soft key. Select 3.Delete All, and press [o] to delete all words from the My Words list. NOTE The Delete All function activates when two or more words are stored in the My Words list. Editing a word in My Words (Edit function) •Press the [Options] Soft key in the T9 alphabet editor. Select My Words, and press [o]. •Select a word to edit with the Navigation key, then press the [Options] Soft key. Select 1.Edit, and press [o] to edit the word in the Add Word editor. 38 070210_C3B_EN_at&t_(00)�‚�¬.indd 38 2007.2.10 12:39:19 PM Applications 1. Camera 2. Messaging 3. Recent Calls 4. MEdia Net 5. AT&T Mall 6. Mobile Email 7. My Stuff 8. Address Book 9. Settings 3 See the appendix for information about the menu tree. 070210_C3B_EN_at&t_(00)�‚�¬.indd 39 2007.2.10 12:39:36 PM Camera This function enables you to take a photo using the built-in camera. The photo can be saved and sent with a multimedia message. Take a Photo Taking photos when your phone is open ❶ Press the [Menu] Soft key, 1. Camera, and then select 1. Take a Photo to enter your phone’s photo capture mode. Tip You can also press the [Camera] Soft key ([]]) on the idle screen to take a photo. At this time, the image size depends on the user setting. ❷ To change the photo shooting mode, press the Right Soft key ([]]). This toggles between the following options, represented by icons on your phone’s display. Shooting Mode Icon Description Single Capture General mode for a single photo. Multi Capture Takes multiple photos. The quantity of photos is determined by the [Multi-shot] option. Frame Capture Takes a photo with a built-in frame. The image size is fixed as 128X128. NOTE The default image size is 640X480 mode. You cannot set Frame in 640X480 size. ❸ Press the Scroll key ([u/d]) to zoom in/out of the image in the current preview when the image size is 128X128. Press the Scroll key ([l/r]) to control the seven levels of brightness. ❹ The phone saves the image automatically when the user presses the [o] key. Press the [c] key to return to the camera preview screen. NOTE In Multi Capture mode, the photo can be named automatically only if one photo is set as Marked. Select [Mark] or [Unmark] to check the image that you want to save. NOTE Image counter, which is located below image size, indicates the number of photos that you can take. Image counter might not be accurate depending on the types of objects and the level of brightness. Tip If you are taking photos while your phone is open, you can use the following keys to adjust your phone’s camera directly. Function Zoom 40 070210_C3B_EN_at&t_(00)�‚�¬.indd 40 Description Brightness 7 levels (from 0 to 6) 4 levels (from 0 to 3) (only available in 128x128 size). Key Scroll key [l/r] Scroll [u/d] 2007.2.10 12:39:37 PM Camera Using your camera options The Preview mode Press the [Options] Soft key ([[]) in Preview mode to select the following information which will be applied to the image. Its setting value is temporary, so if you want to save its value, press the [Menu] Soft key, select 1. Camera, and then select 3. Settings. •Go to Album: Moves to the Photo Album. •Image Size: Displays the size of image that you want to shoot: 128X128 or 640X480. NOTE This option does not appear in Frame Capture mode. •Self Timer: Specifies the delay time. You can choose None, 5 Secs, or 10 Secs. When the selected time has lapsed, the camera takes a photo. •Frame: Specifies the frame to use. NOTE This option appears in Frame Capture mode. •Multi-Shot: Selects the multi-shot number that you want (4/6/9). NOTE This option appears in Multi Capture mode. •Flash: Turns the flash on or off. •Effect: Applies one of the following effects to the picture: 070210_C3B_EN_at&t_(00)�‚�¬.indd 41 •Normal •Sepia •Solarization •Monochrome •Line Drawing •Negative •Embossing NOTE You cannot set Effect in 640X480 size. •Display Icons: Turns the display icons On or Off. The Single or Frame Capture mode ❶ Press the [Options] Soft key ([[]) in Capture mode to select the following information, which is applied to the image. •Delete: Deletes the photo that is saved automatically. •Set as: •Wallpaper – Adds a photo to Wallpaper in Display. The photo is set as the background image of the main screen. •Address Book– Assigns a specific photo image to Address Book. •Back to Preview: Returns to the camera preview screen. •Send via Bluetooth: Transmits the selected photo via Bluetooth . 41 2007.2.10 12:39:37 PM Camera •Print: Transmits the selected photo to the Printer via Bluetooth •Rename: Renames a photo. (For more information about renaming a photo, see 7. Entering text on page 33.) •Go to Album: Moves to the Photo Album. ❷ Press the [Send] Soft key ([]]) to transmit the photo with the multimedia message. Taking photos when your phone is closed ❶ Press and hold the side [z] key on the left side of your phone with the folder closed to enter or escape from Preview mode. ❷ Adjust the image by aiming the camera at the subject. Press the side [z] key to shoot the image in the current preview. The phone saves the image automatically and returns to Preview mode. NOTE Press and hold the side up key to enter into capture mode when the flip is closed. At this time, the image size is 640X480 only, and the image appears on the external LCD. Photo Album 42 This function allows you to view or edit the photos saved on your phone. Press [Menu] Soft key, select 1. Camera, and then select 2. Photo Album. 070210_C3B_EN_at&t_(00)�‚�¬.indd 42 Viewing the saved photos ❶ Press the [Menu] Soft key, select 1. Camera, and then select 2. Photo Album in the menu to access the Photo Album List. ❷ Select photo from the list and press the [o] key to display the photo list in the album. ❸ Use the [Small] or [List] Soft key to change the list type (Small/List). ❹ Select a photo and press the [o] key to enlarge the photo view. Press the Scroll key ([l/r]) to view other photos in the album. Using the photo options Press the [Options] Soft key ([[]) to apply the following options to a selected photo from the album. •Set as: •Wallpaper: Adds a photo to Wallpaper in Display. The photo is set as the background image of the main screen. •Address Book: Assigns a specific photo image to Address Book Entry. •Send via : •Multimedia Message: Attach the selected photo and send as multimedia message. •Bluetooth: Transmits the selected photo via Bluetooth. 2007.2.10 12:39:37 PM Camera & Messaging •Rename: Renames a photo. (For further details about renaming a photo, see 7. Entering text on page 33.) •Delete: Deletes a photo. •Delete All: Deletes all photos in the album. •File Info: Views the information on a photo. •Print: Transmits the selected photo to the Printer via Bluetooth. Press the [Send] Soft key ([[]) to transmit the photo with the multimedia message. Settings Press the [Menu] Soft key, select 1. Camera, and then select 3. Settings. Change the default camera option value. •Image Size: Size of the image to shoot: 128X128 or 640X480. •Shutter Sound: Shutter/Smile/321/Off •Flash: On/Off •Self Timer: Specifies the delay time. You can choose None, 5 Secs, or 10 Secs. When the selected time has lapsed, the camera takes a photo. •Multi-Shot: Selects the multi-shot number that you want (4/6/9). 070210_C3B_EN_at&t_(00)�‚�¬.indd 43 Messaging This function allows you to create, send, read and save a message using the Short Message Service (SMS: text messages), Multimedia Message Service (MMS: messages supporting presentation of various media types, such as full color images and polyphonic ring tones) provided by your network operator, or an e-mail service. Voice mails are also available. The multi-selection function is also supported. Press the [Menu] Soft key and then select 2.Messaging. NOTE These features are available only if your service provider’s network supports it. Contact your service provider for more information. Text Message Short message service (SMS) allows you to send and receive a short text message to and from other phones. Multimedia Message Multimedia Message Service (MMS) is a messaging service similar to Short Message Service (SMS). It provides asynchronous delivery of personal multimedia messages. 43 2007.2.10 12:39:38 PM Messaging In addition to the familiar text content of text messages, multimedia messages can contain images, graphics, and/or sound. An MMS message is a separate multimedia presentation in a single entry, not an attachment to the text file. Using the MMS feature, your phone can receive a multimedia message and/or send a picture message, depending on MMS availability from your service provider. Only phones that support the multimedia message feature can receive or display the multimedia messages. Receiving a new message When you receive a new message, the popup dialog box displays the number of unread messages and the number of total messages with the New Message icon ( ) in the icon area of the internal and external displays. You also hear an alert, depending on the message sound setting. To read the new message(s) immediately, press the [Read] Soft key or the [o] key. NOTE To clear the new message notification on the display, press the [Cancel] Soft key, the [e] key, or the [c] key. 44 070210_C3B_EN_at&t_(00)�‚�¬.indd 44 Managing memory The Inbox, Outbox, Drafts, Sent, and Templates share a given amount of memory on the phone. In the Inbox, text messages (SMS) can be saved on the phone or the SIM, depending on the Text Message settings. When Save to in the Text Message settings is set to SIM, received messages are saved in the phone memory if the SIM capacity is full. Also, even if Save to in the Text Message settings is set to Phone, received messages are saved in the SIM if the memory capacity is full. When using the Inbox, up to 100 received messages can be saved to the phone memory. Up to 30 entries can be saved in the other mailboxes. The Inbox can use the SIM memory. Only the Inbox can use the SIM memory to store text messages (SMS). When you try to save more than 100 messages in the Inbox, a full icon ( ) appears. When a full icon appears, you cannot receive any new messages. When you open the phone, the notification “Message full Please delete” appears on the display. You must delete one or more of the old messages in order to make memory available for the new messages. Use the [Delete] option within the each mailbox, or use the [Delete All] option to delete all the messages. •Write New: Writes a multimedia message (MMS) or a text 2007.2.10 12:39:38 PM Messaging message (SMS) •Inbox: Displays the received messages in the SIM and Phone memory. You can save up to 100 messages in the phone memory and more messages are received only if the SIM capacity is available. So you can see over 100 messages in the Inbox. The “10” in [10/20] represents the number of unread messages, whereas the “20” represents the number of saved messages in the Inbox. •Sent: Displays the stored messages in the phone memory that were sent. This depends on the settings for Save Messages. Sent can display more than 30 messages. •Outbox: Displays the list of stored messages that have not been sent. 30 messages can be saved to phone memory. •Draft: Displays the list of stored messages that were not completed and stored as Draft. You can save up to 30 messages in Draft. •Templates: Displays the default template and your saved templates. You can save up to 30 messages in the phone memory (including the default template). •Settings: Sets up the environment for messages. •Memory Info: Displays the free space of the SIM or phone memory. 070210_C3B_EN_at&t_(00)�‚�¬.indd 45 Write New Press [Menu] Soft key, select 2. Messaging, select 1. Write New, and then press the [o] key. Select the type of message you want to write. •Text Message: Writes new SMS message. •Multimedia Message: Writes new MMS message. Text Message ❶ Creating a Text Message. At the top of the display, the number of remaining characters appears and you can see the [ ] icon. ❷ While you are entering a text message, press the [Options] Soft key ([[]) for more editing options. Use [u/d] key to select an item and press the [o] key. •Add template: Obtains a template. •Edit Subject: Edits the message subject. •Save: Saves messages in the phone memory. •Language: Selects English, Spanish or French. •My Word: Manage the words that you have added to the dictionary You can edit and delete the words (For more information about My Word, see My Words on page 33) ❸ After you have created the message, press the [o] 45 2007.2.10 12:39:39 PM Messaging key to send the message. If you want to send a Text Message to a new number that is not stored, press the [u] key to move to Add Entry, and then just enter the number (Add Entry is only for entering numbers that are not searched). If you want to search for a stored name, enter the name using the keypad. You can also add numbers from Call Log. To search for a number in the All Calls list, press the [Call Log] Soft key, select the correct number, and then press the [o] key to check it. When you have finished entering the recipient information, press the [Send] Soft key. Multimedia Message 46 ❶ When [No Subject] page displays, press the [Options] Soft key ([[]) to use the following [Editor Options]. •Edit Subject: Edits the message subject. •Add Objects: Adds the text, image, or sound. •Add Template: Adds a multimedia message template. This feature is only available when no item is in the slide. With more than one slide, Add Template is not available. •Settings: The user can only change the setting for the message which is in the process of being written. The setting for Slide Timing, Page Layout and Priority can only be set while a message is being written. However, 070210_C3B_EN_at&t_(00)�‚�¬.indd 46 Delivery Reports and Read Reports setting can also be set by pressing 2. Messaging, select 10. Settings, and then select 3.Multimedia Message. •Slide Timing: Sets how long the received message is displayed for. The display automatically scrolls to the next slide page after the specified time. •Page Layout: Arranges the image and text display position in the slide page. You can set Image at Top or Text at Top. •Delivery Reports: When this option is set to [On], the network informs you whether or not your message has been delivered successfully (This is network dependent). •Read Reports: When this option is set to [On], the recipient’s phone sends a reply to let you know when your message has been read. (if your carrier>s network supports this functionality) •Priority: Set Normal, High, or Low. ❷ When [No Subject] page displays, press the [Add] Soft key ([]]) to add an objects. •Add Text: Adds a new text. •Add Image: Adds the photo or the downloaded image. Press the [o] key to select the sub-menu. 2007.2.10 12:39:39 PM Messaging •Take a Photo: Creates a new photo. •Photo Album: Already saved photo. •Downloaded: Downloaded image. (For further details, see Graphics on page 65.) •Add Sound: Adds the voice memo or the downloaded sound. Press the [o] key to select the sub-menu. •New Voice Memo: Creates a new recording memo. •Voice Memo: Already recorded sound. •Downloaded: Downloaded sound. (For further details, see Audio on page 64 and Voice Memo on page 69.) •Add Slide: Adds a new slide. NOTE After you add the text, the image or the sound, the Add Slide menu appears if you press the [Add] Soft key ([]]). To move to a different slide, press the [l/r] key. ❸ After writing the message, press the [o] key. And then press the [Options] Soft key ([[]) to use the following [Editor Options]. •Preview: Shows the message as it appears on the recipient’s phone, and you can return to the Editor to press the [Editor] soft key ([[]). •Delete Text/Image/Sound: Deletes the selected text, 070210_C3B_EN_at&t_(00)�‚�¬.indd 47 image, or sound from the slide page. •Add Objects: Adds an image, sound, and slide objects. •Save as Draft: Saves messages in the phone memory. •Delete Slide: Deletes the selected slide. NOTE When more than one slide exists, this menu appears. •Edit Subject: Edits the subject •Settings: The user can only change the setting for the message which is in the process of being written regardless of the global settings. To find those settings, press [Menu] Soft key select 2. Messaging, select 10. Settings, and then select 3.Multimedia Message. •Slide Timing: Sets how long the received message is displayed. The display automatically scrolls to the next slide page after the specified time. •Page Layout: Arranges the image and text display position in the slide page. You can set Image at Top or Text at Top. •Delivery Reports: When this option is set to [On], the network informs you whether or not your message has been delivered successfully (This is network dependent). •Read Reports: When this option is set to [On], the 47 2007.2.10 12:39:39 PM Messaging 48 recipient’s phone sends a reply to let you know when your message has been read if your carrier>s network supports this functionality. •Priority: Set Normal, High, or Low. ❹ After writing the message, if the user wants to change the already added object, press the [u/d] key to move to the already added object and press the [Edit] or [Replace] Soft key ([]]). This key is automatically linked to editing text, or replacing image or sound. •Edit: Edits text •Replace Image: Replaces the selected image/photo with a different selected image from the sub-menu. •Take a Photo: Creates a new photo •Photo Album: Already saved photo •Downloaded: Downloaded image •Replace Sound: Replaces the selected sound with a different selected sound from the sub-menu. •New Voice Memo: Creates a new recording memo •Voice Memo: Already recorded sound •Downloaded: Downloaded sound ❺ When you have finished creating the message, press the [o] key to send the message. If you want to send 070210_C3B_EN_at&t_(00)�‚�¬.indd 48 a Multimedia Message to a new number or an e-mail address that is not stored, press the [u] key to move to Add Entry, and then just enter the number or e-mail address (Add Entry is only for entering numbers or email addresses that are not searched). If you want to search for a stored name, enter the name using the keypad. You can also add numbers from Call Log. To find the Call Log menu, press the [Options] Soft key.. •Call Log: Shows the recent calls •Cc (Carbon copy): Sends the message to both the recipient and a third party in Address Book Entry. •Bcc (Blind carbon copy): Sends the message to a third party but does not notify the other recipients in Address Book Entry. After selecting the correct number, press the [o] key to check it. When you have finished entering the recipient information, press the [Send] Soft key. NOTE To send a text message or MMS message to someone not in your phonebook, enter the phone number at the idle screen and select the right soft key and then select type of message. 2007.2.10 12:39:40 PM Messaging NOTE If the size of the Multimedia Message exceeds the transmission limit (100 Kb), a warning information message will appear. It is automatically saved in the Sent folder if transmission is successful. Inbox Press the [Menu] Soft key, select 2. Messaging, select 2. Inbox, and press the [o] key to display the received messages one by one. To write a new message, press the [Reply] Soft key at the lower-right corner. You can receive a multimedia message notification through the network and read only the downloaded multimedia message. You can also receive a text message and voice mail. In case of a text messages, if available in the Address Book, the sender’s name and initial text appears with the list of messages. In the case of multimedia messages, the list of messages appears with the sender phone number or name and the message subject. According to message type, the list of messages shows the following icons: Unread text message in the SIM Read text message in the SIM Unread text message in the phone 070210_C3B_EN_at&t_(00)�‚�¬.indd 49 Read text message in the phone Unread multimedia message Read multimedia message ❶ Select the [Options] Soft key ([[]) on the bottom of the message list to select one of the following options. •Callback: Calls to the message sender. •Delete: Deletes the selected message. •Delete All Read Messages: Deletes all read messages received. •Delete All: Deletes all messages in the Inbox. •Forward: Sends the received message to another recipient. •Move to Phone (SIM): Saves the message in the phone memory (in the SIM) if the message is saved in the phone (in the SIM). Only text message is available. •Reply All: Replies to the message sender and the 3rd party who received the message. (Shown only on the Multimedia Message.) ❷ Select the Soft key ([]]) on the bottom of the message list to select the following option. •Reply: Reply to the message sender. 49 2007.2.10 12:39:40 PM Messaging 50 ❸ Select the [Options] Soft key ([[]) on the bottom of the message view to select one of the following options. •Reply All: Replies to the message sender and the 3rd party who received the message. (Shown only on the Multimedia Message.) •Delete: Deletes the selected message. •Forward: Sends the received message to another recipient. •Callback: Calls the message sender. •Save Numbers & E-mail: Extracts a number & e-mail from the message text. You can save it as an Address Book entry. - When you select the numbers in the list. 1) If you press the [s] key, you can call the person with that number. 2) Press the [o] key. •Save New: Creates a new entry. •Add to Old: Adds to the existing entry and saves the entry •Send Message: Sends a message to a selected recipient. - When you select the e-mail in the list 070210_C3B_EN_at&t_(00)�‚�¬.indd 50 1) Press the [o] key. •Save New: Creates a new entry. •Add to Old: Adds to the existing entry and save the entry. •Send Message: Sends a message to a selected recipient. •Save URLs: Extracts a URL address from the message text. You can save it as a MEdia Net bookmark. If you press the [o] key, you can connect to the URL. •Save Objects: Extracts an object from the multimedia message. You can save it in one of the categories in My Stuff. (Shown only on the multimedia message.) 2) Select the Soft key ([]]) on the bottom of the message view to select the following function. •Reply: Reply to the message sender. IM Use Instant Messenger (IM) to send and receive short, simple messages that are delivered immediately. Starting Instant Messenger ❶ Press [Menu] Soft key, select 2. Messaging, and then 2007.2.10 12:39:41 PM Messaging select 3. IM. ❷ Highlight your established IM application and press the [Select] Soft key ([[]) or the [o] key. ❸ Type your Logon ID and your Password and then select Sign On. ❹ Select the person you want to talk to. ❺ Start your conversation. Viewing the Conversation Log You can view the log of your conversations in the Instant Messenger Saved History. Sent Sent saves all messages sent from your phone. Press [Menu] Soft key, select 2. Messaging, and then select 4. Sent. The icons below indicate the status of the SMS message saved in Sent: Sent SMS message (normal) The icons below indicate the status of the MMS message saved in Sent: Sent MMS message (normal) Delivered MMS message Expired or Rejected MMS message Read MMS message Deleted MMS message Delivered and Read MMS message Delivered and Deleted MMS message To manage messages in Sent: ❶ Press the [Edit] Soft key at the bottom right corner to edit and send a Sent message using the recipient’s number. ❷ Select the [Options] Soft key on the bottom of the message list to select one of the following functions. •Delete: Deletes the selected message. •Delete All: Deletes all messages in Sent. •Forward: Sends the Sent message to another recipient. •Details : View details (Delivery/Read status, Delivery /Read timestamp of each destination) Outbox Outbox contains all messages you have not yet sent. Press [Menu] Soft key, select 2. Messaging, select 5. Outbox, and press the [o] key. 51 070210_C3B_EN_at&t_(00)�‚�¬.indd 51 2007.2.10 12:39:42 PM Messaging To manage messages in Outbox: ❶ Press the [Send] Soft key ([]]) at the bottom right corner to send the failed message again. ❷ Press the [Options] Soft key ([[]) at the bottom left corner to select the following functions. •Delete: Deletes the message. •Delete All: Deletes all messages in the Outbox. •Edit: Edits and sends an unsent message using the recipient’s number. Draft Draft contains all the messages you have edited and saved. Press [Menu] Soft key, select 2. Messaging, select 6. Draft, and press the [o] key. To manage messages in Draft: Press the [Options] Soft key ([[]) at the bottom left corner to select the following functions. •Delete: Deletes the message. •Delete All: Deletes all messages in Draft. Browser Msg 52 The phone can receive browser messages from the service 070210_C3B_EN_at&t_(00)�‚�¬.indd 52 provider. Press [Menu] Soft key, select 2. Messaging, and then select 7.Browser Msg, where the number of unread Browser messages is shown. When you are in the list of Browser Messages, press the [Options] Soft key ([[]) to select from the following functions. •Delete: Deletes a message. •Delete All: Deletes all the messages in Inbox. •Ok: Shows the information for the selected message. In addition you can press the [Go to] Soft key ([]]) to connect to the appropriate WAP page. Voicemail If you are busy or cannot answer when someone calls, you can refer the caller to a voice-mail message service. After the caller leaves a message, the voice mail service indicates that a message is available. Press the [Menu] Soft key, select 2. Messaging, select 8. Voicemail, and press the [o] key. You can listen to the voicemail by calling the voicemail center. Templates A template contains a block of text for quick insertion into 2007.2.10 12:39:42 PM Messaging text messages and multimedia messages. Press the [Menu] Soft key, select 2. Messaging, and then select 9. Templates. If no user-created template exists, only the Create New menu appears in the list. ❶ Select a text or a multimedia template menu and press the [Options] Soft key ([[]) at the left for associated options. •Create New: Makes a new template. Not available if the template space is full. •Text Message: Writes a new text template. •Multimedia Message: Writes a new multimedia template. •Delete: Deletes a template you have defined. The default template does not appear. •Delete all: Deletes all messages in the templates box. The default template does not appear. •Edit: Edits the selected template. ❷ Select a message and press the [Send] Soft key ([]]) to send the selected template. Settings Before you can send or receive messages using your phone, you must configure their settings first. This information is normally pre-populated in the phone by your service provider. Press the [Menu] Soft key, select 2. Messaging, and then select 10. Settings. Common Settings Select [Menu], select 2. Messaging, select 10. Settings, select 1.Common Settings, and press the [o] key. To set up common message settings, use the following functions: •Default Edit Mode: Sets in Alphabet mode (Multi-tap mode) or Predictive mode (T9 mode). •Save messages: If set as On, the messages sent will be stored in the [Sent]. •Auto Delete Read messages: If set as On, with the inbox full, when handset receives new message, it deletes the oldest read message and saves the new message instead. Text Message Press the [Menu] Soft key, select 2. Messaging, select 10. Settings, select 2.Text Message, and press the [o] key. To set up default Text Message information, use the following functions: 53 070210_C3B_EN_at&t_(00)�‚�¬.indd 53 2007.2.10 12:39:43 PM Messaging 54 •Message Center: Stores or changes the number of your message center that is required when sending a message. •E-mail Gateway: Stores or changes the number of your e-mail gateway required when sending an e-mail. •Save to: Sets the text message storage to SIM or phone. •Message Format: Sets the message type to Normal, Fax, Voicemail, ERMES, National Paging, X.400, or Internet. The network converts the messages into the selected format. NOTE The message format depends on the SIM. recipient’s phone sends a reply to let you know when your message has been read. •Message Lifetime: Sets the duration of time your message is stored at the message center while attempting to deliver it. You can select one of 1 Hour, 2 Hours, 6 Hours, 1 Day, 2 Days, 1 Week, 4 Weeks, 6 Months, or Maximum. •Note: If you reset the phone, all user settings of the Profiles will be deleted and returned to factory-default settings. Multimedia Message Press the [Menu] Soft key, select 2. Messaging, select 10. Settings, select 4.Voice Mail, and press the [o] key. This number is normally pre-populated by your carrier during the activation process. Press the [Menu] Soft key, select 2. Messaging, select 10. Settings, select 3 .Multimedia Message, and press the [o] key. To set up default Multimedia Message information, use the following functions: •Profiles: Sets up multimedia messages profile settings. •Delivery Reports: When this option is set to [On], the network informs you whether or not your message has been delivered successfully. •Read Reports: When this option is set to [On], the 070210_C3B_EN_at&t_(00)�‚�¬.indd 54 Voice Mail Browser SL Message Press the [Menu] Soft key, select 2. Messaging, select 10. Settings, select 5.Browser SL Message, and press the [o] key. •Receive: Sets up browser message receiving. The ( ) icon displays when the user receives a new message. When the user receives an SL (Service Load) message 2007.2.10 12:39:43 PM Messaging & Recent Calls •On 1. When Press the [Accept] Soft key ([[]) on the Browser Message Alerting screen. Shows the information for the selected message ·Go to: Enters the browser. ·Delete: Deletes the received message. ·Inbox: Shows the Brower message list 2. When Press the [Exit] Soft key ([]]) on the Browser Message Alerting screen. Saves and exits the Browser Message service. Recent Calls This function displays missed calls, received calls, and dialed calls. You can delete a call log and see the information for the Call Time and GPRS info in this menu. Press the [s] key to see the recent calls in Standby mode or select the [Menu] Soft key and then select 3. Recent Calls. NOTE If Address Book Entry contains the phone number that you want to dial, the name displays. Alternatively, the phone number, date, and time displays on the screen. •Off Does not accept messages. •No Alerting It works as same as the On-Mode without audio alert. Press the [s] key when the cursor is placed on the number or name to dial the number. Memory Info Missed Calls This function displays the amount of used and available memory on your phone. Press the [Menu] Soft key, select 2. Messaging, and then select 11. Memory Info to display the free text message and multimedia message memory space. This function displays the missed calls list showing the time and date of missed calls as well as the number or name of the caller. Press the [Menu] Soft key, select 3. Recent Calls, and then select 1. Missed Calls. Press the [u/d] key to select the missed call. To manage your missed calls, press the [Options] Soft key 070210_C3B_EN_at&t_(00)�‚�¬.indd 55 55 2007.2.10 12:39:43 PM Recent Calls ([[]) to select from the following functions. •Call: Call the selected number. •Save Number: If the selected number is not saved on the SIM or the phone, this option appears. Saves the selected number to the SIM or the phone. •Delete: Deletes the selected number. •Delete All: Deletes all missed call records from the list. Press the [Message] Soft key ([]]) to send a message to the person whose call you missed. Received Calls 56 This function displays the received call list showing the time and date of a received call as well as the number or name of the caller. Press the [Menu] Soft key, select 3. Recent Calls, and then select 2. Received Calls. Press the [u/d] key to select the received call. To manage your received calls, press the [Options] Soft key ([[]) to select from the following functions. •Call: Call the selected number. •Save Number: If the selected number is not saved on the SIM or the phone, this option appears. Save the selected 070210_C3B_EN_at&t_(00)�‚�¬.indd 56 number to the SIM or the phone. •Delete: Deletes the selected number. •Delete All: Deletes all received call records from the list. Press the [Message] Soft key ([]]) to send a message to the person who called you. Dialed Calls This function displays the dialed calls list showing the time and date of dialed calls as well as the number or name of the recipient. Press the [Menu] Soft key, select 3. Recent Calls, and then select 3. Dialed Calls. Press the [u/d] key to select a dialed call. To manage your dialed calls, press the [Options] Soft key ([[]) to select from the following functions. •Call: Call the selected number. •Save Number: If the selected number is not saved on the SIM or the phone, this option appears. Save the selected number to the SIM or the phone. •Delete: Deletes selected number. •Delete All: Deletes all the dialed call records from the list. Press the [Message] Soft key ([]]) to send a message to 2007.2.10 12:39:44 PM Recent Calls the person if you missed the call. then press the [o] key. Delete Call Logs GPRS Info This function allows you to choose to delete all missed, received, or dialed call records or delete all call records. Press the [Menu] Soft key, select 3. Recent Calls, and then select 4. Delete Call Logs. Select All Calls to delete all the call records. Press [Yes] or [No] to confirm that you want to execute or cancel this function. This function displays the following information on the volume of GPRS data transmitted. Press the [Menu] Soft key, select 3. Recent Calls, and then select 6. GPRS Info. •Current Info.: Displays the total volume of GPRS data transmitted in the current session, in Kbytes. •Last Info.: Displays the total volume of GPRS data transmitted in previous sessions, in Kbytes. •Total Info.: Displays the total volume of GPRS data transmitted and received, in Kbytes. •Clear Logs: Clears the logs recording how much GPRS data you have transmitted. NOTE If no logs exist, the message “List Empty” appears. Call Time This function displays information on call times. •Press the [Menu] Soft key, select 3. Recent Calls, and then select 5. Call Time. The following information is displayed. •Last Call: Displays date and time. •Received, Dialed and Total Calls: Displays the total call time. •Reset Call Times: Resets the call timer. To confirm the resetting of all call times, input your phone’s password 57 070210_C3B_EN_at&t_(00)�‚�¬.indd 57 2007.2.10 12:39:44 PM MEdia Net MEdia Net Home You can access the Internet with MEdia Net. This means you can connect to the Internet anywhere and anytime you have network coverage. This function contacts your network to load your Wireless Web service provider’s homepage. You can also press the [o] key in Idle mode. Press the [Menu] Soft key, select 4.MEdia Net, and then select 1.MEdia Net Home. The context of the MEdia Net startup homepage depends on your Wireless Web service provider. To scroll through the screen, use the [u] and [d] keys. OTA Settings Service WAP/ OTA Provisioning 58 In order to use the MEdia Net, you need to have the correct connection settings on your phone. You can add or edit the WAP Profile manually, or receive its settings information as a type of configuration message from an operator or a service provider. If you receive the settings information from an operator or service provider, it will automatically store the WAP setting information on the phone. 070210_C3B_EN_at&t_(00)�‚�¬.indd 58 Note that you need to follow some on-screen steps to save and activate the settings. Bookmarks This function allows you to bookmark an Internet address using the MEdia Net just as you do with a PC Internet browser. ❶ Press the [Menu] Soft key, select 4.MEdia Net, and then select 2.Bookmarks ❷ To register a URL and name in the closest empty number of the Bookmark List, go to the 6.Empty menu and then press the [Add] Soft key on the right. To manage existing bookmarks, select the bookmark then press the [Options] Soft key ([[]) to select from the following functions. •Edit: Edits the URL and name of a bookmark. •Delete: Deletes a bookmark from the list. •Send Message: Sends a currently selected bookmark via SMS. NOTE You cannot use the [Edit] and [Delete] options for default bookmarks. ❸ Press the [Go] Soft key []] to go to the related site. 2007.2.10 12:39:44 PM MEdia Net Go to URL This function allows you to directly input the address of a URL and connect to it. ❶ Press the [Menu] Soft key, select 4.MEdia Net, and then select 3.Go To URL. ❷ Input the URL you want to go to, then press the [o] key. Profiles This function selects or edits WAP connection profiles on your phone. NOTE The settings for your WAP service are already entered as required by your service provider. Care should be taken when you make any modification to a profile since it may cause WAP to be inoperative. Your phone is compatible with OTA (Over The Air) messages. These are used by service providers to send connection details directly to your phone. Please ask your service provider for details of this service. ❶ Press the [Menu] Soft key, select 4.MEdia Net, and then select 4.Profiles. ❷ To select a profile, highlight it in the Profile List then press the [o] key. You cannot select Unedited Profile. To edit a profile, select it in the Profile List then press the [Edit] Soft key to select from the following functions. 070210_C3B_EN_at&t_(00)�‚�¬.indd 59 •Profile Name: Press the [o] key to change the profile name. •Home URL: Press the [o] key to edit the Homepage URL provided by your service provider. •Connection Type: Select either WAP or HTTP. •GSM Settings: This function allows you to set the GSM network proxy by inputting the following information. •Gateway/Proxy: If you set the Connection Type to WAP, Gateway is displayed. If you set it to HTTP, Proxy is displayed. Press the [o] key to display the subfunctions such as IP Address and IP Port, then input the appropriate information for each of the following subfunctions, inputting the information provided by your service provider. •Data Call Type: Press the Left or Right scroll key to select ISDN or Analog. •Dial Number: Press the [o] key to input the appropriate dialup number. •Login ID: Press the [o] key to input the appropriate login ID. •Password: Press the [o] key to input the appropriate password. 59 2007.2.10 12:39:45 PM MEdia Net •GPRS Settings: This menu allows you to set the GPRS network proxy by inputting the following information. •Gateway/Proxy: If you set the Connection Type to WAP, Gateway is displayed. If you set it to HTTP, Proxy is displayed. Press the [o] key to display the subfunctions such as IP Address and IP Port, then input the appropriate information for each of the following subfunctions, inputting the information provided by your service provider. •Access Point: Press the [o] key to input the appropriate Access Point. •Login ID: Press the [o] key to input the appropriate login ID. •Password: Press the [o] key to input the appropriate password. •DNS Settings: Input the appropriate IP address for the Domain Name Server. You can input the primary and secondary DNS. NOTE This function is available only when your Connection Type is set to HTTP. •Bearer: Select the bearer type for each type of network access. Press the Left or Right scroll key to select GSM Only or GPRS Only. 60 070210_C3B_EN_at&t_(00)�‚�¬.indd 60 •Reset Profile: Press the [o] key to reset the settings of the selected profile. Press the Left or Right scroll key to select Yes or No. Cache This function sets up your phone’s cache. This feature is used to store WAP pages directly on your phone, so they display rapidly when you return to them. Cache Mode This function sets up the cache memory check, which verifies whether the WAP page’s information is already stored in your phone’s cache memory. ❶ Press the [Menu] Soft key, select 4.MEdia Net, select 5.Cache, and then select 1.Cache Mode. ❷ Select one of the following options. •Always Check: The cache is always checked whenever a URL is loaded. •Never Check: The cache is never checked. Clear Cache This function clears all data stored in the cache (recently visited WAP pages). Press the [Menu] Soft key, select 4.MEdia Net, select 2007.2.10 12:39:45 PM MEdia Net & AT&T Mall 5.Cache, and then select 2.Clear Cache. AT&T Mall Security Certifications Shop Tones Press the [Menu] Soft key, select 4.MEdia Net, and then select 6.Security Certifications. Press the [o] key to see the saved security certificate. Selecting this menu launches the Web browser to AT&T’s Tones menu. Press the [Menu] Soft key, select 5.AT&T Mall, and then select 1. Shop Tones. Version This function displays the software version of your phone’s WAP browser. Press the [Menu] Soft key, select 4.MEdia Net, then select 7.Version. Shop Games Selecting this menu launches the Web browser to AT&T’s Game menu. Press the [Menu] Soft key, select 5.AT&T Mall, and then select 2. Shop Games. Shop Graphics Selecting this menu launches the Web browser to AT&T’s Graphics. Press the [Menu] Soft key, select 5.AT&T Mall, and then select 3. Shop Graphics. Shop Multimedia Selecting this menu launches the Web browser to AT&T’s Multimedia menu. 070210_C3B_EN_at&t_(00)�‚�¬.indd 61 61 2007.2.10 12:39:45 PM AT&T Mall & Mobile Email Press the [Menu] Soft key, select 5.AT&T Mall, and then select 4. Shop Multimedia. Shop Applications Selecting this menu launches the Web browser to AT&T’s Applications menu. Press the [Menu] Soft key, select 5. AT&T Mall, and then select 5. Shop Applications. MEdia Net Home For further details about 4. MEdia Net, see page 56. Mobile Email This function enables you to send an e-mail to someone and read your email. Starting Mobile Email •Read: Reads the selected e-mail. •Delete: Deletes the selected e-mail. •Mark for Deletion: Selects an e-mail you want to delete. If you select one or more e-mails, the [Delete Marked] option is displayed. •Delete Marked: Deletes the marked e-mails. •Unmark: Unmarks the selected e-mail for deletion (Multi Delete). •Compose New (Write in AOL): Writes the new e-mail. •Go to Folder: Lists your e-mail folder. •Email Alerts: Sets the new e-mail alerts functionality. •Check for Mail (Retrieve Mail in AIM & AOL): Retrieves the e-mail from the mail server. •Yahoo Search (only Yahoo): Browse the Yahoo search homepage. •Preferences: Sets the display and confirmation setting. ❶ Press the [Menu] Soft key and select 6. Mobile Email. ❷ Highlight your established e-mail account and press the [Select] Soft key ([]] or the [o] key. ❸ Type your Logon ID and your Password and then select Sign On. 62 070210_C3B_EN_at&t_(00)�‚�¬.indd 62 2007.2.10 12:39:46 PM My Stuff Your phone supports a Digital Rights Management (DRM) system to protect acquired content. A piece of content (for example, ringtones, wallpapers) can be protected by using Forward Lock, which means the protected contents cannot be forwarded to other devices including other phones and desktops. With respect to DRM, a forward locked sound appears with an icon ( ) in the sound list. •Delete: Deletes the selected game. (You cannot delete the default game.) •Update: Updates the selected game version. (You cannot update the default game.) •Permissions: Sets the permission regarding each function when the selected game accomplishes a specific function. •VM Version: Shows the JAVA version that the built-in Java VM (Virtual Machine) supports. Games & Apps Audio Shop Games Shop Tones DRM/ Forward Lock Selecting this menu launches the Web browser to AT&T’s Arcade menu. Selecting this menu launches the Web browser to AT&T’s Tones menu. Games Audio Press the [Menu] Soft key, select 7. My Stuff, and then select 1.Games & Apps in the menu to view the Java Game. The list is stored in your phone. After moving to the game that you select, using the scroll key, press the [o] key or the [Run] Soft key to run the game and press the [Options] Soft key to view the following: •Info: Shows the information about the selected game. 070210_C3B_EN_at&t_(00)�‚�¬.indd 63 Play back sound in your phone or edits information. The sound formats supported here are MIDI, SMAF, iMelody, MP3 and AMR. Press the [Menu] Soft key, select 7. My Stuff, and then select 2. Audio to display the list of sounds recorded in your phone. The selected melody automatically plays once. 63 2007.2.10 12:39:46 PM My Stuff NOTE Unless you have set your ring type to vibration or silent mode. Press the [Options] Soft key ([[]) to apply the options to the sound concerned. The [Options] Soft key is active when the downloaded sound is selected. •Send via : •Multimedia Message: Attach the selected sound and send as multimedia message. This option is available only for nonforward-locked sounds. •Bluetooth: Transmits the selected sound via Bluetooth •Set as Ringtone: Sets the selected sound as a preferred ringtone. Press the [o] key to set default ringtone. •Rename: Renames a sound. (For further details about renaming a file, see 7. Entering text on page 33.) •Delete: Deletes a sound. •Delete All: Deletes all sounds in the sound list. •File Info: Views the information about a sound. NOTE MP3 ringtone support (maximum file size: 500 Kb) and MP3 files might be subject to the relevant copyright laws, so refrain from distributing these files illegally. Graphics Shop Graphics Selecting this menu launches the Web browser to AT&T’s Graphics menu. Graphics You can view or edit the image or information recorded in your phone in this menu. The image formats supported here are JPEG, GIF, BMP, WBMP and PNG. ❶ Press the [Menu] Soft key, select 7. My Stuff, and then select 3. Graphics to see the list of images that are saved in your phone. ❷ Press the [View] Soft key or press the [o] key to set the selected image as Wallpaper. ❸ Press the [l/r] key to view other images in the list. ❹ Press the [List] Soft key to return to the list. ❺ Press the [Options] Soft key ([[]) to apply the options to the image. The [Options] Soft key is active when the downloaded image is selected. •Send via : •Multimedia Message: Attach the selected image and send 64 070210_C3B_EN_at&t_(00)�‚�¬.indd 64 2007.2.10 12:39:46 PM My Stuff as multimedia message. This option is available only for nonforward locked graphics. •Bluetooth: Transmits the selected image via Bluetooth •Set as Wallpaper: Adds an image to ‘Wallpaper’ in the ‘Display settings’. The image is set as the background image of the main screen. •Rename: Renames an image. (For further details about renaming a file, see 7. Entering text on page 33.) •Delete: Deletes an image •Delete All: Deletes all images in the image list. •File Info: View the information about an image. With respect to DRM, a forward locked image appears with an icon ( ) in the image list. Photo Album This function allows you to view or edit the photos saved on your phone. Press [Menu] Soft key, select 7. My Stuff, and then select 4. Photo Album. Viewing the saved photos ❶ Press the [Menu] Soft key, select 1. Camera, and then select 2. Photo Album in the menu to access the photos. ❷ Select a photo from the list and press the [o] key to display the photo list in the album. ❸ Use the [Small] or [List] Soft key to change the list type (Small/List). ❹ Select a photo and press the [o] key to enlarge the photo view. Press the Scroll key ([l/r]) to view other photos in the album. Using the photo options Press the [Options] Soft key ([[]) to apply the following options to a selected photo from the album. •Set as: •Wallpaper: Adds a photo to Wallpaper in Display. The photo is set as the background image of the main screen. •Address Book: Assigns a specific photo image to Address Book Entry. •Send via : •Multimedia Message: Attach the selected photo and send as multimedia message. •Bluetooth: Transmits the selected photo via Bluetooth •Rename: Renames a photo. (For further details about renaming a photo, see 7. 65 070210_C3B_EN_at&t_(00)�‚�¬.indd 65 2007.2.10 12:39:47 PM My Stuff Entering text on page 33.) •Delete: Deletes a photo. •Delete All: Deletes all photos in the album. •File Info: Views the information on a photo. •Print: Transmits the selected photo to the Printer via Bluetooth. Other Files Allows you to view or manage the list of the files of unsupported formats. Also, allows you to include in the list the files of supported formats via Bluetooth or other devices. Press the [Menu] Soft key, select 7.My Stuff, and then select 5.Other files Press the [Option] Soft key [[] to: •Rename: Renames a file.. •Delete: Deletes a file. •Delete All : Deletes all files. •File Info: Views the information on a file. •Send via Bluetooth: When Bluetooth is set for “On,”, files can be sent to other Bluetooth device . Tools Tools provides various functions such as Alarm, Calendar, Memo, Voice Memo, World Time, Calculator, Converter, Stopwatch, and SIM Tool Kit. Press the [Menu] Soft keys, select 7. My Stuff, and then select 6. Tools. Alarm This function allows you to set an alarm to sound at up to five different times. Press [Menu] Soft key, select 7.My Stuff, select 6. Tools, and then select 1. Alarm to display the current alarm list. NOTE When you set the Wake-Up Call to On, an icon is shown on your phone’s display. To set an alarm Press [Menu] Soft key, select 7. My Stuff, select 6. Tools, and then select 1. Alarm to display the current alarm list. Press the [New] Soft key ([]]), and compose a new alarm in the alarm edit screen. To manage existing alarms Select the alarm then press the [Options] Soft key ([[]) to select from the following functions. 66 070210_C3B_EN_at&t_(00)�‚�¬.indd 66 2007.2.10 12:39:47 PM My Stuff •Delete: Deletes an alarm from the list. •Delete All: Deletes all alarms from the list. •Wake-Up Call On/Off: If you set Wake-Up Call to On, the alarm rings regardless of any other settings (for example, vibrate settings). •Snooze On/Off: If the alarm is set to Snooze, it rings in 5 minute intervals for the next 15 minutes. Only one alarm can be set to Snooze On. Press the [o] key to edit the alarm, and then press the Scroll [u/d] key in the Edit Alarm screen to set Time, or Melody. Press the [AM] or [PM] Soft key ([[]) to select AM or PM time format for setup. Calendar Calendar helps you manage your schedule including your time for calls or special days. You can set alarms service on a set date with this function. Calendar is displayed as the following views: Monthly View, Daily View, and Event View & Edit. Press the [Menu] Soft key, select 7. My Stuff, select 6. Tools, and then select 2. Calendar. Monthly View Calendar is displayed in this view by default. Press the [Menu] Soft key, select 7.My Stuff, select 6. Tools, and then select 2. Calendar from the menu to display the Monthly View. Press the following keys to move in Monthly View. To: Press: Move to another day [l] key Previous Day [r] key Next Day Move to another week [z] or [u] key Previous Week [x] or [d] key Next Week Move to the previous or [1] key Previous Month [3] key Next Month next month Press the [New] Soft key ([]]) to add a new event. To manage existing events, press the [Options] Soft key ([[]) to select from the following functions. •Go to Date: Moves to the set date. •Go to Today: Moves to today for selection. •View All Events: Shows all of your scheduled events. •Delete All Events: Deletes all of your scheduled events. 67 070210_C3B_EN_at&t_(00)�‚�¬.indd 67 2007.2.10 12:39:48 PM My Stuff •Memory Info: Displays the number of stored events (up to 50). Use the Scroll keys to select the date you want then press the [o] For dates containing events, switch to Daily View to check the schedule. Events recorded for a date are displayed at the bottom of the display as an icon. Daily View This function displays the events recorded for a date. Select a date then press the [o] key to view or edit the details of specific events. To manage existing events, press the [Options] Soft key ([[]) to select from the following functions. •Delete: Deletes an event. •Delete All: Deletes all events. •Save Number: If the selected number is not saved on the SIM or the phone, this option appears. Saves the selected number to the SIM or the phone. NOTE The [Save Number] option is displayed only when a phone number is saved in an event. 68 Event View & Edit This function displays the events individually and edits the 070210_C3B_EN_at&t_(00)�‚�¬.indd 68 schedule or creates a new schedule. To create a new event in Event View & Edit ❶ Select a day from Monthly View or scroll to a day and press the [New] Soft key ([]]) ❷ On the New Event screen, select and input an event item by item for registration. ❸ After input, press the [o] key to save the event. NOTE You can create up to 50 events. You can create up to 5 events for a day. You can create events for dates from 01/01/1950 to 12/31/2043. Notepad This function enables you to create text and voice memos on your phone. Press the [Menu] Soft key, select 7. My Stuff, select 6. Tools, and then select 3.Notepad. To manage text memos, press the [Options] Soft key ([[]) to select from the following functions. •Edit: Retrieve existing memos, edit existing memos, and press the [o] key to save modified memos. Tip Press the [o] key and [Edit] Soft key ([]]) to return to the editing screen. 2007.2.10 12:39:48 PM My Stuff •Delete/Delete All: Delete any or all items. (For more information about using the editor, see 7. Entering text on page 33.) Voice Memo The Voice Memo function records your voice messages. You can use Record, Stop, Play, and Save for voice recording and playback. Press the [Menu] Soft key, select 7. My Stuff, select 6. Tools, and then select 4. Voice Memo. To record a voice memo: ❶ Press the [New] Soft key ([]]) to start recording immediately. ❷ Press the [ ] key to terminate the recording process and press the [Play] Soft key to hear the recorded data before saving the voice data. ❸ Press the [Re-rec] key to re-record a voice message. ❹ Press the [ ] key, input a name, and press the [o] key to save the data. Tip When the memory is full, the “Not Enough Memory” message appears and you return to the menu. To manage voice memos: To manage voice memos, press the [Options] Soft key 070210_C3B_EN_at&t_(00)�‚�¬.indd 69 ([[]) to select from the following functions. •Send via : •Multimedia Message: Attach the AMR file and send as multimedia message •Bluetooth: Transmits the selected AMR file via Bluetooth •Rename: Renames the voice memo. •Delete: Deletes the selected voice memo. •Delete All: Deletes all voice memos. •File Info: Views the information about a file To play a voice memo: ❶ Select an item in the voice memo list, and press the [o] key to play immediately. ❷ Press the [ ] key or [ ] key to rewind or fast forward. ❸ Press the [ ] key to play or pause a voice memo. ❹ Press the [ ] key to stop a voice memo. World Time This function informs you of world times. Press the [Menu] Soft key, select 7.My Stuff, select 6. Tools, select 5.World Time. To manage world times, press the [Options] Soft key ([[]) to select from the following functions. 69 2007.2.10 12:39:49 PM My Stuff •Daylight-saving On/Off: Specifies whether the current time of the selected place is adjusted to Daylight saving time. A [ ] icon indicates that daylight-saving is activated for that place. Tip Daylight-saving sets the clock one hour ahead. Calculator Your phone has a Calculator function. Calculator provides four basic operations: +, -, x, and /. Press the [Menu] Soft key, select 7. My Stuff, select 6. Tools, and then select 6. Calculator. Press the number keys and direction keys to input a calculation then press = to display the result. Tip To input a decimal, press the [[]) key. Press and hold the [c], or press the Soft key ([]]) to reset the formula. Press the [c] key briefly to delete the text of a formula and press and briefly hold the [c] key to delete the whole formula. Converter 70 Converter converts a figure between different units, i.e. length, area, volume, weight and temperature. 070210_C3B_EN_at&t_(00)�‚�¬.indd 70 ❶ Press the [Menu] Soft key, select 7.My Stuff, select 6. Tools, and then select 7.Converter. ❷ Select Length, Area, Volume, Weight, or Temperature. •Press the [d] key to move to the next line, press the [l/r] key to select a target unit, and press the number keys to input numbers. •Press the [d] key again to move to the next line and select a result unit to get the converted figure. •The result is automatically recalculated upon a change of unit or value. •Press the Soft key ([[]) to input a decimal point. Stopwatch Stopwatch measures time for sports activities. Press the [Menu] Soft key, select 7.My Stuff, select 6. Tools, and then select 8. Stopwatch. •Press the [ ] key to operate the Stopwatch. •Press the [ ] key to pause the Stopwatch and press the [ ] key to restart the Stopwatch. •When you select the [Lap] Soft key ([[]), the two lap times as a maximum are displayed and when you select the second [Lap] Soft key ([[]), the Stopwatch stops. •Press the [Reset] Soft key ([]]) to initialize all. 2007.2.10 12:39:49 PM My Stuff & Address Book SIM Tool Kit SIM Tool Kit performs the function supported by SIM. Press the [Menu] Soft key, select 7.My Stuff, select 6. Tools, and then select 9. SIM Tool Kit If SIM supports this service, when the user selects the supported menu, you can see or receive the information about the selected menu. This menu depends on SIM and network services. Memory Status This function displays the information of the memory usage status for Photo, Image, Sound, Voice, Games, Message, and System. NOTE System memory refers to the total memory used for reserved objects, user defined wallpapers, etc. Press [Menu] Soft key, select 7. My Stuff, and then select 6. Memory Status. Address Book You can store your personal entries, which can be added or deleted at any time, on your phone. You can save up to 800 contacts on the SIM or in your phone memory. Entries that can be stored on the SIM card depend upon the storage capacity of the card. Contact List Press the [Menu] Soft key, select 8. Address Book, and then select 1.Contact List. To search for a phone number from Address Book, do the following procedure. ❶ Input a name. The entry list is shown and the cursor is placed on an item that matches your input data. ❷ Press the [u/d] key to view the recorded numbers. ❸ Press the [o] key to view all. To manage entries, press the [Options] Soft key ([[]) to select from the following functions. •Add Entry: Creates a new entry. •Edit: Edits and saves the entry. •Delete: Deletes the selected item. 71 070210_C3B_EN_at&t_(00)�‚�¬.indd 71 2007.2.10 12:39:50 PM Address Book •Copy: Copies memory to SIM or phone. NOTE When you copy memory to phone, select the “Change Type”- Mobile, Home, or Office. •Send Message: Sends a message to a selected recipient. •Add to Speed Dial: Adds the selected number to speed dial. •Language: Selects Spanish or French. English is the default selection. •Group Search: Searches for the phone number of each group. •Forward Contact Info: Sends the information of the person selected in the View Names list in the form of a business card. •Send via MMS : Transmits the selected contacts information via MMS •Send via Bluetooth : Transmits the selected contacts information via Bluetooth Add Contact 72 Press the [Menu] Soft key, select 8. Address Book, and then select 2. Add Contact. Then add the entry information for other people. Initially, an empty field with grey appears until you input text. 070210_C3B_EN_at&t_(00)�‚�¬.indd 72 Depending on the SIM Card or Phone setup in the Save to pop-up window, the following fields are displayed. •Phone: Name( ), Mobile( ), Home( ), Office( ), Group( ), Picture( ), Melody( ), E-mail1( ), E-mail2( ), and Memo( ) •SIM Card: Name( ), Mobile( ), Group( ), Picture( ), and Melody( ) Speed Dial This function enables you to use the Speed Dialing function to dial the entry by pressing a Speed Dial number in Standby mode. The Speed Dial numbers range from 2 to 9, totaling 8 Speed Dial numbers. NOTE Pressing and holding the [0] or the [1] key is the prefix for international calls or the Voice Mail service, respectively. To set Speed Dial Pres the [Menu] Soft key, select 8. Address Book, and then select 3. Speed Dial. To add to Speed Dial •Press the [z/x] key or the [u/d] key to move to an empty entry and press the [Add] key. 2007.2.10 12:39:51 PM Address Book •Press the [z/x] key or the [u/d] key to select a person. •Press the [Options] Soft key ([[]) to select the language and search for Spanish or French. (English is the default selection.) •Press the [o] key to save an item in the Speed Dial list. ❷ To add Speed Dial, press the [Options] key and select the [Add to Speed Dial] option in the list. ❸ Press the [z/x] key or the [u/d] key to move to an empty entry. ❹ Press the [o] key to save an item in the Speed Dial list. To edit Speed Dial Group ❶ If you want to edit a particular item in the speed dial list, move the cursor to the item and press the [Edit] Soft key ([]]) to update the item. ❷ Press the [Options] Soft key ([[]) to select the language and search for Spanish or French. (English is the default selection.) ❸ Press the [o] key to save an item in the Speed Dial list. To remove from Speed Dial If you want to remove a particular item in the speed dial list, move the cursor to the item and press the Soft key ([[]) to remove an item. To set Speed Dial in Contact List Press the [Menu] Soft key, select 8. Address Book, and then select 1. Contact List. ❶ Press the [z/x] key or the [u/d] key to select a person. 070210_C3B_EN_at&t_(00)�‚�¬.indd 73 This function is used to configure the settings for the four predefined caller groups: Family, Friends, Business, and VIP Press the [Menu] Soft key, select 8. Address Book, and then select 4.Groups. To manage the Groups, press the [Options] Soft key ([[]) to select from the following functions. •Group Ringtones: Sets a Group, Melody, and Photo. •Rename: Renames a group in the user defined group. •Delete: Deletes the selected groups in the user defined group. NOTE The Rename and Delete menus do not appear in the Default Group. Press the [New] Soft key ([]]) to set a new group. 73 2007.2.10 12:39:52 PM Address Book My Business Card Copy All Press the [Menu] Soft key, select 8. Address Book, and then select 5. My Business Card Allows you to save your business card and send it to the phone of other user Bluetooth. You can edit or delete the saved numbers. Press the [Option] Soft key [[]to: •Send via Bluetooth : Transmission via Bluetooth is possible. •Delete: Deletes the saved business card. •Edit : Edits the saved business card. This function copies all information saved on the Phone/SIM card to SIM or Phone. Press the [Menu] Soft key, select 8.Address Book, and then select 8. Copy All. Memory in Use This function enables you to specify whether you want to save your entry information on your Phone, on your SIM Card, or on either Phone or SIM. Press the [Menu] Soft key, select 8.Address Book, and then select 6. Memory in Use. Delete All This function deletes all information saved on your phone or SIM card. Press the [Menu] Soft key, select 8.Address Book, and then select 7. Delete All. Press the [o] key and type the phone password. 74 070210_C3B_EN_at&t_(00)�‚�¬.indd 74 My Phone Number Press the [Menu] Soft key, select 8. Address Book, and then select 9. My Phone Number. The number for My Phone Number can vary depending on the SIM. Press the [Options] Soft key ([[]) to select following functions. •Add: Adds an Own Number. •Delete: Deletes an Own Number. Press the [Edit] Soft key ([]]) to edit an Own Number. Memory Info Press the [Menu] Soft key, select 8. Address Book, and then select 10. Memory Info. Select Memory Info and press the [o] Select Memory Info and press the memory space in Phone and SIM memory. Service Numbers This feature might not be available depending on your SIM card. The list of numbers in the SDN (Service Dial Number) 2007.2.10 12:39:52 PM Address Book & Settings appears. Press the [Menu] Soft key, select 8. Address Book, and then select 11. Service Numbers. If necessary, scroll to a number by pressing the [z/x] key or the [u/d] key and press the [s] key to dial the number. Settings This function enables you to personalize how your phone operates. Display You can define how information is displayed on your phone. Press the [Menu] Soft key, select 9. Settings, and then select 1. Display. one as an idle-screen image. To delete wallpapers other than the default, press the [Delete] Soft key ([[]). (You cannot delete the default wallpaper.) •Wallpaper Type: Digital Clock /Greeting Greeting This function allows you to set the greeting message displayed in Startup or Idle mode. Press the [Menu] Soft key, select 9. Settings, select 1. Display, and then select 3. Greeting. Contrast Selecting this menu launches the Web browser to AT&T’s Graphic menu. This function allows you to set the backlighting level from 1 to 8 for your phone’s main display. Press the [Menu] Soft key, select 9. Settings, select 1. Display, and then select 4. Contrast. Press the [l/r] key to change the value that you want and press the [o] key. Main Screen Backlight This function allows you to change the idle screen image shown on your phone’s main display. Press the [Menu] Soft key, select 9. Settings, select 1. Display, and then select 2. Main Screen. •Wallpaper: You can select one of five default images and This function allows you to specify for how long your phone’s displays are backlight. ❶ Press the [Menu] Soft key, select 9. Settings, select 1. Display, and then select 5. Backlight. ❷ Choose how long you want backlighting of your phone’s Shop Graphics 070210_C3B_EN_at&t_(00)�‚�¬.indd 75 75 2007.2.10 12:39:52 PM Settings displays to remain on if you do not touch any key. You can choose 5 Secs, 10 Secs, 20 Secs, 1 Min, and 10 Mins. ❸ Press the [l/r] key to change the duration value that you want and then press the [o] key. Audio You can define how sound is played on your phone. Press the [Menu] Soft key, select 9. Settings, and then select 2. Audio. Sounds define how your phone reacts when you receive a call or a message, how your keypad sounds when you press a key, and more. You can either leave the default ringtone, key tone, and other settings, or you can personalize them to your needs. Shop Tones Selecting this menu launches the Web browser to AT&T’s Tone menu. Ringtone 76 Press the [Menu] Soft key, select 9. Settings, select 2. Audio, and then select 2. Ringtone. Select the preferred ring type, melody to ring. •Ring Type: Specifies how your phone rings or vibrates when you receive calls. You can choose Ringing Tone, 070210_C3B_EN_at&t_(00)�‚�¬.indd 76 Vibration, Vib then Ring, Vib and Ring, Ascending, or Silent. •Sound: Sound is composed of several groups such as Melody Sound, MP3 Sound, Bell Sound, and User Sound. Each group has multiple tones. User Sound presents the melody that results when you press the [Menu] Soft key, select 7. My Stuff, and then select 2. Audio. Volume Specifies how loudly your phone rings. Press the [Menu] Soft key, select 9. Settings, select 2. Audio, and then select 3. Volume. •Ring Volume: Controls the volume in eight levels. •Key Volume: Controls the volume in eight levels. Alert Tones This function allows you to specify how your phone alerts you when you receive messages. Press the [Menu] Soft key, select 9. Settings, select 2 .Audio, and then select 4. Alert Tones. You can personalize the following. •Alerting: Specifies at what intervals you will be reminded when you have received a message. Press the [l/r] key to select Off, Once, Every 2 Mins, or Every 5 Mins. 2007.2.10 12:39:53 PM Settings •Ring Volume: Controls the volume in eight levels. •Sound: Specifies the Message Alert Tone. Press the [l/r] key to set Message Alert Tone to Bell 1, Bell 2, or Bell 3. Key Tone This function allows you to select the sound you hear when you press your phone’s keys. Press the [Menu] Soft key, select 9. Settings, select 2. Audio, and then select 5. Key Tone. You can personalize the following. •Tone Type: Specifies whether key tones are turned on or off. •Sound: Specifies the key tone sound to Beep, DTMF, or Bell 1~3. Flip Open Tone This function allows you to select the sound you hear when you open your phone’s flip. Press the [Menu] Soft key, select 9. Settings, select 2. Audio, and then select 6. Flip Open Tone. You can personalize the following. •Tone Type: Specifies whether your phone’s flip tone is turned on or off. 070210_C3B_EN_at&t_(00)�‚�¬.indd 77 •Ring Volume: Controls the volume in eight levels. •Sound: Specifies the flip open tone. You can choose from Bell 1, Bell 2, or Bell 3. Sound Effects This function allows you to turn the default sound effect on or off for various events. Press the [Menu] Soft key, select 9.Settings, select 2. Audio, and then select 7.Sound Effects. Press the [Mark] Soft key, and then press [o] key to save the effect. •WAP Connection: When you connect or end a WAP session. •Minute Minder: Every minute while making a phone call. •Call Connection: When you dial or hang up. Call Call Settings define how your phone reacts when you receive a call or a message, and specifies how calls are to be answered on your phone. Press the [Menu] Soft key, select 9. Settings, and then select 3. Call. 77 2007.2.10 12:39:53 PM Settings Call Forward 78 This function allows you to divert incoming calls to another phone number. Press the [Menu] Soft key, select 9. Settings, select 3. Call, and then select 1. Call Forward. Choose Forward Always, When Busy, On No Answer, When not Found, or Cancel All, all of which divert the call as required. Because call forwarding is a network service, you must contact your service provider to verify the availability of the service. Forward Always This function forwards all calls without regard to the condition. It does not even matter if the mobile phone is switched on or off. •Activate: Sets Call Forwarding Always. •Deactivate: Cancels Call Forwarding Always. •Status: Informs the setup condition. •By Service: Sets up Call Forwarding Always for each service (All Services, Voice calls, Data and Fax). When Busy This function forwards only those calls that receive a busy 070210_C3B_EN_at&t_(00)�‚�¬.indd 78 connection or that otherwise would have returned the busy indication to the caller. •Activate: Sets up Call Forwarding When Busy. •Deactivate: Cancels the preset Call Forwarding When Busy. •Status: Informs the setup condition. •By Service: Sets up Call Forwarding When Busy for each service (All Services, Voice calls, Data and Fax) On No Answer This function forwards the calls that are not answered or not picked up by the called party within a specific time. •Activate: Sets up Call Forwarding On No Answer. •Deactivate: Cancels the preset Call Forwarding On No Answer. •Status: Informs the setup condition. •By Service: Sets up Call Forwarding On No Answer for each service (All Services, Voice calls, Data and Fax) When not Found If the mobile subscriber is currently out of the GSM network or decides to switch off the mobile phone, this service forwards all of the subscriber’s calls to the indicated number. 2007.2.10 12:39:53 PM Settings •Activate: Sets up Call Forwarding When not Found. •Deactivate: Cancels the preset Call Forwarding When not Found. •Status: Informs the setup condition. •By Service: Sets up Call Forwarding When not Found for each service (All Services, Voice calls, Data and Fax) Cancel All Cancel the Call Forward options. Answer Type This function allows you to specify how calls are to be answered on your phone. ❶ Press the [Menu] Soft key, select 9. Settings, select 3. Call, and then select 2.Answer Type. ❷ Use the [l/r] key to set the call receiving method. Press the [o] key to save. •Send key: Incoming calls are answered by pressing the [s] key. •Any Key: Incoming calls are answered by pressing any key except the [e] key and the [Reject] Soft key. •Flip Open: Incoming calls are answered by opening your phone’s flip. 070210_C3B_EN_at&t_(00)�‚�¬.indd 79 •Auto Answer: Your phone automatically answers calls after 10 seconds. This feature is available only when a headset is connected to your phone’s headset jack. Auto Redial This function automatically redials the number you call if your call is unsuccessful. ❶ Press the [Menu] Soft key, select 9. Settings, select 3. Call, and then select 3. Auto Redial. ❷ Select On or Off. Call Waiting This function informs you that you have received a second call while you are in a call. Press the [Menu] Soft key, select 9. Settings, select 3. Call, and then select 4. Call Waiting. •Activate: Activates the Call Waiting feature. •Deactivate: Cancels the Call Waiting feature. •Status: Indicates whether or not the Call Waiting feature is activated. Caller ID This function prevents your phone number from being displayed on the phone of the people you call. 79 2007.2.10 12:39:54 PM Settings NOTE This service is network dependent. Please inquire with your network provider. Press the [Menu] Soft key, select 9. Settings, select 3. Call, and then select 5. Caller ID. Phone Language This function allows you to select which language is displayed on your phone. Press the [Menu] Soft key, select 9. Settings, select 4. Phone, and then select 1. Language to select a language for the display. NOTE Select Automatic to set the language as English. Time & Date This function allows you to set the time and date displayed on your phone. Press the [Menu] Soft key, select 9. Settings, select 4. Phone, and then select 2.Time & Date. You can set up Time, Time Format and Date, and Date Format by pressing the [o] key If you select On for Automatic, the time and date are updated automatically. 80 070210_C3B_EN_at&t_(00)�‚�¬.indd 80 Flight Mode Press the [Menu] Soft key, select 9. Settings, select 4. Phone, and then select 3 .Flight Mode. After you select Flight Mode On, you cannot call or receive calls. This mode enables you to cut off the radio session but maintains power to other ancillary functions such as the calendar, games, and other features. This mode supports use of these features in environments where transmitters or receivers are not allowed, such as on an airplane. If you select Flight Mode Off, your phone reboots. Connectivity Bluetooth Press the [Menu] Soft key, select 9. Settings, select 5.Connectivity and then select 1.Bluetooth . Bluetooth refers to either the specifications for connecting wirelessly various devices such as computers, mobile phones and home appliances, which are located within a short distance, and then enabling real time, bidirectional communication among them, or the products complying to those specifications The mobile phone (C3b) supports the following profiles: - Serial port profile (SPP) with the PC connectivity software 2007.2.10 12:39:54 PM Settings - Dial-up networking profile (DUN) as a gateway - Hands-free Profile (HFP) as an audio gateway - Object push profile (OPP) as a client and server - File transfer profile (FTP) as a client and server - Basic Image profile (BIP) for printing a photo Bluetooth technology enables cost-free wireless connections between electronic devices within a maximum range of 33 feet (10 meters). A Bluetooth connection can be used to send images, videos, texts, business cards, calendar notes, or to connect wirelessly to devices using Bluetooth technology, such as computers. Since devices using Bluetooth technology communicate using radio waves, your phone and the other devices do not need to be in direct line-of-sight. The two devices only need to be within a maximum of 33 feet (10 meters) of each other, although the connection can be subject to interference from obstructions such as walls or from other electronic devices. Using Bluetooth technology consumes the battery and the phone's operating time will be reduced. Take this into account when performing other operations with your phone. Bluetooth Selecting [On] activates Bluetooth, while selecting [Off] 070210_C3B_EN_at&t_(00)�‚�¬.indd 81 deactivates Bluetooth. Paired Device Displays the paired device or allows you to add a new device. The displayed icon type varies depending on the types of paired devices. Press the [Option] Soft key [[] to: (Depending on the profiles provided by the paired device, different Option Menu appears.) •Connect/Disconnect : It is displayed when devices provide Bluetooth Headset/Handsfree profile, and connects or disconnects each device. •Browser Folder : It is displayed when the device provides FTP Server profile, and in this case, the FTP directory of the other device is displayed. •Edit Name : Allows you to edit the device names of the other party. •Delete : Deletes desired devices from the Paired Device List. •Set Authorized/Unauthorized : If the relevant device has been set for Authorized, it is possible to access your phone with any permission. On the other hand, if it is set for “Unauthorized, the device must have the privilege to access your phone. This menu is displayed only when 81 2007.2.10 12:39:54 PM Settings 82 the registered device type is PC/PDA.. •Set as Default/Don’t set as Default : If two or more headsets/handsfrees have been registered, choose one of them to be set as the default headset. Placing or receiving calls through headset will be done via the default headset/handsfree. Although you can set a default headset using the menu, the last headset connected will be automatically set as the default headset. This menu is displayed only when the registered device type is PC/PDA. On the other hand, if the device is set for ”Don’t set as Default,” the settings of the device set for default become disabled. •Add New Device : Performs the function to register a new device. When you select this option, a sub-menu will appear with features for additional registration. The menu allows you to select the device to be newly registered. - Search All - Audio Accessory - PC - Phone - Others If you choose from the above menu for the device you wish to search, “Search a device” appears. 070210_C3B_EN_at&t_(00)�‚�¬.indd 82 Press the [New] Soft key []]to: The menu allows you to select the device to be newly registered. - Search All - Audio Accessory - PC - Phone - Others If you choose from the above menu for the device you wish to search, “Search a device” appears. To Search a device Every time a new device is searched, the List becomes updated. During the search process, selecting [Cancel] Soft key stops searching and displays all the search results. At this time, select the [Refresh] Soft Key to resume the search function. After selecting the device to be paired, press the OK key for pairing. To Pair with a device Your handset will ask for the Passkey to be used for registering with the other party. If you enter the Passkey and then other party also enters the Passkey correctly, the registration will be completed. 2007.2.10 12:39:55 PM Settings Outgoing call device shown to other phones with Bluetooth technology. Before placing a call, select the device to be used. •Headset : You can place a call through the headset, provided that it has been successfully registered as the default headset. •Always Ask : As soon as you place a call, a popup message will appear asking you if you wish to use the headset/handsfree. When you press the Yes key, you make a call using the headset/handsfree. If you press the No key, you make a call using your handset. The popup message will continue to appear until the called party answers the phone. In case of no entry, the call will be made through your phone. •Phone : You can place a call in the normal way that you use your phone to make a call. Address Visibility •Shown to All: Permits search to all other cell phones with Bluetooth technology. •Hidden: Permits search only to cell phones listed in the Paired device list Name Allows you to edit the name of your phone, which will be 070210_C3B_EN_at&t_(00)�‚�¬.indd 83 Displays the Bluetooth address of your cell phone. To send an object Then select “Bluetooth”, search starts (See: “To Search a device” ). After “Search” is completed, if you choose the device to receive objects, “Send” is processed. At this time, if the corresponding device requests for Pairing (see:To Pair with a device), “Send” is processed after the “Pairing” procedure has been completed. To receive an object The receiving process starts only when the receipt has been approved. If the received object is “Contact” information, when it is saved, it will be saved in the phone memory. If the object is an “Event,” when it is saved, it will be saved in the Schedule. Security The security settings enable you to restrict the use of your phone to specific people and types of calls. Codes and passwords are used to protect these features of your phone. They are described in the following sections. See also 2. Access codes in the Appendix, on page 85. 83 2007.2.10 12:39:55 PM Settings The security settings enable you to restrict the use of your phone to specific people and types of calls. Your phone’s security features keep your phone and SIM card safe from unauthorized use. You can either set a password for your phone or use the Call Barring service and Fixed Dialing mode to restrict which calls can be made using your phone. Press the [Menu] Soft key, select 9.Settings, and then select 6.Security. password is input. Press the [o] key after you type the password. PIN1 Check This function offers multiple methods to limit incoming or outgoing calls. In general, the barring service becomes activated by interoperating with the network, but phone barring is made by the phone itself. Major functions are as follows. •Incoming: Limits all incoming calls. Press the scroll [l/r] key and [o] key for setup. If you input the incorrect PIN1 code three consecutive times, you will be prompted to input the PUK1 number. The default is Disabled. •Enabled: Input PIN1 whenever the power is turned on. •Disabled: Does not input PIN1 whenever the power is turned on. Change PIN1 Change the PIN1 number. You can change the PIN1 number only when the phone is set for PIN1 Enable. Phone Lock 84 Change Password This function allows you to change your phone’s password. The default password is 1234. Phone Barring •On: Sets up all incoming calls barring. •Off: Cancels all incoming calls barring. •Outgoing: Limits all outgoing calls. When you attempt to make a call that has the prefixed number that you previously registered, the call is barred. •Bar All: Sets up all outgoing calls barring. •Bar Prefixed: Adds and deletes the prefixed number. (Prefix also means your 10 or 11 digit number of your choosing) •Off: Cancels all outgoing calls barring including the bar prefixed. This function allows you to lock your phone until the correct 070210_C3B_EN_at&t_(00)�‚�¬.indd 84 2007.2.10 12:39:55 PM Settings Fixed Dialing (Fixed Dialing Numbers) Fixed Dialing is a service that limits your access to specific numbers in the Address Book list recorded on the SIM. Input the PIN2 to set up or cancel this service. (PIN 2 must be correctly entered within 3 tries.) •On •Off •Fixed Dial List: Displays the numbers recorded in the Fixed Dialing list. Change PIN2 This function allows you to change your phone’s PIN2 code. Network Barring This function is available only if the service provider provides such a function and you have subscribed to it. You can set limitations for making certain types of calls: •Outgoing Calls: Limits all Outgoing calls. •International Calls: Limits an outgoing and incoming international call. •Only Local/Home: Limits other international calls except home country. •Incoming Calls: Limits all incoming calls. 070210_C3B_EN_at&t_(00)�‚�¬.indd 85 •Incoming Calls When Abroad: Limit all international incoming calls. •Delete All: Cancels all the barring settings. •Change Password: Replaces the old password with a new one. Closed User Group (CUG) This function allows you to set up a group of numbers that you want to dial or receive calls from. Select CUG name and press [o] to see the CUG name list as you input. This service is dependent on the SIM. Press the [Delete] Soft key ([[]) to delete the CUG Identifier, or the [Edit] Soft key ([]]) to edit the CUG Identifier. NOTE In Empty record, the Soft key ([[]) will turn into the [Add] Soft key and move to the name input screen for a new CUG registration. Software Version This function allows you to display your phone’s current software version. Press the [Menu] Soft key, select 9.Settings, and then select 7.Software Version. 85 2007.2.10 12:39:56 PM Settings Reset This function allows you to delete all user settings and data from your phone and returns it to factory-default settings. Press the [Menu] Soft key, select 9. Settings, and then select 8. Reset. Input the phone password and press the [o] key to reset. The default password is 1234. TTY TTY (also known as a TDD or Test Telephone) is a telecommunications device that allows people who are deaf or hard of hearing, or who have speech or language disabilities, to communicate via a telephone. Your phone is compatible with select TTY devices which have an internal CTM. Please check with the manufacturer of your TTY device for connectivity information and to ensure that the TTY device supports digital wireless transmission. Press the [Menu] Soft key, select 9. Settings, and then select 9. TTY. 86 070210_C3B_EN_at&t_(00)�‚�¬.indd 86 2007.2.10 12:39:56 PM Appendix 1. Menu Tree 2. Access Codes 3. Troubleshooting checklist 4. Performance and safety 5. Glossary 6. FCC & Industry Canada Regulatory Compliance 7. Safety precautions 8. Warranty 070210_C3B_EN_at&t_(00)�‚�¬.indd 87 4 2007.2.10 12:39:56 PM Menu tree 1 Camera 1.1 1.2 1.3 1.3.1 1.3.2 1.3.3 1.3.4 1.3.5 Take a Photo Photo Album Settings Image Size Shutter Sound Flash Self Timer Multi-Shot 2 Messaging 88 2.1 2.1.1 2.1.2 2.2 2.3 2.4 2.5 2.6 2.7 2.8 2.9 2.10 Write New Text Message Multimedia Message Inbox IM Sent Outbox Draft Browser Msg Voicemail Templates Settings 070210_C3B_EN_at&t_(00)�‚�¬.indd 88 2.10.1 2.10.2 2.10.3 2.10.4 2.10.5 2.11 Common Settings Text Message Multimedia Message Voice Mail Browser Message Memory Info 3 Recent Calls 3.1 3.2 3.3 3.4 3.4.1 3.4.2 3.4.3 3.4.4 3.5 3.5.1 3.5.2 3.5.3 3.5.4 3.5.5 3.6 Missed Calls Received Calls Dialed Calls Delete Call Logs Missed Calls Received Calls Dialed Calls All Calls Call Time Last Call Received Calls Dialed Calls Total Calls Reset Call Times GPRS Info 3.6.1 3.6.2 3.6.3 3.6.4 Current Info Last Info Total Info Clear Logs 4 MEdia Net 4.1 4.2 4.3 4.4 4.5 4.5.1 4.5.2 4.6 4.7 MEdia Net Home Bookmarks Go to URL Profiles Cache Cache Mode Clear Cache Security Certifications Version 5 AT&T Mall 5.1 5.2 5.3 5.4 5.5 Shop Tones Shop Games Shop Graphics Shop Multimedia Shop Applications 5.6 MEdia Net Home 6 Mobile Email 7 My Stuff 7.1 7.2 7.3 7.4 7.5 7.6 7.6.1 7.6.2 7.6.3 7.6.4 7.6.5 7.6.6 7.6.7 7.6.8 7.6.9 7.7 Games & Apps Audio Graphics Photo Album Other Files Tools Alarm Calendar Notepad Voice Memo World Time Calculator Converter Stopwatch SIM Tool Kit* Memory Status 8 Address Book 2007.2.10 12:39:57 PM Menu tree 8.1 8.2 8.3 8.4 8.5 8.6 8.7 8.8 8.9 8.10 8.11 Contact List Add Contact Speed Dial Groups My Business Card Memory in Use Delete All Copy All My Phone Number Memory Info Service Numbers* 9 Settings 9.1 9.1.1 9.1.2 9.1.3 9.1.4 9.1.5 9.2 9.2.1 9.2.2 9.2.3 Display Shop Graphics Main Screen Greeting Contrast Backlight Audio Shop Tones Ringtone Volume 9.2.4 9.2.5 9.2.6 9.2.7 9.3 9.3.1 9.3.2 9.3.3 9.3.4 9.3.5 9.4 9.4.1 9.4.2 9.4.3 9.5 9.5.1 9.6 9.6.1 9.6.2 9.6.3 9.6.4 9.6.5 9.6.6 Alert Tones Key Tone Flip Open Tone Sound Effects Call Call Forward Answer Type Auto Redial Call Waiting Caller ID Phone Language Time & Date Flight Mode Connectivity Bluetooth Security PIN1 Check Change PIN1 Phone Lock Change Password Phone Barring Fixed Dialing 9.6.7 9.6.8 9.6.9 9.7 9.8 9.9 9.9.1 Change PIN2 Network Barring* Closed User Group* Software Version Reset TTY Setting * This menu depends on SIM. 89 070210_C3B_EN_at&t_(00)�‚�¬.indd 89 2007.2.10 12:39:57 PM Access codes The following section describes various security codes used on your phone. PIN1 code (4 to 8 digits) The PIN1 (Personal Identification Number) code protects your SIM card against unauthorized use. The PIN1 code is usually supplied with the SIM card. If you input the incorrect PIN1 code entry three times in a row, the PIN1 code will be blocked. If the PIN1 code is blocked, you need the PUK 1 code to unblock before you can use the SIM card again. See information on the PUK1 code. PIN2 code (4 to 8 digits) The PIN2 code, supplied with some SIM cards, is required to access some functions, such as call cost counters. Contact your carrier for information. Lock code The lock code can be used to lock the phone and keypad to avoid unauthorized use. NOTE The factory setting for the lock code is 1234. To avoid unauthorized use of your phone, change the lock code. Keep the new code secret and in a safe place separate from your phone. PUK1 and PUK2 codes (8 digits) The PUK1 (Personal Unblocking Key) code is required to change a blocked PIN1 code. The PUK2 code is required to change a blocked PIN2 code. If the codes are not supplied with the SIM card, contact the operator whose SIM card is in your phone for the codes. NOTE You can change the following codes: lock code, PIN1 code, and PIN2 code. These codes can include numbers from 0 to 9 only. The [#] key works as the [o] function. Avoid using access codes similar to emergency numbers such as 112, to prevent accidental dialing of an emergency number. Network Barring Password (4 digits) The N/W password is required when you use the N/W Barring function. Your service provider will provide the N/W password to you when you subscribe to this function. You can change this password using the Call barring function. (For further details, see Security on page 83.) 90 070210_C3B_EN_at&t_(00)�‚�¬.indd 90 2007.2.10 12:39:58 PM Troubleshooting checklist If you experience any problem while using your mobile phone, please refer to the following checklist. If the problem still persists, contact your dealer or nearest service carrier. When the “Insert SIM Card” message appears: Make sure the SIM card is correctly installed. Check to see if the SIM card is working properly. If it does not work, try to clean the contact points of the card. If it is out of order, take it to the nearest service carrier. When the “Password” message appears in Phone locked state: Enter the phone password. The default password is”1234”. If you cannot remember the password, contact the nearest service carrier. When the “Enter PIN1” message appears: Input PIN1. If you cannot remember it, contact the nearest service carrier. You can still receive calls even if your mobile phone becomes locked after entering the incorrect PIN1 on three consecutive attempts. When the “No Service” or “Network Search” appears: If you cannot make/receive a call when you are indoors or undergrounds where the signal strength is poor, move toward a window or go out to an open area. If you still 070210_C3B_EN_at&t_(00)�‚�¬.indd 91 cannot make a connection, contact the nearest service carrier. When audio quality is poor: End a call and try again. When the other party cannot hear you speaking: Your phone may be set to MUTE. Disable the MUTE function. When battery lifetime is shorter than usual: This may happen when you are in an area with low signal strength. Turn off your phone when it is not in use. Change the battery when battery energy is exhausted. When your mobile phone does not turn on: Make sure your battery is charged. Check to see if your phone works while recharging the battery. When you are unable to send a message: Either you are not registered to receive an SMS service, or you may be in an area where your network service provider cannot provide such a service. When you are unable to make a call: Your phone may be set to “fixed dial.” Cancel the “fixed dial” function. 91 2007.2.10 12:39:58 PM Troubleshooting checklist & Performance and safety When you are unable to charge the battery: This may be the result of one of the following three cases. ❶ Your charger may be out of order. Contact your nearest dealer. ❷ You may be attempting to use the phone in an overly hot/cold temperature. Try changing the charging environment. ❸ Your battery may have not been connected to the charger properly. Check the connector. When you are unable to input data into your Address Book: Your Address Book memory may be full. Try deleting some entries from your Address Book. When you are unable to select a certain function: You may not have subscribed to that function, or your network service provider may be in an area where such service cannot be provided. Contact your local service provider. 92 070210_C3B_EN_at&t_(00)�‚�¬.indd 92 Performance and safety The following list shows how to maintain your mobile phone, together with precautions to take. •Keep your mobile phone and its accessories out of the reach of children. •Maintain your mobile phone in dry conditions and keep it within normal operating temperatures. Temperatures higher than 55°C (131°F) or lower than -20°C (-4°F) may damage your phone. •Do not use or store your mobile phone in dusty, dirty areas. •Do not attempt to disassemble your mobile phone. •Do not drop or cause severe impact to your mobile phone. •Do not use chemical products, cleaning solvents or detergents to clean your mobile phone. •If your mobile phone does not work properly, contact your dealer immediately. •Use only authorized batteries, battery chargers and accessories. Any malfunction or damage caused by the use of unauthorized batteries, battery chargers and accessories will void the limited product warranty. 2007.2.10 12:39:58 PM Performance and safety & Glossary •Ensure that the earthing points of the battery and battery charger do not come in contact with conductive objects. Glossary To help you understand the main technical terms and abbreviations used in this booklet and take full advantage of the features of your mobile phone, here are a few definitions. Call Barring Ability to restrict outgoing and incoming calls. Call Forwarding Ability to re-route calls to another number. Call Holding Ability to put one call on Standby while answering or making another call; you can then switch between the two calls, as required. Call Waiting Ability to inform users that they have an incoming call while engaged on another call. CLI (Caller Line Identification) Services Services allowing subscribers to view or block the telephone 070210_C3B_EN_at&t_(00)�‚�¬.indd 93 numbers of callers. EMS (Enhanced Message Service) Network service sending and receiving messages that include images, sounds and animations to and from another user without having to speak to the correspondent. GPRS (General Packet Radio Service) New non-voice value-added service that allows information to be sent and received across a mobile telephone network. GPRS guarantees a continuous connection to the Internet for mobile phone and computer users. It is based on the Global System for Mobile Communication (GSM) circuitswitched mobile phone connections and Short Message Service (SMS). GSM (Global System for Mobile Communication) International standard for mobile phone communication, guaranteeing compatibility between the various network operators. GSM covers most European countries and many other parts of the world. MMS(Multimedia Message Service) Network service sending and receiving messages to and from another subscriber without having to speak to the correspondent. The Message supports presentation of various media types, such as full color images and 93 2007.2.10 12:39:59 PM Glossary 94 polyphonic ringtones. Multiparty Calling Ability to establish a conference call involving up to five additional parties. PIN (Personal Identification Number) Security code that protects the phone/SIM against unauthorized use. The PIN is supplied by the service provider with the SIM card. It may be a four to eight-digit number and can be changed, as required. PUK (PIN Unblocking Key) Security code used to unlock the phone when an incorrect PIN has been entered three times in succession. The eightdigit number is supplied by the service provider with the SIM card. SIM (Subscriber Identification Module) Card containing a chip with all the information required to operate the phone (network and memory information, as well as the subscriber’s personal data). The SIM card fits into a small slot on the back of the phone and is protected by the battery. SMS (Short Message Service) Network service sending and receiving messages to and 070210_C3B_EN_at&t_(00)�‚�¬.indd 94 from another subscriber without having to speak to the correspondent. The message created or received can be displayed, received, edited or sent. Soft Keys Two keys ([[], []]) marked on the phone, that: •vary according to the function that you are currently using •are indicated on the bottom line of the display just above the corresponding key. Voice Mail Computerized answering service that automatically answers your calls when you are not available, plays a greeting (optionally in your own voice) and records a message. 2007.2.10 12:39:59 PM FCC & Industry Canada Regulatory Compliance FCC & Industry Canada Regulatory Compliance This device complies with Part 15 of the FCC Rules. Operation is subject to the following two conditions: (1) this device may not cause harmful interference, and (2) this device must accept any interference received, including interference that may cause undesired operation. Your mobile device is a low power radio transmitter and receiver. When it is ON, it receives and also sends out radio frequency (RF) signals. In August 1996, the Federal Communications Commission (FCC) adopted RF exposure guidelines with safety levels for mobile devices. Those guidelines are consistent with safety standards previously set by both U.S. and international standards bodies: American National Standard Institute (ANSI), National Council of Radiation Protection and Measurements(NCRP), and International Commission on Non-Ionizing Radiation Protection (ICNRP). Those standards were based on comprehensive and periodic evaluations of the relevant scientific literature. The design of your Phone complies with the FCC guidelines and applicable. 070210_C3B_EN_at&t_(00)�‚�¬.indd 95 Statement according to FCC part 15.105 NOTE This equipment has been tested and found to comply with the limits for a Class B digital device, pursuant to Part 15 of the FCC Rules. These limits are designed to provide reasonable protection against harmful interference in a residential installation. This equipment generates, uses and can radiate radio frequency energy and, if not installed and used in accordance with the instructions, may cause harmful interference to radio communications. However, there is no guarantee that interference will not occur in a particular installation. If this equipment does cause harmful interference to radio or television reception, which can be determined by turning the equipment off and on, the user is encouraged to try to correct the interference by one or more of the following measures: •Reorient or relocate the receiving antenna. •Increase the separation between the equipment and receiver. •Connect the equipment into an outlet on a circuit different from that to which the receiver is connected. •Consult the dealer or an experienced radio/TV technician for help. Statement according to FCC part 15.21 Modifications not expressly approved by this company could void the user's authority to operate the equipment. RF exposure FCC For body worn operation, to maintain compliance with FCC RF exposure guidelines, use only accessories that contain no metallic components and provide a separation distance 95 2007.2.10 12:39:59 PM FCC & Industry Canada Regulatory Compliance of 15mm (0.6 inches) to the body. Use of other accessories may violate FCC RF exposure guidelines and should be avoided. This device and its antenna must not be co-located or operating in conjunction with any other antenna or transmitter. Health and Safety Information FCC This EUT has been shown to be capable of compliance for localized specific absorption rate (SAR) for uncontrolled environment/general population exposure limits specified in ANSI/IEEE Std. C95.1-1992 and had been tested in accordance with the measurement procedures specified in FCC/OET Bulletin 65 Supplement C (2001) and IEEE Std. 1528-2003 Ministry of Health (Canada), Safety Code 6. The standards include a substantial safety margin designed to assure the safety of all persons, regardless of age and health. The exposure standard for wireless mobile phones employs a unit of measurement known as the Specific Absorption Rate, or SAR. The SAR limit set by the FCC is 1.6W/kg *. * In the U.S. and Canada, the SAR limit for mobile phones used by the public is 1.6 watts/kg (W/kg) averaged over one gram of tissue. The standard incorporates a substantial margin of safety to give additional protection for the public and to account for any variations in. **This device contains 1800 MHz GSM functions that are not operational in U.S. Territories; this filing is applicable only for 850 MHz GSM and 1900 MHz PCS operations. 96 070210_C3B_EN_at&t_(00)�‚�¬.indd 96 2007.2.10 12:40:0 PM Safety precautions Using a mobile phone while driving may be prohibited. Please check local laws and regulations with regard to the prohibition of mobile phone use while driving, and comply with them. Use of your phone while you are driving may disturb your concentration and so cause an accident. Always switch your phone off as soon as possible. Should you use your phone in an emergency, either use a hands free device built into your car, or pull over in a safe place first. Switch off in restricted areas Always switch your phone off in areas where mobile phone use is restricted. Switch off in explosive or dangerous areas Always switch your phone off in areas with explosive or dangerous materials (such as fuels, fuel stations or areas containing chemical goods) and obey any instructions or signals. Do not remove your mobile phone’s battery in such areas. Switch off in aircraft Always switch your phone off or select Flight Mode On (press the [Menu] Soft key, select 9.Settings, select 4.Phone, and then select 3.Flight Mode) when you are in an aircraft. The electromagnetic waves emitted by your phone may affect the electronic navigation equipment in the aircraft. Switch off in hospitals and near medical equipment Always switch your phone off in hospitals, and obey the regulations or rules of the hospital. Switch your phone off when using medical equipment for private purposes, if possible. Always consult with the medical equipment’s manufacturer or an expert regarding phone use near the medical equipment. Installing a hands free device in your vehicle Install vehicle hands free devices away from the steering wheel and airbag expansion area, otherwise injury may result. 97 070210_C3B_EN_at&t_(00)�‚�¬.indd 97 2007.2.10 12:40:0 PM Safety precautions Mobile phones and other electronic devices Mobile phones emit electromagnetic waves that may affect nearby electronic devices. When it is switched on, do not place your phone close to delicate electronic equipment. 98 070210_C3B_EN_at&t_(00)�‚�¬.indd 98 2007.2.10 12:40:0 PM Warranty Protect Your Warranty Read your Warranty carefully, with the special consideration to paragraph seven of the Limited Warranty for your unit. “Warranty does not apply to... or to any product or part thereof which has suffered through alteration... mishandling, misuse, neglect or accident”. Many companies are making look alike accessories and in some cases, promoting that their product is equal to or better than the Pantech product. Be careful. Some of these products may not be compatible to use with your Pantech product and may damage the unit or cause it to malfunction. If service is required on your unit and it is determined that a non-Pantech accessory has created the problem with your unit, the Warranty will not apply. In addition, if the unit has already suffered irreversible damage by reason of a non-compatible accessory, the Warranty will be voided. To protect your Warranty, use only compatible accessories which cannot damage or interfere with the functioning of your Pantech product. 12 Month Limited Warranty Pantech Wireless, Inc. (the Company) warrants to the original retail purchaser of this Pantech handheld portable cellular telephone, that should this product or any part thereof during normal consumer usage and conditions, be 070210_C3B_EN_at&t_(00)�‚�¬.indd 99 proven defective in material or workmanship that results in product failure within the first twelve (12) months period from the date of purchase, such defect(s) will be repaired or replaced (with new or rebuilt parts) at the Company’s option, without charge for parts or labor directly related to the defect(s). The antenna, key pad, display, rechargeable battery and battery charger, if included, are similarly warranted for twelve (12) months from date of purchase. This Warranty extends only to consumers who purchase the product in the United States or Canada and it is not transferable or assignable. This Warranty does not apply to: (a) Product subjected to abnormal use or conditions, accident, mishandling, neglect, unauthorized alteration, misuse, improper installation or repair or improper storage; (b) Product whose mechanical serial number or electronic serial number has been removed, altered or defaced. (c) Damage from exposure to moisture, humidity, excessive temperatures or extreme environmental conditions; (d) Damage resulting from connection to, or use of any accessory or other product not approved or authorized by the Company; (e) Defects in appearance, cosmetic, decorative or structural items such as framing and non-operative parts; (f) Product damaged from external causes such as fire, 99 2007.2.10 12:40:0 PM Warranty flooding, dirt, sand, weather conditions, battery leakage, blown fuse, theft or improper usage of any electrical source. The Company disclaims liability for removal or reinstallation of the product, for geographic coverage, for inadequate signal reception by the antenna or for communications range or operation of the cellular system as a whole. To obtain repairs or replacement within the terms of this Warranty, the product should be delivered with proof of Warranty coverage (e.g. dated bill of sale), the consumer’s return address, daytime phone number and/or fax number and complete description of the problem, transportation prepaid, to the Company by calling the number listed below or to the place of purchase for repair or replacement processing. In addition, you may telephone us at (800) 962-8622, or email us at [email protected] THE EXTENT OF THE COMPANY’S LIABILITY UNDER THIS WARRANTY IS LIMITED TO THE REPAIR OR REPLACEMENT PROVIDED ABOVE AND, IN NO EVENT, SHALL THE COMPANY’S LAIBILITY EXCEED THE PURCHASE PRICE PAID BY PURCHASER FOR THE PRODUCT. ANY IMPLIED WARRANTIES, INCLUDING ANY IMPLIED WARRANTY OF MERCHANTABILITY OR FITNESS FOR A PARTICULAR PURPOSE, SHALL BE LIMITED TO THE DURATION OF THIS WRITTEN WARRANTY. ANY ACTION FOR BREACH OF ANY WARRANTY MUST BE BROUGHT WITHIN A PERIOD OF 18 MONTHS FROM DATE OF ORIGINAL PURCHASE. IN NO CASE SHALL THE COMPANY BE LIABLE FOR ANY SPECIAL CONSEQUENTIAL OR INCIDENTAL DAMAGES FOR BREACH OF THIS OR ANY OTHER WARRANTY, EXPRESS OR IMPLIED, WHATSOEVER. THE COMPANY SHALL NOT BE LIABLE FOR THE DELAY IN RENDERING SERVICE UNDER THIS WARRANTY OR LOSS OF USE DURING THE TIME THE PRODUCT IS BEING REPAIRED OR REPLACED. No person or representative is authorized to assume for the Company any liability other than expressed herein in connection with the sale of this product. Some states or provinces do not allow limitations on how long an implied warranty lasts or the exclusion or limitation of incidental or consequential damage so the above limitation or exclusions may not apply to you. This Warranty gives you specific legal rights, and you may also have other rights which vary from state to state or province to province. PANTECH WIRELESS, INC. 11240 Warland Drive, Cypress, CA 90630 (800) 962-8622 100 070210_C3B_EN_at&t_(00)�‚�¬.indd 100 2007.2.10 12:40:1 PM MANUAL DEL USUARIO DEL TELÉFONO C3b Gracias por elegir Pantech C3b, nuestro último teléfono celular GSM. El C3b posee muchas funciones que mejorarán su experiencia con teléfonos celulares. Desde su escaso peso y confiabilidad, hasta la cámara incorporada con flash, estamos seguros de que disfrutará de todas las funciones que el C3b tiene para usted. La guía del usuario del C3b contiene información importante acerca de cómo usar el teléfono. Lea atentamente el manual, preste atención a la garantía en la cubierta posterior y esté atento a las exclusiones y limitaciones de ésta, con relación al uso de componentes no autorizados. NOTA Parte de la información de este Manual de usuario puede diferir de su teléfono, dependiendo de la versión de software y proveedor de red. 1 070210_C3b_SP_at&t(00).indd 1 2007.2.10 12:51:4 PM Especificaciones del teléfono Diseño Teléfono tipo concha con pantallas TFT interna y externa. Pantallas •LCD interna de 1,52 pulgadas •LCD externa de 1,0 pulgada •Pantalla TFT de colores verdaderos •Admite hasta 262.000 colores dentro de 128 x 128 píxeles •6 líneas para texto en modo básico con fuente de 16 píxeles •Dos teclas de selección (“programables”) [[] y []]; tecla de desplazamiento/selección de cuatro direcciones ([o]) •Menú de lista y cuadrícula Melodías Sonido polifónico de 64 tonos Yamaha Tonos de timbre MP3 Cámara 2 Cámara VGA CMOS incorporada. •Resolución hasta 640 x 480 (307.200 píxeles) 070210_C3b_SP_at&t(00).indd 2 •Función de temporizador automático (5 ó 10 segundos) •Pantallas interna y externa que se utilizan como visores •LED de flash (Luz) •Álbum de fotos Dimensiones y peso •Peso: 71,8 g •Dimensiones: 69 mm x 43 mm x 20,4 mm Administración de energía (Rendimiento) Tipo de batería Ión de litio estándar (Ión-litio) Capacidad Tiempo de Tiempo de espera conversación Hasta Hasta 930 mAh 250 horas 3 horas Frecuencia operativa •Redes GSM 850 y PCS 1900 en América del Norte, América del Sur, Europa, África y Asia Pacífico, donde existe soporte para éstas •Cambio de banda automático. 2007.2.10 12:51:5 PM Un vistazo al Pantech C3b Audífono Pantalla interna Tecla de atajo de menú especial/navegación de menús de cuatro direcciones (escribir nuevo mensaje, MI, contactos, Mi material) Tecla programable izquierda Tecla de marcación Aceptar llamada Correo de voz Teclas alfanuméricas Modo vibración Tecla OK (tecla de confirmación del menú) Pantalla externa Flash de la cámara (modo LCD) / Luz del flash Cámara Tecla programable derecha Encendido/Apagado Tecla Cancelar/Atrás/ Borrar/Editar texto/Salir Calendario Conector del audífono Subir el volumen (cámara)/ Bajar el volumen (luz del flash/luz de fondo) Desplazamiento del menú Micrófono 3 070210_C3b_SP_at&t(00).indd 3 2007.2.10 12:51:6 PM Rápido y fácil Teclas Funciones [ ] Ejecuta las funciones que aparecen en la parte inferior de la pantalla utilizando las teclas programables. Izquierda Derecha n o 4 Se desplaza a través de las opciones de menú en el modo Menú. En modo de espera: Tecla izquierda [l]: acceder al menú Mi material Tecla arriba [u]: acceder al menú Escribir Nuevo mensaje Tecla derecha [r]: acceder al menú Mensajes instantáneos Tecla abajo [d]: acceder al menú Lista de contactos En el modo de espera, presiónela para iniciar MEdia Net directamente. Selecciona una función del menú o almacena información ingresada por el usuario, como nombres. Esta tecla también se usa para confirmar (como la tecla [OK]). c Elimina caracteres de la pantalla o vuelve al menú anterior. Si se presiona brevemente en el modo de espera, abre la vista de Calendario. s Realiza o recibe una llamada. Si se presiona en el modo de espera, muestra la lista de llamadas recientes. Si se mantiene presionada en el modo de espera, remarca el último número llamado. e Finaliza la llamada actual. Si se mantiene presionada en el modo Menú, cancela lo ingresado por el usuario y vuelve al modo de espera. Si se mantiene presionada, fuera del modo Menú, enciende o apaga el teléfono. 070210_C3b_SP_at&t(00).indd 4 2007.2.10 12:51:8 PM Rápido y fácil Teclas 1 0~9 Funciones Si se mantiene presionada en el modo de espera, conecta automáticamente al servidor de correo de voz. Ingresa números, letras o caracteres especiales. Si se presiona en el modo de espera, muestra la pantalla de marcación. * Si se mantiene presionada en el modo de espera, ingresa o sale del modo Vibración. Si se mantiene presionada en el modo de ingreso de texto, muestra la pantalla de ingreso de símbolos. Si se presiona en el modo de ingreso de texto Predictivo, cambia a modo de búsqueda de Palabras. 0 Ingresa un prefijo de marcación internacional (011, +). En el modo de ingreso de texto, ingresa el carácter de espacio. zx Ajusta el volumen del audífono durante una llamada y mueve el cursor hacia arriba o hacia abajo en los menús. Si el teléfono está abierto mientras está en el modo de espera, controla el volumen del tono de las teclas. Activa y desactiva el modo Vista previa de la cámara si se mantiene presionada la tecla para subir el volumen en el modo de espera. Cuando la tapa esté cerrada, presione la tecla hacia abajo para encender la luz de fondo y manténgala presionada para encender o apagar la linterna. 5 070210_C3b_SP_at&t(00).indd 5 2007.2.10 12:51:8 PM Contenidos Inicio 6 Contenido del paquete ........................................................14 Tarjeta SIM.............................................................................15 Acerca de la tarjeta SIM .........................................................15 Instalación y extracción de la tarjeta SIM ..............................15 Cubierta intercambiable.......................................................15 Extracción de la cubierta ........................................................15 Ajuste de la cubierta ...............................................................15 Batería ...................................................................................16 Inserción de la batería ............................................................16 Extracción de la batería ..........................................................16 Carga de la batería .................................................................16 Pantallas interna y externa ..................................................17 Pantalla interna.......................................................................17 Iconos de la pantalla interna...................................................17 Apagado automático de la pantalla ........................................21 Selección de funciones y opciones ....................................21 Selección de funciones y opciones cuando el teléfono está abierto.....................................................................................21 Selección de funciones y opciones cuando el teléfono está cerrado. ..................................................................................21 Funciones especiales de las teclas laterales .........................22 Bloqueo de teclas .................................................................22 070210_C3b_SP_at&t(00).indd 6 Para bloquear el teclado.........................................................22 Para desbloquear el teclado ...................................................22 Funciones básicas Encendido y apagado del teléfono .....................................24 Para encender el teléfono ......................................................24 Para apagar el teléfono ..........................................................24 Realización y finalización de llamadas...............................24 Para realizar una llamada.......................................................24 Para finalizar una llamada ......................................................24 Para realizar una llamada usando los Registros de llamadas .................................................................................25 Para realizar una llamada usando los Contactos ...................25 Para realizar llamadas internacionales...................................25 Contestación de llamadas ...................................................26 Para realizar marcación rápida desde los Contactos .............26 Para realizar llamadas de emergencia ...................................26 Para contestar una llamada....................................................26 Para responder una llamada perdida .....................................26 Para rechazar una llamada ....................................................27 Para contestar una segunda llamada .....................................27 Para intercambiar entre dos llamadas ....................................27 Para finalizar la llamada actual...............................................27 Opciones durante una llamada ...........................................28 2007.2.10 12:51:8 PM Contenidos Para ajustar el volumen de la llamada ...................................28 Para desactivar (Mudo) o activar (Hablar) el micrófono ............28 •Para desactivar el micrófono del teléfono ...........................28 •Para activar nuevamente el micrófono del teléfono ............28 Para retener una llamada y volver a una llamada retenida ....28 •Para retener una llamada ...................................................28 •Para volver a una llamada retenida ....................................29 •Para realizar una llamada mientras tiene otra en curso .....29 •Para intercambiar entre dos llamadas ................................29 •Para finalizar una llamada ..................................................29 Transferencia de llamadas .....................................................29 Llamadas multipartitas............................................................29 •Para realizar una llamada multipartita ................................29 •Para agregar una nueva persona a una llamada multipartita .......................................................................... 30 •Para agregar a otra persona a una llamada multipartita.....30 •Para ver el estado de los participantes de la llamada multipartita .......................................................................... 30 •Para contestar o realizar una segunda llamada durante una llamada multipartita ............................................................. 30 •Para mantener una conversación privada con un participante ......................................................................... 30 •Para quitar a un participante de una llamada multipartita...31 Búsqueda de un número en los Contactos durante una llamada ...................................................................................31 •Para buscar un nombre o grupo en los Contactos .............31 •Para encontrar un nombre en forma manual en los Contactos ............................................................................ 31 •Para ver la entrada resaltada en los Contactos ..................31 Uso de tonos DTMF ...............................................................31 Lectura o escritura de un mensaje durante una llamada .......32 Recuperar llamada en audífono/manos libres/teléfono ..........32 Uso del audífono ..................................................................32 Selección de funciones del menú .......................................33 Desplazamiento por las funciones del menú y submenús del teléfono ...................................................................................33 Uso de teclas de atajo en el modo de espera ........................33 Ingreso de texto ....................................................................34 Modo de ingreso .....................................................................34 Modo T9 .................................................................................34 Modo ABC ..............................................................................34 Modo 123................................................................................35 Modo de símbolos ..................................................................35 Mis palabras ...........................................................................35 Deletrear .................................................................................35 Para cambiar el modo de ingreso de texto .............................35 7 070210_C3b_SP_at&t(00).indd 7 2007.2.10 12:51:9 PM Contenidos Para insertar un espacio.........................................................35 Desplazamiento ......................................................................36 Borrado de letras y palabras ..................................................36 Retorno a la pantalla anterior .................................................36 Uso del modo T9 ....................................................................36 Uso del modo ABC .................................................................37 Cambio entre mayúsculas y minúsculas ................................37 Uso del modo 123 ..................................................................38 Uso del modo de símbolos .....................................................38 Uso de Mis palabras ...............................................................38 Aplicaciones 8 Cámara ..................................................................................42 Tomar una foto........................................................................42 •Toma de fotos cuando la tapa del teléfono está abierta. ....42 Uso de las opciones de la cámara .........................................43 •El modo de Vista previa ......................................................43 Álbum de fotos........................................................................44 •Visualización de las fotos guardadas..................................44 •Uso de las opciones de foto................................................45 Configuración .........................................................................45 Mensajes ...............................................................................46 Mensaje de texto ....................................................................46 Mensaje mult. .........................................................................46 070210_C3b_SP_at&t(00).indd 8 Recepción de un nuevo mensaje ...........................................46 Administración de memoria ....................................................47 Escribir nvo. ............................................................................48 •Mensaje de texto.................................................................48 •Mensaje mult.......................................................................49 Buz. entr. ................................................................................52 MI............................................................................................53 •Inicio de Mensajero instantáneo .........................................54 •Visualización del registro de conversaciones .....................54 Enviado...................................................................................54 Buzón salida ...........................................................................55 Borrador..................................................................................55 Msjs naveg .............................................................................55 Correo de voz .........................................................................56 Plantillas .................................................................................56 Configuración .........................................................................56 •Config. común .....................................................................56 •Mensaje de texto.................................................................57 •Mensaje mult.......................................................................57 •Correo de voz .....................................................................58 •Mensaje SL del navegador .................................................58 Info. Memoria..........................................................................58 Llamadas recientes ..............................................................59 2007.2.10 12:51:9 PM Contenidos Perdidas .................................................................................59 Llam. recibidas .......................................................................59 Llam. marcadas ......................................................................60 Borrar registros de llam. .........................................................60 Tiempo de llam. ......................................................................61 Info. GPRS .............................................................................61 MEdia Net ..............................................................................61 Inicio de MEdia Net ................................................................61 Servicio de configuraciones OTA............................................62 •Aprovisionamiento OTA/WAP .............................................62 Favoritos .................................................................................62 Ir a URL ..................................................................................62 Perfiles....................................................................................63 Caché .....................................................................................64 •Modo Caché........................................................................64 •Eliminar caché ....................................................................64 Certif. Seguridad.....................................................................65 Versión....................................................................................65 AT&T Mall ..............................................................................65 Comprar timbres .....................................................................65 Comprar juegos ......................................................................65 Comprar gráficos ....................................................................65 Comprar multimedia ...............................................................65 Comprar aplicaciones .............................................................65 Inicio de MEdia Net ................................................................66 Correo de celular ..................................................................66 Inicio de Correo de celular......................................................66 Mi material .............................................................................67 DRM/ Bloqueo de transferencia .............................................67 Juegos y apl. ..........................................................................67 •Comprar juegos ..................................................................67 •Juegos ................................................................................67 Audio ......................................................................................67 •Comprar timbres .................................................................67 •Audio ...................................................................................67 Gráficos ..................................................................................68 •Comprar gráficos ................................................................68 •Gráficos...............................................................................68 Álbum de fotos........................................................................69 •Visualización de las fotos guardadas..................................69 •Uso de las opciones de foto................................................69 Otros archivos ........................................................................70 Herramientas ..........................................................................70 •Alarma.................................................................................70 •Calendario...........................................................................71 •Bloc notas ...........................................................................73 9 070210_C3b_SP_at&t(00).indd 9 2007.2.10 12:51:10 PM Contenidos •Nota de voz .........................................................................73 •Hora mundial.......................................................................74 •Calculadora .........................................................................74 •Conversor ...........................................................................75 •Cronómetro .........................................................................75 •Kit de herramientas SIM .....................................................75 Estado de memoria ................................................................76 Contactos ..............................................................................76 Lista contactos........................................................................76 Agr contacto ...........................................................................77 Marcación rápida ....................................................................77 •Para programar la Marcación rápida ..................................77 •Para añadir a Marcación rápida ..........................................77 •Para editar una Marcación rápida .......................................78 •Para eliminar de marcación rápida .....................................78 •Para programar Marcación rápida en Lista contactos ........78 Grupos ....................................................................................78 Mi tarjeta de negocios ............................................................79 Memoria en uso ......................................................................79 Borrar todo..............................................................................79 Copiar todos ...........................................................................79 Número propio ........................................................................79 Info. Memoria..........................................................................80 Núm. de servicio .....................................................................80 Configuración .......................................................................80 Pantalla...................................................................................80 •Comprar gráficos ................................................................80 •Pantalla principal.................................................................80 •Saludo .................................................................................81 •Contraste ............................................................................81 •Luz de fondo .......................................................................81 Audio ......................................................................................81 •Comprar timbres .................................................................81 •Sonido de timbre .................................................................81 Volumen..................................................................................82 •Tonos alerta ........................................................................82 •Tono de tecla.......................................................................82 •Tono al abrir tapa ................................................................82 •Efectos de sonido ...............................................................83 Llamada ..................................................................................83 •Transferir llamada ...............................................................83 Tipo de contestar ....................................................................84 Remarc. autom. ......................................................................85 Llamada en espera .................................................................85 ID de llamada .........................................................................85 Teléfono ..................................................................................85 10 070210_C3b_SP_at&t(00).indd 10 2007.2.10 12:51:10 PM Contenidos •Idioma .................................................................................85 •Hora y fecha........................................................................86 •Modo de vuelo ....................................................................86 Conectividad ...........................................................................86 •Bluetooth .............................................................................86 •Dispositivos asoc. ...............................................................87 •Dispositivo de llamada saliente...........................................88 •Visibilidad ............................................................................89 •Nombre ...............................................................................89 •Dirección .............................................................................89 Seguridad ...............................................................................89 •Verif. PIN1 ...........................................................................90 •Cambiar PIN1 .....................................................................90 •Bloqueo de teléfono ............................................................90 •Cambiar contraseña............................................................90 •Restricc. teléfono ................................................................90 •Marcación fija (números de marcación fija) ........................91 •Cambiar PIN2 .....................................................................91 •Restricc. Llamada ...............................................................91 •Grupo de usuario cerrado (GUC)........................................91 Versión de software ................................................................92 Reiniciar..................................................................................92 TTY .........................................................................................92 Apéndice Árbol de menús ....................................................................94 Códigos de acceso ...............................................................96 Lista de control de solución de problemas .......................97 Desempeño y seguridad ......................................................99 Glosario .................................................................................99 Cumplimiento con las normas de la FCC y de Industry Canada.................................................................................102 Medidas de seguridad ........................................................104 Garantía ...............................................................................106 11 070210_C3b_SP_at&t(00).indd 11 2007.2.10 12:51:10 PM 12 070210_C3b_SP_at&t(00).indd 12 2007.2.10 12:51:10 PM Inicio 1. Contenido del paquete 2. Tarjeta SIM 3. Cubierta intercambiable 4. Batería 5. Pantallas interna y externa 6. Selección de funciones y opciones 7. Bloqueo de teclas 070210_C3b_SP_at&t(00).indd 13 1 2007.2.10 12:51:11 PM Contenido del paquete Teléfono 14 070210_C3b_SP_at&t(00).indd 14 Batería Cargador de viaje Manual del usuario * El contenido real puede variar dependiendo de la región. 2007.2.10 12:51:12 PM Tarjeta SIM & Cubierta intercambiable Acerca de la tarjeta SIM Extracción de la cubierta Cuando se suscribe a un operador de red, usted recibe una tarjeta SIM (Módulo de identidad del abonado) que contiene información de registro, un código PIN, etc. Al igual que una tarjeta de crédito, debe mantenerla en un lugar seguro y manejarla con cuidado. No debe doblarla, rayarla ni tampoco exponerla a la humedad. Evite la electricidad estática. Para evitar que se corrompa la memoria de la tarjeta SIM, apague siempre el teléfono antes de extraer o insertar la tarjeta. Deslice hacia abajo la cubierta de la tapa en la dirección que indican las flechas de la imagen. Instalación y extracción de la tarjeta SIM Ajuste de la cubierta ❶ Quite la batería del teléfono presionándola y levantándola, tal como se muestra a continuación. ❷ Si la ranura de la tarjeta SIM está vacía, inserte la tarjeta SIM en ella. ❸ Para extraer la tarjeta SIM, presiónela en la dirección que indica la flecha, tal como se muestra en la imagen. 070210_C3b_SP_at&t(00).indd 15 Consejo Una forma más sencilla de hacerlo es manteniendo el teléfono al revés y usar los dedos pulgares para deslizar la cubierta de la tapa hacia arriba en la dirección que indican las flechas de la imagen.) Inserte los surcos en cada lado de la cubierta en las ranuras del teléfono en la dirección que indican las flechas de la imagen. Ajuste en su lugar. NOTA Debido a que el Front Deco (A-Deco) es una cubierta intercambiable, podría salirse si deja caer el teléfono o lo golpea. Si ocurriese esto, vuelva a ajustar la cubierta antes de usar el teléfono. 15 2007.2.10 12:51:16 PM Batería Inserción de la batería Coloque los contactos de la batería en el orificio localizado en la parte inferior de la unidad, como se indica en la siguiente imagen. Presione el extremo superior de la batería hasta escuchar un «chasquido». Extracción de la batería Empuje la tecla de bloqueo de la batería hacia arriba y extraiga la batería. Carga de la batería Este teléfono utiliza una batería de ión litio. Asegúrese de utilizar solamente baterías y cargadores autorizados. Para obtener más detalles, comuníquese con el distribuidor más cercano. Puede utilizar el teléfono mientras recarga la batería. Cuando la batería se encuentra instalada en 16 070210_C3b_SP_at&t(00).indd 16 el teléfono, abra la cubierta protectora ubicada en la parte inferior del teléfono y conecte el adaptador del cargador, tal como se muestra a continuación. El teléfono incluye el adaptador correspondiente. Cuando la batería esté completamente cargada, desenchufe el adaptador de la toma de corriente, luego desconecte el adaptador del teléfono presionando los botones de los costados y quite el adaptador del teléfono, tal como se muestra en la imagen. Consejo La energía del teléfono proviene de una batería de ión de litio (ión-litio). Esto significa que, a diferencia de otras tecnologías, se puede recargar la batería mientras aún queda carga, sin reducir la autonomía del teléfono debido al «efecto de memoria de batería» inherente a estas tecnologías. •No utilice baterías ni cargadores dañados. •Use la batería sólo para el fin especificado. •Mientras más cerca esté de la estación base de red, mayor será el tiempo de uso del teléfono, debido a que la conexión consume menos energía. 2007.2.10 12:51:22 PM Batería & Pantallas interna y externa •El tiempo de recarga de la batería varía dependiendo de la capacidad restante de la batería y del tipo de batería y cargador utilizado. •La vida útil de la batería inevitablemente se reduce con el tiempo. •Utilice solamente baterías y cargadores autorizados. •Debido a que el sobrecalentamiento reduce la vida útil de la batería, quite el teléfono del cargador cuando esté completamente cargado. Desenchufe el cargador cuando finalice la carga. Dejar la batería en lugares calientes o fríos, especialmente al interior de un automóvil en verano o invierno, puede reducir su vida útil. Manténgala siempre a temperaturas normales. •No permita que la batería entre en contacto con objetos conductores. •Elimine y recicle las baterías utilizadas según las leyes locales. No queme las baterías; podrían explotar. •No utilice cargadores no autorizados. •Para evitar lesiones o quemaduras, asegúrese de no colocar objetos metálicos en contacto con los terminales + y – de la batería. Pantallas interna y externa Este teléfono tiene dos pantallas (una interna y otra externa). Los iconos de la parte superior de la pantalla interna indican el estado del teléfono. Pantalla interna Área de iconos Área de texto y gráficos Muestra la siguiente información en el modo de espera: información de texto y gráficos que muestra el Nombre de la red, Hora y fecha, o un saludo ingresado por el usuario Teclas programables Iconos de la pantalla interna Dependiendo del estado del teléfono, los siguientes iconos pueden aparecer en la parte superior de la pantalla interna. 17 070210_C3b_SP_at&t(00).indd 17 2007.2.10 12:51:25 PM Pantallas interna y externa Icono(s) Descripción Intensidad de la señal recibida. A mayor número de barras, más potente es la señal. Hay una llamada en curso. El teléfono está fuera del área de cobertura de red; no puede realizar ni recibir llamadas. Recibió uno o más mensajes de voz. WAP conectado. Recibió uno o más mensajes de texto, multimedia o correo electrónico. aparece si la memoria de mensajes de texto está llena. Una señal GPRS está disponible. aparece cuando hay una sesión GPRS activa. La característica de transferencia de llamadas está activada. El modo de vuelo está activado. 18 070210_C3b_SP_at&t(00).indd 18 2007.2.10 12:51:27 PM Pantallas interna y externa Icono(s) Descripción La alarma está programada. Ha programado el tipo de alerta para llamada entrante solamente en timbre. Ha programado el tipo de alerta para llamada entrante en timbre ascendente (el volumen aumenta mientras dura el timbre). Ha programado el tipo de alerta para llamada entrante en timbre y vibración. Ha programado el tipo de alerta para llamada entrante en vibración y luego timbre. Ha programado el tipo de alerta para llamada entrante en silencioso. Ha programado el tipo de alerta para llamada entrante en vibración solamente. Auriculares Conectados. Nivel de la batería. Las barras indican la carga disponible de la batería. Si la carga de la batería es baja, aparece 19 070210_C3b_SP_at&t(00).indd 19 2007.2.10 12:51:28 PM Pantallas interna y externa Icono(s) Descripción Se está recibiendo un mensaje. Se está enviando un mensaje. El modo de altavoz telefónico está activado. Ha recibido un nuevo mensaje del navegador. Este icono aparece hasta que se descarga el mensaje. Estado de AIM: Disponible, Ausente e Invisible Estado de Windows Live Messenger: Conectado, Ausente, No Disponible, No Conectado Estado de YAHOO: Disponible, Ocupado e Invisible Recibió uno o más mensajes de MI Aparece cuando la función Bluetooth está activada. Aparece cuando el Audífono/Manos Libres Bluetooth están conectados. 20 070210_C3b_SP_at&t(00).indd 20 2007.2.10 12:51:29 PM Pantallas interna y externa & Selección de funciones y opciones Apagado automático de la pantalla Si no presiona ninguna tecla durante diez segundos (dependiendo de la configuración del usuario) mientras las pantallas interna y externa están atenuadas, la pantalla interna se apaga automáticamente para ahorrar energía. Para restablecer la pantalla, presione cualquier tecla. Selección de funciones y opciones El teléfono ofrece varias formas de seleccionar la función deseada. Puede acceder a todas las funciones del teléfono cuando está abierto. Selección de funciones y opciones cuando el teléfono está abierto. El teléfono ofrece varias funciones de operación y personalización dispuestas en menús y submenús. Cada menú y submenú le permite ver y cambiar la configuración de una función en particular. A estas funciones se accede usando las teclas de selección (“programables”) izquierda y derecha cuando el teléfono está abierto. Las funciones de las teclas programables cambian dependiendo del contexto actual. La etiqueta o icono en la parte inferior de la pantalla, sobre las teclas programables, muestra la función actual de cada tecla. Para mostrar las funciones y opciones disponibles o seleccionar la opción o función requerida: ❶ Presione la tecla programable izquierda o derecha, según corresponda. ❷ Para seleccionar la función que aparece o la opción resaltada, presione la tecla programable [[] o la tecla [o]. NOTA En algunas funciones, se le pedirá que ingrese una contraseña o PIN. Ingrese el código requerido y luego presione la tecla [o]. ❸ Para resaltar la siguiente opción en una lista, presione la tecla [u/d]. ❹ Para regresar a la función u opción anterior en una lista, presione la tecla [c]. ❺ Para volver al modo de espera, presione la tecla [e]. Selección de funciones y opciones cuando el teléfono está cerrado. Puede usar algunas funciones a pesar de que el teléfono esté cerrado. Aquí aparecen las funciones de las teclas laterales cuando la tapa del teléfono está cerrada: 21 070210_C3b_SP_at&t(00).indd 21 2007.2.10 12:51:30 PM Selección de funciones y opciones & Bloqueo de teclas - Presione para subir el volumen del audífono. - Presione una vez para desactivar el timbre de una llamada entrante. - Mantenga presionado para rechazar una llamada entrante. - Mantenga presionado para activar o desactivar la cámara cuando la tapa esté cerrada. Presione una vez para tomar una foto. •Ajusta el volumen del audífono. z •Apaga la melodía si se presiona cuando recibe una llamada y la tapa está cerrada. •Rechaza la llamada entrante si se mantiene presionada cuando recibe una llamada y la Lateral hacia tapa está cerrada. arriba •Enciende y apaga el modo de captura de la cámara si se mantiene presionada. •Presione para bajar el volumen del audífono. x •Presione una vez para desactivar el timbre de una llamada entrante. •Mantenga presionado para rechazar una llamada entrante. Lateral hacia •Presione una vez para encender la luz de abajo fondo, mientras la tapa está cerrada. 22 •Mantenga presionada para encender la luz del flash. Presione una vez para apagarla. 070210_C3b_SP_at&t(00).indd 22 Funciones especiales de las teclas laterales Foto: Para iniciar la función de cámara cuando la tapa está cerrada, mantenga presionada la tecla lateral [z]. Presione nuevamente la tecla lateral [z] para tomar una foto. La imagen se guarda en el álbum. Esta función facilita la realización de un autorretrato. Luz del flash: Para ENCENDER la luz del flash, mantenga presionada la tecla lateral hacia Abajo [x]. Presiónela una vez para APAGARLA. Bloqueo de teclas Para bloquear el teclado El bloqueo del teclado impide que las teclas se presionen en forma accidental. Presione la tecla programable [Menú] y luego seleccione la tecla [*] dentro de 3 segundos. Para desbloquear el teclado Presione la tecla programable [Desbloq.] y luego seleccione la tecla [*] dentro de 5 segundos para desbloquear el teclado. 2007.2.10 12:51:30 PM Funciones básicas 1. Encendido y apagado del teléfono 2. Realización y finalización de llamadas 3. Contestación de llamadas 4. Opciones durante una llamada 5. Uso del audífono 6. Selección de funciones del menú 7. Ingreso de texto 070210_C3b_SP_at&t(00).indd 23 2 2007.2.10 12:51:30 PM Encendido y apagado del teléfono & Realización y finalización de llamadas Para encender el teléfono ❶ Abra el teléfono. ❷ Mantenga presionada la tecla de encendido/apagado hasta que el teléfono se encienda. ❸ Si se le solicita que ingrese su PIN (Número de identificación personal), ingrese el PIN de la tarjeta SIM y presione la tecla [o]. (Para obtener más detalles, consulte Seguridad en la página 89.) El teléfono comienza a buscar una red disponible y la fecha y hora actuales aparecen en las pantallas interna y externa. Una vez conectado a la red, puede realizar y recibir llamadas. NOTA Si mientras usa el teléfono éste funciona mal o no está encendido, extraiga la batería y luego insértela transcurridos unos 5 a 10 segundos. NOTA Para cambiar el idioma cuando encienda por primera vez el teléfono, seleccione la opción del menú Idioma. (Para obtener más detalles, consulte Idioma en la página 85 .) Para apagar el teléfono Mantenga presionada la tecla [e] hasta que aparezca la animación del apagado. Realización y finalización de llamadas Para realizar una llamada Ingrese el código de área y número de teléfono en el modo de espera, luego presione la tecla [s]. Para borrar el último dígito mostrado, presione la tecla [c]. Para borrar todos los dígitos mostrados, mantenga presionada la tecla [c]. NOTA Si ha activado la opción [Remarc. autom.] (Para obtener más detalles, consulte Remarc. autom. en la página 85.), el teléfono intentará realizar la llamada en forma automática hasta 10 veces si ésta no se contesta. Para finalizar una llamada Presione la tecla [e] como de costumbre. Para finalizar todas las llamadas activas al mismo tiempo mientras está en una llamada multipartita, seleccione [Opciones] y luego [Terminar todas las llams.]. Una vez finalizada la llamada, aparece un resumen de la llamada (que muestra el nombre o número del destinatario y la duración de la llamada). 24 070210_C3b_SP_at&t(00).indd 24 2007.2.10 12:51:31 PM Realización y finalización de llamadas Para realizar una llamada usando los Registros de llamadas El teléfono registra hasta 30 números de llamadas marcadas, recibidas y perdidas. El número de la última llamada se guarda en la primera posición. Si marca el mismo número más de una vez, sólo se guarda la última. ❶ Presione la tecla [s] para mostrar la lista de números de llamadas marcadas, recibidas y perdidas de los Registros de llamadas en orden cronológico inverso. ❷ Presione la tecla [z/x] o la tecla [u/d] para seleccionar un número. ❸ Presione la tecla [s] para marcar el número seleccionado. (Para obtener más detalles, consulte 3.Llamadas recientes en la página 60.) NOTA Para marcar el último número en la lista de Registros de llamadas, mantenga presionada la tecla [s] SIM o en la memoria del teléfono. Por lo tanto, usted no tiene que recordar todos sus números de teléfonos; simplemente seleccione el nombre para volver a llamar al número asociado. ❶ Presione la tecla [d] para ver la Lista de contactos. ❷ Seleccione un número de la Lista de contactos. ❸ Presione la tecla [s] para marcar.(Para obtener más detalles, consulte 8.Contactos en la página 76.) Para realizar llamadas internacionales ❶ Mantenga presionada la tecla [0] para el prefijo internacional hasta que aparezca el carácter ‘+’ o ingrese el código nacional de salida que sigue a 011 (si la red lo admite). ❷ Ingrese el código del país, código de área y número de teléfono al que desea llamar. ❸ Presione la tecla [s]. Para realizar una llamada usando los Contactos Puede guardar los nombres y números de teléfonos utilizados con frecuencia, llamados Contactos, en la tarjeta 070210_C3b_SP_at&t(00).indd 25 25 2007.2.10 12:51:31 PM Contestación de llamadas Para realizar marcación rápida desde los Contactos Mantenga presionado el número de Marcación rápida para realizar una llamada usando el número guardado. Por ejemplo, mantenga presionada la tecla [5] para marcar un número que guardó como “5” en la lista de Marcación rápida. (Para obtener más detalles, consulte Marcación rápida en la página 77.) Para realizar llamadas de emergencia NOTA Esta función depende de la red y de la suscripción y podría no estar disponible en todas las áreas. ❶ Para contestar una llamada, abra el teléfono. ❷ Si el teléfono ya está abierto, presione la tecla [s]. NOTA Si el tipo de contestar está definido en [Cualquier tecla], puede contestar las llamadas presionando cualquier tecla, excepto [e]. Mientras la tapa esté cerrada, puede presionar cualquier tecla lateral para detener el timbre, o mantener presionada cualquier tecla lateral para rechazar la llamada. Puede realizar llamadas de emergencia incluso si el teléfono no tiene una tarjeta SIM. ❶ Seleccione Número de emergencia o presione la tecla programable [SOS] si el teléfono no tiene una tarjeta SIM. ❷ Presione la tecla [s]. Para responder una llamada perdida Para contestar una llamada Para responder una llamada perdida, realice lo siguiente. ❶ Mantenga el teléfono abierto. ❷ Presione la tecla programable [Ver] para mostrar la lista de llamadas perdidas. ❸ Si fuera necesario, desplácese para resaltar el número que desea, presionando la tecla l [u/d]. Cuando recibe una llamada, el teléfono timbra (o vibra). Si la persona que llama se puede identificar, aparece el número de teléfono de ésta (o el nombre, si está almacenado en sus contactos). 26 070210_C3b_SP_at&t(00).indd 26 Si la llamada entrante no se pudo contestar, en la pantalla del teléfono aparece un mensaje de llamada perdida a modo de recordatorio. NOTA Esta función depende de la red y de la suscripción y podría no estar disponible en todas las áreas. 2007.2.10 12:51:32 PM Contestación de llamadas ❹ Presione la tecla [s] para llamar. Presione la tecla [c] o [e] para cerrar el mensaje de aviso de "llamada perdida". Para intercambiar entre dos llamadas Para rechazar una llamada Para finalizar la llamada actual •Si el teléfono está abierto, presione la tecla [e] o la tecla programable [Rechaz.]. •Si el teléfono está cerrado, mantenga presionada la tecla [z/x] durante la llamada entrante. La persona que llama escucha el Correo de voz. Presione la tecla programable [Interc.]. Presione la tecla [s]. La llamada retenida se vuelve a conectar en forma automática. Para contestar una segunda llamada Usted puede contestar una llamada entrante mientras tiene una llamada en curso si su proveedor de servicio de red admite este servicio y tiene activada la opción Llamada en espera. (Para obtener más detalles, consulte Llamada en espera en la página 85.) Se le avisará que tiene una llamada entrante mediante un tono de ‘llamada en espera’. Presione la tecla [s]. La primera llamada se retiene en forma automática. 27 070210_C3b_SP_at&t(00).indd 27 2007.2.10 12:51:32 PM Opciones durante una llamada Para ajustar el volumen de la llamada Para ajustar el volumen del audífono durante una llamada, realice lo siguiente. •Para aumentar el volumen de una llamada en curso, presione la tecla de volumen [z] ubicada en el costado izquierdo del teléfono. •Para bajar el volumen de una llamada en curso, presione la tecla de volumen [x] ubicada en el costado izquierdo del teléfono. •En el modo de espera con la tapa abierta, ajuste el volumen del timbre con las teclas [z/x]. Para desactivar (Mudo) o activar (Hablar) el micrófono Usted puede desactivar temporalmente el micrófono del teléfono de modo que la persona con la que está hablando no pueda oírlo. Por ejemplo, puede que desee decir algo a otra persona en la sala, pero que no quiera que la persona de la llamada lo escuche. Para desactivar el micrófono del teléfono Presione la tecla programable [Mudo] o presione [Opciones] y luego seleccione [Mudo]. Para activar nuevamente el micrófono del teléfono Presione la tecla programable [No mudo] o presione [Opciones] y luego seleccione [No mudo]. Para retener una llamada y volver a una llamada retenida Usted puede retener una llamada cuando lo desee. Puede realizar otra llamada cuando está con una en curso, si su proveedor de servicio de red admite este servicio. Una llamada está activa mientras la otra se encuentra retenida. También puede intercambiar entre ambas. Para retener una llamada Presione la tecla programable [Opciones] y luego seleccione [Retener] o bien presione la tecla [s]. El nombre de las personas que llaman y el icono se colocan en gris mientras la llamada está retenida. 28 070210_C3b_SP_at&t(00).indd 28 2007.2.10 12:51:32 PM Opciones durante una llamada Para volver a una llamada retenida Transferencia de llamadas Presione la tecla programable [Opciones] y luego seleccione [Reanud.] o bien presione nuevamente la tecla [s]. Usted puede transferir o conectar la llamada actual con la llamada retenida si su proveedor de servicio de red admite este servicio, de modo que las personas que llaman puedan conversar entre ellas. Usted se desconectará de ambas llamadas. ❶ Durante una llamada, realice o conteste otra como es de costumbre y luego presione la tecla programable [Opciones]. ❷ Presione la tecla [u/d] para resaltar la opción de [Transferir] y luego presione la tecla programable [Selecc.] o la tecla [o]. Las dos personas que llaman se conectarán entre sí. Para realizar una llamada mientras tiene otra en curso ❶ Ingrese el número de teléfono que desea marcar o búsquelo en los Contactos. ❷ Presione la tecla [s] para marcar el número de la segunda llamada. La primera llamada se retiene en forma automática. Para intercambiar entre dos llamadas Presione la tecla programable [Interc.]. La llamada actual se retiene y la llamada retenida se reactiva de modo que pueda continuar la conversación. Para finalizar una llamada Presione la tecla [s] como de costumbre. Para finalizar todas las llamadas activas al mismo tiempo mientras está en una llamada multipartita, seleccione [Opciones] y luego [Terminar todas las llams.]. Llamadas multipartitas Una función de llamada multipartita es un servicio de red que permite que hasta seis personas participen en una llamada multipartita o de conferencia simultáneamente. Para obtener más detalles, comuníquese con el proveedor de servicio. Para realizar una llamada multipartita ❶ Llame al primer participante en la forma normal. ❷ Llame al segundo participante de la misma forma. 070210_C3b_SP_at&t(00).indd 29 29 2007.2.10 12:51:33 PM Opciones durante una llamada La primera llamada se retiene en forma automática. retieautomática. ❸ Para unir al primer participante a una llamada multipartita, presione la tecla programable [Opciones] y luego seleccione la opción [Comunicar todos]. ❹ Presione la tecla [o]. Para agregar una nueva persona a una llamada multipartita ❶ Llame a la persona como de costumbre. ❷ Presione la tecla programable [Opciones] y luego seleccione la opción [Comunicar todos]. ❸ Presione la tecla [o]. Para agregar a otra persona a una llamada multipartita Presione la tecla programable [Opciones] y luego seleccione la opción [Comunicar todos]. Para ver el estado de los participantes de la llamada multipartita Presione la tecla [l/r]. Un icono indica si la parte remota está participando en una llamada multipartita ("Far multipartita") o está retenida ("Far en espera"). 30 070210_C3b_SP_at&t(00).indd 30 Para contestar o realizar una segunda llamada durante una llamada multipartita ❶ Retenga la llamada multipartita presionando la tecla programable [Opciones] y luego seleccione la opción [Retener todas las llams.]. ❷ Conteste o realice una llamada como de costumbre. ❸ Para volver a activar la llamada multipartita retenida, presione la tecla programable [Interc.]. ❹ Para finalizar la llamada multipartita, presione la tecla [e] o cierre la tapa. Para mantener una conversación privada con un participante ❶ Presione la tecla programable [Opciones] y luego seleccione la opción [Privado]. ❷ Presione la tecla [o]. ❸ Presione la tecla [u/d] para resaltar al participante que desee y luego presione la tecla [o]. Ahora puede conversar en privado con esa persona. ❹ Los demás participantes pueden continuar la conversación entre sí. ❺ Para volver a la llamada multipartita, presione la tecla 2007.2.10 12:51:33 PM Opciones durante una llamada programable [Opciones] y luego seleccione la opción [Comunicar todos]. ❻ Presione la tecla [o]. Todos los participantes de la llamada multipartita ahora pueden oírse mutuamente. Para quitar a un participante de una llamada multipartita ❶ Presione la tecla programable [Opciones] y luego seleccione la opción [Excluir]. ❷ Presione la tecla [u/d] para resaltar al participante y luego presione la tecla [o]. La llamada finaliza para ese participante, pero usted puede continuar la conversación con los demás. Finalice la llamada multipartita cerrando el teléfono o presionando la tecla [e]. Búsqueda de un número en los Contactos durante una llamada ❶ Presione la tecla programable [Opciones]. ❷ Si fuera necesario, presione la tecla [u/d] para resaltar la opción [Lista contactos]. ❸ Presione la tecla [o]. 070210_C3b_SP_at&t(00).indd 31 ❹ Aparecen los contactos. Para buscar un nombre o grupo en los Contactos Ingrese las primeras letras del nombre para Buscar por nombre o las primeras letras del grupo para Buscar por grupo. Los contactos aparecen a partir de la primera entrada que coincide con lo ingresado. Para encontrar un nombre en forma manual en los Contactos Presione la tecla [u/d]. Para ver la entrada resaltada en los Contactos Presione la tecla [o]. (Para obtener más detalles, consulte 8.Contactos en la página 76.) Uso de tonos DTMF Durante una llamada, se pueden desactivar o activar los tonos de teclas DTMF. Cuando la opción [DTMF Desactivado] está seleccionada, el teléfono no transmite los tonos de las teclas. Le permite presionar las teclas sin oír los tonos de éstas durante las llamadas. Para comunicarse con contestadores automáticos o sistemas telefónicos 31 2007.2.10 12:51:33 PM Opciones durante una llamada & Uso del audífono computarizados, debe seleccionar la opción [DTMF Activado]. Lectura o escritura de un mensaje durante una llamada Usted puede leer o escribir un mensaje durante una llamada telefónica. ❶ Presione la tecla programable [Opciones]. ❷ Presione la tecla [u/d] para resaltar la opción [Mensajes] y luego presione la tecla [o]. •Para leer un mensaje recibido, seleccione el subcomando Buz. entr. y luego desplácese hasta el mensaje que desea leer. •Para escribir un nuevo mensaje, seleccione el subcomando Escribir nvo. y luego presione la tecla [o]. (Para obtener más detalles, consulte Escribir nvo. en la página 48.) NOTA Durante una llamada, sólo puede enviar mensajes de texto. No se pueden enviar mensajes multimedia, pero sí se pueden guardar. 32 Recuperar llamada en audífono/ manos libres/teléfono 070210_C3b_SP_at&t(00).indd 32 Esta función está disponible cuando el Audífono/Manos Libres Bluetooth están conectados durante una llamada. Para hablar usando el Audífono/Manos Libres Bluetooth durante una llamada, seleccione [Opción] -> [Recup. llam. en audífono/manos libres]. Por otro lado, seleccionando [Opción] -> [Recup. llam. en teléfono] le permite hablar usando el teléfono nuevamente. NOTA Mientras se encuentra hablando por su teléfono celular, un botón determinado del Audífono/Manos Libres Bluetooth le permite hablar usando el Audífono/Manos Libres Bluetooth. Uso del audífono Se pueden realizar o recibir llamadas utilizando el audífono. Cuando coloca el audífono en el conector ubicado en la parte superior del teléfono, el botón en éste funciona de la siguiente forma: •En el modo de espera, presione una vez el botón para ver una lista de llamadas recientes. •En el modo de espera, presione dos veces el botón para remarcar la última llamada. •Presione una vez el botón para recibir una llamada. •Presione una vez el botón para finalizar la llamada 2007.2.10 12:51:34 PM Selección de funciones del menú Visualización de las funciones del menú del teléfono. Para mostrar las funciones del menú del teléfono, presione la tecla programable [Menú] ([[]) en el modo de espera. Desplazamiento por las funciones del menú y submenús del teléfono Para moverse por las funciones del teléfono y seleccionar una función o valor deseado, presione las siguientes teclas. Tecla Función Tecla programable Lleva al menú principal en el modo de [[] espera. NOTA Puede ingresar el número de la función del menú para acceder rápidamente a la función del submenú. Para obtener detalles del árbol de menús que muestra todos los números de las funciones y subfunciones del menú, consulte 1. Árbol de menús en la página 94. NOTA Presione la tecla [c] para volver al menú anterior. Ingrese el número del menú para acceder rápidamente al submenú. Uso de teclas de atajo en el modo de espera Tecla Menú seleccionado cuando se presiona [l], [r] tecla Se mueve por el menú principal. [u], [d] tecla Busca el submenú. Se mueve por el menú principal. Tecla programable Muestra el menú [[] Lleva al submenú. Lleva al menú inicial de MEdia Net en el modo de espera. Tecla programable Activa la Cámara []] Mueve el cursor hacia arriba y hacia abajo en el menú. [r] tecla Navegación Muestra MI [l] tecla Navegación Muestra Mi material [o] tecla [z], [x] 070210_C3b_SP_at&t(00).indd 33 Si se mantiene presionada Menú 33 2007.2.10 12:51:34 PM Selección de funciones del menú & Ingreso de texto Tecla Menú seleccionado cuando se presiona Si se mantiene presionada [u] tecla Navegación Muestra la pantalla Escribir nvo. [d] tecla Navegación Muestra la lista de Contactos [o] tecla Muestra el navegador WAP de WAP [c] tecla [s] tecla Muestra la vista mensual del Calendario Muestra Llamadas recientes Ingreso de texto Modo de ingreso En muchas ocasiones es necesario ingresar texto en el teléfono, por ejemplo: cuando almacena un nombre en los Contactos, cuando escribe un nuevo mensaje, cuando crea un saludo o cuando programa eventos en el calendario. Puede seleccionar entre los siguientes métodos (modos) de ingreso de texto en el teléfono. Modo T9 Remarca la última llamada [e] tecla Encendido/apagado [1] tecla Conecta al servidor de correo de voz [*] tecla Ingresa o sale del modo de Vibración Puede ingresar una letra usando sólo una pulsación por letra. El teclado tiene más de una letra por tecla; cuando presiona la tecla [5] una vez, puede aparecer J, K o L. El modo T9 compara automáticamente las pulsaciones de las teclas con un diccionario lingüístico para determinar la palabra correcta, de este modo se necesita mucho menos pulsaciones que en el modo ABC convencional (ver a continuación). Modo ABC En este modo, se ingresa la letra deseada presionando el teclado una vez para seleccionar la primera letra de la tecla, dos veces para seleccionar la segunda, tres veces 34 070210_C3b_SP_at&t(00).indd 34 2007.2.10 12:51:35 PM Ingreso de texto para la tercera y así sucesivamente hasta que aparezca la letra deseada. Modo 123 En este modo se pueden ingresar números. Ejemplo: Ingreso de un mensaje de texto ← El icono del número de página y la cantidad de caracteres restantes que puede ingresar ← Área de edición Modo de símbolos En este modo se pueden ingresar caracteres especiales como letras griegas, unidades monetarias o un punto. Mis palabras Administra las palabras que ha añadido al diccionario. Puede editar y borrar las palabras. Deletrear Edita la palabra sugerida usando el ingreso de texto (modo ABC, 123 o de símbolos) sólo para el ingreso de texto T9. Para cambiar el modo de ingreso de texto Cuando se encuentre en un área en que puede ingresar texto, el indicador de modo de ingreso de texto aparece en la parte inferior de la pantalla. 070210_C3b_SP_at&t(00).indd 35 ↑ ↑ Opciones del editor El modo de ingreso de texto actual ❶ Presione la tecla programable []] que indica el modo de ingreso de texto actual. ❷ Cambie al modo que desea usar presionando la tecla programable []] cuantas veces sea necesario. Para insertar un espacio Para insertar un espacio entre dos palabras, presione la tecla [0]. Si se encuentra en el modo 123 o en el modo de símbolos, mantenga presionada la tecla [0] para agregar un espacio. 35 2007.2.10 12:51:36 PM Ingreso de texto Desplazamiento Para mover el cursor a la izquierda o la derecha dentro del texto, presione la tecla de desplazamiento [l/r]. Para mover el cursor hacia arriba o hacia abajo entre las líneas, presione la tecla de desplazamiento ([u/d]). NOTA Al presionar la tecla [z/x] el cursor se puede mover muy rápidamente hacia el comienzo o final del texto. Borrado de letras y palabras Para borrar la letra a la izquierda del cursor, presione la tecla [c]. Para borrar todas las letras en el cuadro editor, mantenga presionada la tecla [c]. Retorno a la pantalla anterior Cuando el campo de ingreso de texto está vacío, presione la tecla [c] para volver a la pantalla anterior. Consejo Use los siguientes procedimientos para cambiar el modo de ingreso de texto rápidamente en modo Inglés (el modo Alfabético o Predictivo): 36 070210_C3b_SP_at&t(00).indd 36 Tecla Función Mantenga presion- Muestra la pantalla de símbolos. Vuelve a la pantalla anterior en el ada la tecla [*] modo de Símbolo. Presione la tecla [0] Ingresa un carácter de espacio. Presione la tecla Borra los caracteres uno a uno. Luego de borrar todos los caracteres, [c] vuelve a la pantalla anterior. Mantenga presionada la tecla [c] Borra todos los caracteres y mueve el cursor al comienzo de la pantalla de ingreso. Uso del modo T9 En el Editor alfabético T9, las palabras más comúnmente utilizadas aparecen a medida que ingresa el texto. ❶ Presione las teclas con los números [2] a [9] para ingresar texto. Por ejemplo, presione [4][3][5][5][6] en secuencia para ingresar la palabra ‘hello’ (hola en inglés). La palabra que está escribiendo aparece en la pantalla. 2007.2.10 12:51:37 PM Ingreso de texto Podría cambiar con cada tecla que presione. ❷ Ingrese la palabra completa antes de editar o borrar alguna pulsación. ❸ Al buscar una palabra, ingrese el siguiente texto. ❹ Si la búsqueda no tiene éxito, presione la tecla [*] para buscar qué texto se puede ingresar. El teléfono primero muestra las opciones más comúnmente utilizadas. ❺ Continúe con el ingreso de la siguiente palabra. Uso del modo ABC Al escribir en el modo ABC, presione la tecla con la letra deseada una vez para la primera letra, dos veces para la segunda y así sucesivamente. Ejemplo: Para mostrar la letra “C”, presione rápidamente la tecla [2] tres veces. Para mostrar la letra “K”, presione dos veces la tecla [5]. Este método se denomina ingreso Multi-tap. NOTA El cursor se mueve a la derecha cuando presiona una tecla diferente. Cuando ingresa la misma letra dos veces o una letra diferente de la misma tecla, simplemente presione la tecla de desplazamiento [Derecha] o espere unos segundos para que el cursor se mueva automáticamente a la derecha y luego ingrese la siguiente letra. Consulte la tabla que aparece a continuación para obtener más información acerca de los caracteres disponibles. Los caracteres varían dependiendo del idioma del ingreso de texto. Cambio entre mayúsculas y minúsculas Para cambiar a mayúscula o minúscula (según corresponda) la siguiente letra que ingrese, presione la tecla [#]. Existen tres tipos: •Minúscula (sin indicador) •Mayúscula inicial ( ) •Bloqueo de mayúscula ( ) [Inglés] 070210_C3b_SP_at&t(00).indd 37 Tecla Caracteres, en el orden que aparecen 1 . , - ? ! ‘ @ : 1 2 a b c 2 37 2007.2.10 12:51:39 PM Ingreso de texto Tecla Caracteres, en el orden que aparecen 3 d e f 3 4 g h i 4 5 j k l 5 6 m n o 6 7 p q r s 7 8 t u v 8 9 w x y z 9 0 Espacio 0 Uso del modo 123 Use el modo 123 para ingresar números en el texto. Presione la tecla que corresponde al dígito que desea ingresar. Uso del modo de símbolos El modo de símbolos le permite ingresar símbolos en el texto. Para mostrar más símbolos, presione la tecla de desplazamiento ([u/d]). Para ingresar un símbolo, presione el número para un símbolo y éste aparecerá en la pantalla de ingreso. Uso de Mis palabras Adición de una nueva palabra a Mis palabras (función Escribir) Por ejemplo, escribamos la palabra en inglés ‘lode’, que por supuesto no está en la base de datos T9, en el editor alfabético T9. •Para agregar ‘lode’ en el modo T9, presione [5], [6], [3], [3] en orden. 38 070210_C3b_SP_at&t(00).indd 38 2007.2.10 12:51:42 PM Ingreso de texto •Presione [5], [6], [3], [3] en orden y verá la tecla programable [Escribir] en la parte inferior izquierda de la pantalla. •Presione la tecla programable [Escribir] y aparecerá el editor Agregar palabra. Ingrese ‘lode’ en el modo ABC y presione [o]. NOTA El editor Agregar palabra no es compatible con el modo T9 ya que las palabras deseadas de los usuarios solamente se almacenan en la base de datos T9. •Ahora, la palabra se almacenó en la base de datos T9. 070210_C3b_SP_at&t(00).indd 39 Para volver a ingresar ‘lode’, presione [5], [6], [3], [3] en orden en el modo T9. Borrado de una palabra de Mis palabras (función Borrar) •Presione la tecla programable [Opción] en el editor alfabético T9. Seleccione Mis palabras y presione [o]. •Seleccione la palabra que desee borrar con la tecla de navegación, luego presione la tecla programable [Opción]. Seleccione 2.Borrar y presione [o] para borrar la palabra de la lista Mis palabras. Eliminación de todas las palabra de Mis palabras (función Borrar todas) •Presione la tecla programable [Opción] en el editor alfabético T9. Seleccione Mis palabras y presione [o]. 39 2007.2.10 12:51:49 PM Ingreso de texto la palabra en el editor Agregar palabra. •Presione la tecla programable [Opción]. Seleccione 3.Borrar todas y presione [o] para borrar todas las palabras de la lista Mis palabras. NOTA La función Borrar todas se activa cuando se almacenan dos o más palabras en la lista Mis palabras. Edición de una palabra en Mis palabras (función Editar) •Presione la tecla programable [Opción] en el editor alfabético T9. Seleccione Mis palabras y presione [o]. 40 •Seleccione la palabra que desee editar con la tecla de navegación, luego presione la tecla programable [Opción]. Seleccione 1.Editar y presione [o] para editar 070210_C3b_SP_at&t(00).indd 40 2007.2.10 12:52:9 PM Aplicaciones 1. Cámara 2. Mensajes 3. Llamadas recientes 4. MEdia Net 5. AT&T Mall 6. Correo de celular 7. Mi material 8. Contactos 9. Configuración 3 Consulte el apéndice para obtener información acerca del árbol de menús. 070210_C3b_SP_at&t(00).indd 41 2007.2.10 12:52:26 PM Cámara Esta función le permite tomar una foto usando la cámara incorporada. La foto se puede guardar y enviar con un mensaje multimedia. Tomar una foto Toma de fotos cuando la tapa del teléfono está abierta ❶ Presione la tecla programable [Menú], 1. Cámara y luego seleccione 1. Tomar foto para ingresar al modo de captura de fotos del teléfono. Consejo También puede presionar la tecla programable [Cámara] ([]]) con la pantalla en reposo para tomar una foto. En este momento, el tamaño de la imagen depende de la configuración del usuario. ❷ Para cambiar el modo de captura de fotos, presione la tecla programable derecha([]]). Esto alterna entre las siguientes opciones, representadas por iconos en la pantalla del teléfono. Modo de captura Icono Modo general para una sola foto. Captura múltiple Toma varias fotos. La cantidad de fotos la determina la opción [Capturas múlt.]. 070210_C3b_SP_at&t(00).indd 42 Captura en marco Icono DescriptionDescripción Toma una foto con un marco incorporado. El tamaño de la imagen es fijo de 128X128. NOTA El tamaño predeterminado de la imagen es de modo 640X480 No se puede definir el Marco en tamaño 640X480. ❸ Presione la tecla de desplazamiento ([u/d]) para acercar/alejar la imagen en la vista previa actual cuando el tamaño de la imagen sea 128X128. Presione la tecla de desplazamiento ([l/r]) para controlar los siete niveles de brillo. ❹ El teléfono guarda automáticamente la imagen cuando el usuario presiona la tecla [o]. Presione la tecla [c] para volver a la pantalla de vista previa de cámara. NOTA En el modo de Captura múltiple, automáticamente se puede dar un nombre a la foto si una foto se define como Marcada. Seleccione [Marcar] o [Desmar.] para marcar la imagen que desea guardar. DescriptionDescripción Captura simple 42 Modo de captura NOTA El contador de imágenes ubicado debajo del tamaño de la imagen indica la cantidad de fotos que puede tomar. El contador de imágenes podría no ser exacto dependiendo de los tipos de objetos y el nivel de brillo. 2007.2.10 12:52:26 PM Cámara Consejo Si está tomando fotos cuando el teléfono está abierto, puede usar las siguientes teclas para ajustar directamente la cámara. Función Descripción Tecla Brillo 7 niveles (de 0 a 6) Tecla de desplazamiento [l/r] Zoom 4 niveles (de 0 a 3) (disponible sólo en tamaño de 128x128). Desplazamiento [u/d] Uso de las opciones de la cámara El modo de Vista previa Presione la tecla programable [Opciones] ([[]) en el modo de vista previa para seleccionar la siguiente información que se aplicará a la imagen. Su valor de configuración es temporal, de modo que si desea guardar su valor, presione la tecla programable [Menú], seleccione 1. Cámara y luego seleccione 3. Configuración. •Ir a álbum: lo lleva al Álbum de fotos. •Tamaño de imagen: muestra el tamaño de la imagen que desea capturar: 128X128 ó 640X480. NOTA Esta opción no aparece en el modo de Captura en arco.. 070210_C3b_SP_at&t(00).indd 43 •Temporizador autom.: especifica el tiempo de retraso. Puede elegir Ninguno, 5 segs, o 10 segs. Cuando ha transcurrido el tiempo seleccionado, la cámara toma la foto. •Marco: especifica el marco que se usará. NOTA Esta opción aparece en el modo de Captura en marco. •Capturas múlt.: selecciona el número de capturas múltiples que desea (4/6/9). NOTA Esta opción aparece en el modo de Captura múltiple. •Flash: activa y desactiva el flash. •Efecto: aplica uno de los siguientes efectos a la imagen: •Normal •Sepia •Solarización •Monocromo •Dibujo •Negativo •Estampar NOTA No se puede programar Efecto en tamaño 640X480 •Mostrar iconos: Activa o Desactiva los iconos de la pantalla. 43 2007.2.10 12:52:27 PM Cámara El modo de captura simple o en marco. ❶ Presione la tecla programable [Opciones] ([[]) en el modo de Captura para seleccionar la siguiente información, que se aplicará a la imagen. •Borrar: borra la foto que se guarda automáticamente. •Config.: •Papel tapiz: agrega una foto al Papel tapiz en Pantalla. La foto se configura como imagen de fondo de la pantalla principal. •Contactos: asigna una imagen fotográfica específica a los Contactos. 44 •Atrás a Vista prev.: vuelve a la pantalla de vista previa de cámara. •Enviar vía Bluetooth: Transmite la foto seleccionada vía Bluetooth . •Imprimir: Transmite la foto seleccionada a la impresora vía Bluetooth •Renombrar: cambia el nombre de una foto. (Para obtener más información para cambiar el nombre de una foto, consulte en la página 34.) •Ir a álbum: lo lleva al Álbum de fotos. ❷ Presione la tecla programable [Enviar] ([]]) para transmitir la foto con el mensaje multimedia. Toma de fotos cuando la tapa del teléfono está 070210_C3b_SP_at&t(00).indd 44 cerrada. ❶ Mantenga presionada la tecla lateral [z] del costado izquierdo del teléfono con la tapa cerrada para ingresar o salir del Modo vista previa. ❷ Ajuste la imagen apuntando la cámara al objetivo. Presione la tecla lateral [z] para capturar una imagen en la vista previa actual. El teléfono guarda automáticamente la imagen y vuelve al Modo vista previa. NOTA Mantenga presionada la tecla lateral superior para ingresar en el modo de captura cuando la tapa esté cerrada. En este momento, el tamaño de la imagen es sólo 640X480 y la imagen aparece en la LCD externa. Álbum de fotos Esta función le permite ver o editar las fotos guardadas en el teléfono. Presione la tecla programable [Menú], seleccione 1. Cámara y luego seleccione 2. Álbum de fotos. Visualización de las fotos guardadas ❶ Presione la tecla programable [Menú], seleccione 1. Cámara y luego seleccione 2. Álbum de fotos en el menú para acceder a la Lista de álbumes de fotos. 2007.2.10 12:52:27 PM Cámara ❷ Seleccione una foto de la lista y presione la tecla [o] para mostrar la lista de fotos en el álbum. ❸ Use la tecla programable [Pequeño] o [Lista] para cambiar el tipo de lista (Pequeño/Lista). ❹ Seleccione una foto y presione la tecla [o] para ampliar la vista de la foto. Presione la tecla de desplazamiento ([l/r]) para ver otras fotos en el álbum. •Borrar todos: borra todas las fotos del álbum. •Info. de archivo: visualiza la información de una foto. •Imprimir: transmite la foto seleccionada a la impresora vía Bluetooth. Presione la tecla programable [Enviar] ([]]) para transmitir la foto con el mensaje multimedia. Uso de las opciones de foto Configuración Presione la tecla programable [Opciones] ([[]) para aplicar las siguientes opciones a la foto seleccionada en el álbum. •Config.: •Papel tapiz: agrega una foto al Papel tapiz en Pantalla. La foto se configura como imagen de fondo de la pantalla principal. •Contactos: asigna una imagen fotográfica específica a los Contactos. •Enviar vía: •Mensajes mult.: adjunta la foto seleccionada y la envía como mensaje mult. •Bluetooth: Transmite la foto seleccionada vía Bluetooth. •Renombrar: cambia el nombre de una foto. (Para obtener más detalles para cambiar el nombre de una foto, consulte 7. Ingreso de texto en la página 34.) •Borrar: borra una foto. 070210_C3b_SP_at&t(00).indd 45 Presione la tecla programable [Menú], seleccione 1. Cámara y luego seleccione 3. Configuración. Cambie el valor predeterminado de la opción de cámara. •Tamaño de imagen: tamaño de la imagen que se capturará: 128X128 ó 640X480. •Sonido de disparador: Disparador/Sonrisa/321/Desactivar •Flash: Activar/Desactivar •Temporizador autom.: especifica el tiempo de retraso. Puede elegir Ninguno, 5 segs, o 10 segs. Cuando ha transcurrido el tiempo seleccionado, la cámara toma la foto. •Capturas múlt.: selecciona el número de capturas múltiples que desea (4/6/9). 45 2007.2.10 12:52:28 PM Mensajes Esta función le permite crear, enviar, leer y guardar un mensaje usando el Servicio de mensajes cortos (SMS: Mensajes de texto), Servicio de mensajes multimedia (MMS: mensajes que admiten presentación de varios tipos de medios, como imágenes a todo color y sonidos de timbre polifónicos) proporcionados por el operador de red o un servicio de correo electrónico. También están disponibles los correos de voz. También se admite la función de múltiples selecciones. Presione la tecla programable [Menú] y luego seleccione 2.Mensajes. NOTA Estas funciones están disponibles sólo si la red del proveedor de servicio las admite. Para obtener más información, comuníquese con su proveedor de servicio. Mensaje de texto Servicio de mensajes cortos (SMS) le permite enviar y recibir mensajes de texto cortos desde y hacia otros teléfonos. Mensaje mult. 46 Servicio de mensajes multimedia (MMS) es un servicio de mensajes similar al Servicio de mensajes cortos (SMS). Proporciona entrega asincrónica de mensajes 070210_C3b_SP_at&t(00).indd 46 multimedia personales. Además del contenido de texto familiar de los mensajes de texto, los mensajes multimedia pueden incluir imágenes, gráficos y/o sonido. Un mensaje MMS es una presentación multimedia independiente en una sola entrada, no un anexo al archivo de texto. Al utilizar la función MMS, el teléfono puede recibir mensajes multimedia y/o enviar un mensaje con imagen, dependiendo de la disponibilidad de MMS entregada por el proveedor de servicio. Sólo los teléfonos que admiten la función de mensajes multimedia pueden recibir o mostrar mensajes multimedia. Recepción de un nuevo mensaje Cuando recibe un nuevo mensaje, el cuadro de diálogo emergente muestra el número de mensajes no leídos y el número total de mensajes con el icono Nuevo mensaje ( ) en el área de iconos de las pantallas interna y externa. También puede oír una alerta, dependiendo de la configuración de sonido de mensaje. Para leer el o los nuevos mensajes inmediatamente, presione la tecla programable [Leer] o la tecla [o]. NOTA Para eliminar el aviso de nuevo mensaje en la pantalla, presione la tecla programable [Cancelar], la tecla [e] la tecla [c]. 2007.2.10 12:52:28 PM Mensajes Administración de memoria Las opciones Buzón de entrada, Buzón de salida, Borrador, Enviado y Plantillas comparten una cantidad determinada de memoria en el teléfono. En el Buzón de entrada, los mensajes de texto (SMS) se pueden guardar en el teléfono o en la tarjeta SIM, dependiendo de la configuración de Mensajes de texto. Cuando Guardar en en la configuración de Mensajes de texto se programa en SIM, los mensajes recibidos se guardan en la memoria del teléfono si la capacidad de la tarjeta SIM está completa. Además, incluso si Guardar en en la configuración de Mensajes de texto se programa en Teléfono, los mensajes recibidos se guardan en la tarjeta SIM si la capacidad de la memoria está completa. Al usar el Buzón de entrada, se pueden guardar hasta 100 mensajes recibidos en la memoria del teléfono. Se pueden guardar hasta 30 entradas en los otros buzones. El Buzón de entrada puede usar la memoria de la tarjeta SIM. Sólo el Buzón de entrada puede usar la memoria de la tarjeta SIM para guardar mensajes de texto (SMS). Cuando intenta guardar más de 100 mensajes en el Buzón de entrada, aparece un icono de lleno ( ). Cuando aparece el icono de lleno, no puede recibir ningún mensaje nuevo. Cuando abre el teléfono, en la pantalla aparece la notificación ”Msj. lleno, Borre”. Debe borrar uno o más de los antiguos mensajes para que quede memoria 070210_C3b_SP_at&t(00).indd 47 disponible para los nuevos mensajes. Use la opción [Borrar] dentro de cada buzón o use la opción [Borrar todos] para borrar todos los mensajes. •Escribir Nvo.: escribe un mensaje multimedia (MMS) o un mensaje de texto (SMS) •Buz. entr.: muestra los mensajes recibidos en la memoria de la tarjeta SIM y del teléfono. Puede guardar hasta 100 mensajes en la memoria del teléfono y se reciben más mensajes sólo si la capacidad de la tarjeta SIM está disponible. Por lo tanto, puede ver más de 100 mensajes en el Buzón de entrada. El “10” en [10/20] representa el número de mensajes no leídos, mientras que el “20” representa el número de mensajes guardados en el Buz. entr. •Enviado: Muestra los mensajes almacenados en la memoria del teléfono que fueron enviados. Esto depende de la configuración de Guardar mensajes. Enviado puede mostrar más de 30 mensajes. •Buzón salida: Muestra la lista de mensajes almacenados que no han sido enviados. Se puede guardar 30 mensajes en la memoria del teléfono. •Borrador: Muestra la lista de mensajes almacenados que no se completaron y se almacenaron como Borrador. Puede guardar hasta 30 mensajes en Borrador. 47 2007.2.10 12:52:28 PM Mensajes •Plantillas: Muestra la plantilla predeterminada y sus plantillas guardadas. Puede guardar hasta 30 mensajes en la memoria del teléfono (incluida la plantilla predeterminada). •Configuración: Configura el entorno para los mensajes. •Info memoria: Muestra el espacio libre de memoria de la tarjeta SIM o del teléfono. Escribir nvo. Presione la tecla programable [Menú], seleccione 2. Mensajes, seleccione 1. Escribir nvo., y luego presione la tecla [o]. Seleccione el tipo de mensaje que desea escribir. •Mensaje de texto: escribe un nuevo mensaje SMS. •Mensaje mult.: escribe un nuevo mensaje MMS. Mensaje de texto 48 ❶ Creación de un mensaje de texto. En la parte superior de la pantalla, aparece el número de caracteres restantes y puede ver el icono [ ]. ❷ Mientras ingresa un mensaje de texto, presione la tecla programable [Opciones] ([[]) para utilizar más opciones de edición. Use la tecla [u/d] para seleccionar un elemento y presione la tecla [o]. 070210_C3b_SP_at&t(00).indd 48 •Añadir plantilla: obtiene una plantilla. •Editar asunto: edita el asunto del mensaje. •Guardar: guarda los mensajes en la memoria del teléfono. •Idioma: selecciona Inglés, Español o Francés. •Mis palabras: Administra las palabras que ha agregado al diccionario. Puede editar y borrar palabras (Para obtener más información sobre Mis palabras, consulte Mis palabras en la página 35) ❸ Una vez creado el mensaje, presione la tecla [o] para enviarlo. Si desea enviar un Mensaje de texto a un número nuevo que no está almacenado, presione la tecla [u] para ir a Añadir contacto, y luego simplemente ingrese el número (Añadir contacto es sólo para ingresar números que no son buscados). Si desea buscar un nombre guardado, ingrese el nombre usando el teclado. También puede añadir números desde Registros de llamadas. Para buscar un número en la lista de Todas las llamadas, presione la tecla programable [Registro de llamadas], seleccione el número correcto y luego presione la tecla [o] para marcarlo. Cuando haya terminado de ingresar la información del destinatario, presione la tecla programable [Enviar]. 2007.2.10 12:52:29 PM Mensajes Mensaje mult. ❶ Cuando aparece la página de [Sin asunto], presione la tecla programable [Opciones] ([[]) para utilizar las siguientes [Opc. Editor]. •Editar asunto: edita el asunto del mensaje. •Añadir objetos: añade texto, imagen o sonido. •Añadir plantilla: añade una plantilla de mensaje multimedia. Esta función sólo está disponible cuando no hay ningún elemento en la diapositiva. Con más de una diapositiva, Añadir plantilla no está disponible. •Configuración: el usuario sólo puede cambiar la configuración para el mensaje que se está escribiendo. La configuración de Cronom. Diapos., Diseño de pág. y Prioridad sólo se puede establecer mientras se está escribiendo un mensaje. Sin embargo, la configuración de Inf. de entrega y Leer informes también se puede establecer presionando 2. Mensajes, luego 10. Configuración, y después 3.Mensajes mult. •Cronom. Diapos.: programa el tiempo que se mostrará el mensaje recibido. La pantalla se desplaza automáticamente a la siguiente página de diapositiva transcurrido el tiempo especificado. •Diseño de pág.: dispone la posición de la imagen y 070210_C3b_SP_at&t(00).indd 49 texto mostrado en la página de diapositiva. Puede definir Imagen arriba o Texto arriba. •Inf. de entrega: cuando esta opción está programada en [Activar], la red le informa si el mensaje se entregó o no con éxito (esto depende de la red). •Leer informes: cuando esta opción está programada en [Activar], el teléfono del destinatario envía una respuesta que le permite saber cuándo fue leído su mensaje. (si la red del portador admite esta funcionalidad) •Prioridad: programe en Normal, Alta o Baja. ❷ Cuando aparece la página [Sin asunto], presione la tecla programable [Añadir] ([]]) para añadir un objeto. •Añadir texto: añade texto nuevo. •Añadir imagen: añade la foto o la imagen descargada. Presione la tecla [o] para seleccionar el submenú. •Tomar una foto: crea una nueva foto. •Álbum de fotos: foto ya guardada. •Descargada: imagen descargada. (Para obtener más detalles, consulte Gráficos en la página 68.) •Añadir sonido: añade la nota de voz o el sonido descargado. Presione la tecla [o] para seleccionar el 49 2007.2.10 12:52:29 PM Mensajes submenú. •Nueva nota de voz: crea una nueva nota de grabación. •Nota de voz: sonido ya grabado. •Descargado: sonido descargado. (Para obtener más detalles, consulte Audio en la página 67 y Nota de voz en la página 73.) •Añadir diapo.: añade una nueva diapositiva. NOTA una vez añadido el texto, imagen o sonido, si presiona la tecla programable [Añadir] ([]]) aparece el menú Añadir diapo.. Para moverse a una diapositiva diferente, presione la tecla [l/r]. 50 ❸ Luego de escribir el mensaje, presione la tecla [o]. Y luego presione la tecla programable [Opciones] ([[]) para usar las siguientes [Opc. Editor]. •Vista previa: muestra el mensaje tal como aparecerá en el teléfono del destinatario; usted puede volver a la pantalla de edición presionando la tecla programable [Editor] ([[]). •Borrar texto/imagen/sonido: borra el texto, la imagen o el sonido seleccionado de la página de diapositiva. •Añadir objetos: agrega imagen, sonido y objetos de diapositiva. •Guardar como borrador: guarda los mensajes en la 070210_C3b_SP_at&t(00).indd 50 memoria del teléfono. •Borrar diapo.: borra la diapositiva seleccionada. NOTA Este menú aparece cuando existe más de una diapositiva. •Editar asunto: edita el asunto. •Configuración: el usuario sólo puede cambiar la configuración para el mensaje que se está escribiendo, sin importar la configuración general. Para encontrar dicha configuración, presione la tecla programable [Menú], seleccione 2. Mensajes, seleccione 10. Configuración y luego seleccione 3.Mensajes mult. •Cronom. Diapos.: programa el tiempo que se mostrará el mensaje recibido. La pantalla se desplaza automáticamente a la siguiente página de diapositiva transcurrido el tiempo especificado. •Diseño de pág.: dispone la posición de la imagen y del texto mostrado en la página de diapositiva. Puede definir Imagen arriba o Texto arriba. •Inf. de entrega: cuando esta opción está programada en [Activar], la red le informa si el mensaje se entregó o no con éxito (esto depende de la red). •Leer informes: cuando esta opción está programada en [Activar], el teléfono del destinatario envía una respuesta que le permite saber cuándo fue leído 2007.2.10 12:52:30 PM Mensajes su mensaje, si la red del portador admite esta funcionalidad. •Prioridad: programe en Normal, Alta o Baja. ❹ Después de escribir el mensaje, si el usuario desea cambiar el objeto ya añadido, presione la tecla [u/d] para mover el objeto ya añadido, y presione la tecla programable [Editar] o [Sus.] ([]]). Esta tecla se vincula automáticamente para editar el texto o sustituir la imagen o el sonido. •Editar: edita el texto •Sustituir imagen: sustituye la imagen/foto seleccionada con una imagen diferente seleccionada del submenú. •Tomar una foto: crea una nueva foto •Álbum de fotos: foto ya guardada •Descargada: imagen descargada •Sustituir sonido: sustituye el sonido seleccionado con un sonido diferente seleccionado del submenú. •Nueva nota de voz: crea una nueva nota de grabación •Nota de voz: sonido ya grabado •Descargado: sonido descargado. ❺ Cuando haya terminado de crear el mensaje, presione la tecla [o] para enviarlo. Si desea enviar un Mensaje 070210_C3b_SP_at&t(00).indd 51 Multimedia a un número nuevo o a una dirección de correo que no está almacenada, presione la tecla [u] para ir a Añadir contacto, y luego simplemente ingrese el número o la dirección de correo (Añadir contacto es sólo para ingresar números o direcciones de correo que no son buscados). Si desea buscar un nombre guardado, ingrese el nombre usando el teclado. También puede añadir números desde Registros de llamadas. Para encontrar el menú Registro de llamadas, presione la tecla programable [Opciones]. •Registros de llamadas: muestra las llamadas recientes •CC (Copia de carbón): envía el mensaje tanto al destinatario como a un tercero de Contactos. •CCO (Copia de carbón oculta): envía el mensaje a un tercero, pero no lo notifica a los otros destinatarios de Contactos. Después de seleccionar el número correcto, presione la tecla [o] para marcarlo. Cuando haya terminado de ingresar la información del destinatario, presione la tecla programable [Enviar]. NOTA Para enviar un mensaje de texto o MMS a alguien que no se encuentra en sus contactos, ingrese el número en la pantalla en reposo, seleccione la tecla programable derecha y luego seleccione el tipo de mensaje. 51 2007.2.10 12:52:30 PM Mensajes NOTA Si el tamaño del Mensaje multimedia excede el límite de transmisión (100 Kb), aparecerá un mensaje informativo de advertencia. Éste se guarda automáticamente en la carpeta Enviado si la transmisión resulta exitosa. Buz. entr. 52 Presione la tecla programable [Menú], seleccione 2. Mensajes, seleccione 2. Buz. entr. y luego presione la tecla [o] para mostrar los mensajes recibidos uno por uno. Para escribir un nuevo mensaje, presione la tecla programable [Respon.] en el extremo inferior derecho. Puede recibir un aviso de mensaje multimedia a través de la red y leer sólo el mensaje multimedia descargado. También puede recibir un mensaje de texto y correo de voz. En el caso de un mensaje de texto, si están disponibles en los Contactos, el nombre del remitente y texto inicial aparece con la lista de mensajes. En el caso de mensajes multimedia, la lista de mensajes aparece con el número de teléfono o nombre del remitente y el asunto del mensaje. De acuerdo con el tipo de mensaje, la lista de mensajes muestra los siguientes iconos: Mensaje de texto no leído en la tarjeta SIM Mensaje de texto leído en la tarjeta SIM Mensaje de texto no leído en el teléfono 070210_C3b_SP_at&t(00).indd 52 Mensaje de texto leído en el teléfono Mensaje multimedia no leído Mensaje multimedia leído ❶ Seleccione la tecla programable [Opciones] ([[]) en la parte inferior de la lista de mensajes para seleccionar una de las siguientes opciones. •Dev. llam.: llama al remitente del mensaje. •Borrar: borra el mensaje seleccionado. •Borrar todos los msjs. leídos: borra todos los mensajes recibidos leídos. •Borrar todos: borra todos los mensajes del Buz. entr. •Transferir: envía el mensaje recibido a otro destinatario. •Mover a Teléfono (SIM): guarda el mensaje en la memoria del teléfono (en la tarjeta SIM) si el mensaje está guardado en el teléfono (en la tarjeta SIM). Sólo mensajes de texto disponibles. •Responder a todos: responde al remitente del mensaje y al tercero que recibió el mensaje. (Sólo aparece en el mensaje multimedia.) ❷ Seleccione la tecla programable ([]]) en la parte inferior de la lista de mensajes para seleccionar la siguiente opción. 2007.2.10 12:52:31 PM Mensajes •Respon.: responde al remitente del mensaje. ❸ Seleccione la tecla programable [Opciones] ([[]) en la parte inferior de la vista de mensajes para seleccionar una de las siguientes opciones. •Responder a todos: responde al remitente del mensaje y al tercero que recibió el mensaje. (Sólo aparece en el mensaje multimedia.) •Borrar: borra el mensaje seleccionado. •Transferir: envía el mensaje recibido a otro destinatario. •Dev. llam.: llama al remitente del mensaje. •Guardar Núm. y Correo: extrae un número y el correo del mensaje de texto. Puede guardarlo como un Contacto. - Cuando seleccione el número en la lista. 1) Si presiona la tecla [s], puede llamar a la persona con ese número. 2) Presione la tecla [o]. •Guardar nuevo: crea un nuevo contacto. •Añadir al anterior: se agrega al contacto existente y guarda el contacto •Enviar mensaje: envía un mensaje a un destinatario seleccionado. - Cuando seleccione el correo en la lista 070210_C3b_SP_at&t(00).indd 53 1) Presione la tecla [o]. •Guardar nuevo: crea un nuevo contacto. •Añadir al anterior: se agrega al contacto existente y guarda el contacto. •Enviar mensaje: envía un mensaje a un destinatario seleccionado. •Guardar URLs: extrae una dirección URL del mensaje de texto. Puede guardarlo como un favorito de MEdia Net. Si presiona la tecla [o], puede conectarse al URL. •Guardar objetos: extrae un objeto del mensaje multimedia. Puede guardarlo en una de las categorías de Mi material. (Sólo aparece en el mensaje multimedia.) 2) Seleccione la tecla programable ([]]) en la parte inferior de la vista de mensajes para seleccionar la siguiente función. •Respon.: responde al remitente del mensaje. MI Use Mensajero instantáneo (MI) para enviar y recibir mensajes cortos y simples que se entregan inmediatamente. 53 2007.2.10 12:52:31 PM Mensajes Inicio de Mensajero instantáneo ❶ Presione la tecla programable [Menú], seleccione 2. Mensajes y luego seleccione 3.MI. ❷ Resalte la aplicación MI establecida y presione la tecla programable [Selecc.] ([[]) o la tecla [o]. ❸ Ingrese su ID de inicio de sesión y Contraseña y luego seleccione Conectar. ❹ Seleccione la persona con la que desea hablar. ❺ Inicie la conversación. Visualización del registro de conversaciones Puede ver un registro de sus conversaciones en el Historial guardado de Mensajero instantáneo. Enviado 54 Enviado guarda todos los mensajes enviados desde el teléfono. Presione la tecla programable [Menú], seleccione 2. Mensajes y luego seleccione 4.Enviado. Los siguientes iconos indican el estado del mensaje SMS guardado en Enviado: Mensaje SMS enviado (normal) Los siguientes iconos indican el estado del mensaje MMS guardado en Enviado: 070210_C3b_SP_at&t(00).indd 54 Mensaje MMS enviado (normal) Mensaje MMS enviado Mensaje MMS vencido o rechazado Mensaje MMS leído Mensaje MMS borrado Mensaje MMS enviado y leído Mensaje MMS enviado y borrado Para administrar mensajes en Enviado: ❶ Presione la tecla programable [Editar] en el extremo inferior derecho para editar y enviar un mensaje Enviado usando el número del destinatario. ❷ Seleccione la tecla programable [Opciones] en la parte inferior de la lista de mensajes para seleccionar una de las siguientes funciones. •Borrar: borra el mensaje seleccionado. •Borrar todos: borra todos los mensajes en Enviado. •Transferir: envía el mensaje Enviado a otro destinatario. •Detalles: muestra los detalles (estado de entrega/lectura, fecha y hora de entrega/lectura de cada destino) 2007.2.10 12:52:32 PM Mensajes Buzón salida Buzón salida contiene todos los mensajes que aún no ha enviado. Presione la tecla programable [Menú], seleccione 2. Mensajes, seleccione 5. Buzón salida y presione la tecla [o]. Para administrar mensajes en el Buzón salida: ❶ Presione la tecla programable [Enviar] ([]]) en el extremo inferior derecho para enviar nuevamente los mensajes fallidos. ❷ Presione la tecla programable [Opciones] ([[]) en el extremo inferior izquierdo para seleccionar las siguientes funciones. •Borrar: borra el mensaje. •Borrar todos: borra todos los mensajes del Buzón salida. •Editar: edita y envía un mensaje no enviado usando el número del destinatario. Borrador Borrador contiene todos los mensajes editados y guardados. Presione la tecla programable [Menú], seleccione 2. Mensajes, seleccione 6. Borrador y presione la tecla [o]. Para administrar mensajes en Borrador: Presione la tecla programable [Opciones] ([[]) en el extremo inferior izquierdo para seleccionar las siguientes funciones. •Borrar: borra el mensaje. •Borrar todos: borra todos los mensajes en Borrador. Msjs naveg El teléfono puede recibir mensajes del navegador provenientes del proveedor de servicio. Presione la tecla programable [Menú], seleccione 2. Mensajes y luego seleccione 7.Msjs naveg, donde aparece la cantidad de mensajes del navegador no leídos. Cuando se encuentre en la lista de mensajes del navegador, presione la tecla programable [Opciones]([[]), para seleccionar una de las siguientes funciones. •Borrar: borra un mensaje. •Borrar todos: borra todos los mensajes en Buz. entr. •Ok: muestra la información para el mensaje seleccionado. Además, puede presionar la tecla programable [Ir a] ([]]), para conectarse con la página WAP correspondiente. 55 070210_C3b_SP_at&t(00).indd 55 2007.2.10 12:52:33 PM Mensajes Correo de voz 56 Si está ocupado o no puede contestar cuando alguien llama, puede transferir la llamada al servicio de mensajes de correo de voz. Una vez que la persona que llama deja un mensaje, el servicio de correo de voz indica que hay un mensaje. Presione la tecla programable [Menú], seleccione 2. Mensajes, seleccione 8.Correo de voz y presione la tecla [o]. Puede escuchar el correo de voz llamando al centro de correo de voz. •Mensajes mult.: escribe una nueva plantilla multimedia. •Borrar: borra una plantilla que ha definido. La plantilla predeterminada no aparece. •Borrar todos: borra todos los mensajes en el buzón de plantillas. La plantilla predeterminada no aparece. •Editar: edita la plantilla seleccionada. ❷ Seleccione un mensaje y presione la tecla programable [Enviar] ([]]) para enviar la plantilla seleccionada. Plantillas Configuración Una plantilla contiene un bloque de texto para inserción rápida en mensajes de texto y mensajes multimedia. Presione la tecla programable [Menú], seleccione 2. Mensajes y luego seleccione 9.Plantillas. Si no existe ninguna plantilla creada por el usuario, sólo aparece el menú Crear en la lista. ❶ Seleccione un texto o un menú de plantilla multimedia y presione la tecla programable [Opciones] ([[]) a la izquierda para ver las opciones asociadas. •Crear: genera una nueva plantilla. No está disponible si el espacio para plantillas está lleno. •Mensaje de texto: escribe una nueva plantilla de texto. Antes de enviar o recibir mensajes con el teléfono, primero deber programar su configuración. Esta información normalmente la ingresa previamente en el teléfono el proveedor de servicio. Presione la tecla programable [Menú], seleccione 2. Mensajes y luego seleccione 10. Configuración. 070210_C3b_SP_at&t(00).indd 56 Config. común Seleccione [Menú], seleccione 2. Mensajes, seleccione 10. Configuración, seleccione 1. Config. común, y presione la tecla [o]. Para programar una configuración común de mensajes, use las siguientes funciones: •Modo Edición Predet.: se programa en modo Alfabético 2007.2.10 12:52:33 PM Mensajes (modo Multi-tap) o en modo Predictivo (modo T9). •Guardar mensajes: si está programado en Activar, los mensajes enviados se almacenarán en [Enviado]. •Autoborrado de mensajes leídos: Si está programado en Activar, con el buzón de entrada lleno, cuando el teléfono recibe un nuevo mensaje, borra el mensaje más antiguo leído y guarda el nuevo mensaje. Mensaje de texto Presione la tecla programable [Menú], seleccione 2. Mensajes, seleccione 10.Configuración, seleccione 2.Mensajes de texto y presione la tecla [o]. Para configurar información de mensaje de texto predeterminada, use las siguientes funciones: •Centro de msj.: almacena o cambia el número del centro de mensajes que se requiere al enviar un mensaje. •Pta enl. corr: almacena o cambia el número de la puerta de enlace del correo que se requiere al enviar un correo. •Guardar en: programa el almacenamiento del mensaje de texto en la tarjeta SIM o en el teléfono. •Formato de msj.: programa el tipo de mensaje en Normal, Fax, Correo de voz, ERMES, Buscador nacional, X.400 o Internet. La red convierte los mensajes al formato seleccionado. 070210_C3b_SP_at&t(00).indd 57 NOTA El formato de los mensajes depende de la tarjeta SIM. Mensaje mult. Presione la tecla programable [Menú], seleccione 2. Mensajes, seleccione 10.Configuración, seleccione 3. Mensajes mult. y presione la tecla [o]. Para configurar la información de Mensajes multimedia predeterminada, use las siguientes funciones: •Perfiles: programa la configuración de los perfiles de los mensajes multimedia. •Inf. de entrega: cuando esta opción está programada en [Activar], la red le informa si el mensaje se entregó o no con éxito. •Leer informes: cuando esta opción está programada en [Activar], el teléfono del destinatario envía una respuesta que le permite saber cuándo fue leído su mensaje. •Validez de msj.: programa el tiempo que el mensaje se almacena en el centro de mensajes mientras intenta la entrega. Puede seleccionar una de las siguientes opciones 1 hora, 2 horas, 6 horas, 1 día, 2 días, 1 semana, 4 semanas, 6 meses o Máximo. NOTA Si reinicia el teléfono, todas las configuraciones del usuario de los Perfiles se eliminarán y volverán a la configuración predeterminada de fábrica. 57 2007.2.10 12:52:33 PM Mensajes Correo de voz Presione la tecla programable [Menú], seleccione 2. Mensajes, seleccione 10.Configuración, seleccione 4.Correo de voz y presione la tecla [o]. Este número normalmente lo ingresa previamente el portador durante el proceso de activación. Mensaje SL del navegador Presione la tecla programable [Menú] y seleccione 2. Mensajes, 10.Configuración, 5.Mensaje SL del navegador; luego, presione la tecla [o]. •Recibir: configura la recepción de mensajes del navegador. El icono ( ) aparece cuando el usuario recibe un nuevo mensaje. Cuando el usuario recibe un mensaje SL (Carga de servicio) •Activar pantalla Alerta de mensajes del navegador. Guarda y sale del servicio de Mensajes del navegador. •Desactivar no acepta ningún mensaje. •Ning. alerta Funciona al igual que con el Modo Activado sin la alerta de audio. Info. Memoria Esta función muestra la cantidad utilizada y disponible de memoria en el teléfono. Presione la tecla programable [Menú], seleccione 2. Mensajes y luego seleccione 11.Info memoria para mostrar el espacio de memoria libre de mensajes de texto y mensajes multimedia. 1. Cuando presiona la tecla programable [Aceptar] ([[]) en la pantalla Alerta de mensajes del navegador. Muestra la información para el mensaje seleccionado ·Ir a: ingresa al navegador. ·Borrar: borra el mensaje recibido. ·Buz. entr.: muestra la lista de Mensajes del Navegador 58 2. Cuando presiona la tecla programable [Salir] ([]]) en la 070210_C3b_SP_at&t(00).indd 58 2007.2.10 12:52:34 PM Llamadas recientes Esta función muestra las llamadas perdidas, llamadas recibidas y llamadas marcadas. Puede borrar un registro de llamadas y ver la información del Tiempo de llam. e Info. de GPRS en este menú. Presione la tecla [s] para ver las llamadas recientes en el modo de espera o seleccione la tecla programable [Menú] y luego seleccione 3. Llamadas recientes. NOTA Si el Contacto contiene el número de teléfono que desea marcar, aparecerá el nombre. Alternativamente, el número de teléfono, fecha y hora aparece en la pantalla. Presione la tecla [s] cuando el cursor esté en el número o nombre para marcar el número. Perdidas Esta función muestra la lista de llamadas perdidas con la hora y fecha de éstas como también el número o nombre de la persona que llamó. Presione la tecla programable [Menú], seleccione 3. Llamadas recientes y luego seleccione 1. Perdidas. Presione la tecla [u/d] para seleccionar la llamada perdida. Para administrar las llamadas perdidas, presione la tecla programable [Opciones] ([[]) para seleccionar entre las 070210_C3b_SP_at&t(00).indd 59 siguientes funciones. •Llamar: llama al número seleccionado. •Guardar número: si el número seleccionado no está guardado en la tarjeta SIM o en el teléfono, aparecerá esta opción. Guarda el número seleccionado en la tarjeta SIM o en el teléfono. •Borrar: borra el número seleccionado. •Borrar todos: borra todos los registros de llamadas perdidas de la lista. Presione la tecla programable [Mensaje] ([]]) para enviar un mensaje a la persona de la llamada perdida. Llam. recibidas Esta función muestra la lista de llamadas recibidas con la hora y fecha de éstas y también el número o nombre de la persona que llamó. Presione la tecla programable [Menú], seleccione 3. Llamadas recientes y luego seleccione 2. Llam. recibidas. Presione la tecla [u/d] para seleccionar la llamada recibida. Para administrar las llamadas recibidas, presione la tecla programable [Opciones] ([[]) para seleccionar entre las siguientes funciones. 59 2007.2.10 12:52:34 PM Llamadas recientes 60 •Llamar: llama al número seleccionado. •Guardar número: si el número seleccionado no está guardado en la tarjeta SIM o en el teléfono, aparecerá esta opción. Guarde el número seleccionado en la tarjeta SIM o en el teléfono. •Borrar: borra el número seleccionado. •Borrar todos: borra todos los registros de llamadas recibidas de la lista. Presione la tecla programable [Mensaje] ([]]) para enviar un mensaje a la persona que lo llamó. •Guardar número: si el número seleccionado no está guardado en la tarjeta SIM o en el teléfono, aparecerá esta opción. Guarde el número seleccionado en la tarjeta SIM o en el teléfono. •Borrar: borra el número seleccionado. •Borrar todos: borra todos los registros de llamadas marcadas de la lista. Presione la tecla programable [Mensaje] ([]]) para enviar un mensaje a la persona si perdió la llamada. Llam. marcadas Esta función le permite optar por borrar todos los registros de llamadas perdidas, recibidas, marcadas o borrar todos los registros de llamadas. Presione la tecla programable [Menú], seleccione 3. Llamadas recientes y luego seleccione 4. Borrar registros de llam. Seleccione Todas las llamadas para borrar todos los registros de llamadas. Presione [Sí] o [No] para confirmar que desea ejecutar o cancelar esta función. Esta función muestra la lista de llamadas marcadas con la hora y fecha de éstas y también el número o nombre del destinatario. Presione la tecla programable [Menú], seleccione 3. Llamadas recientes y luego seleccione 3. Llam. marcadas. Presione la tecla [u/d] para seleccionar una llamada marcada. Para administrar las llamadas marcadas, presione la tecla programable [Opciones] ([[]) para seleccionar entre las siguientes funciones. •Llamar: llama al número seleccionado. 070210_C3b_SP_at&t(00).indd 60 Borrar registros de llam. NOTA Si no existe ningún registro, aparece el mensaje “Lista vacía”. 2007.2.10 12:52:35 PM Llamadas recientes & MEdia Net Tiempo de llam. Esta función muestra información sobre los tiempos de las llamadas. •Presione la tecla programable [Menú], seleccione 3. Llamadas recientes y luego seleccione 5. Tiempo de llam. Aparece la siguiente información. •Última llam.: muestra la fecha y hora. •Llamadas recibidas, marcadas y total de llamadas: muestra el tiempo total de las llamadas. •Reiniciar tpo. llam.: reinicia el cronómetro. Para confirmar el reinicio de todos los tiempos de llamadas, ingrese la contraseña de su teléfono, luego presione la tecla [o]. Info. GPRS Esta función muestra la siguiente información sobre el volumen de datos GPRS transmitidos. Presione la tecla programable [Menú], seleccione 3. Llamadas recientes y luego seleccione 6. Info. GPRS. •Info. actual: muestra el volumen total de datos GPRS transmitidos en la sesión actual en Kbytes. •Última Info.: muestra el volumen total de datos GPRS transmitidos en las sesiones anteriores, en Kbytes. •Info. total: muestra el volumen total de datos GPRS transmitidos y recibidos, en Kbytes. •Eliminar registros: borra los registros que indican la cantidad de datos GPRS que ha transmitido. MEdia Net Inicio de MEdia Net Puede acceder a Internet con MEdia Net. Esto significa que puede conectarse a Internet en cualquier momento y lugar, siempre que tenga cobertura de red. Esta función contacta la red para cargar la página principal de su proveedor de servicio Web inalámbrico. También puede presionar la tecla [o] en el modo de reposo. Presione la tecla programable [Menú], seleccione 4. MEdia Net y luego seleccione 1. Inicio de MEdia Net. El contexto de la página principal de inicio de MEdia Net depende de su proveedor de servicio Web inalámbrico. Para desplazarse por la pantalla, use las teclas [u] y [d]. 61 070210_C3b_SP_at&t(00).indd 61 2007.2.10 12:52:35 PM MEdia Net Servicio de configuraciones OTA Aprovisionamiento OTA/WAP Para utilizar MEdia Net, debe contar con la configuración de conexión correcta en el teléfono. Puede agregar o editar manualmente el perfil WAP o recibir la información de configuración como un tipo de mensaje de configuración, a través de un operador o proveedor de servicio. Si recibe la información de configuración de un operador o proveedor de servicio, ésta se almacenará automáticamente en el teléfono. Observe que deberá realizar algunos pasos que aparecen en pantalla para guardar y activar esta configuración. Favoritos 62 Esta función le permite colocar una dirección de Internet como favorito usando MEdia Net tal como lo haría con el navegador de Internet de su PC. ❶ Presione la tecla programable [Menú], seleccione 4. MEdia Net y luego seleccione 2. Favoritos. ❷ Para registrar un URL y nombre en el número de la Lista de favoritos vacío más cercano, vaya al menú 6. Vacío y luego presione la tecla programable [Añadir] a 070210_C3b_SP_at&t(00).indd 62 la derecha. Para administrar los favoritos existentes, seleccione el favorito y luego presione la tecla programable [Opciones] ([[]) para seleccionar entre las siguientes funciones. •Editar: edita el URL y nombre del favorito. •Borrar: borra un favorito de la lista. •Enviar mensaje: envía el favorito seleccionado actualmente vía SMS. NOTA No puede utilizar las opciones [Editar] y [Borrar] para los favoritos predeterminados. ❸ Presione la tecla programable [Ir] []] para ir al sitio relacionado. Ir a URL Esta función le permite ingresar directamente la dirección de un URL y conectarse a éste. ❶ Presione la tecla programable [Menú], seleccione 4. MEdia Net y luego seleccione 3. Ir a URL. ❷ Ingrese el URL al que desea ir, luego presione la tecla [o]. 2007.2.10 12:52:35 PM MEdia Net Perfiles Esta función selecciona o edita los perfiles de conexión WAP en el teléfono. NOTA La configuración para el servicio WAP ya está ingresada según lo solicitado por su proveedor de servicio. Se debe tener cuidado al realizar cualquier modificación a un perfil, ya que esto podría hacer que WAP no funcionara correctamente. Si su teléfono es compatible con mensajes OTA (del inglés Over The Air, por aire). Éstos los utilizan los proveedores de servicio para enviar detalles de las conexiones directamente a su teléfono. Para obtener detalles de este servicio, comuníquese con su proveedor de servicio. ❶ Presione la tecla programable [Menú], seleccione 4.MEdia Net y luego seleccione 4.Perfiles. ❷ Para seleccionar un perfil, resáltelo en la Lista de perfiles y luego presione la tecla [o]. No puede seleccionar un Perfil no editado. Para editar un perfil, selecciónelo en la Lista de perfiles y luego presione la tecla programable [Editar] para seleccionar entre las siguientes funciones. •Nombre de perfil: presione la tecla [o] para cambiar el nombre del perfil. •Página principal: presione la tecla [o] para editar la página principal proporcionada por su proveedor de 070210_C3b_SP_at&t(00).indd 63 servicio. •Tipo de conexión: seleccione WAP o HTTP. •Config. GSM: esta función le permite programar el proxy de red GSM ingresando la siguiente información. •Puerta de enlace/Proxy: si programa el Tipo de conexión en WAP, aparece la Puerta de enlace. Si la programa en HTTP, aparece Proxy. Presione la tecla [o] para mostrar las subfunciones, como Dirección IP y Puerto IP, luego ingrese la información correspondiente para cada una de las siguientes subfunciones, ingresando la información proporcionada por su proveedor de servicio. •Tipo. Llam. de datos: presione la tecla de desplazamiento izquierda o derecha para seleccionar ISDN o Análogo. •Marcar número: presione la tecla [o] para ingresar el número de marcación correspondiente. •Login ID: presione la tecla [o] para ingresar el login ID correspondiente. •Contraseña: presione la tecla [o] para ingresar la contraseña correspondiente. •Config. GPRS: este menú le permite programar el proxy de red GPRS ingresando la siguiente información. 63 2007.2.10 12:52:36 PM MEdia Net •Puerta de enlace/Proxy: si programa el Tipo de conexión en WAP, aparece la Puerta de enlace. Si la programa en HTTP, aparece Proxy. Presione la tecla [o] para mostrar las subfunciones, como Dirección IP y Puerto IP, luego ingrese la información correspondiente para cada una de las siguientes subfunciones, ingresando la información proporcionada por su proveedor de servicio. •Punto de acceso: presione la tecla [o] para ingresar el Punto de acceso correspondiente. •Login ID: presione la tecla [o] para ingresar el login ID correspondiente. •Contraseña: presione la tecla [o] para ingresar la contraseña correspondiente. •Config. DNS: ingrese la dirección IP correspondiente para el Servidor de nombre de dominio. Puede ingresar el DNS primario y secundario. NOTA Esta función está disponible sólo cuando el Tipo de conexión se programa en HTTP. 64 •Portador: seleccione el tipo de portador para cada tipo de acceso de red. Presione la tecla de desplazamiento izquierda o derecha para seleccionar Sólo GSM o Sólo GPRS. •Reiniciar perfiles: presione la tecla [o] para reiniciar la 070210_C3b_SP_at&t(00).indd 64 configuración del perfil seleccionado. Presione la tecla de desplazamiento izquierda o derecha para seleccionar Sí o No. Caché Esta función configura el caché de su teléfono. Esta función se usa para almacenar páginas WAP directamente en el teléfono, de modo que éstas aparezcan rápidamente cuando se vuelva a ellas. Modo Caché Esta función configura la revisión de la memoria caché, la cual verifica si la información de la página WAP ya está almacenada en la memoria caché del teléfono. ❶ Presione la tecla programable [Menú], seleccione 4.MEdia Net, 5.Caché, y luego 1.Modo Caché. ❷ Seleccione una de las siguientes opciones. •Verif. siempre: el caché siempre se verifica cuando se carga un URL. •Nunca verif.: el caché nunca se verifica. Eliminar caché Esta función borra todos los datos almacenados en el caché (páginas WAP recientemente visitadas). 2007.2.10 12:52:36 PM MEdia Net & AT&T Mall Presione la tecla programable [Menú], seleccione 4.MEdia Net, 5.Caché, y luego 2.Eliminar caché. Certif. Seguridad Presione la tecla programable [Menú], seleccione 4.MEdia Net y luego seleccione 6.Certif. Seguridad. Presione la tecla [o] para ver el certificado de seguridad guardado. Versión Esta función muestra la versión de software del navegador WAP del teléfono. Presione la tecla programable [Menú], seleccione 4.MEdia Net y luego seleccione 7.Versión. AT&T Mall Comprar timbres Cuando se selecciona este menú se inicia el navegador Web para el menú de Timbres AT&T. Presione la tecla programable [Menú], seleccione 5.AT&T Mall, y luego seleccione 1. Comprar timbres. 070210_C3b_SP_at&t(00).indd 65 Comprar juegos Cuando se selecciona este menú se inicia el navegador Web para el menú de Juegos AT&T. Presione la tecla programable [Menú], seleccione 5.AT&T Mall, y luego seleccione 2. Comprar juegos. Comprar gráficos Cuando se selecciona este menú se inicia el navegador de Web para los Gráficos AT&T. Presione la tecla programable [Menú], seleccione 5.AT&T Mall, y luego seleccione 3. Comprar gráficos. Comprar multimedia Cuando se selecciona este menú se inicia el navegador Web para el menú de Multimedia AT&T. Presione la tecla programable [Menú], seleccione 5.AT&T Mall, y luego seleccione 4. Comprar multimedia. Comprar aplicaciones Cuando se selecciona este menú se inicia el navegador Web para el menú de Aplicaciones AT&T. Presione la tecla programable [Menú], seleccione 5. AT&T Mall, y luego seleccione 5. Comprar aplicaciones. 65 2007.2.10 12:52:36 PM AT&T Mall & Correo de celular Inicio de MEdia Net Para obtener más detalles, sobre 4. MEdia Net, consulte la página 62. Correo de celular Esta función le permite enviar un correo a alguien y leer su correo. Inicio de Correo de celular ❶ Presione la tecla programable [Menú] y seleccione 6. Correo de celular. ❷ Resalte la cuenta de correo establecida y presione la tecla programable [Selecc.] ([[]) o la tecla [o]. ❸ Ingrese su ID de inicio de sesión y Contraseña y luego seleccione Conectar. •Leer: permite leer el correo seleccionado. •Borrar: borra el correo seleccionado. •Marcar para borrar: selecciona el correo que desea borrar. Si selecciona uno o más correos, aparece la opción [Borrar marcados]. •Borrar marcados: borra los correos marcados. •Desmar.: desmarca el correo seleccionado para borrar (Borrado múltiple). •Crear nvo. (escribir en AOL): escribe el nuevo correo. •Ir a la carpeta: enumera las carpetas del correo. •Alertas de correo: programa la funcionalidad de alertas de nuevo correo. •Verificar correo (recuperar correo en AIM & AOL): recupera el correo del servidor de correo. •Búsqueda Yahoo (sólo Yahoo): Navega por la página principal de búsqueda de Yahoo. •Preferencias: programa los parámetros de pantalla y configuración. 66 070210_C3b_SP_at&t(00).indd 66 2007.2.10 12:52:37 PM Mi material DRM/ Bloqueo de transferencia El teléfono admite un sistema de Administración de derechos digitales (DRM) para proteger el contenido adquirido. El Bloqueo de transferencia puede proteger cierto tipo de contenido (por ejemplo, timbres, papel tapiz), lo que significa que el contenido protegido no puede ser transferido a otros dispositivos, entre ellos otros teléfonos y computadoras de escritorio. Con respecto a DRM, aparece un sonido de transferencia bloqueada con un icono ( ) en la lista de sonidos. Juegos y apl. Comprar juegos Cuando se selecciona este menú se inicia el navegador Web para el menú de Arcade AT&T. Juegos Presione la tecla programable [Menú], seleccione 7. Mi material y luego seleccione 1.Juegos y apl. en el menú para ver los Juegos Java. La lista está almacenada en el teléfono. Después de ir al juego seleccionado, usando la tecla 070210_C3b_SP_at&t(00).indd 67 de desplazamiento, presione la tecla [o] o la tecla programable [Ejecutar] para ejecutar el juego y presione la tecla programable [Opciones] para ver lo siguiente. •Info: muestra la información sobre el juego seleccionado. •Borrar: borra el juego seleccionado. (No puede borrar el juego predeterminado.) •Actualizar: actualiza la versión del juego seleccionado. (No puede actualizar el juego predeterminado.) •Permisos: configura los permisos relacionados con cada función cuando el juego seleccionado realiza una función específica. •Versión de VM: muestra la versión de JAVA que admite la Java VM (máquina virtual) incorporada. Audio Comprar timbres Cuando se selecciona este menú se inicia el navegador Web para el menú de Timbres AT&T. Audio Reproduce sonido en su teléfono o edita información. Los formatos de sonido admitidos aquí son MIDI, SMAF, iMelody, MP3 y AMR. 67 2007.2.10 12:52:37 PM Mi material Presione la tecla programable [Menú], seleccione 7. Mi material y luego seleccione 2. Audio para mostrar la lista de sonidos grabados en el teléfono. La melodía seleccionada automáticamente se reproduce una vez. NOTA A menos que haya programado el tipo de timbre en el modo de vibración o silencioso. Presione la tecla programable [Opciones] ([[]) para aplicar las opciones al sonido respectivo. La tecla programable [Opciones] está activa cuando se selecciona el sonido descargado. •Enviar vía: •Mensajes mult.: adjunta el sonido seleccionado y lo envía como mensaje mult. Esta opción está disponible sólo para sonidos sin bloqueo de transferencia. •Bluetooth: transmite el sonido seleccionado vía Bluetooth . 68 •Definir como timbre: define el sonido seleccionado como el timbre preferido. Presione la tecla [o] para definir el timbre predeterminado. •Renombrar: renombra un sonido. (Para obtener más detalles acerca de cómo renombrar un archivo, consulte 7. Ingreso de texto en la página 34.) •Borrar: borra un sonido. 070210_C3b_SP_at&t(00).indd 68 •Borrar todos: borra todos los sonidos de la lista de sonidos. •Info. de archivo: visualiza la información de un sonido. NOTA compatible con timbres de MP3 (tamaño máximo de archivo: 500 Kb) y archivos MP3 pueden estar sujetos a las leyes de derechos de autor pertinentes, de modo que absténgase de distribuir estos archivos ilegalmente. Gráficos Comprar gráficos Cuando se selecciona este menú se inicia el navegador de Web para el menú de Gráficos AT&T. Gráficos En este menú puede ver o editar la imagen o información registrada en el teléfono. Los formatos de imagen admitidos aquí son JPEG, GIF, BMP WBMP y PNG. ❶ Presione la tecla programable [Menú], seleccione 7. Mi material y luego seleccione 3. Gráficos para ver la lista de imágenes guardadas en el teléfono. ❷ Presione la tecla programable [Ver] o presione la tecla [o] para establecer la imagen seleccionada como Papel tapiz. 2007.2.10 12:52:37 PM Mi material ❸ Presione la tecla [l/r] para ver otras imágenes en la lista. ❹ Presione la tecla programable [Lista] para volver a la lista. ❺ Presione la tecla programable [Opciones] ([[]) para aplicar las opciones a la imagen. La tecla programable [Opciones] está activa cuando se selecciona la imagen descargada. •Enviar vía: •Mensaje mult.: adjunte la imagen seleccionada y envíe como mensaje multimedia. Esta opción está disponible sólo para gráficos sin bloqueo de transferencia. •Bluetooth: transmite la imagen seleccionada vía Bluetooth . •Definir como papel tapiz: agrega una imagen al "Papel tapiz" en la "Configuración de pantalla". La imagen se configura como imagen de fondo de la pantalla principal. •Renombrar: renombra una imagen. (Para obtener más detalles para cambiar el nombre de un archivo, consulte 7. Ingreso de texto en la página 34.) •Borrar: borra una imagen •Borrar todos: borra todas las imágenes de la lista de imágenes. •Info. de archivo: vea la información de una imagen. Con respecto a DRM, aparece una imagen con transferencia 070210_C3b_SP_at&t(00).indd 69 bloqueada con un icono ( ) en la lista de imágenes. Álbum de fotos Esta función le permite ver o editar las fotos guardadas en el teléfono. Presione la tecla programable [Menú], seleccione 7. Mi material y luego seleccione 4. Álbum de fotos. Visualización de las fotos guardadas ❶ Presione la tecla programable [Menú], seleccione 1. Cámara y luego seleccione 2. Álbum de fotos en el menú para acceder a las fotos. ❷ Seleccione una foto de la lista y presione la tecla [o] para mostrar la lista de fotos en el álbum. ❸ Use la tecla programable [Pequeño] o [Lista] para cambiar el tipo de lista (Pequeño/Lista). ❹ Seleccione una foto y presione la tecla [o] para ampliar la vista de la foto. Presione la tecla de desplazamiento ([l/r]) para ver otras fotos en el álbum. Uso de las opciones de foto Presione la tecla programable [Opciones] ([[]) para aplicar las siguientes opciones a la foto seleccionada en el álbum. 69 2007.2.10 12:52:38 PM Mi material •Config.: •Papel tapiz: agrega una foto al Papel tapiz en Pantalla. La foto se configura como imagen de fondo de la pantalla principal. •Contactos: asigna una imagen fotográfica específica a los Contactos. •Enviar vía: •Mensajes mult.: adjunta la foto seleccionada y la envía como mensaje mult. •Bluetooth: transmite la foto seleccionada vía Bluetooth •Renombrar: cambia el nombre de una foto. (Para obtener más detalles para cambiar el nombre de una foto, consulte 7. Ingreso de texto en la página 34.) •Borrar: borra una foto. •Borrar todos: borra todas las fotos del álbum. •Info. de archivo: visualiza la información de una foto. •Imprimir: transmite la foto seleccionada a la impresora vía Bluetooth. Otros archivos 70 Le permite visualizar o administrar la lista de los archivos de formatos no admitidos. También permite incluir en la lista los archivos de formatos admitidos a través de Bluetooth u otros dispositivos. 070210_C3b_SP_at&t(00).indd 70 Presione la tecla programable [Menú], seleccione 7.Mi material y luego seleccione 5. Otros archivos. Presione la tecla programable [Opción] ([[]) para: •Renombrar: cambia el nombre de un archivo. •Borrar: borra un archivo. •Borrar todos: borra todos los archivos. •Info. de archivo: visualiza la información en un archivo. •Enviar vía Bluetooth: Cuando Bluetooth está programado en “Activar”, los archivos se pueden enviar a otro dispositivo Bluetooth. Herramientas Herramientas proporciona diversas funciones, como Alarma, Calendario, Notas, Nota de voz, Hora mundial, Calculadora, Conversor, Cronómetro y Kit de herramientas SIM. Presione la tecla programable [Menú], seleccione 7.Mi material y luego seleccione 6. Herramientas. Alarma Esta función le permite programar una alarma para que suene hasta en cinco oportunidades diferentes. Presione la tecla programable [Menú], seleccione 7.Mi 2007.2.10 12:52:38 PM Mi material material, seleccione 6.Herramientas y luego seleccione 1.Alarma para mostrar la lista de alarmas actuales. NOTA Cuando programa el Despertador en Activado, aparece un icono en la pantalla del teléfono. Para programar una alarma Presione la tecla programable [Menú], seleccione 7. Mi material, seleccione 6. Herramientas, y luego seleccione 1. Alarma para mostrar la lista de alarmas actuales. Presione la tecla programable [Nuevo] ([]]) y cree una nueva alarma en la pantalla de edición de alarmas. Para administrar las alarmas existentes Seleccione la alarma y luego presione la tecla programable [Opciones] ([[]) para seleccionar entre las siguientes funciones. •Borrar: borra una alarma de la lista. •Borrar todos: borra todas las alarmas de la lista. •Despertador Activado/Desactivado: si programa el Despertador en Activado, la alarma suena sin importar las otras configuraciones (por ejemplo, configuración de vibración). •Recordat. Act./Desact.: si la alarma está programada en Recordatorio, ésta suena en intervalos de 5 minutos 070210_C3b_SP_at&t(00).indd 71 durante los próximos 15 minutos. Sólo una alarma se puede programar en Recordat. Act. Presione la tecla [o] para editar la alarma y luego presione la tecla de desplazamiento [u/d] en la pantalla Editar alarma para programar la Hora o Melodía. Presione la tecla programable [AM] o [PM] ([[]) para seleccionar el formato de hora que desea configurar, AM o PM. Calendario El Calendario le ayuda a administrar sus horarios, incluidas horas para llamadas o días especiales. Con esta función, puede programar el servicio de alarmas en una fecha determinada. El Calendario aparece con las siguientes vistas. Vista mensual, vista diaria y vista de eventos y edición. Presione la tecla programable [Menú], seleccione 7. Mi material, seleccione 6. Herramientas y luego seleccione 2. Calendario. Vista mensual En forma predeterminada, el Calendario aparece en esta vista. Presione la tecla programable [Menú], seleccione 7.Mi 71 2007.2.10 12:52:39 PM Mi material material, seleccione 6.Herramientas y luego seleccione 2.Calendario desde el menú para mostrar la Vista mensual. Presione las siguientes teclas para moverse en Vista mensual. Para: Presione: Moverse a otro día [l] tecla Día anterior [r] tecla Día siguiente Moverse a otra semana [z] o [u] Semana anterior [x] o [d] Semana siguiente Moverse al mes anterior [1] tecla Mes anterior [3] tecla Mes siguiente o siguiente 72 Presione la tecla programable [Nuevo]([]]) para agregar un nuevo evento. Para administrar los eventos existentes, presione la tecla programable [Opciones] ([[]) para seleccionar entre las siguientes funciones. •Ir a fecha: lo lleva a la fecha definida. •Ir a hoy: lo lleva a hoy para selección. •Ver todos los eventos: muestra todos los eventos programados. •Borrar todos los eventos: borra todos los eventos 070210_C3b_SP_at&t(00).indd 72 programados. •Info memoria: muestra el número de eventos almacenados (hasta 50). Use las teclas de desplazamiento para seleccionar la fecha deseada y luego presione la tecla [o]. Para las fechas que contienen eventos, cambie a Vista diaria para revisar lo programado. Los eventos registrados para una fecha aparecen en la parte inferior de la pantalla, como un icono. Vista diaria Esta función muestra los eventos registrados para una fecha. Seleccione una fecha y luego presione la tecla [o] para ver o editar los detalles de los eventos específicos. Para administrar los eventos existentes, presione la tecla programable [Opciones] ([[]) para seleccionar entre las siguientes funciones. •Borrar: borra un evento •Borrar todos: borra todos los eventos. •Guardar número: si el número seleccionado no está guardado en la tarjeta SIM o en el teléfono, aparecerá esta opción. Guarda el número seleccionado en la tarjeta SIM o en el teléfono. 2007.2.10 12:52:39 PM Mi material NOTA La opción [Guardar número] aparece sólo cuando se guarda un número telefónico en un evento. Vista de eventos y edición Esta función muestra los eventos en forma individual y edita lo programado o crea una nueva programación. Para crear un nuevo evento en Vista de eventos y edición ❶ Seleccione un día en la Vista mensual o desplácese a un día y presione la tecla programable [Nuevo] ([]]). ❷ En la pantalla Nuevo evento, seleccione e ingrese un evento, de a uno, para su registro. ❸ Después de ingresarlo, presione la tecla [o] para guardar el evento. NOTA Puede crear hasta 50 eventos. Puede crear hasta 5 eventos por día. Puede crear eventos para fechas a partir de 01/01/1950 y hasta 31/12/2043. Bloc notas Esta función le permite crear notas de texto y de voz en el teléfono. Presione la tecla programable [Menú], seleccione 7. Mi material, seleccione 6. Herramientas y luego seleccione 3. Bloc notas. Para administrar las notas de texto, presione la tecla programable [Opciones] ([[]) para 070210_C3b_SP_at&t(00).indd 73 seleccionar entre las siguientes funciones. •Editar: recupere notas existentes, edite notas existentes y presione la tecla [o] para guardar las notas modificadas. Consejo Presione la tecla [o] y la tecla de desplazamiento [Editar] ([]]) para volver a la pantalla de edición. •Borrar/Borrar todos: borra uno o todos los elementos. (Para obtener más información acerca de cómo usar el editor, consulte 7. Ingreso de texto en la página 34.) Nota de voz La función Nota de voz graba sus mensajes de voz. Puede usar Grabar, Detener, Repro. y Guardar para grabar voz y reproducirla. Presione la tecla programable [Menú], seleccione 7. Mi material, seleccione 6. Herramientas y luego seleccione 4. Nota de voz. Para grabar una nota de voz: ❶ Presione la tecla programable [Nuevo] ([]]) para comenzar a grabar inmediatamente. ❷ Presione la tecla [ ] para finalizar el proceso de grabación y presione la tecla programable [Repro.] para escuchar los datos grabados antes de guardar los datos de voz. 73 2007.2.10 12:52:40 PM Mi material ❸ Presione la tecla [Re-grab.] para volver a grabar un mensaje de voz. ❹ Presione la tecla [ ], ingrese un nombre y presione la tecla [o] para guardar los datos. Consejo Cuando la memoria está llena, aparece el mensaje “Falta memoria” y vuelve al menú. Para administrar notas de voz: Para administrar las notas de voz, presione la tecla programable [Opciones] ([[]) para seleccionar entre las siguientes funciones. •Enviar vía: •Mensajes mult.: adjunta el archivo AMR y lo envía como mensaje mult. •Bluetooth: transmite el archivo AMR seleccionado vía Bluetooth. 74 •Renombrar: renombra la nota de voz. •Borrar: borra la nota de voz seleccionada. •Borrar todos: borra todas las notas de voz. •Info. de archivo: visualiza la información de un archivo. Para reproducir una nota de voz: ❶ ione un elemento en la lista de notas de voz y presione la tecla [o] para reproducirlo inmediatamente. 070210_C3b_SP_at&t(00).indd 74 ❷ Presione la tecla [ ] o la tecla [ ] para retroceder o adelantar. ❸ Presione la tecla [ ] para reproducir o hacer una pausa en la nota de voz. ❹ Presione la tecla [ ] para detener la nota de voz. Hora mundial Esta función le informa las horas mundiales. Presione la tecla programable [Menú], seleccione 7.Mi material, seleccione 6. Herramientas, seleccione 5.Hora mundial. Para administrar las horas mundiales, presione la tecla programable [Opciones] ([[]) para seleccionar entre las siguientes funciones. •Activar/Desactivar hora de verano: especifica si la hora actual del lugar seleccionado se ajusta al Horario de verano. Un icono [ ] indica que está activado el horario de verano para ese lugar. Consejo El Horario de verano adelanta una hora el reloj. Calculadora El teléfono tiene una función de Calculadora. La Calculadora le proporciona cuatro operaciones básicas: +, -, x y /. Presione la tecla programable [Menú], seleccione 7. Mi material, seleccione 6. Herramientas y luego seleccione 2007.2.10 12:52:40 PM Mi material 6. Calculadora. Presione las teclas numéricas y las teclas de dirección para ingresar el cálculo, luego presione = para mostrar el resultado. Consejo Para ingresar un decimal, presione la tecla [[]. Mantenga presionada [c] o presione la tecla programable ([]]) para reiniciar la fórmula. Presione brevemente la tecla [c] para borrar el texto de una fórmula y mantenga brevemente presionada la tecla [c] para borrar toda la fórmula. Conversor El Conversor convierte una cifra entre unidades diferentes, por ejemplo, longitud, área, volumen, peso y temperatura. ❶ Presione la tecla programable [Menú], seleccione 7.Mi material, seleccione 6. Herramientas y luego seleccione 7. Conversor. ❷ Seleccione Longitud, Área, Volumen, Peso o Temperatura. •Presione la tecla [d] para moverse a la siguiente línea, presione la tecla [l/r], para seleccionar una unidad objetivo y presione las teclas numéricas para ingresar los números. •Presione nuevamente la tecla [d] para moverse a la siguiente línea y seleccione una unidad de resultado para 070210_C3b_SP_at&t(00).indd 75 obtener la cifra convertida. •El resultado se recalcula automáticamente al cambiar la unidad o valor. •Presione la tecla programable ([[]) para ingresar un punto decimal. Cronómetro El Cronómetro mide el tiempo de actividades deportivas. Presione la tecla programable [Menú], seleccione 7.Mi material, seleccione 6. Herramientas y luego seleccione 8. Cronómetro. •Presione la tecla [ ] para hacer funcionar el Cronómetro. •Presione la tecla [ ] para realizar una pausa en el Cronómetro y presione la tecla [ ] para reiniciarlo. •Cuando selecciona la tecla programable [Nvo. per.] ([[]), aparecen los dos tiempos cronometrados, como máximo, y cuando selecciona la segunda tecla programable [Nvo. per.] ([[]), el Cronómetro se detiene. •Presione la tecla programable [Reinicio] ([]]) para inicializar todo. Kit de herramientas SIM El Kit de herramientas SIM realiza la función admitida 75 2007.2.10 12:52:41 PM Mi material & Contactos por la tarjeta SIM. Presione la tecla programable [Menú], seleccione 7.Mi material, seleccione 6.Herramientas y luego seleccione 9. Kit de herramientas SIM. Si la tarjeta SIM admite este servicio, cuando el usuario selecciona el menú admitido, puede ver o recibir información sobre el menú seleccionado. Este menú depende de los servicios de red y tarjeta SIM. Estado de memoria Esta función muestra la información del estado de uso de la memoria para Foto, Imagen, Sonido, Voz, Juegos, Mensaje y Sistema. NOTA Memoria del sistema se refiere a la memoria total utilizada para los objetos reservados, papel tapiz definido por el usuario, etc. Presione la tecla programable [Menú], seleccione 7. Mi material y luego seleccione 6. Estado de memoria. Contactos 76 En el teléfono, puede almacenar sus contactos personales, los cuales se pueden añadir o borrar en cualquier momento. Puede guardar hasta 800 contactos en la memoria de la tarjeta SIM o del teléfono. La cantidad de contactos que se puede almacenar en la tarjeta SIM 070210_C3b_SP_at&t(00).indd 76 depende de la capacidad de almacenamiento de la tarjeta. Lista contactos Presione la tecla programable [Menú], seleccione 8.Contactos y luego seleccione 1.Lista contactos. Para buscar un número de teléfono en los Contactos, realice lo siguiente. ❶ Ingrese un nombre. Aparecerá la lista de contactos y el cursor se ubicará en un elemento que coincida con los datos ingresados. ❷ Presione la tecla [u/d] para ver los números registrados. ❸ Presione la tecla [o] para verlos todos. Para administrar los contactos, presione la tecla programable [Opciones]([[]) para seleccionar entre las siguientes funciones. •Añadir contacto: crea un nuevo contacto. •Editar: edita y guarda el contacto. •Borrar: borra el elemento seleccionado. •Copiar: copia memoria a la tarjeta SIM o teléfono. NOTA Cuando copie memoria al teléfono, seleccione “Cambiar tipo”: Celular, Casa u Oficina. 2007.2.10 12:52:41 PM Contactos •Enviar mensaje: envía un mensaje a un destinatario seleccionado. •A marcación rápida: añade el número seleccionado a marcación rápida. •Idioma: selecciona español o francés. Inglés es la selección predeterminada. •Buscar por grupo: busca el número de teléfono de cada grupo. •Transf info contac: envía la información de la persona seleccionada en la lista Ver nombres en la forma de una tarjeta profesional. •Enviar vía MMS : transmite la información de los contactos seleccionados vía MMS •Enviar vía Bluetooth : transmite la información de los contactos seleccionados vía Bluetooth Agr contacto Presione la tecla programable [Menú], seleccione 8.Contactos y luego seleccione 2.Agr contacto. Luego agregue la información del contacto para otras personas. Inicialmente, mientras no ingrese el texto, aparece un campo vacío en gris. Dependiendo de la configuración del teléfono o tarjeta SIM en la ventana emergente Guardar en, aparecen los siguientes campos. 070210_C3b_SP_at&t(00).indd 77 •Teléfono: Nombre( ), Celular( ), Casa( ), Oficina ( ), Grupo( ), Imagen( ), Melodía( ), Correo1 ( ), Correo2( ) y Nota( ) •Tarjeta SIM: Nombre( ), Celular( ), Grupo( ), Imagen( ) y Melodía( ) Marcación rápida Esta función le permite usar la función de Marcación rápida para marcar el contacto, presionando un número de Marcación rápida en el modo de espera. Los números de Marcación rápida van del 2 al 9, siendo en total 8. NOTA Al mantener presionada la tecla [0] o [1] se obtiene el prefijo de las llamadas internacionales o el servicio de Correo de voz, respectivamente. Para programar la Marcación rápida Presione la tecla programable [Menú], seleccione 8. Contactos y luego seleccione 3. Marcación rápida. Para añadir a Marcación rápida •Presione la tecla [z/x] o la tecla [u/d] para moverse a una entrada vacía y presione la tecla [Añadir]. •Presione la tecla [z/x] o la tecla [u/d] para seleccionar una persona. 77 2007.2.10 12:52:43 PM Contactos •Presione la tecla programable [Opciones] ([[]) para seleccionar el idioma y buscar Español o Francés. (Inglés es la selección predeterminada.) •Presione la tecla [o] para guardar un elemento en la lista de Marcación rápida. Para editar una Marcación rápida ❶ Si desea editar un elemento en particular en la lista de marcación rápida, mueva el cursor al elemento y presione la tecla programable [Editar] ([]]) para actualizarlo. ❷ Presione la tecla programable [Opciones] ([[]) para seleccionar el idioma y buscar Español o Francés. (Inglés es la selección predeterminada.) ❸ Presione la tecla [o] para guardar un elemento en la lista de Marcación rápida. Para eliminar de marcación rápida Si desea eliminar un elemento en particular de la lista de marcación rápida, mueva el cursor al elemento y presione la tecla programable ([[]) para eliminarlo. Para programar Marcación rápida en Lista contactos 78 Presione la tecla programable [Menú], seleccione 8. 070210_C3b_SP_at&t(00).indd 78 Contactos y luego seleccione ❶ Presione la tecla [z/x] o la tecla [u/d] para seleccionar una persona. ❷ Para añadir una Marcación rápida, presione la tecla [Opciones] y seleccione la opción [A marcación rápida] en la lista. ❸ Presione la tecla [z/x] o la tecla [u/d] para moverse a una entrada vacía. ❹ Presione la tecla [o] para guardar un elemento en la lista de Marcación rápida. Grupos Esta función se usa para programar la configuración para los cuatro grupos predefinidos de personas que llaman: Familia, Amigos, Negocios y VIP Presione la tecla programable [Menú], seleccione 8.Contactos y luego seleccione 4.Grupos. Para administrar los Grupos, presione la tecla programable [Opciones] ([[]) para seleccionar entre las siguientes funciones. •Tonos de timbre de grupos: define un Grupo, Melodía y Foto. •Renombrar: renombra un grupo en el grupo definido por el usuario. 2007.2.10 12:52:43 PM Contactos •Borrar: borra los grupos seleccionados en el grupo definido por el usuario. Presione la tecla programable [Menú], seleccione 8.Contactos y luego seleccione 6. Memoria en uso. NOTA los menús Renombrar y Borrar no aparecen en el Grupo predeterminado. Borrar todo Presione la tecla programable [Nuevo] ([]]) para definir un nuevo grupo. Mi tarjeta de negocios Presione la tecla programable [Menú], seleccione 8.Contactos y luego seleccione 5.Mi tarjeta de negocios. Esto le permite guardar su tarjeta profesional y enviarla al teléfono de otro usuario a través de Bluetooth. Puede editar o borrar los números guardados. Presione la tecla programable [Opción] ([[]) para: •Enviar vía Bluetooth : transmite vía Bluetooth si es posible. •Borrar: borra la tarjeta profesional guardada. •Editar: edita la tarjeta profesional guardada. Memoria en uso Esta función le permite especificar si desea guardar la información del contacto en el Teléfono, o en la Tarjeta SIM, o ya sea en el Teléfono o SIM. 070210_C3b_SP_at&t(00).indd 79 Esta función borra toda la información guardada en el teléfono o en la tarjeta SIM. Presione la tecla programable [Menú], seleccione 8.Contactos y luego seleccione 7. Borrar todos. Presione la tecla [o] e ingrese la contraseña del teléfono. Copiar todos Esta función copia toda la información guardada en el teléfono/tarjeta SIM a la tarjeta SIM o al teléfono. Presione la tecla programable [Menú], seleccione 8.Contactos y luego seleccione 8. Copiar todos. Número propio Presione la tecla programable [Menú], seleccione 8.Contactos y luego seleccione 9. Número propio. El Número propio puede variar dependiendo de la tarjeta SIM. Presione la tecla programable [Opciones] ([[]) para seleccionar las siguientes funciones. •Añadir: añade un Núm. propio. •Borrar: borra un Núm. propio. 79 2007.2.10 12:52:44 PM Contactos & Configuración Presione la tecla programable [Editar] ([]]) para editar un Núm. propio. Info. Memoria Configuración Esta función le permite personalizar la manera de operar el teléfono. Presione la tecla programable [Menú], seleccione 8.Contactos y luego seleccione 10. Info. Memoria. Seleccione Info. Memoria y presione la tecla [o] para mostrar el uso y el espacio de memoria libre de la memoria del teléfono y tarjeta SIM. Pantalla Núm. de servicio Cuando se selecciona este menú se inicia el navegador de Web para el menú de Gráficos AT&T. Esta función podría no estar disponible; esto dependerá de su tarjeta SIM. Aparece la lista de números en el SDN (Número de marcación de servicio). Presione la tecla programable [Menú], seleccione 8.Contactos y luego seleccione 11. Núm. de servicio. Si fuera necesario, desplácese a un número presionando la tecla [z/x] o [u/d] y presione la tecla [s] para marcarlo. 80 070210_C3b_SP_at&t(00).indd 80 Usted puede definir la forma en que aparece la información en su teléfono. Presione la tecla programable [Menú], seleccione 9.Configuración y luego seleccione 1.Pantalla. Comprar gráficos Pantalla principal Esta función le permite cambiar la imagen de la pantalla en espera que aparece en la pantalla principal del teléfono. Presione la tecla programable [Menú], seleccione 9.Configuración, seleccione 1. Pantalla y luego seleccione 2. Pantalla principal. •Papel tapiz: puede seleccionar una de las cinco imágenes predeterminadas y una como imagen de pantalla en espera. Para borrar los papeles tapiz distintos al predeterminado, presione la tecla programable [Borrar] ([[]). (El papel tapiz predeterminado no se puede borrar.) 2007.2.10 12:52:44 PM Configuración •Tipo de papel tapiz: Reloj digital /Saludo Saludo Esta función le permite programar el mensaje de saludo que aparece en el Inicio o en el modo en espera. Presione la tecla programable [Menú], seleccione 9. Configuración, seleccione 1. Pantalla y luego seleccione 3. Saludo. no toca ninguna tecla. Puede elegir 5 segs, 10 segs, 20 segs, 1 min y 10 mins. ❸ Presione la tecla [l/r] para cambiar el valor de la duración deseada y luego presione la tecla [o]. Audio Esta función le permite definir el nivel de luz de fondo de 1 a 8 para la pantalla principal del teléfono. Presione la tecla programable [Menú], seleccione 9. Configuración, seleccione 1. Pantalla y luego seleccione 4. Contraste. Presione la tecla [l/r] para cambiar el valor que desee y presione la tecla [o]. Usted puede definir la forma en que se reproduce el sonido en su teléfono. Presione la tecla programable [Menú], seleccione 9. Configuración y luego seleccione 2.Audio. Los sonidos definen cómo reacciona el teléfono cuando recibe una llamada o un mensaje, cómo suena el teclado cuando presiona una tecla y más. Puede conservar el timbre, tono de teclas y otras configuraciones predeterminadas, o bien puede personalizarlas según sus necesidades. Luz de fondo Comprar timbres Contraste Esta función le permite especificar el tiempo que permanecerá encendida la luz de fondo en las pantallas de su teléfono. ❶ Presione la tecla programable [Menú], seleccione 9. Configuración, seleccione 1. Pantalla y luego seleccione 5. Luz de fondo. ❷ Elija el tiempo que desea que la luz de fondo permanezca encendida en las pantallas de su teléfono si 070210_C3b_SP_at&t(00).indd 81 Cuando se selecciona este menú se inicia el navegador Web para el menú de Timbres AT&T. Sonido de timbre Presione la tecla programable [Menú], seleccione 9. Configuración, seleccione 2. Audio y luego seleccione 2. Sonido de timbre. Seleccione el tipo de timbre preferido o la melodía para el timbre. •Tipo de timbre: especifica la forma en que timbrará o 81 2007.2.10 12:52:44 PM Configuración vibrará el teléfono cuando se reciban llamadas. Puede elegir Tono de timbre, Vibración, Vib y luego tim, Vib y timbre, Ascendente o Silencioso. •Sonido: el sonido lo componen varios grupos, como Sonido de melodía, Sonido MP3, Sonido de timbre y Mi melodía. Cada grupo posee varios tonos. Mi melodía presenta la melodía que se genera cuando presiona la tecla programable [Menú], selecciona 7. Mi material y luego selecciona 2. Audio. •Alerta: especifica a qué intervalos se le recordará cuando reciba un mensaje. Presione la tecla [l/r] para seleccionar Desactivar, Una vez, Cada 2 mins o Cada 5 mins. •Volum. timbre: controla el volumen en ocho niveles. •Sonido: especifica el Tono de alerta de mensaje. Presione la tecla [l/r] para programar Tono de alerta de mensaje en Timbre 1, Timbre 2 o Timbre 3. Volumen Esta función le permite seleccionar el sonido que se escuchará cuando se presionen las teclas del teléfono. Presione la tecla programable [Menú], seleccione 9. Configuración, seleccione 2. Audio y luego seleccione 5. Tono de tecla. Puede personalizar lo siguiente: •Tipo de tono: especifica si los tonos de las teclas están activados o desactivados. •Sonido: especifica el sonido del tono de las teclas Bip, DTMF o Timbre 1~3. Especifica cuán fuerte timbra el teléfono. Presione la tecla programable [Menú], seleccione 9. Configuración, seleccione 2. Audio y luego seleccione 3. Volumen. •Volum. timbre: controla el volumen en ocho niveles. •Volumen de tecla: controla el volumen en ocho niveles. Tonos alerta 82 Esta función le permite especificar la manera en que el teléfono le avisa cuando recibe mensajes. Presione la tecla programable [Menú], seleccione 9. Configuración, seleccione 2. Audio y luego seleccione 4. Tonos alerta. Puede personalizar lo siguiente: 070210_C3b_SP_at&t(00).indd 82 Tono de tecla Tono al abrir tapa Esta función le permite seleccionar el sonido que se escuchará cuando abra la tapa del teléfono. Presione la tecla programable [Menú], seleccione 9. Configuración, seleccione 2. Audio y luego seleccione 6. Tono al abrir tapa. 2007.2.10 12:52:45 PM Configuración Puede personalizar lo siguiente: •Tipo de tono: especifica si el tono al abrir la tapa del teléfono está activado o desactivado. •Volum. timbre: controla el volumen en ocho niveles. •Sonido: especifica el tono al abrir la tapa. Puede elegir entre Timbre 1, Timbre 2 o Timbre 3. Efectos de sonido Esta función le permite activar o desactivar el efecto de sonido predeterminado para diversos eventos. Presione la tecla programable [Menú], seleccione 9. Configuración, seleccione 2. Audio y luego seleccione 7. Efecto de sonido. Presione la tecla programable [Marcar] y luego presione la tecla [o] para guardar el efecto. •Conexión WAP: cuando conecta o finaliza una sesión WAP. •Recordatorio de minutos: cada minuto mientras está realizando una llamada. •Conexión de llam.: cuando marca o cuelga. Llamada La Configuración de llamada define cómo reacciona el teléfono cuando recibe una llamada o un mensaje y 070210_C3b_SP_at&t(00).indd 83 especifica cómo se deberán contestar las llamadas en el teléfono. Presione la tecla programable [Menú], seleccione 9. Configuración y luego seleccione 3. Llamada. Transferir llamada Esta función le permite desviar las llamadas entrantes a otro número de teléfono. Presione la tecla programable [Menú], seleccione 9. Configuración, seleccione 3. Llamada y luego seleccione 1. Transferir llamada. Elija Transf. siempre, Si está ocupada, Si no contesta, Si no se encuentra o Cancelar todas, todas las cuales desvían la llamada según lo requerido. Debido a que la transferencia de llamadas es un servicio de red, debe comunicarse con el proveedor de servicio para verificar la disponibilidad de éste. Transf. siempre Esta función transfiere todas las llamadas sin importar la condición. No importa que el teléfono celular esté encendido o apagado. •Activar: programa Transferencia de llamadas siempre. •Desactivar: cancela la Transferencia de llamadas siempre. •Estado: informa el estado de configuración. •Por servicio: configura Transferencia de llamadas 83 2007.2.10 12:52:45 PM Configuración 84 siempre para cada servicio (todos los servicios, llamadas de voz, datos y fax). Si está ocupada Esta función transfiere sólo aquellas llamadas que reciben una conexión ocupada o que de lo contrario habrían devuelto la indicación de ocupado a la persona que llama. •Activar: programa Transferencia de llamadas si está ocupada. •Desactivar: cancela la programación de Transferencia de llamadas si está ocupada. •Estado: informa el estado de configuración. •Por servicio: configura Transferencia de llamadas si está ocupada para cada servicio (todos los servicios, llamadas de voz, datos y fax) Si no contesta Esta función transfiere las llamadas que no se contestan o no se atienden dentro de un tiempo especificado. •Activar: programa Transferencia de llamadas si no contesta. •Desactivar: cancela la programación de Transferencia de llamadas si no contesta. •Estado: informa el estado de configuración. 070210_C3b_SP_at&t(00).indd 84 •Por servicio: configura Transferencia de llamadas si no contesta para cada servicio (todos los servicios, llamadas de voz, datos y fax) Si no se encuentra Si el abonado de un teléfono celular actualmente está fuera de la red GSM o decide apagar el teléfono, este servicio transfiere todas sus llamadas al número indicado. •Activar: programa Transferencia de llamadas si no se encuentra. •Desactivar: cancela la programación de Transferencia de llamadas si no se encuentra. •Estado: informa el estado de configuración. •Por servicio: configura Transferencia de llamadas si no se encuentra para cada servicio (todos los servicios, llamadas de voz, datos y fax) Cancelar todas Cancela las opciones de Transferencia de llamada. Tipo de contestar Esta función le permite especificar la manera en que las llamadas se contestan en el teléfono. ❶ Presione la tecla programable [Menú], seleccione 9. Configuración, seleccione 3. Llamada y luego seleccione 2007.2.10 12:52:45 PM Configuración 2. Tipo de contestar. ❷ Use la tecla [l/r] para definir el método de recepción de llamadas. Presione la tecla [o] para guardar. •Tecla HABLAR: las llamadas entrantes se contestan presionando la tecla [s]. •Cualquier tecla: las llamadas entrantes se contestan presionando cualquier tecla, excepto la tecla [e] y la tecla programable [Rechaz.]. •Tapa abierta: las llamadas entrantes se contestan abriendo la tapa del teléfono. •Respuesta autom.: el teléfono contesta automáticamente las llamadas después de 10 segundos. Esta función está disponible sólo cuando el audífono está conectado al teléfono. Remarc. autom. Esta función remarca automáticamente el número al que está llamando si la llamada no tiene éxito. ❶ Presione la tecla programable [Menú], seleccione 9. Configuración, seleccione 3. Llamada y luego seleccione 3. Remarc. autom. ❷ Seleccione Activar o Desactivar. Llamada en espera Esta función le informa que recibió una segunda llamada mientras estaba hablando. Presione la tecla programable [Menú], seleccione 9. Configuración, seleccione 3. Llamada y luego seleccione 4. Llamada en espera. •Activar: activa la función Llamada en espera. •Desactivar: cancela la función Llamada en espera. •Estado: indica si la función Llamada en espera está activada o no. ID de llamada Esta función impide que el número de su teléfono aparezca en el teléfono de la persona a la que está llamando. NOTA Este servicio depende de la red. Consulte con su proveedor de red. Presione la tecla programable [Menú], seleccione 9. Configuración, seleccione 3. Llamada y luego seleccione 5. ID de llamada. Teléfono Idioma Esta función le permite seleccionar el idioma que aparecerá 070210_C3b_SP_at&t(00).indd 85 85 2007.2.10 12:52:46 PM Configuración en su teléfono. Presione la tecla programable [Menú], seleccione 9. Configuración, seleccione 4. Teléfono y luego seleccione 1. Idioma para seleccionar un idioma para la pantalla. NOTA Seleccione Automático para definir el idioma en Inglés. Hora y fecha Esta función le permite programar la hora y fecha que aparecerá en su teléfono. Presione la tecla programable [Menú], seleccione 9. Configuración, seleccione 4. Teléfono y luego seleccione 2.Hora y Fecha. Puede configurar la hora, formato de hora, fecha y formato de fecha, presionando la tecla [o]. Si selecciona Activar para Automático, la hora y fecha se actualizan automáticamente. Modo de vuelo 86 Presione la tecla programable [Menú], seleccione 9. Configuración, seleccione 4. Teléfono y luego seleccione 3.Modo de vuelo. Una vez que selecciona Modo de vuelo activado, no puede llamar ni recibir llamadas. Este modo le permite interrumpir la sesión de radio, pero se mantiene encendido para otras funciones anexas, como calendario, juegos, etc. Este modo admite el uso de estas funciones en entornos en los que los transmisores o receptores no están 070210_C3b_SP_at&t(00).indd 86 permitidos, como en los aviones. Si selecciona Modo de vuelo desactivado, el teléfono se reinicia. Conectividad Bluetooth Presione la tecla programable [Menú], seleccione 9. Configuración, seleccione 5. Conectividad y luego seleccione 1. Bluetooth. Bluetooth se refiere a las especificaciones para conectar de forma inalámbrica diferentes dispositivos como computadoras, teléfonos celulares y artefactos hogareños, que están ubicados a corta distancia y luego permitir la comunicación bidireccional en tiempo real entre los mismos, u otros productos que cumplen con estas especificaciones. El teléfono celular (C3b) admite los siguientes perfiles: - Perfil de puerto serial (SPP) con el software de conectividad de la PC - Perfil de red de marcación (DUN) como puerta de enlace - Perfil de manos libres (HFP) como puerta de enlace de audio - Perfil de objeto push (OPP) como cliente y servidor - Perfil de transferencia de archivos (FTP) como cliente y servidor 2007.2.10 12:52:46 PM Configuración - Perfil de imagen básica (BIP) para la impresión de fotos Debido a que los dispositivos con tecnología Bluetooth comunican utilizando ondas de radio, su teléfono y los otros dispositivos no necesitan estar alineados de forma directa. Ambos dispositivos sólo deben estar a un máximo de 33 pies (10 metros) uno del otro, aunque la conexión puede estar sujeta a interferencias debido a obstrucciones como paredes u otros dispositivos electrónicos. El uso de la tecnología Bluetooth consume la batería y el tiempo operativo del teléfono se verá reducido. Tenga esto en cuenta cuando realice operaciones con su teléfono. Bluetooth Si selecciona [Activar], Bluetooth se activa, en tanto si selecciona [Desactivar], Bluetooth se desactiva. Dispositivos asoc. Muestra el dispositivo asociado o permite agregar un nuevo dispositivo. El tipo de icono mostrado varía dependiendo de los tipos de dispositivos asociados. Presione la tecla programable [Opción] [[] para: (Dependiendo de los perfiles proporcionados por el dispositivo asoc., aparecerán diferentes Menús de opciones.) •Conectar/Desconectar : aparece cuando los dispositivos 070210_C3b_SP_at&t(00).indd 87 ofrecen el perfil Audífono/Manos Libres Bluetoot h, y conecta o desconecta cada dispositivo. •Carpeta del navegador : aparece cuando el dispositivo ofrece el perfil de Servidor FTP, y en este caso apar ecerá el directorio del FTP del otro dispositivo. •Editar nombre : le permite editar los nombres del dispositivo de la otra parte. •Borrar : borra los dispositivos deseados de la Lista de Dispositivos asoc. •Ajustar Autorizado/No autorizado : si el dispositivo correspondiente ha sido ajustado en Autorizado, es posible acced er a su teléfono con cualquier permiso. Por otra parte, si está ajustado en “No autor izado”, el dispositivo debe tener el privilegio de acceder a su teléfono. Este menú a parecerá sólo cuando el tipo de dispositivo registrado sea PC/PDA. •Definir como predet./No definir como predet. : Si dos o más audífonos/manos libres han sido registrados, elija uno de ellos para definirlo como audífono predeterminado. La realización o recepción de llamadas mediante el audífono se realizará mediante el audífono/ manos libres predeterminado. Aunque puede definir un audífono predeterminado usando el menú, el último audífono conectado se definirá automáticamente como 87 2007.2.10 12:52:46 PM Configuración 88 el audífono predeterminado. Este menú aparecerá sólo cuando el tipo de dispositivo registrado sea PC/PDA. Por otra parte, si el dispositivo está programado en ”No definir como predet.”, se deshabilitará la configuración del dispositivo definido como predeterminado. •Añadir Nuevo dispositivo : Ejecuta la función de registrar un nuevo dispositivo. Cuando selecciona esta opci ón, aparecerá un submenú con funciones para un registro adicional. El menú le per mite seleccionar el dispositivo que desea registrar como nuevo. - Buscar todos - Accesorio audio - PC - Teléfono - Otros Si elige buscar el dispositivo usando el menú anterior, aparecerá “Buscar dispositivo”. Presione la tecla programable [Nuevo] []]to: El menú le permite seleccionar el dispositivo que desea registrar como nuevo. - Buscar todos - Accesorio audio 070210_C3b_SP_at&t(00).indd 88 - PC - Teléfono - Otros Si elige buscar el dispositivo usando el menú anterior, aparecerá “Buscar dispositiv o”. Para buscar un dispositivo Cada vez que busque un nuevo dispositivo, la Lista se actualiza. Si selecciona la tecla programable [Cancelar] durante el proceso de búsqueda, la búsqueda se detiene y se muestran todos los resultados de la misma. En ese momento, seleccione la tecla programable [Actualizar] para reanudar la función de búsqueda. Después de seleccionar el dispositivo que desea asociar, presione la tecla OK para asociarlo. . Para asociarse con un dispositivo Su teléfono le solicitará la Llave maestra que utilizará para registrarse con la otra parte. Si ingresa la Llave maestra y la otra parte también ingresa la Llave maestra correctamente, el registro se completa. Dispositivo de llamada saliente Antes de realizar una llamada, seleccione el dispositivo que desea usar. 2007.2.10 12:52:47 PM Configuración •Audífono : Puede realizar una llamada mediante un audífono, siempre que haya si do registrado con éxito como el audífono predeterminado. •Preg. siempre : Apenas realiza la llamada, aparecerá un mensaje emergente preguntándole si desea usar el audífono/manos libres. Cuando presiona la tecla Sí, realiza la llamada usando el audífono/manos libres. Si presiona la tecla No, realiza la llamada usando el teléfono. El mensaje emergente continuará apareciendo hasta que la persona a la que está llamando conteste el teléfono. En caso de no existir ninguna entrada, la llamada se realizará mediante el teléfono. •Teléfono : Puede realizar una llamada como de costumbre usando el teléfono. Visibilidad •Mostrar a todos: permite la búsqueda a todos los demás teléfonos celulares con tecnología Bluetooth. •Oculto: permite la búsqueda sólo a los teléfonos celulares que aparecen en la lista de Dispositivos asoc. Nombre Le permite editar el nombre de su teléfono, el cual se mostrará a los otros teléfonos con tecnología Bluetooth. 070210_C3b_SP_at&t(00).indd 89 Dirección Muestra la dirección Bluetooth de su teléfono celular. Para enviar un objeto Después de seleccionar el archivo deseado, si selecciona “Enviar vía” en [Opción] y luego selecciona “Bluetooth”, la búsqueda comienza (Consulte: ”Para buscar un dispositivo”). Una vez que la ”Búsqueda” finaliza, si elige el dispositivo que recibirá los objetos, se procesa “Enviar”. En este momento, si el dispositivo correspondiente solicita Asociarse (consulte: “Para asociarse con un dispositivo”), se procesa “Enviar” después de haberse completado el procedimiento para “Asociarse”. Para recibir un objeto El proceso de recepción comienza únicamente cuando la recepción ha sido aprobada. Si el objeto recibido es información de un “Contacto”, se guardará en la memoria del teléfono. Si el objeto es un “Evento”, se guardará en el Programa. Seguridad La configuración de seguridad le permite restringir el uso del teléfono a personas y tipos de llamadas específicas. Se usan códigos y contraseñas para proteger estas 89 2007.2.10 12:52:47 PM Configuración funciones del teléfono. Estos se describen en las siguientes secciones. Consulte también, 2. Códigos de acceso en el Apéndice, en la página 121. La configuración de seguridad le permite restringir el uso del teléfono a personas y tipos de llamadas específicas. Las funciones de seguridad del teléfono mantienen su teléfono y tarjeta SIM protegidos del uso no autorizado. Puede programar una contraseña para el teléfono o usar el servicio de Restricc. llamada y el modo de Marcación fija para restringir llamadas que se puedan realizar usando el teléfono. Presione la tecla programable [Menú], seleccione 9. Configuración y luego seleccione 6. Seguridad. Cambiar PIN1 Verif. PIN1 Restricc. teléfono Presione la tecla de desplazamiento [l/r] y la tecla [o] para la configuración. Si ingresa el código PIN1 incorrecto tres veces consecutivas, se le solicitará que ingrese el número PUK1. El predeterminado está Deshabilitado. •Habilitado: ingresa el PIN1 cada vez que se enciende la alimentación. •Deshabilitado: no ingresa el PIN1 cuando se enciende la alimentación. Esta función ofrece varios métodos para limitar las llamadas entrantes o salientes. En general, el servicio de restricción se activa al interoperar con la red, pero la restricción del teléfono la efectúa el teléfono mismo. Las principales funciones son las siguientes. •Entrante: limita todas las llamadas entrantes. Cambia el número PIN1. Puede cambiar el número PIN1 sólo cuando el teléfono está programado para PIN1 Habilitado. Bloqueo de teléfono Esta función le permite bloquear el teléfono hasta que se ingrese la contraseña correcta. Presione la tecla [o] después de ingresar la contraseña. Cambiar contraseña Esta función le permite cambiar la contraseña del teléfono. La contraseña predeterminada es 1234. •Activar: configura la restricción de todas las llamadas entrantes. •Desactivar: cancela la restricción de todas las llamadas entrantes. 90 070210_C3b_SP_at&t(00).indd 90 2007.2.10 12:52:47 PM Configuración •Saliente: limita todas las llamadas salientes. Cuando intenta realizar una llamada que tiene el número de prefijo anteriormente registrado, la llamada se restringe. •Restring. todas: configura la restricción de todas las llamadas salientes. •Restringir prefijo: añade y borra el número de prefijo. (El prefijo también puede ser un número de 10 u 11 dígitos que usted elija) •Desactivar: cancela la restricción de todas las llamadas salientes que incluyan el prefijo restringido. Marcación fija (números de marcación fija) Marcación fija es un servicio que limita el acceso a números específicos en la lista de Contactos registrados en la tarjeta SIM. Ingrese el PIN2 para configurar o cancelar este servicio. (El PIN 2 se debe ingresar correctamente en 3 intentos.) •Activar •Desactivar •Lista de marcación fija: muestra los números registrados en la lista de Marcación fija. Cambiar PIN2 Esta función le permite cambiar el código PIN2 del teléfono. 070210_C3b_SP_at&t(00).indd 91 Restricc. Llamada Esta función está disponible sólo si el proveedor de servicio proporciona una función de este tipo y usted está suscrito. Puede programar limitaciones para realizar ciertos tipos de llamadas: •Llam. salientes: limita todas las llamadas salientes. •Llamadas intls: limita las llamadas internacionales salientes y entrantes. •Sólo local/nacional: limita otras llamadas internacionales, salvo al país de origen. •Llam. entrantes: limita todas las llamadas entrantes. •Entrantes en extranjero: limita todas las llamadas entrantes internacionales. •Borrar todos: cancela todas las configuraciones de restricción. •Cambiar contraseña: reemplaza la antigua contraseña por una nueva. Grupo de usuario cerrado (GUC) Esta función le permite configurar un grupo de números al que desea marcar o recibir llamadas. Seleccione el nombre de GUC y presione [o] para ver la lista del nombre de GUC tal como lo ingresó. 91 2007.2.10 12:52:48 PM Configuración Este servicio depende de la tarjeta SIM. Presione la tecla programable [Borrar] ([[]) para borrar el Identificador de GUC, o la tecla programable [Editar] ([[]) para editar el Identificador de GUC. NOTA En el registro Vacío, la tecla programable ([[]) se convertirá en la tecla programable [Añadir] y se moverá a la pantalla de ingreso de nombre para un nuevo registro de GUC. Versión de software Esta función le permite mostrar la versión de software actual del teléfono. Presione la tecla programable [Menú], seleccione 9.Configuración y luego seleccione 7.Versión de software. TTY TTY (también conocido como TDD o Teléfono de prueba) es un dispositivo de telecomunicaciones que permite comunicarse vía telefónica a las personas que presentan problemas de audición, o que tienen dificultades para hablar o de idioma. Su teléfono es compatible con dispositivos TTY selectos, que poseen un CTM interno. Verifique con el fabricante del dispositivo TTY que posea información de conectividad y asegúrese de que el dispositivo admita transmisión inalámbrica digital. Presione la tecla programable [Menú], seleccione 9.Configuración y luego seleccione 9.TTY. Reiniciar Esta función le permite borrar todas las configuraciones y datos de usuario del teléfono y volverlas a la configuración predeterminada de fábrica. Presione la tecla programable [Menú], seleccione 9. Configuración y luego seleccione 8. Reiniciar. Ingrese la contraseña del teléfono y presione la tecla [o] para reiniciar. La contraseña predeterminada es 1234. 92 070210_C3b_SP_at&t(00).indd 92 2007.2.10 12:52:48 PM Apéndice 1. Árbol de menús 2. Códigos de acceso 3. Lista de control de solución de problemas 4. Desempeño y seguridad 5. Glosario 6. Cumplimiento con las normas de la FCC y de Industry Canada 7. Medidas de seguridad 8. Garantía 070210_C3b_SP_at&t(00).indd 93 4 2007.2.10 12:52:48 PM Árbol de menús 1 Cámara 1.1 1.2 1.3 1.3.1 1.3.2 1.3.3 1.3.4 1.3.5 Tomar una foto Álbum de fotos Configuración Tamaño de imagen Sonido del disparador Flash Temporizador autom. Capturas múlt. 2 Mensajes 94 2.1 2.1.1 2.1.2 2.2 2.3 2.4 2.5 2.6 2.7 2.8 2.9 2.10 Escribir nvo. Mensajes de texto Mensajes mult. Buz. entr. MI Enviado Buzón de salida Borrador Msjs naveg Correo de voz Plantillas Configuración 070210_C3b_SP_at&t(00).indd 94 2.10.1 2.10.2 2.10.3 2.10.4 2.10.5 2.11 Config. común Mensajes de texto Mensajes mult. Correo de voz Mensajes del navegador Info. Memoria 3 Llamadas recientes 3.1 3.2 3.3 3.4 3.4.1 3.4.2 3.4.3 3.4.4 3.5 3.5.1 3.5.2 3.5.3 3.5.4 Perdidas Llam. recibidas Llam. marcadas Borrar registros de llam. Perdidas Llam. recibidas Llam. marcadas Todas las llamadas Tiempo de llam. Última llam. Llam. recibidas Llam. marcadas Total de llam. 3.5.5 3.6 3.6.1 3.6.2 3.6.3 3.6.4 Reiniciar tpo. llam. Info. GPRS Info. actual Última info. Info total Eliminar registros 4 MEdia Net 4.1 4.2 4.3 4.4 4.5 4.5.1 4.5.2 4.6 4.7 Inicio de MEdia Net Favoritos Ir a URL Perfiles Caché Modo Caché Eliminar caché Certif. Seguridad Versión 5 AT&T Mall 5.1 5.2 5.3 5.4 Comprar timbres Comprar juegos Comprar gráficos Comprar multimedia 5.5 5.6 Comprar aplicaciones Inicio de MEdia Net 6 Correo de celular 7 Mi material 7.1 7.2 7.3 7.4 7.5 7.6 7.6.1 7.6.2 7.6.3 7.6.4 7.6.5 7.6.6 7.6.7 7.6.8 7.6.9 Juegos y apl. Audio Gráficos Álbum de fotos Otros archivos Herramientas Alarma Calendario Bloc notas Nota de voz Hora mundial Calculadora Conversor Cronómetro Kit de herramientas SIM* 2007.2.10 12:52:49 PM Árbol de menús 7.7 Estado de memoria 8 Contactos 8.1 8.2 8.3 8.4 8.5 8.6 8.7 8.8 8.9 8.10 8.10 Lista contactos Agr contacto Marcación rápida Grupos Mi tarjeta de negocios Memoria en uso Borrar todo Copiar todos Número propio Info. Memoria Num. de servicio* 9 Configuración 9.1 9.1.1 9.1.2 9.1.3 9.1.4 9.1.5 Pantalla Comprar gráficos Pantalla principal Saludo Contraste Luz de fondo 9.2 9.2.1 9.2.2 9.2.3 9.2.4 9.2.5 9.2.6 9.2.7 9.3 9.3.1 9.3.2 9.3.3 9.3.4 9.3.5 9.4 9.4.1 9.4.2 9.4.3 9.5 9.5.1 9.6 9.6.1 9.6.2 Audio Comprar timbres Sonido de timbre Volumen Tonos alerta Tono de tecla Tono al abrir tapa Efectos de sonido Llamada Transferir llamada Tipo de contestar Remarc. autom. Llamada en espera ID de llamada Teléfono Idioma Hora y fecha Modo de vuelo Conectividad Bluetooth Seguridad Verif. PIN1 Cambiar PIN1 9.6.3 9.6.4 9.6.5 9.6.6 9.6.7 9.6.8 9.6.9 9.7 9.8 9.9 9.9.1 Bloqueo de teléfono Cambiar contraseña Restricc. teléfono Marcación fija Cambiar PIN2 Restricc. Llamada* Grupo de usuario cerrado* Versión de software Reiniciar TTY Configuración * Este menú depende de la tarjeta SIM. 95 070210_C3b_SP_at&t(00).indd 95 2007.2.10 12:52:49 PM Códigos de acceso La siguiente sección describe diversos códigos de seguridad utilizados en el teléfono. Código PIN1 (4 a 8 dígitos) El código PIN1 (Número de identificación personal) protege a la tarjeta SIM contra el uso no autorizado. Por lo general, el código PIN1 se suministra con la tarjeta SIM. Si este código es ingresado en forma incorrecta tres veces seguidas, se bloqueará. Si el código PIN1 está bloqueado, necesitará el código PUK 1 para desbloquearlo antes de poder usar nuevamente la tarjeta SIM. Consulte la información sobre el código PUK1. Código PIN2 (4 a 8 dígitos) El código PIN2, suministrado con algunas tarjetas SIM, es necesario para acceder a algunas funciones, como contadores de costos de llamadas. Comuníquese con su portador para obtener información. Código de bloqueo El código de bloqueo se puede usar para bloquear el teléfono y el teclado con el fin de evitar su uso no autorizado. 96 NOTA La configuración de fábrica para el código de bloqueo es 1234. Para evitar el uso no autorizado del teléfono, cambie el código de bloqueo. Mantenga el nuevo código en secreto en un 070210_C3b_SP_at&t(00).indd 96 lugar seguro, alejado del teléfono. Códigos PUK1 y PUK2 (8 dígitos) El código PUK1 (Clave de desbloqueo personal) es necesario para cambiar un código PIN1 bloqueado. El código PUK2 es necesario para cambiar un código PIN2 bloqueado. Si los códigos no se suministran junto con la tarjeta SIM, comuníquese con el operador de quien obtuvo la tarjeta para conseguir los códigos. NOTA Puede cambiar los siguientes códigos: código de bloqueo, código PIN1 y código PIN2. Estos códigos solamente pueden incluir números del 0 al 9. La tecla [#] actúa como la función [o]. Evite usar códigos de acceso similares a los números de emergencia, como 112, para evitar marcar accidentalmente uno de estos números. Contraseña de restricción de llamadas (4 dígitos) La contraseña de red es necesaria cuando utiliza la función Restricc. Llamada. El proveedor de servicio le proporcionará una contraseña de red al momento de suscribirse a esta función. Puede cambiar esta contraseña usando la función Restricc. llamada. (Para obtener más detalles, consulte Seguridad en la página 89.) 2007.2.10 12:52:49 PM Lista de control de solución de problemas Si experimenta algún problema mientras usa su teléfono celular, consulte la siguiente lista de control. Si el problema persiste, comuníquese con el distribuidor o el portador más cercano. Cuando aparezca el mensaje “Inserte SIM”: asegúrese de que la tarjeta SIM esté instalada correctamente. Revise para ver si la tarjeta SIM está funcionando adecuadamente. Si no funciona, intente limpiar los puntos de contacto de la tarjeta. Si no responde, llévela al portador más cercano. Cuando aparezca el mensaje “Contraseña” en el estado de teléfono bloqueado: Ingrese la contraseña del teléfono. La contraseña predeterminada es «1234». Si no puede recordar la contraseña, póngase en contacto con el portador más cercano. Cuando aparezca el mensaje “Ingrese PIN1”: Ingrese el PIN1. Si no puede recordarlo, póngase en contacto con el portador más cercano. Todavía puede recibir llamadas, incluso si el teléfono celular se bloquea luego de ingresar el PIN1 incorrecto tres veces consecutivas. 070210_C3b_SP_at&t(00).indd 97 Cuando aparezca “Sin servicio” o “Buscando red”: Si no puede realizar ni recibir llamadas en el interior de un recinto o en un subterráneo, donde la intensidad de la señal es débil, muévase hacia una ventana o salga a un área abierta. Si aun así no puede establecer una conexión, póngase en contacto con el portador más cercano. Cuando la calidad del audio sea débil: Finalice la llamada y vuelva a intentarlo. Cuando la otra persona no lo escuche: El teléfono podría estar en MUDO. Desactive la función MUDO. Cuando la vida útil de la batería sea menor que lo habitual: Esto podría suceder cuando se encuentre en un área con baja intensidad de la señal. Apague el teléfono cuando no esté en uso. Cambie la batería cuando la energía de ésta se haya agotado. Cuando el teléfono celular no se encienda: Asegúrese de que la batería esté cargada. Verifique que el teléfono funcione mientras recarga la batería. 97 2007.2.10 12:52:50 PM Lista de control de solución de problemas 98 Cuando no pueda enviar un mensaje: Puede que no esté registrado para recibir servicio SMS o bien, puede estar en un área en la que el proveedor de servicio de red no puede proporcionar dicho servicio. Cuando no pueda realizar una llamada: El teléfono puede estar programado en “marcación fija”. Cancele la función “marcación fija”. Cuando no pueda cargar la batería: Esto podría ser el resultado de uno de los siguientes casos. ❶ El cargador podría no estar funcionando. Póngase en contacto con el distribuidor más cercano. ❷ Podría estar intentando usar el teléfono en una temperatura extremadamente calurosa/fría. Intente cambiar el entorno de carga. ❸ Es posible que la batería no se haya conectado correctamente al cargador. Revise el conector. Cuando no pueda ingresar datos en los Contactos: La memoria de los Contactos podría estar llena. Intente borrar algunas entradas de los Contactos. Cuando no pueda seleccionar una función determinada: Es posible que no esté suscrito a esa función o que el 070210_C3b_SP_at&t(00).indd 98 proveedor de servicio de red esté en un área en la cual dicho servicio no se puede proporcionar. Póngase en contacto con el proveedor de servicio local. 2007.2.10 12:52:50 PM Desempeño y seguridad & Glosario La siguiente lista muestra cómo mantener el teléfono celular, junto con las precauciones que se deben tomar. •Mantenga el teléfono celular y sus accesorios fuera del alcance de los niños. •Mantenga el teléfono celular en condiciones secas y manténgalo dentro de temperaturas de funcionamiento normales. Las temperaturas por sobre los 55°C (131°F) o inferiores a -20°C (-4°F) podrían dañar el teléfono. •No use o guarde el teléfono celular en lugares polvorientos y sucios. •No trate de desarmar el teléfono celular. •No deje caer el teléfono celular ni lo golpee fuertemente. •No use productos químicos, solventes o detergentes de limpieza para limpiar el teléfono celular. •Si el teléfono celular no funciona correctamente, póngase en contacto de inmediato con un distribuidor. •Use sólo baterías, cargadores y accesorios autorizados. Cualquier mal funcionamiento o daño causado por el uso de baterías, cargadores y accesorios no autorizados invalidará la garantía limitada del producto. •Asegúrese de que los puntos de conexión a tierra de la batería y el cargador no entren en contacto con objetos conductores. 070210_C3b_SP_at&t(00).indd 99 Glosario Para ayudarlo a comprender los principales términos técnicos y abreviaturas utilizados en este folleto y así poder aprovechar al máximo las funciones del teléfono celular, a continuación aparecen algunas definiciones. Restricc. Llamada Capacidad de restringir las llamadas salientes y entrantes. Transferencia de llamadas Capacidad de redirigir las llamadas a otro número. Retención de llamadas Capacidad de colocar una llamada en espera mientras se contesta o realiza otra llamada; luego puede intercambiar entre ambas llamadas, según se requiera. Llamada en espera Capacidad de informar a los usuarios que poseen una llamada entrante mientras están conectados con otra llamada. Servicios CLI (Identificación de línea de llamada) Servicios que permiten a los abonados ver o bloquear los números de teléfono de las personas que llaman. 99 2007.2.10 12:52:50 PM Glosario GPRS (Servicio de radio de paquete general) Nuevo servicio de valor agregado sin voz que permite que la información se envíe y reciba a través de una red de telefonía celular. GPRS garantiza una continua conexión a Internet a los usuarios de teléfonos celulares y computadoras. Se basa en conexiones de telefonía celular de circuito conmutado del Sistema global para comunicaciones móviles (GSM) y el Servicio de mensajes cortos (SMS). GSM (Sistema global para comunicaciones móviles) Estándar internacional para comunicaciones de telefonía celular, que garantiza la compatibilidad entre los diversos operadores de redes. GSM cubre a la mayoría de los países europeos y muchas otras partes del mundo. MMS (Servicio de mensajes multimedia) Servicio de red que envía y recibe mensajes hacia y desde otro abonado sin necesidad de hablar con la persona. El mensaje admite la presentación de diversos tipos de medios, como imágenes a todo color y tonos de timbres polifónicos. Llamada multipartita Capacidad de establecer una llamada de conferencia que incluya a hasta cinco partes adicionales. PIN (Número de identificación personal) Código de seguridad que protege el teléfono/tarjeta SIM contra el uso no autorizado. El PIN lo suministra el proveedor de servicio con la tarjeta SIM. Puede ser un número de cuatro a ocho dígitos y se puede cambiar si se requiere. PUK (Clave de desbloqueo de PIN) Código de seguridad utilizado para desbloquear el teléfono cuando se ingresa un PIN incorrecto tres veces seguidas. El número de ocho dígitos lo suministra el proveedor de servicio con la tarjeta SIM. SIM (Módulo de identificación del abonado) Tarjeta que contiene un chip con toda la información requerida para hacer funcionar el teléfono (información de red y memoria, así como también datos personales del abonado). La tarjeta SIM se inserta en una pequeña ranura en la parte posterior del teléfono y queda protegida por la batería. SMS (Servicio de mensajes cotos) Servicio de red que envía y recibe mensajes hacia y desde otro abonado sin necesidad de hablar con la persona. El mensaje creado o recibido se puede mostrar, recibir, editar o enviar. 100 070210_C3b_SP_at&t(00).indd 100 2007.2.10 12:52:51 PM Glosario Teclas programables Dos teclas programables ([[], []]) marcadas en el teléfono, que: •varían de acuerdo con la función que esté utilizando •se indican en la parte inferior de la pantalla, justo sobre la tecla correspondiente. Correo de voz Servicio de contestación computarizado que responde automáticamente las llamadas cuando usted no está disponible, reproduce un saludo (opcionalmente con su propia voz) y graba mensajes. 101 070210_C3b_SP_at&t(00).indd 101 2007.2.10 12:52:51 PM Cumplimiento con las normas de la FCC y de Industry Canada Cumplimiento con las normas de la FCC y de Industry Canada Este dispositivo cumple con la parte 15 de las normas de la FCC. El funcionamiento está sujeto a las siguientes dos condiciones: (1) este dispositivo puede no causar interferencia dañina, y (2) este dispositivo debe aceptar cualquier interferencia recibida, incluida una interferencia que pueda provocar un funcionamiento no deseado. Su dispositivo celular es un radiotransmisor y receptor de baja potencia. Cuando está encendido, recibe y también envía señales de radiofrecuencia (RF). En agosto de 1996, la Comisión federal de comunicaciones (FCC) adoptó las pautas para la exposición a la RF con niveles de seguridad para los dispositivos celulares. Dichas pautas son coherentes con los estándares de seguridad previamente definidos por los cuerpos de estándares de EE.UU. e internacionales: Instituto nacional de estándares americanos (ANSI), Consejo nacional de protección radiológica y medidas (NCRP) y Comisión internacional para la protección contra la radiación no ionizante (ICNRP). Aquellos estándares se basaron en evaluaciones integrales y periódicas de textos científicos pertinentes. El diseño del teléfono cumple con las pautas de la FCC y aquellas aplicables. Declaración conforme a la parte 15,105 de la FCC NOTA Este equipo ha sido probado y se demostró que cumple con los límites para un dispositivo digital clase B, conforme a la parte 15 de las normas de la FCC. Estos límites están diseñados para proporcionar una protección razonable contra la interferencia dañina en una instalación residencial. Este equipo genera, usa y puede irradiar energía de radiofrecuencia y, si no se instala y utiliza conforme a las instrucciones, puede provocar interferencia dañina a las comunicaciones de radio. Sin embargo, no existe una garantía de que no se producirá interferencia en una instalación en particular. Si este dispositivo provoca una interferencia dañina a la recepción de radio o televisión, la cual se puede determinar encendiendo y apagando el equipo, se invita al usuario a intentar corregir la interferencia mediante una o más de las siguientes medidas: •Vuelva a orientar o ubicar la antena de recepción. •Aumente la separación entre el equipo y el receptor. •Conecte el equipo a una toma de corriente en un circuito diferente del que está conectado el receptor. •Pida ayuda a un distribuidor o técnico de radio/TV experimentado. Declaración conforme a la parte 15.21 de la FCC Las modificaciones no expresamente aprobadas por esta empresa podrían invalidar la autoridad del usuario de operar el equipo. 102 070210_C3b_SP_at&t(00).indd 102 2007.2.10 12:52:51 PM Cumplimiento con las normas de la FCC y de Industry Canada Exposición a RF según la FCC En el caso de utilizarlo en el cuerpo, para mantener el cumplimiento con las pautas de exposición a la RF de la FCC, use sólo accesorios que contengan componentes no metálicos y deje una distancia de 15mm (0,6 pulgadas) con el cuerpo. El uso de otros accesorios podría violar las pautas de exposición a RF de la FCC y debe evitarse. Este dispositivo y su antena no deben estar ubicados en el mismo lugar ni funcionar en conjunto con otras antenas o transmisores. Información sobre salud y seguridad según FCC Este EUT ha demostrado ser capaz de cumplir con la tasa de absorción específica (SAR) localizada para límites de exposición de población general/entorno especificada en ANSI/IEEE Estándar C95.1-1992 y ha sido probada de acuerdo con los procedimientos de medidas especificados en FCC/OET Boletín 65 Suplemento C (2001) y IEEE Estándar 1528-2003 Ministerio de salud (Canadá), Código de seguridad 6. Los estándares incluyen un margen de seguridad sustancial diseñado para asegurar la protección de todas las personas, sin importar su edad y estado de salud. El estándar de exposición para los teléfonos celulares inalámbricos emplea una unidad de medida conocida como Tasa de absorción específica o SAR. El límite de SAR definido por la FCC es 1,6W/kg *. * En Estados Unidos y Canadá, el límite de SAR para los teléfonos celulares utilizados por el público es 1,6 watts/kg (W/kg) promedio sobre un gramo de tejido. El estándar incorpora un margen sustancial de seguridad para dar protección adicional al público y para justificar cualquiera de las variaciones en las medidas. **Este dispositivo contiene funciones GSM de 1800 MHz que no están operativas en los territorios de Estados Unidos; este documento se aplica sólo a las operaciones de GSM de 850 MHz y PCS de 1900 MHz. 103 070210_C3b_SP_at&t(00).indd 103 2007.2.10 12:52:52 PM Medidas de seguridad Es posible que el uso de teléfonos móviles no esté permitido cuando se conduce un automóvil. Revise las leyes y regulaciones locales relacionadas con la prohibición de uso de teléfonos celulares mientras se conduce y obedézcalas siempre. El uso del teléfono mientras conduce puede interrumpir su concentración y provocar un accidente. Siempre apáguelo lo antes posible. Si debe utilizar el teléfono en caso de emergencia, use un dispositivo de manos libres incorporado en el automóvil o estaciónese en un lugar de detención apropiado para mayor seguridad. Apáguelo en áreas restringidas Siempre apague el teléfono en áreas donde su uso esté restringido. 104 Apáguelo en áreas de explosivos o peligrosas Siempre apague el teléfono en áreas que contienen materiales explosivos o peligrosos (como combustible, gas o productos químicos) y respete todas las instrucciones o señalizaciones presentes en el área. No extraiga la batería del teléfono móvil en dichas áreas. 070210_C3b_SP_at&t(00).indd 104 Apáguelo dentro de los aviones Siempre apague su teléfono o seleccione Modo de vuelo activado (presione la tecla programable [Menú], seleccione 9. Configuración seleccione 4 Teléfono y luego seleccione 3. Modo de vuelo) cuando se encuentre en un avión. Las ondas electromagnéticas que emite el teléfono pueden afectar los equipos electrónicos de navegación del avión. Apáguelo en hospitales y cerca de equipos médicos Siempre apague el teléfono en los hospitales y cumpla con las reglamentaciones y normas de éstos. Apague el teléfono cuando se utilicen equipos médicos para fines privados. Siempre consulte al fabricante de equipos médicos o a un experto con respecto al uso del teléfono cerca de éstos. Instalación de un dispositivo de manos libres en el vehículo Instale los dispositivos de manos libres lejos del volante de la dirección y del área de inflado de las bolsas de aire, de lo contrario, se podrían producir lesiones. 2007.2.10 12:52:52 PM Medidas de seguridad Teléfonos móviles y otros dispositivos electrónicos Los teléfonos móviles emiten ondas electromagnéticas que pueden afectar a los dispositivos electrónicos cercanos. Cuando el teléfono esté encendido, no lo coloque cerca de equipos electrónicos delicados. 105 070210_C3b_SP_at&t(00).indd 105 2007.2.10 12:52:52 PM Garantía Proteja su Garantía Lea cuidadosamente su Garantía, con especial consideración al párrafo siete que trata la Garantía Limitada para su unidad. “La Garantía no se aplica a... o a cualquier producto o parte del mismo que haya sufrido a través de alteración... mal trato, mal uso, negligencia o accidente”. Muchas compañías están haciendo accesorios parecidos y en algunos casos, están promocionando que sus productos son iguales o mejores que los productos de Pantech. Tenga cuidado. Algunos de estos productos pueden no ser compatibles para ser utilizados con su producto Pantech y pueden dañar la unidad o causar su mal funcionamiento. Si su unidad requiere servicio y se determina que un accesorio que no sea Pantech ha generado el problema para la misma, la Garantía no tendrá aplicación. Además, si la unidad ya ha sufrido un daño irreversible motivado por el uso de un accesorio no compatible, la Garantía caducará. Para proteger su Garantía, utilice solamente accesorios compatibles que no puedan dañar ni interferir con el funcionamiento de su producto Pantech. Garantía limitada por 12 meses 106 Pantech Wireless, Inc. (la Compañía) garantiza al comprador minorista original de este teléfono celular portátil de mano marca Pantech, que si este producto o cualquier parte del mismo, durante el uso y condiciones normales que del mismo haga el consumidor, se comprueba que tiene defectos en el 070210_C3b_SP_at&t(00).indd 106 material o defectos de fabricación, los cuales conducen a fallas en el producto dentro de los primeros doce (12) meses a partir de la fecha de compra, dicho(s) defecto(s) será(n) reparado(s) o reemplazado(s) (con partes nuevas o reconstruidas) a opción de la Compañía, sin cargo alguno por las partes ni por los trabajos directamente relacionados con el(los) defecto(s). La antena, teclado, pantalla, batería recargable y el cargador de baterías, si estuvieran incluidos, están igualmente garantizados por doce (12) meses a partir de la fecha de compra. Esta Garantía se extiende solamente a clientes que adquieran el producto en los Estados Unidos o Canadá y la misma no es transferible ni asignable. Esta garantía no se aplica a: (a) Un producto sometido a uso y condiciones anormales, accidente, mal manejo, negligencia, alteración no autorizada, mal uso, instalación inadecuada o reparación o almacenaje inapropiado; (b) Un producto cuyo número de serie mecánico o electrónico haya sido removido, alterado o desfigurado. (c) Daños producidos por exposición a la humedad, temperaturas excesivas o condiciones ambientales extremas; (d) Daños producidos por la conexión o el uso de un accesorio u otro producto no aprobado o no autorizado por la Compañía; (e) Defectos de apariencia, cosmética, decorativos o elementos estructurales tales como armazones o partes no operativas; (f) Un producto dañado por causas externas tales como incendio, inundación, tierra, arena, condiciones climáticas, pérdidas en la batería, fusible quemado, robo o uso inapropiado de alguna 2007.2.10 12:52:53 PM Garantía fuente de suministro eléctrico. La Compañía deslinda toda responsabilidad por la remoción o la reinstalación del producto, por la cobertura geográfica, por inadecuada recepción de la señal por parte de la antena o por el rango de las comunicaciones o la operación del sistema de telefonía celular en su conjunto. Para realizar reparaciones u obtener un reemplazo dentro de los términos de esta Garantía, el producto debe ser enviado con la prueba de cobertura de la Garantía (por ejemplo, factura de venta con fecha), el domicilio del usuario remitente, un número de teléfono diurno y/o número de fax y descripción completa del problema, con flete pagado, a la Compañía llamando al número que se detalla más abajo o bien enviándolo al lugar donde se lo compró para procesar su reparación o reemplazo. Además, usted nos puede llamar por teléfono al número (800) 962-8622, o nos puede enviar un email a [email protected] LOS ALCANCES DE LA RESPONSABILIDAD DE LA COMPAÑÍA BAJO ESTA GARANTÍA ESTÁN LIMITADOS A LA REPARACIÓN O REEMPLAZO COMO SE ESTIPULA MÁS ARRIBA Y, EN NINGÚN CASO, LA RESPONSABILIDAD DE LA COMPAÑÍA EXCEDERÁ EL PRECIO DE COMPRA QUE EL COMPRADOR HAYA PAGADO POR EL PRODUCTO. CUALQUIER GARANTÍA IMPLÍCITA, INCLUYENDO CUALQUIER GARANTÍA IMPLÍCITA DE COMERCIALIZACIÓN O ADAPTABILIDAD PARA UN PROPÓSITO EN PARTICULAR, ESTARÁ LIMITADA A LA 070210_C3b_SP_at&t(00).indd 107 DURACIÓN DE ESTA GARANTÍA ESCRITA. CUALQUIER ACCIÓN POR LA RUPTURA DE UNA GARANTÍA DEBE SER PRESENTADA DENTRO DE UN PERÍODO DE 18 MESES A PARTIR DE LA FECHA DE COMPRA ORIGINAL. EN NINGÚN CASO LA COMPAÑÍA SERÁ RESPONSABLE POR DAÑOS ESPECIALES CIRCUNSTANCIALES O COMO CONSECUENCIA DE LA RUPTURA DE ESTA O CUALQUIER OTRA GARANTÍA, EXPRESA O IMPLÍCITA, CUALQUIERA QUE ESTA FUERA. LA COMPAÑÍA NO SERÁ RESPONSABLE POR LA DEMORA EN PRESTAR SERVICIO AL AMPARO DE ESTA GARANTÍA NI POR LA PÉRDIDA DE USO POR EL PERÍODO DURANTE EL CUAL EL PRODUCTO ESTÉ SIENDO REPARADO O REEMPLAZADO. Ninguna persona o representante están autorizados a asumir ninguna responsabilidad en nombre de la Compañía que no sea aquella expresada en este documento en relación con la venta de este producto. Algunos estados o provincias no permiten la existencia de limitaciones en cuanto al tiempo de duración de una garantía implícita o la exclusión o limitación de daños circunstanciales o indirectos, por lo tanto la limitación o exclusiones mencionadas más arriba pueden no ser de aplicación en su caso. Esta Garantía le da a usted derechos legales específicos, y usted puede también tener otros derechos los cuales varían de estado a estado o de provincia a provincia. PANTECH WIRELESS, INC. 11240 Warland Drive, Cypress, CA 90630 (800) 962-8622 107 2007.2.10 12:52:53 PM Nota 108 070210_C3b_SP_at&t(00).indd 108 2007.2.10 12:52:53 PM