Download American Standard Culinaire Bar/Pantry Faucet 4233.400 User's Manual
Transcript
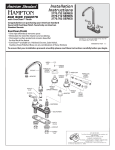
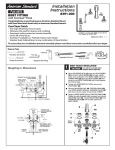
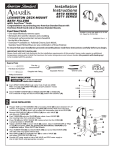
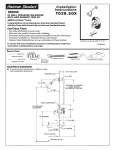
Installation Instructions Culinaire 4233.400 BAR/PANTRY FAUCET with EverClean™ Finish Congratulations on purchasing your American Standard faucet with EverClean finish found only on American Standard faucets. EverClean Finish • One wipe effortlessly removes spots • Eliminates the need for cleaners and scrubbing • Permanent surface protectant remains beautiful for the life of the faucet Certified to comply with ANSI A112.18.1M .3&7 • EverClean™ available on: Polished Chrome, Satin Nickel, Stainless Steel, Polished Brass (or any combination of these finishes) To ensure that your installation proceeds smoothly-please read these instructions carefully before you begin. 3FDPNNFOEFE5PPMT.BUFSJBMT 3FHVMBS4DSFXESJWFS "EKVTUBCMF8SFODI 5VCJOH$VUUFS 1MVNCFSTh1VUUZPS $BVMLJOH $IBOOFM-PDLT 1IJMMJQT4DSFXESJWFS INSTALL FAUCET CAUTION Turn off hot and cold water supplies before beginning. Make certain the large O-RING (1) is properly seated in recess of faucet body. Insert supply TUBES (2) and SHANK (3) through hole of sink or mounting surface Assemble RUBBER WASHER (4), BRASS WASHER (5), and thread LOCKNUT (6) onto SHANK (3) from underside of sink. Hand tighten LOCKNUT (6) Check that FAUCET is centered. NOTE: Set screw is in back of faucet body. Use a screwdriver to tighten the SCREWS (7) on LOCKNUT (6). Alternate tightening the SCREWS (7) slightly each time until snug to ensure even pressure. SET SCREW (IN BACK) RECESS 1 3 2 4 5 6 7 MAKE WATER SUPPLY CONNECTIONS NOTE: FLEXIBLE SUPPLIES OR BULL-NOSE RISERS MUST BE PURCHASED SEPARATELY. TEST INSTALLED FAUCET Remove AERATOR (1). With handles in OFF position, turn on WATER SUPPLIES (2) and check all connections for leaks. Connect water supplies to SUPPLY ADAPTERS (1) with 1/2" IPS FLEXIBLE SUPPLIES (2) or 3/8" O.D. BULL-NOSE RISERS (3). Operate both HANDLES (3) to flush water lines thoroughly. Rotate SPOUT (4) in both directions. Replace AERATOR (1). Use tubing cutter to cut to proper length. Connect the HOT to the left supply and the COLD to the right supply. Use adjustable wrench on coupling nut and another wrench on supply adapters to prevent twisting of supply tubes. Tighten connections. Do not over tighten. Be careful not to kink copper supply when bending. 1 4 3 1 2 3 2 FERRULE HOT COLD SERVICE 2 1 To change direction of handle rotation, proceed as follows: Turn valve to OFF position. Remove INDEX CAP (1). Remove HANDLE SCREW (2). Pull off HANDLE (3) and pull off HANDLE BASE (4). Remove SPRING CLIP (6). Lift STOP WASHER (5), turn 90˚ and replace. Replace SPRING CLIP (6). Reinstall HANDLE BASE (4) and HANDLE ASSEMBLY (3,2,1). 3 4 6 90˚ 5 If faucet drips proceed as follows: Aerator may accumulate dirt causing distorted and reduced water flow. Remove aerator and rinse clean. If spout drips, operate handles several times from ON to OFF position. Do not force-handles turn only 90˚. .3&7


