1
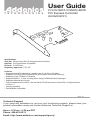
User
Guide
2 Ports SATA II RAID5/JBOD
T E C H N O L O G I E S
PCI Express Controller
(AD2SA3GPX1)
Specifications
Chip Set: Silicon Image Sil3132 Integrated Host Controller
Interface: PCI-Express Bus Compatible
I/O Ports: 2 SATA Ports
Regulatory approvals: FCC, CE
Features:
• Supports Serial ATA Generation 2 transfer rate of 3.0 Gbps (300 Mb/s)
• Supports First-Party DMA Commands for NCQ (Native Command Queuing)
• Supports 1-lane 2.5Gbps PCI Express
• Supports RAID0, 1, 5, and 10 using Silicon Image SATARAID5 Array Manager
• Supports individual drive mode
• Fully compliant with Serial ATA 1.0a and Serial ATA II Extensions to Serial ATA 1.0a Specifications
revision 1.1
• Hot-plug capability
• Port Multiplier Compatible
v4.1.11
Technical Support
If you need any assistance to get your unit functioning properly, please have your
product information ready and contact Addonics Technical Support at:
Hours: 8:30 am - 6:00 pm PST
Phone: 408-453-6212
Email: http://www.addonics.com/support/query/
RAID Described:
Stripe (RAID 0): Greatly increases the performance of data transfer by simultaneously writing data to 2
or more drives.
Mirror (RAID 1): Duplicates or mirrors the data on both drives. No data will be lost if one of the drives
fails.
Mirror-Striping (RAID 1+0): Combined both Striping and Mirroring technologies to provide both the
performance enhancements that come from Striping and the data availability and integrity that come
from Mirroring.
Parity (RAID 5): Adds fault tolerant to disk striping by including parity information with the data.
Installation:
Software Installation:
Note: Install the SATARAID5 array manager utility from the CD that came with your package first before
installing the SATA Host Controller.
A.
From the CD start-up menu select Auto Play > SATA RAID Utilities > Model #AD2SA3GPX1.
B.
Unzip the file on your drive. Folder name is SATARAID5_Utility_3132.
C.
On the GUI folder install 3132-W-I32-R_15180b.msi (SATARAID5 software).
D.
From the CD start-up menu select SATA Adapters > Model # AD2SA3GPX1.
E.
Unzip the file on your drive. Folder name is 3132r5.
Hardware Installation:
1.
2.
3.
4.
Power off PC and remove its cover.
Select an empty PCI-E slot and insert the SATA host controller.
Makes sure to secure the bracket with a screw.
Close the PC’s cover.
Windows 2000, XP, 2003, 2008 Server Driver Installation:
1.
2.
3.
4.
5.
6.
Turn computer ON. When Windows boots up, “A New Hardware Found” pops on the screen
and the Addonics Serial ATA PCI Host Controller is identified.
At the “Add New Hardware Wizard Window, click “Next”
Choose “Select for the best driver for your devices”, and click “Next”
Navigate to the folder where you extracted the 3124r5 driver.
If using a driver that has not been digitally signed by Microsoft, you will be asked if you want
to continue the installation. Click Continue.
When the new hardware wizard has finish installing the Serial ATA card. Click “Finish” to
complete the installations.
Confirming Serial ATA Driver Installation:
1.
2.
3.
Right click the My Computer icon and select Manage.
Click Device Manager in the Menu Tree.
Click the “+” sign in front of SCSI controllers. Silicon Image SoftRAID5 controller should
appear.
Important Note:
•
•
•
To do a RAID SET with 2 SATA drives directly connected to the SATA ports on the controller
card, you can press F4 or CTRL+S from the boot up screen. Read and follow the instruction
inside the BIOS screen.
You can also install the SATA GUI utility under Windows to monitor the RAID Set. It is under
the Utility section of the driver disc.
If you have a port multiplier (PM) with 5 drives and connect the PM to the SATA controller
card, in the RAID BIOS of the SATA controller card, it will only display 1 drive and that is the
drive connected to port 1 on the PM. To see all 5 drives, you would need to be inside the
operating system disk utility.
www.addonics.com
Technical Support (M-F 8:30am - 6:00pm PST)
Phone: 408-453-6212
Email: www.addonics.com/support/query/