1
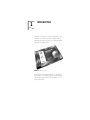
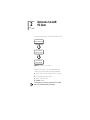
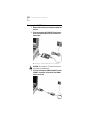
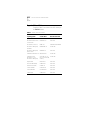
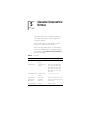
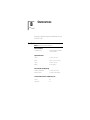
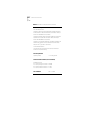
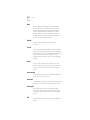
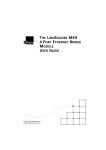
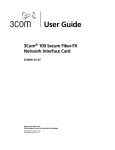
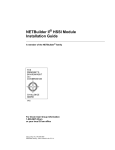
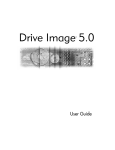
LAN PC Card
User Guide
Part No. 09-1349-000/BO695D
Published April 1998
3Com Corporation
■
5400 Bayfront Plaza
■
Santa Clara, California
■
95052-8145
© 3Com Corporation, 1998. All rights reserved. No part of this documentation may be reproduced in
any form or by any means or used to make any derivative work (such as translation, transformation, or
adaptation) without permission from 3Com Corporation.
3Com Corporation reserves the right to revise this documentation and to make changes in content
from time to time without obligation on the part of 3Com Corporation to provide notification of such
revision or change.
3Com Corporation provides this documentation without warranty of any kind, either implied or
expressed, including, but not limited to, the implied warranties of merchantability and fitness for a
particular purpose. 3Com may make improvements or changes in the product(s) and/or the program(s)
described in this documentation at any time.
UNITED STATES GOVERNMENT LEGENDS:
If you are a United States government agency, then this documentation and the software described
herein are provided to you subject to the following restricted rights:
For units of the Department of Defense:
Restricted Rights Legend: Use, duplication or disclosure by the Government is subject to restrictions as
set forth in subparagraph (c) (1) (ii) for restricted Rights in Technical Data and Computer Software
clause at 48 C.F.R. 52.227-7013. 3Com Corporation, 5400 Bayfront Plaza, Santa Clara, California
95052-8145.
For civilian agencies:
Restricted Rights Legend: Use, reproduction or disclosure is subject to restrictions set forth in
subparagraph (a) through (d) of the Commercial Computer Software - Restricted Rights Clause at 48
C.F.R. 52.227-19 and the limitations set forth in 3Com Corporation’s standard commercial agreement
for the software. Unpublished rights reserved under the copyright laws of the United States.
If there is any software on removable media described in this documentation, it is furnished under a
license agreement included with the product as a separate document, in the hard copy documentation,
or on the removable media in a directory file named LICENSE.TXT. If you are unable to locate a copy,
please contact 3Com and a copy will be provided to you.
Unless otherwise indicated, 3Com registered trademarks are registered in the United States and may or
may not be registered in other countries.
3Com, CardFacts, EtherDisk, EtherLink, NetFacts, Parallel Tasking, Transcend, and XJACK are registered
trademarks of 3Com Corporation. AutoLink and SmartAgent are trademarks of 3Com Corporation.
3ComFacts and Ask3Com are service marks of 3Com Corporation.
Novell and NetWare are trademarks of Novell, Inc. Banyan and VINES are trademarks of Banyan
Systems Incorporated. DEC and PATHWORKS are trademarks of Digital Equipment Corporation.
Artisoft and LANtastic are trademarks of Artisoft, Inc. Microsoft, MS-DOS, Windows, and Windows 95
are trademarks of Microsoft Corporation. IBM, Warp, and OS/2 are trademarks of International
Business Machines Corporation. CompuServe is a trademark of CompuServe, Inc. AT&T is a trademark
of American Telephone and Telegraph. PC Card is a trademark of Personal Computer Memory Card
International. Motorola is a trademark of Motorola, Inc. Anixter is a trademark of Anixter Bros. Inc.
Other brand and product names may be registered trademarks or trademarks of their respective
holders.
ii
CONTENT
ABOUT THIS GUIDE
Introduction 1
How to Use This Guide
Conventions 2
1
1 INTRODUCTION
Features 1-3
Requirements 1-3
Network Driver Installation Options 1-4
Troubleshooting 1-4
Transcend PC Link SmartAgent Support 1-5
Card Services 1-5
2 INSTALLING THE LAN PC CARD
Connecting the LAN PC Cards
2-2
iii
3 INSTALLING THE NETWORK DRIVER
Before You Install the Network Driver 3-1
Which Driver Installation Instructions Should You Use? 3-1
Windows 95 3-1
Which Windows 95 Version Are You Running? 3-2
Windows 95 Version 4.00.950A 3-3
Windows 95 Version 4.00.95B 3-3
Confirming Installation 3-5
Windows NT 3-5
Windows NT 4 Installation without Networking
Installed 3-6
Windows NT 4 Installation with Networking Installed 3-8
Windows NT Version 3.51 3-9
Microsoft Windows for Workgroups (WFW) 3-10
Before You Begin 3-11
Installing the Network Driver 3-11
AutoLink for Windows 3.x, Windows for Workgroups, and
DOS 3-12
Supported Network Drivers 3-14
4 TROUBLESHOOTING
Testing the 3C589D PC Card 4-2
Avoiding Memory Manager Conflicts
Troubleshooting Tips 4-4
4-3
5 CHANGING CONFIGURATION SETTINGS
Changing Power Management with Windows 95 5-2
Changing Configurations Settings with DOS 5-2
Configuration Settings Descriptions 5-3
CIS Memory Address 5-3
I/O Base Address 5-3
Interrupt Request Level 5-4
Transceiver Type 5-4
Network Driver Optimization 5-4
Power Management 5-4
iv
A ABOUT CARD SERVICES
Verifying That Card Services Is Installed A-1
Using the 3C589D PC Card Without Card Services
Avoiding Memory Manager Conflicts A-1
A-1
B SPECIFICATIONS
Specifications
B-1
GLOSSARY
INDEX
FCC CLASS B CERTIFICATION STATEMENT
CE NOTICE
v
ABOUT THIS GUIDE
Introduction
This guide describes how to install, configure, and
troubleshoot the LAN PC Card (referred to as the 3C589D
PC Card in this guide).
If the information in the README.TXT file on the EtherDisk
diskette shipped with your product differs from the
information in this guide, follow the instructions in the
README.TXT file.
How to Use This Guide
The following table shows where to find specific
information in this guide.
If you are looking for:
Turn to:
Overview
Chapter 1
Installation and cabling
Chapter 2
Network driver installation
Chapter 3
Troubleshooting
Chapter 4
Changing Configuration
Chapter 5
Card Services information
Appendix A
Specifications
Appendix B
Technical support
Appendix C
Definition of terms
Glossary
2
ABOUT THIS GUIDE
Conventions
Table 1 and Table 2 list text and icon conventions that are
used throughout this guide:
Table 0-1 Text Conventions
Convention
Description
Text represented as
screen display
This typeface is used to represent displays that appear
on your terminal screen, for example:
Login:
Text represented as
commands
This typeface is used to represent commands that you
enter, for example:
A: Install [Enter]
[Enter] means to press the Enter or Return key.
Italics
Italics are used to denote new terms or emphasis.
Table 0-2 Notice Icons
Icon
Type
Description
Information Note
Information notes call attention to
important features or instructions.
Caution
Cautions alert you to personal safety risk,
system damage, or loss of data.
1
INTRODUCTION
The LAN PC Card shown in Figure 1-1 (referred to as the
3C589D-TP PC Card in this guide) is a network adapter
that allows you to connect your PC to an Ethernet network
using a 15-pin network cable.
Figure 1-1 3C589D PC Card
The 3C589D PC Card complies with the PC Card standard
and operates in PCs containing Personal Computer Memory
Card International Association (PCMCIA) Release 2.0 or 2.1
Type II or Type III slots.
1-2
CHAPTER 1: INTRODUCTION
The LAN PC Card shown in Figure 1-2 (the 3CXE589DC PC
Card in this guide) is a network adapter that allows you to
connect your PC to an Ethernet network, using the
XJACK® connector. The only difference between the PC
Cards is the connector.
Figure 1-2 3CXE589DC LAN PC Card
Features
1-3
Features
■
■
■
■
■
■
■
■
■
■
Parallel Tasking® II architecture for greater network
speed.
Power savings (when there is no network activity, the
3C589D PC Card turns off power to itself).
Compliance with 10BASE-T and 10BASE2 standards.
Integrated Card Services support.
“Hot Swap” support (you can remove and replace the
PC Card without rebooting the PC if you have Card
Services installed).
Driver support for Microsoft® (NDIS) and Novell®
NetWare® (ODI) networks.
Automatic PC Card configuration (AutoLink™ program)
for Novell NetWare DOS ODI.
Windows® 95 Plug and Play support.
EtherDisk® diskette containing the 3C589D PC Card
software, network drivers, and text files that contain
technical information about the 3C589D PC Card.
Network management capabilities using 3Com’s
Transcend® PC Link SmartAgent™ software. (Refer to
the 3Com Transcend PC Link SmartAgent Software User
Guide for more information.)
Requirements
Make sure your PC meets the following requirements:
■
■
■
■
■
PC Card (PCMCIA) Type II or Type III card slot and a
3 1/2-inch diskette drive.
Windows or DOS 3.1 and higher.
80386 or higher processor.
450 K of lower memory available to run the installation
software.
Access to a network port for a network connection.
Call your MIS representative to get a network port.
The EtherDisk diskette contains a README.TXT file that
describes important information that became available
after this guide was printed.
1-4
CHAPTER 1: INTRODUCTION
Network Driver Installation Options
You must install the network driver on the EtherDisk diskette
that allows the PC Card to work with your network operating
system. The PC Card works with the following network
operating systems:
■
■
Novell NetWare
NDIS 2.01 and NDIS 3 network operating systems
including:
Microsoft Windows 95
■
■
Microsoft Windows NT
■
Microsoft Windows for Workgroups
■
Banyan® VINES®
■
Microsoft LAN Manager
■
IBM LAN Server
Artisoft™ LANtastic®/AI
■
■
DEC® PATHWORKS®
Network driver installation is described in Chapter 3. Ask
your MIS representative or system administrator which type
of network operating system you are using.
Troubleshooting
The PC Card software contains a DOS diagnostic program,
as described in chapters 4 and 5.
The DOS program performs the following functions for
Windows 3.x and Windows for Workgroups environments:
Runs diagnostics
■
■
Allows you to change and display settings.
Detailed troubleshooting information is provided in
Chapter 4.
Transcend PC Link SmartAgent Support
1-5
Transcend PC Link SmartAgent Support
You can manage the PC Card using 3Com’s Transcend PC
Link SmartAgent software. Refer to the Transcend PC Link
SmartAgent Software User Guide for more information.
Card Services
Card Services, which is usually supplied with your PC,
coordinates PC Card access to device drivers, utilities, and
application programs. The 3C589D PC Card supports Card
Services, but does not require it to operate.
Card Services assigns the I/O Base Address, Interrupt
Request Level, and CIS Memory Base Address for the
3C589D PC Card. For more information about Card
Services, see Appendix A.
To install the PC Card, go to Chapter 2.
INSTALLING THE LAN
PC CARD
2
This chapter describes how to install the 3C589D PC Card.
Install LAN PC Card
Connect network
cable to PC Card
Connect network
cable to network
Figure 2-1 3C589D PC Card Installation
Unpack the PC Card. If any of these items are missing,
contact your authorized network supplier immediately.
■
■
■
■
LAN PC Card or LAN PC Card with XJACK Connector
PC Card cable and network cable
LAN PC Card User Guide
EtherDisk diskette
For instructions on returning a product to 3Com, please
refer to the Limited Warrantly in this guide.
2-2
CHAPTER 2: INSTALLING THE LAN PC CARD
Connecting the LAN PC Cards
1 Remove all PC Cards from your notebook computer and
turn it on.
2 If you are connecting the 3C589D-TP PC Card, connect
the PC Card network cable to the PC Card and to the
network port.
a Slide the PC Card all the way into the PC Card slot.
CAUTION: Do not force the PC Card into the slot or you
may bend the pins inside the slot.
3 If you are connecting the 3C589D-COMBO PC Card for
10BASE-T connections, connect the PC Card COMBO
cable to the PC Card.
Connecting the LAN PC Cards
2-3
a Attach one RJ-45 network cable to the RJ-45 port on
the PC Card COMBO cable.
b Insert the other RJ-45 connector into the network port.
c Slide the PC Card all the way into the PC Card slot.
4 If you are connecting the 3C589D-COMBO PC Card,
for 10BASE2 connections, connect the PC Card
COMBO cable to the PC Card.
You must supply your own BNC T-connector.
a Connect the BNC T-connector to the PC Card COMBO
cable port.
b Connect the BNC T-connector to the network cable.
c Slide the PC Card all the way into the PC Card slot.
CAUTION: Do not force the PC Card into the slot or you
may bend the pins inside the slot.
2-4
CHAPTER 2: INSTALLING THE LAN PC CARD
5 If you are connecting the 3CXE589DT LAN PC Card,
connect the RJ-45 PC Card network cable to the PC
Card XJACK connector.
a Connect the network cable to the network port.
b Slide the PC Card all the way into the PC Card slot.
6 If you are connecting 3CXE589DC LAN PC Card for
10BASE-T connections, follow the instructions above.
7 If you are connecting the 3CXE589DC PC Card for
10BASE2 connections, connect the PC Card COMBO
cable to the PC Card.
Connecting the LAN PC Cards
2-5
a Attach the BNC T-connector to the PC Card COMBO
cable BNC port.
b Connect the BNC T-connector to the network cable.
c Slide the PC Card all the way into the PC Card slot.
CAUTION: Do not force the PC Card into the slot or you
may bend the pins inside the slot.
You may get messages from Windows 95 and Windows NT
about installing the network driver. To install the network
driver, go to Chapter 3.
INSTALLING THE NETWORK
DRIVER
3
Before You Install the Network Driver
Now that the PC Card is installed and connected to the
network, the final installation step is to install the network
driver. This section describes the requirements for a successful
driver installation.
Which Driver Installation Instructions Should You Use?
Ask your MIS department which network driver
instructions you should use. Instructions are provided
in this chapter for each of the following environments:
■
■
■
■
■
Windows 95 version 4.00.950 or 4.00.950A
Windows 95 version 4.00.950B (OSR 2)
Windows NT version 4.0
Windows NT version 3.51
Windows for Workgroups
Proceed to the driver installation section that your MIS
department recommends to install the driver.
Windows 95
This section describes how to install the network driver
when your PC is running Windows 95. You need the
Windows 95 system installation files (either on hard disk,
floppy diskettes, or CD) to complete the installation.
3Com includes the both the new NDIS 4 network driver
and the NDIS 3 network driver on the 3C589D EtherDisk
diskette. The 3Com software automatically detects which
Windows version is installed on your PC and loads the
correct driver.
3-2
CHAPTER 3: INSTALLING THE NETWORK DRIVER
The NDIS 4 driver works with Windows 95 OSR2 (version #
4.00.950B) but not standard Windows 95. You must use
the latest NDIS.VXD (8/24/96 or later) to use the NDIS 4
driver with Windows 95 OSR2.The W95EL589.INF file loads
the correct NDIS 4 driver for Windows 95.
The NDIS 3 driver works with standard Windows 95
(versions 4.00.950 or 400.950a), Windows 95 OSR2,
Windows NT 4.0, and Windows NT 3.51.
The following instructions assume that you have not
installed any other network adapter in the machine. If you
have been using a network connection on your computer,
some of the following instructions may not apply or may
produce different results. Refer to your MIS department or
system manager for instructions.
Which Windows 95 Version Are You Running?
You must determine if you are running Windows 95 OEM
Service Release 2 (OSR 2) or the standard Windows 95
before you install the network driver.
If you already know which version of Windows 95 you are
running, go to the appropriate Windows 95 section to
install the network driver on your notebook.
1 In the Windows 95 Control Panel, double-click System
to display the System Properties dialog box.
2 Click the General Tab to display the Windows 95
version information.
If your Windows 95 version is 4.00.950 or 4.00.950A, go
to the appropriate section to install the network driver.
If your Windows 95 version is 4.00.950B (OSR 2), go to the
following section to install the network driver.
Windows 95 Version 4.00.950A
3-3
Windows 95 Version 4.00.950A
This section describes how to install the NDIS network driver
when your notebook is running Windows 95 4.00.950A.
1 Make sure the CardBus PC Card is installed and
connected to the network, as described in Chapter 2.
The New Hardware Found window appears and states that
it has detected the 3Com Corporation 3C589D PC Card.
2 Insert the EtherDisk diskette.
3 Select Driver from Disk provided by manufacturer and
click OK.
The Install from Disk window appears.
4 Click OK to copy the manufacturers files from A:\.
If Windows 95 files are requested, enter the path to the
files (typically C:\windows\options\cabs)and click OK.
The 3C598D nework driver installation is complete.
5 Restart the PC to login to the network.
Windows 95 Version 4.00.95B
1 Insert the PC Card in either PC Card slot in your PC as
described in Chapter 2.
The Update Device Driver wizard window appears and
states that it has detected the 3Com LAN PC Card.
2 Insert the EtherDisk diskette and click Next to begin
driver installation.
The following message appears: "Windows found the
following updated driver for this device: 3Com EtherLink III
PCMCIA (3C589D)".
3-4
CHAPTER 3: INSTALLING THE NETWORK DRIVER
3 Click Finish to accept the driver.
a If the software prompts for computer name and
work-group name, type the names as supplied by
your MIS department and click OK.
■
The computer name is the name of your PC.
Give your PC a unique name of up to 15 characters.
The PC name cannot include blank spaces.
■
A workgroup is composed of the PCs you usually
communicate with (like your department) and
contains shared resources (like printers).
■
If you use peer-to-peer networking, the workgroup
name is your peer group. Peers can see each other
when they look in the Network Neighborhood.
■
Your computer description is visible to other
members of your workgroup when they see your PC
in the Network Neighborhood.
4 If you are prompted for Windows 95 files, enter
the directory path for Windows 95 (typically
C:\windows\options\cabs) or insert the Windows 95
CD-ROM.
If during installation, the 3Com driver cannot be found,
enter A:\ to point Windows to the driver.
When installation is complete, Windows 95 prompts
for restart.
5 Remove the EtherDisk diskette and click Yes.
When the software restarts, it prompts for your user name
and password.
6 Enter your user name and password as supplied by
your MIS department.
7 Click OK.
8 When prompted to verify your password, retype it
and click OK.
The Network Neighborhood icon appears on your desktop.
9 Double-click the icon to access the network.
The driver installation is complete.
Windows NT
3-5
Confirming Installation
1 Double-click the My Computer icon.
2 Double-click the Control Panel icon.
3 Double-click the System icon.
The System Properties box appears, detailing your system
setup.
4 Click the Device Manager tab.
A list of devices appears, arranged by type.
5 Double-click Network Adapters.
The PC Card name appears confirming successful installation:
3Com EtherLink III LAN PC Card (3C589D)
6 Double-click EtherLink III LAN PC Card to display a
description of the 3C589D PC Card and its current
status.
The dialog box confirms that the PC Card is working properly.
7 Click the Cancel button to leave each dialog box and
return to the Control Panel.
You’ve confirmed successful driver installation.
Windows NT
Before you begin, obtain the EtherDisk diskette shipped with
your 3C589D PC Card and the Windows NT installation files
(on hard disk, floppy diskettes, or CD-ROM).
If Windows NT networking is not installed, you also need
the following information from your MIS department.
■
■
■
■
Are you on a local area network or are you using a
modem?
Protocol used in the Microsoft Windows network
(NWLink IPX/SPX compatible transport, TCP/IP protocol,
NetBEUI protocol)
Name of the NT Server domain or workgroup you
belong to
IP address if you are not using DHCP
3Com includes the new NDIS 4 network driver on the
EtherDisk diskette.
3-6
CHAPTER 3: INSTALLING THE NETWORK DRIVER
The NDIS 4 driver works with Windows NT 4.0, but not
Windows NT 3.51. The OEMSETNT.INF file loads the correct
driver for Windows NT. The 3Com software automatically
detects which version of Windows NT your are running and
installs the correct driver.
Windows NT 4 Installation without Networking Installed
If you have networking installed, go to the next section to
install the driver.
1 In the Control Panel, double-click Network.
2 When the system prompts:
3 "Windows NT Networking is not installed. Install it
now?" Click Yes.
This opens the Windows NT network Setup Wizard.
4 Place a checkmark in the Wired to the network box.
The next window prompts, "To have setup start searching
for a network adapter.”
5 Click the Start Search button.
6 Click on the Select from List button.
7 Click on the Have Disk button.
8 Insert the EtherDisk diskette into drive A and click OK.
9 When the SELECT OEM OPTION window opens, select
3Com EtherLink III (3C589D) LAN PC Card, and click OK.
The Network Adapters list shows the 3Com EtherLink III
(3C589D) LAN PC Card with a check mark on it.
10 Click Next to continue.
11 In the Network Protocols list, place a check mark next
to each network protocol that Windows NT will use.
The TCP/IP transport will already be selected for use. If you
have no specific reason to use TCP/IP, you may delete it now.
12 In this dialog box, select the transport appropriate for
the network client.
Most Microsoft NT networks use the NWLink IPX/SPX
Compatible Transport. If you are not sure, ask your system
administrator or MIS department.
Windows NT
3-7
13 Click Next.
The Network Services window appears.
14 Place a check mark in the box next to each desired
service.
15 Click Next to continue.
The next window states that Windwos NT is now ready to
install networking components that you selected and others
required by the system.
16 Click Next to install the selected components.
17 The Setup prompt states that Setup needs to copy
Windows NT files.
18 Enter the path to the Windows NT installation files
and click Continue.
This opens the Etherlink III PC Card dialog box.
19 Enter the settings for the PC card.
Select the appropriate settings for the card. In most cases,
the default settings will work, but if you are unsure about
what settings to use, ask your system administrator or MIS
department.
20 Click Continue.
If you are prompted for the bus type, select PCMCIA.
If prompted for the Bus number, select 0. Click OK.
21 Click OK to the next prompt.
22 If you selected TCP/IP and have a DHCP server, click Yes.
23 If you do not have a DHCP server, click No and get an IP
address from your system administrator and enter it.
Windows NT files are copied to the hard drive.
If you are prompted for TCP/IP information, enter it and
click OK.
The Network Setup Wizard shows a Bindings list.
24 Click Next to continue.
25 Click Next to allow Windows NT to start the network.
The Domain/Workgroup Settings window appears.
3-8
CHAPTER 3: INSTALLING THE NETWORK DRIVER
26 Select the appropriate domain or workgroup name
for Windows Networking and click Next.
27 Click Finish to exit the Network Setup Wizard.
28 Remove the EtherDisk diskette from Drive A and click
Yes to restart the PC.
Windows NT 4 Installation with Networking Installed
1 Install the PC Card and connect it to the network as
described in Chapter 2.
2 Using the Control Panel, double-click Network. Select
the Adapters tab and click Add.
3 Select Have Disk.
4 Enter the path A:\, insert the EtherDisk diskette in the
A drive, and click OK.
5 When the SELECT OEM OPTION window opens, select
3Com EtherLink III (3C589D) LAN PC Card, and click OK.
6 Enter the settings for the PC card.
Select the appropriate settings for the card. In most cases,
the default settings will work, but if you are unsure about
what settings to use, ask your system administrator or MIS
department.
7 Click OK.
If prompted for the bus type, select PCMCIA. If prompted
for the bus number, select 0. Click OK.
8 A setup message states that “the parameters are not
verifiably correct - use them anyway?” Click OK.
9 In the Network Protocols tab, place a check mark next
to each network protocol that Windows NT will use.
The TCP/IP transport is selected for use. If you have no
specific reason to use TCP/IP, you may delete it now.
10 Select the transport appropriate for the network client.
Most Microsoft NT networks use the NWLink IPX/SPX
Compatible Transport. If you are not sure, ask your system
administrator or MIS department.
11 In the Network Services tab, place a check mark in the
box next to each s\desired service.
Windows NT
3-9
12 Click on the close button to save and exit the Network
setup area.
13 Remove the EtherDisk diskette from drive A and
restart the PC.
The driver installation is complete. To confirm installation,
double-click the Network icon in the Control Panel. Click
the Adapters tab. If the 3C589D does not appear on the
list, see Chapter 4 for troubleshooting procedures.
Windows NT Version 3.51
1 Make sure the PC Card is installed and connected to
the network, as described in Chapter 2.
2 In the Main group, select Control Panel.
3 On the Control panel, double-click the Network icon
and click on the Add Adapter tab.
a If Windows NT networking is not installed, click Yes to
install Windows NT networking.
The Windows NT Setup window appears.
b Enter the directory name where the Windows NT
installation files are located.
c Click Do Not Detect.
Windows NT does not fully support Plug and Play and
cannot detect the 3C589D PC Card.
d Click Continue.
The Add Network Adapter window appears.
4 Select Other Requires disk from manufacturer from
the list.
5 Click the Continue button.
6 Insert the EtherDisk diskette into drive A and type:
a:\ [Enter]
7 Click OK.
8 Select 3Com 3C589D EtherLink III LAN PC Card from
the list and click OK.
The 3C589D files are copied to your PC.
3-10
CHAPTER 3: INSTALLING THE NETWORK DRIVER
9 Click OK to accept the default settings for the 3C589D
PC Card or enter new settings.
10 If networking is already installed, enter the IP
Address if prompted, and reboot the PC to activate
the network.
11 If networking is not installed, select the transport
protocol (NWLink IPX/SPX compatible transport,
TCP/IP protocol, NetBEUI protocol) in the Windows NT
Setup Window.
a Click OK.
b If prompted, enter the directory name where the NT
installation files are located.
c Click No.
d Click OK.
e Click Close.
f If prompted, enter the domain or workgroup name for
Windows Networking and click OK.
g Remove the EtherDisk diskette and restart your PC.
The driver installation is complete.
Microsoft Windows for Workgroups (WFW)
The EtherDisk diskette contains a subdirectory structure
and files that make it an OEM import disk for Windows for
Workgroups (WFW).
WFW v3.11 does not include internal support for the Plug
and Play standard. Because NDIS 3 (32-bit) drivers operate
only in Plug and Play environments, you cannot operate the
3C589D PC Card with the included 32-bit driver.
To ensure support for WFW v3.11, 3Com includes a 16-bit
NDIS 2.0 driver. This driver offers full support for WFW, but
may affect PC performance. To resolve this deficiency with
WFW 3.11, you may want to upgrade your operating
system.
Microsoft Windows for Workgroups (WFW)
3-11
Before You Begin
Before you begin installing the network driver, obtain the
EtherDisk diskette and Windows for Workgroups v3.11
installation files (on hard disk, floppy diskettes, or CD).
Ask your MIS department for the following information:
■
■
Transport protocol used in the Microsoft Windows
Network (typically NetBEUI)
Name of the NT Server domain or Windows 95/WFW
3.11 Workgroup to which you belong
The latest versions of the Card and Socket Services must be
installed on your machine. Check with your PC manufacturer
if you are not sure.
If you installed any other network adapter or network
driver in the PC, consult your MIS department for further
instructions.
Installing the Network Driver
1 Using the Windows menu, select Network.
2 Select Network Setup.
3 In the Network Setup dialog box, select the
Networks... button.
4 Select Install Microsoft Windows Network and then
click OK.
5 Select the Drivers... button.
6 In the Network Adapters dialog box, click Add Adapter.
A dialog box appears, listing the supported network
adapters on the diskette.
7 From the list of network adapters, select Unlisted Or
Updated Network Adapter, and click OK.
8 Insert the EtherDisk diskette in drive A and click OK.
A dialog box appears, prompting you to specify the drive or
directory where the EL3C589D.DOS driver can be found.
9 Click OK to accept the default directory. Otherwise, if
you need to specify the directory, type:
a:\ndis2
10 Select 3Com EtherLink III LAN PC Card and click OK.
3-12
CHAPTER 3: INSTALLING THE NETWORK DRIVER
11 Click OK.
12 In the Network Adapters dialog box, click Close.
13 In the Network Setup dialog box, click OK.
14 If prompted, supply the information you gathered
before you began the installation. After you enter
the information, click OK.
A message appears, prompting you to restart your PC.
15 Click Continue instead.
16 If you are not using Card Services and you have a
memory manager (all PCs running Windows have a
memory manager), you must exclude the CIS memory
address range for the PC Card and other Card Services
devices.
For more information, see Appendix A.
The driver installation is complete.
AutoLink for Windows 3.x, Windows for Workgroups,
and DOS
If only one PC Card has been installed, you can use 3Com’s
AutoLink™ software program to automatically install the
NetWare ODI client software (including the driver), and to
modify the CONFIG.SYS and AUTOEXEC.BAT files.
To use the AutoLink program, the PC must meet these
requirements:
■
Use Novell NetWare 3.12, 4.10, or 4.11 network
operating system
■
Have only one 3C589D PC Card installed
■
Be intended for use as a NetWare DOS ODI client
To use the AutoLink program, follow these steps:
1 Make sure the 3C589D PC Card is installed and
connected to the network, as described in Chapter 2.
2 Boot the PC under DOS.
3 Insert the EtherDisk diskette into drive A, type the
following at the DOS prompt:
a:install [Enter]
AutoLink for Windows 3.x, Windows for Workgroups, and DOS
3-13
4 Choose Auto Install and Config for NetWare (AutoLink).
An OS selection screen appears.
5 Press Enter
6 Select AutoLink for DOS, Windows 3.x, or WFW 3.11.
Several messages appear while the AutoLink program is
running. A final message indicates successful installation.
If problems occur only when the AutoLink program runs,
view or print the AUTOLINK.LOG file (located in the C:\
directory) to see problems listed in the file.
■
To display the file, type:
type autolink.log | more [Enter]
■
To print the file, type:
print autolink.log [Enter]
7 As installation concludes, you are asked if you want
to reboot the PC. For the installation to be effective,
remove the EtherDisk diskette and reboot the PC.
When prompted, type your user name and password.
The driver installation is complete.
3-14
CHAPTER 3: INSTALLING THE NETWORK DRIVER
Supported Network Drivers
These files in Table 3-1 are located in the HELP directory on
the EtherDisk diskette.
Table 3-1 Network Driver Text File Names
Network
Operating System
Text File Name
Network Driver Name
Windows 95
W95NDIS3.TXT
EL589ND3.SYS/EL589ND4
Windows 95 NDIS 2 16-bit
network driver
W95NDIS2.TXT
ELPC3.DOS
Windows NT (v 4.0/3.51)
WINNT.TXT
EL589ND3.SYS/EL589ND4
Windows for Workgroups
(NetWare)
WFWNETWR.TXT
3C589.COM
Windows for Workgroups
(NDIS 2 driver)
WFWNDIS.TXT
ELPC3.DOS
NetWare and Windows 3.11 NWDOSODI.TXT
3C589.COM
NetWare and DOS,
Windows 3.11, and
Windows for Workgroups
AUTOLINK.TXT- this
file is in the AUTOLINK
directory
3C589.COM
Banyan VINES
BANYAN.TXT
ELPC3.DOS
Microsoft LAN Manager
LANMAN.TXT
ELPC3.DOS
IBM LAN Server (DOS)
LANSRV.TXT
ELPC3.DOS
Artisoft LANtastic
LANTASTK.TXT
ELPC3.DOS
DEC PATHWORKS
PATHWORK.TXT
ELPC3.DOS
LAN Manager
LANMAN.TXT
ELPC3.DOS
TROUBLESHOOTING
4
This chapter provides information for isolating and solving
problems that may occur during the installation and
configuration of the PC Card.
You can run the DOS diagnostic program for your installed
PC Card when you need to:
■
■
■
Test for setup/configuration and cabling
Test for PC Card problems
View PC Card statistics
If you have already installed the network driver, you need
to reboot and boot with a DOS diskette before you run the
diagnostic program.
4-2
CHAPTER 4: TROUBLESHOOTING
Testing the 3C589D PC Card
Follow these steps to run the PC Card diagnostic program
to test the PC Card and the setup:
1 Check that the adapter is installed and connected to
the network, as described in Chapter 2.
2 Boot the computer under DOS.
3 Place the EtherDisk diskette in a floppy disk drive
on your PC and make that drive the active drive. For
example, type:
a:install [Enter]
The main menu appears.
4 Select Configuration and Diagnostic program.
The Echo Exchange Window appears.
The Echo Exchange Test tests the adapter’s ability to transmit
and receive data while on the network.
To run this test on the network, you need another PC set
up as an echo server to receive packets from the adapter
being tested and echo them back to the adapter.
The PC being used as an echo server must have a 3Com
adapter running at the same speed as the 3Com adapter.
CAUTION: Running the Echo Exchange test while
connected to an active network can cause intermittent
failures. To avoid failures, connect to an inactive network
on which only the computer being tested is operating.
5 On the echo server PC, select Respond Start and press
[Enter].
6 On your PC, select Start Test and press [Enter].
7 When the test is done, proceed as follows:
a End the program on the echo server computer.
b On the computer with the adapter that you tested, exit
the Configuration and Diagnostic Program and reboot
the computer.
If a test fails, the adapter may not be defective. The problem
may be incorrect option settings, option settings that conflict
with the settings of other boards, or improper installation.
See “Troubleshooting Tips” later in this chapter for more
information.
Avoiding Memory Manager Conflicts
4-3
Avoiding Memory Manager Conflicts
If you are not using Card Services and you are using an
expanded (EMM386.EXE) or extended (HIMEM.SYS)
memory manager on your PC, you must exclude an 8 K
block of upper memory from use by the memory manager.
The memory requirement is 4 K when the diagnostic tests
are not running.
All PCs running Windows have a memory manager.
Follow these steps to exclude 8 K of memory for the
PC Card:
1 Make a backup copy of the CONFIG.SYS file. Type:
copy config.sys config.old [Enter]
2 Use a text editor to edit the CONFIG.SYS file on your PC.
3 Exclude the memory range that the PC Card is using.
For example, type this line into the device section of
the new CONFIG.SYS file:
device=c:\windows\emm386.exe noems x=DE00–DFFF
where x stands for exclude, followed by the memory range
that the PC Card is using. In this example, the memory
setting is DE00–DFFF. This is only a sample.
Refer to the manual that accompanied the memory manager
software for additional instructions and information on how
to exclude memory.
4 Save the CONFIG.SYS file and exit the text editor.
5 Reboot the PC.
The procedure for avoiding conflicts with a memory
manager is completed.
4-4
CHAPTER 4: TROUBLESHOOTING
Troubleshooting Tips
If the diagnostic tests fail, the PC Card may not be
defective. The problem may be incorrect option settings,
option settings that conflict with the settings of other
boards, or improper installation.
Read through the following tips and check your PC Card:
■
Make sure that the PC Card is operating in a PC
containing a PC Card standard and PCMCIA Release
2.01/2.1, Type II /Type III slot.
■
Make sure that the PC Card is correctly installed. Review
the installation instructions in Chapter 2.
■
Inspect all cables and connections.
Use the supplied cabling.
■
Make sure that the I/O Base Address and the Interrupt
Request Level settings for the PC Card are not the same
settings used on other cards or system units.
Troubleshooting Tips
4-5
To display the PC Card configuration settings, see Chapter 5.
■
■
■
■
■
■
Use the drivers that are on the EtherDisk diskette that
shipped with the PC Card.
If you are running the Echo Exchange Test, make sure
that the PC Card is connected to a properly cabled and
inactive network and that an echo server is set up on
the network.
Install the PC Card in another functioning PC and run
the tests again.
Your PC may be defective. If the PC Card passes the tests
in the second PC, contact the reseller or manufacturer of
the original PC.
If you experience problems that occur only when
running under Microsoft Windows, consult the
README files that are provided in Windows.
The README.WRI, NETWORKS.WRI, and SYSTEM.WRI
files all contain information that could be helpful.
Specifically, check the TimerCriticalSection parameter in
the Windows SYSTEM.INI file. It may be necessary to set
it. Make sure that the Network Driver Optimization mode
is set to Windows on the Configuration Information
screen, described in Chapter 5. Refer to the Microsoft
Windows documentation for more information.
If you experience problems that occur only when using
the AutoLink program, display the AutoLink.Log file.
Type:
c:\Type AutoLink.Log | More [Enter]
The AutoLink.Log file contains a log of the events that
occurred during the AutoLink installation and
configuration process.
To run the Diagnostic Program, you must bypass loading
the network drivers. Reboot the PC and boot using a
DOS diskette to avoid loading the drivers.
CHANGING CONFIGURATION
SETTINGS
5
This chapter describes how to display and change the PC
Card configuration settings by using the supplied DOS
configuration program.
The DOS configuration runs under DOS and at a DOS
prompt in a PC with Windows 95 installed.
Table 5-1 lists each software option, the default setting,
and the other available settings. For a detailed description
of these settings, see Configuration Settings Descriptions at
the end of this chapter.
.
Table 5-1 Option Settings
Option
Default Setting
Available Settings
CIS Memory Address
Assigned by Card
Services
4 K contiguous block of memory
I/O Base Address
Assigned by Card
Services
200h, 210h, 220h, 230h, 240h,
250h, 260h, 270h, 280h, 290h,
2A0h, 2B0h, 2C0h, 2D0h, 2E0h,
2F0h, 300h, 310h, 320h, 330h,
340h, 350h, 360h, 370h, 380h,
390h, 3A0h
Interrupt Request Level Assigned by Card
Services
3, 5, 7, 9, 10, 11, 12, 15
Transceiver Type
Auto-Sense
Auto-Sense, Twisted-Pair, or Coax
Network Driver
Optimization
Windows or
OS/2 client
DOS client, Windows client, or OS/2
client or server
Power Management
Enabled
Enabled, disabled
5-2
CHAPTER 5: CHANGING CONFIGURATION SETTINGS
Changing Power Management with Windows 95
To enable or disable power management with Windows 95,
follow these steps:
1 Click the Control Panel icon.
2 Click Systems.
3 Click Device Manager.
4 Highlight the 3Com EtherLink III LAN PC Card.
5 Click Properties.
6 Click on Enable or Disable power management.
7 Close the windows.
The power management status is changed.
Changing Configurations Settings with DOS
You cannot change configuration settings if Card Services
is installed. To change the configuration settings using the
DOS program, follow these steps:
1 Make sure the PC Card is installed and connected to
the network, as described in Chapter 2.
2 Boot the PC under DOS.
If your computer is running an operating system other than
DOS, exit to the DOS prompt. For instructions, see the
operating system documentation.
3 Insert the EtherDisk diskette in the A drive and type
the following command at the DOS prompt:
a:\install [Enter]
The main menu appears.
4 Select Configuration and Diagnostic program and
press [Enter].
5 On the next menu, select Configure Adapter and
press [Enter].
You can select Show Configuration Information to display
configuration information.
Configuration Settings Descriptions
5-3
If you are using Card Services, the I/O Base Address and the
Interrupt Request Level settings are assigned by Card
Services. If you change these settings here, they will be
saved to the EEPROM, but the PC will still use the values
Card Services allocated at start-up.
The configuration window appears.
6 Use the arrow keys to scroll through the list of
settings for that option. Select a setting and press
[Enter].
7 Continue this procedure with any of the other
options.
When all changes are complete, press [Esc] to exit the
program.
Configuration Settings Descriptions
This section describes each configuration setting for the
3C589D PC Card. Table 5-1 displays the possible values for
each setting.
CIS Memory Address
The CIS Memory requires a 4 K segment of memory for
drivers and an 8 K block when you are running diagnostics.
I/O Base Address
The I/O address space is used by the PC Card for
communication between the PC Card and the PC. The PC
Card uses 16 bytes of I/O space, starting at the I/O Base
Address.
Make sure that no other device is using the same value.
The I/O Base Address range is from 200h to 3A0h and is
assigned by Card Services. If you are not using Card
Services, the default is 300h.
5-4
CHAPTER 5: CHANGING CONFIGURATION SETTINGS
Interrupt Request Level
The IRQ is used by the PC Card for communication
between the PC Card and the PC.
The 3C589D PC Card can operate on one of eight interrupt
levels: 3, 5, 7, 9, 10, 11, 12, or 15.
The preferred interrupt level is 10, but the PC Card can
operate on the other levels if necessary. If a conflict
continues, you may have to change the setting of other
adapters or options that are in the PC.
Transceiver Type
The Transceiver Type can be Auto-Sense, Coax, or
Twisted-Pair. The default is Auto Sense. If the PC Card
cannot automatically sense what type of cable is connected
to the network, it will assign Twisted-Pair.
Network Driver Optimization
Network driver optimization can be selected for a DOS,
Microsoft Windows, or IBM OS/2 client, or a server
environment. Changing this option to match your system
may improve the network performance. Using a larger
percentage of CPU resources under DOS improves network
throughput.
Power Management
The 3C589D PC Card can shut down in the absence of LAN
traffic to conserve power in your PC. Power management
can be enabled or disabled. The default is enabled.
A
ABOUT CARD SERVICES
This appendix describes the Card Services information for
the 3C589D PC Card.
Card Services coordinates the 3C589D PC Card access to
sockets and system resources, including device drivers,
utilities, and application programs. Card Services is usually
preloaded on your PC when you purchase it.
Verifying That Card Services Is Installed
You can verify whether or not Card Services is installed in
your PC by looking in the CONFIG.SYS file.
Check the device section of the CONFIG.SYS file. If Card
Services is installed, one device statement will list Card
Services, Card Serv, or CS on the device line and usually have
a CS or SS in the driver name. Refer to your Card Services
documentation for more information.
Using the 3C589D PC Card Without Card Services
If your PC does not have Card Services, the 3C589D PC
Card uses the 3Com point enabler to manage system
resources. The point enabler uses less memory, but does
not permit another PC Card in the same PC.
If you are having problems with Card Services or you want
to disable it to save memory, you can reboot the PC and
press [F8] to avoid loading Card Services. The 3C589D PC
Card software works without Card Services.
Avoiding Memory Manager Conflicts
If you are not using Card Services and you are using a
memory manager on your PC (all PCs running Windows
have a memory manager), you need to inform the memory
manager of the memory used by the 3C589D PC Card.
A-2
APPENDIX A: ABOUT CARD SERVICES
The 3C589D PC Card requires 4 K for the CIS memory for
normal operation (when you are running diagnostics, the
PC Card needs 8 K of memory).
The 3C589D PC Card searches the upper memory, finds the
4 K block that has been excluded, and uses this area for
reading the contents of the CIS memory. For this reason,
you do not need to exclude a specific range, as long as it is
contiguous.
Follow these steps to exclude a sample 4 K memory range:
1 Make a backup copy of the CONFIG.SYS file. Type:
copy config.sys config.old [Enter]
2 Use a text editor to edit the CONFIG.SYS file on
your PC.
3 Exclude the memory range that the 3C589D PC Card is
using. For example, type this line in the CONFIG.SYS
file:
device=c:\windows\emm386.exe noems x=DE00–DFFF
where x stands for exclude, followed by the memory range
that the PC Card is using. In this example, the memory
setting is DE00–DFFF. This is only a sample.
Refer to the manual that accompanied the memory manager
software for additional instructions and information.
4 Save the CONFIG.SYS file and exit the text editor.
5 Reboot the PC.
The procedure for avoiding conflicts with a memory
manager is completed.
SPECIFICATIONS
B
The following table lists the physical specifications for the
3C589D PC Card.
Specifications
Table B-1 3C589D PC Card Specifications
Network Interface
3C589D PC Card
Ethernet IEEE 802.3 10BASE-T
industry standard
Physical Dimensions
Length
3.370 in. (85.6 mm)
Width
Type II, 0.197 in. (5.0 mm)
Height
2.126 in. (54 mm)
Weight
0.86 oz (24.4 g)
Environmental Operating Range
Operating temperature
0 to 55˚C (32 to 131˚F)
Relative humidity
5 to 90% noncondensing
Card Information Structure (CIS) Memory Size
Drivers
4K
Diagnostics
8K
B-2
APPENDIX B: SPECIFICATIONS
Table B-1 3C589D PC Card Specifications (continued)
Network Cable Specifications
UTP Cable Requirements:
Category 3 LAN and high-speed data cable (10 Mbps) that meets
the requirements of EIA/TIA-568 and EIA/TIA TSB-36 (for example,
Anixter® CM-00424BAG-3 or equivalent)
Category 4 extended distance LAN cable (16 Mbps) that meets the
requirements of EIA/TIA-568 and EIA/TIA TSB-36 (for example,
Anixter CM-00424BAG-4 or equivalent)
Category 5 voice and data transmission LAN cable (100 Mbps) that
meets the requirements of EIA/TIA-568 and EIA/TIA TSB-36 (for
example, AT&T® type 1061 or equivalent)
Coax Cable Requirements:
Thin Ethernet (coax) connections (50-ohm) require RG58 A/U,
3C530-xxx or equivalent cabling
Power Requirements
Operating voltage
+5 V ± 5% @ 50 mA
Mean Time Between Failures (hours calculated)
3C589D-TP PC Card
40 ˚C (104 ˚F) benign environment
50 ˚C (122 ˚F) benign environment
40 ˚C (104 ˚F) mobile environment
50 ˚C (122 ˚F) mobile environment
346,440
228,608
62,602
53,818
FCC Certification
Part 15, Class B
GLOSSARY
AutoLink
A software installation program that configures the
3C589D PC Card, installs the DOS ODI client driver, and
modifies PC startup files to allow you to log in to a
NetWare server after you reboot your PC.
Card Information Structure (CIS)
A data structure written on every card that complies with
the PC Card standard, containing information about the
formatting and organization of the data on the card.
Card Services
A software program that coordinates PC Card access to
sockets and system resources, including device drivers,
utilities, and application programs. Card Services assigns
the I/O Base Address, Interrupt Request Level, and the CIS
Memory Base Address for the 3C589D PC Card. For more
information about Card Services, see Appendix A.
Driver
A program, usually resident in server or workstation memory,
that controls the PC Card or implements the protocol stacks
that allow higher-level applications to communicate with the
network hardware.
Loopback
A type of diagnostic test in which the transmitted signal
is returned to the sending device after passing through all,
or a portion of, a data communications link or network.
A loopback test permits the comparison of a returned
signal with the transmitted signal.
2
GLOSSARY
NDIS
Network Driver Interface Specification, developed by
Microsoft and 3Com. A software specification used in
network operating systems, such as IBM LAN Server or
Microsoft LAN Manager, to create drivers for network
adapters. NDIS drivers support multiple protocols and
multiple adapters and can be unloaded from memory to
conserve conventional DOS RAM space.
PCMCIA
Personal Computer Memory Card International
Association.
PC Card
A new global standard that replaced the PCMCIA standard
in 1994. The standard is designed to enhance compatibility
and functionality among PC Cards (credit card-sized devices).
It also provides for future high-performance PC Card
applications through CardBus, a new 32-bit bus-mastering
interface.
Socket
In the PC Card environment, the hardware in the host
computer where the PC Card is placed. The socket maps
the host’s internal bus signals to the PC Card interface
signals.
Socket Services
The software layer that provides a standardized interface to
manipulate PC Cards, sockets, etc.
Transceiver
A hardware device that links a node to a baseband network
cable and functions as both a transmitter and a receiver.
Twisted-pair
Wiring similar to that found in the telephone system,
consisting of two insulated wires loosely twisted around
each other to help cancel out induced noise in balanced
circuits.
URL
Universal resource locator. This is the internet address of a
web site.
INDEX
Numbers
H
3Com point enabler A-1
hot swap support 1-3
A
I
AutoLink program 3-12
for NetWare client installation 1-4
AutoLink.Log file 4-5
avoiding memory manager
conflicts A-1
installing drivers
AutoLink 3-12
NetWare and Windows 3.11 3-14
Windows 95 3-1
Windows for Workgroups 3-14
Windows for Workgroups
(NetWare) 3-14
Windows NT 3-5
Interrupt Request Level setting 5-3,
5-4
I/O Base Address setting 5-3
C
cabling specifications B-2
Card Information Structure (CIS)
memory size A-2, B-1
Card Services 1-5, A-1
CIS Memory Address 5-3
CIS memory range, excluding A-2
CONFIG.SYS file 4-3, A-2
configuration
requirements 1-3
connecting
3C575-TX PC Card to the network
cable 2-5
conventions 2
D
diagnostic program
echo exchange test 4-2, 4-3
E
environmental operating range B-1
EtherDisk diskette 1-3, 1-4, 4-2
excluding upper memory range 4-3,
A-2
F
FCC certification B-2
M
mean time between failures B-2
Media Type option description 5-1
memory manager conflicts A-1
N
NetWare
DOS ODI client driver 3-12
network driver installation
options 1-4
Network Driver Optimization 5-1
Network Driver Optimization setting
description 5-4
network interface B-1
O
option settings default 5-1
2
INDEX
P
PC Card
configuring 5-1
connecting to network cable 2-5
installing 2-1
requirements 1-3
troubleshooting 4-1
physical dimensions B-1
point enabler A-1
Power Management 1-3, 5-1, 5-4
power requirements B-2
R
running
3C589C PC Card diagnostic
program 4-2
S
setup. See configuration
software options
default settings 5-1
specifications B-1
T
tests. See diagnostic tests
Transceiver Type setting 5-4
troubleshooting 1-4
V
verifying Card Services is installed A-1
W
Windows 4-3, 4-5, A-1
Windows 95
installing the network driver 3-1,
3-3
OSR 2 network driver
installation 3-3
which version are you running 3-2
Windows for Workgroups
installing the network driver 3-10
Windows NT
installing the network driver 3-5
FCC Class B Certification Statement
3Com Corporation
Model Nos: 3C589D
FCC ID: DF63C589D
Made in U.S.A.
This device complies with Part 15 of the FCC Rules. Operation is subject to the
following two conditions:
1 this device may not cause harmful interference, and
2 this device must accept any interference received, including interference that may
cause undesired operation.
WARNING: This equipment has been tested and found to comply with the limits for a
Class B digital device, pursuant to Part 15 of the FCC Rules, and the Canadian
Department of Communications Equipment Standards entitled, “Digital Apparatus,”
ICES-003. These limits are designed to provide reasonable protection against harmful
interference in a residential installation. This equipment generates, uses and can radiate
radio frequency energy and, if not installed and used in accordance with the
instructions, may cause harmful interference to radio communications. However, there
is no guarantee that interference will not occur in a particular installation. If this
equipment does cause harmful interference to radio or television reception, which can
be determined by turning the equipment off and on, the user is encouraged to try to
correct the interference by one or more of the following measures:
■
Reorient or relocate the receiving antenna.
■
Increase the separation between the equipment and receiver.
■
Connect the equipment into an outlet on a circuit different from the one which the
receiver is connected to.
■
Consult the dealer or an experienced radio/TV technician for help.
The user may find the following booklet prepared by the Federal Communications
Commission helpful:
The Interference Handbook
This booklet is available from the U.S. Government Printing Office, Washington, D.C.
20402. Stock No. 004-000-00345-4.
NOTE: In order to maintain compliance with the limits of a Class B digital device, 3Com
requires that you use quality interface cables when connecting to this device. Changes
or modifications not expressly approved by 3Com could void the user’s authority to
operate this equipment. Refer to the manual for specifications on cabling types.
Users should ensure for their own protection that the electrical ground connections of
the power utility, telephone lines, and internal metallic water pipe system, if present,
are connected together. This precaution may be particularly important in rural areas.
CE NOTICE
Marking by the symbol CE indicates compliance of this 3Com system to the EMC
directive of the European Community. Such marking is indicative that this 3Com system
meets or exceeds the following technical standards:
■
EN 55022—”Limits and Methods of Measurement
Characteristics of Information Technology Equipment.”
of
Radio
Interference
■
EN 50082-1—”Electromagnetic compatibility—Generic immunity standard Part 1:
Residential, commercial, and light industry.”
■
IEC 801-2—”Electromagnetic compatibility for industrial-process measurement and
control equipment Part 2: Electrostatic discharge requirements.”—Severity level 3.
■
IEC 801-3—”Electromagnetic compatibility for industrial-process measurement and
control equipment Part 3: Radiated electromagnetic field requirements.”—Severity
level 2.
■
IEC 801-4—”Electromagnetic compatibility for industrial-process measurement and
control equipment Part 4: Electrical fast transient/burst requirements.”—Severity level
2.
■
A “Declaration of Conformity” in accordance with the above standards has been
made and is on file at 3Com.