1
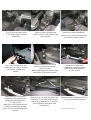
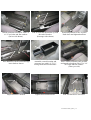
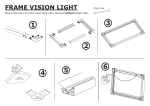
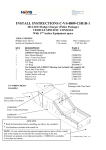
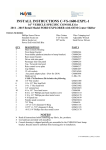
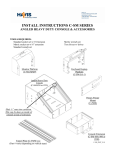
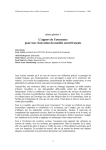
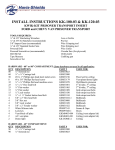
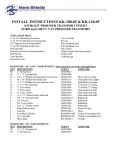
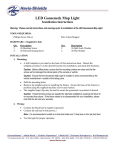
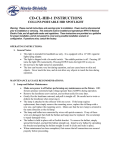
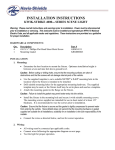
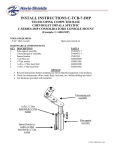
INSTALL INSTRUCTIONS C-VS-1800-CAPR-1
2011- 2013 Chevy Caprice (9C1 Police Package)
VEHICLE SPECIFIC CONSOLE
With 18” inches Equipment space
TOOLS NEEDED:
Phillips Screw Driver
Socket set (Standard & Metric)
QTY
1
1
1
1
1
1
1
1
2
2
1
DESCRIPTION
Main Console Housing only
Accessory Box / mount kit
Accessory box housing
15” notched extrusion
Front cover plate with pole cutout
Rear cover plate with pole cutout
Floor bracket (driver side)
Floor bracket (passenger side)
Rear bracket
12 volt socket
Hardware kit
Wire Cutters
7/16 wrench
Wire Crimping tool
T-20 Torx Bit
PART #
CM004588
includes the following:
CM004523
CM002432-17
CM004526
CM004527
CM004522-2
CM004522-1
CM004598
CM216560
C-HK-191
C-VS-1800-CAPR-1
(Assembly)
CM004523
Accessory box housing
CM004526 and CM004527
Front and rear cover plate with pole cutout
CM002432-17
15” notched extrusion
CM216560
12 volt sockets
CM004588
Main Console Housing
ALWAYS!
* Read all Instructions before installing any Havis, Inc. products.
* Use Hardware included with install kit
Mount brackets not shown
C-VS-1800-CAPR-1_INST_1-12
View of O.E.M. dash prior to
C-VS-1800-CAPR-1 console
installation.
Use 6 mm x 30 mm bolt, flat
washer and 7/16” spacer to attach
rear bracket to OEM floor
mounts.
Attach passenger side bracket
(CM004522-1) to transmission
hump using OEM hardware.
(15 mm socket)
Note: Newer version bracket has
extension towards front and has
three (3) holes for attaching to the
extrusion.
Remove plastic fasteners and
remove center O.E.M. plastic cover
next to shifter.
Ready for console installation.
Remove lower side dash trim panels
as needed for running wiring.
CM004598 Rear bracket shown
attached to OEM floor mounts.
(One each side)
Note: Production bracket has a slight
bend offset. (Flat bracket shown)
Attach driver side bracket
(CM004522-2) to transmission
hump using OEM hardware.
(15 mm socket)
Slide two (2) 1/4” nuts into driver side
and three (3) 1/4” nuts into passenger
side of the (CM002432-17) extrusion
and carefully position them with
bracket holes.
Attach extrusion to brackets with 1/4"
x 1/2” hex bolts and flat washers.
C-VS-1800-CAPR-1_INST_1-12
Attach extrusion to brackets with 1/4"
x 1/2” hex bolts and flat washers.
(Driver side shown)
End of extrusion should line up with
the end of bracket.
(Passenger side shown)
Extrusion platform is now in place.
Push down and tighten hardware.
Wire harnesses can be routed through
lower dash as shown.
Assemble console housing and
accessory box with 1/4” x 1/2”
carriage bolts and serrated nuts.
Place console assembly into position
and attach to brackets with 1/4"x 3/4"
hex bolts and flat washers.
(Three per side)
Adjust brackets if needed.
Tighten all mount hardware
Run wire harnesses as needed.
C-VS-1800-CAPR-1_INST_1-12
Run all wiring including 12 volt sockets.
This accessory mount has a knockout in
forward side for wiring access if desired.
Optional C-HDM-208 computer mount bolts to
extrusion in location as shown. Filler plates with
cutouts included.
Mount optional cup holder or computer
mount.
Completed C-VS-1800-CAPR-1
Console installation
Completed console installation with C-DMM-116, C-HDM-208,
C-HDM-303, C-MD-204 and C-KBM-102
C-VS-1800-CAPR-1_INST_1-12