1
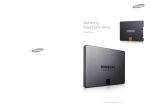
ACTIVATION KEY
SOLID STATE DRIVE UPGRADE KIT FOR WINDOWS®
Quick Start Guide
OCZ’s Solid State Drive Upgrade Kit provides a simple and efficient solution for
swapping out your hard drive with a high performance solid state drive. The cloning
software effortlessly migrates your entire hard drive (operating system, applications
and data) onto your SSD, ensuring a smooth transition into the world of solid state
drives.
Note: The following instructions provide a general guideline for preparing your SSD for the cloning
process. For further, detailed installation instructions, please refer to the user’s manual located on
the CD. If the target drive is a Vertex 4 or Agility 4 SSD, you MUST use the “Cloning your HDD onto the
SSD (w/bootable CD)” method in this guide.
Package Contents:
•
•
•
•
•
•
OCZ 2.5” to 3.5” Adapter Bracket
OCZ 2.5” External Drive Enclosure
Mounting Screws
SATA III 6Gbp/s Data Cable
Dual USB 2.0 Cable
Acronis True Image HD Software CD w/ Activation Key
Install Acronis True Image HD for Windows®
1.
2.
3.
4.
Insert the software CD into your CD-ROM Drive.
Run the .exe setup file on the CD.
Follow on the on-screen instructions to install the software.
Start the application and enter the Activation Key (included) when prompted.
Cloning your HDD onto the SSD
Note: If the target drive is a Vertex 4 or Agility 4 SSD, you MUST use the “Cloning your HDD onto the
SSD (w/bootable CD)” method in this guide.
Caution: Do not power down your system during the cloning process. Doing so can result in
unwanted changes to your computer’s settings.
1. Open the external enclosure and install the SSD by carefully aligning and
connecting the SSD with the SATA connectors within the case. Close and the secure
the enclosure.
ISF-UPGRADEKIT
2. Connect the USB 2.0 cable to the enclosure and the remaining end to the PC.
3. Start the Acronis True Image HD application on your PC.
4. Follow the on-screen instructions to begin the process of cloning your HDD to your
SSD.
5. After the cloning process has completed, shut down your PC, unplug the external
drive and remove the SSD from the enclosure.
6. Your SSD is now ready for installation into your PC.
Installing your SSD into a Laptop
1. Power off the system, disconnect all power cables and remove the battery.
2. Locate the hard drive access panel, unscrew and remove the access panel.
3. Disconnect and remove the HDD from the drive bay (refer to your system’s user
manual)
4. Remove all brackets and connectors form your HDD and install it on the SSD (if
necessary).
Note: If a proprietary connector and/or bracket are present on the HDD, carefully remove it and
connect it to the SSD. Systems will vary and these items may or may not be present.
5. Insert the SSD into the drive bay, carefully aligning the SSD with the SATA
connectors.
6. Secure the SSD in the drive bay, re-install the access panel and insert the battery
back into the system.
7. Power on your system to verify a successful installation.
Installing your SSD into a Desktop
1.
2.
3.
4.
Power off the system and disconnect all power cables.
Remove the system’s outer panel (refer to your system’s user manual).
If your system provides 2.5” drive bays, there is no need for a 3.5” adapter bracket.
If your system does not provide 2.5” drive bays, you will need to mount the SSD
onto the 2.5” to 3.5” adapter bracket with the mounting screws provided.
5. Install the SSD into an available drive bay.
6. Connect one end of the SATA III data cable and power connector to the SATA
connectors on your motherboard and the remaining end to your SSD.
7. Re-install the outer panel; reconnect the power cable to your PC.
8. Power on your system to verify a successful installation.
Cloning your HDD onto the SSD (w/bootable CD)
Note: If the target drive is a Vertex 4 or Agility 4 SSD, you MUST use this cloning method.
Caution: Do not power down your system during the cloning process. Doing so can result in
unwanted changes to your computer’s settings.
1. Power off the system and disconnect all power sources.
2. Locate the hard drive access panel and remove the HDD.
3. Remove all brackets and connectors form your HDD and install it on the SSD (if
necessary).
4. Insert the SSD into the drive bay, carefully aligning the SSD with the SATA
connectors.
5. Secure the SSD in the drive bay and re-install the access panel.
6. Install the HDD into the external enclosure by carefully aligning and connecting
the HDD with the SATA connectors within the case. Close and the secure the
enclosure.
7. Connect the Dual USB 2.0 cable to the enclosure and the remaining end to the PC.
8. Power on the system, insert the disc and change the CD ROM drive to the top of the
boot order in the BIOS (refer to your system’s user manual).
9. Once booted into the CD, select the Acronis software option and follow the
on-screen instructions to begin the process of cloning your HDD to your SSD.
10. Once the process has completed, close the windows, remove the CD and restart
the system.
Converting your HDD into a Portable Storage System
Additionally, you may utilize the 2.5” External Drive Enclosure to convert your old 2.5”
hard drive into a portable storage system. Simply, install the HDD into the external
enclosure for a USB powered storage device.