1
Only for use by children over 8 years cid. Only for use under the
supervision of an adult,
#
Read the instructions before use, follow them and keep them for
reference, Keep small children and animals away from experiments. Store
the microscope set out of reach of small children. Eye protection for
supervising adults is not included.
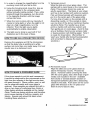
ADVICE FOR SUPERVISING ADULTS
SAFETY INFORMATION
a) Read and follow the instructions, the safety
rules and the first aid information. Keep them
for reference.
b) The incorrect use of chemicals can cause
injury and damage to health. Only carry
those preparations which are listed in the
instructions.
c) This Microscope set is for use only by
children over 8 years oid.
d) Because children’s abilities vary so much,
even within age groups, supervising adults
shouid exercise discretion as to which
preparations are suitable and safe for them. -
The instructions should enable supervisors to
assess any preparation to establish its
suitability for a particular child.
e) The supervising aduit should discuss the
warnings and safety information with the
children before commencing the
preparations. Particular attention should be
paid to the safe handling of chemicals if
used.
Ñ The area surrounding the preparation of
slides should be kept clear of any
obstructions and from the storage of food. It
shouid be in a good light and close to a water
supply. A solid table with a heat resistant top
should be provided.
g) A separate tin or bucket should be used for
the disposal of solid waste materials. Any
wasted solution should be poured down a
drain but never into a sink.
IMPORTANT TELEPHONE NUMBERS
General First Aid Information
a) In case of eye contact: Wash the eye with
plenty of water, holding the eye open if
necessary. Seek immediate medical advice.
0) И swallowed: Wash the mouth with water,
drink some fresh water. Do not induce
vomiting. Seek immediate medical advice.
c} In case of inhalation - Move person to fresh
air. |
d) In case of skin contact and burns: Wash
affected area with plenty of water for 5
minutes.
6) In case of a cut: Wash the cut with antiseptic
solution {if not available, use clean water).
Then put on a bandage. In case of any
serious injury, you should get first aid
treatment and inform a doctor as soon as
possibie.
in case of doubt seek medicai advise without
delay. Take the material together with the
container with you. In case of injury, always
seek medical advise.
SAFETY RULES
a) Do read these instructions before use, follow
them and keep them for reference.
5) Do keep young children and animals, and
those who are not wearing eye protection
away from the experimental area.
c) Do always wear eye protection:
d) Do store microscope sets out of reach of
young children. |
e) Do clean all equipment after use.
f} Do wash hands after carrying out
preparations.
g) Do not use any equipment which has not
been supplied with the set.
N) Do not eat, drink or smoke in the
experimental area.
i) Do not allow chemicals to come into contact
with the eyes or mouth.
i) Do not put foodstuffs in used container.
Dispose of immediately.
re
CAUTION FOR HANDLING
1) The vital part of the microscope is the lens.
Therefore, sufficient care must be taken in
handling the lens, If the lens gets dirty or
dusty; wipe the lens surface with a clean lens
tissue or soft cotton cloth. Do not rub the
lens with a finger or dirty cloth, etc.
2) After the microscope set is used, it should be
covered with a cloth and be put back into the
box for screening from dust.
3) Microscope shouid be stored in a moisture
free place. Moisture buildup on the light will
cause a reduction in light intensity.
4} When a microscope is not used for a long
period of time, remove the light source
batteries.
TAO ENDO AWN
—
ho
. llluminator Lamp
. Base (Battery
. Condenser Lens
Eyepiece
Focusing Knob
Body Tube
Revolving Turret
Objective Lens
Arm à
Stage © CE i
Clip
Mirror
Case)
Cap
ев
INSTRUCTIONS FOR USE OF
MICROSCOPE
INTRODUCTION TO A MICROSCOPIC
WORLD
In this world there is an abundance of living
things. Some are large enough to be seen with
our own eyes, but a fot of others are so minute
that millions can be squeezed on the head of a
pin. Of course these tiny organisms can only
be seen through a microscope.
The microscope was invented many years ago.
Since then it has opened a wider field of
research, involving many things as fascinating
and as beautiful as you can imagine. Today,
from the most elementary study of biology to
the highly specialized fields of physiology, some
form of microscope has to be used for the
students to understand better the elaborate,
complicated forms of either living organisms or
static materials, which make up our fiving
environment.
Your microscope will be either a source of fun
for a long-time hobby or an opening door to
advanced knowledge in various fields of
science. We hope you will enjoy using it.
Battery installation
Unscrew the ballery door cover with a philips
screwdriver.
insert two 1.5V size "AA" batteries into the
hattery compartment,
Repiace the battery cover and screw it back
into piace.
1.
First tit the arm and
adjust the position of
the reflector so that
the light is fully caught
by the mirror.
. When the light is fully
reflected by the
mirror, as can be seen
through the eyepiece,
the microscope will be
ready for observation.
. Next, put the prepared
slide on the stage and
fix it in place with the
clips.
. Now decide what
magnification to use.
The greater the length
of the objective lens
the greater the
magnification.
Observation is
generally made
starting at a low
setting.
a be
5. In order to change the magnification turn the
revolving turret until you fee! a click.
8. Using the focusing knob, lower the lens as
close as possible to the prepared slide
without actually making contact. Then, while
looking through the eyepiece, turn the knob
in the opposite direction until the image
comes into focus.
7. When the room is dark with low intensity of
natural or lamp light, or when the sight is not
clear at a high magnification, turn the
reflector. Then the light source lights
automatically to enable observation.
8. The light source lamp is used with 2 ‘AA
(batteries) put in the back of base.
HOW TO USE AS A PROJECTION DEVICE
Remove the eyepiece and tilt the microscope
so {hat the body tube is pointing at a white
surface not more than one meter away. For best
results view in a darkened room.
HOW TO MAKE A PREPARED SLIDE
If the given sample is not thin and transparent,
it cannot be observed by the microscope as the
light from the reflector or the light source does
not pass through it. Fibres, pollen, wool, or sait
can be observed easily and cover glass is
optional. Clear samples are stained first with a
drop or two drops of methylene blue, Eosin or
other dyeing solutions available on the market.
(Note: These are dyeing solutions and therefore
could cause staining of clothing, carpets, and
fabrics. Special care shouid be taken when
handling these solutions.)
1) Temporary mount |
Wipe the slide and cover glass clean. Thin
sempie with a razor blade or the micro-slicer
(Note: This process should be under an
aduit's supervision. The blade is very sharp
and has to be handled with extreme caution).
Pick up thinned sample with tweezers and
put it on the centre part of the glass slide.
Put one drop of water on the sample with a
dissecting needle, or if the sample is clear,
use one drop of the above mentioned dyeing
solutions (Note: The needle has a sharp
point so handle with extreme caution) and
then gently put on cover glass. Avoid 10 trap
any air bubbles. Remove any excess water
or dyeing solution with blotting paper. Now it
is ready for observation. (Remember to
wash your hands after doing the preparation
and remember to dispose the dyeing
solutions.)
2) Permanent mount
Wipe the slide and cover glass clean as
above (Temporary mount). Proceed as
above. However before covering the slide
with the cover glass, add a few drops of gum
media (not included in the set - available
from store) or Canada balsam solution or
transparent adhesive glue with a dissecting
needle to the slide. Push down on the cover
glass with tweezers to fix it in place and
leave to dry for about a day.
X
P38-MS006-81001001