1
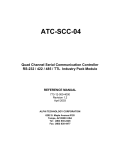
Super DriveLock User’s Guide Intelligent Computer Solutions Intelligent Computer Solutions 9350 Eton Avenue Chatsworth, CA 91311 DOC-0148-000C Rev. 1.31 Printed in the USA Sales/Technical Support Phone: 1-818-998-5805 Fax: 1-818-998-3190 E-Mail: [email protected] E-Mail: [email protected] Home Page: http://www.ics-iq.com ® Copyright© 2007, Intelligent Computer Solutions. All rights reserved. The ImageMASSter and associated software are copyrighted and registered in accordance with the laws and regulations of the State of California and ® ® the United States of America. IBM and OS/2 are registered trademarks of the International Business Machines ® ® ® ® ® ® Corporation. DOS , Windows , Windows NT , and Windows 95/98/2000 Windows ME , Windows XP , ® Windows VISTA are registered trademarks of the Microsoft Corporation. All other brand and product names are trademarks of their respective owners. Contents CONTENTS .......................................................................... 3 CHAPTER 1: INTRODUCTION ........................................... 5 Overview............................................................................................ 6 Features ............................................................................................ 7 About this User Guide...…………………………………………………………………...8 Typical Conventions Used………………………………………………………………………8 CHAPTER 2: QUICK START .............................................. 9 Quick Start Setup............................................................................. 10 CHAPTER 3: INSTALLATION .......................................... 12 Setup ............................................................................................... 13 • Internal PC Mounting using PCs native S-ATA interface......... 13 • Internal PC Mounting using PC’s eS-ATA interface. ............... 15 • External PC Mounting using PCs External eSATA interface. .. 17 • External Notebook Mounting using eSATA Interface .............. 19 • External Mounting using the External USB interface. .............. 22 Hardware Description ...................................................................... 26 CHAPTER 4: OPERATION ............................................... 30 User Interface .................................................................................. 31 Standard Operation ......................................................................... 32 Contents APPENDIX A: DEFINITIONS ............................................. 36 Appendix B: Operational Notes ....................................................... 40 APPENDIX C: PRODUCT INFORMATION ...................... 46 Limited Warranty.............................................................................. 46 What is Not Covered: ....................................................................... 47 Limitation of Liability......................................................................... 47 Technical Support ............................................................................ 47 Chapter 1 - Introduction Chapter 1: Introduction 7 Chapter 2 – Quick Start Overview The Super DriveLock is designed exclusively for Forensic data analysis applications by providing a write-protect hardware solution for acquiring, viewing or analyzing data in a secure environment without the risk of deleting or modifying the data. The Super DriveLock is compact, portable and designed to be mounted in a PC’s available drive bay or mounted outside of the PC. The Super DriveLock is also designed to be used with a Notebook. The Super DriveLock can be connected to the PC using the high speed S-ATA or eSATA interface. The Super DriveLock provides an all in one writeprotect solution by providing native support for today’s most common device interfaces, including P-ATA, S-ATA, SCSI and USB. Super DriveLock Figure 1 6 Chapter 2 – Quick Start Features • Multi Media Write-Protect Support: Built-in USB 2.0, P-ATA, S-ATA and SCSI interfaces provides native writeprotect support for USB, P-ATA, S-ATA, and SCSI devices. Supports SCSI interfaces such as Ultra-160 and Ultra-320, including SCSI Narrow (50-pin), SCSI Wide (68-pin) and SCSI-SCA80 (80-pin). Supports 3.3v devices. • High Speed Operation: Transfer rates can exceed 3.5GB/min. • Multiple O/S Host Support: Supports Windows XP, Windows VISTA and Linux. • Upgradeable Firmware: Unit’s firmware can be easily upgraded using the PC’s USB interface. • Multiple Host Interface Support: Unit can be connected to the PC or Notebook using multiple interfaces such as PC’s Native S-ATA port, eSATA controllers, eSATA CardBus adapters, and USB. • Portable: Can be used as a portable device or mounted in a PCs available drive bay. • HPA/DCO Support: Detects HPA and DCO areas. • 3.3V Device Support: Provides 3.3V output for devices which require 3.3V for operation. 7 Chapter 2 – Quick Start About this User Guide The User Guide for the Super DriveLock will be updated as needed to reflect hardware and software modifications. Therefore, descriptions of features may be subject to change. Typical Conventions Used Convention Meaning Bold In procedures, bold typeface indicates a screen menu item or function such as a setting or control button. Italic Indicates the name of a Super DriveLock feature, system, mode, or other important reference. Note Identifies additional important information regarding a topic or task. Indicates a warning or caution 8 Chapter 2 – Quick Start Chapter 2: Quick Start 9 Chapter 2 – Quick Start Quick Start Setup The following instructions describe the basic procedures to setup and start using the Super DriveLock (SDL) unit. 1. Power OFF the PC and remove the PCs cover. 2. Insert the Super DriveLock unit in an available 5 1/4” PC drive bay and secure it using the supplied screws. NOTE: Mounting the SDL unit in a PC is optional. See Chapter titled INSTALLATION for additional details. 3. Connect the SDL’s eSATA connector, located on the back of the unit, to the PC’s internal SATA or eSATA interface using the supplied eSATA interface cable. NOTE: Though a PC’s native SATA port can be used to connect the SDL unit, the SATA interface is not designed for “hot swapping”. For best results it is recommended to use the SDL unit connected to the PC’s eSATA interface. The eSATA interface is designed primarily for “hot swapping” drives. The SDL’s USB connector, located on the back of the unit, is used for firmware upgrade functions only. Figure 2 Dual eSATA and USB Interface Connector Power Connector 4. Connect a PC’s available power supply cable to the SDL’s Power Connector, located on the back of the unit. 5. Power ON the PC. 10 Chapter 2 – Quick Start 6. Connect the S-ATA, P-ATA, SCSI drive or External USB device to the SDL’s corresponding drive interface connector using the appropriate data and power cables, supplied with the unit (See Fig. 22-25). NOTE: The P-ATA or SCSI power cable will use the four power pins nearest the SATA data connector. Red 5V Cable Location Figure 3 Drive Status LEDs Power LED Figure 4 Power Button 7. Press and hold down the SDL’s Power Button until the drive’s corresponding Status LED is turned ON. The unit’s Red Power LED and the Drive’s Green Status LED will turn ON to indicate that the drive has been selected and powered ON. The O/S will detect the new hardware and the drive’s volume will be mounted in a write-protected environment. See Chapter titled OPERATION for additional details. NOTE: When connecting an External USB device verify that it is powered ON prior to pressing the SDL’s Power Button. 8. To power OFF the drive, hold down the SDL’s Power Button until the Power LED begins to blink. The unit’s Power LED and Drive Status LED will turn OFF, indicating that it is safe to remove the drive. 11 Chapter 3 – Installation Chapter 3: Installation 12 Chapter 3 – Installation Setup 1. Carefully remove the Super DriveLock from its shipping box. 2. Use the supplied Parts List (Table 1-3) to complete an inventory check. See Appendix B for a picture reference of supplied cables. 3. Review the HARDWARE DESCRIPTION section in this Chapter. 4. The Super DriveLock can be setup for five different types of configurations depending on needs and available hardware. • Internal PC Mounting using PCs native S-ATA interface. The following describes the basic steps for mounting and connecting the Super DriveLock in a PC using the PC’s native S-ATA interface. NOTE: Though a PC’s native S-ATA port can be used to connect the SDL unit, the S-ATA interface is not designed for “hot swapping”. For best results it is recommended to use the SDL unit connected to the PC’s eSATA interface. The eSATA interface is designed primarily for “hot swapping” drives. a. Power OFF the PC and remove the PCs cover. b. Insert the Super DriveLock unit in an available 5 1/4” PC drive bay and secure it using the supplied screws. Figure 5 13 Chapter 3 – Installation d. Connect a PC’s available power supply cable to the SDL’s Power Connector, located on the back of the unit. eSATA Interface Connector Power-In Connector Figure 6 c. Connect the SDL’s eSATA connector, located on the back of the unit, to the PC’s internal native SATA interface using the supplied eSATA-to-S-ATA interface cable. PC Internal S-ATA Ports Figure 7 e. Verify that the PC’s native S-ATA interface used to connect to the SDL unit is enabled in the PC’s BIOS. f. Close PC’s cover. 14 Chapter 3 – Installation • Internal PC Mounting using PC’s eS-ATA interface. The following describes the basic steps for mounting and connecting the Super DriveLock in a PC using the PC’s eS-ATA interface. NOTE: For best results it is recommended to use the SDL unit connected to the PC’s eSATA interface. The eSATA interface is designed primarily for “hot swapping” drives. a. Power OFF the PC and remove the PCs cover. b. Insert the Super DriveLock unit in an available 5 1/4” PC drive bay and secure it using the supplied screws. c. Insert the eSATA PCI or PCI-Express controller card in the PCs available PCI or PCI-Express expansion slot. eSATA PCI-Express Figure 8 External eSATA “Hot Swap” Compatible Interface External eSATA “Hot Swap” Compatible Interface eSATA PCI Internal S-ATA “Hot Swap” Compatible Interface Internal S-ATA “Hot Swap” Compatible Interface Figure 9 15 Chapter 3 – Installation d. Load the appropriate eSATA PCI or PCI-Express controller card drivers. NOTE: Refer to the card manufacturer’s instructions for appropriate driver installation instructions. e. Connect the SDL’s eSATA connector, located on the back of the unit, to the PC’s internal eSATA interface using the supplied eSATA-to-S-ATA interface cable. NOTE: Most eSATA controller cards use an S-ATA type connector for its internal port and an eSATA type connector for its external port. d. Connect a PC’s available power supply cable to the SDL’s Power Connector, located on the back of the unit. f. Close PCs cover. 16 Chapter 3 – Installation • External PC Mounting using PCs External eSATA interface. The following describes the basic steps for using the Super DriveLock as a portable external device using the PCs External eSATA interface.. a. Place the Super DriveLock on a flat level surface outside and near the PC. Figure 10 b. Insert the eSATA PCI or PCI-Express controller card in the PCs available PCI or PCI-Express expansion slot. c. Load the appropriate eSATA PCI or PCI-Express controller card drivers. NOTE: Refer to the card manufacturer’s instructions for appropriate driver installation instructions. d. Connect the SDL’s eSATA connector, located on the back of the unit, to the PC’s External eSATA interface, using the supplied eSATA-to-eSATA interface cable. Figure 11 17 Chapter 3 – Installation External eSATA Interface Figure 12 e. Verify that the Super DriveLock’s External power supply is disconnected from the AC power outlet. f. Connect the Super DriveLock’s External power supply to the SDL’s Power Connector, located on the back of the unit. g. Connect the Super DriveLock’s External power supply to the AC power outlet. Figure 13 18 Chapter 3 – Installation • External Notebook Mounting using eSATA Interface The following describes the basic steps for using the Super DriveLock as a portable external device using the Notebook’s External eSATA ExpressCard or eS-ATA CardBus interface. NOTE: The eSATA ExpressCard or eS-ATA CardBus Adapters are available through 3rd Party Vendors and not supplied by ICS. a. Place the Super DriveLock on a flat level surface outside and near the Notebook. Figure 14 19 Chapter 3 – Installation a. Insert the eSATA ExpressCard or eS-ATA CardBus Adapter into the Notebooks ExpressCard or CardBus slot. eSATA CardBus Figure 15 eSATA ExpressCard Figure 16 20 Chapter 3 – Installation b. Load the appropriate eSATA ExpressCard or eS-ATA CardBus Adapter drivers. NOTE: Refer to the card manufacturer’s instructions for appropriate driver installation instructions. c. Connect the SDL’s eSATA connector, located on the back of the unit, to the Notebook’s External eSATA interface, using the supplied eSATA-to-eSATA interface cable. d. Verify that the Super DriveLock’s External power supply is disconnected from the AC power outlet. e. Connect the Super DriveLock’s External power supply to the SDL’s Power Connector, located on the back of the unit. f. Connect the Super DriveLock’s External power supply to the AC power outlet. 21 Chapter 3 – Installation • External Mounting using the External USB interface. The following describes the basic steps for using the Super DriveLock as a portable external device using the Notebook or PC’s native USB interface.. a. Place the Super DriveLock on a flat level surface outside and near the PC. S-ATA-to-USB Adapter External Power Supply USB Interface Figure 17 22 Chapter 3 – Installation d. Connect the SDL’s eSATA connector, located on the back of the unit, to the S-ATA-to-USB Adapter’s S-ATA connector, using the supplied eSATA-to-S-ATA interface cable (Fig. 11 and 17). S-ATA-to-USB Adapter Figure 18 USB Connector S-ATA Connector e. Connect the S-ATA-to-USB adapter’s USB connector to the Notebook or PC’s USB interface. f. Verify that the Super DriveLock’s External power supply is disconnected from the AC power outlet. g. Connect the Super DriveLock’s External power supply to the SDL’s Power Connector, located on the back of the unit. h. Connect the Super DriveLock’s External power supply to the AC power outlet. 23 Chapter 3 – Installation QUICK-REFERENCE PARTS LIST1 Super DriveLock Basic Kit (F.GR-0028-000A) Table 1 Part Super Drive Lock Unit External USB Device Data Cable S-ATA Data/Power Cable 8” P-ATA/SCSI Power Cable 6” S-ATA 3.3v/5v Power Cable 6” S-ATA Data Cable 6” SCSI Data Cable SCSI Terminator 5” P-ATA Data Cable e-SATA-to-S-ATA Data Cable USB A-to-A F/W Upgrade Data Cable e-SATA-to-e-SATA Data Cable 36” P-ATA/SCSI Power Cable SCSI Narrow Adapter SCSI SCA80 Adapter 18” P-ATA Data Cable Warranty documents PART Number F.GR-0028-000A CBLR-0350-000A CBLR-0421-000A CBPR-0001-000A CBPR-0651-000A CBDR-0472-000A F.GR-0000-860A CSAR-0100-000A CBDR-0406-000A CBDR-0509-000A CBLR-0681-000A CBLR-0682-000A CBPR-0272-000A F.GR-0206-002A F.GR-0231-000A CBDR-0406-400A Quantity 1 1 1 1 1 1 1 1 1 1 1 1 1 1 1 1 Super DriveLock eSATA PCI Kit (F.GR-0029-900A) Table 2 Part Super DriveLock Basic Kit External Power Supply USB-to-S-ATA Adapter eSATA PCI Controller Card Hard Case 1 PART Number F.GR-0028-000A CSAR-0222-000A CSAR-0222-000A CSAR-0224-000A F.GR-0030-000A Quantity 1 1 1 1 See Appendix B for a picture reference of supplied cables 24 Chapter 3 – Installation Super DriveLock eSATA Express Kit (F.GR-0029-000A) Table 3 Part Super DriveLock Basic Kit External Power Supply USB-to-S-ATA Adapter eSATA PCI Express Controller Card Hard Case PART Number F.GR-0028-000A CSAR-0222-000A CSAR-0222-000A CSAR-0223-000A F.GR-0030-000A Quantity 1 1 1 1 25 Chapter 3 – Installation Hardware Description The following section provides a Hardware Description of the Super DriveLock. Refer to Table 4 for a detailed description of the unit’s hardware. Components and Functions Table 4 Front Panel (See Fig. 15) USB 2.0 Device Interface Drive Power Connector S-ATA Device Interface P-ATA Device Interface Drive Status LEDs Power LED Power Button Back Panel (See Fig. 16) 5V/12V DC In Power Socket eSATA/USB Combo Interface Firmware Jumper Connector IC3 Connector PC Connector Used to connect USB devices. Used to supply power to S-ATA, P-ATA and SCSI devices. Used to connect S-ATA devices. Used to connect P-ATA devices. Four Drive Status LEDs provides drive power and activity status display. Provides SDL power status display. Used to power ON and OFF the connected drive. Supplies the SDL unit with 5V/12V DC power using a PC or external power supply. The eSATA interface is used to connect the SDL to a PC/Notebook. The USB interface is used to Upgrade unit’s firmware. For Factory Use Only. For Factory Use Only. For Factory Use Only. 26 Chapter 3 – Installation FRONT PANEL Figure 19 P-ATA Device Interface Drive Status LEDs Power LED USB 2.0 Device Interface Drive Power Output S-ATA Device Interface Dual eSATA and USB Interface Connector Factory Use Only SCSI Device Interface Power Control Button BACK PANEL Figure 20 Power IN Connector Factory Use Only 27 Chapter 3 – Installation System Specifications Supply Voltage Power Consumption Operating Temperature Relative Humidity Net Weight Overall Dimensions +5VDC @ 2A, +12VDC @ 2A 9W 5 degrees - 55 degrees C 20% - 60% non-condensing 1 lbs 5.75” (L) x 3.25” (W) x 1.125””(H) System Requirements Table 5 Part PC/Notebook O/S Compatible Interfaces Specification Intel Based PC Windows XP, Windows VISTA, LINUX eSATA, SATA, USB2.0 28 Chapter 3 – Installation Hardware Accessories The following section provides a description of the Hardware Accessories that are available for the Super DriveLock unit. • eSATA PCI Express Controller Card Provides a “hot swap” eSATA interface to connect the Super DriveLock with the PC. Installs in a PC’s available Express Slot. • eSATA PCI Controller Card Provides a “hot swap” eSATA interface to connect the Super DriveLock with the PC. Installs in a PC’s available PCI Slot. • External Power Supply Provides external power for the Super DriveLock device, allowing the SDL to be used as a portable device. • USB-to-S-ATA Adapter The USB-to-S-ATA Adapter can be used to connect the SDL to the PC or Notebook using the USB interface. • Hard Case Provides a portable carry case for the Super DriveLock device. 29 Chapter 4 - Operation Chapter 4: Operation 30 Chapter 4 - Operation User Interface The Super DriveLock unit provides an easy to use Power Control Button and Drive Status LEDs which are used to control and operate the unit. Refer to the STANDARD OPERATION section in this Chapter for descriptions of functions and for detailed usage. Each drive interface has a corresponding Drive Status LED to indicate the status of the device connected to the SDL. . USB Device Interface and Status LED P-ATA Device Interface and Status LED Power Control Button Figure 21 S-ATA Device Interface and Status LED Power LED SCSI Device Interface and Status LED 31 Chapter 4 - Operation Standard Operation This section describes the standard recommended procedure to follow when preparing to detect drives and mount drive’s volume in a write-protected environment using Super DriveLock unit. 1. Verify Installation Verify that the Super DriveLock and PC/Notebook are properly configured using the Installation instructions listed in Chapter 3. 2. Prepare the Drive for Detection and Mounting Verify that the Suspect’s drive jumper block is properly configured. For P-ATA drives the jumper block should be set for “Single/Master” operation. For SCSI drives the SCSI Address jumper block should be set to 0. Using the supplied data and power cable(s), connect the drive to the SDL’s appropriately labeled interface connector. Connectors are available for P-ATA, S-ATA, SCSI and USB devices. Refer to Figures 22 through 25 for a graphical display of drive positions. For P-ATA data cables, connect the cable’s “HDD Side” labeled connector to the drive’s data connector. Verify that the cable’s Pin-1 is properly oriented. The cable’s Pin-1 should be aligned adjacent to the drive’s power connector (See Fig. 23). For SCSI data cables, connect the ICS supplied single channel SCSI cable to the unit’s SCSI data connector. Verify that the SCSI Cable Terminator is connected to the cable’s end connector. The terminated connector is located on the drive side (See Fig. 24). NOTE: A short and long S-ATA and P-ATA data and power cable set is provided for ease of use. 32 Chapter 4 - Operation SDL with S-ATA Drive Figure 22 SDL with P-ATA Drive Figure 23 SDL with SCSI Drive Figure 24 33 Chapter 4 - Operation SDL with USB Drive Figure 25 3. Drive Detection A connected drive is detected by pressing and holding down the Power Control Button until the drive’s corresponding Status LED turns ON (Green), at which point the drive will power ON. The Power LED will also turn ON (Red). The PCs O/S will detect the drive within a few seconds after the drive is powered ON. NOTE: Though multiple drives can be physically connected, only one drive can be selected for detection. Power ON External USB drives using the drive’s own power supply, prior to pressing the Power Control Button. When using the SDL connected to the PC’s native S-ATA interface, it may be necessary to perform the following additional steps after powering ON the drive, before the O/S will properly detect the drive. a. Manually select the built-in O/S function which forces the O/S to detect new hardware. Ex. Select Windows XP “Scan for Hardware Changes” function located in “Device Manager”. b. If the O/S does not detect the drive after selecting “Scan for Hardware Changes”, reset the PC with the drive connected and powered ON. The O/S “Device Manager” function can be used to verify that the drive was properly detected. The drive’s model information will be prefixed with an “IC” signature to indicate that the drive is connected using the SDL unit NOTE: The drive’s model information may be truncated when using the SDL with eSATA controller cards. 34 Chapter 4 - Operation 4. Drive Volume Mounting If the O/S detects and recognizes a valid partition after the drive is detected, it will mount the drive’s volume(s). If a known volume exists but is not mounted after the drive is properly detected, it may be necessary to perform the following additional steps after powering ON the drive. a. Manually select the built-in O/S function which forces the O/S to detect new hardware. Ex. Select Windows XP “Scan for Hardware Changes” function located in “Device Manager”. b. If the O/S does not mount the drive’s volume after selecting “Scan for Hardware Changes”, reset the PC with the drive connected and powered ON. 5. SDL’s Write-Protection Properties The detected drive will be mounted in a write-protected environment without risk of changing or overwriting the drive’s data. Once the drive is detected and its volume mounted, the drive can be used as any other mounted device for browsing, analyzing or acquiring data. The SDL works as a transparent device. The O/S will not display any WriteProtect messages when attempting to delete or move data from the SDL connected drive. Since the O/S may cache operations in the background, selecting delete or move commands will visually indicate that the operation was performed, but due to the SDL write-protect properties, the changes cannot be physically written to the drive’s media. Power cycling the drive will demonstrate that the delete or move commands had no effect. 6. Removing the SDL Drive The drive is powered OFF by pressing and holding down the Power Control Button until the Power LED begins to blink. The drive can be disconnected after the Power LED turns OFF. Once the drive is powered OFF, the O/S will un-mount the drive’s volume and remove the drive from its list of detected hardware. NOTE: It would be recommended to use the O/S “Safely Remove Hardware” function when available, prior to powering OFF the drive. If the SDL is connected to the PC’s native SATA interface, it may be necessary to manually select the O/S “Uninstall” function, before the drive can be properly removed from the O/S list of detected hardware. 35 Appendix A- Definitions Appendix A: Definitions Host Protected Area (HPA) HPA is defined as a reserved area for data storage outside the normal operating file system. This area is hidden from the operating system and file system and is normally used for specialized applications. Systems may wish to store configuration data or save memory to the hard disk drive device in a location that the operating systems cannot change. If an HPA area exists on a drive, the Super DriveLock will temporarily “unlock” this area for read-only access. Device Configuration Overlay (DCO) DCO allows systems to modify the apparent features provided by a hard disk drive device. DCO provides a set of commands that allows a utility or program to modify some of the modes, commands and feature sets supported by the hard disk drive. DCO can be used to hide and protect a portion of the drive’s area from the operating system and file system. If DCO is detected on a drive, the Super DriveLock will temporarily “unlock” this area for read-only access. eSATA External Serial Advanced Technology Attachment (eSATA) is an external interface for SATA technologies. The eSATA interface provides “hot swapping” capabilities, which allows devices to be disconnected without the need to power OFF the PC. 36 Appendix A- Definitions PCI Express Bus Interface The PCI Express (PCI-E), is a computer expansion card interface. PCI Express was designed to replace the general-purpose PCI (Peripheral Component Interconnect) expansion bus, the high-end PCI-X bus and the AGP graphics card interface. SCA-80 Interface SCSI interface which uses an 80-pin connector, used on SCSI drives to plug to backplane connections. The SCA connector provides grounds, voltage, and control lines needed to allow hot-plugging. SCSI Narrow SCSI 50-pin parallel interface. The narrow bus uses 8 data lines. SCSI Wide SCSI parallel interface which uses a 68-pin connector. The wide bus uses 16 data lines. 37 Appendix A- Definitions SCSI Single Channel Data cable SCSI data cable used to connect the SCSI drive. SCSI Cable Terminator Use to terminate last device on the SCSI chain. SCSI SCA-80 Adapter Use to convert SCSI Wide interface to SCA-80 interface. SCSI Low Voltage SCA-80 Adapter—(SCSI 68 Pin to SCSI 80 Pin) SCSI to SATA Adapter - (68 Pin to SATA) 38 Appendix A- Definitions SCSI Nar r ow Adapter Use to convert SCSI Wide Interface to SCSI Narrow Interface SCSI Wide to SCSI Narrow Adapter (68 Pin to 50 Pin) 39 Appendix B- Operational Notes Appendix B: Operational Notes FIRMWARE UPGRADE The SuperDrive Lock’s firmware can be upgraded by connecting the SDL to the PC using the SDL’s USB interface located on the back of the unit. Detailed Firmware Upgrade instructions and files can be downloaded from the ICS Web Site (www.ics-iq.com). SDL USB Firmware Upgrade Figure 26 Dual eSATA and USB Interface Connector USB Cable DRIVE JUMPER SETTINGS The following are common SCSI jumper settings required for proper operation: • • Enable “Auto Spin”. It is recommended to set the “SCSI Address” to 0. 40 Appendix B- Operational Notes CABLE ACCESSORIES The following cables are provided with the Super DriveLock . 5” P-ATA Data Cable CBDR-0406-000A Figure 27 8” P-ATA/SCSI Power Cable CBPR-0001-000A Figure 28 6” S-ATA Data Cable CBDR-0472-000A Figure 29 41 Appendix B- Operational Notes 6” S-ATA 3.3v/5v Power Cable CBPR-0651-000A Figure 30 S-ATA Data/Power Cable CBLR-0421-000A Figure 31 36” P-ATA/SCSI Power Cable CBPR-0272-000A Figure 32 42 Appendix B- Operational Notes 12” SCSI Data Cable F.GR-0000-860A Figure 33 43 Appendix B- Operational Notes 18” P-ATA Data Cable CBDR-0406-400A Figure 34 e-SATA-to-S-ATA Data Cable CBDR-0509-000A Figure 35 44 Appendix C- Product Information e-SATA-to-e-SATA Data Cable CBLR-0682-000A Figure 36 External USB Device Data Cable CBLR-0350-000A Figure 37 USB A-to-A F/W Upgrade Data Cable CBLR-0681-000A Figure 38 45 Appendix C- Product Information Appendix C: Product Information Limited Warranty Intelligent Computer Solutions, Inc. warrants that our products are free from defects in materials and workmanship for a period of twelve (12) months from the date of purchase by the original buyer. If you discover physical defects or malfunction, Intelligent Computer Solutions, Inc. will, at our discretion, repair or replace the product. You must return the defective product to Intelligent Computer Solutions, Inc. within the warranty period accompanied by an RMA number that has been issued by Intelligent Computer Solutions, Inc. All products purchased from Intelligent Computer Solutions, Inc. include a seven-day unconditional money-back guarantee. Intelligent Computer Solutions, Inc.’s products are shipped in cardboard boxes that have been designed and tested to ensure that our products can endure standard commercial shipping methods and still arrive in working order. We advise you to save your box and original packing materials in case you need to return the product(s) for any reason. If product(s) are returned without proper protective packaging, the warranty may be void. When you received your product(s), please note the following: -That the shipping box does not have dents or visible damage. -What you have received conforms to the packing list. -There is no apparent damage to the product(s) or accessories. If any shipping damage is found: -Please contact the shipper immediately to inspect. -Please contact our Technical Support Department to report the damage. 46 Appendix C- Product Information What is Not Covered: This limited warranty provided by Intelligent Computer Solutions, Inc. does not cover: - Products which have been subjected to abuse, accident, alteration, modification, tampering, negligence, misuse, faulty installation, lack of reasonable care, or if repaired or serviced by anyone without prior authorization from Intelligent Computer Solutions, or if the model or serial number has been altered, tampered with, defaced or removed. - Normal maintenance. - Damage that occurs in shipment due to act of God and/or cosmetic damage. - Accessories Please note that External cables are covered by a 30-day warranty. This Agreement also does not include service (whether parts or labor) necessitated by any natural cause such as flood, tornado, earthquake or other acts of nature. Limitation of Liability The following limitations of ICS liability apply: ICS is not liable for any incidental or consequential damages, including, but not limited to property damage, loss of time, loss resulting from use of an ICS product, or any other damages resulting from breakdown or failure of a servi ced product or from delays in servicing or inability to render servi ce on ICS product. ICS will make every effort to ensure proper operation of its product. It is, however, the Customer’ s responsibility and obligation to verify that the output of ICS product meets the Customer’ s quality requirement. Customer acknowledges that improper operation of ICS product and/or software, or hardware problems, can cause defective formatting or data loading to target drive. It is the customer, not ICS, who is responsible for verifying that the drive meets the Customer’ s quality standards. ICS will make efforts to solve any problems identified by Customer. Technical Support For help in resolving a problem, contact ICS Technical Support at: Phone: 1-818-998-5805 between 7 a.m. and 6 p.m. Pacific Time. Please be prepared with the following information: serial number of the Super DriveLock nature of the problem steps you have taken your phone and fax numbers error messages displayed on the screens. 47