1
LLL LA
errant a
AS LLANA
. A Tr TL ar vr in re;
- FEATURES
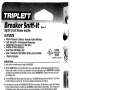
Breaker Sniff-It …
Digital Circuit Breaker Identifier
A Micro-Processor Controlled - Reduces False Readings
a Fully Automatic - No Adjustments Necessary
A 90/280 VAC Transmitter (280 VAC Max)
a Audible & Visual Indication
a Auto Power Off Battery Saver | LISTED
A Uses 1 standard 9-Volt Alkaline Battery (not included) © Ug CIRCUIT TESTER
A Lifetime Warranty PATENT NO, 6, 222, 358
Instructions
1) Install a fresh 9-volt alkaline battery (not included) in the RECEIVER.
2) Plug the TRANSMITTER into a live wall outlet (see Figure 1A) or a light socket adapter (Kit sold separately) (ses Figure 18) on the
circuit you wish to identify. If the circuit ís not yet connected to a wall outlet or light socket, plug the TRANSMITTER into the Alligator
Lead adaptor (Kit sold separately) and clip the leads to the wires. Once the TRANSMITTER is connected to the circuit, the LED will
glow, indicating power,
3) Turn the RECEIVER power ON by pressing the power button once. The RECEIVER will beep and the arrow will flash. The LED above
the button will remain on (see Figure 2). You do not need to hold the power button down to run Ie test
4) At the breaker box or fuse box, hold the RECEIVER PERPENDICULAR to the breakers. With the power on, scan the rows of breakers
from top to bottom (see Figure 3). During this scan, the RECEIVER may beep and flash at several breakers. This is a normal part of
the identification process. When you have completed one scan of aif of the breakers, go back to the first breaker and, without
g power button, scan them all a second time, When the receiver beeps and the arrow flashes during the second scan, you
have correctly identified the circuit,
5) When you have finished, turn the RECEIVER off by pressing and holding the power button until the LED above the button turns off,
Besping and flashing of the RECEIVER during shutdown Is normal, The RECEIVER will also turn itself off after several minutes of
inaciivily. Always remember to unplug the TRANSMITTER when you have finished,
Optional Accessories
Instrucciones
1) Instale una batería alcalino fresca de 9 voltios (no Incluido) en el Receptor.
2) Tape el Transmisor en una salida viva de la pared (visto la Figura (el Número) 1A) o un adaptador de enchufe ligero(de luz) (Kit
vendido separadamente) (visto la Figura (el Número) 18) sobre el circuito usted desea identificarse. Sí el circuito aún no es
baidofooneetado) à una salida de la pared.o el enchufe ligerofde luz), el! enchufe el Transmisor en el adaptador de Plomo(Ventaja) de
Caimán (Kit vendido separadamente) y el clip el conduce a los cables. Una vez que el Transmisor es unido(coneciado) al circuito, el
CONDUCIDO brillarä, indicando el poder,
3) Gire el poder de Receptor Sobre por presionando el botón de poder una vez. El Receptor emitirá una señal sonora y la fecha Padded Carr ying Case
destellará. El CONDUCIDO encima del botón permanecerá sobre (visto la Figura (el Número) 2). Usted no tiene que dominar el botón Cal. No. 10-4250
de poder para controlar la prueba, |
, , ¢ Large pockel holds Receiver
4) En la ola grande la caja o la caja de fusibles, sostenga el PERPENDICULAR de Receptor a las olas grandes, Con el poder sobre, o 2 small pockels hold Transmitter
explore las filas de olas grandes de arriba abajo (visto la Eigura(e! Número) 3), Durante esta exploración, el Receptor puede emitir una 8 Light Sockel Adapler
señal sonora y destellar en varías olas grandes. Esto es una parte normal del proceso de identificación, Cuando usted ha completado o Durable “Cordura” Exterior
una exploración de todas las olas grandes, vuelva a la primera ola grande y, sin tocar el botón de poder, explóreles todo un segunda e Salt. Padded Interior
vez. Cuando el receptor emite una señal sonora y los destellos de flecha durante la segunda exploración, usted correctamente ha о | arje Bell Loop w/ Snaps
identificado el circuito, o Velcro® Flap Closures
5) Cuando usted ha terminado, apaga al Receptor por presionando y sosteniendo el botón de poder hasta que el CONDUCIDO encima del
botón apage, La emisión de una señal sonora y el dirigir del Receptor durante la parada son normales. El Receptor también se
apagará después de varios minutos de inactividad. Siempre acuérdese de intapar el Transmisor cuando usted ha terminado.
Instructions
1} Installez une batterie(pile) alcaling fraiche de 9 volts (non inclus) dans le Récepteur. | Breaker Sniff-it
2} Branchez{Bouchez) 'Emstieur dans une sortiefun débouché) murale vivante (voir la Figurefle Chiffre) TA) ou un adaptateur de douille reaker N "ri
léger (Kit vendu séparément) (voir la Figure(le Chiffre) 18) sur le circuit vous voulez identifier. Si le circuit n'est pas encore connecté à Adapter Kit
une sortie(un débouché) murale où à une douille légère, la prise l’Émetteur dans l'adaptateur d'Avance(de Plomb} d'Alligator (Kit Cat, No. 79-796
vendu séparément) et l'agrafe le mène aux fils. Une fois que l'Émetteur est connecté au circuit, le MENE rougeclera, India uant Ie ,
pans nt дари
3) Tournez le pouvoir(la puissance) de Récepteur Sur en appuyant le bouton de pouvoir(puissance) une fois. Le Récepleur donnera des 0 Alligator Clip A dapter
signaux sonores et la flèche étincellera. Le MENE au-dessus du bouton restera sur (voir la Figure(le Chiffre) 2), Vous ne devez pas
maintenir le bouton de pouvolr(puissance} pour diriger l'essai. H046000010-B0
4) À la boîte d'interrupteur ou la boîte à fusibles, tenez la PERPENDICULAIRE de Récepteur aux interrupteurs. Avec le pouvoir(ta WARNING! ¡ADVERTENCIA!
puissance) sur, parcourez les rangées d'interrupteurs de haut en bas (voir la Figure(le Chiffre) 3). Pendant ce feuillelage, le Récepteur AVERTISSEMENT! WARNUNG!
peut donner des signaux sónores et élinceler a plusieurs interrupteurs. C'est une partie normale du processus d’identification, Quand :
vous avez achevé un feuilletage de tous les interrupteurs, retournez au premier interrupteur el, sans toucher le bouton de fonte RISK OP ELEC TRICAL SHOCK
pouvoir(puissance), parcourez-leur tout une deuxième fois. Quand le récepteur donne des signaux sonores et les flashes de flèche removal of ballery. Keep away from children. Do
vendant le deuxième feuillelace. vous avez correctement identifié le cireuit, not use In wet localions.
—r SP oT pe A
E LACALLE A wr
Po? ad ELA Ad A AA
Ha
e i
EA “A ME CIC .
Lhd Е T я, sf AE
k n If TE
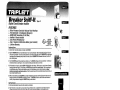
Digital Circuit Breaker Identifier
FEATURES
a Micro-Processor Controller - Reduces False Readings
a Fully Automatic - No Adjustments Necessary
A 90/280 VAC Transmitter (280 VAC Max)
A Audible & Visual Indication |
A
А
A
EEE SEA Tem e Sp ae
RAT ST TE ch HT SP DR
О EE
TEA y
ad
E MEA ES AA
EEE
a 5 TA
Auto Power Off Battery Saver U LISTED
Uses 1 standard 9-Volt Alkaline Battery (not included) — eN eL)us "875.
Lifetime W arranty ` . PATENT NO. 6, 222, 358
Instructions annonces
1) Install a fresh 9-volt alkaline battery (not included) in the RECEIVER.
2) Plug the TRANSMITTER into a live wall outlet (see Figure TA) or a light socket adapter (Kit sold separately) (see Figure TB) on the
circuit you wish to identify. If the circuit is not yet connected to a wall outlet or light socket, plug the TRANSMITTER info the Alligator
Lead adaptor (Kit sold separately) and clip the leads to the wires. Once the TRANSMITTER is connected to the circuit, the LED will
glow, indicating power.
3) Turn the RECEIVER power ON by pressing the power button once. The RECEIVER will beep and the arrow will flash. The LED above
the button will remain on (ses Figure 2). You do not need to hold the power button down fo run the test.
4) At the breaker box or fuse box, hold the RECEIVER PERPENDICULAR to the breakers. With the power on, scan the rows of breakers
from top to bottom (see Figure 3). During this scan, the RECEIVER may beep and flash at several breakers. This is a normal part of
the identification process. When you have completed one scan of all of the breakers, go back to the first breaker and, without
touching the power button, scan them all a second time. When the receiver beeps and the arrow flashes during the second scan, you
have correctly identified the circuit.
5) When you have finished, turn the RECEIVER off by pressing and holding the power button until the LED above the button turns off
Beeping and flashing of the RECEIVER during shutdown is normal. The RECEIVER will also turn itself off after several minutes of
inactivity. Always remember to unplug the TRANSMITTER when you have finished.
Instrucciones > :
1) Instale una batería alcalino fresca de 9 voltios (no incluido) en el Receptor.
2) Tape el Transmisor en una salida viva de la pared (visto la Figura (el Número) 1A) o un adaptador de enchufe ligero(de luz) (Kit
vendido separadamente) (visto la Figura (el Número) 18) sobre el circuito usted desea inentificarse. Si el circuito aún no es —
unido(conectado) a una salida de la pared.o el enchufe ligero(de luz), el enchufe el Transmisor en el adaptador de Plomo(Ventaja) de
Caimán (Kit vendido separadamente) y el clip el conduce a los cables. Una vez que el Transmisor es unido(conectado) al circuito, el
CONDUCIDO brillará, indicando el poder. 2
3) Gire el poder de Receptor Sobre por presionando el botón de poder una vez. El Receptor emitirá una señal sonora y la flecha —
destellará. El CONDUCIDO encima del botón permanecerá sobre (visto la Figura (el Número) 2). Usted no tiene que dominar el botón
de poder para controlar la prueba.
4) En la ola grande la caja o la caja de fusibles, sostenga el PERPENDICULAR de Receptor a las olas grandes. Con el poder sobre, В
explore las filas de olas grandes de arriba abajo (visto la Figura(el Número) 3). Durante esta exploración, el Receptor puede emitir una
señal sonora y destellar en varias olas grandes. Esto es una parte normal del proceso de identificación, Cuando usted ha completado
una exploración de todas las olas grandes, vuelva a la primera ola grande y, sin tocar el botón de poder, explóreles todo un segunda
vez, Cuando el receptor emite una señal sonora y los destellos de flecha durante la segunda exploración, usted correctamente ha
identificado el circuito. |
5) Cuando usted ha terminado, apaga al Receptor por presionando y sosteniendo el botón de poder hasta que el CONDUCIDO encima del
botón apage. La emisión de una señal sonora y el dirigir del Receptor durante la parada son normales. El Receptor también se
nnnanrâ Hdanni:ión da trarian rainitan da Inantiisad Ojlaranra aattÁrdanna da infanar al Tranemicenr nianra notan ha tarminada
Padde
Cat. No
o Large p
« 2 small
& Light
e Durable
e Sol, Pá
* Large B
e Veleros
a