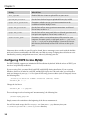
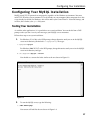
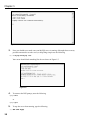
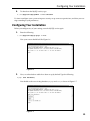
1
1
TE
RI
AL
Configuring Your
Installation
GH
TE
D
MA
You’ve spent your hard-earned money and purchased this book, so you undoubtedly know the
enormous benefits of using PHP, Apache, and MySQL together to create your Web site. But in case
you found this book on your desk one Monday morning with a sticky note reading “Learn this!,”
this chapter looks at the basics of PHP, MySQL, and Apache to show you what makes the “AMP”
combination so popular. This chapter also walks you through the procedure for installing all three
components of the AMP module and advises you on how to best configure the software to meet
your specific needs.
Projects in This Book
RI
Over the course of this book, you will develop two complete Web sites:
Movie Review Web site. Developing this site introduces you to writing a PHP program,
making your pages look professional, working with variables and includes, and integrating PHP with MySQL to make your site truly dynamic as pages are created on the fly for
your Web site visitor. You will also get experience in error handling and data validation
while working on this site.
❑
Comic Book Fan Web site. The creation of this Web site takes you through the steps of
building databases from scratch, manipulating images and sending out e-mails using
PHP, authenticating users, managing content through CMS, creating a mailing list, setting
up an e-commerce section, and developing and customizing a discussion forum.
CO
PY
❑
Finally, this book covers how to learn about your visitors through the use of log files and how to
troubleshoot common mistakes or problems. The appendixes in this book provide you with the
necessary reference materials you’ll need to assist you in your Web site development journey and
offer tools to make you more efficient.
Chapter 1
After reading this book, you will be able to create a well-designed, dynamic Web site using tools available for free. Although this book is not intended to be a detailed analysis of Apache, PHP, and MySQL, it
points you in the right direction to explore further issues you may wish to delve into.
Brief Intro to PHP, Apache,
MySQL, and Open Source
PHP, Apache, and MySQL are all part of the open source group of software programs. The open source
movement is a collaboration of some of the finest minds in computer programming. By allowing the
open exchange of information, programmers from all over the world contribute to make a truly powerful and efficient piece of software available to everyone. Through the contributions of many people to
the publicly available source code, bugs get fixed, improvements are made, and a good software program becomes a great one over time.
A Brief History of Open Source Initiatives
The term open source was coined in 1998 after Netscape decided to publish the source code for its popular Navigator browser. This announcement prompted a small group of software developers who had
been long-time supporters of the soon-to-be open source ideology to formally develop the Open Source
Initiatives (OSI) and the Open Source Definition.
Although the OSI ideology was initially promoted in the hacker community, upon Netscape’s release of
Navigator’s source code, programmers from all walks of life began to offer suggestions and fixes to
improve the browser’s performance. The OSI mission was off and running, as the mainstream computing world began to embrace the idea.
Linux became the first operating system that could be considered open source (although BSD was a
close runner-up, distributed from Berkeley in 1989), and many programs followed soon thereafter. Large
software corporations, such as Corel, began to offer versions of their programs that worked on Linux
machines.
Although there are now numerous classifications of OSI open source licenses, any software that bears the
OSI Certification seal can be considered open source because it has passed the Open Source Definition test.
These programs are available from a multitude of Web sites; the most popular is www.sourceforge.net,
which houses more than 83,000 open source projects.
Why Open Source Rocks
Open source programs are very cool because:
❑
4
They are free. The greatest thing about open source software is that it is free and available to the
general public. Software developers and programmers volunteer their time to improve existing
software and create new programs. Open source software cannot, by definition, require any sort
of licensing or sales fees.
Configuring Your Installation
❑
They are cross-platform and “technology-neutral.” By requiring open source software to be
non–platform specific, the open source community has ensured that the programs are usable
by virtually everyone. According to the Open Source Definition provided by the Open Source
Initiative at http://opensource.org/docs/definition.php, open source programs must
not be dependent on any “individual technology or style of interface” and must be “technologyneutral.” As long as the software can run on more than one operating system, it meets the
criterion.
❑
They must not restrict other software. This basically means that if an open source program is
distributed along with other programs, those other programs may be open source or commercial in nature. This gives software developers maximum control and flexibility.
❑
They embrace diversity. Diversity of minds and cultures simply produces a better result. For
this reason, open source programs cannot, by definition, discriminate against any person or
group of persons, nor against any “field of endeavor.” For example, a program designed for use
in the medical profession cannot be limited to that field if someone in another field wants to
take the program and modify it to fit his or her needs.
For a complete list of the criteria a piece of software must meet before it can be considered “open
source,” or for more information about the OSI or the open source community, visit the OSI Web site
at www.opensource.org.
How the Pieces of the AMP
Module Work Together
Now that you’ve learned some of the history of open source, it’s important to understand the role each
of these programs (Apache, MySQL, and PHP) plays in creating your Web site.
Imagine that your dynamic Web site is a fancy restaurant. Diners come to your place, and each one
wants something different and specific. They don’t worry so much about how the food is prepared, as
long as it looks and tastes delicious. Unlike a buffet-type spread, where everything is laid out and your
patrons simply choose from what’s available, a nice restaurant encourages patron/waiter interaction
and complete customization for any specific dietary needs. Similarly, a Web site shouldn’t be a static
page with little interaction from visitors; it should be a dynamic site where the visitor can choose what
he or she wants to see.
In this scenario, you can characterize the three components of the AMP module as follows:
❑
Apache: This is your highly trained master of culinary arts, the chef. Whatever people ask for,
she prepares it without complaint. She is quick, flexible, and able to prepare a multitude of different types of foods. Apache acts in much the same way as your HTTP server, parsing files and
passing on the results.
❑
PHP: This is the waiter. He gets requests from the patron and carries them back to the kitchen
with specific instructions about how the meal should be prepared.
❑
MySQL: This is your stockroom of ingredients (or in this case, information).
5
Chapter 1
When a patron (or Web site visitor) comes to your restaurant, he or she sits down and orders a meal with
specific requirements, such as a steak, well done. The waiter (PHP) takes those specific requirements back
to the kitchen and passes them off to the chef (Apache). The chef then goes to the stockroom (MySQL) to
retrieve the ingredients (or data) to prepare the meal and presents the final dish to the patron, exactly the
way he or she ordered it.
You can choose to install one, two, or all three components of the AMP package based on your specific
needs. For example, if you are responsible for providing a company-wide intranet, or hosting your own
Web site, you should probably install all three. If your site is hosted by a third-party Web hosting company,
however, you do not necessarily need to install all three components (or, for that matter, any of them).
Installing the three components, even if you don’t have to, enables you to develop and test your site in
the comfort of your own workspace without having to upload to the file server just to test at every little
step. Even if you do a lot of off-line testing, however, we highly recommend that you still perform a complete test once your site is live and running, because your settings may differ from those on your Webhosting company’s server. Even a small difference can cause you big headaches.
Apache
Apache acts as your Web server. Its main job is to parse any file requested by a browser and display the
correct results according to the code within that file. Apache is quite powerful and can accomplish virtually any task that you, as a Webmaster, require.
The version of Apache covered in this book is the most recent and stable at the time of this writing: version 2.0.50. The features and server capabilities available in this version include the following:
❑
Password-protected pages for a multitude of users
❑
Customized error pages
❑
Display of code in numerous levels of HTML, and the capability to determine at what level the
browser can accept the content
❑
Usage and error logs in multiple and customizable formats
❑
Virtual hosting for different IP addresses mapped to the same server
❑
DirectoryIndex directives to multiple files
❑
URL aliasing or rewriting with no fixed limit
According to the Netcraft Web site (www.netcraft.com), at the time of this writing Apache is running
over 34 million Internet servers, more than Microsoft, Sun ONE, and Zeus combined. Its flexibility,
power, and, of course, price make it a popular choice. It can be used to host a Web site for the general
public, or a company-wide intranet, or for simply testing your pages before they are uploaded to a
secure server on another machine. Later in this chapter, you learn to configure your Apache setup to
accommodate all of these options.
PHP
PHP is a server-side scripting language that allows your Web site to be truly dynamic. PHP stands for
PHP: Hypertext Preprocessor (and, yes, we’re aware PHP is a “recursive acronym” — probably meant to
6
Configuring Your Installation
confuse the masses). Its flexibility and relatively small learning curve (especially for programmers who
have a background in C, Java, or Perl) make it one of the most popular scripting languages around. PHP’s
popularity continues to increase as businesses, and individuals everywhere embrace it as an alternative
to Microsoft’s ASP language and realize that PHP’s benefits most certainly outweigh the costs (three
cheers for open source!). According to Netcraft, PHP code can now be found in approximately 16 million
Web sites.
The version of PHP referenced in this book is the most recent stable release at the time of publication:
version 5.0.0. Although we discuss several of the most common uses and functions of PHP, you can find
a complete list of PHP functions in Appendix B of this book. As you continue to program in PHP and
your comfort level increases (or the demands of your boss grow), we encourage you to expand your use
of built-in PHP functions to take advantage of its tremendous power. You can download the PHP software from PHP’s Web site at www.php.net.
MySQL
Another open source favorite, MySQL is the database construct that enables PHP and Apache to work
together to access and display data in a readable format to a browser. It is a Structured Query Language
server designed for heavy loads and processing of complex queries. As a relational database system,
MySQL allows many different tables to be joined together for maximum efficiency and speed.
This book references version 4.0.20, the most stable release of MySQL at the time of writing. You can find
a complete list of features at the MySQL Web site (www.mysql.com), but some of the more popular features of this program are as follows:
❑
Multiple CPUs usable through kernel threads
❑
Multi-platform operation
❑
Numerous column types cover virtually every type of data
❑
Group functions for mathematical calculations and sorting
❑
Commands that allow information about the databases to be easily and succinctly shown to the
administrator
❑
Function names that do not affect table or column names
❑
A password and user verification system for added security
❑
Up to 32 indexes per table permitted; this feature has been successfully implemented at levels
of 60,000 tables and 5,000,000,000 rows (version 4.1.2, currently in development, will allow 64
indexes)
❑
International error reporting usable in many different countries
MySQL is the perfect choice for providing data via the Internet because of its ability to handle heavy
loads and its advanced security measures.
For more information on how MySQL was developed, or other specific information not covered in this
book, visit the resource Web site at www.mysql.com.
7
Chapter 1
AMP Installers
If you’d like to take your entire Saturday afternoon to install each of these components separately, feel
free to refer to Appendix I at the back of this book. However, we can also tell you about some third-party
software programs that will complete the installation for you. You can find an extended list of these
types of installers at www.hotscripts.com.
Foxserv
Foxserv is an Apache/MySQL/PHP installer that is available at www.foxserv.net. It is offered as an
open source program and is free to the general public. Foxserv allows you to customize your configuration files during installation and also allows for PEAR modules to be downloaded. (You can read more
about the use of PEAR in Appendix H.) This installer is compatible with both Windows and Linux
systems.
PHPTriad
PHPTriad is another open source installer that is available at no charge. It is available for download at
http://sourceforge.net/projects/phptriad/ but is currently applicable to Windows systems
only. Along with Apache, PHP, and MySQL, the package includes Perl and phpMyAdmin (another
powerful database administration system we discuss in Chapter 3).
XAMPP
XAMPP, available at http://sourceforge.net/projects/xampp, is an open source installer that will
install Apache, MySQL, PHP, Perl, phpMyAdmin, and an FTP server. It is suitable for Linux, Solaris, and
Windows systems.
Configuring Your Apache Installation
For the purposes of working through this book, we assume that you have installed Apache on your
computer. If you haven’t done so but would like to, you can find detailed installation instructions in
Appendix I.
Before you begin configuring and customizing your installation, take a minute to make sure you have
installed everything correctly.
You can access the Apache executable file in three ways:
8
❑
During installation, the default option is to add Apache to your Start menu, so unless you disabled this, you can locate the Apache HTTP Server listing directly from your Start button. This
gives you shortcuts to starting the server and to testing and configuring features, as well.
❑
Open Windows Explorer and go to the directory where you have installed Apache, the default
being c:\program files\Apache Group\Apache2\bin\; click Apache.exe to start your
Apache HTTP server.
❑
At the DOS prompt, change directories to the location where the Apache file has been loaded,
and type apache. This starts the server.
Configuring Your Installation
Testing Your Installation
To test installation of your Apache server, open your Web browser and type the following:
http://localhost/
If your installation was successful, you will see an Apache “success” page in your browser. If not, check
your error log by opening the error. log file, which you can find in c:\program files\Apache
Group\Apache2\logs\. This gives you an indication of where your installation went wrong. For a
more in-depth discussion of logs, please refer to Chapter 17.
If you had installation problems, note that you might experience errors, such as the “no services installed”
error if Apache is trying to share port 80 with another Web server or application, such as a firewall. To fix
this, open your httpd.conf file in the c:\program files\Apache group\Apache2\conf directory
and locate the following lines:
# Listen: Allows you to bind Apache to specific IP addresses and/or
# ports, instead of the default. See also the <VirtualHost>
# directive.
#
# Change this to Listen on specific IP addresses as shown below to
# prevent Apache from glomming onto all bound IP addresses (0.0.0.0)
#
#Listen 12.34.56.78:80
Listen 80
Change the last line of this block to read
Listen 8080
Then locate the following lines:
#
# ServerName gives the name and port that the server uses to identify itself.
# This can often be determined automatically, but we recommend you specify
# it explicitly to prevent problems during startup.
#
# If this is not set to valid DNS name for your host, server-generated
# redirections will not work. See also the UseCanonicalName directive.
#
# If your host doesn’t have a registered DNS name, enter its IP address here.
# You will have to access it by its address anyway, and this will make
# redirections work in a sensible way.
#
ServerName www.yourdomainnamehere.com:80
Change the last line of this code to the following:
ServerName www.yourdomainnamehere.com:8080
9
Chapter 1
Finally, if you are still experiencing problems and you are running a Windows system, The Apache
Foundation has provided a nifty document about some other issues that may arise during installation.
You can view the document by going to http://httpd.apache.org/docs-2.0/platform/
windows.html.
Customizing Your Installation
Now that you know that everything works okay, you can adjust the configuration file to better suit your
needs. The main configuration file you use to make changes is httpd.conf; this is found in the c:\
program files\Apache group\Apache2\conf directory by default or wherever you have installed
Apache. You can open this file with any common text editor, such as Notepad.
Adding PHP to the Equation
In order for Apache to recognize a PHP file as one that needs to be parsed with the PHP engine, you
need to first locate the following lines in your httpd.conf file:
#
# AddType allows you to add to or override the MIME configuration
# file mime.types for specific file types.
#
AddType application/x-tar .tgz
AddType image/x-icon .ico
Then add the following lines:
AddType application/x-httpd-php .php
AddType application/x-httpd-php-source .phps
Now add the PHP module into your httpd.conf program so that Apache can properly parse PHP. In
your script, locate the following lines:
#
# Dynamic Shared Object (DSO) Support
#
# To be able to use the functionality of a module which was built
# have to place corresponding `LoadModule’ lines at this location
# directives contained in it are actually available _before_ they
# Statically compiled modules (those listed by `httpd -l’) do not
# to be loaded here.
#
# Example:
# LoadModule foo_module modules/mod_foo.so
#
LoadModule access_module modules/mod_access.so
LoadModule actions_module modules/mod_actions.so
LoadModule alias_module modules/mod_alias.so
LoadModule asis_module modules/mod_asis.so
LoadModule auth_module modules/mod_auth.so
10
as a DSO you
so the
are used.
need
Configuring Your Installation
#LoadModule auth_anon_module modules/mod_auth_anon.so
#LoadModule auth_dbm_module modules/mod_auth_dbm.so
#LoadModule auth_digest_module modules/mod_auth_digest.so
LoadModule autoindex_module modules/mod_autoindex.so
#LoadModule cern_meta_module modules/mod_cern_meta.so
LoadModule cgi_module modules/mod_cgi.so
#LoadModule dav_module modules/mod_dav.so
#LoadModule dav_fs_module modules/mod_dav_fs.so
LoadModule dir_module modules/mod_dir.so
LoadModule env_module modules/mod_env.so
#LoadModule expires_module modules/mod_expires.so
#LoadModule file_cache_module modules/mod_file_cache.so
#LoadModule headers_module modules/mod_headers.so
LoadModule imap_module modules/mod_imap.so
LoadModule include_module modules/mod_include.so
#LoadModule info_module modules/mod_info.so
LoadModule isapi_module modules/mod_isapi.so
LoadModule log_config_module modules/mod_log_config.so
LoadModule mime_module modules/mod_mime.so
#LoadModule mime_magic_module modules/mod_mime_magic.so
#LoadModule proxy_module modules/mod_proxy.so
#LoadModule proxy_connect_module modules/mod_proxy_connect.so
#LoadModule proxy_http_module modules/mod_proxy_http.so
#LoadModule proxy_ftp_module modules/mod_proxy_ftp.so
LoadModule negotiation_module modules/mod_negotiation.so
#LoadModule rewrite_module modules/mod_rewrite.so
LoadModule setenvif_module modules/mod_setenvif.so
#LoadModule speling_module modules/mod_speling.so
#LoadModule status_module modules/mod_status.so
#LoadModule unique_id_module modules/mod_unique_id.so
LoadModule userdir_module modules/mod_userdir.so
#LoadModule usertrack_module modules/mod_usertrack.so
#LoadModule vhost_alias_module modules/mod_vhost_alias.so
#LoadModule ssl_module modules/mod_ssl.so
Add the following line:
LoadModule php5_module “c:/php/sapi/php5apache2.dll”
Make sure your path matches the location of this file, as determined during your installation.
Document Root
By default, the directory under which Apache looks for files is c:\program files\Apache Group\
Apache2\htdocs\. You can change this to whatever is applicable for your directory structure, but for
the purposes of this discussion, create a directory named c:\program files\Apache Group\
Apache2\test\ where you can put files to test them. After you have created the directory, you must
point Apache to the new directory.
To point Apache to the new directory, you must change the document root in your httpd.conf file by
following these steps:
11
Chapter 1
1.
Locate the section of the file that resembles this text:
#
# DocumentRoot: The directory out of which you will serve your
# documents. By default, all requests are taken from this directory, but
# symbolic links and aliases may be used to point to other locations.
#
DocumentRoot “C:/Program Files/Apache Group/Apache2/htdocs”
2.
Change the last line of this section to
DocumentRoot “C:/Program Files/Apache Group/Apache2/test”
Notice that this uses forward slashes instead of backslashes.
3.
#
#
#
#
#
#
Locate the section of the file that resembles this text:
Note that from this point forward you must specifically allow
particular features to be enabled - so if something’s not working as
you might expect, make sure that you have specifically enabled it
below.
#
# This should be changed to whatever you set DocumentRoot to.
#
<Directory “C:/Program Files/Apache Group/Apache2/htdocs”>
4.
Change the last line of this section to
<Directory “C:/Program Files/Apache Group/Apache2/test”>
5.
Save your file and restart Apache so it can recognize the changes you made to the config
file. (Make sure you have created this directory before restarting Apache or you will get an
“Operation Failed!” error.)
Now create a small “test” program to make sure Apache can find your directory.
Open Notepad and type the following:
<HTML>
<HEAD>
<TITLE>Apache testing</TITLE>
</HEAD>
<BODY>
If this works, we did it!
</BODY>
</HTML>
Save this as index.html in the “test” directory you created. Now open your browser, and type http://
localhost. You should see the screen shown in Figure 1-1.
12
Configuring Your Installation
Figure 1-1
Configuring Your PHP Installation
Once PHP has been installed on your computer, you can customize it to fit your needs. Although some
of the configuration settings deal with how the information is shown through the browser, a great many
of the settings relate to how the server handles errors and how those errors are displayed to you and
your users. You will also be able to have some control over how PHP interacts with MySQL.
Testing Your Installation
To ensure that both PHP and Apache have been installed together, write another test program. Open
Notepad and type the following program:
<HTML>
<HEAD>
<TITLE>PHP Testing</TITLE>
</HEAD>
<BODY>
13
Chapter 1
<?php
echo “If this works, we <i>really</i> did it!”;
?>
</BODY>
</HTML>
Save this file as phptest.php. Open your browser and type http://localhost/phptest.php and you
should see the screen shown in Figure 1-2.
Customizing Your Installation
The configuration file that holds the key to how PHP runs on your computer is named php.ini; it can
be found in the root directory where you extracted your installation files. In Windows, this file was
saved to c:\windows so Apache could find it.
The php.ini file includes a brief explanation of each of the configuration settings, which are beyond the
scope of this discussion. However, you are encouraged to read through the entire introduction of the
php.ini file before you begin making changes. In the table that follows, we touch on some of the more
commonly changed settings.
Figure 1-2
14
Configuring Your Installation
Setting
What It Does
short_open_tag
Allows short tags to be parsed (<? and ?> as opposed to <?php
and ?>).
asp_tags
Allows ASP-style tags to be parsed (<% and %>).
precision
Determines the number of digits to be displayed in floatingpoint numbers. The default is 12, and this should suffice for most
applications.
output_buffering
Allows header lines to be sent after HTML has already been sent
to the server. The default is “Off,” and most third-party hosts
maintain this default. It is not advisable to change this setting,
especially if you depend on a third-party host.
max_execution_time
Sets the limit for how long a script can take to run; expressed in
seconds.
max_input_time
Sets the limit for how long a script can take to parse the data;
expressed in seconds.
memory_limit
Sets the limit for how much memory a script can use to run;
expressed in MB.
error_reporting
There are many levels you can use to set what errors will be
shown to you, but for the purposes of this book, we assume that
error_reporting is set to E_ALL. When set to E_ALL, all errors
and warnings are shown.
display_errors
Determines whether or not errors will be printed. Leave this feature on while you develop your site and you learn PHP, but once
the site is ready to go live, we recommend that this setting be
switched to “off” for security purposes.
log_errors
Allows errors to be written into a log file for future reference. We
recommend that you switch this setting to “on.”
error_log
Points to the name of your PHP error log file.
variables_order
Determines the order in which variables are registered. The
default is EGPCS, which translates into Environment, GET,
POST, COOKIE, and Built-in variables. We recommend that you
leave this as the default setting until you are more familiar with
PHP and the way variables work. In addition, your third-party
host will most likely keep the default setting. This setting applies
to all variables on all PHP pages, which we discuss in greater
detail in Chapter 2.
register_globals
Determines whether variables sent through forms are available
globally. This was a recent change from “on” to “off” as the
default, and we recommend you leave this set to “off.” You can
read more about register_globals in Chapter 2.
Table continued on following page
15
Chapter 1
Setting
What It Does
file_uploads
Enables Web site visitors to upload files to your server.
upload_max_filesize
Sets the limit for how large an uploaded file may be, in MB.
mysql.allow_persistent
Determines whether or not a persistent connection can be
established with the MySQL server.
mysql.max_persistent
Sets the limit of how many persistent connections are allowed.
For no limit, set this to -1.
mysql.max_links
Sets the limit of how many total links are allowed (persistent and
non-persistent together). For no limit, set this to -1.
session.save_path
Determines where session information will be stored on your
computer. You must specify a valid path, such as c:\php\sess\
tmp or c:\tmp if you are using Windows. You must also create
this directory beforehand, because PHP will not set this up for
you.
Numerous other variables in your file can be altered, but we encourage you to work with the defaults
until you feel more comfortable with PHP and your Web site setup. Changing these defaults can raise
functionality, security, and performance issues, adversely affecting your site.
Configuring PHP5 to Use MySQL
Pre-PHP5, MySQL support was included in PHP installation by default. With the release of PHP5, you
now have to specifically enable this.
If you are using Unix, you most likely built PHP with MySQL during installation. If you are using
Windows, however, in order for your PHP and MySQL to play nice with each other, you will need to
make two changes to your php.ini file. Open the file using your text editor (such as Notepad). Locate
the following lines:
; Directory in which the loadable extensions (modules) reside.
extension_dir = “./”
Change the last line to
extension_dir = “c:\php\ext”
The next change involves locating and “uncommenting” the following line:
;extension=php_mysql.dll
Simply remove the semicolon at the beginning of the line to uncomment it.
You will also need to copy the file libmysql.dll from your c:\php directory into your
c:\windows\system32 or c:\winnt\system32 directory.
16
Configuring Your Installation
Configuring Your MySQL Installation
MySQL needs TCP/IP protocols to run properly, regardless of the Windows environment. You must
install TCP/IP before you can continue if it is not already on your computer. (Most computers have this
set up already by default.) In Windows, this will be under your Control Panel ➪ Network Settings, and
in Linux, this is under your /proc filesystem.
Testing Your Installation
As with the other applications, it’s a good idea to test your installation. You can do this from a DOS
prompt so that you can view any error messages your MySQL server encounters.
Follow these steps to test your installation:
1.
For Windows 95/98/Me, at the DOS prompt, change directories until you are in the MySQL
server main directory (the default is c:\mysql\bin\). Then type
c:\mysql\bin>mysqld
For Windows 2000/XP/NT, at the DOS prompt, change directories until you are in the MySQL
server main directory and type
C:\>C:\mysql\bin\mysqld --install
You should see a screen that looks similar to the one shown in Figure 1-3.
Figure 1-3
2.
To start the MySQL server, type the following:
c:\>NET START MySQL
Your screen will look like the one shown in Figure 1-4.
17
Chapter 1
Figure 1-4
3.
Now you should test to make sure your MySQL server is running. Although there are many
possible commands to test the server, to keep things simple use the following:
C:\>c:\mysql\bin\mysql test
Your screen should look something like the one shown in Figure 1-5.
Figure 1-5
4.
To return to the DOS prompt, enter the following:
mysql>exit
or
mysql>quit
5.
To stop the server from running, type the following:
c:\>NET STOP MySQL
18
Configuring Your Installation
6.
To shut down the MySQL service, type
C:\>c:\mysql\bin\mysqladmin -u root shutdown
It’s time to configure your system to improve security, set up some user permissions, and alter your settings according to your preferences.
Configuring Your Installation
Before you configure any of your settings, start the MySQL service again.
1.
Enter the following:
c:\>c:\mysql\bin\mysql mysql -u root
Now your screen should look like Figure 1-6.
Figure 1-6
2.
Next, see what database tables have been set up by default. Type the following:
mysql> show databases;
You should see the two existing databases, mysql and test, as shown in Figure 1-7.
Figure 1-7
19
Chapter 1
3.
Now see what tables are there. Type the following:
mysql> show tables;
You should see what is depicted in Figure 1-8.
Figure 1-8
4.
By default, MySQL on Windows sets up all users with all privileges. For this reason, you want
to focus on the user table for a moment. If you would like to see all the privileges that can be
assigned, you can type the following:
mysql> SHOW COLUMNS FROM user FROM mysql;
You only want to look at what users are already there, so type the following:
mysql> SELECT user, host FROM user;
You should see what is depicted in Figure 1-9.
Figure 1-9
20
Configuring Your Installation
5.
Because you want to set up a secure service, you want to change the blank user for the
localhost host. Type the following:
mysql> DELETE FROM user WHERE Host=’localhost’ AND User=’’;
You will get a response from MySQL that states:
Query OK, 1 row affected (0.07 sec)
The time it takes to process the query may differ based on the speed of your computer, but the
important thing here is that you get the “OK” from the MySQL gods.
6.
Then get out of MySQL again and reset the users by entering the following:
mysql> quit
c:\>c:\mysql\bin\mysqladmin -u root reload
c:\>c:\mysql\bin\mysqladmin -u root password mysqlpass
7.
Insert whatever password you would like for your root access; in this example, we chose the
word “mysqlpass.”
8.
To reconnect to the server, try your new password:
C:\>c:\mysql\bin\mysql -h localhost -u root -p
You will be prompted for your password; in this case, enter “mysqlpass” or whatever you chose
for your root password. You should then see the prompt shown in Figure 1-10.
Figure 1-10
The my.cnf File
The my.cnf file, which you can open with any text editor, such as Notepad, is the main file that MySQL
uses to read configuration options you have set up in your installation. You can alter this file at any time
to tweak your configuration down the road.
By default, the installation of MySQL provides four sample my.cnf configuration files to use as examples: my-small.cnf, my-medium.cnf, my-large.cnf, and my-huge.cnf. If you used the default directory during installation, these were all saved under the c:\mysql\ directory. If for some reason your
copy of the installation zip file did not include these sample files, you can use the one provided here
(you will just need to type it in from scratch using Notepad).
21
Chapter 1
The difference in these files is presumably the amount of space you have on your computer dedicated
to processing query requests and so on. For the purposes of the Web sites used in this book, the
my-medium.cnf file will suffice, so save it to your root c:\ directory so it can be accessed by the
MySQL server. Be sure to rename this file my.cnf so the server can find it.
Your my.cnf file looks like this:
#
#
#
#
#
Example mysql config file.
Copy this file to c:\my.cnf to set global options
One can use all long options that the program supports.
Run the program with --help to get a list of available options
# This will be passed to all mysql clients
[client]
#password=my_password
port=3306
#socket=MySQL
# Here is entries for some specific programs
# The following values assume you have at least 32M ram
# The MySQL server
[mysqld]
port=3306
#socket=MySQL
skip-locking
set-variable
= key_buffer=16M
set-variable
= max_allowed_packet=1M
set-variable
= table_cache=64
set-variable
= sort_buffer=512K
set-variable
= net_buffer_length=8K
set-variable
= myisam_sort_buffer_size=8M
server-id
= 1
# Uncomment the following if you want to log updates
#log-bin
# Uncomment the following rows if you move the MySQL
# distribution to another location
#basedir = d:/mysql/
#datadir = d:/mysql/data/
# Uncomment the following if you are NOT using BDB tables
#skip-bdb
# Uncomment the following if you are using BDB tables
#set-variable
= bdb_cache_size=4M
#set-variable
= bdb_max_lock=10000
# Uncomment the following if you are using Innobase tables
#innodb_data_file_path = ibdata1:400M
#innodb_data_home_dir = c:\ibdata
#innodb_log_group_home_dir = c:\iblogs
22
Configuring Your Installation
#innodb_log_arch_dir = c:\iblogs
#set-variable = innodb_mirrored_log_groups=1
#set-variable = innodb_log_files_in_group=3
#set-variable = innodb_log_file_size=5M
#set-variable = innodb_log_buffer_size=8M
#innodb_flush_log_at_trx_commit=1
#innodb_log_archive=0
#set-variable = innodb_buffer_pool_size=16M
#set-variable = innodb_additional_mem_pool_size=2M
#set-variable = innodb_file_io_threads=4
#set-variable = innodb_lock_wait_timeout=50
[mysqldump]
quick
set-variable
= max_allowed_packet=16M
[mysql]
no-auto-rehash
# Remove the next comment character if you are not familiar with SQL
#safe-updates
[isamchk]
set-variable
set-variable
set-variable
set-variable
=
=
=
=
key_buffer=20M
sort_buffer=20M
read_buffer=2M
write_buffer=2M
[myisamchk]
set-variable
set-variable
set-variable
set-variable
=
=
=
=
key_buffer=20M
sort_buffer=20M
read_buffer=2M
write_buffer=2M
[mysqlhotcopy]
interactive-timeout
Although you can find a complete reference of configuration at the source (www.mysql.com), the
options a beginner will be most concerned with follow. To set any of these options, simply type the
appropriate line directly in your my.cnf file under the appropriate section.
First, we’ll discuss the local-infile option, which can be found in the my.cnf file as follows:
[mysqld]
local-infile
=1
This allows you to load large amounts of data from a tab-delimited file or .csv file directly into your
MySQL database. While this option can be very helpful if you are running your own Web site, or if you
are the only one accessing the MySQL configurations, many third-party hosts have this set to 0 to block
their MySQL hosts from accessing this command, primarily for security reasons. If you are contemplating having your Web site hosted by a third party and you will need this feature, you may want to verify
that they have this setting enabled to save yourself some major headaches later on, such as having to
manually input large amounts of data a bit at a time, or having to write a subroutine that inputs the data
for you. If you haven’t yet chosen your third-party host, this will be an important selling point.
23
Chapter 1
Second, we’ll discuss altering the log-bin configuration option that can be found in the following section of the my.cnf file:
# Uncomment the following if you want to log updates
#log-bin
This is very important if you care at all about monitoring which updates are made to your MySQL tables
(and you should). This logs all activity to the tables, and this topic is covered in greater detail in Chapter
17. We recommend that you uncomment the log-bin line to at least make the data available. Whether
or not you do anything with it is another story.
Setting Up Users and Privileges
Hackers (or the malicious breed known as “crackers”) can be quite crafty in the ways in which they break
into your system, especially if you are directly connected to the Internet. MySQL allows you to pick and
choose what user is allowed to perform what function based on the “privileges” that you establish. All
user privilege information is stored in a database called mysql, which is located, by default, in your
c:\mysql\data directory.
If you’re the only one accessing the MySQL database, you may not have to worry about adding users.
However, what if you have, say, an Aunt Edna who is going to help you out by inputting some backlogged information? You want her to be able to go into the tables and look at things, and even insert
some information. But you probably don’t want her to be able to delete your entire database. By restricting her privileges as a user, you help to protect your data.
Try It Out
Setting Up Privileges
To set up the initial privileges parameters, you need to make sure you’re logged on as “root.” Then
you’re going to GRANT Aunt Edna some privileges as a new user, so type the following:
mysql>
->
->
->
GRANT SELECT,INSERT,UPDATE
ON *.*
TO edna@localhost
IDENTIFIED BY ‘ednapass’;
How It Works
You have now established that “edna” is a valid user who will be allowed access to your MySQL system,
provided two things:
❑
She attempts her connection from the “localhost” host — not a different connection from somewhere else.
❑
She supplies the correct password: “ednapass.”
Your Aunt Edna will now be allowed to select information from the database, insert new information
in the database, and update old information in the database. By giving her access to all the tables in the
database (via the use of ON *.*), you have allowed her to modify any table in existence.
24
Configuring Your Installation
As you become more familiar with working with tables and MySQL commands, modifying privileges or
user information will become easier for you because the information is all stored in a table (just like
everything else in MySQL).
A complete list of privileges that you can grant is available at the MySQL Web site, www.mysql.com.
Where to Go for Help and Other
Valuable Resources
Although we’ve certainly tried to make this as easy as possible for you, there are so many different
variables in computers and their setups that it is virtually impossible to cover every possible situation.
Anyone who works with computers on a regular basis is surely aware that, while in theory everything
seems relatively simple, things don’t always go as planned (or as you think they should). To your advantage, there are several avenues for help should you find yourself in a difficult situation.
Help within the Programs
Before getting online and searching for help, you can try looking for answers to your problems within
the programs themselves.
In Apache, the manual was installed with the standard installation and can be accessed in c:\program
files\apache group\apache2\manual. A check of your error log will be most helpful as well.
In MySQL, you can enter this realm by typing the following at your DOS prompt:
c:\>c:\mysql\bin\mysql --help
This provides a multitude of commands that will help you find what you need, or at the very least, a
valuable “cheat sheet” for administering your MySQL server. In addition, this will allow you to see the
current settings for your server at a glance so you can potentially troubleshoot any problem spots.
The MySQL manual is also installed to your computer and can be found under c:\mysql\docs\
manual.htm.
Source Web Sites
You undoubtedly know where to find these by now, but just in case, the Web sites associated with each
of our three components have incredibly detailed information to help you work out any issues, or report
any bugs you may find in the programs:
❑
For Apache questions and information: www.apache.org
❑
For PHP questions and information: www.php.net
❑
For MySQL questions and information: www.mysql.com
25
Chapter 1
Summar y
By now, you should have an idea of what AMP is and how it fits into the open source initiative. You
know that the abbreviation AMP refers to Apache, MySQL, and PHP, all of which work together to help
you develop dynamic Web sites.
So now you’ve installed, configured, and tested the installation for Apache, MySQL, and PHP, and you
should be ready to start making some Web sites! You’ll get your hands dirty in the next chapter, starting
with PHP code and your movie review Web site.
26