1
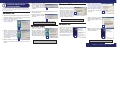
Installation Process
For more detailed instructions, please refer to the User Guide.
This Quick Installation is meant to help you install the USB Adapter quickly and easily. For detailed instructions on installation and configuration and further setup options, please consult the User Guide.
Instant PowerLine™
PowerLine USB
Adapter
Included with the Linksys
PLUSB10 PowerLine USB
Adapter
• Instant PowerLine USB Adapter
(1)
• One Power Cord (2)
• One USB Cable (3)
• One Setup Utility CD-ROM (4)
• One User Guide (5)
• Quick Installation (this document)
and Registration Card (not shown)
PLUSB10
System Requirements
• Pentium-Class 90MHz or Higher
• Minimum 32MB RAM
• USB-Ready PC
• Windows 98, Millennium, 2000, or
XP
• CD-ROM Drive
D. Click the Install button to begin
installation of the Security
Configuration Utility.
Windows 2000 users: Windows
will inform you that there was no
digital signature found. Click the
Yes button to proceed with the
installation.
Note: You must have
Windows 98, 2000,
Millennium, or XP
installed on your PC.
Windows 95 and NT
do not support the
PowerLine
USB
Adapter.
B. Insert the USB cable’s Type B connector into the USB port on the
PowerLine USB Adapter.
B
D
C. Plug the power cord into the powerline port on the PowerLine USB
Adapter.
Windows XP users: Windows will notify you that the driver has not
passed Windows Logo testing. Click the Continue Anyway button.
E. Click the Finish button to exit.
Using the Setup Utility CD-ROM
A. Insert the Setup Utility CD-ROM into the computer’s CD-ROM
drive. The Setup Utility CD-ROM should run automatically. If it
does not, click the Start button and choose Run. In the box that
appears, enter D:\setup.exe (if “D” is the letter of your CD-ROM
drive).
B. To install the PowerLine USB Adapter, click Next.
C. Enter your User Name and
Organization Name. Select Anyone
who uses this computer (all users)
to install a shortcut to the Security
Configuration Utility on every
user’s desktop (This selection is not
available for Windows 98 and ME
users). Then click the Next button.
F. Eject the Setup Utility CD-ROM
from the CD-ROM drive.
C
D. Plug the other end of the power
cord into an electrical outlet.
E
Connecting the PowerLine USB
Adapter to Your PC
A. Insert the end of the USB cable with
the Type A connector (rectangular)
into the computer’s USB port.
C
Note: Use only the supplied power cord
to connect the USB Adapter to the
power outlet.
D
Note: For highest performance, plug the PowerLine USB Adapter’s
power cord directly into a power outlet on the wall. Do not plug the
device into a UPS or power strip with surge protection. The PowerLine
USB Adapter has its own power filter for protection against surges.
Your hardware installation is complete. For
setup information or any other questions,
refer to the User Guide.
A
Continue to Step 3
W W W . L I N K S Y S . C O M
Installing the USB Driver for the
PowerLine USB Adapter
Proceed to the instructions for your operating system: Windows 98, 2000,
Millennium, or XP. Note: Your Windows operating system may ask for its
Windows Installation Files.
Windows 98
A. Windows 98 will automatically detect the presence of the PowerLine
USB Adapter hardware in your computer once you have completed
the hardware installation. Click the Next button.
E. Windows will ask you to supply
your Windows 98 Installation Files.
Insert the Windows 98 CD-ROM
into the CD-ROM drive of your
computer. Then click the OK button
to continue.
Windows Millennium
E
F. Windows will tell you when it has finished installing the new driver.
Click the Finish button.
G. Click the Yes button to restart your
computer, or click the No button to
restart later.
G
B. Click the radio button next to
Search for the best driver for your
device. (Recommended).
A
Your driver installation is complete. For setup information or any other
questions, refer to the User Guide.
Your driver installation is complete. For setup information or any other
questions, refer to the User Guide.
B
A. Windows 2000 will automatically
detect the presence of the
PowerLine USB Adapter in your
computer after you have completed
the hardware installation. Windows
will inform you that there was no
digital signature found. Click the
Yes button to install the USB driver.
A
A. Windows XP will automatically
detect the presence of the
PowerLine USB Adapter in your
computer after you have completed
the hardware installation. Click the
radio button next to Install from a
list or specific location (Advanced).
Then click the Next button.
B
C. Windows will notify you that the
driver has not passed Windows Logo
testing. Click the Continue Anyway
button.
Windows XP
Windows 2000
C. Windows will look for new drivers
and ask you which locations you
want to search. Select Specify a
location:, and enter C:\Program
Files\Linksys\USB Drivers in the
location field (if “C” is the letter of
your hard drive). Click the Next
button to continue.
A. Windows Millennium will automatically detect the presence of the
PowerLine USB Adapter in your
computer after you have completed
the hardware installation. Windows
will ask you the location of the USB
driver files. Enter C:\Program Files\Linksys\USB Drivers in the Copy
files from: field (if “C” is the letter of your hard drive). Then click the
OK button to install the USB driver.
B. Click the radio button next to
Search for the best driver in these
locations. Select Include this location in the search:, and enter
C:\Program Files\Linksys\USB Drivers
in the location field (if “C” is the letter
of your hard drive). Then click the
Next button.
C
D. Windows will tell you when it has
finished installing the new driver.
Click the Finish button.
A
D
C
D. Windows will display a screen announcing that it is ready to install
the driver for the PowerLine USB Adapter. Click the Next button to
continue.
Your driver installation is complete. For setup information or any other
questions, refer to the User Guide.
Your driver installation is complete. For setup information or any other
questions, refer to your product’s User Guide.
QI-PLUSB1-012802NC-JL
W W W . L I N K S Y S . C O M