1
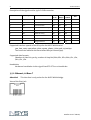
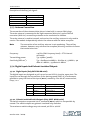
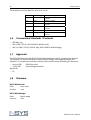
Operating Manual
INSYS
WLAN bridge
WLAN serial
Version 1.01 / 10.04
Copyright © 2004 INSYS MICROELECTRONICS GmbH
Any duplication of this manual is prohibited. All rights on this documentation and the
devices are with INSYS MICROELECTRONICS GmbH Regensburg.
Restrictions of Statutory Guarantee
This handbook contains a concise description. The compilation of the text has been made
with the utmost care. Despite all efforts, there may be deviations compared with the
actual functions. No guarantee can therefore be given for the accuracy of the contents.
We can neither take over a legal responsibility nor any liability for incorrect information
and their consequences. Suggestions for improvements and comments are gladly
accepted.
Trademarks
The use of a trademark not shown below is not an indication that it is freely available for
use.
MNP is a registered trademark of Microcom Inc.
IBM PC, AT, XT are registered trademarks of International Business Machine Corporation.
INSYS ® is a registered trademark of INSYS MICROELECTRONICS GmbH.
Windows™ is a registered trademark of Microsoft Corporation.
Publisher:
INSYS MICROELECTRONICS GmbH
Waffnergasse 8
93047 Regensburg, Germany
Telefon:
+49(0)941-560061
Telefax:
+49(0)941-563471
[email protected]
E-Mail:
Internet:
http://www.insys-tec.de
1st edition, version 1.01 / 10.04
Content
I
0
IMPORTANT SAFETY INSTRUCTIONS..........................1
1
SCOPE OF DELIVERY....................................................1
2
GENERAL INFORMATION ABOUT WIRELESS LAN .......2
2.1
INSYS WLAN SERIAL AND INSYS WLAN BRIDGE..........................2
2.1.1
2.1.2
INSYS WLAN serial ..............................................................................2
INSYS WLAN bridge.............................................................................2
2.2
INFRASTRUCTURE OR ADHOC MODE..............................................2
2.2.1
2.2.2
Infrastructure Mode............................................................................3
Adhoc Mode ........................................................................................3
2.3
VIRTUAL COM PORT ..................................................................3
3
TECHNICAL DATA........................................................4
3.1
GENERAL ..................................................................................4
3.1.1
3.1.2
Features...............................................................................................4
Mechanical Features ...........................................................................4
3.2
FRONT ELEMENTS.......................................................................5
3.3
TERMINAL LAYOUT .....................................................................6
3.4
POWER SUPPLY .........................................................................7
3.5
INTERFACES...............................................................................7
3.5.1
3.5.2
3.5.3
3.5.4
Serial Interface....................................................................................7
Ethernet, 10 Base-T.............................................................................8
Antenna Connection ...........................................................................9
Digital Inputs And Galvanic Insulated Outputs .................................9
3.6
TRANSMISSION STANDARDS / PROTOCOLS ...................................10
3.7
APPROVALS ............................................................................10
version 1.01 / 10.04
II
Inhalt
3.8
FIRMWARE..............................................................................10
4
INSTALLATION ..........................................................11
4.1
SAFETY INSTRUCTIONS DURING INSTALLATION ..............................11
4.2
CONNECTION OVERVIEW...........................................................11
4.3
INSTALLATION STEPS ................................................................12
5
IMPLEMENTATION AND CONFIGURATION INSYS
WLAN BRIDGE ..........................................................13
5.1
WLAN NETWORK STRUCTURE ...................................................13
5.2
ADDRESSING WITHIN THE IP NETWORK ......................................13
5.3
RESET FUNCTION .....................................................................13
5.4
CONFIGURATION THROUGH BROWSER ........................................14
5.4.1
5.4.2
5.4.3
5.4.4
5.4.5
5.4.6
5.4.7
5.4.8
Operation ..........................................................................................14
Configuration....................................................................................14
Configuration Page Status................................................................15
Wireless Settings ..............................................................................16
IP Settings .........................................................................................17
Bridge Table ......................................................................................18
Administration..................................................................................19
Bridging Function “Layer 2.5 NAT” ..................................................19
5.5
FIRMWARE UPDATE ..................................................................20
6
IMPLEMENTATION AND CONFIGURATION INSYS
WLAN SERIAL............................................................21
6.1
CONFIGURATION SOFTWARE HSCOMM .......................................21
6.1.1
6.1.2
6.1.3
General Operation ............................................................................21
Basic Settings ....................................................................................24
Network ............................................................................................26
version 1.01 / 10.04
Content
III
6.2
CONFIGURATION VIA TERMINAL PROGRAM ..................................30
6.2.1
6.2.2
6.2.3
AT Commands for Default Settings ..................................................30
Serial Interface..................................................................................30
WLAN Network Structure .................................................................31
6.3
REMOTE CONFIGURATION VIA TELNET .........................................31
6.4
FIRMWARE UPDATE ..................................................................33
7
COMMAND OVERVIEW INSYS WLAN SERIAL ...........34
7.1
AT COMMANDS.......................................................................34
7.1.1
7.1.2
Syntax of Standard AT Commands...................................................34
Overview AT Commands ..................................................................34
7.2
RESPONSES AND NUMERICAL CODES ...........................................44
version 1.01 / 10.04
Important Safety Instructions
0 Important Safety Instructions
The BSI (German Federal Office for IT Safety) has drawn up an information brochure
“Wireless LAN Safety” (Sicherheit im Funk-LAN), which clearly describes the set-up as
well as safety aspects of the WLAN according to IEEE 802.11b.
http://www.bsi.de/literat/doc/wlan/wlan.pdf
Attention!
Before implementing the system, please inform yourself about the
currently effective safety regulations.
1 Scope Of Delivery
Before you begin with the installation and the initial operation, please check if all
accessories are included in the box.
• INSYS WLAN serial or INSYS WLAN bridge
• RS232- cable, 9-pin (only for WLAN serial)
• Network cable (only for WLAN bridge)
• Operating Manual
The following accessories are optionally available:
• Main antenna with reverse SMA connection
• Auxiliary antenna with reverse SMA connection
In case the content is not complete, please refer to your supplier. Please also check the
device for shipping damage; please refer to your supplier if damage exists.
Please keep the packaging material for possible future dispatch or storage.
version 1.01 / 10.04
1
2
General Information About Wireless LAN
2 General Information About Wireless LAN
2.1
INSYS WLAN serial and INSYS WLAN bridge
The INSYS WLAN serial and INSYS WLAN bridge are communication devices for industrial
applications. They are designated for the use on the DIN rail in the switchboard. In the
Wireless LAN, the transmission of data takes place with up to 11 Mbit/s, according to the
industrial standard IEEE 802.11 b.
WLAN connections may be established to AccessPoints (infrastructure mode) as well as
in adhoc networks. The radio connection is made with a main antenna and optionally
with an auxiliary antenna for improved reception (diversity). The antenna connections
are reverse SMA plugs. The radio connection is protected by Wireless Equivalent Privacy
(WEP) with 64 or 128 bit keys.
2.1.1 INSYS WLAN serial
The INSYS WLAN serial transmits the serial data in IP packets, the standard for local
networks and the Internet. At the remote terminal, control software receives the data
directly or via a virtual COM port. The configuration takes place via the configuration
software HSComm, AT commands or Telnet. The serial interface works with up to 115
kbps.
Both devices have 2 digital inputs and 2 galvanic insulated outputs, which may be used
for additional tasks.
2.1.2 INSYS WLAN bridge
The INSYS WLAN bridge is an Ethernet WLAN bridge, which integrates Ethernet devices,
or connects two network segments with each other, by a radiolink.
The configuration takes place via a web interface (Ethernet or WLAN); the Ethernet
access is designed as 10 Base-T. The IP address can be allocated directly or via DHCP.
2.2
Infrastructure or Adhoc Mode
The wireless network according to the standard WLAN IEEE 802.11b enables the
operation in two different modes:
version 1.01 / 10.04
General Information About Wireless LAN
2.2.1 Infrastructure Mode
All WLAN devices connect to an
AccessPoint which routes data
between the connected devices and
to a wire-bound LAN. Several
AccessPoints can establish a joint
WLAN (with the same SSID code) and
also allow transparent handover.
The infrastructure mode is the
standard operating mode.
2.2.2 Adhoc Mode
WLAN devices can also merge without a
dedicated master and form an adhoc
network (peer-to-peer communication).
The first active device will assume the
master role.
The adhoc mode is a part of the WLAN
standard, but is not completely supported
by all WLAN devices.
2.3
Virtual COM Port
When an application under Microsoft Windows requires a serial interface, which is not
available physically, a virtual COM port driver is needed. The virtual COM port driver
transforms the data intended for the serial interface into IP data, which are then
transmitted via a network.
INSYS MICROELECTRONICS provides a free virtual COM port driver.
version 1.01 / 10.04
3
4
Technical Data
3 Technical Data
3.1
General
3.1.1 Features
•
•
•
•
•
•
•
•
•
•
•
Mounting on DIN rail
Power Supply 10…60 V DC, 5% ripple
Wireless LAN Standard IEEE 802.11b
Radio frequency 2.4 GHz
Transmission rate up to 11 Mbit/s
Encryption 64 Bit or 128 Bit WEP
Level on V.24 interface according to V.28 (only INSYS WLAN serial)
Protected V.24/V.28 interface with 9-pin SUB-D jack (only INSYS WLAN serial)
Ethernet connection, 10 Base-T (only INSYS WLAN bridge)
2 digital inputs
2 galvanic insulated outputs (only INSYS WLAN serial)
3.1.2 Mechanical Features
Weight
250g
Dimensions (maximum) w x d x h = 55mm x 120mm x 75mm
Temperature range
-20°C...+55°C
Protection class
Housing IP 40/ Terminal IP 20
Humidity
0 - 95% non-condensing
Attention!
The INSYS WLAN serial and the INSYS WLAN bridge must not be used in wet
environments!
version 1.01 / 10.04
Technical Data
3.2
5
Front Elements
Front view
INSYS
AUX Ant.
MAIN Ant.
Power
RF Link
DCD / Link
RX / TX
Signal
RS 232
10 Base-T
Reset
WLAN
The INSYS WLAN devices are equipped with important display elements. Besides the
“Power LED”, the LEDs “RF Link”, “DCD/Link” and “RX/TX” indicate the most important
operating states.
LED on
Power
WLAN serial
The device is supplied with operating
voltage and is ready for operation
RF Link
A WLAN connection has been
established
DCD/Link A connection via the serial interface is
active
RX/Tx
Data is transmitted
Signal
Currently no function
version 1.01 / 10.04
WLAN bridge
The device is supplied with operating
voltage and is ready for operation
A WLAN connection has been
established
A connection to a network (link) is
active
Data is transmitted
Currently no function
6
3.3
Technical Data
Terminal Layout
The terminals are designed as screw terminals and are located on the top and bottom of
the cover.
View of the cover top
1
GND
INSYS WLAN serial
2
50...80 VDC
INSYS WLAN bridge
3
10...60 VDC
4
GND
5
GND
6
Reset
7
GND
8
Input 1
9
Input 2
10
GND
INSYS MICROELECTRONICS GmbH
Internet: www.insys-tec.de
Sales: [email protected]
Support: [email protected]
Layout of the terminals on the cover top
Terminal
1
2
3
4
5
6
7
8
9
10
Attention!
Labeling
GND
50...80 VDC
10...60 VDC
GND
GND
Reset
GND
Input 1
Input 2
GND
Description
Ground
Supply voltage input 50 – 80 V DC (optional)
Supply voltage input 10 – 60 V DC
Ground
Ground
Reset input
Ground
Digital input 1
Digital input 2
Ground
For series devices, the supply voltage input for the range 50 – 80 V DC at
terminal 2 is not equipped. If required, devices with this supply voltage
input may be ordered.
View of the cover bottom
11
OUT 1-NC
12
OUT 1
13
OUT 1-NO
14
OUT 2-NC
15
OUT 2
16
OUT 2-NO
version 1.01 / 10.04
Technical Data
7
Layout of the terminals on the cover bottom
Terminal
11
12
13
14
15
16
3.4
Labeling
OUT 1-NC
OUT 1
OUT 1-NO
OUT 2-NC
OUT 2
OUT 2_NO
Description
Output 1 – normally closed contact
Output 1, COM
Output 1 – normally open contact
Output 2 – normally closed contact
Output 2, COM
Output 2 – normally open contact
Power Supply
Power supply:
Power input:
10…60 V DC, 5% ripple
In addition, a second power supply range 50…80 V DC is
possible. This, however, must be ordered separately, if
required.
Approx. 3 W (during connection)
Current consumption:
3.5
Current consumption at
10VDC approximately
280mA
Current consumption at
24VDC approximately
120mA
Current consumption at
36VDC approximately
80mA
Interfaces
3.5.1 Serial Interface
Attention!
This interface is only active for the INSYS WLAN serial.
View of the 9-pin D-SUB jack
version 1.01 / 10.04
8
Technical Data
Description of the signals on the 9-pin D-SUB connector
Pin
Description
Function
CCITT
V-24
EIA
RS232
DIN
66020
E/A DCE to
DTE
1
DCD
Data Carrier Detect
109
CF
M5
O
2
RXD
Receive Data
104
BB
D2
O
3
TXD
Transmit Data
103
BA
D1
I
4
DTR
Data Terminal Ready
108
CD
S1
I
5
GND
Ground
102
AB
E2
6
DSR
Data set ready
107
CC
M1
O
7
RTS
Request to send
105
CA
S2
I
8
CTS
Clear to send
106
CB
M2
O
9
RI
Ring Indication
125
CE
M3
O
Supported interface speeds of the RS232 for the INSYS WLAN serial:
300, 600, 1200, 2400, 4800, 9600, 19200, 38400, 57600 and 115200 bps.
The baud rate indicates the transmitted bits per second (bps).
Supported data formats:
(Number of data bits, parity, number of stop bits) 8N1, 8E1, 8O1, 8N2, 7E1, 7O1,
7N2, 7E2, 7O2
Handshake:
Hardware handshake via the signal lines RTS/CTS or no handshake
3.5.2 Ethernet, 10 Base-T
Attention!
This interface is only active for the INSYS WLAN bridge.
View of the RJ45 jack
version 1.01 / 10.04
Technical Data
9
Description of the RJ45 jack signals
Signal
RxRx+
TxTx+
Connection to RJ45
6
3
2
1
3.5.3 Antenna Connection
The connection of the antennas takes place via two built-in reverse SMA plugs.
The main antenna is connected to the right connector (Main Ant.) and at the left
connector (AUX Ant.) an auxiliary antenna can be connected in addition.
The main antenna is used to transmit and receive; the auxiliary antenna is only used to
receive. The module independently selects the antenna with the better reception.
Note:
The connection of an auxiliary antenna is not mandatory. The auxiliary
antenna, however, may enhance the reception (diversity) and thus increase
the transmission rate.
Frequency:
Transmitting power:
Sensitivity (BER<10-5):
2.4 GHz (ISM frequency band) – ETSI channel
utilization
Typ 15dBm (30mW)
Typ –84 dBm at 11MBit/s, -87 dBm at 5.5 MBit/s, -90
dBm at 2 MBit/s, -93 dBm at 1 MBit/s
3.5.4 Digital Inputs And Galvanic Insulated Outputs
3.5.4.1 Digital Inputs (Only INSYS WLAN serial)
The digital inputs are designed as pull-up and are on HIGH in inactive, open state. The
inputs are set through the connections to the device ground (GND). It is furthermore
possible to query the state of the inputs (AT*I) remote by. See also AT command set,
Chap. 7.1.2.
Terminal
7
8
9
10
Labeling
GND
Input 1
Input 2
GND
Description
Ground
Digital input 1
Digital input 2
Ground
3.5.4.2 Galvanic Insulated Switch Outputs (Only INSYS WLAN serial)
The switch outputs are operated via AT command (AT*Y), which is also possible by
remote. The switch outputs are galvanic insulated relay switches.
The maximum switch voltage may not exceed 30V DC or 42V AC.
version 1.01 / 10.04
10
Technical Data
The maximum current load is 1 A DC or 0.5 A AC.
Terminal
Labeling
11
OUT 1-NC
3.6
12
13
OUT 1
OUT 1-NO
14
OUT 2-NC
15
16
OUT 2
OUT 2_NO
Description
Output 1 – normally closed
contact
Output 1, COM
Output 1 – normally open
contact
Output 2 – normally closed
contact
Output 2, COM
Output 2 – normally open
contact
Transmission Standards / Protocols
IEEE 802.11b
• ARP, ICMP, TCP/IP, UDP/IP (INSYS WLAN serial)
• ARP, IP, ICMP, TCP/IP, UDP/IP, http, DHCP (INSYS WLAN bridge)
•
3.7
Approvals
The INSYS WLAN serial and INSYS WLAN bridge both bear the CE symbol of conformity.
This symbol is a declaration that on account of its design and implementation, this
modem is in compliance with the currently valid versions of the following EC directives:
• 89/336/EEC
(EMC directive)
• 73/23/EEC
(Low voltage directive)
Approvals:
• CE
3.8
Firmware
INSYS WLAN serial:
Date:
June 2004
Version:
1.10
INSYS WLAN bridge:
Date:
March 2004
Version:
1.00
version 1.01 / 10.04
Installation
11
4 Installation
4.1
Safety Instructions During Installation
When repairing and installing electric systems and devices, the according VDE
regulations must be observed.
The BSI (German Federal Office for IT Safety) has drawn up an information brochure
“Wireless LAN Safety” (Sicherheit im Funk-LAN), which clearly describes the set-up as
well as safety aspects of the WLAN according to IEEE 802.11b.
http://www.bsi.de/literat/doc/wlan/wlan.pdf
Attention! Before implementing the system, please inform yourself about
the currently effective safety regulations.
4.2
Connection Overview
version 1.01 / 10.04
12
4.3
Installation
Installation Steps
1.
Mounting on DIN rail:
Simple snap-on
2.
Attaching the antenna(s)
Simple screw-on; please do not bend the antenna.
3.
Connecting the RS232 or the Ethernet connection
Plug the enclosed RS232 interface cable (INSYS WLAN serial) or the network cable
(INSYS WLAN bridge) into the cover front and connect it with the PC.
4.
Connecting the Power Supply:
a) Connecting the ground wire GND (terminal 1)
b) Connecting the power supply 10..60 V DC (terminal 3)
Attention! For mass production devices, the supply voltage input 50…80 V DC at
terminal 2 is optional and not equipped.
c) Switching on the power supply
After successful installation, the power LED will be green.
Attention!
When the device acts faulty or abnormal, please disconnect the power
supply immediately. For those cases, please refer to your supplier. To
protect your guarantee claims, please do not intervene with the device.
The further implementation or configuration of the INSYS WLAN bridge is described in
Chap. 5; INSYS WLAN serial is described in Chap. 6.
version 1.01 / 10.04
Implementation and Configuration INSYS WLAN bridge
13
5 Implementation And Configuration INSYS WLAN bridge
5.1
WLAN Network Structure
For a network structure according to IEEE 802.11b, the included devices must be
coordinated regarding the following settings:
Description
Radio channel (only for adhoc network)
Clear text name of the radio network (SSID)
Architecture: Infrastructure or adhoc
WEP Encryption
Gateway for the local network segment
Network mask for the local network segment
Own IP address
5.2
Website (see Chap. 6.3)
Wireless settings (Chap. 5.4.4)
IP Settings (Chap.5.4.5)
Addressing Within the IP Network
Devices in IP networks – office or Internet networks – use 3 details to identify the own
device, the own network segment, and the gateway for connections to other
subnetworks.
All IP addresses consist of a sequence of 4 numbers in a range of values from 0 to 255,
e.g. 192.168.100.45. For private networks without direct Internet connection,
numbering areas such as 192.168.*.* are reserved. The IP address describes the
network segment as well as the number of the individual device within this segment.
IP address:
Own address of the INSYS WLAN bridge
e.g. 192.168.100.203
Subnetwork mask: Part of the address which describes the network segment:
The subnetwork 255.255.255.0 , for example, marks the first three
numbers 192.168.100 of the address 192.168.100.203 as
network segment.
Standard gateway: All data packets to recipients outside the own network segment are
transmitted to the gateway to be forwarded.
5.3
Reset Function
Press the reset key on the cover front to restart the INSYS WLAN bridge. Last saved
settings remain established.
version 1.01 / 10.04
14
Implementation and Configuration INSYS WLAN bridge
If, however, the reset key is briefly pressed five times in succession, a complete device
reset will take place and the INSYS WLAN bridge is reset to default factory settings.
This will enable the device to be reset to default factory settings without having to
establish a connection to the device. This function is very useful when the INSYS WLAN
bridge can not be returned to an operational state, due to an accidental false entry
during configuration or when a password is lost.
5.4
Configuration Through Browser
5.4.1 Operation
The configuration pages allow simple and convenient configuration of the INSYS WLAN
bridge using a web browser (e.g. Internet Explorer, Netscape, Opera), regardless of the
used operating system. No drivers, etc. are required for the configuration.
The web interface is protected by a password. During the factory configuration, the fields
user name and password are empty, i.e. the pages can be accessed without entering a
password.
Note:
A lost password can only be reset by completely resetting the factory
configuration. See RESET key to reset the INSYS WLAN to the default factory
settings (Chap. 5.3).
The settings in the individual configuration windows will only be saved when the button
“Apply” is clicked. To ensure that the settings are applied, a reboot of the INSYS WLAN
bridge must be performed. This is also possible from the configuration pages.
After the settings have been transmitted to the INSYS WLAN bridge , the configuration
pages must be reloaded (menu “Update” of the web browser).
The configuration pages are available in two languages. Use the symbol for the
English or German flag in the top right corner to switch between the two
languages.
5.4.2 Configuration
To be able to configure the INSYS WLAN bridge , it must have a network connection to a
computer with a web browser, either via the AccessPoint or the LAN connection
(Ethernet). The standard settings for the network parameters after delivery or resetting
to the factory settings are as follows:
IP = 192.168.100.203
Network mask = 255.255.255.0
Gateway = 192.168.100.1
For the initial installation a PC is required which can access this network segment, i.e.
which has an IP address from this network segment.
The easiest way is to set the PC to an address from this network segment (e.g.
192.168.100.100). Depending on the system, administrator rights may be required. The
connection between an INSYS WLAN bridge and the configuration PC takes place with a
crossed network cable. After the IP settings have been configured to the desired values,
version 1.01 / 10.04
Implementation and Configuration INSYS WLAN bridge
15
the PC can be reset to the previous IP address. The PC and the INSYS WLAN bridge can
then be reconnected normally with the network.
Note:
At all events, avoid the LAN connection of the AccessPoints and the LAN
connection of the INSYS WLAN bridge being connected to the same network.
This will lead to bridging of the packets into the same network and to serious
malfunctions in the network and subsequently also to serious problems with
your system administrator.
If the IP address has accidentally been adjusted and/or is not known, the INSYS WLAN
bridge can also be reset to the factory settings without the web interface, using the
RESET key. See Chap. 5.3.
5.4.3 Configuration Page Status
The status page displays the current state of the INSYS WLAN bridge .
In detail, the following information is provided:
Connected to SSID:
SSID of the remote terminal (AccessPoint or another bridge in
adhoc mode), to which the module has a connection
HF channel:
Currently used channel
MAC address of the AP:
MAC address of the remote terminal (adhoc) or of the
AccessPoint
Data rate (Mbits/s):
Currently reached data rate
Signal power (%):
Current quality of the received signal level – the signal should
be more than 20%
Own MAC address:
MAC address of the INSYS WLAN bridge
version 1.01 / 10.04
16
Implementation and Configuration INSYS WLAN bridge
IP address:
Set (static mode) or allocated (DHCP mode) IP address of the
INSYS WLAN bridge
Firmware version:
Firmware version number
5.4.4 Wireless Settings
On this page, the parameters for the WLAN interface are set:
Station mode:
Determination of the WLAN architecture (see Chap. 2.2)
“adhoc” (peer-to-peer) or “infrastructure”
version 1.01 / 10.04
Implementation and Configuration INSYS WLAN bridge
17
SSID:
Enter the WLAN network SSID (default “WLANDEMO”). An
empty input field indicates a connection with any available
network.
Channel:
Radio channel when using the adhoc mode. In adhoc mode, all
involved stations must be set to the same channel. This
channel may not be used by other WLAN networks in the
reception area at the same time (default “6”). In infrastructure
mode the channel is assigned by the AccessPoint.
Transfer rate:
Fixed data rate directly in Mbit/s or fallback behavior (“default
“Auto Fallback”).
AccessPoint density:
This setting influences the search behavior for AccessPoints
depending on their quantity within the environment. In
general, there is no need to adjust this setting – only when
many AccessPoints are present and problems occur when
registering to the correct AccessPoint (default “Small
Distance”).
WEP Encryption:
When this button is activated, the WEP encryption as well as
the Shared Key Authentication are switched on (default
“Deactivated”).
WEP length of key field: Length of the WEP key field for encryption. The following
lengths are allowed: 64 bit and 128 bit
WEP key:
Enter a maximum of 4 WEP keys:
Key to be used:
For 64 bit encryption each WEP key consists of 10 hexadecimal
digits (5 bytes); for 128 bit encryption each WEP key consists of
26 hexadecimal digits (13 bytes). The hexadecimal digits
(‚0’..’9’, ‚A’..’F’) are entered without spaces.
Selects the key to be used from the 4 defined WEP keys.
5.4.5 IP Settings
version 1.01 / 10.04
18
Implementation and Configuration INSYS WLAN bridge
The INSYS WLAN bridge supports two possibilities for IP address allocation: “Static” and
“DHCP”.
When the option “Static” (default) is activated, the IP addresses are configured manually.
The configuration is done in the displayed window (IP address, subnetwork mask,
standard gateway).
When the option “DHCP” (adjustable in the field “IP address mode”) is activated, the das
INSYS WLAN bridge attempts to retrieve your IP configuration from a DHCP server at the
start. In this case, a DHCP server must be available in the local network, which will
allocate an IP address to the INSYS WLAN bridge .
The default settings are IP=192.168.100.203, Subnetwork mask=255.255.255.0,
Gateway=192.168.100.1
5.4.6 Bridge Table
This page displays all devices which are connected “behind” the INSYS WLAN bridge (IP
address and MAC).
The bridging functionality “Layer 2.5 NAT” is described in Chap. 5.4.8.
version 1.01 / 10.04
Implementation and Configuration INSYS WLAN bridge
19
5.4.7 Administration
On this page, the access protection for the web interface is set with a user name and
password. The default settings for user name and password are both empty, i.e. there is
no user name and no password.
In addition, this page offers the opportunity, to restart the INSYS WLAN bridge or to
restore the factory defaults.
5.4.8 Bridging Function “Layer 2.5 NAT”
The bridging function “Layer 2.5 NAT”, which is built into this INSYS WLAN bridge,
enables safe and convenient bridging between two network segments.
The bridging function works transparently for IP connections and requires no special
network settings for the individual devices. All devices must simply be located in the
same network segment, like for a direct cable connection. A gateway setting is not
required either.
The INSYS WLAN bridge itself must be allocated its own IP address from the available
local address area. This IP address is basically required for the configuration.
Regarding network technology the bridging function works on MAC level. To reach a
device that is connected to a network, an ARP request is sent, which inquires at which
MAC address the required device is located. The INSYS WLAN bridge forwards these ARP
requests to all connected devices (wireless or not). When the ARP request has arrived on
one side of the INSYS WLAN bridge (e.g. on the WLAN side), and a device on the other
side of the INSYS WLAN bridge (e.g. LAN interface) replies, the INSYS WLAN bridge sends
version 1.01 / 10.04
20
Implementation and Configuration INSYS WLAN bridge
its own MAC address as response and saves IP and MAC of the device “behind” it in a
table.
With this, the INSYS WLAN bridge virtually passes itself off as the required end device
and thus receives all packets which were meant for the end device. These packets are
then forwarded to the end device “behind” the INSYS WLAN bridge .
5.5
Firmware Update
This page will enable you to update the firmware of the INSYS WLAN bridge in a simple
way.
Click on the button “Browse” to select a firmware update file (in general “update.hex”)
from a local directory. Press the button “Here” to load this firmware into the INSYS WLAN
bridge.
This process takes approximately 30 seconds. Afterwards the INSYS WLAN bridge is
restarted. After a firmware update the device is reset to the default factory settings.
version 1.01 / 10.04
Implementation and Configuration INSYS WLAN serial
6 Implementation and Configuration INSYS WLAN Serial.
The initial operation may take place comfortably by using the configuration software
HSComm under Windows as well as directly by entering the AT commands into a
terminal program.
6.1
Configuration Software HSComm
The software HSComm allows the configuration of the INSYS WLAN serial under
Windows without explicit knowledge of the AT commands and their parameters. The
requested functions and settings can be selected on a graphical user interface. The
selected settings are translated to AT commands and sent to or read from the INSYS
WLAN serial according to the instruction (button Send).
The configuration software HSComm WLAN is available on the Internet for free
download:
http://www.insys-tec.com/configuration
6.1.1 General Operation
6.1.1.1 Help
The context sensitive help is available any time via the key F1 or the menu “Help”.
Help also contains the complete command reference for the extended INSYS AT
commands.
6.1.1.2 Menus
File
The current settings, as displayed in the HSComm user interface, can be saved as a file
and read out again.
version 1.01 / 10.04
21
22
Implementation and Configuration INSYS WLAN serial
Interface
Setting of the serial interface which is
used at the configuration PC. The
baud rate and the format (data bits,
stop bit, parity) have to match the
settings of the serial interface at the
INSYS WLAN serial.
If a remote configuration is
performed via WLAN, select Telnet
and enter the IP address of the device
that is being configured. In addition,
the user name and the password
which were stored in the INSYS WLAN
serial or which were set by the
manufacturer must be specified. (see
Chap. 6.1.3.3)
Language
Selection of the HSComm user interface
language: German or English. The setting
has no effect on the functionality of the
INSYS WLAN serial.
Overview
All current settings of
the INSYS WLAN serial
are clearly displayed.
The output extends
over several screen
pages and can be saved
as text file.
Note!
Read out the settings of your device and have this overview ready when
contacting our hotline!
version 1.01 / 10.04
Implementation and Configuration INSYS WLAN serial
23
6.1.1.3 Status Bar
The status bar at the lower window border of the HSComm displays the settings and
activities of the serial interface.
6.1.1.4 Buttons
Read
The current settings of the INSYS WLAN serial are read and
displayed on the user interface of the HSComm WLAN.
Reset
A device reset is performed in the INSYS WLAN serial.
Default settings
The factory settings (defaults) are loaded.
Attention! The IP address is reset as well. During a remote
configuration, this command will abort the connection.
Send
The current settings from the HSComm WLAN user interface
are sent to the INSYS WLAN serial.
Abort
Terminates a running data transmission (“Send”, “Read”, or “Default settings”). This is
indicated by the progress bar above the buttons.
RS232 Synchronize
The serial interface of the INSYS WLAN serial and the used PC must have the same
settings. With “Synchronize RS232”, all possible baud rate and data format settings at
the PC side are tested through until both sides match.
6.1.1.5 Tabs
The settings for the INSYS WLAN serial and the network are spread across two pages,
which can be selected via the tab titles. The settings are transmitted to the INSYS WLAN
serial only after pressing the button “Send”.
The functions are described in detail in the following chapters.
version 1.01 / 10.04
24
Implementation and Configuration INSYS WLAN serial
6.1.2 Basic Settings
6.1.2.1 Serial Interface
The settings of the serial interface of the INSYS WLAN serial must match the parameter
settings of the device to be connected.
This concerns the transmission rate (baud rate) and
the data format (number of data bits, number of stop
bits, and parity).
Baud Rate and Data Format
The baud rate and data format settings can be set in
the according pull-up menus. The default factory
settings are 19200 baud, 8N1.
Echo
With echo, all commands which are transmitted via
the serial interface are returned to allow local
recording in terminal operation.
version 1.01 / 10.04
Implementation and Configuration INSYS WLAN serial
25
Handshake
The handshake controls the data flow at the serial interface while the data rate is too
high at the moment. Hardware handshake uses the separate control lines RTS/CTS of the
serial interface.
Without handshake, overflowing data is ignored.
Attention!
Handshake must be deactivated when the INSYS WLAN serial is operated
with a device that does not support the according handshake.
DTR Behavior
The control line DTR of the serial interface
indicates whether a device (configuration PC,
control) is connected with the INSYS WLAN
serial and whether it is active. The setting
controls the behavior when the DTR signal is
missing, e.g. when the terminal device (PC,
control) is disconnected.
When the DTR signal is missing, a data
connection can automatically be terminated, or
a reset can be performed.
Attention!
The DTR function must be
deactivated (no DTR behavior) when
the INSYS WLAN serial is operated
with a device that does not support
DTR.
Connection
In this field, the device can be set to automatically establish the connection.
In addition, the data stream can be monitored via the idle connection control (Data
Transmit Control). There is a possibility to terminate the connection when no data was
transmitted within a previously set time period. When the time period is zero, or nothing
has been entered into the window, the data stream monitoring is not active.
Responses
The response format of the INSYS WLAN serial after an AT command or a system
message (CONNECT, NO CARRIER, OK, etc.) can be set as text or numerical code; it
can also be switched off, if necessary.
version 1.01 / 10.04
26
Implementation and Configuration INSYS WLAN serial
6.1.3 Network
6.1.3.1 IP Settings
Devices in IP networks use three
details to identify connections to
other subnetworks. These are details
to identify the own device, the own
network segment, and the gateway.
All IP addresses consist of a sequence
of 4 numbers in a range of values
from 0 to 255. For private networks
without direct Internet connection,
numbering areas such as
192.168.*.* are reserved. The IP
address describes the network
segment as well as the number of the
individual device within this segment.
version 1.01 / 10.04
Implementation and Configuration INSYS WLAN serial
27
IP Address
The own address of the INSYS WLAN serial, e.g. 192.168.100.218
Port
The port specifies the applications which will be performed within the internet protocol
(IP). The serial interface of the INSYS WLAN serial is represented at the IP address and the
port in the WLAN.
Network Mask
Part of the address which describes the network segment.
The subnetwork 255.255.255.0 , for example, marks the first three numbers
192.168.100 of the address 192.168.100.218 as network segment.
Gateway
All data packets to recipients outside the own network segment are transmitted to the
gateway to be forwarded.
6.1.3.2 WLAN Settings
In this field, the parameters for the WLAN interface are set.
Mode
Determination of the WLAN architecture (see Chap. 2.2) “adhoc” (peer-to-peer) or
“infrastructure” (AccessPoint).
Channel
Radio channel when using the adhoc mode. In adhoc mode, all involved stations must be
set to the same channel. This channel may not be used by other WLAN networks in the
reception area at the same time (default “6”). In infrastructure mode the channel is
assigned by the AccessPoint.
version 1.01 / 10.04
28
Implementation and Configuration INSYS WLAN serial
Network Name SSID
Enter the WLAN network SSID (default “WLANDEMO”). An empty input field indicates a
connection with any available network.
Safety/WEP
Activating the buttons “64 bit WEP” or “128 bit WEP” will switch on WEP encryption as
well as Shared Key Authentication. The following lengths are allowed: 64 bit and 128 bit.
WEP Key
Up to 4 WEP keys may be stored.
For 64 bit encryption each WEP key consists of 10 hexadecimal digits; for 128 bit
encryption each WEP key consists of 26 hexadecimal digits. The hexadecimal digits (0…9
and A…F) may be used. They must be entered without spaces.
Standard Key
One of the up to 4 defined WEP keys will be set up for the encryption.
Transfer Rate
Adjustment possibilities for fixed data rates or fallback behavior.
Connection Status
Clicking on the button “State of connection” will
clearly display the current connection data.
Click the button “Connection Status” again to update the values. The optimum received
signal level will be in the range –50dBm to –60dBm. Values of –80dBm will be sufficient
for a successful connection.
version 1.01 / 10.04
Implementation and Configuration INSYS WLAN serial
In detail, the following information is provided:
Channel:
Currently used channel
Tx Transfer Rate:
Currently reached data rate
Received Signal Level:
Current quality of the received signal level
Signal-To-Noise Ratio:
Current signal-to-noise ratio:
AccessPoint MAC:
MAC address of the remote terminal (adhoc) or of the
AccessPoint
6.1.3.3 Remote Maintenance Using the Configuration Software HSComm
When the WLAN connection for remote configuration of the device is to be used (see
interface), the field “Enabled” must be active.
Furthermore, the user name and the password in the INSYS WLAN serial may be
changed.
The default factory setting for the user is: insys, and for the password: insys
Clicking the button “configure” will open the field
“Password/User”.
Enter the new user name and the new password.
Attention!
When entering the user name and password please consider case
sensitivity.
version 1.01 / 10.04
29
30
Implementation and Configuration INSYS WLAN serial
The connection is automatically established when Telnet is selected in the menu
“Interface”. The IP address as well as the user name and the correct password of the
device to be configured must be entered in advance.
6.2
Configuration Via Terminal Program
The configuration of the INSYS WLAN serial can be performed directly by entering AT
commands in a terminal program.
6.2.1 AT Commands for Default Settings
Command Description
AT&F
Loading the default factory settings
AT&V
Display settings
AT&W
Saving the settings as user defaults
ATZ
Software reset and loading the user defaults
In Chapter 7 you will find a complete description of the AT commands and their
parameters.
6.2.2 Serial Interface
Control/PC and the INSYS WLAN serial must be modulated via the following joint
settings of the serial interface:
• Baud rate (Data transmission speed)
• Data format (data bits, parity, stop bits)
• Data flow control (hardware handshake)
These settings must also be performed at the device which is connected to the INSYS
WLAN serial.
version 1.01 / 10.04
Implementation and Configuration INSYS WLAN serial
31
6.2.2.1 AT Commands for the Serial Interface
Command
Description
AT*S
Determine baud rate
AT*U
Determine data format
AT&K
Data flow control between the PC and the modem
ATE
Command echo
AT&S
DSR behavior
AT&C
DCD (CT109) behavior
AT&D
DTR (CT108/2) behavior
In Chapter 7 you will find a complete description of the AT commands and their
parameters.
6.2.3 WLAN Network Structure
For a network structure according to IEEE 802.11b, the included devices must be
coordinated regarding the following settings:
Description
Radio channel (only for adhoc networks)
Clear text name of the radio network (SSID)
Architecture: Infrastructure or adhoc
WEP Encryption
Gateway for the local network segment
Network mask for the local network segment
Own IP address
Local port number
Command
AT#CHAN
AT#SSID
AT#PTY
AT#KEY, AT#WKY, AT#WEL, AT#WKL
AT#GW
AT#NM
AT#IP
AT#PORT
In Chapter 7 you will find a complete description of the AT commands and their
parameters.
6.3
Remote Configuration via Telnet
The remote configuration of the INSYS WLAN is possible with a device which is located
within the same WLAN network and has network access.
After starting the terminal program the IP address of the INSYS WLAN serial and the TCP
port (23) must be entered. Subsequently the connection is established.
version 1.01 / 10.04
32
Implementation and Configuration INSYS WLAN serial
Example: Terminal program TeraTerm Pro.
After the connection has been established successfully, a terminal window is opened and
the user is asked to enter the user name and the password. The default factory setting
for both entries is: insys
Attention!
The user name and the password are case sensitive!
After the user name and the password have been correctly verified, AT commands can be
sent to the INSYS WLAN serial via this terminal window. As a result, remote maintenance
or remote configuration can be performed.
version 1.01 / 10.04
Implementation and Configuration INSYS WLAN serial
33
Example: Query the settings of the INSYS WLAN serial (AT&V)
6.4
Firmware Update
Attention!
Before the firmware is uploaded, hardware handshake (RTS/CTS) must be
activated at the terminal program and the INSYS WLAN serial.
The command AT** will start the upload process and the device will prepare itself for
receiving the firmware.
After the response Send file now the firmware (file with the ending HEX) is sent as a
text file.
After the file has been received the device needs up to 60 seconds to complete the
upload. The INSYS WLAN serial resets autonomously after the upload.
In Chapter 7 you will find a complete description of the AT commands and their
parameters.
version 1.01 / 10.04
34
Command Overview INSYS WLAN serial
7 Command Overview INSYS WLAN serial
7.1
AT commands
7.1.1 Syntax of Standard AT Commands
The AT standard is a line-oriented command language. Each command consists of three
elements: Prefix, body and end character.
The prefix always consists of the letters “AT“.
The body consists of a name and pertinent values, if applicable. If a pertinent value is
optional, this is indicated by square brackets ([...]).
The end character is <CR> (=0X0D) by default.
Commands can be grouped to one command line. Space characters between the
individual main parts are ignored. The commands can be categorized as follows:
• Basic instruction set
• Extended instruction set (Main part starts with “+” or “^”)
The commands are acknowledged with “OK” or “ERROR”. A command that is being
edited will be interrupted by any further incoming character. Therefore, the next
command must wait for acknowledgement to avoid the deletion of the current
command.
7.1.2 Overview AT Commands
Command
ATA
Description
Manual connection acceptance
ATA accepts an incoming connection.
ATA only works when the model previously received packets at the local port, i.e. issued
the command „RING“.
AT#APD=
AP Density
Setting the search algorithms to AccessPoints – depending on the density of the
AccessPoints that is to be expected:
AT#APD=1
"Large Density"
AT#APD=2
"Medium Density"
AT#APD=3
"Small Density" (default)
AT#APD=4
"Mini Density"
AT#APD=5
"Micro Density"
The setting AT#APD is immediately stored in the permanent memory (independent from
the command AT&W). The setting will only take effect with Reboot (AT#RBT).
version 1.01 / 10.04
Command Overview INSYS WLAN serial
35
Command
AT#AUT=
Description
Set authorization
Explicit authentication at the AccessPoint before the data exchange
AT#AUT=0
Shared Key off (default)
AT#AUT=1
Shared Key on
The setting AT#AUT is immediately stored in the permanent memory (independent from
the command AT&W). The setting will only take effect with Reboot (AT#RBT).
AT&C
DCD behavior
AT&C0
AT&C1
AT#CHAN
DCD always on
DCD only on with existing connection (default)
Radio channel for adhoc mode
In adhoc mode, all involved modules must be set to the same channel.
AT#CHAN=n
Possible channel settings for Europe: n=1..14
In infrastructure mode the channel is assigned by the AccessPoint.
ATD
Dial remote terminal
The remote terminal is specified in the format IP number: Port. If no port is specified, the
own port number (set with AT#PORT) is also used for the remote terminal.
Optionally, it is possible to specify information regarding the necessary protocol (ATDT
for TCP/IP or ATDU for UDP/IP), before the remote terminal is specified.
Example:
ATDT192.168.100.111:1234 dials port “1234” of the IP address 192.168.100.111 .
Protocol: TCP/IP.
ATDT192.168.100.111:1234 dials port “1234” of the IP address 192.168.100.111 .
Protocol: UDP/IP.
AT&D
Behavior with DTR drop
When the DTR line is deactivated during an existing connection, the function set through
AT&D is executed.
AT&D0
Ignore DTR drop (for operation at modules which do not serve the DTR line).
AT&D2
A DTR drop causes the module to terminate the connection (default).
AT&D3
A DTR drop caused the module to terminate the connection and perform a
reset.
AT#DTC
Idle connection control (Data Transmit Controller)
The data transmit controller causes an unused connection to terminate automatically. If
no data is sent within the preset time, the connection is terminated.
AT#DTC=n
n in units of seconds
The maximum value is a timeout value of 2550 seconds (AT#DTC=255). The data
transmit controller can be switched off by setting the time to „0“ (AT#DTC=0). This is also
the default setting.
ATE
Echo
ATE0
ATE1
version 1.01 / 10.04
Switches the echo of the entered command in command mode off
Switches the echo on (default)
36
Command
AT&F
Command Overview INSYS WLAN serial
Description
Load factory settings
Factory settings (defaults) are loaded.
By entering the command sequence AT&F&W, the module can be returned to the factory
settings (excluding the network settings).
All settings, which can be stored using AT&W, are affected by AT&W (not the network
settings, see also AT&W). However, not all settings that were saved using AT&W are
changed, only the currently active settings.
AT#GW
Set gateway address
ATH
AT#GW sets the address of the standard gateway. This setting is used by remote IP
addresses, which can only be accessed by routers, not directly.
IP packets, which cannot be sent to the local network (defined by AT#IP and AT#NM), are
sent using the address set by AT#GW for forwarding.
AT#GW is used in connection with AT#NM to establish a connection via a router. If a router
is used, AT#GW and AT#NM must be set to enable a data connection via the router.
The default setting is AT#GW=192.168.1.1
The setting AT#GW is immediately stored in the permanent memory (independent from
the command AT&W). The setting will only take effect with Reboot (AT#RBT).
The IP address, the gateway and the network mask must be coordinated in the local
network segment.
.
Dummy command
Command with an optional parameter without effect implemented for compatibility to
the modem – response “OK”.
The device does not support any online command mode.
ATI
Display of the module identification
ATI0
ATI3
ATI4
AT*I
Querying the Alarm Input
Response:
0
1
AT#IP
displays the device type („WLAN 802.11b“)
displays the version number and the date when the software was created
displays an ID string and the version number
<Input1>, <Input2>
Input is connected to GND and therefore activated
Input is open and therefore not activated
Set own IP address
AT#IP sets the own IP address of the device, e.g.
AT#IP=192.168.1.1
The default setting is AT#IP=192.168.1.160.
The setting AT#IP is immediately stored in the permanent memory (independent from
the command AT&W). The setting will only take effect with Reboot (AT#RBT).
IP address, gateway and network mask must be coordinated in the local network
segment.
version 1.01 / 10.04
Command Overview INSYS WLAN serial
Command
AT&K
Description
Data flow control
AT&K
AT&K0
AT&K3
AT&K8
AT#KEEP
37
sets the function of the data flow control.
switches the data flow control off (default).
switches the hardware data flow control (RTS/CTS) on
Activates the controlled half duplex operation on the serial interface for
RS485
In this mode, the CTS signal is deactivated (high), while the device sends data
at the serial interface. Thus, the CTS signal can be used as driver release
signal for a RS485 driver. Controlling of the data direction for RS485 takes
place via the CTS signal. Polarity setting via AT&R.
TCP/IP Keep Alive
This timer enables the monitoring of an existing TCP/IP connection when no data is
transferred. When 3 consecutive monitoring packets are not answered, the connection is
terminated and re-established, if necessary (in leased line mode, see AT&L).
AT#KEEP=n
n=1..255
The time between monitoring packets in units of 10 seconds
n=0
No monitoring packets (default)
The setting AT#KEEP is immediately stored in the permanent memory (independent
from the command AT&W).
AT#KEYn=
Define WEP keys
Entering of the WEP keys 0..3 as a series of hexadecimal digits (0..9,A..F) in quotes. After
every two digits an underscore follows as separator.
For 64 bit keys 10 hexadecimal digits are required; for 128 bit keys 26 hexadecimal digits.
Default setting: empty keys (all 0)
AT#KEY0=”11_12_13_14_15_16_17_18_19_1a_1b_1c_1d”
AT#KEY1=”11_12_13_14_15_16_17_18_19_1a_1b_1c_1d”
AT#KEY2=”11_12_13_14_15_16_17_18_19_1a_1b_1c_1d”
AT#KEY3=”11_12_13_14_15_16_17_18_19_1a_1b_1c_1d”
A single WLAN is determined by joint codes (SSID) and WEP keys.
WEP encryption is switched on via AT#WEL. The key length is determined via AT#WKL. The
active WEP key is selected with AT#WKY.
The setting AT#KEYn is immediately stored in the permanent memory (independent
from the command AT&W). The setting will only take effect with Reboot (AT#RBT).
AT#NM
Set network mask
AT#NM sets the address range of the local network in connection with AT#IP. All packets
that are not sent to the local network, are sent to the gateway address set by AT#GW.
The default setting is AT#NM=255.255.255.0
The setting AT#NM is immediately stored in the permanent memory (independent from
the command AT&W). The setting will only take effect with Reboot (AT#RBT).
IP address, gateway and network mask must be coordinated in the local network
segment.
AT&O
Set the function of the OH line
AT&O0
AT&O1
version 1.01 / 10.04
OH is active (low) as soon as a physically functioning WLAN link is available,
i.e. the module is registered at the AccessPoint. (Link ok, default)
OH is active (low), as soon as a connection (TCP/IP or UDP/IP) is active
38
Command
AT#PING
Command Overview INSYS WLAN serial
Description
Send PING
AT#PINGa.b.c.d sends an echo request (PING) to a remote terminal (similar to the
standard TCP/IP program). If an echo is received within a timeout period of 2 seconds,
the required time is displayed.
AT#PING is used to check if an IP number can be reached. If AT#PING fails, no
connection can be established to the specified IP number.
The reason could be a wrong configuration or a firewall between the two network
subscribers.
AT#PORT=
Set local port number
AT#PORT=n sets the local port number to the value n (1..65535).
For automatic call acceptance, the local port number is used as the port number to which
the module “listens”.
The default setting is AT#PORT=1234
The setting AT#PORT is immediately stored in the permanent memory (independent
from the command AT&W). The setting will only take effect with Reboot (AT#RBT).
AT#PTY=
Set port type
Determination of the WLAN architecture
AT#PTY= 0
Adhoc (peer-to-peer)
AT#PTY= 1
Infrastructure (Connection to AccessPoint – default)
The setting AT#PTY is immediately stored in the permanent memory (independent from
the command AT&W). The setting will only take effect with Reboot (AT#RBT).
ATQ
Quiet control
This command switches the sending of messages from the device via the serial interface
on or off.
ATQ0
ATQ1
AT#QUIET
Send messages to PC (default)
Don’t send messages to PC
Suppress switch-on message
AT#QUIET=0 shows the switch-on message during the cold start (default)
AT#QUIET=1 suppresses the switch-on message of the device
The setting of AT#QUIET is stored with AT&W in the fail-safe module memory of the
device.
AT&R
Polarity of the CTS control line
for controlling a RS485 driver (see also AT&K8). The CTS signal is set to active or inactive
when the device receives data at the serial interface:
AT&R0
CTS signal inactive
AT&R1
CTS signal active (default)
version 1.01 / 10.04
Command Overview INSYS WLAN serial
Command
AT#RAT=
39
Description
Set data rate (in Mbps)
AT#RAT=1
AT#RAT=2
AT#RAT=3
AT#RAT=4
AT#RAT=5
AT#RAT=6
AT#RAT=7
"Fixed 1 Mbps"
"Fixed 2 Mbps"
"Auto Fallback" (default)
"Fixed medium rate"
"Fixed high rate"
"Auto fallback standard"
"Auto fallback medium"
The setting AT#RAT is immediately stored in the permanent memory (independent from
the command AT&W). The setting will only take effect with Reboot (AT#RBT).
AT#RBT
AT#RESET
ATS0=
Reboot
The device is rebooted. All network parameters are reloaded from the permanent
memory.
Number of ringing tones until automatically going off-hook.
determines the number of ringing tones (received packets), after which it
automatically goes off-hook.
ATS0=1
goes off-hook when the local port is first accessed (default)
ATS0=0
deactivates automatically going off-hook when the local port is accessed.
For UDP/IP connections, ringing tones represent single (also empty) UDP/IP network
packets. For TCP/IP connections, connection requests of a remote terminal („SYN“) are
recognized as ringing tones.
While the UDP connection is established, the modules send an empty UDP data packet in
the beginning, so the remote terminal device accepts the connection if it is configured
with ATS0=1.
Important difference to modems: In TCP/IP mode, for S0=0 the connection acceptance is
completely blocked, i.e. „RING“ is not displayed for a connection request.
For manual connection acceptance, So=200 should be set.
ATS0=n
ATS1?
Number of received packets for connection request
Query of the number of TCP-SYN packets. This registry is used to achieve a behavior such
as, for example, S0=2.
ATS2=
Character for escape sequence
The escape sequence consist of a series of a 1 second pause, 3 times the escape character
and 1 second pause again. (The pre and post run time of 1 second can be changed using
ATS12)
ATS2=n n=0...127
Determination of the escape character as ASCII code
n=43
Default setting „+“
n>127
Functionality deactivated
The setting is stored in the permanent memory with AT&W.
ATS3=
Carriage Return – CR
ATS3=n n=0...127
Determination of the character as ASCII code
n=13
Default setting
The setting is not stored with AT&W in the permanent memory.
version 1.01 / 10.04
40
Command Overview INSYS WLAN serial
Command
ATS4=
Description
Character for line feed – LF
ATS4=n n=0...127
Determination of the character as ASCII code
n=10
Default setting
The setting is not stored with AT&W in the permanent memory.
ATS5=
Character for backspace – BS
ATS5=n n=0...127
Determination of the character as ASCII code
n=8
Default setting
The setting is not stored with AT&W in the permanent memory.
ATS8=
Set waiting period for block formation
Sets the waiting time until a block is sent via the network. The unit is in 1/1000 seconds
(1 ms). The time starts to run as soon as a character is received. As soon as no data is
received from the serial interface during the period set in S8, a data packet is sent. Small
values in S8 lead to faster transmission of short messages, but increase the number of
packets and therefore the load on the network side. Large packets in S8 lead to a delay of
small data packets.
n=2..255
ATS8=n
n=50
Waiting period in milliseconds (corresponds to 2ms ... 255
ms)
50 ms (default)
The setting is stored in the permanent memory with AT&W .
ATS12=
Pre and post run time for escape sequence
Minimum pre and post run time when sending the escape sequence („+++“)
ATS12=n n=2...255
Time in units of 1/10 seconds
n=10
Default setting 1 second
The setting is stored in the permanent memory with AT&W.
ATSn?
Query S-registry
n = 2,3,4,5,8,12 Query of the according registry
Access to other S-registries will not lead to errors, but also has no effect. When reading
non-implemented S-registries the value „0“ is returned.
AT*S
Set baud rate
AT*S sets the baud rate at the serial interface. The following baud rates are supported:
AT*S1
300 baud
AT*S2
600 baud
AT*S3
1,200 baud
AT*S4
2,400 baud
AT*S5
4.800 baud
AT*S6
9,600 baud
AT*S7
19,200 baud (default)
AT*S8
38,400 baud
AT*S9
57,600 baud
AT*S10
115,200 baud
AT&S
DSR behavior
AT&S0
AT&S1
DSR is always active (default)
DSR follows DCD, e.g. DSR is only active for existing connections
version 1.01 / 10.04
Command Overview INSYS WLAN serial
Command
AT#SSID=
41
Description
Define SSID
AT#SSID=“WLAN_DEMO“
The setting AT#SSID is immediately stored in the permanent memory (independent
from the command AT&W). The setting will only take effect with Reboot (AT#RBT).
AT#STAT
Display status
AT#STAT displays the current status of the WLAN connection:
• Used channel
• Data rate of the connection
• Signal-to-noise ratio SNR and incoming power Rx LEVEL – Select location and
positioning of the antenna in a way that SNR ≥ 20 dB.
• The MAC of the AccessPoints, with which a connection has been established
AT#TEL
Telnet port for remote configuration
AT#TEL=n
n:
n=0
n=23
Determines the remote configuration port via Telnet for the
TCP/IP port
Deactivates the access
Default setting for Telnet
During remote configuration all AT commands can be entered, so a remote firmware
update (AT**) or establishing a connection is also possible remotely.
The user name and password are determined via AT#TLU and AT#TLP.
The setting AT#TEL is immediately stored in the permanent memory (independent from
the command AT&W). The setting will only take effect with Reboot (AT#RBT).
AT#TLP
Password for remote configuration
AT#TLP="password" Password for remote configuration (in quotes) – Maximum of 8
characters. The entry is case sensitive. Default is „insys“
The user name and the Telnet port are determined with AT#TLU and AT#TEL.
The setting AT#TEL is immediately stored in the permanent memory (independent from
the command AT&W).
AT#TLU
User name for remote configuration
AT#TLU="name"
User name for remote configuration (in quotes) – Maximum of 8
characters. The entry is case sensitive. Default is „insys“
The password and the Telnet port are determined with AT#TLP and AT#TEL.
The setting AT#TEL is immediately stored in the permanent memory (independent from
the command AT&W).
ATT
Select TCP mode
For the next connection ATT selects the TCP mode. This setting applies to ATD commands
without a specific protocol (e.g. ATD192.168.100.200:1234 or for incoming calls.
version 1.01 / 10.04
42
Command
ATU
Command Overview INSYS WLAN serial
Description
Select UDP mode
For the next connection ATU selects the UDP mode. This setting applies to ATD
commands without a specific protocol (e.g. ATD192.168.100.200:1234 or for
incoming calls.
AT*U
Select data format
AT*U sets the data format at the serial interface.
The following data formats (data bits, parity, stop bits) are supported:
AT*U0
8N1 (default)
AT*U1
7E1
AT*U2
7O1
AT*U4
7E2
AT*U5
7O2
AT*U6
7N2
AT*U7
8E1
AT*U8
8O1
AT*U9
8N2
ATV
Select message format (short or long format)
ATV sets the format for responses. When ATV1 (default) is set, the messages are
displayed in clear texts; for ATV0 the message numbers are displayed (see table of
message numbers below)
AT&V
Display settings and connection statistics
AT&V0
AT&V1
AT&W
displays the current and saved settings of the module.
Displays the diagnostic data of the last connection (connection partner,
reason for disconnect).
Save settings
AT&W saves all current settings in the permanent memory. The settings are restored from
this permanent memory, when the module is switched on.
The following AT settings are stored:
AT&C, AT&D, ATE, AT&K, AT&O, AT#QUIET, ATS0, ATS8, AT*S, AT&S, AT*U,
ATT, ATU, ATV.
AT#WEL=
Switch WEP on and off
AT#WEL=0
off (default)
AT#WEL=1
on
The setting AT#WKY is immediately stored in the permanent memory (independent from
the command AT&W). The setting will only take effect with Reboot (AT#RBT).
AT#WKL=
Length of the WEP key
AT#WKL=0
64 bit
AT#WKL=1
128 bit (default)
The setting AT#WKY is immediately stored in the permanent memory (independent from
the command AT&W). The setting will only take effect with Reboot (AT#RBT).
version 1.01 / 10.04
Command Overview INSYS WLAN serial
Command
Description
AT#WKY=
Define TX WEP key
43
Selection of the currently used WEP key that was defined with AT#KEY.
AT#WKY=0 (default)
AT#WKY=1
AT#WKY=2
AT#WKY=3
The setting AT#WKY is immediately stored in the permanent memory (independent from
the command AT&W). The setting will only take effect with Reboot (AT#RBT).
ATX
Dummy command
Command with an optional parameter without effect implemented for compatibility to
the modem – response “OK”.
The device does not support any online command mode.
AT*Yx,y
Switch outputs
x:
Port
0 Port UA1
1 Port UA2
y:
Desired condition of the UAx output
0 Pin UAx low
1 Pin UAx high
Notes:
Default:
If no port is specified (x), UA1 is used
AT*Y0,0
AT*Y1,0
ATZ
Dummy instruction (no function).
AT**
Firmware Update
AT** starts the update process for the firmware (flash update).
IMPORTANT:
To update the firmware, hardware handshake (RTS/CTS) must be
activated at the terminal
After AT** is entered, the device prepares itself for receiving the firmware.
After the response Send file now the firmware (file with the ending HEX) must be
sent as a text file.
After the file has been sent, the firmware update needs some (up to 60) seconds time
during which the update is carried out.
After the flash update, the device resets autonomously.
Routine:
Entry:
AT**
Response:
Wait. Preparing firmware upgrade.
Send file now. Enable RTS/CTS.
Wait 10 seconds and then send the firmware file as text (not binary). (TeraTerm: Menu
File Æ Send file…)
Response:
Firmware upload finished.
Firmware successful validated.
Wait. Processing firmware update and reboot.
Afterwards, the INSYS WLAN serial resets and displays the start up message.
version 1.01 / 10.04
44
Command Overview INSYS WLAN serial
Command
Description
+++
Escape sequence
If the sequence “+++” is sent during an active connections with at least 1 second pause
before and after the sequence, the module will terminate the connection.
Unlike the modem, no online command mode is supported.
7.2
Responses and Numerical Codes
The following message texts (with setting ATV1) or message numbers (with setting ATV0)
are displayed by the module:
Message number
Short form
(ATV0)
Message text
Long form
(ATV1)
Meaning
0
1
2
3
4
7
OK
CONNECT
RING
NO CARRIER
ERROR
BUSY
Command was accepted
Connection was established
Connection request was recognized
Connection was terminated
Error in AT command string
Remote terminal did not accept connection
version 1.01 / 10.04