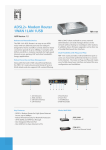
Download iDream ADSL2/2+ Modem Router ADSL
Transcript
ADSL2/2+ Modem/Router with 4 ports switch
Quick Installation Guide
Contents
1.
Panel Descriptions ............................................................................................... 1
2.
Connecting 4 Ports ADSL2/2+ Router ................................................................. 3
3.
Setting up the TCP/IP in Windows ...................................................................... 5
Windows ME/98 .................................................................................................... 5
Windows 2000 ...................................................................................................... 6
Windows XP ......................................................................................................... 7
4.
Setting up the 4 Ports ADSL2/2+ Router ............................................................ 8
5.
Making sure of Internet connection .................................................................... 17
4 Ports ADSL2/2+ Router
0
1. Panel Descriptions
1.1 Back Panel:
The back panel of the 4 Ports ADSL2/2+ Router contains ADSL, Ethernet Switches, Reset Button
and Power Adaptor connection.
ADSL
Port for connecting to the ADSL/ADSL2/ADSL2+ Service Provider.
Ports 1~4
Four 10/100Mbps Ethernet Ports for connecting to the network devices.
Power
Power adapter connector
All the Ethernet port of the 4 Ports ADSL2/2+ Router supports
!
auto-crossover capability.
RESET Button:
!
Reboot & Restore the 4 Ports ADSL2/2+ Router to factory defaults.
To “Reset” the 4 Ports ADSL2/2+ Router to factory defaults:
Ensure that the device is powered on.
Press the Reset button for 10~15 seconds and release. Wait for 30 seconds after release
the Reset button. Do not power off the device during the reset process.
The default settings are now restored after 30 seconds.
4 Ports ADSL2/2+ Router
1
1.2 Front Panel:
The 4 Ports ADSL2/2+ Router’s LED indicators display information about the device’s status.
PWR
Lights up when 4 Ports ADSL2/2+ Router is powered on.
1
Blinking when Port 1 of this 4 Ports ADSL2/2+ Router is Sending/Receiving data.
2
Blinking when Port 2 of this 4 Ports ADSL2/2+ Router is Sending/Receiving data.
3
Blinking when Port 3 of this 4 Ports ADSL2/2+ Router is Sending/Receiving data.
4
Blinking when Port 4 of this 4 Ports ADSL2/2+ Router is Sending/Receiving data.
ADSL
PPP
Blinking when 4 Ports ADSL2/2+ Router is ready.
Lights up when a successful ADSL2/2+ connection is established.
Lights up when a PPP connection is established.
4 Ports ADSL2/2+ Router
2
2. Connecting 4 Ports ADSL2/2+ Router
2.1 Connection Mechanism:
This section describes the hardware connection mechanism of your 4 Ports ADSL2/2+ Router on
your Local Area Network (LAN) connect to the Internet, how to configure your 4 Ports ADSL2/2+
Router for Internet access or how to manually configure your Internet connection.
Before you can establish an Internet or Wireless connection through your 4 Ports ADSL2/2+ Router,
make sure you have the following:
1.
A Computer/Notebook with an installed Ethernet Adaptor and an Ethernet Cable.
2.
ADSL service account and configuration information provided by your Internet Service
Provider (ISP). The following configuration parameters are require in order to connect your 4
Ports ADSL2/2+ Router to the Internet:
a. VPI/VCI parameters
b. Multiplexing Method or Protocol Type or Encapsulation Type
c. Host and Domain Names
d. ISP Login Name and Password
e. ISP Domain Name Server (DNS) Address
f.
Fixed or Static IP Address
4 Ports ADSL2/2+ Router
3
2.2 Connection Steps:
Following are the steps to properly connect your 4 Ports ADSL2/2+ Router:
1. Turn off your computer.
2. Connect the ADSL port of your 4 Ports ADSL2/2+ Router to the wall jack of the ADSL Line with a
RJ-11 cable.
3. Connect the Ethernet cable (RJ-45) from your 4 Ports ADSL2/2+ Router to the Ethernet Adaptor
in your computer.
4. Connect the Power adaptor to the 4 Ports ADSL2/2+ Router and plug the other end into a Power
outlet.
The Power light will lit after turning on the 4 Ports ADSL2/2+ Router.
!
Auto and self-diagnostic process might turn the LED indicators ON and
OFF during the process.
Use the Power Adaptor exclusively in combination with the equipment
!
supplied and do not use any other kind of power adaptor for the equipment.
5.
Turn on your computer.
6.
Refer to the next chapter to setup or configure your system’s Network Adaptor.
4 Ports ADSL2/2+ Router
4
3. Setting up the TCP/IP
Windows Me / 98
Step 1: Click Start→Settings→Control Panel.
Step 4: Go to IP Address icon and select
Obtain an IP address.
Step 2: Double-click the Network icon.
Step 5: Go to Gateway icon and erase all
previous setting.
Step 3: Go to Configuration icon, select network
adapter installed and click Properties.
Step 6: Go to DNS Configuration icon, select
Disable DNS and click OK.
1
1
2
2
4 Ports ADSL2/2+ Router
5
Windows 2000
Step 1: Click Start→Settings→Control Panel.
Step 4: Select Internet Protocol (TCP/IP) and
click Properties.
1
2
Step 2: Double-click the Network and Dial-up
Connections.
Step 5: Select Obtain an IP address
automatically and DNS server address
automatically. Then, click OK.
Step 3: Right Click the Local Area Connection and
1
select Properties.
2
1
3
2
4 Ports ADSL2/2+ Router
6
Windows XP
Step 1: Click Start→Control Panel→Classic View.
Step 4: Go to General icon, select Internet
Protocol (TCP/IP) and click Properties.
1
2
Step 2: Double-click the Network Connections.
Step 5: Go to General icon, select Obtain an IP
address automatically and DNS server
address automatically.
Then, click OK.
Step 3: Right Click on the Local Area Connection
and select Properties.
1
2
1
3
2
4 Ports ADSL2/2+ Router
7
4. Setting up the 4 Ports ADSL2/2+ Router
1. Launch your web browser, and enter the 4 Ports ADSL2/2+ Router’s IP Address:
“192.168.1.1” in the address field then press the “Enter” key to login.
2. Enter the default User Name: “Admin” and Password: “Admin”. Then press “OK” to login.
!
Note that the Username and Password are case sensitive.
4 Ports ADSL2/2+ Router
8
3. Upon entering the address into the web browser, the system HOME page with all the device
information will pop up.
4. Click on “Wizard Setup” and the following screen will pop-up. The Setup Wizard is a
presetting wizard which meant to help you install the 4 Ports ADSL2/2+ Router quickly and
easily.
Follow the Steps describe below to complete your first time installation.
4 Ports ADSL2/2+ Router
9
Step 1: Select your country from the Country list and the ADSL service provider from the ISP List
(If there are more than two ISP in your country) and note the “Encapsulation” type and
“VPI & VCI” setting. Click “Next” to continue.
1
2
Click “Config” if you can’t find any available parameters from the
!
presetting country list.
Check your ISP immediately for the setting/configuration details.
4 Ports ADSL2/2+ Router
10
A.
For countries with the following “Encapsulation” type after clicking the “Next” button at
Step 1, you will enter into set Username and Password window as shown below:
PPPoA VC-Mux
PPPoA LLC
PPPoE VC-Mux
PPPoE LLC
1
2
Manually enter your “Username” and “Password” which will be provided by your
Service Provider (ISP). Click “Apply” after setup.
4 Ports ADSL2/2+ Router
11
B.
For countries with the following “Encapsulation” after clicking the “Next” button at Step
1, the following window will pop-up:
1483 Routed IP VC-Mux
1483 Routed IP LLC
1483 Routed IP LLC (1577)
1483 Bridged IP VC-Mux
1483 Bridged IP LLC
In this current window, you will find TWO different Connection Type:
Static (Fixed IP by ISP)
DHCP (Get IP dynamically from ISP)
Click “Config” if you can’t find any available parameters from the
presetting country list.
!
Check your ISP immediately for the setting/configuration details.
4 Ports ADSL2/2+ Router
12
1.
Static:
Click the radio button to enable Static (Fixed IP by ISP) option then click
“Next”, the following window will pop-up.
1
2
Manually enter the “IP Address”, “Mask”, “Default Gateway” and “DNS” which will be
provided by your ISP. Click “Apply” after your setting.
Static Setup:
Static IP Settings are for users who have a Static IP Address (WAN
side) from their ISP.
IP Address: This is the Static IP Address given by your ISP.
Mask: This is the Subnet Mask provided by your ISP.
Default Gateway: This is your gateway IP address.
DNS: This is the DNS address specify by your ISP.
4 Ports ADSL2/2+ Router
13
2.
DHCP (Get IP dynamically from ISP): Click the radio button to enable DHCP (Get IP
dynamically from ISP) option then click “Next”, the following window will pop-up:
1
Nothing to be filled under this mode. Just click the “Apply” button to confirm your setting.
4 Ports ADSL2/2+ Router
14
Step 2:
The following configuration home page with the device setup information will pop-up
after your confirmation at Step 1.
Check the following items when the above window pop-up. All the setting should be exactly the
same with your setting in STEP1.
Description: Show the ISP name you’d selected in STEP 1.
Type: Show the Encapsulation type selected in STEP 1.
NOTE: If the final setting are differ from what you’d selected in STEP 1, click Setup Wizard and
redo the setup procedures or else check your dealer immediately for technical support.
NOTE: For more detailed information regarding settings and connections, refer to “Users Manual”.
4 Ports ADSL2/2+ Router
15
5. Making sure of Internet connection
1.
Click the “Refresh” button and check the “System Information”.
The “DSL Status” and “DSL Speed” under “System Information” shows you the
ADSL connection status and connection speed (Upstream/Downstream) in Kbps.
2
4 Ports ADSL2/2+ Router
1
16
2.
Launch your web browser, and enter the Google Website Address: “www.google.com” in
the address field then press “Enter”.
3.
The following Google website index page will display on your screen. This shows your ADSL
connection is correctly set and access to the Internet is now available.
NOTE: For more detailed information regarding settings and connections, refer to “Users Manual”.
UI8505_01
4 Ports ADSL2/2+ Router
17


