1
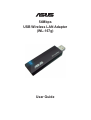
®
54Mbps
USB Wireless LAN Adapter
(WL-167g)
User Guide
Control Number: E1684
Checklist
Manual Version: July 2004
Copyright © 2004 ASUSTeK COMPUTER INC. All Rights Reserved.
No part of this manual, including the products and software described in it, may be
reproduced, transmitted, transcribed, stored in a retrieval system, or translated into any
language in any form or by any means, except documentation kept by the purchaser for
backup purposes, without the express written permission of ASUSTeK COMPUTER INC.
(“ASUS”).
Product warranty or service will not be extended if: (1) the product is repaired, modified or
altered, unless such repair, modification of alteration is authorized in writing by ASUS; or (2)
the serial number of the product is defaced or missing.
ASUS PROVIDES THIS MANUAL “AS IS” WITHOUT WARRANTY OF ANY KIND, EITHER
EXPRESS OR IMPLIED, INCLUDING BUT NOT LIMITED TO THE IMPLIED WARRANTIES
OR CONDITIONS OF MERCHANTABILITY OR FITNESS FOR A PARTICULAR PURPOSE.
IN NO EVENT SHALL ASUS, ITS DIRECTORS, OFFICERS, EMPLOYEES OR AGENTS BE
LIABLE FOR ANY INDIRECT, SPECIAL, INCIDENTAL, OR CONSEQUENTIAL DAMAGES
(INCLUDING DAMAGES FOR LOSS OF PROFITS, LOSS OF BUSINESS, LOSS OF USE
OR DATA, INTERRUPTION OF BUSINESS AND THE LIKE), EVEN IF ASUS HAS BEEN
ADVISED OF THE POSSIBILITY OF SUCH DAMAGES ARISING FROM ANY DEFECT OR
ERROR IN THIS MANUAL OR PRODUCT.
SPECIFICATIONS AND INFORMATION CONTAINED IN THIS MANUAL ARE FURNISHED
FOR INFORMATIONAL USE ONLY, AND ARE SUBJECT TO CHANGE AT ANY TIME
WITHOUT NOTICE, AND SHOULD NOT BE CONSTRUED AS A COMMITMENT BY ASUS.
ASUS ASSUMES NO RESPONSIBILITY OR LIABILITY FOR ANY ERRORS OR
INACCURACIES THAT MAY APPEAR IN THIS MANUAL, INCLUDING THE PRODUCTS
AND SOFTWARE DESCRIBED IN IT.
Products and corporate names appearing in this manual may or may not be registered
trademarks or copyrights of their respective companies, and are used only for identification or
explanation and to the owners’ benefit, without intent to infringe.
ii
Contents
Features
Notice .............................................................................................. v
Safety statements ........................................................................... vi
About this guide ............................................................................ viii
WL-167g specification summary .................................................... ix
Chapter 1: Product introduction
1.1
1.2
1.3
1.4
Welcome! ........................................................................... 1-2
Package contents ............................................................... 1-2
Features ............................................................................. 1-3
Network setup .................................................................... 1-4
1.4.1 Ad-hoc network ...................................................... 1-4
1.4.2 Infrastructure network ............................................ 1-4
Chapter 2: Installation
2.1
2.2
System requirements ......................................................... 2-2
Installation procedures ....................................................... 2-2
2.2.1 Installing the device drivers and utilities ................ 2-2
2.2.2 Installing the device ............................................... 2-3
Chapter 3: Software support
3.1
Control Center .................................................................... 3-2
3.1.1 Control Center icons .............................................. 3-2
3.1.2 Control Center right-click menu ............................. 3-3
3.1.3 Control Center left-click menu ............................... 3-3
iii
Contents
Safeguards
3.2
3.3
3.4
Wireless Settings ................................................................ 3-4
3.2.1 Status ..................................................................... 3-4
3.2.2 Configuration ......................................................... 3-7
3.2.3 Site Survey ............................................................ 3-9
3.2.4 About Wireless Settings ....................................... 3-10
3.2.5 Link State ............................................................. 3-10
3.2.6 Command icons ....................................................3-11
3.2.7 Other right-click options ........................................3-11
Mobile Manager ................................................................ 3-13
3.3.2 Creating a new configuration ............................... 3-15
3.3.3 Editing a configuration ......................................... 3-19
Site Monitor ...................................................................... 3-23
3.4.1 Launching Site Monitor ........................................ 3-23
3.4.2 Site Monitor main window .................................... 3-23
3.4.3 Monitoring a connection ....................................... 3-24
Chapter 4: Troubleshooting
Troubleshooting ........................................................................... 4-2
iv
Notices
Federal Communications Commission Statement
This device complies with FCC Rules Part 15. Operation is subject to the
following two conditions:
•
This device may not cause harmful interference, and
•
This device must accept any interference received, including
interference that may cause undesired operation.
This equipment has been tested and found to comply with the limits for a
class B digital device, pursuant to Part 15 of the Federal Communications
Commission (FCC) rules. These limits are designed to provide reasonable
protection against harmful interference in a residential installation. This
equipment generates, uses, and can radiate radio frequency energy and, if
not installed and used in accordance with the instructions, may cause
harmful interference to radio communications. However, there is no
guarantee that interference will not occur in a particular installation. If this
equipment does cause harmful interference to radio or television reception,
which can be determined by turning the equipment off and on, the user is
encouraged to try to correct the interference by one or more of the following
measures:
•
Reorient or relocate the receiving antenna.
•
Increase the separation between the equipment and receiver.
•
Connect the equipment into an outlet on a circuit different from that to
which the receiver is connected.
•
Consult the dealer or an experienced radio/TV technician for help.
CAUTION! You are cautioned that changes or modifications not
expressly approved by the party responsible for compliance could void
your authority to operate the equipment.
Reprinted from the Code of Federal Regulations #47, part 15.193, 1993.
Washington DC: Office of the Federal Register, National Archives and
Records Administration, U.S. Government Printing Office.
v
Safety statements
Regulatory Information/Disclaimers
Installation and use of this Wireless LAN device must be in strict accordance
with the instructions included in the user documentation provided with the
product. Any changes or modifications (including the antennas) made to this
device that are not expressly approved by the manufacturer may void the
user’s authority to operate the equipment. The manufacturer is not
responsible for any radio or television interference caused by unauthorized
modification of this device, or the substitution of the connecting cables and
equipment other than manufacturer specified. It is the responsibility of the
user to correct any interference caused by such unauthorized modification,
substitution or attachment. Manufacturer and its authorized resellers or
distributors will assume no liability for any damage or violation of government
regulations arising from failing to comply with these guidelines.
CAUTION! To maintain compliance with FCC’s RF exposure
guidelines, this equipment should be installed and operated with
minimum distance [20cm] between the radiator and your body. Use on
the supplied antenna. Unauthorized antenna, modification, or
attachments could damage the transmitter and may violate FCC
regulations.
Safety Information
In order to maintain compliance with the FCC RF exposure guidelines, this
equipment should be installed and operated with minimum distance [20cm]
between the radiator and your body. Use only with supplied antenna.
Unauthorized antenna, modification, or attachments could damage the
transmitter and may violate FCC regulations.
CAUTION! Any changes or modifications not expressly approved in
this manual could void your authorization to use this device.
MPE Statement
Your device contains a low power transmitter. When device is transmitted it
sends out Radio Frequency (RF) signal.
vi
Safety statements
FCC Radio Frequency Exposure
This Wireless LAN radio device has been evaluated under FCC Bulletin
OET 65C and found compliant to the requirements as set forth in CFR 47
Sections 2.1091, 2.1093, and 15.247(b)(4) addressing RF Exposure from
radio frequency devices. The radiation output power of this Wireless LAN
device is far below the FCC radio frequency exposure limits. Nevertheless,
this device shall be used in such a manner that the potential for human
contact during normal operation – as a mobile or portable device but use in
a body-worn way is strictly prohibit. When using this device, a certain
separation distance between antenna and nearby persons has to be kept to
ensure RF exposure compliance. In order to comply with the RF exposure
limits established in the ANSI C95.1 standards, the distance between the
antennas and the user should not be less than [20cm].
RF Exposure
The antenna(s) used for this transmitter must not be co-located or operating
in conjunction with any other antenna or transmitter.
vii
About this guide
This user guide contains the information you need to install and configure
your ASUS USB Wireless LAN Adapter.
How this guide is organized
This guide contains the following parts:
•
Chapter 1: Product introduction
This chapter describes the physical features of the ASUS USB Wireless
LAN Adapter. This part also presents the package contents, LED
indicators, and recommended network settings.
•
Chapter 2: Hardware installation
This chapter provides information on how to install the ASUS USB
Wireless LAN Adapter.
•
Chapter 3: Configuration
This chapter provides information on the contents of the support CD.
•
Chapter 4: Troubleshooting
This chapter contains a troubleshooting guide for solving common
problems you may encounter when using the ASUS USB Wireless LAN
Adapter.
Conventions used in this guide
To make sure that you perform certain tasks properly, take note of the
following symbols used throughout this guide.
WARNING: Information to prevent injury to yourself when trying to
complete a task.
CAUTION: Information to prevent damage to the components
when trying to complete a task.
IMPORTANT: Information that you MUST follow to complete a task.
NOTE: Tips and additional information to aid in completing a task.
viii
WL-167g specification summary*
Standard
IEEE 802.11g
Interface
USB 2.0
Technology
Orthogonal Frequency Division Multiplexing (OFDM)
Direct Sequence Spread Spectrum (DSSS)
Data transfer rate
802.11g:
802.11b:
54Mbps with auto-fallback to 48, 36,
24, 18, 12, 9, and 6Mbps
11Mbps with auto-fallback to 5.5, 2,
and 1Mbps
Network types
Supports Infrastructure and Ad-hoc networks
Frequency band
2.4 GHz ~ 2.5 GHz
Security
64-bit/128-bit configurable WEP encryption
Operating distance
Indoors @ 11Mbps
Indoors @ 54Mbps
Outdoors @ 11Mbps LOS**
Outdoors @ 54Mbps LOS**
Compatibility
Compatible with IEEE 802.11b and 802.11g devices
Power requirement
USB bus-powered
Supported OS
Windows® 98SE/ME/2000/XP
Software support
Control Center
One Touch Wizard
Wireless Settings
Mobile Manager
Site Monitor
TroubleShooting
:
:
:
:
130 ft (40 m)
80 ft (25 m)
1000 ft (310 m)
200 ft (60 m)
* Specifications are subject to change without notice.
** Line-of-Sight
The ASUS USB Wireless LAN Adapter operating distance may be
shorter if there are walls, barriers, or interferences in the home layout
or operating environment.
ix
x
Chapter 1
This chapter describes the physical features
of the ASUS USB Wireless LAN Adapter.
This part presents the package contents,
LED indicators, and recommended network
settings.
Product introduction
1.1 Welcome!
Thank you for choosing the ASUS USB Wireless LAN Adapter!
The ASUS USB Wireless LAN Adapter is an easy-to-install and use
wireless LAN adapter. Conforming to IEEE 802.11g standard for wireless
local area network (WLAN), the ASUS USB Wireless LAN Adapter is
capable of up to 54Mbps data transmission rate using the Direct Sequence
Spread Spectrum (DSSS) and the Orthogonal Frequency Division
Multiplexing technologies.
The ASUS USB Wireless LAN Adapter also comes with the latest wireless
technology developed by ASUS to keep you ahead in the world of wireless
computing.
1.2 Package contents
Check the following items in your ASUS USB Wireless LAN Adapter
package. Contact your retailer if any item is damaged or missing.
ASUS USB Wireless LAN Adapter (WL-167g)
USB 2.0 extension cable (type A to type A)
USB 2.0 universal joint
Neck lace
Support CD
Quick Start Guide
Unless otherwise specified, the term “device” in this User Guide refers
to the ASUS USB Wireless LAN Adapter.
1.3 Features
USB 2.0, OFDM, DSSS, Supports Infrastructure and Ad-hoc networks,
Compatible with IEEE 802.11b and 802.11g devices, USB bus-powered,
Software support
1-2
Chapter 1: Product introduction
1.4 LED indicators
The device comes with a Power, Activity, and Link LED indicators. Refer to
the table below for LED indications.
LED
Status
PWR
ON
The adapter is receiving power from the USB port.
OFF
The adapter is not receiving power from the USB port.
The adapter may be disconnected or the computer is OFF.
ACT
Indication
Blinking The adapter is transmitting or receiving data packets.
OFF
There is no wireless data activity.
ASUS WL-167g USB wireless LAN adapter
1-3
1.5 Network setup
The ASUS USB Wireless LAN Adapter may be used in both Ad-hoc and
Infrastructure network types. The following sections decribe the device
functions in these network types.
Determine your network settings before installing the device to avail all
its features. The following network settings are recommended.
1.5.1 Ad-hoc network
In an Ad-hoc network type, the device connects to another wireless LAN
adapter in a wireless network. No access point (AP) is present in this
wireless environment.
1.5.2 Infrastructure network
In an Infrastructure network, the wireless network is centered on an
access point (AP) that provides a central link for wireless clients to
communicate with each other or with a wired network.
INTERNET
ADSL Modem
1-4
Access Point
Chapter 1: Product introduction
Chapter 2
This chapter provides information on
how to install the ASUS USB Wireless
LAN Adapter.
Installation
2.1 System requirements
Before installing the ASUS USB Wireless LAN Adapter, make sure that
your system meets the following requirements:
•
•
•
•
•
Intel® Pentium® 4 or AMD K7/K8 system
Minimum 64MB system memory
Windows® 98SE/ME/2000/XP operating system
Optical drive (for software installation)
An available USB port (USB 2.0 recommended because USB 1.1 cannot
achieve maximum wireless performance)
2.2 Installation procedures
Follow these instructions to install the ASUS USB Wireless LAN Adapter in
your computer.
1. Install the device drivers and utilities from the support CD.
2. Connect the device to your computer.
NOTE: You must install the ASUS USB Wireless LAN Adapter drivers and
utilities before connecting the device to your computer.
2.2.1 Installing the device drivers and utilities
To install the device driver and
utilities in your computer:
1. Insert the support CD to the
optical drive.
2. Click “Install ASUS WLAN
Card Utilities/Driver” when
the ASUS Wireless LAN
Card installation window
appears.
3. The device drivers and
utilities are copied into your computer.
NOTE: If Autorun is NOT enabled in your computer, browse the contents of
the support CD and double click the Setup.exe file to run the CD.
* See limitations on page 4-5
2-2
Chapter 2: Installation
Installation procedures (Cont.)
2.2.2 Installing the device
To install the ASUS USB Wireless LAN
Adapter in your computer:
1. Insert to any USB port.
2. When “Found New Hardware” dialog
box appears, select
“Install...automatically” and follow the
instructions.
Windows® 2000 users - A Digital Signature Not Found dialog box may
appear. Click Yes to proceed.
Windows® XP users - A Windows Logo Testing Not Found dialog box may
appear. Click Continue Anyway to proceed.
3. After completing installation, configure the ASUS USB Wireless LAN
Adapter using ASUS Wireless Settings.
Support Software
Control Center
The Control Center utility is a
management software that launches
applications and configures network settings. The Control Center starts
automatically when the system boots and displays the Control Center icon in
the Windows® taskbar. The Control Center icon serves as an application
launcher, and indicator of signal quality and Internet connection.
Control Center right-click menu
Right-clicking the Control Center icon
displays the right-click menu. The following
sections describe the right-click menu
utilities.
ASUS WL-167g USB wireless LAN adapter
2-3
2-4
Chapter 2: Installation
Chapter 3
This chapter provides information on
the softwares and utilities inside the
support CD
Software support
3.1 Control Center
The Control Center utility is a
management software that launches
applications and configures network
settings. The Control Center starts
automatically when the system boots and displays the Control Center icon
in the Windows® taskbar. The Control Center icon serves as an application
launcher, and indicator of signal quality and Internet connection.
3.1.1 Control Center icons
The Control Center icon indicates the quality of link to the access point
and connection to the Internet. Refer to the table below for icon
indications.
Infrastructure network (wireless LAN adapter to an access point)
Excellent link quality and
connected to the Internet
Excellent link quality but not
connected to the Internet
Good link quality and
connected to the Internet
Good link quality but not
connected to the Internet
Fair link quality and
connected to the Internet
Fair link quality but not
connected to the Internet
Poor link quality but
connected to the Internet
Poor link quality and not
connected to the Internet
Not linked but connected
to the Internet
Not linked and not
connected to the Internet
Ad-hoc network (wireless LAN adapter to other Wi-Fi device)
Linked
Not Linked
Connected to the Internet
3-2
Chapter 3: Software support
3.1.2 Control Center right-click menu
Right-clicking the Control Center icon
displays the softwares and utilities
the ASUS USB Wireless LAN
Adapter supports. Refer to the
succeeding sections for details on
these utilities and softwares.
3.1.3 Control Center left-click menu
Left-clicking the Control Center icon
displays the left-click menu.
Search & Connect – View available wireless networks within range.
Wireless Option – Sets your
Windows® XP wireless networking
environment. The Wireless Option
window appears when you select this
option. Select “Only use ASUS
utilities and disable XP wireless
function” to avail all ASUS USB
wireless LAN adapter features.
Click OK.
ASUS WL-167g USB wireless LAN adapter
3-3
3.2 Wireless Settings
The Wireless Settings window is
composed of the property window
and tabbed property sheets. Click
the icons in the property window to
display their tabbed property
sheets.
Tabbed property sheets
Property window
The Wireless Settings is the main
interface that allows you to control
the ASUS wireless LAN adapter.
Use the Wireless Settings to view
the operational and connection
status, or to modify the wireless
LAN adapter configuration.
3.2.1 Status
Status tab
The Status tab provides general
information on the wireless LAN
adapter.
Association State. This field
displays the connection status and
MAC address of the network where
the system is connected.
Service Set Identifier (SSID). This
field displays the SSID of the
network to which the card is
associated or is intending to join. The SSID is a group name shared by
every member of a wireless network. Only client PCs with the same SSID
are allowed to establish a connection.
The MAC Address field displays the hardware address of a device
connected to a network.
The Current Channel field displays the radio channel that the card is
currently tuned. The channel changes as wireless LAN adapter scans the
available channels.
The Current Data Rate field displays the data transfer rate between the
wireless LAN adapter and the access point.
3-4
Chapter 3: Software support
Rescan button - Click to allow wireless LAN adapter to scan available
wireless networks and to connect to the network with the best signal quality.
Change SSID button - Click to change the SSID. Clicking this button
opens the Config-Basic window. See “Basic tab” on page 3-7.
Search and Connect button - Click to view all wireless networks within
the range of your system. Clicking this button opens the Site Survey
window. See page 3-9.
Connection tab
The Connection tab provides
real-time information on connection
throughput, frame errors, signal
strength, link quality and overall
connection quality in graphical
representation.
IP Config tab
The IP Config tab displays the
current host and Ethernet adapter
configurations. IP Config displays
TCP/IP information including the IP
address, subnet mask, default
gateway, DNS and Windows Internet
Naming Service (WINS)
configurations.
Use the IP Config Tab to verify your
network settings.
IP Release. Click to release the DHCP IP address for the wireless LAN adapter.
IP Renew. Click to renew the DHCP IP address for the wireless LAN adapter.
Ping. Click to display the Ping tab. Use ping to verify a connection to a particular
host name or IP address.
The IP Release and IP Renew buttons may only be used on a
DHCP-configured wireless LAN adapter.
ASUS WL-167g USB wireless LAN adapter
3-5
Ping tab
The Ping tab allows you to verify the
connection of your computer with
another computer in a network. To
ping a connection:
1. Type the IP address of the
connection you want to verify in
the IP Address field.
2. Configure the ping session by
assigning the size and count of
packet to send, and the time limit
for a ping session to continue (in milliseconds).
3. Click the Ping button.
During the ping session, the Ping
button toggles into a Stop button.
Click Stop anytime to cancel the
ping session.
The session field displays
information on the verified
connection including the roundtrip
time (minimum, maximum, and
average) and packets sent, received,
and lost after a ping session.
Click the Clear button to clear the session field.
3-6
Chapter 3: Software support
3.2.2 Configuration
Basic tab
The Basic tab provides general
information on network types and
other configurations.
Network Type. Select the type of
network that you wish to use. Select
Infrastructure mode to establish a
connection with an access point
(AP). In this mode, your system can
access wireless LAN and wired LAN
(Ethernet) via the AP. Select the Ad
Hoc mode to communicate directly
with other mobile clients within the wireless LAN adapter range.
Network Name - Displays the network SSID. The network SSID is a string
use to identify a wireless LAN. Assign different SSIDs to segment the
wireless LAN and increase network security. Set the SSID to a null string
to allow your station to connect to any available access point. Null string
may not be used in Ad-hoc mode.
Channel. In Infrastructure mode, wireless LAN adapter automatically
tunes in to the access point channel. In Ad-hoc mode, select a channel
that is allowed for use in your country/region.
Data Rate. Sets the data transmission rate to Fix or Auto. Select Fully Auto
to allow the device to adjust to the most suitable connection. You may also
fix data transfer rates to 54, 48, 36, 24, 18, 12, 11, 9, 6, 5.5, 2 and 1 Mbps.
Note: Operating the device at very high data rates reduces the operating
range. When the “Data Rate” is changed, the adapter will survey
available APs and connect to the AP with the strongest signal.
Others. Click the WEP or Advanced link to open the Encryption or
Advanced property tab sheet.
ASUS WL-167g USB wireless LAN adapter
3-7
Encryption tab
Wireless data transmissions
between your wireless LAN adapter
and the AP are secured using the
Wired Equivalent Privacy (WEP)
encryption. Check the Data
encryption (WEP enabled) option to
assign the WEP keys.
Check the Network Authentication
(Shared Mode) option if you wish to
use a network key to authenticate a
preferred wireless network.
Unchecking this option allows the network to operate on an Open System mode.
Key Format allows you to set a hexadecimal digit or ASCII character WEP key.
Key Length allows you to choose a 64-bit or a 128-bit WEP key. A 64-bit
encryption contains 10 hexadecimal digits or 5 ASCII characters. A 128-bit
encryption contains 26 hexadecimal digits or 13 ASCII characters.
All wireless clients in a network must have identical WEP keys to
communicate with each other or with an access point.
Two ways to assign WEP keys
Manual Assignment. For a 64-bit encryption, enter 10 hexadecimal digits
(0~9, a~f, A~F) or 5 ASCII characters in each of the four WEP keys. For
128-bit encryption enter 26 hexadecimal digits (0~9, a~f, A~F) or 13 ASCII
characters in each of the four WEP keys.
Automatic Generation. Type a combination of up to 64 letters, numbers,
or symbols in the Passphrase field. The Wireless Settings utility uses an
algorithm to generate four WEP keys based on the typed combination.
3-8
Chapter 3: Software support
•
64-bit and 40-bit WEP keys use the same encryption method and
can interoperate on wireless networks. This lower level of WEP
encryption uses a 40-bit (10 hexadecimal digits assigned by the
user) secret key and a 24-bit Initialization Vector assigned by the
wireless LAN adapter. 104-bit and 128-bit WEP keys use the same
encryption method.
•
After assigning the WEP keys, click APPLY to save and activate
the encryption. Manually assigned encryptions are more secure
than automatically generated encryptions.
•
Use Manual Assignment instead of Automatic Generation if you are
not sure whether other wireless clients use the same algorithm as
that of wireless LAN adapter.
•
Keep a record of the WEP encryption keys.
3.2.3 Site Survey
The Site Survey window displays
the available networks within the
wireless LAN adapter range and the
following network settings.
BSSID - The IEEE MAC address of
the available wireless networks.
SSID - SSID (service set identifier) of
the network.
CH - Direct sequence channel used
by the network.
RSSI - Received Signal Strength Indicator (RSSI) in dBm.
Type - wireless network mode. AP indicates an Infrastructure network
type. STA indicates an Ad-hoc network type.
WEP - shows whether a network has an enabled (On) or disabled (Off)
WEP encryption.
Select an available network and click Connect to establish connection.
Click Search to rescan available networks.
ASUS WL-167g USB wireless LAN adapter
3-9
3.2.4 About Wireless Settings
Click the About icon to view the
software version, driver version, and
copyright information.
3.2.5 Link State
Displays the current connection status of the wireless LAN adapter to the
AP or to other Wi-Fi devices. An icons represents the Link State for easy
identification. Refer to the table below for icon indications.
Table of Icon Indications
3-10
Excellent link quality (Infrastructure)
Not linked (Infrastructure)
Good link quality (Infrastructure)
Linked (Ad-hoc)
Fair link quality (Infrastructure)
Not linked (Ad-hoc)
Poor link quality (Infrastructure)
Scanning
Chapter 3: Software support
3.2.6 Command icons
Apply. Click to apply the changes
made on the Wireless Settings utility.
OK. Click to close the Wireless
Settings utility window.
Cancel. Click to cancel any changes
made on the Wireless Settings utility.
Clicking Cancel closes the Wireless
Settings utility window.
Help. Click to display the help menu.
3.2.7 Other right-click options
Activate Configuration
This option allows you to select the wireless profile to use.
Mobile Manager
Click this button to launch the Mobile Manager utility. See section 3.2
“Mobile Manager” for details.
Site Monitor
Click this button to launch the Site Monitor utility. See section 3.3 “Site
Monitor” for details.
Help Menu
The Control Center utility has a Help menu to guide you in using the
Control Center and Wireless Settings utilities. Right-click the Control
Center icon, then select Help. Select a utility to display the help window.
Preferences
The Preferences window allows you
to customize the Control Center Utility
settings.
ASUS WL-167g USB wireless LAN adapter
3-11
About Control Center
Select the About Control Center
option to display the Control Center
software version and copyright
information.
3-12
Chapter 3: Software support
3.3 Mobile Manager
The Mobile Manager is a convenient tool to setup and manage network
location settings. This utility allows users to configure multiple alternative
configurations for different locations. You need to set up this utility once so
you can easily switch configurations when you change your location.
To launch the Mobile Manager utility:
1. Click the Windows® Start button. Select Programs > ASUS Utility >
WLAN Card > Mobile Manager, or right-click the Control Center icon
on the Windows® taskbar, then select Mobile Manager.
2. The Mobile Manager main window appears.
You may use the Mobile Manager utility main window to create, edit, or
activate a configuration. The main window displays the menu bar, tool
bar, and existing configurations.
The toolbar buttons allow quick access to some common commands in
the Mobile Manager utility. All toolbar button commands are also
available from the menu bar.
ASUS WL-167g USB wireless LAN adapter
3-13
File menu
New Configuration
– Select this option to launch the New
Configuration Wizard. See the next section for details.
Import Configuration
an INI File.
– Select this option to load a configuration from
Export Configuration
– Save the selected configuration (containing
Wireless Settings, TCP/IP Settings, Network Settings, etc.) to an INI file.
The INI file may be saved on a floppy disk, and may be imported by other
computers with the Mobile Manager utility. You may also use this file as
backup.
Exit
– Select to close the Mobile Manager utility.
Mobilize menu
Auto Roaming
– Activating this option allows the ASUS USB Wireless
LAN Adapter to switch to another association you have specified when
changes to an existing association occured. If no associations are made,
Auto Roaming automatically connects to a wireless network based on your
specified configurations.
Activate Configuration
– Applies the configuration you selected from
the list. Follow the screens instructions to activate a configuration.
Activating a configuration requires system restart when you are using
Windows® 98/ME OS. Windows® 2000/XP OS does not require system
restart after you activate a configuration.
Edit menu
Edit Configuration
– The Edit Configuration option allows you to edit
selected configuration items. See the “Editing a Configuration” section on
page 3-19 for details.
Rename
– Changes the name of the selected configuration.
Copy
– Duplicates the selected configuration.
Delete
– Discards the selected configuration.
Up
– Raises the position of a selected wireless network configuration
in the preferred network list.
3-14
Chapter 3: Software support
Down – Lowers the position of the selected wireless network configuration
in the preferred network list.
Edit menu commands appear when you right-click a configuration in the
Mobile Manager window.
View menu
Large Icons
– Displays large icons for each configuration.
Small Icons
– Displays small icons for each configuration.
List
– Shows a list of available configurations.
– Displays the name, type, and description of a selected
Details
configuration.
Help menu
Contents
– Displays the WinHelp window for online help.
– Displays the Mobile Manager version
About Mobile Manager
number and copyright information. Click on the ASUS logo to open the
ASUS website.
3.3.2 Creating a new configuration
To create a new configuration:
1. Launch the New Configuration Wizard by clicking File from the menu
bar, then select New Configuration from the drop-down menu, or
double-clicking the New Configuration
icon on the Mobile
Manager toolbar. The New Configuration Wizard dialog box appears.
ASUS WL-167g USB wireless LAN adapter
3-15
2. Choose the type of configuration
you want to create. The
configuration types are described
below. Click Next when done.
• ASUS Wireless Local Area Network Configuration. Select this option
if you have an installed ASUS USB Wireless LAN Adapter in your
computer.
• Wired Local Area Network Configuration. Select this if your computer
has an installed network interface card other than ASUS USB Wireless
LAN Adapter.
• Dialup Networking Configuration. Select this option if your computer
has an installed modem.
3. Enter the name and description
of the configuration you wish to
create, then click Next.
3-16
Chapter 3: Software support
4. Configure the wireless settings
including the network type, SSID,
channel and WEP encryption.
Click Next when done.
5. Set the IP address of the
configuration using this window.
Specify the IP address using the
DHCP server (automatic) or
manual assignment. The wizard
auto-detects and displays the
current system settings.
Click Next when done.
6. Enter the computer name, then
click Next.
ASUS WL-167g USB wireless LAN adapter
3-17
7. Use this window to set the proxy
server and printer sharing.
Click Advanced to display the
proxy server and printer sharing
options.
Click Next when finished.
8. Check the Activate
Configuration Now option to
start using the created
configuration. The Mobile
Manager window displays the
created configuration when it is
not activated. Click Finish to
close the wizard.
3-18
Chapter 3: Software support
3.3.3 Editing a configuration
To edit a configuration:
1. Select a configuration from the
Mobile Manager window.
2. Click Edit from the menu bar,
then select Edit Configuration.
The Edit Configuration dialog box
appears. Navigate through the
windows by clicking the buttons
on the left.
General settings
Name – The configuration name indicates the location from where you are
dialing or connecting to a network. For example, name your configuration
“Work-Meeting Room” if you are using this connection at your workplace
meeting room.
Description – Enter additional details of the configuration in this field. This
field is optional.
Network settings -Wireless tab
Priority of Preferred Network –
This field allows you to select the
priority of the preferred network.
Network Type
Infrastructure – Select the
Infrastructure mode to establish
connection to an access point.
Ad-hoc – Select the Ad-hoc mode
to communicate directly with other
WLAN devices without using an
access point.
ASUS WL-167g USB wireless LAN adapter
3-19
SSID – SSID stands for Service Set Identifier, a string used to identify a
wireless LAN. You can only connect with an Access Point, that has the
same SSID. Use different SSIDs to segment the wireless LAN and add
security.
Channel – The Channel field allow you to select the radio channel for the
ASUS USB Wireless LAN Adapter. In an Infrastructure network, your
wireless LAN adapter automatically selects the correct frequency channel
required to communicate with an Access Point.
WEP – This option allows you to disable or enable (64-bit or 128-bit) WEP
encryption. The WEP Key is a 64-bit (5 byte) or 128-bit (13 byte)
hexadecimal digit use to encrypt transmitted data packets and decrypt
received data packets.
Network settings -Identification tab
Computer name – Assign your computer a unique name of up to 15
characters. The computer name allows other users in a network to
recognize your computer. The computer name is generally the same with
the DNS hostname.
Avoid using spaces or symbols in your computer name.
TCP/IP settings-Device tab
Select the network adapter you want
to use for this configuration.
This item appears only when
you are edtiting a wired LAN
configuration.
TCP/IP settings-IP Address tab
Obtain an IP address from a DHCP server – The Dynamic Host
Configuration Protocol (DHCP) server assigns IP addresses
automatically within a specified range of devices.
3-20
Chapter 3: Software support
Specify an IP address – Ask your network administrator for the IP
address and subnet mask you should use. Type in the IP Address and
Subnet Mask manually.
TCP/IP settings-Gateway tab
Specify the gateways. You may specify more than one gateway. Set up the
primary gateway first.
Add – Click this button to add a new TCP/IP gateway address. The added
gateway appears in the Default gateways list. Repeat the process to add
another gateway. The value in each gateway field must be between 0 and
255. You can have up to eight IP addresses for gateways.
Edit – Click this button to edit a selected gateway address.
Remove – Click this button to delete a selected gateway address.
TCP/IP settings-DNS tab
The DNS tab allows you to configure the DNS settings of the selected
configuration. This tab also allows you to add a DNS server and arrange
them in order of their use. You may also assign a DNS suffix for a
specified DNS server.
TCP/IP settings-WINS tab
The WINS tab allows you to configure the WINS settings of the selected
configuration. This tab allows you to add WINS addresses and arrange
them in order of their use. This tab also allows you to enable or import
LMHOST lookup and adjust the NetBIOS settings.
Internet settings
A proxy server acts as a security
barrier between your internal network
(Intranet) and the Internet. A proxy
server restricts other people on the
Internet from gaining access to
confidential information on your
internal network or your computer.
Disable Proxy Server – Allows you
to disable the proxy server.
ASUS WL-167g USB wireless LAN adapter
3-21
Enable Proxy Server – Use the Proxy server to access the Internet.
Use the same proxy server for all protocols – Specifies whether you
want to use the same proxy server to gain access to the Internet using all
protocols.
Servers field – Provides fields for you to type the address and port
number of the proxy server you want to use to gain access to the Internet
over HTTP, Secure, FTP, Gopher, and Socks protocol.
Exceptions field
Do not use proxy server for address beginning with – Type the Web
addresses that do not need to be accessed through the proxy server. If
you want to connect to a computer on your Intranet, make sure you type
its address in this box. You may use wild cards to match domain and host
names or addresses, for example, “*.company.com”, “192.72.111.*”.
Bypass proxy server for local addresses – This option allows you to
use the proxy server for all local (Intranet) addresses.
You may gain access to local addresses easier and faster if you do not
use the proxy server.
Sharing settings
I want to set the default printer–
Allows you to select the default
printer for printer sharing.
Default printer – Allows you to
select the default printer from a list
of installed printers.
Click New to add a new printer
using the Windows® Add Printer
Wizard.
Click Properties to display the
properties of a selected printer.
Command buttons
Use these buttons to activate, save, or cancel changes made in the
configuration. Click Close to close the Edit Configuration window. Click
Help to view the help files.
3-22
Chapter 3: Software support
3.4 Site Monitor
The Site Monitor utility measures the signal-to-noise (SNR) values of all
available wireless networks. Use this utility to determine the best
placement of access points in a wireless network.
3.4.1 Launching Site Monitor
To launch the Site Monitor:
• Click the Windows® Start button,
then select Programs > ASUS
Utility > WLAN Card > Site
Monitor, or
• Right-click the Control Center
icon on the Windows taskbar, then select Site Monitor.
The Site Monitor survey message appears. Click OK.
3.4.2 Site Monitor main window
The Site Monitor main window displays the available wireless connections
and the signal-to-noise (SNR) value of a selected connection.
Some Access Points disable their SSID broadcasting to hide themselves
from “Site Survey” or “Site Monitor”. You may join these APs if you know
their SSID.
ASUS WL-167g USB wireless LAN adapter
3-23
3.4.3 Monitoring a connection
To monitor a connection:
1. Select the connection from the list.
2. Click Command from the menu bar, then select monitor. You may also
press <Ctrl> <M> in your keyboard.
The Monitor window appears.
The following connection parameters are displayed in graphical representation.
SNR. This indicates the quality of communications within the current
network. The communication quality is based on signal level and noise level
measurements. The higher the SNR, the better the connection quality.
Communication Quality. This indicates the communication quality of the
Basic Service Set to which the station is connected.
Signal Level. This line specifies the average signal level of the Basic
Service Set to which the station is connected.
Noise Level. Specifies the average noise level of the Frequency Channel
currently used for connection.
Throughput. The Throughput graph sends a specified number of data
packets to the remote host and calculates the average transmission rate in
megabytes per second.
During the test, the Start button toggles to Stop. Click Start button to
begin the link test. Click the Stop button at any time to stop the test.
3-24
Chapter 3: Software support
Chapter 4
This chapter contains a
troubleshooting guide for solving
common problems you may encounter
when using the ASUS USB Wireless
LAN Adapter.
Troubleshooting
Troubleshooting
This troubleshooting guide provides answers to some common problems
which you may encounter while installing and/or using ASUS Wireless
LAN card products. These problems requires simple troubleshooting that
you can perform by yourself. Contact the Wireless LAN Technical Support
if you encounter problems not mentioned in this section.
Problem
My computer does not
recognize the installed
ASUS USB Wireless LAN
Adapter.
A yellow exclamation
point or a red plus sign
appears on the ASUS
802.11b Network Adapter
or ASUS 802.11g
Network Adapter item.
4-2
Action
Verify if the ASUS USB Wireless LAN
Adapter drivers are properly installed by
following these instructions:
1. Open the Control Panel window from
the Windows® desktop.
2. Double-click on the System icon.
3. Windows® 98SE/Me users: Select the
Device Manager tab.
Windows® 2000/XP users: Select the
Hardware tab then click the Device
Manager button.
4. Click the “+” symbol preceeding the
Network Adapters item, then check the
ASUS 802.11 Network Adapter item.
A yellow exclamation point or a red plus
sign preceeding the network adapter
means that the device driver is not
properly installed. Re-install the device
driver following the instructions below.
The device driver is not properly installed.
Follow these instructions to uninstall and
re-install the driver.
1. Insert the Support CD into the CD-ROM
drive.
2. When the ASUS Wireless LAN installation
window appears, click “Uninstall ASUS
WLAN Card Utilities/Driver” option.
3. Restart your computer and repeat the
software installation following the
instructions contained in this User Guide.
Chapter 4: Troubleshooting
Troubleshooting
Problem
Action
I cannot connect to an
Access Point.
• Check if the Network Type of the
device is set to Infrastructure mode.
• Check if the device has the same
Service Set Identifier (SSID) as that of
the AP.
• Check if the device and the AP have the
same Encryption. If WEP encryption is
enabled, set the same WEP keys for
the device and the AP.
• Check if the MAC address of the device
is added in the AP Authorization Table.
Inquire this with your LAN administrator.
• There is poor signal reception. Shorten
the distance between the device and
the access point.
I can connect to an
Access Point but I
cannot connect to the
Internet.
• Check if the device and the AP have the
same Encryption. If WEP encryption is
enabled, set the same WEP keys for
the device and the AP.
• Make sure the network protocol
parameters (IP address, subnet mask,
gateway, and DNS) of your computer
are correctly set.
• Check the proxy settings of the web browser.
I cannot connect to
another station with a
wireless LAN device.
• Check if the Network Type of the
device is set to Ad-hoc mode.
• Check if the device has the same
Service Set Identifier (SSID) with that
of the other station.
• There is poor signal reception. Shorten
the distance between the device and
the station.
• Check if the device and the other station
have the same Encryption. If WEP
encryption is enabled, set the same
WEP keys for the device and the AP.
ASUS WL-167g USB wireless LAN adapter
4-3
Troubleshooting
Problem
Action
I cannot connect to other
computers linked via an
Access Point or Ad-hoc
network.
• Check if the device and the other APs and/
or clients have the same Encryption. If
you enable WEP encryption, you must set
the same WEP keys for the device and
the other AP/s and/or clients.
• Check the TCP/IP settings (IP address,
subnet mask, gateway, and DNS) of your
computer.
• Enable file and printer sharing in each
client computer to allow file sharing.
I always have poor link
quality and low signal.
Do the following to achieve better link
quality and stronger signal:
• Keep the device away from microwave
ovens and large metal objects to avoid
radio interference.
• Shorten the distance between the
device and the AP/station.
Why do I got the warning This warning mesage appears when you
plug the ASUS USB Wireless LAN Adapter
“Hi-Speed USB Device
to a USB 1.1 port.
Plugged Into
Non-Hi-Speed USB Hub”
• For Windows® XP users, you need to
message when I
upgrade your OS to Service Pack 1 to
connected the ASUS
convert your USB ports to USB 2.0.
USB Wireless LAN
®
Adapter to the USB port? • For Windows 2000 users, you must
install Service Pack 4 in order to convert
your USB ports into USB 2.0. You can
download these service packs from the
Windows Update website
(windowsupdate.microsoft.com)
4-4
Chapter 4: Troubleshooting
Troubleshooting
Problem
Action
When I remove the
• This is a limitation with computers
wireless adapter from my
equipped with Intel/NVIDIA USB 2.0
computer running
controller and running the newest
Windows 98SE, my
OrangeWare USB 2.0 driver.
system becomes very
slow and stops
responding.
ASUS WL-167g USB wireless LAN adapter
4-5
4-6
Chapter 4: Troubleshooting