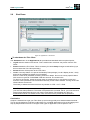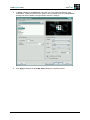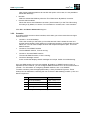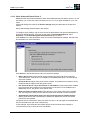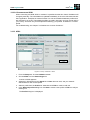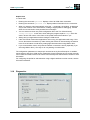
1
eLux® NG Embedded Linux for Thin
Clients Next Generation
Version 1.34
Administrator’s Guide
Build Nr.: 27
UniCon Software GmbH
www.myelux.com
eLux® NG
Information in this document is subject to change without notice. Companies, names and data used in examples herein are
fictitious unless otherwise noted. No part of this document may be reproduced or transmitted in any form or by any means,
electronic or mechanical, for any purpose, without the express consent of UniCon Software GmbH.
© by UniCon 2006 Software GmbH. All rights reserved
eLux is a registered trademark of UniCon Software GmbH in Germany.
Accelerated-X is a trademark of Xi Graphics, Inc.
Adobe, Acrobat Reader and PostScript are registered trademarks of Adobe Systems Incorporated in the United States and/or
other countries.
Broadcom is a registered trademark of Broadcom Corporation in the U.S. and/or other countries.
CardOS is a registered trademark and CONNECT2AIR is a trademark of Siemens AG in Germany and/or other countries.
Cisco and Aironet are registered trademarks of Cisco Systems, Inc. and/or its affiliates in the U.S. and certain other countries.
Citrix, Independent Computing Architecture (ICA), Program Neighborhood, MetaFrame, and MetaFrame XP are registered
trademarks or trademarks of Citrix Systems, Inc. in the United States and other countries.
CUPS and the Common UNIX Printing System are the trademark property of Easy Software Products.
DivX is a trademark of Project Mayo.
Ericom and PowerTerm are registered trademarks of Ericom Software in the United States and/or other countries.
Gemplus is a registered trademark and GemSAFE a trademark of Gemplus.
Linux is a registered trademark of Linus Torvalds.
Macromedia and Shockwave are registered trademarks of Macromedia, Inc. in the United States and/or other countries.
Microsoft, MS, MS-DOS, Windows, Windows NT, Windows Server, Excel and Word are either registered trademarks or
trademarks of Microsoft Corporation in the United States and/or other countries.
palmOne and Tungsten are among the trademarks or registered trademarks owned by or exclusively licensed to palmOne, Inc.
PCL is a registered trademark of Hewlett Packard Company in the United States and/or other countries.
PS/2 and Token Ring are registered trademarks of International Business Machines Corporation.
RealPlayer is a registered trademark of RealNetworks, Inc.
Safesign is a registered trademark of Thales e-Security Ltd.
SAP and SAP product and service names are the trademarks or registered trademarks of SAP AG in Germany and several
other countries.
SICRYPT is a registered trademark of Infineon Technologies Security Solutions GmbH in Germany and/or in other countries.
SSH and SSH product and service names are the trademarks or registered trademarks of SSH Communications Security Ltd.
Sun, Sun Microsystems, Java and Solaris are trademarks or registered trademarks of Sun Microsystems, Inc. in the United
States and other countries.
UNIX is a registered trademark of The Open Group in the United States and other countries.
All other Trade Names referred to are the Servicemark, Trademark or Registered Trademark of the respective manufacturers.
This product includes software developed by The XFree86 Project, Inc (http://www.xfree86.org/) and its contributors.
The end user takes full responsibility for his or her actions. Neither UniCon Software GmbH nor its partners assume liability for
any errors or damage resulting from the information contained herein.
Build # 27
www.myelux.com
eLux® NG
CONTENTS
1
Before You Begin ........................................................................................................................ 2
1.1
1.2
1.3
Who Should Use This Manual....................................................................................................... 2
About This Guide........................................................................................................................... 2
Conventions and Abbreviations .................................................................................................... 3
1.3.1 Conventions...................................................................................................................... 3
1.3.2 Commonly-Used Abbreviations........................................................................................ 3
Finding More Information .............................................................................................................. 4
eLux NG on the World Wide Web ................................................................................................. 4
Overview of eLux NG .................................................................................................................... 4
1.6.1 What is eLux NG? ............................................................................................................ 4
1.6.2 Features of eLux NG ........................................................................................................ 6
1.6.3 New Features in eLux NG 1.8 .......................................................................................... 7
1.6.4 New Features in eLux NG 1.9 .......................................................................................... 8
1.6.5 New Features in eLux NG 1.10 ........................................................................................ 8
1.6.6 New Features in eLux NG 1.11 ........................................................................................ 8
1.6.7 New Features in eLux NG 1.12 ........................................................................................ 8
1.6.8 New Features in eLux NG 1.14 ........................................................................................ 8
1.6.9 New Features in eLux NG 1.17 ........................................................................................ 8
1.6.10 New Features in eLux NG 1.20 ........................................................................................ 9
1.6.11 New Features in eLux NG 1.21 ........................................................................................ 9
1.6.12 New Features in eLux NG 1.22 ........................................................................................ 9
1.6.13 New Features in eLux NG 1.23 ........................................................................................ 9
1.6.14 New Features in eLux NG 1.25 ........................................................................................ 9
1.6.15 eLux NG Software Packages ......................................................................................... 10
1.4
1.5
1.6
2
Quick Start ................................................................................................................................. 12
2.1
2.2
2.8
First Boot ..................................................................................................................................... 13
First Configuration Wizard........................................................................................................... 15
2.2.1 Managed Device............................................................................................................. 15
2.2.1.1 Step 1: Activating Manager ....................................................................................... 15
2.2.1.2 Step 2: Manager Address ......................................................................................... 15
2.2.1.3 Step 3: Manager Groups........................................................................................... 16
2.2.1.4 Step 4: Summary....................................................................................................... 16
2.2.2 Manually Configured Device .......................................................................................... 17
2.2.2.1 Step 1: Deactivating Manager................................................................................... 17
2.2.2.2 Step 2: Mouse / Keyboard......................................................................................... 17
2.2.2.3 Step 3: Summary....................................................................................................... 18
Troubleshooting........................................................................................................................... 18
eLux NG Interface ....................................................................................................................... 19
User Settings............................................................................................................................... 20
2.5.1 Making changes ............................................................................................................. 20
2.5.2 Screen ............................................................................................................................ 21
2.5.3 Network .......................................................................................................................... 22
2.5.4 Network Hardware.......................................................................................................... 23
Defining an Application ............................................................................................................... 24
Sessions...................................................................................................................................... 25
2.7.1 Starting an Application ................................................................................................... 25
2.7.2 Exiting an Application ..................................................................................................... 25
Shut Down................................................................................................................................... 26
3
Setup 27
3.1
3.2
General........................................................................................................................................ 28
Network ....................................................................................................................................... 29
3.2.1 Dynamic Host Configuration Protocol ............................................................................ 29
3.2.2 Bootstrap Protocol .......................................................................................................... 29
3.2.3 Manual Entry .................................................................................................................. 30
3.2.4 Setting the Host Name via DHCP .................................................................................. 30
3.2.5 Setting a Hosts List When No Name Server Is Present................................................. 31
Desktop ....................................................................................................................................... 32
2.3
2.4
2.5
2.6
2.7
3.3
Build # 27
www.myelux.com
3.4
3.5
3.6
3.7
3.8
3.9
3.10
3.11
3.12
3.13
eLux® NG
3.3.1 Time Server .................................................................................................................... 33
3.3.2 Desktop Themes ............................................................................................................ 34
3.3.3 Taskbar........................................................................................................................... 34
3.3.4 Background Image ......................................................................................................... 34
3.3.5 Starter............................................................................................................................. 34
3.3.6 Workspaces.................................................................................................................... 34
Screen ......................................................................................................................................... 35
3.4.1 Safe Boot........................................................................................................................ 38
Mouse / Keyboard ....................................................................................................................... 38
3.5.1 Advanced Mouse and Keyboard Settings ...................................................................... 39
3.5.2 Consoles......................................................................................................................... 40
Firmware ..................................................................................................................................... 41
3.6.1 Updating over the Network (Base OS) ........................................................................... 41
3.6.2 Package Update from a CD-ROM or USB Stick ............................................................ 42
3.6.2.1 Required Firmware.................................................................................................... 43
3.6.2.2 Activating USB port ................................................................................................... 44
3.6.3 Starting an update .......................................................................................................... 44
3.6.4 Microsoft Internet Information Server ............................................................................. 45
3.6.5 Update Log ..................................................................................................................... 46
3.6.6 To Reload the Configuration from Scout Enterprise ...................................................... 46
3.6.7 Resetting the Thin Client to Factory-Delivered Default Settings.................................... 46
Security ....................................................................................................................................... 47
3.7.1 Device Password............................................................................................................ 47
3.7.2 Local Security Settings................................................................................................... 48
3.7.3 Authorization Hotkey ...................................................................................................... 50
3.7.4 User Authorization .......................................................................................................... 51
3.7.4.1 “Help! I’m locked out!” ............................................................................................... 53
3.7.5 User Variables ................................................................................................................ 53
3.7.5.1 Application Possibilities for User Variables ............................................................... 54
3.7.6 Manager Settings ........................................................................................................... 55
3.7.7 Mirroring Settings ........................................................................................................... 55
Multimedia (Volume) ................................................................................................................... 56
Drives .......................................................................................................................................... 56
3.9.1 Samba ............................................................................................................................ 57
3.9.2 Network File System ...................................................................................................... 58
3.9.3 Internal Drives ................................................................................................................ 58
3.9.4 USB Drives ..................................................................................................................... 59
3.9.5 Mount points ................................................................................................................... 59
Browser Home Directory ............................................................................................................. 60
Printer.......................................................................................................................................... 61
3.11.1 Local Printer ................................................................................................................... 62
3.11.2 Network Printer............................................................................................................... 64
3.11.3 Citrix Universal Printer Driver 2 ...................................................................................... 65
3.11.4 TCP Direct Print.............................................................................................................. 66
3.11.5 Thin Client as Print Server ............................................................................................. 67
3.11.6 ThinPrint ......................................................................................................................... 68
3.11.7 CUPS.............................................................................................................................. 69
Hardware..................................................................................................................................... 70
3.12.1 USB Devices .................................................................................................................. 70
3.12.1.1 USB card readers ................................................................................................. 70
3.12.1.2 USB network adapter............................................................................................ 70
3.12.1.3 USB mass storage devices .................................................................................. 71
3.12.1.4 USB mouse / keyboard......................................................................................... 71
3.12.2 RAM Disk........................................................................................................................ 71
3.12.3 Multiple Monitors ............................................................................................................ 71
3.12.4 COM Ports...................................................................................................................... 71
Network Hardware....................................................................................................................... 72
3.13.1 Ethernet .......................................................................................................................... 72
3.13.2 ISDN ** ........................................................................................................................... 73
3.13.2.1 ISDN Card ............................................................................................................ 73
Build # 27
www.myelux.com
eLux® NG
3.18
3.13.2.2 USB Network Adapter........................................................................................... 73
3.13.2.3 Configuring Network Hardware Settings for ISDN ............................................... 73
3.13.2.4 Comments on ISDN.............................................................................................. 75
3.13.3 ADSL .............................................................................................................................. 75
3.13.4 Modem............................................................................................................................ 77
3.13.5 Token Ring ** ................................................................................................................. 79
3.13.6 Wireless LAN ** .............................................................................................................. 80
3.13.6.1 Cisco Aironet 350 Series Network Cards ............................................................. 80
3.13.6.2 D-Link DWL-G520 Network Card ......................................................................... 84
3.13.6.3 Fujitsu Siemens WLAN D1700 USB Network Adapter......................................... 88
Remote Management.................................................................................................................. 90
Smart Card .................................................................................................................................. 91
3.15.1 Configuring Smart Card Hardware Settings................................................................... 91
3.15.2 Local Authentication ....................................................................................................... 92
3.15.3 User Roaming................................................................................................................. 94
3.15.4 Citrix Logon .................................................................................................................... 95
3.15.5 RDP Logon ..................................................................................................................... 95
Mirroring ...................................................................................................................................... 96
VPN ............................................................................................................................................. 99
3.17.1 Cisco VPN Client ** ........................................................................................................ 99
Diagnostics................................................................................................................................ 102
4
Configuring Applications ....................................................................................................... 105
4.1
Introduction................................................................................................................................ 106
4.1.1 Copying Between Applications..................................................................................... 107
ICA Terminal Session ............................................................................................................... 108
4.2.1 Remote Desktop........................................................................................................... 108
4.2.2 Microsoft Windows Application..................................................................................... 109
4.2.3 Smart Card User Roaming ........................................................................................... 110
4.2.4 Citrix ICA Client for Linux – Advanced Citrix ICA Settings........................................... 110
4.2.5 Client Drive Mapping .................................................................................................... 112
4.2.6 COM Port Mapping....................................................................................................... 113
4.2.7 Handhelds .................................................................................................................... 117
4.2.8 Server Browsing ........................................................................................................... 119
4.2.9 Citrix Secure Gateway.................................................................................................. 124
4.2.10 Tool xcapture................................................................................................................ 124
Accessing Citrix Published Applications ................................................................................... 126
4.3.1 Via Application Definition.............................................................................................. 126
4.3.2 Via Citrix ICA Client for Linux ....................................................................................... 127
4.3.3 Via Web Interface ......................................................................................................... 127
4.3.4 Via Program Neighborhood Agent ............................................................................... 128
4.3.5 Via Program Neighborhood Light ................................................................................. 133
4.3.6 Troubleshooting............................................................................................................ 135
RDP........................................................................................................................................... 136
4.4.1 Remote Desktop........................................................................................................... 136
4.4.2 Windows Application .................................................................................................... 137
4.4.3 Session Parameters ..................................................................................................... 138
4.4.4 Command RDESKTOP ................................................................................................ 140
Internet ...................................................................................................................................... 140
4.5.1 Local Browser............................................................................................................... 140
4.5.1.1 Opera ...................................................................................................................... 140
4.5.1.2 Mozilla ..................................................................................................................... 140
4.5.1.3 Firefox ..................................................................................................................... 141
4.5.1.4 Configuring a Browser Application .......................................................................... 141
4.5.1.5 Kiosk Mode.............................................................................................................. 142
4.5.2 Mail Clients ................................................................................................................... 143
4.5.2.1 Thunderbird ............................................................................................................. 143
4.5.3 Web Tools .................................................................................................................... 145
4.5.3.1 Adobe Acrobat Reader............................................................................................ 145
4.5.3.2 Movie Player............................................................................................................ 145
4.5.3.3 RealPlayer............................................................................................................... 145
3.14
3.15
3.16
3.17
4.2
4.3
4.4
4.5
Build # 27
www.myelux.com
4.6
4.7
4.8
eLux® NG
4.5.3.4 Java Plug-in............................................................................................................. 146
SAPGUI..................................................................................................................................... 147
4.6.1 Entering Connection Data ............................................................................................ 148
Emulation .................................................................................................................................. 154
4.7.1 Tarantella...................................................................................................................... 155
4.7.2 Terminal Emulation for Motif ........................................................................................ 155
4.7.3 eterm for UNIX Systems............................................................................................... 156
4.7.3.1 Key Definition File “eterm.map”............................................................................... 156
4.7.4 X11 for X Applications Using the Local X Server ......................................................... 160
4.7.5 XDMCP......................................................................................................................... 161
4.7.6 VNC .............................................................................................................................. 163
4.7.7 PowerTerm InterConnect ............................................................................................. 164
Local.......................................................................................................................................... 166
4.8.1 XTerm (Local Shell)...................................................................................................... 166
4.8.2 Resource Display ......................................................................................................... 168
4.8.3 Secure Shell ................................................................................................................. 169
4.8.4 User-Defined Commands............................................................................................. 171
4.8.5 Calculator ..................................................................................................................... 173
4.8.6 Adobe Acrobat Reader................................................................................................. 174
4.8.7 File Manager................................................................................................................. 174
4.8.8 Text Editor .................................................................................................................... 176
4.8.9 Movie Player................................................................................................................. 177
4.8.10 NoMachine ................................................................................................................... 178
4.8.11 Virtual Keyboard ........................................................................................................... 179
5
Troubleshooting ...................................................................................................................... 181
5.1
5.2
5.3
5.4
eLux NG Upgrade License........................................................................................................ 182
Safe Boot................................................................................................................................... 183
Factory Reset ............................................................................................................................ 184
Solutions to Common Problems................................................................................................ 185
6
Recovery Installation .............................................................................................................. 188
7
Shortcut Keys .......................................................................................................................... 189
Appendix 1: Desktop......................................................................................................................... 190
A. eLux NG Desktop............................................................................................................................ 190
B. Desktop Options.............................................................................................................................. 190
C. Taskbar ........................................................................................................................................... 191
Appendix 2: Memory Usage ............................................................................................................. 192
A. Flash Memory ................................................................................................................................. 192
B. Main Memory .................................................................................................................................. 192
C. Warning Messages ......................................................................................................................... 192
D. Main Memory Usage....................................................................................................................... 193
Appendix 3: Examples of Internet Profiles ..................................................................................... 194
A. Examples of ADSL Connections..................................................................................................... 194
B. Examples of ISDN Connections...................................................................................................... 194
C. Examples of Modem Connections .................................................................................................. 195
Appendix 4: Configuring Kiosk Mode ............................................................................................. 197
A. Kiosk Mode for Firefox .................................................................................................................... 197
B. Kiosk Mode for Mozilla .................................................................................................................... 198
Appendix 5: Setting Thin Client Time to UTC................................................................................. 200
Appendix 6: Supported Hardware ................................................................................................... 201
Appendix 7: Supported Smart Card Readers ................................................................................. 203
Appendix 8: Port Assignments ........................................................................................................ 205
Index
Build # 27
................................................................................................................................... 208
www.myelux.com
eLux® NG
TABLE OF FIGURES
Figure 1: Boot procedure for the first boot......................................................................................................................................13
Figure 2: First contact: Activating manager ....................................................................................................................................15
Figure 3: First contact: Entering manager IP address....................................................................................................................15
Figure 4: First contact: Manager groups ........................................................................................................................................16
Figure 5: First contact: Summary ...................................................................................................................................................16
Figure 6: First contact: Activating manager ....................................................................................................................................17
Figure 7: First contact: Mouse / Keyboard configuration................................................................................................................17
Figure 8: First contact: Summary ...................................................................................................................................................18
Figure 9: Initial eLux NG screen .....................................................................................................................................................19
Figure 10: Setup .............................................................................................................................................................................20
Figure 11: Setup > Screen .............................................................................................................................................................21
Figure 12: Setup > Network............................................................................................................................................................22
Figure 13: Setup > Hardware .........................................................................................................................................................23
Figure 14: Configuration > ICA.......................................................................................................................................................24
Figure 15: Applications tab .............................................................................................................................................................25
Figure 16: Applications > Shut Down .............................................................................................................................................26
Figure 17: Setup > General ............................................................................................................................................................28
Figure 18: Setup > Network............................................................................................................................................................29
Figure 19: Advanced Network Settings dialog box.........................................................................................................................31
Figure 20: Setup > Desktop............................................................................................................................................................32
Figure 21: Setup > Screen .............................................................................................................................................................35
Figure 22: Define font server dialog box ........................................................................................................................................37
Figure 23: Setup > Mouse / Keyboard............................................................................................................................................38
Figure 24: Hotkeys for switching consoles .....................................................................................................................................40
Figure 25: Setup > Firmware..........................................................................................................................................................41
Figure 26: Required base OS FPMs ..............................................................................................................................................43
Figure 27: Microsoft Internet Information Services Manager .........................................................................................................45
Figure 28: Setup > Security............................................................................................................................................................47
Figure 29: Examples of “All fields modifiable” (left) and “All fields locked” (right) ..........................................................................48
Figure 30: Examples of fields in the Setup tab (left) and Applications tab (right)...........................................................................49
Figure 31: eLux NG screen with security settings - Configuration and Setup tabs disabled..........................................................50
Figure 32: Device password hotkey dialog box..............................................................................................................................50
Figure 33 User Authorization..........................................................................................................................................................51
Figure 34: Setup > Multimedia .......................................................................................................................................................56
Figure 35: Setup > Drives...............................................................................................................................................................57
Figure 36: Define drives dialog box ................................................................................................................................................57
Figure 37: Results of the Test button in the Define drives dialog box ............................................................................................58
Figure 38: Setup > Printer ..............................................................................................................................................................61
Figure 39: Printer definition dialog box (settings for local printer shown)......................................................................................62
Figure 40: Printer definition dialog box (settings for network printer shown)..................................................................................64
Figure 41: MetaFrame XP generic printer drivers ..........................................................................................................................66
Figure 42: Installing an LPR printer ................................................................................................................................................67
Figure 43: Hardware Tab................................................................................................................................................................70
Figure 45: Setup > Hardware > ISDN ............................................................................................................................................73
Figure 46: “Profile” dialog box for ISDN .........................................................................................................................................74
Figure 47: Setup > Hardware > ADSL............................................................................................................................................75
Figure 48: “Profile” dialog box for ADSL.........................................................................................................................................76
Figure 49: Setup > Hardware > Modem .........................................................................................................................................77
Figure 50:” Profile” dialog box for modem ......................................................................................................................................78
Figure 51: Setup > Hardware > Token Ring...................................................................................................................................79
Figure 52: Setup > Hardware > Wireless LAN ...............................................................................................................................80
Figure 53: Setup > Hardware > Wireless LAN > Edit button ..........................................................................................................81
Figure 54: Cisco Aironet Client Utility interface ..............................................................................................................................82
Figure 55 Setup > Hardware > Wireless LAN ...............................................................................................................................85
Figure 56 Setup > Hardware > Wireless LAN > WEP ..................................................................................................................85
Figure 57 Setup > Hardware > Wireless LAN > WPA .................................................................................................................86
Figure 58 Setup > Hardware > Wireless LAN > IEEE802.1x .......................................................................................................87
Figure 59: Setup > Hardware > Wireless LAN ...............................................................................................................................88
Figure 61: Smart card domain field in Setup > Network > Advanced network settings dialog box ................................................93
Figure 62: Example mirroring session – eLux NG desktop (display 0) ..........................................................................................97
Figure 63: Example mirroring session – XDMCP session (display number depends on hardware platform) ................................98
Figure 64: Initiating an encrypted session with Cisco VPN ..........................................................................................................101
Figure 65: Diagnostics tab............................................................................................................................................................103
Figure 66: Application definition dialog box ..................................................................................................................................106
Figure 67: ICA configuration – Remote Desktop ..........................................................................................................................108
Figure 68: ICA configuration – MS Windows application .............................................................................................................109
Figure 69: Accessing Citrix advanced settings.............................................................................................................................110
Figure 70: Citrix ICA Client dialog box .........................................................................................................................................111
Figure 71: Citrix ICA Client for Linux – Drive Mapping.................................................................................................................112
Figure 72: CA certificates for Citrix ICA........................................................................................................................................124
Figure 73: ICA configuration – Published application...................................................................................................................126
Figure 74: Citrix ICA Client for Linux – Connection view..............................................................................................................128
Figure 75: Citrix ICA Client for Linux – PNAgent page.................................................................................................................129
Build # 27
www.myelux.com
eLux® NG
Figure 76: Definition of the PNAgent application..........................................................................................................................130
Figure 77: PNAgent ......................................................................................................................................................................132
Figure 78: Configuring PNLight ....................................................................................................................................................133
Figure 79: How PNL definitions appear to Thin Client user .........................................................................................................134
Figure 80: RDP client configured for a remote desktop ...............................................................................................................136
Figure 81: RDP client configured for a terminal server application ..............................................................................................137
Figure 82: RDP client session settings: screen............................................................................................................................138
Figure 83: RDP client session settings: advanced .......................................................................................................................138
Figure 84: RDP client session settings: local resources ..............................................................................................................139
Figure 85: Browser application .....................................................................................................................................................141
Figure 86: Definition of the Thunderbird mail client......................................................................................................................143
Figure 87: Einstellung in Firefox ...................................................................................................................................................144
Figure 88: SAP/R3 application definition in eLux NG...................................................................................................................147
Figure 89: Configuring SAPGUI (automatically): Connection dialog box .....................................................................................149
Figure 90: Configuring SAPGUI (automatically): Preferences dialog box ....................................................................................149
Figure 91: Configuring SAPGUI (automatically): Add New Connection dialog box......................................................................150
Figure 92: Configuring SAPGUI (automatically): Connection dialog box (connections configured).............................................151
Figure 93: Configuring SAPGUI (manually): Connection dialog box............................................................................................151
Figure 94: Configuring SAPGUI (manually): Add New Connection dialog box (System tab).......................................................152
Figure 95: Configuring SAPGUI (manually): Add New Connection dialog box (Advanced tab)...................................................152
Figure 96: Configuring SAPGUI (manually): Connection dialog box (connections configured) ...................................................153
Figure 97: Application definition dialog box for an emulation .......................................................................................................154
Figure 98: Level switching ............................................................................................................................................................157
Figure 99: Key sequences for ASCII control characters for eterm.map .......................................................................................159
Figure 100: Application definition dialog box for an X11 emulation..............................................................................................160
Figure 101: XDMCP session ........................................................................................................................................................161
Figure 102: VNC viewer ...............................................................................................................................................................163
Figure 103: PowerTerm configuration ..........................................................................................................................................164
Figure 104: Local shell (XTerm) ...................................................................................................................................................166
Figure 105: Resource Display ......................................................................................................................................................168
Figure 106: Application definition dialog box for SSH ..................................................................................................................169
Figure 107: Customized commands.............................................................................................................................................171
Figure 108: Calculator ..................................................................................................................................................................173
Figure 109: Message when eLux NG is not licensed ...................................................................................................................182
Figure 110: The Reset button in Setup > Firmware .....................................................................................................................184
Figure 113: Taskbar .....................................................................................................................................................................191
Figure 114: Low memory warnings ..............................................................................................................................................192
Figure 115: Main memory usage table .........................................................................................................................................193
Build # 27
eLux® NG
www.myelux.com
1 Before You Begin
1.1
Who Should Use This Manual
This manual is for system administrators responsible for installing, configuring, deploying and
maintaining Embedded Linux Next Generation (eLux® NG), and for experienced users. This manual
assumes knowledge of:
•
Installation, operation and maintenance of network and asynchronous communication hardware,
including serial ports, modems and device adapters
•
The operating system (OS) on the client computer
While eLux NG is Linux® based, the advantage of eLux NG is that no significant knowledge of Linux is
needed for either the administrator or the end user.
1.2
About This Guide
Starting with unpacking the appliance, this documentation presents step-by-step directions to run the
Thin Client using eLux NG. For convenience, the manual is divided into the following parts:
Chapter
Description
1
Before You Begin
Manual conventions, overview of eLux NG functions and
features
2
Quick Start
How to get eLux NG running quickly
3
Setup
Instructions on how to set eLux NG desktop settings, hardware
settings, mirroring, security settings, VPN
4
Configuring Applications
Instructions on how to configure local applications and session
clients
5
Troubleshooting
Detailed instructions on how to recognize and enter a manual
eLux NG upgrade license, how to perform a safe boot, how to
perform a factory reset, and solutions to frequent user errors
6
Recovery Installation
Detailed instructions on how to return the Thin Client to default
settings and default flash image are provided with our separate
Papers Recovery Installation and Migration and Server
Transfer.
A recovery is necessary to update from eLux 1.0 to NG.
7
Shortcut Keys
Keyboard shortcuts
Appendix 1: Desktop
Introduction to the eLux NG desktop: starter, taskbar,
workspaces
Appendix 2: Memory
Usage
Memory usage data
Appendix 3: Examples of
Internet Profiles
A list of the default ISDN and modem profiles included in the
eLux NG software
Appendix 4: Configuring
Kiosk Mode
Detailed instructions on how to configure kiosk mode
Appendix 5: Setting Thin
Client Time to UTC
How to set BIOS time to UTC
Appendix 6: Supported
Hardware
List of supported hardware: network cards, video cards,
keyboards, modems
Appendix 7: Supported
Smart Card Readers
List of supported card readers
Appendix 8: Port
eLux NG and Scout Enterprise port numbers for firewall
Build # 27
2
eLux® NG
www.myelux.com
Assignments
administrators
1.3
Conventions and Abbreviations
1.3.1
Conventions
The following are text formats and symbols that appear in the manual:
Convention
Description
>
Move to a tab or directory.
Refers to a procedure with sequential steps.
•
Refers to a list of related information, not procedural steps.
“ ... “
Quotation marks refer to screen text and text in pop-up
messages.
ALL UPPERCASE
Represents keyboard keys (for example, ENTER, F4,
CTRL).
Bold
Indicates boxes and buttons, column headings, commandline commands and options, dialog box titles, tabs, icons,
lists, menu names and menu commands, and directories,
subdirectories and folders.
Courier New
The Courier New font represents entries you can type at the
command line or initialization files.
<Italics>
Indicates a placeholder for information or parameters that
you must enter. As an example, if the procedure asks you
to type <IP address>, you must type the actual IP address.
Italics can also refer to book titles.
Two stars (**) next to a title indicates this function is not supported by all hardware platforms.
1.3.2
Commonly-Used Abbreviations
The following are terms that appear in the manual:
Abbreviation
Description
ADSL
Asymmetric Digital Subscriber Line
base OS
Base operating system
BDC
Backup Domain Controller
BOOTP
Bootstrap Protocol
DHCP
Dynamic Host Configuration Protocol
DNS
Domain Name Service
GUI
Graphical User Interface
ICA
Independent Computer Architecture
IP address
IP addresses are represented in four 3-digit groups
separated by periods.
Example: ....................................................192.45.85.1
LDAP
Build # 27
Lightweight Directory Access Protocol, a TCP/IP-based
protocol for accessing information directories and retrieving
directory information such as e-mail addresses, public keys,
3
eLux® NG
www.myelux.com
Abbreviation
Description
etc.
MAC address
Media Access Control address. The format of a MAC or
hardware address is: xx:xx:xx:xx:xx:xx
Example: ...................................... 00:30:05:07:85:1A
1.4
MSN
Multiple Subscriber Number
NFS
Network File System
PCL
Printer Control Language
PDC
Primary Domain Controller
PXE
Pre-Boot Execution Environment
RDP
Remote Desktop Protocol
RFC
Request For Comments. A series of documents about
Internet protocols, moderated by the Internet Engineering
Task Force.
SMB
Server Message Block
SNMP
Simple Network Management Protocol
VNC
Virtual Network Computing
XDMCP
X Display Manager Control Protocol
Finding More Information
This manual contains conceptual information, and installation and configuration steps for eLux NG.
Additional information is available from the following sources:
•
The eLux NG Administrator’s Guide for previous releases of eLux NG.
•
The Scout Enterprise Administrator’s Guide for information on the Scout Enterprise management
tool and the supplementary program and image editor ELIAS NG.
This guide as well as other eLux NG documentation is available in Adobe PDF format. It can be found
in the following locations:
•
The documentation folder on your eLux NG CD-ROM
•
The product documentation library at www.myelux.com
1.5
eLux NG on the World Wide Web
UniCon offers online technical support at www.myelux.com. This includes the following:
•
An actual version of this document in PDF
•
Downloadable software
•
The latest updates and hotfixes for download
•
A list of supported hardware
1.6
Overview of eLux NG
1.6.1
What is eLux NG?
eLux® NG is a Linux-based, complete desktop solution which offers the Thin Client user fast,
comfortable and secure access to Windows® and other servers in a server-based
environment. Server-based computing is known for reducing the total cost of ownership and
administrative costs – important factors in today’s economy.
In server-based computing, applications run on a central server. “Client” software is installed
locally on a terminal to enable the device to connect to the respective server. eLux NG
provides access to the following servers:
Build # 27
4
eLux® NG
www.myelux.com
Server
Client
®
®
• Microsoft Windows Terminal Server
Remote Desktop Protocol (RDP) client
• Citrix MetaFrame Server
Independent Computer Architecture (ICA®)
client
• Web server
Opera, Mozilla, Firefox
®
®
®
• UNIX system
X11 server (local desktop or XDM)
• Mainframes
Terminal emulations:
• eterm (Siemens 97801 [7 & 8 bit], ANSI,
AT386, BA-80, VT320)
• Terminal Emulation for Motif (3270, 5250,
9750)
• PowerTerm InterConnect (3270, 5250,
VT3xx, AT386, Wyse and more)
• SAP server
SAP®GUI for the Java environment
• Tarantella server
Tarantella client
eLux NG can be installed on a flash card (for use in Thin Clients) or a hard disk, turning your
PC into a multifunctional terminal!
eLux NG is a Linux-based embedded operating system. However, neither the end user nor
the administrator needs Linux knowledge to use or configure the software. The interface is
user-friendly, and can be operated using the mouse or keyboard. Additionally, the QT interface
has been streamlined to insure the maximum amount of space for client applications and to
reduce initialization time upon start.
•
IBM 3270 (TN3270E), 3179, 3278, 3279, 5250 (TN5250 with device name support), 3477
•
Digital VT52, VT100, VT220, VT320, VT420, VT520, VT525
•
ANSI BBS-ANSI, SCO-ANSI, AT386
•
Other Wyse (50/60), Data General D-412, Televideo TVI 925/950, AIXterm
Updating Firmware
Updating the firmware on your terminal is fast and easy using the “container method.” All
required software is provided in the so-called “containers,” which are available on the eLux NG
CD or for download on the Internet. The software to be installed on the device is determined
by the image definition file (IDF). The IDF is edited using the program eLux NG Image
Administration Service Next Generation (ELIAS NG), which is available to owners of
eLux NG at no additional charge and allows the administrator to customize the software
installed on the device to exactly satisfy end-user requirements. The use of ELIAS NG is not
discussed in this manual. Please consult the Scout Enterprise Administrator’s Guide for more
information.
Management Tool
eLux NG can be 100% managed from a central location, again without any Linux know-how,
using the management tool Scout Next Generation (“Scout Enterprise”). This application is
installed on a PC and must be purchased separately. Please consult the Scout Enterprise
Administrator’s Guide for information on how to install and use ELIAS NG and Scout
Enterprise.
Compatibility
eLux NG version 1.20 should be used with Scout Enterprise version 5.5.12 (and later) and
ELIAS NG version 5.2.4 (and later).
Build # 27
5
www.myelux.com
eLux® NG
Defining Packages
Not just any software can be installed on the device – the software must be compatible with
the container method. In addition to the software provided on the eLux NG CD, software
updates are available on the Internet 24 hours a day! These include new client software, base
OS updates, new drivers, etc. For ease of use, these “packages” are already in eLux NGcompatible format.
In addition, you can create your own packages – for example, to install a specific driver –
using the eLux Builder Kit (EBK). Advanced Linux knowledge is required. More information
on this product is available at the Web site www.myelux.com.
1.6.2
Features of eLux NG
eLux NG offers the following features:
•
Easy installation Installs on flash cards or hard disks. eLux NG can also be installed on
CD-ROMs or USB sticks to boot from the peripheral device.
You can install eLux NG on a device that does not yet have eLux NG installed or has
another operating system installed by performing a recovery installation. This can be
done using a recovery CD or the PXE EPROM of the network card.
•
User-friendly interface The QT GUI has been streamlined to insures a low start time.
The appearance of the eLux NG desktop is modern and can be personalized using
desktop themes. In addition, corporate branding is possible by setting the background
color or transferring a background image.
•
Network hardware support Extensive support of all current technologies and additional
legacy technologies, including Ethernet, gigabit Ethernet, fiber optics, modem, ISDN, USB
ISDN, DSL and Token Ring.
•
Wireless LAN support You can connect to an access point using a Cisco Aironet card.
•
Simple desktop management The first time the device starts, a First Contact Wizard
appears to help the user through the initial configuration. After that, customizing the
desktop settings to fulfill the needs of the user is simple for the administrator using the
easy-to-use “eLux NG starter” (Setup tab). The options are laid out logically and intuitively.
•
Application management Applications can be easily created using the eLux NG starter
(Configuration tab). The applications can be set to automatically start at device boot or
automatically restart when the application is closed.
•
Easy firmware management The firmware installed on the device can be easily
managed using the “container method” and the image definition file editor ELIAS NG,
Windows-based software available to users of eLux NG at no additional charge.
•
Comprehensive management eLux NG can be 100% managed from a central location,
again without any Linux know-how, using the management tool Scout Next Generation
(“Scout Enterprise”). Scout Enterprise offers additional features such as automatic
software license distribution, license transfer, recovery settings configuration, background
image transfer, configuration file transfer, help desk and more.
•
License transfer If the device becomes defect, the eLux NG license is not lost. Note: The
device must be managed by Scout Enterprise.
•
Security Support of authentication servers during logon, including LDAP and ADS. This
provides greater system entry security into networked environments by limiting user
access to the system. Smart card support for local authentication, user roaming, and Citrix
ICA logon. SSH and virtual private networks are supported.
•
User variables In conjunction with an authentication server, user variables allow for
configuration consolidation, reduce configuration time for the administrator and simplify
the configuration overall. In addition, special ICA variables are available when you log on
to MetaFrame server using Program Neighborhood, allowing you to set a unique client
name in the Citrix MetaFrame session.
•
Network drives Connect to network drives with SMB or NFS protocol.
Build # 27
6
www.myelux.com
eLux® NG
•
Printing Printing support for network printers and local printers (line printer, PostScript,
PCL v. 2) connected via serial, parallel or USB. The Common UNIX Printing System™
(CUPS™) client supported.
•
Language Desktop support of most common European languages, keyboard support of
most common keyboard layouts. The eLux NG starter itself can only be displayed in
English or German.
•
Multi-monitors When used with a Matrox graphics card, eLux NG supports up to four
monitors.
•
Peripheral devices You can use up to eight USB mass storage devices at a time, in
addition to a USB mouse and USB keyboard. In addition, you can access serial
peripheries using a USB to serial adapter from Digitus.
•
Backing store Saves screen information to the local X11 server on the thin client. This
increases the screen refresh speed when the network connection is slow.
•
SNMP eLux NG supports the Simple Network Management Protocol.
•
Time server support You can use a Windows or UNIX time server to properly set the time
on the Thin Client.
•
Advanced monitor options You can set resolution up to 1600x1200. eLux NG comes
with a screen saver to increase monitor life and power delay energy saving feature that
turns the screen off after a specified idle time. In addition, the screen can be locked with a
one-time password.
•
Help desk features Interactive, real-time mirroring capabilities.
•
Troubleshooting One-click viewing of various logs and system files from the diagnostics
tab, factory reset to remotely delete the configuration and all locally-saved files, recovery
installation to reformat the flash card or hard drive.
No other terminal software offers the features and flexibility of eLux NG!
1.6.3
New Features in eLux NG 1.8
•
Autostart application feature can be suppressed Press SHIFT when the device boots to
suppress applications configured to automatically start.
•
COM port settings It is now possible to change the COM port settings.
•
Desktop tools New desktop tools include a QT-based file manager for browsing the local
flash and a text editor.
•
Languages New desktop language: Estonian. New keyboard languages: Estonian,
Japanese (ICA client only), Bulgarian and Faeroese.
•
Mouse and keyboard settings You can now set the mouse double-click speed, mouse
drag speed, key delay and key repeat speed. In addition, the NUMLOCK key can be
deactivated upon boot.
•
Movie player Play DVDs and MPEG files, as well as other file types. The files can reside
on the Thin Client, a network drive or the Internet.
•
NoMachine The NoMachine NX client is now available for eLux NG. The NX client
connects to an NX server (running on a Linux or Solaris machine). The NoMachine
software provides terminal server functionalities, X-Window protocol compression and
tunneling of protocols such as RDP. It improves performance across slow modems.
•
Virtual keyboard Display a virtual keyboard on the screen to enter characters into a
program using a mouse click. This is useful for kiosk terminals or for workstations without
a keyboard.
•
®
®
®
Web tools Adobe Acrobat Reader is available as browser plug-in or as a stand-alone
®
program. RealPlayer is available as a plug-in.
•
XDMCP An XDMCP session can now run in a local window, rather than in a separate
console.
Build # 27
7
www.myelux.com
1.6.4
1.6.5
1.6.6
1.6.7
1.6.8
New Features in eLux NG 1.9
•
Card readers GemPC Twin USB (USB only) and GemPC Key are supported. GemPC Key
is a USB reader in key format which reads/writes smart cards in plug-in form. Gemplus
card readers can be used with Citrix ICA smart card logon.
•
Mirroring password You can password-protect a mirroring session.
•
Network cards AT-2700FX PCI LAN card from Allied Telesyn, Inc. and OLICOM 3140
PCI Token Ring card from Madge Limited are now supported.
•
ThinPrint Can now print to network printers in addition to local parallel and USB printers.
•
USB stick Support of MemoryBird USB 2.0 Revision 2 from Fujitsu Siemens Computers
formatted by Windows 2000 or Windows 2003.
New Features in eLux NG 1.10
•
Card reader SPR532 dual mode PINpad from SCM Microsystems. For use as a USB
card reader (PINpad not supported, RS232 not supported).
•
Desktop theme New desktop theme “XP.”
•
Handhelds The palmOne™ Tungsten™ E and HP iPAQ pocket PC 2003 handhelds are
now supported.
•
Network card Gigabit Ethernet network cards of type Broadcom Tigon 3 (BCM570x) are
now supported.
•
Wireless LAN The Connect2Air USB network adapter from Fujitsu Siemens Computers is
now supported.
New Features in eLux NG 1.11
•
Card reader EZ100PU USB card reader from Castles Technology Co.
•
Desktop icons Desktop shortcuts for applications can be defined on the eLux NG
desktop. Double-clicking with the middle mouse button on an icon redraws all icons.
•
Starter Improved ease of use. The selected application remains selected when switching
between the Applications tab to the Configuration tab.
New Features in eLux NG 1.12
•
Browser The Firefox browser is now available.
•
RDP keyboard mappings Bulgarian, Czech, Czech/US, Estonian, Faeroese, French
(Switzerland) and Japanese are now supported.
•
RDP ports You can access serial ports using the native RDP client.
•
RDP smart card Certificate-based smart card logon using RDP 1.4.0 is now supported.
•
USB to serial converter The USB v. 24 converter from DIGITUS or Sandberg with chip
PL2303 or PL2303-HX is now supported.
•
VPN The Nortel Contivity VPN is now supported.
•
XFree 4.4.0 New X11 server.
New Features in eLux NG 1.14
•
1.6.9
eLux® NG
Screen The monitor frequencies have been optimized.
New Features in eLux NG 1.17
•
COM ports The COM ports 3 and 4 have been renamed to COM ports 5 and 6. For
example, when a PCI card is inserted, the two new ports – COM 5 and COM 6 – can be
made available. View available ports in eLux NG starter > Setup > Hardware > “COM port
settings.”
•
Handhelds The palmOne™ Tungsten™ 5 handheld is now supported.
Build # 27
8
www.myelux.com
eLux® NG
•
Network card The network speed can now be set to “1 Gbit” in eLux NG starter > Setup
> Hardware. This applies only to the gigabit Ethernet network card Broadcom Tigon 3
(BCM570x). All other card parameters are automatically configured.
•
PC/SC lite The PC/SC lite software has been removed from the base OS and is now
available as a stand-alone upper-level package.
•
Program Neighborhood Agent PNA sessions can no longer be disconnected using the
eLux NG starter.
•
XDMCP Applications that are e-sound compatible can now be played in an XDMCP
session.
1.6.10 New Features in eLux NG 1.20
•
Thunderbird Mail Client V1.0.6
•
Sun Java™ 2 Runtime Environment V 1.5 supports Java Web Start as a local
application.
•
Cisco Aironet Utility has been extended by "leapscript" and "leapset" for LEAP
authentication.
1.6.11 New Features in eLux NG 1.21
•
SSID and Channel can be configured in the WAVELAN settings
1.6.12 New Features in eLux NG 1.22
•
Printer can be verified by sending a test page (Text formatted or Postscript)
•
PDA Qtek S100 support
•
Graphic card Radeon 9100 PRO IGP supported
•
DHCP lease is now stored permanently
•
Improved detection of Intel network adapters
•
Fibre optic adapter DLINK DFE 550 FX supported
•
Fibre optic adapter AT2701 FTX supported
•
Card reader Omnikey CardMan 2020 and Omnikey CardMan 6020 supported
•
'Shutdown' button is available in userauth and smartcard dialogs
1.6.13 New Features in eLux NG 1.23
•
Starter/Desktop: New button to sync time/date with time server
•
Starter/Security: New dialog for advanced manager settings to enter info properties
•
Starter/Security: New button to select a group from the list of available groups
•
Starter/Security: New button to delete the manager and set the client unmanaged (factory
reset will be performed)
•
If the DHCP server is unreachable on boot, IP network connections are not available. If
DHCP connection was established and DHCP server fails, the client will loose its IP
address when half the lease time has elapsed.
1.6.14 New Features in eLux NG 1.25
Build # 27
•
Futro D100 now supports screen resolution 1280x1024/85Hz/24bbp
•
Graphic adapter Intel 945G supported
•
Taskbar: new button to show desktop (minimize/restore all windows)
•
Starter/General: Serial number is now listed
•
Starter/Multimedia: New slide to change microphone volume
9
www.myelux.com
eLux® NG
•
Starter/Multimedia: Volume slides are now vertical
•
WLAN WPA mode supported, TKIP or Radius EAP (certificate based)
•
WLAN client adapter Intel PRO/Wireless 2200BG supported
•
Kernel V2.4.32
•
AES encryption between eLux NG clients and Scout Enterprise V8.5.5
•
The screen saver is now locked by the actual user password and no longer by userdefined password (requires a configured user authorisation).
•
Starter/Diagnosis: IP availability can be verified with Ping
•
Print performance enhanced when printing to parallel port
1.6.15 eLux NG Software Packages
Terminalserver:
•
ICA Client (Citrix), V 9.15
•
NX Client (NoMachine), V 1.5.0
•
RDP Client (Linux), V 5.2
•
Tarantella Client (Linux), V 4.20.909
•
ThinLinc, V 1.20
Host Connectivity:
•
SAPGUI Client (Java),V 6.40rev6
•
eterm – 97801 Terminal emulation , V 2.2.2
•
X97 – 9750 Emulation V 2.4.7
•
PowerTerm, V 7.1
•
HOB Link Jterm, V 3.3 (not included in standard delivery)
•
X11 Terminal with XDM support
Hardware Support:
Build # 27
•
PCL Printer Support
•
Cisco Aironet Utility
•
WLAN USB
•
WLAN DLINK
•
USB Compaq IPAQ Driver, Pocket Loox
•
USB Handspring Visor, Palm Driver
•
Cherry KVK Reader
•
KV Card
•
PCSC Lite
•
Touchscreen Elographics Input Driver, V 2.0-1 (not included in standard delivery)
•
G-Touch, Touchscreen Driver (not included in standard delivery)
10
www.myelux.com
eLux® NG
Printing:
•
ThinPrint, V 1.6.69
•
CUPS Print Client, V 2.0-11
Browser:
•
Firefox , V 1.5.0.1
•
Mozilla, V 1.7.12
•
Opera, V 8.5
Mail Client:
•
Thunderbird Mail Client, V 1.5
Desktop:
•
Desktop themes
•
Desktop tools (CD Player, Calculator, File Manager, Editor)
•
XScreensaver
Document Viewer:
•
Adobe Acrobat Reader, V 5.09; V 7.0.5
Multimedia:
•
Macromedia® Shockwave® Player, V 7.0r63
•
Movie Player (DVD, MPEG, DivX, etc.), V 1.0.7.1
•
RealPlayer® , V 10.0.7
Middleware:
•
IBM Java: Sun
•
Sun Java Runtime Environment, V 1.5.0.6
•
Sun Java Web Start
Network Management:
•
net-SNMP, V 4.2.1
Network Security:
•
Secure Shell (SSH)
•
Cisco Systems VPN Client 4.8
Security:
•
User authorization with LDAP, ADS, SMB, V 2.5-13
Helpdesk:
•
VNC Server; VNC Client
Additional Software (ThirdParty):
Accelerated-X™ Display Server, V 2.2.22
A list of all currently available software and version numbers is available at www.myelux.com.
Some software is included in the eLux NG license, other is third-party software that must be
purchased separately. For more information, see your vendor.
Build # 27
11
eLux® NG
www.myelux.com
2 Quick Start
This chapter provides the basic steps necessary to configure the Thin Client for use as a Windowsbased terminal and open a session via ICA. It does not describe all eLux NG features. For detailed
descriptions on eLux NG settings and configurations, see chapters 3 and 4.
Section
Description
2.1
First Boot
Flow chart and description of the first boot procedure
2.2
First Configuration Wizard
Step-by-step, detailed instructions of the Wizard that appears
the first time the device is turned
2.3
Troubleshooting
Error messages and answers to common problems upon boot
2.4
eLux NG Interface
eLux NG main screens
2.5
User Settings
How to configure user settings
2.6
Defining an Application
How to define your first application
2.7
Sessions
How to start and close applications
2.8
Shut Down
How to switch off/restart the Thin Client, log off the user, or
activate the screen lock
Build # 27
12
eLux® NG
www.myelux.com
2.1
First Boot
Unpack the device, attach the cables and turn it on.
We highly recommend using the Scout Enterprise software to centrally manage your eLux NG clients.
The Thin Client is delivered containing eLux NG software and a default image on the flash memory.
This figure shows the boot procedure the first time on the Thin Client is switched on.
Turn on
BIOS scan
no
Network
link?
yes
no
Message
DHCP
server?
Manual network
information
yes
Fetch network
information
Boot eLux NG
ScoutSrv?
yes
no
First Contact
Enter in
Lost&Found
Work
Figure 1: Boot procedure for the first boot
Build # 27
13
www.myelux.com
eLux® NG
First Boot Procedure:
This is the boot procedure for a Thin Client with default settings (upon delivery, after a factory reset, or
after a Recovery Installation):
1. Scan BIOS
2. Check if a LAN (Ethernet) connection is available
•
If none is found, an error message is displayed, eLux NG is booted, and the First
Configuration Wizard appears, allowing the user to set initial user settings. Go to step 6.
3. Make a DHCP server request
•
If a DHCP server is not found, an error message is displayed, eLux NG is booted, and the
user is asked to enter the network information manually. Go to step 6.
4. Boot eLux NG
5. The device is automatically entered in Scout Enterprise and configured. Requirement: The
hostname “ScoutSrv” has been set to the Scout Enterprise Server IP address on the DNS
server.
•
If the hostname “ScoutSrv” cannot be resolved, this step is skipped.
6. First Contact: A Wizard appears, helping the user through the initial configuration.
This procedure does not apply to subsequent boots.
Build # 27
14
www.myelux.com
2.2
eLux® NG
First Configuration Wizard
By default, the first time the Thin Client successfully boots, a Wizard appears to help you through the
configuration process.
You have the choice between entering the device in the management software Scout Enterprise or
configuring it by hand.
If a DHCP server was contacted, the IP address is displayed at the top. Otherwise, a default value is
displayed.
2.2.1
Managed Device
2.2.1.1 Step 1: Activating Manager
The Scout Enterprise server that
manages the Thin Clients is
referred to as the “manager.”
If the device is to be managed and
the IP address of the Scout
Enterprise server is known, select
Yes.
If the Thin Client will not be
managed, you can still configure
the device manually. Select No and
go to section “2.2.2 Manually
Configured Device”.
Figure 2: First contact: Activating manager
2.2.1.2 Step 2: Manager Address
Enter the IP address or name of the
Scout Enterprise manager.
Entering information in the
Information fields is optional.
Click Next.
Figure 3: First contact: Entering manager IP address
Build # 27
15
www.myelux.com
eLux® NG
2.2.1.3 Step 3: Manager Groups
Next, you are asked to select the
destination Group of the device on
the Scout Enterprise server.
Default is Lost&Found (ID=0).
Figure 4: First contact: Manager groups
2.2.1.4 Step 4: Summary
Finally, you are given a summary of
the entered information.
When you click Next, the device is
registered in the Scout Enterprise
Server, entered in the destination
Group, and restarted. Upon boot, it
contacts Scout Enterprise and
downloads its configuration and
application definitions. In addition,
you can configure Scout Enterprise
to automatically update the
software.
If a profile for this device already
exists in Scout Enterprise, the
device will not change Groups.
Rather, its status in Scout
Enterprise will be updated and it will
receive the configuration of the existing profile.
Figure 5: First contact: Summary
For more information on the management software Scout Enterprise, see the Scout Enterprise
Administrator’s Guide.
Build # 27
16
www.myelux.com
2.2.2
eLux® NG
Manually Configured Device
2.2.2.1 Step 1: Deactivating
Manager
The Scout Enterprise server that
manages the Thin Clients is
referred to as the “manager.”
If the device is to be managed and
the IP address of the Scout
Enterprise server is known, select
Yes and go to section “2.2.1
Managed Device”.
If the Thin Client will not be
managed, select No to configure
the device manually.
Figure 6: First contact: Activating manager
2.2.2.2 Step 2: Mouse / Keyboard
Select your desktop language.
The eLux NG screen elements
themselves can only be displayed
in English or German. However,
your country’s language must be
set for applications to work
correctly.
Select your keyboard language
from the country-specific list.
Select the mouse type.
Figure 7: First contact: Mouse / Keyboard configuration
Build # 27
17
www.myelux.com
eLux® NG
2.2.2.3 Step 3: Summary
Finally, you are given a summary of
the entered information.
When you click Next, the
configuration is updated and the
desktop may be restarted.
Figure 8: First contact: Summary
The Wizard assists you in setting minimum user settings. User settings are described in detail
in chapter “3 Setup.”
2.3
Troubleshooting
Problem:
An error message appears at boot saying the network interface “etho0” has been
disconnected.
Solution:
There is no LAN connection. Check for loose cable connections. Check that the cable is
patched and the port is active.
Problem:
An error message appears at boot saying the DHCP client does not have IP address
information.
Solution:
When a DHCP time-out occurs the first time the Thin Client boots, eLux NG network
settings are set to “manual” and you are prompted to enter network settings by hand. A
Wizard appears to guide you through the process.
Please be aware that the next time the Thin Client boots, it will not automatically search
for a DHCP server. To set network settings to DHCP, in the eLux NG starter go to Setup
> Network.
Build # 27
18
eLux® NG
www.myelux.com
2.4
eLux NG Interface
After completing the first configuration Wizard, the eLux NG interface appears. The main window is
referred to in this documentation as the “eLux NG starter”. Screen elements can only be displayed in
German. For all other desktop languages, the screen elements appear in the default language,
English (US). However, the desktop language setting is required for local applications to run correctly.
There are three main tabs at the top: Applications, Configuration and Setup.
(1)
(2)
(3)
Figure 9: Initial eLux NG screen
(1) Applications tab Displays a list of configured applications, allowing you to connect/disconnect a
session.
(2) Configuration tab For configuring applications.
(3) Setup tab For configuring eLux NG settings.
Initially, the Applications and Configuration tabs are empty, and the Setup tab contains a default
configuration.
The eLux NG starter is mouse based. However, it is possible to navigate the eLux NG starter using
the keyboard by pressing ALT + <underlined letter>. For example, press ALT + T to jump to the Setup
tab.
Build # 27
19
eLux® NG
www.myelux.com
Clicking the Setup tab displays the following:
Figure 10: Setup
The subtabs General, Network, Desktop, Screen, Mouse / Keyboard, Firmware are displayed.
Click the ► symbol to display the subtabs Security, Multimedia, Drives, Printer, Hardware, VPN,
Diagnostics.
2.5
User Settings
The Setup tab is used to configure desktop settings. It is not necessary to modify all settings in order
to get the Thin Client ready for use. This chapter describes the minimum settings required to get eLux
NG running.
2.5.1
Making changes
Modifying the settings activates the Apply and Reset buttons.
•
Click Reset to discard changes.
•
Click Apply to accept changes.
Some changes require the graphical user interface (GUI) or the terminal to be restarted. In this
case, after clicking Apply the message: “The changes require a new start of the user
interface. Continue?” appears.
•
Click Yes to restart immediately.
•
Click No to restart at a later time.
In Quick Start, we configure the minimum settings user settings. These include the subtabs
Desktop, Mouse / Keyboard, Screen and Network, Hardware in the Setup tab. You already
configured some settings in the First Configuration Wizard.
•
Desktop language Subtab Desktop (see section “3.3 Desktop”)
•
Keyboard language, mouse type Subtab Mouse / Keyboard (see section “3.5 Mouse /
Keyboard”)
Build # 27
20
eLux® NG
www.myelux.com
In addition, you should configure the following:
2.5.2
•
Screen resolution, color depth
•
Network IP information
•
Network hardware
Screen
Screen settings are set in the Screen subtab. Please adjust settings to your monitor. (default
settings: resolution = 1024x768, frequency = 60 Hz, color depth = 16 bit)
Figure 11: Setup > Screen
To modify the screen settings
From the Setup tab, click the Screen subtab.
1.
Select your monitor resolution, frequency and color depth.
2.
Click Apply and Yes in the eLux NG Starter dialog box regarding restart.
The Screen subtab is described in detail in section “3.4 Screen.”
Build # 27
21
eLux® NG
www.myelux.com
2.5.3
Network
Server
Manual
Figure 12: Setup > Network
To modify the network settings
From the Setup tab, click the Network subtab.
1.
The network settings can be automatically retrieved from a DHCP or BootP server, or
they can be is set manually.
2.
Click Apply for modifications to take effect.
Configuring network settings is discussed in detail in section “3.2 Network”.
Build # 27
22
eLux® NG
www.myelux.com
2.5.4
Network Hardware
The First Configuration Wizard automatically detects and sets an Ethernet LAN connection.
However, if you have ADSL, Token Ring or ISDN, you must enter the hardware settings
manually.
Figure 13: Setup > Hardware
To modify the network hardware settings
From the Setup tab, click the Hardware subtab.
1.
Select the network type.
•
Token Ring Select the speed. Generally Auto (=”automatic detection”) is sufficient.
•
ADSL, ISDN Click Edit to enter user information (account name, password, dialup
number, etc.).
2.
Click Apply for modifications to take effect.
Configuring network hardware settings are discussed in detail in section “3.13 Network
Hardware.”
Next, we define an application in the Configuration tab.
Build # 27
23
eLux® NG
www.myelux.com
2.6
Defining an Application
Let’s configure a Windows desktop via an ICA session.
Name of
defined
application
Server name
or IP address
Define a new
application
Figure 14: Configuration > ICA
To configure a Windows session via ICA
1.
From the Configuration tab, click New. This opens the Application definition dialog box,
which contains a number of subtabs. The subtabs reflect the firmware installed on the Thin
Client’s flash memory (*.idf file).
2.
Click the ICA tab.
Name: Enter a name for this application. You can enter any name, however we recommend
you make it relevant to the application (that is, “Citrix Desktop” for a remote desktop, etc.).
Server: Enter the IP address (or name) of the MetaFrame server (at this point, use an
individual server, not a server farm). The Application and Working directory fields can be
left empty for the moment.
User, Password, Domain: (optional) Required for automatic logon. For now, can be left
blank.
3.
Click Apply in the Application Definition dialog box and Finish in the Configuration tab.
When you open the Application definition dialog box, the main eLux NG screen is disabled. Close
the Application definition dialog box to re-enable the main eLux NG screen.
If the Application definition dialog box is hidden by another screen, you can use the “task hotkey”
CTRL + ALT + not only to switch between application windows, but also to switch between eLux NG
screens. See “Task hotkey” in chapter “3.3 Desktop,” page 32.
Configuring applications is discussed in detail in chapter 4.
Build # 27
24
eLux® NG
www.myelux.com
2.7
Sessions
2.7.1
Starting an Application
Highlight...
...and click
Connect.
Figure 15: Applications tab
To start an application
Once you have configured an application, click the Applications tab. The applications appear
in alphabetical order.
Click on a column title to sort in ascending order. Click a second time to sort in descending
order.
To run the Windows application you configured, either:
2.7.2
•
highlight the application and click Connect or
•
double-click the application or
•
click with the left mouse button on the applications button in the taskbar (see Appendix 1:
Desktop)
Exiting an Application
The Disconnect button disconnects a session.
The Disconnect button can be used to close a local application (browser, shell, user-defined
command, resource information, etc.)
However, a remote session should be closed from within the session itself. For example, for
ICA:
•
ICA desktop Start menu (Start menu > Shut Down > Log off)
•
ICA application Application command (File menu > Exit)
•
ICA published application Application command (File menu > Exit)
etc.
If you use the Disconnect button to end a remote session, open applications continue to run
on the server. This can cause problems for the server administrator.
Build # 27
25
eLux® NG
www.myelux.com
2.8
Shut Down
Figure 16: Applications > Shut Down
To shut down the Thin Client
The Shutdown button in the Applications tab provides three standard and one optional option:
•
Logoff ends the session for that user. This is useful when more than one person uses the Thin
Client.
•
Restart restarts the Thin Client. This is necessary for certain Setup changes to take effect (if you
did not restart the Thin Client previously).
•
Switch off turns off the power to the Thin Client.
•
Lock is a security feature. It is part of the Desktop Tools package (“Local X display locker,” xlock)
and must be installed. By default it is not installed.
Enter a screen saver password containing numbers or letters. Do not use country-specific letters
with accents or symbols. Press Enter. Wait two seconds. The screen locks.
To return to the monitor, pause the screen saver by pressing a key or moving the mouse and
enter the correct password. The lock feature lasts only for the current session. Turning off the Thin
Client ends the screen lock.
The hotkey to initiate the screen lock from any session is CTRL + ALT + END.
Note The screen lock password is an arbitrary password for one use only. It is not the same as
your the Thin Client password. The screen lock password is not saved, that is, you must re-enter a
screen saver password every time you use the Lock feature. The exception is if when an
authentication server is activated. In this case, the screen lock is preset with the password.
Conclusion
Chapter 2 showed how to get your Thin Client up and running quickly as a Windows-based terminal.
This is only the beginning of what eLux NG offers. For complete descriptions of eLux NG settings and
step-by-step directions on how to configure other types of applications, see chapters 3 and 4.
Build # 27
26
eLux® NG
www.myelux.com
3 Setup
This chapter describes how to configure eLux NG desktop settings.
Section
Description
3.1
General
Viewing Thin Client hardware information, eLux NG license,
MAC address, installed image name, version of eLux NG
starter and firmware versions
3.2
Network
Setting network IP information via BootP server, DHCP
server or manually
3.3
Desktop
Desktop language settings, background color, key
combination for switching between open sessions, date and
time settings, taskbar and workspace settings
3.4
Screen
Screen settings, screen saver, energy save mode, font
server, backing store
3.5
Mouse / Keyboard
Mouse and keyboard settings, deactivating dead keys
3.6
Firmware
Server parameters for a firmware update via FTP or HTTP
server, configuring for update from a USB stick or CD-ROM
3.7
Security
Description of and how to set the Thin Client password, how
to set user rights, the authorization hotkey for overriding
locked settings, how to connect to an authorization server,
usage possibilities for user variables
3.8
Multimedia (Volume)
Volume settings
3.9
Drives
Configuring an SMB drive
3.10 Browser Home Directory
Setting the home directory for a local browser to an NFS or
Samba network drive
3.11 Printer
Configuring local printers, configuring network printers,
activating TCP direct print, using Thin Client as a print
server, Citrix ICA autocreated printer
3.12 Hardware
Activating the USB port, setting the number of monitors,
increasing RAM disk size
3.13 Network Hardware
Configuring the Thin Client for Ethernet, ADSL, ISDN,
modem, Token Ring, wireless LAN
3.14 Remote Management
Entering Scout Enterprise manager settings
3.15 Smart Card
Using smart cards as an eLux NG security feature and for
user roaming, or for automatic Windows logon. How to
deactivate the card reader when not in use.
3.16 Mirroring
Description of and how to configure device to allow (or
prohibit) remote mirroring from an administrator machine
3.17 VPN
The different virtual private networks eLux NG supports
3.18 Diagnostics
How to view log files or send them to an FTP server
Build # 27
27
eLux® NG
www.myelux.com
3.1
General
To view eLux NG license and installed software
From the Setup tab, click the General subtab.
Figure 17: Setup > General
In the General tab you can find the thin client’s MAC address, license number, host ID and related
hardware information. If you double-click on “License,” the license dialog box appears for manual entry
of a new license.
Go to the scroll box to find the name of the installed image, as well as a list of the software packages
installed on the Thin Client’s flash card (including version numbers).
The Apply and Reset buttons are not active, as there are no changes that can be made.
In all other Setup subtabs the Apply and Reset buttons are context sensitive. After making changes
to settings, click Apply and confirm the request to restart to save the new values. To discard changes
that have not yet been applied, click Reset.
Build # 27
28
eLux® NG
www.myelux.com
3.2
Network
Before you can begin working, you need to assign an IP address to your client. here are three ways to
set network settings: DHCP server, BootP server or manually.
DHCP
BOOTP
Manual entry
Figure 18: Setup > Network
3.2.1
Dynamic Host Configuration Protocol
A Dynamic Host Configuration Protocol (DHCP) server assigns the client a dynamic IP
address. This means that the IP address assigned to the Thin Client changes periodically (the
interval is set on the DHCP server). DHCP also supports a mix of static and dynamic IP
addresses. DHCP simplifies network administration because the server and not an
administrator assigns IP addresses – when a new Thin Client is added to the network, it
automatically receives an IP address and network settings. Due to its flexibility, most networks
use DHCP.
1.
From the Setup tab, click the Network subtab.
2.
Select DCHP. You can also set a time-out in seconds. The default is 20 seconds.
3.
(optional) Enter a local hostname. It will be transferred to the server upon boot if
server settings permit (a hostname may not already be defined on the server).
4.
Click Apply and Yes in the eLux NG Starter dialog box regarding restart.
If a server is not found within the defined time, it uses the settings saved from the previous
session.
3.2.2
Bootstrap Protocol
A Bootstrap Protocol (BootP) server assigns the client a static IP address. This means that the
IP address assigned to the Thin Client is fixed. A BootP server is more work for the
administrator, because the administrator must configure the server when a new Thin Client is
added to the network.
Build # 27
1.
From the Setup tab, click the Network subtab.
2.
Select BOOTP. The BootP standard time-out is a fixed 10 seconds.
29
www.myelux.com
eLux® NG
3.
(optional) Enter a local hostname. It will be transferred to the server upon boot if
server settings permit (a hostname may not already be defined on the server).
4.
Click Apply and Yes in the eLux NG Starter dialog box regarding restart.
If a server is not found within the defined time, it uses the settings saved from the previous
session.
3.2.3
Manual Entry
If you do not have one of the above servers, you can enter the IP address and network
information directly on the terminal.
1.
From the Setup tab, click the Network subtab.
2.
Click Manually.
3.
Enter the IP address, subnet mask, host name and domain.
4.
To enter a gateway (router) address, click the Add button below Gateway.
•
Enter the IP address in the dialog box. Click OK.
•
Repeat until you have entered all gateway addresses.
•
To delete a gateway entry, select it from the Gateway list and click Delete. Click Yes
in the eLux NG Starter dialog box.
•
To change the order, you must delete and re-enter the IP addresses.
5.
To enter the IP address of a domain name server, click the Add button below DNS.
•
Enter the IP address in the dialog box. Click OK.
•
Repeat until you have entered all DNS addresses.
•
To delete a DNS entry, select it from the DNS list and click Delete. Click Yes in the
eLux NG Starter dialog box.
•
To change the order, you must delete and re-enter the IP addresses.
6.
Click Apply and Yes in the eLux NG Starter dialog box regarding restart.
To avoid network conflicts, verify that the IP address you enter is not in use by another
machine or assigned a DHCP pool.
Those are the three ways to enter the IP address and network information on a Thin Client.
The following two sections describe advanced features, such as how to set the client
hostname on the DHCP server using the terminal or how to set a local hosts list.
3.2.4
Setting the Host Name via DHCP
With a DHCP request it is possible to transfer the local host name to the DHCP. The host
name will then be visible at the DHCP server.
1. Click Manually.
2. Enter the host name of the Thin Client in the field Hostname and click Apply. The
remaining fields should stay empty – they are automatically set by the DHCP server.
3. Click No in the eLux NG Starter dialog asking for restart.
4. Click DHPC.
5. Click Apply.
6. Click Yes in the eLux NG-Starter message box asking for restart.
Build # 27
30
eLux® NG
www.myelux.com
3.2.5
Setting a Hosts List When No Name Server Is Present
Host name
Host IP address
Figure 19: Advanced Network Settings dialog box
eLux NG allows you to store a hosts list locally. This allows you to use host names even if
your network does not contain a domain name server (DNS). The hostnames and IP
addresses must be entered manually.
Build # 27
1.
Click Network tab > Advanced. The Network advanced dialog box appears.
2.
Enter the host name and its IP address in the appropriate boxes. Click Add. To delete
an entry, select it and click Delete.
3.
Click OK and then Apply in the Network tab.
31
eLux® NG
www.myelux.com
3.3
Desktop
Desktop settings can be individually tailored to your country’s language and time zone.
Figure 20: Setup > Desktop
To modify the desktop settings
From the Setup tab, click the Desktop subtab.
1.
Select your desktop language from the Language list.
•
The default language of eLux NG screen elements (tabs, lists, etc.) is English.
•
The eLux NG screen elements themselves can only be displayed in English or German.
However, your country’s language must be set for local applications to work correctly.
2.
Click Background color to set the eLux NG desktop background color.
3.
Although eLux NG is mouse-based, several keyboard commands are important. The Task
hotkey drop-down list allows you to choose the key combination to switch between current
open sessions, or “tasks.” You can use this not only to switch between applications, such as
between an XTerm and an ICA application, but also between eLux NG screens, such as the
main eLux NG screen and a dialog box. Default is CTRL + ALT + <cursor>.
4.
CTRL + ALT +
: Left selection in the Applications bar
CTRL + ALT +
: Right selection in the Applications bar
Click Apply and then Yes in the eLux NG Starter dialog box.
To set the date and time
From the Setup tab, click the Desktop subtab.
1.
Select your time zone from the Time zone list.
2.
There are two ways to set the time:
•
3.
eLux NG adjusts for daylight savings time automatically.
•
Manually: Enter the date and time and click Adjust to update the settings.
•
Automatically: (recommended) Enter a time server. Settings are retrieved when the Thin
Client boots. For technical requirements, see the section “3.3.1 Time Server” below.
Click Apply and then Yes in the eLux NG Starter dialog box.
Build # 27
32
www.myelux.com
3.3.1
eLux® NG
Time Server
In addition to time zone, the time must be set on the Thin Client for proper use. This can, of
course, be done by filling in the date and time fields as described above. However, due to its
better accuracy we recommend using a time server.
You have the option of entering a time server running on either a UNIX or Windows machine.
Synchronizing the time with the time server may now be done online by clicking the button
“Synchronize” in the Desktop tab. Up to V1.23 the time leveling was performed by a restart,
only.
Note Please read the entire section for a complete overview of all possibilities!
Windows
Enter the IP address or name of a computer running Windows 2000 (or later).
If you select this option, the time server must conform to Simple Network Time Protocol as
described in RFC 1305. The Windows Time Service (W32Time), which is installed by default
on computers running Windows 2000 or later, is SNTPv4 compliant.
The W32Time service starts automatically on computers that are joined to an Active Directory
domain. For computers that are not joined to a domain, you must start the time service
manually.
The Windows NT time service does not support SNTP. To use NT, you must install third-party
software. See the following section “Unix” for more information.
For more information on SNTP, see the Knowledge Base article 224799 (“Basic Operation of
the Windows Time Service”), 216734 (“How to Configure an Authoritative Time Server in
Windows 2000”) or the white paper “Windows Time Service”
(http://www.microsoft.com/windows2000/docs/wintimeserv.doc).
The forerunner of SNTP is Network Time Protocol as described in RFC 1305. The two
protocols are interchangeable. Thus, you can alternatively enter an NTP-compliant machine.
Many UNIX servers have xntpd, which is NTP compliant. The service must be started.
For more information on NTP, see www.ntp.org.
This service operates on port 123 with the UDP protocol.
Unix
Enter the IP address or name of a UNIX machine running a RFC 868 time service.
If you select this option, the time server must conform to Internet standard RFC 868 (“Time
protocol”). This type of time service is a standard component on UNIX machines as an internal
service of inetd. It can be activated in the file /etc/inetd.conf.
There are several products on the market that allow you to install a time server conform to
RFC 868 on a Windows machine, for example, the free time server for Windows NT from
Roberson Computer Consulting, Inc., available at www.rccinc.com.
The service operates on port 37 with the TCP and UDP protocols.
For more information on RFC 868, see www.faqs.org.
Note It is also possible to set the system time directly in the Thin Client’s BIOS Setup. Due to
inconvenience, this is not recommended. However, the procedure is described in the
appendix.
Build # 27
33
www.myelux.com
3.3.2
eLux® NG
Desktop Themes
Users of eLux 1.1 will be delighted to learn that eLux NG offers a new desktop with a whole
new range of features.
To use this feature, you must have the “Desktop themes” (themes) package installed.
You can change the appearance of the taskbar, dialog boxes and menus. In the Desktop tab
click Advanced. Choose from the predefined colors and fonts in the drop-down list Theme.
3.3.3
Taskbar
Users of eLux 1.1 will be delighted to learn that eLux NG offers a new taskbar with a whole
new range of features.
In the Desktop tab click Advanced. Here you can set the taskbar options (“Always on top”,
“Hide automatically”) or blend out the taskbar by deselecting the Taskbar check box. In
addition, you can choose to blend out the clock.
3.3.4
Background Image
Users of eLux 1.1 will be delighted to learn that eLux NG offers a variety of ways to customize
the desktop, including installing a background image.
The background image must match the resolution setting of the monitor. Supported formats
include: JPEG, PNG or GIF. eLux NG does not support wallpaper or tiled images. There must
be enough space on the Thin Client (saved to /setup on the flash card).
The background image is transferred using the management tool Scout Enterprise. For more
information, please see the Scout Enterprise Administrator’s Guide.
3.3.5
Starter
Users of eLux 1.1 will be delighted to learn that eLux NG offers a new starter with a whole new
range of features.
By default, the starter runs automatically when the devices starts. To deactivate this feature, in
the Desktop tab click Advanced. Deselect the Starter check box. You can run the starter
from the eLux desktop at any time by clicking the Run starter button in the taskbar or using the
hotkey CTRL-<Win key>.
3.3.6
Workspaces
Users of eLux 1.1 will be delighted to learn that workspaces have been integrated into
eLux NG.
In the Desktop tab click Advanced. Select the desired number of workspaces from the
Number list. Default is one.
The new functionality of the “eLux NG desktop” – taskbar, starter and workspaces – is
discussed in detail in Appendix 1: Desktop.
Build # 27
34
eLux® NG
www.myelux.com
3.4
Screen
Figure 21: Setup > Screen
To modify the screen settings
From the Setup tab, click the Screen subtab.
1.
Select your monitor resolution, frequency and color depth.
Note: The higher the resolution and color settings, the greater the amount of main memory
that is used. The number of applications that can be used simultaneously is limited by system
resources. See Appendix 2: Memory Usage
2.
(optional) Power save is an energy saving feature that shuts the monitor off after a specified
idle time. Moving the mouse or pressing a keyboard character activates the monitor again.
Enter a screen shutdown time (in minutes) in Power save after.
3.
(optional) Enter a delay time for the screen saver. You can restart the monitor by pressing a
key or moving the mouse. Provided that the eLux software packages “userauth” and “xscreen”
have been installed and the authentication server is active (see 3.7.4 User Authorization) you
can define in the screen setup whether the screen saver is to be locked. To unlock the screen
saver you have to enter your logon password.
Build # 27
35
www.myelux.com
eLux® NG
4.
In Setup > Screen click Advanced. This leads you to the advanced settings of the
screensaver. Please consider that this option is only available when the „xscreensaver“
package has been installed. The figure below shows the settings.
5.
Click Apply and OK in the eLux NG Starter dialog box regarding restart.
Build # 27
36
eLux® NG
www.myelux.com
To modify advanced screen settings
Backing store is
not supported by
all hardware
platforms.
From the Setup > Screen subtab, click Advanced.
1. Backing store: Saves screen information to the local X11 server on the thin client. When this
option is active, a copy of the application window is stored in an off-screen pixel buffer. When
hidden sections of overlapping application windows are redrawn, the sections are copied from
this buffer rather than fetched from the server. This increases the screen refresh speed when
the network connection is slow (especially noticeable by ISDN); however, the main memory
requirements are large (128 MB or higher).
2. Font server: If your network has an X11 font server, you can use it to access fonts. The font
server will be available in both the eLux NG desktop and XDMCP sessions. Click New in the
Screen advanced dialog box.
Figure 22: Define font server dialog box
•
Either click Font server:Port and enter the IP address (or name) of the font server and
the port number, separated by a colon.
Example:
office:7100
or
•
Click Font path and enter the font path. (Font paths are usually accessed via Samba or
Network File System (NFS) drives. Ask your administrator for the correct path.)
Example:
/smb/g/fonts
3. Click OK in the Font server dialog box. If the information you entered is valid, the dialog box
closes. If it is invalid, an error message appears. Correct the information and click OK.
4. By default, local fonts have precedence. Select Prepend user font path to give the font
server/path you just entered precedence.
Build # 27
37
eLux® NG
www.myelux.com
3.4.1
Safe Boot
Default screen settings are set to values all monitors support. If after configuring the Thin
Client you have massive screen distortion, resolution, frequency and color depth are most
likely set to values your monitor does not support. In this case, switch off your monitor to avoid
damage. Start the Thin Client in Safe Boot mode. Safe Boot allows you start the terminal in a
mode which does not damage hardware. You can then correct screen settings.
See section 5.2 Safe Boot.
3.5
Mouse / Keyboard
Figure 23: Setup > Mouse / Keyboard
To modify standard mouse / keyboard settings
From the Setup tab, click the Mouse / Keyboard subtab.
1.
Here you can set the mouse settings.
•
Type Click to select your mouse type from the drop-down list.
•
Auto Automatically detect the mouse type. Default setting.
•
2 button Two-button mouse
•
3 button Three-button mouse
•
Wheel To enable the wheel function of a mouse
•
No mouse Deactivates the mouse functionality. The mouse pointer is fixed in the lower
right-hand corner of the screen. To reactivate mouse functionality you must go into the
Mouse / Keyboard tab using the keyboard and change this setting: ALT+<underlined
letter> allows you to jump from tab to tab, TAB key allows you to move within a tab, and
UP/DOWN arrow keys allow you to select the mouse type from the drop-down list.
•
Double click speed Move the slider to the right to shorten the interval between mouse
double-clicks.
•
Acceleration Move the slider to the right to increase the mouse drag speed.
Build # 27
38
www.myelux.com
2.
3.
eLux® NG
Here you can set the keyboard settings.
•
Language Click to select your keyboard language from the drop-down list.
•
The default is English (US).
•
Delay The initial delay before a symbol appears when a key is pressed and held.
•
Speed The repeat speed when a key is pressed and held.
Click Apply in Mouse / Keyboard subtab and Yes in the eLux NG Starter dialog box.
Keyboard types are automatically recognized when they are plugged in. No further configuration is
necessary. For a list of supported keyboards, see “Appendix 6: Supported Hardware.”
When configuring a Microsoft application via ICA, if you wish to use the Windows default option which
moves the mouse pointer to the default button in a dialog box, you must set the mouse type to two
button or three button (the wheel function will not be supported). This setting is not required for
Microsoft Remote Desktop Protocol (RDP).
3.5.1
Advanced Mouse and Keyboard Settings
From the Setup > Mouse / Keyboard subtab, click Advanced. Here you can configure the
following advanced settings:
•
3-button mouse emulation
In general, eLux NG is used with a three button mouse. However, it is possible to achieve
the same functionality with a two button mouse. In this case, the third button is simulated
by clicking the left and right mouse buttons at the same time. Select to activate this
feature. By default it is not active.
•
Left-handed
Select to switch the mouse buttons. By default it is not active.
•
Dead keys
“Dead keys” make it possible to entered accented combination characters. A dead key
combination means that you press two keys one after the other (press the first key and
release it, then press the second key and release it) in order to form a single character. In
general, you press a key for the accent you want (nothing happens), then a key for the
letter to apply to accent to (the accented combination character appears).
For example, pressing “`” on the U.S. international keyboard produces nothing, but
subsequently typing “e” produces “è”. Other keyboard layouts may produce accented
characters in other ways (on the French keyboard there is a key that produces “è”
directly).
By default, dead keys are active. If you use an application that is incompatible with dead
keys, click to deselect.
Build # 27
39
eLux® NG
www.myelux.com
Note: Some hardware platforms do not offer this option. In this case, it is not possible to
deactivate dead keys.
•
Numlock
Select to activate the NUM key when the Thin Client boots. By default, it is active.
•
Console switch enabled
Allows the user to switch between consoles (“virtual screens”) on the Thin Client using
the hotkeys. By default, it is active. For information on consoles, see “3.5.2 Consoles.”
Click OK in the Mouse Advanced dialog box.
3.5.2
Consoles
eLux NG provides access to virtual consoles, which allow you to have more than one logon
session at a time:
•
Console 1: eLux NG desktop
This is the console you see when you boot the terminal. Here is where the user runs
terminal server sessions, SAP sessions, local browser sessions, configures the eLux NG
starter, etc. You can have multiple windows and multiple workspaces open. This is the
default console.
•
Console 2: First XDMCP session
The first XDMCP session, if one is running.
•
Console 3: Second XDMCP session
The second XDMCP session, if one is running.
•
Console 4: Message console
A text console that displays kernel messages and scripts. Useful for troubleshooting.
Up to two XDM sessions at a time are possible. By default, an XDMCP session runs in a
separate console. However, you can configure XDMCP sessions to run as a normal window in
console 1. For information on configuring XDMCP sessions, see “4.7.5 XDMCP.”
To switch consoles, press the appropriate hotkey. A list is provided in Figure 24. These
hotkeys can be deactivated, restricting the user to the eLux NG desktop (console 1). See “3.5
Mouse / Keyboard.”
No.
Console
Hotkey
1
eLux NG desktop
CTRL + ALT + F1
2
First XDMCP session
CTRL + ALT + F2
3
Second XDMCP session
CTRL + ALT + F3
4
Message console
CTRL + ALT + F4
Figure 24: Hotkeys for switching consoles
Build # 27
40
eLux® NG
www.myelux.com
3.6
Firmware
To update terminal firmware, you need a new image definition file (IDF) (the name of the file may be
the same). The new IDF is created using the software “ELIAS NG.” For information on how to create
an IDF, see the ELIAS NG Administrator’s Guide or the Scout Enterprise Administrator’s Guide.
This new IDF may reside on an FTP/HTTP server, CD-ROM or USB stick. The image file must reside
in the same directory as the software packages (that is, in the container)!
Figure 25: Setup > Firmware
3.6.1
Updating over the Network (Base OS)
Packages and the base OS can be updated over the network.
To update over the network, do the following:
1. From the Setup tab, click the Firmware subtab.
2. Enter the IP address or name of the update server in the Server field.
3. Enter the name of the new IDF file in the IDF-File field and the directory where it is
located in the Path field.
4. In the Protocol area select:
• HTTP if the update server is an HTTP server. Enter the proxy IP address or name,
and the proxy port number, if used (optional). To use Microsoft Internet Information
server 6.0, you must define several new MIME types. See the section ““3.6.4
Microsoft Internet Information Server.”
• FTP if the update server is an FTP server.
• Enter the username and password for the server in the User and Password fields.
• If no username or password is defined for the server, the entries are arbitrary. Use
elux as the password and username. Do not leave blank.
• We recommend you access the FTP server using a user account. However,
“anonymous” FTP is supported.
5. Click Apply.
Build # 27
41
www.myelux.com
3.6.2
eLux® NG
Package Update from a CD-ROM or USB Stick
Packages can be updated locally. The base OS must be updated over network. For more
information on network update, see ”3.6.1 Updating over the Network (Base OS).”
To perform an update locally you need direct file access to a container on a USB stick or a CD
drive. It is not possible to perform an update using Samba or Network File System (NFS).
Update over floppy is not supported.
1. From the Setup tab, click the Firmware subtab.
2. In the Protocol area select File.
3. Enter the name of the new IDF file in the IDF-File field.
4. In the Path field enter /misc/cdrom to access an internal CD drive (IDE) or
/misc/USB[0…7] to access a USB stick or USB CD drive. See section “3.9.5 Mount
points.” Enter the subdirectory of the image definition file, if required. Example:
/misc/usb0/eluxng/<container name>
Note: If you used the standard container name, you can enter the Container macro.
5.
Click Apply.
The following restrictions apply for update via file:
1. Both the current IDF and the update IDF must contain the base OS FPM “Drive
Support”. See Figure 26.
2. USB must be activated in the Hardware Tab.
Build # 27
42
eLux® NG
www.myelux.com
3.6.2.1 Required Firmware
Required firmware for an update via file is the base OS FPM “Drive Support.” This firmware
allows the terminal to access the USB drive, so it must be installed on the terminal before
performing an update via USB drive. In addition, the new IDF must likewise contain this
firmware, otherwise it will be removed during the update and the process will hang.
Figure 26: Required base OS FPMs
The right to use the image builder tool ELIAS NG software is included in the eLux NG license.
There is no additional charge. It is used to edit the IDFs for updating firmware on Thin Clients
and can be downloaded from www.myelux.com. Its use is beyond the scope of this document.
For more information on ELIAS NG functionality and editing IDFs, as well as terminology such
as “FPM”, see the ELIAS NG Administrator’s Guide or the Scout Enterprise Administrator’s
Guide.
Build # 27
43
www.myelux.com
eLux® NG
3.6.2.2 Activating USB port
For security reasons, by default the USB port is deactivated. From the Hardware tab, click to
activate the USB mass storage devices check box. Note that update over floppy is not
supported.
3.6.3
Starting an update
1. From the Setup tab, click the Firmware subtab.
2. Select the Click for update on boot check box to check for an update when the Thin
Client boots.
3. Select the Update confirmation necessary check box for a confirmation message to
appear before an update takes place. If you click on Details in this confirmation box,
the packages that will be installed/removed are displayed.
4. Click Apply to save your changes.
5. Click Update to perform a recovery immediately.
During an update, eLux NG compares the software on the Thin Client to the software in the
image definition file. If they differ, an update is performed. (The name of the IDF is irrelevant,
because it is the contents that are examined.)
Warning Never switch off the Thin Client during an update procedure! This can destroy the
image and the terminal will no longer boot. In this case, contact your system administrator and
perform a recovery (see chapter “6 Recovery Installation”).
The following two sections describe buttons that are in the Firmware tab, but do not directly
relate to a firmware update.
If the update cannot be performed, the reason is displayed in a dialog. In addition, you can
click on Details to display the technical details.
Build # 27
44
eLux® NG
www.myelux.com
3.6.4
Microsoft Internet Information Server
To update firmware or perform a recovery using Microsoft Internet Information Server (IIS),
there is an additional step: The file extensions requested by eLux NG are not automatically
transferred by IIS, but rather must be explicitly added to the MIME types. This is discussed in
the Microsoft online help.
Note Entering the MIME types may not always be necessary. We recommend, however, that
you add them when using IIS. For version 6.0 they are required.
1. Open the Internet Services Manager (Start > Administrative Tools > Internet
Information Services (IIS) Manager).
2. Expand the branches until the Internet site is visible.
3. Click with the right mouse button on the Internet site and select Properties.
Figure 27: Microsoft Internet Information Services Manager
4. In the Web Site Properties dialog box go to the HTTP header tab. Click the button File
Types.
Build # 27
45
www.myelux.com
eLux® NG
5. In the File Types dialog box click New
Type and enter .idf, .fpm, .epm,
.gz as text/plain.
IIS is configured for an update/recovery.
3.6.5
Update Log
To view the update log, go to Diagnostics tab, click to select System files, and click
Execute. Use the PAGE UP / PAGE DOWN keys to scroll. The update log is “eluxman.log”.
For more information on the Diagnostics tab, see section “3.18 Diagnostics.”
3.6.6
To Reload the Configuration from Scout Enterprise
A Thin Client managed by the management tool Scout Enterprise receives its Setup
configuration from the Scout Enterprise server:
•
the first time it is entered in the Scout Enterprise software
•
when the Thin Client starts
However, the Setup configuration is loaded when the Thin Client starts only if a change is
registered in the Scout Enterprise server. This takes place when the administrator makes a
change to the Setup configuration using Scout Enterprise. If the administrator makes no
change, the Setup configuration is not loaded when the Thin Client starts. The Thin Client
uses the previously saved configuration instead.
To force the Setup configuration to reload, click the Reload button. The Thin Client contacts
the Scout Enterprise server and loads the configuration, regardless of whether there has been
a change registered with the Scout Enterprise server.
Note: You must be managed.
For more information on the management tool Scout Enterprise, see the Scout Enterprise
Administrator’s Guide.
3.6.7
Resetting the Thin Client to Factory-Delivered Default Settings
The Reset button overwrites the eLux NG configuration and with the factory default setting
and deletes all defined application. For information on the Reset button, see “5.3 Factory
Reset.”
Build # 27
46
eLux® NG
www.myelux.com
3.7
Security
Figure 28: Setup > Security
To modify security settings
From the Setup tab, click the Security subtab.
By default, the user has access to the Setup and Configuration tabs. In the Security subtab you can
and set user rights and restrict access.
eLux NG mirroring settings (“3.16 Mirroring”) are discussed in a different chapter.
3.7.1
Device Password
The device password is very powerful, as it gives administrator rights for the Thin Client. It is
required for various functions, such as entering the Thin Client in the Scout Enterprise
management software (see the Scout Enterprise Administrator’s Guide, “Client Discovery”),
etc.
To change the Thin Client password,
from the Security subtab, click “Local
security” > Permissions > Edit. In the
Local security settings dialog box,
enter the new password twice. The
password upon delivery is elux.
Warning Do not forget the Thin Client password! The only way to recover a lost Thin Client
password is to do a Recovery Installation. This deletes the configuration and defined
applications and resets the Thin Client password to elux. See chapter “6 Recovery
Installation.”
Build # 27
47
eLux® NG
www.myelux.com
3.7.2
Local Security Settings
It is possible to set user rights for the Thin Client. This section describes how to restrict the
access the user has to the configuration settings.
To set user rights
From the Security subtab, click “Local security” > Permissions > Edit. In the Local security
settings dialog box you can set user rights. The configuration parameters are displayed in a
branching tree-like structure. Upon restart, the user can only access the functions that you
enabled.
Figure 29: Examples of “All fields modifiable” (left) and “All fields locked” (right)
Build # 27
1.
All fields modifiable Click to enable local configuration of all fields. The color green
indicates that a field is unlocked.
2.
All fields locked Click to disable local configuration of all fields. The color red
indicates that a field is locked.
48
eLux® NG
www.myelux.com
Figure 30: Examples of fields in the Setup tab (left) and Applications tab (right)
The configuration parameters are displayed in a tree-like structure. Click the plus to expand
the element. Click the minus to collapse the element. Double click with the left mouse button
(keyboard equivalent: space bar) to change a field’s status: red = locked, green = unlocked
(local configuration allowed).
3.
Setup To allow users to access the Setup tab and modify user settings, expand
“Setup” and set the desired fields to green.
4.
Configuration Allows you to restrict local access to the Configuration tab and local
access to application profiles.
5.
The remaining top-level parameters refer to options in the Applications tab (see
Figure 30, right).
6.
•
Start application and Stop application refer to the “Connect” and “Disconnect”
options.
•
Logoff, Restart, Halt and Lock refer to the shutdown options.
When you are done configuring local access, click OK in the Local security settings
dialog box and Apply in the Security subtab.
In addition, the option “Allow remote X11 clients” in the Security tab allows remote X11 clients
to connect to the local Thin Client.
Build # 27
49
eLux® NG
www.myelux.com
The following figure shows an example of the eLux NG starter with restricted access.
Configuration
disabled
Setup disabled
Figure 31: eLux NG screen with security settings - Configuration and Setup tabs disabled
3.7.3
Authorization Hotkey
The default user “LocalLogin" is the local device administrator. The password for “LocalLogin”
is the Thin Client password.
You can access Setup or Configuration from an account in which they are disabled using the
so-called “terminal password authorization hotkey.”
To re-enable disabled settings
Figure 32: Device password hotkey dialog box
1. Select the eLux NG starter. Use the hotkey CTRL + ALT + HOME. The hotkey dialog
box appears.
2. Enter the terminal password (= password of “LocalLogin”) and click OK.
Note: The terminal password is “elux” by default. If you change the terminal password
and forget it, to reset the password you must do a Recovery. See chapter “6 Recovery
Installation.”
3. All settings are re-enabled. Click the Settings tab to make changes to settings.
4. To disable this access, click Shut down > Log off from the Applications tab.
You can also re-enable settings using the remote management tool Scout Enterprise.
Build # 27
50
eLux® NG
www.myelux.com
3.7.4
User Authorization
Software Requirements
User authorization: “User authorization modules” (file name: “userauth”) EPM.
To test user variables: “LDAP search module” (file name: “usersearchldap”) FPM in “User
authorization modules” EPM. By default, it is not activated.
For a description of EPMs and FPMs, see the ELIAS NG Administrator’s Guide.
Figure 33 User Authorization
You can use an authorization server with eLux NG. Settings are made in the Setup >
Security tab. Username and password are entered once at eLux NG start.
Note In this chapter, there are numerous configuration examples that include unusable IP
addresses, passwords, and domain examples. Be sure to use your own IP addresses,
passwords, and domains when configuring the authentication server settings.
To configure server authorization
Settings are made in the Setup > Security tab.
1.
Build # 27
Under “Access authorization”, select the type of authorization server from the dropdown list:
None:
to disable user authorization
LDAP server:
for an LDAP server
Windows NT/2000:
for a Windows NT® 4.0 domain controller
Active Directory Server:
for an Active Directory Server (Windows 2000)
2.
Further parameters are server specific.
3.
Click Edit. The Authorisation settings dialog box appears.
51
www.myelux.com
eLux® NG
LDAP server: Light Directory Access
Protocol is a TCP/IP-based protocol that
defines a standard method for accessing
directory services.
For authorization using an LDAP server,
enter the following:
•
Server: Enter the IP address/name of
the LDAP server.
•
Version: Select the LDAP version to
use from the drop-down list
Click Find values. The Thin Client will
search for the server and automatically fill
in the Search base field.
For information on user variables, see
“User Variables” in this section.
Windows NT/2000: In a Windows NT domain the user accounts are administrated by a
Primary Domain Controller (PDC). When a user logs on to the PDC, he or she is
authenticated using the user database. User account information must no longer be
entered on every workstation within the domain. User information must only be entered
once. Due to redundancy, load sharing or optimizing WANs, user information can be
replicated using a Backup Domain Controller (BDC). Authorization takes place using this
server if the PDC cannot be reached.
For authentication using a Windows NT computer, enter the following parameters:
•
Domain: Enter the NT domain.
•
Primary: Enter the IP name of the
Primary Domain Controller (PDC).
Each domain has one and only one
PDC. An IP address is not allowed.
•
Secondary: Enter the IP name of the
Backup Domain Controller (BDC). An
IP address is not allowed. While a
domain can have more than one
BDC, only one entry is allowed.
The NetBIOS name of the PDC must be identical to the IP name. This is also true for the
BDC.
Build # 27
52
www.myelux.com
eLux® NG
Active Directory Server: The directory
service for Windows 2000 is called Active
Directory. The structure is different from
Windows NT: there are no longer PDCs
and BDCs – they are given up in favor of a
peer model, where all domain controllers
(DC) in a Windows forest are equal.
For authorization using Active Directory,
enter the following:
•
Server: Enter the IP address/name of
the domain controller.
Click Find values. The Thin Client will
search for the server and automatically fill
in the Search base field.
For information on user variables, see
“User Variables” in this section.
4.
Click OK and then Apply in the Security tab.
You must now enter a username and password when the Thin Client starts.
eLux NG supports changing the password (ADS only). When the password on the ADS server
expires, the user will be requested to enter a new password in the logon dialog box.
If you have entered incorrect directory service settings, use LocalLogin and the Thin Client
password to log on to the Thin Client locally. You can then correct the settings by going to
Setup > Security.
3.7.4.1 “Help! I’m locked out!”
If you activate directory services and settings are incorrect, you will be locked out. However,
you can still log on to the Thin Client locally using the login name “LocalLogin” and the Thin
Client password. You can then correct the settings by going to Setup > Security.
3.7.5
User Variables
Software Requirements
To test user variables: “LDAP search module” (file name: “usersearchldap”) FPM in “User
authorization modules” EPM. By default, it is not activated.
User variables are variables whose values are read from the authorization server when the
Thin Client makes its authorization call. The variables can be used in certain fields in the eLux
NG starter.
Preset variables are $ELUXUSER, $ELUXDOMAIN und $ELUXPASSWORD. They are
automatically set when the Thin Client starts. When using LDAP or Active Directory Server as
the authorization server, it is also possible to define your own user variables.
Build # 27
53
eLux® NG
www.myelux.com
To set user variables
1.
In the Authorisation settings dialog box for ADS or LDAP click on Add. The User
variable dialog box appears.
•
Local variable: Enter a name for the variable. The name must begin with the
prefix “ELUX” without the initial “$”.
End with the “#” character to transfer more than one value, for example,
ELUXMAIL#=mailLocalAddress. If more than one mail account address resides on
the server, they will be transferred using the nomenclature ELUXMAIL_1,
ELUXMAIL_2, etc. In this case, the variable ELUXMAIL_0 contains the number of
mail addresses that were read.
•
LDAP variable: Enter the name of the attribute that the LDAP or Active Directory
should assign the variable. As an example, the LDAP/Active Directory schema
can contain the attribute “displayName”. If you assign this attribute to the variable
ELUXFULLNAME, it will be assigned the value of this attribute during the next
user authorization call.
2.
Test: The Thin Client attempts to retrieve the value for the attribute you entered from
the authorization server.
3.
Click OK in the User variable dialog box and Apply in the Security tab.
User variables can be entered in the eLux NG starter just like normal parameters. Enter each
variable with the “$” character as prefix. For example, in an ICA application definition enter
$ELUXUSER as the username. This variable will be replaced with the given username when
the application is called.
3.7.5.1 Application Possibilities for User Variables
When user authorization is active, user variables can be used in the following fields in the
eLux NG starter.
Applications Tab
Field
Function
Shut down > Lock
Manual activation of the Preset with the value of
screen saver lock
$ELUXPASSWORD
Build # 27
User Variable
54
eLux® NG
www.myelux.com
Setup Tab
Subtab
Field
User Variable
Drives
Username
$ELUXUSER,
Password
$ELUXPASSWORD,
Directory, Server,
Share
Every $ELUX variable
Browser home
directory
Every $ELUX variable
Screen saver
password
$ELUXPASSWORD
Subtab
Field
User Variable
ICA/RDP
Server
Every $ELUX variable
User
$ELUXUSER
Password
$ELUXPASSWORD
Domain
$ELUXDOMAIN
Browser
Proxy, Proxy port
Every $ELUX variable
Tarantella
Server
Every $ELUX variable
Screen
Configuration Tab
Local > Customized Commands
Application possibility: Programs that can be executed using the command line.
Example: .............................. rdesktop -u $ELUXUSER -p $ELUXPASSWORD <machine>
Parameter
3.7.6
Every $ELUX variable
Manager Settings
See “3.14 Remote Management.”
3.7.7
Mirroring Settings
See “3.16 Mirroring.”
Build # 27
55
eLux® NG
www.myelux.com
3.8 Multimedia (Volume)
Figure 34: Setup > Multimedia
To adjust the volume
1.
From the Setup tab, click the Multimedia subtab.
2.
Move the slider to the right to increase the volume.
3.
To enable sound in XDMCP sessions, click to select Enable sound in XDMCP sessions.
Note: The application must be e-sound system compatible.
4.
3.9
Click Apply.
Drives
eLux NG supports the following drives:
•
Samba
•
Network File System
•
internal drives (CD-ROM, floppy)
•
Universal Serial Bus
Note The Drives tab is
exclusively for mapping
SMB drives! All other drive
types are mapped
automatically.
This section describes how to access the various drives.
Build # 27
56
eLux® NG
www.myelux.com
3.9.1
Samba
Samba is an implementation of the Session Message Block (SMB) protocol that allows Linux
and Windows computers to share files and printers over the network. Network drives for a
Windows NT or Samba server must be explicitly defined.
Figure 35: Setup > Drives
To set a network drive using NT or Samba server
From the Setup tab, click Drives.
1.
Click the button New.
2.
Fill in the fields in the Define drives dialog box:
•
Local directory: Enter the directory
name.
eLux NG automatically adds “/smb/“ to
the directory name. The data can then be
accessed locally in the directory
/smb/<directory name>. See section
“3.9 Drives” for more information.
•
Server: Enter the name of the server.
•
Share: Enter the export name of the
shared drive as defined on the Windows
machine.
•
Username, Password: Enter your
username and password on the server.
Figure 36: Define drives dialog box
Build # 27
57
eLux® NG
www.myelux.com
Figure 37: Results of the Test button in the Define drives dialog box
3.
Click Test. If the drive can be used, the message “Drive can be used” appears. If the
server cannot be located, the message “Server cannot be contacted” appears. Check
your entries for validity.
4.
Click OK in the Define drives dialog box. Click Apply in the Drives subtab and Yes in
the eLux NG Starter dialog box.
Note It is particularly important to click Apply and Yes in the confirmation request dialog box
to complete the mapping process.
3.9.2
Network File System
eLux NG comes equipped with NFS drive capability. No additional settings modifications are
required.
To use a network drive shared via NFS, use the following format:
/nfs/<hostname>
or
/nfs/<IP address>
When the Thin Client accesses an NFS drive, all shared NFS directories on this host are
displayed.
Warning All Thin Clients have access to the server as “nobody.” There is no privacy. Each
client has the same access rights to the other clients’ files. Therefore, we strongly recommend
that you permit write-protected drives only.
3.9.3
Internal Drives
If your hardware includes an internal (IDE) CD-ROM or floppy drive, you can access it without
further configuration. It is also automatically mapped in a Citrix ICA session.
To access it locally, use the mount point. See section “3.9.5 Mount points.”
Build # 27
58
eLux® NG
www.myelux.com
3.9.4
USB Drives
eLux NG supports the following USB peripherals:
•
card readers
•
network cards
•
mass storage devices
•
mouse / keyboard
More than one USB peripheral can be in use at the same time.
Due to security reasons, by default the USB port is disabled for mass storage devices (CDROM, floppy, USB stick, etc.). To enable this port, select the USB mass storage devices
check box in the Hardware tab. To access the mass storage device locally, use the mount
point. See section “3.9.5 Mount points.”
For more information on USB devices, see section “3.12.1 USB Devices.”
Mass storage devices
A pop-up message appears when a mass storage device is successfully connected to the Thin
Client. Alternatively, click the Show detected devices button in the Hardware tab to see the
currently connected USB devices.
Citrix ICA drive mapping
To access a mass storage device or handheld device from within a Citrix ICA session, it must
be mapped. See section “4.2.5 Client Drive Mapping” for information on mapping client drives
within a Citrix ICA session.
3.9.5
Mount points
eLux NG is Linux based. For this reason, to access a drive from a local application, you must
use a prefix in your drive path. This prefix is the so-called “mount point.” The drive prefixes
are:
/smb
Samba
NFS
/nfs
Internal floppy
/misc/floppy
Internal CD-ROM
/misc/cdrom
USB mass storage device
/misc/usb[0-7]
Your device may support up to eight USB mass storage devices, depending on your hardware
platform. The mount points are distributed chronologically starting with /misc/usb0, that is,
the first device to be connected receives the mount point /misc/usb0, the second device
/misc/usb1, etc. For security reasons, the USB port must be activated before use
(Hardware tab).
See section “4.2.5 Client Drive Mapping” for information on mapping client drives within a
Citrix ICA session.
Example 1: Setting a browser home directory
To set the browser home directory to a network drive (see section “3.10 Browser Home
Directory” for more details) in the Hardware tab > Browser field enter:
NFS drive:
/nfs/smith/browser
Samba:
/smb/g/smith
Build # 27
59
www.myelux.com
eLux® NG
To use a network drive via Samba, the drive must already be defined in the Drives tab.
Example 2: Downloading to a network drive
A user wants to download a file from the Internet. The user is using the local browser Mozilla.
The file is too large to save to the flash.
A solution is to save the file to a network drive. In our example, the target directory is the
Samba network drive “g”.
In the Save As dialog > File name field, the user can either type the complete path including
file name (/smb/g/test.pdf) or the user can type /smb/<drive name> (in our example =
/smb/g) to view a list of subdirectories. The user can then choose the desired subdirectory.
The file download path is not the same as the browser home directory.
Example 3: Reading a PDF file from an internal CD-ROM drive
To use a local application to view a PDF document using an internal CD-ROM drive (IDE),
install the Adobe® Acrobat® Reader and Mozilla software and start the browser. Insert a CD
containing PDF files (in this example, the eLux NG CD) in the CD drive.
Start Mozilla. In the Open File dialog, enter /misc in the File name field. A list of mount
points appears. Double-click on cdrom > windows > docu > eng. A list of available
documentation folders is displayed.
Alternatively, you can use the local command
acroread /misc/cdrom/windows/docu/eng/elias/elias_manual_eng.pdf
from within a shell to open the file using the file directly using the Acrobat Reader software
(you must know the complete path).
3.10
Browser Home Directory
All browser files are saved to the Thin Client’s local memory. The local folder /tmp is used for
temporary files (cache, etc.) and the local folder /setup/<browser> is used for permanent files
(history, bookmarks, etc.).
By definition, a Thin Client has very little available memory. For this reason, heavy surfing can use up
the available local memory very quickly. When available memory is 5% or less, the user is plagued by
recurring warning messages. There are two options: either the user restarts the terminal (the /tmp
folder resides on a RAM disk and is deleted when the Thin Client is turned off) or the administrator
must go to the terminal and delete the files by hand.
To avoid this inconvenience, you can use a network drive as the home directory for the browser. All
browser files (cache, history, configuration, cookies, etc.) are saved to this directory, regardless of
whether they are temporary files or not.
To set a browser home directory
1.
2.
From the Setup tab, click Drives.
Enter a netdrive path in the “Directories” > Browser field.
You can use a network drive or a subdirectory on that drive.
Example:
/smb/g/user/paul or /nfs/hal2001/users/paul
In the case of Samba, the drive must have been previously defined. (See “3.9 Drives”.)
3.
Click Apply.
Build # 27
60
eLux® NG
www.myelux.com
3.11
Printer
You can print from both local and network printers. In addition, other workstations or servers within the
network can use a printer installed locally on your Thin Client, which supports LPR and TCP direct
print. You can use eLux NG to configure and assign logical names to local printers, which can be used
from within the network. If the printer name for the local or network printer is different from the preset
“lp”, you must also configure it within in the local application, such as Mozilla.
Figure 38: Setup > Printer
The printer attached locally to your Thin Client may be used by other machines if they support TCP
direct print (for Windows: Windows 2000 and later). In this case, enter the port number of the local
printer’s interface (parallel or USB) in the “TCP direct print” area.
For local applications that use PostScript® as the output format, such as Mozilla or Acrobat Plug-in,
you must define a PostScript printer.
The Maximum printer response time allows you to set a time-out for a locally defined printer. If the
printer is for any reason unavailable (paper out, cannot be reached, broken, etc.), the local application
stops responding, or “hangs.” The print job will be terminated after this time-out, allowing you to
resume using the local application.
With eLux NG V1.23 and higher you can print a test page in text format or PostScript format (see
figure 38).
Build # 27
61
eLux® NG
www.myelux.com
3.11.1 Local Printer
The default printer definition “lp” is preset to a local printer. This means you can attach a
printer to the Thin Client parallel port and print without additional configuration (depending on
your printer, you may need to activate the filter).
The main memory is used to buffer print data. The following describes how to configure a local
printer.
To configure a local printer
1.
Connect a printer to the parallel, serial
or USB port of the Thin Client.
2.
From the Setup tab, click the Printer
subtab.
3.
Click New.
4.
Enter the name of the printer in the
Printer settings dialog box.
5.
Click the interface type in the
Connection type list.
•
Parallel: If the printer is attached to
a parallel port.
•
Serial (COM1): If the printer is
attached to the external serial port.
Click the baud rate from the Baud
rate list. To set COM port settings,
see “3.12.4 COM Ports.”
•
USB: If the printer is attached to a
USB port.
Figure 39: Printer definition dialog box
(settings for local printer shown)
6.
From the Filter drop-down list, select Text to print from a local shell (print shell
command: lpr –P <printer name>). Select PCL2 for the PCL 2 protocol. Select
None to disable filtering. In this case, the print data will be sent to the printer in the
output format of the application. See also “Filtering” below.
7.
Citrix MetaFrame ICA servers have autocreated printer capabilities. Autocreated
printer means a printer definition is automatically created on the MetaFrame server
when you connect via ICA. It is now possible to configure eLux NG to use these
capabilities. Enter the following:
Driver name: Enter the driver for your printer. Note: The printer driver name must be
exactly the same as the driver installed on the MetaFrame server. See the installed
printer driver list on the MetaFrame server if you are unsure. The MetaFrame server
will not autocreate a printer if the printer driver you entered here is not installed on the
MetaFrame server (check capitalization and spelling!).
Default: Sets the printer to your default printer on the MetaFrame server.
8.
Click OK in the Printer definition dialog box and Apply in the Printer subtab.
Filtering
To configure the filter, you must determine which page description language is being used by
the application and by the printer. The two most common are PostScript® from Adobe and
Printer Control Language (PCL®) from Hewlett Packard.
Build # 27
62
eLux® NG
www.myelux.com
If the output format of the application differs from the local printer format, you will have to
activate the filter.
File format
Convert to
Filter Setting
UNIX text
DOS text
“Text”
PostScript
PCL2
“PCL2”
If the application output format is the same as the printer format, disable the filter (“None”).
Troubleshooting
Printing is a complex topic beyond the scope of this manual. For help with a specific printer,
please contact the printer manufacturer. As a guide, below is help for some common
questions.
1. PostScript file – PostScript printer (Filter = “None”)
Most local applications – such as the local browser or Acrobat Reader – generate PostScript
output. To print PostScript files to a PostScript printer, the filter should be set to “None.”
If your printer prints a large amount of ASCII text, your file could be PCL. To check the file
format, in the print dialog select “Print to file” and save to a network drive or to the local
directory “tmp”. Open the resulting *.prn file using Notepad or vi. If the first line starts with %!
the file is PostScript.
2. PostScript file – PCL printer (filter should be set to “PCL2”)
For this filter option to be displayed, the PCL package must be installed on the Thin Client
(“PCL printer support” located in the base OS). By default, it is not installed.
3. Is the printing problem affecting multiple devices or just one device? If one device, make
sure the Thin Client is working properly – try printing to other printers, accessing network
drives, contacting other devices, etc. If it cannot, it is not a printer problem. If it can, see if the
print job reaches the printer (most printers have a status line). If it does, the problem is most
likely the file format. See 1 and 2 above.
4. Attempt to communicate with the printer on a protocol level. If the printer has an IP address,
ping it from a local shell (see “4.8.1 XTerm (Local Shell)”). If you are unsuccessful, or if the
problem is affecting multiple Thin Clients, it may be a network problem.
5. If the application stops responding, or “hangs,” you may have a performance problem. For
example, the Thin Client buffers print data in main memory. How large is the main memory
compared to the file you are trying to print? The more complex the file, the larger it will be.
Graphics and color increase file size. PostScript files are often much larger than the original
file. If your main memory is small, printing large files could cause a delay if the printer is not
ready at the time a print task is running (see 6). Avoid this by checking the printer status in
advance and by setting a “Maximum printer response” time-out.
6. Hardware problem: Verify that the printer is on and ready, that the paper tray is full, and that
there are no error messages in the display.
Build # 27
63
eLux® NG
www.myelux.com
3.11.2 Network Printer
The Thin Client uses the standardized Line Printer Daemon Protocol (BSD spool) as defined
in RFC 1179 to communicate with network printers.
IP address or name of the
remote system or printer box
Name of printer queue of the
remote system or printer box
Figure 40: Printer definition dialog box (settings for network printer shown)
To set up a network printer
From the Setup tab, click the Printer subtab.
1.
Click New.
2.
Enter the name of the printer in the Printer settings dialog box.
3.
From the Connection type drop-down list, select Network.
4.
From the Filter drop-down list, select None to disable filtering. Select Text to print
from a local shell (print shell command: lpr -P<printer name>). Select PCL2 for the
PCL2 protocol (not supported by all hardware platforms).
5.
Enter the IP address or name of the remote system or printer box in the Printer
address field.
•
If your network does not have a DNS server, alternatively you can use the name
of the printer if it has been defined in the local hosts file on the Thin Client (Setup
> Network > Advanced) See Ch. 3.2 Network.
6.
Enter the name of the printer queue of the remote system or printer box in the Printer
queue field.
7.
Citrix MetaFrame ICA servers can automatically create a printer definition
(“autocreated printer”) using parameters you entered on the Thin Client. These
parameters are transferred to the MetaFrame server when you connect via ICA. Enter
the following:
Driver name: Enter the driver for your printer. Note: The printer driver name must be
exactly the same as the driver installed on the MetaFrame server. See the installed
printer driver list on the MetaFrame server if you are unsure. The MetaFrame server
will not autocreate a printer if the printer driver you entered here is not installed on the
MetaFrame server (check capitalization and spelling!).
Default: Sets the printer to your default printer on the MetaFrame server.
8.
Build # 27
Click OK in the Printer definition dialog box and Apply in the Printer subtab.
64
www.myelux.com
eLux® NG
3.11.3 Citrix Universal Printer Driver 2
MetaFrame XP with Feature Release 3 offers autocreated printers with generic drivers. To use
this feature, you must have Citrix ICA Client for Linux V 7.04 or higher installed on your Thin
Client.
Client-side settings are made in the Printer settings dialog box described in the previous
section.
Server-side settings are described in this section.
To configure driver settings, log on to the server as administrator and open the Management
Console for MetaFrame XP. From the context menu for Printer Management, select
Properties. The Printer Management Properties dialog box opens.
Click Printers in the left-hand panel. Here you set autocreated printer settings. See the Citrix
documentation for more information.
Click Drivers in the left-hand panel. Here you set driver settings.
•
Native drivers only A client printer will be created using the printer driver entered in
Scout Enterprise. If the driver is not installed on the MetaFrame server, the client printer
will not be created.
•
Universal driver only A client printer will be created. The printer driver entered in Scout
Enterprise will be replaced with the generic driver.
•
Use universal driver only if native driver is unavailable A client printer will be created
using the printer driver entered in Scout Enterprise. If the driver is not installed on the
MetaFrame server, the generic driver will be used.
•
Both universal and native drivers Two versions of each client printer will be created,
one with the generic driver and one with the native driver entered in Scout Enterprise.
•
Automatically install native drivers for auto-created client and network printers
Native printer drivers will automatically be installed on MetaFrame XP servers where
printers are autocreated.
The generic driver used with the Citrix ICA Client for Linux 7.04 and higher is the MetaFrame
XP PS Universal Driver (HP Color LaserJet PS).
In this example, we activate the autocreated printer function and set driver settings to
“Universal drivers only if native driver is unavailable.”
Build # 27
65
eLux® NG
www.myelux.com
Figure 41: MetaFrame XP generic printer drivers
Assume the user opens an ICA session to the Citrix MetaFrame server. In the Printers and
Faxes window (Start > Printers and Faxes), the user will see icons for the automatically
created client printers in the format Client/<hostname>#/<printer>, where <hostname> is
the hostname of the Thin Client and <printer> is the name of the printer as defined in Setup.
When a universal printer driver is used, the text “[UPD:<generic driver name>]” is appended to
the printer name, where <generic driver name> is “PS”. In the figure above, the client printer
“Client/Herman#/lp” is created using the native driver “HP LaserJet 4L” and
“Client/Herman#/laser6” is created using the generic driver for PostScript, as the specified
driver “HP LaserJet PS” is not installed on the application server.
For more information on server-side settings for Universal Drivers, please see the Citrix
documentation for MetaFrame XP with Future Release 3.
3.11.4 TCP Direct Print
In TCP direct print, data is sent directly to the printer. There is no spooling of print jobs on the
Thin Client and the data is not modified before printing. The flow is controlled by TCP/IP.
To configure the Thin Client as a print server with TCP direct print
Enable TCP/IP on the Thin Client.
1.
In the eLux NG starter (Setup > Printer)
click to select “TCP direct print” >
Enabled.
2.
Enter the number of the port (parallel or
USB) the printer is attached to.
3.
Click Apply in the Printer subtab.
The IP address of the Thin Client, printer name
and port number must be entered at the remote
machine.
The Thin Client can resolve the host name of the machine initiating the print job. If you don’t
have a domain name service (DNS), enter the host name and the IP address in the local file
"hosts" (Setup > Network > Advanced). See Ch. 3.2 Network.
Build # 27
66
eLux® NG
www.myelux.com
3.11.5 Thin Client as Print Server
Other workstations or servers can use a printer connected to a Thin Client. These
workstations or servers must either support TCP direct print or have the have the LPR protocol
(BSD spool) installed.
The figure below shows the definition of an LPR printer in Windows NT Server.
Figure 42: Installing an LPR printer
To define an LPR printer in Windows NT
In Windows NT,
1. Install the “Microsoft TCP/IP Print Service” via Control Panel > Network > Services.
2. Install the printers in the Print Setup.
3. Use the eLux NG printer as a network printer from the Windows NT station.
To define an LPR printer in Sinix
In Sinix,
1. Create a so-called sinkfile for every printer. The name is arbitrary:
>/var/spool/Spool/config/my_elux_printer
2. Add the printer to the system. Be sure that the Thin Client can be reached when
entering the following command:
xpadd -dev my_elux_printer
da /var/spool/Spool/config/my_elux_printer
Build # 27
// Sinkfile
-su root
// Xprint Supervisor
-fl bsd
// LPR print filter
-ca "host=myterminal queue=lp"
// Host name of Thin Client and queue
name as defined.
-pc HP_LASERJET
// Printer type
67
eLux® NG
www.myelux.com
3. Activate the printer:
xpchange -dev my_elux_printer
4. Test the printer:
xpadd -de my_elux_printer dr /etc/hosts
3.11.6 ThinPrint
ThinPrint® software from the ThinPrint GmbH in Germany allows optimized printing in network
across various platforms. Components include the ThinPrint server and ThinPrint client. The
server component processes print data for the target printer and sends it in compressed form
to the client. The client receives print jobs from the server, decompresses them and sends
them to the selected printer. ThinPrint Server and Client are connected via TCP/IP. ThinPrint
is a print protocol. Unlike TCP direct, LPR or CUPS, with ThinPrint the bandwidth can be
specified, meaning it is a viable option for networks with small bandwidth.
To use this software, on the Thin Client you must install the ThinPrint client software, attach a
local printer and configure the ThinPrint Client and ThinPrint Server.
To configure the ThinPrint client as a local application using a user-defined
command
1.
Install the software “Thin Print client” (“thinprint”) on the Thin Client.
2.
Connect a printer to the Thin Client.
3.
On the Thin Client, go to Configuration > New > Local.
•
Name: Enter an appropriate name, such as “ThinPrint”.
•
Application: Select Custom.
•
Parameter: Enter the command “thnuclnt” and required parameters. The individual
parameters are described the section “Parameters” below.
Example: thnuclnt -dev /dev/lp0 -class HP -name “HP LaserJet 6L”
4.
Select Start automatically to start the software at device start.
5.
(optional) Select Hidden to hide the application from the user. (recommended)
6.
Click Apply and Finish.
Parameters
Format: thnuclnt -dev <device> -class <classname> -name <printer name>
<device>
Enter the device name. Use one of the following formats:
Parallel printer Enter /dev/lp0.
USB printer Enter /dev/usb/lp0.
Network printer Enter the printer definition name as defined in the eLux
NG starter (see “3.11.2 Network Printer”).
Serial printers are not supported.
<classname>
(optional) Class name. Maximum length of seven characters. Do not
include blanks.
<printer name>
Name for this printer. UNIX conventions generally apply.
For more than one printer, repeat the parameters in the order above.
Example for a parallel and USB printer:
thnuclnt -dev /dev/lp0 -class HP -name “HP LaserJet 6L” -dev
/dev/usb/lp0 -class HP -name “HP LaserJet 4L”
Build # 27
68
www.myelux.com
eLux® NG
Note No error messages are displayed when a local program is run. If you enter the command
in a local shell, you will be able to view any error messages. We recommend doing this before
configuring ThinPrint as a local application using a user-defined command.
See section “4.8.1 XTerm (Local Shell)” for more information on the local shell and section
“4.8.4 User-Defined Commands” for information on local commands.
Additional settings must be made on the ThinPrint server. This is beyond the scope of this
manual. For more information, please see the ThinPrint documentation available at
www.thinprint.com.
3.11.7 CUPS
To use this feature, the software “CUPS printing front-end“ (qtcups) must be installed. In
addition, the CUPS server must have server options configured.
The Common UNIX Printing System™ (CUPS™) is a software product from Easy Software
Products. It provides a common printing interface within a local network and dynamic printer
detection and grouping. The advantage of CUPS is that all configuration takes place on the
CUPS server. No configuration takes place locally on the client.
The CUPS server contains a list of back-ends, including parallel port, USB connections, serial
connections and network (LPD).
On the Thin Client, when the CUPS client is installed, it replaces the local LPD printing
system. All local printer definitions in Setup > Printer are ignored.
The CUPS client and server are provided free of charge. Commercial add-ons and support for
the CUPS server can be purchased from Easy Software Products. For more information, see
www.cups.org.
CUPS is used to print from local applications on the Thin Client (for example, Adobe Acrobat
or a local browser). These local applications have PostScript as output format. If you do not
have a PostScript printer, you must install a filter (for example, PostScript to PCL) on the
CUPS server.
Configuration takes place using the Scout Enterprise management tool. For more information,
see the Scout Enterprise Administrator’s Guide.
Build # 27
69
eLux® NG
www.myelux.com
3.12
Hardware
In the Hardware tab you can set various hardware settings: USB port activation, RAM disk size and
the number of monitors.
Network hardware settings are discussed in chapter “3.13 Network Hardware.”
Network
hardware
settings
(Ch. 3.13)
Hardware
settings
Figure 43: Hardware Tab
3.12.1 USB Devices
The following USB devices are supported:
•
card readers
•
network adapters
•
mass storage devices
•
mouse, keyboard
3.12.1.1 USB card readers
Card readers are used with smart cards. For information on smart cards and a list of
supported card readers, see “3.15 Smart Card.”
3.12.1.2 USB network adapter
Define a profile for the ISDN connection as described in section “3.13.2 ISDN **.” No further
configuration is required (plug-and-play).
Configuring a WLAN USB network adapter is described in section “Fujitsu Siemens WLAN
D1700 USB Network Adapter.”
Build # 27
70
eLux® NG
www.myelux.com
3.12.1.3 USB mass storage devices
In general, all USB mass storage devices are supported including, but not limited to, CD-ROM,
floppy, USB stick, 2.0 flash card readers, photo mass storage, etc. A maximum of eight mass
storage devices can be used at one time.
For security reasons, by default the port is disabled.
To enable the USB ports for mass storage devices,
select the check box USB mass storage devices in the Hardware tab.
Click on the browse button to display currently connected devices.
Accessing USB storage devices is described in section “3.9 Drives.”
3.12.1.4 USB mouse / keyboard
A USB keyboard / mouse can be used without further configuration (plug-and-play). For a list
of supported keyboards, see “Appendix 6: Supported Hardware.”
3.12.2 RAM Disk
A large RAM disk is required in special instances, such as printing a large file from Acrobat
Reader. You can set the size in a defined area depending on the physical main memory
without restricting the basic functionality of the Thin Client. The option RAM disk only affects
/tmp on the flash card (and not /setup, for example).
If you have 64 MB or less of main memory, the RAM disk size cannot be changed. It is fixed at
4 MB. However, if your main memory is greater than 64 MB, you can increase the RAM disk
settings. In this case, the minimum RAM disk size is 8 MB.
To modify RAM settings (> 64 MB)
1. From the Setup tab, click the Hardware
subtab.
2. Move the slider to the right to increase
the disk space allocated to RAM.
3. Click Accept.
Figure 44: RAM disk settings (for > 64 MB main memory)
Data in /tmp is automatically deleted when you turn off or restart the Thin Client
(Applications > Shutdown > Restart or Switch off). It is not deleted when you log off
(Applications > Shutdown > Log off).
3.12.3 Multiple Monitors
If you have a video card installed, you can set the
number of monitors to use in the Hardware tab.
You can choose between one, two, three or four
monitors (depending on card type). This option is
displayed only if the corresponding software
(Matrox video card software FPM in base OS,
“matrox”) and hardware (a graphics card) are installed.
For a list of supported cards, see “Appendix 6: Supported Hardware.”
3.12.4 COM Ports
Available with base OS 1.8.
You can set COM port settings in the Hardware tab.
Click on the COM port settings button. The COM port settings dialog box appears. Make
the desired changes.
Build # 27
71
eLux® NG
www.myelux.com
3.13
Network Hardware
Software Requirements
ISDN, ADSL, modem: “ISDN Modem ADSL support” (file name: “isdn”) FPM in base OS EPM.
Required software for wireless LAN is discussed in the wireless LAN chapter.
For a description of EPMs and FPMs, see the ELIAS NG Administrator’s Guide.
To modify network hardware settings
1.
From the Setup tab, click the Hardware subtab.
2. Click your network type from the Network type drop-down list: Ethernet, ISDN, ADSL,
Modem, Token ring. Fill in the related fields.
3. Click Apply.
A detailed description of each network setting follows. For a list of supported cards, see “Appendix 6:
Supported Hardware.”
3.13.1 Ethernet
Depending on your hardware platform you can connect to a local-area network using the onboard
Ethernet card, a network interface card, or an adapter card for fiber optic.
To set network hardware settings for Ethernet
1. From the Setup tab, click the Hardware subtab.
2. Click Ethernet from the Network type list.
3. Select the Ethernet speed from the Speed list. If Auto does not work, see your
network administrator for the correct speed.
•
1 Gbit Only available for the gigabit Ethernet network card Broadcom Tigon 3
(BCM570x). Other card parameters will be automatically configured.
•
AUI, BNC: Only available for the 3Com® EtherLink® 10 PCI Combo Network
Interface Card.
4. Click Apply.
Build # 27
72
eLux® NG
www.myelux.com
3.13.2 ISDN **
You have two possibilities to connect to ISDN: PCI interface card or USB modem.
3.13.2.1 ISDN Card
In this variant, the Thin Client has an ISDN card installed and is connected to an ISDN cable.
See “Appendix 6: Supported Hardware” for a list of supported hardware.
3.13.2.2 USB Network Adapter
In this variant, the Thin Client is connected to an ISDN cable over a USB network adapter.
Verify that a LAN cable (for example, Ethernet) is not connected to the device.
Warning Do not use USB ISDN with a Thin Client that already contains an ISDN card.
See “Appendix 6: Supported Hardware” for a list of supported hardware.
3.13.2.3 Configuring Network Hardware Settings for ISDN
Figure 45: Setup > Hardware > ISDN
1. From the Setup tab, click the Hardware subtab.
2. Click ISDN from the Network type list.
A series of fields appears.
3. Select a profile from the Profile list. Otherwise click Edit to create or edit one. This opens
the Network profiles dialog box.
4. In the Network profiles dialog box click New to create a new profile or Edit to modify an
existing one.
The Profile dialog box is displayed.
Build # 27
73
eLux® NG
www.myelux.com
Figure 46: “Profile” dialog box for ISDN
Name:
Enter a name for the ISDN profile, such as the name of your
provider.
User account:
Enter the user account name assigned by your provider.
Password:
Enter the password assigned by your provider.
Identification:
Click the method assigned by your provider (generally PAP).
Idle time-out:
Enter an idle time (in seconds). After this specified amount of
inactivity, eLux NG disconnects the ISDN connection.
Manager time-out:
Time (in seconds) for the security / remote management tool
Scout Enterprise to reply when the terminal boots (ask your
network administrator). The Thin Client must be managed.
The countdown starts when the network connection is
established. See the Scout Enterprise Administrator’s Manual
for information on Scout Enterprise. If the manager time-out is
not known, use the default value.
Number:
Enter the access number of your provider. For company
telephone systems, include the code used to access an
outside line, if required.
MSN:
Multiple Subscriber Number. If you use the callback function,
enter the phone number of your terminal (without the area
code). If you don’t use the callback function, enter zero.
Callback:
Select if your provider supports the callback feature (usually
unchecked for commercial providers). If you use callback, you
must enter an MSN.
Use local IP address:
Select if your provider reserves a static IP address for your
eLux NG terminal (usually unchecked for commercial
providers).
5. When you are done entering information for a profile, click OK in the Profile dialog box.
Repeat until you have entered / edited the desired profiles.
6. Click OK in the Profile dialog box and Apply in the Hardware subtab.
Build # 27
74
eLux® NG
www.myelux.com
3.13.2.4 Comments on ISDN
When connecting via ISDN, ADSL or modem it is possible that the thin client’s IP address will
change dynamically. The new address is updated immediately in the eLux NG starter title bar.
See “Appendix 3: Examples of Internet Profiles” for a list of the default hardware profiles that
are delivered in eLux NG. These default profiles are valid in Germany and may not be valid in
your country. Use them only as examples when defining your profiles. Included is a T-Online
profile.
For troubleshooting, see chapter ”5.4 Solutions to Common Problems.”
3.13.3 ADSL
Figure 47: Setup > Hardware > ADSL
1. From the Setup tab, click the Hardware subtab.
2. Choose ADSL from the Network type list.
A series of fields appears.
3. Select the LAN speed from the Speed list. If Auto does not work, see your network
administrator for the correct speed.
4. Select a profile from the Profile list. Otherwise click Edit to create or edit one.
5. In the Network profiles dialog box click New to create a new profile or Edit to modify an
existing one.
The Profile dialog box is displayed.
Build # 27
75
eLux® NG
www.myelux.com
Figure 48: “Profile” dialog box for ADSL
Name:
Enter a name for this profile.
User account:
Enter the user account name assigned by your provider.
Password:
Enter the password assigned by your provider.
Identification:
Select the method assigned by your provider (generally PAP).
Idle time-out:
Enter a value for the idle time (in seconds). After this specified
amount of inactivity, eLux NG disconnects the connection.
Manager time-out:
Enter the time (in seconds) for the security / remote
management tool Scout Enterprise to reply when the terminal
boots (ask your administrator). If not known, use the default
value.
6. Click Apply in the Profile dialog box.
7. Click OK in the Network profile dialog box and Apply in the Hardware tab.
When connecting via ISDN, ADSL or modem it is possible that the thin client’s IP address will
change dynamically. The new address is updated immediately in the eLux NG starter title bar.
See “Appendix 3: Examples of Internet Profiles” for a list of the default hardware profiles that
are delivered in eLux NG. Included is a T-Online profile for ADSL.
Build # 27
76
eLux® NG
www.myelux.com
3.13.4 Modem
Figure 49: Setup > Hardware > Modem
1. From the Setup tab, click the Hardware subtab.
2. Choose Modem from the Network type list.
A series of fields appears.
3. Click the baud rate of your modem from the Speed list.
Note: Must be greater than the actual maximum modem baud rate.
4. Select a profile from the Profile list. Otherwise click Edit to create or edit one.
5. In the Network profiles dialog box click New to create a new profile or Edit to modify an
existing one.
The Profile dialog box is displayed.
Build # 27
77
eLux® NG
www.myelux.com
Figure 50:” Profile” dialog box for modem
Name:
Enter a name for this profile.
User account:
Enter the user account name assigned by your provider.
Password:
Enter the password assigned by your provider.
Identification:
Click the method assigned by your provider (generally PAP).
Idle time-out:
Enter a value for the idle time (in seconds). After this specified
amount of inactivity, eLux NG disconnects the connection.
Manager time-out:
Enter the time (in seconds) for the security / remote
management tool to reply when the terminal boots (ask your
administrator). If not known, use the default value.
Number:
Enter the access number of your provider.
6. Click Apply in the Profile dialog box.
7. Click OK in the Network profiles dialog box and Apply in the Hardware tab.
When connecting via ISDN, ADSL or modem it is possible that the thin client’s IP address will
change dynamically. The new address is updated immediately in the eLux NG starter title bar.
See “Appendix 3: Examples of Internet Profiles” for a list of the default hardware profiles that
are delivered in eLux NG. These default profiles are valid in Germany and may not be valid in
your country. Use them only as examples when defining your profiles. Included is a T-Online
profile.
Build # 27
78
eLux® NG
www.myelux.com
3.13.5 Token Ring **
Figure 51: Setup > Hardware > Token Ring
1. From the Setup tab, click the Hardware subtab.
2. Choose Token Ring from the Network type list.
3. Click autosensing or the speed (in Mbit/s) from the Speed list.
4. Click Apply.
Build # 27
79
eLux® NG
www.myelux.com
3.13.6 Wireless LAN **
eLux NG supports the following wireless LAN products:
(1) Aironet 350 Series Network cards from Cisco Systems, Inc.
(2) DWL-G520 Network card from D-Link Corporation.
(3) WLAN USB D1700 USB network adapter from Fujitsu Siemens Computers.
3.13.6.1 Cisco Aironet 350 Series Network Cards
eLux NG supports the Aironet 350 Series network cards from Cisco Systems, Inc. No adapter
is required and it is not necessary to disable the onboard Ethernet controller in the Thin
Client’s BIOS Setup. This feature is not available for all hardware platforms.
Enabling wireless LAN on your device involves the following:
1. Installing the required firmware
2. Inserting the card
3. Configuring network hardware settings
4. Entering the WEP key for encrypted transfer
To install the wireless LAN firmware
To use wireless LAN you must install the Aironet Client Utility from Cisco.
1. Start ELIAS NG and add the following packages to the device’s IDF:
•
Aironet Client 350 Series (aironet) This FPM is found in the base OS package.
•
GTK Library Package (gtklib) EPM. This is a library required for the next package.
Confirm that the FPM “GTK MM Library” (libgtkmm) is active.
•
Cisco Aironet Utility (airo) EPM. The graphical interface of the Cisco client.
2. Save the IDF and exit ELIAS NG.
3. Install the software on the Thin Client by performing a firmware update over Ethernet.
To insert the wireless card
Insert the card into your device according to the directions that came with the card.
To set network hardware settings for wireless LAN
Figure 52: Setup > Hardware > Wireless LAN
1. In eLux NG, from the Setup tab, click the Hardware subtab.
2. Choose WLAN Aironet from the Network type list.
Build # 27
80
eLux® NG
www.myelux.com
3. Click Apply and then Yes in the eLux NG Starter dialog box.
4. When the device restarts, it will attempt to contact the access point using unencrypted
wireless LAN.
To set client-side encryption settings
This section explains how to activate Wired Equivalent Privacy (WEP) with static keys for your
client in an enterprise network. WEP is an optional feature based on the IEEE 802.11b
standard that provides data confidentiality. Using WEP involves packet-by-packet data
encryption by the transmitting device and decryption by the receiving device. The 350 Series
supports high-speed WEP at 40 and 128 bits.
Encryption settings are made in the Client Encryption Manager (CEM) portion of the Cisco
Aironet Client Utility.
Figure 53: Setup > Hardware > Wireless LAN > Edit button
1. From the Setup tab, click the Hardware subtab. Click the Edit button. The Aironet Client
Utility appears (command line equivalent: “acu”).
Note If the Edit button is not displayed, select WLAN Aironet from the Network type list.
Click Apply and then Yes in the eLux NG Starter dialog box. After restarting, the Edit
button will be present.
Build # 27
81
eLux® NG
www.myelux.com
Figure 54: Cisco Aironet Client Utility interface
2. This client program is from Cisco Systems. A few highlights:
•
Commands > Status Displays the signal level and other useful information for userlevel diagnostics.
•
Commands > Statistics Shows how data is currently being transmitted or received.
•
CEM > Change Password Allows you to change the Client Encryption Manager
(CEM) password.
•
Commands > Edit Properties In the System Parameters tab, enter the client name
and SSID (from the network administrator).
For a description of all Aironet client settings, see the Cisco documentation. Enterpriselevel encryption settings are described below.
3. To activate Wired Equivalent Privacy (WEP) for encrypted transfer, from the CEM menu
select Enter WEP key. Enter the CEM password (default = “Cisco”). The Enter WEP
key(s) dialog box appears.
4. Click to select the WEP key check box, Transmit Key check box and speed (40- or 128bit) for the key that you are creating (1, 2, 3 or 4). Note that the speed must match serverside settings.
5. Enter the WEP key, keeping the following rules in mind:
•
The WEP key must match the WEP key used by the access point with which you are
planning to communicate.
•
For 40-bit encryption, the WEP key must be 10 characters in length, for 128-bit
encryption, 26 characters.
•
General purpose WEP keys can only consist of the hexadecimal characters 0-9, A-F,
and a-f, whereas home networking WEP keys can be comprised of ASCII text.
•
You can write over existing keys, but you cannot edit or delete them.
6. Click Apply and OK. Note that entering a WEP key does not enable WEP. Also, for
security reasons, the codes for existing WEP keys will not be displayed.
Build # 27
82
www.myelux.com
eLux® NG
7. From the Commands menu select Edit Properties. The Properties dialog box opens.
Go to the Network Security tab. Click to select the Enable WEP (Wired Equivalent
Privacy) check box. Click OK.
8. Close the Aironet Client Utility and restart the device for configuration settings to take
effect.
In addition, security settings must be configured on the access point.
Extensions in Cisco Aironet Utility, V 2.1.13-2 (and later)
With eLux NG V1.20 the software package "Cisco Aironet Utility 2.1.13" has been extended by
the programs "leapscript" and "leapset".
leapscript enables to set the user name and password for the LEAP-authentication. LEAP is
an authentication method supported by Cisco WLAN devices for networks secured by IEEE
802.1x. Up to now user name and password could only be entered via graphical interface
(acu), so that during boot procedure no network connection was available nor could the
management server be reached.
leapscript reads the user name and password for the LEAP authentication from the file
/setup/aironet/aironet.ini. This file can be entered in Scout Enterprise for devices and/or
groups (properties of groups or devices – Advanced file entries).
Structure of the file /setup/aironet/aironet.ini:
Example 1:
[LEAP]
Username=elux
CleartextPassword=secret
The device authenticates with the user name elux and the password secret. The password
is shown as plain text.
Example 2:
[LEAP]
Username=__HOSTNAME__
CleartextPassword=secret
The macro __HOSTNAME__ is being replaced by the host name of the device, i.e. each
device authenticates by its network name and the password secret.
Example 3:
[LEAP]
Username=elux
Password=q]@Xy^b[w
In this example the password is stored in encrypted form.
leapset – just like leapscript – serves for entry of the user name and password for the LEAP
authentication. However, entry with leapset can only be done interactively, not by scriptfile.
For further information on Cisco products, or for WEP settings for a home (non-enterprise)
network, consult the Cisco documentation.
Build # 27
83
www.myelux.com
eLux® NG
3.13.6.2 D-Link DWL-G520 Network Card
eLux NG supports the DWL-G520 network card from D-Link Corporation. No adapter is
required and it is not necessary to disable the onboard Ethernet controller in the Thin Client’s
BIOS Setup. This feature is not available for all hardware platforms.
Enabling wireless LAN on your device involves the following:
1. Installing the required firmware
2. Inserting the card
3. Configuring network hardware settings
4. Configuring network hardware settings and entering the WEP key for encrypted transfer
To install the wireless LAN firmware
To use wireless LAN you must install the following firmware:
1. Start ELIAS NG and add the following packages to the device’s IDF:
•
WLAN DLINK DWL-G520 (wireless_g520) This FPM is found in the base OS
package.
Note: If you cannot activate this FPM, remove the “Cisco Aironet Utility” (airo) EPM from
the IDF first.
2. Save the IDF and exit ELIAS NG.
3. Install the software on the Thin Client by performing a firmware update over Ethernet.
To insert the wireless card
Insert the card into your device according to the directions that came with the card.
Build # 27
84
eLux® NG
www.myelux.com
To set network hardware settings for wireless LAN with DWL-G520
Figure 55 Setup > Hardware > Wireless LAN
1. In eLux NG, from the Setup tab, click the Hardware subtab.
2. Select Wireless LAN from the Network type list.
3. Configure the WPA mode you want to secure the network by (WEP/WPA/IEEE
802.1x).
Below you find examples for the 3 configurations.
(1) WEP Configuration:
Figure 56 Setup > Hardware > Wireless LAN > WEP
Build # 27
85
eLux® NG
www.myelux.com
1. Select WEP from the WPA mode list.
2. Enter the WEP key you received from your network administrator.
3. Enter the SSID information you got from your network administrator.
• Service Set Identifier (SSID) defines the network name of a wireless network based on
the IEEE 802.11b standard.
4. Configure the channel where the Access Point provides its service or set Auto for this
parameter, in order to make the client scan for the used channel and automatically
configure it.
5. Click Apply and then Yes in the eLux NG Starter dialog box.
When the device restarts, it will attempt to contact the access point using wireless LAN.
(2) WPA Configuration:
Figure 57
Setup > Hardware > Wireless LAN > WPA
1. Select WPA (PSK) from the WPA mode list.
2. Enter the SSID information you got from your network administrator.
• Service Set Identifier (SSID) defines the network name of a wireless network based on the
IEEE 802.11b standard.
3. Configure the channel where the Access Point provides its service or set Auto for this parameter, in order to make the client scan for the used channel and automatically configure it.
4. Enter the Preshared Key you received from your network administrator.
5. Click Apply and then Yes in the eLux NG Starter dialog box.
Build # 27
86
eLux® NG
www.myelux.com
(3) IEEE 802.1x/ Leap Configuration:
Figure 58 Setup > Hardware > Wireless LAN > IEEE802.1x
1. Select IEEE 802.1X (LEAP) from the WPA mode list.
2. Enter the SSID information you got from your network administrator.
• Service Set Identifier (SSID) defines the network name of a wireless network based on the
IEEE 802.11b standard.
3. Configure the channel where the Access Point provides its service or set Auto for this parameter, in order to make the client scan for the used channel and automatically configure it.
4. Depending on your authentication server enter user name and password as set on your
authentication server.
5. The Lightweight Extensible Authentication Protocol (LEAP) is a proprietary method which
enables to integrate the authentication of wireless clients into a Radius server.
6. Click Apply and then Yes in the eLux NG Starter dialog box.
Display of the Signalstärke in the taskbar:
When configuring Wireless LAN for the network type, the signal strength of your WLAN
connection is displayed by an icon on the taskbar..
Signal strength: none
Signal strength: low
Signal strength: medium
Signal strength: high
Signal strength: very high
Build # 27
87
eLux® NG
www.myelux.com
3.13.6.3 Fujitsu Siemens WLAN D1700 USB Network Adapter
eLux NG supports the Connect2Air™ WLAN E-5400 D1700 USB adapter from Fujitsu
Siemens Computers. The Connect2Air USB adapter supports data transfer rates of up to 54
Mb/s and 64 and 128 bit WEP encryption. This product is not supported by all hardware
platforms.
Enabling wireless LAN on your device involves the following:
1. Installing the required firmware
2. Attaching the USB network adapter
3. Configuring network hardware settings and entering the WEP key for encrypted transfer
To install the wireless LAN firmware
To use wireless LAN you must install the following firmware:
1. Start ELIAS NG and add the following packages to the device’s IDF:
•
WLAN USB D1700 (wireless) This FPM is found in the base OS package.
Note: If you cannot activate this FPM, remove the “Cisco Aironet Utility” (airo) EPM
from the IDF first.
2. Save the IDF and exit ELIAS NG.
3. Install the software on the Thin Client by performing a firmware update over Ethernet.
To attach the USB network adapter
Insert the USB network adapter into your device according to the directions that came with the
adapter.
To set network hardware settings for wireless LAN
Figure 59: Setup > Hardware > Wireless LAN
1. In eLux NG, from the Setup tab, click the Hardware subtab.
2. Choose Wireless LAN from the Network type list.
3. (optional) Enter the WEP key you received from your network administrator. If you
leave this field blank, the connection will be unencrypted.
4. Wired Equivalent Privacy (WEP) is based on the IEEE 802.11b standard and provides
data confidentiality.
5. (optional) Enter the SSID information you got from your network administrator.
Build # 27
88
www.myelux.com
eLux® NG
6. Service Set Identifier (SSID) defines the network name of a wireless network based
on the IEEE 802.11b standard.
7. Configure the channel where the Access Point provides its service or set Auto for this
parameter, in order to make the client scan for the used channel and automatically
configure it.
8. Click Apply and then Yes in the eLux NG Starter dialog box.
9. When the device restarts, it will attempt to contact the access point using wireless
LAN.
Build # 27
89
www.myelux.com
3.14
eLux® NG
Remote Management
Thin Clients are managed using the Scout Enterprise management tool. In order to be managed, they
must be registered in the Scout Enterprise Server. There are two ways to do this:
1. The Scout Enterprise “Client Discovery” function is performed at the Scout Enterprise Server
management server. This procedure searches for Thin Clients available over the network
remotely and automatically enters the IP address of the management server in the Thin
Client’s Manager field.
2. A “Reverse Discovery” is similar to a Client Discovery, except that the IP address of the
management server Scout Enterprise is entered in the Manager field on the Thin Client
manually. This procedure is described below.
First, install and configure the Scout Enterprise management software on the designated machine.
Second, unpack and set up the Thin Clients. The information you enter in the “Remote management
settings area” on the Thin Client is sent to the Scout Enterprise management machine, which uses this
information to locate and configure the Thin Client.
To use the First Configuration Wizard
By default, the first time the Thin Client successfully boots, a Wizard appears to help you through the
configuration process.
You have the choice between entering the device in the management software Scout Enterprise or
configuring it by hand.
For more information, see “2.2 First Configuration Wizard.”
To perform a Reverse Discovery
After the initial configuration, you can enter the Thin Client in the management software by performing
a Reverse Discovery.
From the Setup tab, click the Security subtab.
1. Enter the IP address or name of the Scout Enterprise
server in the “Manager settings” > Manager field.
You may also assign the management addresse to
the client by the Scout Enterprise Discovery function.
But if te field already contains an IP address, the
terminal is currently being managed.
2. With V1.23 and higher the group may be selected
from the list of available groups at the server.
3. With V1.23 and higher the user may disconnect
from the management by clicking delete, but
consider that this effects a factory reset.
4. The Advanced button opens the dialog with a list of
all Scout Enterprise servers, the top one being the
currently assigned server. Further you find the info
fields here.
Figure 60: Remote management settings area
This feature has been implemented in eLux NG
V1.23, because of the ability to work with a socalled Scout Enterprise farm, i.e. several Scout servers run simultaneously and the client may
use another server in case of a disconnection. This increases availability. The list of Scout
Enterprise servers is either transferred by one of the Scout servers or may be set by means of
DHCP tags from the DHCP server.
5. Fill in the Info1, Info2, and Info3 fields with the information requested by your managing
administrator. (We suggest user-specific information such as name, room number, telephone
extension, etc.)
Build # 27
90
www.myelux.com
eLux® NG
6. If your Scout Enterprise administrator has predefined groups, enter your group ID number in
the Group ID field. Otherwise enter zero. This will send the Thin Client’s information to the
“Lost and Found” group of Scout Enterprise.
7. Click Apply.
Note Upon delivery, the host name “ScoutSrv” is preset in the Manager field. Set this field to your
Scout Enterprise server IP address on your Domain Name Server to automatically enter the device in
Scout Enterprise the first time the Thin Client boots. For more information on this functionality as well
as on entering Thin Clients in the Scout Enterprise management tool, see the Scout Enterprise
Administrator’s Handbook.
3.15
Smart Card
Smart cards can be used as an eLux NG security feature, for user roaming, for Citrix logon or for RDP
logon. The PC/SC lite interface is used.
The following features are supported:
•
Citrix ICA roaming Allows you to capture a Citrix session that was running on another terminal by
removing and inserting a smart card.
•
PKSC#11 The PKSC#11 smart card interface can be used by local applications, for example, by
Mozilla to sign or encrypt emails.
•
RDP CSP A Crypto Service Provider is server-side software. CSP can be used for RDP logon or
to capture an RDP session that was running on another terminal (roaming).
•
Secure PIN Allows you to enter a PIN on a card reader instead of via keyboard. The card verifies
the PIN itself.
3.15.1 Configuring Smart Card Hardware Settings
Software Requirements
To use smart cards, the “PCSC Lite” (pcsc_lite) EPM must be installed. Available driver FPMs
for various card readers:
•
“CCID Gemplus” (gemplus): Driver for the following card readers: Gemplus GemPC Key,
Gemplus GemPC Twin USB (serial not supported), OMNIKEY CardMan 3121, Cherry
keyboard XX33 with integrated smart card reader, Fujitsu Siemens Computers smart card
reader and more. Supports ICA roaming.
•
“Castles EZ100” (ez100): Driver for the Castles Technology EZ100 and EZ100PU USB
card readers. Supports ICA roaming.
•
“Generic CCID reader” (ccid): Driver for the following card readers: Gemplus GemPC Key,
Gemplus GemPC Twin USB (serial not supported), OMNIKEY CardMan 3121, Cherry
keyboard XX33 with integrated smart card reader, Kobil KAAN Base, Kobil KAAN
Advanced, Kobil KAAN SIM III and more. Supports secure PIN.
•
“OMNIKEY CardMan 2020” (cm2020): Driver for the OMNIKEY CardMan 2020 and Fujitsu
Siemens Computers USB card readers.
•
“OMNIKEY CCID” (omnikey): Driver for the following card readers: OMNIKEY CardMan
3121, Cherry smart terminal X44, Cherry SmartBoard X44, Fujitsu Siemens Computers
USB smart card reader 2A, Fujitsu Siemens Computers USB keyboard with integrated
smart card reader 2A and more. Supports ICA roaming.
Build # 27
91
eLux® NG
www.myelux.com
In ELIAS NG select the FPM to view the card readers supported by this driver. If the list
exceeds available space, in the Package Information window click in the description field and
drag with the mouse or press the PAGE DOWN key to view remaining entries.
For a description of EPMs and FPMs, see the ELIAS NG Administrator’s Guide.
eLux NG supports a number of USB card readers and USB keyboards with integrated card
reader from the following companies (not all-inclusive):
•
Castles Technology
•
Datakey
•
Fujitsu Siemens Computers
•
Gemplus
•
Kobil Systems
•
OMNIKEY
•
SCM Microsystems
For a table of available drivers and their use at the time of publishing, see “Appendix 7:
Supported Smart Card Readers.” An up-to-date version of this table is available at
www.myelux.com.
Activating the Card Reader
To activate the card reader, in the Setup dialog box, click the Hardware subtab. From the
Smart Card list choose USB.
Deactivating the Card Reader
If you do not have a card reader, deactivate the card reader setting in the Hardware subtab.
This prevents you from accidentally being locked out of an application. If a card reader is
present, this prevents eLux NG and other applications from accessing it.
3.15.2 Local Authentication
You can restrict local access to the Thin Client by requiring a smart card upon boot.
Local authentication works with the following smart cards:
•
•
CardOS® version “M2” or “M4”
®
SICRYPT CryptoCard
Siemens GmbH
Fujitsu Siemens Computers
They must be encoded with the users’ logon data (name, password, if desired domain) using
the SICRYPT SMARTY 2 software.
Local authentication requires a Fujitsu Siemens Computers card reader.
To configure the client for smart card authentication
1. Set the smart card hardware settings as described in “3.15.1 Configuring Smart Card
Hardware Settings.”
2. Set the smart card security settings. In the Setup dialog box, click the Security
subtab. From the Smart card drop-down list, click to select one of the following:
Build # 27
92
eLux® NG
www.myelux.com
•
Always required A smart card is required when the Thin Client boots and during
the entire eLux NG session. If the user removes the card, the session will be
locked. A smart card and valid PIN are required to unlock the terminal.
•
Required on startup A smart card is required only when the Thin Client starts.
The local user can remove the card without interrupting the eLux NG session.
3. If the information saved on the smart card includes a domain name, go to the Network
tab, click Advanced, and enter the domain name in the Smart Card domain field.
Figure 61: Smart card domain field in Setup > Network > Advanced network settings dialog box
4. Save your changes.
Security settings have now been activated. Depending on the security settings you chose
(step 2), the smart card screen will appear at system start and whenever the card is removed
during the session, or at system start only. The smart card screen instructs the local user to
insert a smart card into the card reader and enter a PIN. The user is blocked until this is done.
Attention Do not mistype the PIN! If an invalid PIN is entered three times, the card is locked
and can no longer be used. It must be reset by the smart card administrator using the
SICRYPT® SMARTY 2 software.
Troubleshooting
Following is a list of the most frequent error messages.
Code
Error
Description
The card is locked
The card has been locked. See your smart card
administrator with SMARTY 2 software to unlock.
No card reader was
detected
The card reader is missing. Please attach a card
reader and reboot.
Domain mismatch
The domain name saved to the smart card is not the
same as the domain entered in eLux NG.
6d00
Cannot read card
The card is not supported. Please use cards coded
with SMARTY 2.
6301
PIN mismatch
Invalid PIN. You have one more attempt to enter the
correct PIN.
6302
PIN mismatch
Invalid PIN. You have two attempts remaining to enter
the correct PIN.
If the smart card does not work, you can access the device by performing a factory reset. For
security reasons, all configuration information is deleted. See “5.3 Factory Reset.”
Build # 27
93
eLux® NG
www.myelux.com
3.15.3 User Roaming
You can combine local authentication with another eLux NG feature: user roaming.
User roaming is transferring an active Windows terminal server session from one eLux NG
terminal to another. This is useful when you want to move to a terminal with certain hardware
– for example, with a special printer – without logging off from your current ICA or RDP
session. In user roaming, the terminal disconnects the session when you remove the smart
card (the processes continue to run on the server) and reconnects when you insert the smart
card in a second terminal, using the second device’s hardware settings (printer, drive
mapping).
All terminals that will be used for user roaming must have user roaming enabled in advance.
User roaming works with the following smart cards:
•
•
CardOS® version “M2” or “M4”
®
SICRYPT CryptoCard
Siemens GmbH
Fujitsu Siemens Computers
They must be encoded with the users’ Citrix logon data (name, password, domain) using the
SICRYPT SMARTY 2 software. A certificate is not permitted.
User roaming requires a Fujitsu Siemens Computers card reader.
To configure eLux NG for user roaming
1. Set the smart card hardware settings as described in “3.15.1 Configuring Smart Card
Hardware Settings.”
2. Set the smart card security settings. In the Setup tab, click the Security subtab. From
the Smart card drop-down list, click to select the following:
•
Always required A smart card is required when the Thin Client boots and during
the entire eLux NG session. If the user removes the card, the session will be
locked. A smart card and valid PIN are required to unlock the terminal.
3. Click Apply and OK to close the Setup dialog box.
4. Configure one of the following sessions:
•
ICA See ”4.2.1 Remote Desktop.”
•
RDP See “4.4.1 Remote Desktop.”
In the application definition, click to select Roaming.
Logon information is read directly from the card. The entries User, Password, Domain in
the application definition dialog will be ignored.
Note: The option Allow smart card logon (see “3.15.4 Citrix Logon”) cannot be
combined with user roaming.
5. Save your changes.
Activating the Roaming check box starts the terminal server session automatically. Log on to
a Windows session or unlocking a locked Windows session is reduced to inserting a smart
card and entering the user PIN for this card. The user logon data is dynamically read from the
smart card and used to connect to the terminal server. If the local user removes the smart
card, the terminal server session is disconnected. Therefore, certain settings must be defined
on the terminal server. For further information, consult the terminal server manual.
Build # 27
94
eLux® NG
www.myelux.com
3.15.4 Citrix Logon
You can restrict access to a Citrix MetaFrame server by requiring a smart card upon logon.
This feature is distinct from local authentication and user roaming and cannot be combined.
Citrix smart card logon works with a number of smart cards. Users’ logon data (name,
password, domain) as well as a certificate are saved to the smart card. You must have the
corresponding smart card software installed on your MetaFrame server. See the Citrix
documentation for more information.
To configure eLux NG for Citrix ICA smart card logon
1. Set the smart card hardware settings as described in “3.15.1 Configuring Smart Card
Hardware Settings.”
2. Set the smart card security settings. In Setup, click the Security subtab. From the Smart
card drop-down list, click to select the following:
•
Not required This disables eLux NG security settings, freeing up the card reader
for other applications, in this case, for the Citrix ICA client.
Click Apply.
3. Go to the Configuration tab. Configure an ICA session as described in ”4.2.1 Remote
Desktop.” Click to select Allow smart card logon.
4. Save your changes.
3.15.5 RDP Logon
To use this feature, your terminal server must support RDP 5.2 or higher. In addition, on the
thin client you must have base OS 1.14.1 or higher and the RDP native client 1.4.0 or higher
installed (“rdesktop52”).
You can restrict access to a terminal server by requiring a smart card upon logon. This feature
is distinct from local authentication and user roaming and cannot be combined.
RDP smart card logon works with a number of smart cards. Users’ logon data (name,
password, domain) as well as a certificate are saved to the smart card. You must have the
corresponding smart card software installed on your server.
The following cryptographic service providers are supported:
•
GemSAFE™ from Gemplus®
•
SafeSign® from Thales e-Security Ltd.
To configure eLux NG for RDP smart card logon
1. Set the smart card hardware settings as described in “3.15.1 Configuring Smart Card
Hardware Settings.”
2. Set the smart card security settings. In Setup, click the Security subtab. From the
Smart card drop-down list, click to select the following:
• Not required This disables eLux NG security settings, freeing up the card reader for
other applications, in this case, for the RDP client.
Click Apply.
3. Go to the Configuration tab. Configure an RDP session as described in ”4.4.1 Remote
Desktop.” Leave Roaming deselected.
4. Click Advanced.
5. In the RDP advanced dialog box go to the Advanced tab and set the protocol to “Auto”
or “RDP V5”.
6. Go to the Local Resources tab and select the Enable smart card check box.
7. Save your changes.
Build # 27
95
eLux® NG
www.myelux.com
3.16
Mirroring
Mirroring is the term used to describe the process of monitoring a user’s session remotely and,
optionally, participating in the session using your own keyboard and mouse. Mirroring has a variety of
uses, including troubleshooting, training and presentations.
Mirroring requires server-side and client-side configuration. In this section, we will use the scenario of
a Thin Client mirroring another Thin Client.
Required Software
Administrator
VNC viewer (“VNC client” (vnc)). (If the administrator machine
is not a Thin Client, use the respective VNC viewer software.)
User
VNC server ( “eLux NG mirroring” (mirror)). Mirroring is
disabled if the eLux NG terminal does not have the necessary
firmware installed.
Active
session
Mirrored
session
Administrator
(VNC viewer)
User
(VNC server)
To enable / disable mirroring (user terminal)
From the Setup tab, click the Security subtab.
1. Select the Activated check box to allow mirroring. Other options are:
Read only access: Gives other machines
view rights only.
Confirmation necessary: The user must
confirm a mirroring session before it can start.
XDMCP: Enables mirroring of XDMCP
sessions.
Password: (optional) Set the password that must be entered to start a mirroring session.
2. Click Apply.
To configure the eLux NG VNC viewer (administrator machine)
From the Configuration tab, click New.
1. The Application Definition dialog box appears. Click the Emulation tab.
2. Click VNC in the Emulation type list. A series of fields appears.
•
Name: Enter an appropriate name for this application, such as “mirror.”
•
Server address: Use the following format:
<IP address or name of the eLux NG terminal>:<display number>
For description of display numbers, see below.
•
Password: (optional) Enter the mirroring password saved to the target device. If a
mirroring password does not exist, leave blank.
3. Click Finish.
Build # 27
96
eLux® NG
www.myelux.com
During the mirroring session, the keyboard mapping of the local system has precedence.
Display number
You can enter “0”, “1” or “2” for the display number.
If your hardware platform supports multiple consoles, use "0" to mirror the eLux NG main screen. Use
“1” to mirror the first running XDMCP session and “2” for the second XDMCP session, if applicable.
If your hardware platform does not support multiple consoles – you will know this because the
eLux NG desktop is automatically ended when an XDMCP session is started – always use “0”.
Security concerns
During a mirroring session, a message box appears on the remote machine, making it impossible to
“secretly” mirror a user. The user can end a mirroring session at any time. In addition, you can set a
mirroring password. Nonetheless, if security is a concern, you can deactivate mirroring entirely by
deselecting the Activated check box in the Security subtab > “Mirror server settings”.
Figure 62: Example mirroring session – eLux NG desktop (display 0)
Build # 27
Message box = mirroring
session active
97
www.myelux.com
eLux® NG
Figure 63: Example mirroring session – XDMCP session (display number depends on hardware platform)
Related Information
Section “4.7.6 VNC” discusses configuring the free eLux NG software “VNC viewer”.
Section “4.7.5 XDMCP” discusses configuring XDMCP sessions.
Build # 27
98
www.myelux.com
3.17
eLux® NG
VPN
A virtual private network (VPN) is a system that allows two or more private networks to be connected
over a publicly accessible network, such as the Internet. These systems use encryption and other
security mechanisms to ensure that only authorized users can access the network and that the data
cannot be intercepted. A VPN can be used to exchange critical information between employees
working remotely or to securely deliver information between business partners.
eLux NG can be used with Cisco VPN.
3.17.1 Cisco VPN Client **
The Cisco VPN client is used to connect to a Cisco VPN device to create a secure connection
between the Thin Client and a private network. It uses Internet Key Exchange (IKE) and IP
Security (IPSec) tunneling protocols to establish and manage the secure connection. You can
connect using LAN, DSL or ISDN to one of the following:
•
Cisco IOS devices that support Easy VPN server functionality
•
VPN 3000 Series Concentrators
•
Cisco PIX Firewall Series
The following describes how to configure the VPN client via shell and start a session using
preshared keys. Configuration takes place locally on each Thin Client that will access the
private network. It is assumed that the initial configuration takes place in the company’s
Ethernet network before the device is transferred to a remote workplace using Ethernet,
ADSL, ISDN or WLAN.
Each Thin Client must have the configuration parameters saved to the file:
/setup/ciscovpn/sample.pcf.
This section assumes you are familiar with defining a local shell, setting network hardware
settings and using the UNIX text editor vi.
Firewall Issues
If you are running a firewall, the following types of traffic must be allowed through:
•
Port 500 for UDP
•
Port 10000 for UDP (or any other port number being used for IPSec/UDP)
•
IP protocol 50 (ESP)
•
TCP port configured for IPSec/TCP
•
NAT-T (Standards-Based NAT Transparency) port 4500
Required Information
The following information is necessary for the configuration (see your VPN system
administrator):
•
Hostname or IP address of the secure gateway you are connecting to
•
IPSec group name
•
IPSec group password
•
Username and password if authenticating through:
~ the secure gateway’s internal server
~ an authentication, authorization and accounting (AAA) server, either RADIUS or
TACACS+
•
The hostnames or IP addresses of the backup servers, if configuring backup server
connections
Build # 27
99
www.myelux.com
eLux® NG
Using the Cisco VPN to build a tunnel involves the following:
1. Installing the required firmware
2. Configuring network hardware settings
3. Configuring the Cisco VPN client
4. Initiating a connection
5. Configuring an application for automatic start
To install the required firmware
To set up your VPN you must install the VPN client from Cisco.
1. Start ELIAS NG and add the following packages to the device’s IDF:
• Base OS 1.7 or later
• Browser of your choice (optional, for testing purposes)
• Cisco Systems VPN Client (cisco_vpnclient) EPM. The Cisco client software.
2. Save the IDF and exit ELIAS NG.
3. Install the software on the Thin Client by performing a firmware update.
Note Only one VPN may be installed on the Thin Client at a time. In ELIAS NG, if you
receive the error message “Package already defined” when selecting the package,
remove the current VPN from your IDF.
To configure network hardware settings
1. Configure the network hardware settings.
Tip: For ISDN or ADSL, set the time-out to 600 seconds.
For information on how to configure network hardware settings, see “3.13 Network
Hardware.”
2. Restart the device.
3. Test that your hardware parameters are correct.
Tip: You can do this by starting a local browser (such as Opera, Mozilla or Firefox). If
you can successfully connect to an external Web site, the parameters are valid.
To configure the Cisco VPN client
To initiate an encrypted session with a Cisco device, you must have certain parameters saved
to the device. The Cisco VPN client default configuration file is sample.pcf.
Edit the profile configuration file with one of the following:
•
UNIX editor vi. Run a local shell (see “4.8.1 XTerm (Local Shell)”). At the command-line
prompt type the following command to open the file in the editor vi:
vi /setup/ciscovpn/sample.pcf
•
Local text editor (see “4.8.8 Text Editor”)
To set the required parameter:
1. Open the file. Set the parameter “Host” to address of the Cisco VPN server. The
address can be either in decimal format (nnn.nnn.nnn.nnn) or a DNS Lookup address.
You can set other tunnel parameters in this file if desired, such as IPSec group name
and password or backup servers. For a complete list of all configuration parameters,
see the Cisco documentation.
2. Save the file and exit the editor.
Build # 27
100
eLux® NG
www.myelux.com
To initiate a session
1. A VPN session is initiated from the local shell. There is no graphical user interface.
2. To initiate the session, open a local shell. At the bash prompt type: vpnclient
connect sample
3. If connection was successful, you will be requested to enter a group name and
password and a user name and password (depending on the configuration).
4. Once the tunnel has been established, the local shell displays the status of the
connection as well as potential error messages (see Figure 64).
5. You can run applications (ICA, RDP, emulations etc.) from the eLux NG starter as
usual. The connections will be established through the secure tunnel.
6. To disconnect, type CTRL-C or close the local shell.
To configure an application for automatic start
After successfully establishing a session from a local shell, you can configure an application to
run Cisco VPN automatically when the device starts. This section is optional.
1. From the Configuration tab, click New. In the Application Definition dialog box,
click the Local tab.
•
Name: Enter “VPN Connect”.
•
Application: Select XTERM.
•
Parameter: Enter –e vpnclient connect sample
•
Application Restart: Leave deselected
•
Start automatically: Click to select
2. From now on when the Thin Client starts, the window VPN Connect will automatically
open and a VPN session will be initiated.
Figure 64: Initiating an encrypted session with Cisco VPN
3. The VPN Connect window displays the status of the connection. The window is
displayed only for the duration of the VPN session. Error messages are not displayed.
4. To disconnect, use CTRL-C or close the VPN Connect window.
Build # 27
101
www.myelux.com
eLux® NG
Helpful hints
In a local shell:
•
Entering the command vpnclient displays a list of all VPN client commands.
•
Entering the command vpnclient stat displays status information for the connection.
•
When you start the client automatically using the –e parameter, the window is displayed
only for the duration of the VPN session, making it inappropriate for debugging. Call the
client from a local shell to view potential error messages.
•
You can save more than one profile configuration file to the Thin Client directory
/setup/ciscovpn/. In this case, when calling the program replace sample with <file
name> where <file name> is the name of the profile without the extension *.pcf.
•
Always end your applications before closing the VPN tunnel!
•
If the VPN tunnel closes when applications are running, the applications will hang. If this
occurs, disconnect the session by either closing the window or disconnecting the session
in the eLux NG starter. Avoid this by setting high idle times when using ISDN or DSL.
•
If you cannot build a tunnel, verify that the network connection is active (especially if you
are using ISDN or DSL). One way to do is by starting a local browser.
The configuration parameters in sample.pcf can also be set by Scout Enterprise. In addition,
remote devices with Cisco VPN can be managed by Scout Enterprise as long as the manager
can be reached outside of the tunnel. See the Scout Enterprise Administrator’s Guide for more
information.
For configuring the profile for authentication using a digital certificate or token vendor, see the
Cisco documentation.
3.18
Diagnostics
Build # 27
102
eLux® NG
www.myelux.com
Figure 65: Diagnostics tab
This subtab is for diagnostic purposes. You can either view a single file, view groups of files, or you
can send files to an FTP server.
To configure diagnostics
From the Setup tab, click the Diagnostics subtab.
1. To view a single file, you must know its path on the Thin Client. Select the User file check box
and enter the complete path including path name in the box. (The file name is generally
provided by your servicer during a diagnostic procedure.)
Example:
/setup/ica/wfclient.ini.
To view the file, click Execute.
2. For ease of use, you can choose to select preprogrammed groups of files. For example, the
check box ICA files displays the file “appsrv.ini” in addition to the file “wfclient.ini”. In this case,
you do not need to know the file path.
•
Log files: eLux NG log files. Displays the files diag.txt, eluxd.log and elux_starter.log.
Note: The level of eLux NG logging detail is set in Debug level. None means the logs
eluxd.log and elux_starter.log will not be generated. You must reboot the Thin Client for
changes in eLux NG logging detail to take effect.
•
System files: System configuration files, including the update log (eluxman.log).
•
ICA files: ICA configuration files.
•
Browser files: Configuration files for Opera, Mozilla or Firefox browsers.
•
X-Emulation files: The trace files written by one of the X-Emulations – X97, X32 or X52 –
are binary and cannot be displayed. However, they can be sent to an FTP server.
See step 3.
To view the files, click Execute.
Build # 27
103
eLux® NG
www.myelux.com
3. To send files to an FTP server, select the desired files, select the Transfer files to check box,
enter the URL of the destination directory, and click Execute.
Format:
ftp://<FTP server>/<path>
or ftp://<username>:<password>@<FTP server>/<path>
Navigation
When viewing the files, if you do not have a scroll bar, you still have the following scrolling
options:
•
Keys: PAGE UP and PAGE DOWN, HOME and END
•
Mouse: Click anywhere in the text and drag above or below the window frame to shift the
focus
Build # 27
104
eLux® NG
www.myelux.com
4 Configuring Applications
This chapter describes how to define an application that runs locally or how to connect to a remote
server.
Section
Description
4.1
Introduction
Introduction to local applications and session clients,
description of the Application definition tab, standard tab
options
4.2
ICA Terminal Session
How to configure the Citrix ICA Client and connect to a Citrix
MetaFrame server
4.3
Accessing Citrix Published
Applications
Different configuration possibilities for connecting to a Citrix
ICA published application
4.4
RDP
How to connect to a terminal server via RDP
4.5
Internet
How to configure a local browser (Opera, Mozilla or Firefox)
and available Web tools
4.6
SAPGUI
How to configure the SAPGUI client
4.7
Emulation
How to configure a session to connect to a mainframe
4.8
Local
How to configure a local shell, user commands and desktop
accessories that run locally
Build # 27
105
eLux® NG
www.myelux.com
4.1
Introduction
eLux NG offers you two types of application possibilities:
•
remote
•
local
The main employment area of a Thin Client is as a terminal in server-based computing. “Remote”
means the application runs on a server, such as a Windows application on a terminal server. Even
when an application runs remotely, client-side software is still required to initiate and maintain a
session.
By nature, the Thin Client has limited resources, meaning the majority of applications will be server
based. However, in addition to server applications eLux NG also offers a variety of local applications.
“Local” means the application runs directly on the Thin Client. Local applications include browser
software (Opera, Mozilla, Firefox), local shell (XTerm), and desktop tools (resource information,
calculator, CD player). This software is provided free of charge and can be downloaded from
www.myelux.com or copied from the eLux NG CD-ROM.
This chapter describes how to configure both local applications and session clients. In addition, further
configuration may be required in the application itself. For further information on configuring session
clients (such as SAPGUI or Citrix ICA), please consult the manufacturer’s product documentation.
Configuration takes place in the Configuration tab.
Figure 66: Application definition dialog box
To configure a local application or session client
1.
From the Configuration tab, click New. This opens the Application definition dialog box,
which contains a number of subtabs.
2.
Click the tab for the application you want in the Application definition dialog box.
Build # 27
106
eLux® NG
www.myelux.com
Note: If the application you want does not appear as a tab, the required firmware is not
installed on the Thin Client. Contact your network administrator.
3.
Configure the application (see details in the following sections).
4.
Click Finish in the Application definition dialog box.
Standard options:
•
Start automatically The session will be started when the terminal starts.
•
Application restart The session will be reconnected after a user logs off (so-called “terminal
mode”). In addition, the session will be started when the terminal starts.
•
Desktop icon Creates a desktop shortcut for this application on the eLux NG desktop. Note: Not
available for Program Neighborhood Agent.
Additional options are application specific, for example, kiosk mode for a browser.
As long as the dialog box Application Definition is open, you cannot start any applications or activate
the Setup tabs.
Use the task hotkey CTRL + ALT + <cursor> to jump between open eLux NG dialog boxes:
•
CTRL + ALT +
: Left selection in the Applications bar
•
CTRL + ALT +
: Right selection in the Applications bar
To start an application, from the Applications tab either double-click the application you want, or click
to select the application and click Connect.
When the user shuts off the device, remote applications continue to run on the server. For this reason,
it is important that the administrator either set a server-side time-out for logging off inactive accounts
or instruct users to quit from within the session rather than click the eLux NG Disconnect button.
You can modify an existing application configuration by clicking Edit. Click Delete to remove an
application configuration.
4.1.1
Copying Between Applications
eLux NG has a clipboard that allows you to copy between applications running locally on the client and
applications running remotely in a server session. Access to the local clipboard requires no special
procedures; using the familiar cut, copy, and paste commands, you can transfer text back and forth
between most local and remote applications.
In general, this works for terminal server sessions and ICCCM compliant X window applications
running on the eLux NG desktop. Note: Due to the differences in applications this may not work in
every case.
To copy text:
Applies to copying between Citrix ICA, RDP and X window applications (such as local programs):
1. In the terminal server session (for example, Citrix) use the relevant copy command in the
application.
2. Use the task key to switch to the local program (for example, Mozilla).
For more information on the task key, see “3.3 Desktop.”
3. Use the relevant paste command in the local program.
Tip: To copy in XTerm, click the middle mouse button.
To copy graphics:
Applies to copying between Citrix ICA and an X window application:
•
Use the program xcapture described in “4.2.10 Tool xcapture.”
Build # 27
107
eLux® NG
www.myelux.com
4.2
ICA Terminal Session
Independent Computing Architecture (ICA®) is used to connect to a Windows terminal server running
Citrix® MetaFrame® software. You can then access all Windows applications residing on the terminal
server.
You have the following two configuration possibilities when connecting to a specific MetaFrame
server: remote desktop or Windows application. In addition, this chapter discusses the Citrix ICA
Client for Linux, which allows you to set advanced ICA client settings.
Configuring a session to connect to a published application is discussed in chapter “4.3 Accessing
Citrix Published Applications.”
4.2.1
Remote Desktop
A remote desktop session allows you access to the desktop of a MetaFrame server. You can
run any applications available on the desktop, in any order.
Figure 67: ICA configuration – Remote Desktop
To configure a remote desktop session via ICA
From the Configuration tab, click New.
1. The Application Definition dialog box appears. Click the ICA tab.
Build # 27
•
Name: Enter an appropriate name for this application, such as “Remote desktop”.
•
Published application: Leave deselected.
•
Server: Enter the IP address (or name) of the MetaFrame server.
•
Application: Leave blank
•
Working dir: Leave blank
•
User, Password, Domain: Enter to automatically log on to the terminal server.
•
Allow smart card logon: See section “3.15.4 Citrix Logon”
•
Roaming: See section “4.2.3 Smart Card User Roaming”
108
eLux® NG
www.myelux.com
•
Application restart: Immediately reconnects after the user logs off. When this
feature is selected, the application automatically starts when the Thin Client starts
or restarts.
•
Start automatically: Click this check box to open the session when the terminal
starts.
•
Desktop icon Creates a desktop shortcut for this application on the eLux NG
desktop.
2. Advanced: See “4.2.4 Citrix ICA .”
3. Click Apply and Finish.
4.2.2
Microsoft Windows Application
This section describes how to configure a session to a Windows application running on a
specific MetaFrame server.
Figure 68: ICA configuration – MS Windows application
To configure a connection to a Microsoft Windows application via ICA
From the Configuration tab, click New. The Application Definition dialog box appears. Click
the ICA tab.
The parameters are the same as in “4.2.1 Remote Desktop” with the following exceptions:
•
Name: Enter an appropriate name for this application, such as “MS Excel” for Microsoft
Excel.
•
Application: Name of the Windows application (for example, notepad.exe), including
path, for example,
c:\Program Files\Microsoft Office\Office\EXCEL.EXE
•
Working dir: (optional) Enter the working directory of the Windows application.
Build # 27
109
eLux® NG
www.myelux.com
4.2.3
Smart Card User Roaming
For user roaming, you need a smart card (containing user information) and a valid PIN. The
user information is sent to the ICA server and logon takes place automatically. If the smart
card is removed, the session is automatically disconnected and the Thin Client is locked. The
applications on the server remain open. If you enter the smart card and PIN on a different Thin
Client, the connection is restored. This allows you to “transfer” sessions from one Thin Client
to another.
For more information, see “3.15.3 User Roaming.”
4.2.4
Citrix ICA Client for Linux – Advanced Citrix ICA Settings
Using Citrix ICA, you can access server-specific applications or published applications. Other
features include:
•
Client drive mapping
•
Client printer mapping
•
COM port mapping
•
Low bandwidth requirements
•
Citrix ICA Client hotkeys
•
Seamless Windows support
•
Program Neighborhood Agent
•
128-bit SSL support
Note that some of these features are server specific.
Configuration of advanced ICA settings is done by clicking the Advanced button in an ICA
application definition.
Figure 69: Accessing Citrix advanced settings
Build # 27
110
eLux® NG
www.myelux.com
Figure 70: Citrix ICA Client dialog box
This opens the ICA Client for Linux, which is software from Citrix and has a different look than
the eLux NG starter.
In Connection view, you see a list of all ICA connections. ICA sessions defined in eLux NG are
automatically entered in the Citrix ICA Client. You do not have to redefine them here.
If you do not see a list of ICA connections, you may not be in Connection view. In the View
menu, click Connection View to switch to Connection view. PNAgent view is described in
chapter “4.3.4 Via Program Neighborhood Agent.”
Warning Do not define a new ICA session in the Citrix Client! Define new sessions in the eLux
NG Configuration tab. If you define new sessions in the Citrix Client, they will not be
accessible via the eLux NG Applications tab!
The configuration file for the Citrix ICA Client for Linux is named “wfclient.ini” and resides on
the Thin Client under: /setup/ica/wfclient.ini
This file can easily be viewed using the Diagnostics tab > ICA files.
Published applications, a feature commonly in use with MetaFrame server farms, are
discussed in a separate chapter: “4.3 Accessing Citrix Published Application.”
Drive mapping, COM port mapping and server location are discussed in the following sections.
For further information on configuring the Citrix ICA Client, please consult the Citrix
documentation.
Build # 27
111
eLux® NG
www.myelux.com
4.2.5
Client Drive Mapping
Client drive mapping allows a remote application running on the MetaFrame server to access
a floppy, CD-ROM and USB drives from within an ICA session. You then have access to
locally stored files during an ICA session. Note: The MetaFrame server must be configured to
allow client drive mapping.
•
Internal floppy No further configuration is necessary.
•
Internal CD-ROM No further configuration is necessary.
•
USB drive Configuration necessary.
Two CD-ROM drives can be in use at the same time (IDE internal and USB external).
Two floppy drives can be in use at the same time (IDE internal and USB external).
By default, the IDE floppy or CD-ROM drive is mapped. However, the USB drive is not. How to
map USB drives is described below.
To map USB client drives to an ICA session
1. Due to security reasons, the USB port is
not activated. Go to the Hardware tab,
select the USB mass storage devices check box and save the settings.
2. Connect the USB device to the Thin Client.
Figure 71: Citrix ICA Client for Linux – Drive Mapping
3. To make the external drive accessible in an ICA session, in the ICA client
(Configuration > ICA > Advanced) click Tools > Settings > Drive Mapping. Enter
the mount point (see section “3.9.5 Mount points”) in the drive of your choice (we
Build # 27
112
eLux® NG
www.myelux.com
recommend drive E or later) and set it to read-only (if required). Click Apply and OK
to save the advanced ICA parameters.
4. At this point, you can connect to the MetaFrame server. The client drive appears in
Windows Explorer under the letter you mapped it to.
For more information, see “3.9 Drives” and “3.12 Hardware.”
Troubleshooting
Do not configure advanced ICA settings for an open or disconnected session! Log off first.
If the desired client drive does not appear in the ICA session, and you have multiple USB
devices attached to the Thin Client, check that the mount point you used is correct.
4.2.6
COM Port Mapping
Client COM port mapping allows devices attached to the Thin Client’s serial ports to be used
from ICA sessions on a MetaFrame server. This allows local devices like modems, serial
printers, and bar-code scanners to be used by applications running on the MetaFrame server.
To map a COM port, you must know the device name of the serial port on the client.
The serial port device name always begins with “/dev”:
•
/dev/ttyS0
: external serial port
•
/dev/ttyS1
: internal serial port
•
/dev/usb/tts/0
: USB v. 24 converter (PL2303 chip only)
Note: Device names are case sensitive. The letters shown here in lower case must be typed in
lower case.
Which serial ports are available depends on your hardware platform.
To map a Thin Client COM port to an ICA session, first configure the advanced ICA settings in
the eLux NG starter, then configure the Citrix MetaFrame ICA server settings.
Build # 27
113
www.myelux.com
eLux® NG
To map a COM port from a Thin Client to an ICA session
As an example, we will map the internal serial port (COM2 on the Thin Client).
1. eLux NG starter
•
Build # 27
•
In the eLux NG starter
Configuration tab, click New and
select ICA.
•
Fill out the ICA application
definition as described in “4.2.1
Remote Desktop.”
•
Click Advanced. This opens
Citrix ICA Client for Linux
dialog box.
From the Tools menu, select Settings.
114
www.myelux.com
•
In the Settings dialog box, from the
Preferences drop-down list select COM Ports.
This opens the window for COM port settings.
•
The window for COM port settings displays the
COM ports that have been defined on the Thin
Client. In the figure, COM1 has been defined
as /dev/ttyS0.
•
To define a new COM port on your Thin Client,
click Add. This opens the COM Port Device
eLux® NG
Selection dialog. All available COM ports on
your Thin Client are displayed.
Select the desired port. In our example, we
use /dev/ttyS1 for the internal V24 port.
Click OK.
•
A new COM port will appear, numbered
automatically in ascending order. If this is the
second port you have entered, it will be
named COM2.
Build # 27
115
www.myelux.com
eLux® NG
2. Citrix MetaFrame ICA server
•
Connect to your MetaFrame server and open a command shell.
•
To map the Thin Client COM port to the COM port on the MetaFrame server, use the
following format:
net use <ICA port>: \\Client\<Thin Client port>: /persistent:yes
<ICA port>
: local port on MetaFrame server
<Thin Client port>
: remote port on Thin Client
Example:
net use com1: \\Client\COM2: /persistent:yes
3. Following are useful commands:
net use
: To view the mapping (for a drive, printer, COM port, etc.)
mode com1:
: To view the parameters
mode /?
: To change parameters
net use /help : To view man pages
Normally the port parameters are set within your application.
This procedure should work with all COM port based synchronizing software. For example, if
your personal digital assistant (PDA) software synchronizes with the COM port, map it within
the ICA session using the procedure described above.
To set COM port settings, see “3.12.4 COM Ports.”
Build # 27
116
www.myelux.com
4.2.7
eLux® NG
Handhelds
You can access handheld computing devices (such as personal data assistants, PDAs) within
an ICA session by mapping the serial connection. In addition, you need third-party server
synchronization software.
Requirements
eLux NG supports the following PDAs:
•
palmOne™ Tungsten™ 3 und 5
•
palmOne™ Tungsten™ E
•
iPAQ pocket PC 2003
•
Pocket Loox from Fujitsu Siemens Computers and others
Required software:
•
Administration and client software. This is included with your handheld.
•
For all Tungsten handhelds:
OneBridge Sync server v. 4.2 or later (part of the OneBridge Mobile Groupware) from
Extended Systems, Inc. This must be purchased separately.
•
For all Pocket PCs:
Microsoft Active Sync (free) or others
Procedure
To access Microsoft applications from the handheld (for example, Lotus Notes) within a Citrix
ICA session:
1. Install the required firmware on the eLux NG device
2. For Tungsten: Install the OneBridge Sync server on a PC
3. For Tungsten: Install the OneBridge Sync client on the MetaFrame server
4. Install the client software on the PDA
5. Map the COM port
6. Access the handheld within an ICA session
Installing the required driver on the eLux NG device
Install the following firmware on the eLux NG device using the image editor ELIAS NG. For
more information, see the ELIAS NG Administrator’s Guide.
•
Handheld driver. This is a component of the base OS. Only one handheld driver can be
installed at a time. Install one of the following:
•
Tungsten “USB Handspring Visor, Palm driver” (visor)
•
iPAQ “USB Compaq iPAQ driver” (ipaq) – included in the BaseOS
•
“ICA Client” (ica)
Installing the OneBridge Sync server on a PC
The OneBridge Sync server runs as a service on Windows NT or Windows 2000 Server,
allowing users to synchronize their mobile device. Version 4.2 or later is required The
OneBridge Sync server is required third-party software that must be purchased separately.
For information on purchasing and installation, see www.extendedsys.com.
Build # 27
117
eLux® NG
www.myelux.com
Installing the OneBridge Sync client on the MetaFrame server
The OneBridge Sync client must be installed on your MetaFrame server you plan to connect
to.
For information on purchasing and installation, see www.extendedsys.com.
Installing the client software on the PDA
Use the CD and documentation that came with the PDA to install the client on the PDA.
Mapping the COM port
Configure COM port settings as described in “4.2.6 COM Port Mapping.”
In the COM Port Device Selection dialog enter the following parameter:
•
Tungsten:
/dev/palm/0
•
iPAQ:
/dev/usb/tts/0
•
USB v. 24 converter (PL2303 chip only):
/dev/usb/tts/0
When you use the net use command, write down the COM port number you mapped to on
the MetaFrame server.
Accessing the handheld within an ICA session
1. In the eLux NG starter, configure a remote desktop ICA session.
•
For more information, see “4.2.1 Remote Desktop.”
2. Start the session (Applications > Connect). The Windows desktop appears.
3. In the ICA session, start the OneBridge Sync client and go to the Desktop Connector.
Select the COM port number you mapped to on the MetaFrame server and click
Enable.
Note: This only needs to be performed once. Settings will be saved for future
sessions.
4. Perform the desired operations with the handheld.
Build # 27
118
www.myelux.com
4.2.8
eLux® NG
Server Browsing
Server location (also called server browsing) in the Citrix ICA Client for Linux permits one-click
access from the ICA application definition to all MetaFrame servers on the network, or a list of
all published applications. To use this feature, the software “Utils for ICA Client“ (icautils) must
be installed. It is located in the “ICA client” (ica) package. In addition, the MetaFrame servers
must have server connections configured for the specific network protocol.
First configure the Citrix ICA Client for Linux, then configure the ICA application in the eLux
starter.
To configure the Citrix ICA Client for Linux
Global server location:
1. In the eLux NG starter
Configuration tab, click New and
select ICA.
2. Enter a name for this ICA
application.
3. Click Advanced. This opens Citrix
ICA Client for Linux dialog box.
4. From the Tools menu, select Settings.
Build # 27
119
www.myelux.com
eLux® NG
5. In the Settings dialog box, from the
Preferences drop-down list select
Server Location. This opens the
window for the server location
settings.
6. Select the network protocol and/or enter one or more servers. The way in which
server location works depends on which network protocol is configured:
•
Build # 27
TCP/IP+HTTP The Citrix ICA Client for UNIX uses the HTTP or HTTPS protocol to contact
MetaFrame servers. The default server address is ica.<domain name>, where <domain
name> is a TCP/IP domain name. Alternatively, you can set specific addresses for
MetaFrame servers.
120
www.myelux.com
•
eLux® NG
TCP/IP – By default, the UNIX client attempts to contact all of the servers on the
subnet by broadcasting on the UDP protocol (auto-locate). Alternatively, you can set
specific addresses for MetaFrame servers.
7. Click Apply and OK to save your settings and close the dialog box.
Build # 27
121
www.myelux.com
eLux® NG
After setting a global server location, configure the ICA application definition.
From the Configuration tab, click New.
•
Remote desktop The parameters are described in “4.2.1 Remote Desktop.” Choose the server
from the drop-down list by clicking Browse. All MetaFrame servers currently on the network
configured for that protocol will be displayed.
•
Application After choosing the MetaFrame server, enter the complete path of the desired
Windows application. A working directory is optional. See “4.2.2 Microsoft Windows Application.”
Build # 27
122
www.myelux.com
•
eLux® NG
Published application The parameters are described in “4.3.1 Via Application Definition.”
Choose the application from the drop-down list by clicking Browse. All applications currently
published on that MetaFrame server will be displayed. Note: This is one method for connecting to
published applications. For a detailed description of other methods, see chapter “4.3 Accessing
Citrix Published Applications.”
Build # 27
123
eLux® NG
www.myelux.com
4.2.9
Citrix Secure Gateway
You can use certificate-based server authentication to ensure that the server you are
connecting to is genuine.
To use Secure Sockets Layer (SSL) or Transport Layer Security (TLS) to connect to a Citrix
Secure Gateway server, you need a root certificate on the client machine that can verify the
signature of the Certificate Authority (CA) on the server certificate. The following CA
certificates are automatically installed with the Citrix ICA client:
Certificate
Issuing Authority
Class3PCA_G2_v2.crt
VeriSign Trust Network
Class4PCA_G2_v2.crt
VeriSign Trust Network
BTCTRoot.crt
Baltimore Cyber Trust Root
GTECTGlobalRoot.crt
GTE Cyber Trust Global Root
GTECTRoot.crt
GTE Cyber Trust Root
Pcs3ss_v4.crt
Class 3 Public Primary Certification Authority
SecureServer.crt
Secure Server Certification Authority
TC_RootServer_DER_Class2.crt
Class 2 TC TrustCenter Certification Authority
Figure 72: CA certificates for Citrix ICA
You are not required to obtain and install root certificates on the client machine to use the
certificates from these CAs. However, if you choose to use a different CA, you must obtain
and install a root certificate from the CA on each client machine.
Warning Certificate key lengths of greater than 2048 bits are not supported by the Citrix ICA
Client for Linux. Ensure that the bit lengths of the CA root certificates, intermediate certificates
and server certificates do not exceed this size.
Save root CA certificates to /setup/cacerts.
Note Sometimes the Citrix literature tells you to save the CA certificate to the client directory
/usr/lib/ICAClient/keystore/cacerts. This directory is read-only. Save it to /setup/cacerts
instead. A symbolic link will refer the program to the correct directory.
Certificates can be transferred to many clients using Scout Enterprise file transfer feature.
For more information on the Scout Enterprise management tool, see the Scout Enterprise
Administrator’s Guide.
4.2.10 Tool xcapture
To use this feature, you must have the “Utils for ICA Client” (icautils) package installed. It is
located in the “ICA client” (ica) package.
The Citrix ICA Client for Linux includes a helper application, xcapture, that allows you to
exchange graphical data between the MetaFrame server clipboard and non-ICCCM-compliant
X Windows applications on the X desktop. You can use xcapture to:
•
Build # 27
Grab dialog boxes or screen areas and copy them between the UNIX desktop (including
non-ICCCM-compliant applications) and an application running in an ICA Client window.
124
eLux® NG
www.myelux.com
To configure xcapture
From the Configuration tab, click New.
1. The Application Definition dialog box appears. Click the Local tab.
Name
Enter an appropriate name for this application.
Application
Click Customized.
Parameter
Enter /usr/lib/ICAClient/util/xcapture
Hidden
Does not display the application in the Application tab.
Application Restart
Click to select to immediately reconnect after the user logs off.
When this feature is selected, the application automatically
starts when the Thin Client starts or restarts
Start automatically
Click this check box to open the session when the terminal
starts.
Desktop icon
Creates a desktop shortcut for this application on the eLux NG
desktop.
2. Click Finish.
From the Applications tab, double-click or use the Connect button to run xcapture.
How to use xcapture
1. From the xcapture dialog box, click From screen. The cursor changes to a crosshair.
•
Select a window Move the cursor over the window you want to copy and click the
middle mouse button.
•
Select a region Hold down the left mouse button and drag the cursor to select the
area you want to copy.
2. From the xcapture dialog box, click To ICA.
The xcapture button changes color to show that it is processing the information.
3. When the transfer is complete, switch to the ICA session. Use the paste command to
insert the contents of the clipboard in the application.
Build # 27
125
eLux® NG
www.myelux.com
4.3
Accessing Citrix Published Applications
A connection to a published application lets a user access a predefined application and its associated
environment. Published applications can be run in seamless mode, where the applications appear to
the Thin Client as if they were running locally, each application running in its own resizable window.
Published applications require server-side and client-side configuration. In this section, we will discuss
client-side configuration.
4.3.1
Via Application Definition
You can configure a session to access a published application via the eLux NG starter. Note:
You must know the application name exactly as it is published on the server.
Figure 73: ICA configuration – Published application
To configure a published application session via eLux NG starter
The parameters are the same as in “4.2.1 Remote Desktop” with the following exceptions:
•
Name: Enter an appropriate name for this application, such as “MS Excel” for Microsoft
Excel.
•
Published Application: Select.
•
Application: Enter the name exactly as it is published on the MetaFrame server.
Server location (also called server browsing) provides a method for users to view a list of all
published applications. See section “4.2.8 Server.”
Build # 27
126
eLux® NG
www.myelux.com
4.3.2
Via Citrix ICA Client for Linux
Alternatively, you can search for available published applications in the Citrix ICA Client for
Linux. When you are done, the parameters will automatically be transferred to eLux NG.
For an overview of the Citrix ICA Client for Linux, see “4.2.4 Citrix ICA .”
To configure a published application in Citrix ICA Client for Linux
From the Configuration tab, click New.
1. The Application Definition dialog box appears. Click the ICA tab.
•
Name: Enter an appropriate name for this application.
2. Click Advanced. The Citrix ICA Client for Linux opens.
3. Select the session you want to configure.
4. Click Connections > Properties > Network.
5. Select the check box Published Application. Type the name of the published
application or select the name from the pop-up menu to the right of the Server field.
Note If no applications appear, check that the browser protocol is correct.
6. In the Properties dialog box, click OK.
7. Exit the Citrix ICA Client for Linux to return to the eLux NG ICA application
definition. The published application parameters are automatically entered in the eLux
NG ICA application definition.
8. Click Apply and OK.
4.3.3
Via Web Interface
You can launch published applications from a local browser using the Web Interface for
MetaFrame XP® (formerly called “NFuse Classic”).
Required software: browser software (Opera, Mozilla or Firefox) and Citrix ICA Client version
7.x
To access a published application via local browser
1. Configure a local browser, as described in “4.5.1 Local Browser.”
•
Name: Enter an appropriate name for this application.
•
Start page: Enter the URL used to access your Web Interface (ask your Citrix
administrator). Common formats are:
http://<server name> or http://<server name>/Citrix/Nfuse
•
Proxy type Choose one of the following:
No proxy: If you don’t use a proxy server.
Manual (Proxy:Port): If you use a proxy server, enter it in the format:
<proxy server IP address or name>:<port number>.
Auto (URL): If you use an automatic proxy configuration file.
Example:
http://www.yourserver.com/autoproxy.pac
•
Browser type: Select the browser you want: Opera, Mozilla or Firefox.
•
Kiosk mode: Leave unchecked.
2. Start the browser from the eLux NG Applications tab. The Web Interface appears.
Enter your credentials to log on.
3. After successful logon, a list of published applications is displayed. Click on an
application to start it.
Build # 27
127
eLux® NG
www.myelux.com
4.3.4
Via Program Neighborhood Agent
The Citrix ICA Client for Linux 7.x contains a new feature, the Program Neighborhood Agent.
The PNAgent allows the MetaFrame server to capture credentials and launch applications and
content that are accessed by users through servers running the Web Interface for MetaFrame
XP. The configuration for all users is defined in the configuration file “config.xml”. The default
location for config.xml on a MetaFrame server is //Inetpub/wwwroot/Citrix/PNAgent. The
PNAgent downloads its configuration data from the server running the Web Interface when it is
started, and can be configured to update settings and the user interface periodically.
The file config.xml should be edited using the Program Neighborhood Agent Admin Tool,
which is available in Citrix MetaFrame XP Server with Feature Release 3 and later.
To configure Program Neighborhood Agent settings on the Thin Client
PNAgent settings can also be set for all users by the administrator using the Program
Neighborhood Agent Admin Tool. See the Citrix documentation for more detail.
Figure 74: Citrix ICA Client for Linux – Connection view
To configure PNAgent settings on the Thin Client, from the Configuration tab, click New.
1. The Application Definition dialog box appears. Click the ICA tab.
2. Enter a name for this definition and click the Advanced button. The Citrix ICA Client
for Linux appears.
3. In the Citrix ICA Client for Linux click Tools > Settings > PNAgent to display the
PNAgent page.
Build # 27
128
eLux® NG
www.myelux.com
(1)
(2)
Figure 75: Citrix ICA Client for Linux – PNAgent page
4. The PNAgent page consists of three configuration areas. (It is possible for the Citrix
administrator to blend areas out. These settings are made in the configuration file
config.xml, which is edited with the Program Neighborhood Agent Admin Tool. See
the Citrix documentation for more information). Here the two eLux NG related areas::
•
(1) Server
Server URL To set the server running the Web Interface, click “Server URL” > Change. In the
PNA configuration dialog box, enter the IP address/name of the server. Click Update. Your entry
will automatically be extended with the URL of the configuration file. If the PNAgent cannot contact
the server, check server-side entries.
Logon mode Only “anonymous logon” and “prompt user” are supported. Entries are made on the
server side using the Program Neighborhood Agent Admin Tool.
•
(2) Application refresh
Define an update time for the published resources in the PNAgent view. In addition to PNAgent or
published application start, you can choose to update the display at intervals specified by the
number of hours in the box.
Build # 27
129
eLux® NG
www.myelux.com
5. Click Apply and OK. (The Refresh Settings button retrieves changes made to the
PNAgent configuration using the Program Neighborhood Agent Admin Tool.)
6. Exit the Citrix ICA Client and return to the eLux NG starter.
To define a Program Neighborhood Agent application in eLux NG
The following describes how to configure a PNAgent application definition, enabling the user
to call the PNAgent directly from the Applications tab.
Figure 76: Definition of the PNAgent application
1. To define a PNAgent application in eLux NG, from the Configuration tab, click New.
The Application Definition dialog box appears. Click the Local tab.
Build # 27
•
Name: Enter an appropriate name for this application, such as “PNAgent”.
•
Application: Select Custom.
•
Parameter: Enter wfcmgr
•
Hidden: Does not display the application in the Applications tab. If this option is
selected, please select one of the two following options:
•
Application restart: Click to select to immediately reconnect after the user logs
off. When this feature is selected, the application automatically starts when the
Thin Client starts or restarts
•
Start automatically: Click this check box to open the session when the terminal
starts.
130
eLux® NG
www.myelux.com
•
Desktop icon Creates a desktop shortcut for this application on the eLux NG
desktop.
2. Click Finish in the Application definition dialog box.
To start the Program Neighborhood Agent from eLux NG
The following describes how to call the PNAgent directly from the Applications tab and
access a published resource.
1. In the eLux NG starter Applications tab, start the application you just defined.
2. If you see a list of connections (as shown above), you are in the so-called “Connection
view.” Click View > PNAgent view to enter PNAgent view.
3. A dialog opens requesting your user credentials for the Web Interface server. Enter
your user information to log on.
Build # 27
131
eLux® NG
www.myelux.com
Figure 77: PNAgent
4. After successfully logging on, the Citrix ICA Client for Linux opens in PNAgent view
and you have access to published resources. Click the icon to start an application.
Refresh settings are set either by the administrator or in the PNAgent page of the
Citrix ICA Client for Linux, as shown in Figure 75, page 129, area (2).
Build # 27
132
eLux® NG
www.myelux.com
4.3.5
Via Program Neighborhood Light
The eLux NG starter offers a new function, Program Neighborhood Light (PNL). Using PNL,
you can display all published applications on a MetaFrame server by entering the server name
directly in an application definition.
To configure PNLight
Figure 78: Configuring PNLight
From the Configuration tab, click New.
1. The Application Definition dialog box appears. Click the PN-Agent tab.
•
Name: Enter an appropriate name for this application.
•
Server: Enter the IP address (or name) of the MetaFrame server.
•
Build # 27
Alternatively, if the Citrix Web interface is not running on port 80 or if the
configuration file does not have the standard path
“/Citrix/PNAgent/config.xml”, you can enter an URL to direct the client to the
configuration file on the server. Format: http://<server>:<port> or
http://<server>/<path> . Example:
http://server1/Citrix/PNAgent/config.xml
http://server1:81
http://server1/MyNfuse/config.xml
•
User, Password, Domain: Enter to automatically log on to the terminal server.
•
Logoff delay After closing the last published application, the idle time the user has to
start another published application before the session is automatically disconnected
from the MetaFrame server.
•
Show last user The user credentials (except for password) of the last logon will
automatically be displayed in the MetaFrame logon dialog box. Note that this option
has no effect if you enter user credentials for automatic logon.
133
eLux® NG
www.myelux.com
•
Allow cancel When activated, allows the user to close the MetaFrame logon dialog
box.
•
Autostart folder On the server, in Program Neighborhood Agent create a folder (or
subfolder) with published applications. Enter the name of the folder here. All published
applications in this folder will automatically be started when the session connects.
•
Start automatically: Click this check box to open the session when the terminal
starts.
2. Click Apply and Finish.
Window properties
Click on Advanced to display the Advanced PN-Agent settings dialog box. Here you can set
the window parameters for this application. If you click Use default, the settings as defined on
the server will be used.
When this session connects, the Thin Client will retrieve all applications from the defined
MetaFrame server which were published for the given user credentials. The published
applications will be displayed in the eLux NG starter and taskbar menu (in addition to the other
defined applications) in a tree-like structure: the top-level name is the PNLight application
definition name, second level are the published applications or folders from the server (both
applications and folders are defined server side).
Figure 79: How PNL definitions appear to Thin Client user
The option Refresh in the taskbar menu allows the user to periodically refetch the published
applications from the server.
If an autostart folder has been defined, the published applications in this folder will
automatically run when the session is connected.
Build # 27
134
www.myelux.com
eLux® NG
Multiple Users
In the application definition, if you leave the server or user credentials fields blank, a dialog
requesting user logon information will appear when the Thin Client attempts to contact the
server, either upon boot (“Start automatically” is selected) or upon demand (the user selects
the Refresh option from the Taskbar menu). This is useful for multiple users on the same
terminal. Please note that for ease of use, there is an option where the user information
(except for password) of the last logon will automatically be displayed in the MetaFrame logon
dialog box.
4.3.6
Troubleshooting
4.3.2 Via Citrix ICA Client for Linux, Step 5
If you are having trouble accessing a list of published applications over the network:
•
verify the Thin Client network settings (eLux NG starter > Setup > Network)
•
verify the server location parameters (Citrix ICA Client for Linux > Tools > Settings >
Server Location)
4.3.4 Via Program Neighborhood Agent
If you get the error message when logging on using the PNAgent:
One or more fields are incorrect
check if your logon credentials are correct. Note: In our experience, the PNAgent will not
always accept an empty domain name field. If your server does not belong to a Citrix domain,
we recommend entering the Windows domain at logon.
Build # 27
135
eLux® NG
www.myelux.com
4.4
RDP
This connection corresponds to the ICA functionality using Microsoft Remote Desktop Protocol (RDP).
It is used to connect to a Microsoft Terminal Server. The application type is a native RDP client with
the free software "rdesktop." For further information see www.rdesktop.org.
Previous releases of eLux offered a Java-based RDP solution from Hob called “JWT” that was
licensed. This application has since been incorporated into the J-Term emulation (also from HOB).
Please consult HOB (www.hob.de) for further information.
You have two configuration possibilities: Windows desktop or individual application.
4.4.1
Remote Desktop
A remote desktop session allows you access to the desktop of a terminal server. You can run
any applications available on the desktop, in any order.
Figure 80: RDP client configured for a remote desktop
To configure a remote desktop session via RDP
From the Configuration tab, click New.
Build # 27
1.
The Application Definition dialog box appears. Click the RDP tab.
•
Name: Enter an appropriate name for this application, such as “RDP Desktop.”
•
Server: Enter the IP address or name of the terminal server.
•
Application: Leave blank.
•
Working dir: Leave blank.
•
User, Password, Domain: Enter to automatically log on to the terminal server.
•
Roaming: Click this check box to enable smart card User Roaming. A smart card and
PIN are required when the terminal starts. If the PIN is correct, the terminal server
136
eLux® NG
www.myelux.com
session is automatically started using the user logon data saved to the card. If you
remove the smart card, the session is automatically disconnected. It is reconnected
when you reinsert the card and enter the PIN, even in another terminal.
See section “3.15.3 User Roaming” for a description of settings.
4.4.2
•
Application Restart: Immediately reconnects after the user logs off. When this
feature is selected, the application automatically starts when the Thin Client starts or
restarts.
•
Start automatically: Click this check box to open the session automatically when the
terminal starts.
•
Desktop icon Creates a desktop shortcut for this application on the eLux NG desktop.
2.
Advanced: See section “4.4.3 Session Parameters.”
3.
Click Finish.
Windows Application
This section describes how to configure a session to a Windows application running on a
specific terminal server.
Figure 81: RDP client configured for a terminal server application
To configure a connection to a Microsoft Windows application via RDP
From the Configuration tab, click New. The Application Definition dialog box appears. Click
the RDP tab.
The parameters are the same as in “4.4.1 Remote Desktop” with the following exceptions:
•
Name: Enter an appropriate name for this application, such as “MS Word” for Microsoft
Word.
•
Application: Enter the name of the Windows application (for example, notepad.exe),
including path, for example,
c:\Program Files\Microsoft Office\Office\Winword.exe
Build # 27
137
eLux® NG
www.myelux.com
Note: System variables are allowed, for example:
%SystemRoot%\system32\notepad.exe
•
4.4.3
Working dir: (optional) Enter the working directory of the Windows application. Do not
end the parameter with a backslash. Note: System variables are allowed, for example:
%HOMEDRIVE%%HOMEPATH%
Session Parameters
Click on Advanced to display the RDP advanced dialog box. Here you can set the
parameters for this session.
In the Display tab, you can set screen settings.
Figure 82: RDP client session settings: screen
In the Advanced tab, you can set the following parameters:
Figure 83: RDP client session settings: advanced
•
Protocol Allows you to set the protocol to 4 or 5. By default, the RDP protocol type is
automatically detected.
•
Keyboard layout Allows you to set the keyboard layout within the RDP session. Default
setting is Auto, which means the setting in the eLux NG starter will be used.
Warning: The keyboard language set in RDP advanced settings may not differ from the
keyboard language set in the eLux NG starter.
•
Disable window manager decorations The border that appears on eLux NG windows
will be blended out.
•
Disable encryption Activate if your server does not accept encrypted sessions. Default is
deactivated.
Build # 27
138
eLux® NG
www.myelux.com
•
Disable mouse motion events Information on mouse position will not be sent to the
server continuously, but rather only upon mouse clicks. This improves performance for
low-bandwidth connections. Default is deactivated.
The Local resources tab offers additional settings for terminal servers that support RDP 5.2
or higher. Note: This tab is only visible if you have the native RDP client version 1.3.1 or
higher installed (“rdesktop52”). In addition, these options will have no effect if you set the
protocol to “RDP V4” in the Advanced tab. To be able to use these settings, you must be
using a terminal server that supports RDP 5.2 or higher.
Figure 84: RDP client session settings: local resources
•
Drives Allows you to map local drives. To map a drive, click to select the drive. Enter the
mount point, which is the path to access the drive locally (see “3.9.5 Mount points”). Enter
a letter. This is the drive that will appear in the RDP session. You can map up to 10 local
drives.
To access the drive from the command shell, use \\tsclient\<drive letter>, for
example, dir \\tsclient\b would allow you to access the CD-ROM.
•
Printers Allows you to automatically create up to four printer definitions for this session.
The printers must be defined in the eLux NG starter > Printer tab and have a valid driver
name as it appears on the server (capitalization is important). The first four profiles with
drivers are used. To set a default printer, click to select the “default” check box in the eLux
NG printer profile.
•
Sound “Play local” means the sound will be played locally on the Thin Client. “Play
remote” means the sound will be played remotely on the server.
•
Ports Enabling the check box means the ports will be accessible from within the RDP
session.
Build # 27
139
www.myelux.com
•
4.4.4
eLux® NG
Smart card This feature is available starting with base OS 1.14.1 and RDP 1.4.0.
Enabling the check box means smart cards can be used for certificate-based logon. See
section “3.15.5 RDP Logon.”
Command RDESKTOP
Advanced Users
Advanced users have the possibility of calling the native RDP client from a local shell.
To see command line parameters, enter the command rdesktop -h in a shell. You can then
define a session with any rdesktop parameter in the tab Local > Local application >
Customized. See also section ”4.8.4 User-Defined Commands.”
4.5
Internet
eLux NG offers a variety of ways to connect locally to the Internet, including browsers and Web tools.
4.5.1
Local Browser
The following browsers are available: Opera, Mozilla and Firefox.
4.5.1.1 Opera
Software Requirements
To use this program, the “Opera Web browser” (opera) EPM must be installed. Available
FPMs:
•
“Kiosk mode” (opera kiosk): Required for kiosk mode.
•
“Opera help pack” (opera_help): Online help for the program.
•
Various language packs are available for your localization.
For a description of EPMs and FPMs, see the ELIAS NG Administrator’s Guide.
Opera is a Web browser from Opera Software ASA. It is a complete suite of Web-related
applications, including a browser, a mail/news client and a chat client. Opera offers various
features including pop-up blocking and customizable toolbars. For more information, see
www.opera.com.
This software can be tested without purchasing a license. For professional use or to remove
the advertising banners, you must purchase a license. To purchase a license, see
www.opera.com.
4.5.1.2 Mozilla
Software Requirements
To use this program, the “Mozilla suite“ (mozilla) EPM must be installed. Available FPMs:
•
“Kiosk mode” (mozkiosk): Required for kiosk mode.
•
Various language packs are available for your localization.
Mozilla and Firefox cannot both be installed on the same machine running eLux NG.
For a description of EPMs and FPMs, see the ELIAS NG Administrator’s Guide.
Mozilla is a free, open-source Web browser from the Mozilla Foundation. It is a complete suite
of Web-related applications, including a browser, a mail/news client and a chat client. Mozilla
offers various features including pop-up blocking. For more information, see www.mozilla.org.
Build # 27
140
eLux® NG
www.myelux.com
4.5.1.3 Firefox
Software Requirements
To use this program, the “Firefox” (firefox) EPM must be installed. Available FPMs:
•
“Kiosk mode” (firefoxkioskmode): Required for kiosk mode.
•
“Firefox DOM inspector” (firefoxinspector): Tool for displaying the structure of HTML and
XML pages. For more information, see the Firefox documentation.
•
“Java support” (firefoxjava): Enables Java support in Firefox. Requires “SunJava(2)”
(j2jre150) EPM 1.5 or higher.
•
Various language packs are available for your localization.
Mozilla and Firefox cannot both be installed on the same machine running eLux NG.
For a description of EPMs and FPMs, see the ELIAS NG Administrator’s Guide.
Firefox is a free, open-source web browser based on the Mozilla codebase. It is just a browser
and does not contain a mail client. Firefox offers various security features including control
over cookies and pop-up blocking. Firefox is not the stand-alone Mozilla browser. The user
interface in Firefox differs from Mozilla in many ways. For example, Firefox has customizable
toolbars. For more information, see www.mozilla.org/products/firefox.
4.5.1.4 Configuring a Browser Application
To create or modify a browser session, in the Configuration tab click New.
Figure 85: Browser application
1. The Application Definition dialog box appears. Click the Browser tab. A series of
fields appears.
Build # 27
141
eLux® NG
www.myelux.com
•
Name: Enter an appropriate name for this application, such as “www.”
•
Homepage: Enter a home page for the browser.
•
Start page: Enter the first Web page to be called when the system starts.
•
Proxy type
No proxy: If you don’t use a proxy server.
Manual (Proxy:Port): If you use a proxy server. Use the format
<proxy server IP address or name>:<port number>.
Auto (URL): If you use an automatic proxy configuration file.
Example:
http://www.yourserver.com/autoproxy.pac
•
Browser type
Software Requirements
A selection of browser types is offered only if multiple browser software is
installed (Opera, Mozilla or Firefox).
Select the browser you want: Opera or Mozilla or Firefox.
•
Kiosk mode See "Kiosk Mode," page 142.
•
Application Restart: Immediately reconnects after the user logs off. When this
feature is selected, the application automatically starts when the Thin Client starts
or restarts.
•
Start automatically: Click this check box to open the session when the terminal
starts.
•
Desktop icon Creates a desktop shortcut for this application on the eLux NG
desktop.
2. Click Apply and Finish.
Note By default, all browser files (cache, history, bookmarks, etc.) are saved to the device
flash memory, which is limited. This can quickly use up available memory and interfere with
work. To avoid this, configure the browser to save files to a network drive. See “3.10 Browser
Home Directory.”
You can make additional settings configurations in the browser itself. For further information
consult the respective browser documentation at www.opera.com or www.mozilla.org or
www.mozilla.org/products/firefox.
4.5.1.5 Kiosk Mode
Software Requirements
The kiosk option is enabled only if the kiosk feature is installed. It is located in the respective
browser package. By default it is not activated.
Allows the users access to a specific Web site. In general, navigation (menus, toolbars, etc.) is
deactivated, the user cannot alter preferences and keyboard commands are deactivated.
Keyboard input is generally allowed. To allow the user to navigate, the Web site should be
constructed appropriately.
Enter in Start page the Web page that you want to appear when the browser starts. The Web
page can be on the Internet, on your thin client, or on another computer on the network. To
enter a Web site, use the full URL format: “http://<domain name>”.
For more information on kiosk mode, see “Appendix 4: Configuring Kiosk Mode.”
Build # 27
142
eLux® NG
www.myelux.com
4.5.2
Mail Clients
4.5.2.1 Thunderbird
Required Software
To use this program you must install the EPM “Thunderbird, V1.0.6-1”. The application
"Thunderbird mail client" is supported by eLux NG BaseOS, V1.20-2. If you should want to use
older BaseOS versions, it can be configured with the application type "user", but no icons for
starter or desktop are provided in this case.
Application definition in the eLux NG Starter:
Figure 86: Definition of the Thunderbird mail client
Remarks
•
Just like the browsers (Firefox, Mozilla, Opera) Thunderbird provides the possibility to set
the home directory on a network drive (via Starter / Setup / drives, see chapter 3.10
Browser Home Directory).
•
E-Mails coming in from a POP3 server will be lost after reboot of the Thin Client, if the
Thunderbird home directory does not reside on a network drive (also valid for subscribed
RSS-Feeds, newsgroup accounts and address books).
•
Clicking hyperlinks in e-mails (such as http://www.myelux.com) opens the Firefox Browser
(or a new browser tab, if Firefox is already open). Required is Firefox Version 1.4.0-2 or
later.
•
Vice versa you can click a mailto hyperlink in Firefox (e.g. [email protected]) to create a
new message, thus opening a Thunderbird window. If this should not occur automatically
proceed as follows:
•
In the address bar of Firefox enter the URL about:config (confirm entry with RETURN).
Then enter the „Filter“ network.protocol-handler.external into the textfield and
confirm (see figure below). The entry network.protocol-handler.external.mailto must be
assigned the value true..
Build # 27
143
eLux® NG
www.myelux.com
Figure 87: Einstellung in Firefox
Rightclick the selected line, select New
String and define a new string value with the name
network.protocol-handler.app.mailto.
Enter thunderbird
Mozilla Thunderbird help is provided under http://www.mozilla.org/support/thunderbird/
Build # 27
144
eLux® NG
www.myelux.com
4.5.3
Web Tools
The following Web tools are available: Adobe® Acrobat® Reader®, RealPlayer® and Java™
Plug-in.
4.5.3.1 Adobe Acrobat Reader
To use this feature, the software “Acrobat5“ (Acrobat5) must be installed.
This software can be run either as a stand-alone program or as a browser plug-in.
•
To run Adobe Acrobat Reader as a stand-alone program, see “4.8.6 Adobe Acrobat
Reader.”
•
To run Adobe Acrobat Reader as a browser plug-in, just install the software. No further
configuration is required.
4.5.3.2 Movie Player
To use this feature, the software “Movie Player” (mplayer) must be installed. Install the
individual subcomponents (FPMs) relating to the features you desire. In addition, the base OS
starting with version 1.8.4 must be installed.
MPlayer is an open-source movie player. It supports all common movie formats including DVD
(including encrypted DVD), MPEG, DivX, AVI, ASF, RealVideo, Windows Media Video (.wmv),
Quicktime (.mov) and others. The files can reside on the Thin Client, a network drive or the
Internet.
This software can be run either as a stand-alone program or as a browser plug-in.
•
To run MPlayer as a stand-alone program, see “4.8.9 Movie Player.”
•
To run MPlayer as a browser plug-in (Mozilla only), just install the software “MPlayer
Mozilla support” (mplayer_plugger) in the package “Movie Player” (mplayer). No further
configuration is required.
4.5.3.3 RealPlayer
To use this feature, the software “Realplayer 8 Plugin“ (realplayer) must be installed.
RealPlayer is software from RealNetworks, Inc.
This software can only be run as a browser plug-in.
Configuration depends on whether you use a proxy:
•
If you do not use a proxy, to run RealPlayer as a browser plug-in, just install the software.
No further configuration is required.
•
If you use a proxy, to run RealPlayer as a browser plug-in, install the software and
configure the RealPlayer proxy setting.
To configure the RealPlayer proxy setting
1. Install the software.
2. Start the browser of your choice.
3. Start RealPlayer. To do this, go to a website that contains a RealPlayer-supported file
(for example, RealAudio, RealVideo, MP3, Ogg Vorbis and Theora, H263, AAC). Click
the link to the file. RealPlayer runs.
4. Open the Preferences dialog.
Build # 27
•
If RealPlayer is running in a separate window, go to View > Preferences.
•
If RealPlayer is running embedded in a page, right-click and select Preferences.
145
eLux® NG
www.myelux.com
5. In the Proxy tab, enter the proxy server. If the proxy server is in a different subnet,
enter the fully qualified domain name.
•
(optional) In addition, you can set other RealPlayer settings in the Preferences
dialog box as desired.
6. Click OK.
4.5.3.4 Java Plug-in
To use this feature, the software “SunJava 2” (j2jre142) must be installed.
The Java™ 2 Runtime Environment (JRE) is software from Sun Microsystems, Inc. The JRE
enables your computer to run applications and applets that use Java™ technology, such as
the Mozilla browser and SAP/R3 client. The Java plug-in software used by browsers is a
component of the JRE.
To run the Java plug-in, just install the software. No further configuration is required if you
decide to use default settings.
Configuring the Java plug-in involves the following:
1. Configuring a Java Plug-in Control Panel application definition in eLux NG
2. Configuring options in the Java Plug-in Control Panel
To configure a Java Plug-in Control Panel application definition in eLux NG
Configuring the application definition in eLux NG does not configure the plug-in. It simply runs
the Java Plug-in Control Panel. You configure the plug-in directly in the Java Plug-in Control
Panel.
From the Configuration tab, click New.
1. The Application Definition dialog box appears. Click the Local tab.
Name
Enter an appropriate name for this application.
Application
Click Customized.
Parameter
Enter the following: ControlPanel
Caution: Capitalization is important!
Hidden
Does not display the application in the Application tab.
Application Restart
Click to select to immediately reconnect after the user logs off.
When this feature is selected, the application automatically
starts when the Thin Client starts or restarts
Start automatically
Click this check box to open the session when the terminal
starts.
2. Click Apply and Finish.
To configure options in the Java Plug-in Control Panel
To configure the Java plug-in, go to the Applications tab.
1. Start the application you configured in “To configure a Java Plug-in Control Panel
application definition in eLux NG“. The Java Plug-in Control Panel dialog box appears.
2. Make the desired changes.
Tip: Optimize the cache size. The optimal size is hardware specific. Default is 4 MB.
3. Click Apply and close the dialog box.
For information on the Java 2 Runtime Environment, see http://java.com.
Build # 27
146
eLux® NG
www.myelux.com
4.6
SAPGUI
eLux NG supports the SAP/R3 client from SAP AG. This feature is not available for all hardware
platforms.
The SAP client configuration file is: “/setup/sapgui/platin.ini”.
System requirements:
•
96 MB flash card or larger
•
128 MB of RAM minimum
Establishing a connection involves the following:
1. Installing the required firmware
2. Configuring the SAPGUI application definition in eLux NG
3. Entering connection data in the SAP/R3 client
To install the required firmware
To use this feature, you must have the “SAP R/3 client PlatinGUI” (sapplatingui) and “IBMJAVA2”
(IBMJAVA2) packages installed.
To configure the SAPGUI application definition in eLux NG
Figure 88: SAP/R3 application definition in eLux NG
Configuring the application definition in eLux NG does not configure a session. It simply runs the
SAP/R3 interface. You configure a session directly in the SAP/R3 interface.
From the Configuration tab, click New.
Build # 27
147
www.myelux.com
eLux® NG
1. The Application Definition dialog box appears. Click the SAPGUI tab. Configure the
following options:
•
Name: Enter an appropriate name for this application, such as “SAP”.
•
Classical user interface Click to select to display the SAP interface in the former design
(“Classic”). Default settings are for the new design ("EnjoySAP").
•
Application Restart: Immediately reconnects after the user logs off. When this feature is
selected, the application automatically starts when the Thin Client starts or restarts.
•
Start automatically: Click this check box to open the session automatically when the
terminal starts.
2. Click Apply and Finish.
4.6.1
Entering Connection Data
To connect to an SAP system, you must enter its connection data. This is done in the SAP/R3
interface. See your SAP administrator for connection data.
To enter the connection data, you have two options:
•
Message Server List
Instruct the SAP client to retrieve a message server list.
•
Manual configuration
Enter the parameters manually.
To enter SAP connection data from a message server
This section describes how to retrieve the connection data for an SAP system from a message
server. The message server list must exist in advance and be available over the network.
To set a message server list, go to the Applications tab.
1.
Build # 27
Click to highlight the SAP application configured in “To configure the SAPGUI
application definition in eLux NG“ and click Connect. The SAPGUI for Java dialog
box appears.
148
eLux® NG
www.myelux.com
Figure 89: Configuring SAPGUI (automatically): Connection dialog box
2.
In the Options menu, select Preferences.
Figure 90: Configuring SAPGUI (automatically): Preferences dialog box
3.
The SAPGUI Preferences dialog box appears. Configure the following options:
•
Include Configuration File Enter a blank.
Note: You must enter a blank to be able to save the configuration. This is a
known bug in the SAP/R3 software.
•
Build # 27
Messageserver List Enter the message server list. This file must exist on the
SAP message server in advance. You have the following options:
149
eLux® NG
www.myelux.com
•
Web server
Enter the fully qualified URL of the message server list, for example:
http://server1/sapmsg.ini
•
Netdrive
Enter the path of the of the message server list residing on a Samba or NFS
network drive, for example: /smb/drive1/sap2.ini
Click Save. The SAPGUI Preferences dialog box closes.
4.
In the SAPGUI for Java dialog box, click New. The Add New Connection dialog box
appears.
Figure 91: Configuring SAPGUI (automatically): Add New Connection dialog box
5.
In the System tab, configure the following options:
•
Description Enter a name for this connection.
The choices in the following dropdown-lists are automatically set once you enter a
message server:
•
System Select your SAP system from the drop-down list.
•
Group/Server Select your SAP group from the drop-down list.
•
Router (optional) Select your SAP router from the drop-down list. Only required if
you use SAP routers to make remote connections.
For information on remaining parameters, see the SAP documentation.
Click Save. The Add New Connection dialog box closes.
Build # 27
150
eLux® NG
www.myelux.com
Figure 92: Configuring SAPGUI (automatically): Connection dialog box (connections configured)
6.
To connect, in the SAPGUI for Java dialog box select a connection and click
Connect.
Tip To save your entries, close the SAP/R3 for Java dialog box. Only then is the configuration
saved to the Thin Client.
To enter SAP connection data manually
To enter the connection data manually, go to the Applications tab.
Figure 93: Configuring SAPGUI (manually): Connection dialog box
1.
Build # 27
Click to highlight the SAP application configured in “To configure the SAPGUI
application definition in eLux NG“ and click Connect. The SAPGUI for Java dialog
box appears.
151
eLux® NG
www.myelux.com
Figure 94: Configuring SAPGUI (manually): Add New Connection dialog box (System tab)
2.
Click New. The Add New Connection dialog box appears.
Figure 95: Configuring SAPGUI (manually): Add New Connection dialog box (Advanced tab)
3.
Click the Advanced tab. Configure the following options:
•
Description Enter a name for this connection.
•
Use expert configuration Click to select.
In the text field, enter the connection string in the following format:
conn=/H/<host>/S/<port>
where
Build # 27
152
eLux® NG
www.myelux.com
<host> = IP address or hostname of the SAP host
<port> = port number
Note: Do not use blanks.
For information on connection string syntax possibilities, see the SAP
documentation.
4.
Click Save. The SAPGUI for Java dialog box appears and displays the new
connection.
5.
Add additional connections as desired.
Figure 96: Configuring SAPGUI (manually): Connection dialog box (connections configured)
6.
To connect, in the SAPGUI for Java dialog box select a connection and click
Connect.
For further information on this application, see www.mysap.com or the SAP documentation available
on the eLux NG CD-ROM.
Build # 27
153
eLux® NG
www.myelux.com
4.7
Emulation
Use the Emulation tab to connect to mainframes or UNIX systems.
Figure 97: Application definition dialog box for an emulation
To configure a terminal emulation
From the Configuration tab, click New.
1. The Application Definition dialog box appears. Click the Emulation tab.
•
Name: Enter an appropriate name for this application, such as, “Star Office” for the SUN
office program run as an X11 terminal.
•
Emulation type: Click an emulation type from the Emulation type list. The following
emulations are supported:
Build # 27
•
97801-7Bit: for Sinix or Reliant UNIX systems with TCP/IP or V.24 protocol
•
97801-8Bit: for Sinix or Reliant UNIX systems with TCP/IP or V.24 protocol
•
ANSI: for UNIX systems with TCP/IP or V.24 protocol
•
AT386: for UNIX systems with TCP/IP or V.24 protocol
•
VT320: for UNIX systems with TCP/IP or V.24 protocol
•
BA-80: for Targon systems with TCP/IP or V.24 protocol
•
3270: for IBM mainframes with TN3270E protocol (to be licensed)
•
5250: for IBM AS400 systems with TN5250E protocol (to be licensed)
•
9750: for BS2000/OSD systems with TCP/IP (to be licensed)
•
X11: for X applications on remote (UNIX) systems, using the local X server
•
XDMCP: for the complete X Desktop of remote UNIX systems using the local X
server (Not available for all hardware platforms)
•
VNC: for VNC server or mirroring
154
eLux® NG
www.myelux.com
•
Tarantella: for a Tarantella server
•
PowerTerm: for IBM Mainframe, IBM AS/400,Unix, VAX/Alpha OpenVMS,
Tandem (NSK), HP-3000 and Data General (to be licensed)
A series of fields appears. Fill in the requested information (see sections 4.7.1 to 4.7.7).
•
Application Restart: Immediately reconnects after the user logs off. When this feature is
selected, the application automatically starts when the Thin Client starts or restarts.
•
Start automatically: Click this check box to open the session when the terminal starts.
•
Desktop icon Creates a desktop shortcut for this application on the eLux NG desktop.
2. Click Finish.
4.7.1
Tarantella
To use this software, you must have the “Tarantella Native Client” (tarantella) package
installed.
Tarantella uses a bitmap protocol to connect from a Tarantella client to a Tarantella server,
which can then connect to another machine. It can be used as an alternative to Citrix for small
installations.
You can enter the server name (or IP address) and the username directly in the application
definition.
The native Tarantella client has no further parameters. The configuration of the client is done
within the application. For further information consult the Web site www.tarantella.com.
4.7.2
Terminal Emulation for Motif
To use this software, you must have the “Terminal emulation for Motif” (xemu) package
installed.
“Terminal emulation for Motif” is a terminal emulation suite for IBM and BS2000 systems that
includes the following emulations:
•
3270 for IBM mainframes with TN3270E protocol
•
5250 for IBM AS400 systems with TN5250E protocol
•
9750 for BS2000/OSD systems with TCP/IP
This is a licensed product. The software includes a 15-minute trial period To purchase a
license, please contact [email protected]. You can purchase either a license that is
distributed using the Scout Enterprise management tool or a license that is entered directly on
the terminal (start the program > Add-Ons menu > Licensing).
The configuration is saved in a file with the extension "cfg". Select the configuration file from
the drop-down list. Initially only the default configuration file (X32: 3270.cfg, X52: 5250.cfg,
X97: default.cfg) is available.
To define a new configuration file
1. Start the emulation.
2. Set the settings you want.
3. The menu command File > CONFIGURATION > Save as allows you to save the
settings to a new configuration file. Enter the name of the configuration file in the Save
Configuration dialog box. You must enter the extension “.cfg”!
Note The path must be the default /setup/xemu!
4. Close the emulation and return to the eLux NG Configuration tab.
Build # 27
155
eLux® NG
www.myelux.com
This new configuration file is now available in the eLux NG Configuration > New >
Emulation > 3270 (or 5250 or 9750) > Configuration drop-down list.
You can set the station name to a set value using an environment variable. “X97STATNAM” is
the defined station name environment variable for all UniCon Software GmbH emulations
(X32, X52, X97). Alternatively, you can set the station name to a variable. Requirement: The
device must be managed by Scout Enterprise. For more information, see the X97 chapter or
environment variable chapter in the Scout Enterprise Administrator’s Guide.
For detailed instructions on how to use X32 or X52, please consult the X32 – 3270 / X52 –5250 for Motif Administrator’s Guide, available at www.myelux.com or the eLux NG CD.
For detailed instructions on how to use X97, please consult the X97 – 9750 for Motif
Administrator’s Guide, available at www.myelux.com or the eLux NG CD.
4.7.3
eterm for UNIX Systems
To use this software, you must have the “Eterm 97801 terminal emulation” (eterm) package
installed.
eterm is a terminal emulation suite for UNIX systems that includes the following emulations:
Siemens 97801 (7 & 8 bit, Sinix or Reliant), ANSI, AT386, BA-80, VT320
Information on how to configure the key mapping file (such as for special sequences) is
provided below. For further information on how to configure eterm, see the eterm
Administrator’s Guide, available for download at www.myelux.com (log on, go to “Manuals” >
“Emulations”) or on the eLux NG CD.
4.7.3.1 Key Definition File “eterm.map”
Technical details:
File name:
eterm.map
File format:
UNIX
File path:
/setup/eterm
Automatically installed
during installation?:
No, must be created
Tip Do not edit
elux.map using
Notepad, which will
convert it to an
MS-DOS® text file.
The default eterm keyboard mapping suffices for most keyboards and emulations (VT320,
97801, etc.).
In addition, elux supports user-defined keyboard mapping. To perform this:
1. Create a new UNIX text file. Acceptable editors include “vi” on UNIX machines or
“Programmer’s File Editor” on Windows machines.
2. Enter the values in the format described below.
3. Save the file as “eterm.map”.
4. Transfer it to the directory “/setup/eterm” on the Thin Client. (This is done easily using
the “File Transfer” feature of Scout Enterprise – see the Scout Enterprise
Administrator’s Guide for more information.)
The user-customized keyboard mapping file allows you to change the default mapping and/or
implement your own sequences (such as special control sequences).
Format
In the file eterm.map, tabs are field separators. The first field must start in the first column:
<key symbol>
<modifier>
<string>
Parameters
<key symbol>
The key to modify (=character string).
<modifier>
The level switching value (=hexadecimal number).
Build # 27
156
eLux® NG
www.myelux.com
The character(s) that the key is to produce (=character string).
<string>
A detailed description of the parameters follows.
Key Symbol
This is the key to modify. The parameter format is character string.
To view key symbols, open a local shell and enter the following command, which displays the
keyboard mapping of the local X server:
xmodmap -pke | more
The available key symbols are displayed in the format:
keycode <keycode number> = <key symbol>
The parameter <keycode number> can be ignored. Enter the string <key symbol> exactly as it
is shown here in the file eterm.map.
Modifier – Level Switching
Each key can be in more than one state, or “level”:
1. pressing the key (unshifted)
2. pressing the key with Numlock on
3. pressing the key and the Shift button (shifted)
4. pressing the key with Shift-Lock on
etc.
Levels are specified using a modifier. The modifier is a preset hexadecimal number (base 16).
A comprehensive list of level switching modifiers is shown in Figure 98.
Level Switching
Value
Unshifted
0
Shifted
1
Shift-Lock
2
Control
4
Alt
(mod1)
8
Numlock (mod2)
10
Alt Gr
(mod3)
2000
Figure 98: Level switching
Modifiers can be combined, for example, Shift + Numlock. In this case, add the level switching
modifiers using hexadecimal addition (8+2 = A, not 10).
In the file eterm.map, it is highly recommended that for each key you enter multiple entries
corresponding to different levels. For example, you could map the
following levels:
Tip We recommend
configuring each key
1. the key alone (level = ”unshifted”)
in the mapping file
2. key + Shift-Lock
twice, with and
3. key + Numlock
without Numlock.
4. key + Numlock + Shift-Lock
If you are running eterm on a Thin Client running eLux NG software, when the Thin Client
boots, by default the Numlock key is activated. Thus, in eterm.map you should have an entry
for unshifted (modifier=0) and Numlock (modifier=10) for each key. If you just map the key for
Build # 27
157
eLux® NG
www.myelux.com
unshifted, then no mapping will occur if the Numlock key is accidentally on! This is one of the
most common errors.
String
The character(s) that pressing the key should produce. The parameter format is character
string.
For a list of character strings, enter the command infocmp on the host. You will see the
character sequences the host accepts for different terminals.
For a list of ASCII control character sequences, see the following table. CTRL = ^ so the key
sequence you would enter for the parameter <string> is always ^ plus the key listed in the
second column. For example, ^[ would produce the ESC character (0x1B). (For the character
^ itself, enter it twice: ^^)
Build # 27
Control Character
(Mnemonic)
CTRL + Key
NUL
@
SOH
A
STX
B
ETX
C
EOT
D
ENQ
E
ACK
F
BEL
G
BS
H
HT
I
LF
J
VT
K
FF
L
CR
M
SO
N
SI
O
DLE
P
DC1
Q
DC2
R
DC3
S
DC4
T
NAK
U
SYN
V
ETB
W
CAN
X
EM
Y
SUB
Z
ESC
[
FS
\
GS
]
158
eLux® NG
www.myelux.com
Control Character
(Mnemonic)
CTRL + Key
US
–
Figure 99: Key sequences for ASCII control characters for eterm.map
Example for eterm.map
For a VT320 emulation, assume that you want to assign the keys F1 to F4 with the codes for
the VT320 keys PF1 to PF4 (ESC OP, ESC OQ, ESC OR, ESC OS).
In the example that follows, each key is mapped four times for the following levels:
1. Normal
2. Shift Lock
3. Numlock
4. Shift Lock + Numlock.
The eterm.map file is as follows:
Level Mapping
# Enter a pound symbol in the first
# column to comment out a line.
F1
0
^[OP
F1
2
^[OP
F1
10
^[OP
F1
12
^[OP
F2
0
^[OQ
F2
2
^[OQ
F2
10
^[OQ
F2
12
^[OQ
F3
0
^[OR
F3
2
^[OR
F3
10
^[OR
F3
12
^[OR
F4
0
^[OS
F4
2
^[OS
F4
10
^[OS
F4
12
^[OS
1. Normal
2. Shift Lock
3. Numlock
4. Shift Lock + Numlock
etc.
Troubleshooting
If the customized key mapping does not work, answer the following questions regarding
eterm.map:
1. Did you mix upper and lowercase? (case-sensitive)
2. Is the file name “eterm.map”?
3. Is the file path “/setup/eterm” on the Thin Client?
4. Is it a UNIX text file?
etc.
Build # 27
159
eLux® NG
www.myelux.com
4.7.4
X11 for X Applications Using the Local X Server
The X11 server developed by The XFree86 Project, Inc (http://www.xfree86.org/) and its
contributors is included in the base OS. No additional software must be installed.
Figure 100: Application definition dialog box for an X11 emulation
To configure an X11
From the Configuration tab, click New.
1. The Application Definition dialog box appears. Click the Emulation tab.
2. Click X11 in the Emulation type list. A series of fields appears.
•
Name: Enter an appropriate name for this application, such as “X11.”
•
Server address: Enter the IP address (or name) of the UNIX server.
•
User name: Enter the username on the UNIX server.
•
Application: Enter the X application name with its complete path.
•
Use SSH: If selected, the X11 session is started via the Secure Shell (SSH)
protocol. Only the public key authorization is permitted (see page 170 for
instructions on how to set a public key).
3. Application restart: Click to select to immediately reconnect after the user logs off.
When this feature is selected, the application automatically starts when the Thin Client
starts or restarts.
4. Start automatically: Click this check box to open the session when the terminal
starts.
5. Desktop icon Creates a desktop shortcut for this application on the eLux NG desktop.
6. Click Finish.
Build # 27
160
eLux® NG
www.myelux.com
Note You must register the host name of the Thin Client on the server by creating the user
“elux” in the file .rhosts in the user’s home directory.
Example:
xsklaus.unicon-ka.de elux
For more information on rsh services, please refer to your UNIX server’s man page.
Note Useful additional software is Accelerated-XTM Display Server, an accelerator for X11
applications. This software is licensed and can be purchased from UniCon Software GmbH
(see www.myelux.com) or your eLux NG supplier. Not available for all hardware platforms.
Accelerated-X requires a Matrox graphics card.
4.7.5
XDMCP
You can configure an X terminal using X Display Manager Control Protocol (XDMCP). This
functionality is included in the base OS.
Figure 101: XDMCP session
To configure an XDMCP session
From the Configuration tab, click New.
1. The Application Definition dialog box appears. Click the Emulation tab.
2. Click XDMCP in the Emulation type list. A series of fields appears.
•
Name: Enter an appropriate name for this application, such as “XDMCP.”
•
Server address: Enter the IP address (or name) of the UNIX server.
•
Access: Choose the mode:
Direct: Direct connection to the defined UNIX system.
Indirect: The defined UNIX system is searched for a list of servers which is then
displayed.
For the following parameters, if “Default” is selected, the settings in the eLux NG
starter (Setup > Screen) will be used.
•
Build # 27
Set the Resolution and Color depth.
161
eLux® NG
www.myelux.com
•
Backing store: Saves screen information to the local X11 server on the thin
client. This increases the screen refresh speed when the network connection is
slow (especially noticeable by ISDN); however, the main memory requirements
are large (128 MB or higher).
•
Dead keys: Maps exist that define several “dead keys” on the keyboard. Dead
keys make it possible to entered accented combination characters. A dead key
combination means that you press two keys one after the other (press the first key
and release it, then press the second key and release it) in order to form a single
character. In general, you press a key for the accent you want (nothing happens),
then a key for the letter to apply to accent to (the accented combination character
appears).
For example, pressing “`” on the U.S. international keyboard produces nothing,
but subsequently typing “e” produces “è”. Other keyboard layouts may produce
accented characters in other ways (on the French keyboard there is a key that
produces “è” directly).
By default, dead keys are active. If you use an application that is incompatible
with dead keys, click to deselect.
•
Allow remote X11 clients: Allows remote X11 clients to connect to the local Thin
Client.
•
Show information message: Pop-up message that appears when an XDMCP
session is started. Can be deactivated.
•
Run as normal window To use this feature, you must have the “Xnest” (xnest)
package installed.
By default, an XDMCP session runs in its own console. The key combinations for
switching between consoles are described below.
Select this option to run the XDMCP session directly in the eLux NG desktop. No
switching is required.
3. Application Restart: Click to select to immediately reconnect after the user logs off.
When this feature is selected, the application automatically starts when the Thin Client
starts or restarts.
4. Start automatically: Click this check box to open the session when the terminal
starts.
5. Desktop icon Creates a desktop shortcut for this application on the eLux NG desktop.
6. Click Finish.
To enable sound, go to Setup > Multimedia and click to select Enable sound in XDMCP
sessions. Note: The application must be e-sound system compatible.
An XDM session uses a virtual screen. A new
console is started. Use the shortcut key
CTRL + ALT + F1 to move to the eLux NG
screen. To switch to the XDM screen, use
CTRL + ALT + F2. Up to two XDM sessions at
a time are possible (switch to the second open
XDM session using CTRL + ALT + F3).
To close the session, move to the eLux NG
screen, highlight the active XDM session and
click Disconnect.
Note Multiple consoles are not supported
by all hardware platforms, due to large
resource use. In this case, when you start
an XDMCP session, a pop-up dialog box
appears informing you that all active
sessions are about to be disconnected,
giving you the chance to cancel. When
you click OK, all eLux NG sessions are
stopped and the XDMCP session is
started. Return to the eLux NG desktop
by disconnecting from your XDMCP
server.
For more information on consoles, see “3.5.2 Consoles.”
Build # 27
162
eLux® NG
www.myelux.com
4.7.6
VNC
To use this software, you must have the “VNC client” (vnc) package installed.
A VNC (Virtual Network Computing) viewer allows you to connect to a VNC server or to mirror
a Thin Client.
Figure 102: VNC viewer
To configure a VNC session
From the Configuration tab, click New.
1. The Application Definition dialog box appears. Click the Emulation tab.
2. Click VNC in the Emulation type list. A series of fields appears.
•
Name: Enter an appropriate name for this application, such as “VNC.”
•
Server address: Use the following format (see below):
<IP address or name of the VNC server>:<display number>
•
Password: Enter the password of the VNC server. If you are connecting to a Thin
Client, enter the mirroring password saved to the Thin Client, if it exists.
•
Application Restart: Click to select to immediately reconnect after the user logs
off. When this feature is selected, the application automatically starts when the
Thin Client starts or restarts.
•
Start automatically: Click this check box to open the session when the terminal
start.
•
Desktop icon Creates a desktop shortcut for this application on the eLux NG
desktop.
3. Click Finish.
Build # 27
163
eLux® NG
www.myelux.com
To connect to another Thin Client (for example, for help desk support), the eLux NG VNC
server on the target Thin Client must be activated. Do this by activating the mirroring options
on the target Thin Client. See chapter “3.16 Mirroring”.
The following table lists the display numbers:
4.7.7
Session
Display number
eLux NG desktop
0
1st XDMCP session
1
2nd XDMCP session
2
Not all hardware
platforms support
multiple displays.
PowerTerm InterConnect
To use this software, you must have the “PowerTerm InterConnect” (powerterm) package
installed.
PowerTerm® Interconnect from Ericom® Software allows you to connect to IBM Mainframe,
IBM AS/400,Unix, VAX/Alpha OpenVMS, Tandem (NSK), HP-3000 and Data General. The
following emulations can be simulated:
•
IBM 3270 (TN3270E), 3179, 3278, 3279, 5250 (TN5250 with device name support), 3477
•
Digital VT52, VT100, VT220, VT320, VT420, VT520, VT525
•
ANSI BBS-ANSI, SCO-ANSI, AT386
•
Other Wyse (50/60), Data General D-412, Siemens 97801, Televideo TVI 925/950,
AIXterm
This is a licensed product. The software includes a 30-minute trial period. To purchase a
license, please contact [email protected]. The license is distributed using the Scout
Enterprise management tool.
Figure 103: PowerTerm configuration
Build # 27
164
eLux® NG
www.myelux.com
To start PowerTerm InterConnect
From the Configuration tab, click New.
1. The Application Definition dialog box appears. Click the Emulation tab.
2. Click PowerTerm in the Emulation type list. A series of fields appears.
•
Name: Enter an appropriate name for this application, such as “PowerTerm.”
•
Parameter: (optional) If you leave this field blank, the default setup file (ptdef.pts)
will be used. Alternatively, you can enter one of the following:
•
PowerTerm setup file A customized setup file. It must have the ending
*.pts. Example: myfile.pts
•
Parameters + PowerTerm setup file Enter accepted PowerTerm
parameters, followed by the customized setup file. Example:
-no-menu -fullscreen myfile.pts
•
PowerTerm script Enter an accepted Power Script Language (*.psl)
enclosed in double quotation marks (“”). Example:
““telnet.psl myserver””
See the PowerTerm documentation for more information on PowerTerm
parameters and scripts.
•
Application Restart: Click to select to immediately reconnect after the user logs
off. When this feature is selected, the application automatically starts when the
Thin Client starts or restarts.
•
Start automatically: Click this check box to open the session when the terminal
start.
•
Desktop icon Creates a desktop shortcut for this application on the eLux NG
desktop.
3. Click Finish.
4. From the Applications tab, double-click or use the Connect button to run the
application.
5. In the Communication menu select Connect. The Connect dialog box opens. Set
the Terminal Type (emulation), the Terminal ID (if necessary) and the appropriate
Session Type. Fill in the appropriate parameter fields and click Connect.
The configuration is saved to a file with the extension "pts". The configuration files must be
located in the directory “/setup/PowerTerm/” (or “/setup/local/PowerTerm”). To create a new
configuration file, start PowerTerm, configure your settings and save the file using a different
name (File menu > Save terminal setup as). When you open a connection (Communication
menu > Connect), you can select the configuration file by clicking on the browse button next
to “Setup File” in the “Upon connection run” area. Initially only the default configuration file
(ptdef.pts) is available.
You can transfer a configuration file to many Thin Clients using the “File Transfer” feature of
Scout Enterprise – see the Scout Enterprise Administrator’s Guide for more information.
For information on configuring PowerTerm, please see the Ericom documentation available at
www.ericom.com or the eLux NG CD.
Build # 27
165
eLux® NG
www.myelux.com
4.8
Local
eLux NG offers an easy-to-use graphical user interface (the so-called “starter”). All configuration
settings and application definitions can be made using point-and-click. No Linux knowledge is
required.
Because eLux NG is Linux-based, you also have the option of entering commands directly in the
command-line interface (CLI). It helps if the administrator has experience either with Linux or using a
CLI (such as the Windows CLI). Selected commands are provided in this manual.
The command line does not replace the GUI, rather it extends the options available to experienced
administrators.
The Local tab allows you to enter a command just as you would from a local shell. There are two
types of local commands available:
•
predefined (XTerm, resource display or SSH)
•
user defined (the so-called “customized commands”)
4.8.1
XTerm (Local Shell)
The terminal window is useful for troubleshooting and for defining applications interactively.
For example, if you are experienced with using the command line, you can type in the
command line for the application, see if it works correctly and test different options. You can
then configure that application using the eLux NG GUI or by entering that same command line
into the starter (see 4.8.4 User-Defined Commands). Using UNIX commands and the UNIX
editor vi, you can browse local directories, edit configuration files, or move files between the
Thin Client and mapped SMB drives (such as log files to send to your support team).
The predefined command XTerm opens a local shell. The user is elux and has no root
authorization.
Figure 104: Local shell (XTerm)
Build # 27
166
eLux® NG
www.myelux.com
To configure a local shell
From the Configuration tab, click New.
1. The Application Definition dialog box appears. Click the Local tab.
•
Name: Enter an appropriate name for this application, such as “shell.”
•
Application: Select XTERM.
•
Parameter: (optional) Enter the desired parameter. See the examples below.
•
Application Restart: Click to select to immediately reconnect after the user logs
off. When this feature is selected, the application automatically starts when the
Thin Client starts or restarts
•
Start automatically: Click this check box to open the session when the terminal
starts.
•
Desktop icon Creates a desktop shortcut for this application on the eLux NG
desktop.
2. Click Finish.
Example 1: Setting font and color parameters
Enter the following in the Parameter box:
-fn 10x20 –bg darkblue –fg yellow
fn
10x20
bg
fg
font
font size (big)
background color
foreground color
Example 2: Setting font and color parameters and calling a program
Enter the following in the Parameter box:
-fn 10x20 –bg navy –fg white –e telnet –l schmidt myhost
fn
10x20
bg
fg
font
font size (big)
background color
foreground color
-e
parameter to call a program
telnet
ASCII program
-l schmidt program-specific parameter
myhost
host required by telnet program
For more information see the man pages of a Linux system.
Tip: To copy in XTerm, click the middle mouse button.
The properties for all X applications are set in the resource file “Xdefaults” located in /setup.
For more information on Xdefaults, see the Scout Enterprise Administrator’s Guide.
Build # 27
167
eLux® NG
www.myelux.com
4.8.2
Resource Display
This predefined command calls a program that displays the current resource use (such as
memory, CPU). This can be used for diagnostics. To use this program, you must have the
software “Resource info display“ (resinfo) installed. It is located in the “Desktop Tools” (dtt)
package.
Figure 105: Resource Display
To configure a resource display
From the Configuration tab, click New.
1. The Application Definition dialog box appears. Click the Local tab.
•
Name: Enter an appropriate name for this application.
•
Application: Click Resource display.
•
Parameter: Leave blank.
•
Application Restart: Click to select to immediately reconnect after the user logs
off. When this feature is selected, the application automatically starts when the
Thin Client starts or restarts
•
Start automatically: Click this check box to open the session when the terminal
starts.
•
Desktop icon Creates a desktop shortcut for this application on the eLux NG
desktop.
2. Click Finish.
Build # 27
168
eLux® NG
www.myelux.com
4.8.3
Secure Shell
This predefined command calls a local client that allows you to connect to a remote Secure
Shell (SSH) server. The software package “SSH Tools“ (ssh) must be installed.
Figure 106: Application definition dialog box for SSH
To configure SSH
From the Configuration tab, click New.
1. The Application Definition dialog box appears. Click the Local tab.
•
Name: Enter an appropriate name for this application.
•
Application: Click SSH.
•
Parameter: Enter the user and the remote host, as shown in Figure 106, in the
following format: -l <username> <host>. See “User Authorization” below.
•
Application Restart: Click to select to immediately reconnect after the user logs
off. When this feature is selected, the application automatically starts when the
Thin Client starts or restarts
•
Start automatically: Click this check box to open the session when the terminal
starts.
•
Desktop icon Creates a desktop shortcut for this application on the eLux NG
desktop.
2. Click Finish.
Password Authorization
SSH server settings determine the type of authorization (password or key) needed to connect.
If you want to connect using a password, the SSH server must be configured for password
authorization.
Build # 27
169
eLux® NG
www.myelux.com
To connect using password authorization, open a session and enter the password. In the
future, you must enter this password every time you connect to the server.
Public Key Authorization
SSH server settings determine the type of authorization (password or key) needed to connect.
The authentication type – RSA or DSA – required to start a session is configured on the
server. Older server support RSA version 1. Newer servers support RSA version 1 and in
addition RSA version 2 and DSA version 2.
Each user uses the program ssh-keygen to generate a public/private key pair. The key pair is
generated locally. The public key (*.pub) must be transferred to the server that the user will log
on to. The server knows the public key, however only the user knows the private key. This is
typical asymmetrical encryption.
To connect using a public key
1. Open a local shell and type:
ssh-keygen –t <authentication type>
where <authentication type> =
rsa1
rsa
dsa
: generates the protocol for version 1 RSA public authentication key
: generates the protocol for version 2 RSA public authentication key
: generates the protocol for version 2 DSA public authentication key
2. At the “where to locate the files” prompt, press ENTER.
3. At the passphrase prompt,
•
Enter a passphrase to enter this phrase every time you establish a connection to
the server.
•
Press ENTER to avoid having to enter a passphrase in the future.
4. The program generates the keys using the authentication parameter entered in step 1
and saves them to the following directory:
rsa1 (version 1 RSA)
: /setup/ssh/identity
/setup/ssh/identity.pub
rsa (version 2 RSA)
: /setup/ssh/id_rsa
/setup/ssh/id_rsa.pub
dsa (version 2 DSA)
: /setup/ssh/id_dsa
/setup/ssh/id_dsa.pub
5. The contents of the public key file (*.pub) should be entered in the file
$HOME/.ssh/authorized_keys on all SSH servers the user is allowed to log on to
using the public key (where $HOME is the user’s home directory).
If you know which authentication type your server uses, you can create a single authentication
key pair. However, if you do know the authentication type, all is not lost – run the program sshkeygen three times using the three different authentication parameters. You will then have
three key pairs for all three authentication types. Save all three public keys to
$HOME/.ssh/authorized_keys, as in step 5. Enter one key per line. The keys that are not
needed will be ignored.
For more information on SSH server configuration, ask the system administrator of the remote
host.
Build # 27
170
eLux® NG
www.myelux.com
4.8.4
User-Defined Commands
Defining local commands is special – it allows you to define
applications which can be called within a shell. (Note that the average
user may not have the necessary knowledge about commands.)
The user must be authorized to start the applications. All commands
are carried out by the UNIX user “eLux NG” (UID = 65534).
In some hardware
platforms,
“Customized
Commands” is called
“Custom”.
We recommend that you test whether the command works by calling it from within an XTerm
session before entering it in the Application definition dialog box. This is the only way you
will receive feedback via error messages. You will not receive feedback when you enter it in
the Local tab, as no error messages are displayed when it is called from eLux NG.
If you enter a command that does not call an X-capable application, you will not see anything
when it is carried out.
Figure 107: Customized commands
To enter a command
From the Configuration tab, click New.
1. The Application Definition dialog box appears. Click the Local tab.
Build # 27
•
Name: Enter an appropriate name for this application.
•
Application: Click Customized.
•
Parameter: Enter the desired command, including all program parameters. See
the examples below. For more information see the man pages of a Linux system.
•
Hidden: Does not display the application in the Application tab.
•
Application restart: Click to select to immediately reconnect after the user logs
off. When this feature is selected, the application automatically starts when the
Thin Client starts or restarts
•
Start automatically: Click this check box to open the session when the terminal
starts.
171
eLux® NG
www.myelux.com
•
Desktop icon Creates a desktop shortcut for this application on the eLux NG
desktop.
2. Click Finish.
If you select the option “Hidden,” you must select “Start automatically” (or “Application restart”)
for the command to run.
Example 1: Retrieve any file from an FTP server automatically
Enter the following:
ftp –o /setup/public/getfile ftp://user:passwd@myftpserver/getfile
This command is entered on one line. The parameter –o describes the target location and
target name of the file you want to get from the FTP server, followed by the name of the FTP
server the file resides on.
Files can also be retrieved from a Web server.
Example 2: Retrieve any file from a Web server automatically
ftp –o /setup/local/eterm/eterm.map http://mywebserver/confiles/eterm.map
This command is entered on one line. Keep in mind that files can only be transferred to the
local directories /setup/public and /setup/local/<application>. Further, the memory
area is restricted.
To see the current memory usage, enter the shell command df (=disk free) to see free disk
space and df –i to see the number of I nodes. For example on a 32-MB flash, data saved in
/setup cannot exceed 512 KB or 100 files.
Further line commands and parameters can be found in the product’s online documentation or
the Internet.
“Start automatically” with “Customized command”
You can use the customized command features to retrieve a configuration file, as in the
examples above. However, the order in which applications are started automatically (Start
automatically check box) is not defined. If both the application and a local command to get its
configuration file are set to “Start automatically,” this application may be started before the
configuration file arrives. If this conflict occurs upon start, restart the desktop.
Build # 27
172
eLux® NG
www.myelux.com
4.8.5
Calculator
To use the desktop calculator, you must have “X calculator” (xcalc) activated. It is located in
the “Desktop Tools” (dtt) package.
Figure 108: Calculator
To configure the calculator
From the Configuration tab, click New.
1. The Application Definition dialog box appears. Click the Local tab.
Name
Enter an appropriate name for this application.
Application
Click Customized.
Parameter
Enter xcalc.
Hidden
Does not display the application in the Application tab.
Application Restart
Click to select to immediately reconnect after the user logs off.
When this feature is selected, the application automatically
starts when the Thin Client starts or restarts
Start automatically
Click this check box to open the session when the terminal
starts.
Desktop icon
Creates a desktop shortcut for this application on the eLux NG
desktop.
2. Click Finish.
From the Applications tab, double-click or use the Connect button to run the calculator.
Build # 27
173
eLux® NG
www.myelux.com
4.8.6
Adobe Acrobat Reader
To use Adobe® Acrobat® Reader®, you must have the software “Acrobat5” (Acrobat5)
installed.
This section describes how to run Adobe Acrobat as a stand-alone program. To run Adobe
Acrobat Reader as a browser plug-in, just install the software. No further configuration is
required.
To run Adobe Acrobat Reader as a stand-alone program
From the Configuration tab, click New.
1. The Application Definition dialog box appears. Click the Local tab.
Name
Enter an appropriate name for this application.
Application
Click Customized.
Parameter
Enter the following: acroread <parameters>
where <parameters> are optional command-line parameters.
Note: Capitalization is important!
Hidden
Does not display the application in the Application tab.
Application Restart
Click to select to immediately reconnect after the user logs off.
When this feature is selected, the application automatically
starts when the Thin Client starts or restarts
Start automatically
Click this check box to open the session when the terminal
starts.
Desktop icon
Creates a desktop shortcut for this application on the eLux NG
desktop.
2. Click Finish.
From the Applications tab, double-click or use the Connect button to run the program.
You can view a PDF that is saved locally (such as in the directory /tmp) or on a network drive
(SMB or NFS).
For more information on:
•
Available command-line parameters. Open a local shell (see “4.8.1 XTerm (Local
Shell)”) and type acroread –helpall | more. A list of available parameters is
displayed. To scroll, press the spacebar.
•
How to use Acrobat Reader. See the Acrobat Reader documentation available on the
eLux NG CD-ROM. Also describes selected parameters.
•
Online help. The Acrobat Reader Online help is not available.
Related information: See “4.5 Internet.”
4.8.7
File Manager
To use this feature, you must have the “File Explorer“ (qfm) package installed. It is in the
package “Desktop tools“ (dtt) starting with version 1.4.2. In addition, the base OS starting with
version 1.8.4 must be installed.
eLux NG is a Linux-based operating system. While no Linux knowledge is required to install
and use eLux NG, to browse local files and directories using a local shell you need to know
UNIX commands.
Build # 27
174
eLux® NG
www.myelux.com
QFm is a QT-based file manager from Nick Battle (http://home.freeuk.com/nick.battle/). It
allows you to browse local files and directories on the Thin Client in a graphical interface using
the mouse rather than in a local shell using text commands. You can move, copy and rename
files.
To run the File Manager
From the Configuration tab, click New.
1. The Application Definition dialog box appears. Click the Local tab.
Name
Enter an appropriate name for this application.
Application
Click File manager.
Parameter
(optional) Enter <directory>
where <directory> is an optional parameter that enables you
define the directory that will be displayed upon start. For
example, tmp will display the tmp directory. By default, the
root directory is displayed.
Note: Capitalization is important!
Application Restart
Click to select to immediately reconnect after the user logs off.
When this feature is selected, the application automatically
starts when the Thin Client starts or restarts
Start automatically
Click this check box to open the session when the terminal
starts.
Desktop icon
Creates a desktop shortcut for this application on the eLux NG
desktop.
2. Click Finish.
Start the program with a double-click on the profile in the Applications tab or by marking the
profile and clicking the Connect button.
How to use QFm
Using QFm is similar to other file managers, such as Windows Explorer. You can delete, copy,
rename and change files.
Tool tips help you through the basic features (holding the cursor over an object displays a
short description).
To understand how files are displayed, the highest-level directory is root. Root contains a
number of subdirectories, including setup, tmp, smb, nfs.
•
setup Contains permanent files needed by applications, such as configuration files. The
contents are not deleted upon boot.
•
tmp Contains temporary files needed by applications for this session. Deleted upon boot.
Note: Browser, ICA and SAP cache is stored here. For improved performance, we
recommend reducing allocated cache in the respective program or, in the case of the
browser, defining a network drive for storing program files (“browser home directory”). See
“3.10 Browser Home Directory.”
•
smb Displays the currently mapped SMB drives. Note: Only defined SMB drives that are
currently mounted are displayed. The user must connect to the SMB drive before it will be
displayed. For information on mapping SMB drives, see “3.9 Drives.”
•
nfs Displays the currently available NFS drives.
Build # 27
175
eLux® NG
www.myelux.com
While using QFm is intuitive, we provide the following general guidelines and tips:
4.8.8
•
The task bar provides one-click access to the most frequently used commands: Home,
Display hidden files, Exit, Refresh, One directory up, Change directory, Shell, New
window.
•
To expand a directory , click once. To display that directory only in tree view, double-click.
in the task bar or File > Home.
To return to root, click Home
•
To open a file, double-click. By default, applications have been preset for the following
files (you must have the respective application installed):
Acrobat Reader
Opens *.pdf files.
Citrix ICA Client
Opens *.ica files.
MP3 Player
Opens *.mp3 files.
Opera, Mozilla, Firefox
Opens HTML files.
QT Text Editor
Opens *.cnf, *.conf, *.cpp, *.h, hosts, *.ini, *.java, *.log,
printcap, readme, *.txt files. See “4.8.8 Text Editor.”
Wav Player
Opens *.wav files.
•
You can bookmark frequently used files and directories by right-clicking on the file and
selecting Bookmark. You can then jump directly to the file or directory using the
Bookmarks menu.
•
To open a shell, click Shell
•
The error “Not an executable file“ means that the file cannot be displayed. Try installing
the appropriate software or clicking with the right mouse button on a file and selecting
Open with to display a list of available programs.
in the task bar or File > Shell.
Text Editor
To use this feature, you must have the “Text Editor“ (qtt) package installed. It is in the package
“Desktop tools“ (dtt) starting with version 1.4.2. In addition, base OS version 1.8.4 or later
must be installed.
QT Text Editor is a simple QT-based text editor that offers basic editing features. You can
copy, paste, find, undo, redo, select all text, etc. The files must be saved to the Thin Client or
available on a network drive.
To run the text editor
Click with the right mouse button on an Applications category and select Add.
1. The Application Definition dialog box appears. Click the Local tab.
Name
Enter an appropriate name for this application.
Application
Click Text editor.
Parameter
(optional) Enter <file name>
where <file name> is an optional parameter that enables you
define the file that will be displayed upon start. Enter the
complete file name. For example, tmp/hosts will display the
hosts file located in the tmp directory.
Note: Capitalization is important!
Application Restart
Build # 27
Click to select to immediately reconnect after the user logs off.
When this feature is selected, the application automatically
starts when the Thin Client starts or restarts
176
eLux® NG
www.myelux.com
Start automatically
Click this check box to open the session when the terminal
starts.
Desktop icon
Creates a desktop shortcut for this application on the eLux NG
desktop.
2. Click Finish.
Start the program in the Applications tab with a double-click on the profile or by marking the
profile and clicking the Connect button.
Tip
To access files on an SMB network drive, you must configure the SMB drive in advance. For
information on how to configure SMB drives, see “3.9 Drives.” In addition, the user must know
the SMB drive name. On the Thin Client, open the QT Text Editor. Click File > Open > smb,
enter the network drive and click Open. This mounts the drive. It will then appear in the dialog
box and can be selected. It remains mounted for the rest of the eLux NG session.
4.8.9
Movie Player
To use this feature, you must have the “Movie Player” (mplayer) package installed. In addition,
install the individual subcomponents (FPMs) relating to the features you desire. In addition, the
base OS starting with version 1.8.4 must be installed.
MPlayer is an open-source movie player from the MPlayer Project (http://www.mplayerhq.hu).
It supports all common movie formats including DVD (including encrypted DVD), MPEG, DivX,
AVI, ASF, RealVideo, Windows Media Video (.wmv), Quicktime (.mov) and others. The files
can reside on the Thin Client, a network drive or the Internet.
This section describes how to run MPlayer as a stand-alone program. To run MPlayer as a
browser plug-in (Mozilla only), install the software “MPlayer Mozilla support”
(mplayer_plugger) in the package “Movie Player” (mplayer). No further configuration is
required.
To run the movie player as a stand-alone program
Click with the right mouse button on an Applications category and select Add.
1. The Application Definition dialog box appears. Click the Local tab.
Name
Enter an appropriate name for this application.
Application
Click Movie player.
Parameter
Leave blank.
Application Restart
Click to select to immediately reconnect after the user logs off.
When this feature is selected, the application automatically
starts when the Thin Client starts or restarts.
Start automatically
Click this check box to open the session when the terminal
starts.
Desktop icon
Creates a desktop shortcut for this application on the eLux NG
desktop.
2. Click Finish.
Start the program in the Applications tab with a double-click on the profile or by marking the
profile and clicking the Connect button.
Proxy settings are set using Scout Enterprise. For more information, see the Scout Enterprise
Administrator’s Guide.
Build # 27
177
eLux® NG
www.myelux.com
How to use MPlayer
While using MPlayer is intuitive, we provide the following general guidelines and tips:
•
Access commands by clicking the buttons of the remote control. Alternatively, click with
the right mouse button in the movie window. This opens the context menu.
•
To play a DVD from a local drive, on the Thin Client start MPlayer. Insert the DVD in the
drive. Click with the right mouse button in the movie window. In the context menu select
DVD > Open disk… and browse for the DVD. To open a chapter, in the context menu
select DVD > Chapters > <chapter number>. Note: MPlayer does not support chapter
menus.
•
To change the appearance, in the context menu select Skin browser. The Skin Browser
dialog box is displayed. Select your desired theme.
•
To configure settings, in the context menu select Preferences. The Preferences dialog
box is displayed.
•
You have two drivers available: xv, which provides hardware acceleration with a modern
graphics card, and x11, which provides no scaling. If playback does not occur, try setting
the driver to x11. This is done in the Preferences dialog box. The default driver is xv.
For more information on MPlayer, see the documentation available at
http://www.mplayerhq.hu/DOCS/HTML-single/en/MPlayer.html.
4.8.10 NoMachine
To use this feature, you must have the software “NxClient” (nxclient) installed.
NoMachine from Medialogic S.p.A. enables a UNIX workstation to provide terminal server
functionalities. NoMachine software is based on the NX Distributed Computing Architecture, a
suite of open source technologies built on SSH and the X-Window System. NX also translates
and embeds the RDP (Remote Desktop Protocol) used by Microsoft in its terminal server
product family and VNC protocols into X/NX. NX is faster than VNC or X11 and can run on
bandwidth as narrow as 10 kBit/sec. It enables users to compress and accelerate remote
desktops like Windows, KDE, Gnome and CDE. NX lets you work fluently even across slow
links like modems.
NX software consists of the following components:
•
NX server The NX server is available for Linux and Solaris and is licensed per-server, not
per-connection.
•
NX client The client software is available for eLux NG and other platforms. All NX clients
are free of charge.
To configure the NoMachine NX client
From the Configuration tab, click New.
1. The Application Definition dialog box appears. Click the Local tab.
Name
Enter an appropriate name for this application.
Application
Click Customized.
Parameter
Enter nx.sh.
Hidden
Does not display the application in the Application tab.
Application Restart
Click to select to immediately reconnect after the user logs off.
When this feature is selected, the application automatically
starts when the Thin Client starts or restarts.
Start automatically
Click this check box to open the session when the terminal
starts.
Desktop icon
Creates a desktop shortcut for this application on the eLux NG
desktop.
2. Click Finish.
Build # 27
178
eLux® NG
www.myelux.com
From the Applications tab, double-click or use the Connect button to run the program.
How to use NX client
•
The NoMachine NX server must be installed and running.
•
A wizard appears the first time you run the software to help you through the initial
configuration.
•
For further information, see the NoMachine documentation available at
www.nomachine.com.
Tip
•
We recommend setting the “cache on disk” (Configure > Advanced) to zero.
For information on NoMachine, see www.nomachine.com.
4.8.11 Virtual Keyboard
To use this feature, you must have the software “Virtual Keyboard” (xvkbd) installed. It is in the
package “Desktop tools“ (dtt) starting with version 1.4.2.
This is an open-source program to display a virtual keyboard on the screen. You can enter
characters into a program using a mouse click. This is useful for kiosk terminals or for a
workstation with a mouse but no keyboard.
To run the virtual keyboard
From the Configuration tab, click New.
1. The Application Definition dialog box appears. Click the Local tab.
Name
Enter an appropriate name for this application.
Application
Click Customized.
Parameter
Enter xvkbd.sh.
Hidden
Does not display the application in the Application tab.
Application Restart
Click to select to immediately reconnect after the user logs off.
When this feature is selected, the application automatically
starts when the Thin Client starts or restarts.
Start automatically
Click this check box to open the session when the terminal
starts.
Desktop icon
Creates a desktop shortcut for this application on the eLux NG
desktop.
2. Click Finish.
From the Applications tab, double-click or use the Connect button to run the program.
How to use the virtual keyboard
While using the virtual keyboard is intuitive, we provide the following general guidelines and
tips:
•
Run a program of your choosing that requires keyboard entry.
•
Run the virtual keyboard. The keyboard window always appears on top. Click on a
character using the mouse.
•
By default, the character appears in the window of the last program used. To set the focus
to a specific window, click Focus and the window of your choosing.
Build # 27
179
eLux® NG
www.myelux.com
•
By default, the virtual keyboard program uses the keyboard language setting from the
eLux NG starter (see “3.5 Mouse / Keyboard”), assuming the language is supported,
otherwise English will be used. To manually set the language for this session or to view a
list of available languages, click Main menu > Change Keyboard Layout.
Tip
•
To set the size and/or position, enter the following command in the Parameter field:
xvkbd.sh –geometry <width>x<height>+<x position>+<y position>
Examples:
xvkbd.sh –geometry 600x200
Set keyboard size to 600x200 pixel
xvkbd.sh –geometry 600x200+200+0 Set keyboard size to 600x200 pixel and
position it above center
xvkbd.sh –geometry 600x200+0-40
Set keyboard size to 600x200 pixel and
position it lower left
For further information, see the documentation available at
http://homepage3.nifty.com/tsato/xvkbd/.
Build # 27
180
eLux® NG
www.myelux.com
5 Troubleshooting
Following are solutions to various problems.
Section
Description
5.1
eLux NG Upgrade License
What to do when eLux NG is not licensed
5.2
Safe Boot
How to boot eLux in safe mode
5.3
Factory Reset
How to return eLux NG configuration to factory-delivered state
5.4
Solutions to Common Problems
Answers to common problems
Build # 27
181
eLux® NG
www.myelux.com
5.1
eLux NG Upgrade License
eLux NG is a licensed product. You must pay for the product in order to use it.
When you order a Thin Client containing eLux NG from the factory, it is delivered with a license. No
further action is required on your part. In normal use – including such procedures as firmware update
or recovering the Thin Client - the license is not deleted. Once it is licensed, it is always licensed.
In rare occasions the license can be deleted or if you rewrite a non-eLux NG operating system with
eLux NG, eLux NG will not be licensed. In this case you will need the so-called eLux NG upgrade
license. There are two types:
1. eLux NG upgrade license to be entered in Scout
Format : xxxx-xxxx-xxxx-xxxxx
A license with the above format is to be distributed using the Scout Enterprise management software.
It may be for one eLux NG upgrade license, can also be for many. The license must be activated via
the Internet site www.myelux.com. When the license activation process is complete, eLux NG upgrade
licenses are distributed by Scout Enterprise on a first come, first serve basis. That means the first
unlicensed Thin Client to contact Scout Enterprise will receive an eLux NG upgrade license. License
distribution takes place once. Remaining Scout Enterprise eLux NG upgrade licenses cannot be
reactivated if unintentionally deleted from the Scout Enterprise software.
See the Scout Enterprise
A0
dministrator’s Manual for a detailed description of the license activation process via the Internet.
2. Manual eLux NG upgrade license
Format : xxx-xxx-xxx-xxx-x
Your license is a manual eLux NG upgrade license if:
•
it has the format: xxx-xxx-xxx-xxx-x
•
you had to provide a host ID to your servicer to obtain the license
•
the license is for one device only
In this case, you do not need to activate it via the Web. It is already activated. Enter it directly on the
Thin Client as described below.
Figure 109: Message when eLux NG is not licensed
Build # 27
182
eLux® NG
www.myelux.com
To enter a manual eLux NG license key
1. Start the terminal. If your system is unlicensed, you receive the eLux NG system information
message box.
2. The license key you received from your eLux NG distributor is specific to this eLux NG
terminal’s host ID (to get your license, provide your supplier with the 12-digit terminal host ID
displayed here). A manual license key has the format: xxx-xxx-xxx-xxx-x.
Enter the complete 13-digit license key. Hyphens are not required.
3. Click OK. The terminal is licensed. Licensing is one-time only – eLux NG remains licensed
even if you update firmware or perform a recovery.
5.2
Safe Boot
Default screen settings are set to values all monitors support. If after configuring the Thin Client you
have massive screen distortion, resolution, frequency and color depth are most likely set to values
your monitor does not support. In this case, switch off your monitor to avoid damage. Start the Thin
Client in Safe Boot mode. Safe Boot allows you start the terminal in a mode which does not damage
hardware. You can then correct screen settings. In addition, network capabilities are disabled. This
allows you to change incorrect network hardware settings.
In Safe Boot, the eLux starter is displayed in English. If you had set a different application language,
do not be concerned. User settings (Setup tab) and defined applications (Configuration tab) are not
deleted. When you exit Safe Boot, your old language will be restored.
Procedure for Safe Boot
1. Switch off the Thin Client immediately.
2. Restart the Thin Client.
3. During the boot procedure, the supplier logo appears. Press the TAB key when the screen
goes blank.
4. The eLux NG logo will be displayed, and then the prompt “Please enter admin password”.
Enter the terminal password (“elux” by default).
•
If an invalid password is entered three times, the terminal restarts.
5. At the prompt “factory reset (y/n)?” type n. You can now access eLux NG and make
changes to settings in a mode that is safe for the monitor. Previous settings information is
not lost.
6. Restart the Thin Client to exit Safe Boot mode.
Build # 27
183
eLux® NG
www.myelux.com
5.3
Factory Reset
Factory reset returns the Thin Client to the factory-delivered configuration state. User settings (Setup
tab) and defined applications (Configuration tab) are deleted. Firmware is not deleted.
Procedure for Factory Reset via Keyboard
1. Switch off the Thin Client.
2. Restart the Thin Client.
3. During the boot procedure press the TAB key within three seconds.
4. At the prompt “Please enter admin password” enter the terminal password (“elux” by
default).
•
If an invalid password is entered three times, the terminal restarts.
5. At the prompt “factory reset (y/n)?” type y. Previous settings information and defined
applications are deleted.
Alternatively you can initiate factory reset using the mouse.
Procedure for Factory Reset via Mouse
1. From the Setup tab, click the Firmware subtab.
2. Click Default.
3. Click Yes in the eLux NG Starter dialog box. eLux NG restarts.
Figure 110: The Reset button in Setup > Firmware
Warning A Factory Reset deletes all defined applications and resets configuration settings to factory
default.
Build # 27
184
eLux® NG
www.myelux.com
5.4
Solutions to Common Problems
General
Problem:
You can change settings in the tabs Setup or Configuration, but your changes are
overwritten when the device is restarted.
Solution:
Your Thin Client is managed. Remove it from or deactivate it in the Scout Enterprise
software.
Ch. 3.4, “Screen”
Problem:
eLux screen settings are incompatible with the monitor.
Solution:
If you are no longer able to view the Screen tab, either attach a compatible monitor,
perform a Recovery Installation, or change the settings remotely using the Scout
Enterprise management software. Alternatively, you can start the terminal using Safe
Boot. Safe Boot allows you start the terminal in a mode which does not damage
hardware. You can then change eLux NG settings.
Procedure for Safe Boot
1.
Switch off the Thin Client immediately.
2.
Restart the Thin Client.
3.
During the boot procedure, the BIOS information is displayed. When the screen
goes blank, press the TAB key.
4.
The eLux NG logo will be displayed, and then the prompt “Please enter admin
password”. Enter the terminal password (“elux” by default).
• If an invalid password is entered three times, the terminal restarts.
5.
At the prompt “factory reset (y/n)?” type n. You can now access eLux NG and
make changes to settings in a mode that is safe for the monitor. Previous settings
information is not lost.
6.
Restart the Thin Client to exit Safe Boot mode.
Ch. 3.4, “Screen”
Problem:
Font server error (in the dialog box Setup > Screen > New).
Solution:
”Check the Font server:Port entry.
•
The format is incorrect (font server:port), for example, the colon has not been
entered, or the port number is missing or not a number.
•
The font server name or address is incorrect.
•
The font server cannot be reached.
Check the Font path entry.
•
The path does not exist.
•
There is no file named fonts.dir in, for instance, the following directory:
/smb/share/dir or /nfs/host/dir
Ch. 3.6, “Firmware”
Problem:
Build # 27
You are using an HTTP server. After starting the firmware update, the update stops and
you receive one of the following errors:
Error 401: Unauthorized
185
eLux® NG
www.myelux.com
Error 403: Forbidden
Error 404: File or directory not found
Error 406: Client browser does not accept the MIME type of the
requested page (client problem)
Error 407: Initial proxy authentication required by the Web server
Solution:
If an update is interrupted, click the Details button to display a detailed error message.
Depending on the HTTP error that is displayed, take the appropriate actions. If you have
checked that settings are correct, you can do the following:
1. Verify that the IDF is in the appropriate HTTP server directory.
2. Enter the MIME types. If you are using IIS version 6.0 or higher, you must enter the
MIME types explicitly. If you are using a previous version IIS or a different HTTP server,
see if defining the MIME types solves the problem. For more information, see "3.6.4
Microsoft Internet Information Server.“
Ch. 3.7, “Security”
Problem:
You no longer have the password for the terminal (=LocalLogin).
Solution:
The Thin Client’s password is at the same time the password for LocalLogin. Factory
default is “elux”. If you change and then forget LocalLogin’s password, only a Recovery
Installation can reset the password. All settings are reset to factory default.
Ch. 3.11, “Printer”
Problem:
After you connect a locally attached printer and load the printer drivers to the Citrix
MetaFrame ICA server, you log on to the terminal server computer. The printer is
supposed to be autocreated and available to you in the Printers folder of your Terminal
Server session. The printer does not appear in the Printers folder.
Solution:
If the printer driver name on the thin client does not match the printer driver name on the
terminal server computer exactly, the printer will not autocreate. On the thin client, correct
spelling, capitalization and spacing.
In addition, on the Citrix MetaFrame ICA server verify the following:
1. In Citrix Connection Configuration double click the ICA listener port. Select the Client
Settings button, ensure "Connect client printers at logon" is checked.
2. Ensure that the following boxes are not checked under the Client Settings Area:
Disable Windows Client Printer Mapping
Disable Client LPT Mapping
Both of these settings prevent client printers from being autocreated on the system, and
prohibit the client printer from being manually added during the session.
For further MetaFrame configuration, see the Citrix documentation.
Ch. 3.13, “ISDN“
Problem:
ISDN does not connect (not the first time you try to connect).
Solution:
Check the ISDN error codes.
Procedure for troubleshooting ISDN connections
Build # 27
1.
Open a local shell (XTerm)
2.
On prompt type: dmesg | xmessage – file -
186
eLux® NG
www.myelux.com
Problem:
Connecting to the server or using Windows Explorer is extremely slow. The application
stops responding, or “hangs.”
Solution:
Automatic floppy drive mapping is active. Go to BIOS Setup on the Thin Client and
deactivate the floppy controller setting.
Ch. 3.16, “Mirroring”
Problem:
You want to initiate a mirroring session, but the Mirroring settings area on the target Thin
Client is disabled.
Solution:
The Mirroring settings area is disabled if the mirror package is not installed.
Ch. 4, “Configuring Applications”
Problem:
The application does not start automatically when the Thin Client starts, although the
Start automatically check box is selected.
Solution:
If eLux NG is not licensed, applications cannot be started automatically.
Ch. 4.5.3 Web Tools
Problem:
After clicking on a link to run a RealPlayer-supported file, the screen freezes and the
keyboard does not work (NUMLOCK key does not respond).
Solution:
When the screen freezes and the keyboard does not respond, the main memory has
been used to full capacity. Most likely the file you just tried to download is too large for the
available main memory. Generally, a pop-up message appears when memory usage has
reached 95%, allowing you to quit applications and prevent a screen freeze. However,
RealPlayer files may download and completely use available main memory before the
pop-up warning can be sent.
Unfortunately, there is no way to solve this problem once it has occurred. You must
restart the device.
You can, however, prevent the problem. In the future, avoid downloading oversized
RealPlayer files and be aware of your memory size. To see the main memory available
on the device, go to Setup > General.
Ch. 4.7.4, “X11 for X Applications Using the Local X Server”
Problem:
X11 application does not start.
Solution:
Check remote shell and command functionality.
Procedure for troubleshooting remote shell applications
1.
Open a local shell (XTerm).
2.
At the prompt type: rsh <host name> -l <username> ls.
3.
If you receive the error message “permission denied," check the remote shell
functionality on the UNIX server.
If you receive other error messages, this indicates a problem with the command.
Log on to your UNIX server, set the DISPLAY variable to your Thin Client’s
address, and check the functionality of the command.
Problem:
My X11 application (running on a remote machine) will not start. When connecting from
the Application tab, the “Active” column displays Yes and then a short time later No.
Solution:
Remote X11 applications are not allowed. Go to Setup > Security > “Local security” >
Permissions. In the Local security settings dialog box select the check box Allow
remote X11 clients.
Build # 27
187
www.myelux.com
eLux® NG
6 Recovery Installation
During an eLux NG Recovery Installation, the Thin Client boots from a server over the network, loads
network information from a so-called boot server”, loads a boot file from a TFTP server, and overwrites
the entire flash image with a default image retrieved from the recovery server. The software is
overwritten with the recovery software and settings are returned to factory-delivered default settings.
A recovery can be used to solve the following problems:
/
•
eLux NG cannot be booted anymore.
•
The flash memory of the Thin Client does not yet contain a basic image.
•
The password for LocalLogin has been changed from factory settings and is no longer known.
•
You want to replace the current software on the flash memory with eLux NG.
•
You want to make a factory reset.
•
To update from eLux 1.x to eLux NG.
•
When during update a message box appears saying a recovery is necessary.
Note: The Recovery procedures, which install the eLux NG Software to the flash of the Thin Client or
make a factory reset of the Thin Client, are described in detail in our papers Recovery Installation
and Migration and Servertransfer. These guides are provided on f www.myelux.com in the area
Manuals / Documentation.
Build # 27
188
eLux® NG
www.myelux.com
7 Shortcut Keys
Following is a list of shortcut keys:
CTRL+ALT+HOME
Password request for the Thin Client (and LocalLogin)
CTRL+ALT +
Opens the window list, which allows you to switch between
running applications (alternative to the taskbar). Scroll
direction: left.
CTRL+ALT +
Opens the window list, which allows you to switch between
running applications (alternative to the taskbar). Scroll
direction: right.
CTRL+ALT+F1
Moves to console 1 for the eLux NG desktop
CTRL+ALT+F2
Moves to console 2 for the first open XDM session
CTRL+ALT+F3
Moves to console 3 for the second open XDM session
CTRL+ALT+F4
Moves to console 4 for the messages during the boot phase
and recovery phase
Cursor keys
Selects applications in the Applications and Configuration
tabs
TAB key
Moves from button to button (changes the active button) in the
eLux NG starter
ALT + <underlined letter> Changes the active screen element in the eLux NG starter
Build # 27
CTRL+ALT+END
Starts screen saver, if installed. If an authentication server is
used (LDAP, ADS), the password is preset with the user
password ($ELUXPASSWORD).
CTRL+<Win key>
Opens the Taskbar Menu
SHIFT
Suppresses the application autostart function upon boot. After
the eLux NG logo appears, the screen goes black, and the
cursor appears as a clock, press and hold the SHIFT key (do
not press and release).
189
www.myelux.com
eLux® NG
Appendix 1: Desktop
In eLux 1.1, the starter was always started upon system boot and remained blended in during the
entire session. This was distracting to some users. In NG, automatic start of the starter is an option
that can be deselected by the administrator.
The taskbar has new features. For example, in eLux 1.1, applications were run using the starter. This
led to the problem that the starter could not be blended out, because the user would then be unable to
start sessions. In eLux NG, This problem has been eliminated by implementing one-click access to the
applications directly from the taskbar.
Finally, the desktop itself has been greatly enhanced.
These changes are described in detail below.
A. eLux NG Desktop
The desktop consists of the starter, the taskbar and workspaces.
The starter contains three tabs with the following functions:
•
Setup Configuring eLux NG settings. See chapter “3 Setup.”
•
Configuration Defining applications. See chapter “4 Configuring Applications.”
•
Applications Starting applications and shutdown options. See chapter “2.7 Sessions” and “2.8
Shut Down.”
The taskbar allows you to minimize applications, switch between applications and workspaces, and
start/minimize the starter.
Users of eLux 1.1 will be happy to learn that workspaces are a new feature of eLux NG. Note: This
feature is recommended for advanced users.
B. Desktop Options
Access the taskbar/starter/workspace options by going to Setup > Desktop > Advanced. Your
choices of taskbar properties include:
•
Taskbar Activates the taskbar. The taskbar will be visible no matter what program is open. It
remains in the background. Default setting. Deselect to deactivate the taskbar.
•
Always on top The taskbar will be visible no matter what program is open, reducing screen space
but making minimized programs accessible.
•
Hide automatically The taskbar disappears, increasing screen space. It reappears when you
move the cursor to the lower edge of the screen.
•
Show clock A clock appears on the right-hand side of the taskbar. Moving the cursor over the
clock to displays the date.
Your choices of starter properties include:
•
Starter Automatically starts the starter when the system boots. This is the default setting. Deselect
this option to deactivate. The starter can always be accessed by clicking the “Run starter” button
in the taskbar.
Your choices of workspace properties include:
•
Number Sets the number of workspaces. You are allowed up to four. Default is one.
Build # 27
190
eLux® NG
www.myelux.com
C. Taskbar
The taskbar is a bar on the lower edge of the screen that allows open applications to be minimized
and minimized applications to be maximized. It can also display the date and time as well as icons that
represent the status of certain operations on the device.
Time and date
Mirroring icon
Starter icon
Application icons
Workspaces
Run starter
Active applications
Taskbar button
Figure 111: Taskbar
Click with the left mouse button on the Taskbar button to display the Taskbar Menu. The Taskbar
Menu provides one-click access to the defined applications, shutdown options and the Window menu,
and running the eLux NG starter. Hotkey: CTRL+<Win key>
Click with the left mouse button on the Active applications button to display a list of all applications
that are currently running. Click to toggle between applications. You can also toggle between
workspaces, assuming you have defined more than one, or access the Window menu.
If you have defined multiple workspaces, the Workspace buttons are active on the taskbar. Select a
workspace to switch to it.
The Run starter button starts the starter when it is currently not running.
An Application icon is displayed in the taskbar when an application is started. Click to switch to this
application.
A Starter icon appears when you minimize the starter.
Mirroring is a help desk feature that is performed using the management tool Scout Enterprise. When
a device is mirrored, the Mirroring icon appears.
Finally, if you move the cursor over the time, the Time and Date are displayed according to the
conventions for your desktop language (in the figure above, English (US)).
Clicking with the right mouse button on a free space in the taskbar opens the View Menu. Here you
can arrange open windows on your screen, tiling them horizontally or vertically or cascading them. If
you click “Hide All”, their icons will disappear from the taskbar. Open the View Menu again and select
“Undo” to reverse this. Even when the application icons are hidden, the sessions can always be
accessed from the Window List or by clicking on the Active applications button or by using the hotkey
CTRL+<Win key> or CTRL-ALT-<arrow up>.
Build # 27
191
eLux® NG
www.myelux.com
Appendix 2: Memory Usage
A Thin Client contains the following internal memory: a flash card and main memory.
A. Flash Memory
The following is saved to the flash card:
•
software packages (firmware). Rights: read only.
•
application files. Rights: read/write.
Different suppliers offer different flash sizes, such as 32 MB, 128 MB, etc. Contact your supplier for a
list of available flash sizes.
Each local application or session client requires software saved to the flash card. The size of these
packages is displayed in ELIAS NG when the image files are created. The flash card size for your
requirements depends on the total number of programs to be run on the Thin Client (local browser,
ICA, SAP, RDP, emulation, etc.).
In addition, the directory /setup on the flash card is reserved for application files, such as ICA
configuration files, browser history file, etc. This directory is not deleted upon system shutdown.
B. Main Memory
Each Thin Client contains main memory. The directory /tmp in the main memory is reserved for
temporary system files or applications.
If you have 64 MB or less of main memory, 4 MB of main memory is reserved for the directory /tmp. If
your main memory is greater than 64 MB, the size of /tmp is a minimum 8 MB and can be increased
by the user.
The files in the directory /tmp are deleted upon system shutdown.
C. Warning Messages
When disk usage exceeds 95% (either in /setup or /tmp), eLux NG displays a warning message:
Figure 112: Low memory warnings
Note which directory is affected! Files in /tmp can be deleted by restarting the device. Files in /setup
must be removed by hand.
Tips:
•
ICA clients save cache files to the temporary directory. Solution: In advanced ICA settings, set the
ICA cache (Tools > Settings > Disk Cache > “Amount of disk space to use”) to zero. See section
“4.2.4 Citrix ICA Client for Linux – Advanced Citrix ICA Settings” for information on accessing the
advanced ICA settings.
•
During a local browser session, cache files are saved to the temporary directory, which can fill up
quickly. Solution: Set the browser home directory to a network drive. See section “3.10 Browser
Home Directory.”
Build # 27
192
eLux® NG
www.myelux.com
D. Main Memory Usage
The following survey gives approximate minimum values of memory usage (in MB) for several
applications. The stated values vary depending on the functions used during a session and should
only be used as a rough guideline.
Approximate Main Memory Requirements
Application
First Session
Every Further Session
Basic memory usage
35 MB
–
ICA client (for example, WORD, EXCEL)
10 MB
6 MB
SAP®GUI (SAP/R3)
128 MB
–
X terminal client
3 MB
2,3 MB
Local applications
2,5 MB
1,5 MB
RDP session (native client)
3,9 MB
1,9 MB
Mozilla
20 MB
–
XDMCP
2,5 MB
–
Emulations for Motif 3270, 5250, 9750
(UniCon Software GmbH)
2,3 MB
2,1 MB
eterm emulation 97801
0,9 MB
0,8 MB
Figure 113: Main memory usage table
Build # 27
193
eLux® NG
www.myelux.com
Appendix 3: Examples of Internet Profiles
Following are the preset hardware profiles. The following providers are present in Germany and may
or may not be available in other countries:
•
Arcor AG (www.arcor.de)
•
freenet.de AG (www.freenet.de)
•
T-Online International AG (www.t-online.com)
The profiles are meant to serve as guidelines and should be modified based on the provider you use.
Except for T-Online, the numbers listed are call-by-call. No registration is required. The dial-up
information listed here was current as of June 8, 2005. Please contact the provider before using to
verify availability and the dial-up rate.
Follow these general rules when entering network information for a call-by-call provider:
•
Profile name The profile name is a name of your choosing.
•
User account May not contain symbols or be left blank.
•
Password May not contain symbols or be left blank.
A. Examples of ADSL Connections
Example of an ADSL connection using T-Online
Profile name:
User account:
Password:
Identification:
Idle time-out:
Manager time-out:
<arbitrary>
[email protected]
***
PAP
240
60
The user account has the following format:
12-digit ID number + 12-digit T-Online number + 4-digit co-user number + @ + t-online.de
Consult your T-Online order for this information.
B. Examples of ISDN Connections
Example of an ISDN connection using Arcor
Profile name:
User account:
Password:
Identification:
Idle time-out:
Manager time-out:
Dial-up number:
MSN:
Callback:
Use local IP address:
Build # 27
<arbitrary>
arcor
internet
PAP
240
60
01920785 (“Spartarif Tag”)
0
Not activated
Not activated
194
eLux® NG
www.myelux.com
Example of an ISDN connection using freenet.de
Profile name:
User account:
Password:
Identification:
Idle time-out:
Manager time-out:
Dial-up number:
MSN:
Callback:
Use local IP address:
<arbitrary>
<arbitrary>
<arbitrary>
PAP
240
60
019231770 (“Internet-by-call”)
0
Not activated
Not activated
Example of an ISDN connection using T-Online
Profile name:
User account:
Password:
Identification:
Idle time-out:
Manager time-out:
Dial-up number:
MSN:
Callback:
Use local IP address:
<arbitrary>
000000000000888888888888#0001
***
PAP
240
60
0191011
0
Not activated
Not activated
The username has the following format:
12-digit ID number + 12-digit T-Online number + # +4-digit co-user number
Consult your T-Online order for this information.
C. Examples of Modem Connections
Example of a modem connection using Arcor
Profile name:
User account:
Password:
Identification:
Idle time-out:
Manager time-out:
Dial-up number:
<arbitrary>
arcor
internet
PAP
240
60
01920785 (“Spartarif Tag”)
Example of a modem connection using freenet.de
Profile name:
User account:
Password:
Identification:
Idle time-out:
Manager time-out:
Dial-up number:
<arbitrary>
<arbitrary>
<arbitrary>
PAP
240
60
019231770 (“Internet-by-call”)
Example of a modem connection using T-Online
Profile name:
Password:
User account:
Identification:
Build # 27
<arbitrary>
***
000000000000888888888888#0001
PAP
195
eLux® NG
www.myelux.com
Idle time-out:
Manager time-out:
Dial-up number:
240
60
0191011
The username has the following format:
12-digit ID number + 12-digit T-Online number + # +4-digit co-user number
Consult your T-Online order for this information.
Build # 27
196
eLux® NG
www.myelux.com
Appendix 4: Configuring Kiosk Mode
Kiosk mode allows you to restrict the user functionality of the browser. The individual elements (and
layout) of the graphical user interface are defined in XML User Interface Language (XUL). The
functionality is formulated in JavaScript.
For kiosk mode, a number of XUL and JavaScript files are bundled into a JAR archive. To define your
own kiosk mode, you must edit these XUL documents.
For more information on XUL, see http://www.xulplanet.com/tutorials/xultu/intro.html.
A. Kiosk Mode for Firefox
Firefox comes with a default kiosk mode with the following features:
•
URL bar has been blended out
•
Toolbar cannot be customized by user
•
“Save to disk” is deactivated (downloads still allowed)
•
Preferences cannot be customized by user
•
Not in full screen mode
To make additional changes, you will have to customize kiosk mode yourself. The JAR archive that
comes with Firefox can be used as a template. It contains all XUL documents used to describe the
user interface.
To customize kiosk mode for Firefox
1. Install the kiosk mode software (in the respective browser package).
2. Copy the following file to a machine with unzipping software:
/opt/MozillaFirefox/lib/chrome/modes/kioskmode.jar
Tip On the Thin Client, you can use the UNIX copy command (“cp <file directory> <target
directory>”) to copy the file to an NFS or SMB drive, or in the eLux NG starter the FTP function
available in Setup > Diagnosis.
3. Unzip the file.
Windows:
Winzip tool
UNIX:
unzip tool (command: unzip kioskmode.jar)
The directory “content” with the subdirectory “browser” will be created.
Warning Do not change the directory structure. This will make your rezipped JAR file
unusable.
4. Edit the appropriate files using Notepad or an XUL editor. Comment out functions you want to
deactivate and interface elements (menus, toolbars, etc.) you do not want displayed. For an
example, view the document “browser.xul” from
“/opt/MozillaFirefox/lib/chrome/modes/kioskmode.jar”, which mainly describes the browser
interface.
Build # 27
197
eLux® NG
www.myelux.com
Tip A description of what to edit exceeds the scope of this document. For more information,
there are many tutorials available on the Web, for example,
http://tln.lib.mi.us/~amutch/pro/phoenix/kiosk.htm.
5. Zip the file to the name “kiosk.jar”.
Windows:
Winzip program
UNIX:
“zip” command with the “-r” option (recursive) (zip –r kiosk.jar)
6. Copy the file to the following directory on the Thin Client:
/setup/firefox/kiosk.jar
7. Set the homepage and start page in the application definition (Configuration > New >
Browser). Use full URL format: “http://<domain name>”. The Web page can be on the
Internet, on your thin client, or on another computer on the network. Click to select Kiosk
mode.
Firefox uses the *.jar file according to the following selection rules:
1. /opt/MozillaFirefox/lib/chrome/modes/normalmode.jar
This file is used if the Kiosk mode check box in the browser definition is deactivated (always
the case when the „Kiosk mode“ software has not been installed).
2. /setup/firefox/firefox.ini
The following entry in the Firefox initialization file is used if the Kiosk mode check box in the
browser definition is activated, “File=<path>/<file>”, where path is the complete path of the
*.jar file and file is the file name. The default value “/setup/firefox/kiosk.jar” can be customized
to the path and name of your choosing, for example “/smb/smith/browser/testkiosk.jar”.
3. /opt/MozillaFirefox/lib/chrome/modes/kioskmode.jar
This file is used if the Kiosk mode check box in the browser definition is activated and the
*.jar archive specified in the Firefox initialization file (/setup/firefox/firefox.ini) does not exist.
B. Kiosk Mode for Mozilla
Mozilla comes with the following default kiosk styles (so-called “chromes”):
•
full A modified toolbar is displayed. All other buttons have been blended out.
•
blank All buttons have been blended out. A time-out loads the homepage after 30 seconds idle
time.
•
urlbar A modified toolbar and the URL bar are displayed. All other buttons have been blended out.
All styles have the following:
•
Keyboard shortcuts are deactivated, however the keyboard is still active.
•
The homepage and start page are taken from the application definition.
•
Toolbar cannot be customized by user
•
Preferences cannot be customized by user
To activate kiosk mode for Mozilla
1. Install the kiosk mode software (in the respective browser package).
2. In /setup/mozilla/mozilla.ini set the following style parameter (so-called “chrome”):
[kiosk]
chrome=<value>
where value:
Build # 27
198
eLux® NG
www.myelux.com
full:
A modified toolbar (Back, Forward, Reload, Stop, Print) is displayed. You
can choose a Web site from the list of base sites. All other buttons are
blended out. Keyboard shortcuts are deactivated, however the keyboard is
still active.
blank:
All buttons in the browser are blended out. In addition, returns to the
homepage after a set idle time.
urlbar:
A modified toolbar (Back, Forward, Reload, Stop, Print) and the URL bar are
displayed. All other buttons are blended out. Keyboard shortcuts are
deactivated, however the keyboard is still active.
To set the chrome parameter locally you can use the “ucinitool” command. Example: To set
the chrome to “urlbar,” on the Thin Client open a local shell and type the following (case
sensitive):
ucinitool -f /setup/mozilla/mozilla.ini –s kiosk Chrome=urlbar
Tip To edit a file in /setup:
1. Use the UNIX editor vi
2. Use the text editor (see “4.8.8 Text Editor”)
3. Transfer the file to a machine with editing software, edit the file and copy it back to the
Thin Client
Tip On the Thin Client, you can use the UNIX copy command (“cp <file directory> <target
directory>”) to copy the file to an NFS or SMB drive, or in the eLux NG starter the FTP function
available in Setup > Diagnosis.
3. Depending on which style you used, set additional parameters:
“full”:
Set the list of base sites in /setup/mozilla/uri-list.properties.
Example: To set three entries:
uriCount=3
uriString1=My eLux
uriValue1=http://www.myelux.com
uriString2=UniCon Software GmbH
uriValue2=http://www.unicon-ka.de
uriString3=Mozilla
uriValue3=http://www.mozilla.org
“blank”:
Returns to the homepage after 30 seconds idle time. Set the time in
/setup/mozilla/kioskDefault.properties.
“urlBar”:
No further parameters available.
4. Set the homepage and start page in the application definition (Configuration > New >
Browser). Use full URL format: “http://<domain name>”. The Web page can be on the
Internet, on your thin client, or on another computer on the network. Click to select Kiosk
mode.
This section described how to activate the default styles by editing files in /setup. The required files
can be transferred to many Thin Clients using the Scout Enterprise file transfer function. This is the
easiest method. Making changes to the *.jar file (/usr/mozilla/chrome/kiosk.jar) directly requires EBK.
Build # 27
199
eLux® NG
www.myelux.com
Appendix 5: Setting Thin Client Time to UTC
Coordinated Universal Time (UTC) is the successor to and modern version of Greenwich Mean Time
(GMT). The system time in the Thin Client’s BIOS must be set to UTC. You must do this directly on the
Thin Client, either in the eLux NG software (recommended) or BIOS Setup.
eLux NG Software
The easiest method is to use the eLux NG main screen (Setup > Desktop) and enter a time
server conform to Internet standard RFC 868 (“Time protocol”).
If your network does not have such a time server, manually enter the time and date settings,
and select the time zone from the drop-down list.
Click Apply.
This updates the time settings in BIOS automatically. There is no need to enter BIOS Setup. In
addition, the fall and spring Daylight Saving Time changes are made automatically.
BIOS Setup
Alternatively, you can enter BIOS Setup and change the system time manually to UTC. To
calculate UTC, take local time minus the time zone difference from GMT (found in the Time
Zone drop-down list in Scout Enterprise Setup > Desktop tab). In Summer Time, subtract an
additional hour to take into account Daylight Saving Time.
UTC in winter months
= (local time – time zone difference)
UTC in summer months = (local time – time zone difference) – 1 hour
For example, if you are in Amsterdam, the Time Zone drop-down list in Scout Enterprise
shows the local time for Amsterdam is GMT plus one hour (GMT + 1). Thus, you should
change time setting in BIOS to the local time minus one hour. If local time is 17:45, system
time in BIOS should be set to 16:45. If it is Summer Time (Daylight Saving Time), the system
time should be set to local time minus two hours, or 15:45. Note that BIOS system time uses
the 24-hour system.
You only need to set the system time once. Fall and spring Daylight Saving Time changes are
made automatically.
Build # 27
200
eLux® NG
www.myelux.com
Appendix 6: Supported Hardware
The following hardware components are supported by eLux NG version 1.21 and later.
Type
Product
Producer
Specification
LAN
3C900B Combo
3Com Corporation
10 Mbps Ethernet, RJ-45, AUI and
BNC connectors for 10Base-T,
10BASE5 and 10BASE2
3C905C-TX-M
3Com Corporation
10/100 Mbps Fast Ethernet, RJ-45
connector
AT-2450FT
Allied Telesyn, Inc.
10 Mbps fiber (ST or SC) connectors
PCI bus
AT-2450FTX
Allied Telesyn, Inc.
AT-2700FX
Allied Telesyn, Inc.
10 Mbps fiber (ST or SC), 10/100
auto-sensing port (RJ-45), PCI bus
100 Mbps fiber (ST or VF45), 10/100
auto-sensing port, PCI bus
BCM570x (Tigon 3)
Broadcom Corp.
Gigabit Ethernet controller, PCI
IBM 16/4 Adapter 2
IBM Corporation
Token Ring, PCI
Intel Pro / 1000 MT
Intel Corporation
Gigabit Ethernet controller, PCI
OLICOM 3140
Madge Limited
Token Ring, PCI
SK9521
SysKonnect
Gigabit Ethernet controller, PCI
Smart MK4 PCI
Madge Limited
Token Ring, full duplex
100/16/4 Mbps switched and
16/4 Mbps shared connectivity
External Hayes compatible modem
56 k
Modem
Keyboard
ISDN
Wireless
Build # 27
FSC K235
Fujitsu Siemens Computers
IBM-MF compatible keyboard for
3270 terminal emulation, PS/2
FSC K257
Fujitsu Siemens Computers
Trimodal keyboard for terminal
emulations, PS/2
FSC K319 (KBPC
C2)
Fujitsu Siemens Computers
Keyboard with integrated PC/SC
compatible smart card reader, USB
FSC K329 (KBPC
CX)
Fujitsu Siemens Computers
Keyboard with integrated PC/SC
compatible smart card reader, USB
SUN Type 6
Sun Microsystems
SUN Type 6, USB
Cherry G80-1501
Cherry GmbH
Keyboard with integrated smart card
reader compatible with German
health insurance cards, PS/2
Fritz!PCI 2.0
AVM GmbH
ISDN interface card, PCI
Fritz!Card USB V2.1 AVM GmbH
External ISDN adapter, USB
Diva ISDN V2.0.1
Eicon Networks Corporation
ISDN interface card, PCI
Aironet 350 Series
Cisco Systems, Inc.
Wireless LAN adapter card, IEEE
802.11b and 802.11g compliant, PCI
Wireless USB
D1700
Fujitsu Siemens Computers
Wireless LAN network adapter,
IEEE 802.11b compliant, USB
DWL-G520
D-Link Corporation
Wireless LAN adapter card, IEEE
802.11b and 802.11g compliant, PCI
201
eLux® NG
www.myelux.com
Type
Product
Producer
Specification
Video
G200 Quattro
Matrox Graphics Inc.
Matrox G200 graphics chip, single
PCI card for dual or quad output
G450 PCI32
Matrox Graphics Inc.
Matrox G450 chip for dual output
G450 MMS Quad
Matrox Graphics Inc.
Matrox G450 chip, single PCI card
Multi-Monitor Series for dual or quad
output
EZ100PU
Castles Technology
USB card reader
Datakey 731
SafeNet
USB card reader
GemPC Key
Gemplus
Portable USB reader in key format
that reads/writes smart cards in
plug-in form
GemPC Twin
Gemplus
USB external smart card
reader/writer for USB and serial
(only USB supported)
SCR USB internal
Fujitsu Siemens Computers
USB internal smart card
reader/writer
SCR USB Solo 2
Fujitsu Siemens Computers
USB external smart card
reader/writer
SPR532
SCM Microsystems
Dual mode PINpad. For use as USB
card reader (PINpad not supported,
RS232 not supported)
USB V.24 converter
DIGITUS, Sandberg
USB to serial adapter, PL2303 or
PL2303-HX chip
USB
USB 3.5", 1.44MB external floppy
1
disk drive
USB CD-ROM3
USB stick3
Handheld
iPAQ
Hewlett Packard
Pocket PCs,
e.g. Pocket Loox
Fujitsu Siemens Computers
Can be accessed in Citrix ICA
session via serial adapter
Can be accessed in Citrix ICA
session via serial adapter.
Requires: Microsoft Active Sync or
others (free software)
Tungsten E
Tungsten 3
Tungsten 5
palmOne, Inc.
Can be accessed in Citrix ICA
session via serial adapter
Requires additional software:
OneBridge Sync Server V4.2 and
later from Extended Systems, Inc.
1
eLux NG supports a large number of USB mass storage devices (floppy, CD-ROM, USB stick). The USB device can be used if
it is automatically detected when it is plugged in.
Build # 27
202
eLux® NG
www.myelux.com
Appendix 7: Supported Smart Card Readers
The following smart card readers are supported by the “PCSC lite” (pcsc_lite) package (eLux NG
version 1.17 and higher).
For more information on smart cards, see “3.15 Smart Card”.
Feature
Driver Package
Generic CCID
Gemplus
CCID
OMNIKEY
CCID
OMNIKEY
CardMan
Castles EZ100
PKCS#11
–
GEM
DataKey
GEM
GEM
RDP CSP
–
GEM
GEM
GEM
GEM
KOBIL
KOBIL
SafeSign
SafeSign
SafeSign
SafeSign
ICA Roaming
–
+
+
–
+
Secure PIN
+
–
–
–
–
ACR 38
ACR 38
ActivCard
ActivCard
Reader
CASTLES
EZ100
CASTLES
EZ100PU
Cherry
SmartBoard
X44
Cherry xx33
Cherry xx33
Cherry xx44
Cherry xx44
Dell keyboard
SK-3106
Dell keyboard
SK-3106
Cherry
SmartBoard
X44
Cherry xx44
Dell smart card Dell smart card
reader
reader
keyboard
keyboard
FSC
SmartCard
Keyboard USB
2A
FSC
SmartCard
Keyboard USB
2A
FSC
SmartCard
Reader USB
FSC
SmartCard
Reader USB
2A
GemPC Key
GemPC Key
GemPC Twin
GemPC Twin
FSC
SmartCard
Reader USB
2A
GemPC433 SL GemPC433 SL
KAAN
Advanced
Build # 27
203
eLux® NG
www.myelux.com
Feature
Driver Package
GENERIC
CCID
Reader
GEMPLUS
CCID
OMNIKEY
CCID
OMNIKEY
CARDMAN
CASTLES
EZ100
KAAN Base
KAAN
mIDentity
KAAN SIM III
LTC31
LTC31
OMNIKEY
CardMan 2020
OMNIKEY
CardMan 3121
OMNIKEY
CardMan 3121
OMNIKEY
CardMan 3121
OMNIKEY
CardMan
Smart@Key
OMNIKEY
CardMan
Smart@Link
Oz776
SCR 331
SCR 331
SCR 3310
SCR 331-DI
SCR 331-DI
SCR 333
SCR 333
SCR 335
SCR 335
SK-3105
SK-3105
SPR 532
SPR 532
An up-to-date version of this table is available in the Internet. You must complete a free one-time
registration.
D To view an up-to-date list of smart card readers on the Internet
1. Go to the Web site www.myelux.com.
2. In the navigation links on the left-hand side, click “Login.”
3. If you have not yet registered, click “Registration” and follow the instructions. You will receive
your login and password in one to three days. Otherwise enter your login information and click
“Submit.”
4. The main page is displayed with a “Download” and “Service” area. Click “eLux software
packages.” This opens the “Available containers“ page.
5. Under “eLux NG”, locate your hardware platform and click on the link in the column under
“Released packages.” Select container version 1.17 or later.
6. The container page lists the container ID and the hardware platform. As containers are
hardware specific, please verify that you have selected the correct container and, if necessary,
go back and correct your selection.
7. Scroll down until you find “PCSC lite.” Click on “Details.”
A list of supported smart card reader and features is displayed.
Build # 27
204
eLux® NG
www.myelux.com
Appendix 8: Port Assignments
The following is a list of TCP/IP ports for eLux NG und Scout Enterprise. The port numbers are fixed.
Exceptions are indicated with a footnote.
eLux NG
Port
Type Description
How to Deactivate
ESP
VPN (Cisco)
Uninstall the package “Cisco
Systems VPN client”
(cisco_vpnclient)
Incoming
ESP
VPN (Cisco)
Uninstall the package “Cisco
Systems VPN client”
(cisco_vpnclient)
Outgoing
21
TCP
Updating via FTP control
port (dynamic data port)
Outgoing
22
TCP
SSH applications
Outgoing
23
TCP
3270, 5250, 97801
emulations and telnet
sessions
Outgoing
37
TCP
Time server – RFC 868
Do not configure a time server
(Setup > Desktop)
Outgoing
37
UDP Time server – RFC 868
Do not configure a time server
(Setup > Desktop)
Outgoing
53
TCP
53
UDP DNS server
Outgoing
67
UDP DHCP server
Outgoing
68
UDP DHCP client (or BootP
client)
69
UDP TFTP server (only used
during a Recovery
Installation)
Outgoing
69
UDP TFTP server (only used
during a Recovery
Installation)
Incoming
80
TCP
Updating using HTTP
(and proxy port, if used)
Outgoing
102
TCP
Emulations to BS2000
mainframes
Outgoing
111
UDP Port mapper – drive
access on NFS servers.
Works with NFSD drive
access (port 2049) and
mountd (random)
Uninstall the FPM “Drive Support”
(automount) in baseOS
Outgoing
111
TCP
Port mapper – RPC
internal use only. Works
with nlockd (random)
Uninstall the FPM “Drive Support”
(automount) in baseOS
Incoming
139
TCP
SMB drive mapping
(NetBIOS) and SMB user
authentication
Uninstall the FPM “Drive Support”
(automount) in baseOS and the
package “User authorisation
modules” (userauth)
Outgoing
Build # 27
DNS server (Windows)
Port Type
Outgoing
Configure a local IP address (Setup
> Network)
Incoming
205
eLux® NG
www.myelux.com
Port
Type Description
How to Deactivate
139
UDP SMB drive mapping
(NetBIOS) and SMB user
authentication
Uninstall the FPM “Drive Support”
(automount) in baseOS and the
package “User authorisation
modules” (userauth)
Outgoing
161
UDP SNMP
Uninstall the package “net-snmp”
(snmp)
Incoming
161
UDP SNMP
Uninstall the package “net-snmp”
(snmp)
Outgoing
162
UDP SNMPTRAP
Outgoing
177
UDP XCMCP protocol
Outgoing
389
TCP
Outgoing
500
UDP VPN (Cisco, FreeS/WAN)
Uninstall the package “Cisco
Systems VPN client”
(cisco_vpnclient) or “Linux Free
S/WAN” (swan)
Incoming
500
UDP VPN (Cisco, FreeS/WAN)
Uninstall the package “Cisco
Systems VPN client”
(cisco_vpnclient) or “Linux Free
S/WAN” (swan)
Outgoing
514
TCP
Shell, RSH applications
Outgoing
515
TCP
Printing over LPD
Outgoing
515
TCP
Printing over LPD
Cannot be deactivated, in the future
can be deactivated by uninstalling the
package “Printer support”
Incoming
631
TCP
CUPS (IPP) print client
Uninstall the package “CUPS print
client” (qtcups)
Outgoing
631
UDP CUPS (IPP) print client
Uninstall the package “CUPS print
client” (qtcups)
Outgoing
2049
UDP NFSD drive access NFS
Uninstall the FPM “Drive Support”
(automount) in baseOS
Outgoing
5681
TCP
Scout Enterprise
management port
Cannot be deactivated
Incoming
5900
TCP
Mirroring eLux NG
desktop
Disable mirroring (Setup > Security)
or uninstall the EPM “eLux mirroring”
(mirror)
Incoming
5901
TCP
Mirroring first XDMCP
session
Disable mirroring (Setup > Security)
or uninstall the EPM “eLux mirroring”
(mirror)
Incoming
5902
TCP
Mirroring second XDMCP
session
Disable mirroring (Setup > Security)
or uninstall the EPM “eLux mirroring”
(mirror)
Incoming
6000
TCP
Remote X11 applications
Click to deselect the check box
"Allow remote X11 clients" (Setup >
Security)
Incoming
6001
TCP
First XDMCP session
Incoming
6002
TCP
Second XDMCP session
Incoming
LDAP user authentication
1
Port Type
Outgoing
7100
TCP
Font server
7777
TCP
Scout Enterprise manager
Incoming
7777
TCP
Scout Enterprise manager
Outgoing
Build # 27
206
eLux® NG
www.myelux.com
Port
Type Description
How to Deactivate
Port Type
9100
TCP
Direct Print to parallel
port2
Deactivate the check box “TCP direct
print” (Setup > Printer).
Incoming
9101
TCP
Direct Print to USB port2
Deactivate the check box “TCP direct
print” (Setup > Printer).
Incoming
16001
TCP
e-sound system for audio
in XDMCP sessions
Deactivate the check box “Enable
sound in XDMCP sessions” (Setup >
Multimedia).
Incoming
1
Port number can be assigned by the administrator in eLux NG starter (Setup > Screen > Advanced)
2
Port number can be assigned by the administrator in eLux NG starter (Setup > Printer).
Scout Enterprise Server
Port Type Description
How to Deactivate
Port Type
7778 TCP
Scout Enterprise Console
Incoming
7779 TCP
Wake-on-LAN gateway
Outgoing
Build # 27
207
eLux® NG
www.myelux.com
Index
3
3270 emulation
Ericom
about · 165
CD-ROM documentation · 166
licensing · 165
UniCon
about · 156
CD-ROM documentation · 157
licensing · 156
3Com Combo card · 73
5
5250 emulation
Ericom
about · 165
CD-ROM documentation · 166
licensing · 165
UniCon
about · 156
CD-ROM documentation · 157
licensing · 156
Ericom · 165
UniCon Software GmbH · 157
APPLICATION RESTART command · 108
applications
clipboard · 108
configuring · 106
disconnecting · 25
language · 32
restart · 108
start automatically · 108
starting
from starter · 25
from taskbar · 192
hotkey · 192
APPLY button · 28
AT386 emulation
Ericom · 165
UniCon Software GmbH · 157
AUI · 73
authorization
about · 51
user variables · 53
authorization server
Active Directory Server · 53
LDAP · 52
Samba · 52
autocreated printer
settings · 65
Universal Printer Driver · 66
AVI player · 178
9
9750 emulation
about · 156
CD-ROM documentation · 157
licensing · 156
memory usage · 194
97801 emulation
Ericom
about · 165
licensing · 165
settings · 166
UniCon Software GmbH
about · 157
memory usage · 194
A
Accelerated-X Display Server
about · 162
licensing · 162
Active Directory Server · 53
adapter, USB · See USB network adapter
Adobe Acrobat Reader · 175
ADSL
example profile · 195
settings · 76
Aironet 350 WLAN card · 81
ANSI emulation
Build # 27
B
BA80 emulation
Ericom · 165
UniCon Software GmbH · 157
background
color · 32
image · 34
backing store
overview · 37
XDMCP · 163
Bildschirm-Tab · 36
blending out Setup tab · 48
BNC · 73
boot procedure
factory reset · 185
first time · 13
Safe Boot · 184, 186
BootP
network settings · 29
Broadcom Tigon 3 Gigabit card · 73
browser
about · 141
automatic proxy configuration file · 143
home directory · 61
home page · 143
kiosk mode · 143, 198
memory usage · 194
208
eLux® NG
www.myelux.com
page to call · 143
plug-in
Acrobat Reader · 146
Java · 147
movie player · 146
RealPlayer · 146
proxy settings · 143
published applications · 128
standard options
application restart · 143
desktop icon · 110, 138, 143
start automatically · 143
type
Firefox · 142
Mozilla · 141
Opera · 141
Browser
Typ
Opera · 144
button
APPLY · 20, 28
CONNECT · 25, 108
RESET · 20, 28
SHUT DOWN
LOCK · 26
LOG OFF · 26
RESTART · 26
SWITCH OFF · 26
C
calculator, desktop · 174
callback function, ISDN · 75
card reader
activating · 93
COM port mapping · 114
deactivating · 93
resetting smart card · 94
CD-ROM
Citrix client drive mapping · 113
firmware update · 42
CD-ROM, eLux NG
documentation
Citrix ICA client · 112
ELIAS · 4
eLux NG · 4
emulation for Motif · 157
eterm · 157
general · 4
PowerTerm InterConnect · 166
SAPGUI · 154
Scout Enterprise · 4
certificates
Citrix Secure Gateway · 125
Cisco Aironet 350 WLAN card · 81
Cisco VPN client · 100
Citrix
COM ports
mapping · 114, 118
settings · 72
configuring ICA session · 109
connecting to Secure Gateway · 125
ICA Client for Linux advanced settings · 111
printing
autocreated printers · 65
Universal Printer Driver · 66
Build # 27
Program Neighborhood Agent · 129
Program Neighborhood Light · 134
published applications · 111
server location · 120
Citrix Secure Gateway · 125
classical user interface, SAPGUI · 149
clipboard · 108
COM ports
mapping in ICA · 114, 118
settings · 72
COM1, printer · 63
commands, customized · 172
Configuration tab
about · 19, 107
Browser · 141
Emulation · 155
ICA · 109
Local
customized commands · 172
resource display · 169
shell · 167
SSH · 170
RDP · 137
SAPGUI · 148
troubleshooting · 188
configuring applications · 106
CONNECT button · 108
Connect2Air WLAN network adapter · 89
console
hotkey
about · 40
enabling · 40
multiple · 40
XDMCP · 163
copying between applications · 108
CUPS print client · 70
customized commands · 172
D
deactivating
console hotkey · 40
Numlock · 40
dead keys · 39
default
device password · 47
keyboard language · 39
default settings
reset to · 185
Safe Boot · 184
desktop icon · 108
Desktop subtab
about · 32
background color · 32
language
application · 32
eLux NG screen elements · 32
starter · 191
taskbar
about · 192
options · 191
themes · 34
time server · 33
time zone · 32
workspaces · 191
desktop tools
3
eLux® NG
www.myelux.com
calculator · 174
file manager · 175
resource display · 169
screen saver · 35
text editor · 177
virtual keyboard · 180
device password · 47
DHCP
network settings · 29
setting hostname locally · 29, 30
Diagnostics subtab
about · 104
log files
sending via FTP · 105
viewing · 104
display number, mirroring · 98
DivX player · 178
D-LINK DWL-G520 WLAN network card · 85
DNS server, network settings · 30
domain
authorization with NT domain · 52
entering manually · 30
logon
ICA · 109
RDP · 137
smart card
Citrix logon · 96
local authentication · 94
RDP logon · 96
user roaming · 95
user variable · 53
drives
NFS · 59
Samba · 37, 58
Windows NT · 58
Drives subtab
about · 59
browser
Firefox · 61
Mozilla · 61
Opera · 61
mount points · 59
network
NFS · 59
Samba · 58
Windows NT · 58
DSL · see ADSL
DVD player · 178
E
editing local files · 177
ELIAS NG image editor · 5
eLux NG
boot procedure · 13
features · 6
installing · 15
interface
about · 19
navigating using keyboard · 19
emulation
about · 155
application restart · 156
software, X Window System accelerator · 162
start automatically · 156
types supported
Build # 27
3270 · 156
5250 · 156
9750 · 156
ANSI · 155
AT386 · 155
BA-80 · 155
eterm · 157
PowerTerm · 165
Tarantella · 156
VNC · 164
VT320 · 155
X11 · 161, 188
XDMCP · 162
Ericom, PowerTerm InterConnect · 165
eterm
CD-ROM documentation · 157
eterm emulation
97801 · 157
ANSI · 157
AT386 · 157
BA80 · 157
keyboard mapping file · 157
VT320 · 157
eterm.map
about · 157
example file · 160
Ethernet
settings · 73
supported cards · 202
Extended Systems OneBridge Sync server · 118
F
factory default settings
Factory Reset · 185
Safe Boot · 184
features of eLux NG · 6
file manager · 175
Firefox
about · 142
conflicts · 142
home directory · 61
required software · 142
settings · 142
Firmware subtab
about · 41
ELIAS NG image builder program · 41
reloading Scout Enterprise · 46
RESET command · 185
settings
local drive · 42
server · 41
starting recovery · 44
first configuration Wizard · See installation
flash memory
SAPGUI requirements · 148
usage · 193
viewing in General subtab · 28
floppy
Citrix client drive mapping · 113
font server
settings · 37
troubleshooting · 186, 187
FTP anonymous
firmware update · 41
4
eLux® NG
www.myelux.com
Fujitsu Siemens Connect2Air WLAN network
adapter · 89
G
General subtab
about · 28
displaying MAC, host ID, license number · 28
H
handhelds · 118
Hardware subtab
about · 73
ADSL
example profiles · 195
settings · 76
COM ports · 72
Ethernet · 73
ISDN
example profiles · 195
settings · 74
modem
example profiles · 196
settings · 78
multiple monitors · 72
RAM disk · 72
smart card · See smart card
Token Ring · 80
USB devices · 71
wireless LAN · 81
hardware supported · 202
Hewlett Packard iPAQ · 118
host ID, viewing in General subtab · 28
hotkey
configuration authorization · 50
consoles · 40
LocalLogin password request · 190
See also · shortcut keys
I
ICA client
about · 109
advanced settings · 111
certificates · 125
COM port mapping · 114, 118
drive mapping · 113
memory usage · 194
printing
autocreated printers · 65
Universal Printer Driver · 66
Program Neighborhood Agent · 129
Program Neighborhood Light · 134
published application · 110
server location · 120
smart card
Citrix logon · 96
user roaming · 95
standard options
application restart · 110
start automatically · 110
working directory · 109, 110
Build # 27
xcapture · 125
IIS
configuring MIME types · 45
update · 41
image definition file
entering settings in Firmware tab · 41
using ELIAS NG to create new · 41
installing
eLux NG
first configuration wizard · 15
IP address
dynamic update in eLux NG starter · 76, 77, 79
entering manually · 30
iPAQ · 118
ISDN
about · 74
example profiles · 195
increasing screen refresh speed · 37
MSN · 75
network card · 74
settings · 74
supported hardware · 202
USB network adapter · 74
J
Java plug-in · 147
K
keyboard language · 39
keyboard mapping
eterm · 157
mirroring · 98
keyboard, virtual · 180
kiosk mode in browser · 143, 198
L
language
eLux NG screen elements · 32
for applications · 32
keyboard · 39
LDAP server · 52
licensing
eLux NG · 183
products
Accelerated-X Display Server · 162
Opera · 141
PowerTerm InterConnect · 165
terminal emulation for Motif · 156
Scout Enterprise · 5
Local
Adobe Acrobat Reader · 175
calculator · 174
customized commands · 172
file manager · 175
memory usage · 194
movie player · 178
NoMachine · 179
resource display · 169
shell · 167
SSH · 170
5
eLux® NG
www.myelux.com
text editor · 177
virtual keyboard · 180
local host file · 67
LocalLogin
about · 50
password request hotkey · 190
LOCK button · 26
locking the screen · 26
log files
browsing in file manager · 175
See also Diagnostics subtab · 46
sending via FTP · 105
viewing locally · 104
viewing locally in text editor · 177
LOG OFF button · 26
M
MAC address
viewing in General subtab · 28
managing files · 175
Matrox graphics card · 72
memory stick · See USB stick
memory usage
displaying used resources · 169
flash card · 193
RAM · 194
MetaFrame, Citrix · 109
Microsoft Internet Information server · See IIS
Microsoft Remote Desktop Protocol · 137
MIME types
recovery · 45
update · 45
mirroring
disabling · 97
display number · 98
enabling · 97
keyboard mapping · 98
read only access · 97
security concerns · 98
troubleshooting · 188
XDMCP · 97
modem
baud rate · 78
example profiles · 196
settings · 78
supported hardware · 202
monitor
increasing refresh speed · 37
multiple · 72
See also screen · 35
settings · 35
mount point
about · 60
NFS · 59
Samba · 58
Mouse / Keyboard subtab
about · 38
dead keys · 39
keyboard language · 39
Microsoft application via ICA · 39
mouse settings · 38
movie player · 178
Mozilla
about · 141
conflicts · 141
Build # 27
home directory · 61
required software · 141
settings · 142
MPEG player · 178
Multimedia subtab
enabling XDMCP audio · 57
settings · 57
Multiple Subscriber Number, ISDN · 75
N
network adapter · See USB network adapter
network cards
Cisco Aironet 350 WLAN · 81
D-LINK DWL-G520 WLAN · 85
list of supported · 202
network drive
NFS · 59
Samba · 58
network settings
BootP · 29
DHCP · 29
entering manually · 30
local hosts list · 31
Network subtab · 29
Network Time Protocol · 33
NFS drives · 59
NoMachine · 179
Numlock, deactivating · 40
O
OneBridge Sync server from Extended Systems ·
118
Opera
about · 141
erforderliche Software · 144
home directory · 61
required software · 141
settings · 142
P
palmOne Tungsten · 118
parallel port printer, local · 63
password
accessing Samba drives · 58
device · 47
firmware update · 41
individual users · 53
LocalLogin
about · 50
resetting · 187
SSH · 170
terminal server
ICA · 109
RDP · 137
user variable · 53
VNC server · 164
PDA
HP iPAQ · 118
mapping in ICA · 117
palmOne Tungsten · 118
6
eLux® NG
www.myelux.com
PDF, Adobe Acrobat Reader · 175
personal data assistant · See PDA
PNAgent · See Program Neighborhood Agent
PNL · See Program Neighborhood Light
port
assignments · 206
font server · 37
printer
parallel · 63
serial · 63
USB · 63
time server · 33
USB
mount points · 60
updating firmware · 42
power management delay · 35
PowerTerm InterConnect
about · 165
CD-ROM documentation · 166
licensing · 165
settings · 166
printer
ICA
autocreate · 65
Universal Printer Driver · 66
RDP · 140
TCP direct print · 67
Thin Client as print server · 68
ThinPrint · 69
Printer subtab
about · 62
CUPS · 70
local · 63
local host file · 67
network
about · 65
protocol · 65
PostScript · 62
print server
Sinix · 68
Windows NT · 68
TCP direct print · 62
Program Neighborhood Agent
about · 129
calling from eLux NG starter · 132
defining application definition · 131
PNAgent page · 130
Program Neighborhood Light · 134
protocol
connecting to terminal server
ICA · 109
RDP · 137
emulation
97801 · 155
ANSI · 155
AT386 · 155
BA-80 · 155
Tarantella · 156
VT320 · 155
X32 · 156
X52 · 156
X97 · 156
XDMCP · 162
for update server · 41
LDAP · 52
NoMachine NX · 179
printing
Build # 27
LPD · 65
PCL2 · 63
ThinPrint · 69
SMB for network drives · 58
SSH
connecting to server · 170
with X11 session · 161
time server · 33
VPN
Cisco · 100
published applications
about · 127
configuring a session
application definition · 127
Citrix ICA Client · 128
local browser · 128
Program Neighborhood Agent · 129
Program Neighborhood Light · 134
server location · 120
troubleshooting · 136
Q
QFm · 175
Quick Start · 12
R
RAM disk settings
fixed (64 MB or less main memory) · 72
variable (> 64 MB main memory) · 72
RDP
about · 137
calling from local shell · 141
mapping local drives · 140
memory usage · 194
NoMachine · 179
protocol 5.2 settings · 139
remote desktop · 137
screen settings · 139
smart card
logon · 96
user roaming · 95
standard options
application restart · 138
start automatically · 138
terminal server application · 138
Reader, Acrobat · 175
RealPlayer
settings · 146
troubleshooting · 188
recovery installation
IIS · 45
Register
Bildschirm · 36
Reliant systems, emulations for · 157
reloading Setup from Scout Enterprise · 46
remote management
about · 91
reloading Setup from Scout Enterprise · 46
reverse discovery (rollout) · 91
required software
ADSL · 73
authentication
7
www.myelux.com
server · 51
test user variables · 51
ISDN · 73
modem · 73
RESET button · 28
RESET command, Firmware subtab · 185
reset the Thin Client
factory reset · 185
Safe Boot · 184, 186
resource display · 169
resource file · 168
RESTART button · 26
reverse discovery · 91
roaming · See user roaming
rolling out Thin Clients · 91
S
Safe Boot · 184
Samba server · 58
SAPGUI
about · 148
CD-ROM documentation · 154
classical user interface · 149
configuration
automatically · 149
manually · 152
Java · 147
memory usage · 194
standard options
application restart · 149
start automatically · 149
system requirements · 148
Scout Enterprise
CD-ROM documentation · 4
licensing · 5
reloading Setup · 46
remote management · 91
settings in eLux NG Security subtab · 91
troubleshooting user management · 186
screen
backing store · 37
booting in
Safe Boot mode · 184
increasing refresh speed · 37
lock · 26
settings · 35
shortcut key · 190
virtual · 40
XDM · 163
screen saver
settings · 35
shortcut key · 190
Screen subtab
about · 35
backing store · 37
color depth · 35
font server · 37
frequency · 35
power management delay · 35
resolution · 35
screen saver · 35
seamless window mode for published applications ·
127
security
mirroring · 98
Build # 27
eLux® NG
VPN · 100
Security subtab
about · 47
device password · 47
local security settings · 48
management settings · 91
mirroring settings · 97
smart card settings · 93
user authorization · 51
serial printer · 63
server
authentication · 51
BootP
settings · 29
Cisco · 100
DHCP
settings · 29
font
settings · 37
troubleshooting · 186, 187
proxy · 143
troubleshooting, general · 187
VNC · 164
server location, ICA · 120
Setup tab · 27
about · 20
blend out · 48
Desktop · 32
Diagnostics · 104
Drives · 59
Firmware · 41
General · 28
Hardware · 73
Mouse / Keyboard · 38
Multimedia (volume) · 57
Network · 29
Printer · 62
Screen · 35
Security · 47
VPN · 100
shell · 167
SHIFT key · 190
shortcut keys
list of · 190
See also · hotkey
SHUT DOWN button · 26
SICRYPT SMARTY 2 software
local authentication · 93
resetting after entering invalid PIN · 94
user roaming · 95
Simple Network Time Protocol · 33
Sinix
emulations · 157
printer settings · 68
smart card
domain name · 94
logon
Citrix ICA · 96
RDP · 96
reader
activating · 93
deactivating · 93
supported · 204
resetting · 94
supported card types
Citrix logon · 96
local authentication · 93
8
eLux® NG
www.myelux.com
user roaming · 95
user roaming · 95
SMARTY 2 software
local authentication · 93
resetting after entering invalid PIN · 94
user roaming · 95
SSH
shell · 170
X11 emulation · 161
START AUTOMATICALLY command · 108
starter
file manager · 175
options · 191
See also · Setup tabs
Sun Java plug-in · 147
SWITCH OFF button · 26
T
tab
Applications · 19
Configuration · 19
Setup · 20, 27
Tab
Bildschirm · 36
Tarantella · 156
task hotkey · 108
taskbar
about · 192
options · 191
shortcut keys · 190
terminal mode · 108
terminal server
connecting to
ICA · 109, 127
RDP · 137
functionality for UNIX · 179
See also · Citrix, RDP
text editor · 177
text filter for local printer · 63
themes, desktop · 34
ThinPrint · 69
time server · 33
port · 33
settings · 32
time zone, setting · 32
time-out
ADSL
for connecting to manager · 77
idle · 77
DHCP · 29
ISDN
for connecting to manager · 75
idle · 75
locally defined printer · 62
modem
for connecting to manager · 79
idle · 79
power delay · 35
screen saver · 35
Token Ring
settings · 80
supported cards · 202
troubleshooting
configuring applications · 188
font server error · 186, 187
Build # 27
installing eLux NG · 18
lost terminal password · 187
mirroring · 188
published applications · 136
RealPlayer · 188
Safe Boot · 184
screen settings · 186
X11 · 188
Tungsten · 118
U
Universal Printer Driver of MetaFrame XP Feature 3
· 66
UNIX systems
emulations
eterm · 157
PowerTerm InterConnect · 165
NoMachine terminal server functionality · 179
update
firmware settings · 41
IIS · 45
log · 46
See also · Firmware subtab
via CD-ROM · 42
via network · 41
via USB stick · 42
UPDATE command · 44
USB network adapter
Fujitsu Siemens Connect2Air WLAN · 89
ISDN · 74
list of supported · 202
USB port
enabling · 72
ICA drive mapping · 113
local printer · 63
mount point · 60
supported peripherals · 71
updating firmware · 42
USB stick
Citrix client drive mapping · 113
enabling port · 72
firmware update · 42
mount point · 60
user management
authorization server · 51
enabling / disabling configuration · 48
user name
authorization server · 53
firmware update · 41
LocalLogin · 50
network settings
ADSL · 77
ISDN · 75
modem · 79
smart card · 94
user variable · 53
VPN
Cisco · 102
X11 emulation · 161
user rights · 48
user roaming · 95
user variables
application possibilities · 55
settings · 53
9
eLux® NG
www.myelux.com
V
virtual keyboard · 180
virtual private network
about · 100
Cisco · 100
virtual screens
about · 40
enabling hotkey · 40
hotkey · 40
VNC emulation
about · 164
mirroring · 97
settings · 164
VNC protocol, NoMachine NX · 179
VNC server · 97
VNC viewer · 97
volume, setting · 57
VPN subtab · 100
VT320 emulation
Ericom · 165
UniCon Software GmbH · 157
W
Web tools
Adobe Acrobat Reader · 175
Java plug-in · 147
movie player plug-in · 146
Build # 27
RealPlayer · 146
WEP key
Cisco Aironet 350 · 83
D-Link DWL-G520 · 89
WEP, about · 82
wireless LAN · 81
Wizard, first configuration · See installation
workspaces · 34
X
X Display Manager Protocol
available as emulation · 162
backing store · 163
memory usage · 194
mirroring · 97
settings · 162
sound · 57
X11 emulation
about · 161
accelerator for · 162
SSH · 161
troubleshooting · 188
xcapture · 125
Xdefaults · 168
XDMCP · See X Display Manager Protocol
XTerm
about · 167
resource file · 168
settings · 168
10