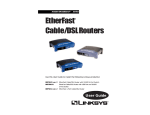
1
Instant EtherFast® Series
®
EtherFast 10/100
Managed Network
Adapter
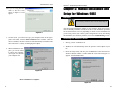
Use this guide to install: LNE100M
User Guide
COPYRIGHT & TRADEMARKS
Copyright © 2002 Linksys, All Rights Reserved. Instant EtherFast, EtherFast, and Linksys
are registered trademarks of Linksys. Microsoft, Windows, and the Windows logo are registered trademarks of Microsoft Corporation. All other trademarks and brand names are
the property of their respective proprietors.
LIMITED WARRANTY
Linksys guarantees that every EtherFast® 10/100 Managed Network Adapter is free from
physical defects in material and workmanship for the lifetime of the Adapter, when used
within the limits set forth in the Specifications section of this User Guide. If the product
proves defective during this warranty period, call Linksys Technical Support in order to
obtain a Return Authorization number. BE SURE TO HAVE YOUR PROOF OF PURCHASE ON HAND WHEN CALLING. RETURN REQUESTS CANNOT BE PROCESSED
WITHOUT PROOF OF PURCHASE. When returning a product, mark the Return
Authorization number clearly on the outside of the package and include a copy of your
original proof of purchase. All customers located outside of the United States of America
and Canada shall be held responsible for shipping and handling charges.
IN NO EVENT SHALL LINKSYS LIABILITY EXCEED THE PRICE PAID FOR THE
PRODUCT FROM DIRECT, INDIRECT, SPECIAL, INCIDENTAL, OR CONSEQUENTIAL
DAMAGES RESULTING FROM THE USE OF THE PRODUCT, ITS ACCOMPANYING
SOFTWARE, OR ITS DOCUMENTATION. Linksys makes no warranty or representation,
expressed, implied, or statutory, with respect to its products or the contents or use of this
documentation and all accompanying software, and specifically disclaims its quality, performance, merchantability, or fitness for any particular purpose. Linksys reserves the right
to revise or update its products, software, or documentation without obligation to notify
any individual or entity. Please direct all inquiries to:
Linksys P.O. Box 18558, Irvine, CA 92623.
Reorient or relocate the receiving antenna
Increase the separation between the equipment or device
Connect the equipment to an outlet other than the receivers
Consult a dealer or an experienced radio/TV technician for assistance
FCC STATEMENT
The EtherFast® 10/100 Managed Network Adapter has been tested and complies with the
specifications for a Class B digital device, pursuant to Part 15 of the FCC Rules. These
limits are designed to provide reasonable protection against harmful interference in a residential installation. This equipment generates, uses, and can radiate radio frequency
energy and, if not installed and used according to the instructions, may cause harmful
interference to radio communications. However, there is no guarantee that interference
will not occur in a particular installation. If this equipment does cause harmful interference
to radio or television reception, which is found by turning the equipment off and on, the
user is encouraged to try to correct the interference by one or more of the following measures:
UG-LNE100M-090602NC KL
Instant EtherFast ® Series
EtherFast ® 10/100 Managed Network Adapter
Table of Contents
Chapter 1: Introduction
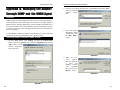
The EtherFast® 10/100 Managed Network Adapter
Features
Package Contents
Minimum Requirements
1
1
1
2
2
Chapter 2: Getting to Know the
EtherFast® 10/100 Managed Network Adapter
LEDs
The RJ-45 Port
3
3
3
Chapter 3: Installing the Adapter
Overview
Installing the Adapter and Cabling
4
4
4
Chapter 4: Installing the Adapter’s Drivers with the
Setup Utility CD
Overview
Using the Setup Utility
7
7
7
Chapter 5: Manual Installation
and Setup for Windows 98SE
Overview
Installing the Adapter's Driver
Network Component Configuration
10
10
10
14
Chapter 6: Manual Installation
and Setup for Windows Me
Overview
Installing the Adapter's Driver
Network Component Configuration
19
19
19
22
Chapter 7: Manual Installation
and Setup for Windows NT
Overview
Installing NT Networking and the Adapter’s Driver
Installing the Adapter’s Driver if Networking is Already Installed
27
27
28
33
Chapter 8: Manual Installation
and Setup for Windows 2000
Overview
Installing the Adapter's Driver
36
36
36
Chapter 9: Manual Installation
and Setup for Windows XP
Overview
Installing the Adapter's Newest Driver
40
40
40
Chapter 10: Configuring the Adapter
Overview
General Tab
Advanced Tab
Driver Tab
Resources Tab
Power Management Tab
42
42
43
44
48
49
49
Chapter 11: Using the Adapter’s
NIC Control Set and Diagnostic Tools
Running the Control Set
General Tab
Setting Tab
Statistics Tab
Diagnostics Tab
50
50
51
52
57
62
Instant EtherFast ® Series
Appendix A: Troubleshooting
Common Problems and Solutions
Running the Adapter's Diagnostics
64
64
68
Appendix B: Managing the Adapter
through SNMP and the RMON Agent
Overview
Installing SNMP for Windows 98SE and Me
Installing SNMP for Windows NT
Installing SNMP for Windows 2000 and XP
Adding the Adapter’s SNMP Agent
Utilizing the Adapter’s SNMP Agent
69
69
69
72
74
76
76
Appendix C: Sharing Your Files and Printers
Overview
Enabling File Sharing
Enabling Printer Sharing
78
78
78
79
Appendix D: Windows 98 and Me Client
for Windows Domain Server
80
Appendix E: Starting Over in
Windows 98, Me, 2000, or XP
Starting Over in Windows 98 or Me
Starting Over in Windows 2000 or XP
82
82
84
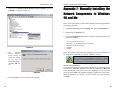
Appendix F: Manually Installing the Network
Components in Windows 98 and Me
86
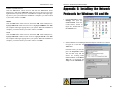
Appendix G: Installing the Network Protocols
for Windows 98 and Me
88
Appendix H: About Plug-and-Play Technology
90
Appendix I: Uninstalling the Drivers
with the Install Wizard
92
EtherFast ® 10/100 Managed Network Adapter
Appendix J: The Setup Utility CD
93
Appendix K: Glossary
94
Appendix L: Specifications
Environmental
103
103
Appendix M: Warranty Information
104
Appendix N: Contact Information
105
3
Instant EtherFast ® Series
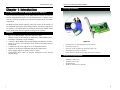
Chapter 1: Introduction
EtherFast ® 10/100 Managed Network Adapter
Package Contents
The EtherFast® 10/100 Managed Network Adapter
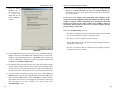
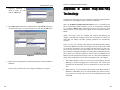
This powerful auto-negotiating 10/100 Mbps Ethernet interface card features
network management functions to save you time and hassle. Configure, check
error rates, and keep an inventory of your network resources from one centralized location.
The Wake-On-LAN function remotely "wakes up" any PC on the network, so
you can handle maintenance chores during off-hours. The 802.1Q support lets
you optimize your network traffic by dividing the network into smaller Virtual
LANs, while packet delivery is prioritized using 802.1P signaling.
Features
•
•
•
•
•
•
•
•
•
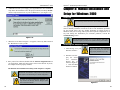
Easy to Use Plug-and-Play 10/100 PCI Network Adapter
Adapter settings can be managed via SNMP using standard MIB browser
Full Duplex Capability at Up To 200Mbps
Connects to Both 10Mbps Ethernet and 100Mpbs Fast Ethernet Networks
Power On your PC from anywhere on the network with Wake-On-LAN
Management
Complete 802.1Q VLAN support for use in segmented networks
Support for IP Checksum offloading built-into the adapter driver
802.1p tagging support for Quality of Service (QoS)
Configuration utility allows for complete management of the network
adapter settings
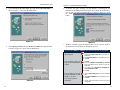
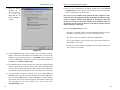
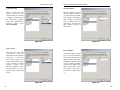
Figure 1-1
•
•
•
•
•
One EtherFast® 10/100 Managed Network Adapter
One Setup Utility CD
One User Guide (included on the Setup Utility CD)
One Registration Card (not shown)
Quick Install for Windows Operating Systems (not shown)
Minimum Requirements
•
•
•
•
1
200MHz or Faster CPU
Available PCI 2.2 Slot
CD-ROM Drive
Windows 98/Me/NT 4.0/2000/XP
2
Instant EtherFast ® Series
Chapter 2: Getting to Know the
EtherFast® 10/100 Managed
Network Adapter
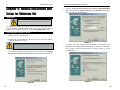
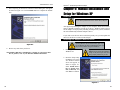
Figure 2-1
EtherFast ® 10/100 Managed Network Adapter
Chapter 3: Installing the Adapter
Overview
Each Adapter is equipped with an RJ-45 port that automatically adjusts to
either 10Mbps or 100Mbps speeds, allowing your PC to attach to either Fast
Ethernet (also known as 100BaseTX) or regular 10BaseT Ethernet network
segments without additional hardware or software.
The Adapter should only be used with twisted-pair cabling. 10BaseT and
100BaseTX cabling is available in a number of different grades. For best
results, use 8-wire, UTP Category 5 unshielded twisted-pair for both 10BaseT
and 100BaseTX network segments, although UTP Category 3 can be used for
10BaseT segments. The cable that runs from the Adapter to your network
should not exceed 100 meters (328 feet).
LEDs
Installing the Adapter and Cabling
100
Yellow. The 100 LED will illuminate when the Adapter is operating at 100Mbps. If the 100 LED is not illuminated and the PC is
powered on, the card is operating at 10Mbps.
Link/Act
Green. The Link LED will illuminate when the Adapter has been
successfully connected to a network and flicker when data is being
transmitted or received over the network.
COL
Green. The COL LED will illuminate when the Adapter experiences any collisions.
FDX
Green. The FDX LED will illuminate when the Adapter is operating in full duplex mode.
1. Power off your PC and any peripheral equipment attached to it. Unplug
your PC’s power cable.
2. Remove your computer's outside cover.
The RJ-45 Port
The RJ-45 Port is where you will connect your Category 5 Ethernet Network Cable
or better network cabling.
3
4
Instant EtherFast ® Series
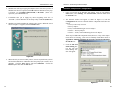
3. Open your computer and locate the PCI slot(s) on your motherboard. PCI
slots are easily identified by their beige or white color. Remove the metal
slot cover on the back of the PC, then insert the Adapter into an empty PCI
slot, as shown in Figure 3-1.
Important: When installing the Adapter, be sure to press it solidly into the
PCI slot. The Adapter are built to resist the pressure necessary to insert it
correctly in the PCI slot. Avoid a call to technical support by making sure
that the Adapter is inserted all the way into your PCs network slot! You will
know this has occurred when the Adapters faceplate is flush with your
computers slot.
EtherFast ® 10/100 Managed Network Adapter
6. Plug one end of a
twisted-pair network
cable
into
the
Adapter's RJ-45 port,
as shown in Figure 32.
7. Plug the other end of
the cable into a network device, such as
a hub or switch, DSL
modem,
cable
modem, router, etc.
8. Reconnect your PC’s
power, then power on
your computer. Your
computer will automatically recognize
the Adapter and
assign it a unique
IRQ ("interrupt") and
I/O address.
Figure 3-2
Figure 3-1
4. Once the Adapter is firmly in place, secure its fastening tab to your PC's
chassis with a mounting screw.
5. Replace your PC's cover.
The Adapter’s installation is complete. Next, to install the Adapter’s device
drivers, turn to Chapter 4: Installing the Adapter’s Drivers with the Setup
Utility CD. If your operating system will not install the drivers using the
Setup Utility on the CD or if you’d rather install the drivers manually, turn
to the chapter appropriate to your Operating System.
Important: If you intend to use both 10Mbps and 100Mbps
components on your network, you will need an auto-sensing
hub or switch. For more information on auto-sensing hubs or
switches, go to the Linksys website at www.linksys.com.
5
6
Instant EtherFast ® Series
Chapter 4: Installing the Adapter’s
Drivers with the Setup Utility CD
Overview
EtherFast ® 10/100 Managed Network Adapter
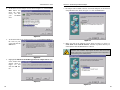
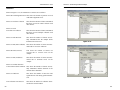
3. Click the Install
tab, as shown in
Figure 4-2, and
the installation
process
will
begin.
The Adapter’s drivers can easily be installed with the Setup Utility included on
the Setup Utility CD after the Adapter is physically installed into your PC. This
chapter will describe the steps necessary to do this.
Using the Setup Utility
The Install Wizard works for installing the drivers under Windows 98, Me,
2000, and XP. To manually install and setup the Adapter on a Windows NT PC,
refer to Chapter 7: Manual Installation and Setup for Windows NT.
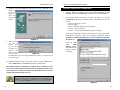
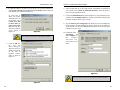
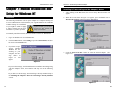
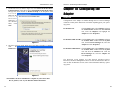
1. Start your PC. Windows will automatically detect the presence of the
Adapter in your PC and bring up the Add New Hardware Wizard screen.
Since you will be installing the drivers through the Install Wizard, click the
Cancel button on this screen.
2. Insert the Setup Utility CD into your CD-ROM drive. The Setup Utility’s
Welcome screen, shown in Figure 4-1, will come up automatically and identify the version
of Windows you
are using.
Figure 4-2
4a. If you are using
Windows 98,
Me or 2000,
the
screen
shown
in
Figure 4-3 will
appear.
Figure 4-3
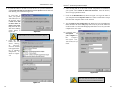
On this screen, you will need to type your computer’s name and your group,
or workgroup, name in the appropriate fields. Then, click the Driver Install
button to continue.
Figure 4-1
7
8
Instant EtherFast ® Series
EtherFast ® 10/100 Managed Network Adapter
Chapter 5: Manual Installation and
Setup for Windows 98SE
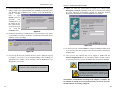
4b. If you are using Windows
2000 or XP, the screen
shown in Figure 4-4 will
appear.
Overview
Important: The directions in this Chapter only apply if you
have not already installed the drivers with the Setup Utility CD.
Figure 4-4
5. On this screen, you will need to type your computer’s name in the appropriate field. Then, click the Driver Install button to continue. Once the
driver is installed, the NIC Control Set will automatically be installed. This
NIC Control Set is a utility for managing the Adapter.
After physically installing the Adapter in your computer, follow these instructions to manually install the network device driver. The installation procedure
for the network driver will vary depending on which version of Windows 98
you are using, and on your current system configuration. If at any time during
the installation you encounter problems, refer to the Troubleshooting section.
Installing the Adapter’s Driver
1. Start up your PC in Windows 98.
2. Windows 98 will automatically detect the presence of the Adapter in your
PC.
6. When installation is complete, you will be asked
to restart your computer.
(See Figure 4-5.) Restart
your computer now.
3. Insert the Setup Utility CD into your CD-ROM drive while the Add New
Hardware Wizard window is visible. When the screen shown in Figure 5-1
appears, click the Next button.
Figure 4-5
Driver installation is complete!
Figure 5-1
9
10
Instant EtherFast ® Series
4. Select Search for the best driver for your device (Recommended), as
shown in Figure 5-2, and click the Next button.
Figure 5-2
5. Select Specify a location and type D:\drivers\win98 in the drop-down box,
as shown in Figure 5-3. Then, click the Next button.
EtherFast ® 10/100 Managed Network Adapter
6. A window will open, notifying you that Windows is searching for the
EtherFast 10/100 Managed Network Adapter driver. When the window notifies you that it is ready to install the driver, as shown in Figure 5-4, click
the Next
button.
Figure 5-4
7. Windows will begin copying the Adapter’s driver files to your PC. Refer to
the chart below to help guide you through the process.
If you press Skip or Cancel, the drivers will not be installed!
Figure 5-3
11
If your PC asks for the Linksys
Setup Utility CD
1. Click OK.
2. Verify that the Setup Utility CD is in your PCs CDROM drive.
3. Type d:\Drivers\Win98 in the Copy files from: box.
4. Click OK.
If you are asked to supply your
Windows 98 Installation Files
or Disks
1. Click OK.
2. If you have a Windows 98 CD-ROM, type d:\win98
in the Copy files from: box, where d: is your CDROM drive.
3. If you dont have a Windows 98 CD-ROM, type
c:\windows\options\cabs.
4. Click OK.
If you are asked for a file that
includes LNE100M or WINNDI.DLL in its name
1. Insert the Setup Utility CD into your PCs CD-ROM
drive.
2. Type d:\Drivers\WIN98 in the Copy files from: box.
3. Click OK
If you receive a Version
Conflict error
1. Choose to keep the newest version of the file by
clicking Yes.
12
Instant EtherFast ® Series
8. Windows will finish installing the software onto your PC. When the screen
shown in
Figure 5-5
appears,
click the
Finish
button.
Figure 5-5
9. When asked if
you want to
restart
your
PC, as shown
in Figure 5-6,
remove
the
Setup Utility
Figure 5-6
CD and click
the Yes button. If you are using a Windows CD, leave it in your PC. You
may need it later.
EtherFast ® 10/100 Managed Network Adapter
Network Component Configuration
1. From the Windows 98 desktop, click on the taskbar's Start button, select
Settings, choose the Control Panel, and double-click the Network icon.
2. The Network window will appear, as shown in Figure 5-7, with the
Configuration tab selected. Confirm that the components listed here are
shown:
• Client for Microsoft Networks
• Dial-Up Adapter
• Linksys LNE100M Managed Network Adapter
• TCP/IP -> Dial-Up Adapter
• TCP/IP -> Linksys LNE100M Managed Network Adapter
There may be additional components listed; however, if any of the components shown are missing, you’ll need to manually install them. Refer to
Appendix F: Manually Installing the Network Components in Windows
98 and Me now.
3. Click the File
and
Print
Sharing button.
The File and Print
Sharing window
will appear.
10. If Windows does not ask you to restart your PC, click the Start button,
choose Shut Down, choose Restart, then click the Yes button.
The Windows 98 driver installation is complete. Please continue on to the
next section, which will provide instructions for configuring Windows 98’s
network protocol. Consult your Windows documentation for your network
configuration information if necessary.
Note: From this point on, you must provide Windows with a User name
and Password every time you are prompted to do so. Remember to click
the OK button to properly log in to Windows. If you click the Cancel button or press the Escape (ESC) key, you will not log in to the network.
Figure 5-7
13
14
Instant EtherFast ® Series
4. If you'd like others to be able to access the files on your PC's hard drive,
select I want to be able to give others access to my files from the File and
Print Sharing screen shown in Figure 5-8.
If you'd like to
share your printer
with other users on
the network, select
I want to be able
to allow others to
print to my printer(s) from the File
and Print Sharing
screen shown in
Figure 5-8.
EtherFast ® 10/100 Managed Network Adapter
6. After ensuring that all of the listed network components are installed on
your system, select Client for Microsoft Networks from the Primary
Network Logon pull-down menu.
7. Click on the Identification tab, shown in Figure 5-10. Type the name of
your computer in the Computer Name box. Choose a name that is unique
from the other computer names on the network.
8. Type the name of your workgroup in the Workgroup box. The Workgroup
name should be the same Workgroup name in use by all of the other PCs
on the network. Use the same Workgroup name that is in use on your other
computers for ease of use.
Figure 5-8
Note: If you do not enable File and Printer Sharing, your PC
will be invisible on the network, inaccessible by anyone.
5. Click the OK
button. File and
Printer Sharing
for
Microsoft
Networks should
now appear in the
list of installed
components, as
shown in Figure
5-9.
8a. (Optional) Enter a
description
of
your computer in
the
Computer
Description box.
This box may be left
blank.
Figure 5-10
Note: Your Computer Name and Workgroup
Name must both be fewer than 15 characters,
and should only consist of numbers and letters.
Figure 5-9
15
16
Instant EtherFast ® Series
9. Choose the Access
Control tab, as
shown in Figure 511. Verify that
Shared-level
access control is
selected.
EtherFast ® 10/100 Managed Network Adapter
13.Once you are at the Windows 98 desktop, double-click on the Network
Neighborhood icon. You should see one icon for the entire network and the
names of the other PCs on the network.
If you can see your computer along with all the other computers on the
network in Network Neighborhood, then the Windows 98 network configuration is complete. Continue with Appendix C: Sharing Your Files and
Printers if you want your PC’s data or printer to be available to others on
the network. You may stop here, however, if you wish to configure File and
Printer Sharing at a later time.
Refer to the Troubleshooting section if:
• You don't see anything at all in Network Neighborhood and have pressed
the F5 key on your keyboard a few times to refresh the screen.
• You only see your own computer in Network Neighborhood.
• You see all computers on the network except yours and have tried pressing the F5 key a few times.
• You only see computers that are running the same operating system as you
and you don’t see any others.
Figure 5-11
10. Click the OK button. Your system may ask you for your Windows 98 CDROM or the location of the Windows 98 installation files. If it does, direct
Windows to the appropriate location, (i.e., D:\win98, where D is the letter
of your CD-ROM drive, making sure you have inserted the Windows 98
CD-ROM, or C:\windows\options\cabs).
11. Once Windows has copied the necessary files, the System Settings Change
window appears. Remove all disks from your PC and click the Yes button
to restart your PC. If you don't see this window, simply shut down Windows
98 and restart your PC. Remember to remove any disks prior to rebooting.
12. A Logon window will appear, requiring you to enter a User name and
Password. Enter your user name and password and click the OK button.
Do not click the Cancel button or press the Escape key. Clicking either of
these buttons will prevent you from logging in to the network. If the logon
does not appear or if it does not allow you to log on, refer to the
Troubleshooting section.
17
18
Instant EtherFast ® Series
Chapter 6: Manual Installation and
Setup for Windows Me
EtherFast ® 10/100 Managed Network Adapter
4. Click the Search for the best driver for your device (Recommended)
radio button and select Specify a location. Type D:\drivers in the dropdown box and click the Next button.
Overview
Important: The directions in this Chapter only apply if you
have not already installed the drivers with the Setup Utility CD.
After physically installing the Adapter in your computer, follow these instructions to manually install the network device driver. If at any time during the
installation you encounter problems, consult the Troubleshooting section.
Installing the Adapter’s Driver
1. Start up your PC in Windows Me.
2. Windows Me will automatically detect the presence of the PCI Ethernet
Controller hardware in your PC.
Important: Do not click Cancel or Skip at any time during the installation.
Doing so will prevent your driver from being properly installed on your PC.
3. Insert the Setup Utility CD into your CD-ROM drive while the Add New
Hardware Wizard window, shown in Figure 6-1, is visible. Click the Specify
the location of the driver (Advanced) radio button. Click the Next button.
Figure 6-2
5. A window will open, notifying you that Windows is searching for the
EtherFast 10/100 Managed Network Adapter driver. When the window notifies you that it is ready to install the driver, as shown in Figure 6-3, click
the Next button.
Figure 6-3
Figure 6-1
19
20
Instant EtherFast ® Series
6. Windows Me will begin copying the Adapter’s driver files onto your PC. If
Windows Me files are requested, click OK and direct Windows to the proper location, e.g. C:\windows\options\install, or D:\win9x (where “D:”
represents your CD-ROM drive).
7. If Windows asks you to supply any drivers beginning with “lne” or
“lne100m”, re-direct Windows to the Setup Utility CD-ROM (D:\drivers).
8. Windows will finish installing the software onto your PC. When the screen
shown in Figure 6-4 appears, click the Finish button.
EtherFast ® 10/100 Managed Network Adapter
Network Component Configuration
1. Once you are back at the Windows Me desktop, click on your taskbar's
Start button, select Settings, then Control Panel, and then double-click
the Network icon.
2. The Network window will appear, as shown in Figure 6-5, with the
Configuration tab selected. Confirm that the components listed here are
shown:
• Client for Microsoft Networks
• Dial-Up Adapter
• Linksys LNE100M Managed Network Adapter
• TCP/IP -> Dial-Up Adapter
• TCP/IP -> Linksys LNE100M Managed Network Adapter
There may be additional components listed; however, if any of the components shown are missing, you’ll need to manually install them. Refer to
Appendix F: Manually Installing the Network Components in Windows
98 and Me now.
3. Click the File and
Print Sharing button. The File and
Print Sharing window will appear.
Figure 6-4
9. When asked if you want to restart your PC, remove any disks from your PC
and click the Yes button. If Windows does not prompt you to restart, do so
manually. Click the Start button, and select Shutdown. Choose the
Restart option and click the OK button.
Figure 6-5
21
22
Instant EtherFast ® Series
4. If you'd like others to be able to access the files on your PC's hard drive,
select I want to be able to give others access to my files from the File and
Print Sharing screen shown in Figure 6-6.
If you'd like to
share your printer
with other users on
the network, select
I want to be able
to allow others to
print to my printer(s) from the File
and Print Sharing
screen shown in
Figure 6-6.
EtherFast ® 10/100 Managed Network Adapter
6. After ensuring that all of the listed network components are installed on
your system, select Client for Microsoft Networks from the Primary
Network Logon pull-down menu.
7. Click on the Identification tab, shown in Figure 6-8. Type the name of your
computer in the Computer Name box. Choose a name that is unique from
the other computer names on the network.
8. Type the name of your workgroup in the Workgroup box. The Workgroup
name should be the same Workgroup Name in use by all of the other PCs
on the network. Use the same Workgroup Name that is in use on your other
computers for ease of use.
Figure 6-6
Note: If you do not enable File and Printer Sharing, your PC
will be invisible on the network, inaccessible by anyone.
5. Click the OK button.
File
and
Printer Sharing for
Microsoft Networks
should now appear
in the list of
installed components, as shown in
Figure 6-7.
8a. (Optional) Enter a
description
of
your computer in
the
Computer
Description box.
This box may be left
blank.
Figure 6-8
Note: Your Computer Name and Workgroup Name must both be fewer
than 15 characters, and should only consist of numbers and letters.
Figure 6-7
23
24
Instant EtherFast ® Series
9. Choose the Access
Control tab, as
shown in Figure 69. Verify
that
Shared-level
access control is
selected.
EtherFast ® 10/100 Managed Network Adapter
13.Once you are at the Windows Me desktop, double-click the My Network
Places icon, the Entire Network icon, and then the Your Workgroup icon.
You should see one icon for the entire network and the names of the other
PCs on the network.
If you can see your computer along with all the other computers on the
network in Network Neighborhood, then the Windows Me network configuration is complete. Continue with Appendix C: Sharing Your Files and
Printers if you want your PC’s data or printer to be available to others on
the network. You may stop here, however, if you wish to configure file and
printer sharing at a later time.
Refer to the Troubleshooting section if:
• You don't see anything at all in Entire Network and have pressed the F5
key on your keyboard a few times to refresh the screen.
• You only see your own computer in Entire Network.
• You see all computers on the network except yours and have tried pressing the F5 key a few times.
Figure 6-9
• You only see computers that are running the same operating system as
you and you don’t see any others.
10. Click the OK button. Your system may ask you for your Windows Me CDROM or the location of the Windows Me installation files. If it does, direct
Windows to the appropriate location, (i.e., D:\win9x, where D is the letter
of your CD-ROM drive, making sure you have inserted the Windows Me
CD-ROM, or C:\windows\options\cabs).
11. Once Windows has copied the necessary files, the System Settings Change
window appears. Remove all disks from your PC and click the Yes button
to restart your PC. If you don't see this window, simply shut down Windows
Me and restart your PC. Remember to remove any disks prior to rebooting.
12. A Logon window will appear, requiring you to enter a User name and
Password. Enter your user name and password and click the OK button.
Do not click the Cancel button or press the Escape key. Clicking either of
these buttons will prevent you from logging in to the network. If the logon
does not appear or if it does not allow you to log on, refer to the
Troubleshooting section.
25
26
Instant EtherFast ® Series
EtherFast ® 10/100 Managed Network Adapter
Chapter 7: Manual Installation and
Setup for Windows NT
Installing NT Networking and the Adapter’s Driver
Overview
2. When the screen shown in Figure 7-2 appears, put a checkmark next to
Wired to the network and then click the Next button.
1. After clicking on the Yes button, the Network Setup Wizard window will
appear.
The following instructions will set up the Adapter in a computer running NT
4.0 Server/Workstation. You should have your original Windows NT CD-ROM
available during the installation,
Important: If you have installed
as you might be asked to supply
any Service Packs, you will need to
it. Always consult your NT docureinstall them after installing and
setting up the Adapter.
mentation if you have questions.
To manually install the network driver for an NT 4.0 Server or Workstation:
1. Log in to Windows NT as an administrator.
2. Click the Start button, select Settings, open the Control Panel, and double-click on the Network icon.
3. If you have not previously installed
Windows NT networking on your
computer, the message shown in
Figure 7-1 will
appear.
Figure 7-2
3. Click the Select from list... button to select the network adapter. (See
Figure 7-3)
Figure 7-1
• If you see this message, click the Yes button to install NT networking along
with the Adapter’s driver, and continue with step one on the following
page.
• If you don't see this message, NT networking is already installed. Skip to
the Installing the Adapter’s Driver if Networking is Already Installed
section.
Figure 7-3
27
28
Instant EtherFast ® Series
4. At the Select Network Adapter screen, shown in Figure 7-4, click the Have
Disk button and
insert the Setup
Utility CD into
your
CD-ROM
drive.
EtherFast ® 10/100 Managed Network Adapter
7. The adapter will be added to the list of Network Adapters on the Network
Setup Wizard screen, shown in Figure 7-7. Click the Next button.
Figure 7-4
5. At the Insert Disk screen, shown in Figure 7-5, type D:\drivers\winnt into
the field on your
screen and click the
OK button.
Figure 7-7
8. Make sure that on the following screen, shown in Figure 7-8, there is a
check mark beside TCP/IP Protocol. Uncheck any others that may be
checked, then click the Next button to continue.
Note: If you install the TCP/IP protocol, refer to your Windows NT documentation when installation steps appear that arent listed in this User
Guide. Linksys does not provide technical support for the configuration or
troubleshooting of the TCP/IP protocol.
Figure 7-5
6. Highlight the EtherFast 10/100 Managed Network Adapter Driver entry
in the window that
appears, shown in
Figure 7-6, and
click the OK button.
Figure 7-6
Figure 7-8
29
30
Instant EtherFast ® Series
9. Click the Next button to proceed through the subsequent screens. If you are
asked to supply your original Windows NT CD-ROM or setup disks, place
your Windows NT CD-ROM in your CD drive. If the CD-ROM loads a
pop-up
window,
close it. Type
D:\i386 (where D:
represents
your
CD-ROM drive) in
the field at the bottom of the window,
as shown in Figure
7-9.
Click the
Continue button.
Figure 7-9
EtherFast ® 10/100 Managed Network Adapter
12. When you reach the screen shown in Figure 7-11, choose either
Workgroup or Domain, depending on the type of network you're setting
up. (Your Microsoft documentation explains the difference between
Workgroups and Domains.) Click the Next button to continue.
10. You may be asked if there if a DHCP Server on your network. Verify if there
is, and whether you wish to use DHCP. Click the Yes or No button on the
following screen, accordingly.
Figure 7-11
Figure 7-10
11. NT will copy the necessary network drivers to your PC. When the copying
is complete, you will see a list of installed bindings. These bindings are
appropriate to the Adapter you are installing. Click the Next button to go
through these two screens.
Note: For information and help on bindings, services
and protocols, check your Windows NT documentation.
13. On the next screen, click the Finish to complete installation. When asked
if you want to restart your computer, remove the Setup Utility CD and click
the Yes button.
14. Once your PC has rebooted and you are logged in, double-click the
Network Neighborhood icon on your desktop. Make sure that you have
access to the network. If you do, the Adapter has been properly installed.
Note: If you need to install the TCP/IP Protocol, consult your
Windows NT documentation. Linksys does not provide technical support for TCP/IP configuration or troubleshooting.
Important: If you had previously installed any NT service packs, you must re-install them. Otherwise, you
may receive Not Enough Service Storage Space
errors in the Event Viewer.
The Windows NT Installation and Setup of the Adapter is complete. Do
not continue on with the next set of instructions. They are for NT users who
already had their networking configured.
31
32
Instant EtherFast ® Series
Installing the Adapter’s Driver
if Networking is Already Installed
The following steps are for NT PCs that have networking already installed
according to the Windows NT documentation. If you have not already installed
networking onto your NT PC, please refer to your Windows documentation.
These steps will install the Adapter’s driver software on your PC, enabling your
PC to properly communicate with the Adapter. Remember that you must be
logged on as a network administrator to continue.
EtherFast ® 10/100 Managed Network Adapter
3. When the list of available network adapters appears, as shown in Figure 713, click
the Have
Disk button.
1. Click the Start button, and select Settings. Then, open the Control Panel,
and double-click on the Network icon.
2. When the networking window (shown in Figure 7-12) appears, choose the
Adapters tab and click the Add button.
Figure 7-13
4. At the Insert Disk screen, shown in Figure 7-14, insert the Setup Utility
CD-ROM and type
D:\drivers\winnt
into the field on
your screen and
click the OK button.
Figure 7-14
5. Highlight
the
EtherFast 10/100
Managed Network
Adapter Driver
entry in the window
that appears, shown
in Figure 7-15, and
click the OK button.
Figure 7-12
33
Figure 7-15
34
Instant EtherFast ® Series
6. If Windows NT asks you to supply your original Windows NT CD-ROM or
setup disks, direct Windows NT to the proper location (most likely D:\i386,
where D represents the letter of your CD-ROM drive). (See Figure 7-16.)
EtherFast ® 10/100 Managed Network Adapter
Chapter 8: Manual Installation and
Setup for Windows 2000
Overview
Important: The directions in this Chapter only apply if you
have not already installed the drivers with the Setup Utility CD.
After physically installing the Adapter in your computer, follow these instructions to manually install the network device driver. The installation procedure
for the network driver will vary slightly depending on which version of
Windows 2000 you are using, and on your current system configuration. If at
any time during the installation you encounter problems, consult the
Troubleshooting section.
Figure 7-16
7. When the screen shown in Figure 7-17 appears, remove any disks and click
the Yes button to restart your PC.
Note: Prior to proceeding, ensure that you are operating Windows
2000 with administrative rights. If you log in to Windows 2000 without
administrative rights, you may run into problems during the installation.
Installing the Adapter’s Driver
1. Start and log on to your
Windows 2000 PC.
Figure 7-17
8. Once your PC has rebooted, double-click the Network Neighborhood icon
on your desktop. Make sure that you have access to the network. If you do,
the Adapter has been properly installed.
Important: Do not click Cancel or Skip
at any time during the installation.
Doing so will prevent your driver from
being properly installed on your PC.
2. Windows will display the Found
New
Hardware
Wizard box, as
shown in Figure 81. Click the Next
button to continue.
The Windows NT Installation and Setup of the Adapter is complete.
Note: If you need to install the TCP/IP Protocol, consult your
Windows NT documentation. Linksys does not provide technical support or troubleshooting for TCP/IP configuration .
Important: If you had previously installed any NT service packs, you must re-install them. Otherwise, you
may receive Not Enough Service Storage Space
errors in the Event Viewer.
35
Figure 8-1
36
Instant EtherFast ® Series
3. The Install Hardware Device Drivers dialog box will appear, as shown in
Figure 8-2. When Ethernet Controller is displayed, select Search for a suitable driver for my device (Recommended) and click the Next button.
EtherFast ® 10/100 Managed Network Adapter
5. When the Found New Hardware Wizard box appears, insert the Setup
Utility CD into your CD-ROM drive. In the Copy manufacturer’s files from
field, type D:\drivers\win2000 (as shown in Figure 8-4) and click the OK
button
Figure 8-4
Figure 8-2
6. The Driver File Search Results dialog box will appear, as shown in Figure
8-5. Click the Next button to continue.
4. The Locate Driver Files dialog box will appear, as shown in Figure 8-3.
Select Specify a location and click the Next button.
Figure 8-5
Figure 8-3
37
38
Instant EtherFast ® Series
7. The Completing the Found New Hardware Wizard dialog box will appear,
as shown in Figure 8-6. Click the Finish button to complete the installation.
EtherFast ® 10/100 Managed Network Adapter
Chapter 9: Manual Installation and
Setup for Windows XP
Overview
Important: The directions in this Chapter only apply if you
have not already installed the drivers with the Setup Utility CD.
After physically installing the Adapter in your computer, follow these instructions to manually install the network device driver. Windows XP has a driver
for the Adapter. After physically installing the Adapter into your PC, Windows
XP will automatically install the Adapter’s driver.
If you want to use the new driver on the Setup Utility CD, you must update the
driver for this device as shown in this chapter.
Installing the Adapter’s Newest Driver
Figure 8-6
Important: Prior to proceeding, verify that you are
operating Windows XP with administrative rights. If you
log into Windows XP without administrative rights, you
may run into problems during the installation.
8. Remove any disks from your drives.
The Windows 2000 driver installation is complete. If you want to share
files or printers, refer to your Windows 2000 documentation.
1. Power up your PC and start
Windows XP.
Important: Do not click Cancel or
Skip at any time during the installation.
Doing so will prevent your driver from
being properly installed on your PC.
2. Insert the Setup Utility
CD-ROM. The Found
New Hardware Wizard
screen will appear, as
shown in Figure 9-1.
Select Install from a
list or specific location (Advanced), and
click Next to continue.
Figure 9-1
39
40
Instant EtherFast ® Series
3. On the next screen, as shown in Figure 9-2, select Search for the best driver
in these locations. Check the box next to Include this location in the search
and type the driver location of D:\drivers\winxp in the drop-down field
beneath.
Make sure the
S e a r c h
Removable
Media box is
not checked.
Then, click
Next.
EtherFast ® 10/100 Managed Network Adapter
Chapter 10: Configuring the
Adapter
Overview
Configuration of the Adapter is handled through the PC’s Device Manager
within the control panel. Instructions will differ depending upon your operating system.
For Windows NT
Figure 9-2
4. The driver will now install. When the screen shown in Figure 9-3 appears,
click
the
Finish button.
Click the Start button, select Settings, and open
the Control Panel. Double-click the Network
icon, select the Adapters tab, highlight the
Adapter and click Properties.
For Windows 98SE and Me Click the Start button, select Settings, and open
the Control Panel. Double-click the System
icon, click the Device Manager tab, select the
Adapter and click Properties.
For Windows 2000 and XP Click the Start button, select Settings, and open
the Control Panel. Double-click the System
icon and select the Hardware tab. Click the
Device Manager tab, select the Adapter and
click Properties.
The Properties screen displays five tabs: General, Advanced, Driver,
Resources, and Power Management. These five tabs are described in this section. As these are Windows screens, some of the information differs by operating system.
Figure 9-3
The Windows XP driver installation is complete. If you want to share
files or printers, refer to your Windows XP documentation.
41
42
Instant EtherFast ® Series
EtherFast ® 10/100 Managed Network Adapter
General Tab
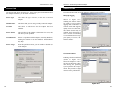
Advanced Tab
The General Tab, shown in Figure 10-1, shows some general information about
the Adapter and allows you to enable or disable it.
From the Advanced tab, all of the Adapter’s settings can be modified.
802.1p/Q Tagging
Device Type
This shows the type of device; in this case a Network
Adapter.
Manufacturer
This shows that you are using a Linksys Network Adapter.
Location
This shows in which PCI slot the Adapter has been
installed.
Device Status
This will show if the Adapter is functional. If it is not, this
will show you the problem.
Troubleshooter
If there is a problem with the Adapter, caused by Windows,
clicking this button to run the Windows Troubleshooter
may help.
Device Usage
From this pull-down menu, you can enable or disable use
of the Adapter.
Shown in Figure 10-2,
enabling this feature allows
for quality of service packet
tagging when connected to a
network switch that supports
quality of service. Therefore,
this feature should only be
enabled when connecting to
such a switch. If connecting
to a switch that does not support quality of service, disable this feature.
Figure 10-2
Checksum Offload
Enabling Checksum Offload
(shown in Figure 10-3)
allows the Adapter to calculate the IP Checksum, rather
than having the operating
system perform this computation. This provides a slight
increase in PC performance.
Figure 10-2
43
Figure 10-3
44
Instant EtherFast ® Series
EtherFast ® 10/100 Managed Network Adapter
Connection Type
Network Address
Shown in Figure 10-4, this
allows you to choose the
speed at which your network
is running. If connecting to
an auto-sensing network,
where data is transmitted at
different speeds, select
Auto-Negotiation.
Shown in Figure 10-6, the
Network Address selection is
set to Not Present by default.
This setting is the Adapter’s
MAC Address and should
only be changed when no
other device with the same
MAC Address is present in
the network.
Figure 10-4
Figure 10-6
Flow Control
Receive Buffers
This allows for more efficient transfer of data and
should only be selected when
connected to networking
devices that support flow
control. The third option provided, Hardware Default
(shown in Figure 10-5),
allows the Adapter to automatically detect if it is connected to such a networking
device.
The Receive Buffer (Figure
10-7) is used to regulate the
flow of data frames between
adapters and protocol stacks.
Although the default setting
of 64 is usually acceptable,
increasing the number may
improve performance if network traffic is heavy, but it
will also use system memory.
Figure 10-5
45
Figure 10-7
46
Instant EtherFast ® Series
EtherFast ® 10/100 Managed Network Adapter
Transmit Buffers
Driver Tab
The Transmit Buffer (shown
in Figure 10-8) is used to
regulate the flow of data
frames between adapters and
protocol stacks. Although the
default setting of 64 is usually acceptable, increasing the
number may improve performance if network traffic is
heavy, but it will also use
system memory.
The Driver Tab, shown in Figure 10-10, provides information about the
Adapter’s drive and allows the user to uninstall and update the driver.
Driver Provider This displays the source of the driver used for the Adapter.
Driver Date
This shows the date when the driver was last updated.
Driver Version
This shows the version of the driver currently installed.
Digital Signer
This digital signature shows that the driver is from a safe
source, adding an additional level of security in the use of
driver software.
Driver Details
For further information about the driver, click this button.
Uninstall
Click this button to uninstall the driver. Drivers can also be
uninstalled via the method explained in Appendix I:
Uninstalling the Drivers with the Install Wizard.
Update Driver
Before clicking this button to update the Adapter’s drivers,
make sure that you’ve downloaded the new driver from
www.linksys.com.
Figure 10-8
VLAN ID
Important: Do not
update the Adapters
driver unless you are
experiencing a problem with the Adapter.
Adapter performance
is not improved with
a newer driver.
As shown in Figure 10-9,
VLAN ID is used when setting up virtual LANs on your
network. By assigning the
ID, this PC will access other
PCs within the VLAN. Up to
4,096 VLANs can be identified by the Adapter.
Figure 10-9
47
Figure 10-10
48
Instant EtherFast ® Series
EtherFast ® 10/100 Managed Network Adapter
The Resources Tab displays resources assigned to the Adapter by your
Windows operating system and any IRQ conflicts that might exist.
Chapter 11: Using the Adapter’s NIC
Control Set and Diagnostic Tools
Power Management Tab
Running the Control Set
The Driver Tab, shown in Figure 10-11, allows the Adapter to save power when
not in use. There are two ways in which the Adapter does this.
This chapter describes how to use NIC Control Set, a window interface program, to set up configurations for the Adapter and diagnose the Adapter’s status.
Resources Tab
Important: The NIC Control Set will NOT run under Windows NT. To
configure the Adapter under Windows NT, follow the instructions in
Chapter 10: Configuring the Adapter.
If you haven’t already installed the utility, as mentioned in Chapter 4: Installing
the Adapter’s Drivers with the Setup Utility CD, do so now. Insert the Setup
Utility CD, right click your CD-ROM drive from My Computer, and select
Explore. Double-click the autorun folder to open it. Then, double-click the
utility folder to open that. Finally, double-click the NICControlSet.exe icon to
install the Control Set. When the installation is complete, restart your computer.
You can run the Control
Set by double-clicking
the icon in your system
tray, shown in Figure
11-1.
Figure 10-11
Allow this device to bring the computer out of standby. Any PC equipped
with the Adapter, that is in Standby mode, will come out of Standby mode to
receive packets sent to it from the network.
All the computer to turn off this device to save power. After the Adapter is
unused for a few minutes, this setting will allow your computer to power down
the Adapter to save power.
49
Figure 11-1
Right-clicking will
open a menu, shown
in Figure 11-2.
Select Launch NIC
Control Set to run
the Control Set.
Figure 11-2
50
Instant EtherFast ® Series
EtherFast ® 10/100 Managed Network Adapter
You can also run the
Control Set from the Start
menu by clicking Start,
selecting
Programs,
selecting Linksys NIC
Control Set, and clicking
NIC Control Set, as
shown in Figure 11-3.
Figure 11-3
This will open the Control Set’s main screen, indicating the general information of your computer, including Computer Name, User Name, Network
Group,
Operating
System,
and
OS
Version, as shown in
Figure 11-4. Click the
Adapter
(EtherFast
10/100
Managed
Network Adapter) to
continue.
There are four tabs
through which the
Control Set is used:
General,
Setting,
Statistics,
and
Diagnostics. Each tab is
described in this chapter.
Figure 11-4
Figure 11-5
Setting Tab
The Setting Tab will show all of the Adapter’s current settings. From the field
at the top of the screen, each setting can be modified by first selecting the setting and changing the display in the window.
These settings, shown in Figure 11-6 include 802.1p/Q Tagging, Connection
Type, Driver Initial Delay, Flow Control, Network Address, Receive Buffers,
Transmit
Buffers, and
VLAN ID.
General Tab
The General Tab will display the Adapter’s current functions and settings.
In the window at the top of the screen, the Adapter’s settings are shown: MAC
Address, IP Address, Link Speed, and Duplex Speed. In the screen shown in
Figure 11-5, the Adapter was not connected to a network. In all other circumstances, the Link Speed and Duplex Speed would show the Adapter’s data
transfer rate in megabits per second (Mbps).
In the window at the bottom of the screen, a graphic display of the Adapter’s
functions will appear, showing both send and receive rates.
51
Figure 11-6
52
Instant EtherFast ® Series
EtherFast ® 10/100 Managed Network Adapter
802.1p/Q Tagging
Driver Initial Delay
Shown in Figure 11-7, enabling this feature allows for quality of service packet tagging when connected to a network switch that supports quality of service.
Therefore, this feature should only be enabled when connecting to such a
switch. If connecting to a switch that
does not support
quality of service,
disable this feature.
Enabling
the
Driver
Initial
Delay
option,
shown in Figure
11-9, will increase
the speed of packet transmission.
Figure 11-9
Figure 11-7
Flow Control
Connection Type
Shown in Figure 11-8, this allows you to choose the speed at which your network is running. If connecting to an auto-sensing network, where data is transmitted at different speeds, select Auto-Negotiation.
Figure 11-8
53
This allows for more efficient transfer of data and should only be selected when
connected to networking devices that support flow control. The third option
provided, Hardware Default (shown in Figure 11-10), allows the Adapter to
automatically detect if it is connected to such a networking device.
Figure 11-10
54
Instant EtherFast ® Series
EtherFast ® 10/100 Managed Network Adapter
Network Address
Transmit Buffers
Shown in Figure 11-11, the Network Address selection is set to Not Present by
default. This setting is the Adapter’s MAC Address and should only be changed
when no other device with the same MAC Address is present in the network.
The Transmit Buffer (shown in Figure 11-13) is used to regulate the flow of
data frames between adapters and protocol stacks. Although the default setting
of 64 is usually acceptable, increasing the number may improve performance if
network traffic is
heavy, but it will
also use system
memory.
Figure 11-11
Receive Buffers
VLAN ID
The Receive Buffer (Figure 11-12) is used to regulate the flow of data frames
between adapters and protocol stacks. Although the default setting of 64 is usually acceptable, increasing the number may improve performance if network
traffic is heavy, but
it will also use system memory.
As shown in Figure 11-14, VLAN ID is used when setting up virtual LANs on
your network. By assigning the ID, this PC will access other PCs within the
VLAN. Up to 4,096 VLANs can be identified by the Adapter.
Figure 11-12
55
Figure 11-13
Figure 11-14
56
Instant EtherFast ® Series
EtherFast ® 10/100 Managed Network Adapter
Statistics Tab
Directed Bytes Tx
This is the amount of bytes transmitted across the network to one node.
The Statistics Tab will show how, in a smaller screen, the Adapter is functioning. This tab consists of three sub-tabs: General, IEEE 802.3, and Others. These
are described in this section.
Directed Frames Tx
This is the amount of frames transmitted across the
network to one node.
GENERAL
Multicast Bytes Tx
This is the amount of bytes transmitted across the network to several nodes.
Multicast Frames Tx
This is the amount of frames transmitted across the network to several nodes.
Broadcast Bytes Tx
This is the amount of bytes transmitted across the network to all nodes.
Broadcast Frames Tx This is the amount of frames transmitted across the network to all nodes.
Directed Bytes Rx
This is the amount of bytes received across the network
from one node.
Directed Frames Rx
This is the amount of frames received across the network from one node.
Multicast Bytes Rx
This is the amount of bytes received across the network
from several nodes.
Figure 11-15
Shown in Figure 11-15, the “General” statistics are as follows:
Multicast Frames Rx This is the amount of frames received across the network from several nodes.
Frames Tx OK
This shows the amount of frames transmitted successfully.
Frames Rx OK
This shows the amount of frames received successfully.
Frames Tx Fail
This shows the amount of frames transmitted that did not
reach the destination successfully.
Broadcast Frames Rx This is the amount of frames received across the network from all nodes.
Frames Rx Fail
This shows the amount of frames that were not received
correctly.
Rx CRC Error
This shows the amount of incoming packets that failed
the cyclical redundancy check.
Rx No Buffer
This specifies the number of frames that the Adapter cannot receive due to lack of receive buffer space.
Tx Packets Queued
This shows the amount of packets scheduled to be
transmitted based on queue configuration.
Broadcast Bytes Rx
57
This is the amount of bytes received across the network
from all nodes.
58
Instant EtherFast ® Series
EtherFast ® 10/100 Managed Network Adapter
IEEE 802.3
Shown in Figure 11-16, the “IEEE 802.3” statistics are as follows:
Frames Rx with Alignment Error This shows the amount of packets received
with frame alignment errors.
Frames Tx with one Collision
Frames Tx with
more than one Collision
Frames Tx after Deferral
This shows the amount of frames transmitted
that have received an initial collision with
other frames.
This shows the amount of frames transmitted
that have received multiple collisions with
other frames.
This shows the number of frames successfully transmitted after the Adapter defers
transmission at least once.
Figure 11-16
Frames Tx Fail (Max Collision) This shows the number of frames not transmitted due to excessive collisions.
Frames Rx Fail (Overrun)
This shows the number of frames not
received due to overrun errors on the
Adapter.
Frames Tx Fail (Underrun)
This shows the number of frames not transmitted due to underrun errors on the
Adapter.
Frames Tx without detection
of the collision-detect heartbeat This shows the number of frames successfully transmitted without detection of the
collision-detect heartbeat.
Frames Tx CRS Lost
Late Collisions on Frames Tx
59
This shows the number of times the CRS
signal has been lost during packet transmission.
Figure 11-17
This shows the number of collisions detected after the normal window.
60
Instant EtherFast ® Series
OTHERS
EtherFast ® 10/100 Managed Network Adapter
Vendor Driver Version
This show the currently driver version utilized by
the Adapter.
Current Packet Filter
This displays the types of packets for which a protocol receives indications from the Adapter’s driver.
Shown in Figure 11-17, the “Others” statistics are as follows:
Hardware Status
This shows the Adapter’s present status.
Media Support
This displays the media type(s) supported by the
Adapter.
Current Lookahead Size
This shows the number of bytes of received packet
data that will be indicated to the protocol driver.
Media in Use
The shows the media type presently in use by the
Adapter.
Driver NDIS Version
This shows the NDIS version in use by the
Adapter’s driver.
Maximum Lookahead Size This is maximum number of bytes that the
Adapter can provide as lookahead data.
Maximum Total Size
This is the maximum total packet length, in bytes,
the Adapter supports.
Maximum Frame Size
This is the maximum network packet size, in
bytes, that the Adapter supports.
MAC Option
This shows the underlying properties of the driver.
Media Connect Status
Link Speed
This displays the Adapter’s maximum speed.
This shows the present status of the Adapter’s connection.
Tx Buffer Space
This shows the amount of memory available in the
transmit buffer.
Maximum Send Packets
This shows the maximum number of send packet
descriptors in the Adapter’s driver.
Rx Buffer Space
This shows the amount of memory available in the
receive buffer.
Diagnostics Tab
Tx Block Size
This displays the minimum number of bytes that a
single net packet occupies in the Adapter’s transmit buffer space.
Rx Block Size
This shows the amount of storage, in bytes, that a
single packet occupies in the Adapter’s receive
buffer space.
Vendor ID
This is a three-byte code followed by a single byte
to identify a particular Adapter.
Vendor Description
This is a short text string describing the Adapter.
Vendor Driver Version
This show the currently driver version utilized by
the Adapter.
The Diagnostics Tab, shown in Figure 11-19, will allow you to test the
Adapter’s functionality. Simply check the function to be tested in the checkbox
beside the name and click the Start Diagnose button. Select the number of
tests you wish to run from the bar on the bottom of the screen or check the
Continuous box for constant testing. The pass rate will appear under Pass/Fail
on the right.
As shown in Figure 11-18, you will be cautioned once you start your test(s) that
the Adapter will cease to function while testing.
Figure 11-18
61
62
Instant EtherFast ® Series
EtherFast ® 10/100 Managed Network Adapter
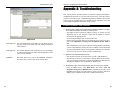
Appendix A: Troubleshooting
This section provides possible solutions to problems regarding the Adapter’s
installation and operation. If you can’t find an answer here, check the Linksys
website at www.linksys.com. Troubleshooting hints for Windows can be found
below. If you are using Windows NT, or another network operating system, skip
to the Adapter Diagnostics instructions in this section.
Common Problems and Solutions
Figure 11-19
MAC Registers
This tests the Registers of the MAC for such things as reading and writing to the MAC chip and getting its feedback
value and time.
PHY Registers
This tests the Register inside of the Phyceiver for such things
as reading and writing to the MAC chip and getting its return
value to verify function.
EEPROM
This reads and writes a value to the EEPROM, testing that
the return value is not the same as the writing value.
1. Windows doesn’t detect new hardware with the Adapter installed, or it continues to detect the Adapter each time you restart your PC.
• You might not have inserted the Adapter correctly or securely into the
appropriate slot of your computer. Check that the Adapter is securely
inserted into the appropriate slot.
• Try inserting the Adapter into an alternate PCI slot.
• You may have previously aborted a new hardware setup. Follow the directions in the Appendix E: Starting Over in Windows 98, Me, 2000 or
XP.
• The motherboard in your system might not be Plug-and-Play compatible,
your PC’s Plug-and-Play settings may not be enabled, or the motherboard
may have Plug-and-Play options not supported by Windows 98, 2000, Me
or XP. If you are not sure, contact your PC’s manufacturer.
2. Windows can’t locate the Adapter’s driver.
• You may have inserted the wrong CD into your PC’s CD-ROM drive.
• The CD may be defective or files may be missing. Make sure the CD has
a few files starting with lne100 in a folder called Win98 for Windows 98,
Win2000 for Windows 2000, or WinXP for Windows XP.
3. The Windows Logon screen doesn’t appear after you restart your computer.
• Click the Start button, select Shut Down, and choose Close All
Programs and Logon as a Different User. (In Windows 98 or Me, select
Log Off.) If this doesn’t solve the problem, your PC may have “Microsoft
Family Logon” installed. Remove this to enable network logon.
63
64
Instant EtherFast ® Series
4. After entering a username and password, a window appears that reads, “No
Domain Server could be found to validate your Username and Password.”
• Click the Start button, select Settings, and open the Control Panel.
Double-click on the Network icon and select the Configuration tab.
Under “The Following Network Components are Installed” box, highlight
Client for Microsoft Networks and click on the Properties button.
Once you are in the Client For Microsoft Networks Properties window,
make sure that Log on to Windows NT Domain is unchecked. Once you
have made sure that it is unchecked, click on the OK button and restart
your computer.
5. On the Access Control Tab, User Level Access is selected, but Shared Level
Access is grayed out and not accessible.
• You previously had your primary network logon set to Client for NetWare
Networks. On the Configuration tab of the Network Properties window,
verify that your primary network logon is set to Client for Microsoft
Networks.
• Your personal web server PC or Microsoft Front Page may require you to
choose a user level for security reasons.
6. In Network Neighborhood, you can only see yourself and no other computers
on the network.
• Make sure that the cables are connected correctly. Make sure you are getting Link or Activity lights on both the Adapter and the network device to
which it is connected. Try using a new cable that you know is working.
• Your workgroup name may be different from other computers on your
network. Make sure each PC on the network is using the same workgroup
name and protocol.
• Try using the Find Computer function.
7. In Network Neighborhood, you can see all other computers on the network but
not yourself, and all other computers can see each other and not your computer.
• You may not have enabled File and Printer Sharing. To do so, go to the
Network Component Configuration sections in Chapter 5: Manual
Installation and Setup for Windows 98SE.
• The Adapter might not be set up properly. Try reinstalling the Adapter’s
drivers. To clean your system of the old installation, go to the Appendix
E: Starting Over in Windows 98, Me, 200 or XP and then re-install.
65
EtherFast ® 10/100 Managed Network Adapter
8. “Network Neighborhood” or “Entire Network” is Empty.
• For “Network Neighborhood”, verify that your Microsoft Client is
installed. Refer to Chapter 5: Manual Installation and Setup for Windows
98SE for directions. Verify that you have logged in correctly. Refresh the
screen by pressing F5 several times.
• For “Entire Network”, verify that your Microsoft Client is installed. Refer
to Chapter 6: Manual Installation and Setup for Windows Me for directions. Verify that you have logged in correctly. Refresh the screen by
pressing F5 several times.
9. You receive DHCP Errors in Windows.
• If you are connecting to a DHCP server, check your cabling and connection. If you require TCP/IP to be configured, check with your network
administrator or your Windows documentation for proper settings.
• If you don’t have a DHCP server on your network and your network setup
doesn’t require TCP/IP, you may remove the TCP/IP component from
Windows’ networking. To do this, click on the Start button, select
Settings, open the Control Panel, and double-click on the Network icon.
Click once on the component entry with the words TCP/IP and Linksys
or TCP/IP on its own, then click on the Remove button. Click OK when
finished and restart your PC. If the problem persists, try running the diagnostics.
10. In Network Neighborhood you can only see computers running the same operating system as your computer (i.e., your PC is running Windows Me and it can
only see other Windows Me computers and not any computer running Windows
98).
• Click the Start button, select Find, choose Computer and type the name
of the computer in the window that appears. Then, click the Find Now
button.
• Now make sure that you are using the same protocol(s) and workgroup
name on Windows 98 computers. To do this, click the Start button, select
Settings, and open the Control Panel on two computers running different Windows operating systems. Click on the Network icon, choose the
Configuration tab, and click on the Identification tab for Workgroup
name. Compare the protocols on both computers and make sure that they
are the same. If any protocols are missing, refer to the Appendix F:
Manually Installing Network Components in Windows 98 and Me to
install any needed protocol(s).
66
Instant EtherFast ® Series
• If all computers are using the same protocol(s) and Workgroup name, and
Windows Me computers still can't see Windows 98 computers, enable
NetBIOS on all the computers using Windows Me and 98 as follows:
The IPX/SPX-compatible protocol should be installed on all Windows
computers (see Appendix F: Manually Installing Network
Components in Windows 98 and Me if you need to add this protocol).
Bring up the properties of the IPX/SPX-compatible protocol by clicking
the Start button, selecting Settings, opening the Control Panel, then
double-clicking the Network icon. Choose the Configuration tab and
highlight IPX/SPX-compatible Protocol. Click on the Properties button. To install NetBIOS, click on the NetBIOS tab. Put a check next to
I want to enable NetBIOS over IPX/SPX. Click the OK button, and
then click the OK button again. Windows will copy the appropriate files
to your computer. When asked to restart your PC, remove any disks and
click the OK button. Be sure to do this on all of your computers that are
having trouble seeing your entire network.
11. The workgroup, protocols, cabling and driver are all working properly, but the
PC uses an AMD processor and it can only see itself in Network Neighborhood.
• In some instances with PCs using AMD processors, the IRQ assigned to
the Adapter by the BIOS (as it gets listed on the boot up screens of most
PCs) doesn't correspond to the IRQ assigned by Windows. This can be
fixed by disabling the IRQ holder for PCI Steering in the Windows
Device Manager. Refer to your PC's documentation for instructions or
you can follow the suggested instructions below. Keep in mind that this
procedure could vary depending on your computer’s configuration.
• Click on the Start button, select Settings, open the Control Panel, and
double-click the System icon. Click on the Device Manager tab. Open
System Devices, then open PCI Bus.
• Click on the IRQ Steering tab. Remove the check from Use IRQ Holder
and click the OK button. Windows will ask you to restart the PC (if it
doesn’t ask you, then reboot the PC manually).
• After the computer boots up, Windows will try to re-detect the PCI
Steering. Continue rebooting the PC until Windows stops detecting new
hardware and settings for PCI Steering. This normally takes a total of four
reboots.
EtherFast ® 10/100 Managed Network Adapter
Running the Adapter’s Diagnostics
If you suspect that there may be a problem with the Adapter, or if you need to
identify the Adapter’s MAC address, you can use the DIAG diagnostic program
on the Setup Utility CD.
To run the program, start up your computer in DOS. The program only works
in standard “real DOS mode” DOS – it will not work in a Windows DOS window. To get into “real DOS mode” in Windows 98, start your computer (No
Starting Windows... message will appear). Immediately and rapidly press the
F8 key until you get the Microsoft Window Startup Menu.
1. Choose the Safe mode command prompt only option. Press Enter on the
keyboard.
2. Insert the Setup Utility CD into your CD-ROM drive. Enter the appropriate commands after the following prompts:
• When “C:\>” appears, type d: then press Enter.
• When “D:\>” appears, type cd diag then press Enter.
• When “D:\diag>” appears, type diag then press Enter.
You can also copy the software to your local (c:\) drive and run DIAG from
your hard disk.
3. The Fast Ethernet Diagnostics Program will appear, providing a display of
the Adapter’s basic information (Ethernet Address, IRQ, I/O Port and
Media Type). Press Enter to begin the testing cycle. If the Adapter isn’t
found, power off the PC and verify that the Adapter is properly seated in the
PCI slot.
4. The word “passed” will appear next to each successful test. If the Adapter
fails the Peer-to-Peer, Ping, or Bandwidth tests, any network problems that
you are experiencing are external to the Adapter. Check your cabling and
network device connections. If the Adapter fails the Loopback or Register
tests, check your computer’s settings, then contact Linksys Customer
Support for help.
12. While installing the Driver, an error message states that Setup cannot find
OEMSETUP.INF or OEMSETNT.INF.
• Make sure that the Setup Utility CD is in your computer’s CD-ROM
drive, and click the OK button.
• Enter the correct path name as shown in the section of this user guide,
detailing installation for the operating system you are using.
67
68
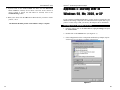
Instant EtherFast ® Series
Appendix B: Managing the Adapter
through SNMP and the RMON Agent
EtherFast ® 10/100 Managed Network Adapter
2. From the screen shown in Figure B-2, select Service and click the Add…
button to install the
network
component.
Overview
SNMP (Simple Network Management Protocol) is the protocol governing network management and the monitoring of network devices and their functions.
RMON (Remote Network Monitoring) provides standard information that a
network administrator can utilize to monitor, check and troubleshoot an array
of local area networks (LANs). This appendix describes how to install and utilize these programs.
To utilize RMON, SNMP must already be installed on your system. Follow the
instructions below to install SNMP for your operating system.
Installing SNMP for Windows 98SE and Me
Figure B-2
3. In the next window
that appears, shown
in Figure B-3, click
the Have Disk…
button.
1. Click the Start button, select Settings, and open the Control Panel.
Double-click on the Network icon. From the Configuration tab, click the
Add... button to install
network components.
(See Figure B-1.)
Figure B-3
4. When the next
screen
appears,
shown in Figure B4,
insert
your
Windows CD into
your
CD-ROM
drive and click the
Browse… button.
Figure B-4
Figure B-1
69
70
Instant EtherFast ® Series
5. Browse to your CD-ROM drive (shown as “d:\” in Figure B-5). Open the
Resource Kit folder. Open the netadmin folder. Open
the SNMP folder.
Within this folder,
select the file
named snmp.inf
and click the OK
button.
EtherFast ® 10/100 Managed Network Adapter
8. Having returned to
the Configuration
tab of the Network
screen (shown in
Figure B-8), verify
that
Microsoft
SNMP agent is listed and click the OK
button.
Figure B-5
6. The next screen,
shown in Figure B6, will show the
path you have chosen to select the
snmp.inf file. Click
the OK button.
Figure B-6
Figure B-8
7. From the Select
Network Service
screen, shown in
Figure B-7, select
Microsoft SNMP
agent and click the
OK button.
9. Windows will now ask you to restart your computer. Click Yes to restart
now.
SNMP has now been added for Windows 98SE and Me. Now, proceed to
Adding the Adapter’s SNMP Agent in this appendix.
Installing SNMP for Windows NT
These installation instructions are for PCs running Windows NT, service pack
6, only. Screens will appear different and the installation may not work if performed under a different version of Windows NT.
Figure B-7
71
72
Instant EtherFast ® Series
1. Click the Start button, select Settings,
and
open
the
Control
Panel.
Double-click the
Network icon and
select the Services
tab (shown in
Figure B-9). Then,
click the Add... button.
EtherFast ® 10/100 Managed Network Adapter
3. Insert your Windows NT CD into your CD-ROM and type the correct location of the snmp file
into the field on the
Windows NT Setup
screen (as shown in
Figure B-11). Then,
click the Continue
button.
Figure B-11
4. Click the OK button on the SNMP Services screen and the Close button on
the Network screen. When asked to restart your computer, click the Yes button.
SNMP has now been added for Windows NT. Now, proceed to Adding the
Adapter’s SNMP Agent in this appendix.
Installing SNMP for Windows 2000 and XP
Figure B-9
2. Select SNMP Service and click the OK button. (See Figure B-10.)
Figure B-10
73
These installation instructions are for PCs running Windows 2000 or Windows
XP in Classic Mode only. If you are not running Windows XP in Classic mode,
change it to Classic mode while installing SNMP. Otherwise, screens will
appear different and the installation may not work as described.
1. Click the Start button, select Settings,
and
open
the
Control
Panel.
Then, double-click
the Add/Remove
Programs icon, as
shown in Figure B12.
Figure B-12
74
Instant EtherFast ® Series
2. Click the Add/Remove Windows Components button. (See Figure B-13.)
EtherFast ® 10/100 Managed Network Adapter
4. When the Insert Disk screen appears, as shown in Figure B-15, insert your
Windows CD into
your CD-ROM and
click the OK button.
Figure B-15
5. When the installation is completed, click the Finish button.
SNMP has now been added for Windows 2000 and XP. Now, proceed to
Adding the Adapter’s SNMP Agent in this appendix.
Adding the Adapter’s SNMP Agent
Figure B-13
3. Click the box beside Management and Monitoring Tools to select that
component (as shown in Figure B-14) and click the Next button to continue.
Once SNMP has been added for Windows in the instructions above, and you
have rebooted your computer, you will need to add the Adapter’s SNMP Agent.
The Adapter’s SNMP agent is located on the Setup Utility CD by opening the
Autorun folder and opening the Utility folder within. Double-click the
NicSNMP icon.
The Adapter’s SNMP agent will install and you will be asked to restart your
computer. Reboot at this time.
Now, proceed to Utilizing the Adapter’s SNMP Agent in this appendix.
Utilizing the Adapter’s SNMP Agent
In order to utilize SNMP functions, you much use a third-party SNMP application that includes a MIB browser, such as HP-Openview or SNMPC.
You may see the screens shown in Figures B-16 and B-17, indicating the current statistics and information of RMON counter, depending upon the MIB
browser you use.
Figure B-14
75
76
Instant EtherFast ® Series
EtherFast ® 10/100 Managed Network Adapter
Appendix C: Sharing Your Files and
Printers
Overview
By sharing your files and printers, other PCs on your network will be able to
access the resources on your PC.
Before sharing your files and printers, you should prepare your computer to be
used with any file servers that may be on the network. If you are not using
Windows 98 or Me with an NT, 2000 or XP file server, or if you are not sure if
you have a file server, continue below.
If you are using an NT or 200 domain server, refer to Appendix D: Windows
98 and Me Client for Windows Domain Server for client setup.
Enabling File Sharing
Figure B-16
1. Double-click the My Computer icon. A window of available disk drives
will appear.
Note: If you are only using your PC to access
the Internet, it is highly recommended that you
create passwords for your shares.
2. Right-click once
on the drive or
folder that you want to make available to other users.
3. Click on Sharing, select the Sharing tab. Click on Share As.
4. In the Share Name box, enter a name for the drive or folder you are sharing. This can be any drive on your PC—floppy drive, hard drive, CD drive,
zip drive, etc.
5. Decide on the type of access that you want to give other users.
• Read-Only access allows other users to view the files on the selected
drive.
• Full access allows other users to create, change, or delete files on the
selected drive.
• Depends on Password allows other users to have Read-Only and/or Full
access to the selected drive, depending on the password that you decide to
give them.
Figure B-17
77
78
Instant EtherFast ® Series
6. If you want to assign access passwords, type the passwords into the
Password boxes.
7. When you're done, click on the Apply button. Then, click the OK button.
Repeat steps 1-7 for any drive or folder you desire to share on the network.
You have successfully enabled File Sharing on your PC. Your selected
drives or folders can now be accessed by other network users. If a user tries
to access one of your password-protected drives or folders, he or she will
be asked for the appropriate Read-Only or Full-Access password.
Continue on if you wish to share your PC’s printer over the network.
Enabling Printer Sharing
Note: Not all printers may be shared on the network. Others may require
special instructions. Refer to your printers user guide or contact your printers manufacturer if you think this may be the case with your printer.
1. Double-click on
Computer icon.
the
My
Important: Any printer you wish
to share from your PC must be
physically connected to your PC.
EtherFast ® 10/100 Managed Network Adapter
Appendix D: Windows 98 and Me
Client for Windows Domain Server
If you are installing the Adapter in a Windows 98 or Me PC that you plan on logging in to a Windows NT or 2000 domain server, follow the directions below.
1. Start up Windows. Click on the Start button, select Settings, and open the
Control Panel. Double-click on the Network icon. The Network window
appears with several tabs. Among these are tabs labeled Configuration and
Access Control.
2. Click on the Configuration tab. Select Client for Microsoft Networks in
the Installed Components box and click the Properties button. Verify that
Log on to Windows NT domain is selected in the Logon validation box.
For the Windows NT domain, enter the proper domain name (in the example below, DOMAIN is entered). Under Network logon options, select
Logon and restore network connections. Click the OK button.
2. Double-click the Printers folder. A window of available printers will
appear.
3. Right click on the printer that you want to share with other users. Click on
Sharing, and select the Sharing tab.
4. Click on Share As. In the Share Name box, give a name to the printer you
want to share. If you want to assign a password to the printer so that only
certain users can access it, type a password in the Password box.
5. Click on the Apply button. Then, click the OK button. Your printer(s) are
now shared.
The Printer Sharing setup and installation is complete. Your printer can
now be accessed by other network users. The printer’s driver may have to
be installed on other PCs. Consult your printer’s documentation.
Figure D-1
79
80
Instant EtherFast® Series
3. Optional: Click on the Access Control tab. Make sure that Share-level
access control is selected; do not choose User-level access control. If
Access Control is grayed out and cannot be selected, refer to the
Troubleshooting section.
4. When you’re done, click the OK button. When asked if you want to restart
your PC, do so.
The Windows Domain portion of the Windows setup is complete.
EtherFast ® 10/100 Managed Network Adapter
Appendix E: Starting Over in
Windows 98, Me, 2000, or XP
If you experience installation difficulties, you may need to re-install all of the
Windows networking components. The instructions below explain how to give
your PC a clean sweep so that you can retry the Adapter’s driver installation.
Starting Over in Windows 98 or Me
1. From the desktop click on the Start Button, highlight Settings, and open
the Control Panel.
2. Double-click on the Network Icon. (See Figure E-1.)
3. If the Configuration box has a component called Dial-Up Adapter, skip forward to step five. If it doesn’t, continue with step four.
Figure E-1
81
82
Instant EtherFast® Series
4. Remove any instance of the name Linksys in the box. This includes
IPX/SPX…Linksys, NetBEUI…Linksys, and TCP/IP…Linksys. Also remove
Client for Microsoft Networks, Client for NetWare Networks, and File and
Printer Sharing for Microsoft Networks.
In some cases, removing one of these components may in turn automatically remove other components as well. If this happens, skip ahead to step six.
EtherFast ® 10/100 Managed Network Adapter
Starting Over in Windows 2000 or XP
1. Click the Start button, choose Settings, open the Control Panel, and double-click the System icon. The System Properties window will open.
2. Choose the Hardware tab, as shown in Figure E-2
.
5. For PCs with Dial-Up Networking and/or an AOL adapter, remove any
instance of the name Linksys, all IPX/SPX protocols, all NetBEUI, all
Clients, and File and Printer Sharing for Microsoft Networks. Do not
remove Dial-Up Adapter, AOL Adapter, TCP/IP-Compatible Protocol-AOL
Adapter or TCP/IP-Compatible Protocol-Dial-Up Adapter.
6. When you have completed the removal of all unnecessary components,
click the OK button. When asked to restart, click the No button.
7. Return to the Windows Control Panel. Double-click on the System Icon.
The System Properties window will appear. Click on the Device Manager
tab.
8. Scroll down to the Network Adapters listing and expand it by clicking on
the plus sign.
9. Remove all devices with the name Linksys in its description. (If at any point
you are asked to restart the computer, Click the No button.)
10. Scroll down to the Other Devices listing. Click the plus sign. Remove PCI
Ethernet Controller, PCI Ethernet Adapter or Managed Network Adapter.
(If Other Devices is not listed, proceed to the next step.)
Figure E-2
3. Click the Device Manager button. The Device Manager window will open.
11. Click the Close button and restart your computer.
12. After your computer has restarted, refer to the chapters for Windows 98 or
Windows Me for setup instructions.
83
4. Click the plus sign beside Network Adapters. The Managed Network
Adapter listing should appear.
84
Instant EtherFast ® Series
5. Right-click on EtherFast 10/100 Managed Network Adapter and select
Uninstall...., as shown in Figure E-3.
EtherFast ® 10/100 Managed Network Adapter
Appendix F: Manually Installing the
Network Components in Windows
98 and Me
There may be times when you will need to manually install missing Windows
networking components.
1. Click on the Start button, select Settings, and open the Control Panel.
2. Double-click the Network icon.
3. Click the Configuration tab. Make sure that the following network components are installed.
•
•
•
•
•
Figure E-3
6. The
Confirm
Device Removal
screen, shown in
Figure E-4, will ask
if you want to
remove the Adapter.
Click the OK button.
Client for Microsoft Networks
EtherFast® 10/100 Managed Network Adapter
IPX/SPX-compatible Protocol
NetBEUI
TCP/IP
There may be other components listed in addition to the ones shown above. If
any of the above components are missing, add them as follows.
Note: You will likely need your Windows CD-ROM to install network components. If your CD-ROM isnt available, try directing
Windows to c:\windows\options\cabs when asked for a file location, providing you have Windows files loaded to this location.
Figure E-4
Client for Microsoft Networks
If you plan on connecting to an NT, 2000 or XP file server or peer-to-peer network, click the Add button. Highlight Client and click Add. Choose Microsoft
as the manufacturer in the Network Client box. Highlight Client for Microsoft
Networks and click OK. The computer will begin copying files to your system.
When the installation is complete, you will be asked if you want to reboot.
Click OK.
7. Once the Adapter is removed, restart your computer.
85
86
Instant EtherFast ® Series
IPX/SPX-compatible Protocol
Click the Add button. Choose Protocol and click the Add button. Select
Manufacturer and choose Microsoft. Under the Network Protocol box, highlight IPX/SPX-compatible protocol. Click OK. The computer will begin copying files to your system. When the installation is complete, you will be asked
if you want to reboot. Click OK.
NetBEUI
Click the Add button. Select Protocol, then click Add. Under Manufacturer,
highlight Microsoft. Under Network Protocol, highlight NetBEUI. Click OK.
The computer will begin copying files to your system. When the installation is
complete, you will be asked if you want to reboot. Click OK.
EtherFast ® 10/100 Managed Network Adapter
Appendix G: Installing the Network
Protocols for Windows 98 and Me
1. From the Start Menu, select
Settings and open the
Control Panel. From the
Control Panel, shown in
Figure G-1, double-click on
the Network icon.
TCP/IP
Click the Add button. Select Protocol, then click Add. Under Manufacturer,
highlight Microsoft. Under Network Protocol, highlight TCP/IP. Click OK.
The computer will begin copying files to your system. When the installation is
complete, you will be asked if you want to reboot. Click OK.
Figure G-1
2. Select EtherFast 10/100 Managed Network Adapter from the list, as shown
in Figure G-2, and click the
Add button.
From this screen, you can also
press the Properties button.
You can then verify that the
drivers are working under
Enhanced Mode on the Driver
Type tab, or reconfigure the
Adapter on the Advanced tab.
Important: Before adding any
network protocols, verify that the
protocol is not already installed.
Never install duplicate protocols.
87
Figure G-2
88
Instant EtherFast ® Series
EtherFast ® 10/100 Managed Network Adapter
Appendix H: About Plug-and-Play
Technology
3. Highlight Protocol, as
shown in Figure G-3, and
click the Add button.
The Adapter is designed to run in a 32-bit desktop computer equipped with PCI
expansion slots. The Adapter is built to the PCI 2.2 standard.
Figure G-3
4. Select Microsoft from the list of “Manufacturers” and TCP/IP from the list
of “Network Protocols”, as shown in Figure G-4, and click the OK button.
Short for Peripheral Components Interconnect, PCI is a technology that
allows special Plug-and-Play expansion cards to be automatically configured
by a computer’s BIOS (Basic Input/Output System) once they have been
installed. (Refer to your computer’s user guide for more information about its
BIOS.)
When a PCI card is used in a computer that supports Plug-and-Play, the
Adapter is automatically configured each time the computer is booted. The
card's IRQ, I/O address, and other operating parameters are automatically
assigned.
Figure G-4
5. Repeat steps two through four to install other protocols such as NetBEUI or
IPX/SPX.
There is no easy way to change a Plug-and-Play card's IRQ and other settings
outside of the BIOS menu(s) that your computer provides. If the resources that
are assigned to the Adapter seem to conflict with other devices in your computer, you will need to use your system's BIOS to resolve the conflicts. If you
have problems configuring your BIOS or resolving IRQ or other hardware conflicts, consult your computer’s manual or contact your PC's manufacturer for
BIOS setup and configuration directions. Here are some general guidelines to
follow when installing a PCI card (such as the Adapter) into your computer:
1. The Adapter should be used in a 32-bit PCI slot that supports PCI Bus
Mastering. It cannot be plugged into a PCI Bus Slave slot. Consult your
motherboard's documentation for more information on master and slave
slots.
At this point, you must restart your computer. Installation is complete.
2. When using NT, set your system’s PnP OS option in the BIOS settings to
MANUAL or DISABLE. NT is not a Plug-and-Play OS, and will not usually recognize LAN cards if they are set to be automatically detected and
configured.
89
90
Instant EtherFast ® Series
If you need to configure your PC's BIOS in order to resolve an IRQ or other
conflict with the Adapter, there are a few possibilities:
No Changes Allowed: Your PC may not allow you to change the IRQ value(s)
of the PCI slot(s). In this case, you will ONLY be able to use the IRQ and I/O
values that have been pre-assigned to each slot. The popular BIOS from
Phoenix, for example, does not generally allow you to modify BIOS-assigned
IRQ settings.
Jumper Changes: You may be able to change the IRQ & I/O values for a given
PCI slot by setting jumpers on your PC motherboard. Please refer to your PC's
motherboard user guide for specific instructions.
Menu Changes: Your PC may allow you to change the IRQ & I/O values for a
given PCI slot by accessing the PC's BIOS setup menu. Please refer to your
PC's user guide for specific details. AMI’s BIOS and Award’s BIOS are fully
customizable from their BIOS menus, for example.
EtherFast ® 10/100 Managed Network Adapter
Appendix I: Uninstalling the Drivers
with the Install Wizard
1. Insert the Setup Utility CD into your CD-ROM drive. The Install Wizard’s
Welcome screen will come up automatically and identify the version of
Windows you are using.
2. Move your cursor over the
Uninstall tab and the
Uninstall screen will appear,
as shown in Figure I-1. Click
the Uninstall button.
Figure I-1
3. The
Confirm
File
Deletion screen (Figure
I-2) will ask if you want
to uninstall the drivers.
Click the Yes button.
4. The drivers will be uninstalled
automatically.
When this process is
complete, you will be
asked to restart your
computer, as shown in
Figure I-3. Click the Yes
button to restart.
Figure I-2
Figure I-3
Driver uninstall complete.
91
92
Instant EtherFast ® Series
Appendix J: The Setup Utility CD
EtherFast ® 10/100 Managed Network Adapter
Appendix K: Glossary
10BaseT - An Ethernet standard that uses twisted wire pairs.
The Setup Utility CD that
comes with the Adapter
contains all the tools you’ll
need to install and use the
Adapter. (See Figure J-1.)
100BaseTX - IEEE physical layer specification for 100 Mbps over two pairs of
Category 5 UTP or STP wire.
Architecture - The total design and implementation of the network. It includes
the network's topology, transmission technologies and communications protocols, management and security systems, and any other attributes that give a network a particular set of capabilities and functionalities.
Backbone - The part of a network that connects most of the systems and networks together and handles the most data.
Bandwidth - The transmission capacity of a given facility, in terms of how
much data the facility can transmit in a fixed amount of time; expressed in bits
per second (bps).
Figure J-1
INSTALL
93
The install utility is covered in detail in Chapter 4:
Installing the Adapter’s Drivers with the Setup Utility CD.
This Utility will install the drivers under Windows 98, Me,
2000, and XP. To manually install and setup the Adapter on
a Windows NT PC, refer to Chapter 7: Manual Installation
and Setup for Windows NT.
Bit - A binary digit. The value - 0 or 1-used in the binary numbering system.
Also, the smallest form of data.
Boot - To cause the computer to start executing instructions. Personal computers contain built-in instructions in a ROM chip that are automatically executed
on startup. These instructions search for the operating system, load it and pass
control to it.
Browser - A browser is an application program that provides a way to look at
and interact with all the information on the World Wide Web or PC. The word
"browser" seems to have originated prior to the Web as a generic term for user
interfaces that let you browse text files online.
UNINSTALL
To uninstall the drivers under Windows 98, Me, 2000, and
XP, refer to Appendix I: Uninstalling the Drivers with the
Install Wizard.
DIAGNOSTIC
Select this tab to run the diagnostic tools described in
Chapter 11: Using the Adapter’s NIC Control Set and
Diagnostic Tools.
Bus Mastering - A bus design that allows the peripheral controllers (plug-in
boards) to access the computer's memory independently of the CPU. It allows
data transfers to take place between the peripheral device and memory while
the CPU is performing other tasks.
USER’S GUIDE Selecting this tab brings up a PDF version of this user
guide.
Cable Modem - A device that connects a computer to the cable television network, which in turn connects to the Internet. Once connected, cable modem
users have a continuous connection to the Internet. Cable modems feature
asymmetric transfer rates: around 36 Mbps downstream (from the Internet to
the computer), and from 200 Kbps to 2 Mbps upstream (from the computer to
the Internet).
CONTACT US
Linksys contact information for sales and technical support
is available by selecting this tab.
EXIT
To close the Setup Utility, click this tab.
94
Instant EtherFast® Series
CPU (Central Processing Unit) - The computing part of the computer. Also
called the "processor," it is made up of the control unit and ALU.
CSMA/CD (Carrier Sense Multiple Access/Collision Detection) - The LAN
access method used in Ethernet. When a device wants to gain access to the network, it checks to see if the network is quiet (senses the carrier). If it is not, it
waits a random amount of time before retrying. If the network is quiet and two
devices access the line at exactly the same time, their signals collide. When the
collision is detected, they both back off and each wait a random amount of time
before retrying.
Database - A database is a collection of data that is organized so that its contents can easily be accessed, managed, and updated.
DHCP (Dynamic Host Configuration Protocol) - A protocol that lets network
administrators manage centrally and automate the assignment of Internet
Protocol (IP) addresses in an organization's network. Using the Internet's set of
protocol (TCP/IP), each machine that can connect to the Internet needs a
unique IP address. When an organization sets up its computer users with a connection to the Internet, an IP address must be assigned to each machine.
Without DHCP, the IP address must be entered manually at each computer and,
if computers move to another location in another part of the network, a new IP
address must be entered. DHCP lets a network administrator supervise and distribute IP addresses from a central point and automatically sends a new IP
address when a computer is plugged into a different place in the network.
DHCP uses the concept of a "lease" or amount of time that a given IP address
will be valid for a computer. The lease time can vary depending on how long a
user is likely to require the Internet connection at a particular location. It's especially useful in education and other environments where users change frequently. Using very short leases, DHCP can dynamically reconfigure networks
in which there are more computers than there are available IP addresses.
DHCP supports static addresses for computers containing Web servers that
need a permanent IP address.
Domain - A subnetwork comprised of a group of clients and servers under the
control of one security database. Dividing LANs into domains improves performance and security.
Download - To receive a file transmitted over a network. In a communications
session, download means receive, upload means transmit.
95
EtherFast ® 10/100 Managed Network Adapter
Driver - A workstation or server software module that provides an interface
between a network interface card and the upper-layer protocol software running
in the computer; it is designed for a specific NIC, and is installed during the
initial installation of a network-compatible client or server operating system.
DSL (Digital Subscriber Line) - A technology that dramatically increases the
digital capacity of ordinary telephone lines into the home or office and, by
employing unused bandwidth, still allows for normal phone usage. DSL provides "always-on" operation, eliminating the need to dial in to the service.
Ethernet - IEEE standard network protocol that specifies how data is placed
on and retrieved from a common transmission medium. Has a transfer rate of
10 Mbps. Forms the underlying transport vehicle used by several upper-level
protocols, including TCP/IP and XNS.
Fast Ethernet - A 100 Mbps technology based on the 10Base-T Ethernet
CSMA/CD network access method.
Firmware - Programming that is inserted into programmable read-only memory (programmable read-only memory), thus becoming a permanent part of a
computing device.
FTP (File Transfer Protocol) - A protocol used to transfer files over a TCP/IP
network (Internet, UNIX, etc.). For example, after developing the HTML pages
for a Web site on a local machine, they are typically uploaded to the Web server using FTP.
FTP includes functions to log onto the network, list directories and copy files.
It can also convert between the ASCII and EBCDIC character codes. FTP operations can be performed by typing commands at a command prompt or via an
FTP utility running under a graphical interface such as Windows. FTP transfers
can also be initiated from within a Web browser by entering the URL preceded
with ftp://.
Unlike e-mail programs in which graphics and program files have to be
"attached," FTP is designed to handle binary files directly and does not add the
overhead of encoding and decoding the data.
Full Duplex - The ability of a device or line to transmit data simultaneously in
both directions.
Half Duplex - Data transmission that can occur in two directions over a single
line, but only one direction at a time.
96
Instant EtherFast® Series
Hardware - Hardware is the physical aspect of computers, telecommunications, and other information technology devices. The term arose as a way to distinguish the "box" and the electronic circuitry and components of a computer
from the program you put in it to make it do things. The program came to be
known as the software.
HTTP (HyperText Transport Protocol) - The communications protocol used
to connect to servers on the World Wide Web. Its primary function is to establish a connection with a Web server and transmit HTML pages to the client
browser.
Hub - The device that serves as the central location for attaching wires from
workstations. Can be passive, where there is no amplification of the signals; or
active, where the hubs are used like repeaters to provide an extension of the
cable that connects to a workstation.
IEEE - The Institute of Electrical and Electronics Engineers. The IEEE
describes itself as "the world's largest technical professional society -- promoting the development and application of electrotechnology and allied sciences
for the benefit of humanity, the advancement of the profession, and the wellbeing of our members."
The IEEE fosters the development of standards that often become national and
international standards. The organization publishes a number of journals, has
many local chapters, and several large societies in special areas, such as the
IEEE Computer Society.
IP Address - In the most widely installed level of the Internet Protocol
(Internet Protocol) today, an IP address is a 32-binary digit number that identifies each sender or receiver of information that is sent in packet across the
Internet. When you request an HTML page or send e-mail, the Internet
Protocol part of TCP/IP includes your IP address in the message (actually, in
each of the packets if more than one is required) and sends it to the IP address
that is obtained by looking up the domain name in the Uniform Resource
Locator you requested or in the e-mail address you're sending a note to. At the
other end, the recipient can see the IP address of the Web page requestor or the
e-mail sender and can respond by sending another message using the IP address
it received.
IPX (Internetwork Packet EXchange) - A NetWare communications protocol
used to route messages from one node to another. IPX packets include network
addresses and can be routed from one network to another.
97
EtherFast ® 10/100 Managed Network Adapter
IRQ (Interrupt ReQuest) - A hardware interrupt on a PC. There are 16 IRQ
lines used to signal the CPU that a peripheral event has started or terminated.
Except for PCI devices, two devices cannot use the same line.
ISP - An ISP (Internet Service Provider) is a company that provides individuals and companies access to the Internet and other related services such as Web
site building and virtual hosting.
LAN - A local area network (LAN) is a group of computers and associated
devices that share a common communications line and typically share the
resources of a single processor or server within a small geographic area (for
example, within an office building).
MAC (Media Access Control Address) - A unique number assigned by the
manufacturer to any Ethernet networking device, such as a network adapter,
that allows the network to identify it at the hardware level.
Mbps (MegaBits Per Second) - One million bits per second; unit of measurement for data transmission.
Motherboard - A motherboard is the physical arrangement in a computer that
contains the computer's basic circuitry and components.
NetBEUI (NetBIOS Extended User Interface) - The transport layer for
NetBIOS. NetBIOS and NetBEUI were originally part of a single protocol
suite that was later separated. NetBIOS sessions can be transported over
NetBEUI, TCP/IP and SPX/IPX protocols.
NetBIOS - The native networking protocol in DOS and Windows networks.
Although originally combined with its transport layer protocol (NetBEUI),
NetBIOS today provides a programming interface for applications at the session layer (layer 5). NetBIOS can ride over NetBEUI, its native transport,
which is not routable, or over TCP/IP and IPX/SPX, which are routable protocols.
NetBIOS computers are identified by a unique 15-character name, and
Windows machines (NetBIOS machines) periodically broadcast their names
over the network so that Network Neighborhood can catalog them. For TCP/IP
networks, NetBIOS names are turned into IP addresses via manual configuration in an LMHOSTS file or a WINS server.
98
Instant EtherFast® Series
There are two NetBIOS modes. The Datagram mode is the fastest mode, but
does not guarantee delivery. It uses a self-contained packet with send and
receive name, usually limited to 512 bytes. If the recipient device is not listening for messages, the datagram is lost. The Session mode establishes a connection until broken. It guarantees delivery of messages up to 64KB long.
Network - A system that transmits any combination of voice, video and/or data
between users.
EtherFast ® 10/100 Managed Network Adapter
Ping - (Packet INternet Groper) An Internet utility used to determine whether
a particular IP address is online. It is used to test and debug a network by sending out a packet and waiting for a response.
Plug-and-Play - The ability of a computer system to configure expansion
boards and other devices automatically without requiring the user to turn off
the system during installation.
NIC (Network Interface Card) - A board installed in a computer system, usually a PC, to provide network communication capabilities to and from that computer system. Also called an adapter.
Port - A pathway into and out of the computer or a network device such as a
switch or router. For example, the serial and parallel ports on a personal computer are external sockets for plugging in communications lines, modems and
printers.
Node - A network junction or connection point, typically a computer or work
station.
Print Server - A hardware device that enables a printer to be located anywhere
in the network.
Notebook (PC) - A notebook computer is a battery-powered personal computer generally smaller than a briefcase that can easily be transported and conveniently used in temporary spaces such as on airplanes, in libraries, temporary
offices, and at meetings. A notebook computer, sometimes called a laptop computer, typically weighs less than five pounds and is three inches or less in thickness.
RJ-11 (Registered Jack-11) - A telephone connector that holds up to six wires.
The RJ-11 is the common connector used to plug a telephone into a wall.
Packet - A unit of data routed between an origin and a destination in a network.
PCI (Peripheral Component Interconnect) - A peripheral bus commonly used
in PCs, Macintoshes and workstations. It was designed primarily by Intel and
first appeared on PCs in late 1993. PCI provides a high-speed data path
between the CPU and peripheral devices (video, disk, network, etc.). There are
typically three or four PCI slots on the motherboard. In a Pentium PC, there is
generally a mix of PCI and ISA slots or PCI and EISA slots. Early on, the PCI
bus was known as a "local bus."
PCI provides "plug and play" capability, automatically configuring the PCI
cards at startup. When PCI is used with the ISA bus, the only thing that is generally required is to indicate in the CMOS memory which IRQs are already in
use by ISA cards. PCI takes care of the rest.
PCI allows IRQs to be shared, which helps to solve the problem of limited IRQs
available on a PC. For example, if there were only one IRQ left over after ISA
devices were given their required IRQs, all PCI devices could share it. In a PCIonly machine, there cannot be insufficient IRQs, as all can be shared.
RJ-45 (Registered Jack-45) - A connector similar to a telephone connector that
holds up to eight wires, used for connecting Ethernet devices.
RMON (Remote MONitoring) - RMON provides comprehensive network
monitoring capabilities. It eliminates the polling required in standard SNMP,
and can set alarms on a variety of traffic conditions, including specific error
types.
Router - Protocol-dependent device that connects subnetworks together.
Routers are useful in breaking down a very large network into smaller subnetworks; they introduce longer delays and typically have much lower throughput
rates than bridges.
Server - Any computer whose function in a network is to provide user access
to files, printing, communications, and other services.
SNMP (Simple Network Management Protocol) - A widely used network
monitoring and control protocol. Data is passed from SNMP agents, which are
hardware and/or software processes reporting activity in each network device
(hub, router, bridge, etc.) to the workstation console used to oversee the network. The agents return information contained in a MIB (Management
Information Base), which is a data structure that defines what is obtainable
from the device and what can be controlled (turned off, on, etc.).
Software - Instructions for the computer. A series of instructions that performs
a particular task is called a "program." The two major categories of software are
99
100
Instant EtherFast ® Series
"system software" and "application software." System software is made up of
control programs such as the operating system and database management system (DBMS). Application software is any program that processes data for the
user.
A common misconception is that software is data. It is not. Software tells the
hardware how to process the data.
Storage - The semi-permanent or permanent holding place for digital data.
STP (Shielded Twisted Pair) - Telephone wire that is wrapped in a metal
sheath to eliminate external interference.
Switch - 1. A data switch connects computing devices to host computers,
allowing a large number of devices to share a limited number of ports. 2. A
device for making, breaking, or changing the connections in an electrical circuit.
TCP (Transmission Control Protocol) - A method (protocol) used along with
the Internet Protocol (Internet Protocol) to send data in the form of message
units between computers over the Internet. While IP takes care of handling the
actual delivery of the data, TCP takes care of keeping track of the individual
units of data (called packet) that a message is divided into for efficient routing
through the Internet.
TCP/IP (Transmission Control Protocol/Internet Protocol) - is the basic communication language or protocol of the Internet. It can also be used as a communications protocol in a private network (either an intranet or an extranet).
When you are set up with direct access to the Internet, your computer is provided with a copy of the TCP/IP program just as every other computer that you
may send messages to or get information from also has a copy of TCP/IP.
Throughput - The amount of data moved successfully from one place to another in a given time period.
EtherFast ® 10/100 Managed Network Adapter
Upload - To transmit a file over a network. In a communications session,
upload means transmit, download means receive.
URL (Uniform Resource Locator) - The address that defines the route to a file
on the Web or any other Internet facility. URLs are typed into the browser to
access Web pages, and URLs are embedded within the pages themselves to provide the hypertext links to other pages.
USB (Universal Serial Bus) - A "plug and play" interface between a computer
and add-on devices (such as audio players, joysticks, keyboards, telephones,
scanners, and printers). With USB, a new device can be added to your computer without having to add an adapter card or even having to turn the computer
off.
USB supports a data speed of 12 megabit per second, accommodating a wide
range of devices.
Since October, 1996, the Windows operating systems have been equipped with
USB driver or special software designed to work with specific I/O device types.
USB is integrated into most Windows operating systems.
UTP - Unshielded twisted pair is the most common kind of copper telephone
wiring. Twisted pair is the ordinary copper wire that connects home and many
business computers to the telephone company. To reduce crosstalk or electromagnetic induction between pairs of wires, two insulated copper wires are
twisted around each other. Each signal on twisted pair requires both wires.
Since some telephone sets or desktop locations require multiple connections,
twisted pair is sometimes installed in two or more pairs, all within a single
cable.
Wake-on-LAN - Wake on LAN is a technology that allows a network professional to remotely power on a computer or to wake it up from sleep mode.
Workgroup - Two or more individuals that share files and databases.
Topology - A network's topology is a logical characterization of how the
devices on the network are connected and the distances between them. The
most common network devices include hubs, switches, routers, and gateways.
Most large networks contain several levels of interconnection, the most important of which include edge connections, backbone connections, and wide-area
connections.
Upgrade - To replace existing software or firmware with a newer version.
101
102
Instant EtherFast ® Series
Appendix L: Specifications
System:
PCI 2.2 compliant PC
Standards:
IEEE 802.3, IEEE 802.3u, PCI 2.2, ACPI
Protocol:
CSMA/CD
Ports:
One RJ-45
Speed:
Full Duplex
Half Duplex
20/200Mbps
10/100Mbps
Cabling:
Category 5 Ethernet Cable
Topology:
Star
LED Status Lights:
Link & Activity (Link/Act), 100Mbps (100),
Collision, FDX
EtherFast ® 10/100 Managed Network Adapter
Appendix M: Warranty Information
BE SURE TO HAVE YOUR PROOF OF PURCHASE AND A BARCODE
FROM THE PRODUCT'S PACKAGING ON HAND WHEN CALLING.
RETURN REQUESTS CANNOT BE PROCESSED WITHOUT PROOF OF
PURCHASE.
IN NO EVENT SHALL LINKSYS’S LIABILITY EXCEED THE PRICE
PAID FOR THE PRODUCT FROM DIRECT, INDIRECT, SPECIAL, INCIDENTAL, OR CONSEQUENTIAL DAMAGES RESULTING FROM THE
USE OF THE PRODUCT, ITS ACCOMPANYING SOFTWARE, OR ITS
DOCUMENTATION. LINKSYS DOES NOT OFFER REFUNDS FOR ANY
PRODUCT.
LINKSYS OFFERS CROSS SHIPMENTS, A FASTER PROCESS FOR PROCESSING AND RECEIVING YOUR REPLACEMENT. LINKSYS PAYS
FOR UPS GROUND ONLY. ALL CUSTOMERS LOCATED OUTSIDE OF
THE UNITED STATES OF AMERICA AND CANADA SHALL BE HELD
RESPONSIBLE FOR SHIPPING AND HANDLING CHARGES. PLEASE
CALL LINKSYS FOR MORE DETAILS.
Environmental
103
Dimensions:
7 .3” x 6” x 1.8” (186 mm x 154 mm x 48 mm)
Unit Weight:
2.4 oz. (.07 kg)
Power:
5W Maximum
Certifications:
FCC Class B, CE Class B, VCCI Class B
Operating Temperature:
0°C to 50°C (32°F to 122°F)
Storage Temperature:
-40°C to 70°C (-40°F to 158°F)
Operating Humidity:
20% to 95% Non-Condensing
Storage Humidity:
Customer Support
20% to 95% Non-Condensing
104
Instant EtherFast ® Series
Appendix N: Contact Information
For help with the installation or operation of this product, contact Linksys
Technical Support at one of the phone numbers or Internet addresses below.
Sales Information
Technical Support
RMA Issues
Fax
Email
Web
FTP Site
800-546-5797 (LINKSYS)
888-326-7114
949-261-1288
949-261-8868
[email protected]
http://www.linksys.com
ftp.linksys.com
Linksys does not provide technical support for Linux, BSD, or other freeware
and open source operating systems. Although many Linksys products have
been proven to perform well under Linux and other freeware operating systems,
technical support for setup and troubleshooting is not provided. For information on where to find device drivers and setup instructions for Linux and other
freeware operating systems, visit the support pages and FAQ files on the
Linksys website at www.linksys.com.
In addition, Linksys does not provide technical support for Beta operating systems.
h t t p : / / w w w. l i n k s y s . c o m
© Copyright 2002 Linksys, All Rights Reserved.
105