1
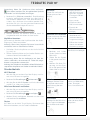
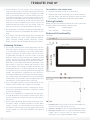
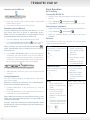
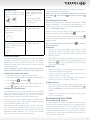
TERRATEC PAD 10" TERRATEC Pad 10" 10" Windows 8 Tablet mit Quadcore Prozessor Inhaltsangabe Sicherheitshinweise. . . . . . . . . . . . . . . . . . . . . . . . . . . . . S.01 Gehörschutz. . . . . . . . . . . . . . . . . . . . . . . . . . . . . . . . . . . S.02 Verpackungsinhalt. . . . . . . . . . . . . . . . . . . . . . . . . . . . . S.02 Eigenschaften und Funktionen. . . . . . . . . . . . . . . . . . . S.02 Hauptanschlüsse . . . . . . . . . . . . . . . . . . . . . . . . . . . . . . S.03 Standardbetrieb. . . . . . . . . . . . . . . . . . . . . . . . . . . . . . . S.04 Instandhaltung. . . . . . . . . . . . . . . . . . . . . . . . . . . . . . . . S.06 Technische Daten. . . . . . . . . . . . . . . . . . . . . . . . . . . . . . S.06 Sicherheitshinweise §§ Bitte setzen Sie das Gerät keinen schweren Belastungen aus und lassen Sie es nicht aus großen Höhen fallen. §§ Schützen Sie das Gerät vor extremer Hitze und Kälte sowie Staub oder Feuchtigkeit und setzen Sie es nicht dem direkten Sonnenlicht aus. §§ Vermeiden Sie es, das Gerät in der Nähe von starken Magnetfeldern zu benutzen. §§ Unterbrechen Sie nicht die Verbindung, wenn das Gerät formatiert wird oder Daten überträgt. Ansonsten können Dateien beschädigt oder Daten verloren gehen. §§ Bitte benutzen Sie das bereitgestellte Zubehör, um Dateien zu installieren und halten Sie sich hierbei an die Anweisungen des Herstellers. §§ Vor der Nutzung des Geräts oder der Installation von Programmen sollten Sie sich mit den Hinweisen auf der Unterseite des Geräts vertraut machen. §§ Es besteht Explosionsgefahr, wenn die Batterie nicht richtig ausgetauscht wird. Bitte ersetzen Sie die Batterie nur durch eine Gleiche oder ein Äquivalent. §§ Die Batterie sollte nicht extremer Hitze wie Feuer oder direktem Sonnenlicht ausgesetzt sein. §§ Bitte entsorgen Sie die Batterie verantwortungsvoll. §§ Wenn Sie die direkte Stromzufuhr unterbrechen, wird das Gerät weiter arbeiten, solange die Batterie genügend Ladung hat. §§ Das Netzteil ist ein CLASS II Gerät mit doppelter Isolierung. Es wird keine Fremderdung benötigt. Erklärung der Sicherheitssymbole: §§ Halten Sie das Gerät von Wasser und anderen Flüssigkeiten fern. Kommt das Gerät mit Flüssigkeit in Berührung, schalten Sie es sofort aus und reinigen Sie es. §§ Benutzen sie keine chemischen Reinigungssubstanzen, um das Gerät zu reinigen. Reinigen Sie es mit einem trockenen Tuch. §§ Halten Sie das Gerät von offenem Feuer fern. §§ Entsorgen Sie das Gerät nicht im Hausmüll sondern gemäß den Richtlinien der Entsorgung. §§ Nutzen Sie das Gerät nur in moderatem Klima. §§ Für Schaden oder Datenverlust, der durch Missbrauch, Umbau oder Batteriewechsel entstanden ist, zeichnen wir nicht verantwortlich. §§ Bitte versuchen Sie nicht, das Gerät auseinander zu nehmen, zu modifizieren oder reparieren. Dies setzt die Garantie außer Kraft. §§ Falls das Gerät für eine längere Zeit nicht genutzt wird, laden Sie bitte die Batterie mindestens 1 Mal pro Monat auf, um eine maximale Lebensdauer zu gewährleisten. §§ Laden Sie die Batterie, wenn: - die Anzeige eine leere Batterie anzeigt. - das Gerät nach dem Einschalten sofort wieder abschaltet. 1 - das Gerät nicht auf Knopfdruck reagiert, auch wenn die Batterie augenscheinlich voll ist. §§ Wenn das Warndreieck mit dem Blitz aufleuchtet, zeigt dies eine mögliche gefährliche Spannung in der Gerätabdeckung an, die stark genug sein könnte einen Stromschlag zu erzeugen. §§ Um die Gefahr eines Elektroschocks zu vermeiden, öffnen Sie nicht die Abdeckung des Geräts. Bitte überlassen Sie die Wartung geschultem Personal. §§ Das Warndreieck mit dem Ausrufezeichen weist Sie auf nötige Instandsetzung des Geräts hin. §§ Bitte sorgen Sie für eine korrekte Entsorgung des Produkts entsprechend der EU Richtlinien. Das Gerät sollte nicht mit dem Hausmüll oder in der Natur entsorgt werden. Bitte führen Sie das Gerät an entsprechenden Stellen dem Recycling zu oder kontaktieren Sie den Verkäufer oder Hersteller des Geräts. §§ Bitte halten Sie bei der Nutzung des Geräts einen Sicherheitsabstand von mindestens 20 Zentimetern ein. §§ CE in welchen Ländern dieses Produkt uneingeschränkt genutzt werden darf: Deutschland, Großbritannien, Italien, Spanien, Belgien, Niederlande, Portugal, Griechenland, Irland, Dänemark, Luxemburg, Österreich, Finnland, Schweden, Norwegen und Island. TERRATEC PAD 10" Gehörschutz Unteransicht §§ Dieses Produkt beschränkt die Ausgangslautstärke gemäß den aktuellen Richtlinien auf ein sicheres Level. Beim Hören über Kopf- oder Ohrhörer mit hoher Lautstärke laufen Sie Gefahr, dauerhafte Gehörschäden davon zu tragen, selbst dann, wenn Sie bereits an hohe Lautstärken gewöhnt sind. Sollten Sie ein Klingeln oder Pfeifen im Ohr bemerken, reduzieren Sie die Lautstärke oder schalten Sie das Gerät ab. Dieses Gerät wurde mit den mitgelieferten Ohrhörern getestet. Um Ihr Gehör zu schützen, raten wir Ihnen, diese zu benutzen oder solche, die den aktuellen Richtlinien entsprechen. Rückansicht §§ Benutzen Sie das Gerät nicht, während Sie ein Fahrzeug führen. Dies kann zu Gefahren im Straßenverkehr führen und ist vielerorts verboten. §§ Benutzen Sie das Gerät nicht, wenn sich mögliche Gefahren durch reduziertes Hören ergeben. §§ Selbst wenn Ihre Ohrhörer so entwickelt wurden, dass Sie Außengeräusche wahrnehmen, drehen Sie die Lautstärke niemals so laut, dass Sie nicht mehr bemerken, was um Sie herum passiert. §§ Der Komfortbereich Ihres Gehörs passt sich mit der Zeit an höhere Lautstärken an. Was sich normal anhört, kann eigentlich laut und schädlich für Ihr Gehör sein. Beugen Sie dem vor, indem Sie die Lautstärke zunächst niedrig einstellen, bevor Ihr Gehör sich anpasst. Verpackungsinhalt Bitte prüfen Sie beim Auspacken Ihres Geräts, ob folgende Gegenstände enthalten sind: - Tablet - Netzteil - Bedienungsanleitung - Service Card Eigenschaften und Funktionen Draufsicht 1.An-/Aus-Schalter: Drücken und halten, um das Tablet an oder aus zu schalten. Drücken, um den Bildschirm an oder aus zu schalten 2. Lautstärke +/-: Drücken um Lautstärke zu erhöhen oder zu verringern. 3. Windows Taste: Drücken, um den Windows StartBildschirm zu öffnen. Drücken, um schnellen Zugang zur zuvor genutzten App oder dem zuletzt angesehenen Bildschirm zu erhalten. 4.Mikrofon: Nimmt Sounds auf. Unterstützt Tonsignale beim Telefonieren über Internet. 5. Micro SD Schacht: Liest und schreibt Daten auf Micro SD Karte 6. HDMI Anschluss: Schließen Sie HD Fernsehen mit einem HDMI-Kabel (nicht im Lieferungsumfang enthalten) an. 7. Micro-USB Eingang: Verbinden Sie USB-Geräte mit einem beliebigen USB-Kabel, um Daten, Musik, Fotos, Videos etc. zu übertragen. 8. DC-In Anschluss: Verbinden Sie das mitgelieferte Datenkabel, um den Akku aufzuladen. Linksseitige Ansicht Vorderansicht 9. Audio Eingang: Schließen Sie ein Headset, Kopfhörer, Mikrophon oder anderes Audiozubehör an, um Stereosound zu genießen, Audiodateien aufzunehmen oder Telefongespräche über das Internet zu führen. 10.Ladeanzeige: Zeigt den Ladestatus des Akkus an. 11.Frontkamera: Nehmen Sie Bilder und Videos auf. Zur Nutzung bei Videotelefonie geeignet. 12.Tastaturanschluss: Befestigen und stützen Sie den Anschluss für die externe Tastatur. 13.Steckanschluss: Verbinden Sie die externe Tastatur 14.Lautsprecher: Unterstützt die Tonwiedergabe. 15.Rückseitenkamera: Nimmt Bilder oder Videos auf. 2 Hinweis: 1. Keine der beiden Kameras unterstützt Zoom oder Gesichtserkennung. 2. Der Micro-USB Anschluss unterstützt keine Verbindung zu Computern, oder Stromversorgung von angeschlossenen USB-Geräten. 3. Wenn gewünscht, können Tastatur und Maus an dieses Tablet angeschlossen werden. Hauptanschlüsse Das Tablet aufladen Nun ist Ihr Tablet startbereit und der Windows Startbildschirm erscheint. Das Tablet besitzt einen eingebauten Akku. Laden Sie das Gerät auf, wenn die Akkuladung niedrig ist. Hinweis: Wenn der Login-Bildschirm nicht aktiv ist, gelangen Sie direkt vom Sperrbildschirm zum Windows Startbildschirm. 1. Schließen Sie das Ladekabel an das Netzteil an. Das Tablet ausschalten 2. Verbinden Sie das Micro-USB-Kabel mit dem Micro-USBAnschluss am Tablet. Sie können Ihr Tablet auf 2 Arten ausschalten: 3. Verbinden Sie das Netzteil mit einem Stromanschluss, um das Tablet aufzuladen, bis der Akku voll ist. 1. Drücken und halten Sie den Ein-/Ausschaltknopf für mindestens 4 Sekunden. 2. Wischen Sie den Bestätigungs-Bildschirm zum unteren Rand des Displays, um das Tablet auszuschalten. Charms benutzen: Achtung: 1. Laden Sie den Akku in einer gemäßigten Temperatur zwischen 0 °C und 35 °C. 2. Benutzen Sie ausschließlich das mitgelieferte Netzteil. Die Nutzung von nicht autorisierten Netzteilen oder Kabeln kann Schaden verursachen. Hinweis: 1. Wenn Sie Ihr Tablet auspacken, ist der Akku noch nicht vollständig geladen. 1. Wischen Sie vom rechten Rand des Displays nach innen, um auf Charms zuzugreifen. Betrieb 2. Tippen Sie auf Einstellungen unterfahren, um das Tablet auszuschalten. her- Den Bildschirm ein- und ausschalten Im Allgemeinen können Sie einmal den Ein-/Ausschalter drücken, um den Bildschirm an oder auszuschalten. Alternativ können Sie auch die Charms benutzen: 1. Wischen Sie vom rechten Rand des Displays nach innen, um auf Charms zuzugreifen. 2. Ein voll entladener Akku braucht ungefähr 4 Stunden um vollständig aufzuladen. 2. Tippen Sie auf Einstellungen Betrieb Sleep, um das Tablet auszuschalten. 3. Während der Akku geladen wird, leuchtet die LEDAnzeige rot und orange, sobald er vollständig geladen ist. Eine Micro-SD Karte einsetzen und entfernen 4. Die LED-Anzeige fängt ca. 4-5 Sekunden nachdem das Netzteil an das Tablet und die Steckdose angeschlossen wird an zu leuchten. Das Tablet einschalten Hinweis: Dieses Gerät wurde mit Windows 8.1 ausgestattet. Es ist nicht nötig, vor dem Gebrauch Windows zu ins tallieren. 1. Drücken und halten Sie den Power Knopf für 2 Sekunden, um Ihr Tablet einzuschalten. Der Sperrbildschirm erscheint. 2. Wischen Sie mit Ihrem Finger von unten nach oben über den Bildschirm zum Login-Bildschirm und geben Sie Ihr Passwort ein. Die Karte wird auf die übliche Weise in den dafür vorgesehenen Slot eingeführt. Achtung: Die Micro-SD-Karte während des Betriebs derselben zu entfernen kann Schaden verursachen. Versichern Sie sich, dass alle Prozesse, die die Micro-SD-Karte betreffen abgeschlossen sind, bevor Sie die Karte entnehmen. 1. Berühren Sie die Desktop-Kachel, um in Desktop-Mode zu gelangen. 2. Berühren Sie „Hardware sicher entfernen“ Anzeige am unteren rechten Bildschirm. in der 3 TERRATEC PAD 10" Anmerkung: Wenn Sie „Hardware sicher entfernen“ nicht sehen, berühren Sie „Ausgeblendete Symbole einblenden“ um alle Symbole anzuzeigen. 3. Berühren Sie „SD Karte auswerfen“. Eine Mitteilung erscheint, welche Ihnen bestätigt, dass die Karte sicher entfernt werden kann. Falls eine Warnung erscheint, dass die Karte nicht entfernt werden kann, versichern Sie sich, dass der gesamte Datentransfer die Karte betreffend abgeschlossen ist. 4. Drücken Sie leicht auf die Micro-SD-Karte, damit sie ausgeworfen wird und ziehen sie dann heraus. Kopfhörer benutzen Berühren Tippen Sie sanft mit der Fingerspitze auf den Display. §§ Gegenstände auf dem Bildschirm wie Optionen, Symbole, Einträge und Bilder auswählen. §§ Apps starten §§ Knöpfe auf dem Bildschirm drücken §§ Text mit der Bildschirmtastatur einfügen Berühren und Festhalten §§ Lassen Sie sich Tippen und lassen Sie Ihren Finger auf dem Display. Sie können ein Headset oder Kopfhörer über den AudioEingang am Tablet anschließen. detaillierte Informationen über ein Programm anzeigen §§ Öffnen des Kontextmenüs um weitere Aktionen zu tätigen Achtung: Über einen längeren Zeitraum laute Musik anzuhören, kann zu Gehörverlust führen. Ziehen 2. Setzen sie die Kopfhörer auf und stellen Sie die Lautstärke auf eine komfortable Stufe. Symbole und Bilder über 1.Berühren und halten den Bildschirm bewegen Sie ein Symbol auf dem Bildschirm. Anmerkung: Wenn Sie ein Audiogerät mit dem Anschluss verbinden, verstummen im Tablet die eingebauten Lautsprecher automatisch. 2. Ziehen Sie das Symbol in die gewünschte Richtung. Achtung: Um Schaden zu vermeiden, ziehen Sie beim Ausstöpseln des Kopfhörers am Stecker anstelle des Kabels! 3. Nehmen Sie Ihren Finger weg, um das Symbol an der gewünschten Stelle fallen zu lassen. 1. Schließen Sie die Kopfhörer an der Audio-Buchse (3,5 mm) an. Standartbetrieb Wi-Fi Betrieb: 1. Wischen Sie vom rechten Rand des Displays nach innen um auf Charms zuzugreifen. 2. Berühren Sie Einstellungen Netzwerk Wischen 3. Wischen Sie das Wi-Fi Symbol nach links oder rechts um Wi-Fi an- oder auszuschalten. Mit einem Netzwerk verbinden: 1. Wischen Sie vom rechten Rand des Displays nach innen um auf Charms zuzugreifen. 2. Berühren Sie Einstellungen verfügbar Scrollen im Startbildschirm, auf Webseiten, Listen, Einträgen, Fotos, Kontakten usw. . 3. Wählen Sie ein verfügbares Netzwerk aus der Liste und berühren Sie verbinden. Gesten Ihr Tablet hat ein Multi-Touch-Display. Sie können den Bildschirm berühren, um das Tablet zu bedienen. 4 Bewegen Sie Ihren Finger in vertikaler oder horizontaler Richtung über den Bildschirm. Einzoomen Berühren Sie den Bildschirm mit 2 Fingern und bewegen Sie sie diese voneinander weg. Die Ansicht einer Webseite oder eines Bildes vergrößern Auszoomen Berühren Sie den Bildschirm mit 2 Fingern und ziehen Sie diese zueinander. Die Ansicht einer Webseite oder eines Bildes verkleinern Drücken Sie die Windows Taste. Wischen Sie vom rechten Rand des Bildschirms in die Mitte, um auf Charms zuzugreifen und drücken Sie dann das Start Symbol . Wenn Sie im Startbildschirm sind, gelangen Sie durch drücken des Start Symbols zur zuletzt verwendeten App oder dem zuletzt angeschauten Bildschirm. Anmerkung: Die Funktion des Start Symbols selbe wie die der Windows Taste. Bildschirmausrichtung Für ein optimales Betrachtungserlebnis, wechselt die Displayausrichtung automatisch zum Portrait- oder Landschaftsformat, je nachdem wie sie das Tablet halten. Sie können die automatische Bildschirmdrehung ausschalten und einen der beiden Modi festsetzen. Anmerkung: Manche Apps unterstützen die automatische Bildschirmdrehung nicht und lassen sich nur in einem der beiden Modi benutzen. Die Bildschirmdrehung ausschalten 1. Drehen Sie das Tablet in die gewünschte Ausrichtung 2. Wischen Sie vom rechten Rand des Bildschirms nach innen um Charms zu aktivieren 3. Berühren Sie Einstellungen 4. Berühren Sie den Hebel hung zu sperren oder Hebel Bildschirm . um die Bildschirmdreum sie zu entsperren. Windows 8.1 Startbildschirm Der Windows 8.1 Startbildschirm beinhaltet eine Liste vorgegebener und spezifischer Live Kacheln, die als Shortcut zu Mail, Windows Explorer, Wetter App, Kalender, dem Windows Store, Internet Explorer und anderen installierten Apps fungieren. Die Kacheln auf Ihrem Startbildschirm wechseln und aktualisieren sich in Echtzeit, um Neuigkeiten und Aktualisierungen in sozialen Netzwerken anzuzeigen. Die kachelbasierte Benutzer Schnittstelle gibt Ihnen direkten Zugang zu den kürzlich verwendeten Apps, E-Mails, Fotos, Musik, Videos, Kontakten, Aktualisierungen auf Sozialen Netzwerk-Seiten, oder häufig angesehenen Webseiten. Sie können Ihre Lieblings-Apps als Kachel auf den Startbildschirm legen um diesen Ihren Wünschen anzupassen. Sie können den Startbildschirm auch personalisieren, indem Sie Ihr Lieblingsbild als Bildschirmhintergrund verwenden. Anmerkung: Kacheln können mit verankern in Taskleiste , in Start verankern oder aus Start entfernen hinzugefügt oder entfernt werden. Zugang zum Startbildschirm Wenn Ihr Gerät Windows hoch lädt, erscheint der Startbildschirm automatisch. Um aus einer beliebigen anderen Anwendung oder App auf den Startbildschirm zuzugreifen benutzen Sie eine der folgenden Methoden: ist die- Nach links wischen 1. Wischen Sie vom rechten Rand des Bildschirms nach innen um die Charms anzuzeigen. Dadurch erhalten Sie Zugang zu den Systembefehlen, wie Start, Suche, Teilen, Geräte und Einstellungen. 2. Auf dem Startbildschirm nach links wischen bis Sie das Ende der Kachelanzeige erreichen lässt das App Symbol . Berühren Sie das App Symbol um eine alphabetische Liste aller installierten Apps zu erhalten. Nach rechts wischen 1. Wischen Sie schnell vom linken Rand des Bildschirms um die aktuell aktiven Apps zu wechseln. 2. Wischen Sie langsam vom linken Rand des Bildschirms um Thumbnails der aktiven Apps anzuzeigen. 3. Wischen Sie am linken Rand des Bildschirms ein und aus um eine Liste der zuletzt verwendeten Apps zu erhalten. Auf und ab wischen 1. Wischen Sie auf dem Startbildschirm vom oberen oder unteren Rand aus um das Anpassen Symbol zu zeigen. Tippen Sie auf das Symbol um die Kacheln auf Ihrem Startbildschirm zu organisieren. 2. Wischen Sie vom oberen zum unteren Rand einer App um diese anzudocken oder zu schließen. Synchronisieren Ihres Tablets Mit einem Windows Account Wenn Windows 8.1 auf Ihrem Computer installiert ist, können Sie die Nutzereinstellungen auf Ihrem Tablet mit Ihrem Computer synchronisieren, indem Sie Ihren Microsoft Account nutzen. Wenn Sie sich auf Ihrem Tablet in Ihren Account einloggen, werden Ihre Einstellungen inklusive Internet Browser, Verlauf, App Einstellungen und persönliche Ordner etc. mit Ihren anderen Windows 8.1 Geräten synchronisiert. 1. Greifen Sie auf Charms auf Ihrem Tablet zu und klicken Sie Einstellungen PC Einstellungen ändern Accounts Ihr Account mit Microsoft Account verbinden, um von Ihren lokalen Einstellungen zu Ihrem Microsoft Account zu wechseln. PC Einstellungen än2. Klicken Sie Einstellungen dern OneDrive Einstellungen synchronisieren, um die Optionen zur Datensynchronisierung zu erhalten. 5 TERRATEC PAD 10" Musik, Fotos und Videos kopieren 1. Verbinden Sie Ihr Tablet mit einem USB Speichergerät mit einem Micro-USB zu Standard-USB Adapterkabel und übertragen Sie dann Dateien vom oder auf das Speichergerät. 2. Nachdem Sie die Dateien übertragen haben, nutzen Sie die Hardware sicher entfernen Funktion, um das Speichergerät zu entfernen. Anmerkung: Das Micro-USB zu Standard-USB Adapterkabel ist nicht im Lieferumfang enthalten. Instandhaltung Achtung: Bevor Sie Ihr Tablet reinigen, entfernen Sie alle Kabel und schalten Sie das Tablet aus. Reinigen Sie Ihr Tablet mit einem weichen, angefeuchteten Tuch. Benutzen Sie keine Flüssig- oder Aerosolreiniger, die entzündliche Substanzen enthalten könnten. 1. Schalten Sie Ihr Tablet aus. 1. Wischen Sie vom rechten Rand zur Mitte um auf Charms zuzugreifen. PC Einstellungen 2. Tippen Sie auf Einstellungen ändern Update und Wiederherstellung Wiederherstellung. 3. Berühren Sie starten unter Alles entfernen und Windows neu installieren. 4. Lesen Sie die Warnung und klicken Sie anschließend auf Weiter. Achtung: Das Wiederherstellen Ihres Tablets löscht alle Dateien inklusive der Konfiguration Ihres Accounts, Apps, Musik, Bilder, Dateien und so weiter. Stellen Sie sicher, dass alle wichtigen Dateien auf einem externen Datenträger gesichert sind, bevor Sie fortfahren. Technische Daten Item Descriptions 2. Entfernen Sie alle verbundenen Geräte, Kopfhörer und Lautsprecher. CPU Intel® Atom™ Quad Core Prozessor 1.8 GHz (Z3735G) 3. Feuchten Sie ein weiches, faserfreies Tuch mit Wasser oder Bildschirmreiniger und wischen Sie über die Oberfläche des Tablets. Lassen Sie nicht zu, dass Wasser zu den Knöpfen oder Anschlüssen des Tablets hinunterläuft. Betriebssystem Windows 8.1 with Bing DDR 1 GB Interner Speicher EMMC: 16 GB Achtung: 1. Um Schäden zu vermeiden, sprühen Sie keine Reiniger direkt auf den Bildschirm und nutzen Sie nur speziell für Bildschirme vorgesehene Produkte. Erweiterbarer Speicher Micro SD card: up to 64 GB Schnittsellen §§ USB 2.0 high speed /Micro SD (compatible SDHC, up to 64 GB) card §§ 3,5 mm Earphone Anschlussvereinbarung WiFi (802.11 b/g/n); BT4.0 Frontkamera 0,3 Mega Pixel; rear camera, 2,0 Mega Pixel 2. Tippen Sie auf Einstellungen PC Einstellungen ändern Update und Wiederherstellung Wiederherstellung. Bluetooth Support Bildschirm Auflösung,1280 x 800 Pixel, 10,1 Zoll LCD 3. Berühren Sie Start unter PC Wiederherstellen ohne Ihre Daten zu beeinflussen. Netzteil §§ Rechargeable lithium battery, 6000 mA §§ AC Adapter: Micro USB 5V/2 A Speicher Temp. -20˚C ~ +65˚C Außentemp. 0˚C ~ +40˚C Arbeits RH 20 % ~ 90% (40˚C) Speicher RH 20% ~ 93% (40˚C) Aktualisieren Ihres Tablets Die Aktualisierung Ihres Tablets stellt Windows zurück auf die Original-Werkseinstellung ohne Ihre persönlichen Dateien oder installierten Apps zu löschen. 1. Wischen Sie vom rechten Rand zur Mitte um auf Charms zuzugreifen. 4. Lesen Sie die Warnung und klicken Sie anschließend auf Weiter. Anmerkung: Apps, die aus dem Windows Store installiert wurden, werden automatisch wieder installiert, nach dem die Wiederherstellung komplett ist. Apps aus anderen Quellen gehen verloren und müssen manuell wieder installiert werden. Eine Liste aller entfernten Apps wird auf dem Desktop erstellt, sobald der Prozess beendet ist. Wiederherstellen Ihres Tablets Das Wiederherstellen Ihres Tablets wird das System auf die Werkseinstellungen zurücksetzen. 6 Software Updates auf unserer Website Sie erhalten den aktuellsten Treiber und die neuste Software kostenfrei von unserer Website. Damit sind Sie immer auf dem neusten Stand. www.terratec.de/163774 Unter der oben genannten Adresse finden Sie neben den aktuellen Treibern und Softwareversionen auch weitere Informationen wie FAQ’s, Handbücher, Praxistipps und unsere Hotlinenummer. Manual TERRATEC Pad 10" 10" Windows 8 Tablet with Quad Core CPU Table of Content Safety Precautions. . . . . . . . . . . . . . . . . . . . . . . . . . . . . S.07 Listening Cautions. . . . . . . . . . . . . . . . . . . . . . . . . . . . . S.08 Packing Contents. . . . . . . . . . . . . . . . . . . . . . . . . . . . . . S.08 Features & Functionality. . . . . . . . . . . . . . . . . . . . . . . . S.08 Basic Connections. . . . . . . . . . . . . . . . . . . . . . . . . . . . . . . S.10 Basic Operation. . . . . . . . . . . . . . . . . . . . . . . . . . . . . . . . . S.10 Maintenance. . . . . . . . . . . . . . . . . . . . . . . . . . . . . . . . . . . S.12 Major Specifications. . . . . . . . . . . . . . . . . . . . . . . . . . . . . S.12 Safety Precautions §§ Do not subject the device to severe impact or drop it from heights. §§ Do not use the device in extreme hot or cold, dusty or damp conditions. Do not expose it to direct sunlight. §§ Avoid using the device near strong magnetic fields. §§ Normal functioning of the product may be disturbed by ESD. If so, simply reset and restart the device following the instruction manual. During file transmission, please handle with care and operate in a staticfree environment. §§ Keep the device away from water and other liquids. In the event that water or other liquids enter the device, power off the product immediately and clean the device. §§ Do not use chemicals to clean the device in order to avoid corrosion. Clean it with a dry cloth. §§ Do not install this equipment in a confined space such as a book case or similar unit. The ventilation should not be impeded by covering the ventilation openings with items such as newspaper, table-cloths, curtains etc. - the device powers off automatically when restarted. - there is no response when pressing keys with keys unlocked and battery full. §§ Do not interrupt the connection when the device is being formatted or transferring files. Otherwise, data may be corrupted or lost. §§ When the device is used as a portable HD, please use only per the instructions. Otherwise, permanent data loss could occur. §§ Please use and install data using the attachments/accessories provided and only according to the manufacturer’s instruction. §§ Please refer to the information on the bottom of the device for electrical and safety information before installing data or operating the device. §§ To reduce the risk of fire or electric shock, do not expose this device to rain or moisture. The device should not be exposed to dripping or splashing. Never place objects filled with liquids, such as vases, on the device. §§ There is danger of explosion if the battery is replaced incorrectly. Replace only with the same or equivalent type. §§ The battery (battery or batteries or battery pack) should not be exposed to excessive heat such as sunlight, fire or the like. §§ Please follow responsible procedures for battery disposal. §§ If the power adaptor disconnected from the device, the device will remain operable as long as the battery has sufficient charge. §§ The power adaptor is a CLASS II apparatus with double insulation, and no external ground is provided. Safety symbol explanation: §§ No naked flame sources, such as lighted candles, should be placed on the apparatus. §§ Attention should be drawn to environmental aspects of battery disposal. §§ Use the apparatus in moderate climates. §§ We are not responsible for damage or lost data caused by malfunction, misuse, modification of the device or battery replacement. §§ Do not attempt to disassemble, repair or modify the product. This will invalidate the warranty. §§ If the device will not be used for an extended period of time, please charge the battery at least once per month to maintain battery life. §§ Charge the battery if: - the battery level icon displays (An empty battery) §§ The lightning flash with arrowhead symbol within an equilateral triangle is intended to alert the user to the presence of non-insulated “dangerous voltage” within the product’s enclosure that may be of sufficient magnitude to constitute a risk of electric shock. §§ To reduce the risk of electric shock, do not remove the cover (or back) as there are no user-serviceable parts inside. Refer servicing to qualified personnel. §§ The exclamation point within an equilateral triangle is intended to alert the user to the presence of important operating and maintenance instructions in the literature accompanying the device. 7 TERRATEC PAD 10" §§ Correct Disposal of this product. This marking indicates that this product should not be disposed of with other household waste in the EU. To prevent possible harm to the environment or human health from uncontrolled waste disposal, recycle it responsibly to promote the sustainable reuse of material resources. To dispose of your used device, please use the return and collection systems available in your area or contact the retailer where the product was purchased. They can take this product for safe environmental recycling. §§ This equipment should be installed and operated with minimum distance 20cm between the radiator & your body. §§ CE in which countries where the product may be used freely: Germany, UK, Italy, Spain, Belgium, Netherlands, Portugal, Greece, Ireland, Denmark, Luxembourg, Austria, Finland, Sweden, Norway and Iceland. Listening Cautions §§ This product respects the current regulations for limiting the output volume of consumer audio devices to a safe level. By listening to your device with headphones or earbuds at high volumes, you run the risk of permanent damage to your ears. Even if you get used to listening at high volumes and it seems normal to you, you still risk the possibility of damaging your hearing. Reduce the volume of your device to a reasonable level to avoid permanent hearing damage. If you hear ringing in your ears, reduce the volume or shut off your device. This device has been tested with the supplied earphones. In order to preserve your hearing, it is advised that you use only the following headphone models: the earphones supplied with your device, or any other headphones that respect the current regulations. Other types of headphones may produce higher volume levels (at full power ,the prolonged listening of the walkman can damage the ear of the use). To establish a safe volume level: a. Start your volume control at a low setting. b. Slowly increase the sound until you can hear it comfortably and clearly, and without distortion. Once you have established a comfortable sound level, leave it there. Packing Contents When you get your Nextbook device, be sure to check the following items are included in the package: - Main Unit - Power Adaptor - User’s Manual - Service Card Features & Functionality Top View Left View Front View Bottom View Back View §§ Do not use while operating a motorized vehicle. It may create a traffic hazard and is illegal in many areas. §§ You should use extreme caution or temporarily discontinue use in potentially hazardous situations created by obstructed hearing. §§ Even if your headphones or earphones are the openair type designed to let you hear outside sounds, don’t turn up the volume so high that you can’t hear what’s around you. §§ Sound can be deceiving. Over time your hearing “comfort level” adapts to higher volumes of sound. What sounds “normal” can actually be loud and harmful to your hearing. Guard against this by setting the volume of your device at a safe level BEFORE your hearing adapts. 8 1. Power button: Press and hold to turn the tablet on or off. Press to turn the display on or off. 2. Volume+/- buttons: Press to increase/decrease volume. 3. Windows button: Press to open the Windows Start screen. Press for quick access to the most recently used app or most recently viewed screen. 4.Microphone: Records sounds. Provides sound input while making calls using web-based apps. 2. A fully discharged battery takes about 4 hours to fully charge. 5. microSD card slot: Reads and writes files stored on a microSD card. 3. When the battery is being charged, the LED indicator lights red, and when the battery has been fully charged, the LED indicator lights orange. 6. HDMI port: Connect HD television via optional HDMI cable, for switching the display to wider screen. 7. Micro-USB port: Connect USB devices, via an optional USB conversion cable, for transferring data, music, photos, videos, and so on. 8. DC-In socket: Connect the supplied power adapter for charging the battery. 9. Audio port (3.5 mm): Connect a headset, headphones, microphones, or other audio equipment to listen to stereo sound, record audio, or make web phone calls. 10.Charging indicator: Indicates the battery-charge status. 11. Front-facing camera: Capture a front view picture or record videos. Use while making video calls. 4. The LED indicator will light 4-5 seconds later after the adapter has been connected to the tablet and the wall outlet. Turning On the Tablet Note: This Nextbook device has been equipped with Windows 8.1 system at the factory, so user need not perform Windows setup again before using for the first time. 1. Press and hold the Power button for 2 seconds to turn on your tablet. The lock screen appears. 2. Swipe-up your finger from the bottom of the display to switch to the login screen, and then enter password to log in to Windows. 12. Sustaining port (female): Fix and sustain the connection to external keyboard. 13. Pogo pin connector (female): Connect external keyboard 14.Speaker: Provides audio output. 15.Rear camera: Captures pictures or videos. Note: 1. Both cameras do not support zoom, face tracking. 2. The Micro-USB port does not support connecting to a computer, or power sharing to connected USB devices. Now the tablet is ready for use when the Windows Start screen is displayed. Basic Connections Note: If the login screen is not enabled in Windows 8.1, you will be taken directly from the lock screen to the Start screen. Charging the tablet Turning Off the Tablet The tablet has a built-in rechargeable battery. Charge the device when the battery level is low. You can turn off the tablet in two ways: 1. Connect the power cable into the power adapter. 2. Connect the Micro-USB cable to the Micro-USB port on the tablet. 3. Connect the power adapter to an electrical outlet and charge the tablet until the battery is fully charged. Using the Power button: 1. Press and hold the Power button for at least 4 seconds. 2. Swipe-down the shutdown confirmation screen to the bottom edge of the display to turn off the tablet. Using Charms: 1. Swipe-in from the right edge of the display to access Charms. 2.Touch Settings Power turn off the tablet. Caution: 1. Charge the battery in an ambient temperature of 0 °C to 35 °C. 2. Use only the supplied power adapter to charge your tablet. Using unauthorized power adapters or Micro-USB cables may severely damage your tablet. Note: 1. The battery is not fully charged when you unpack your tablet. Shut down to Turning On/Off screen Usually, user can press once the power button to turn on/ off the screen display. Optionally, user can also use the Charms: 1. Swipe-in from the right edge of the display to access Charms. 2. Touch Settings the screen. Power Sleep to turn off 9 TERRATEC PAD 10" Inserting a microSD card Basic Operation Wi-Fi Setting Turning On/Off Wi-Fi: 1. Pick up a microSD card. 1. Swipe-in from the right edge of the display to access Charms. Network icon 2. Align the microSD card so that the pins are pointed toward the card slot. 2.Touch Settings 3. Push the microSD card into the card slot. Connecting to a network: Removing a microSD card Caution: Removing the microSD card while it is in use may cause data loss or result in application errors. Make sure all save operations to the microSD card are complete before removing the microSD card. 1. Touch the Desktop tile to enter Desktop mode. in the notifica2.Touch Safely Remove Hardware tion area at the bottom-right corner of the screen. , Note: If you do not see Safely Remove Hardware touch Show Hidden Icons to display all icons in the notification area. 1. Swipe-in from the right edge of the display to access Charms. 2.Touch Settings Available Gestures Your tablet has a multi-touch display. You can touch the screen to operate the tablet. Touch Tap gently on the display with your fingertip §§ Touch buttons on the screen. §§ Input text using the on-screen keyboard. Touch and hold your finger on the display. Warning: Listening to loud music for an extended period of time can lead to hearing loss. 1. Connect headphones to the audio port (3.5 mm) on the tablet. 2. Insert the earphones in your ears and adjust the volume level to a comfortable level. Note: When you connect an audio device to the 3.5 mm audio jack, the integrated speakers on your tablet are muted automatically. Caution: To prevent damage to the headphones when disconnecting it from the tablet, pull the connector instead of the cable. 10 §§ Display detailed information about an item. §§ Open the context menu of an item to perform further actions. Using Headphones You can connect a headset or headphones to the audio port of your tablet. §§ Select items on the screen, including options, entries, images, and icons. §§ Start apps. Touch and Hold 5. Slide the card out after it pops out from the microSD card slot. . 3. Select an available network from the list and touch Connect. 3.Touch Eject SD Memory Card. A message appears confirming that the microSD card can be safely removed. If a warning message appears stating the microSD card cannot be removed, ensure all data transfers involving the microSD card are complete. 4. Press on the microSD card to release it. . 3.Swipe Wi-Fi icon left or right to turn Wi-Fi on or off. Drag 1. Touch and hold your finger on an item on the screen. 2. Keeping your finger in contact with the display, move your fingertip to the desired location. 3. Take your finger off the display to drop the item in the desired location. Move items such as images and icons on the screen. Swipe or Slide Move your finger in a vertical or horizontal direction on the display. Scroll through the Start screen, web pages, lists, entries, photos, contacts, and so on. Close an app. (Swipe the app to the bottom of the display.) Zoom in Touch the display with two fingers and then move the fingers apart. Zoom out Touch the display with two fingers and then move the fingers closer. Enlarge the view of an image or web page. Reduce the view of an image or web page. Accessing the Start screen When you computer boots into Windows, the Start screen appears by default. To access the start screen from any other window or app, use any of the following methods. Press the Windows button. If you are at the Start screen, pressing the Start icon takes you to the most recently used app or most recently viewed screen. Note: The functionality of the Start icon Windows button. is same as Swipe left 1. Swipe-in from the right edge of the display to show the charms. Charms provide access to the system commands, such as Start, Search, Share, Devices, and Settings options. For optimal viewing experience, the screen orientation changes automatically to portrait or landscape format depending on how you hold the tablet. You can disable automatic screen rotation and lock the screen in portrait or landscape mode. Note: Some apps may not support automatic screen rotation and are designed to work only in one orientation. Locking the screen orientation 1. Change the screen to the desired orientation. 2. Swipe-in from the right edge of the display to access Charms. 4.Touch touch Note: Live Tiles can be added or removed by using Pin to taskbar , Pin to Start or Unpin from Start options. Swipe-in from the right edge of the display to access Charms, and then touch the Start icon . Screen Orientation 3.Touch Settings You also can personalize the Start screen by setting your favorite picture as the wallpaper. Screen . toggle to lock the screen orientation, or toggle to unlock the screen orientation. Windows 8.1 Start Screen The Windows 8.1 Start screen displays a list of default and custom Live Tiles, which act as a shortcut to Mail, Windows Explorer, Weather app, Calendar, Windows Store, Internet Explorer, and other installed apps. Live Tiles on your Start screen change and update in real time to show news and sports updates, weather updates, social-networking feeds, and so on. The tile-based user interface gives you direct access to your most recently used apps, emails, photos, music, videos, contacts, updates from social-networking sites, and frequently viewed websites. You can pin your favorite apps as tiles to customize the Start screen. 2. From the Start screen, swiping left until you reach the end of the tile view will bring up the Apps icon. Touch Apps icon to show an alphabetical list of all apps installed on your tablet. Swipe right 1. Swipe-in quickly from the left edge of the display to switch the currently running apps. 2. Swipe-in slowly from the left edge of the display to show thumbnails of open apps. 3. Swipe-in and out on the left edge of the display to show a list of the most recently used apps. Swipe up/down 1. From Start screen, swipe-in from the bottom or top edge of the display to show the Customize icon . Touch Customize to organize the tiles on your Start screen. 2. Swipe-in from the top to the bottom of an app to dock or close the app. Synchronizing Your Tablet Using a Microsoft account If your computer has Microsoft Windows 8.1 installed, you can synchronize user settings of your tablet with your computer using a Microsoft account. When you sign in with your Microsoft account on your tablet, your settings, including internet browser history, app settings, and personal files etc., are synchronized with other Windows 8.1 PCs and tablets computers. 11 TERRATEC PAD 10" 1. On the tablet, access Charms and click Settings Change PC Settings Accounts Your account Connect to a Microsoft Account to switch your computer local account to your Microsoft account. Change PC Settings OneDrive 2.Click Settings Sync settings to see the options for synchronizing your data and settings. Copy music, photos, and videos 1. Connect your tablet to a USB storage device with a Micro-USB to standard USB conversion cable, then transfer files to or from the USB storage device. 2. After transferring files, use the Safely Remove Hardware wizard to remove the USB storage device. Note: The Micro-USB to standard USB conversion cable is sold separately and is not shipped with the tablet. Maintenance Cleaning Your Tablet Resetting your tablet Resetting your tablet will return the system to original factory settings. 1. Swipe-in from the right edge of the display to access Charms. 2.Touch Settings Change PC settings Update and recovery Recovery. 3.Touch Get started under Remove everything and reinstall Windows. 4. Read the warning and touch Next after you read the warning. Caution: Resetting your tablet erases all data from your tablet, including your account configuration, apps, music, pictures, files, and so on. Make sure that you back up all the required data before you proceed. Major Specifications Caution: Before you clean your tablet, disconnect all the cables and turn off the tablet. Clean your tablet with a soft cloth dampened with water. Do not use liquid or aerosol cleaners, which may contain flammable substances. Item Descriptions CPU Intel® Atom™ Quad Core Prozessor 1. Turn off your tablet. For more information on turning off your tablet, Operation system Windows 8.1 with Bing 2.Disconnect any attached devices, headphones, and speakers from the tablet and from their electrical outlets. DDR 1 GB Internal Memory EMMC: 16 GB Expandable Memory Micro SD card: up to 64 GB Interfaces §§ USB 2.0 high speed /Micro SD (compatible SDHC, up to 64 GB) card §§ 3.5 mm Earphone Connection Agreement WiFi (802.11 b/g/n); BT4.0 Front Webcam 0,3 Mega Pixels; rear camera, 2.0 Mega Pixels Bluetooth Support To restore your tablet: Display Resolution,1280 x 800 Pixels, 10,1 inch LCD 1. Swipe-in from the right edge of the display to access Charms. Power Supply Change PC settings Update 2.Touch Settings and recovery Recovery. §§ Rechargeable lithium battery, 6000 mA §§ AC Adapter: Micro USB 5V/2,5 A StorageTemp. -20˚C ~ +65˚C 3.Touch Get started under Refresh your PC without affecting your files. Ambient Temp. 0˚C ~ +40˚C Operation RH 20 % ~ 90% (40˚C) 4. Read the warning and touch Next after you read the warning. Storage RH 20% ~ 93% (40˚C) 3. Moisten a soft, lint-free cloth with either water or a display cleaner, and wipe the surface of the tablet until it is clean. Do not allow water from the cloth to seep down to the tablet ports or buttons. Caution: To avoid damaging the tablet or display, do not spray cleaning solution directly onto the display. Only use products specifically designed for cleaning displays and follow the instructions included with the product. Refreshing your tablet Refreshing your tablet will restore Windows to original factory settings without deleting any of your personal files, installed apps from Windows Store, or personalization settings. Note: Apps installed from the Windows Store are automatically reinstalled after the refresh is complete. Apps installed from sources other than the Windows Store are removed and have to be manually installed. 12 A list of apps removed during this process is created on the desktop after the process is complete. 1.8 GHz (Z3735G) Software updates on our website You get the latest drivers and the newest software free of charge from our website. So you are always up to date and spare our environment. Thank you for this! www. terratec.de/163774. At the above address you will find the latest drivers and software versions, other information such as FAQs, guides, practical tips and our hotline number.