1
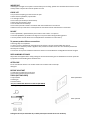
 HOW TO INSTALL YOUR GLASS SPLASHBACK / UPSTAND BEFORE STARTING: • Read the checklist at the back of these instructions. • Read the assembly guide overleaf. • Check that you have all the tools needed (see overleaf). FITTING STEPS – SPLASHBACKS / UPSTANDS Ensure the surface being fixed to is flat, non‐
porous, dry and dust free. First check the dimensions. Hold up the back of the splashback/ upstand to the worktop/ wall to check fit. Use the spacers to achieve a good fit. Take the splashback/ upstands away making sure to keep all corners safe from hard surfaces and then remove the covering from self adhesive backing. Fit the splashback on top of the spacers. Place the bottom edge of the splashback/ upstand on the spacers, then push the splashback/ upstand to the wall and apply firm pressure evenly over the whole surface area. Ensure that a 2mm space is left. Finally (2‐3 hours) remove spacers. Seal the edges of the splashback/ upstand with a bead of silicone sealant not less than 2.5 mm in thickness.
Complete the surrounding wall covering. ASSEMBLY GUIDE ‐ SPLASHBACKS / UPSTANDS IMPORTANT Unfitted glass is fragile. Do not place on hard surfaces prior to fitting. Special care should be taken with the corners of the product as impact will cause the product to crack. CHECK LIST • Do you have everything you need to start the job? • Check that the splashback / upstands fits. • Is it the right colour? • Ensure that your worktop is fitted securely. • Check that your worktop is level. • Clear all dust from the worktop. • Ensure that your hob is fitted in accordance with the manufacturer’s instructions. • Make sure that your extractor is securely fitted in accordance with the manufacturer’s instructions. DO NOT • Fit the splashback / upstands directly onto a hob or work surface ‐ use spacers. • Place the splashback / upstands on its edge or on any hard surface during the fitting process. • Use the product until the silicone has cured (follow the manufacturer’s instructions). To prevent product failures ensure that: • All fitting steps are completed. • A space of 2 mm is left between the product and all surfaces. The gaps must be filled with silicone. • The surface to which the product is applied is flat, variations in level in excess of 5 mm should be packed with silicone prior to fitting. • You do not use any form of adhesive other than silicone as certain adhesives will degrade the finish of the glass. SAFE HANDLING OF GLASS All products are supplied with a safety packing but we recommend that glass is handled with care and in particular eye protection and suitable gloves should be worn. AFTER CARE Do not use abrasive cleaners. For the best results use hot water with a mild soap detergent. BEFORE YOU START • Check that all components are present. • Ensure that you have all tools to hand. TOOLS (NOT INCLUDED) • Tape measure • Sealant gun • Silicone sealant Only use Low Modular Neutral Cure Silicone (BS 5889 A) • Packing shim (spacers) 2mm thick Drilling should only be undertaken by a suitably trained person with the correct machinery. Glass Splashbacks
Glass Upstands