1
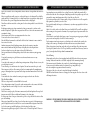
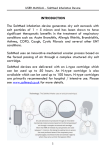
Additional One Year Guarantee
* For An
*
Please Register Your Appliance
At The Website Below
INSTRUCTION MANUAL
www.elgento.co
and enjoy the peace of mind
of a
TECHNICAL SUPPORT
If you require technical support or in the unlikely event that your purchase is
faulty please telephone our Help line for immediate assistance.
0871 221 3619
OR
www.elgento.co
1.5 LITRE SLOW COOKER
E16001
SPECIFICATION DATA
Product Code E16001
AC: 220V~ 240V 50Hz
Power 120W
SAFETY INFORMATION
Sutton House,
Berryhill Road,
Fenton
Stoke on Trent
Staffordshire,
ST4 2NL.
PARTS IDENTIFICATION
1. Glass Lid with Handle.
2. Crockery pot.
3. Slow Cooker Handles.
4. Slow Cooker Body.
5. Power Indication Light.
6. Temperature Control Switch.
1
2
3
4
5
6
When using the SLOW COOKER, basic safety precautions
should always be followed, including the following
Read all the instructions.
This product is for household use ONLY
To protect against the risk of electrical shock do not put base in water or in any other liquid.
Close supervision is necessary when the appliance is operating or cooling near children.
Always switch off the appliance and the wall socket before removing the plug.
Always unplug from the wall socket when not in use, before putting on or taking off attachments,
and before cleaning.
The use of attachments or tools is not recommended by supplier as they may cause fire, electric
shock or injury.
Do not use outdoors.
DO NOT let the power cord hang over the edge of the table or kitchen counter top.
DO NOT let the power cord come into contact with any hot surfaces.
KEEP YOUR APPLIANCE AWAY FROM ANY HOT PLATES, BURNERS AND HEATED OVENS.
Extreme caution must be used when moving the slow cooker when it contains hot food, water, or
other hot liquids.
Do not use the slow cooker other than for its intended use.
Do not switch on the slow cooker if the ceramic pot is empty.
Allow lid and ceramic pot to cool down first before cleaning with water.
Never touch the outer enclosure of the slow cooker during its operation or before it cools.
Use the handles or knobs. Do not touch hot surfaces.
The use of oven gloves or a cloth when removing lid or handling contents.
Never cook directly in the base unit. Always use the ceramic pot.
Do not use ceramic pot or glass lid if cracked or chipped.
Do not switch on the slow cooker when it is upside down or laid on its side.
The glass lid and ceramic pot are fragile. Handle them with care.
The appliance must not be immersed in water.
This appliance is not intended for use by children or the infirm unless they have been given
adequate supervision and/or instruction concerning the safe use of the appliance by the person
responsible for their safety.
Children should be supervised to ensure that they do not play with the appliance.
If the supply cord is damaged, it must be replaced by the manufacture or its service agent.
SUITABLE FOODS FOR SLOW COOKING & PREPARATION
SUITABLE FOODS FOR SLOW COOKING & PREPARATION
Most foods are suited to slow cooking methods; however there are a few guidelines that need to be
followed.
Cut root vegetables into small, even pieces, as they take longer to cook than meat. They should be
gently sautéed for 2-3 minutes before slow cooking. Ensure that root vegetables are always placed
at the bottom of the pot and all ingredients are immersed in the cooking liquid.
Trim all excess fat from meat before cooking, since the slow cooking method does not allow fat to
evaporate.
If adapting an existing recipe from conventional cooking, you may need to cut down on the
amount of liquid used. Liquid will not evaporate from the slow cooker to the same extent as with
conventional cooking.
Never leave uncooked food at room temperature in the slow cooker.
Do not use the slow cooker to reheat food.
Uncooked Kidney beans must be soaked and boiled for at least 10 minutes to remove toxins before use in a slow cooker.
Authentic stoneware is fired at high temperatures; therefore the ceramic pot may have
minor surface blemishes and the glass lid may rock slightly due to these imperfections.
Low heat cooking does not produce steam so there will be little heat loss.
Due to normal wear and tear through the products life, the outer surface may start appearing
“crazed”.
Do not put the ceramic pot or glass lid in an oven, freezer, and microwave or on any
gas/electric hob.
Do not subject the ceramic pot to sudden changes in temperature. Adding cold water to a very hot
pot could cause it to crack.
Do not allow the pot to stand in water for a long time (You can leave water in the pot to soak).
There is an area on the base of the ceramic pot that has to remain unglazed for manufacturing
purposes. This unglazed area is porous and will soak up water when immersed in it. This should
be avoided.
Do not switch the cooker on when the ceramic pot is empty or when it is out of the base.
Some ingredients are not suitable for slow cooking. Pasta, seafood, milk, and cream should be
added towards the end of the cooking time. Many things can affect how quickly a recipe will cook,
water and fat content, initial temperature of the food and the size of the food.
Food cut into small pieces will cook more quickly. A degree of ‘trial and error’ will be required to
fully optimise the potential of your slow cooker.
Root vegetables usually take longer to cook than meat, so try and arrange vegetables in the lower
half of the pot.
After food is cooked, switch cooker off and leave covered with the lid. There will be enough heat
in the ceramic pot to keep warm for 30 minutes. If you require longer to keep warm switch to the
low setting.
All food may be covered with a liquid, gravy or sauce. In a separate pan or jug prepare your liquid,
gravy or sauce and completely cover the food in the ceramic pot.
Pre-browning meat and onions in a pan to seal in the juices also reduces the fat content before
adding to the ceramic pot. This improves the flavour but is not necessary if time is limited.
When cooking joints of meat, ham, and poultry etc the size and shape of the joint is important.
Try to keep the joint in the lower 2/3 of the pot and fully cover with water. If necessary, cut in two
pieces. Joint weight should be kept within the maximum limit.
Care & Cleaning.
Always make sure the slow cooker is unplugged and in the OFF position before storing away or
cleaning. Make sure the unit has cooled down completely before commencing cleaning.
The stoneware insert is dishwasher safe or can also be cleaned with warm soapy water.
To remove any foods that have stuck to the bottom of the pot, simply fill the pot
and soak overnight in soapy water and rinse the next day.
The exterior of the slow cooker can be wiped with a damp cloth and dried.
DO NOT use harsh abrasive cleaner or scouring pad to clean any part of the slow cooker as this
will damage the surface.
Tips for slow cooking
The slow cooker pot must be at least half full for best results.
Slow cooking retains moisture. If you wish to reduce moisture in the cooker, remove the lid after
cooking and turn the control to high (if set to low or auto) and simmer
for 30 to 45 minutes.
The lid is not a seated properly. Don’t remove unnecessarily as the built up heat will escape. Each
time you remove the lid, allow an additional 10 minutes to the cooking time.
If cooking soups, leave a 5 cm space between the top of the cook pot and the food surface to allow
space for simmering.
Many recipes demand all day cooking, if you do not have time to prepare food that morning prepare it the night before and store the food in a covered container in the refrigerator. Transfer the
food to the ceramic pot and add liquid/gravy. Select the setting low, high or auto.
Most meat and vegetable recipes require 8-10 hours on low. 4-6 hours on high and 5-7 hours on
auto.
WARNING: NEVER IMMERSE THE SLOW COOKER BASE IN WATER OR ANY OTHER
LIQUID OR THIS MAY DAMAGE THE SLOW COOKER.
USING YOUR SLOW COOKER FOR THE FIRST TIME
Before using the SLOW COOKER for the first time:
Remove packaging from the product.
Wash the ceramic pot and glass lid in hot soapy water with a sponge or a dish cloth, rinse
thoroughly and dry.
IMPORTANT: Do Not immerse the slow cooker base in water or pour water into the base all
liquids and ingredients must be placed in the crockery liner .
Note: During initial use you may notice a slight odour due to the burning off of manufacturing
residues. This is completely normal and will disappear after using the unit for some time.
AUTO Setting:
The AUTO setting allows the user to set the slow cooker to cook frozen food for the day and be
ready to server 8-10 hours later. When set to AUTO, the Slow Cooker will cook on HIGH until
the food defrosts and reaches a preset temperature, then switches to LOW and maintains a constant low cooking temperature.
However if you wish to extend the cooking period, you can use the LOW setting and if you wish
to shorten the cooking period you can use the HIGH setting.
HOW TO USE YOUR SLOW COOKER
Place the base on a dry, level, heat resistant surface, away from the edge of the work surface.
Do not use on the floor.
Place food and other ingredients into the ceramic pot, and place the pot into the base. Cover with
the glass lid. If you need to precook or brown foods prior to slow cooking, this must be done in a
pan. Do not try to brown or precook food in the slow cooker.
Set the control knob the OFF position before plugging the unit into the main socket.
Switch off and unplug the health cooker after cooking and remove the crock pot using oven
gloves.
CAUTION: BE CAREFUL NOT TO TOUCH THE BASE UNIT AFTER COOKING AS IT REMAINS
HOT.
About slow cooking
Slow cooking has always been the best way to prepare a nutritious hot meal with minimum preparation and maximum free time away from the kitchen.
Traditionally slow cooking has centred on soups and casseroles but with this ceramic pot you can
also produce most modern family meals and dinner party dishes. This pot is convenient as well as
looking good enough to take straight to the table for serving. (Always place the ceramic pot on a
heat proof mat or surface).
This method of cooking is ideal for preparing tougher cuts of meat, giving them the long, gentle
simmering that ensures that they become tender and full of flavour.
RECIPIES
The following recipes are not specifically for this appliance but can be adapted to suit any size slow
cooker by reducing or increasing the quantities of the ingredients to suit your needs and tastes
CHICKEN ADOBO
This is a slow cooker version of the classic Philippians dish. Recipe will feed 6-8 or leave lots of left
overs for a family of 4.
Ingredients:
3-4 lb. chicken thighs (boneless) 3/4 cup rice vinegar 3/4 cup soy sauce
1 head garlic, peeled and minced (approximately 8-10 cloves) 1 large sweet onion
3-4 peppercorns 2 bay leaves
Feel free to substitute ingredients to for your personal taste. Chicken breasts would
be slightly healthier but may result in a drier finished product. Cider vinegar, low sodium soy
sauce or yellow onions would work too.
Method
Cook on low for 8 hours or until chicken falls apart. You can use a fork to shred the chicken if you
desire but I found it unnecessary.
served it over rice with steamed broccoli and carrots on the side.
The quanties may have to be altered to suit your appliance, taste and servings.
HERBED CHICKEN
Ingredients
1 chicken, cut with skin removed 2 medium tomatoes, chopped 1 medium onion, chopped
2 cloves garlic, chopped or 1 tsp. garlic powder 1/2 cup + 2 Tbsp. chicken broth
1 bay leaf 1 1/2 tsp. salt 1 tsp. thyme, dried 1/4 tsp. pepper 2 cups broccoli florets
rice, cooked
Method
Place chicken in crockpot. Top with tomatoes, onion, and garlic. Combine broth, bay leaf, salt,
thyme and pepper. Pour over chicken. Cover and cook on low for 8 hours. Add broccoli; cook 4560 minutes longer (until the juices run clear).
Discard bay leaf.
Juices may be thickened with a little corn starch,
Serve over hot rice.
The quanties may have to be altered to suit your appliance, taste and servings.
BEEF STROGANOFF.
Ingredients (serves 4)
50g Butter/Margarine
2 Onions, chopped
30ml Plain Flour
Salt and freshly Ground Black Pepper
700g Braising Steak, cut into strips across the grain
300ml Beef Stock
100g Mushrooms, sliced 5ml Dried Mixed Herbs
15ml Tomato puree (paste)•10ml French
Mustard 150ml Single (light) Cream 15ml Chopped Parsley
Method
Preheat the Slow Cooker on high.
Heat the butter/margarine gently in a large frying pan, and gently fry the onions until transparent.
Season the flour with salt and pepper, then toss the meat in the flour, shaking off any excess.
Add the meat to the onions and stir until browned.
Stir in all the remaining ingredients except the cream and parsley and bring to the boil, then
transfer to the slow cooker. Cook on low for 7-10 hours.
Just before serving, stir well, swirl the cream on top and garnish with the parsley
The quanties may have to be altered to suit your appliance, taste and servings.
SLOW COOKED BEEF STEW
Ready in 5 hours 30 mins
Ingredients Serves: 6
1.2L (2 pints) water boiled from a kettle 1/2 a swede, cut into small chunks
3 medium sized carrots, cut in chunks mushrooms (as many as you want)
1 large pack of lean stewing steak or rump steak, cut into small even chunks 2 tablespoons oil
75g (3 oz) flour 2 tsp dried parsley 2 tsp dried thyme
3 to 4 beef stock cubes 5 twists of Black pepper from mill Worcestershire Sauce
1 tsp Marmite 1 desertspoon of tomato puree
Method
Prep: 30 mins | Cook: 5 hours
Prepare vegateables and put into stockpot or slow cooker.
Put the oil and beef into a large bowl and coat the beef with the oil using wooden spoon or your
hands.
In another large bowl combine the flour, herbs, pepper and 3 stock cubes. Add the beef to the
flour mixture (keep the oil separate as you will need this later) and coat the beef with the flour.
Add some of the oil from the other bowl to a large frying pan or wok and heat gently.
Take out the beef and add it to the hot oil (leave any excess flour in the bowl for later).
Add Marmite and Worcestershire sauce to the pan and if beef sticks to the pan add more oil. Cook
the beef all the way through for about 5 to 10 minutes to seal in the flavour.
Add the rest of the flour to the vegetables in the slow cooker.
Pour boiled water onto the vegetables a little at a time and stir to mix in the flour.
Add the beef and cooking juices to the pot and cook all day in your slow cooker on medium heat.
Taste throughout cooking to see if stew has enough herbs, pepper and stock cubes. If too thick
add more water.
Serve with potatoes and cabbage and crusty bread.
The quantities may have to be altered to suit your appliance, taste and servings.
LAMB, LEEK & POTATO CASSEROLE
Ingredients:
½ lb potatoes, peeled and cut into 5 mm (¼") thick slices
2 medium leeks, thinly sliced salt
freshly ground black pepper
dried rosemary
2 tablespoons oil
4 large best end of neck lamb chops
1 cup hot beef stock
Method
Put the potatoes in a layer over the bottom of the stoneware pot. Add the leeks
and sprinkle with a little salt and pepper and the rosemary.
Heat the oil in a frying pan. Add the chops and brown on both sides.
Transfer the chops to the stoneware pot, arranging them so that the vegetables
are completely covered.
Add a little more salt and pepper and pour in the stock.
Cover and cook on Low for 8-10 hours or High for 4-5 hours.
Taste and adjust the seasoning before serving.
The quantities may have to be altered to suit your appliance, taste and servings.
ORANGE RICE PUDDING
Ingredients (serves 6)
25g Butter/Margarine 900ml Milk 150 ml Evaporated milk
100g Short-grain pudding rice
50g Caster (superfine) sugar
1 Grated rind and juice of orange A few drops of vanilla essence (extract)
Method
Butter the inside of the slow cooker and preheat on high.
Place all ingredients into the slow cooker and mix well.
Cook on low for 6-8 hours.
The quanties may have to be altered to suit your appliance, taste and servings.
ELECTRICAL SAFETY
Class 1 Configuration
The wires in the mains lead are coloured in accordance with the following code:
GREEN/YELLOW: EARTH (E)
BLUE: NEUTRAL (N)
BROWN: LIVE (L)
Class 1 Configuration
As the colours of the wires in the mains lead of this appliance may not correspond with
the coloured markings identifying the terminals in your plug, proceed as follows:
The wire which is coloured GREEN & YELLOW (or coloured GREEN) must be connected
to the terminal in the plug which is marked with the letter “E” or by the earth symbol .
The wire which is coloured BLUE (or coloured BLACK) must be connected to the NEUTRAL
terminal which is marked with the letter “N”.
The wire which is coloured BROWN (or coloured RED) must be connected to the LIVE
terminal which is marked with the letter “L”.
Always ensure that the Mains Cord is fixed into the plug through the Cord Guard or Cable
Clamp, (plug wiring diagram above), and that the Cord Guard screws are tightened to clamp
the cord (outer sheath and inner coloured wires) into position in the plug. Make sure that
the plug top is also fitted securely.
This appliance must be protected by a 5 Amp fuse in a 13 Amp type (BS1363) plug. Should
you need to replace the fuse, use only a 5Amp ASTA approved BS1362 fuse (13A).
OPERATIONAL GUIDELINES
It is important to ensure the correct Plug Adaptor is used when operating in a country not usingthe UK 13 Amp socket system. If in doubt, consult a qualified electrician.
GUARANTEE.
This product is guaranteed for 12 months from the date of the original purchase.
If any defect arises due to faulty materials or workmanship the faulty products must be returned
to the place of purchase. Refunds or replacement are at the discretion of the Retailer .
The following conditions apply:
The product must be returned to the retailer with the proof of purchase.
The product must be installed and used in accordance with the instructions contained in this
instruction guide.
For domestic purposes. ONLY.
It does not cover wear and tear, damage, misuse or consumable parts.
PFD has limited responsibility for incidental or consequential loss or damage.
Valid in the UK and Eire only.
Declaration of Conformity
We PFD Ltd Declare that this product conforms to all the following
product legislation
In accordance with the following directive(s):
2004/108/EEC. The Electromagnetic compatibility Directive
2006/95EC. The LVD directive (Low Voltage Directive)
2002/95/EC. The RoHS. Directive. (Restriction of Hazardous substances Directive)
1935/2004/EC Materials & Articles in Contact with Food. (LFBG section 30, 31 & 35)
Peter Bowden
Quality Assurance Manager
Sutton House, Berryhill Road, Fenton, Stoke-On-Trent,
Staffordshire, ST4 2NL.
DISPOSAL OF UNIT
Disposal instructions for Elgento items in accordance with the WEEE directive.
Appliances bearing the symbol shown here may not be disposed of in domestic
rubbish. You are required to dispose of old electrical and electronic appliances like this
separately. Please visit www.recyclemore.co.uk, or www.recylcenow.co.uk for access
to information about the recycling of electrical items.
Please visit www.weeeireland.ie for access to information about the recycling of
electrical items purchased in Ireland.
The WEEE directive, introduced in August 2006, states that all electrical items must be
recycled, rather than taken to landfill. Please arrange to take this appliance to your local
Civic Amenity site for recycling, once it has reached the end of its life.
Imported & Distributed throughout the U.K.By PFD. ST4 2NL | www.elgento.co