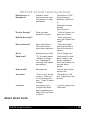
1
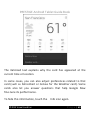
PRESTIGE Android Tablet Guide Book
Copyright © 2013 Visual Land Inc. All rights reserved.
Google, Android, Gmail, Google Maps, Google Play, and other
trademarks are property of Google Inc. Visual Land and the Visual
Land logo are trademarks of Visual Land Inc. All other marks and
trademarks are properties of their respective owners.
The content of this guide including images/illustrations may differ
in some details from the product or its software. All information
in this document is subject to change without notice.
For online Help and support, visit www.visual-land.com.
©2013 Visual Land Inc.
P a g e |1
PRESTIGE Android Tablet Guide Book
Table of Contents
1. Get Started............................................................Page 3
2. Play & Explore.......................................................Page 5
3. Tune Performance................................................Page 21
4. Enter & Edit Text..................................................Page 25
5. Connect to Networks...........................................Page 28
6. Connect to Keyboards, Mice & Other Devices...Page 36
7. Connect to a Computer.......................................Page 38
8. Manage Accounts................................................Page 41
9.Change Backup & Reset Options.........................Page 44
10.Secure Your Tablet.............................................Page 46
11. Work With Certificates.....................................Page 50
12. Try Some Apps..................................................Page 55
13.Google Now & Search........................................Page 62
14.Settings...............................................................Page 81
15. Accessibility.......................................................Page 82
©2013 Visual Land Inc.
P a g e |2
PRESTIGE Android Tablet Guide Book
1
Getting Started
Power On & Sign In
To turn on your Prestige, press the Power button on the right
edge near the top for a few seconds, then release it.
Charge the battery
The battery may not be fully charged at first. It’s a good idea to
fully charge it as soon as you can.
The tablet can be charged 2 ways. With the power adapter,
connect the power adapter to the tablet and to a power outlet.
With a USB, connect the included USB cable to the tablet and to a
computer that is powered on. (Note: charging via USB is slower
than via power adapter.)
Set up your tablet
The first time you turn on the tablet, you'll see a Welcome screen.
©2013 Visual Land Inc.
P a g e |3
PRESTIGE Android Tablet Guide Book
When prompted, you can sign in with your Google Account or
create one at that time. You can also choose to skip this step and
create one later.
An e-mail address that you use for any of the following counts as
a Google Account:
•
•
•
•
•
Gmail
YouTube
Google Apps
Adwords
Any other Google Product
When you sign in with a Google Account, all the e-mail, contacts,
calendar events and any other data associated with that account
are automatically synced with your tablet.
If you have multiple Google Accounts, you can add the others
later.
©2013 Visual Land Inc.
P a g e |4
2
PRESTIGE Android Tablet Guide Book
Play & Explore
Browse Home Screens
To move between Home screens, swipe left or right.
To resize a widget, touch & hold, then let go and drag the blue
dots. To remove it, touch & hold, then drag it to the Remove icon
at the top of the screen.
Tap Status Bar for Notifications
Notifications alert you to the arrival of new messages, calendar
events, and alarms, as well as ongoing events, such as video
downloads.
When a notification arrives, its icon appears at the bottom of the
screen. Icons for pending notifications appear on the left, and
system icons showing things like Wi-Fi signal or battery strength
on the right.
To open the notifications shade, swipe up from the bottom or tap
the bar to expand it:
©2013 Visual Land Inc.
P a g e |5
PRESTIGE Android Tablet Guide Book
©2013 Visual Land Inc.
P a g e |6
PRESTIGE Android Tablet Guide Book
Certain notifications can be expanded to show more information,
such as email previews or calendar events. To expand or collapse
a notification, use two fingers to either swipe vertically or twist
together.
To open the related app, touch the notification icon on the left.
Some notifications also allow you to take specific actions by
touching icons within the notification. For example, Calendar notifications allow you to Snooze (remind you later) or send email to
other guests.
When you’re finished with a notification, just swipe it away to the
left or right. If you want to dismiss all notifications, touch the Dismiss icon at the top of the notification shade. drawer.
Getting Around
Every home screen shows the Favorites Tray: another quick way
to get to your books, magazines, apps, movies and music.
At the bottom of every screen, no matter what you’re doing,
you’ll always find these three navigation buttons:
Back
©2013 Visual Land Inc.
P a g e |7
PRESTIGE Android Tablet Guide Book
Opens the previous screen you were working in, even if it was in a
different app. Once you back up to the Home screen, you can’t go
back any further in your history.
Home
Opens Home. If you’re viewing a left or right Home screen, opens
the central Home screen.
Recent Apps
Opens a list of thumbnail images of apps you’ve worked with
recently. To open an app, touch it. To remove a thumbnail from
the list, swipe it left or right.
After a short time without getting used, these buttons may shrink
to dots or fade away, depending on the current app. To bring
them back, touch their location.
Touch & Type
Use your fingers to manipulate icons, buttons, menus, the
on-screen keyboard, and other items on the touch screen. You
can also change the screen’s orientation.
©2013 Visual Land Inc.
P a g e |8
PRESTIGE Android Tablet Guide Book
To select or activate something, touch it.
To type something, such as a name, password, or search terms,
just touch where you want to type. A keyboard pops up that lets
you type into the field.
Type text by speaking: you can speak to enter text in most places
that you can enter text with the onscreen keyboard.
1. Touch a text field, or a location in text you've already entered
in a text field.
2. Touch the Microphone key on the onscreen keyboard.
3. When you see the microphone image, speak what you want to
type.
Say "comma", "period", "question mark", "exclamation mark" or
"exclamation point" to enter punctuation.
When you pause, what you spoke is transcribed by the speech
recognition service and entered in the text field, underlined. You
can touch the Delete key to erase the underlined text. If you start
typing or entering more text by speaking the underline
disappears.
©2013 Visual Land Inc.
P a g e |9
PRESTIGE Android Tablet Guide Book
To improve the processing of your voice input, Google may record
a few seconds of ambient background noise in temporary
memory at any time. This recording remains on the device only
fleetingly and is not sent to Google.
Other common gestures include:
Touch & Hold: Touch & hold an item on the screen by touching it
and not lifting your finger until an action occurs.
Drag: Touch & hold an item for a moment and then, without lifting your finger, move your finger on the screen until you reach
the target position. For example, you can move apps around on
the Home screen.
Swipe or Slide: Quickly move your finger across the surface of the
screen, without pausing when you first touch (so you don’t drag
something instead). For example, you can slide a Home screen
left or right to view the other Home screens.
Double-tap: Tap quickly twice on a webpage, map, or other
screen to zoom. For example, double-tap a picture in browser to
zoom in, and double-tap again to zoom out.
Pinch: in some apps (such as Maps, browser, and Gallery), you
can zoom in and out by placing two fingers on the screen at once
©2013 Visual Land Inc.
P a g e | 10
PRESTIGE Android Tablet Guide Book
and pinching them together (to zoom out) or spreading them
apart (to zoom in).
Rotate the Screen: on most screens, the orientation of the screen
rotates with your device as you turn it. You can change this in
display settings.
Settings
On the All Apps screen or the Utilities home screen, notice the
settings icon. This brings you to the settings screens for your
tablet, where you can adjust things like network, sound, and
account settings, among many others.
TIP: To get to Settings quickly no matter what screen you’re on,
swipe up your Notifications from the top of any screen and touch
the small
settings icon near the top.
To change your tablet’s notification sounds, volumes, and more,
go to
Settings > Device > Sound.
To change your tablet’s brightness, font size, and more, go to
©2013 Visual Land Inc.
P a g e | 11
PRESTIGE Android Tablet Guide Book
Settings > Device > Display.
Lock Screen
Depending how you use your tablet, you may want to set some
form of automatic screen lock to prevent unauthorized access. if
a lock has been set, the screen locks when your tablet’s display
goes to sleep.
When you touch the power button to wake up a locked tablet,
you must take some action, ranging from a simple swipe to typing
a lengthy password, to unlock it.
You can set locks of different strengths using your tablet’s lock
settings. To do so, go to
Settings > Personal > Security > Screen lock and touch the
type of lock you’d like to use.
IMPORTANT: If you set a pattern or password unlock you MUST
remember it. If you forget it, there is no way of unlocking your
tablet without restoring it to the factory settings which will erase
all data on your tablet.
©2013 Visual Land Inc.
P a g e | 12
PRESTIGE Android Tablet Guide Book
Access Your Content
To resize a widget, touch & hold, then let go and drag the blue
dots. To remove it, touch & hold, then drag it to the Remove icon
at the top of the screen.
To add a widget, touch and hold on an empty part of the home
screen, then select Widgets from the popup menu and swipe
from up until you see the one you want. If there is proper space
for the widget it'll be placed on the home screen.
Use apps
To see all your apps, touch All Apps at the bottom on any home
screen. The main All Apps screen opens. This is where you can see
all your apps. You can move app icons to any of your Home
screens.
From All Apps, you can
Move Between Screens: swipe up or down.
Launch an App: Touch its icon.
Place an app icon on a Home screen: Touch & hold the app icon,
slide your finger, and lift your finger to drop the icon in place.
©2013 Visual Land Inc.
P a g e | 13
PRESTIGE Android Tablet Guide Book
To remove an app icon from the Home screen, touch and hold it,
slide your finger toward the top of the screen, and drop the app
over the
Remove icon .
Most apps include a Menu icon near the top or bottom of the
screen that lets you control the app’s settings.
Organize Your Home screens
To move an app or widget icon to a different location on a Home
screen:
Touch & hold the icon.
Slide your finger to the new position.
To move between Home screens, slide toward the edge of the
screen. To bump another icon out of the way, slide slowly into it.
Lift your finger.
The icon drops into its new position.
Slide an icon quickly over another icon to create a folder.
Quick settings
©2013 Visual Land Inc.
P a g e | 14
PRESTIGE Android Tablet Guide Book
Use Quick Settings to easily access Wi-Fi settings, manage display
brightness, open the main Settings menu and more.
Swipe down from the top right corner of any screen to open
Quick Settings, then touch one of the boxes to open a specific
setting.
Change sound settings
Your tablet uses sounds to communicate, including notifications,
alarms, and navigation feedback.
To customize the sounds your tablet makes, go to Settings > Device > Sound:
Volumes sets the master volume separately for music, notifications, and alarms. You can still use the physical volume control
on the tablet to raise or lower volume of whatever sound is
currently playing.
Default notification announces the arrival of notifications unless
you specify a different sound in an individual app.
Touch sounds give audible feedback when you touch active icons
or buttons on the screen.
©2013 Visual Land Inc.
P a g e | 15
PRESTIGE Android Tablet Guide Book
Screen lock sound is triggered when you unlock the screen.
Change the wallpaper
Touch and hold on an empty part of any home screen. Select
Wallpapers and a selection of thumbnails will appear. Swipe
left or right to browse the available wallpapers. Tap on one to
select it. Choose Set wallpaper to make the selection your
wallpaper.
Google Now
(You must be logged in to your Google account to use this
feature.)
Google Now shows you information at just the right time, such as
today’s weather before you start your day, how much traffic to
expect before you leave for work, and even your favorite team’s
score while they’re playing.
Swipe up from the bottom center of any screen, or touch the
Google Search bar on any Home screen.
Say “Google” to search
©2013 Visual Land Inc.
P a g e | 16
PRESTIGE Android Tablet Guide Book
When the Google Now screen is open, you can say “Google” to
activate a voice search.
Open Google Now, then say “Google” and your query to search.
You’re in control
When you decide to use Google Now, you’re turning on location
reporting and location history. Google Now also uses location information provided by Google’s location service and GPS, if those
are currently turned on.
Google Now also uses data that you may have stored in other
Google products. For example, if you have searches stored in your
Web History, Google Now can show cards based on sports scores,
flight status, and so on.
Similarly, Google Now can use data that you may have stored in
third-party products that you allow Google to access. For example, your tablet’s synced calendar may include entries from
non-Google calendar products. If you have a synced calendar
entry for a dentist appointment that includes the dentist’s
address, Google Now can check traffic and suggest when to leave.
You’re in control. You can choose exactly which cards you’d like
to see, adjust the details of what they display, and adjust your
privacy settings.
©2013 Visual Land Inc.
P a g e | 17
PRESTIGE Android Tablet Guide Book
Relax with Google Play
Google Play brings together all your favorite content in one place
– movies, TV shows, books, music, magazines, apps, and more –
so you can reach it from any of your devices.
Shop on Google Play
Sign in to play.google.com to get your entertainment from
anywhere.
Find your content
If you purchased on Google Play in the past, you’ll automatically
have access to this content on your tablet — just make sure
you’re signed in using the same
account that you used to purchase it.
You can get to your content using any of the Google Play icons in
your Favorites tray, including Books, Magazines, Movies, and
Music.
Or, touch the Play Store icon to open Google Play. In the top right
corner, to the left of the Menu and Search icons, you’ll find a My
Library icon corresponding to the section of Google Play you’re
currently viewing. For example, while browsing the Movies & TV
section, you’ll see the Google Play Movies app icon, which will
take you to My Movies & TV.
©2013 Visual Land Inc.
P a g e | 18
PRESTIGE Android Tablet Guide Book
You can quickly access your content this way, from the Google
Play Store app, even if you originally purchased it on Google Play
using a different phone or tablet. If you get a new device, all your
media will automatically be waiting for you here when you turn
on and sign in.
Google Play settings
To adjust your Google Play settings, switch accounts, or get help,
choose the option you want from the Menu in the top right
corner.
The Google Play Settings screen lets you control when you’re
no¬tified about updates to apps and games, clear your search
history, and enable user controls. To filter Android apps based on
matu¬rity level or require a PIN before completing any purchase,
touch Content filtering or Set or change PIN.
Google Play support
For more detailed information about Google Play, including
options,
visit
phone
and
email
support
support.google.com/googleplay.
Use & customize the lock screen
©2013 Visual Land Inc.
P a g e | 19
PRESTIGE Android Tablet Guide Book
This information applies to Android 4.2.1 and higher. If an earlier
version is installed on your device and you haven’t accepted the
latest system update, some details will differ.
You can add widgets to the top of the lock screen and swipe
be¬tween them. Lock screen widgets let you scan recent Gmail
mes¬sages, Calendar entries, and other app content without
unlocking your screen.
If your tablet is set up for more than one user, you may need to
touch your image at the bottom of the screen to see your own
lock screen.
To set or change the type of lock, go to Settings > Personal >
Security > Screen lock.
To open Google Now from the lock screen, swipe up from the
bottom of the lock screen. Enter your PIN, pattern, or password if
prompted.
Take a screenshot
You can easily take a screenshot on your tablet that you can save
in your Gallery or share with others:
1. Make sure the image you want to capture is displayed on
the screen.
©2013 Visual Land Inc.
P a g e | 20
PRESTIGE Android Tablet Guide Book
2. Press the Power and Volume UP buttons for one second.
The screenshot is automatically saved in your Gallery.
©2013 Visual Land Inc.
P a g e | 21
PRESTIGE Android Tablet Guide Book
3
Tune Performance
Optimize Battery Life
You can extend your battery’s life between charges by turning off
features that you don’t need. You can also monitor how apps and
system resources consume battery power.
To control battery settings, go to
Settings > Device > Battery.
Extend the life of your battery
If you aren’t using Wi-Fi use the Settings app to turn it off.
Turn down screen brightness and set a shorter sleep timeout:
Settings > Device > Display.
If you know you won’t be near a mobile or Wi-Fi network for a
while, switch to Airplane mode: press and hold the Power button,
or go to Settings > Wireless & networks > More > Airplane
mode.
©2013 Visual Land Inc.
P a g e | 22
PRESTIGE Android Tablet Guide Book
Check battery level and usage details open Settings > Device >
Battery.
The list at the bottom of the screen shows the breakdown of battery usage for individual apps and services. Touch a graph for
more details. The details screen for some apps includes buttons
that allow you to adjust settings affecting power usage, or stop
the app completely.
Warning: if you stop some apps or services, your device may not
work correctly.
Battery status (charging, discharging) and level (as a percentage
of fully charged) are displayed at the top of the screen.
The discharge graph shows battery level over time since you last
charged the device, and how long you’ve been running on battery
power.
Use the Settings Apps Screen
The Apps screen allows you to adjust several aspects of the way
your device uses memory. To view these settings, go to Settings >
Wireless & networks > Data usage.
©2013 Visual Land Inc.
P a g e | 23
PRESTIGE Android Tablet Guide Book
You’ll see three tabs at the top of the screen, each displaying a list
of apps or their components:
Downloaded. Displays apps you’ve downloaded
Running. Displays all apps, processes, and services that are
currently running or that have cached processes, and how much
RAM they are using.
The graph at the bottom of the Running tab shows the total RAM
in use and the amount free. At the top right of the screen, touch
Show cached processes or Show running services to switch back
and forth.
All. Displays all apps that came with Android and all apps you
downloaded on Google Play or other sources.
To view details about an app or other item listed under any tab,
touch its name. The information and controls available vary
among different types of apps, but commonly include:
Force stop button: stops an app that is misbehaving. stopping an
app, process, or service may cause your device to stop working
correctly. You may need to restart your device after doing this.
Uninstall button: deletes the app and all of its data and settings.
©2013 Visual Land Inc.
P a g e | 24
PRESTIGE Android Tablet Guide Book
Disable button: Prevents the app from running, but does not
uninstall it. This option is available for some apps and services
that can’t be uninstalled.
Clear data button: Delete an app’s settings and other data
without removing the app itself.
Clear cache: if the app stores data in a temporary area of the
tablet’s memory, lists how much information is stored, and includes a button for clearing it.
Launch by default: If you have configured an app to launch certain file types by default, you can clear that setting here.
Permissions: Lists the kinds of information about your tablet and
data the app has access to.
©2013 Visual Land Inc.
P a g e | 25
PRESTIGE Android Tablet Guide Book
4
Enter & Edit Text
Use the keyboard
You can enter text using the onscreen keyboard. some apps open
it automatically. in others, you open it by touching where you
want to type.
To make the keyboard go away, touch the modified
ton below it.
back but-
Basic editing
©2013 Visual Land Inc.
P a g e | 26
PRESTIGE Android Tablet Guide Book
Move the insertion point: Touch where you want to type. The
cursor blinks in the new position, and a green tab appears below
it. Drag the tab to move the cursor.
Select text: Touch & hold or double-tap within the text.
The nearest word highlights, with a tab at each end of the selection. drag the tabs to change the selection.
The tab disappears after a few moments, to get out of your way.
To make it reappear, touch the text again.
Delete text: Touch
before the cursor.
to delete selected text or the characters
Type capital letters: Touch the shift key once to switch to capital
letters for one letter. Or touch & hold
shift key while you type.
When you release the key, the lowercase letters reappear.
Turn caps lock on: double-tap or touch & hold
shift key, so it
changes to
. Touch
shift key again to return to lowercase.
Cut, copy, paste: select the text you want to manipulate. Then
touch
Cut,
Copy or
Paste button:
©2013 Visual Land Inc.
P a g e | 27
PRESTIGE Android Tablet Guide Book
©2013 Visual Land Inc.
P a g e | 28
PRESTIGE Android Tablet Guide Book
5
Connect to Networks
Wi-Fi is a wireless networking technology that can provide internet access at distances of up to 100 meters, depending on the
Wi-Fi router and your surroundings.
To use Wi-Fi, you connect to a wireless access point, or “hotspot.”
Some hotspots are open and you can simply connect to them.
Others implement security features that require other steps to
set up, such as digital certificates or other ways to ensure that
only authorized users can connect.
To extend the life of your battery between charges, turn off Wi-Fi
when you’re not using it. You can also set your device to disconnect automatically from Wi-Fi networks when it’s sleeping.
To work with Wi-Fi settings, go to
works > Wi-Fi.
Settings > Wireless & net-
Turn Wi-Fi on & connect to a Wi-Fi network
©2013 Visual Land Inc.
P a g e | 29
PRESTIGE Android Tablet Guide Book
If you’re adding a Wi-Fi network when first setting up your device
touch
Settings > Wireless & networks > Wi-Fi.
Slide the Wi-Fi switch to the on position.
The device scans for available Wi-Fi networks and displays the
names of those it finds. Secured networks are indicated with a
Lock icon. If the device finds a network that you connected to
previously, it connects to it.
Touch a network name to see more details or connect to it, and
type a password if necessary or, if your Wi-Fi router supports
Wi-Fi Protected setup, touch the WPs icon on your tablet, and
then touch the same button on your router.
To modify a network’s settings, touch & hold the network name.
Add a Wi-Fi network
You can add a Wi-Fi network so your device will remember it,
along with any security credentials, and connect to it automatically when it’s in range. You must also add a Wi-Fi network if the
network does not broadcast its name (ssid), or to add a Wi-Fi network when you are out of range.
©2013 Visual Land Inc.
P a g e | 30
PRESTIGE Android Tablet Guide Book
To join a secured network, you first need to learn security details
from the network’s administrator.
Turn on Wi-Fi, if it’s not already on. Touch the
Plus icon at
the top of the screen. Enter the ssid (name) of the network. if
necessary, enter security or other network configuration details.
Touch Save.
The information about the network is saved. Your device will connect to this network automatically the next time you come within
range.
Forget a Wi-Fi network
You can make the tablet forget about the details of a Wi-Fi network that you added—for example, if you don’t want the tablet
to connect to it automatically or if it’s a network that you no
longer use.
Turn on Wi-Fi, if it’s not already on. In the Wi-Fi settings screen,
touch the name of the network. Touch Forget in the dialog that
opens.
Configure proxy settings for a Wi-Fi network
©2013 Visual Land Inc.
P a g e | 31
PRESTIGE Android Tablet Guide Book
Some network administrators require you to connect to internal
or external network resources via a proxy server. by default, the
Wi-Fi networks you add are not configured to connect via a proxy,
but you can change that for each Wi-Fi network you’ve added.
Proxy settings are used by browser but may not be used by other
apps.
Touch & hold a network in the list of Wi-Fi networks you’ve
added. Touch Modify network in the dialog that opens. Select
Show advanced options. If the network has no proxy settings,
touch none under Proxy settings, then touch Manual in the menu
that opens. Enter the proxy settings supplied by your network
administrator. Touch Save.
The proxy settings apply only to the Wi-Fi network you modified.
To change the proxy settings for other Wi-Fi networks, modify
them individually.
Set Wi-Fi Notifications, Disconnect Policy, & Other
Advanced Options
To work with advanced Wi-Fi settings:
©2013 Visual Land Inc.
P a g e | 32
PRESTIGE Android Tablet Guide Book
Turn on Wi-Fi, if it’s not already on. In the Wi-Fi settings screen,
touch
Menu icon > Advanced.
These are the settings you can adjust:
Network notification: by default, when Wi-Fi is on, you receive
notifications in the Status bar when your device detects an open
Wi-Fi network. uncheck this option to turn off notifications.
Keep Wi-Fi during sleep: To conserve mobile data usage, your
device stays connected to Wi-Fi when the screen goes to sleep.
Touch this option to change this default behavior: either to stay
connected to Wi-Fi only when the device is connected to a
charger (when battery life isn’t a problem), or never to stay
connected to Wi-Fi during sleep.
This screen also displays the following information:
MAC address: The Media Access Control (MAC) address of your
device when connected to a Wi-Fi network.
IP address: The internet Protocol (IP) address assigned to the
device by the Wi-Fi network you are connected to (unless you
used the IP settings to assign it a static IP address).
©2013 Visual Land Inc.
P a g e | 33
PRESTIGE Android Tablet Guide Book
To turn Wi-Fi on or off, go to
> Wi-Fi.
Settings > Wireless & networks
To manage mobile data options, go to
networks > Data usage.
Settings > Wireless &
Connect to Virtual Private Networks
Virtual private networks (VPNs) allow you to connect to the resources inside a secured local network, from outside that network. VPNs are commonly deployed by corporations, schools, and
other institutions to let people access local network resources
when not on campus, or when connected to a wireless network.
To configure VPN access, you must first obtain the details from
your network administrator. Depending on your organization’s
solution, you may need to obtain a VPN app from your administrator.
The VPN settings screen allows you to add VPN networks and
adjust their settings. To view this screen and perform the tasks
described here, go to Settings > Wireless & networks > More >
VPN.
Add a VPN
©2013 Visual Land Inc.
P a g e | 34
PRESTIGE Android Tablet Guide Book
From the VPN screen, touch Add VPN profile.
In the form that appears, fill in the information provided by your
network administrator. Touch Save. The VPN is added to the list
on the VPN screen.
Connect to a VPN
From the VPN screen, touch the name of the VPN. In the dialog
that opens, enter any requested credentials. Touch Connect.
When you’re connected to a VPN, a Status icon and notification
are displayed continuously. To disconnect, touch the notification
for the VPN connection.
Edit a VPN
From the VPN screen, touch & hold the name of the VPN profile.
In the dialog that opens, touch Edit profile. Edit the VPN settings
you want. Touch Save.
Delete a VPN
From the VPN screen, touch & hold the name of the VPN profile.
Touch & hold the VPN you want to delete. In the dialog that
opens, touch Delete profile.
©2013 Visual Land Inc.
P a g e | 35
PRESTIGE Android Tablet Guide Book
Control Airplane Mode & Other Network Settings
These settings are available under Settings > Wireless & networks > More. Follow the links for detailed instructions:
Airplane Mode. Check to turn off all data transmission from the
device.
VPN. Touch to adjust settings that allow you to connect to
websites and other resources within a secured local network from
outside that network. see “Connect to virtual private networks”
on page 59.
©2013 Visual Land Inc.
P a g e | 36
PRESTIGE Android Tablet Guide Book
6
Connect to Keyboards, Mice, &
Other Devices
You can connect a keyboard, mouse, or even a joystick or other
input device to your tablet via usb and use it just as you would
with a PC.
You may need the provided adapter to connect the keyboard or
other device to your tablet’s USB port. To connect more than one
USB device at a time, use a powered usb hub to reduce the drain
on your tablet’s battery.
Keyboards
In addition to entering text, you can use your keyboard to
navigate your tablet’s features:
Use the arrow keys to select items on screen.
Pressing Return when an item is selected is equivalent to
touching that item.
©2013 Visual Land Inc.
P a g e | 37
PRESTIGE Android Tablet Guide Book
Pressing escape is equivalent to touching back.
Press Tab or Shift-Tab to move from field to field in a form or
other screen with multiple text fields.
Mice
When you connect a mouse to your tablet and move the mouse,
an arrow-shaped cursor appears, just as on a computer:
Use the mouse to move the cursor.
Clicking, pressing, and dragging with the mouse button is
equivalent to touching, touching & holding, and dragging with
your finger. Only one mouse button is supported. If your mouse
has a trackball or scroll wheel, you can use it to scroll both
vertically and horizontally.
Other Input Devices
You can connect joysticks, gamepads, and other input devices to
your tablet. if they work without special drivers or adapters on
your PC, they will likely work with your tablet. However, games
and other apps must be designed to support any special features
of an input device, such as dedicated buttons or other controls, to
take full advantage of them.
©2013 Visual Land Inc.
P a g e | 38
PRESTIGE Android Tablet Guide Book
7
Connect to a Computer
Connect to a Windows Computer via USB
You can use a usb cable to connect your tablet to a Windows
computer and transfer music, pictures, and other files in both directions. This connection uses the MTP protocol, which is supported by most recent versions of Windows.
When you connect your tablet to the usb port on your computer,
its usb storage is mounted as a drive and appears on your computer screen. You can now copy files back and forth as you would
using any other external device.
When you’re finished, simply disconnect the tablet by unplugging
the usb cable.
To change your tablet’s USB connection options, go to Settings >
Device > Storage > Menu > USB computer connection.
Connect to a Macintosh computer via USB
©2013 Visual Land Inc.
P a g e | 39
PRESTIGE Android Tablet Guide Book
You can use a usb cable to connect your tablet to a computer running Mac OS X with a usb cable and transfer music, pictures, and
other files in both directions.
This connection uses the MTP protocol, which is not supported by
Mac OS X natively. Therefore, you first need to install the free
Android File Transfer application on your Macintosh. It’s available
from www.android.com/filetransfer, along with instructions on
how to install it.
After you install Android File Transfer, follow these steps:
1. If you are using Android File Transfer for the first time,
double-click it to open it.
After you start Android File Transfer once, it opens automatically
whenever you connect your device to your computer.
2. Connect your device to your computer with a usb cable.
Android File Transfer starts, if it’s not already running, and opens
a window that displays the contents of your device, along with
storage space details at the bottom of the window.
You work with this window much as if it were a Finder window:
opening and closing folders, creating new folders, and dragging
©2013 Visual Land Inc.
P a g e | 40
PRESTIGE Android Tablet Guide Book
files to or from it and other Finder windows. Disconnect the USB
cable when you’re finished.
To change your tablet’s USB connection options, go to Settings >
Device > Storage > Menu > USB computer connection.
©2013 Visual Land Inc.
P a g e | 41
PRESTIGE Android Tablet Guide Book
8
Manage Accounts
Add or remove accounts
You can use multiple Google Accounts and Microsoft exchange
Activesync accounts on your device. You may also be able to add
other kinds of accounts, depending on your apps. Some you can
add in the Accounts section of settings, as described here. Others
you add using an app that works with those kinds of accounts.
For example, you can add IMAP and POP3 email accounts with
the email app.
To reach the settings described here, start from
Accounts.
Settings >
Add an Account
To add some accounts, you may need to obtain details from system administrator about the service to which the account connects. For example, you may need to know the account’s domain
or server address.
©2013 Visual Land Inc.
P a g e | 42
PRESTIGE Android Tablet Guide Book
Go to Settings > Accounts > Add account. Touch the kind of
account to add. Follow the on-screen instructions.
Most accounts require a username and password, but the details
depend on the kind of account and the configuration of the
service you’re connecting to.
Depending on the kind of account, you may be asked to configure
what kinds of data you want to sync, name the account, and
other details.
When you’re finished, the account is added in one of two places:
Google Accounts show up under Settings > Accounts > Google.
Other accounts show up under Accounts on the main settings
screen.
Remove an Account
You can remove any account and all information associated with
it from your device, including email, contacts, settings, and so on.
To remove a Google account, touch
©2013 Visual Land Inc.
Menu > remove account.
P a g e | 43
PRESTIGE Android Tablet Guide Book
For any other type of account go, to Settings > Accounts > account-name and look for the Remove option.
©2013 Visual Land Inc.
P a g e | 44
PRESTIGE Android Tablet Guide Book
9
Change Backup & Reset Options
You can back up settings and other data associated with one or
more of your Google Accounts. if you need to replace or factory
reset your device, you can restore your data for any accounts that
were previously backed up.
To view the settings described here, go to
& Reset.
Settings > Backup
These options are available:
Back Up My Data. If you check this option, a wide variety of your
personal data is backed up automatically, including your Wi-Fi
passwords, Browser bookmarks, a list of the apps you’ve
installed, the words you’ve added to the dictionary used by the
onscreen keyboard, and most of your customized settings. some
third-party apps may also take advantage of this feature, so you
can restore your data if you reinstall an app. If you uncheck this
option, your data stops getting backed up, and any existing
backups are deleted from Google servers.
©2013 Visual Land Inc.
P a g e | 45
PRESTIGE Android Tablet Guide Book
Backup Account. Displays the Google Accounts whose information gets backed up. You must sign in with one or more of
these accounts on a new or reset device to retrieve the associated information.
To add a new account, touch Backup account > Add account.
Automatic restore. Check this option to restore settings and
other data when you reinstall an app. This feature requires that
you are backing up your data with your Google Account and that
the app is using the backup service.
Factory data reset. Touch this option, then reset tablet to erase
all your personal data from internal storage, including
information about your Google Account, any other accounts, your
system and app settings, any downloaded applications, and your
music, photos, videos, and other files.
After resetting your tablet, you’ll need to re-enter the same information requested when you first set up your tablet. If you’ve
been backing up your data to a Google account, an option during
the setup process allows you to restore it. Some third-party apps
also make use of the backup service, so if you reinstall one, its
settings and data are restored.
©2013 Visual Land Inc.
P a g e | 46
PRESTIGE Android Tablet Guide Book
10
Secure Your Tablet
Set Screen Lock
Depending how you use your tablet, you may want to set some
form of automatic screen lock to prevent unauthorized access. If
a screen lock has been set, the screen locks when your tablet’s
display goes to sleep.
If your tablet’s playing music when the screen locks, you can continue listening or pause the selection without unlocking.
To adjust your lock settings:
1. Go to
Settings > Personal > Security > Screen lock.
2. Touch the type of lock you want and follow the onscreen
instructions. If you have previously set a lock, you must enter the
pattern, PIN, or password to unlock the lock settings.
You can choose among these lock options, listed in approximate
order of strength:
©2013 Visual Land Inc.
P a g e | 47
PRESTIGE Android Tablet Guide Book
Slide provides no protection, but lets you get to the Home screen
quickly, or open Camera and start taking pictures immediately.
Pattern lets you draw a simple pattern with your finger to unlock
the phone. This is more secure than Slide unlock.
PIN requires four or more numbers. Longer PINs tend to be more
secure.
Password requires four or more letters or numbers. This is the
most secure option, as long as you create a strong password.
Password tips: For best security, specify a password that is at
least 8 characters long, contains a mixture of numbers, letters,
and special symbols and doesn’t contain any recognizable words
or phrases.
To change when your phone goes to sleep, go to Settings
Device > Display > Sleep.
>
To see your passwords when you input them, go to Settings
Personal > Security > Make passwords visible.
>
Encrypt your Tablet
©2013 Visual Land Inc.
P a g e | 48
PRESTIGE Android Tablet Guide Book
You can encrypt all the data on your tablet: Google Accounts, app
data, music and other media, downloaded information, and so
on. if you do, you must enter a numeric PIN or password each
time you turn on your tablet. Note that this is the same PIN or
password that you use to unlock your tablet without encryption,
and cannot be set independently.
Warning: encryption is irreversible. The only way to revert to an
unencrypted tablet is to perform a factory data reset, which
erases all your data.
Encryption provides additional protection in case your tablet is
stolen, and may be required or recommended in some organizations. Consult your system administrator before turning it on. in
many cases the PIN or password you set for encryption is controlled by the system administrator.
Before turning on encryption, prepare as follows:
Set a lock screen PIN or password.
Charge the battery.
Plug in your tablet.
©2013 Visual Land Inc.
P a g e | 49
PRESTIGE Android Tablet Guide Book
Schedule an hour or more for the encryption process: you must
not interrupt it or you will lose some or all of your data.
When you’re ready to turn on encryption: Touch Settings >
Personal > Security > Encryption > Encrypt tablet.
Read the information about encryption carefully.
The Encrypt Tablet button is dimmed if your battery’s not
charged or your tablet’s not plugged in. If you change your
mind about encrypting your tablet, touch the back button.
Warning: if you interrupt the encryption process, you will lose
data.
Touch Encrypt tablet.
Enter your lock screen PIN or password and touch Continue.
Touch Encrypt Tablet again.
The encryption process starts and displays its progress. encryption can take an hour or more, during which time your tablet may
restart several times.
©2013 Visual Land Inc.
P a g e | 50
PRESTIGE Android Tablet Guide Book
When encryption is complete, you’re prompted to enter your PIN
or password. subsequently, you must enter your PIN or password
each time you power on your tablet, to decrypt it.
©2013 Visual Land Inc.
P a g e | 51
PRESTIGE Android Tablet Guide Book
11
Work with Certificates
You can use digital certificates to identify your device for a variety
of purposes, including VPN or Wi-Fi network access as well as
authentication to servers by apps such as email or browser. To
use a certificate to identify your device, you must obtain it with
help from your system administrator, and install it in your
device’s trusted credential storage .
Android supports DER-encoded X.509 certificates, saved in files
with a .crt or .cer file extension. If your certificate file has a .der or
other extension, you must change it to .crt or .cer or you won’t be
able to install it.
Android also supports X.509 certificates saved in PKCS#12 key
store files with a .p12 or .pfx extension. If your key store has
some other extension, you much change it to .p12 or .pfx or you
won’t be able to install it. When you install a certificate from a
PKCS#12 key store, Android also installs any accompanying
private key or certificate authority certificates.
Install Client & CA Certificates
©2013 Visual Land Inc.
P a g e | 52
PRESTIGE Android Tablet Guide Book
To install a certificate from your tablet’s internal storage: Copy
the certificate or key store from your computer to the root of
your device’s internal storage (that is, not in a folder).
Touch
Settings > Personal > Security > Credential storage >
Install from storage.
Touch the filename of the certificate or keystore to install. Only
certificates that you haven’t already installed are displayed. If
prompted, enter the key store password and touch OK. Enter a
name for the certificate and touch OK.
Typically, a CA certificate included with a client certificate is installed at the same time. You can also install separate CA certificates using the same steps.
if you have not already set a pattern, PIN, or password for your
device, you’re prompted to set one up. The type of lock that’s acceptable may be predetermined by your system administrator.
You can now use the certificate that you installed when connecting to a secure network or for client authentication with email,
Browser, and third-party apps. After a certificate is installed successfully, the copy in storage is deleted.
©2013 Visual Land Inc.
P a g e | 53
PRESTIGE Android Tablet Guide Book
Warning: Apps such as email and browser that support
certificates allow you to install certificates directly from within
the app. For details, see the Help or other instructions that come
with each app.
Work with CA Certificates
If a certificate authority (CA) certificate gets compromised, or for
some other reason your organization doesn’t want to trust it, you
can disable or remove it. To do so, follow these steps:
1. Touch
Settings > Personal > Security > Credential storage
>Trusted credentials. The trusted credentials screen has two
tabs:
System displays certificate authority (CA) certificates that are
permanently installed in the RoM of your tablet.
User displays any CA certificates that you have installed yourself,
for example in the process of installing a client certificate.
To examine the details of CA certificate, touch its name. A
scrolling screen displays the details.
©2013 Visual Land Inc.
P a g e | 54
PRESTIGE Android Tablet Guide Book
To remove or disable a CA certificate, scroll down to the bottom
of the details screen and touch either Disable for system
certificates or remove for user certificates.
When you disable a system CA certificate, the button at the
bottom of its details screen changes to Enable, so you can enable
the certificate again if necessary. When you remove a
user-installed CA certificate, it is gone permanently and must be
re-installed if you want it back.
In the confirmation dialog that appears, click OK.
©2013 Visual Land Inc.
P a g e | 55
PRESTIGE Android Tablet Guide Book
12
Try Some Apps
Use All Apps
From All Apps, you can:
• Move between screens - Swipe left or right.
• Open an app - Touch its icon.
• Place an app icon on a Home screen - Touch & hold the
app icon, slide your finger, and lift your finger to drop
the icon in place.
• Browse widgets - Touch the Widgets tab at the top of
any All Apps screen.
• Get more apps - Touch the Play Store icon in the list of
app icons, or the Shop icon at the upper right.
To remove an app icon from the Home screen, touch & hold it,
slide your finger toward the top of the screen, and drop the app
over the Remove icon.
To view info about an app from an All App screen, touch & hold it,
slide your finger toward the top of the screen, and drop the app
over the App Info icon.
©2013 Visual Land Inc.
P a g e | 56
PRESTIGE Android Tablet Guide Book
Most apps include a Menu icon near the top or bottom of the
screen that lets you control the app’s settings.
Start Gmail
But Gmail isn’t just about email. You can use your Gmail account
to sign in to all Google apps and services, including these and
many more:
• Google Now, for getting just the right information at just
the right time
• Calendar
• People, for keeping track of your contacts
• Google Drive, for working with documents,
spreadsheets, or drawings
While you’re reading a message:
• Touch the icons and menu along the top of the screen to
archive, throw away, label, or perform other actions on
that message.
• Swipe left or right to read the previous or next
conversation.
To organize your email, check the box beside a message to select
it. Then use the icons and menu along the top of the screen to
manage the selected messages.
To change your settings, add an account, or get help, touch the
Menu icon.
©2013 Visual Land Inc.
P a g e | 57
PRESTIGE Android Tablet Guide Book
No matter where you are within Gmail, you can always get back
to the Inbox by touching the Gmail icon at the top of the screen.
Find People
When you first turn on your tablet and sign into a Google
Account, any existing contacts from that account are synced with
your People app. After that, all your contacts stay in sync
automatically on your tablet, another device, or a Web browser.
If you use Exchange, you can also sync that contact information
with People.
All your People information is available from Gmail, Google Talk,
and other apps. As you add contacts from different sources,
they’re synced automatically across all the places you need them.
When you open the People app, you can:
• View all contacts, favorites, or groups. Choose from the
top left of the screen.
• Read details. Touch a name to see details for a contact
or group.
• View recent activity. When viewing a contact, swipe to
the right to see recent updates.
©2013 Visual Land Inc.
P a g e | 58
•
PRESTIGE Android Tablet Guide Book
Edit details. While viewing a contact, touch icons at the
top of the screen or the Menu icon to edit or share
contact details, delete a contact, and so on. You can also
touch the star beside the contact’s name to add that
contact to your Favorites list.
• Change your settings. While viewing the main list screen,
touch the Menu icon to import or export contacts,
choose display options for the Groups and All tabs, and
add or edit accounts.
No matter where you are within People, you can always get back
to the main lists by touching the People icon at the top of the
screen.
Manage your Calendar
When you first set up your tablet, you configured it to use an
existing Google Account (such as Gmail), or you created a new
one. The first time you open the Calendar app on your tablet, it
displays any existing calendar events from that Google Account
on the web.
As you edit events from any mobile device or web browser,
they’re synced automatically across all the places you need them.
To change the Calendar view, choose Day, Week, Month, or
Agenda from the top of the screen.
©2013 Visual Land Inc.
P a g e | 59
PRESTIGE Android Tablet Guide Book
From any of these views, you can:
• Read or edit event details. Touch an event to view its
details.
• Manage events and calendars. Touch icons across the
top of the screen or Menu to search or create events,
return to today, or adjust settings.
To email everyone who’s invited to an event, you have two
options:
1. Open the event from the Calendar app at any time and
touch Email guests.
2. When a notification of the event arrives just before the
meeting starts, swipe down the notification shade. Then
swipe using one finger to expand the notification if
necessary, and touch Email guests.
Open & Use Clock
Set an alarm
1. Touch the Alarm Clock icon in the lower left corner of
the screen.
2. Touch the Add icon to add a new alarm.
Select the time you want, then touch OK. Any existing alarms will
show in the main Clock screen. To turn one On or Off, slide the
switch.
©2013 Visual Land Inc.
P a g e | 60
PRESTIGE Android Tablet Guide Book
You can also add a label to an alarm and change the ringtone. To
change these options for a single alarm, touch the arrow
underneath the On/Off switch.
Set a timer
1. Touch the Timer icon in the top left corner of the screen.
2. Enter the time you want, then touch Start.
When the timer is going, you can add an additional minute, pause
the timer, or delete the current timer.
The timer beeps when the time is up. It keeps beeping until you
touch Stop.
Use the stopwatch
1. Touch the Stopwatch icon in the top right corner of the
screen.
2. Touch Start to start the stopwatch.
If you want to pause the stopwatch, touch Stop. You can also add
laps while the stopwatch is running by touching the icon to the
left of the stopwatch.
To share your results, touch the Share icon to share via Google+,
Gmail, and more.
View your Clock
©2013 Visual Land Inc.
P a g e | 61
PRESTIGE Android Tablet Guide Book
To view the current date and time, touch the Clock icon at the top
center of the screen.
Manage downloads
Google Play streams your purchases and rentals from Google
servers while you’re playing them. They don’t occupy permanent
storage space. However, you can pin (download) books, movies,
and other content in order to access it offline.
In addition to downloading content from Google Play, you can
download files from Gmail or other sources. Use the Downloads
app to view, reopen, or delete what you download in this way.
From the Downloads app:
• Touch an item to open it.
• Touch headings for earlier downloads to view them.
• Check items you want to share. Then touch the Share
icon and choose a sharing method from the list.
• Check items you want to delete. Then touch the Trash
icon.
• At the bottom of the screen, touch Sort by size or Sort by
date to switch back and forth.
When your tablet is connected to a computer, look in the
Download directory to view files available in the Downloads app.
You can view and copy files from this directory.
©2013 Visual Land Inc.
P a g e | 62
PRESTIGE Android Tablet Guide Book
13
Google Now & Search
About Google Now
You must be logged in to your Google account in order to use this
feature.
Google Now gives you just the right information at just the right
time. Swipe up from the bottom of your tablet to get commute
traffic before work, popular nearby places, your favorite team’s
current score, and more.
You can turn Google Now on or off at any time. Swipe up the
same way and touch Menu > Settings > Google Now. If the
keyboard’s covering the menu, touch the modified Back button to
lower it.
After you decide to start using Google Now, you don’t need to do
anything else. If you like, you can fine-tune some settings, but
Google Now doesn’t need any elaborate setup. The information
you need is always at your fingertips.
©2013 Visual Land Inc.
P a g e | 63
PRESTIGE Android Tablet Guide Book
To know when to display what information, Google Now uses
contextual data from your tablet and from other Google
products, plus data from third-party products that you allow
Google Now to access.
For example, Google Now uses the time of day, your current
location, and your location history to show you what the traffic
on your commute is like when you wake up in the morning. It also
uses information from Google services such as your Web History
for sports or flight updates, or from your synced calendar entries
for appointment reminders.
About Google Now cards
A Google Now card is a short snippet of useful information that
slides into view right when you’re most likely to need it. For
example, here’s a traffic card:
To see some sample cards from the main Google Now screen,
touch Menu > Sample cards. When you’re finished and want to
©2013 Visual Land Inc.
P a g e | 64
PRESTIGE Android Tablet Guide Book
get back to the main Google Now screen, touch Hide sample
cards.
In addition to the cards shown in the list of samples, you may also
see a Public Alerts card.
Public Alerts provide emergency information from sources such
as the National Weather Service and the U.S. Geological Survey.
Coverage is currently provided by a limited number of key
partners, only in the United States (excepting U.S. Geological
Survey earthquake alerts). Google can’t guarantee that you’ll see
every relevant alert. However, Google Now attempts to show you
what’s important when you need it, in the hope that such alerts
are a useful additional source of information. To learn more, visit
support.google.com/publicalerts.
About location access, reporting, & history
Location access settings determine whether your tablet can use
your current location. When location access is turned on, apps
can use it to give you more relevant information, such as nearby
restaurants or commute traffic.
To turn off location access for all apps, go to Settings > Personal >
Location access. If you prefer, you can turn off location access by
©2013 Visual Land Inc.
P a g e | 65
PRESTIGE Android Tablet Guide Book
Google apps while still permitting its use by non-Google apps –
just go to Settings > Accounts > Google > Location settings.
Location reporting refers your tablet’s ability to report your
current location for the purpose of recording your location
history.
Location history refers to your tablet’s ability to store your past
locations, including home and work.
When you decide to use Google Now, you’ll start reporting your
location and turn on your location history. Google won’t share
this information with other users or marketers without your
permission.
If you opted in to location history in the past, Google Now uses
your previously recorded locations as well as ongoing locations
when making suggestions. Turning off location history pauses the
collection of location information, but doesn’t delete your
history. To manage or delete your location details, visit
google.com/locationhistory.
Along with location history, Google Now uses your tablet’s
location access service, which must also be turned on for Google
©2013 Visual Land Inc.
P a g e | 66
PRESTIGE Android Tablet Guide Book
Now to work. To manage this setting, go to
> Location access.
Settings > Personal
For more details, see “Control location access, reporting, &
history.”
About Web History & other data
Google Now uses data from multiple sources to help predict what
you need. For example, if you have a synced calendar entry for a
dentist appointment, Google Now can check traffic and suggest
when to leave. And if you have relevant searches saved in your
Web History, such as for your favorite sports team or for
upcoming flights, Google Now can also show cards for sports
scores, flight status, and more.
To manage your Web History, visit google.com/history. You can
delete or pause your Web History and still use Google Now, but
certain kinds of information, such as flight details, won’t show up.
Use Google Now
To view the Google Now cards that are waiting for you at any
particular time, swipe up from the bottom of your tablet, or
touch Google on any Home screen.
©2013 Visual Land Inc.
P a g e | 67
PRESTIGE Android Tablet Guide Book
Google Now displays cards when they’re most likely to be useful
and relevant based on the current time and your current location.
To expand that search and get additional ones, touch Show more
cards below the last card displayed.
Swipe cards away
Swipe cards away when you don’t need them.
You’ll occasionally be asked whether a card was useful. By
answering, you can help Google Now learn which cards are most
useful to you and when.
Turn cards off or on
1. From the main Google Now screen, go to Menu >
Settings > Google Now.
2. Locate the type of card.
3. Touch the card’s On/Off switch.
Edit card settings
To learn why a card appears when it does, or to adjust your
preferences for that card type, touch the Info icon.
The icon turns blue, and the card expands downward, like this:
©2013 Visual Land Inc.
P a g e | 68
PRESTIGE Android Tablet Guide Book
The italicized text explains why the card has appeared at the
current time or location.
In some cases, you can also adjust preferences related to that
card (such as Fahrenheit or Celsius for the Weather card). Some
cards also let you answer questions that help Google Now
fine-tune its performance.
To hide this information, touch the
©2013 Visual Land Inc.
Info icon again.
P a g e | 69
PRESTIGE Android Tablet Guide Book
Some cards rely on details you specify about your home and work
addresses, the sports team or stocks you’re following, and so on.
To edit such details, go to Menu > Settings > My stuff.
Adjust notifications
When cards appear, you’ll receive a notification. You can touch
the notification to open the card, or swipe to dismiss it.
For high-priority card notifications, you can set a ringtone or turn
Vibrate on or off. You can also turn notifications for specific types
of cards off completely.
To adjust notifications:
Touch Menu > Settings > Notifications
Use the Google Now widget
The Google Now widget displays a summary of your current
Google Now cards, either on a Home screen or on the lock screen.
Touch the widget anywhere to see the details in Google Now.
To add a Google Now widget:
To the lock screen: Touch the Add icon and follow the
instructions.
©2013 Visual Land Inc.
P a g e | 70
PRESTIGE Android Tablet Guide Book
To the Home screen: Touch the All Apps icon and swipe left until
you find the widget. Then touch & hold the widget to activate a
Home screen, and drag the widget to the location you want.
Turn Google Now on or off
You can turn Google Now on or off from within the Google Search
app:
1. Swipe up from the bottom of any screen, or touch
Google or the Google icon on a Home screen.
2. Touch Menu > Settings. You may need to lower the
keyboard to see the Menu icon.
Turn on Google Now from the Settings screen:
1. Touch Google Now.
2. In the screen that appears, touch Yes, I’m in.
Turn off Google Now from the Settings screen:
1. Touch Google Now.
2. Slide the On/Off switch to Off.
3. In the dialog that appears, decide whether you also want
to turn off Location History. If so, check Also turn off
Location history. Selecting this option may affect the way
other Google products work.
4. Touch Turn off.
©2013 Visual Land Inc.
P a g e | 71
PRESTIGE Android Tablet Guide Book
Turning off Google Now stops the display of cards and returns any
card settings you may have changed to their initial state. Turning
off location history doesn’t delete existing history or turn off
location reporting.
Control location access, reporting, & history
This section describes how to set your home and work addresses
and manage other location-related features used by Google Now.
Define home & work
As you use Google Now, you may be asked to confirm your home
or work address to get commute traffic information, travel help,
and more. You can change these addresses in several other ways:
• When a Traffic card appears for home or work, touch the
Info icon.
• On the main Google Now screen, go to Menu > Settings
> My stuff > Places, then edit Home or Work.
• Visit maps.google.com from a browser and open My
Places.
• Visit Location history dashboard from a browser, click
Change next to Time at Work or Time at Home, edit the
address, and click Save.
Turn off location reporting & history
©2013 Visual Land Inc.
P a g e | 72
PRESTIGE Android Tablet Guide Book
To turn off both location reporting and location history for your
tablet:
1. Go to Settings > Google > Maps & Latitude. This brings
you to the Location settings screen for Google Maps.
2. To turn off location reporting, touch Location reporting >
Do not update your location.
3. To turn off location history, uncheck Enable location
history.
You can turn off and delete your location history and still use
Google Now, but certain kinds of information, such as commute
traffic, may be limited or won’t show up at all.
Delete location history details
Even if you turn off both location reporting and location history,
your previously recorded history is still available to Google
services such as Google Now.
To delete location history details, follow these steps from a
desktop computer:
1. Open a web browser and make sure you’re signed in
with the account whose location history you want to
manage.
2. Visit google.com/locationhistory. A page appears that
allows you to view your location history for any date.
©2013 Visual Land Inc.
P a g e | 73
3.
4.
PRESTIGE Android Tablet Guide Book
To delete all your recorded location history, click Delete
all history. Alternatively, from this screen you can delete
a portion of your location history starting from a date
you choose in the calendar.
Click OK.
Turn off location access for your tablet
Even when location reporting and location history are turned off,
Google can periodically report data for use by various apps from
sources such as Wi-Fi, mobile networks, and GPS to determine
your precise location at any given time.
To turn off access to precise location information for your tablet,
go to Settings > Personal > Location access and slide the switch
to Off.
To keep location access on, you must keep GPS satellites, Wi-Fi &
mobile network location, or both settings checked.
If you prefer, you can turn off location access by Google apps
while still permitting its use by non-Google apps – just go to
Settings > Accounts > Google > Location settings.
For more information about location access settings, see Manage
location access.
©2013 Visual Land Inc.
P a g e | 74
PRESTIGE Android Tablet Guide Book
Use your voice on Android
You can speak into your Android phone or tablet to search, get
directions, send messages, and perform other common tasks. To
initiate an action or a search using your voice, touch the
Microphone icon on the Home screen or in the Google Search
app.
If your device is running Android 4.1 or later, you don’t have to
touch the microphone — just open the Google Search app and
say “Google.”
Turn hotword detection on or off
The ability to trigger a search or action by saying “Google” is
called hotword detection. To turn it off or on, open the Google
Search app and touch Menu > Settings > Voice > Hotword
detection.
Voice Search
After you touch the Microphone icon or say “Google,” Google
listens as you speak and initiates the search or action you
describe. If Voice Search doesn’t understand you, it lists a set of
possible meanings. Just touch the one you want.
If you ask your question to Google, the answer can be spoken to
you. The answer can be a fact, weather condition, stock price,
©2013 Visual Land Inc.
P a g e | 75
PRESTIGE Android Tablet Guide Book
flight status, sports score, currency conversion, mathematical
calculation, and more. Some examples include:
Weather: What’s the weather like tomorrow morning?
Locations: Where’s the nearest pharmacy?
Flight status: When does United Airlines flight 900 depart?
Time: What time is it in London?
Events: When is sunset?
Math: What is the square root of 2209?
Translation: How do you say cucumber in Spanish?
Sports: When is the Red Sox game?
Finance: How is the S&P 500 doing today?
Trivia: How tall is the tallest building in the world?
Conversions: How many dollars is 2600 rupees?
Images: Show me pictures of the Golden Gate Bridge
Spoken answers are supported for English only at this time. This
feature is turned on by default for Voice Search.
Voice Actions
Note: Voice Actions are supported only in English, French,
German, Spanish, and Italian.
You can use Voice Actions to perform common tasks, such as
sending an email or opening an app.
©2013 Visual Land Inc.
P a g e | 76
PRESTIGE Android Tablet Guide Book
After touching the Microphone icon or saying “Google,” speak the
Voice Action you want to use. Or say “help” to see examples of
the kinds of things you can tell Google to do for you.
Examples include:
“Set alarm for 8:30 a.m.”
“Send email to Marcus Foster. Subject: Coming tonight? Message:
Hope to see you later.”
“Navigate to Mike’s Bikes in Palo Alto.”
Voice Actions commands
Voice Actions are only supported in English, French, German,
Spanish, and Italian.
To see examples of Voice Actions commands on the Google Now
screen, say “Google,” then “Help.”
This table also lists some key Voice Actions phrases.
"Open"
App name
"Open Gmail"
"Create a calendar
event"
"Event description" &
"day/date" & "time"
"Create a calendar
event: Dinner in San
Francisco, Saturday
at 7:00PM"
“Map of”
Address, name,
business name, type
of business, or other
location
“Map of Golden Gate
Park, San Francisco.”
©2013 Visual Land Inc.
P a g e | 77
PRESTIGE Android Tablet Guide Book
“Directions to” or
“Navigate to”
Address, name,
business name, type
of business, or other
destination
“Directions to 1299
Colusa Avenue,
Berkeley, California”
or
“Navigate to Union
Square,
San Francisco.”
"Post to Google+"
What you want
posted to Google+
"What's this song?"
"Post to Google+ I'm
going out of town."
When you hear a
song, ask "What's this
song?"
"Scan a barcode"
Scan a barcode or
QR code to learn
more about a product.
"Scan a barcode"
and hold barcode in
front of the device's
camera.
“Go to”
Search string or URL
“Go to Google.com”
“Send email”
“To” & contact name,
“Subject” & subject
text, “Message” &
message text (speak
punctuation)
“Send email to Hugh
Briss, subject, new
shoes, message, I
can’t wait to show you
my new shoes,
period.”
“Note to self”
Message text
“Note to self: remember the milk”
“Set alarm”
“Time” or “for” & time,
such as “10:45 a.m.”
or “20 minutes from
now,” “Label” & name
of alarm
“Set alarm for 7:45
p.m., label, switch the
laundry”
“Listen to”
Play music in the
Google Play Music
app by speaking the
name of a song, artist,
or album.
“Listen to: Smells Like
Teen Spirit”
About Gmail Cards
©2013 Visual Land Inc.
P a g e | 78
PRESTIGE Android Tablet Guide Book
Gmail cards are based on confirmation messages sent to the
Gmail account you’ve selected for use with Google Now. For
example, cards appear before restaurant reservations you’ve
made with OpenTable or when you receive email updates for
packages in transit.
Gmail cards typically include links to other useful information,
such as a link to the email on which the card is based, or
directions to a restaurant or hotel from your current location.
You can turn Gmail cards off or on from the main Google
Now screen:
All Gmail cards at once. Go to Menu > Settings > Google Now
and touch the On/Off switch for Gmail cards.
Individual Gmail cards. Go to Menu > Settings > Google Now >
Gmail and check or uncheck each card.
About the Activity summary card
The Activity summary card appears once a month. It provides a
very rough approximation of how far you’ve walked or cycled
during that month compared to the previous one. These
estimates are based on occasional samples of the accelerometer
©2013 Visual Land Inc.
P a g e | 79
PRESTIGE Android Tablet Guide Book
in your tablet, which are then compared to typical movements
involved in walking or cycling.
This information isn’t available unless you’ve turned on location
reporting and history for at least one of your Android devices. If
you’ve turned these on for more than one device, the Activity
summary card reflects the one you used most often that month.
About the Stocks card
The Stocks card displays stocks that:
• You’ve searched on recently.
• You’re tracking through Google Finance.
• You’ve explicitly listed in the Stocks card settings.
You can choose whether to display stocks when their price
changes by 1% or more, or in the mornings or evenings.
To change the stocks displayed by the stocks card, do one of the
following:
• When the Stocks card is displayed, touch the Info icon
to modify your existing stock list or add new stocks.
• Go to Menu > Settings > My Stuff > Stocks. Then touch
the stock you want to remove, or Add stock to add a new
one.
©2013 Visual Land Inc.
P a g e | 80
PRESTIGE Android Tablet Guide Book
About the Research topics card
The Research topics card appears when your recent Web History
includes several searches related to a single topic – such as a trip
you’re planning – and Google detects relevant webpages that you
may not have found yet. For this card to appear, you must have
Web History turned on for the account you use with Google Now.
To explore more links that may be relevant to the topic, touch
Explore at the bottom of the card. From the list of links, touch the
History tab to view a summary of your recent Web History related
to this topic.
Search settings
Settings may vary depending on the version of the Google Search
app you’re using.
To view Google Search settings (including Google Now) to the
bottom of the Google Now screen and touch Menu > Settings.
To get more information about the settings available from this
screen, choose
Menu > Help. Or open one of these
corresponding online articles:
Google Now. Turn Google Now off or on and set card options.
Voice. Control aspects of speech input and output when you
search by voice or use voice actions.
©2013 Visual Land Inc.
P a g e | 81
PRESTIGE Android Tablet Guide Book
Tablet search. Control which apps on your tablet are included in
Google searches.
Privacy & accounts. Set the account for use with Google Search
and search-related privacy options for that account.
©2013 Visual Land Inc.
P a g e | 82
PRESTIGE Android Tablet Guide Book
14
Settings
Quick Settings provide the fastest way to adjust settings that you
access frequently, such as Wi-Fi or brightness. You can also reach
the main Settings screen from Quick Settings.
Most apps include their own settings, typically available from
Menu > Settings.
These are the main types of settings available. Click the links to
see the help articles available for each category.
Wireless & networks. Wi-Fi, Bluetooth, data usage, Android
Beam, and related settings.
Device. Sound, battery, sleep, and other display settings.
Personal. Location access, language, and backup/reset options.
Security. Passwords and certificates, app verification, screen lock,
and encryption.
Accounts. Sync and other account settings.
System. Date, time, accessibility, and device information.
©2013 Visual Land Inc.
P a g e | 83
PRESTIGE Android Tablet Guide Book
15
Accessibility
To use the accessibility options available on your tablet, open
Settings > System > Accessibility.
Options for people with visual impairments include:
TalkBack is a pre-installed screen reader from Google. It uses
spoken feedback to describe events, such as notifications, and the
results of your actions, such as opening an app.
Explore by Touch is a system feature that works with TalkBack,
allowing you to touch your tablet’s screen and hear what’s under
your finger via spoken feedback. This feature is helpful to people
with no vision.
Accessibility settings let you modify your tablet’s display and
sound options, such as increasing the text size, changing the
speed at which text is spoken, and more.
©2013 Visual Land Inc.
P a g e | 84
PRESTIGE Android Tablet Guide Book
You can make reading and navigating this material easier by
increasing the text size – just open Chrome, go to Menu > Settings
> Accessibility, and drag the slider to adjust the text size. You can
also try magnification gestures, which allow you to zoom in and
out, as well as temporarily magnify what’s under your finger. To
try magnification gestures, go to Settings > Accessibility >
Magnification gestures.
©2013 Visual Land Inc.
P a g e | 85
PRESTIGE Android Tablet Guide Book
Safety Information
•
•
•
•
•
•
•
•
•
The battery is not intended to be replaced by the consumer. If you believe
the battery is damaged or needs to be replaced, contact Visual Land
customer support for inspection and/or replacement.
Do not let the battery come in contact with liquids.
Do not place your device near a heat source or leave it in your car in high
temperatures.
Do not dispose of the battery in a fire.
Avoid dropping device.
Never use any charger or battery that is damaged in any way. Use only the
provided charger which is specifically designed for your device.
Do not use if screen is cracked or broken as this could cause injury to you.
Please note that a touch screen responds best to a light touch from the pad
of your finger or a non-metallic, no sharp stylus. Using excessive force or
hard or sharp objects when pressing on the touch screen may damage the
tempered glass surface and void the warranty.
Do not set the volume at its highest levels when using headphones.
Prolonged exposure to loud noise could damage your hearing.
FCC Compliance
This device complies with Part 15 of the FCC Rules. Operation is subject to the
following two conditions: (1) this device may not cause harmful interference, and
(2) this device must accept any interference received, including interference that
may cause undesired operation.
FCC Radiation Exposure Statement: This equipment complies with FCC RF
radiation exposure limits set forth for an uncontrolled environment. This
transmitter must not be co-located or operating in conjunction with any other
antenna or transmitter.
©2013 Visual Land Inc.
P a g e | 86
PRESTIGE Android Tablet Guide Book
©2013 Visual Land Inc.
P a g e | 87
PRESTIGE Android Tablet Guide Book
©2013 Visual Land Inc.
P a g e | 88