1
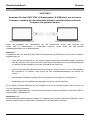
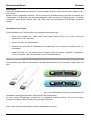
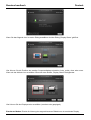
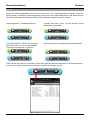
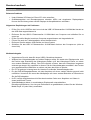
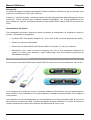
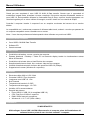
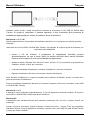
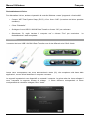
USB 3.0 KVM & Data Transfer Cable
User Manual
Benutzerhandbuch
Manuel Utilisateur
Manuale
English
Deutsch
Français
Italiano
No. 42624
www.lindy.com
Tested to Comply with
FCC Standards
For Home and Office Use!
© LINDY ELECTRONICS LIMITED & LINDY-ELEKTRONIK GMBH - FIRST EDITION (July 2014)
User Manual
English
Introduction
Thank you for purchasing the LINDY USB 3.0 KVM & Data Transfer Cable. This cable gives you the
ability to share Video, Keyboards & Mouse resources and transfer files between two Windows®
computers, via USB 3.0. Use Drag & Drop or Copy & Paste functionality via an easy to use GUI to
quickly move pictures, music, video and other files between computers at speeds of up to 5Gbps.
Control one computer from the other by simply moving your cursor from one screen to the other.
Touchscreen support means you can use touch enabled tablets, screens or monitors to switch between
compatible computers as you would use a mouse, while also maintaining the full resource and clipboard
sharing features of the cable.
Note – The cable has a limited performance when used with USB 2.0 host ports.
Package Contents
USB 3.0 KVM & Data Transfer Cable
Software CD
LINDY Manual
Features
Share Keyboards, Mice and Monitors between computers
Turn a Notebook / Desktop / Tablet PC into a 2nd display via Mirror & Extended display modes
Share Video Card & Hard Disk resources between two Windows computers
Easily transfer data, photos, music, and video between two computers
Conforms to SuperSpeed USB 3.0 (5Gbps) transfer rate
Support touch screen (Windows 8 or above)
Specification
Max Resolution 2048 x 1152 / 32bit
USB 3.0 Type-A Male connectors
USB 3.0 cable length 1.5m
Bus Powered
Operating Temperature: 0~50°C
Storage Temperature: -10~75°C
Humidity: <85% non-condensing
System Requirements
Available USB 2.0 / USB 3.0 port (USB 3.0 port is recommended)
CPU: Dual Core 2.0GHz or higher
RAM: 2GB memory or higher
Windows 8.1 / 8 / 7 / XP (32bit or 64bit)
User Manual
English
Installation
!!! IMPORTANT!!!
DO NOT connect the LINDY USB 3.0 KVM & Data Transfer Cable to either computer until after
installing the included software and restarting both machines.
Installing the device driver from the Software Disc allows your computers to recognize the
LINDY USB 3.0 KVM & Data Transfer Cable. Please check your OS and refer to the appropriate
installation procedure below to begin installing the device drivers.
Windows 8.1 / 8 / 7 / XP
This section describes the driver installation procedure for a computer running Windows 7 OS.
Please ensure the USB 3.0 KVM & Data Transfer Cable is unplugged from your PC or Notebook before
continuing with the setup procedure.
•
Insert the Software CD; the setup program should launch automatically, if it doesn’t launch, open
the Disc Drive folder via Windows Explorer and double click the Setup Application Icon.
•
When the Windows User Account Control appears, click “Yes” to allow the program to install and
follow the Installation Wizard, click “Next” to continue.
•
Once the installation is complete, close the Installer and Restart your computer.
•
Repeat the driver installation on the second computer that you are going to use.
Note: You may notice your computer screens flashing or turning on & off during the installation; this is
normal and part of the installation process.
After finishing the driver installation on both computers and restarting, connect the USB 3.0 KVM & Data
Transfer Cable.
Windows 8.1 / 8 / 7
The device driver will be configured automatically. A Pop Up will appear on both computers. When this
completes the USB 3.0 KVM & Data Transfer Cable is ready to be used.
Windows XP
The Hardware Installation Wizard dialogue will show, select “No, not this time” and click “Next” to
continue.
User Manual
English
Click “Continue Anyway” when the Microsoft Software warning dialogue box appears, then, click “Finish”
to complete the Hardware Wizard. A Pop Up will appear on both computers. When this completes the
LINDY USB 3.0 KVM & Data Transfer Cable is ready for use.
Uninstalling the Drivers
To uninstall the drivers, go to the Windows Control Panel and use the ‘Uninstall a Program’ feature.
•
Locate the “MCT Dual System Swap (D.S.S.) 13.xx. Xxxx. 0186” (driver version may vary).
•
Click the “Uninstall” button.
•
Unplug the USB 3.0 KVM & Data Transfer Cable and click “OK” to continue.
•
Select “Yes, I want to restart my computer now” and click “Finish” to reboot. After rebooting, you
will have completed the driver un-installation.
Connection Setup
The connectors of the USB 3.0 KVM & Data Transfer Cable are two different colours: Blue & Green.
These correspond to the colour of the User Interface (UI) icon that appear in your computer's toolbar and
help you identify the connected computer as you configure your system.
The following Settings are available and can be accessed on both Blue & Green computers. When you
first attach the cable the following dialogue will appear. The colour of the avatar icon will correspond to
end of the cable you have attached, Blue or Green.
User Manual
English
Selecting the next icon on the first dialogue screen will open the ‘Display Share’ dialogue.
Here you can set the position of the second computer display; Left, Right, Above or Below. Selecting the
next icon will open the next ‘Display Share’ dialogue.
Here you can select the display mode (Extended or Mirror Mode)
Extended Mode - This feature allows you to use the connected computer's screen as an extended
display.
User Manual
English
Mirror Mode - This feature allows the same contents to be displayed (mirrored) on both displays.
The screen resolution setting on the attached computer will follow the lead computer’s screen resolution.
For example, if this is 1024x768 at 32bit, then the mirrored computer will retain the same resolution.
Use your computers ‘Display Setting’s to change the resolution of the two screens as desired. The
Maximum Resolution the Cable supports is 2048 x 1152 / 32bit
Touch Screen Control (for Windows 8 or above)
If the computer has a touch screen, you can use that to directly control the computer being Mirrored or
Extended via the touch screen. This also applies to Tablets.
Save your settings by selecting the tick box in the bottom left of the screen. This will ensure you skip this
process the next time you connect the cable.
Selecting the next icon will open a final Information dialogue. You can choose not to see this Information
dialogue again by selecting the tick box in the bottom left of the screen.
Note – if you disconnect the cable at any time you should reconnect the appropriate Blue or Green end
to the computer it was attached to during setup. Swapping ends initialises a second install of the device
drivers and can cause malfunctions in the cables operation.
User Manual
English
Operation
After finishing the Connection Setup, a new icon will appear in the System Tray of both machines.
Selecting this launches the Control Bar, which appears at the bottom right corner of both screens.
With the Control Bar you can control Display & Data Sharing Settings between the two computers.
Default Control Bar
Stop sharing displays – Select the Stop Icon.
Display Share - Select the Blue / Green icon to
view and control that computer.
Data Sharing - View and transfer data between
computers via GUI.
Clicking the “Folder” icon opens a file transfer GUI (Graphical User Interface) allowing you to transfer
files from one computer to the other.
User Manual
English
The GUI supports File/Folder and Data transfer through the generic Drag & Drop or Copy & Paste
actions from the opposite computer at 5Gbps. Clipboard Sharing allows selected texts from the first
computer to be simply and easily pasted on the second, and vice versa.
Close Control Bar – Select the ‘X’ in the top right
corner of the Control Bar.
Reset Positions & Display Mode – Reset screen
positions and re-run the ‘Display Share’
dialogue.
Restart Control Bar - Double click the Control Bar icon on the task bar to restart the Control Bar.
Keyboard & Mouse Sharing - Move your Mouse cursor between the two computers to switch the
Keyboard usage to the other computer. I.e. Use the Keyboard of the first computer to type on the second
computer.
User Manual
English
Troubleshooting
Known Issues
•
•
Direct 3D is not supported under XP/Vista
Some display utility and drivers that shipped with certain AGP and built-in display adapters may
prevent you setting the 2nd display as the main screen when display sharing
General Recommendation if you have a problem
•
•
•
•
•
•
Check your USB port it active the device is plugged in correctly to the host system
Unplug the USB 3.0 KVM & Data Transfer Cable and re-insert it
Check to see that the monitor is correctly connected to your computer and it is powered ON
Ensure to restart your computer after the driver installation
Unplug all other USB devices from the system
Try connecting the USB 3.0 KVM & Data Transfer Cable directly to the computer instead of
through a hub
Media Playback
•
•
•
•
•
•
Ensure that the USB port you are using is a USB 3.0 port.
During video playback on all platforms, do not change the display mode, position or arrangement
of video player window (such as dragging the video player window between main display and
attached display). This usually causes the video player to lag and the video may stop playing. We
suggest stopping the video playback, moving the window to the attached display and then playing
the video.
You may experience poor video performance on some low-spec PC system.
Some DVD playback software packages do not support playing on a second display adapter of
any kind. You may try to open the media player in the secondary display first before playing the
DVD.
Your PC may be a lack of the correct codec to support playback of certain video format.
Video/Media players have different decoding capability under different display modes. For better
performance it is recommended you use Windows Media Player 10 or above.
Benutzerhandbuch
Deutsch
Einführung
Vielen Dank für den Kauf des LINDY USB 3.0 Datentransfer- & KVM-Kabels. Dieses Kabel ermöglicht es
Ihnen, mit einem Monitor, einer Tastatur und einer Maus an zwei Windows® Computern zu arbeiten und
Daten via USB 3.0 auszutauschen. Die anwenderfreundliche, grafische Benutzeroberfläche erlaubt per
Drag-and-Drop oder Copy-and-Paste ein schnelles Verschieben/Kopieren von Bildern, Musik, Videos
oder anderen Dateien zwischen den Computern mit Geschwindigkeiten bis zu 5 Gbit/s. Dabei wird
einfach der Mauscursor von einem Bildschirm zum anderen bewegt.
Durch die Touchscreen-Unterstützung können auch Tablets, Bildschirme oder Monitore mit TouchFunktion zum Umschalten zwischen kompatiblen Computern verwendet werden. Hierbei bleibt die
Funktion der gemeinsamen Ressourcennutzung und Zwischenablage erhalten.
Beachten Sie bitte, dass die Performance bei Gebrauch eines USB 2.0 Ports eingeschränkt ist.
Lieferumfang
USB 3.0 Datentransfer- und KVM-Kabel
Software CD
LINDY Handbuch
Eigenschaften
Mit einer Maus, Tastatur und einem Monitor an 2 Computern arbeiten
Macht aus einem Notebook, Desktop oder Tablet ein zweites Display über gespiegeltem oder
erweitertem Displaymodus
Zwei Computer teilen sich eine Grafikkarte und Festplatte
Einfacher Austausch von Daten, Bildern, Musik und Videos zwischen zwei Computern
USB 3.0 SuperSpeed Standard mit Datentransferraten bis zu 5Gbit/s
Touchscreen-Unterstützung (ab Windows 8)
Spezifikationen
Maximale Auflösung: 2048 x 1152 / 32Bit
USB 3.0 Typ A Stecker
USB 3.0 Kabel, ca. 1,5m
Bus Powered – keine externe Stromversorgung erforderlich
Betriebstemperatur: 0~50 °C
Lagertemperatur: -10~75 °C
Luftfeuchtigkeit: <85% nicht-kondensierend
Systemanforderungen:
USB 2.0 / USB 3.0 Port (USB 3.0 empfohlen)
CPU: Dual Core 2.0GHz oder höher
RAM: 2GB oder mehr
Windows 8.1 / 8 / 7 / XP (32Bit oder 64Bit)
Benutzerhandbuch
Deutsch
Installation
! ACHTUNG !
Verbinden Sie das LINDY USB 3.0 Datentransfer- & KVM-Kabel erst mit einem
Computer, nachdem Sie die beiliegende Software installiert haben und beide
Computer neu gestartet wurden.
Durch die Installation der Gerätetreiber von der Software-CD können die Computer das
LINDY USB 3.0 Datentransfer- & KVM-Kabel erkennen. Unten finden Sie das korrekte
Installationsprozedere für Ihr Betriebssystem.
Windows 7
Vergewissern Sie sich, dass das LINDY USB 3.0 Datentransfer- & KVM-Kabel nicht an einem Computer
angeschlossen ist.
•
Legen Sie die Software-CD ein, das Setup-Programm sollte dann automatisch starten. Sollte das
nicht der Fall sein, dann öffnen Sie den Ordner des CD-Laufwerks über den Windows Explorer
und starten Sie das Installation mit einem Doppelklick das Setup Icon.
•
Wenn die Windows Benutzerkontensteuerung erscheint, klicken Sie auf “Ja” um die Installation
des Programms zu erlauben. Dann folgen Sie dem Installationsassistenten und klicken auf
“Weiter”.
•
Nach erfolgter Installation schließen Sie den Assistenten und starten den Computer neu.
•
Wiederholen Sie den Installationsvorgang dann auf Ihrem zweiten Computer.
Es ist möglich, dass der Bildschirm bei der Installation kurz an- und wieder ausgeht; das ist normal und
Teil des Installationsprozesses.
Nach erfolgter Treiberinstallation und einem Neustart beider Computer schließen Sie bitte das USB 3.0
Datentransfer- & KVM-Kabel an.
Windows 8.1 / 8
Der Gerätetreiber wird automatisch installiert; ein Popup-Fenster erscheint auf beiden Computern. Wenn
dieses schließt, können Sie das USB 3.0 Datentransfer- & KVM-Kabel verwenden.
Benutzerhandbuch
Deutsch
Windows XP
Wenn der Hardwareassistent erscheint und eine Auswahl anbietet, klicken Sie auf “Nein, diesmal nicht”
und “Weiter”.
Klicken Sie auf “Installation fortsetzen” wenn die Microsoft Softwarewarnung erscheint und danach auf
“Fertigstellen” zum Beenden des Hardwareassistenten. Dann erscheint ein Popup-Fenster auf beiden
Computern. Wenn dieses schließt, kann das LINDY USB 3.0 Datentransfer- & KVM-Kabel verwendet
werden.
Deinstallation der Treiber
Die Deinstallation der Treiber erfolgt in der Windows Systemsteuerung.
•
Suchen Sie zunächst den Treiber “MCT Dual System Swap (D.S.S.) 13.xx. Xxxx. 0186” (die
Treiberversion kann variieren).
•
Klicken Sie dann auf “Deinstallieren”.
•
Entfernen Sie das USB 3.0 Datentransfer- & KVM-Kabel vom Computer und klicken “OK” um
fortzufahren.
•
Wählen Sie dann “Ja, ich möchte meinen Computer jetzt neu starten” und dann “Fertigstellen”,
um neu zu starten. Nach dem Neustart ist der Treiber deinstalliert.
Verbindungsaufbau
Die Anschlüsse des USB 3.0 Datentransfer- & KVM-Kabels haben zwei verschiedene Farben: blau und
grün.
Diese korrespondieren mit der Farbe des Icons, das in der Symbolleiste erscheint und erleichtert die
Identifikation des angeschlossenen Computers bei der Konfiguration.
Es sind mehrere Einstellungen möglich, die im Folgenden aufgeführt werden. Sie sind auf beiden
Computern möglich, jeweils mit blau oder grün gekennzeichnet.
Beim ersten Anschluss des Kabels erscheint untenstehender Dialog.
Benutzerhandbuch
Deutsch
Wenn Sie das folgende Icon im ersten Dialog auswählen wird der Dialog „Display Share“ geöffnet.
Hier können Sie die Position des zweiten Computerdisplays einstellen: links, rechts, oben oder unten.
Wenn sie das nächste Icon auswählen öffnet sich das nächste „Display Share“ Dialogfenster.
Hier können Sie den Displaymodus auswählen (erweitert oder gespiegelt).
Erweiterter Modus: Erlaubt die Nutzung des angeschlossenen Bildschirms als erweitertes Display.
Benutzerhandbuch
Deutsch
Gespiegelter Modus: Erlaubt es, dieselben Inhalte auf beiden Displays anzuzeigen (Spiegelung).
Die Bildschirmauflösung auf dem gespiegelten Display wird vom ersten Computer übernommen. Sind es
z.B. 1024x768 bei 32Bit, so wird diese Einstellung beim gespiegelten Display beibehalten.
In den Anzeigeeinstellungen können Sie die Auflösung beider Bildschirme nach Belieben ändern. Die
maximal unterstützte Auflösung beträgt 2048 x 1152 / 32Bit.
Touchscreen-Steuerung (ab Windows 8)
Wenn der Computer über einen Touchscreen verfügt, können Sie diesen zur direkten Steuerung des
erweiterten oder gespiegelten Modus verwenden. Dies ist auch mit Tablets möglich.
Sichern Sie Ihre Einstellungen, indem Sie das Kästchen links unten auf am Fenster auswählen. Wenn
Sie das Kabel das nächste Mal anschließen wird dieser Vorgang dann übersprungen.
Wenn Sie das nächste Icon auswählen, öffnet sich ein Dialog “Information”. Sie können die Anzeige
dieses Dialogs für die Zukunft unterbinden, indem Sie wieder das Kästchen links unten anklicken.
Beachten Sie bitte, dass Sie immer, wenn Sie das Kabel entfernen, bei erneutem Anschluss wieder das
richtige grüne oder blaue Ende am Computer anschließen (wie bei der Inbetriebnahme). Wenn Sie die
Enden vertauschen, wird eine zweite Installation der Treiber durchgeführt, was zu Fehlfunktionen führen
kann.
Benutzerhandbuch
Deutsch
Betrieb
Nach dem Verbindungsaufbau sehen Sie ein neues Icon in der Taskleiste beider Computer. Wenn Sie
darauf klicken, erscheint die Steuerungsleiste rechts unten auf beiden Bildschirmen. Mit dieser können
Sie die Einstellungen des Displays und des Datenaustauschs beider Computer steuern.
Steuerungsleiste – Standardeinstellung:
Auswahl des Icons „Stop“ um die Nutzung zweier
Bildschirme zu beenden:
Teilen des Displays: Wählen Sie das grüne
bzw. blaue Icon, um den entsprechenden
Computer zu sehen bzw. zu steuern:
Datenaustausch über grafische Benutzeroberfläche:
Wenn Sie auf das “Ordner”-Icon klicken, öffnet eine grafische Benutzeroberfläche zum Datenaustausch,
womit Sie nun Daten von einem zum anderen Computer übertragen können.
Benutzerhandbuch
Deutsch
Die grafische Benutzeroberfläche unterstützt den Austausch von Dateien/Ordnern und Daten von einem
zum anderen Computer durch Drag-and-Drop oder Copy & Paste mit Geschwindigkeiten bis zu 5Gbit/s.
Die gemeinsame Nutzung der Zwischenablage erlaubt es, ausgewählte Texte von einem zum anderen
Computer zu kopieren.
Schließen der Steuerungsleiste durch Klicken auf das “X“ in der Steuerungsleiste rechts oben
Zurücksetzen von Bildschirmdarstellung & Displaymodus:
Durch einen Doppelklick auf das Icon der Steuerungsleiste in der Taskleiste führen Sie einen Neustart
der Steuerungsleiste durch
Gemeinsame Nutzung von Tastatur & Maus:
Bewegen Sie den Mauszeiger zwischen den zwei Computern hin und her, um die Tastaturnutzung
zwischen den Computern zu steuern und die Tastatur des ersten Computers auf dem zweiten Computer
zu verwenden.
Benutzerhandbuch
Deutsch
Fehlersuche
Bekannte Probleme
•
•
Unter Windows XP/Vista wird “Direct 3D” nicht unterstützt
Grafikkartentreiber und Dienstprogramme einzelner AGPs und eingebauter Displayadapter
können die Einrichtung eines zweiten Displays als Hauptbildschirm verhindern
Allgemeine Empfehlungen bei Problemen
•
•
•
•
•
•
Prüfen Sie, ob Ihr USB Port aktiv ist und ob das USB 3.0 Datentransfer- & KVM-Kabel korrekt an
den USB Host angeschlossen ist
Entfernen Sie das USB 3.0 Datentransfer- & KVM-Kabel vom Computer und schließen Sie es
erneut an
Prüfen Sie ob Ihr Monitor korrekt am Computer angeschlossen und eingeschaltet ist
Führen Sie nach der Treiberinstallation einen Neustart durch
Entfernen Sie alle anderen USB-Geräte von Ihrem System
Schließen Sie das USB 3.0 Datentransfer- & KVM-Kabel direkt an den Computer an (nicht an
einen Hub)
Medienwiedergabe
•
•
•
•
•
•
Vergewissern Sie sich, dass Sie einen USB 3.0 Anschluss benutzen.
Während der Videowiedergabe auf beiden Displays sollten Sie weder den Displaymodus noch
die Position oder Einstellung des Videoplayers ändern (z.B. das Videoplayer-Fenster von einem
zum anderen Bildschirm ziehen). Dies führt nämlich oft dazu, dass der Videoplayer langsamer
wird oder gar stoppt. Wir empfehlen in diesem Fall die Videowiedergabe anzuhalten, das Fenster
zum angeschlossenen Bildschirm zu ziehen und dann das Video zu spielen.
Ein PC mit geringer Leistung kann die Ursache für schlechte Videowiedergabe sein.
Es gibt DVD-Wiedergabesoftware, die das Abspielen auf einem zweiten Monitor generell nicht
unterstützt. Versuchen Sie zuerst den Mediaplayer auf einem zweiten Bildschirm zu öffnen bevor
Sie die DVD abspielen.
Ihr PC verfügt möglicherweise nicht über den korrekten Codec zum Abspielen von Videos in
einem bestimmten Format.
Video/Mediaplayer haben in verschiedenen Displaymodi unterschiedliche
Dekodierungsfunktionen. Um eine gute Performance zu gewährleisten, sollten Sie den Windows
Media Player 10 (oder höher) verwenden.
Manuel Utilisateur
Français
Introduction
Merci d’avoir choisi le câble KVM & Data Transfer USB 3.0 LINDY. Ce câble vous donne la possibilité de
partager la vidéo, claviers & souris et de transférer des fichiers entre deux ordinateurs Windows®, via
USB 3.0. Utilise les fonctionnalités Glisser & Déposer ou Copier & Coller via une interface utilisateur
GUI simple d’utilisation, pour rapidement transférer images, musique, vidéo et autres fichiers entre
ordinateurs à une vitesse de transfert allant jusqu’à 5 Gbit/s. Contrôlez un ordinateur à partir d’un autre
en déplaçant simplement le curseur d’un écran à l’autre.
La prise en charge des écrans tactiles permet l’utilisation de tablettes, écrans ou moniteurs tactiles pour
commuter entre les ordinateurs compatibles comme si vous utilisiez une souris, tout en maintenant les
fonctions presse papier et caractéristiques du câble.
Remarque – le câble a des performances limitées lorsqu’il est utilisé sur des ports hôtes USB 2.0.
Continue
Câble KVM & Data Transfer USB 3.0
CD de logiciels
Manuel LINDY
Caractéristiques
Partage claviers, souris et moniteurs entre ordinateurs
Transforme un Notebook / Ordinateur de bureau / Tablette PC en un second affichage via modes
d’affichages clone & étendu
Partage les ressources vidéo & disque dur entre deux ordinateurs sous Windows
Transfert facile de données, photos, musique et vidéo entre deux ordinateurs
Conforme aux taux de transfert USB 3.0 SuperSpeed (5Gbit/s)
Prise en charge des écrans tactiles (Windows 8 ou supérieur)
Spécification
Résolution maximale 2048 x 1152 / 32bit
Connectiques USB 3.0 Type A male
Câble USB 3.0 longueur 1.5m
Alimenté par le Bus USB
Températures de fonctionnement: 0~50°C
Températures de stockage: -10~75°C
Humidité relative: <85% non condensée
Configuration requise
Port USB 2.0 / USB 3.0 disponible (port USB 3.0 recommandé)
CPU: Dual Core 2.0GHz ou supérieur
RAM: 2Go ou plus de mémoire
Windows 8.1 / 8 / 7 / XP (32bit or 64bit)
Manuel Utilisateur
Français
Installation
!!! IMPORTANT!!!
NE PAS connecter le câble KVM & Data Transfer USB 3.0 LINDY à l’un des ordinateurs avant
d’avoir installé le logiciel fourni et redémarrer les deux machines.
L’installation du pilote à partir du CD-ROM fourni permet aux ordinateurs de reconnaître le câble
KVM & Data Transfer USB 3.0 LINDY. Merci de vérifier votre version d’OS et de vous référez à la
procédure d’installation appropriée ci-dessous pour démarrer l’installation des pilotes.
Windows 8.1 / 8 / 7 / XP
Cette section décrit la procédure d’installation de pilotes pour un ordinateur fonctionnant sous Windows
7.
Merci de vous assurer que le câble KVM & Data Transfer USB 3.0 LINDY n’est pas connecté à votre PC
ou Notebook avant de continuer la procédure d’installation.
•
Insérez le CD-ROM de logiciels; le programme d’installation devrait se lancer automatiquement,
dans le cas contraire, ouvrez le dossier du lecteur de disque via l’explorateur Windows et doublecliquez sur l’icône de Setup.
•
Lorsque la fenêtre de contrôle d’utilisateur Windows apparait, cliquez sur “Yes” pour permettre au
programme de s’installer et de continuer l’assistant d’installation, cliquez sur “Next” pour
continuer.
•
Une fois l’installation finalisée, fermez le programme et redémarrer votre ordinateur.
•
Répétez l’installation des pilotes sur le second ordinateur que vous allez utiliser.
Remarque: vous remarquerez peut-être que vos écrans d’ordinateurs pourront clignoter ou
s’allumer/s’éteindre durant l’installation; ceci est normal et fait partie du processus d’installation.
Après avoir finalisé l’installation des pilotes sur les deux ordinateurs et les avoir redémarrés, vous
pourrez connecter le câble KVM & Data Transfer USB 3.0.
Windows 8.1 / 8 / 7
Le pilote de périphérique se configurera automatiquement. Une fenêtre Pop-Up apparaitra sur les deux
ordinateurs. Une fois cette étape terminée le câble KVM & Data Transfer USB 3.0 est prêt à être utilisé.
Manuel Utilisateur
Français
Windows XP
La fenêtre de dialogue d’assistant d’installation matériel s’affichera, sélectionnez “No, not this time” (pas
cette fois-ci) et cliquez sur “Next” pour continuer.
Cliquez sur “Continue Anyway” (continuer) lorsque la fenêtre d’avertissement Microsoft apparait, cliquez
ensuite sur “Finish” (terminer) pour compléter l’assistant d’installation. Un Pop-Up apparaitra sur les
deux ordinateurs. Une fois cette étape terminée le câble KVM & Data Transfer USB 3.0 est prêt à être
utilisé.
Désinstallation des pilotes
Pour désinstaller les pilotes, rendez-vous dans le panneau de configuration de Windows et utilisez la
fonction “ Désinstaller un programme”.
•
Localisez “MCT Dual System Swap (D.S.S.) 13.xx. Xxxx. 0186” (la version de pilote peut variée).
•
Cliquez sur le bouton “Désinstaller”.
•
Déconnectez le câble KVM & Data Transfer USB 3.0 et cliquez sur “OK” pour continuer.
•
Sélectionnez “Yes, I want to restart my computer now” (oui, je veux redémarrer l’ordinateur) et
cliquez sur “Finish” pour redémarrer. Après redémarrage, vous aurez finalisé le processus de
désinstallation de pilote.
Configuration de la connexion
Les connecteurs du câble KVM & Data Transfer USB 3.0 sont de deux couleurs différentes: Bleu & Vert.
Ceci correspond à la couleur de l’icône de l’interface utilisateur (User Interface (UI)) qui apparait dans la
barre d’outils de votre ordinateur et vous aide à identifier l’ordinateur connecté lorsque vous configurez
votre système.
Les paramètres suivant sont disponibles et sont accessibles sur les deux ordinateurs (Bleu & Vert). Lors
de la première connexion du câble, la fenêtre de dialogue suivante s’affichera. La couleur de l’icône de
l’avatar correspond à la couleur du connecteur du câble raccordé, bleu ou vert.
Manuel Utilisateur
Français
En sélectionnant l’icône ‘’Suivant’’ sur le premier écran de dialogue, la fenêtre de dialogue ‘Display
Share’ s’ouvrira.
Ici vous pouvez paramétrer la position d’affichage du second ordinateur; gauche, droite, au-dessus ou
en-dessous. Sélectionnez l’icône ‘’Suivant’’ pour ouvrir la fenêtre de dialogue ‘Display Share’ suivante.
Ici vous pouvez sélectionner le mode d’affichage (Extended or Mirror Mode – mode étendu ou clone)
Extended Mode – Cette fonction vous permet d’utiliser l’écran de l’ordinateur connecté comme
affichage étendu.
Manuel Utilisateur
Français
Mirror Mode – Cette fonction permet d’afficher le même contenu sur les deux écrans (miroir ou clone).
La résolution de l’écran de l’ordinateur raccordé sera identique à la résolution de l’écran de l’ordinateur
principal. Par exemple, si la résolution est en 1024x768 en 32bit, alors l’ordinateur cloné aura la même
résolution.
Utilisez les paramètres de résolution d’écran de votre ordinateur pour changer la résolution des deux
écrans comme souhaité. La résolution maximale prise en charge par le câble est de 2048 x 1152 / 32bit
Écran tactile de contrôle (pour Windows 8 ou supérieur)
Si l’ordinateur possède un écran tactile, vous pouvez l’utiliser pour contrôler directement l’ordinateur
cloné ou étendu. Ceci s’applique également aux tablettes.
Enregistrez vos paramètres en cochant la case située dans le coin inférieur gauche de l’écran. Cela
vous permettra de passer cette étape la prochaine fois que vous connecterez le câble.
En sélectionnant l’icône ‘’Suivant’’, la fenêtre d’information finale s’ouvrira. Vous pouvez choisir de ne
plus afficher ces informations en cochant la case située dans le coin inférieur gauche de l’écran.
Remarque – si vous déconnectez le câble à tout moment, vous devrez le reconnecter le connecteur
approprié, bleu ou vert, à l’ordinateur auquel il était raccordé initialement durant la configuration. La
permutation du sens du câble initialisera une seconde installation des pilotes et pourra provoquer des
dysfonctionnements lors de l’utilisation du câble.
Manuel Utilisateur
Français
Utilisation
Après avoir configure la connexion, une nouvelle icône apparaitra dans la barre des tâches des deux
machines. En sélectionnant cette icône, la barre de contrôle se lancera et s’affichera dans le coin
inférieur droit des deux écrans.
Avec la barre de contrôle, vous pouvez contrôler l’affichage & le partage des données entre les deux
ordinateurs.
Barre de contrôle par défaut
Stop partage écran – Sélectionnez l’icône Stop
Partage écrans - Sélectionnez l’icône bleu / vert
pour visualiser et contrôler cet ordinateur.
Partage données – Voir et transférer les
données entre ordinateurs via GUI (interface
utilisateur).
En cliquant sur l’icône “Répertoire”, l’interface utilisateur de transfert de fichiers s’ouvrira (GUI Graphical User Interface), vous permettant de transférer des fichiers d’un ordinateur à l’autre.
Manuel Utilisateur
Français
La GUI prend en charge le transfert de fichier/répertoire et de données via les fonctions génériques
Glisser & Déposer ou Copier & Coller à partir de l’ordinateur opposé à jusqu’à 5Gbit/s. Le partage du
contenu du presse-papier permet au texte sélectionné sur le premier ordinateur d’être simplement et
facilement coller sur le second, et vice versa.
Fermeture barre de contrôle – Sélectionnez la
croix ‘X’ dans le coin supérieur droit de la barre
de contrôle.
Réinitialisation Positions & Mode d’affichage –
Reset la position écran et relance le dialogue
‘Display Share’.
Redémarrer la barre de contrôle – Double-cliquez l’icône dans la barre des tâches pour redémarrer la
barre de contrôle.
Partage clavier & souris – Déplacez le curseur de la souris entre les deux ordinateurs pour commuter
l’utilisation du clavier sur l’autre ordinateur. Par exemple, utilisez le clavier du premier ordinateur pour
taper du texte sur le second ordinateur.
Manuel Utilisateur
Français
Dépannage
Problèmes connus
•
•
Direct 3D n’est pas pris en charge sous XP/Vista
Certains utilitaires d’affichage et pilotes fournis avec certaines cartes graphiques et certains
Chipsets graphiques intégrés peuvent vous empêcher de paramétrer le second écran comme
écran principal lors de partage d’affichage.
Recommandations générales si vous rencontrez des problèmes
•
•
•
•
•
•
Vérifiez la connexion du port USB, que le câble soit bien enfiché au système hôte
Débranchez le câble KVM & Data Transfer USB 3.0 et réinsérez-le
Vérifiez que l’écran soit bien connecté à votre ordinateur et qu’il soit sous tension
Assurez-vous de redémarrer l’ordinateur après l’installation des pilotes
Déconnectez tout autre périphérique USB de votre système
Assurez-vous de connecter le câble KVM & Data Transfer USB 3.0 directement à l’ordinateur
plutôt que de passer par un hub USB.
Lecture de médias
•
•
•
•
•
•
Assurez-vous que le port USB utilisé est un port USB 3.0.
Pendant la lecture de vidéo sur toutes plateformes, ne pas changer le mode d’affichage, la
position ou la disposition de la fenêtre du lecteur vidéo (tel que de glisser la fenêtre du lecteur
vidéo entre l’affichage principal et l’écran attaché). Cela provoque généralement des lenteurs de
lecture et un arrêt de la lecture de la vidéo. Nous recommandons de stopper la lecture, de
déplacer la fenêtre d’un écran à l’autre et de relancer ensuite la lecture de la vidéo.
Vous pourrez constater de mauvaises performances vidéo sur certains PC ayant de faibles
performances.
Certains logiciels de lecture de DVD ne prennent pas en charge la lecture sur une deuxième
carte graphique de quelque nature que ce soit. Vous pouvez essayer d’ouvrir le lecteur
multimédia sur l’écran secondaire avant de lancer la lecture du DVD.
Votre ordinateur peut ne pas posséder le codec approprié pour prendre en charge la lecture de
certains formats vidéo.
Les lecteurs de vidéos/médias ont des capacités de décodage différentes sous différents modes
d’affichages. Pour de meilleures performances, il est recommandé d’utiliser Windows Media
Player 10 ou supérieur
Manuel Utilisateur
Français
Introduzione
Grazie per aver acquistato il cavo USB 3.0 KVM & Data transfer. Questo cavo vi permetterà di
condividere i segnali video, di tastiere e mouse e trasferire i file tra due computer Windows®, tramite un
cavo USB 3.0. Sarà possibile utilizzare le funzionalità Drag & Drop, copia ed incolla interagendo con
l'interfaccia grafica per un veloce utilizzo di immagini, musica e video con una velocità di 5Gbps.
Controlla il computer1 tramite il computer2 con un semplice movimento del cursore da un monitor
all'altro.
La compatibilità con i touchscreen consente di utilizzare tablet touch, schermi o monitor per passare da
un computer compatibile come si farebbe con un mouse.
Nota – Il cavo ha una performance limitata quando viene utilizzato con porte host USB 2.
Contenuto della confezione
Cavo USB 3.0 KVM & Data Transfer
Software CD
Questo manuale
Caratteristiche
Condivisione di tastiere, mouse e monitor tra computer
Passare Notebook / Desktop / Tablet PC nel secondo display tramite la visualizzazione estesa
Mirror & Extended
Condivisione di scheda video e Hard Disk tra due computer
Semplice trasferimento di dati, foto, musica e video tra due computer
Velocità di trasferimento dati conforme alle specifiche USB 3.0 (5Gbps)
Supporta touch screen (Windows 8 o superiore)
Specifiche
Risoluzione Max 2048 x 1152 / 32bit
Connettori USB 3.0 Tipo-A maschio
Lunghezza cavo USB 3.0: 1.5m
Bus Powered
Temperatura di esercizio: 0~50°C
Temperatura di stoccaggio: -10~75°C
Umidità: <85% senza condensa
Requisiti del sistema
Porta USB 2.0 / USB 3.0 (è consigliata USB 3.0)
CPU: Dual Core 2.0GHz o superiore
RAM: 2GB di memoria o superiore
Windows 8.1 / 8 / 7 / XP (32bit o 64bit)
Installazione
!!! IMPORTANTE!!!
NON collegare il cavo USB 3.0 KVM & Data transfer al computer prima dell'installazione del
software fornito e prima di aver riavviato entrambi i computer.
Manuel Utilisateur
Français
Installare il driver fornito, il quale consentirà ai computer di riconoscere il cavo USB 3.0 KVM & Data
Transfer. Si prega di controllare il sistema operativo e fare riferimento alla procedura di
installazione appropriata per iniziare a installare i driver di periferica.
Windows 8.1 / 8 / 7 / XP
Questa sezione descrive la procedura di installazione del driver su un computer con sistema operativo
Windows 7.
Assicurarsi che il cavo USB 3.0 KVM & Data Transfer sia collegato al computer prima di continuare con
la procedura di installazione.
•
Inserire
•
Quando compare Windows User Account Control, cliccare “Si” per permettere al programma di
installarsi, cliccare “Avanti” per continuare.
•
Una volta completata l'installazione, chiudere l'installazione e riavviare il computer.
•
Ripetere l'installazione del driver nel secondo computer da utilizzare.
il programma di installazione dovrebbe avviarsi
automaticamente, se non si avvia, aprire la cartella dell'unità disco tramite Windows
Explorer e fare doppio clic sull'icona Installazione applicazioni.
il
CD
del
Software;
Nota: Durante l'installazione il computer potrebbe avere problemi di sfarfallio; questo è normale ed è
parte del processo di installazione.
Prima di completare l'installazione del driver su entrambi i computer e del riavvio, connettere il cavo USB
3.0 KVM & Data Transfer.
Windows 8.1 / 8 / 7
Il dispositivo verrà configurato automaticamente. Il Pop Up apparirà su entrambi computer. Al termine il
cavo USB 3.0 KVM & Data Transfer sarà pronto all'utilizzo.
Windows XP
L'installazione dell' hardware Wizard verrà mostrato, selezionare “No, non ora” e cliccare “Avanti” per
continuare.
Cliccare “Continua comunque” quando comprare la finestra di errore, cliccare "Fine" per completare
l'hardware Wizard. Il Pop Up apparirà su entrambi i computer. Ora il cavo USB 3.0 KVM & Data Transfer
è pronto per essere utilizzato.
Manuel Utilisateur
Français
Disinstallazione dei Driver
Per disinstallare il driver, andare sul pannello di controllo Windows e usare "programmi e funzionalità".
•
Cercare “MCT Dual System Swap (D.S.S.) 13.xx. Xxxx. 0186” (la versione del driver potrebbe
cambiare).
•
Clicca “Disinstalla”.
•
Scollegare il cavo USB 3.0 KVM & Data Transfer e cliccare “OK” per continuare.
•
Selezionare “Si, voglio riavviare il computer ora” e cliccare “Fine” per concludere.
disinstallazione è stata completata.
La
Connessione
I connettori del cavo USB 3.0 KVM & Data Transfer sono di due differenti colori: Blu & Verde.
Questi colori corrispondono alle icone dell'interfaccia utente (UI), che compaiono sulla barra delle
applicazioni, e sono utili ad identificare il computer connesso.
Le seguenti impostazioni sono disponibili su entrambi i computer. La prima volta che viene collegato il
cavo, comparirà la seguente finestra di dialogo.
Il colore dell'icona corrisponderà al colore
corrispondente al connettore collegato, Blu o Verde.
Manuel Utilisateur
Français
Selezionando l'icona avanti, sulla prima finestra di dialogo, comparirà la seguente finestra.
Qui sarà possibile impostare la posizione del monitor del secondo; Sinistra, Destra, Sopra o Sotto.
Selezionando la successiva icona, apparirà la finestra di dialogo.
Ora si potrà selezionare la modalità di visualizzazione (modalità Estesa o Specchio)
Modalità estesa – Questa modalità consente di utilizzare i monitor dei computer connessi come
un'estensione di uno.
Modalità specchio – Questa modalità consente di visualizzare gli stessi contenuti su entrambi i monitor.
La risoluzione del monitor collegato seguirà le medesime risoluzione del monitor collegato al computer
principale. Ad esempio, se questo è di 1024x768 a 32 bit, il computer a specchio manterrà la stessa
risoluzione.
E' possibile modificare la risoluzione dei monitor, la risoluzione massima supportata dal cavo è di 2048 x
1152 / 32 bit.
Controllo Touch Screen (per Windows 8 o superiore)
Se il computer è dotato di un touch screen, è possibile usarlo per controllare direttamente il computer
tramite touch screen. Questa possibilità è attiva anche su Tablet.
Manuel Utilisateur
Français
Salvare le impostazioni selezionando la casella in basso a sinistra dello schermo. Questo permetterà di
salvare le impostazioni la prossima volta che si collega il cavo.
Selezionando la seguente icona comparirà una finestra di dialogo. E' possibile non visualizzare più
questa finestra selezionando la casella in basso a sinistra dello schermo.
Note – Se si scollega il cavo in qualsiasi momento è necessario ricollegare i connettori (blu e verde)
appropriati, i medesimi impostati durante l'installazione. Scambiare la posizione causerà l'inizio di una
seconda installazione del driver ed è possibile riscontrare malfunzionamenti.
Manuel Utilisateur
Français
Funzionamento
Una volta terminate le impostazioni di connessione, comparirà una nuova icona nella barra delle
applicazioni di entrambi i computer. Selezionando questa icona verrà lanciata una barra di controllo, che
apparirà in basso a destra di entrambi i monitor.
Con la barra di controllo è possibile controllare i monitor e le impostazioni di condivisione dei dati tra i
due computer.
Barra di controllo predefinita
Interruzione della condivisione del monitor –
Selezionare l'icona di stop.
Condivisione del monitor – Selezionare l'icona
Blu / Verde per visualizzare e controllare.
Condivisione dei dati – Visualizzare e trasferire
dati tra computer tramite interfaccia grafica.
Cliccando sull'icona “Cartella” si apre il trasferimento file GUI (Graphical User Interface) che permette di
trasferire file da un computer all'altro.
Manuel Utilisateur
Français
L'interfaccia grafica supporta file/cartelle e il trasferimento dati tramite Drag & Drop generico o Copia &
Incolla a 5Gbps. Il Clipboard Sharing consente di selezionare testi sul primo computer ed di incollarli sul
secondo e viceversa.
Chiusura barra di controllo – Selezionare ‘X’ in
altro a destra
Ripristina impostazioni – Reset posizioni del
monitor ed esegui nuovamente ‘condivisione
del monitor’
Manuale
Restart Barra di controllo – Fare doppio click sull'icona barra di controllo
applicazioni per riavviare.
Italiano
posta sulla barra delle
Condivisione di tastiera e mouse – Spostare il cursore del mouse tra i due computer per attivare l'utilizzo
della tastiera su un altro computer. Utilizzare la tastiera del primo computer per digitare sul secondo.
Risoluzione problemi
Problemi più comuni
•
Le estensioni Direct 3D non sono supportate su sistemi operativi XP/Vista
•
Alcuni driver e software, abbinati a determinate schede grafiche AGP o integrate nei chipset delle
schede madri, possono impedire l'impostazione del secondo monitor, come schermo principale,
durante la condivisione del video.
Consigli per risolvere un problema
•
•
•
•
•
•
Controllare che la porta USB, del dispositivo collegato, sia attiva e correttamente collegata al
sistema host
Scollegare il cavo USB 3.0 KVM & Data Transfer e ricollegarlo
Controllare che il monitor sia correttamente collegato al computer ed acceso
Assicurarsi di riavviare il computer dopo l'installazione del driver
Scollegare tutti gli altri dispositivi USB dal sistema
Provare a collegare il cavo USB 3.0 KVM & Data Transfer direttamente al computer invece che
attraverso un hub
Riproduzione di contenuti
•
•
•
•
•
•
Assicurarsi che la porta USB utilizzata sia USB 3.0
Durante la riproduzione di video su tutte le piattaforme, non cambiare la modalità di
visualizzazione, la posizione o la disposizione della finestra del player video (ad esempio
trascinare la finestra del lettore video dal monitor principale a quello collegato). Questo potrebbe
causare l'interruzione della riproduzione. Si consiglia di fermare la riproduzione video, spostarla
nel monitor desiderato e quindi riprendere la visualizzazione.
Si possono avere prestazioni video di bassa qualità con PC con hardware di basso livello.
Alcuni pacchetti software di riproduzione DVD non supportano la riproduzione su una seconda
scheda video di qualsiasi tipo. E' possibile provare ad aprire il lettore multimediale nel display
secondario prima di riprodurre il DVD.
Il PC potrebbe non avere i corretti codec per supportare la riproduzione di alcuni formati video.
Alcuni lettori Video / Media hanno capacità di decodifica diverse in base alle modalità di
visualizzazione. Per ottenere migliori prestazioni si consiglia di utilizzare Windows Media Player
10 o superiore.
CE/FCC Statement
CE Certification
This equipment complies with the requirements relating to Electromagnetic Compatibility Standards
EN55022/EN55024 and the further standards cited therein. It must be used with shielded cables only.
It has been manufactured under the scope of RoHS compliance.
CE Konformitätserklärung
Dieses Produkt entspricht den einschlägigen EMV Richtlinien der EU für IT-Equipment und darf nur
zusammen mit abgeschirmten Kabeln verwendet werden.
Diese Geräte wurden unter Berücksichtigung der RoHS Vorgaben hergestellt.
Die formelle Konformitätserklärung können wir Ihnen auf Anforderung zur Verfügung stellen
FCC Certification
This equipment has been tested and found to comply with the limits for a Class B digital device, pursuant
to part 15 of the FCC Rules. These limits are designed to provide reasonable protection against harmful
interference in a residential installation.
You are cautioned that changes or modification not expressly approved by the party responsible for
compliance could void your authority to operate the equipment.
This device complies with part 15 of the FCC Rules.
Operation is subject to the following two conditions:
1. This device may not cause harmful interference, and
2. This device must accept any interference received, including interference that may cause undesired
operation.
LINDY Herstellergarantie – Hinweis für Kunden in Deutschland
LINDY gewährt für dieses Produkt über die gesetzliche Regelung in Deutschland hinaus eine zweijährige
Herstellergarantie ab Kaufdatum. Die detaillierten Bedingungen dieser Garantie finden Sie auf der LINDY Website
aufgelistet bei den AGBs.
Recycling Information
WEEE (Waste of Electrical and Electronic Equipment),
Recycling of Electronic Products
Europe, United Kingdom
In 2006 the European Union introduced regulations (WEEE) for the collection and recycling of all waste electrical
and electronic equipment. It is no longer allowable to simply throw away electrical and electronic equipment.
Instead, these products must enter the recycling process.
Each individual EU member state has implemented the WEEE regulations into national law in slightly different
ways. Please follow your national law when you want to dispose of any electrical or electronic products. More
details can be obtained from your national WEEE recycling agency.
Germany / Deutschland
Die Europäische Union hat mit der WEEE Direktive Regelungen für die Verschrottung und das Recycling von
Elektro- und Elektronikprodukten geschaffen. Diese wurden im Elektro- und Elektronikgerätegesetz – ElektroG in
deutsches Recht umgesetzt. Dieses Gesetz verbietet das Entsorgen von entsprechenden, auch alten, Elektro- und
Elektronikgeräten über die Hausmülltonne! Diese Geräte müssen den lokalen Sammelsystemen bzw. örtlichen
Sammelstellen zugeführt werden! Dort werden sie kostenlos entgegen genommen. Die Kosten für den weiteren
Recyclingprozess übernimmt die Gesamtheit der Gerätehersteller.
France
En 2006, l'union Européenne a introduit la nouvelle réglementation (DEEE) pour le recyclage de tout équipement
électrique et électronique.
Chaque Etat membre de l’ Union Européenne a mis en application la nouvelle réglementation DEEE de manières
légèrement différentes. Veuillez suivre le décret d’application correspondant à l’élimination des déchets électriques
ou électroniques de votre pays.
Italy
Nel 2006 l’unione europea ha introdotto regolamentazioni (WEEE) per la raccolta e il riciclo di apparecchi elettrici
ed elettronici. Non è più consentito semplicemente gettare queste apparecchiature, devono essere riciclate. Ogni
stato membro dell’ EU ha tramutato le direttive WEEE in leggi statali in varie misure. Fare riferimento alle leggi del
proprio Stato quando si dispone di un apparecchio elettrico o elettronico.
Per ulteriori dettagli fare riferimento alla direttiva WEEE sul riciclaggio del proprio Stato.
LINDY No 42624
1st Edition, July 2014
Tested to Comply with
FCC Standards
For Home and Office Use!
www.lindy.com