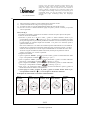
1
Fax +32 030 9904733 Copies of the I/B. Please reproduce them without any changes except under special instruction from Bimar (Italy). The pages must be reproduced and folded in order to obtain a booklet A5 (+/- 148.5 mm width x 210 mm height). When folding, make sure you keep the good numbering when you turn the pages of the I/B. Don’t change the page numbering. Keep the language integrity. LIBRETTO ISTRUZIONI INSTRUCTION BOOKLET NOTICE D’INSTRUCTION BEDIENUNGSANLEITUNG FOLLETO DE INSTRUCCIONES NOTICE D'INSTRUCTIONS NOTICE D'INSTRUCTION STUFA INFRAROSSI INFRARED HEATER POÊLE INFRAROUGE INFRAROTOFEN CALEFACTOR INFRARROJOS type K84.GR (mod. LD-568) 1/32 Assembly page 1/32 Fax +32 030 9904733 Copies of the I/B. Please reproduce them without any changes except under special instruction from Bimar (Italy). The pages must be reproduced and folded in order to obtain a booklet A5 (+/- 148.5 mm width x 210 mm height). When folding, make sure you keep the good numbering when you turn the pages of the I/B. Don’t change the page numbering. Keep the language integrity. Gentile Signora, egregio Signore, ci complimentiamo con lei per aver scelto una infrarossi Bimar, la stufa caratterizzata da un design moderno e raffinato, curata nei minimi particolari e dotata delle più avanzate soluzioni tecniche e di sicurezza. Con la stufa infrarossi Bimar potrà scaldare ogni zona della Sua casa, si sposta comodamente e non serve alcun tubo di scarico. In questo breve manuale può trovare tutti i consigli per poter utilizzare la Sua stufa nel modo migliore. Ringraziandola per la preferenza, la salutiamo con i più sinceri auguri di un caldo inverno. AVVERTENZE Questo simbolo vi invita a leggere attentamente queste istruzioni prima dell’uso dell’apparecchio, ed eventualmente informare terzi, se necessario. CONSERVARE IL LIBRETTO PER ULTERIORI CONSULTAZIONI. Se nella lettura di questo libretto di istruzioni d’uso alcune parti risultassero di difficile comprensione o se sorgessero dubbi, prima di utilizzare il prodotto contattare l’azienda all’indirizzo indicato in ultima pagina. Questo simbolo vi invita a prestare attenzione, ed a leggere gli specifici avvertimenti sul libretto istruzioni. Questo simbolo indica: ATTENZIONE: per evitare il surriscaldamento non coprire l’apparecchio. • Questa stufa è destinata al riscaldamento supplementare di ambienti e deve esse utilizzata seguendo scrupolosamente le indicazioni e avvertenze riportate nel presente libretto istruzioni. La stufa è idonea al riscaldamento di ambienti asciutti e non polverosi, e nei Paese/i indicati sull’imballo. Ogni altro uso è da considerarsi improprio e pericoloso. Il costruttore non potrà essere ritenuto responsabile di eventuali danni derivanti da uso improprio, erroneo e irresponsabile e/o da riparazioni effettuate da personale non qualificato. • Questa stufa deve essere installata da una persona competente. • Questa stufa deve essere alimentata solo con gas GPL e della categoria indicata sulla targa dati, in bombola da 15 kg; essa va raccordata con un regolatore di pressione e con un tubo flessibile: il regolatore di pressione deve essere taratura fissa 30 mbar EN12864 ed il tubo flessibile in gomma deve essere marchiato UNI-CIG 7140, della lunghezza di 50 cm (non più lungo di 60cm); verificare questi particolari col vostro fornitore di gas. Il tubo flessibile deve essere assicurato con fascette metalliche di idonea dimensione e necessita di sostituzione entro la data impressa sul medesimo. • Questa stufa Non deve essere considerata come impianto di riscaldamento centrale, e non deve essere utilizzata per riscaldare veicoli per il tempo libero quali veicoli quali caravan, roulotte, barche,ecc. • Tenere la bombola lontano da materiale infiammabile, bombole o altro per evitare rischio incendio, preferibilmente all’esterno della Vostra abitazione; mai depositare la bombola in locali interrati, seminterrati o soffitte. Conservare le bombole di gas in luogo asciutto e aerato e non esposto al sole. • Non usare la stufa in luoghi dove sono presenti materiali infiammabili (benzina, vernice,ecc..) e/o volatili (tende) che possano venire a contatto con la stufa. • La stufa è corredata da un dispositivo di sicurezza che interviene in caso di spegnimento accidentale della fiamma pilota o in caso in cui il locale non sia sufficientemente ventilato, il dispositivo di sicurezza blocca l’afflusso di gas spegnendo la stufa. 2/32 Assembly page 2/32 Fax +32 030 9904733 Copies of the I/B. Please reproduce them without any changes except under special instruction from Bimar (Italy). The pages must be reproduced and folded in order to obtain a booklet A5 (+/- 148.5 mm width x 210 mm height). When folding, make sure you keep the good numbering when you turn the pages of the I/B. Don’t change the page numbering. Keep the language integrity. • La stufa deve essere installata come descritto nel paragrafo “installazione” , tenendo conto inoltre delle seguenti avvertenze: 1) Usare la stufa solo in ambienti con adeguata aerazione; in tal modo si ottiene la rimozione dei gas prodotti nella combustione, e si assicura la sostituzione con aria più ossigenata. Inoltre l’areazione riduce considerevolmente la possibilità di eventuali condense. 2) Qualora si sospetti una perdita di gas: - chiudere immediatamente il rubinetto della bombola e creare circolo d’aria per evacuare i gas nell’ambiente -Spegnere tutte le fiamme libere (ad esempio del fornello, ecc.) ed aprire una finestra comunicante con l’esterno. NON accendere alcun dispositivo elettrico (lampade, elettrodomestici, ecc.). -Controllare tutte le connessioni con acqua saponata, verificando che le giunzioni di tubi e raccordi siano ben eseguite (il tubo deve ben calzare sul portagomma), serrate e sigillate. -Per rilevare le perdite di gas preparare dell’acqua saponata e con un pennellino passare sopra tutti i raccordi e le connessioni del circuito gas. In caso di perdita si formeranno delle bollicine: in questo caso chiudere il rubinetto della bombola e serrare bene il raccordo e/o calzare maggiormente la connessione. Riaprire il rubinetto della bombola e verificare nuovamente la tenuta del gas: se si rilevano ancora perdite di gas, chiudere il rubinetto della bombola e rivolgersi a personale professionalmente qualificato. Ventilazione dei locali Usare l’apparecchio solo in ambienti sufficientemente ventilati: è indispensabile praticare nei locali in cui sono installati gli apparecchi a gas due aperture una in alto e una in basso Posizione manopola Posizione minima, Dimensioni stanze 15m³ Dimensioni soggiorno 28 m³ Apertura superiore 55 cm² Apertura inferiore 55 cm² simbolo: “ “ Posizione media, 28 m³ 52 m³ 55 cm² 55 cm² 42 m³ 84 m³ 55 cm² 55 cm² simbolo: “ “ Posizione massima, simbolo: “ • “ Non spostare mai la stufa quando è in funzione o, se appena spenta, sino a quando non si è completamente raffredata. Attenzione: non verificare le perdite di gas quando l’apparecchio è caldo, ma attendere che si sia raffredato NON IMPIEGARE MAI UNA FIAMMA PER LA RICERCA DI PERDITE. • Il bruciatore della stufa è corredata da una griglia frontale, per prevenire rischi di incendio o infortuni; questa griglia deve essere sempre applicata davanti al bruciatore e non deve essere rimossa. Detta protezione si scalda durante l’utilizzo e non può garantire una completa tutela per bambini o persone irresponsabili. Assicurarsi che bambini, persone, animali siano a debita distanza dalla parte radiante,per evitare scottature o danni. • La griglia di protezione non fornisce completa protezione a bambini o a persone con ridotte capacità fisiche, sensoriali o mentali. • Per garantire l’evacuazione dei prodotti di combustione si sottolinea l’importanza che le aperture siano eseguite verso l’esterno (e non verso ambienti interni) e che queste non abbiano alcune ostruzione (controllare periodicamente). 3/32 Assembly page 3/32 Fax +32 030 9904733 Copies of the I/B. Please reproduce them without any changes except under special instruction from Bimar (Italy). The pages must be reproduced and folded in order to obtain a booklet A5 (+/- 148.5 mm width x 210 mm height). When folding, make sure you keep the good numbering when you turn the pages of the I/B. Don’t change the page numbering. Keep the language integrity. • L’apparecchio non è destinato a essere usato da persone (bambini compresi) le cui capacità fisiche, sensoriali o mentali siano ridotte, oppure con mancanza di esperienza o di conoscenza, a meno che esse abbiano potuto beneficiare, attraverso l’intermediazione di una persona responsabile della loro sicurezza, di una sorveglianza o di istruzioni riguardanti l’uso dell’apparecchio. I bambini devono essere sorvegliati per sincerarsi che non giochino con l’apparecchio. • Non appoggiare alcun oggetto, abiti, ecc.. sopra la stufa per evitare danneggiamenti o rischi di incendio. • L’apparecchio deve essere ispezionato prima dell’uso almeno una volta all’anno da personale professionalmente qualificato. La pulizia potrebbe essere necessaria più frequentemente: deve essere controllato il bruciatore, rubinetto, raccordi e tubi. • Quando è in funzione l’apparecchio si scalda, quindi toccare soltanto la manopola in plastica. Evitare il contatto con la parte radiante. • Non toccare l’apparecchio con mani o piedi bagnati. • Non lasciare l’apparecchio esposto agli agenti atmosferici (sole, pioggia, ecc.). • Attenzione: l'utilizzatore non deve lasciare l’apparecchio senza sorveglianza quando è in funzione. Questo simbolo indica: ATTENZIONE: per evitare il surriscaldamento o incendi non coprire l’apparecchio con tessuti indumenti o altro. Tale avvertenza vale sia nel caso di funzionamento a gas che elettrico. ASSEMBLAGGIO STUFA E COLLEGAMENTO BOMBOLA GAS 1) Tolta la stufa dall’imballo assicurarsi dell’integrità dell’apparecchio: in caso di dubbio non utilizzarlo e rivolgersi a personale professionalmente qualificato. Gli elementi dell’imballaggio non devono essere lasciati a portata di mano di bambini in quanto potenziali fonti di pericolo; provvedere allo smaltimento secondo le normative vigenti. 2) Togliere dal mobile il copri bombola, che durante il trasporto è rivolto verso l’interno,svitando le viti. 3) La stufa deve essere dotata di regolatore e tubo, controllare che siano in dotazione. Il tubo flessibile deve essere controllato periodicamente ad ogni sostituzione della bombola, verificando che non abbia graffi, scalfiture, che sia perfetto in buono stato, e comunque sostituito entro la data di scadenza impressa sul tubo stesso. 4) Collegare il tubo flessibile al portagomma del regolatore di pressione e a quello del rubinetto, assicurando la tenuta con fascette metalliche e prestando particolare attenzione a non manomettere o danneggiare alcun componente o raccordo. 5) Prima di collegare la bombola, verificare che il rubinetto della bombola stessa sia chiuso e che nel luogo dove state operando non vi siano altre sorgenti di fiamma (fornello acceso ecc.). Avvitare il regolatore di pressione alla bombola seguendo queste avvertenze: A) controllare il buono stato della guarnizione di tenuta B) fissare il regolatore al rubinetto avvitando il dado in senso antiorario e serrando bene. C) controllare con attenzione che non vi siano perdite di gas dalle giunzioni, mediante acqua saponata: nel caso ve ne fossero, si formeranno delle bolle; serrare maggiormente il raccordo o rivolgersi a personale professionalmente qualificato. Attenzione: evitare rigorosamente di utilizzare una fiamma per rilevare eventuali fughe di gas. 6) Inserire la bombola nell’apposito vano facendo attenzione affinché il tubo non subisca torsioni o strozzature e non sia a contatto con parti calde. 7) Agganciare il copribombola posteriore al mobile, fissarlo mediante le viti in dotazioni. 8) L’apparecchio deve essere completamente assemblato, con coprimombola fissato al mobile. La stufa deve essere utilizzata unicamente con la bombola da 15Kg inserita nel proprio vano. 9) Per sostituire la bombola, prima di svitare il regolatore verificare che il rubinetto della bombola stessa sia chiuso e che nel luogo dove state operando non vi siano altre sorgenti di fiamma 4/32 Assembly page 4/32 Fax +32 030 9904733 Copies of the I/B. Please reproduce them without any changes except under special instruction from Bimar (Italy). The pages must be reproduced and folded in order to obtain a booklet A5 (+/- 148.5 mm width x 210 mm height). When folding, make sure you keep the good numbering when you turn the pages of the I/B. Don’t change the page numbering. Keep the language integrity. 10) 11) 12) 13) (fornello acceso ecc.), o di calore; si raccomanda di controllare il buono stato della guarnizione del regolatore e del tubo flessibile in gomma, e se necessario sostituirli. Non manomettere raccordi o altri componenti. Non capovolgere la bombola per sfruttarne completamente il contenuto: questa operazione provoca la fuoriuscita di residui liquidi depositati nella bombola, che danneggiano in modo irreparabile la stufa. Non scollegare il regolatore di pressione dalla bombola quando il rubinetto della bombola è aperto. Il costruttore declina ogni responsabilità qualora uno dei punti sin qui elencati non venga rispettato. INSTALLAZIONE 1) Usare la stufa solo in ambienti ben aerati. E’ indispensabile che nei locali in cui è installata la stufa, possa affluire tanta aria quanto ne necessita per la regolare combustione. E’ quindi necessario che tale ambiente sia dotato di due prese di almeno 110cm2 verso l’esterno per il ricambio dell’aria. 2) La stufa deve essere installata su una superficie stabile e piana. 3) Non installare né usare la stufa in locali: - adibiti a bagno e/o doccia e/o servizi igenici - in camera da letto - nei piani interrati o semi-interrati, ai piani superiori degli stabili, in locali di volume inferiore a 15 m3. - in locali classificati con pericolo di incendio (autorimesse, garage, box, ecc.). 4) La stufa non deve essere utilizzata nelle camere da letto durante il sonno. 5) La stufa non deve essere vicino ad altre fonti di calore (distanza minima 1 metro), materiali infiammabili o esplosivi, e non deve essere orientata verso oggetti che si possono danneggiare o incendiare (ad esempio verso tende, poltrone e mobili). 6) Orientare la stufa in modo che il calore sia diretto verso il centro della stanza e comunque verso uno spazio libero; la parte frontale (radiante) deve essere distante almeno 2 metri da tende, divani, mobili o altri oggetti. La parte laterale e posteriore deve avere uno spazio libero di almeno 50cm Devono essere prese particolari precauzioni se la stufa si trova in locali dove hanno acesso bambini o animali, ecc. Per l’installazione attenersi a quanto riportato nelle norme UNI CIG 7129 e norme UNI CIG 7131 paragrafi 3.1-3.2-5.4-6.1-6.2-6.3. 7) Non utlizzare la stufa in alta montagna. 8) Far funzionare la stufa solo con la bombola gas alloggiata nel proprio scomparto. Usare la stufa e la bombola solo ed esclusivamente in posizione verticale. 9) Utilizzare solo bombole da 15Kg con il tipo di gas corretto. 10)In caso di guasto o cattivo funzionamento spegnere l’apparecchio e farlo controllare da personale professionalmente qualificato. USO Gli organi di accensione e regolazione sono posti nella parte superiore dell’apparecchio. 1) Aprire il rubinetto della bombola. 2) Verificare che la manopola della stufa sia in pos. “ ” , premerla sino in fondo, e dopo 30 secondi circa contemporaneamente premere il pulsante del piezoelettrico più volte sino ad accendere la fiamma dell’analizzatore d’atmosfera posto sul lato inferiore del bruciatore. Mantenere premuta la manopola 10-20 secondi dall’accensione della fiamma e poi rilasciarla. Se la fiamma non si accende, ripetere l’operazione dall’inizio. Per nuove installazioni o al cambio bombola potrebbe essere difficoltoso accendere la fiamma: essa non rimane attaccata al collare dell’analizzatore ma tende a sfuggire, e si 5/32 Assembly page 5/32 Fax +32 030 9904733 Copies of the I/B. Please reproduce them without any changes except under special instruction from Bimar (Italy). The pages must be reproduced and folded in order to obtain a booklet A5 (+/- 148.5 mm width x 210 mm height). When folding, make sure you keep the good numbering when you turn the pages of the I/B. Don’t change the page numbering. Keep the language integrity. spegne al rilascio della manopola. Ripetere immediatamente l’accensione una o più volte: così facendo si esaurisce la turbolenza (causa del disguido), la fiamma rimane accesa, ed avvia così il bruciatore. Avvenuta l’accensione della fiamma dell’analizzatore, tenere premuta la manopola, per circa 15 secondi, e poi rilasciarla: si avvia la combustione del bruciatore. 3) Regolazioni termiche: a) per la regolazione “minima“, premere la manopola a fondo e ruotarla in senso antiorario sino alla pos. b) corrispondente al simbolo “ “ (vedi Fig. “pos.1”). per la regolazione “media” premere la manopola parzialmente e ruotarla in senso antiorario sino alla c) pos. corrispondente ai simboli “ “ (vedi Fig. “pos.2”). per la regolazione “massima” premere la manopola parzialmente e ruotarla in senso antiorario sino alla pos. corrispondente ai simboli “ “ (vedi Fig.“pos.3”). per tornare alle regolazioni media e minima premere nuovamente la manopola e ruotarla in senso orario sino ai simboli corrispondenti. Spegnimento Per spegnere la stufa: premere la manopola e ruotarla in senso orario sino alla pos. corrispondente al d) simbolo “ Pos.A Accensione/ ” e chiudere accuratamente il rubinetto della bombola. Pos.1 Minimo Pos.2 Medio Pos.3 Massimo Pos.OFF Posizione PULIZIA E MANUTENZIONE Attenzione: prima di pulire l’apparecchio spegnerlo ed attendere che sia completamente raffredato. Per pulire la parte esterna della stufa utilizzare un panno morbido inumidito con acqua e detergente liquido. Non utilizzare pagliette metalliche o prodotti abrasivi. Non usare acqua, ne’combustibili o pulitori abrasivi. • Ispezionare regolarmente l’analizzatore d’atmosfera e i fori di aerazione; nel caso fosse presente polvere o lanugine, rimuoverla senza danneggiare il bruciatore o le tubazioni. • Verificare regolarmente lo stato del tubo flessibile in gomma e sostituirlo entro la data di scadenza indicata sul tubo stesso; ad ogni cambio di bombola verificare il buono stato della guarnizione del regolatore di pressione. • Fare attenzione a non urtare o danneggiare la superficie del bruciatore (è delicata), i raccordi e i tubi gas, il rubinetto, e tutti gli altri componenti del circuito gas. • Si raccomanda di far ispezionare la stufa una volta l’anno da personale di un ns. Centro Assistenza Tecnica autorizzato. • Quando si decide di non utilizzare la stufa per lunghi periodi, è bene seguire le seguenti indicazioni: 1) Chiudere il rubinetto della bombola e scollegare il regolatore di pressione dalla bombola stessa. 2) Depositare la bombola in un ambiente ben aerato e lontano da materiale infiammabile o esplosivo, preferibilmente all’esterno della Vostra abitazione; mai depositare la bombola in all’interno di appartamente, seminterrati o soffitte, né nei garage, e nemmeno negli sgabuzzini. Riconsegnare sempre la bombola vuota al rivenditore da cui si acquista la bombola nuova. Non 6/32 Assembly page 6/32 Fax +32 030 9904733 Copies of the I/B. Please reproduce them without any changes except under special instruction from Bimar (Italy). The pages must be reproduced and folded in order to obtain a booklet A5 (+/- 148.5 mm width x 210 mm height). When folding, make sure you keep the good numbering when you turn the pages of the I/B. Don’t change the page numbering. Keep the language integrity. abbandonare mai la bombola vuota tra i rifiuti. Non ricaricare la bombola in "fai da te" in quanto è estremamente pericoloso. Solo i rivenditori autorizzati possono riempire le bombole a gas GPL in piena sicurezza. 3) La stufa deve essere depositata in un ambiente asciutto e protetta dalla polvere (tanto meglio se si utilizza l’imballo originale). • Se si decide di non utilizzare più l’apparecchio, si raccomanda di scollegare la bombola (per lo stoccaggio seguire le indicazioni appena sopra descritte), renderlo inoperante tagliando il tubo flessibile in gomma, e di rendere innocue quelle parti che sono pericolose qualora utilizzate per gioco dai bambini. Avvertenze per il corretto smaltimento del prodotto Alla fine della sua vita utile il prodotto non deve esser smaltito insieme ai rifiuti urbani. Può essere consegnato presso gli appositi centri di raccolta differenziata predisposti dalle amministrazioni comunali, oppure presso i rivenditori che forniscono questo servizio. Smaltire separatamente un elettrodomestico consente di evitare possibili conseguenze negative per l’ambiente e per la salute derivanti da un suo smaltimento inadeguato e permette di recuperare i materiali di cui è composto al fine di ottenere un importante risparmio di energia e di risorse. Per rimarcare l’obbligo di smaltire separatamente gli elettrodomestici. Lo smaltimento abusivo del prodotto da parte dell’utente comporta l’applicazione delle sanzioni amministrative previste dalla normativa vigente 7/32 Assembly page 7/32 Fax +32 030 9904733 Copies of the I/B. Please reproduce them without any changes except under special instruction from Bimar (Italy). The pages must be reproduced and folded in order to obtain a booklet A5 (+/- 148.5 mm width x 210 mm height). When folding, make sure you keep the good numbering when you turn the pages of the I/B. Don’t change the page numbering. Keep the language integrity. Dear Sir or Madam: Thank you for choosing a Bimar infrared heater characterized by a modern, refined design, attention to the smallest detail and equipped with the most advanced technology and safety features. This Bimar infrared heater can be used to warm every area of your home, can be easily moved and requires no exhaust tube. This short manual will provide all the advice you will need to make the best use of your new heater. Thank you again for your choice, we wish you a warm, comfortable winter. WARNINGS Please read these instructions carefully before using the appliance, and instruct other persons using it, too, when necessary. Keep booklet handy for further use. If you have any doubts or you don’t understand some parts of this instruction booklet, before using the appliance contact the producer at the address written in the last page. This symbol show: WARNING: In order to avoid overheating, do not cover the heater with cloths. This warning applies to both gas and electric heaters. • This stove is destined to the supplementary heating of rooms and must be used in strict compliance with the instructions and warnings contained in this instruction booklet. The stove is ideal for heating dry and dust-free environments, in the country/countries indicated on the packaging. Any other use is to be considered inappropriate and therefore dangerous. The manufacturer cannot be held responsible for eventual damage caused by inappropriate, improper or irresponsible use and/or for repairs made to the product by unauthorised personnel. • The stove must be installed by qualified personnel only. • This stove must be fired only with LPG of the category stated on the serial plate, in 15 kg. cylinders; it must be connected with a pressure regulator by means of a flexible hose: the pressure regulator must have a fixed rating of 30 mbar EN12864; the rubber hose must be marked UNI-CIG 7140, with a length of 50 cm (not longer than 60 cm); verifiy these details with your gas seller. Then fasten the rubber hose with metal bands of suitable dimensions; the latter must be replaced within the date stamped on the bands. • This stove must never be considered a replacement of central heating, and should never be used to heat vehicles such as campers or caravans, etc. • Keep the cylinder far away from inflammable materials, other cylinders or objects to avoid the risk of fire, and preferably outside your home; never store the cylinder in the basement, cellar or loft. Keep the gas cylinders in a dry and well-ventilated room and do not expose to sunlight. • Never use the heater in the proximity of petrol, paint or other inflammable materials, and/or wall curtains. • The heater must be installed as described in the paragraph, “Installation” and keeping the following warnings in mind: 1) Use the heater in rooms with adequate ventilation; in this way, the gases produced by combustion will be removed and replaced with more oxygenated air. In addition, aeration considerably reduces the possibility of condensation. 2) If you think there's a gas leak: - Immediately close the cylinder valve and carefully check the appliance in the case of: 8/32 Assembly page 8/32 Fax +32 030 9904733 Copies of the I/B. Please reproduce them without any changes except under special instruction from Bimar (Italy). The pages must be reproduced and folded in order to obtain a booklet A5 (+/- 148.5 mm width x 210 mm height). When folding, make sure you keep the good numbering when you turn the pages of the I/B. Don’t change the page numbering. Keep the language integrity. - Extinguish all open flame (such as a stove, etc.) and open a window to the outside. Do NOT turn-on any electrical devices (lamps, appliances, etc.). - Make sure that all the connections are tight (the tube be tightly connected to the hose union). - To find the gas leak, brush soapy water on all the fittings and connections of the gas circuit. If there's a leak, you will see bubbles: if you find one, close the valve on the cylinder and tighten the fitting and/or push the connection together better. Open the gas cylinder valve and check for leaks again: if there are still leaks, close the cylinder valve and request professionally-qualified assistance. Room Ventilation Use the appliance only in well-aired rooms. It is necessary to make two breaches (a upper breach and a lower breach) in the rooms in which the gas heaters are placed. Knob positions Rooms size Livingroom size Upper breach Lower breach Miminum position, symbol: 15m³ 28m³ 55m² 55m² “ “ Medium position, symbol: “ “ Maximum position, symbol: “ 28m³ 52m³ 55m² 55m² 42m³ 84m³ 55m² 55m² “ • Never move the heater when it is working or, if just switched off, until it has cooled down completely. Warning: - do not check for gas leaks when the appliance is hot, but wait until it is cold. - NEVER use a flame to detect any leaks. • The heater has a front grill to prevent from the risk of fire or accident; this grill must always protect the burner and never be removed. The grill gets hot during use and cannot provide complete protection for children or irresponsible people. Make sure that children, persons and animals are at a safe distance from the radiant part in order to avoid burns or other injuries. • To ensure that combustion fumes are extracted, remember that vents must be towards the exterior (and never towards the interior) and they must not be obstructed in any way (check regularly). • This appliance is not intended for use by persons (including children) with reduced physical, sensory or mental capabilities, or lack of experience and knowledge, unless they have been given supervision or instruction concerning use of the appliance by a person responsible for their safety. Children should be supervised to ensure that they do not play with the appliance. • Do not place any objects on the heater to avoid damage or the risk of fire. • The appliance must be inspected before use at least once a year by a professional expert. Cleaning may be necessary more often, especially in the area around the burner and the valve to ensure sufficient air flow to the burner. • The appliance gets hot when working; so only touch the handle and plastic Knobs. Avoid contact with the heating element. • The fireguard of this heater is intended to prevent direct access to heating elements and must be in place when the heater is in use, but the fireguard does not give full protection for young children and for infirm person. • That the user must not leave the appliance unattended while it is connected to the supply. • Do not touch the heater with wet hands or feet. • Do not expose the heater to the weather (sun, rain, etc.). 9/32 Assembly page 9/32 Fax +32 030 9904733 Copies of the I/B. Please reproduce them without any changes except under special instruction from Bimar (Italy). The pages must be reproduced and folded in order to obtain a booklet A5 (+/- 148.5 mm width x 210 mm height). When folding, make sure you keep the good numbering when you turn the pages of the I/B. Don’t change the page numbering. Keep the language integrity. ASSEMBLING THE HEATER AND CONNECTING THE GAS CYLINDER 1) After removing the heater from its packaging, check it for damage: if you are unsure, do not use the appliance and contact qualified service personnel. The packing materials should not be left within the reach of children because they are potentially dangerous; dispose of them in conformity with the law. 2) Remove from the cabinet the cover on the gas cylinder, and unscrew. 3) This device must only be powered with LPG gas in a 15-kg cylinder and this must be equipped with a pressure regulator and flexible tube. The pressure regulator must have a fixed calibration of 30 mbar conforming to EN12864 and the flexible rubber tube must be marked UNI-CIG 7140, with a length of 50 cm (and not longer than 60 cm); the latter must be attached with metal bands of suitable size and needs to be replaced by the date stamped on it (fig.2-3). 4) The heater must be provided with a regulator and hose: make sure they are included in the supply. The flexible hose must be checked regularly whenever the cylinder is replaced to be sure it has no scratches or cuts and it is in a perfect state. It must be replaced in any case before the expiry date stamped on the hose itself. 5) Connect the flexible tube to the hose union of the pressure regulator and to that of the tap, checking that the metal bands are tight and paying particular attention not to tamper with or damage any component or fitting. 6) Before connecting the cylinder, make sure that its tap is closed and that there are no open flames (lit oven, etc.) in the room, where the stove is placed. Screw the pressure regulator onto the cylinder, keeping these warnings in mind: A) check that the gasket seal is in good condition B) attach the regulator to the tap, screwing the nut tightly counterclockwise. C) carefully check that there is no gas leaking from the connection, using soapy water: if there is a leak, bubbles will form; tighten the connection more or seek professionally qualified service. Warning: do not check for gas leaks when the appliance is hot, but wait until it is cold. 7) Place the cylinder in its compartment, taking care that the tube is not twisted or choked and isn't touching hot parts. 8) Hook the rear cylinder cover on the cabinet, fix it with the screws supplied. 9) The appliance has to be installed with the cover of the gas cylinder fixed to the cabinet. Use the stove only woth a 15kg cylinder placed in its compartment. 10) To replace the cylinder, make sure that its tap is closed and that there are no open flames (lit oven, etc.) or sources of heat in the place where you are working; we recommend that you check that the gasket seals of the regulator and flexible rubber tube are in good condition and replace them, if necessary. 11) To not mishandle the connections or other components. 12) Do not turn the cylinder upside down to completely use its contents: this releases liquid residues left in the tank that will irreparably damage the heater. 13) Do not disconnect the pressure regulator from the cylinder when the cylinder tap is open. 14) The manufacturer will not be responsible if one of the above points is disregarded. INSTALLATION 1)Use the stove only in well-aired rooms. In the room where the stove is placed there must be as much air as it is necessary for the combustion. The room must have two breaches of 110cm² for the air change. 2)The heater must be installed on a flat, stable surface. 3) Do not install or use the heater: - in bathrooms; - in bedrooms; 10/32 Assembly page 10/32 Fax +32 030 9904733 Copies of the I/B. Please reproduce them without any changes except under special instruction from Bimar (Italy). The pages must be reproduced and folded in order to obtain a booklet A5 (+/- 148.5 mm width x 210 mm height). When folding, make sure you keep the good numbering when you turn the pages of the I/B. Don’t change the page numbering. Keep the language integrity. - in basement floors, in upper floors or in rooms with a volume less than 15 m3 ; - in places with the risk of fire (garage). 4) Do not use the stove in bedroom while sleeping. 5) The heater must not be close to other sources of heat (minimum distance 1 meter), inflammable materials or explosives and must not be directed towards objects which could be damaged or catch fire (it must not be directed towards curtains, armchairs and furniture, for example). 6) Face the heater so that the heat is directed towards the centre of the room and towards an open space; the frontal part (radiating) must be placed at least 2 meters away from curtains, couches, furniture or other objects. The sides and the rear part of the stove must have a free space of at least 50cm. Special attention as to be attached if the stove is in a room where children or animals can enter. For the installation follow norms UNI CIG 7129 and the norms UNI CIG 7131, par. 3.1-3.2-5.4-6.16.2-6.3. 7) Do not use the stove on the mountain. 8) Use the stove only with the gas cylinder in its compartment. Use the stove and the gas cylinder only in vertical position. 9) Use only 15kg gas cylinder. Check the right gas for your stove. 10) In case of defective functioning or damage, switch the appliance off and let it check by qualified personnel. USE (See Fig.4) Controls for switching on and adjustment are found at the top of the appliance. 1. Open the cylinder valve. 2. Press the valve knob down hard and turn anti-clockwise until reaching the ON position ” (see fig.4 “pos.A”), thus lighting the pilot flame; to keep the flame alight, the marked “ knob must be pressed for 15 seconds after the flame has lit. If the pilot does not light, repeat the procedure. For new installations or when the cylinder is changed, it may be difficult to light the pilot flame: it does not remain attached to the collar of the pilot but tends to escape and goes out when the valve knob is released. Repeat the lighting procedure a few times until turbulence (cause of the inconvenience) is removed, the pilot flame will remain attached to the collar and alight, and the burner will start. 3. Regulating the heat: a. For “minimum” position, press the knob down hard and turn anti-clockwise to the position b. “ (see fig. “pos.1”). marked “ For “medium” position, press the knob part and turn anti-clockwise to the position marked c. “ (see fig. “pos.2”). “ For “maximum” heat, press the knob down hard and turn anti-clockwise to the position “ (see fig. “pos.3”). marked “ To return to medium and minimum settings, press the knob and turn clockwise until reaching the position required. To switch off the stove, press the knob and turn clockwise until reaching the OFF position marked d. 4. “ ”: To switch the stove off completely, the cylinder valve must always be shut. 11/32 Assembly page 11/32 Fax +32 030 9904733 Copies of the I/B. Please reproduce them without any changes except under special instruction from Bimar (Italy). The pages must be reproduced and folded in order to obtain a booklet A5 (+/- 148.5 mm width x 210 mm height). When folding, make sure you keep the good numbering when you turn the pages of the I/B. Don’t change the page numbering. Keep the language integrity. Pos.A Pos.1 Pos.2 Pos.3 Pos.OFF Position lighting Position Minium Position medium Position maximum Position Off CLEANING AND MAINTENANCE Attention: before cleaning the appliance, turn it off and wait for it to cool down completely. To clean the outside of the heater, use a soft cloth soaked with water and a liquid detergent. Do not use scouring pads or abrasive products. Do not use water, inflammable or abrasive cleaners. • Regularly inspect the atmosphere analyzer and the aeration holes; if there is dust or lint, remove it without damaging the burner or tubing. • Regularly check the condition of the flexible rubber tube and replace it by the expiration date stamped on it; check the condition of the gasket seal on the pressure regulator every time the gas cylinder is changed. • Take care not to hit or damage the surface of the burner (it's delicate), the fittings and gas tubes, the tap and all the other components of the gas circuit. • We recommend to let the heater inspected once a year by one of our authorized service centers. • If you decide not to use the heater for an extended period, it is a good idea to follow the instructions below: 1) Close the tap on the cylinder and disconnect the pressure regulator from the cylinder. 2) Store the cylinder in a well-ventilated room, far from inflammable or explosive materials and preferably outside your home; never store the cylinder in a basement or attic, garage, and storage closet. Give back to the seller the empy gas cylinder. Never leave the empty cylinder among garbage. Never recharge the cylinder alone as it could be very dangerous. Only authorized seller can safely recharge the cylinder with LPG. 3) The heater must be stored in a dry place and protected from dust (and even better in its original packaging). • If you decide not to use the appliance any more, we recommend to disconnect the cylinder following the above instructions for storage; to make it inoperable by cutting the flexible rubber tube and to make harmless those parts that could be dangerous for children. IMPORTANT INFORMATION FOR CORRECT DISPOSAL OF THE PRODUCT. At the end of its working life, the product must not be disposed of as urban waste. It can be taken to a special local centre for waste collection and recycling or to a dealer providing this service. Disposing of a household appliance separately avoids possible negative consequences for the environment and health deriving from inappropriate disposal and enables the constituent materials to be recovered to obtain significant savings in energy and resources. As a reminder of the need to dispose household appliances separately, the product is marked with a crossed-out wheeled dustbin. The uncorrected disposal of the appliance by the user implies administrative fines according to the existing laws. 12/32 Assembly page 12/32 Fax +32 030 9904733 Copies of the I/B. Please reproduce them without any changes except under special instruction from Bimar (Italy). The pages must be reproduced and folded in order to obtain a booklet A5 (+/- 148.5 mm width x 210 mm height). When folding, make sure you keep the good numbering when you turn the pages of the I/B. Don’t change the page numbering. Keep the language integrity. Chère Madame, Cher Monsieur, merci d’avoir choisi un poêle infrarouge Bimar, un appareil au design moderne et raffiné, étudié avec soin jusque dans les moindres détails et équipé avec des solutions techniques et de sécurité de pointe. Le poêle infrarouge Bimar vous permettra de chauffer toutes les zones de votre maison : aisé à déplacer, il n’a besoin d’aucun tuyau d’évacuation. Vous trouverez dans cette courte notice tous les conseils pour utiliser votre poêle de la meilleure façon possible. En vous félicitant pour votre choix, nous vous addressons nos salutations les plus cordiales et vous souhaitons un agréable hiver bien au chaud. AVERTISSEMENTS Nous vous prions de lire attentivement ces instructions avant d’utiliser l'appareil et de les divulguer à toutes les personnes qui pourraient en avoir besoin. Gardez-les à portée de main. Si vous avez des doutes ou si vous ne comprenez pas de parties de cette notice d’instructions, contacter le producteur à l’addresse écrite en dernière page. Ce symbole indique : ATTENTION : pour éviter toute surchauffe et tout risque d'incendie, ne pas poser de tissus, vêtements ou autre sur l’appareil, quel que soit le type de fonctionnement : à gaz ou électrique. • Ce poêle est destiné au chauffage d'appoint. Suivre scrupuleusement les indications et les instructions de ce manuel d'instructions. Il est apte à chauffer des endroits secs et non poussiéreux dans les pays indiqués sur l’emballage. Tout autre usage est considéré comme inopportun et donc dangereux. Le producteur ne peut pas être considéré comme responsable pour des détériorations dues à une utilisation inappropriée ou non conforme au mode d’emploi et/ou pour des réparations faites par du personnel non autorisé. • Ce poêle doit être installé par du personnel qualifié. • Ce poêle doit être uniquement alimenté avec du gaz GPL de la catégorie indiquée sur la plaque de données, dans des bouteilles de 15 kg qui doivent être branchées à un régulateur de pression et à un tuyau flexible. Le régulateur de pression doit être étalonné à une valeur fixe de 30 mbar EN12864 et le tuyau flexible en caoutchouc d’une longueur de 50 cm (pas plus de 60 cm) doit être marqué UNI-CIG 7140. Celui-ci doit être fixé à l'aide de colliers métalliques de la bonne dimension et il doit être remplacé avant la date indiquée. • Ce poêle n’est pas une installation de chauffage central. Il ne doit pas être utilisé pour chauffer des véhicules (caravanes, roulottes, etc.). • Conserver la bouteille de gaz loin de matières inflammables, d’autres bouteilles de gaz ou autre pour éviter tout risque d'incendie et de préférence en dehors des habitations ; ne jamais stocker les bouteilles de gaz dans des sous-sols ou des greniers. Les conserver dans un endroit sec et aéré, à l’abri du soleil. • Ne pas utiliser le poêle dans un endroit où sont stockés de l'essence, du vernis ou des matières inflammables et loin des rideaux. • Le poêle est équippé d’un dispositif de sécurité qui s’allume lorsque la flamme s’éteint accidentellement ou lorsque le local n’est pas suffisamment aéré. Le dispositif bloque le flux de gaz et éteint le poêle. 13/32 Assembly page 13/32 Copies of the I/B. Please reproduce them without any changes except under special instruction from Bimar (Italy). The pages must be reproduced and folded in order to obtain a booklet A5 (+/- 148.5 mm width x 210 mm height). When folding, make sure you keep the good numbering when you turn the pages of the I/B. Don’t change the page numbering. Keep the language integrity. Fax +32 030 9904733 • Le poêle doit être installé conformément aux indications de la section « Installation » en tenant compte également des avertissements ci-dessous : 1) Utiliser le poêle uniquement dans des locaux convenablement aérés ; cela permet d’éliminer les gaz produits lors de la combustion et assure l’introduction d’air plus oxygéné. De plus, l’aération réduit considérablement le risque de condensat. 2) Si vous redoutez une fuite de gaz : - Refermer immédiatement le robinet de la bouteille de gaz et contrôler l’appareil: éteignez toutes les flammes libres (par exemple la cuisinière, etc.) et ouvrez une fenêtre communiquant avec l’extérieur. N’ALLUMER aucun dispositif électrique (lampe, électroménager, etc.). - Vérifiez tous les raccordements en veillant à ce que les jonctions de tuyaux et raccords soient réalisées correctement (le tuyau doit bien s'engager sur l’embout), serrées et scellées. - Pour dépister les pertes de gaz, préparez de l’eau savonneuse et passez-la à l’aide d’un pinceau sur tous les raccords et les connexions du circuit du gaz. S’il y a une fuite, des bulles se forment. Si c’est le cas, fermez le robinet de la bouteille et serrez à fond le raccord et/ou enfoncez mieux la connexion. Rouvrez le robinet de la bouteille et vérifiez à nouveau l’étanchéité au gaz : si vous détectez encore des fuites de gaz, fermez le robinet de la bouteille et adressez-vous à un technicien professionnel qualifié. Ventilation des locaux Utiliser l’appareil seulement dans des locaux suffisamment aérés : il est indispensable d’avoir deux trous dans le local (l’un en haut et l’autre en bas). Position du bouton Dimension du local Dimension du salon Trous supérieur Trous inférieur symbol « » Position moyenne, 15 m³ 28m³ 55cm² 55cm² symbol « 28m³ 52m³ 55cm² 55cm² 42m³ 84m³ 55cm² 55cm² Position minimum, » Position maximum, symbol« » • Ne jamais déplacer le poêle lorsqu'il est en marche ou, après l'avoir éteint, tant qu'il n'est pas complètement froid. Attention: - ne pas vérifier les pertes de gaz quand l’appareil est chaud ; attendre qu'il ait refroidi - éviter soigneusement d'utiliser une flamme pour détecter des fuites. • Le poêle présente une grille frontale ayant pour fonction de prévenir les risques d'incendie ou d'accident; cette grille doit toujours être appliquée devant le brûleur et ne doit jamais être enlevée. Cette protection s’échauffe pendant l’utilisation et ne peut pas garantir une protection complète pour les enfants ou les personnes irresponsables. Veiller à ce que les enfants, adultes, animaux se trouvent à distance suffisante de la partie radiante afin d’éviter brûlures ou dommages. • Pour garantir l’évacuation des produits de combustion, nous attirons votre attention sur l’importance de réaliser des ouvertures donnant sur l’extérieur (et non pas sur d’autres pièces) et exemptes de tout obstacle (contrôler périodiquement). 14/32 Assembly page 14/32 Fax +32 030 9904733 Copies of the I/B. Please reproduce them without any changes except under special instruction from Bimar (Italy). The pages must be reproduced and folded in order to obtain a booklet A5 (+/- 148.5 mm width x 210 mm height). When folding, make sure you keep the good numbering when you turn the pages of the I/B. Don’t change the page numbering. Keep the language integrity. • Ce produit n’est pas prévu pour être utilisé par des personnes (y compris les enfants) possédant des capacités physiques, sensorielles ou mentales réduites ou bien une expérience et connaissance insuffisante, à moins qu’elles ne se trouvent sous la surveillance de quelqu’un ou qu’elles n’aient reçu des instructions concernant l’utilisation de l’appareil de la part des personnes responsables de leur sécurité. Il convient de surveiller les enfants pour s’assurer qu’ils ne jouent pas avec l’appareil. • Ne placez aucun objet sur le poêle afin d’éviter tout dommage ou risque d’incendie. • The appliance must be inspected before use at least once a year by a professional expert. Cleaning may be necessary more often, especially in the area around the burner and the valve to ensure sufficient air flow to the burner. • Quand le appareil est en service, il se réchauffe et il faut par conséquent toucher seulement les poignée et bouton en matière plastique. Eviter le contact avec la partie chauffante (résistance électrique). • Ne laissez jamais votre appareil sans surveillance lorsque celui-ci est sous tension. • Ne touchez pas l'appareil quand vous avez les mains ou les pieds mouillés. • Ne laissez pas l'appareil dehors, sous la pluie, au soleil etc. ASSEMBLAGE DU POÊLE ET RACCORDEMENT DE LA BOUTEILLE GAZ 1) Sortir le poêle de son emballage et s’assurer de l’intégrité de l’appareil : en cas de doute, ne pas l’utiliser et s'adresser au personnel professionnel qualifié. Les éléments de l’emballage doivent être tenus hors de portée des enfants car ils représentent des sources potentielles de danger et doivent être éliminés dans le respect des dispositions en vigueur. 2) Enlever du meuble la couvre-bonbonne en dévissant les deux visses de fixation (fig.1). 3) Cet appareil doit être alimenté uniquement au gaz GPL en bouteille de 15 kg qui doit être raccordée à un régulateur de pression et à un tuyau flexible : le régulateur de pression doit être à étalonnage fixe à 30 mbar EN12864 et le tuyau flexible en caoutchouc doit porter la marque UNI-CIG 7140 et avoir une longueur de 50 cm (pas plus de 60cm) ; ce dernier doit être assujetti à l’aide de colliers métalliques de dimensions appropriées et remplacé avant la date imprimée dessus (fig.2-3). 4) Le poêle doit être équipé d'un régulateur et d'un tuyau ; s'assurer qu'ils sont fournis. Le tuyau flexible doit être contrôlé périodiquement chaque fois que la bouteille de gaz est remplacée, après s'être assuré qu'il ne présente aucune griffure, éraflure ou autre et qu'il est en parfait état ; il doit dans tous les cas être remplacé avant la date d'échéance indiquée. 5) Relier le tuyau flexible à l’embout du régulateur de pression et à celui du robinet en assujettissant la connexion à l’aide de colliers métalliques et en faisant particulièrement attention à ne pas altérer ni endommager les composants ou raccords. 6) Avant de brancher la bouteille, vérifier que le robinet de la bouteille est bien fermé et que l’endroit où vous êtes en train d’opérer ne contient aucune source de flamme (fourneau allumé, etc.). Visser le régulateur de pression à la bouteille en respectant les avertissements suivants: A) vérifier le bon état du joint d’étanchéité B) fixer le régulateur au robinet en vissant l'écrou dans le sens contre-horaire et en serrant bien C) vérifier soigneusement avec de l’eau savonneuse qu’il n’y ait pas de pertes de gaz aux jonctions : s’il y en a, des bulles se formeront ; serrez le raccord plus à fond ou adressez-vous à un technicien professionnel qualifié. Attention: ne pas vérifier les pertes de gaz quand l’appareil est chaud ; attendre qu'il ait refroidi 7) Introduisez la bouteille dans le compartiment prévu à cet effet en veillant à ce que le tuyau ne subisse ni torsion ni étranglement et à ce qu'il ne soit pas en contact avec des parties chaudes (fig.6). 8) Accrocher la couvre-bonbonne postérieure au meuble et visser les vis (fig.3). 9) L’appareil doit être installé avec le couvre bonbonne fixé au meuble. User le poêle uniquement avec une bouteille de 15kg. 10) Lors des opérations de remplacement de la bouteille, avant de dévisser le régulateur, vérifier que le robinet de la bouteille est bien fermé et que l’endroit où vous êtes en train d’opérer ne contient 15/32 Assembly page 15/32 Fax +32 030 9904733 Copies of the I/B. Please reproduce them without any changes except under special instruction from Bimar (Italy). The pages must be reproduced and folded in order to obtain a booklet A5 (+/- 148.5 mm width x 210 mm height). When folding, make sure you keep the good numbering when you turn the pages of the I/B. Don’t change the page numbering. Keep the language integrity. 11) 12) 13) 14) aucune source de flamme (fourneau allumé, etc.) ou de chaleur ; il est recommandé de vérifier le bon état du joint du régulateur et du tuyau flexible en caoutchouc ; les remplacer si nécessaire. Ne pas altérer les raccords ou autres composants. Ne renversez pas la bouteille pour utiliser complètement son contenu : cette opération provoque la sortie de résidus liquides déposés dans la bouteille et qui endommagent irréparablement le poêle. Ne pas débrancher le régulateur de pression de la bouteille quand le robinet de la bouteille est ouvert. Le constructeur décline toute responsabilité en cas de non-respect d’un des points de la liste cidessus. INSTALLATION 1) N’utiliser le poêle que dans des locaux bien aérés. Il est indispensable que dans les locaux où le poêle est installé, l'air puisse affluer en quantité nécessaire pour assurer la combustion régulière. Il est donc nécessaire que la pièce soit dotée de deux prises d’au moins 110 cm² vers l’extérieur pour la circulation de l’air. 2) Le poêle doit être installé sur une surface stable et plane. Ne pas installer ni utiliser le poêle dans des locaux utilisés comme salles de bains ou chambres à coucher, dans les sous-sols, aux étages supérieurs des bâtiments, dans des locaux de volume inférieur à 15 m3. 3) Le poêle ne doit pas être près d’autres sources de chaleur (distance minimum 1 mètre), de matériaux inflammables ou explosifs, et ne doit pas être orienté vers des objets susceptibles de s’endommager ou de s’incendier (par exemple, ne pas l’orienter vers des rideaux, des fauteuils ou des meubles). 4) Orienter le poêle de façon à ce que la chaleur soit dirigée vers le centre de la pièce et, de toute façon, vers un espace libre ; la partie frontale (radiante) doit se trouver à au moins 2 mètres des rideaux, canapés, meubles ou autres objets. La partie postérieure et latérale doivent avoir un espace libre de au moins 50cm. Il faut prendre des précautions si le poêle se trouve dans un local où des enfents ou des animaux peuvent entrer. 5) Ne pas utiliser le poêle en haute montagne. 6) Ne pas faire fonctionner le poêle si la bouteille de gaz convenablement n’est pas logée dans le compartiment prévu à cet effet. Utiliser le poêle et la bouteille en position verticale. 7) Utiliser uniquement des bouteilles de 15 kg contenant le type de gaz approprié 8) L’appareil ne doit jamais être positionné directement sous une prise électrique. 9) Toutes les réparations doivent être faites par un service qualifié compétent. Dans tous les cas vous devez retourner votre appareil à ce service UTILISATION (Voir fig.) Les organes d'allumage et de réglage sont situés sur le haut de l'appareil. 1. Ouvrir le robinet de la bouteille de gaz. 2. Appuyer à fond sur le bouton du robinet et le tourner dans le sens contraire aux aiguilles d'une montre jusqu'à la position correspondant aux symbole « » (voir Fig. 4« pos. A ») pour amorcer l’allumage de la flamme pilote. Pour que la flamme reste allumée, le bouton doit rester enfoncé pendant 15 secondes après l’allumage. Si le pilote ne s'allume pas, répéter l’opération depuis le début. Pour les nouvelles installations ou lorsque vous changez de bouteille de gaz, il se peut que la flamme pilote s’allume difficilement : elle ne reste pas attachée au collier du pilote et a plutôt tendance à fuir et elle s'éteint lorsque vous relâchez le bouton du robinet. Répétez aussitôt l’allumage une ou plusieurs fois, de manière à épuiser la turbulence (qui est la cause de l'erreur). En restant attachée au collier et allumée, la flamme pilote enflamme le brûleur. 3. Réglages thermiques : 16/32 Assembly page 16/32 Fax +32 030 9904733 Copies of the I/B. Please reproduce them without any changes except under special instruction from Bimar (Italy). The pages must be reproduced and folded in order to obtain a booklet A5 (+/- 148.5 mm width x 210 mm height). When folding, make sure you keep the good numbering when you turn the pages of the I/B. Don’t change the page numbering. Keep the language integrity. a) pour le réglage « minimum », appuyer à fond sur le bouton et le tourner dans le sens contraire b) » (voir Fig. « pos. des aiguilles d'une montre jusqu'à la pos. correspondant aux symboles « 1 »). pour le réglage « moyen », appuyer à fond sur le bouton et le tourner dans le sens contraire des c) » (voir Fig. « pos. aiguilles d'une montre jusqu'à la pos. correspondant aux symboles « 2 »). pour le réglage « maximal », appuyer à fond sur le bouton et le tourner dans le sens contraire » (voir des aiguilles d'une montre jusqu'à la pos. correspondant aux symboles « Fig.4 « pos. 3 »). d) pour revenir aux réglages moyen et min., appuyer de nouveau sur le bouton et le tourner dans le sens des aiguilles d'une montre jusqu'aux symboles correspondant. 5. Pour éteindre le poêle, appuyer sur le bouton et le tourner dans le sens contraire des aiguilles d'une montre jusqu'à la pos. correspondant au symbole « fermer toujours le robinet de la bouteille de gaz. Ne pas déplacer le poêle quand il est allumé. », et pour l'éteindre complètement, Fig.4 Pos.A Pos.1 Pos.2 Pos.3 Pos.OFF Position allumage Position allumage& minimum Position moyenne Position maximum Position Off NETTOYAGE ET ENTRETIEN Attention: avant de nettoyer l’appareil, l’éteindre et attendre qu’il soit complètement refroidi. Pour nettoyer l’extérieur du poêle, utiliser un chiffon doux imbibé d’eau et de savon liquide. Ne pas utiliser de paille de fer ou de produit abrasif. Ne pas utiliser d’eau, de combustible ou de nettoyeur abrasif. • Inspecter régulièrement l’analyseur d’atmosphère et les trous d’aération ; en cas de présence de poussière ou de duvet textile, les enlever sans endommager brûleur ou les tuyaux. • Vérifier régulièrement l’état du tuyau flexible en caoutchouc et le remplacer avant la date d’expiration indiquée sur le propre tuyaux ; à chaque changement de bouteille, vérifier le bon état du joint du régulateur de pression. • Veiller à ne pas heurter ni endommager la surface du brûleur (elle est délicate), les raccords et les tubes gaz, le robinet et tous les autres composants du circuit gaz. • Il est recommandé de faire inspecter le poêle une fois par an par le personnel d'un de nos Centres d’Assistance Technique agréés. • Si vous décidez de ne pas utiliser le poêle pendant des périodes prolongées, nous vous invitons à suivre les indications ci-dessous : 1) Fermer le robinet de la bouteille et débrancher le régulateur de pression de la bouteille. 2) Déposer la bouteille dans un endroit bien aéré et éloignée de toute matière inflammable ou explosive, de préférence à l'extérieur de votre logement ; ne jamais déposer la bouteille dans un sous-sol ou un grenier, dans un garage, ou dans un débarras. Livrer la bouteille vide au détaillant. 17/32 Assembly page 17/32 Fax +32 030 9904733 Copies of the I/B. Please reproduce them without any changes except under special instruction from Bimar (Italy). The pages must be reproduced and folded in order to obtain a booklet A5 (+/- 148.5 mm width x 210 mm height). When folding, make sure you keep the good numbering when you turn the pages of the I/B. Don’t change the page numbering. Keep the language integrity. Ne jamais abandonner la bouteille parmi les déchets. Ne jamais recharger la bouteille tout seul, il peut être très dangereux. 3) Le poêle doit être déposé dans un endroit sec et à l’abri de la poussière (de préférence dans son emballage original). • Si vous décidez de ne plus utiliser l'appareil, il est recommandé de débrancher la bouteille (pour le stockage, suivre les indications ci-dessous), de la rendre inopérante en coupant le tuyaux flexible en caoutchouc et de rendre inoffensives les parties qui sont dangereuses si des enfants devaient s'en servir pour jouer. AVERTISSEMENTS POUR L'ÉLIMINATION CORRECTE DU PRODUIT AUX TERMES Au terme de son utilisation, le produit ne doit pas être éliminé avec les déchets urbains. Le produit doit être remis à l'un des centres de collecte sélective prévus par l'administration communale ou auprès des revendeurs assurant ce service. Éliminer séparément un appareil électroménager permet d'éviter les retombées négatives pour l'environnement et la santé dérivant d'une élimination incorrecte, et permet de récupérer les matériaux qui le composent dans le but d'une économie importante en termes d'énergie et de ressources.Pour rappeler l'obligation d'éliminer séparément les appareils électroménagers, le produit porte le symbole d'un caisson à ordures barré. Le tri abusive du produit de la part de l’utilisateur peut impliquer des sanctions administratives prévues par la loi. 18/32 Assembly page 18/32 Fax +32 030 9904733 Copies of the I/B. Please reproduce them without any changes except under special instruction from Bimar (Italy). The pages must be reproduced and folded in order to obtain a booklet A5 (+/- 148.5 mm width x 210 mm height). When folding, make sure you keep the good numbering when you turn the pages of the I/B. Don’t change the page numbering. Keep the language integrity. Sehr geehrte Kundin, sehr geehrter Kunde, wir gratulieren Ihnen zur Wahl eines Infrarotofens von Bimar. Dieses Raumheizgerät zeichnet sich durch ein modernes und elegantes Design, bis ins Kleinste gepflegte Details und modernste Technik und Sicherheitseinrichtungen aus. Mit dem Infrarotofen von Bimar können Sie jeden Bereich Ihrer Wohnung beheizen. Er lässt sich mühelos verschieben und benötigt kein Abgasrohr. In dieser kleinen Bedienungsanleitung finden Sie alle zum optimalen Gebrauch Ihres neuen Infrarotofens erforderlichen Informationen. Wir danken Ihnen, dass Sie uns den Vorzug gegeben haben, und wünschen Ihnen einen gemütlich warmen Winter. HINWEISE Bitte lesen Sie vor der Benutzung des Gerätes sorgfältig diese Anleitungen und setzen Sie gegebenenfalls Dritte darüber in Kenntnis. Gebrauchsanleitung zum weiteren Nachschlagen aufbewahren. Wenn Sie beim Lesen dieser Bedienungsanleitung einige Teile nicht verstehen oder wenn Sie Zweifel haben, bitte schreiben oder rufen Sie den Betrieb an, bevor Sie das Ofen benutzen. Dieses Symbol heißt: ACHTUNG: Überhitzung und Brandgefahr wird dadurch vermieden, dass das Gerät nicht mit Stoffen, Kleidungsstücken usw. abgedeckt wird. Dies gilt sowohl beim Gas- als auch beim Elektrobetrieb. • Dieser Ofen ist zum zusätzlichen Heizen von Räumen bestimmt und darf nur unter sorgfältiger Beachtung der Anleitungen und Hinweise dieser Bedienungsanleitung benutzt werden. Der Ofen eignet sich zum Heizen von trockenen und nicht staubigen Räumen, und zwar in Ländern, die auf der Verpackung angegeben sind. Wir übernehmen keine Haftung für Schäden, welche durch unsachgemäße Behandlung entstanden sind und/oder für Reparaturen, die nicht von Fachpersonal gemacht sind. • Dieser Ofen soll nur bei qualifizierter Fachkräfte angeschlossen werden • Dieser Ofen darf nur mit Flüssiggas der auf dem Datenschild angegebenen Klasse versorgt werden, das in 15-kg-Gasflaschen abgefüllt ist. Die Gasflasche muss mit einem Druckregler und einem Schlauch angeschlossen werden. Der Druckregler muss einen festen Eichwert von 30 mbar nach EN12864 haben. Der Gummischlauch muss das Kennzeichen UNI-CIG 7140 tragen und 50 cm lang sein (60 cm Länge darf nicht überschritten werden). Überprüfen Sie diese Details mit dem Gas Lieferant. Der Gummischlauch muss mit größenmäßig angemessenen Metallschellen gesichert werden und ist bis zum darauf geprägten Datum auszuwechseln. • Dieser Ofen darf NICHT als Zentralheizanlage benutzt werden, außerdem darf er nicht dazu verwendet werden, Fahrzeuge wie Caravan, Wohnwagen usw. zu heizen. • Das Gerät ist nur zum Heizen von trockenen, jedoch nicht staubhaltigen Räumen oder beweglichen Behausungen (Wohnwagen, Wohnanhänger usw.) bestimmt. • Gasflasche von brennbaren Stoffen fernhalten. Zum Vermeiden von Brandgefahr Gasflasche oder Sonstiges lieber außerhalb der Wohnung lagern, nie im Souterrain, Halbsouterrain oder im Dachgeschoss lagern. Gasflaschen an einem trockenen und belüfteten Ort aufbewahren, der nicht der Sonneneinwirkung ausgesetzt ist. • Das Heizgerät nicht in Räumen betreiben, in denen Benzin, Lack usw. und brennbare Stoffe oder Vorhang vorhanden sind. • Dieser Ofen hat eine Vorkehrung, die das Gas Strömen sperrt, wenn die Pilotflamme ausgeht oder wenn die Räume nicht gut belüftet sind. 19/32 Assembly page 19/32 Fax +32 030 9904733 Copies of the I/B. Please reproduce them without any changes except under special instruction from Bimar (Italy). The pages must be reproduced and folded in order to obtain a booklet A5 (+/- 148.5 mm width x 210 mm height). When folding, make sure you keep the good numbering when you turn the pages of the I/B. Don’t change the page numbering. Keep the language integrity. • Der Infrarotofen muss nach den Angaben im Abschnitt "Installation" installiert werden. Hierbei sind die folgenden Hinweise zu beachten: 1) Betreiben Sie den Infrarotofen nur in angemessen belüfteten Räumen. Hierdurch werden die Abfuhr der bei der Verbrennung entstehenden Abgase und die ausreichende Zufuhr von Frischluft gewährleistet. Außerdem schränkt eine gute Belüftung die Möglichkeit der Bildung von Kondenswasser beträchtlich ein. 2) Bei Verdacht eines Gaslecks: - Bitte schließen Sie sofort den Hahn der Gasflasche und prüfen Sie das Gerät sofort, falls folgende Bedingungen eintreten: - Löschen Sie alle offenen Flammen (z.B. Gastkochstellen usw. ) und öffnen Sie ein Fenster, das ins Freie führt. Schalten Sie KEINESFALLS irgendein elektrisches Gerät (Lampe, Haushaltsgerät usw.) ein. - Kontrollieren Sie alle Anschlüsse. Vergewissern Sie sich, dass die Verbindungen zwischen den Schläuchen und Anschlüssen einwandfrei ausgeführt (der Schlauch muss gut auf dem Schlauchnippel sitzen), fest angezogen und gesichert sind. - Bestreichen Sie zum Auffinden von Gaslecks alle Anschlüsse und Verbindungen des Gaskreislaufs mit Hilfe eines Pinsels mit Seifenwasser. Wenn Gas austritt, bilden sich Blasen: In diesem Fall den Hahn der Gasflasche schließen und den Anschluss fest anziehen und/oder den Schlauch besser auf den Schlauchnippel aufziehen. Öffnen Sie dann den Hahn der Gasflasche wieder und prüfen Sie erneut die Gasdichtheit. Wenn weiterhin Gas austritt, den Hahn der Gasflasche schließen und einen Fachmann anrufen. Lüftung der Räumen Das Heizgerät nur in gut belüfteten Räumen benutzen: es ist unerlässlich, zwei Öffnungen in den Räumen machen, wo ein Gas Ofen angeschlossen ist. Drehknopf Räumen Abmessungen 15m³ Wohnzimmer Abmessungen 28m³ Obere Öffnung Untere Öffnung 55m² 55m² Mittlere Stellung 28m³ 52m³ 55m² 55m² Maximum Stellung 42m³ 84m³ 55m² 55m² Minimum Stellung • Bewegen/Transportieren Sie das Heizgerät nie während des Betriebs bzw. direkt nach dem Abschalten, solange es noch nicht ganz abgekühlt ist. Achtung: - Wenn das Heizgerät warm ist, nicht nach Leckstellen suchen, sondern dazu abwarten, dass es abgekühlt ist. - Es ist absolut zu vermeiden, dass zum Feststellen einer eventuellen Leck eine Flamme benutzt wird. • Der Infrarotofen hat ein Frontschutzgitter, das der Vorbeugung von Bränden und Unfällen dient. Dieses Schutzgitter muss sich stets vor dem Brenner befinden und darf keinesfalls entfernt werden. Das Schutzgitter wird beim Betrieb sehr heiß und garantiert nicht den vollständigen Schutz von Kindern und Personen mit geistiger Behinderung. Stellen Sie sicher, dass Tiere und Menschen (vor 20/32 Assembly page 20/32 Fax +32 030 9904733 Copies of the I/B. Please reproduce them without any changes except under special instruction from Bimar (Italy). The pages must be reproduced and folded in order to obtain a booklet A5 (+/- 148.5 mm width x 210 mm height). When folding, make sure you keep the good numbering when you turn the pages of the I/B. Don’t change the page numbering. Keep the language integrity. • • • • • • • • allem Kinder) stets einen sicheren Abstand zum wärmeabstrahlenden Teil des Geräts einhalten, um Verbrennungen und Sachschäden zu vermeiden. Um das Ableiten der Verbrennungsprodukte zu gewährleisten, beachten Sie bitte, dass die Öffnungen nach außen ableiten (nicht in die Innenräume) und dass sie nicht verstopft sind (regelmäßig kontrollieren). Das Produkt darf von Personen (einschließlich Kindern) mit physischer, sensorialer, geistiger Behinderung oder mit unzureichender Kenntnis und Erfahrung nur unter Aufsicht und nach eingehender Unterrichtung über den Gebrauch des Gerätes durch Personen, die für ihre Sicherheit verantwortlich sind, benutzt werden. Kinder sollten beaufsichtigt werden, um sicherzustellen, dass sie nicht mit dem Gerät spielen. Keine Gegenstände auf den Infrarotofen stellen oder legen, um Sachschäden und Brandgefahr zu vermeiden. Das Heizgerät muss vor dem Gebrauch mindestens 1x im Jahr durch qualifiziertes Fachpersonal geprüft werden. Die Reinigung sollte öfters erforderlich sein: die Kontrolle muss den Bereich um den Brenner und um den Hahn herum umfassen. Damit wird gewährleistet, dass genügend Luft zum Brenner gelangt. Whärend des Gebrauchs wird das Gerät heiß: berühren Sie nur die Plastikgriffe und die Schalter. Berühren Sie nicht die strahlenden Teile. Lassen Sie Ihr Gerät niemals unbeaufsichtigt, wenn es ans Stromnetz angeschlossen ist. Berühren Sie das Gerät nie mit nassen Händen oder barfuß. Setzen Sie das Gerät keinen Witterungseinflüssen aus (Sonne, Regen usw.). MONTAGE DES INFRAROTOFENS UND ANSCHLUSS DER GASFLASCHE 1) Vergewissern Sie sich, nachdem Sie den Infrarotofen aus der Verpackung genommen haben, dass er unversehrt ist: verwenden Sie das Gerät bei Zweifeln in Hinblick auf seine Funktionsfähigkeit nicht, sondern lassen Sie es durch einen Fachmann kontrollieren. Die Verpackungsteile dürfen nicht in Reichweite von Kindern gelassen werden, da sie eine Gefahr darstellen können. Sorgen Sie für ihre vorschriftsmäßige Entsorgung. 2) Nehmen Sie die Gasflaschebedeckung vom Möbel weg, indem Sie die 2 Fixierschrauben (Bild 1) ausschrauben. 3) Dieses Gerät darf nur mit Flüssiggas in Flaschen von 15 kg gespeist werden. Die Gasflasche muss mit einem Druckregler und einem Schlauch angeschlossen werden. Der Druckregler muss einen festen Einstellwert von 30 mbar haben (EN12864) und der Gummischlauch muss über die Kennzeichnung UNI-CIG 7140 verfügen und eine Länge von 50 cm haben (nicht länger als 60cm). Der Schlauch muss mit Metallschellen geeigneter Größe gesichert werden. Er muss innerhalb des auf ihm angegebenen Datums ausgewechselt werden (Bild 2-3). 4) Das Heizgerät sollte mit Regler und Rohr ausgestattet sein, bitte prüfen Sie, ob diese Teile zum Lieferumfang gehören. Der Schlauch wird regelmäßig bei jedem Gasflaschenwechsel kontrolliert. Bitte stellen Sie dabei sicher, dass er keine Kratzer und Ritzen hat und dass er sich in einem einwandfreien Zustand befindet. Auf jeden Fall ist der Schlauch bis zum darauf aufgestempelten Datum auszutauschen. 5) Schließen Sie den Schlauch an die Schlauchnippel von Druckregler und Hahn an und sichern Sie ihn mit Metallschellen. Achten Sie darauf, dass der Druckmesser und die anderen Komponenten und Anschlussstücke nicht beschädigt werden. 6) Kontrollieren Sie, bevor Sie die Gasflasche anschließen, dass der Hahn der Gasflasche geschlossen ist und dass sich keine offenen Flammen (eingeschaltete Gaskochstelle usw.) in der Nähe befinden. Beachten Sie die folgenden Hinweise, wenn Sie den Druckregler auf die Gasflasche schrauben: A) Vergewissern Sie sich, dass sich die Dichtung in einem einwandfreien Zustand befindet. B) Schrauben Sie die Muttergesellschaft zum Befestigen des Druckreglers am Hahn entgegen dem Uhrzeigersinn gut fest. 21/32 Assembly page 21/32 Fax +32 030 9904733 Copies of the I/B. Please reproduce them without any changes except under special instruction from Bimar (Italy). The pages must be reproduced and folded in order to obtain a booklet A5 (+/- 148.5 mm width x 210 mm height). When folding, make sure you keep the good numbering when you turn the pages of the I/B. Don’t change the page numbering. Keep the language integrity. C) Kontrollieren Sie sorgfältig mit Hilfe von Seifenwasser, dass an den Dichtungen kein Gas austritt. Sollte Gas austreten, erkennen Sie dies daran, dass sich Blasen bilden. Ziehen Sie die Verbindung in diesem Fall fester an bzw. wenden Sie sich an einen Fachmann. Achtung: Nicht mit eine Flamme nach Leck suchen. 7) Bringen Sie die Gasflasche im Gasflaschenraum unter. Achten Sie hierbei darauf, dass der Schlauch nicht verdreht oder geknickt wird und dass er nicht mit den heißen Teilen in Berührung kommt 8) Haken Sie die Hintergasflaschebedeckung am Möbel an und schrauben Sie die Schrauben auf (Bild 4-5). 9) Das Heitzgerät soll mit der am Möbel gehakten Hintergasflaschebedeckung angeschlossen sein. Das Ofen soll nur mit einer 15kg Gasflasche benutzt werden. 10) Zum Wechseln der Gasflasche müssen Sie sich vergewissern, dass der Hahn der Gasflasche geschlossen ist, bevor Sie den Druckregler abschrauben. Achten Sie auch darauf, dass sich keine offenen Flammen (eingeschaltete Gaskochstelle usw.) oder sonstige Wärmequellen in der Nähe befinden. Vergewissern Sie sich in jedem Fall, dass sich der Gummischlauch und die Dichtung des Druckreglers in einem einwandfreien Zustand befinden. Andernfalls müssen sie ausgetauscht werden. 11) Nehmen Sie keinerlei Änderungen an den Anschlüssen und sonstigen Komponenten vor. 12) Stellen Sie die Gasflasche nicht auf den Kopf, um sie vollständig entleeren zu können: Es läuft nämlich dann die in der Gasflasche enthaltene Restflüssigkeit aus, durch die der Infrarotofen in irreparabler Weise beschädigt werden kann. 13) Schrauben Sie nicht den Druckregler von der Gasflasche, wenn der Hahn der Gasflasche geöffnet ist. 14) Der Hersteller übernimmt keine Haftung, wenn irgendeiner der o.g. Hinweise missachtet wird. INSTALLATION 1) Betreiben Sie den Infrarotofen nur in gut belüfteten Räumen. Es ist unabdingbar, dass dem Raum, in dem der Infrarotofen aufgestellt wird, ausreichend Luft für die ordnungsgemäße Verbrennung zugeführt wird. Daher muss dieser Raum über zwei Lüftungsöffnungen ins Freie von mindestens 110 cm2 für den Luftaustausch haben. 2) Der Infrarotofen muss auf eine stabile und ebene Fläche gestellt werden. Den Infrarotofen nicht in einem Bad oder einem Schlafzimmer, nicht im Kellergeschoss oder in den Obergeschossen und nicht in Räumen mit einem Volumen von weniger als 15 m3 aufstellen und benutzen. 3) Der Infrarotofen darf nicht in der Nähe anderer Wärmequellen (Mindestabstand 1 m) oder in der Nähe von entflammbaren und explosiven Materialien aufgestellt werden. Er darf nicht auf Gegenstände gerichtet werden, die Schaden nehmen oder sich entzünden könnten (er darf zum Beispiel nicht auf Vorhänge, Sessel oder Möbel gerichtet werden). 4) Richten Sie den Infrarotofen so aus, dass die Wärme in die Mitte des Zimmers und in jedem Fall in einen freien Raum abgestrahlt wird. Die (wärmeabstrahlende) Vorderseite muss einen Abstand von mindestens 2 Metern von Vorhängen, Sofas, Möbeln oder sonstigen Gegenständen halten. Rückseite und Seitenteile sollen einen freien Raum von 50cm haben. 5) Betreiben Sie den Infrarotofen nur mit im Gasflaschenraum untergebrachter Gasflasche. Das Ofen und die Gasflasche nur vertikal benutzen. 6) Nur 15-Kilo-Gasflaschen mit passendem Gas verwenden. 7) Stellen Sie das Gerät nicht gerade unterhalb einer Steckdose auf. 8) Falls das Gerät nicht richtig, oder gar nicht funktioniert, schalten Sie es bitte aus, und wenden Sie sich an einen Fachmann. 22/32 Assembly page 22/32 Fax +32 030 9904733 Copies of the I/B. Please reproduce them without any changes except under special instruction from Bimar (Italy). The pages must be reproduced and folded in order to obtain a booklet A5 (+/- 148.5 mm width x 210 mm height). When folding, make sure you keep the good numbering when you turn the pages of the I/B. Don’t change the page numbering. Keep the language integrity. BEDIENUNG (siehe Abb.) Die Zünd- und Bedienelemente sind im oberen Geräteteil untergebracht. 1) Gasflaschenhahn aufdrehen. 2) Hahn-Drehknopf eindrücken und gegen den Uhrzeigersinn drehen, bis die Stellung mit den Symbolen e “ ” erreicht ist (siehe Abb. 4“Pos. A”). Damit wird die Zündung der Pilotflamme eingeleitet. Damit die Flamme weiter brennt, nach der Zündung den Drehknopf 15 Sekunden lang gedrückt halten. Falls die Pilotflamme nicht zündet, wiederholen Sie bitte den Vorgang von vorne. Bei Neuinstallationen oder beim Gasflaschenwechsel könnte das Zünden der Pilotflamme etwas schwierig sein: Sie bleibt nicht am Pilotrand haften, sondern neigt dazu wegzuflutschen und geht beim Loslassen des Hahn-Drehknopfes aus. Den Zündvorgang 1 x bzw. mehrmals wiederholen: Somit wird die Turbulenz aufgebraucht (Sie ist für die Fehlfunktion verantwortlich), die Pilotflamme bleibt am Pilotrand haften und startet somit den Brenner. 4) Wärmeeinstellungen: a) Zum Einstellen auf die “ Minimum ” Stellung den Drehknopf eindrücken und gegen den b) “ erreicht ist (siehe Abb. 4“Pos. Uhrzeigersinn drehen, bis die Stellung mit den Symbolen “ 1”). Zum Einstellen auf die “mittlere” Stellung den Drehknopf eindrücken und gegen den c) “ erreicht ist (siehe Abb. 4“Pos. Uhrzeigersinn drehen, bis die Stellung mit den Symbolen “ 2”). Zum Einstellen auf die “Maximum” Stellung den Drehknopf eindrücken und gegen den “ erreicht ist(siehe Abb.4 Uhrzeigersinn drehen, bis die Stellung mit den Symbolen ““ “Pos. 3”). d) Zurück zu den Einstellungen "Mittel" und "Minimum": Noch einmal den Drehknopf drücken und in den Uhrzeigersinn drehen, bis die entsprechenden Symbole erreicht sind. 5) Zum Ausmachen des Ofens den Drehknopf drücken und gegen den Uhrzeigersinn drehen, bis die Stellung mit dem Symbol ” ist. Zum vollständigen Abschalten des Ofens immer den Gasflaschenhahn zudrehen. “ Den Ofen während des Betriebs nicht verschieben. Pos.A Pos.1 Pos.2 Pos.3 Pos.OFF Entzuendung Schaltstellung Minimum Schaltstellung mittlere Schaltstellung Maximum Schaltstellung Off 23/32 Assembly page 23/32 Fax +32 030 9904733 Copies of the I/B. Please reproduce them without any changes except under special instruction from Bimar (Italy). The pages must be reproduced and folded in order to obtain a booklet A5 (+/- 148.5 mm width x 210 mm height). When folding, make sure you keep the good numbering when you turn the pages of the I/B. Don’t change the page numbering. Keep the language integrity. REINIGUNG UND PFLEGE Achtung: bevor Sie das Gerät reinigen, müssen Sie es ausschalten und abwarten, bis es vollständig abgekühlt ist. Verwenden Sie zur äußeren Reinigung ein weiches Tuch, das mit Wasser und Flüssigreiniger angefeuchtet ist. Verwenden Sie keine Metallschaber oder scheuernde Produkte. Verwenden Sie kein Wasser, keine entzündliche Substanzen und keine scheuernden Reinigungsgeräte. • Kontrollieren Sie regelmäßig die Sauerstoffmangelsicherung und die Lüftungsöffnungen. Entfernen Sie Staub und Flaum, ohne allerdings das Blech oder die Leitungen zu beschädigen. • Prüfen Sie regelmäßig den Zustand des Gummischlauchs und tauschen Sie ihn innerhalb des auf ihm angegebenen Verfallsdatums aus. Kontrollieren Sie bei jedem Wechsel der Gasflasche den Zustand der Dichtung des Druckreglers. • Achten Sie darauf, dass die (empfindliche) Oberfläche des Brenners, die Anschlussstücke, die Gasleitungen, der Hahn und die anderen Komponenten des Gaskreislaufs nicht durch Stöße o.ä. beschädigt werden. • Lassen Sie den Infrarotofen einmal jährlich durch eine Fachkraft von einem unserer autorisierten Kundendienstzentren überprüfen. • Wenn Sie beabsichtigen, den Infrarotofen für längere Zeit nicht zu benutzen, sollten Sie die folgenden Hinweise befolgen: 1) Schließen Sie den Hahn der Gasflasche und lösen Sie den Druckregler von der Gasflasche. 2) Bewahren Sie die Gasflasche an einem gut belüfteten Ort und entfernt von entflammbaren oder explosiven Materialien vorzugsweise außerhalb Ihrer Wohnung auf. Lagern Sie die Gasflasche keinesfalls im Kellergeschoss oder auf dem Dachboden, oder Garage. Bitte, übergeben Sie dem Lieferant die leere Gasflasche wieder. Niemals das Gasofen zwischen Müll verlassen. Niemals die Gasflasche allein auffüllen, es ist sehr gefährlich. Nur qualifizierter Lieferant können die Gasflasche im Sicherheit auffüllen. 3) Der Infrarotofen muss an einem trockenen Ort geschützt gegen Staub (am besten verwenden Sie die Originalverpackung) aufbewahrt werden. • Wenn Sie vorhaben, das Gerät nicht mehr zu verwenden, müssen Sie die Gasflasche ausbauen (für die Lagerung siehe die oben stehenden Anweisungen) und das Gerät unbrauchbar machen, indem Sie den Gummischlauch durchschneiden. Außerdem müssen Sie dafür sorgen, dass die Teile des Geräts, die eine Gefahr darstellen können, wenn sie von Kindern zum Spielen benutzt werden, keinen Schaden anrichten können. WICHTIGER HINWEIS FÜR DIE KORREKTE ENTSORGUNG DES PRODUKTS IN ÜBEREINSTIMMUNG MIT DER EG-RICHTLINIE 2011/65/EG. Am Ende seiner Nutzungszeit darf das Produkt NICHT mit dem Hausmüll entsorgt werden. Es muss zu einer örtlichen Sammelstelle für Sondermüll oder zu einem Fachhändler gebracht werden, der einen Rücknahmeservice anbietet. Die getrennte Entsorgung eines Haushaltsgerätes vermeidet mögliche negative Auswirkungen auf die Umwelt und die menschliche Gesundheit, die durch eine nicht vorschriftsmäßige Entsorgung bedingt sind. Zudem ermöglicht dies die Wiederverwertung der Materialien, aus denen das Gerät hergestellt wurde, was erhebliche Einsparungen an Energie und Rohstoffen mit sich bringt. 24/32 Assembly page 24/32 Fax +32 030 9904733 Copies of the I/B. Please reproduce them without any changes except under special instruction from Bimar (Italy). The pages must be reproduced and folded in order to obtain a booklet A5 (+/- 148.5 mm width x 210 mm height). When folding, make sure you keep the good numbering when you turn the pages of the I/B. Don’t change the page numbering. Keep the language integrity. ADVERTENCIAS Este símbolo lo invita a leer atentamente las presentes instrucciones antes del uso del aparato, y eventualmente informar a terceros, si es necesario. CONSERVAR EL PRESENTE MANUAL PARA ULTERIORES CONSULTAS. Si en la lectura del presente Manual de Instrucciones de Uso algunas partes resultasen difíciles de comprender o si surgieran dudas, antes de utilizar el producto contactar la empresa a la dirección indicada en la última página. Este símbolo indica: ATENCIÓN: para evitar el recalentamiento no cubrir el aparato. • Esta estufa ha sido diseñada para el calentamiento suplementario de ambientes y debe ser utilizada siguiente escrupulosamente las indicaciones y advertencias indicadas en el presente manual de instrucciones. La estufa es idónea para calentar ambientes secos y no polvorientos, y en los Países indicados en el embalaje. Cualquier otro de uso debe de considerarse impropio y peligroso. El fabricante no podrá ser considerado responsable de eventuales daños causados por el uso impropio, erróneo e irresponsable y/o por reparaciones efectuadas por personal no capacitado. • Esta estufa debe ser alimentada solo con gas GPL y de la categoría indicada en la placa de identificación, en bombona de 15 kg; que debe ser conectada con un regulador de presión y con un tubo flexible: el regulador de presión tiene que tener un calibrado fijo de 30 mbarEN12864 y el tubo flexible de goma tiene que ser marcado UN-CIG 7140, con una longitud de 50 cm (no más de 60 cm); este último tiene que ser asegurado con abrazaderas metálicas de idónea dimensión y necesita ser reemplazado dentro de la fecha impresa en el mismo. • Esta estufa no debe ser considerada como un sistema de calefacción central, y no debe ser utilizada para calentar vehículos para el tiempo libre tales como caravanas, remolques, embarcaciones, etc. • Tener la bombona de gas lejos de material inflamable, bombonas u otros para evitar peligros incendio, preferiblemente al exterior de vuestra vivienda; nunca depositar la bombona en sótanos, áticos o desvanes. Conservar la bombona de gas en lugar seco y ventilador y no exponer al sol. • No utilizar la estufa en lugares donde se encuentra presente gasolina, pintura y materiales inflamables. • La estufa debe ser instalada como se describe en el párrafo “instalación”, teniendo en cuanta las siguientes advertencias: 1) Usar la estufa solo en ambientes con adecuada ventilación; de esta manera se obtiene la eliminación de los gases producidos en la combustión, y se asegura la sustitución con el aire más oxigenado. Además la ventilación reduce considerablemente la posibilidad de eventuales condensaciones. 2) En caso de sospecha de pérdida de gas: - Cerrar inmediatamente la válvula de la bombona y crear circulación de aire para evacuar los gases en el ambiente; -Apagar todas las llamas libres (por ejemplo del horno, etc.). y abrir una ventana comunicante con el exterior. NO encender ningún dispositivo eléctrico (lámparas, electrodomésticos, etc.); -Controlar todas las conexiones con agua jabonosa, verificando que las juntas de los tubos y empalmes estén bien efectuados (el tubo debe calzar bien en el porta-goma), apretados y sellados; -Para detectar las pérdidas de gas preparar agua jabonosa y con un pincel pasar sobre todos los empalmes y las conexiones del circuito del gas. En caso de pérdida se formarán burbujitas: en este caso cerrar la válvula de la bombona y apretar bien la conexión y/o calzar mayormente la conexión de red. Volver a abrir la válvula de la bombona y comprobar nuevamente la estanqueidad del gas: si se 25/32 Assembly page 25/32 Fax +32 030 9904733 Copies of the I/B. Please reproduce them without any changes except under special instruction from Bimar (Italy). The pages must be reproduced and folded in order to obtain a booklet A5 (+/- 148.5 mm width x 210 mm height). When folding, make sure you keep the good numbering when you turn the pages of the I/B. Don’t change the page numbering. Keep the language integrity. detectan todavía perdías de gas, cerrar la válvula de la bombona y diríjase a personal técnico capacitado. • • • • • • • • • • • No desplazar nunca la estufa cuando se encuentra en funcionamiento o, si apenas apagada, hasta cuando no se haya enfriado totalmente. Atención: no verificar las pérdidas de gas cuando el aparato está caliente, esperar hasta cuando se haya enfriado. NO EMPLEAR NUNCA UNA LLAMA PARA BUSCAR PERDIDAS El quemador de la estufa está acompañado por una rejilla frontal, para prevenir peligros de incendio o accidentes; esta rejilla debe estar siempre colocada delante del quemador y no por ningún motivo debe ser removida. Dicha protección se calienta durante su uso y no puede garantizar una completa protección para niños o personas irresponsables. Asegurarse que niños, personas y/o animales, se encuentren a debida distancia de la parte radiante, para evitar quemaduras o daños. La rejilla de protección no provee completa protección a niños o a personas con reducida capacidad física, sensorial o mental. Para garantizar la evacuación de los productos de combustión se hace hincapié en la importancia de que las aberturas sean efectuadas hacia el exterior (y no hacia ambientes internos) y que estas no tengan alguna obstrucción (controlar periódicamente). El aparato no ha sido diseñado para ser utilizado por personas (incluidos niños) con capacidades físicas, sensoriales o mentales reducidas, o con falta de experiencia y conocimiento, a menos que hayan recibido supervisión o instrucción relativas al uso del aparato por una persona responsable de su seguridad. Los niños deben ser supervisados para asegurarse que no jueguen con el aparato. No apoyar ningún objeto sobre la estufa para evitar daños o peligros de incendio. El aparato debe ser inspeccionado antes del uso al menos una vez al año por personal técnico capacitado. La limpieza podría ser necesaria más frecuentemente: debe ser controlado el quemador, válvula, empalmes y tubos. Cuando el aparato está en funcionamiento se calienta, por lo tanto tocar solamente la perilla de plástico. Evitar el contacto con la parte radiante. No tocar el aparato con las manos o pies mojados. No dejar el aparato expuesto a los agentes atmosféricos (sol, lluvia, etc.) ATENCIÓN: El usuario no debe dejar el aparato sin supervisión cuando se encuentra en funcionamiento. Este símbolo indica: ATENCIÓN: para evitar el recalentamiento o incendios no cubrir el aparato con tejidos, indumentaria u otro. Tal advertencia vale sea en el caso de funcionamiento a gas como eléctrico. MONTAJE DE LA ESTUFA Y CONEXIÓN DE LA BOMBONA DE GAS 1) Una vez quitada la estufa del embalaje, asegurarse la integridad del aparato mismo: en caso de dudas no utilizarlo y dirigirse a personal técnico capacitado. Los elementos del embalaje deben de estar fuera del alcance de los niños ya que son potenciales fuentes de peligro; eliminarlos de acuerdo con las normativas vigentes en los correspondientes contenedores para la recolección diferenciada. 2) Quitar del mueble el cubre bombona, la base y la tapa. 3) Para montar, los accesorios del mueble, utilizar una superficie estable, libre de asperezas (para evitar de rayar el mueble). 4) La estufa debe estar provista de regulador y tubo, controlar que se encuentren en dotación. El tubo flexible debe ser controlado periódicamente con cada sustitución de la bombona, 26/32 Assembly page 26/32 Fax +32 030 9904733 Copies of the I/B. Please reproduce them without any changes except under special instruction from Bimar (Italy). The pages must be reproduced and folded in order to obtain a booklet A5 (+/- 148.5 mm width x 210 mm height). When folding, make sure you keep the good numbering when you turn the pages of the I/B. Don’t change the page numbering. Keep the language integrity. verificando que no tenga rayaduras, arañazos, que se encuentre en perfecto estado, y en todo caso sustituirlo dentro de la fecha de vencimiento impresa en el tubo . 5) Conectar el tubo flexible al porta-goma del regulador de presión y a aquel de la válvula, asegurando la estanqueidad con abrazaderas de metal y prestando especial atención a no alterar o dañar algún componente o empalme. 6) Antes de conectar la bombona de gas, verificar que el válvula de la bombona misma se encuentre cerrada y que en el lugar donde estáis operando no se encuentren fuentes de llama (hornos encendidos, etc.). Enroscar el regulador de presión a la bomba teniendo en cuenta las siguientes advertencias: D) controlar el buen estado de la junta de estanqueidad; E) fijar el regulador a la válvula enroscando la tuerca en sentido antihorario y apretando bien; F) controlar con atención que no haya perdidas de gas en las juntas, mediante agua jabonosa: en caso de que existan, se formaran burbujitas; apretar aún más la conexión o dirigirse a un profesional calificado. ATENCIÓN: evitar rigurosamente de utilizar una llama para detectar eventuales fugas de gas. 7) Introducir la bombona en el correspondiente compartimiento prestando atención de manera que el tubo no se retuerza o estrangule y que no esté en contacto con partes calientes (fig.3). 8) Enganchar el cubre bombona posterior al mueble, introducir los dos ganchos en las correspondientes ranuras del mueble. 9) El aparato debe estar completamente montado, base, tapa y cubre bombona fijados al mueble. La estufa debe ser utilizada únicamente con la bombona de 15 kg introducida en su sede. 10) Para sustituir la bombona de gas, antes de desenroscar el regulador, verificar que el válvula de la bombona misma se encuentre cerrada y que en el lugar donde estáis operando no se encuentren fuentes de llama (hornos encendidos, etc.), o de calor; se recomienda controlar el buen estado de la guarnición del regulador y del tubo flexible de goma, y si fuera necesario, sustituirlos. 11) No manipular empalmes u otros componentes. 12) No volcar la bombona para aprovechar completamente su contenido: esta operación provoca la fuga de residuos líquidos depositados en la bombona, que bañarían de manera irreparable la estufa. 13) No desconectar el regulador de presión de la bombona cuando la válvula de la misma está abierta. 14) El fabricante declina todo tipo de responsabilidad en caso de que algunos de los puntos mencionados no hayan sido respetados. INSTALACIÓN 1) Usar la estufa solo en ambientes ventilados. Es indispensable que en los locales donde se encuentra instalada la estufa, puede fluir tanto aire como sea necesario para la normal combustión. Es por lo tanto necesario que dicho ambiente se encuentre provisto de dos tomas de al menos 100cm2 hacia el externo para el recambio del aire. 2) La estufa debe ser instalada sobre una superficie estable y plana. No instalar ni usar la estufa en los locales utilizados como cuarto de baño o dormitorio, ni en sótanos o semi-sótanos, en los pisos superiores de los edificios, en locales con un volumen inferior a los 15 m3. 3) La estufa no debe ser utilizada en las cercanías de una bañadera, ducha o piscina, para evitar que gotas de agua puedan mojar la parte eléctrica. 4) La estufa no debe ser utilizada en dormitorios durante el descanso. 5) La estufa no debe estar cerca de otras fuentes de calor (distancia mínima 1 metro), materiales inflamables o explosivos y no debe estar orientada hacia objetos que se puedan dañar o incendiar (por ejemplo cortinas, sillones y muebles). 6) Orientar la estufa de manera que el calor sea directo hacia el centro de la habitación e igualmente hacia un espacio libre; la parte frontal (radiante) debe ser distante de al menos 2 metros de cortinas, sofás, muebles u otros objetos. 27/32 Assembly page 27/32 Copies of the I/B. Please reproduce them without any changes except under special instruction from Bimar (Italy). The pages must be reproduced and folded in order to obtain a booklet A5 (+/- 148.5 mm width x 210 mm height). When folding, make sure you keep the good numbering when you turn the pages of the I/B. Don’t change the page numbering. Keep the language integrity. Fax +32 030 9904733 7) 8) 9) 10) Hacer funcionar la estufa solo con la bombona de gas alojada en su sede. Utilizar solo bombona de 15 Kg con el tipo de gas correcto. El aparato no debe ser colocado inmediatamente debajo de una toma de corriente. En caso de avería o malfuncionamiento apagar el aparato y hacerlo controlar por personal técnico capacitado. USO (véase fig.4) Los órganos de encendido y regulación se encuentran colocados en la parte superior del aparato. 4) Abrir la válvula de la bombona. 5) Presionar la perilla de la válvula a fondo y girarla en sentido antihorario hasta la pos. ” (véase Fig. 4 “pos.A”), activando así el encendido de la llama correspondiente al símbolo “ piloto; para asegurarse de que la llama permanezca encendida es necesario mantener presionada la perilla durante 15 segundos después del encendido. Si el piloto no se enciende, repetir la operación desde el inicio. Para nuevas instalaciones o al cambio de la bombona podría resultar dificultoso el encendido de la llama piloto: no permanece conectada al collarín del piloto, pero tiende a escapar, y se apaga cuando se suelta la perilla de la válvula. Repetir inmediatamente el encendido una o más veces: Al hacerlo se agota la turbulencia (debido al descuido), la llama piloto permanece unida al collarín y encendida, y así, se inicia el quemador. 4) Regulaciones térmicas: e) para la regulación “mínimo”, presionar la perilla a fondo y girarla en sentido antihorario hasta la pos. correspondiente al símbolo “ ” (véase Fig. 4 “pos.1”). f) para la regulación “medio”, presionar la perilla parcialmente y girarla en sentido antihorario ” (véase Fig. 4 “pos.2”). hasta la pos. correspondiente al símbolo “ g) para la regulación “máximo”, presionar la perilla parcialmente y girarla en sentido antihorario ” (véase Fig. 4 “pos.3”). hasta la pos. correspondiente al símbolo “ h) para volver a las regulaciones media y mínima, presionar nuevamente la perilla y girarla en sentido horario has los símbolos correspondientes. 5) Para apagar la estufa; presionar la perilla y girarla en sentido horario hasta la pos. ”, y cerrar siempre la válvula de la bombona. correspondiente al símbolo “ No desplazar la estufa cuando se encuentra en funcionamiento. Pos.A Posición Encendido Pos.1 Posición mínimo o Pos.2 Posición medio Pos.3 Botón máximo 28/32 Assembly page 28/32 Pos.OFF Botón apagado de Fax +32 030 9904733 Copies of the I/B. Please reproduce them without any changes except under special instruction from Bimar (Italy). The pages must be reproduced and folded in order to obtain a booklet A5 (+/- 148.5 mm width x 210 mm height). When folding, make sure you keep the good numbering when you turn the pages of the I/B. Don’t change the page numbering. Keep the language integrity. LIMPIEZA Y MANTENIMIENTO ATENCIÓN: antes de limpiar el aparato, apagarlo y esperar a que se enfríe completamente. Para limpiar la parte externa de la estufa utilizar un paño suave humedecido con agua y detergente liquido. No utilizar esponjas metálicas o productos abrasivos. No usar agua, ni combustibles o limpiadores abrasivos. • Inspeccionar regularmente el analizador de atmosfera y los orificios de ventilación; en caso de que haya polvo o pelusa, remover sin dañar el quemador o las tuberías • Verificar regularmente el estado del tubo flexible en goma y sustituirlo dentro de la fecha de vencimiento indicada en el tubo mismo; en cada cambio de bombona verificar el buen estado de la guarnición del regulador de presión. • Prestar atención en no golpear o dañar la superficie del quemador (es delicada), los empalmes y tubos de gas, la válvula, y todos los demás componentes del circuito gas. • Se recomienda de hacer inspeccionar la estufa una vez al año por personal de nuestro Centro de Asistencia Técnica autorizado. • Cuando se decide de no utilizar la estufa por largos periodos, es recomendable seguir las siguientes instrucciones: 1. Cerrar la válvula de la bombona y desconectar el regulador de presión de la bombona misma; 2. Almacenar la bombona en un ambiente bien ventilado y lejos de material inflamable, bombonas u otro para evitar peligros incendio, preferiblemente al exterior de vuestra vivienda; no almacenar nunca la bombona en sótanos, áticos o desvanes; 3. La estufa debe ser conservada en un ambiente seco y protegido del polvo (se recomienda utilizar para su conservación el embalaje original). Advertencias para la correcta eliminación del producto conforme la Directiva Europea 2011/65/UE. Al final de su vida útil, el producto no debe eliminarse con los residuos domésticos. Puede ser entregado en los correspondientes centros de recolección diferenciada predispuestos por las administraciones municipales, o bien en la sede de los distribuidores que ofrecen este servicio. Eliminar separadamente un electrodoméstico permite evitar posibles consecuencias negativas para el ambiente y para la salud que derivan de una eliminación inadecuada y permite recuperar los materiales de los que se compone a fin de conseguir un importante ahorro de energía y recursos. Para destacar la obligación de eliminar separadamente los electrodomésticos, La eliminación incorrecta del producto por parte del usuario conlleva la aplicación de sanciones administrativas previstas por la normativa vigente. 29/32 Assembly page 29/32 Fax +32 030 9904733 Copies of the I/B. Please reproduce them without any changes except under special instruction from Bimar (Italy). The pages must be reproduced and folded in order to obtain a booklet A5 (+/- 148.5 mm width x 210 mm height). When folding, make sure you keep the good numbering when you turn the pages of the I/B. Don’t change the page numbering. Keep the language integrity. 1. 2. 3. 4. 5. 6. Pulsante piezoelettrico Manopola di regolazione Bruciatore Griglia frontale Ruote Mobile 1. 2. 3. 4. 5. 6. Piezoelectric Button Adjustment knob Burner The front grill Rear Mobile 1. 2. 3. 4. 5. 6. Bouton piézoélectrique Bouton de réglage Burner La calandre Arrière Mobile 1. Piezo-Taster 2. Einstellknopf 3. Burner 4. Der Frontgrill 5. Rück 6. Mobil 30/32 Assembly page 30/32 Fax +32 030 9904733 Copies of the I/B. Please reproduce them without any changes except under special instruction from Bimar (Italy). The pages must be reproduced and folded in order to obtain a booklet A5 (+/- 148.5 mm width x 210 mm height). When folding, make sure you keep the good numbering when you turn the pages of the I/B. Don’t change the page numbering. Keep the language integrity. 1) 2) 3) Botón piezoeléctrico El botón de ajuste Quemador 4) 5) 6) 31/32 Assembly page 31/32 La parrilla delantera Trasero Móvil Fax +32 030 9904733 Copies of the I/B. Please reproduce them without any changes except under special instruction from Bimar (Italy). The pages must be reproduced and folded in order to obtain a booklet A5 (+/- 148.5 mm width x 210 mm height). When folding, make sure you keep the good numbering when you turn the pages of the I/B. Don’t change the page numbering. Keep the language integrity. Via G.Amendola, 16/18 25019 Sirmione (BS) – ITALY www.bimar-spa.it e-mail: [email protected] Servizio clienti Bimar: 8955895542 32/32 Assembly page 32/32