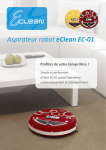
1
Robotic Vacuum Cleaner
\ Staubsaugerroboter \
Aspirateur robotique \ Robot
aspirapolvere
Fully Automated Intelligent Dust
Buster \ Vollautomatisierter,
intelligenter Staubsauger \ Collecteur
de poussière intelligent e automatisé \
Aspirapolvere totalmente automatico
User’s Manual \ Bedienungsanleitung \
Manuel de l’utilisateur \ Manuale d’uso
Easy-Clean Life Style
Table of Contents \ Inhalt \
Table des matières \ Indice
Safety Notice \ Sicherheitshinweise \ Consignes de sécurité \
Avvisi per la sicurezza..................................................................................................1
Package Content \ Lieferumfang \ Contenu de la boite \ Contenuto
della confezione.............................................................................................................5
Main Body \ Das Gerät \ Aspirateur EClean \ Corpo principale....................6
Battery Installation \ Akku einlegen \ Installation de la batterie \
Installazione della batteria.........................................................................................8
Charging the Battery \ Akku aufladen \ Chargement de la batterie \
Caricamento della batteria..................................................................................... 10
Operating Panel Introduction \ Das Bedienfeld \ Présentation du
panneau de commande \ Introduzione al pannello di controllo................6
Using the Recharging Dock \ Ladedock verwenden \ Utilisation de la
station de recharge \ Uso della stazione di caricamento................................9
Scheduling Eclean's Cleaning Time (EC 01 Enhanced) \ Saugzeitplan
des Eclean festlegen (EC 01 Enhanced) \ Programmation de la durée
de nettoyage de Eclean (EC 01 amélioré) \ Pianificazione dei tempi di
pulizia di Eclean (EC 01 ottimizzato).................................................................... 10
Remote Control \ Fernbedienung \ Télécommande \ Telecomando....... 32
Install Solid Freshener \ Lufterfrischer installieren \ Installation d’un
désodorisant solide \ Installazione del deodorante...................................... 35
Maintenance - Dust bin & filter \ Wartung - Staubbehälter und Filter \
Maintenance - Bac à poussière et filtre \ Manutenzione Raccoglitore e filtro.................................................................................................... 37
Maintenance - Side brush & Roll brush \ Wartung - Seitliche Bürste &
Rollbürste \ Maintenance - Brosse latérale & Brosse rotative \
Manutenzione - Spazzola laterale e Spazzola rotante.................................. 39
Maintenance - Cleaning the back wheels \ Wartung - Hinterräder
reinigen \ Maintenance - Nettoyage des roulettes arrière \
Manutenzione - Pulizia delle ruote posteriori.................................................. 40
Operating Scenarios \ Einsatzgebiete \ Scénarii d’utilisation \
Situazioni pratiche..................................................................................................... 42
Troubleshooting \ Problemlösung \ Dépannage \ Risoluzione
dei problemi................................................................................................................. 46
Product Warranty Card \ Problemlösung \ Carte de garantie du
produit \ Scheda di garanzia del prodotto........................................................ 50
Customer Copy \ Exemplar für den Kunden \ Copie client \
Copia per il cliente..................................................................................................... 54
Safety Notice
Before using Eclean, please read the Safety Notice carefully and follow the instructions
below:
Forbidden
Do not disassemble the product. The high voltage inside may cause
severe harm.
Do not place any object and do not sit on the product during
operation or non - operation. Take extra caution around children or
pets.
Keep away from fire or any volatile flammable liquid when using the
product.
Do not cleanse the product with water, or use it on moist surfaces (e.g.
bathroom) to avoid malfunction of any electrical wire or component.
Do not expose the product to direct sunlight, otherwise machine
operation may be interfered.
To avoid eye damage, do not look straight into the Ultraviolet light
when it’s on.
Notice
To avoid malfunction, please ensure the air outlet is not blocked by
foreign objects while using the product.
Before use, remove any clothing, wire, plastic bag and any other
objects that may become entangled with the product.
Roll up - reaching blinds, curtains, bed sheets or carpet tassels to
avoid hazards.
The product is for domestic use only and not intended for factory or
any business-related use. If the product is damaged due to misuse,
the warranty shall be void. If the product is sent for repair, the fees for
labor and parts shall be assessed at our discretion.
The ideal operating temperature range is -10°C to 45°C. Subject
the product to temperatures outside of this range may cause
malfunction.
Ensure the battery is fully charged when using the product for the
first time.
Depending on the floor textures, the product can clean up to approx.
10 m² area in 10 minutes.
While using the product for the first time, please observe its
operation to avoid issues such as being blocked by obstacles or stuck
by objects.
1
Sicherheitshinweise
Bitte lesen Sie sich die Sicherheitshinweise vor dem Einsatz von Eclean aufmerksam
durch und befolgen die nachstehenden Anweisungen:
Keinesfalls:
Zerlegen Sie das Gerät nicht. Hochspannung im Inneren kann zu schweren
Verletzungen führen.
Stellen Sie keine Gegenstände auf dem Gerät ab, setzen Sie sich nicht
darauf – egal, ob das Gerät gerade arbeitet oder ausgeschaltet ist. Geben Sie
besonders gut acht, wenn Kinder oder Haustiere in der Nähe sind.
Benutzen Sie das Gerät nicht in der Nähe von offenen Flammen und
aggressiven brennbaren Flüssigkeiten.
Reinigen Sie das Gerät nicht mit Wasser; benutzen Sie es zur Vermeidung
von Fehlfunktionen elektrischer Drähte und/oder Komponenten nicht auf
feuchten Oberflächen (z. B. im Badezimmer).
Setzen Sie das Gerät nicht dem direkten Sonnenlicht aus; andernfalls kann der
Betrieb gestört werden.
Blicken Sie zur Vermeidung von Augenverletzungen nicht direkt in das
ultraviolette Licht, wenn es eingeschaltet ist.
Hinweis
Bitte stellen Sie zur Vermeidung von Fehlfunktionen sicher, dass die
Abluftöffnungen während des Betriebs nicht durch Fremdkörper blockiert
sind.
Räumen Sie vor dem Einsatz des Gerätes lose Kleidung, Kabel, Plastiktüten
und sämtliche anderen Gegenstände beiseite, die sich im oder am Gerät
verfangen können.
Achten Sie darauf, dass Jalousien, Vorhänge, Bettzeug und ähnliche Dinge
nicht bis auf den Boden herab hängen.
Das Gerät dient ausschließlich dem Einsatz in Privathaushalten; es eignet sich
nicht zur Verwendung in Fabriken, Geschäften oder Büros. Falls das Gerät
aufgrund von unsachgemäßem Einsatz beschädigt wird, erlischt die Garantie.
Wenn das Gerät zu Reparaturzwecken eingesendet wird, erheben wir die
Kosten für Arbeitsleistung und Teile nach eigenem Ermessen.
Die ideale Betriebstemperatur beträgt -10 °C bis 45 °C. Wenn Sie das Gerät
Temperaturen außerhalb dieses Bereichs aussetzen, können Fehlfunktionen
auftreten.
Stellen Sie bei der ersten Inbetriebnahme des Gerätes sicher, dass der Akku
vollständig geladen ist.
Je nach Bodentextur kann das Gerät innerhalb von 10 Minuten eine Fläche
von bis zu 10 m² reinigen.
Bitte beaufsichtigen Sie das Gerät bei der ersten Inbetriebnahme, damit es
nicht durch Hinternisse blockiert bzw. durch Fremdkörper verstopft wird.
2
Consignes de sécurité
Avant d’utiliser Eclean, veuillez lire attentivement les Consignes de sécurité et
suivre les instructions qui suivent :
Interdit
Ne pas démonter ce produit. Les hautes tensions qu’il contient
peuvent être très dangereuses.
Ne placer aucun objet ni s’asseoir sur le produit, qu’il soit en cours de
fonctionnement ou pas. Redoubler d’attention près des enfants ou
des animaux domestiques.
Garder le produit à l’abri des feux et des liquides inflammables
volatiles.
Ne pas nettoyer le produit avec de l’eau et ne pas l’utiliser dans
des zones mouillées (par ex. une salle de bain) afin d’éviter des
problèmes électriques ou des composants.
Ne pas exposer le produit au soleil pour éviter les interférences.
Ne pas regarder directement le rayon ultraviolet lorsque le produit
est allumé pour éviter des problèmes oculaires.
Attention
Pour éviter un malfonctionnement, veuillez vous assurer que la sortie
d’air n’est pas obstruée par un corps étranger lorsque vous utilisez le
produit.
Avant utilisation, veuillez enlever les tissus, fils, sacs plastiques et
autres objets qui risquent de se coincer dans le produit.
Pour éviter tout risque, enroulez les couvertures, rideaux, draps de lit
ou les franges de tapis sur le sol.
Ce produit est conçu pour une utilisation domestique uniquement
et pas pour une utilisation professionnelle. Si le produit a été
endommagée par une utilisation incorrecte, la garantie ne sera pas
valide. Si le produit a été renvoyé pour des réparations, les frais de
pièces et de main d’oeuvre seront décidés par nous.
La température d’utilisation idéale de ce produit est entre -10°C et
45°C. Les températures au-dessus ou au-dessous peuvent causer au
produit de malfonctionner.
Chargement complètement la batterie avant d’utiliser le produit la
première fois.
En fonction du type de sol, le produit peut nettoyer une zone de
jusqu’à 10 m² en 10 minutes.
Lorsque vous utilisez le produit la première fois, faites attention à ce
qu’il ne se bloque pas avec des objets ou des obstacles.
3
Avvisi per la sicurezza
Prima di usare Eclean, leggere accuratamente gli Avvisi per la sicurezza ed
osservare le istruzioni che seguono:
Vietato
Non smontare il prodotto. Le alte tensioni al suo interno possono
provocare gravi lesioni.
Non collocare alcun oggetto sopra il prodotto e non usarlo come seduta
né durante il funzionamento, né in stato di arresto. Prestare maggiore
attenzione quando sono presenti bambini o animali domestici.
Quando il prodotto è in uso, tenerlo lontano dal fuoco o altre sostanze
volatili o liquidi infiammabili.
Non pulire il prodotto con acqua, né usarlo su superfici bagnate (e.g.
bagno) per evitare guasti ai componenti elettrici.
Non esporre il prodotto alla luce diretta del sole, diversamente il
funzionamento della macchina può subire interferenze.
Non guardare direttamente la lampada UV, quando è accesa, per evitare
lesioni agli occhi.
Avviso
Quando il prodotto è in uso, assicurarsi che lo scarico dell’aria non sia
bloccato da oggetti estranei per evitare guasti.
Prima dell’uso, rimuovere dal pavimento abiti, fili o cavi, borse di plastica
e qualsiasi altro oggetto che può impigliarsi nel prodotto.
Sollevare tendaggi, coperte, lenzuola e frange dei tappeti per evitare
pericoli.
Il prodotto è solo per uso domestico e non per impieghi in fabbriche
o altre attività commerciali. Se il prodotto subisce danni a causa di
cattivo uso, la garanzia sarà annullata. Prodotti inviati per la riparazione:
l’eventuale addebito di costi di manodopera e pezzi di ricambio sarà a
nostra discrezione.
La temperatura operativa ideale è compresa tra -10° C e 45° C.
L’esposizione del prodotto a temperature inferiori o superiori può
provocare guasti.
Assicurarsi che la batteria sia completamente caricata quando si utilizza il
prodotto per la prima volta.
In base alla conformazione del pavimento, il prodotto può pulire un’area
di circa 10 m² in 10 minuti.
Quando si usa il prodotto per la prima volta, osservare il suo
comportamento per evitare problemi come il blocco dovuto ad ostacoli
o l’incastro sotto oggetti.
4
Package Content \ Lieferumfang \ Contenu de la
boite \ Contenuto della confezione
1. Eclean Main Body \ Eclean- 2.Remote Control \
Hauptgerät \ Aspirateur
Fernbedienung \
Eclean \ Corpo principale di
Télécommande \
Eclean
Telecomando
4.Rechargeable Battery \
5.Adapter \ Netzteil \
Wiederaufladbarer Akku
Adaptateur \ Adattatore
\ Batterie rechargeable \
Batteria ricaricabile
7. Cleaning Brush \
8.Dust Bin \ Staubbehälter
Reinigungsbürste \ Brosse
\ Bac à poussière\
de nettoyage \ Pennello per
Raccoglitore
la pulizia
1
2
4
5
7
8
3.Filter Cotton x 2 \
Filtereinsätze \
Filtre coton x 2 \
2 Filtri di cotone
6.Recharging Dock \ Ladedock
\ Station de recharge \
Stazione di caricamento
9.User’s Manual \
Bedienungsanleitung
\ Manuel utilisateur \
Manuale d’uso
3
6
9
Robotic Vacuum Cleaner
\ Staubsaugerroboter \
Aspirateur robotique \ Robot
aspirapolvere
Fully Automated Intelligent Dust
Buster \ Vollautomatisierter,
intelligenter Staubsauger \ Collecteur
de poussière intelligent e automatisé \
Aspirapolvere totalmente automatico
User’s Manual \ Bedienungsanleitung \
Manuel de l’utilisateur \ Manuale d’uso
Easy-Clean Life Style
5
Main Body \ Das Gerät \ Aspirateur EClean \
Corpo principale
1 Remote control receiving port \
Fernbedienungsempfänger \ Port de
réception de la télécommande \ Corpo
principale
4 Socket for adapter \ Netzteilanschluss \ Prise
pour adaptateur \ Presa per l’adattatore
5 Operation Panel \ Bedienfeld \ Panneau de
commande \ Pannello di controllo
2 Collision pane \ Kollisionssensor \ Panneau de
collision \ Pannello di collisione
6 Button for removing dust bin \ StaubbehälterFreigabetaste \ Bouton pour accéder au bac à
3 Dust bin and Freshener /odor buster
poussière \ Tasto per rimuovere il raccoglitore
\ Staubbehälter und Lufterfrischer
/ Duftspender \ Bac à poussière et
7 Remote control \ Fernbedienung \
désodorisant / contrôle d’odeur \ Raccoglitore
Télécommande \ Telecomando
e deodorante/elimina odori
5
E C01
6
1
7
2
3
4
E C01 E n h a n c e d
5
1
6
2
3
4
6
8 Ultraviolet light \ UV-Leuchte \ Lampe à
ultraviolets \ Lampada a raggi ultravioletti
12 Front wheel \ Vorderrad \ Roue avant \ Ruota
frontale
9 Air outlet \ Abluftöffnungen \ Sortie de l’air \
Scarico dell’aria
13 Roll brush \ Rollbürste \ Brosse rotative \
Spazzola rotante
10 Battery cove \ Akkufachdeckel \ Capot
du compartiment batterie \ Coperchio
scomparto batterie
14Side brush \ Seitliche Bürste \ Brosse latérale \
Spazzola laterale
15Dust suction entrance \ Saugöffnung \
Entrée de l’aspiration poussière \ Ingresso
aspirazione polvere
11Recharging dock connection point \
Ladedock-Anschluss \ Point de connexion
de la station de recharge \ Punto di
collegamento alla stazione di caricamento
8
16Back wheel set \ Hinterräder \ Jeu de roues
arrière \ Set di ruote posteriori
12
9
13
14
10
15
11
16
7
Battery Installation \ Akku einlegen \ Installation
de la batterie \ Installazione della batteria
Push down \ Nach unten drücken \ Pousser \ Premere
1
2
Pull Up \ Hochziehen \
Soulever \ Sollevare
Step 1
Step 2
2
1
Step 3
Step 4
1 Affix \ Einhängen \ Fixer \ Inserire
2 Put back the cover \ Deckel wieder
aufsetzen. \ Remettre le capot en place \
Rimettere il coperchio
Notice \ Hinweis \ Attention \ Notice
Only use factory-installed battery and adapter.
Do not touch the battery, the adapter and/or the plug with wet hands.
Ensure the adapter is firmly plugged in and do not exposure the plug.
Before recharging, ensure the voltage and ampere specification matches
the specification in your home.
To avoid hazard, stop recharging and remove the battery before cleaning
this product.
Verwenden Sie ausschließlich den mitgelieferten Akku und das
mitgelieferte Netzteil.
Berühren Sie Akku, Netzteil und Stecker niemals mit feuchten oder gar
nassen Händen.
Achten Sie darauf, dass der Stecker vollständig eingesteckt wird.
Überzeugen Sie sich vor dem Aufladen, dass die Steckdosen in Ihrem
Haushalt die richtige Spannung liefern.
Nehmen Sie den Akku aus Sicherheitsgründen immer heraus, bevor Sie das
Gerät reinigen.
8
Utilisez exclusivement la batterie et l’adaptateur d’origine.
Ne touchez pas la batterie, l’adaptateur et/ou la fiche électrique avec les
mains mouillées.
Vérifiez que l’adaptateur est fermement branché et que la fiche n’est pas
exposée.
Avant de remettre en charge, vérifiez que la tension et l’ampérage sont
bien les mêmes que ceux de l’électricité de votre secteur.
Pour éviter tout danger, arrêtez de recharger et enlevez la batterie avant de
nettoyer ce produit.
Usare solo la batteria installata in fase di produzione e l’adattatore fornito
in dotazione.
Non toccare la batteria, l’adattatore e/o la spina con le mani bagnate.
Assicurarsi che l’adattatore sia collegato in sicurezza e che la spina non sia
esposta.
Prima di caricare la batteria, assicurarsi che la tensione e l’amperaggio
specificati corrispondano a quelli erogati all’abitazione.
Per evitare pericoli, arrestare il caricamento e rimuovere la batteria prima
di pulire il prodotto.
9
Charging the Battery \ Akku aufladen \
Chargement de la batterie \ Caricamento della
batteria
If the Low-Battery Indicator (LOW.BATT) is flashing red (i.e. low power), please use
recharging dock or adapter included with Eclean for recharging.Recharging the
battery takes about 3 hours.
a. Auto-return Charging: when the battery is low or the cleaning time is up,
Eclean will automactically return to the recharging dock.If Eclean cannot
locate the recharging dock in 20 minutes, it will stop searching and enter
“Battery saving” mode.
b. Manual Charging: insert one end of adapter cord into adapter slot on the
main unit, then plug the other end of adapter cord onto a wall outlet for
recharging.
Falls die Akkuanzeige (LOW BATT) rot blinkt (d. h. bei geringem Akkustand),
verwenden Sie zum Aufladen bitte das bei Ihrem Eclean mitgelieferte Ladedock und
Netzteil. Der Ladevorgang des Akkus dauert etwa 3 Stunden.
a. Automatische Rückkehr zum Ladedock: Wenn der Akkustand gering bzw. die
Saugzeit abgelaufen ist, kehrt der Eclean automatisch zum Ladedock zurück.
Falls der Eclean sein Ladedock nicht innerhalb von 20 Minuten finden sollte,
hält er an und ruft den Energiesparmodus auf.
b. M anuelles Aufladen: Verbinden Sie ein Ende des Netzteilkabels mit dem
Netzteilanschluss am Hauptgerät; das andere Ende des Netzteilskabels
schließen Sie zur Aufladung an einer Steckdose an.
Si l’indicateur de batterie déchargée (LOW. BAT T) clignote en rouge (c.à.d
alimentation faible), veuillez recharger immédiatement Eclean en utilisant la station
de recharge ou l’adaptateur fourni. Une recharge complète nécessite environ 3
heures.
a. Retour automatique en charge : lorsque la batterie est presque déchargée
ou lorsque le temps de nettoyage programmé est écoulé, Eclean retourne
automatiquement à la station de recharge. Si Eclean ne parvient pas à trouver
la station de recharge au bout de 20 minutes, il s’arrête et passe en mode «
Économie batterie ».
b. Recharge manuelle : branchez une extrémité du cordon adaptateur sur la
fente adaptateur de l’unité principale, et branchez extrémité du cordon
adaptateur sur une prise de courant pour le recharger.
Se l’indicatore di batteria scarica (BATTERIA) lampeggia di colore rosso (e.g. batteria
scarica), usare la stazione di caricamento o il cavo d’alimentazione, in dotazione a
Eclean, per ricaricare la batteria. Ci vogliono circa 3 ore per ricaricare la batteria.
10
a. R
itorno automatico alla stazione di caricamento: Quando la batteria è scarica,
oppure il tempo di pulizia è terminato, Eclean tornerà automaticamente
alla stazione di caricamento. Se Eclean non riesce a trovare la stazione di
caricamento entro 20 minuti, smetterà la ricerca ed accederà alla modalità di
“Risparmio energia”.
b. Caricamento manuale: Inserire una estremità del cavo d’alimentazione nel
connettore del corpo principale e l’altra estremità ad una presa a muro.
a. Auto-return Charging \ Automatische
Rückkehr zum Ladedock \ Retour
automatique en charge \ Ritorno
automatico alla stazione di caricamento
b. Manual Charging \ Manuelles
Aufladen \ Mise en charge manuelle \
Caricamento manuale
11
Notice \ Hinweis \ Attention \ Avviso
When using Eclean for the first time, please charge the battery for 8 full
hours. Please make sure that the power indicator on Eclean flashes blue while
charging. After the battery is fully charged, the power indicator should remain
on continuously.
Bitte laden Sie den Akku bei der ersten Inbetriebnahme des Eclean
vollständig auf; dies dauert etwa 8 Stunden. Bitte stellen Sie sicher, dass die
Betriebsanzeige am Eclean während des Ladevorgangs blau blinkt. Nachdem
der Akku vollständig geladen ist, leuchtet die Betriebsanzeige konstant.
Avant d’utiliser Eclean pour la première fois, chargez complètement la batterie
pendant au moins 8 heures. Assurez-vous que l’indicateur d’alimentation
du Eclean clignote en bleu pendant la recharge. Lorsque la batterie est
complètement rechargée, le voyant d’alimentation devrait rester allumé.
Al primo utilizzo di Eclean, caricare la batteria per almeno 8 ore.
Assicurarsi che l’indicatore di alimentazione di Eclean lampeggi di
colore blu durante il caricamento. Quando la batteria è completamente
carica, l’indicatore resta acceso.
12
Operating Panel Introduction \ Das Bedienfeld
\ Présentation du panneau de commande \
Introduzione al pannello di controllo
1Malfunction indicator \ Fehleranzeige
\ Indicateur de dysfonctionnement\
Indicatore di guasto
2Vacuum on/off indicator \ Staubsauger ein/
aus-Anzeige \ Indicateur de marche/arrêt
de l’aspiration \ Indicatore accensione/
spegnimento aspirazione
3UV light indicator \ UV-Licht-Anzeige \
Indicateur de la lampe UV \ Indicatore
lampada UV
4Battery/Charge indicator \ Betriebs-/
Ladeanzeige \ Indicateur de batterie/
charge \ Indicatore Batteria/
Caricamento
5Low-battery indicator \ Akkuanzeige
\ Indicateur de batterie déchargée \
E C01
1
6
2
3
Indicatore batteria scarica
6Display operation time/mode \ Display
(zeigt Saugzeit und Modus) \ Affichage
de la durée/du mode d’opération \
Visualizza la durata/modalità operativa
7Timer (* Unit: 10 minutes) \ Timer
(* Einheit: 10 Minuten) \ Programmateur
(* Unité : 10 minutes) \ Timer (* Unità: 10
minuti)
8Start/Stop button \ Start-/Stopptaste \
Bouton Marche/Arrêt \ Tasto Avvio/
Arresto
9Power switch \ Ein-/Ausschalter
\ Interrupteur d’alimentation \
Interruttore d’alimentazione
7
8
9
4
5
EC 01 En h a n ce d
1
6
2
7
8
3
9
4
5
13
Indicator Note \ Die unterschiedlichen Anzeigen \
Remarque sur les indicateurs \ Note sugli indicatori
Indicator
Blue
Flashing Blue
Yellow
Green
Red
Function
POWER ON, CHARGE
CHARGE
UV
VAC OFF
ERROR
Flashing Red
LOW BATT
Anzeige
Blau
Blaues Blinken
Gelb
Grün
Rot
Funktion
Hinweis
Eingeschaltet, Aufladen Gerät arbeitet; Akku ist voll geladen
Aufladen
Der Akku wird geladen.
UV
Die UV-Leuchte ist eingeschaltet.
Staubsauger aus
Der Staubsauger ist abgeschaltet.
Fehler
Der Kollisionssensor wurde länger als 3 Sekunden ausgelöst.
Eines der Räder ist seit mehr als 10 Sekunden blockiert.
Der Eclean wurde länger als 3 Sekunden lang angehoben.
Akku fast leer
Akkuanzeige
Rotes Blinken
Note
Turn on battery (On); battery is fully recharged
Recharging
UV light is on
Vacuum is off
Collision panel is stuck with foreign object for over 3 seconds
Wheel (s) is stuck for over 10 seconds
Eclean is lifted for over 3 seconds
Low-battery indicator
Indicateur
Bleu
Bleu clignotant
Jaune
Vert
Rouge
Fonction
Remarque
ALLUMÉ, EN CHARGE Allumez la batterie (On) ; la batterie est à pleine charge
CHARGE
En cours de charge
Rouge
clignotant
BATT DÉCH
La lampe UV est allumée
L'aspiration est arrêtée
Le panneau de collision est coincé par un corps étranger
pendant plus de 3 secondes
Une ou plusieurs roues sont coincées pendant plus de 10
secondes
Eclean est soulevé depuis plus de 3 secondes
Indicateur de batterie déchargée
Indicatore
Blu
Blu
lampeggiante
Giallo
Verde
Funzione
ACCESO, CARICO
CARICAMENTO
Nota
Robot acceso; batteria completamente carica
Caricamento in corso
UV
ASPIRAZIONE
DISATTIVATA
ERRORE
La lampada UV è accesa
L’aspirazione è disattivata
Rosso
UV
ARRÊT ASP
ERREUR
Rosso
BATTERIA SCARICA
lampeggiante
14
Il pannello di collisione è rimasto incastrato con un oggetto
estraneo per più di 3 secondi
Le ruote sono rimaste bloccate per più di 10 secondi
Eclean è stato sollevato per più di 3 secondi
Indicatore batteria scarica
Alarm Note \ Hinweistöne \ Remarque sur les alarmes \
Note sugli allarmi
Alarm
1 short beep,1 long beep
1 long beep
3 short beep
3 short beep, 1 long beep
Note
Vacuum timer is up; low-battery indicator is on;
vacuum is off
Indicator is on
Fully charged
Fully charged, starts clean again
Hinweistöne
1 kurzer Piepton, 1 langer
Piepton
1 langer Piepton
3 kurze Pieptöne
3 kurze Pieptöne, 1 langer
Piepton
Hinweis
Die Saugzeit ist abgelaufen; die Akkuanzeige
leuchtet; der Staubsauger ist abgeschaltet.
Der Indikator leuchtet.
Voll geladen.
Akku vollständig geladen, die Reinigung wird
fortgesetzt.
Alarme
1 bip bref,1 bip long
Remarque
Le programme d’aspiration est terminé ; l'indicateur de
batterie déchargée est allumé ; l'aspiration est arrêtée
L'indicateur est allumé
À pleine charge
À pleine charge, le nettoyage recommence
1 bip long
3 bips brefs
3 bips brefs, 1 bip long
Allarme
1 avviso sonoro breve, 1 avviso
sonoro lungo
1 avviso sonoro lungo
3 avvisi sonori brevi
3 avvisi sonori brevi, 1 avviso
sonoro lungo
Nota
L’intervallo d’aspirazione è trascorso; l’indicatore
batteria scarica è acceso; l’aspirazione è disattivata
L'indicatore è acceso
Completamente carico
Completamente carico, ricomincia a pulire
15
Safety Detection \ Gefahrenerkennung \ Détection de sécurité \
Rilevamento sicurezza
1.When Eclean is lifted or when a foreign 2.Eclean is designed with cliff sensor. Eclean
object is entangled, Eclean sounds
can detect the edge of a stairway and avoid
the alarm and the warning light is on.
falling over (avoid operation near stairway
Eclean will stop operation.
when runnung simple Spiral and “S” shape
modes).
Falls der Eclean angehoben wird
oder sich an einem Fremdkörper
Ihr Eclean ist mit einem nützlichen
verfängt, ertönt ein Warnsignal, eine
Kantensensor ausgestattet. So erkennt das
Hinweisleuchte leuchtet auf. Der
Gerät beispielsweise Treppenkanten und fällt
Eclean stoppt.
nicht hinunter. Wichtiger Hinweis: Meiden
Sie nahe Treppen, wenn das Gerät im
Lorsque Eclean est plein ou si un
S-Form- oder Spirale-Modus arbeitet.
corps étranger est coincé, l’alarme
se met à sonner et le voyant d’alerte Eclean est doté d’un détecteur de chute. Il
s’allume. Eclean interrompt alors son
peut détecter le bord d’un escalier et ainsi
fonctionnement.
éviter de tomber (évitez d’utiliser l’appareil à
proximité d’un escalier lorsque vous l’utilisez
Quando Eclean è sollevato, oppure
en mode spirale ou forme « S »).
quando si impiglia un oggetto
estraneo, Eclean emette un allarme
Eclean è progettato con un sensore dislivelli.
sonoro e l’indicatore d’avviso si
Eclean può rilevare il bordo di uno scalino ed
accende. Eclean arresterà l’operazione.
evitare cadute (evitare di usare il prodotto
vicino a scalini o scale quando si usa la
modalità Spirale e Serpentina).
Beep ~~
16
Cleaning Mode \ Reinigungsmodus \ Modes de nettoyage
\ Modalità di pulizia
Numerical Mode
display
A
Intelligent Mode (default)
1
Irregular space
When Eclean is
operating, press the
MODE button (select
a cleaning mode) to
display the cleaning
mode on the time
display screen. At the
same time, Eclean will
run the cleaning mode
indicated in the screen.
(Time display will
resume automatically in
10 seconds.)
Irregular space
Ramdom Wander
3
Note
Open space or
empty space
Spiral
2
Suitable space
Along Wall
Dirtier space near
the wall
4
"S" shape
Open space or
empty space
5
Polygonal
Open space or
empty space
A
Ramdom Wander
“S” shape
Spiral
Spiral
Along Wall
Spiral
Polygonal
Spiral
Notice
In Spiral mode, Eclean will stop moving if comes in contact with
any object.
17
Displayanzeige Modus
Geeignet für
Intelligenter Modus
(Standardvorgabe)
Hinweis
Wenn der Eclean im
Betrieb ist, drücken
Sie zur Anzeige des
Offene und freie
Spirale
Reinigungsmodus
Flächen
auf dem
Unregelmäßige
Zeitanzeigebildschirm
Zufallsbewegung Flächen
die MODUS-Taste
(Auswahl eines
Verschmutzte
Reinigungsmodus).
Wandfolge
Flächen in der Nähe Gleichzeitig führt der
von Wänden
Eclean den auf dem
Bildschirm angezeigten
Offene und freie
S-Form
Modus aus. (Die
Flächen
Zeitanzeige wird
Offene und freie
automatisch nach 10
Polygonal
Flächen
Sekunden fortgesetzt.)
A
1
2
3
4
5
Unregelmäßige
Flächen
A
Zufallsbewegung
S-Form
Spirale
Spirale
Wandfolge
Polygonal
Spirale
Spirale
Hinweis
Im Spirale-Modus stoppt der Eclean seine Bewegung, sobald er
einen Gegenstand berührt.
18
Affichage
numérique
A
Mode
Espace adapté
Mode intelligent (par
défaut)
Espace irrégulier Lorsque Eclean est
utilisé, appuyez sur
le bouton MODE
Sur un espace
(sélectionner un mode
ouvert ou vide
de nettoyage) pour
Espace irrégulier afficher le mode de
nettoyage sélectionné
sur l'écran. En même
Pour les endroits temps, Eclean
marchera en mode de
plus sales près
nettoyage indiqué sur
des murs
l'écran. (L'affichage du
Sur un espace
temps réapparaîtra
ouvert ou vide
automatiquement
après 10 secondes.)
Sur un espace
ouvert ou vide
1
Spirale
2
Promenade
aléatoire
3
Le long des murs
4
Forme "S"
5
Polygonal
Remarque
A
Promenade aléatoire
Forme « S »
Spirale
Spirale
Le long des murs
Polygonal
Spirale
Spirale
Attention
En mode Spirale, Eclean arrête de se déplacer s’il entre en contact
avec un objet.
19
Display
Modalità
numerico
Superficie adatta
Nota
Quando Eclean è in
funzione, premere
il tasto MODALITÀ
(usato per la selezione
della modalità)
per visualizzare la
modalità sul display.
Al contempo, Eclean
funzionerà alla
modalità indicata
sul display. (L’ora è
visualizzata sul display
automaticamente
dopo 10 secondi.)
A
Modalità Intelligente
Spazi irregolari
1
Spirale
Spazi aperti o
spazi vuoti
2
Spazi irregolari
Percorso casuale
3
Perimetrale
Spazi più sporchi
vicino alle pareti
4
Serpentina
Spazi aperti o
spazi vuoti
5
Poligonale
Spazi aperti o
spazi vuoti
A
Percorso casuale
Serpentina
Spirale
Spirale
Perimetrale
Poligonale
Spirale
Spirale
Avviso
In modalità Spirale, Eclean arresterà il suo movimento se entra in contatto
con qualsiasi oggetto.
20
Using the Recharging Dock \ Ladedock verwenden
\ Utilisation de la station de recharge \ Uso della
stazione di caricamento
Battery indicator (blue)
\ Akkuanzeige (blau) \
Indicateur de batterie (Bleu)
\ Indicatore batteria (blu)
Auto vacuuming set indicator (green) \
Automatisches Saugen eingestellt (grün) \
Indicateur d’aspiration automatique (vert) \
Indicatore aspirazione automatica impostata
(verde)
Function
Indicator
POWER (power indicator)
Blue
Start Auto Vacuuming (press Green
“GO” to turn on or turn off and
indicator will display status)
Off
Funktion
POWER
(Betriebsanzeige)
Automatisches Saugen.
(Mit der GO-Taste schalten
Sie diese Funktion ein und
aus, der aktuelle Status wird
angezeigt.)
Anzeige
Blau
Grün
aus
Start auto vacuuming (GO) \
Automatisches Saugen starten
(GO) \ Lancer l’aspiration
automatique (GO) \ Attiva
aspirazione automatica (GO)
Note
Recharging.
When pressing the GO button before or during
recharging (green indicator will light up), Eclean will
enter the quick charge mode and begin cleaning
automatically when the battery is 80% full.
After Eclean is fully recharged, the alarm will sound 3
short beeps and Eclean will be on standby.
Hinweis
Akku wird geladen.
Wenn Sie vor oder während des Ladevorgangs (grüne
Anzeige leuchtet) die LOS-Taste drücken, ruft der Eclean
den Schnelllademodus auf und beginnt automatisch
mit der Reinigung, sobald der Akku zu 80 % geladen
ist.
Sobald der Akku komplett geladen wurde,
hören Sie drei kurze Pieptöne, Ihr Eclean
wechselt in den Bereitschaftsmodus.
21
Fonction
Indicateur
Remarque
POWER (indicateur
Bleu
en cours de recharge
d'alimentation)
Lancer l'aspiration
Vert
Lorsque vous appuyez sur le bouton ALLER avant
automatique
ou pendant la recharge (l’indicateur vert s’allume),
(appuyez sur « GO »
Eclean entrera en mode de recharge rapide et
pour activer ou désactiver,
commence à aspirer automatiquement lorsque la
l'indicateur affiche l'état)
batterie est 80% rechargée.
arrêt
Une fois que votre Eclean est complètement
rechargé, l’alarme émet trois bips brefs et Eclean
se met en attente.
Funzione
POWER
(indicatore
d’alimentazione)
Attiva aspirazione
automatica
(premere il tasto “GO” per
accendere e spegnere;
l’indicatore mostrerà lo
stato)
Indicatore
Nota
Blu
Caricamento in corso
Verde
Spento
Premere il tasto “GO” prima di ricaricare o durante
il caricamento ed Eclean ricomincerà ad aspirare
quando la procedura di ricarica è completata.
Quando la batteria di Eclean è completamente
carica, l’allarme emetterà 3 avvisi sonori brevi ed
Eclean accederà allo stato di standby.
Before use \ Vor dem Einsatz \ Avant utilisation \ Prima dell’uso
1.Find a suitable wall outlet. Do not place anything near the recharging dock.
2.Lay the mobile base of the recharging dock against the wall. Connect to adapter
power, use the other end and plug into the power input hole. Tie up wires to
prevent obstructing Eclean’s movement.
1.Suchen Sie sich eine Steckdose an geeigneter Stelle. Achten Sie darauf, dass sich
nichts weiter in der Nähe des Ladedocks befindet.
2.Platzieren Sie die Basis des Ladedocks so, dass Sie an der Wand anliegt. Verbinden
Sie das Netzteil mit der Steckdose, schließen Sie den Netzteilstecker an den
Netzteileingang an. Verlegen Sie die Kabel so, dass sich Ihr Eclean frei bewegen
kann.
1.Trouvez une prise murale qui convient. Ne placez rien à proximité de la station de
recharge.
2.Placez la base mobile de la station de recharge contre le mur. Connectez
l’adaptateur d’alimentation, puis branchez l’autre extrémité sur l’orifice d’entrée
de l’alimentation. Attachez les fils de façon à ne pas gêner le déplacement de
Eclean.
22
1.Trovare una presa a muro adatta. Non mettere nulla nelle vicinanze della stazione
di caricamento.
2.Appoggiare alla parete la base mobile della stazione di caricamento. Collegare
una estremità dell’adattatore alla stazione e l’altra estremità alla presa di corrente.
Arrangiare i cavi in modo da prevenire impedimenti ai movimenti di Eclean.
“Home” Test \ Ausgangspunkt-Test \ Test « Origine » \
Test “Ritorno alla stazione di caricamento”
Place Eclean near the recharging dock. Turn on Eclean and press Start. After making
sure it is operating normally, press
“HOME” on the remote control and Eclean
will start “Auto-return” function. You can check if the location for the recharge dock is
appropriate. If Eclean cannot successfully reach the recharging dock, then adjust the
location of the dock. Please refer to P. 44 for optimal charger placement.
Setzen Sie den Eclean in der Nähe des Ladedocks auf den Boden. Schalten Sie den
Eclean ein, drücken Sie die Start-/Stopptaste. Wenn das Gerät normal arbeitet,
drücken Sie die “HOME”-Taste
an der Fernbedienung – der Eclean sucht nun
selbsttätig nach seinem Ladedock. Auf diese Weise prüfen Sie, ob sich das Ladedock
an einer für den Eclean gut erreichbaren Stelle befindet. Falls der Eclean sein
Ladedock nicht erfolgreich erreichen kann, stellen Sie das Ladedock bitte an einer
anderen Stelle auf. Hinweise zur optimalen Platzierung des Ladegerätes finden Sie
auf S. 44.
Placez Eclean près de la station de recharge. Allumez le et appuyez sur Start. Après
avoir vérifié que l’appareil fonctionne bien, appuyez sur
« HOME » (retour
automatique) sur la télécommande et Eclean commence à exécuter la fonction
de « Retour auto ». Vous pouvez vérifier si l’emplacement choisi pour la station de
recharge est approprié. Si Eclean ne parvient pas à trouver la station de recharge,
changez-la de place. Référez-vous à P.44 pour l’emplacement optimal du chargeur.
Collocare Eclean vicino alla stazione di caricamento. Accendere Eclean e premere
il tasto d’avvio. Dopo avere accertato che Eclean funziona in modo normale,
premere il tasto “HOME”
del telecomando ed Eclean avvierà la funzione di
“Ritorno automatico”. Controllare che la posizione della stazione di caricamento sia
appropriata. Se Eclean non riesce a raggiungere la stazione, sistemare la posizione
della stazione di caricamento. Fare riferimento a pagina 44 per istruzioni sulla
collocazione ottimale del caricatore
23
Notice \ Hinweis \ Attention \ Avviso
After connecting the power, the alarm will sound 1 long beep and the
battery indicator will be on (Blue). That indicates electricity is connected
and the recharging dock is ready.
Do not place objects near the recharging dock to avoid obstructing Eclean
returning to the recharging dock.
To ensure longer battery life, please fully discharge Eclean and charge it for
8 hours once a month.
Nachdem das Netzteil angeschlossen wurde, hören Sie einen langen
Signalton, die Akkuanzeige leuchtet (blau) auf. Dies bedeutet, dass das
Gerät mit Strom versorgt wird und das Ladedock bereit ist.
Achten Sie darauf, dass sich keine Gegenstände in der Nähe des Ladedocks
befinden und den Rückweg Ihres Eclean stören.
Zu Gewährleistung einer langen Akkulaufzeit sollten Sie den Eclean einmal
im Monat vollständig entladen und anschließend 8 Stunden aufladen.
Après que vous ayez connecté l’alimentation, l’alarme émet un bip long et
l’indicateur de batterie s’allume (en bleu). Cela indique que l’alimentation est
connectée et que la station de recharge est prête.
Ne placez pas d’objet près de la station de recharge afin d’éviter de gêner le
retour de Eclean sur sa station.
Pour une plus longue durée de vie de la batterie, veuillez décharger
complètement Eclean puis le recharger pendant 8 heures au moins une fois par
mois.
Dopo avere collegato l’alimentazione, l’allarme emetterà 1 avviso sonoro
lungo e l’indicatore batteria si accenderà (blu). Questo significa che
l’alimentazione è collegata e che la stazione di caricamento è pronta.
Non collocare oggetti nelle vicinanze della stazione di caricamento per
evitare impedimenti al ritorno di Eclean alla stazione.
Per garantire una lunga durata della batteria, scaricare completamente e
ricaricare Eclean per 8 ore una volta al mese.
24
Scheduling Eclean's Cleaning Time (EC 01 Enhanced) \
Saugzeitplan des Eclean festlegen (EC 01 Enhanced) \
\ Programmation de la durée de nettoyage de Eclean
(EC 01 amélioré) \ Pianificazione dei tempi di pulizia
di Eclean (EC 01 ottimizzato)
You can only schedule cleaning time and enable auto cleaning function while
Eclean is connected to the recharging dock.
Nur während der Eclean am Ladedock angeschlossen ist, können Sie die geplante
Saugzeit einstellen und die automatische Reinigungsfunktion aktivieren.
Vous ne pouvez programmer la durée de nettoyage et activer la fonction de
nettoyage auto que lorsque Eclean est connecté à la station de recharge.
I tempi di pulizia possono essere pianificati e funzione di pulizia automatica può
essere abilitata solo mentre Eclean è collegato alla stazione di caricamento.
1. LCD Display Diagram \ Abbildung des LCD-Bildschirms \ Diagramme de l’écran
LCD \ Illustrazione del display LCD
••
••
••
••
••
••
••
SET (left): press once to set the clock; press twice to schedule cleaning.
GO (left): if battery and brush icons both appear, this icon indicates Eclean will
start cleaning when the battery is fully charged.
Day display (top) ”Su”, “Mo”, ”Tu”, “We”, “Th”, “Fr”, and “Sa” indicate each day in a
week.
CLK (right) indicates time-setting mode.
Brush icon (right): indicates Eclean will start cleaning at scheduled time.
S ET (links): Drücken Sie die Taste zum Einstellen der Uhr einmal; durch
zweimaliges Drücken stellen Sie den Saugzeitplan ein.
GO (links): Wenn Akku- und Bürstensymbol gleichzeitig erscheinen, zeigt
dieses Symbol an, dass der Eclean mit der Reinigung beginnt, sobald der Akku
vollständig geladen ist.
25
••
••
••
••
••
••
••
••
••
••
••
••
••
Day display (oben): „Su“, „Mo“, „Tu“, „We“, „Th“, „Fr“ und „Sa“ zeigen die
einzelnen Wochentage an.
CLK (rechts): Zeigt den Zeiteinstellungsmodus an.
Brush icon (rechts): Zeigt an, dass der Eclean zur geplanten Zeit mit der
Reinigung beginnt.
S ET (gauche) : appuyez une fois pour régler l’horloge ; appuyez deux fois
pour programmer le nettoyage.
GO (gauche) : si les icônes de la batterie et de la brosse apparaîssent, cette
icône indique que Eclean va commencer à nettoyer lorsque la batterie est
complètement rechargée.
Day display (en haut) ”Su”, “Mo”, ”Tu”, “We”, “Th”, “Fr”, et “Sa” indique le jour
de la semaine.
CLK (à droite) indique le mode de réglage du temps.
Brush icon (à droite) : indique que Eclean va nettoyer à l’heure
programmée.
S ET (sinistra): Premere una volta per impostare l’ora, premere due volte per
pianificare la pulizia.
GO (sinistra): Se appaiono le icone della batteria e della spazzola,
questa icona indica che Eclean avvierà la pulizia appena la batteria è
completamente carica.
Day display (in alto): “Su”, “Mo”, “Tu”, “We”, “Th”, “Fr” e “Sa” indicano i giorni
della .
CLK (destra) indica la modalità d’impostazione timer.
Brush icon (destra): Indica che Eclean inizierà a pulire all’orario pianificato.
2. M
anaging schedule \ Zeitplan verwalten \ Gestion des programmations \
Gestione della pianificazione
Setting the clock \ Uhr einstellen \ Réglage de l’heure \ Impostazione
dell’ora
2.1. Eclean will automatically enter clock display mode upon your first
use.Default time is Sunday, 00:00 (24-hour mode).
Bei der ersten Inbetriebnahme ruft der Eclean automatisch
den Zeitanzeigemodus auf. Die Standardzeit ist Sonntag, 00:00
(24-Stunden-Modus).
Eclean va entrer automatiquement en mode d’affichage de l’heure la
première fois que vous l’utilisez. Le réglage par défaut est Dimanche,
00:00 (mode 24-heures).
Al primo utilizzo, Eclean accederà automaticamente alla modalità
di visualizzazione ora. L’ora predefinita è Do 00:00 (formato delle 24
ore).
26
2.2. P
ress “SET” button to set time (the display shows SET and CLK icons).The
time screen starts flashing.Press “Hr”, “Min” and “Wk” buttons to set the
correct time and date.You can speed up the selection by holding the
button.Eclean will apply the current clock setting when no operation is
performed over 1 minute (SET and CLK icons disappear).
Drücken Sie zum Einstellen der Zeit die „SET“-Taste (auf der Anzeige
werden die Symbole SET und CLK angezeigt). Der Zeitbildschirm beginnt
zu blinken. Stellen Sie die aktuelle Uhrzeit und das Datum mit den
Tasten „Hr“, „Min“ und „Wk“ ein. Sie können die Auswahl beschleunigen,
indem Sie die jeweilige Taste gedrückt halten. Der Eclean übernimmt die
aktuelle Zeiteinstellung, wenn mehr als 1 Minute lang keine Bedienung
erfolgt (die Symbole SET und CLK werden ausgeblendet)
Appuyez sur le bouton “SET” pour régler l’heure (l’affichage montre les
icônes SET et CLK). L’écran de l’heure commence à clignoter. Appuyez sur
les boutons “Hr”, “Min” et “Wk” pour régler la date et l’heure. Vous pouvez
sélectionner plus rapidement en continuant d’appuyer sur le bouton.
Eclean accepte les réglages de l’heure lorsque vous n’appuyez sur aucun
bouton pendant 1 minute (les icônes SET et CLK disparaîtront).
Premere il tasto “SET” per impostare l’ora (il display mostra le icone SET
e CLK). L’ora inizia a lampeggiare. Premere il tasto “Hr”, “Min” e “Wk” per
impostare l’ora e la data corretta. La procedura può essere accelerata
tenendo premuto il tasto. Eclean applicherà le nuove impostazioni
quando non sono eseguire operazioni per più di 1 minuto (le icone SET e
CLK spariscono).
Scheduling cleaning \ Reinigung planen \ Programmation du nettoyage \
Pianificazione della pulizia
Eclean can be scheduled to clean on daily basis or on specific days.
Sie können einen Zeitplan einrichten, nach dem der Eclean täglich oder an
bestimmten Wochentagen saugt.
Eclean peut être programmé pour nettoyer tous les jours ou certains jours
seulement.
Eclean può essere pianificato per pulire su una base giornaliera oppure in giornate
specifiche.
27
2.3. P
ress “SET” button to enter scheduling mode.Time and date screen will
start flashing. The setting scheme is the same as step 2.2, but the default
setting for “Wk” button is “to clean everyday”.If the cleaning time isn’t set
properly, the time display will show “-” (see below).
Drücken Sie zum Aufrufen des Zeitplanmodus die „SET“-Taste. Zeit- und
Datumbildschirm beginnen zu blinken. Die Vorgehensweise bei der
Einstellung entspricht der in Schritt 2.2; die Standardeinstellung der „Wk“Taste ist jedoch die tägliche Reinigung. Wenn die Saugzeit nicht richtig
eingestellt wird, erscheint auf der Zeitanzeige „-“ (vgl. nachstehende
Abbildung).
Appuyez sur le bouton “SET” pour aller au mode de programmation.
L’heure et la date commencent à clignoter. La méthode de réglage est la
même que dans la section 2.2 mais le réglage par défaut du bouton “Wk”
est “nettoyer tous les jours”. Si vous ne réglez pas correctement l’heure de
nettoyage, “-” sera affiché sur l’écran (voir ci-dessous).
Premere il tasto “SET” per accedere alla modalità di pianificazione. Il
display con la data e l’ora inizia a lampeggiare. L’impostazione è uguale a
quella del punto 2.2, però il tasto “Wk” esegue l’impostazione per “pulire
tutti i giorni”. Se l’orario per la pulizia non è impostato correttamente, il
display mostrerà “--:--” (fare riferimento alla figura che segue).
I f you want to set Eclean to clean on a specific day in a week, press “Wk”
button again.”Su” (Sunday) icon will start to flash.If you want to set Eclean
to clean on Sunday, press “Wk” button again within 5 seconds to stop
“Su” from flashing. This indicates that Eclean has confirmed the Sunday
cleaning schedule.You can apply the above procedures to schedule for
other days after 5 seconds.
If you want to skip one day, just wait 5 seconds without pressing the “WK”
button.
After scheduling the cleaning time, press “SET” button to return to Clock
Mode.If Eclean has been scheduled a cleaning time, the LCD will display
as below:
Falls der Eclean an einem bestimmten Wochentag saugen soll, drücken
Sie noch einmal die „Wk“-Taste. Das Symbol „Su“ (Sonntag) beginnt zu
blinken. Falls der Eclean sonntags saugen soll, drücken Sie innerhalb
von 5 Sekunden ein weiteres Mal die „Wk“-Taste; „Su“ hört auf zu blinken.
Dadurch wird angezeigt, dass der Eclean den Zeitplan zur Reinigung
28
am Sonntag übernommen hat. Sie können das obige Verfahren nach 5
Sekunden zur Planung an anderen Tagen verwenden.
Falls Sie einen Tag überspringen möchten, warten Sie 5 Sekunden, ohne
die „Wk“-Taste zu betätigen.
Nach Planung der Saugzeit können Sie durch Drücken der „SET“-Taste
zum Uhrmodus zurückkehren. Falls am Eclean eine geplante Saugzeit
eingerichtet ist, zeigt das LCD Folgendes an:
Si vous voulez que Eclean nettoye seulement certains jours d’une
semaine, appuyez à nouveau sur le bouton “Wk”. L’icône ”Su” (Dimanche)
commencera à clignoter. Si vous voulez que Eclean nettoye chaque
Dimanche, appuyez à nouveau sur le bouton “Wk” dans les 5 secondes
pour que “Su” arrête de clignoter. Cela indique que Eclean a confirmé le
nettoyage automatique chaque dimanche. Vous pouvez continuer de la
même manière pour sélectionner d’autres jours, après 5 secondes.
Si vous voulez sauter un jour, attendez 5 secondes sans appuyer sur le
bouton “WK”.
Lorsque vous avez fini de programmer l’heure de nettoyage, appuyez
sur le bouton “SET” pour retourner au mode Heure. Si Eclean a été
programmé pour nettoyer, l’écran LCD affichera ce qui suit :
S e si vuole impostare Eclean per pulire un giorno specifico della
settimana, premere di nuovo il tasto “Wk”. L’icona “Su” inizia lampeggiare.
Se si vuole che Eclean esegua la pulizia di Domenica, premere di nuovo
entro 5 secondi il tasto “Wk” e l’icona “Su” smette di lampeggiare. Questo
significa che Eclean ha confermato la pulizia pianificata per Domenica.
Dopo 5 secondi, eseguire la stessa procedura per pianificare gli altri giorni
della settimana.
Per saltare un giorno, attendere 5 secondi senza premere il tasto “Wk”.
Dopo avere pianificato la pulizia, premere il tasto “SET” per tornare alla
modalità orologio. Se Eclean è stato pianificato per pulire, il display LCD
apparirà come segue:
3.To view the scheduled cleaning time \ So zeigen Sie die geplante Saugzeit an \
\ Pour afficher l’heure de nettoyage programmé \ Visualizzare l’ora pianificata
per la pulizia
Press “SET” button twice to enter “Schedule Cleaning Mode” and view the
scheduled cleaning tasks.
Drücken Sie zum Aufrufen des „Zeitplanreinigungsmodus“ und Anzeigen der
29
geplanten Reinigungsaufgaben zweimal die „SET“-Taste.
Appuyez sur le bouton “SET” deux fois pour aller à “Mode de nettoyage
programmé” et afficher les tâches de nettoyage programmé.
Premere due volte il tasto “SET” per accedere alla modalità “Pulizia pianificata”
e visualizzare le attività di pulizia.
4. To cancel scheduled cleaning time \ So blenden Sie die geplante Saugzeit aus
\ Pour annuler l’heure de nettoyage programmé \ Annullamento della pulizia
pianificata
ress “SET” button twice, then set the hour and minute until “-” is shown (see
P
below).
Drücken Sie zweimal die „SET“-Taste, stellen Sie dann Stunden- und
Minutenwert ein, bis „-“ angezeigt wird (vgl. nachstehende Abbildung).
Appuyez sur le bouton “SET” deux fois puis réglez l’heure et les minutes sur “-”
(voir ci-dessous).
Premere due volte il tasto “SET”, poi impostare ore e minuti finché il display
visualizza “--;--” (fare riferimento alla figura che segue).
5.To set Eclean to start cleaning after fully charged \ So stellen Sie den Eclean
zum Starten des Saugvorgangs nach vollständiger Aufladung ein \ Pour régler
Eclean pour nettoyer automatiquement lorsque complètement rechargé \
Impostazione di Eclean per avviare la pulizia quando è completamente carico
ress and hold “GO” button on the recharging dock about 1 second, the battery,
P
brush and GO icons will display as below.Press “GO” button again to cancel this
setting.Note: Eclean will only clean once after this function is enabled.
Halten Sie die „GO“-Taste am Ladedock ca. 1 Sekunde lang gedrückt; die Akku, Bürsten- und GO-Symbole werden wie nachstehend gezeigt eingeblendet.
Drücken Sie die „GO“-Taste zum Abbrechen dieser Einstellung noch einmal.
Hinweis: Der Eclean reinigt nach Aktivierung dieser Funktion nur einmal.
Appuyez pendant 1 seconde sur le bouton “GO” sur la station de recharge,
les icônes de brosse et GO s’affichent comme suit. Appuyez à nouveau sur le
bouton “GO” pour annuler ce réglage. Remarque : Eclean ne va nettoyer qu’une
fois lorsque cette fonction est activée.
T enere premuto per 1 secondo il tasto “GO” della stazione di caricamento,
saranno visualizzate le icone della batteria, della spazzola e GO, come mostrato
di seguito. Premere di nuovo il tasto “GO” per annullare questa impostazione.
Nota: Eclean pulirà solo dopo avere abilitati questa funzione.
30
6.To start cleaning right away \ Halten Sie die „Los“-Taste am Ladedock ca.
1 Sekunde lang gedrückt; die Akku-, Bürsten- und Los-Symbole werden
wie nachstehend gezeigt eingeblendet. Drücken Sie die „Los“-Taste zum
Abbrechen dieser Einstellung noch einmal. Hinweis: Der Eclean reinigt
nach Aktivierung dieser Funktion nur einmal. \ Pour commencer à nettoyer
immédiatement \ Pulizia immediata
Press and hold “GO” button over 5 seconds to instruct Eclean to leave the
recharging dock, and it will start cleaning regardless of its charging status.The
“START” button on the remote control has the same function.
Halten Sie die „GO“-Taste mehr als 5 Sekunden lang gedrückt; dadurch verlässt
der Eclean unabhängig vom Ladezustand das Ladedock und beginnt mit dem
Saugen. Die „START“-Taste an der Fernbedienung hat dieselbe Funktion.
Appuyez pendant 5 secondes sur le bouton “GO” pour indiquer à Eclean
de se séparer de la station de recharge, il commencera alors à nettoyer
immédiatement quelque soit son niveau de recharge. Le bouton “START” sur la
télécommande a la même fonction.
T enere premuto per più di 5 secondi il tasto “GO” per istruire Eclean a lasciare
la stazione di caricamento ed iniziare a pulire subito indipendentemente dallo
stato di carica della batteria. Il tasto “START” del telecomando ha la stessa
funzione.
7. To use the remote control to start cleaning \ So verwenden Sie die
Fernbedienung zum Start des Saugvorgangs \ Pour utiliser la télécommande et
commencer à nettoyer \ Uso del telecomando per avviare la pulizia
ou can also press “START” button to set Eclean to start cleaning tasks while it
Y
is charging at the dock.
lternativ können Sie zum Start des Saugvorgangs die „START“-Taste drücken,
A
während der Eclean am Dock geladen wird.
ous pouvez aussi appuyer sur le bouton “START” pour que Eclean commence
V
à nettoyer lorsqu’il est connecté à la station de recharge.
Si può anche premere il tasto “START” per impostare Eclean ad avviare le
attività di pulizia mentre è alla stazione di caricamento.
31
Remote Control \ Fernbedienung \ Télécommande
\ Telecomando
Forward \ Vorwärts \ Avance \ Avanti
Left \ Links \ Gauche \ Sinistra
Timer \ Timer \
Programmateur \ Timer
UV light \ UV-Leuchte \ Lampe UV \
Lampada UV
Stop \ Stopp \ Stop\ Arresto
Home (Auto-return) \ Ausgangspunkt
(Automatische Rückkehr) \
Home (Retour automatique) \ Base
(Ritorno automatico)
Right \ Rechts \
Droite \ Destra
Start \ Start \
Marche \ Avvio
Reverse \ Rückwärts \
Recul \ Indietro
Cleaning Mode \
Reinigungsmodus \ Mode
nettoyage \ Modalità di pulizia
Power switch \ Ein-/Ausschalter
\ Interrupteur d’alimentation \
Interruttore d’alimentazione
Vacuum \ Saugen \
Aspiration \ Aspirazione
Turn on the power first, and then use the remote control to set and control the Ec l e a n .
When done with the remote control, put back onto the upper cover.
1.
OFF: Turn off Eclean.
2.
START: Start Intelligent Mode and vacuum.
3. STOP: Press STOP to stop Eclean. It will sound one long beep as reminder.
4.
TIMER: Set vacuum time. 10 minutes per unit and the range is 10 - 80 minutes.
5.
HOME: Press the button to Start “Auto-return“ function, Eclean will search for
recharging dock.
6.
UV: When Eclean is vacuuming, press the button to turn on/off UV.During
operation, the UV light will automatically shut off if Eclean is picked up.
7.
VAC: When Eclean is on, press the button to start/stop vacuum.
8.
FORWARD: press forward to make Eclean go forward and Start vacuum motor. It will
not stop until hitting an obstacle or when “STOP“ button is pressed.
9. REVERSE, LEFT, RIGHT: Press any of these buttons to go reverse, go left, or go right.
Release button to stop.
32
Schalten Sie das Gerät zunächst ein. Nun können Sie den Eclean über die Fernbedienung
einstellen und steuern. Wenn Sie die Fernbedienung nicht mehr brauchen, setzen Sie sie
wieder an ihren Platz an der Oberseite des Gerätes.
1.
OFF: Schaltet den Eclean ab.
2.
START: Startet das Gerät im intelligenten Modus.
3.
STOP: Mit dieser Taste STOP Sie den Eclean. Zur Bestätigung hören Sie einen langen
Signalton.
4.
Timer: Zum Einstellen der gewünschten Saugzeit. Sie können eine Zeit zwischen 10
und 80 Minuten in 10-Minuten-Schritten vorgeben.
5.
HOME: Mit dieser Taste lassen Sie den Eclean selbsttätig zu seinem Ladedock
zurückkehren. Während der Eclean nach dem Ladedock sucht, ist die Saugfunktion
abgeschaltet.
6.
UV: Mit dieser Taste schalten Sie die UV-Leuchte beim Saugen ein und aus.
7.
VAC: Wenn der Eclean eingeschaltet ist, starten und stoppen Sie das Saugen mit
8.
FORWARD: Ein Druck auf diese Taste lässt den Eclean nach vorne rollen und startet
dieser Taste.
den Staubsauger. Der Eclean fährt weiter vorwärts, bis er an ein Hindernis stößt
oder bis Sie die STOP-Taste drücken.
9. R
EVERSE, LEFT, RIGHT: Mit diesen Tasten lassen Sie den Eclean rückwärts, nach links oder
nach rechts fahren. Zum Stoppen lassen Sie die Taste einfach wieder los.
Allumez d’abord l’appareil, puis utilisez la télécommande pour configurer et contrôler Eclean.
Lorsque vous avez fini d’utiliser la télécommande, remettez-la sur le capot supérieur.
1.
OFF: Pour éteindre Eclean.
2.
START : Activez le Mode intelligent de l’aspirateur.
3. STOP: Appuyez sur STOP pour arrêter Eclean. L’appareil émet alors un bip long.
4.
TIMER: Pour régler la durée d’aspiration. Par tranches de 10 minutes, la plage de
5.
HOME : Appuyez sur le bouton pour lancer la fonction « Retour auto », Eclean se
6.
UV: Lorsque Eclean est en train d’aspirer, appuyez sur le bouton pour
réglage est de 10 à 80 minutes.
met à chercher la station de recharge.
allumer/ éteindre la lampe UV. Lorsque la lampe UV est allumée, elle s’éteint
automatiquement si Eclean est soulevé.
7.
VAC : Alors que Eclean est allumé, appuyez sur ce bouton pour lancer ou arrêter
8.
Avance : appuyez sur ce bouton pour faire avancer Eclean et démarrer le moteur
l’aspiration.
d’aspiration. L’appareil ne s’arrêtera pas avant de heurter un obstacle ou avant que
vous n’appuyiez sur le bouton « STOP ».
33
9. REVERSE, LEFT, RIGHT (Recul, gauche, droite) : Appuyez sur l’un de ces boutons pour
reculer, aller à gauche ou aller à droite.
Prima accendere, poi usare il telecomando per impostare e controllare Eclean. Dopo avere
eseguito tutte le operazioni col telecomando, rimetterlo al suo posto sul coperchio.
1.
OFF: Spegne Eclean.
2.
START: Avvia la modalità Intelligente e l’aspirazione.
3.
STOP: Premere STOP per arrestare le operazioni di Eclean. Sarà emesso un avviso
sonoro lungo come promemoria.
4.
TIMER: Imposta l’intervallo d’aspirazione. 10 minuti per unità e la portata va da 10 a
80 minuti.
5.
HOME: Premere il tasto per avviare la funzione “Ritorno automatico”, Eclean
cercherà la stazione di caricamento.
6.
UV: Quando Eclean sta aspirando, premere il tasto per accendere/spengere la
lampada UV. Durante il funzionamento, la lampada UV si spegnerà automaticamente
se Eclean è sollevato.
7.
VAC: Mentre Eclean è acceso, premere il tasto per attivare/disattivare l’aspirazione.
8.
FORWARD: Premere per far procedere Eclean ed accendere il motore d’aspirazione.
Eclean si fermerà solo quando colpisce un ostacolo, oppure quando è premuto il
tasto “STOP”.
9.REVERSE, LEFT, RIGHT: Premere uno di questi tasti per cambiare direzione, nello specifico:
indietro, sinistra, destra. Lasciare il tasto per arrestare.
34
Install Solid Freshener (Solid Freshener is not included)
Lufterfrischer installieren (Lufterfrischer nicht im Lieferumfang
enthalten)
Installation d'un désodorisant solide (Le déodorisant solide
n’est pas fourni)
Installazione del deodorante (Il deodorante non è incluso)
EC01
PRESS
STEP 1
STEP 3
PUSH
STEP 2
STEP 4
35
EC 01 En h a n ce d
36
STEP 1
STEP 2
STEP 3
STEP 4
Maintenance \ Wartung \ Maintenance \
Manutenzione
To ensure optimal performance during every operation, clean the vacuum dust bin and
filter thoroughly after use.
Damit Ihr Eclean stets wie am ersten Tag funktioniert, reinigen Sie Staubbehälter und
Filter gründlich nach jedem Einsatz.
Pour garantir des performances optimales à chaque fois, nettoyez bien le bac à
poussière et le filtre après chaque utilisation.
Per garantire le prestazioni ottimali durante ciascuna operazione, pulire accuratamente
il raccoglitore ed il filtro dopo ciascun uso.
Dust bin & filter \ Staubbehälter und Filter \ Bac à poussière et filtre \
accoglitore e filtroR
EC01
STEP 4
PRESS
STEP 5
STEP 1
PUSH
STEP 6
STEP 2
STEP 7
STEP 3
37
EC 01 En h a n ce d
STEP 4
STEP 1
STEP 5
STEP 2
STEP 6
STEP 3
STEP 7
38
Side brush \ Seitliche Bürste \ Brosse latérale \ Spazzola laterale
1. Counterclockwise: unscrew
Gegen den Uhrzeigersinn: Lösen.
Dans le sens inverse des aiguilles d’une montre :
dévisser
Senso antiorario: svitare
2. Clockwise: screw
Im Uhrzeigersinn: Anziehen.
Dans le sens des aiguilles d’une montre : visser
Senso orario: avvitare
Roll brush \ Rollbürste \ Brosse rotative \ Spazzola rotante
You can easily take out the roll brush by pressing the side of the roll brush and then lift
upward (Step1).
You can easily put back the brush by making sure the holes of the roll brush lines up
with the holes on Eclean (Step2).
Die Rollbürste lässt sich leicht entnehmen, indem Sie ein Ende der Bürste gegen das
Gehäuse drücken und die Bürste dann nach oben abnehmen (Schritt 1).
Zum Wiedereinsetzen hängen Sie die Bürste wieder in die Aussparungen im Gehäuse
ein (Schritt 2).
Vous pouvez facilement sortir la brosse rotative en appuyant sur le côté de la brosse
puis en la soulevant (Étape 1).
Vous pouvez facilement remettre la brosse en place en vérifiant que les orifices de la
brosse rotative sont bien alignés avec les orifices de votre Eclean (Étape 2).
La spazzola rotante si rimuove con facilità premendo il lato della spazzola e sollevando
(Fase 1).
La spazzola rotante si installa con facilità allineando accuratamente i fori della spazzola
con i fori di Eclean (Fase 2).
2. Lift up \ Anheben \
Soulever \ Sollevare
Step1
1.Press inward \ Nach innen
drücken \ Enfoncer \ Spingere
verso l’interno
Step 2
39
Cleaning the back wheels \ Hinterräder reinigen \
Nettoyage des roulettes arrière \ Pulizia delle ruote posteriori
Step 1.
Step 2.
Step 3.
Step 4.
Turn off Eclean
button and then unscrew the back wheel cover.
Open the back wheel cover.
Secure back wheels and unplug connector.
Clean off dust, hair, or any foreign object.
Schritt 1.Schalten Sie den Eclean auf
, lösen Sie dann die Schrauben an der
Hinterradabdeckung.
Schritt 2. Öffnen Sie die Hinterradabdeckung.
Schritt 3. Blockieren Sie das Rad, lösen Sie den Stecker.
Schritt 4. Entfernen Sie Staub, Haare und andere Fremdkörper.
Étape 1.
Étape 2.
Étape 3.
Étape 4.
Eteignez Eclean avec le bouton
puis dévissez le capot des roues arrière.
Ouvrez le capot des roues arrière.
Fixez les roues arrière et débranchez le connecteur.
Nettoyez la poussière, les cheveux ou les corps étrangers.
Fase 1.Spegnere Eclean usando il tasto
e poi svitare il coperchio della ruota
posteriore.
Fase 2. Aprire il coperchio della ruota posteriore.
Fase 3. Bloccare le ruote posteriori e scollegare il cavo d’alimentazione.
Fase 4. Pulire la polvere, togliere i capelli e qualsiasi altro materiale estraneo.
40
Step 1
Step 3
Step 2
Step 4
41
Operating Scenarios \ Einsatzgebiete \ Scénarii
d'utilisation \ Situazioni pratiche
1. B
efore using Eclean, remove plastic bags, tidy/roll up
bottom of bed sheets, tassels and so on to prevent the
above objects being sucked into the machine during
operation.
Bevor Sie den Eclean auf den Weg schicken, entfernen Sie
Plastiktüten und andere störende Gegenstände vom Boden
und sorgen dafür, dass nichts auf den Boden herabhängt
und aus Versehen eingesaugt werden kann.
Avant d’utiliser Eclean, enlevez les sacs en plastique, soulevez le bas des draps de
lit, les franges, etc., afin d’éviter que des ces objets ne se coincent dans la machine
pendant l’utilisation.
Prima di usare Eclean, rimuovere i sacchetti di plastica, sollevare/arrotolare lenzuola,
tendaggi, frange di tappeti per impedire che siano aspirati nella macchina durante il
suo funzionamento.
2. R
emove any unstable objects within cleaning area, such as vases and liquid
containers.
Achten Sie darauf, dass sich im Saugbereich keine
Gegenstände befinden, die leicht umkippen können,
z. B. Vasen oder andere Gefäße mit Flüssigkeiten.
Dans la zone de nettoyage, enlevez les objets qui
risquent facilement de tomber, tels que vases, verres, etc
Rimuovere tutti gli oggetti instabili nell’area da pulire, come vasi e contenitori di
liquidi.
3. If the cleaning space is smaller than 40cm in diameter, Eclean will be unable to
move around. In this case, please adjust the furniture distance.
D
er Eclean kann nicht an Stellen vordringen, die schmaler als 40 mm sind. Bitte
passen Sie in solch einem Fall den Abstand zwischen den Möbelstücken an.
Eclean ne sera pas en mesure de se déplacer si l’espace est moins de 40cm en
diamètre. Si c’est le cas, veuillez déplacer les meubles.
Se lo spazio da pulire è di dimensioni inferiori ai 40 cm di diametro, Eclean non potrà
muoversi liberamente. In questo caso regolare le distanze tra i mobili.
42
4. E clean will not be able to enter the designated vacuuming range or it may become
stuck if the height of range is lower than 10 cm. Please prevent the entry of Eclean
by blocking it with an object.
Durchgänge von weniger als 10 cm Höhe kann der Eclean nicht durchqueren und
bleibt möglicherweise stecken. Blockieren Sie die Zugänge zu solchen Engstellen
mit einem geeigneten Gegenstand.
Eclean ne sera pas en mesure d’entrer dans la zone d’aspiration désirée ou risque de
se coincer si la hauteur est inférieure à 10 cm. Veuillez empêcher l’entrée du Eclean
en bloquant la zone avec un objet.
Eclean non può accedere né pulire, e potrebbe rimanere incastrato, in aree di altezza
inferiore ai 10 cm. Prevenire l’accesso di Eclean a queste aree bloccandole con un
ostacolo.
5. When using the remote control, aim it directly at Eclean. Make sure there is no
obstacle such as a wooden board in the path of the sensor.
Richten Sie die Fernbedienung möglichst direkt auf den Eclean. Achten Sie darauf,
dass sich keine Hindernisse zwischen Fernbedienung und Eclean befinden.
Lorsque vous utilisez la télécommande, pointez-la directement sur Eclean. Assurezvous qu’il n’y ait aucun obstacle, comme par exemple une plaque en bois, sur le
chemin du capteur.
Quando si usa il telecomando, puntare direttamente ad Eclean. Assicurarsi che sul
percorso del sensore del telecomando non ci siano ostacoli come pannelli di legno.
43
6. The recharging dock must be attached to the wall. To avoid blocking Eclean’s
returning route, do not place anything near the recharging dock. While returning
to the recharging dock, Eclean will head right and move along the wall to locate
the dock. To enable Eclean to locate the dock with ease, place the dock in the lower
right corner of the cleaning area, and keep a 50~100cm distance from the wall.
Das Ladedock muss an einer Wand angebracht sein. Achten Sie darauf, dass sich
keine Hindernisse in der Nähe des Ladedocks befinden, damit der Eclean problemlos
dorthin zurückkehren kann. Wenn der Eclean zum Ladedock zurückkehrt, hält er sich
rechts und bewegt sich zur Lokalisierung des Docks an der Wand entlang. Platzieren
Sie das Dock im unteren rechten Eck des Saugbereichs, damit der Eclean problemlos
zum Dock zurückfindet; halten Sie einen Abstand von 50 bis 100 cm zur Wand ein.
La station de recharge doit être attaché au mur. Enlevez tous les objets autour de la
station de façon à ne pas gêner Eclean lorsqu’il retourne sur sa station de recharge.
Lorsqu’il retourne à la station de recharge, Eclean irra à droite puis le long du mur
pour trouver la station de recharge. Pour que Eclean puisse trouver facilement
la station de recharge, placez la station dans le coin inférieur droit de la zone de
nettoyage, et à une distance de 50-100 cm du mur.
L a stazione di caricamento deve essere attaccata alla parete. Per evitare di
ostacolare il percorso di Eclean alla stazione di caricamento, non collocare alcun
oggetto vicino alla stazione. Durante il ritorno alla stazione di caricamento, Eclean
si muoverà in linea retta lungo la parete per trovare la stazione. Per permettere ad
Eclean di trovare facilmente la stazione di caricamento, collocarla nell’angolo in
basso a destra dell’area da pulire, e tenerla ad una distanza di 50-100 cm dalla parte.
100
50~100CM
CM
50~100CM
ŅŰŤŬŪůŨġŴŵŢŵŪŰů
50~
50~100CM
ŅŰŤŬŪůŨġŴŵŢŵŪŰů
ŅŰŤŬŪůŨġŴŵŢŵŪŰů
ŅŰŤŬŪůŨġŴŵŢŵŪŰů
ŊŵġŪŴġűųŦŧŦųŢţŭŦġŵŰġűŭŢŤŦġŵũŦġ
ťŰŤŬŪůŨġŴŵŢŵŪŰůġŢŵġŢġŭŰŤŢŵŪŰůġ
ŤŭŰŴŦġŵŰġŵũŦġųŪŨũŵġŤŰųůŦųġŰŧġ
ŵũŦġŢųŦŢį
50~100CM
It is preferable to place the docking station at a lacation close to the right corner of
the area. \ Es empfiehlt sich, das Dock in der Nähe der rechten Ecke des Bereichs zu
platzieren. \ Il est recommandé de placer la station d’accueil dans un endroit près du
bord de la pièce.\ È preferibile collocare la stazione di caricamento in un luogo vicino
all’angolo in basso a destra dell’area da pulire.
Docking station \ Dock \ Station de recharge \ Stazione di caricamento
50~100 CM \ 50 bis 100 cm \ 50~100 CM \ 50-100 cm
44
Troubleshooting
Q:Eclean cannot be turned on?
A:Make sure battery is firmly installed and fully charged.
Q:The remote control isn’t reacting?
A:Follow the steps below:
1. Turn on Eclean (during recharging, the remote control do not react).
2. Check for batteries in the remote control and make sure the battery power is
not empty.
3. Eclean does not respond to the remote control during a recharge. Please stop
the recharge and turn on Eclean.
Q:Why the warning indictor turns on?
A:These are the possible reasons:
1. Eclean has been off the ground for over 3 seconds. Please place it on the
ground once more.
2. The wheels have been stuck for over 10 seconds.
3. The collision panel is stuck with a foreign object for over 3 seconds.
Q:Why are the warning indicator and low-battery indicator turn on at the same
time?
A:These are the possible reasons:
1. An adapter other than factory-specified is used. Make sure the adapter is
the factory one (the one that comes with Eclean). Stop the recharge process,
drain the battery and recharge again to avoid accidents.
2. Recharging without a battery.
3. The battery is over-charged. Please wait for 2 hours before restarting Eclean.
Q:The collision panel isn’t reacting?
A:Take off the protective foam to enable proper operation.
Q:In Start Mode, why doesn’t the UV light react?
A:UV light is not automatically on after “Start” is pressed. You can turn it on as
desired.
For more detailed information, please refer to AGAiT homepage: www.agaitech.
com.
45
Problemlösung
F:Warum lässt sich der Eclean nicht einschalten?
A:Vergewissern Sie sich, dass der Akku richtig installiert und voll geladen ist.
F:Warum reagiert das Gerät nicht auf die Fernbedienung?
A:Führen Sie bitte die folgenden Schritte aus:
1.Schalten Sie den Eclean normal ein (beim Aufladen reagiert das Gerät nicht
auf die Fernbedienung).
2.Prüfen Sie die Batterien in der Fernbedienung, vergewissern Sie sich, dass
diese nicht erschöpft sind.
3.Beim Aufladen kümmert sich der Eclean nicht um die Fernbedienungssignale.
Brechen Sie das Aufladen ab, schalten Sie den Eclean ein.
F:Warum leuchtet die Warnanzeige auf?
A:Dafür gibt es mehrere mögliche Ursachen:
1.Der Eclean wurde länger als 3 Sekunden vom Boden abgehoben. Setzen Sie
das Gerät wieder auf den Boden zurück.
2.Die Räder wurden länger als 10 Sekunden blockiert.
3.Der Kollisionssensor wurde länger als 3 Sekunden ausgelöst.
F:Warum leuchten Warnanzeigen und Akkuanzeige gleichzeitig?
A:Dafür gibt es mehrere mögliche Ursachen:
1.Sie haben ein anderes Netzteil als das mitgelieferte benutzt. Verwenden
Sie unbedingt nur das mit dem Eclean gelieferte Netzteil. Brechen Sie das
Aufladen ab, leeren Sie den Akku im normalen Betrieb möglichst vollständig,
laden Sie den Akku anschließend wieder mit dem Originalnetzteil auf.
2.Sie haben versucht, den Akku aufzuladen, obwohl kein Akku eingesetzt war.
3.Der Akku wurde überladen. Bitte warten Sie 2 Stunden, bevor Sie den Eclean
neu starten.
F:Warum reagiert das Gerät nicht auf den Kollisionssensor?
A:Nehmen Sie den Schaumstoffschutz ab, damit der Kollisionssensor richtig
funktioniert.
F:Warum leuchtet die UV-Leuchte nicht gleich nach dem Start?
A:Die UV-Leuchte bleibt beim Start des Gerätes zunächst ausgeschaltet: Das spart
Strom und schont UV-empfindliche Materialien. Sie können es wie gewünscht
einschalten.
Weitere Informationen erhalten Sie auf der AGAiT-Webseite: www.agaitech.com.
46
Dépannage
Q :Eclean ne s'allume pas ?
R :Vérifiez que la batterie est bien fermement installée et qu'elle est à pleine charge.
Q :Pourquoi la télécommande ne réagit-elle pas ?
R :Suivez la procédure ci-dessous :
1.Allumez Eclean (pendant la recharge, la télécommande n'a pas d'effet).
2.Vérifiez les piles de la télécommande et assurez-vous qu'elles ne sont pas
déchargées.
3.Eclean ne répond pas à la télécommande en cours de recharge. Arrêtez la
recharge et allumez Eclean.
Q :Pourquoi le voyant d'alerte s'allume-t-il ?
R :Voici les raisons possibles :
1.Eclean a été soulevé du sol pendant plus de 3 secondes. Veuillez le remettre
sur le sol.
2.Les roues ont été bloquées pendant plus de 10 secondes.
3.Le panneau de collision est coincé par un corps étranger pendant plus de 3
secondes
Q :Pourquoi l'indicateur d'alerte et l'indicateur de batterie déchargée s'allument-ils
en même temps ?
R :Voici les raisons possibles :
1.Vous utilisez un adaptateur autre que celui d'origine. Assurez-vous que
l'adaptateur est bien un adaptateur d'origine (celui qui a été fourni avec
Eclean). Arrêtez le processus de recharge, laissez la batterie se décharger et
rechargez-la pour éviter les accidents.
2.Recharge sans batterie.
3.La batterie est trop chargée. Veuillez attendre 2 heures avant de rallumer
Eclean.
Q :Pourquoi le panneau de collision ne réagit-il pas ?
R :Enlevez la mousse de protection pour permettre un fonctionnement correct.
Q :En mode Démarrage, pourquoi la lampe UV ne réagit-elle pas ?
R :La lampe UV n'est pas allumée automatiquement lorsque l'on appuie sur « Start ».
Vous pouvez l’allumer comme désiré.
Pour plus d’informations, veuillez consulter la page d’accueil de AGAiT : www.
agaitech.com.
47
Risoluzione dei problemi
Domanda:Impossibile accendere Eclean?
Risposta:Assicurarsi che la batteria sia installata in modo appropriato e che sia
completamente carica.
Domanda:Il telecomando non risponde?
Risposta:Osservare le istruzioni che seguono:
1.Accendere Eclean (durante il caricamento il telecomando non
risponde).
2.Controllare le batterie del telecomando ed accertarsi che non siano
scariche.
3.Eclean non risponde al telecomando durante il caricamento. Arrestare
il caricamento ed accendere Eclean.
Domanda:Perché l’indicatore d’avviso si accende?
Risposta:Ecco i possibili motivi:
1.Eclean è stato sollevato dal pavimento per più di 3 secondi. Rimetterlo
a terra.
2.Le ruote sono rimaste bloccate per più di 10 secondi.
3.Il pannello di collisione è rimasto incastrato con un oggetto estraneo
per più di 3 secondi.
Domanda:Perché l’indicatore d’avviso e l’indicatore batteria scarica si accendono
contemporaneamente?
Risposta:Ecco i possibili motivi:
1.È in uso un adattatore diverso da quello specificato dal produttore.
Assicurarsi che l’adattatore sia quello del produttore (quello fornito in
dotazione ad Eclean). Arrestare la procedura di caricamento, scaricare
e ricaricare completamente la batteria per evitare incidenti.
2.È in corso la procedura di caricamento, però manca la batteria.
3.La batteria è sovra-caricata. Attendere 2 ore prima di riavviare Eclean.
Domanda:Il pannello di collisione non reagisce?
Risposta:Togliere le imbottiture protettive per abilitare il funzionamento
normale.
Domanda:In modalità d’avvio la lampada UV non reagisce?
Risposta:La lampada UV non si accende automaticamente quando si premere il
tasto “Avvio/Arresto”. Può essere accesa quando si vuole.
Per altre informazioni dettagliate, fare riferimento al sito AGAiT: www.agaitech.com.
48
Product Warranty Card
AGAiT provides a one-year limited warranty for Eclean and a six-month limited warranty for the battery against
manufacturing defects. Warranty coverage begins from the day of purchase. AGAiT also provides a 3-month
limited warranty for discounted items. Please refer to warranty terms at the time of purchase.
Limited Warranty Terms
1. P
lease keep this warranty card properly and show this warranty card when sending your Eclean for service.
No warranty card will be reissued.
2. The limited warranty covered under these terms is valid only in the country where your Eclean were
purchased.
3. Consumables are not covered by this limited warranty (e.g. filter cotton, roll brush, side brush and wheel
sets).
4. During the warranty period, parts or products may be repaired or replaced with repaired parts or products
of similar functions. AGAiT will return the product or a replacement with similar functions to the customer
after repair. All faulty parts or units removed from the product become the property of AGAiT.
5. This limited warranty shall not cover defects as a result of the following circumstances:
a. removed, altered and/or illegible product serial number, accessory barcode and warranty seal.
b. wear and tear of product as a result of normal use; or
c. damage as result of not following instructions provided in the user’s manual, fall due to improper
handling, washing, use of Eclean in wet areas, use of Eclean in a temperature exceeding the
recommended temperature range, a sudden change in the environment, opening or servicing Eclean
or accessories by an authorized technician, repairing Eclean and accessories without genuine parts,
accidents, use with excessive force, or unreasonable operation of Eclean or accessories.
6. Consumers should notify AGAiT or its authorized dealers within a reasonable time from detecting the
defect to apply for service covered by this limited warranty. No request for warranty service after warranty
expiration will be considered.
7. Consumers are recommended to take the following actions if there are problems with Eclean.
a.
Please refer to the Troubleshooting Guide in the user’s manual to locate the problem and possible
solutions.
b. If the problem persists, consumers should contact their local dealer from which Eclean was purchased,
the online dealer or the AGAiT Call Center for further instructions.
c. Consumers should prepare the following items before contacting AGAiT Call Center, AGAiT agents or
dealers:
-- The model number, serial number and color of the Eclean purchased.
-- The complete address and contact information of the consumer.
-- The photocopy of the purchasing invoice, receipt or sales statement. AGAiT will inform consumers of
the time, place and manner of returning the faulty Eclean. If the warranty of the faulty Eclean is still
valid, AGAiT will be responsible for all delivery fees.
8.If the consumer loses the warranty card, purchasing invoice, purchasing receipt, sales statement or
any purchasing voucher, AGAiT will calculate the warranty validity by adding three months to the
manufacturing date of Eclean.
In case of damage as a result of any of the following reasons, customers must pay for the delivery, repair,
maintenance and labor of Eclean.
1. Any product with the warranty sticker or bar code has been destroyed, obliterated, soiled or modified.
2. Damages/malfunctions caused by parts not produced by the company.
3. Any repairs caused by inappropriate installation and usage (for voltage requirement, refer to User’s Manual).
4. Natural disasters, act of God, deliberate damage or improper operation, such as not following the
instructions provided in the user’s manual and damage unrelated to manufacturing defects.
5. Any damage caused by unauthorized disassembling, modification of the specification or installing any
parts not from the factory.
Should you have any problems regarding the use of Eclean or accessories, please contact an AGAiT dealer or
the shop where your Eclean was purchased.
49
Problemlösung
AGAiT deckt den Eclean durch eine einjährige beschränkte Garantie und den Akku auf eine sechsmonatige
beschränkte Garantie gegen Herstellungsfehler ab. Der Garantieschutz beginnt mit dem Kaufdatum. Zudem
deckt AGAiT herabgesetzte Artikel durch eine 3-monatige beschränkte Garantie ab. Bitte beachten Sie die
Garantiebedingungen zum Zeitpunkt des Kaufs.
Bedingungen der beschränkten Garantie
1. Bitte bewahren Sie diese Garantiekarte sicher auf und legen eine Kopie beim Einsenden Ihres Eclean zur
Reparatur bei. Garantiekarten werden nicht erneut ausgestellt.
2. Die durch diese Bedingungen abgedeckte beschränkte Garantie gilt nur in dem Land, in dem Ihr Eclean
erworben wurde.
3. Verschleißteile sind durch diese beschränkte Garantie nicht abgedeckt (z. B. Filter, Rollbürste, seitliche
Bürste, Räder).
4. Während der Garantiedauer können die Teile oder Produkte repariert oder durch reparierte Teile oder
Produkte mit vergleichbaren Funktionen ersetzt werden. AGAiT übergibt Ihnen nach der Reparatur das
eingesendete Produkt bzw. ein Ersatzprodukt mit vergleichbaren Funktionen. Alle defekten Teile oder
Geräte, die aus dem Produkt entfernt wurden, gehen in das Eigentum von AGAiT über.
5. Diese beschränkte Garantie deckt keine Defekte ab, die aufgrund folgender Umstände aufgetreten sind:
a. Produktseriennummer, Strichcode oder Garantieaufkleber wurden entfernt, verändert und/oder
unkenntlich gemacht.
b. Verschleiß des Produkts in Folge des normalen Betriebs oder
c. Schäden aufgrund der Nichteinhaltung der in dieser Bedienungsanleitung enthaltenen Anweisungen,
unsachgemäßer Handhabung oder Reinigung, Nutzung des Eclean in feuchten Umgebungen, Einsatz
des Eclean bei einer Temperatur außerhalb des empfohlenen Temperaturbereichs, bei plötzlichen
Änderungen der Betriebsumgebungen, durch Öffnen oder Reparieren des Eclean oder seines
Zubehörs durch einen unautorisierten Techniker, bei Reparatur des Eclean oder seines Zubehörs ohne
Verwendung der Originalteile, bei Unfällen, Anwendung übermäßiger Gewalt oder unsachgemäßer
Bedienung des Eclean oder seines Zubehörs.
6. Sie sollten zur Inanspruchnahme der durch die beschränkte Garantie abgedeckten Reparatur AGAiT
oder seine autorisierten Händler innerhalb eines angemessenen Zeitraums nach Erkennung des
Defekts benachrichtigen. Anfragen zu Garantieleistungen werden nach Ablauf der Garantiedauer nicht
berücksichtigt.
7. Wir empfehlen Ihnen die Durchführung der folgenden Aktionen, falls Probleme mit dem Eclean auftreten.
a. Bitte beachten Sie zur Identifikation des Problems und möglicher Lösungen den Abschnitt zu Fragen
und Antworten in der Bedienungsanleitung.
b. Falls sich das Problem nicht beheben lassen sollte, können Sie sich an Ihren örtlichen Händler wenden,
bei dem Sie den Eclean erworben haben; alternativ erhalten Sie beim Online-Händler oder dem AGAiTKundencenter weitere Anweisungen.
c. Bevor Sie das AGAiT-Kundencenter, AGAiT-Vertreter oder Händler kontaktieren, sollten Sie Folgendes
bereithalten:
--Die Modellnummer, Seriennummer und Farbe des erworbenen Eclean.
-Ihre
vollständige Anschrift sowie weitere Kontaktinformationen.
--Eine Fotokopie der Rechnung, des Kassenzettels bzw. Kaufbelegs. AGAiT informiert Sie darüber,
wann, wo und wie Sie den defekten Eclean zurückgeben können. Falls die Garantie des defekten
Eclean noch gültig ist, trägt AGAiT jegliche Versand-/Lieferkosten.
8.Falls Sie Garantiekarte, Rechnung, Kassenzettel bzw. Kaufbeleg verlieren, berechnet AGAiT die
Garantiegültigkeit, indem dem Herstellungsdatum des Eclean drei Monate hinzuaddiert werden.
Bei Schäden in Folge der nachstehenden Ursachen müssen Sie die Kosten für Versand/Lieferung, Reparatur und
Wartung des Eclean sowie die zugehörigen Arbeitsleistungen tragen.
1. Jegliche Produkte, bei denen Garantieaufkleber oder Strichcode entfernt, zerstört, unkenntlich gemacht
oder verändert wurden.
2. Schäden/Fehlfunktionen, die durch Teile von Fremdanbietern verursacht wurden.
3. Schäden aufgrund unsachgemäßer Installation oder Nutzung (Angaben zur Netzspannung entnehmen Sie
bitte der Bedienungsanleitung).
4. Schäden durch Naturkatastrophen, Höhere Gewalt, Fremdeinwirkung oder unsachgemäßen Einsatz, wie z. B.
die Nichteinhaltung der in der Bedienungsanleitung enthaltenen Anweisungen, sowie Schäden, die nicht mit
Herstellungsfehlern in Verbindung stehen.
5. Schäden durch nicht autorisiertes Zerlegen, Modifizieren der Spezifikationen oder durch den Einsatz von
Fremdteilen.
Sollten Probleme bei der Nutzung des Eclean oder seines Zubehörs auftreten, wenden Sie sich bitte an einen
AGAiT-Händler oder den Laden, in dem Sie Ihren Eclean erworben haben.
50
Carte de garantie du produit
AGAiT fournit une garantie limitée d’un an pour Eclean et une garantie limitée de six mois pour la batterie,
contre les défauts de fabrication. La garantie commence à compter de la date d’achate du produit. AGAiT fournit
aussi une garantie limitée de 3 mois pour les pièces en rabais. Référez-vous aux termes de la garantie lors de
l’achat.
Termes de la garantie limitée
1. Veuillez conserver la carte de garantie en lieu sûr et la montrer lorsque vous renvoyez Eclean pour un
service. Nous ne fournirons pas de carte de garantie en cas de perte.
2. Cette garantie limitée et les termes décrits ici sont valables uniquement dans le pays où vous avez acheté
Eclean.
3. Les éléments consommables ne sont pas couverts par la garantie (par ex. filtre en coton, brosse rotative,
brosse latérale, jeux de roues).
4. Pendant la période de garantie, les pièces ou les produits seront réparés ou remplacés par des pièces ou
des produits similaires. AGAiT renverra le produit ou un remplacement avec des fonctions similaires au
client après réparation. Toutes les pièces et les composants enlevés du produit deviendront la propriété de
AGAiT.
5. Les dommages causés par les raisons exposées ci-dessous ne sont pas couverts par cette garantie limitée :
a. Tout produit dont le numéro de série, le code barre des accessoires ou l’étiquette de garantie a été
détruit, effacé, souillé ou modifié.
b. L’usure normale du produit, suite à une utilisation normale ; ou
c. Les dommages causés par le non-respect des instructions fournies dans le manuel de l’utilisateur, une
chute de l’appareil, le lavage, l’utilisation de Eclean dans des endroits humides, l’utilisation de Eclean
dans des endroits trop froids ou chauds, une changement brusque dans l’environnement, l’ouverture
ou les réparations de Eclean ou des accessoires par un technicien autorisé, la réparation de Eclean ou
des accessoires sans utiliser des pièces originales, les accidents, la force excessive ou une utilisation
inappropriée de Eclean ou des accessoires.
6. Vous devez avertir AGAiT ou ses revendeurs autorisés dans un délai approprié si vous remarquez un défaut
matériel, pour demander le service de cette garantie limitée. Aucune demande ne sera acceptée lorsque la
période de la garantie a expirée.
7. Il est recommandé de prendre les actions suivantes s’il y a un problème avec Eclean.
a. Référez-vous au Guide de dépannage dans le Manuel de l’utilisateur pour les problèmes et les
solutions les plus fréquentes.
b. Si le problème persiste, vous pouvez contacter le revendeur où vous avez acheté Eclean, le revendeur
en ligne ou le centre d’appel de AGAiT pour plus d’instructions.
c. Vérifiez que vous avez avec vous ce qui suit avant de contacter le centre d’appel de AGAiT, les
revenduers ou les agents de AGAiT :
--Le numéro du modèle, le numéro de série et la couleur du Eclean acheté.
-L’adresse
et les infos de contact complètes du client.
--Une photocopie de la facture, du ticket ou de l’avis de vente. AGAiT vous informera sur quand, où et
comment faire pour renvoyer le Eclean défectueux. Si la période de la garantie du Eclean défectueux
est toujours valable, AGAiT sera responsable de tous les frais de transport.
8.Si vous avez perdu la carte de garantie, le ticket ou l’avis de vente, la facture ou toute autre preuve d’achet,
AGAiT calculera la validité de la garantie en ajoutant 3 mois à partir de la date de fabrication de votre
Eclean.
Les dommages causés par les raisons exposées ci-dessous donneront lieu à paiement des frais de réparation,
de transport, de maintenance et de main d’oeuvre par le client :
1. Tout produit dont l’étiquette de garantie ou le code barre a été détruit, effacé, souillé ou modifié.
2. Dommages/dysfonctionnements causés par des pièces non produites par notre société.
3. Toute réparation motivée par une mauvaise installation ou une mauvaise utilisation (pour les exigences en
termes de tension électrique, veuillez vous reporter au Manuel de l’utilisateur).
4. Tout dommage causé par une catastrophe naturelle, un évènement imprévisible, volontaire ou utilisation
non appropriée ou sans respecter les instructions fournies dans le Manuel de l’utilisateur, et non du fait d’un
dysfonctionnement du produit.
5. Tout dommage causé par un démontage non autorisé, une modification des spécifications ou l’installation
d’éléments qui ne sont pas d’origine.
Pour toute question concernant l’utilisation de Eclean ou des accessoires, veuillez prendre contact avec votre
revendeur AGAiT ou le magasin où vous avez acheté votre Eclean.
51
Scheda di garanzia del prodotto
AGAiT fornisce una garanzia limitata di un anno per Eclean ed una garanzia limitata di sei mesi per la batteria
per i difetti di produzione. La copertura della garanzia ha inizio con la data d’acquisto. AGAiT fornisce inoltre una
garanzia limitata di 3 mesi per i prodotti scontati. Informarsi sui termini della garanzia prima di eseguire l’acquisto.
Termini della Garanzia Limitata
1. Conservare questa scheda della garanzia in modo appropriato ed esibirla quando si invia Eclean per la
riparazione. La scheda della garanzia non sarà ri-emessa.
2. La garanzia limitata coperta in questi termini è valida solo nel paese in cui è stato eseguito l’acquisto.
3. Questa garanzia limitata non copre i beni di consumo (e.g. filtro di cotone, spazzola rotante, spazzola
laterale e ruote).
4. Durante il periodo di garanzia, le parti o i prodotti possono essere riparati o sostituiti con parti riparate
o prodotti con funzioni simili. Dopo la riparazione AGAiT restituirà al cliente il prodotto riparato o suo
sostituto con funzioni simili. Tutte le parti rimosse o le unità guaste diventano di proprietà della AGAiT.
5. Questa garanzia limitata non si applica nei seguenti casi:
a. Numero di serie, codice a barre e sigillo della garanzia rimosso, alterato e/o illeggibile.
b. Uso e consumo del prodotto a seguito del normale uso; oppure
c. Danni provocati dalla mancata osservanza delle istruzioni del Manuale d’uso; caduta provocata da
uso inappropriato; lavaggio; uso di Eclean in aree bagnate; uso di Eclean a temperature che eccedono
quelle raccomandate; cambi improvvisi delle condizioni ambientali; apertura o riparazione di Eclean
o dei suoi accessori da parte di un tecnico non autorizzato; riparazione di Eclean e dei suoi accessori
usando ricambi non originali; incidenti; uso con forza eccessiva; uso irragionevole di Eclean o dei suoi
accessori.
6. Il cliente deve avvisare AGAiT o i suoi rivenditori autorizzati entro un tempo ragionevole dal rilevamento
del guasto per poter usufruire dei servizi coperti da questa garanzia limitata. Le richieste di assistenza in
garanzia dopo che la garanzia è scaduta saranno ignorate.
7. Si raccomanda ai clienti di prendere eseguire le azioni che seguono se ci sono dei problemi con Eclean.
a. Fare riferimento alla Guida alla risoluzione dei problemi del Manuale d’uso per trovare il problema e
possibili soluzioni.
b. Se il problema persiste, contattare il rivenditore presso cui è stato eseguito l’acquisto di Eclean, il
Centro assistenza online oppure il Call Center AGAiT per altre istruzioni.
c. Il cliente deve preparare quanto segue prima di chiamare il Call Center AGAiT, il concessionario o
rivenditore AGAiT:
--Numero di modello, numero di serie e colore del prodotto Eclean acquistato.
-Indirizzo
completo ed informazioni di contatto del cliente.
--Fotocopia della ricevuta fiscale, scontrino, documento di vendita o simile. AGAiT informerà il cliente
riguardo a data, luogo e modo d’invio del prodotto Eclean guasto. Se la garanzia del prodotto Eclean
guasto è ancora valida, tutte le spese di spedizione sono a carico di AGAiT.
8.Se il cliente perde la scheda della garanzia, ricevuta fiscale, scontrino, documento di vendita o simile, AGAiT
calcolerà la validità della garanzia aggiungendo tre mesi alla data di produzione di Eclean.
In caso di danno provocato da una qualsiasi delle cause che seguono, il cliente deve pagare le spese di
spedizione, riparazione, manutenzione e lavoro del prodotto Eclean da riparare.
1. Qualsiasi prodotto la cui etichetta della garanzia o del codice a barre è stata distrutta, cancellata, resa
illeggibile o modificata.
2. Danni/guasti provocati da parti non prodotte dall’azienda.
3. Qualsiasi riparazione rea necessaria a causa di installazione ed uso impropri (fare riferimento al Manuale
d’uso per i requisiti della tensione elettrica).
4. Disastri naturali, atti divini, danni deliberati o uso improprio come la mancata osservanza delle istruzioni
fornite nel Manuale d’uso, danni non correlabili a difetti di produzione.
5. Qualsiasi danno provocato da smontaggio non autorizzato, modifica delle specifiche o installazione di
qualsiasi parte non prodotta dall’azienda.
Contattare il rivenditore AGAiT o il negozio presso cui è stato eseguito l’acquisto in caso di problemi relativi
all’uso di Eclean.
52
Customer Copy
Product information:_ ________________ Salesperson:_ _________________
Name:_ ____________________________
Model Number:_ ____________________
Serial Number (P/N):__________________
Date of purchase:_______ /_ _____ /______
Dealer name/store stamp
Stick bar code here
* To protect your rights and benefits, please pay attention to the following items:
1. Please keep the purchase voucher, such as the invoice, receipt etc.
Without the purchase voucher, AGAiT will calculate the warranty period
by adding three months to the manufacturing date of Eclean.
2. Please fill out the warranty card with true information. The warranty
card will be validated only with the dealer’s stamp.
3. Please prepare the following information when requesting service:
-- The model number, serial number, dealer and color of Eclean.
-- Your complete address and contact information.
53
Exemplar für den Kunden
Produktangaben:____________________ Händler:______________________
Name:_ ____________________________
Modellnummer:_____________________
Seriennummer:______________________
Kaufdatum:____________ /_ _____ /______
Händlername/Stempel
Strichcode hier aufkleben
* Bitte beachten Sie zum Schutz Ihrer Rechte und Vorteile folgende Punkte:
1. Bitte bewahren Sie den Kaufbeleg (Rechnung, Kassenzettel etc.) auf.
Ohne Kaufbeleg berechnet AGAiT die Garantiedauer, indem dem
Herstellungsdatum des Eclean drei Monate hinzuaddiert werden.
2. Bitte füllen Sie die Garantiekarte wahrheitsgemäß aus. Die Garantiekarte
ist nur mit Stempel des Händlers gültig.
3. Bitte halten Sie bei Reparaturanfragen folgende Informationen bereit:
-- Die Modellnummer, Seriennummer, Händler und Farbe des Eclean.
-- Ihre vollständige Anschrift und weitere Kontaktinformationen.
54
Copie client
Informations produit :_ _______________ Personne de vente :_ ___________
Nom :______________________________
Numéro de modèle :_________________
Numéro de série (P/N) :_ ______________
Date d’achat :_ _________ /_ _____ /______
Nom du détaillant/cachet du
magasin
Coller ici le code barre
* Pour garantir votre protection et valider la garantie, veuillez faire attention à ce
qui suit :
1. Veuillez garder la preuve d’achat, comme le ticket ou l’avis de vente, etc.
Sans cette preuve d’achat, AGAiT calculera la validité de la garantie en
ajoutant 3 mois à partir de la date de fabrication de votre Eclean.
2. Veuillez remplir la carte de garantie avec des informations correctes. La
carte de garantie sera seulement valable si elle possède le tampon du
revendeur.
3. Veuillez fournir les renseignements suivants lorsque vous demandez un
service :
-- Le numéro du modèle, le numéro de série, le revendeur et la couleur
du Eclean.
-- Votre adresse complète et vos informations de contact.
55
Copia per il cliente
Informazioni del prodotto:_____________ Venditore:_ ___________________
Nome:_____________________________
Numero di modello:__________________
Numero di serie (P/N):_ _______________
Data d’acquisto:_ _______ /_ _____ /______
Nome del rivenditore/Timbro del
negozio
Attaccare qui il codice a barre
* Prestare attenzione a quanto segue per garantire i propri diritti e benefici:
1. Conservare la ricevuta fiscale, scontrino, documento di vendita,
eccetera. Senza prova d’acquisto, la AGAiT calcolerà il periodo di
garanzia aggiungendo tre mesi alla data di produzione di Eclean.
2. Completare la scheda della garanzia con informazioni veritiere. La
scheda della garanzia è valida solo se arreca il timbro del negoziante.
3. Preparare le informazioni che seguono quando si richiede l’assistenza:
-- Numero di modello, numero di serie e colore del prodotto Eclean.
-- Indirizzo completo ed informazioni di contatto.
56
Easy-Clean Life Style
AGAiT Technology Corporation
We ate r n Eu r o p e ve r si o n 1.1
15G 0 6 E0 0 8 0AB1