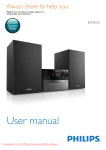
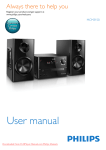
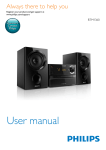
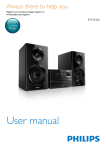
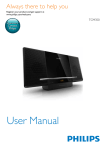
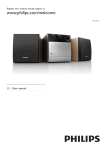
Download Philips BTM2335
Transcript
Always there to help you
Register your product and get support at
www.philips.com/welcome
Question?
Contact
Philips
User manual
BTM2355
Contents
1Important
2
Safety2
2Notice
3
8 Product information
14
14
15
15
9Troubleshooting
16
Specifications
USB playability information
Supported MP3 disc formats
3 Your micro system
4
Introduction4
What's in the box
4
Overview of the main unit
5
Overview of the remote control
6
4 Get started
Connect speakers
Connect power
Demonstrate the features
Prepare the remote control
Set clock
Turn on
7
7
7
7
7
8
8
5Play
9
9
9
10
10
10
10
6 Listen to the radio
12
12
12
12
12
7 Other features
13
13
13
13
Play from disc
Play from USB
Control play
Skip to a track
Program tracks
Play from Bluetooth-enabled devices
Tune to a radio station
Program radio stations automatically
Program radio stations manually
Select a preset radio station
Set the alarm timer
Set the sleep timer
Listen to an external device
EN
1
1Important
Safety
Safety
Warning
•• Never remove the casing of this apparatus.
•• Never lubricate any part of this apparatus.
•• Never look into the laser beam inside this apparatus.
•• Never place this apparatus on other electrical
equipment.
•• Keep this apparatus away from direct sunlight, naked
flames or heat.
•• Ensure that you always have easy access to the power
cord, plug or adaptor to disconnect the apparatus from
the power.
•
•
•
•
•
2
The device shall not exposed to dripping
or splashing.
Do no place any source of danger on the
device (e.g. liquid filled objects. lit candles).
Where the MAINS plug or an appliance
coupler is used as the disconnect device,
the disconnect device shall remain readily
operable.
Make sure that there is enough free space
around the product for ventilation.
Only use attachments/accessories specified
by the manufacturer.
EN
2Notice
Any changes or modifications made to this
device that are not expressly approved by
WOOX Innovations may void the user’s
authority to operate the equipment.
Hereby, WOOX Innovations declares that this
product is in compliance with the essential
requirements and other relevant provisions of
Directive 1999/5/EC.You can find the Declaration
of Conformity on www.philips.com/support.
Your product is designed and manufactured
with high quality materials and components,
which can be recycled and reused.
When this crossed-out wheeled bin symbol is
attached to a product it means that the product is
covered by the European Directive 2002/96/EC.
Please inform yourself about the local separate
collection system for electrical and electronic
products.
Please act according to your local rules and
do not dispose of your old products with your
normal household waste. Correct disposal of
your old product helps to prevent potential
negative consequences for the environment and
human health.
waste.Please inform yourself about the local
rules on separate collection of batteries
because correct disposal helps to prevent
negative consequences for the environmental
and human health.
Environmental information
All unnecessary packaging has been omitted.
We have tried to make the packaging easy to
separate into three materials: cardboard (box),
polystyrene foam (buffer) and polyethylene
(bags, protective foam sheet.)
Your system consists of materials which can
be recycled and reused if disassembled by
a specialized company. Please observe the
local regulations regarding the disposal of
packaging materials, exhausted batteries and old
equipment.
This item incorporates copy protection
technology that is protected by U.S. patents
and other intellectual property rights of
Rovi Corporation. Reverse engineering and
disassembly are prohibited.
The Bluetooth® word mark and logos are
registered trademarks owned by Bluetooth
SIG, Inc. and any use of such marks by WOOX
Innovations is under license.
This apparatus includes this label:
Note
Your product contains batteries covered by
the European Directive 2006/66/EC, which
cannot be disposed with normal household
•• The type plate is located on the back of the device.
EN
3
3 Your micro
system
Congratulations on your purchase, and
welcome to Philips! To fully benefit from the
support that Philips offers, register your product
at www.philips.com/welcome.
What's in the box
Check and identify the contents of your
package:
• Main unit
• 2 x speakers
• Remote control (with one AAA battery)
• Short user manual
• Safety and notice
Introduction
With this unit, you can:
• enjoy audio from discs, Bluetooth-enabled
devices, USB storage devices, or other
external devices;
• listen to FM radio stations.
You can enrich sound output with below
sound effect:
• Digital Sound Control (DSC)
• DSC 1: Powerful
• DSC 2: Clear
• DSC 3: Balanced
• DSC 4: Warm
• DSC 5: Bright
The unit supports these media formats:
4
EN
FM
CD
AUDIO IN
PRESET/ALBUM
Always there to help you
Register your product and get support at
www.philips.com/welcome
REPEAT
VOL
Question?
Contact
Philips
SHUFFLE
MUTE
DISPLAY
SOUND
CLOCK
PROG
TIMER
SLEEP
Short User Manual
Overview of the main unit
h
a
b
c
g
d
M I C RO M U S I C S YS T E M B T M 2 3 3 5
f
e
a
• Turn on the product.
• Switch to standby mode or Eco power
standby mode.
b Display panel
• Show current status.
c
• Connect USB storage devices.
• Charge your device.
d AUDIO IN
• Connect external audio devices.
h SOURCE
• Select a source: DISC, USB, TUNER,
AUDIO IN, BT (Bluetooth).
• Start, pause, or resume play.
• Stop play or erase a program.
/
• Skip to previous/next track.
• Search within a track/disc/USB.
• Tune to a radio station.
• Adjust time.
e Disc compartment
f
• Open or close the disc compartment.
g VOLUME
• Adjust volume.
EN
5
f VOL +/• Adjust volume.
Overview of the remote
control
g MUTE
• Mute or restore volume.
a
b
c
FM
CD
r
h SOUND
• Enrich sound effect with Digital Sound
Control (DSC).
q
i CLOCK
• Set the clock.
• View clock information.
AUDIO IN
PRESET/ALBUM
d
p
e
REPEAT
f
VOL
g
SHUFFLE
MUTE
DISPLAY
SOUND
CLOCK
PROG
TIMER
h
i
SLEEP
o
n
m
l
k
j
j SLEEP/TIMER
• Set sleep timer.
• Set alarm timer.
k PROG
• Program tracks.
• Program radio stations.
• Auto store FM radio stations.
l DISPLAY
• Adjust display brightness.
m SHUFFLE
• Play tracks randomly.
n
a
• Turn the unit on or off.
• switch to standby mode or Eco power
standby mode.
b CD
• Select CD source.
c FM/
• Select FM or Bluetooth source.
d PRESET/ALBUM /
• Select a preset radio station.
• Skip to previous/next album.
e
6
•
•
•
•
EN
/
Skip to the previous/next track.
Search within a track/disc/USB.
Tune to a radio station.
Adjust time.
• Stop play or erase a program.
o REPEAT
• Play a track or all tracks repeatedly.
p
• Start, pause, or resume play.
q USB/AUDIO IN
• Select USB or AUDIO IN source.
r
• Press to open or close the disc
compartment.
4 Get started
Caution
•• Use of controls or adjustments or performance of
procedures other than herein may result in hazardous
radiation exposure or other unsafe operation.
Always follow the instructions in this chapter in
sequence.
If you contact Philips, you will be asked for the
model and serial number of this apparatus. The
model number and serial number are on the
back of the apparatus. Write the numbers here:
Model No. __________________________
Serial No. ___________________________
Connect power
Caution
•• Risk of product damage! Ensure that the power supply
voltage corresponds to the voltage printed on the back
or the underside of the unit.
•• Risk of electric shock! When you unplug the AC power
cord, always pull the plug from the socket. Never pull
the cord.
•• Before you connect the AC power cord, ensure that
you have completed all other connections.
Connect speakers
Note
•• For optimal sound, use the supplied speakers only.
•• Connect only speakers with impedance that is the
same or higher than the supplied speakers. Refer to the
Specifications section of this manual.
Demonstrate the features
In standby mode, press to demonstrate
features of this device.
»» The features are displayed one by one
across the display panel.
• To turn off the demonstration, press
again.
Prepare the remote control
Caution
•• Risk of explosion! Keep batteries away from heat,
sunshine or fire. Never discard batteries in fire.
•• Risk of decreased battery life! Never mix different
brands or types of batteries.
•• Risk of product damage! When the remote control is
not used for long periods, remove the batteries.
EN
7
To insert the remote control battery:
1
2
3
Open the battery compartment.
Insert the supplied AAA battery with
correct polarity (+/-) as indicated.
Close the battery compartment.
Turn on
Press .
»» The unit switches to the last selected
source.
Switch to standby mode
Set clock
1
2
3
4
In standby mode, press and hold CLOCK
on the remote control for more than two
seconds.
»» [24H] or [12H] hour format is
displayed.
Press
/
to select [24H] or [12H]
hour format.
press CLOCK to confirm.
»» The hour digits are displayed and begin
to blink.
Repeat steps 2-3 to set hour and minute.
Note
•• If no button is pressed in 90 seconds, the system exits
clock setting mode automatically.
Tip
•• You can view clock information in power-on mode by
pressing CLOCK.
8
EN
Press again to switch the unit to standby
mode.
»» The clock (if set) is displayed on the
panel.
Switch to ECO standby mode:
Press and hold for more than two seconds.
»» The display panel is dimmed.
Note
•• The unit switches to Eco Power Standby mode after 15
minutes in standby mode.
Switch between standby mode and ECO
standby mode:
Press and hold for more than two seconds.
2
5Play
Insert a USB device into the
socket.
»» Play starts automatically. If not, press
.
Play from disc
1
2
3
4
Press CD to select the CD source.
Press
to open the disc compartment.
M I C RO M U S I C S Y S T E M B T M 2 3 3 5
Insert a disc with printed side facing
upward.
Press to close the disc compartment.
»» Play starts automatically. If not, press
.
CD
FM
AUDIO IN
PRESET/ALBUM
USB
REPEAT
VOL
SHUFFLE
MUTE
DISPLAY
SOUND
CLOCK
PROG
TIMER
SLEEP
Charge your device
You can charge your device through the USB
socket on this product with a USB cable (not
supplied).
M I C RO M U S I C S YS T E M B T M 2 3 3 5
CD
FM
CD
AUDIO IN
Note
•• The maximum current for USB charging is 1 A.
•• Not all devices for USB charging are guaranteed.
PRESET/ALBUM
REPEAT
VOL
SHUFFLE
MUTE
DISPLAY
SOUND
CLOCK
PROG
TIMER
SLEEP
Play from USB
M I C RO M U S I C S YS T E M B T M 2 3 3 5
Note
•• Make sure that the USB device contains playable audio
content.
1
Press USB/AUDIO IN repeatedly to select
the USB source.
EN
9
Control play
/
/
REPEAT
SHUFFLE
VOL +/MUTE
SOUND
DISPLAY
Select a folder.
Select an audio file.
Pause or resume play.
Stop play.
Play a track or all tracks repeatedly.
Play tracks randomly.
Increase or decrease the volume.
Mute or restore sound.
Enrich sound effect with DSC:
balanced, clear, powerful, warm,
and bright.
Adjust display brightness.
Play from Bluetooth-enabled
devices
Note
•• The effective operation range between the unit and
your Bluetooth enabled device is approximately 10
meters (30 feet).
•• Any obstacle between the system and the device can
reduce the operational range.
•• Compatibility with all Bluetooth devices is not
guaranteed.
Skip to a track
M I C RO M U S I C S Y S T E M B T M 2 3 3 5
For CD:
Press
/
to select another track.
For MP3 disc and USB:
1
2
Press
Press
/
to select an album or a folder.
/
to select a track or a file.
FM
CD
AUDIO IN
PRESET/ALBUM
Program tracks
You can program a maximum of 20 tracks.
1
2
3
4
5
PIN
0000
Press PROG to activate the program
mode.
For MP3 tracks, press
album.
/
to select an
1
Press
/
to select a track, and then
press PROG to confirm.
Repeat steps 2-3 to program more tracks.
Press
to play the programmed tracks.
»» During play, [PROG] (program) is
displayed.
• To erase the program, in the stop
position, press .
10
BTM2335
EN
2
Press FM/ repeatedly to select the
Bluetooth source.
»» [BT] (Bluetooth) is displayed.
»» The Bluetooth indicator flashes blue.
On your device that supports Advanced
Audio Distribution Profile (A2DP), enable
Bluetooth and search for Bluetooth devices
that can be paired (refer to the user
manual of the device).
3
4
Select 'Philips BTM2335' on your
Bluetooth enabled device and if necessary
input '0000' as the pairing password.
»» After successful pairing and connection,
the Bluetooth indicator turns solid
blue, and the unit beeps.
Play audio on the connected device.
»» Audio streams from your Bluetooth
enabled device to this unit.
Tip
•• The unit can memorize up to 4 previously connected
Bluetooth devices.
To disconnect the Bluetooth-enabled device:
• Deactivate Bluetooth on your device; or
• Move the device beyond the
communication range; or
• Press and hold
for 3 seconds.
»» The current Bluetooth connection is
disconnected.
To clear Bluetooth pairing history:
• Press and hold for 10 seconds.
»» The current Bluetooth is cleared.
EN
11
6 Listen to the
radio
Tune to a radio station
Tip
Program radio stations
manually
1
2
3
•• Position the antenna as far as possible from TV, VCR, or
other radiation source.
•• For optimal reception, fully extend and adjust the
position of the antenna.
1
2
3
Press FM/ repeatedly to select the FM
source.
Press and hold
/
for more than two
seconds.
»» The radio tunes to a station with
strong reception automatically.
Repeat step 2 to tune to more stations.
To tune to a weak station:
Press
/
repeatedly until you find optimal
reception.
Program radio stations
automatically
Note
•• You can program a maximum of 20 preset radio
stations (FM).
In tuner mode, press and hold PROG for
more than two seconds to activate automatic
programming.
»» All available stations are programmed
in the order of waveband reception
strength.
»» The first programmed radio station is
broadcast automatically.
12
EN
4
Tune to a radio station.
Press PROG, and then press
select a number from 1–20.
/
to
Press PROG to confirm.
»» The preset number and the frequency
of the preset station are displayed.
Repeat steps 2-3 to program more
stations.
Note
•• To overwrite a programmed station, store another
station in its place.
Select a preset radio station
In tuner mode, press
number.
/
to select a preset
7 Other features
Set the alarm timer
This unit can be used as an alarm clock. You can
select CD, FM, or USB as alarm source.
Note
•• Make sure that you have set the clock correctly.
1
2
3
4
In standby mode, press and hold SLEEP/
TIMER for more than two seconds.
»» The hour digits are displayed and begin
to blink.
Press
/
Set the sleep timer
To set the sleep timer, in turn on mode, press
SLEEP/TIMER repeatedly to select a set period
of time (in minutes).
»» When sleep timer is activated, is
displayed. Otherwise, disappears.
Listen to an external device
You can listen to an external device through this
unit with an MP3 link cable.
1
2
repeatedly to set hour.
Press SLEEP/TIMER to confirm.
»» The minute digits are displayed and
begin to blink.
3
Press USB/AUDIO IN repeatedly to select
AUDIO IN source.
Connect an MP3 link cable (not supplied)
between:
• AUDIO IN jack (3.5 mm) on the unit,
• and the headphone jack on an external
device.
Start to play the device (see the device
user manual).
Repeat steps 2-3 to set minute, select
a source (CD, FM, or USB), and adjust
volume.
Note
•• If no button is pressed in 90 seconds, the system exits
timer setting mode automatically.
M I C RO M U S I C S YS T E M B T M 2 3 3 5
AUDIO IN
To activate or deactivate the alarm timer:
Press SLEEP/TIMER repeatedly to activate or
deactivate the alarm.
»» If timer is activated, is displayed.
AUDIO IN
FM
CD
AUDIO IN
PRESET/ALBUM
REPEAT
VOL
Tip
SHUFFLE
MUTE
DISPLAY
SOUND
CLOCK
PROG
TIMER
SLEEP
•• If CD/USB source is selected, but no disc is placed or
no USB connected, the system switches to the tuner
source automatically.
EN
13
8Product
information
Note
•• Product information is subject to change without prior
notice.
Specifications
Tuner Tuning Range
Tuner Tuning grid
Tuner Sensitivity
- Mono, 26dB S/N Ratio
- Stereo, 46dB S/N Ratio
Search Selectivity
Total Harmonic Distortion
Signal to Noise Ratio
87.5-108 MHz
50 KHz
<22 dB u
<45 dB u
<30 dB u
<3%
>45 dBA
USB
USB Direct Version
USB 5 V Power
Amplifier
Maximum Output Power
Frequency Response
Signal to Noise Ratio
Total Harmonic Distortion
Aux Input
30 W
60 Hz - 16 kHZ;
+3 dB
≥70 dBA
<1%
800 mV RMS
Speakers
Speaker Impedance
Speaker Driver
Speaker Sensitivity
Tuner (FM)
4 ohm
Full range 4"
>83 dB/m/W
2.0 full speed
≤1 A
Disc
Laser Type
Disc Diameter
Support Disc
Audio DAC
Total Harmonic
Distortion
Frequency Response
S/N Ratio
Semiconductor
12 cm/8 cm
CD-DA, CD-R, CD-RW,
MP3-CD
24 Bits/44.1 kHz
<1% (1 kHz)
60 Hz - 16 kHZ; ±3 dB
>70 dBA
General information
Bluetooth
Bluetooth Version
Bluetooth Frequency
Band
Bluetooth Range
14
EN
V4.0
2.4 GHz ~ 2.48 GHz
ISM Band
10 m (free space)
AC power
Operation Power
Consumption
Eco Standby Power
Consumption
Dimensions
- Main Unit
(W x H x D)
- Speaker Box
(W x H x D)
Weight
- Main Unit
- Speaker Box
100-240 V~, 50/60 Hz
20 W
<0.5 W
180 x 121 x 247 mm
156 x 253.5 x 128 mm
1.6 kg
2 x 1.10 kg
USB playability information
Compatible USB devices:
• USB flash memory (USB2.0 or USB1.1)
• USB flash players (USB2.0 or USB1.1)
• memory cards (requires an additional card
reader to work with this unit)
Supported USB formats:
• USB or memory file format: FAT12, FAT16,
FAT32 (sector size: 512 bytes)
• MP3 bit rate (data rate): 32-320 Kbps and
variable bit rate
• Directory nesting up to a maximum of 8
levels
• Number of albums/ folders: maximum 99
• Number of tracks/titles: maximum 999
• File name in Unicode UTF8 (maximum
length: 32 bytes)
Unsupported USB formats:
• Empty albums: an empty album is an album
that does not contain MP3/WMA files, and
will not be shown in the display.
• Unsupported file formats are skipped. For
example, word documents (.doc) or MP3
files with extension .dlf are ignored and
not played.
• WMA, AAC, WAV, PCM audio files
• DRM protected WMA files (.wav, .m4a,
.m4p, .mp4, .aac)
• WMA files in Lossless format
Supported MP3 disc formats
•
•
•
•
•
ISO9660, Joliet
Maximum title number: 128 (depending on
file name length)
Maximum album number: 99
Supported sampling frequencies: 32 kHz,
44.1 kHz, 48 kHz
Supported Bit-rates: 32~256 (kbps),
variable bit rates
EN
15
9Troubleshooting
Warning
•• Never remove the casing of this device.
To keep the warranty valid, never try to repair
the system yourself.
If you encounter problems when using this
device, check the following points before
requesting service. If the problem remains
unsolved, go to the Philips Web page (www.
philips.com/support). When you contact Philips,
make sure that the device is nearby and the
model number and serial number are available.
No power
•• Make sure that the AC power cord of the
device is connected properly.
•• Make sure that there is power at the AC
outlet.
•• As a power-saving feature, the system
switches off automatically 15 minutes after
track play reaches the end and no control
is operated.
No sound or poor sound
•• Adjust the volume.
•• Check that the speakers are connected
correctly.
•• Check if the stripped speaker wires are
clamped.
No response from the unit
•• Disconnect and reconnect the AC power
plug, then turn on the unit again.
Remote control does not work
•• Before you press any function button, first
select the correct source with the remote
control instead of the main unit.
•• Reduce the distance between the remote
control and the unit.
•• Insert the battery with its polarities (+/–
signs) aligned as indicated.
•• Replace the battery.
•• Aim the remote control directly at the
sensor on the front of the unit.
16
EN
No disc detected
•• Insert a disc.
•• Make sure that the disc is inserted with
printed side facing upward.
•• Wait until the moisture condensation at
the lens has cleared.
•• Replace or clean the disc.
•• Use a finalized CD or correct format disc.
Cannot display some files in USB device
•• The number of folders or files in the USB
device has exceeded a certain limit. This
phenomenon is not a malfunction.
•• The formats of these files are not
supported.
USB device not supported
•• The USB device is incompatible with the
unit. Try another one.
Poor radio reception
•• Increase the distance between the unit and
your TV or VCR.
•• Fully extend the FM antenna.
Music playback is unavailable on this unit even
after successful Bluetooth connection.
•• The device cannot be used to play music
through this unit wirelessly.
The audio quality is poor after connection
with a Bluetooth-enabled device.
•• The Bluetooth reception is poor. Move the
device closer to this unit or remove any
obstacle between them.
Bluetooth cannot be connected with this unit.
•• The device does not support the profiles
required for this unit.
•• The Bluetooth function of the device is
not enabled. Refer to the user manual of
the device to find out how to enable the
function.
•• This unit is not in pairing mode.
•• This unit is already connected with another
Bluetooth-enabled device. Disconnect that
device and then try again.
The paired mobile device connects and
disconnects constantly.
•• The Bluetooth reception is poor. Move the
device closer to this unit or remove any
obstacle between them.
••
Some mobile phones may connect and
disconnect constantly when you make
or end calls. This does not indicate any
malfunction of this unit.
•• For some devices, the Bluetooth
connection may be deactivated
automatically as a power-saving feature.
This does not indicate any malfunction of
this unit.
Timer does not work
•• Set the clock correctly.
•• Switch on the timer.
Clock/timer setting erased
•• Power has been interrupted or the power
cord has been disconnected.
•• Reset the clock/timer.
EN
17
2014 © WOOX Innovations Limited. All rights reserved.
Philips and the Philips’ Shield Emblem are registered trademarks of Koninklijke Philips N.V.
and are used by WOOX Innovations Limited under license from Koninklijke Philips N.V.
BTM2335_12_UM_V1.0


