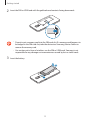
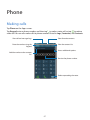
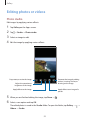
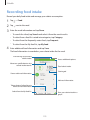
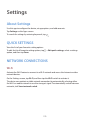
1
SM-G800F
User Manual
English (EU). 07/2014. Rev.1.1
www.samsung.com
Table of Contents
Read me first
Network connectivity
43 Mobile data
43Wi-Fi
45 Tethering and Mobile hotspot
47Internet
Getting started
8 Package contents
9 Device layout
11 Using the SIM or USIM card and
battery
17 Using a memory card
19 Turning the device on and off
20 Locking and unlocking the screen
Motions & usability features
49 Motions and gestures
52 Air view
52Toolbox
53 Increasing touch screen sensitivity
Basics
21
24
29
32
33
35
37
38
40
42
Personalising
Using the touch screen
Home screen layout
Notifications and quick setting panels
Opening apps
Installing or uninstalling apps
Entering text
Screen capture
My Files
Power saving feature
Viewing help information
54
57
58
59
62
64
64
Managing the Home and Apps screens
Setting wallpaper and ringtones
Changing the screen lock method
Finger Scanner
Private mode
Easy mode
Transferring data from your previous
device
66 Setting up accounts
2
Table of Contents
Phone
S Health
67 Making calls
70 Receiving calls
71 Options during calls
106
107
108
110
112
119
121
124
124
Contacts
73 Adding contacts
74 Managing contacts
Messages & email
About S Health
Setting up a user profile
S Health main screen
Walking mate
Exercise mate
Recording food intake
Managing weight
Installing additional S Health apps
S Health settings
Security features
77Messages
80Email
126 Emergency mode
127 Help message
128 Severe weather notifications (Geo
News)
Camera
83 Basic shooting
86 Shooting modes
91 Camera settings
Useful apps and features
130 Kids Mode
134 S Finder
135 S Planner
138 S Voice
140Clock
142Calculator
142Memo
144 Voice Recorder
146Dropbox
147Flipboard
148 Smart Remote
150Torch
151Magnifier
151 Google apps
Gallery
93 Viewing photos or videos
95 Editing photos or videos
99 Gallery settings
Multimedia
100Music
103Video
3
Table of Contents
Connecting with other
devices
Accessibility
198 About Accessibility
199 Using the Home button to open
accessibility menus
199 Voice feedback (TalkBack)
210 Changing the font size
210 Magnifying the screen
210 Setting notification reminders
211 Reversing the display colours
211 Colour adjustment
212 Setting flash notification
212 Turning off all sounds
212 Caption settings
213 Adjusting the sound balance
213 Mono audio
214 Assistive menu
216 Setting tap and hold delay options
216 Interaction control
217 Answering or ending calls
217 Using single tap mode
217 Managing accessibility settings
219 Using other useful features
154Bluetooth
156 Wi-Fi Direct
158NFC
160 S Beam
161 Quick connect
163 Screen Mirroring
165 Mobile printing
Device & data manager
166 Upgrading the device
167 Transferring files between the device
and a computer
168 Backing up and restoring data
169 Performing a data reset
Settings
170 About Settings
170 QUICK SETTINGS
170 NETWORK CONNECTIONS
174 CONNECT AND SHARE
176 SOUND AND DISPLAY
180PERSONALISATION
181MOTION
182 USER AND BACKUP
183SYSTEM
190APPLICATIONS
Troubleshooting
4
Read me first
Please read this manual before using the device to ensure safe and proper use.
• Descriptions are based on the device’s default settings.
• Some content may differ from your device depending on the region, service provider, or
device’s software.
• Content (high quality content) that requires high CPU and RAM usage will affect the
overall performance of the device. Apps related to the content may not work properly
depending on the device’s specifications and the environment that it is used in.
• Samsung is not liable for performance issues caused by apps supplied by providers other
than Samsung.
• Samsung is not liable for performance issues or incompatibilities caused by edited
registry settings or modified operating system software. Attempting to customise the
operating system may cause the device or apps to work improperly.
• Software, sound sources, wallpapers, images, and other media provided with this device
are licensed for limited use. Extracting and using these materials for commercial or other
purposes is an infringement of copyright laws. Users are entirely responsible for illegal
use of media.
• You may incur additional charges for data services, such as messaging, uploading and
downloading, auto-syncing, or using location services depending on your data plan. For
large data transfers, it is recommended to use the Wi-Fi feature.
• Default apps that come with the device are subject to updates and may no longer be
supported without prior notice. If you have questions about an app provided with
the device, contact a Samsung Service Centre. For user-installed apps, contact service
providers.
• Modifying the device’s operating system or installing softwares from unofficial sources
may result in device malfunctions and data corruption or loss. These actions are violations
of your Samsung licence agreement and will void your warranty.
5
Read me first
Maintaining water and dust resistance
The device may be damaged if water or dust enters the device. Follow these tips carefully to
prevent damage to the device and to maintain the water- and dust-resistant performance of
the device.
• Do not immerse the device in water deeper than 1 m and keep it submerged for more
than 30 minutes.
• Ensure that the back cover is tightly closed. Otherwise, it may not provide protection
from water and dust.
• Do not immerse the device in water for extended periods.
• Do not expose the device to water moving with force, such as water running from a tap,
ocean waves, or waterfalls.
• Do not open the device’s covers when the device is in water or in very humid places, such
as swimming pools or bathrooms.
• Do not open the back cover using wet hands or when the device is wet.
• The rubber seal fitted to the back cover is an important component of the device. Take
care when opening and closing the back cover to avoid damaging the rubber seal. Also,
ensure that the rubber seal is free from debris, such as sand or dust to prevent damage to
the device.
• Do not detach or remove the back cover from the device.
• If the device is exposed to freshwater, dry it thoroughly with a clean, soft cloth. If the
device is exposed to any liquid other than freshwater, rinse the device with freshwater
immediately and dry it thoroughly with a clean, soft cloth. Failure to rinse the device
in freshwater and dry it as instructed may cause the device to suffer from operability
or cosmetic issues.
• The back cover may be loosened if the device is dropped or receives an impact. Ensure
that all the covers are properly aligned and tightly closed.
6
Read me first
• If the device has been immersed in water or the microphone or the speaker is wet,
sound may not be heard clearly during a call. Ensure that the microphone or the speaker
is clean and dry by wiping it with a dry cloth.
• The water-resistant design of the device causes it to vibrate slightly in certain conditions.
Vibrations in these conditions, such as when the volume level is high, are normal and do
not affect the device’s performance.
• The touch screen and other features may not work properly if the device is used in water
or in other liquids.
• Your device has been tested in a controlled environment and certified to be waterand dust-resistant in specific situations (meets requirements of classification IP67 as
described by the international standard IEC 60529 - Degrees of Protection provided
by Enclosures [IP Code]; test conditions: 15 - 35 °C, 86 - 106 kPa, 1 metre, 30 minutes).
Despite this classification, your device is not impervious to water damage in any
situation.
Instructional icons
Warning: situations that could cause injury to yourself or others
Caution: situations that could cause damage to your device or other equipment
Note: notes, usage tips, or additional information
7
Getting started
Package contents
Check the product box for the following items:
• Device
• Battery
• Quick start guide
• The items supplied with the device and any available accessories may vary
depending on the region or service provider.
• The supplied items are designed only for this device and may not be compatible
with other devices.
• Appearances and specifications are subject to change without prior notice.
• You can purchase additional accessories from your local Samsung retailer. Make
sure they are compatible with the device before purchase.
• Use only Samsung-approved accessories. Some accessories, such as docking
devices, may not have the same water- and dust-resistance certification.
• Availability of all accessories is subject to change depending entirely on
manufacturing companies. For more information about available accessories, refer
to the Samsung website.
8
Getting started
Device layout
Proximity/Light sensor
Infrared LED
Notification light
Front camera
Earpiece
Power button
Touch screen
Home button
Recent apps button
Back button
Microphone
Multipurpose jack
Headset jack
Microphone
GPS antenna
Rear camera
Volume button
Flash
Back cover
NFC antenna (on the
battery)
Speaker
Main antenna
9
Getting started
• Do not cover the antenna area with your hands or other objects. This may cause
connectivity problems or drain the battery.
• Using a Samsung-approved screen protector is recommended. Unapproved screen
protectors may cause the sensors to malfunction.
Buttons
Button
Function
Power
• Press and hold to turn the device on or off.
• Press to turn on or lock the screen.
• Tap to open the list of recent apps.
Recent apps
Home
• Tap and hold to access additional options for the current
screen.
• Press to turn on the screen while the screen is locked.
• Press to return to the Home screen.
• Press twice to launch S Voice.
• Press and hold to launch Google.
Back
• Tap to return to the previous screen.
Volume
• Press to adjust the device volume.
10
Getting started
Using the SIM or USIM card and battery
Installing the SIM or USIM card and battery
Insert the SIM or USIM card provided by the mobile telephone service provider, and the
included battery.
• Only microSIM cards work with the device.
• Some LTE services may not be available depending on the service provider. For
more information about service availability, contact your service provider.
1 Remove the back cover.
Be careful not to damage your fingernails when you remove the back cover.
Do not bend or twist the back cover excessively. Doing so may damage the cover.
11
Getting started
2 Insert the SIM or USIM card with the gold-coloured contacts facing downwards.
• Do not insert a memory card into the SIM card slot. If a memory card happens to
be lodged in the SIM card slot, take the device to a Samsung Service Centre to
remove the memory card.
• Use caution not to lose or let others use the SIM or USIM card. Samsung is not
responsible for any damages or inconveniences caused by lost or stolen cards.
3 Insert the battery.
2
1
12
Getting started
4 Replace the back cover.
2
1
Press
Align
• Ensure that the back cover is closed tightly.
• Use only Samsung-approved back covers and accessories with the device.
Removing the SIM or USIM card and battery
1 Remove the back cover.
2 Pull out the battery.
13
Getting started
3 Press the SIM or USIM card with your finger, and then pull it out.
Charging the battery
Use the charger to charge the battery before using it for the first time. A computer can be also
used to charge the battery by connecting them via the USB cable.
Use only Samsung-approved chargers, batteries, and cables. Unapproved chargers or
cables can cause the battery to explode or damage the device.
• When the battery power is low, the battery icon appears empty.
• If the battery is completely discharged, the device cannot be turned on
immediately when the charger is connected. Allow a depleted battery to charge for
a few minutes before turning on the device.
• If you use multiple apps at once, network apps, or apps that need a connection
to another device, the battery will drain quickly. To avoid disconnecting from the
network or losing power during a data transfer, always use these apps after fully
charging the battery.
1 Connect the USB cable to the USB power adaptor.
14
Getting started
2 Plug the USB cable into the multipurpose jack.
• Connecting the charger improperly may cause serious damage to the device. Any
damage caused by misuse is not covered by the warranty.
• Ensure that the the back cover is closed tightly to prevent water and dust from
entering the device. Open or loose back cover may allow water and dust to enter
the device and cause damage.
3 Plug the USB power adaptor into an electric socket.
• The device can be used while it is charging, but it may take longer to fully charge
the battery.
• If the device receives an unstable power supply while charging, the touch screen
may not function. If this happens, unplug the charger from the device.
• While charging, the device may heat up. This is normal and should not affect the
device’s lifespan or performance. If the battery gets hotter than usual, the charger
may stop charging.
• If the device is not charging properly, take the device and the charger to a
Samsung Service Centre.
15
Getting started
4 After fully charging, disconnect the device from the charger. First unplug the charger
from the device, and then unplug it from the electric socket.
Do not remove the battery before removing the charger. This may damage the
device.
To save energy, unplug the charger when not in use. The charger does not have a
power switch, so you must unplug the charger from the electric socket when not in
use to avoid wasting power. The charger should remain close to the electric socket
and easily accessible while charging.
Reducing the battery consumption
Your device provides options that help you save the battery power. By customising these
options and deactivating features in the background, you can use the device longer between
charges:
• When you are not using the device, switch to sleep mode by pressing the Power button.
• Close unnecessary apps using the task manager.
• Deactivate the Bluetooth feature.
• Deactivate the Wi-Fi feature.
• Deactivate auto-syncing of apps.
• Decrease the backlight time.
• Decrease the screen brightness.
16
Getting started
Using a memory card
Installing a memory card
Your device accepts memory cards with maximum capacities of 64 GB. Depending on the
memory card manufacturer and type, some memory cards may not be compatible with your
device.
• Some memory cards may not be fully compatible with the device. Using an
incompatible card may damage the device or the memory card, or corrupt the data
stored in it.
• Use caution to insert the memory card right-side up.
• The device supports the FAT and the exFAT file systems for memory cards. When
inserting a card formatted in a different file system, the device asks to reformat the
memory card.
• Frequent writing and erasing of data shortens the lifespan of memory cards.
• When inserting a memory card into the device, the memory card’s file directory
appears in the My Files → SD card folder.
1 Remove the back cover.
2 Insert a memory card with the gold-coloured contacts facing downwards.
3 Replace the back cover.
17
Getting started
Removing the memory card
Before removing the memory card, first unmount it for safe removal. On the Home screen, tap
Apps → Settings → Storage → Unmount SD card.
1 Remove the back cover.
2 Pull out the memory card.
3 Replace the back cover.
Do not remove the memory card while the device is transferring or accessing
information. Doing so can cause data to be lost or corrupted or can damage the
memory card or device. Samsung is not responsible for losses that result from the
misuse of damaged memory cards, including the loss of data.
Formatting the memory card
A memory card formatted on a computer may not be compatible with the device. Format the
memory card on the device.
On the Home screen, tap Apps → Settings → Storage → Format SD card → Format SD
card → Erase everything.
Before formatting the memory card, remember to make backup copies of all
important data stored in the device. The manufacturer’s warranty does not cover loss
of data resulting from user actions.
18
Getting started
Turning the device on and off
Press and hold the Power button for a few seconds to turn on the device.
When you turn on your device for the first time or after performing a data reset, follow the onscreen instructions to set up your device.
To turn off the device, press and hold the Power button, and then tap Power off.
Follow all posted warnings and directions from authorised personnel in areas where
the use of wireless devices is restricted, such as aeroplanes and hospitals.
19
Getting started
Locking and unlocking the screen
Pressing the Power button turns off the screen and locks it. Also, the screen turns off and
automatically locks if the device is not used for a specified period.
To unlock the screen, press the Power button or the Home button and flick your finger in any
direction within the unlock screen area.
You can change the unlock code to unlock the screen. Refer to Changing the screen lock
method for more information.
20
Basics
Using the touch screen
• Do not allow the touch screen to come into contact with other electrical devices.
Electrostatic discharges can cause the touch screen to malfunction.
• To avoid damaging the touch screen, do not tap it with anything sharp or apply
excessive pressure to it with your fingertips.
• The device may not recognise touch inputs close to the edges of the screen, which
are outside of the touch input area.
• Leaving the touch screen idle for extended periods may result in afterimages
(screen burn-in) or ghosting. Turn off the touch screen when you do not use the
device.
• It is recommended to use fingers when you use the touch screen.
Tapping
To open an app, to select a menu item, to press an on-screen button, or to enter a character
using the keyboard on the screen, tap it with a finger.
21
Basics
Tapping and holding
Tap and hold an item or the screen for more than 2 seconds to access available options.
Dragging
To move an item, tap and hold it and drag it to the target position.
Double-tapping
Double-tap on a webpage or image to zoom in. Double-tap again to return.
22
Basics
Flicking
Flick left or right on the Home screen or the Apps screen to see another panel. Flick up or
down to scroll through a webpage or a list of items, such as contacts.
Spreading and pinching
Spread two fingers apart on a webpage, map, or image to zoom in a part. Pinch to zoom out.
23
Basics
Home screen layout
Home screen
The Home screen is the starting point for accessing all of the device’s features. It displays
widgets, shortcuts to apps, and more. Widgets are small apps that launch specific app
functions to provide information and convenient access on your Home screen.
To view other panels, scroll left or right, or tap one of the screen indicators at the bottom of
the screen. To customise the Home screen, refer to Managing the Home screen.
A widget
An app
A folder
Screen indicators
Favourite apps
24
Basics
Home screen options
On the Home screen, tap and hold an empty area, or pinch your fingers together to access
the available options.
25
Basics
Using My Magazine
My Magazine displays live social network updates and news that you are interested in.
To activate My Magazine, tap and hold an empty area on the Home screen. Then, tap Home
screen settings and tick My Magazine.
On the Home screen, tap
or scroll right to open My Magazine.
Access additional
options.
To select the content to be displayed, tap → Settings, and then select the categories that
interest you.
To update the content automatically when My Magazine opens, tap → Settings, and then
tick Auto refresh on opening.
26
Basics
Apps screen
The Apps screen displays icons for all apps, including newly installed apps.
On the Home screen, tap Apps to open the Apps screen. To view other panels, scroll left or
right, or select a screen indicator at the bottom of the screen. To customise the Apps screen,
refer to Managing the Apps screen.
Access additional
options.
An app
Screen indicators
27
Basics
Indicator icons
Indicator icons appear on the status bar at the top of the screen. The icons listed in the table
below are most common.
The status bar may not appear at the top of the screen in some apps. To display the
status bar, drag down from the top of the screen.
Icon
Meaning
No signal
Signal strength
Roaming (outside of normal service area)
GPRS network connected
EDGE network connected
UMTS network connected
HSDPA network connected
HSPA+ network connected
/
LTE network connected
Wi-Fi connected
Bluetooth feature activated
GPS activated
Call in progress
Missed call
Air browse feature activated
Smart stay or smart pause feature activated
Synced with the web
Connected to computer
No SIM or USIM card
28
Basics
Icon
Meaning
New text or multimedia message
Alarm activated
Mute mode activated
Vibration mode activated
Flight mode activated
Error occurred or caution required
Battery power level
Notifications and quick setting panels
Using the notifications panel
When you receive new notifications, such as messages or missed calls, indicator icons appear
on the status bar. To see more information about the icons, open the notifications panel and
view the details.
To open the notifications panel, drag the status bar downwards. To close the notifications
panel, drag the bar from the bottom of the screen upwards.
29
Basics
You can use the following functions on the notifications panel.
Launch Settings.
Activate or deactivate options.
Tap and hold a button to view
more detailed settings.
View all quick setting buttons.
Launch S Finder.
Launch Quick connect.
Clear all notifications.
Adjust the brightness.
Tap a notification and perform
various actions.
Adjusting the brightness
To set the device to adjust the brightness automatically, tick Auto. To manually adjust the
brightness, drag the brightness adjustment bar to the left or right.
When the battery power is low, the brightness adjustment bar disappears from the
notifications panel.
Rearranging quick setting buttons
To rearrange quick setting buttons on the notifications panel, tap
and then drag the item to another location.
30
, tap and hold an item,
Basics
Using the quick setting panel
You can activate or deactivate some features on the notifications panel. To activate or
deactivate more features, open the quick setting panel.
To open the quick setting panel, drag the status bar downwards with two fingers.
Alternatively, tap on the notifications panel. To close the quick setting panel, drag the bar
from the bottom of the screen upwards.
Tap the following options to activate or deactivate them. You can view more detailed settings
if you tap and hold a button.
• Wi-Fi: Refer to Wi-Fi for more information.
• Location: Refer to Location for more information.
• Sound / Vibrate / Mute: Select a sound mode.
• Screen rotation: Allow or prevent the interface from rotating when you rotate the device.
Some apps do not allow screen rotation.
• Bluetooth: Refer to Bluetooth for more information.
• Mobile data: Refer to Data usage or Mobile networks for more information.
• U. power saving: Refer to Ultra power saving mode for more information.
• Toolbox: Refer to Toolbox for more information.
31
Basics
• Mobile hotspot: Refer to Tethering and Mobile hotspot for more information.
• Screen Mirroring: Refer to Screen Mirroring for more information.
• NFC: Refer to NFC for more information.
• Sync: When you activated this feature, the device automatically sync apps, such as
calendar or email.
• Smart stay: When you activate this feature, the screen stays on as long as you look at it.
• Power saving: Refer to Power saving feature for more information.
• Blocking mode: Refer to Blocking mode for details.
• Flight mode: Refer to Flight mode for more information.
• Private mode: Refer to Private mode for more information.
• Touch sensitivity: Refer to Increasing touch screen sensitivity for more information.
Opening apps
On the Home screen or the Apps screen, select an app icon to open it.
To open the list of recently-used apps, tap
and select an app icon to open.
Closing an app
→ , and then tap End next to an app to close it. To close all running apps, tap End
Tap
→ .
all. Alternatively, tap
32
Basics
Installing or uninstalling apps
Samsung Apps (GALAXY Apps)
Use this app to purchase and download apps.
Tap Samsung Apps (GALAXY Apps) on the Apps screen.
This app may not be available depending on the region or service provider.
Installing apps
Browse apps by category or tap
to search for a keyword.
Select an app to view information about it. To download free apps, tap Free. To purchase and
download apps where charges apply, tap the button that shows the app’s price.
To change the auto update settings, tap
then select an option.
→ Settings → Auto update apps, and
Play Store
Use this app to purchase and download apps.
Tap Play Store on the Apps screen.
Installing apps
Browse apps by category or tap
to search for a keyword.
Select an app to view information about it. To download free apps, tap INSTALL. To purchase
and download apps where charges apply, tap the price and follow the on-screen instructions.
To change the auto update settings, tap → Settings → Auto-update apps, and
then select an option.
33
Basics
Downloading suggested apps
You can view and download dedicated Galaxy device apps.
On the Apps screen, tap → GALAXY Essentials. Alternatively, on the Home screen, tap the
GALAXY Essentials widget, and then tap next to an app.
To download all apps in the list, tap Download all.
Managing apps
Uninstalling or disabling apps
To disable default apps, on the Apps screen, tap → Uninstall/disable apps.
the apps that you can disable. Select an app and tap Disable.
appears on
To uninstall downloaded apps, on the Apps screen, tap → Downloaded apps → →
Uninstall. Alternatively, on the Apps screen, tap Settings → Application manager, select an
app, and then tap Uninstall.
Enabling apps
On the Apps screen, tap → Show disabled apps, select apps, and then tap Done.
Alternatively, on the Apps screen, tap Settings → Application manager, scroll to DISABLED,
select an app, and then tap Enable.
• Hiding apps: Hide apps in the Apps screen only. You can continue to use hidden
apps.
• Disabling apps: Disable selected default apps that cannot be uninstalled from the
device. You cannot use disabled apps.
• Uninstalling apps: Uninstall downloaded apps.
34
Basics
Entering text
Keyboard layout
A keyboard appears automatically when you enter text to send messages, create memos, and
more.
Text entry is not supported in some languages. To enter text, you must change the
input language to one of the supported languages.
Suggested keywords
Change the keyboard settings.
Delete a preceding character.
Enter uppercase. For all caps, tap
it twice.
Break to the next line.
Enter punctuation marks.
Enter a space.
Changing the input language
Tap → Select input languages, and then select the languages to use. If you select two or
more languages, you can switch between the input languages by sliding the space key left or
right.
35
Basics
Changing the keyboard layout
Tap , select a language under INPUT LANGUAGES, and then select a keyboard layout to
use.
On 3x4 keyboard, a key has three or four characters. To enter a character, tap the
corresponding key repeatedly until the desired character appears.
Using additional keyboard functions
Tap and hold to use the following functions. Other icons may appear instead of the
depending on the last function that was used.
icon
• : Enter text by voice.
Change the language.
Open the keyboard.
Start or pause entering text by
voice.
• : Add an item from the clipboard.
• : Change the keyboard settings.
• : Enter emoticons.
36
Basics
Copying and pasting
1 Tap and hold over text.
2 Drag or to select the desired text, or tap Select all to select all text.
3 Tap Copy or Cut. The selected text is copied to the clipboard.
4 Place the cursor where the text is to be inserted and tap → Paste. To paste text that
you have previously copied, tap
→ Clipboard and select the text.
Screen capture
Capture a screenshot while using the device.
Press and hold the Home button and the Power button simultaneously. The image is saved in
the Gallery → → Album → Screenshots folder. After capturing a screenshot, you can edit
the image and share it with others.
You can also capture screenshots using other methods. Refer to Palm swipe to capture for
more information.
It is not possible to capture a screenshot while using some apps.
37
Basics
My Files
About My Files
Use this app to access various files stored in the device or in other locations, such as cloud
storage services.
Tap My Files on the Apps screen.
Search for files or folders.
View storage information.
Access additional options.
View files by categories.
View the download history.
View files stored in the device.
View files saved in cloud storage
services.
Tap and use the following options:
• Add shortcut: Add a shortcut to a folder on the My Files main screen.
• Add FTP server: Add an FTP server shortcut on the My Files main screen.
• Scan for nearby devices: Search for devices that have media sharing activated.
• Settings: Change the file manager settings.
38
Basics
Viewing files
Tap My Files on the Apps screen.
Select a folder to open it. To go up a level in the directory, tap . To return to the My Files main
screen, tap .
Select a folder, tap , and then use the following options:
• Select: Select files or folders to apply options.
• Delete: Delete files or folders.
• Create folder: Create a folder.
• View as: Change the view mode.
• Sort by: Sort files or folders.
• Add shortcut: Add a shortcut to a folder on the My Files main screen or to the Home
screen.
• Settings: Change the file manager settings.
Tap and hold a file or folder, and then use the following options:
• : Share files with others.
• : Delete files or folders.
• → Move: Move files or folders to another folder.
• → Copy: Copy files or folders to another folder.
• → Rename: Rename a file or folder.
• → Add shortcut: Add a shortcut to a folder on the My Files main screen or to the Home
screen.
• → Zip: Compress files or folders to create a zip file.
• → Details: View file or folder details.
39
Basics
Power saving feature
Power saving mode
Save the battery power by limiting the device’s functions.
On the Apps screen, tap Settings → Power saving → Power saving mode, and then tap the
Power saving mode switch to activate it. Alternatively, open the quick setting panel and tap
Power saving to activate it.
Select from the following options:
• Restrict background data: Prevent apps that are running in the background from using a
mobile data connection.
• Restrict performance: Limit various options, such as turning off the backlight for the
Recent apps button and the Back button.
• Greyscale mode: Display colours on the screen as grey tones.
Ultra power saving mode
Use this mode to extend the device’s battery power. In ultra power saving mode, the device
performs the following:
• Displays colours on the screen as grey tones.
• Restricts the available apps to essential and selected apps only.
• Deactivates the mobile data connection when the screen turns off.
• Deactivates the Wi-Fi and Bluetooth features.
40
Basics
On the Apps screen, tap Settings → Power saving → Ultra power saving mode, and tap the
Ultra power saving mode switch to activate it. Alternatively, open the quick setting panel
and tap U. power saving to activate it.
Access additional options.
Send a message.
Make a call.
Browse the Internet.
Add more apps to use.
Remaining battery power
To add an app to the Home screen, tap
Estimated maximum standby
time
and select an app.
To remove an app from the Home screen, tap → Remove, select an app with
tap OK.
, and then
To change the settings for ultra power saving mode, such as network connectivity or sound,
tap → Settings.
To deactivate ultra power saving mode, tap → Disable ultra power saving mode.
The estimated maximum standby time shows the time remaining before the battery
power runs out if the device is not used. Standby time may vary depending on your
device settings and operating conditions.
41
Basics
Viewing help information
To view help information to learn how to use the device and apps, on the Apps screen, tap
Settings → Help.
To view help information for an app while you are using the app, tap → Help.
Some apps may not include help information.
42
Network connectivity
Mobile data
Connect the device to a mobile network to use the Internet or share media files with other
devices. Refer to Data usage for additional options.
On the Apps screen, tap Settings → Data usage, and then tick Mobile data. Alternatively,
open the quick setting panel and tap Mobile data to activate it.
Wi-Fi
Connect the device to a Wi-Fi network to use the Internet or share media files with other
devices. Refer to Wi-Fi for additional options.
• Your device uses a non-harmonised frequency and is intended for use in all
European countries. The WLAN can be operated in the EU without restriction
indoors, but cannot be operated outdoors.
• Turn off Wi-Fi to save the battery when not in use.
1 On the Apps screen, tap Settings → Wi-Fi, and then tap the Wi-Fi switch to activate it.
2 Select a network from the list of detected Wi-Fi networks. Networks that require a
password appear with a lock icon.
3 Tap Connect. After the device connects to the Wi-Fi network, the device will
automatically connect to it any time it is available.
43
Network connectivity
Adding Wi-Fi networks
If the desired network does not appear in the networks list, tap Add Wi-Fi network at the
bottom of the networks list. Enter the network name in Network SSID, select the security
type and enter the password if it is not an open network, and then tap Connect.
Activating Wi-Fi Passpoint
Wi-Fi Passpoint enables the device to search for and connect to a certified Wi-Fi network. You
can use the Passpoint feature to connect to public Wi-Fi networks that support automated
authentication. When you move to a new location, it will search for and connect to another
certified Wi-Fi network.
This feature may not be available depending on the region.
Tap → Advanced, and then tick Passpoint.
Forgetting Wi-Fi networks
Any network that has ever been used, including the current network, can be forgotten so the
device will not automatically connect to it. Select the network in the networks list and tap
Forget.
Using Smart network switch
Use this feature to maintain a stable network connection when you browse webpages,
download content, and more.
On the Apps screen, tap Settings → Wi-Fi, and then tick Smart network switch. The device
automatically switches from a Wi-Fi network to a mobile network when the current Wi-Fi
network is weak or unstable. When the Wi-Fi network signal becomes strong, the device
switches from the mobile network back to the Wi-Fi network.
44
Network connectivity
Tethering and Mobile hotspot
About tethering and mobile hotspots
Use this feature to share the device’s mobile data connection with computers and other
devices if an Internet connection is unavailable. Connections can be made via the Wi-Fi
feature, USB, or the Bluetooth feature.
You may incur additional charges when using this feature.
Using the mobile hotspot
Use your device as a mobile hotspot to share your device’s mobile data connection with other
devices.
1 On the Apps screen, tap Settings → Tethering and Mobile hotspot → Mobile hotspot.
2 Tap the Mobile hotspot switch to activate it.
• appears on the status bar. Other devices can find your device in the Wi-Fi networks
list.
• To set a password for the mobile hotspot, tap → Configure hotspot and select the
level of security. Then, enter a password and tap Save.
3 On the other device’s screen, search for and select your device from the Wi-Fi networks
list.
4 On the connected device, use the device’s mobile data connection to access the Internet.
45
Network connectivity
Using USB tethering
Share the device’s mobile data connection with other devices via a USB cable.
1 On the Apps screen, tap Settings → Tethering and Mobile hotspot.
2 Connect your device to the computer via the USB cable.
3 Tick USB tethering.
appears on the status bar when the two devices are connected.
4 On the computer, use your device’s mobile data connection.
Using Bluetooth tethering
Share the device’s mobile data connection with other devices via Bluetooth. Ensure that the
computer that you connect to supports the Bluetooth feature.
1 Pair your device with the other device via Bluetooth. Refer to Pairing with other Bluetooth
devices for more information.
2 On the Apps screen of your device, tap Settings → Tethering and Mobile hotspot.
3 Tick Bluetooth tethering.
4 On the connected device, open the Bluetooth settings screen, tap → Internet access.
appears on the status bar when the two devices are connected.
5 On the connected device, use the device’s mobile data connection to access the Internet.
The connection methods may vary depending on the connected devices.
46
Network connectivity
Internet
Browsing webpages
1 Tap Internet on the Apps screen.
2 Tap the address field. To change the search engine, tap the search engine icon next to the
web address field.
3 Enter the web address or a keyword, and then tap Go. To search the web by voice, tap
To view the toolbars, drag your finger downwards slightly on the screen.
Bookmark the current webpage.
Open the webpage window
manager.
Access additional options.
Refresh the current webpage.
View saved pages.
Open the homepage.
Move to the previously-visited
page.
View bookmarked webpages.
47
.
Network connectivity
Setting the homepage
Tap Internet on the Apps screen.
Tap → Settings → Set homepage → Homepage, and then select one of the following:
• Default page: Set the device’s default webpage as your homepage.
• Current page: Set the current webpage as your homepage.
• Quick access: Set the quick access list as your homepage.
• Most visited sites: Set the list of most-visited webpages as your homepage.
• Other: Set a preset webpage as your homepage.
While viewing a webpage, tap to open the homepage.
Managing the quick access list
You can quickly access your frequently-visited webpages by adding them to the quick access
list.
To add a webpage to the quick access list, open the webpage that you want to add. Then, tap
→ Add to Quick access.
To delete a webpage from the quick access list, tap and hold the webpage icon that you want
to delete. Then, drag it to Delete at the top of the screen.
Managing the webpage history
Tap Internet on the Apps screen.
Tap
→ History to open a webpage from the list of recently-visited webpages.
To delete webpages, tap → Delete or Clear history.
48
Motions & usability features
Motions and gestures
Excessive shaking or impact on the device may result in unintended inputs. Control
motions properly.
Direct call
On the Apps screen, tap Settings → Motions and gestures → Direct call, and then tap the
Direct call switch to activate it.
While viewing call, message, or contact details, pick up and hold the device to your ear to
make a call.
49
Motions & usability features
Smart alert
On the Apps screen, tap Settings → Motions and gestures → Smart alert, and then tap the
Smart alert switch to activate it.
If you have missed calls or new messages, the device will vibrate when you pick it up.
This feature may not work if the screen is turned on or the device is not on a flat
surface.
Mute/Pause
On the Apps screen, tap Settings → Motions and gestures → Mute/Pause, and then tap the
Mute/Pause switch to activate it.
Covering screen with hand
Cover the screen with your palm to mute incoming calls or alarms, or to pause media
playback.
50
Motions & usability features
Turning device over
Turn the device over to mute incoming calls or alarms, or to pause media playback.
Palm swipe to capture
On the Apps screen, tap Settings → Motions and gestures → Palm swipe to capture, and
then tap the Palm swipe to capture switch to activate it.
Place the side of your hand on the screen and sweep it across the screen from the right to the
left or vice versa to capture a screenshot. The image is saved in the Gallery → → Album
→ Screenshots folder. After capturing a screenshot, you can edit the image and share it with
others.
It is not possible to capture a screenshot while using some apps.
51
Motions & usability features
Air view
Hover over an item or the screen with your finger to preview content or view information in a
pop-up window.
On the Apps screen, tap Settings → Air view, and then tap the Air view switch to activate it.
Toolbox
You can easily launch various apps from the toolbox while using other apps.
On the Apps screen, tap Settings → Toolbox, and then tap the Toolbox switch to activate it.
Alternatively, open the quick setting panel and tap Toolbox to activate it. appears on the
screen.
To launch an app, tap
and select an app.
To move the toolbox, tap
and drag it to another location.
To change the apps in the toolbox, tap and hold
To hide the toolbox, tap and hold
, and then drag it to Edit.
, and then drag it to Remove.
52
Motions & usability features
Increasing touch screen sensitivity
Use this feature to operate the screen while wearing gloves.
On the Apps screen, tap Settings → Display, and then tick Increase touch sensitivity.
Alternatively, open the quick setting panel and tap Touch sensitivity to activate it.
• Use leather gloves for better recognition while touching the screen. Other types of
material may not be recognised.
• For best results, tap the screen firmly while wearing gloves.
• This feature may not work properly when you are using S view.
53
Personalising
Managing the Home and Apps screens
Managing the Home screen
Adding items
Tap and hold an app or a folder from the Apps screen, and then drag it to the Home screen.
To add widgets, on the Home screen, tap and hold an empty area, tap Widgets, tap and hold
a widget, and then drag it to the Home screen.
Moving and removing an item
Tap and hold an item on the Home screen, and then drag it to a new location.
To move the item to another panel, drag it to the side of the screen.
You can also move frequently-used apps to the shortcuts area at the bottom of the Home
screen.
To remove an item, tap and hold the item. Then, drag it to Remove that appears at the top of
the screen.
Creating a folder
1 On the Home screen, tap and hold an app, and then drag it to Create folder that appears
at the top of the screen.
2 Enter a folder name.
3 Tap , select the apps to move to the folder, and then tap Done.
54
Personalising
Managing folders
To rename a folder, select a folder, and then tap the existing folder name. Enter a new name
for the folder and tap Done.
To change the colour of a folder, select a folder, tap , and then select a colour.
To move more apps to a folder, tap and hold an app, and then drag it to the folder.
To move an app from a folder, select a folder, tap and hold the app, and then drag it to a new
location.
Managing panels
On the Home screen, tap and hold an empty area to add, move, or remove a panel.
To add a panel, scroll left to the last panel, and then tap
.
To move a panel, tap and hold a panel preview, and then drag it to a new location.
To remove a panel, tap and hold a panel preview, and then drag it to Remove at the top of
the screen.
To set a panel as the main Home screen, tap
.
Managing the Apps screen
Changing view mode
On the Apps screen, tap → View as and select a sorting method.
Hiding apps
Hide apps that you do not want to see on the Apps screen.
On the Apps screen, tap → Hide apps, select apps, and then tap Done.
To display hidden apps, tap → Show hidden apps, select apps, and then tap Done.
55
Personalising
Moving items
On the Apps screen, tap → Edit. Tap and hold an item and drag it to a new location.
To move the item to another panel, drag it to the side of the screen.
To move an item to a new panel, drag it to Create page that appears at the top of the screen.
You can move folders only in the folder panel.
Creating folders
→ Create folder. Alternatively, tap → Edit, tap and hold an
app, and then drag it to Create folder that appears at the top of the screen.
1 On the Apps screen, tap
2 Enter a folder name.
3 Tap , select the apps to move to the folder, and then tap Done.
The new folder is added to the folder panel of the Apps screen.
Managing folders
To rename a folder, select a folder and tap the existing folder name. Enter a new name for the
folder and tap Done.
To change the colour of a folder, select a folder, tap , and then select a colour.
To move more apps to a folder, tap → Edit, tap and hold an app, and then drag it to the
folder.
To move an app from a folder, tap → Edit, select a folder, tap and hold the app, and then
drag it to an app panel. If you move the app from the folder to the folder panel, a new folder
is created.
56
Personalising
Setting wallpaper and ringtones
Setting wallpaper
Set an image or photo stored in the device as wallpaper for the Home screen or the locked
screen.
1 On the Home screen, tap and hold an empty area, and then tap Wallpapers. Alternatively,
on the Apps screen, tap Settings → Wallpaper.
2 Select a screen to change or apply wallpaper to.
3 Scroll left or right and select from images displayed at the bottom of the screen.
To select photos taken by the device’s camera or other images, tap More images.
4 Tap Set wallpaper or Done.
Changing ringtones
Change ringtones for incoming calls and notifications.
On the Apps screen, tap Settings → Sound.
To set a ringtone for incoming calls, tap Ringtones, select a ringtone, and then tap OK. To use
a song stored in the device or in your account as a ringtone, tap Add.
To set a ringtone for notifications, tap Notifications, select a ringtone, and then tap OK.
57
Personalising
Changing the screen lock method
You can change the way that you lock the screen to prevent others from accessing your
personal information.
On the Apps screen, tap Settings → Lock screen → Screen lock, and then select a screen
lock method. The device requires an unlock code whenever unlocking it.
If the unlock code is forgotten, take the device to a Samsung Service Centre to reset it.
Pattern
Draw a pattern by connecting four dots or more, and then draw the pattern again to verify it.
Set a backup PIN to unlock the screen when you forget the pattern.
PIN
A PIN consists of numbers only. Enter at least four numbers, and then enter the password
again to verify it.
Password
A password consists of characters and numbers. Enter at least four characters including
numbers and symbols, and then enter the password again to verify it.
Fingerprint
Register your fingerprints to unlock the screen. Refer to Finger Scanner for more information.
58
Personalising
Finger Scanner
For better fingerprint recognition
When you scan your fingerprints on the device, be aware of the following conditions that
may affect the feature’s performance:
• The Home button contains a fingerprint recognition sensor. Ensure that the Home button
is not scratched or damaged by metal objects, such as coins, keys, and necklaces.
• The screen protector supplied with the device may cause the fingerprint recognition
sensor to malfunction. Remove the screen protector to improve fingerprint sensitivity.
• Ensure that the fingerprint recognition area and your fingers are clean and dry.
• The device may not recognise fingerprints that are affected by wrinkles or scars.
• The device may not recognise fingerprints from small or thin fingers.
• To improve recognition performance, register fingerprints of the hand used most often to
perform tasks on the device.
• Do not drag your finger too quickly or slowly. Drag your finger at a moderate speed to
allow the device to recognise it.
• In dry environments, static electricity can build up in the device. Avoid using this feature
in dry environments or before using the feature, discharge static electricity by touching a
metal object.
Registering fingerprints
1 On the Apps screen, tap Settings → Finger Scanner → Fingerprint manager.
2 If you are registering more fingerprints, a fingerprint recognition pop-up window
appears. Scan a registered fingerprint on the device and tap
59
.
Personalising
3 Place your finger on the fingerprint area at the bottom centre of the screen.
4 Tap and hold the screen in the fingerprint area, and then drag your finger downwards
over the Home button.
Repeat this action using the same finger until the fingerprint is registered.
If you bend your finger or use a fingertip, the device may not recognise your
fingerprints.
5 If a pop-up window appears requesting a password, enter the alternative password, tap
Continue, enter the alternative password again to verify it, and then tap OK. You can use
the alternative password instead of scanning your fingerprints.
6 If a fingerprint lock pop-up window appears, tap OK. You can use your fingerprints to
unlock the screen.
Managing registered fingerprints
You can delete or rename your registered fingerprints.
On the Apps screen, tap Settings → Finger Scanner → Fingerprint manager.
To delete fingerprints, tap → Deregister, select fingerprints, and then tap
To rename a fingerprint, tap and hold a fingerprint, tap
OK.
60
→ OK.
, enter a new name, and then tap
Personalising
Changing the alternative password
You can change the password that you use as an alternative to scanning your fingerprints.
1 On the Apps screen, tap Settings → Finger Scanner → Change alternative password.
2 Enter the current alternative password and tap Done.
3 Enter a new password and tap Continue.
4 Enter the password again and tap OK.
Unlocking the screen with fingerprints
You can unlock the screen with the registered fingerprints.
On the Apps screen, tap Settings → Finger Scanner → Screen lock → Fingerprint.
Alternatively, on the Apps screen, tap Settings → Lock screen → Screen lock → Fingerprint.
Verifying the Samsung account password
Use fingerprints to verify your Samsung account password. You can use a fingerprint instead
of entering your password, for example, when you purchase content from Samsung Apps
(GALAXY Apps).
On the Apps screen, tap Settings → Finger Scanner → Verify Samsung account, and then
tap the Verify Samsung account switch to activate it. Enter your Samsung account password
and tap Confirm.
61
Personalising
Using fingerprints for purchases via PayPal
You can make purchases by scanning your fingerprints.
This feature may not be available depending on the region or service provider.
1 On the Apps screen, tap Settings → Finger Scanner → Pay with PayPal.
2 Tap Install under FIDO Ready™ support.
3 Tap Link under PayPal account.
4 Follow the on-screen instructions to sign in to the PayPal website and register your
fingerprints.
Private mode
About private mode
Use this mode to prevent others from using or accessing specific content, such as images and
documents, stored on the device. You can save content to a specific location and deactivate
private mode to hide items securely.
Hiding content
1 On the Apps screen, tap Settings → Private mode, and then tap the Private mode
switch to activate it. Alternatively, open the quick setting panel and tap Private mode to
activate it.
When you activate private mode for the first time, set an unlock code and a backup PIN.
2 Enter the private mode unlock code.
When this mode is activated,
appears at the top of the screen.
62
Personalising
3 To select items to hide, tap and hold an item in the list, tick items to select, and then tap
→ Move to Private, or tap Move → Private → Move here.
Items that are moved to private mode appear with
on them.
4 When you have selected the items to hide, on the Apps screen, tap Settings → Private
mode, and then tap the Private mode switch to deactivate it. Alternatively, open the
quick setting panel and tap Private mode to deactivate it.
The selected items will disappear from the screen.
Ensure that all files are saved or moved properly before deactivating private mode.
Viewing hidden content
You can only view hidden items when private mode is activated.
1 On the Apps screen, tap Settings → Private mode, and then tap the Private mode
switch to activate it. Alternatively, open the quick setting panel and tap Private mode to
activate it.
2 Enter the private mode unlock code.
3 On the Apps screen, tap My Files → Private.
All items moved in private mode appear on the screen.
63
Personalising
Easy mode
Easy mode provides an easier user experience by using a simpler layout and bigger icons on
the Home screen. You can access the most popular apps and frequently-used settings, and
add shortcuts to your favourite contacts.
On the Apps screen, tap Settings → Easy mode → Easy mode, select apps to apply simpler
layout, and then tap Done.
To return to standard mode, on the Home screen, tap Easy settings → Easy mode →
Standard mode → Done.
Managing shortcuts
To add a shortcut to an app to the Home screen, scroll left, tap
, and then select an app.
To add a shortcut to a contact on the Home screen, scroll right, tap
.
To delete a shortcut from the Home screen, tap → Edit, select an app or contact with
.
Transferring data from your previous device
Using backup accounts
You can transfer backup data from your previous device to your new device using your
Google or Samsung account. Refer to Backing up and restoring data for more information.
Using Samsung Smart Switch
You can transfer data of the previous device to a new device via Smart Switch (for mobiles
and computers). Visit www.samsung.com/smartswitch for more information.
Samsung Smart Switch is not supported on some devices or computers.
64
Personalising
Using Smart Switch Mobile
Use this app to transfer data from your previous iPhone or Android device to your new device.
You can download the app from Samsung Apps (GALAXY Apps) or Play Store.
1 On your device, tap Smart Switch Mobile.
2 On your device, select an option depending on the previous device type and follow the
on-screen instructions.
If the previous device is an Android device, ensure that the Smart Switch Mobile app is
installed on the device. Refer to the help for more information.
Using Smart Switch with computers
Use this feature to import a backup of your data (from selected manufacturer’s
mobile devices) from a computer to your device. You can download the app from
www.samsung.com/smartswitch.
1 Back up data from a previous device to the computer. For more information, contact the
device’s manufacturer.
2 On the computer, launch Smart Switch.
3 Connect your current device to the computer using the USB cable.
4 On the computer, click the manufacturer of the previous device and follow the on-screen
instructions to transfer data to your device.
Using Samsung Kies
Import a backup of your data from your computer via Samsung Kies to restore data on your
device. You can also back up data to the computer via Samsung Kies. Refer to Connecting
with Samsung Kies for more information.
65
Personalising
Setting up accounts
Adding accounts
Some apps used on your device require a registered account. Create accounts to have the
best experience with your device.
On the Apps screen, tap Settings → Accounts → Add account and select an account service.
Then, follow the on-screen instructions to complete the account setup.
To sync content with your accounts, select an account and tick items to sync.
Removing accounts
On the Apps screen, tap Settings → Accounts, select an account, and then tap → Remove
account.
66
Phone
Making calls
Tap Phone on the Apps screen.
Tap Keypad, enter a phone number, and then tap to make a voice call, or tap to make a
video call. You can also make calls to phone numbers listed in Logs, Favourites, and Contacts.
View call and message logs.
View favourite contacts.
Enter the number using the
keypad.
View the contacts list.
Access additional options.
Add the number to the contacts
list.
Preview the phone number.
Delete a preceding character.
67
Phone
Making calls from call logs or contacts list
Tap Logs or Contacts, and then drag a contact or a phone number to the right to make a call.
To deactivate the call by dragging an icon to the right feature, tap → Settings → Contacts,
and then deselect Swipe to call or send msg.
Making calls from the favourites list
You can easily call contacts that you communicate with frequently by adding them to the
favourite contacts list.
To add contacts to the favourites list, tap Contacts, select a contact, and then tap
To make a call to a favourite contact, tap Favourites and select a contact.
68
.
Phone
Number prediction
Tap Keypad.
When entering numbers on the keypad, automatic predictions appear. Select one of these to
make a call.
Speed dial numbers
Tap Keypad.
For speed dial numbers, tap and hold the corresponding digit.
To assign a contact to a speed dial number, tap and hold an available speed dial number on
the keypad, tap OK, and then select a contact. Or, tap Contacts → → Speed dial, select a
number, and then select a contact.
Making an international call
Tap Keypad.
Tap and hold 0 until the + sign appears. Enter the country code, area code, and phone
number, and then tap .
To block outgoing international calls, tap → Settings → Call → More settings → Call
barring. Then, select a call type and deselect International calls.
69
Phone
Receiving calls
Answering a call
When a call comes in, drag
outside the large circle.
If a call notification pop-up window appears while you are using an app, tap Answer in the
pop-up window.
If the call waiting service is activated, another call can be answered. When the second call is
answered, the first call is put on hold.
Rejecting a call
When a call comes in, drag
outside the large circle.
If a call notification pop-up window appears while you are using an app, tap Reject in the
pop-up window.
To send a message when rejecting an incoming call, drag the reject message bar upwards.
To create various rejection messages, on the Apps screen, tap Phone → → Settings → Call
→ Call rejection → Rejection messages → .
Automatically rejecting calls from unwanted numbers
1 Tap Phone on the Apps screen.
2 Tap → Settings → Call → Call rejection → Auto reject mode → Auto reject numbers.
3 Tap Auto reject list → , enter a number, and then assign a category.
4 Tap Save.
Missed calls
If a call is missed, appears on the status bar. Open the notifications panel to view the list of
missed calls. Alternatively, on the Apps screen, tap Phone → Logs to view missed calls.
70
Phone
Options during calls
During a voice call
The following actions are available:
• : Increase the volume.
• Add call: Dial a second call.
• Keypad: Open the keypad.
• End call: End the current call.
• Speaker: Activate or deactivate the speakerphone. When using the speakerphone, speak
into the microphone at the top of the device and keep the device away from your ears.
• Mute: Turn off the microphone so that the other party cannot hear you.
• Bluetooth: Switch to a Bluetooth headset if it is connected to the device.
• → Hold: Hold a call. Tap Resume call to retrieve the held call.
• → Contacts: Open the contacts list.
• → Memo: Create a memo.
• → Messages: Send a message.
• → Personalise call sound: Select or personalise the sound quality used during calls
when a headset is connected.
• → Settings: Change the call settings.
When you launch apps during a call, a pop-up window for the call screen ( ) appears. You can
continue your phone conversation while using apps.
To move the pop-up window, drag it to another location.
To delete the pop-up window, tap and hold it, and then tap OK.
To return to the call screen, tap the pop-up window.
71
Phone
During a video call
The following actions are available:
• → Hide me: Hide your image from the other party.
• → Outgoing image: Select an image to show it to the other party.
• → Capture image: Capture the other party’s image.
• → Record video: Record a video of the other party’s images.
• → Memo: Create a memo.
• → Messages: Send a message.
• → Keypad: Open the keypad.
• → Speaker off / Speaker on: Activate or deactivate the speakerphone. When using the
speakerphone, speak into the microphone at the top of the device and keep the device
away from your ears.
• → Switch to headset: Switch to a Bluetooth headset if it is connected to the device.
Tap the screen to use the following options:
• Switch: Switch between the front and rear cameras.
• Mute: Turn off the microphone so that the other party cannot hear you.
• End call: End the current call.
72
Contacts
Adding contacts
Moving contacts from other devices
You can move contacts from other devices to your device. Refer to Transferring data from
your previous device for more information.
Creating contacts manually
1 On the Apps screen, tap Contacts → Contacts.
2 Tap and enter contact information.
• : Add an image.
• /
: Add or delete a contact field.
3 Tap Save.
To add a phone number to the contacts list from the keypad, tap Keypad, enter the number,
and then tap Add to Contacts.
Creating contacts from business cards
Take a photo of a business card and extract contact information from it.
1 On the Apps screen, tap Contacts → Contacts.
2 Tap → Business cards → .
To select or add languages to recognise, tap → Target language.
73
Contacts
3 Place a business card on the flat surface and rotate the device to landscape orientation.
4 Adjust the device to fit the card inside the frames on the screen. When the frames
turn green, the device automatically takes a photo. The device also reads the contact
information from the business card and converts it to a contact entry.
• If the device does not take the photo automatically, tap
.
• To take photos of business cards manually, tap → Auto capture → Off.
• To extract text from a stored image, tap → Load image.
5 Edit or add more information and tap Save.
Managing contacts
Editing a contact
1 On the Apps screen, tap Contacts → Contacts.
2 Select a contact to edit and tap .
3 Edit the contact information or tap Add another field to add more contact information.
4 Tap Save.
Deleting a contact
Select a contact to delete and tap → Delete.
Sharing a contact
Select a contact to share, tap → Share name card, and then select a sharing method.
74
Contacts
Managing groups
On the Apps screen, tap Contacts → Contacts.
Tap
.
Creating a new group
Tap
, enter a group name, and then tap Save.
Adding contacts to a group
Select a group, and then tap
. Select contacts to add, and then tap Done.
Deleting a group
Tap → Delete group, select user-added groups, and then tap Done.
Sending a message or email to group members
Select a group, tap → Send message or email → Message or Email, select members, tap
Done, enter a message, and then tap the send button.
Merging contacts with accounts
Merge contacts that are saved in the device with your accounts.
On the Apps screen, tap Contacts → Contacts.
Tap → Merge accounts → Google or Samsung account.
Importing and exporting contacts
Import contacts from storage services to your device or export contacts from the device to
storage services.
On the Apps screen, tap Contacts → Contacts.
Tap → Settings → Contacts → Import/export, and then select an import or export option.
75
Contacts
Searching for contacts
On the Apps screen, tap Contacts → Contacts.
Use one of the following search methods:
• Scroll up or down the contacts list.
• Drag a finger along the index at the right side of the contacts list to scroll through it
quickly.
• Tap the search field at the top of the contacts list and enter search criteria.
Once a contact is selected, take one of the following actions:
• : Add to favourite contacts.
• /
: Make a voice or video call.
• : Compose a message.
• : Compose an email.
Adding shortcuts for contacts to the Home screen
Add shortcuts to contacts that you frequently communicate with on the Home screen.
1 On the Apps screen, tap Contacts → Contacts.
2 Select a contact.
3 Tap → Add shortcut to home screen.
76
Messages & email
Messages
Sending messages
Send text messages (SMS) or multimedia messages (MMS).
You may incur additional charges for sending or receiving messages when you are
roaming.
1 Tap Messages on the Apps screen.
2 Tap .
3 Add recipients and enter a message.
Access additional options.
Enter recipients.
Select contacts from the
contacts list.
Attach files.
Send the message.
Enter emoticons.
Enter a message.
4 Tap
to send the message.
77
Messages & email
While composing a message, tap to use one of the following options:
• Quick responses: Select a message template and enter a message.
• Insert smiley: Enter emoticons.
• Add subject: Enter a subject.
• Add slide: Add message slides.
• Schedule message: Set a specified time and date for a message to be sent.
• Discard: Cancel composing the message.
• Font size: Change the font size of text in the text field.
Sending scheduled messages
While composing a message, tap → Schedule message. Set a time and date and tap Done.
• If the device is turned off at the scheduled time, is not connected to the network,
or the network is unstable, the message will not be sent.
• This feature is based on the time and date set on the device. Messages may be sent
at an incorrect time if you move across time zones or the network does not update
the information.
Adding contacts to the priority list
Set contacts that you communicate with frequently as priority contacts. Send them messages
by selecting a contact icon from above the messages list.
Tap Tap to add priority senders. → Inbox or Contacts, select contacts to add, and then tap
Done. To add more contacts, tap .
To remove contacts from the priority list, tap and hold a contact, and then tap Edit list of
priority senders → → Done.
78
Messages & email
Viewing incoming messages
Incoming messages are grouped into message threads by contact. Select a contact to view
the person’s messages.
You may incur additional charges for sending or receiving messages when you are
roaming.
While viewing a message, tap to use one of the following options:
• Video call: Make a video call to the contact.
• View contact: View the contact’s information.
• Add to Contacts: Add the contact to the contacts list.
• Quick responses: Enter a message by selecting one from message templates.
• Add recipient: Add recipients to send the message to.
• Insert smiley: Enter emoticons.
• Add subject: Enter a subject.
• Add slide: Add message slides.
• Schedule message: Set a specified time and date from a message to be sent.
• Add to priority senders / Remove from priority senders: Add contacts to or remove
them from the priority senders list.
• Add to spam numbers / Remove from spam numbers: Identify a phone number as
spam or remove a phone number from the spam list.
• Discard: Cancel composing the message.
• Font size: Change the font size of text in the text field.
79
Messages & email
Managing messages
While viewing the list of messages, tap and use the following options:
• Select: Select messages to apply options.
• Delete: Delete all or selected messages.
• Draft messages: View messages saved for later delivery.
• Locked messages: View locked messages.
• Scheduled messages: View scheduled messages.
• Spam messages: View spam messages.
• Font size: Change the font size of text in the text field.
• Settings: Change message settings.
• Help: View help information about sending and managing messages.
Email
Setting up email accounts
Tap Email on the Apps screen.
Set up an email account when opening Email for the first time.
Enter the email address and password. Tap Next for a private email account, such as Google
Mail, or tap Manual setup for a company email account. After that, follow the on-screen
instructions to complete the setup.
To set up another email account, tap
→ Manage accounts →
.
If you have more than two email accounts, you can set one as the default account. Tap
Manage accounts → → Set as default account.
80
→
Messages & email
Sending messages
Tap Email on the Apps screen.
Tap
at the bottom of the screen to compose a message.
Save the message for later
delivery.
Discard the message.
Attach images, videos and
others.
Send the message.
Access additional options.
Add recipients.
Add a CC or BCC.
Enter a subject.
Insert files into the message, or
use editing options.
Enter a message.
Add recipients from the contacts
list.
Accessing additional options
While composing a message, tap and access additional options.
• Send email to myself: Send the message to myself.
• Schedule email: Send the message at a scheduled time.
• If the device is turned off at the scheduled time, is not connected to the network,
or the network is unstable, the message will not be sent.
• This feature is based on the time and date set on the device. Messages may be sent
at an incorrect time if you move across time zones or the network does not update
the information.
• Priority: Select a message’s priority level.
• Security options: Set security options for the message.
81
Messages & email
Reading messages
Tap Email on the Apps screen.
Tap , select an email account to use, and new messages are retrieved. To manually retrieve
new messages, tap .
Tap a message to read.
Delete the message.
Access additional options.
Add this email address to the
contacts list or view other
options.
Open attachments.
Mark the message as a
reminder.
Forward the message.
Reply to all recipients.
Go to the previous or next
message.
Reply to the message.
Adding contacts to the priority list
Set contacts that you communicate with frequently as priority contacts.
Tap → Priority senders → Tap to add priority senders → Enter email or Contacts, enter
email addresses or select contacts to add, and then tap OK or Done.
To add more contacts to the priority list, tap
.
To remove contacts from the priority list, tap and hold a contact, tap Edit list of priority
senders, tap on each contact, and then tap Done.
82
Camera
Basic shooting
Taking photos or recording videos
1 Tap Camera on the Apps screen.
2 Tap the image on the preview screen where the camera should focus.
When the subject is in focus, the focus frame turns green.
3 Tap
to take a photo or
to record a video.
• Spread two fingers apart on the screen to zoom in, and pinch to zoom out.
• To capture an image from the video while recording, tap
.
• To change the focus while recording a video, tap where you want to focus. To focus on
the centre of the screen, tap .
Display current
mode.
Switch between the
front and rear
cameras.
Start recording a
video.
Change flash
settings.
Take a photo.
Change the
shooting mode.
Change camera
settings.
View photos and
videos you have
captured.
83
Camera
• The camera automatically shuts off when unused.
• Make sure that the lens is clean. Otherwise, the device may not work properly in
some modes that require high resolutions.
• The front camera lens is suitable for taking wide-angle photos. Minor distortion
may occur in wide-angle photos and does not indicate device performance
problems.
Launching Camera on the locked screen
To quickly take photos of special moments, launch Camera on the locked screen.
On the locked screen, drag
outside the large circle. If
is not shown, open the Apps
screen, tap Settings → Lock screen, and then tick Camera shortcut.
This feature may not be available depending on the region or service provider.
Reorganising camera shortcuts
You can reorganise camera shortcuts for fast and easy access on the preview screen. Tap
the preview screen. Tap and hold an item and drag it to a slot at the left of the screen.
84
on
Camera
Camera etiquette
• Do not take photos or record videos of other people without their permission.
• Do not take photos or record videos where legally prohibited.
• Do not take photos or record videos in places where you may violate other people’s
privacy.
Remote viewfinder
Use your device as a viewfinder for another device. You can control the other device remotely
to take photos or record videos from a distance. Your device displays the same image that is
displayed on the connected device.
1 Tap Camera on the Apps screen.
2 Tap → Remote viewfinder.
85
Camera
3 Tap Easily connect via NFC or Wi-Fi Direct settings to connect to another device.
• Easily connect via NFC: Activate the NFC feature on both devices.
• Wi-Fi Direct settings: Activate the Wi-Fi Direct feature on both devices.
4 Tap the image on the preview screen where the device should focus.
5 Tap to take the photo displayed on the connected device’s viewfinder.
Ensure that the device you want to connect to supports the remote viewfinder mode.
Shooting modes
Auto
Use this mode to allow the camera to evaluate the surroundings and determine the ideal
mode for the photo.
On the Apps screen, tap Camera → MODE → Auto.
Beauty face
Use this mode to take a photo with lightened faces for gentler images.
On the Apps screen, tap Camera → MODE → Beauty face.
Shot & more
Use this mode to take a series of photos and modify them by applying various effects using
in Gallery.
the shooting modes. The device identifies the photos with
The zoom feature is not available while taking photos in this mode.
1 Tap Camera on the Apps screen.
2 Tap MODE → Shot & more.
86
Camera
3 Tap
.
The device takes a series of photos and displays the available shooting modes.
4 Select a shooting mode and apply an effect to the photos.
• Best photo: Take a series of photos and save the best one. To view other photos in the
series, scroll left or right. The device recommends the best photo and identifies it with
.
• Best face: Take multiple group shots at the same time and combine them to create the
best possible image. Tap the white frame on each face and choose the best individual
pose for each subject from the poses that appear at the bottom of the screen. The
device recommends the best photo and identifies it with .
• Drama shot: Take a series of photos and combine them to create an image that shows
motion trails. Extend the motion trail in the image by selecting more photos from the
bottom of the screen. To edit the motion trails of selected photos, tap and select
to erase the motion trails.
a photo. Tap to display subject’s motion trails or tap
Edit the photo as desired and tap Done.
• Eraser: Erase unwanted moving objects. Tap
Tap to restore the original photo.
to erase unwanted moving objects.
• Panning shot: Apply an effect to the subject’s background that makes the subject
appear to be moving fast. Tap Objects to select a subject. Tap Motion blur to change
the angle of blurring to apply to the background. Tap and draw a circle with your
finger around the large circle to adjust the angle of blurring. To adjust the level of
background blurring, drag the screen to the left or the right.
5 When you are finished editing photos, tap
87
.
Camera
Panorama
Use this mode to take a photo composed of many photos strung together. The device
in Gallery.
identifies the photo with
On the Apps screen, tap Camera → MODE → Panorama.
To get the best shot, follow these tips:
• Move the camera slowly in one direction.
• Keep the image within the frame on the camera’s viewfinder.
• Avoid taking photos of indistinct backgrounds, such as an empty sky or a plain
wall.
Virtual tour
Use this shooting mode to take photos in a space by moving forwards, or rotating left or right.
Photos of the space are taken from different angles. You can view the photos in a slideshow
and simulate actually moving through the space. The device identifies the photo with in
Gallery.
1 Tap Camera on the Apps screen.
2 Tap MODE → Virtual tour.
3 Move with the device to position the dot inside the large circle in the centre of the
preview screen.
When the circle’s border turns blue, the device starts to take photos.
88
Camera
4 Move slowly forwards, or rotate left or right while taking photos.
Whenever the dot is inside the large circle, the device takes a photo automatically.
5 Repeat this action to take more photos.
To see a preview of the photo, tap at the bottom left of the screen. The direction where
images were taken is displayed on each preview thumbnail.
To delete the last photo that was taken, tap Undo.
6 To finish, tap
.
Continuous shot
Use this mode to take a series of photos of moving subjects.
On the Apps screen, tap Camera → MODE → Continuous shot.
89
Camera
HDR (Rich tone)
Use this mode to take photos with rich colours and reproduce details even in bright and dark
areas.
On the Apps screen, tap Camera → MODE → HDR (Rich tone).
Without effect
With effect
Managing shooting modes
Select the shooting modes to appear on the mode selection screen.
On the Apps screen, tap Camera → MODE → Manage modes.
Downloading shooting modes
Download more shooting modes from Samsung Apps (GALAXY Apps).
On the Apps screen, tap Camera → MODE → Download.
90
Camera
Camera settings
On the Apps screen, tap Camera → . Not all of the following options are available in both
still camera and video camera modes. The available options vary depending on the mode
used.
• Picture size: Select a resolution. Use higher resolution for higher quality. But it takes up
more memory.
• Picture stabilisation: Set the device to automatically detect darker conditions and adjust
the brightness of the photo without the flash.
This option is not available when you record videos.
• Face detection: Set the device to recognise people’s faces and help you take photos of
them.
• ISO: Select an ISO value. This controls camera light sensitivity. It is measured in filmcamera equivalents. Low values are for stationary or brightly-lit objects. Higher values are
for fast-moving or poorly-lit objects.
• Metering modes: Select a metering method. This determines how light values are
calculated. Centre-weighted measures background light in the centre of the scene. Spot
measures the light value at a specific location. Matrix averages the entire scene.
• Tap to take pics: Tap the image on the preview screen to take photos.
• Save as: Set the device to save both the rich tone photo and original photo, or only the
rich tone photo.
• Video size: Select a resolution. Use higher resolution for higher quality. But it takes up
more memory.
• Recording mode: Change the recording mode.
• Effects: Select a filter effect to use when taking photos or recording videos.
91
Camera
• Flash: Activate or deactivate the flash.
• Timer: Use this for delayed-time shots.
• Location tags: Attach a GPS location tag to the photo.
• To improve GPS signals, avoid shooting in locations where the signal may be
obstructed, such as between buildings or in low-lying areas, or in poor weather
conditions.
• Your location may appear on your photos when you upload them to the Internet.
To avoid this, deactivate the GPS tag setting.
• Storage location: Select the memory location for storage.
• Review pics/videos: Set the device to show photos or videos after capturing them.
• Remote viewfinder: Set the device to use as a viewfinder and control the other device to
take photos or record videos. Refer to Remote viewfinder for more information.
• White balance: Select an appropriate white balance, so images have a true-to-life colour
range. The settings are designed for specific lighting situations. These settings are similar
to the heat range for white-balance exposure in professional cameras.
• Exposure value: Change the exposure value. This determines how much light the
camera’s sensor receives. For low-light situations, use a higher exposure.
• Grid lines: Display viewfinder guides to help composition when selecting subjects.
• The volume key: Set the device to use the Volume button to control the shutter or zoom
function.
• Voice control: Set the device to take photos with voice commands.
• Help: View help information for using the camera.
• Reset settings: Reset the camera settings.
92
Gallery
Viewing photos or videos
Viewing content on the device
On the Apps screen, tap Gallery and select an image or a video.
Video files show the
icon on the preview thumbnail.
To hide or show the menu bar and the preview thumbnails, tap the screen.
Send the image to others.
Modify the image.
Move to the previous screen.
Access additional options.
Search for other devices to view
the image.
Delete the image.
Image and video preview
thumbnails
93
Gallery
Selecting a sorting option
The images or videos on your device can be sorted by time or album. You can also filter
images and videos by category, such as people or scenery.
On the Apps screen, tap Gallery → , and then select a sorting option.
Accessing additional options
On the Apps screen, tap Gallery and select an image or a video. Tap and use the following
options. The available options may differ depending on the selected file.
• More info: View more information about the file.
• Copy to clipboard: Copy the file to the clipboard.
• Studio: Edit images or videos in studio mode.
• Rotate left: Rotate anticlockwise.
• Rotate right: Rotate clockwise.
• Crop: Trim the image.
• Rename: Rename the file.
• Slideshow: Start a slideshow with the images in the current folder.
• Set as: Set the image as wallpaper or a contact image.
• Print: Print the image by connecting the device to a printer. Refer to Mobile printing for
more information.
• Settings: Change the Gallery settings.
On the list of files, you can select multiple files by taping and hold a file. You can share or
delete the selected files at once, and use additional options by tapping .
94
Gallery
Editing photos or videos
Photo studio
Edit images by applying various effects.
1 Tap Gallery on the Apps screen.
2 Tap → Studio → Photo studio.
3 Select an image to edit.
4 Edit the image by applying various effects.
Crop, rotate, or resize the image.
Decorate the image by adding
stickers, inserting a frame, or
drawing on the image.
Adjust the saturation or
brightness of the image.
Apply effects to an image of a
person.
Apply effects to the image.
5 When you are finished editing the image, tap Done →
6 Select a save option and tap OK.
.
The edited photo is saved in the Studio folder. To open the folder, tap Gallery →
Album → Studio.
95
→
Gallery
Collage studio
Combine several images together to create a collage.
1 Tap Gallery on the Apps screen.
2 Tap → Studio → Collage studio.
3 Select images to combine and tap Done.
4 Edit the image by applying various effects.
Shuffle your pictures and use a
randomly selected layout and
background.
Change the aspect ratio.
Select a background.
Adjust the margins or corner
roundness.
Select a layout.
5 When you are finished editing the images, tap
.
The edited image is saved in the Studio folder. To open the folder, tap Gallery →
Album → Studio.
96
→
Gallery
Shot & more
Apply various effects to the images you have taken.
Only photos taken in shot & more mode can be selected.
1 Tap Gallery on the Apps screen.
2 Tap → Studio → Shot & more.
3 Select an image to edit.
4 Edit the image by applying various effects.
Save the best photo.
Make the subject appear to be
moving quickly.
Create the best possible image.
Create an image that shows
motion trails.
Erase moving objects from the
background.
5 When you are finished editing the image, tap
.
The edited image is saved in the Studio folder. To open the folder, tap Gallery →
Album → Studio.
97
→
Gallery
Video trimmer
Trim video segments.
1 Tap Gallery on the Apps screen.
2 Tap → Studio → Video trimmer.
3 Select a video to edit.
4 Move the start bracket to the desired starting point, move the end bracket to the desired
ending point, tap Done.
Current position
Start bracket
End bracket
5 Enter a filename, and then tap OK to save the video.
98
Gallery
Gallery settings
1 Tap Gallery on the Apps screen.
2 Tap → Settings.
3 Use the following options:
• Sync via Wi-Fi only: Set the device to sync content only when the Wi-Fi connection is
activated.
• Tag buddy: Tag photos with information, such as date and location. To edit tags, tap the
information on an image, tap , edit the details, and then tap Done.
• Face tag: Assign tags to faces in an image. A white frame appears around a face when it
is detected. Select the face, tap Add name, and then select a contact to identify the face
tag. When the face tag appears on an image, tap it and access various options, such as
calling or sending a message to the person.
When you use Face tag, face recognition may fail depending on the face angle,
face size, skin colour, facial expression, light conditions, or accessories the subject is
wearing.
99
Multimedia
Music
Playing music
Tap Music on the Apps screen.
Select a music category, and then select a song to play.
Search for other devices to play
the file.
Access additional options.
Adjust the volume.
Set the file as your favourite
song.
Turn on shuffle.
Change the repeat mode.
Open the playlist.
Add the song to a playlist.
Skip to the previous song. Tap
and hold to move backwards
quickly.
Skip to the next song. Tap and
hold to move forwards quickly.
Pause and resume playback.
100
Multimedia
To listen to songs at equal volume levels, tap → Settings, and then tick Smart volume.
When Smart volume is activated, the volume may end up louder than the device
volume level. Use caution to avoid long-term exposure to loud sounds to prevent
damage to your hearing.
Smart volume may not be activated for some files.
To set a personalised sound while listening to songs with a headset, tap → Settings →
Adapt Sound → On.
When you activate this option for the first time, tap Start to adjust the sound. The device
starts a series of sound tests to adjust the sound level and starts to beep. Tap Yes if you can
hear the beep or No if you cannot. Repeat this step for each test until the sound adjustment is
finished. Then, tick Music sound and tap Done to apply the option when you listen to music.
When you turn the volume up to level 14 or higher, the adapt sound option is not
applied to music playback. If you turn the volume down to level 13 or lower, the
option is reapplied.
Viewing a list of recommended songs
To view a list of recommended songs based on the song that is currently playing, rotate the
device to landscape orientation.
Setting a song as ringtone or alarm tone
To use the currently-playing song as a ringtone or an alarm tone, tap → Set as → From the
beginning or Auto recommendations, select an option, and then tap Done.
Creating playlists
Make an own selection of songs.
Tap Music on the Apps screen.
Tap Playlists → → Create playlist. Enter a title and tap OK. Tap
and then tap Done.
To add the currently-playing song to a playlist, tap
101
, select songs to include,
and select the playlist.
Multimedia
Playing music by mood
Use this feature to play music that suits your mood.
Tap Music on the Apps screen.
Tap Music square. Songs are automatically categorised by mood. Tap a mood cell or drag
multiple cells to listen to the music in the cells.
Song categories are based on available information about the song. Some songs may
not be categorised in mood cells.
Playing music stored on other devices
Search for music that is stored on other devices and play it on your device.
Tap Music on the Apps screen.
Accessing music on a registered device
Tap Devices and select a device in REGISTERED DEVICES to access and play music. You can
play the song on the devices that are registered to Samsung link. Visit link.samsung.com for
more information. Ensure that the registered devices are turned on and connected to a Wi-Fi
or mobile network.
You may incur additional charges when you access content stored on other devices
via the mobile network.
Accessing music on a nearby device
Tap Devices and select a device in NEARBY DEVICES to access and play music. You can play
the song on the devices with the content sharing feature activated.
On the Apps screen, tap Settings → Nearby devices, and then tap the Nearby devices
switch to activate it. Refer to Nearby devices for more settings.
102
Multimedia
Video
Playing videos
Tap Video on the Apps screen.
Select a video to play.
Search for other
devices to play the
file.
Adjust the volume.
Move forwards or
backwards by
dragging the bar.
Pause and resume
playback.
Access additional
options.
Change screen ratio.
Switch to the
pop-up video player.
Skip to the previous
video. Tap and hold
to move backwards
quickly.
Skip to the next
video. Tap and hold
to move forwards
quickly.
To customise the control panel location during playback, tap → Settings, tick Mini
controller, and then tap Close. Then, tap or to move the control panel to either side of
the screen.
This feature is available only in landscape orientation.
103
Multimedia
Using the pop-up video player
Use this feature to use other apps without closing the video player. While watching videos,
to use the pop-up video player.
tap
Spread two fingers apart on the screen to enlarge the player or pinch to reduce it. To move
the player, drag the player to another location.
Capturing images
To use this feature, during playback, tap → Settings, tick Capture, and then tap Close.
Tap
to capture an image from the video during playback.
Sharing or deleting videos
Tap Video on the Apps screen.
Tap and hold a video, tap , and then select a sharing method.
Tap → Delete, select videos, and then tap Done.
Editing videos
Tap Video on the Apps screen.
Select a video, tap → Studio → Video trimmer. Move the start bracket to the desired
starting point, move the end bracket to the desired ending point, tap Done, enter a filename,
and then tap OK to save the video.
104
Multimedia
Playing videos stored on other devices
Search for videos that are stored in other devices and play them on your device.
Tap Video on the Apps screen.
Accessing a video on a registered device
Tap Devices and select a device in REGISTERED DEVICES to access and play the video. You
can play the video on the devices registered to Samsung link. Visit link.samsung.com for more
information. Ensure that the registered devices are turned on and connected to a Wi-Fi or
mobile network.
You may incur additional charges when you access content stored on other devices
via the mobile network.
Accessing a video on a nearby device
Tap Devices and select a device in NEARBY DEVICES to access and play the video. You can
play the video on devices that have the content sharing feature activated.
On the Apps screen, tap Settings → Nearby devices, and then tap the Nearby devices
switch to activate it. Refer to Nearby devices for more settings.
105
S Health
About S Health
Use this app to set your calorie intake and calorie burning levels based on your physical
statistics. You can use it to record the actual calories you eat and burn. Also, the app
recommends exercises and provides health tips to help you maintain a balanced-lifestyle.
Tap S Health on the Apps screen.
S Health features
While using S Health, you can access the following features:
• Pedometer: Count the steps that you take.
• Exercise: Set and manage your exercise goals. You can record and check exercise
information, such as quantity, speed, and calories burnt. Also, when you exercise
outdoors, you can use the exercise feature to take photos, listen to music, and check your
location.
• Food: Manage your calorie intake.
• Weight: Record and manage weight changes.
106
S Health
Setting up a user profile
When running this app for the first time, read and agree to the terms and conditions, and
then set up a user profile.
1 Tap S Health on the Apps screen.
2 Read the on-screen information about the app and tap Next.
3 Read and agree to the terms and conditions, and then tap Next.
4 Sign in to your Samsung account. Or, tap Skip to skip this procedure.
5 Enter a user name and your birth date, select your gender, and then tap Next.
To prevent your profile to be viewed from other S Health users, tick Hide my profile
information from other S Health users.
6 Enter your physical statistics and tap Next.
7 Select an activity level and tap Next.
When you finish setting up the profile, the profile information you entered appears.
• Based on your physical statistics, the device calculates your basal metabolic rate
(BMR) and recommends a daily calorie intake. The recommendation may not be
accurate for all ages, body compositions, or nutritional needs.
• The burned calories estimated through the S Health may differ from the actual
burned calories due to your device specification, surroundings, health status,
exercise style and many more. Samsung does not warrant the accuracy of the
estimated information of burned calories and we recommend you to use the data
for recreational purpose only.
8 Check your profile information and tap Start.
The S Health main screen appears.
107
S Health
S Health main screen
View a summary that shows your current step count and the calories you have burnt or
eaten. You can also reorganise shortcuts for easy access to S Health menus and change the
background image on the S Health main screen.
On the S Health main screen, tap → Edit favourites, and then tap
S Health main screen.
To delete shortcuts, tap
to add shortcuts to the
.
Access the S Health menu
screen.
Access additional options.
Summaries of step counts,
calorie goals, and intake calories
Shortcuts to S Health menus
Search for and download apps.
Tap and use the following functions:
• Edit favourites: Add or edit S Health menu shortcuts.
• Set background: Select a background image.
• Backup and restore: Backup or restore your S Health data.
• Settings: Configure settings for S Health.
• Help: View help information about using S Health.
108
S Health
Using S Health menus
Tap
to access various menus.
My profile
Access the S Health main screen.
Select to use menus.
• Pedometer: Measure your step count and check burnt calories. Refer to Walking mate for
more information.
• Exercise: Record exercise duration and check burnt calories. Refer to Exercise mate for
more information.
• Food: Record and manage calorie intake. Refer to Recording food intake for more
information.
• Weight: Record and manage weight changes. Refer to Managing weight for more
information.
• More apps: Search for and download the apps that can sync with S Health.
Further information about S Health functions or apps downloaded via More apps is
available. To access more information about a function or app, open it. Then, tap →
Help, select a topic, and then tap User manual.
109
S Health
Walking mate
The device counts the number of steps you have taken and measures the distance travelled. It
also measures the calories you have burnt using a sensor.
1 Tap → Pedometer.
2 Tap Start and start walking.
The device measures your step count, distance travelled, and burnt calories, and displays
them in real-time.
View the logs of your daily steps.
Access additional options.
Move to a specific date of step
count records.
Step count
Target number of steps
Distance you have walked
Calories you have burnt
View your step count in a graph.
Start measuring.
Check your ranking in the
community.
3 To stop measuring, tap Pause → OK.
The measurements are saved.
110
S Health
Tap and use the following functions:
• Daily step goal: Change the target number of steps.
• Reset daily data: Reset the daily step count.
• Device data to view: Select a device to view information recorded by the pedometer.
• Share via: Send the current page to others.
• Notice: View notice of burnt calories.
• Settings: Configure settings for S Health.
• User manual: View more information about using this feature.
• You may experience a brief delay while the Pedometer monitors your steps and
displays your step count.
• If you use the Pedometer while travelling by car or train, vibration may affect your
step count.
Viewing your step count in a graph
View your burnt calories for a period in a graph.
On the Pedometer main screen, tap
.
Access the S Health menu
screen.
View the logs of your daily steps.
View hourly, daily, or monthly
records in a graph.
Total step count
View your step count in a graph.
Return to the previous screen.
111
S Health
Resetting the daily step records
The device accumulates each day’s step records.
To reset the daily step count, tap → Reset daily data → OK.
Exercise mate
Record your exercise information and burnt calories using S Health’s exercise feature. You can
view your exercise and burnt calorie records in a graph and share the data with others.
Tap
→ Exercise.
• Before using this feature, pregnant women, the elderly, and young children, users
suffering from conditions, such as chronic heart disease or high blood pressure, are
recommended to seek the advice of a licensed medical professional.
• If you feel dizzy, experience pain, or have difficulty breathing during exercise, stop
using this feature and seek the advice of a licensed medical professional.
Starting to exercise
1 Set the exercise type, activate or deactivate the voice guide, select background music,
and then tap Start.
The device records the exercise time and displays progress towards achieving exercise
goals.
112
S Health
2 Start exercising and use various features on the screen.
Tap to lock the screen and display exercise information only. To unlock the screen, tap
and hold .
Take a photo of the exercise
location.
View a map of places you have
exercised.
Exercise type
View and manage accessory
device connections.
Information displayed during
exercise such as speed, time, and
more. Tap to show more items.
Activate or deactivate the audio
guide.
Control music playback.
3 To finish exercising, tap Pause → Stop.
The exercise information, distance, and photos you have taken are displayed on the
screen.
4 Enter additional information and tap Done.
The device saves the exercise information.
113
S Health
Tap and use the following functions:
• Set maximum heart rate: Set the device to automatically update your maximum heart
rate based on your profile and previous heart rate measurements. Or, set your heart rate
to be manually updated and enter it yourself.
• Reset daily data: Reset the daily exercise data.
• Notice: View notice of burnt calories.
• Settings: Configure settings for S Health.
• User manual: View more information about using this feature.
Using the coaching feature while exercising in running mode
Use the personalised coaching feature to exercise safely and effectively. You will receive realtime coaching advice that leads you through a safe and effective workout that keeps you fit.
Connect the device to the heart rate monitor to use the coaching feature.
To view the available heart rate monitors, tap → Settings → Compatible
accessories → Exercise.
About the coaching feature
The coaching feature includes Firstbeat technology to provide personalised exercise
guidance. Firstbeat uses Training Effect (TE) analysis that measures the accumulated physical
load during a workout and assesses the impact on your fitness. TE levels are based on your
physical profile and the heart rate information recorded while you work out. Your TE level
increases when you perform effective exercise and the coaching feature uses the TE to
provide you with feedback.
The feedback is provided by the feature via prompts, such as ‘speed up’, ‘keep up this
pace’, and ‘slow down’. When you first start to use the coaching feature, it will estimate an
appropriate TE level based on your profile. As you exercise, it will analyse your training history
and provide more personalised guidance. A typical workout may start at a lower intensity and
sharply increase in intensity towards the end.
Visit www.firstbeat.fi/te for more information.
While exercising, the heart rate monitor may not work properly if the device is
exposed to excessive sweat or its position is changed.
114
S Health
1 Wear the heart rate monitor.
2 On the Exercise main screen, tap
→ Scan.
3 Select your heart rate monitor from the detected devices list.
4 Follow the on-screen instructions to connect your heart rate monitor to your device.
115
S Health
5 When connection is made, tap Running on the Exercise main screen.
View the connection status.
6 Tap Set workout goal → Training effect goal.
7 Tap Auto in the pop-up window to automatically set the maximum heart rate.
The maximum heart rate is the fastest heart rate an individual can achieve through
exercise. If you know your maximum heart rate, enter it manually. If you set the
maximum heart rate to be measured automatically, the device will calculate it using
“210 - 0.65 x age”.
116
S Health
8 Set the exercise intensity and tap Next.
Set the training intensity at one
of the three available levels.
9 Set the exercise duration and tap Done.
If you set the exercise duration shorter than the recommended duration, the exercise
intensity will increase to achieve the TE.
10On the Exercise main screen, activate or deactivate the voice guide, select background
music, and then tap Start.
11Start exercising.
If you feel pain or discomfort while exercising, stop immediately and consult a
medical professional.
12To finish exercising, tap Pause → Stop.
13Check the exercise duration, distance, and calories burned and tap Done to save the
exercise information to the device.
117
S Health
Viewing a log of burnt calories
Compare your burnt calorie records for a period by viewing them in a graph.
On the Exercise main screen, tap
.
View the logs of your daily
exercise.
Access the S Health menu
screen.
View and manage accessory
device connections.
View hourly, daily or monthly
records in a graph.
Total burnt calories
View your burnt calories in a
graph.
Return to the previous screen.
118
S Health
Recording food intake
Record your daily food intake and manage your calorie consumption.
1 Tap → Food.
2 Tap next to the meal.
3 Enter the meal information and tap Done.
• To search for a food, tap Search and select it from the search results.
• To select from a food list sorted into categories, tap Category.
• To select from the frequently-eaten foods, tap Frequent.
• To select from the My food list, tap My food.
4 Enter additional food information and tap Save.
The food information is recorded as your calorie intake for the meal.
View the logs of your daily
calorie intake.
Access additional options.
Move to a specific date to view
calorie intake records.
Total calorie intake
Calorie goal
View or edit meal information.
Add meal information.
Take a photo of a food item to
add it to meal information.
Select from the My food list.
View your calorie intake in a
graph.
119
S Health
Tap and use the following functions:
• Daily calorie goal: Change your daily calorie intake goal.
• My food: Enter the frequently-eaten foods.
• Reset daily data: Reset the daily calorie intake data.
• Share via: Send the current page to others.
• Settings: Configure settings for S Health.
• User manual: View more information about using this feature.
Use the calorie information in Food for personal reference only. The data provided
may not be accurate at all times and is subject to change. Some food information may
differ from actual calorie levels.
Viewing calorie intake in a graph
Compare your calorie intake records for a period by viewing them in a graph.
On the Food main screen, tap
.
Access the S Health menu
screen.
View the logs of your daily
calorie intake.
View hourly, daily or monthly
records in a graph.
Total calorie intake
View your calorie intake in a
graph.
Return to the previous screen.
120
S Health
Entering information about frequently-eaten food
Save information about food that you eat frequently. You can quickly update your calorie
intake by adding saved food information instead of entering the information each time you
eat it.
1 Tap → My food.
2 Tap Add food item, enter the food name and its calorie information, and then tap Save.
3 Enter the amount that you eat and tap OK.
The food information is added to the My food list.
4 To record intake food information from the frequently-eaten food list, tap My food, select
the added food, and then tap Done.
5 Tap Save.
Managing weight
Record your weight information and monitor weight changes using S Health’s weight feature.
You can view your weight records in a graph and share the data with others.
1 Tap → Weight.
2 Tap Update.
121
S Health
3 Enter your weight and tap Save.
Whenever you change your weight, the device applies it to your profile.
View and manage accessory
device connections.
View the logs of your daily
weight.
Access additional options.
Move to a specific date to view
weight records.
Weight information
Height information
Update your weight information.
View weight records in a graph.
Tap and use the following functions:
• Reset daily data: Reset the daily weight data.
• Share via: Send the current page to others.
• Settings: Configure settings for S Health.
• User manual: View more information about using this feature.
122
S Health
Viewing your recorded weight in a graph
Compare your weight records for a period by viewing them in a graph. Tap
main screen.
on the Weight
View the logs of your daily
weight.
Access the S Health menu
screen.
View and manage accessory
device connections.
View hourly, daily or monthly
records in a graph.
Weight information
View your weight records in a
graph.
Return to the Weight main
screen.
Entering data by using accessory devices
Import weight information from the connected device.
→ Scan, select a device from the detected devices list. Follow the on-screen
Tap
instructions to connect the device to your device.
Resetting weight record
To reset the daily weight record, tap → Reset daily data → OK.
123
S Health
Installing additional S Health apps
You can download and install various apps that are compatible with this app.
1 Tap → More apps.
2 Tap More and select an app.
3 Follow the on-screen instructions and install the app.
S Health settings
On the S Health main screen, tap → Settings, and then select one of the following:
• Profile: Edit your physical statistics.
• Accounts: Sign in to your Samsung account to manage S Health data online.
• Password: Set a PIN to lock or unlock S Health.
• Unit settings: Set unit options.
• Notification: Set the device to display new events and achievements.
• My accessories: View and manage accessory device connections.
• Compatible accessories: View accessories that are compatible with the device or
manage connected accessories.
• Reset data: Reset S Health data.
• Check for updates: Check the current version of S Health.
• Terms and Conditions: View the terms and conditions, including personal information
and data retention policies.
• About S Health: View information about S Health.
124
S Health
• The personal information collected by S Health may be stored on the device
for informative purposes only. Samsung does not receive, store, nor transmit
your personal information. (But if you sign in to your Samsung account from S
Health, your data may be saved on the server for data backup purposes.) Personal
information may be stored until the completion of such purposes. You can delete
personal data stored by S Health by using the Reset data option in the Settings
menu or by uninstalling the app. Resetting the data will delete all information
stored in the server. To delete any data you have shared with social networks or
transferred to storage devices, you must delete them separately.
• You assume full responsibility for the inappropriate use of data shared on social
networks or transmitted to others. Use caution when sharing your personal data
with others.
• To secure your personal information, on the S Health main screen, tap → Settings
→ Password, and then set a password.
• If the device is connected to measuring devices, verify the communication protocol
to confirm proper operation. If you use a wireless connection, such as Bluetooth or
ANT+, the device may be affected by electronic interference from other devices.
Avoid using the device near other devices that transmit radio waves.
• The content used in the S Health app may vary depending on the software version
of the app. The services provided with the app are subject to change or the
cancellation of support without prior notice.
125
Security features
Emergency mode
About emergency mode
Use this mode to extend the device’s standby time when you are in an emergency situation.
When this mode is activated, the screen brightness decreases and battery consumption is
reduced by restricting some features. You can also turn on the flash, sound alarms, and send
your location information to others in a message.
Activating emergency mode
Press and hold the Power button, and then tap Emergency mode. Alternatively, on the Apps
screen, tap Settings → Safety assistance → Emergency mode, and then tap the Emergency
mode switch to activate it.
Access additional options.
Turn on the flash.
Sound alarms.
Send your current location
information in a message.
Make a call.
Browsing the Internet.
Add more apps to use.
Remaining battery power and
estimated battery standby time
Make an emergency call.
126
Security features
The estimated maximum standby time shows the time remaining before the battery
power runs out if the device is not used. Standby time may vary depending on your
device settings and operating conditions.
Deactivating emergency mode
To deactivate emergency mode, press and hold the Power button, and then tap Emergency
mode. Alternatively, tap → Disable Emergency mode. Emergency mode is deactivated.
Help message
About help message
You can preset contacts to send a message to in an emergency. Send messages to your
primary contacts by quickly pressing the Power button three times.
On the Apps screen, tap Settings → Safety assistance.
Adding primary contacts
1 On the Apps screen, tap Settings → Safety assistance.
2 Tap Manage primary contacts → Create primary contact.
3 Tap Create new contact and enter contact information or tap Select from contacts to
add an existing contact as a primary contact.
Setting help messages
On the Apps screen, tap Settings → Safety assistance → Send help messages, and then tap
the Send help messages switch to activate it. Select content to include in help messages.
127
Security features
Sending help messages
In an emergency situation, quickly press the Power button three times. The device sends
messages to your primary contacts. The messages include your location information.
Severe weather notifications (Geo News)
About severe weather notifications (Geo News)
Use this feature to receive notifications about severe weather conditions close to your current
location.
• The feature identifies your location and provides you with information about
disasters if they occur in your area. The information provided may differ depending
on the service provider in your current location.
To view information about severe weather conditions and the regions and
languages that the information is available in, visit www.samsung.com/geonews.
• To receive severe weather notifications, connect the device to a Wi-Fi or mobile
network.
• This feature may not be available depending on the region or service provider.
Receiving notifications
On the Apps screen, tap Settings → Safety assistance → Geo News, and then tap the Geo
News switch to activate it.
Warning notifications
Tick Geo News notification pop-ups.
If the weather conditions worsen, the device displays the notification in a pop-up window.
You can make an emergency call or send emergency messages to preset contacts from the
pop-up window.
128
Security features
Watch notifications
Notifications for less severe weather conditions appear on the status bar at the top of the
screen. The information provided is displayed in the Geo News widget.
Using the geo news widget
You can view your current location and information about disasters in your region in the Geo
News widget.
On the Home screen, scroll left and tap the Geo News widget.
Access additional
options.
Current location
Disaster information for
your current location.
129
Useful apps and features
Kids Mode
Starting Kids Mode
Use this widget to provide a fun and safe environment for children by restricting children’s
access to certain apps or content.
Before you use this widget, you need to download and install it. On the Home screen, tap
Kids Mode → Install. When it is installed, the widget appears on the Home and App screens.
To start kids mode, tap Kids Mode on the Home or Apps screen.
When you launch this widget for the first time, tap Set PIN at the bottom of the screen. Then,
follow the on-screen instructions.
If the Kids Mode widget is accidentally uninstalled, you can reinstall it. On the Home
screen, tap and hold an empty area, tap Widgets, tap and hold the Kids Mode
widget. Drag the widget to the Home screen and tap Kids Mode to reinstall it.
130
Useful apps and features
Kids mode home screen
The Home screen is the starting point to access all of apps in kids mode.
Kids Gallery
Newly added apps
Kids Media
Kids Drawing
Kids Camera
Kids Voice Recorder
Exit kids mode.
Access parental controls.
Use this app to view saved images, drawings, voice recordings, and media files that you allow
your child to access.
Use this app to play videos. Before you use this app, add videos that are saved on the device
to the app. Refer to Parental control for more information.
131
Useful apps and features
Use this app to create a drawing with a pen, a brush, and more.
Use this app to record or play voice recordings.
Use this app to take photos or record videos.
Kids mode play area
Scroll right on the Home screen to open kids mode play area.
You can interact with characters, background objects, and more.
132
Useful apps and features
Parental control
Use this feature to set restrictions for kids mode to control access to content and apps. You
can change kids mode settings, usage time limits, and more.
On the Home screen, tap
and enter the PIN.
To exit parental control, press the Home button.
Tap and use the following:
• Children’s name: View and edit children’s profile.
• Activity: View information about how your children use the device, such as playing
duration and frequently-used apps.
• Daily playtime limit: Set a time limit to manage your children’s usage.
• Applications: View and add apps that are allowed to be used in kids mode.
• Media: Allow your children to access certain images and videos saved on the device.
• General: Configure kids mode settings.
• Kids Store: Download apps for kids from Samsung Apps (GALAXY Apps).
133
Useful apps and features
S Finder
Use this app to search for content on the device. You can apply various filters and view the
search history.
Open the notifications panel and tap S Finder.
Searching for content
Tap the search field and enter a keyword, or tap
To get more refined results, tap
and say a keyword.
and apply filters under the search field.
To update the list of search results, tap → Refresh.
You can set the search parameters using the available filters or select search categories. Tap
→ Settings → Select filters or Select search category.
Managing the search history
You can view or delete your past searches. Select a previous search item to perform the
search again.
To delete the search history, tap → Settings → Delete history, select search keywords, and
then tap Done.
To set the device to not save the search history, tap → Settings, and deselect Save search
history.
134
Useful apps and features
S Planner
Starting S Planner
Use this app to manage events and tasks.
Tap S Planner on the Apps screen.
Change the view mode.
Access additional options.
Go to today's date.
Create events or tasks.
Tap and use the following:
• Go to: Move to a specific date.
• Delete: Delete events or tasks.
• Search: Search for events or tasks.
• Calendars: Select the calendars to display.
• Sync: Sync events and tasks with your accounts.
• Settings: Change settings for S Planner.
135
Useful apps and features
Creating events or tasks
1 Tap S Planner on the Apps screen.
2 Tap . Alternatively, select a date with no events or tasks in it and tap the date again.
If the date already has saved events or tasks in it, tap the date and tap
.
3 Select either event or task and enter details.
• Add event: Set a start and end date for an event. You can set an optional repeat
setting.
• Add task: Add a task to do on a specific date. You can set an optional priority setting.
Select an item.
Select a calendar to use or sync
with.
Enter a title.
Attach a map showing the
location of the event.
Set a start and end date for the
event.
Add more details.
4 Tap Save to save the event or task.
136
Useful apps and features
Syncing events and tasks with your accounts
Tap S Planner on the Apps screen.
To sync events and tasks with your accounts, tap → Sync.
To add accounts to sync with, tap → Calendars → Add account. Then, select an account
to sync with and sign in. When an account is added, a green circle is displayed next to the
account name.
To change an account’s syncing option, on the Apps screen, tap Settings → Accounts, and
then select an account service.
Deleting events or tasks
Tap S Planner on the Apps screen.
To delete events or tasks, tap → Delete, select the events or tasks, and then tap Done → OK.
To delete an event or task while viewing it, tap
→ OK.
To mark tasks as completed, tap a date that has tasks in it and tick completed tasks.
Sharing events or tasks
Tap S Planner on the Apps screen.
To share an event or task while viewing it, tap → Share via, and then select a sharing
method.
137
Useful apps and features
S Voice
About S Voice
Use this app to command the device by voice to perform various features.
Tap S Voice on the Apps screen. Alternatively, press the Home button twice.
To deactivate the access by pressing the Home button, tap → Settings, and then deselect
Open via the home key.
This app may not be available depending on the region or service provider.
Setting the language
Tap → Settings → Language, and then select a language.
The selected language is applied to S Voice only, not to the language displayed on
the device.
Using S Voice
When you launch S Voice, the device starts voice recognition and the microphone icon turns
red.
Say a voice command.
If you say a command and the device recognises it, the microphone icon at the bottom of the
screen flashes green. Then, the device performs the command.
138
Useful apps and features
Tips for better voice recognition:
• Speak clearly.
• Speak in quiet places.
• Do not use offensive or slang words.
• Avoid speaking in dialectal accents.
The device may not recognise your commands or may perform unwanted commands
depending on your surroundings or how you speak.
Waking up S Voice in standby mode
If S Voice is not used for a certain period, it automatically switches to standby mode.
Tap the microphone icon or say “Hi Galaxy” to the device to resume voice recognition.
Changing the wake-up command
You can change the wake-up command from “Hi Galaxy”. The wake-up command is used to
launch S Voice when the device is in standby mode.
Tap → Settings → Voice wake-up → Set wake-up command.
Disabling voice feedback
Tap → Disable Voice feedback. The device stops providing voice feedback when you say
commands.
Correcting unwanted voice commands
You can edit the voice commands if the device does not recognise them correctly.
To correct a voice command, tap the last speech bubble that contains your spoken text and
edit the text with the keyboard.
139
Useful apps and features
Clock
Alarm
On the Apps screen, tap Clock → Alarm.
Setting alarms
Tap in the alarms list, set an alarm time, select the days on which the alarm will repeat, set
other various alarm options, and then tap Save. To activate or deactivate alarms, tap next
to the alarm in the alarms list.
• Snooze: Set an interval and the number of times for the alarm to repeat after the preset
time.
• Smart alarm: Set a time and tone for the smart alarm. A smart alarm starts at a low
volume a few minutes before a preset alarm is scheduled to sound. The volume of the
smart alarm increases gradually until you turn it off or the preset alarm sounds.
Stopping alarms
Drag outside the large circle to stop an alarm. If you have previously enabled the snooze
outside the large circle to repeat the alarm after a specified length of time.
option, drag
Deleting alarms
Tap → Delete, select alarms, and then tap Done.
140
Useful apps and features
World clock
On the Apps screen, tap Clock → World clock.
Creating clocks
Tap
and enter a city name or select a city from the cities list.
To apply summer time, tap and hold a clock, and then tap
.
Deleting clocks
Tap → Delete, select clocks, and then tap Done.
Stopwatch
On the Apps screen, tap Clock → Stopwatch.
Tap Start to time an event. Tap Lap to record lap times.
Tap Stop to stop timing. To clear lap times, tap Reset.
To set the device to dim the screen during laps, tap → Settings → Keep screen dimmed.
Timer
On the Apps screen, tap Clock → Timer.
Set the duration, and then tap Start.
Drag
outside the large circle when the timer goes off.
To change the alarm ringtone settings, tap → Settings.
141
Useful apps and features
Calculator
Use this app for simple or complex calculations.
Tap Calculator on the Apps screen.
Rotate the device to landscape orientation to display the scientific calculator. If Screen
rotation is disabled, tap → Scientific calculator.
Memo
Use this app to create memos and organise them by category.
Tap Memo on the Apps screen.
Composing memos
Tap on the memos list and enter a memo. While composing a memo, use the following
options:
• : Create or set a category.
• : Insert images.
• : Make a voice recording to insert.
To save the memo, tap Save.
To edit a memo, tap a memo, and then tap the content of the memo.
Searching for memos
Tap
on the memos list and enter a keyword to search for memos that include the keyword.
142
Useful apps and features
Adding and managing categories
Create categories to sort and manage your memos.
On the memos list, tap
→ Manage categories.
To add a new category, tap
To delete a category, tap
, enter a category name, and then tap OK.
next to the category, and then tap OK.
To rename a category, tap and hold a category name, enter a new name for the category, and
then tap OK.
To change the category order, tap
position.
next to a category and drag it up or down to another
Accessing additional options
You can access additional options on the memos list and while viewing memos.
On the memos list, tap and use the following options:
• Select: Select memos to apply options.
• Delete: Delete memos.
• Account: Sync memos with your Samsung account.
While viewing a memo, tap and use the following options:
• Delete: Delete the memo.
• Share Via: Share the memo with others.
• Print: Print the memo by connecting the device to a printer. Refer to Mobile printing for
more information.
143
Useful apps and features
Voice Recorder
Recording voice memos
Tap Voice Recorder on the Apps screen.
Tap to start recording. Speak into the microphone. Tap
recording, tap . Tap to finish recording.
While recording a voice memo, tap
to pause recording. To cancel
to insert a bookmark.
Access additional options.
Recording elapsed time
Display the list of voice memos.
Change the recording mode.
Start recording.
To set the device to remove background noise, tap → Settings, and then tick Noise
reduction.
Saving files with contextual tags
Add contextual tags, such as locations and dates, to filenames when saving voice memos.
Tap → Settings, and then tick Contextual filename. The device adds the recording date to a
filename. To add the location where a voice memo is recorded, tap → Settings, and then tick
Location tags.
144
Useful apps and features
Playing voice memos
Tap Voice Recorder on the Apps screen.
Tap
and select a voice memo to play.
• : Trim the voice memo.
• : Set a portion of the voice memo for loop playback.
• : Adjust the playback speed.
• : Skip a silent portion in the voice memo.
• : Insert bookmarks in the voice memo.
• /
: Pause or resume playback.
• /
: Skip to the previous or next voice memo.
Using the bookmarks list
You can mark specific points in a voice memo with bookmarks. Each bookmark is marked
with a bookmark icon on the voice memo.
To view the bookmark details while a voice memo is playing, tap → Bookmarks. Select a
bookmark from the bookmark list to play the voice memo from that position.
Managing voice memos
On the Apps screen, tap Voice Recorder →
Tap
to search for voice memos.
Tap
to delete voice memos.
.
Tap and select one of the following:
• Select: Select voice memos to apply options.
• Sort by: Sort memos by date, title, or category.
• Filter by category: View memos filtered by a category.
• Edit categories: Add, delete, or rename categories.
• Settings: Change the voice recorder settings.
145
Useful apps and features
Renaming voice memos
Tap and hold the voice memo, tap → Rename, enter a new name for the voice memo, and
then tap OK.
Managing categories
Tap → Edit categories →
, enter a category name, select a colour, and then tap Done.
To change or assign voice memo categories, in the list of voice memos, tap and hold the voice
memo. Then, tap → Change category, and then select the category.
To filter voice memos by category, tap → Filter by category, and then select the category.
Dropbox
Use this app to save and share files with others via Dropbox cloud storage. When you save
files to Dropbox, your device automatically syncs with the web server and any other devices
that have Dropbox installed.
This app may not be available depending on the region or service provider.
1 Tap Dropbox on the Apps screen.
2 Sign in to your Dropbox account. If you do not have it, create a Dropbox account.
3 Tap Turn on Camera Upload.
The device uploads photos taken with the device’s camera to Dropbox. To upload videos,
tap the Include videos switch to activate it.
To upload photos or videos manually, tap Skip this.
4 Use the following functions:
• : Upload or open files. Tap → Upload here to upload files.
• : View the uploaded photos or videos. Tap
albums.
• : Open files in the favourites list.
• : View notifications.
146
to share or delete files, or create
Useful apps and features
Flipboard
Use this app to view live social network updates and news in a personalised magazine format.
Tap Flipboard on the Apps screen.
This app may not be available depending on the region or service provider.
When you launch this app for the first time or restart it after performing a data reset, follow
the on-screen instructions to finish the setup.
On the Flipboard main screen, select from various news articles and subscriptions.
Editing subscriptions
On the Flipboard main screen, tap
→ My Flipboard to view your subscriptions.
To delete subscriptions or to change their location, tap and hold an item. Then, drag the item
to the rubbish bin or to a new location.
To add more subscriptions, tap
tap .
, select a subscription under DISCOVER MORE, and then
Creating personalised magazines
Save various content by creating your own magazine to read later or to share with others.
While you are reading content, tap to create a magazine. You can create a new magazine
or save the selected content to an existing magazine.
To view your magazines, tap
→ My Flipboard.
→ My Flipboard →
To view help information, tap
Flipboard website for more information.
147
→ Help. You can visit the
Useful apps and features
Smart Remote
About Smart Remote
Use this app to connect to a TV and use the device as a remote control. You can search for and
select TV programmes and control channels with your device.
Tap Smart Remote on the Apps screen.
Connecting to a TV
1 Tap Smart Remote on the Apps screen.
2 Tap Select country or region and select a country.
3 Select a region and select the broadcast service.
The available TV programmes appear.
148
Useful apps and features
Using the device as a remote control
You can turn the TV on or off, browse channels, or adjust the volume level on the TV using the
device as a remote control.
1 On the device, tap → Continue.
2 Select the TV brand.
3 Ensure that the device’s infrared port is facing the TV and tap
. Then, tap Yes, this code
1 works if the device turns off the TV.
If the device does not turn off the TV, tap Send this code 1 again or No, test next code 2,
and then repeat this until the TV recognises the signal.
4 Select a channel source.
5 When the setup is completed, tap
.
Access additional options.
Turn the TV on or off.
TV control menus
Additional functions
149
Useful apps and features
Watching TV using the device
Select a TV programme from the list of available programmes to watch on the connected TV.
Ensure that the device’s infrared port is facing the TV.
1 Tap → TV shows, Movies, or Sports and scroll left or right to select a category.
2 Select a TV programme and tap Watch now.
The selected programme will be shown on the connected TV.
3 Tap
to change channels or adjust the volume.
The remote control panel appears on the screen.
Setting programme reminders
1 Select a TV programme to watch.
2 Tap Reminder, set an alarm to remind you of the TV programme’s start time, and then tap
Done.
The alarm goes off at the preset time.
Torch
Use this widget to turn the flash on or off to improve visibility.
To add it to the Home screen, on the Home screen, tap and hold an empty area, tap Widgets,
tap and hold the Torch widget, and then drag it to the Home screen.
Tap the Torch widget on the Home screen to turn it on or off.
150
Useful apps and features
Magnifier
Use this widget to magnify text or objects with the rear camera.
To add it to the Home screen, on the Home screen, tap and hold an empty area, tap Widgets,
tap and hold the Magnifier widget, and then drag it to the Home screen.
Tap the Magnifier widget on the Home screen.
Tap
or
to adjust the magnification.
To focus on the centre of the screen, tap
where you want to focus.
. You can also adjust the focus manually by tapping
To turn on the flash to view text or objects in dark conditions, tap
To take a photo of text or objects, tap
.
.
Google apps
Google provides entertainment, social network, and business apps. You may require a Google
account to access some apps. Refer to Setting up accounts for more information.
To view more app information, on the each app’s main screen, tap → Help.
Some apps may not be available or may be labelled differently depending on the
region or service provider.
Chrome
Search for information and browse webpages.
Google Mail
Send or receive emails via the Google Mail service.
Google+
Share your news and follow updates that your family, friends, and others share. You can also
back up your photos and videos, and more.
151
Useful apps and features
Maps
Find your location on the map, search for locations, and view location information for various
places.
Play Music
Discover, listen to, and share music on your device.
Play Movies & TV
Watch videos stored on your device and download various content to watch from the Play
Store.
Play Books
Download various books from Play Store and read them.
Play Newsstand
Read news and magazines that interest you in one convenient location.
Play Games
Download games from Play Store and play them with others.
Drive
Store your content on the cloud, access it from anywhere, and share it with others.
YouTube
Watch or create videos and share them with others.
Photos
Manage photos, albums, and videos that you have saved on the device and uploaded to
Google+.
152
Useful apps and features
Hangouts
Chat with your friends individually or in groups and use images, emoticons, and video calls
while you are chatting.
Google
Search quickly for items on the Internet or your device.
Voice Search
Search quickly for items by saying a keyword or phrase.
Google Settings
Configure settings for some features provided by Google.
153
Connecting with other devices
Bluetooth
About Bluetooth
Bluetooth creates a direct wireless connection between two devices over short distances. Use
Bluetooth to exchange data or media files with other devices.
• Samsung is not responsible for the loss, interception, or misuse of data sent or
received via the Bluetooth feature.
• Always ensure that you share and receive data with devices that are trusted
and properly secured. If there are obstacles between the devices, the operating
distance may be reduced.
• Some devices, especially those that are not tested or approved by the Bluetooth
SIG, may be incompatible with your device.
• Do not use the Bluetooth feature for illegal purposes (for example, pirating copies
of files or illegally tapping communications for commercial purposes).
Samsung is not responsible for the repercussion of illegal use of the Bluetooth
feature.
154
Connecting with other devices
Pairing with other Bluetooth devices
1 On the Apps screen, tap Settings → Bluetooth, tap the Bluetooth switch to activate it,
and then tap Scan.
The detected devices are listed.
To set the device as visible to other devices, tap the device name.
2 Select a device to pair with.
If your device has paired with the device before, tap the device name without confirming
the auto-generated passkey.
If the device you want to pair with is not in the list, request that the device turns on its
visibility option.
3 Accept the Bluetooth authorisation request on both devices to confirm.
Sending and receiving data
Many apps support data transfer via Bluetooth. You can share data, such as contacts or media
files, with other Bluetooth devices. The following actions are an example of sending an image
to another device.
Sending an image
1 On the Apps screen, tap Gallery.
2 Select an image.
3 Tap → Bluetooth, and then select a device to transfer the image to.
If the device you want to pair with is not in the list, request that the device turns on its
visibility option. Or, set your device as visible to other devices.
4 Accept the Bluetooth authorisation request on the other device.
155
Connecting with other devices
Receiving an image
When another device sends you an image, accept the Bluetooth authorisation request. The
received image is saved in the Gallery → Download folder.
Unpairing Bluetooth devices
1 On the Apps screen, tap Settings → Bluetooth.
The device displays the paired devices in the list.
2 Tap next to the device’s name to unpair.
3 Tap Unpair.
Wi-Fi Direct
About Wi-Fi Direct
Wi-Fi Direct connects devices directly via a Wi-Fi network without requiring an access point.
Connecting to other devices
1 On the Apps screen, tap Settings → Wi-Fi, and then tap the Wi-Fi switch to activate it.
2 Tap → Wi-Fi Direct.
The detected devices are listed.
3 Select a device to connect to.
To connect to multiple devices, tap → Multi-connect.
To change the device name, tap → Rename device.
4 Accept the Wi-Fi Direct authorisation request on the other device to confirm.
156
Connecting with other devices
Sending and receiving data
You can share data, such as contacts or media files, with other devices. The following actions
are an example of sending an image to another device.
Sending an image
1 On the Apps screen, tap Gallery.
2 Select an image.
3 Tap → Wi-Fi Direct, and then select a device to transfer the image to.
4 Accept the Wi-Fi Direct authorisation request on the other device.
Receiving an image
When another device sends you an image, accept the Wi-Fi Direct authorisation request. The
received image is saved in the Gallery → Download folder.
Ending the device connection
1 On the Apps screen, tap Settings → Wi-Fi.
2 Tap → Wi-Fi Direct.
The device displays the connected devices in the list.
3 Tap End connection → OK to disconnect the devices.
157
Connecting with other devices
NFC
About NFC
Your device allows you to read near field communication (NFC) tags that contain information
about products. You can also use this feature to make payments and buy tickets for
transportation or events after downloading the required apps.
The battery contains a built-in NFC antenna. Handle the battery carefully to avoid
damaging the NFC antenna.
Using the NFC feature
Use the NFC feature to send images or contacts to other devices, and read product
information from NFC tags. If you insert a SIM or USIM card that has a payment feature, you
can use the device to make payments conveniently.
On the Apps screen, tap Settings → NFC, and then tap the NFC switch to activate it.
Alternatively, open the quick setting panel and tap NFC to activate it.
Place the NFC antenna area on the back of your device near an NFC tag. The information from
the tag appears.
Ensure that the device’s screen is unlocked. Otherwise, the device will not read NFC
tags or receive data.
158
Connecting with other devices
Making a purchase with the NFC feature
Before you can use the NFC feature to make payments, you must register for the mobile
payment service. To register or get more information about the service, contact your service
provider.
On the Apps screen, tap Settings → NFC, and then tap the NFC switch to activate it.
Alternatively, open the quick setting panel and tap NFC to activate it.
Touch the NFC antenna area on the back of your device to the NFC card reader.
To set the default payment app, tap Tap and pay and select an app.
The payment services list may not include all available payment apps.
Sending data
Use the Android Beam feature to send data, such as webpages and contacts, to NFC-enabled
devices.
1 On the Apps screen, tap Settings → NFC, and then tap the NFC switch to activate it.
Alternatively, open the quick setting panel and tap NFC to activate it.
2 Tap Android Beam and tap the Android Beam switch to activate it.
3 Select an item and touch the other device’s NFC antenna to your device’s NFC antenna.
4 When Touch to beam. appears on the screen, tap your device’s screen to send the item.
159
Connecting with other devices
S Beam
Use this feature to send data, such as videos, images, and documents.
1 Activate the S Beam feature on the receiving device.
2 On the Apps screen, tap Settings → NFC, and then tap the NFC switch to activate it.
Alternatively, open the quick setting panel and tap NFC to activate it.
3 Tap S Beam and tap the S Beam switch to activate it.
4 Select a file and touch the other device’s NFC antenna to your device’s NFC antenna.
5 When Touch to beam. appears on the screen, tap your device’s screen to send the file.
• Do not send copyright-protected data via S Beam. Doing so may violate copyright
laws. Samsung is not responsible for any liabilities caused by the illegal use of
copyrighted data.
• If both devices try to send data simultaneously, the file transfer may fail.
160
Connecting with other devices
Quick connect
About Quick Connect
Use this feature to easily search and connect to nearby devices. You can use the device as a
remote control by connecting it to a TV. You can also conveniently share content stored on
your device with computers.
• Connection methods may vary depending on the type of connected devices or the
shared content.
• Device name may vary depending on the Bluetooth devices to pair with. For
example, the device name can be shown as BT MAC.
Before using this feature
• When connecting to a device that supports the Quick Connect feature, turn on the
device’s screen to make it detectable.
• When connecting to a device that does not support the Quick Connect feature, ensure
that Wi-Fi Direct or the Bluetooth feature is activated.
Connecting to other devices
1 Open the notifications panel and tap Quick connect.
When the panel opens, the Bluetooth feature is activated automatically and the device
searches for nearby devices.
2 Select a device to connect to.
The next steps may vary depending on the connected device. Follow the on-screen
instructions to complete the connection between the devices.
To allow nearby devices to search for your device and connect to it, tap → Always ready
to connect, and then tap the Always ready to connect switch to activate it.
161
Connecting with other devices
Re-searching for devices
If the desired device does not appear in the list, search for the device.
Tap
and select the device from the list of detected devices.
Disconnecting devices
To deactivate the Quick Connect feature, tap
.
at the top of the screen. Alternatively, tap
Sharing content
Share content with the connected devices.
1 Open the notifications panel and tap Quick connect.
2 Select a device from the list of detected devices.
3 Select a media category.
4 Select the content to share and tap Done.
Your device sends the content to the connected device.
Connecting to a TV
Connect the device to a TV and control the TV by using the device as a remote control.
1 Open the notifications panel and tap Quick connect.
Ensure that the TV is turned on.
2 Select a TV from the list of detected devices.
When the device is connected to the TV, a remote control layout appears on the screen.
When you connect the device to a TV for the first time, tap Set up Remote control. Then,
follow the on-screen instructions to complete connecting the devices.
3 Control the connected TV using the remote control.
162
Connecting with other devices
Screen Mirroring
About Screen Mirroring
Use this feature to connect your device to a large screen with an AllShare Cast dongle or
HomeSync and then share your contents. You can also use this feature with other devices that
support the Wi-Fi Miracast feature.
Screen mirroring
-enabled devices
(AllShare Cast dongle,
HomeSync, and Wi-Fi
Miracast devices)
• This feature may not be available depending on the region or service provider.
• Miracast-enabled devices that do not support High-bandwidth Digital Content
Protection (HDCP 2.X) may not be compatible with this feature.
• Some files may be buffered during playback, depending on the network
connection.
• To save energy, deactivate this feature when not in use.
• If you specify a Wi-Fi frequency, AllShare Cast dongles or HomeSync may not be
detected or connected.
• If you play videos or games on a TV, select an appropriate TV mode to get the best
experience.
163
Connecting with other devices
Viewing content on a TV
Before you connect a TV to your device, connect the TV and the screen mirroring-enabled
device. To set up the connection, refer to the device’s user manual. The following actions are
an example of viewing content on a TV connected via an AllShare Cast dongle.
1 Connect the screen mirroring-enabled device to the TV using an HDMI cable.
2 On the TV, select a connection mode, such as HDMI mode, to connect an external device.
3 On the Apps screen, tap Settings → Screen Mirroring.
The detected devices are listed.
4 Select a device to connect to.
Your device’s screen appears on the TV screen.
If you connect the device for the first time, tap and hold the dongle’s name in the list and
enter the PIN shown on the TV screen.
5 Open or play a file, and then control the display with the keys on your device.
Stopping viewing the content
On the Apps screen, tap Settings → Screen Mirroring, and then tap the Screen Mirroring
switch to deactivate it.
164
Connecting with other devices
Mobile printing
Connect the device to a printer via the Wi-Fi feature or Wi-Fi Direct, and print image or
documents.
Some printers may not be compatible with the device.
Connecting to a printer
On the Apps screen, tap Settings → Printing, select a printer type, and then tap the switch at
the top right of the screen to activate it. The device searches for printers that are connected to
the same Wi-Fi network as your device. Select a printer to use as the default printer.
To add printers manually, tap → Add printer →
, enter details, and then tap OK.
To change printing settings, tap → Printing settings.
Printing content
While viewing content, such as images or documents, tap → Print, and then select a printer.
165
Device & data manager
Upgrading the device
The device can be upgraded to the latest software.
Upgrading over the air
The device can be directly upgraded to the latest software by the firmware over-the-air
(FOTA) service.
On the Apps screen, tap Settings → About device → Software update → Update now.
Upgrading with Samsung Kies
Download the latest version of Samsung Kies from the Samsung website. Launch Samsung
Kies and connect the device to the computer. Samsung Kies automatically recognises the
device and shows available updates in a dialogue box, if any. Click the Update button in the
dialogue box to start upgrading. Refer to the Samsung Kies help for more information about
how to upgrade.
• Do not turn off the computer or disconnect the USB cable while the device is
upgrading.
• While upgrading the device, do not connect other media devices to the computer.
Doing so may interfere with the update process.
166
Device & data manager
Transferring files between the device and a
computer
Move audio, video, image, or other types of files from the device to the computer, or vice
versa.
Do not disconnect the USB cable from the device when you are transferring files.
Doing so may cause data loss or device damage.
• Do not disconnect the device from the computer when you play files saved in the
device on the connected computer. After you finish playing the file, disconnect the
device from the computer.
• The devices may not connect properly if they are connected via a USB hub. Directly
connect the device to the computer’s USB port.
Connecting as a media device
1 Connect the device to the computer using the USB cable.
2 Open the notifications panel, and then tap Connected as a media device → Media
device (MTP).
Tap Camera (PTP) if your computer does not support Media Transfer Protocol (MTP) or
not have any appropriate driver installed.
3 Transfer files between your device and the computer.
167
Device & data manager
Connecting with Samsung Kies
Samsung Kies is a computer app that manages media contents and personal information
with Samsung devices. Download the latest Samsung Kies from the Samsung website.
1 Connect the device to the computer using the USB cable.
Samsung Kies launches on the computer automatically. If Samsung Kies does not launch,
double-click the Samsung Kies icon on the computer.
2 Transfer files between your device and the computer.
Refer to the Samsung Kies help for more information.
Backing up and restoring data
Keep your personal information, app data, and settings safe on your device. You can back up
your sensitive information to a backup account and access it later.
Using a Google account
1 Tap Settings on the Apps screen.
2 Tap Backup and reset and tick Back up my data.
3 Tap Backup account and select an account as the backup account.
To restore data, you must sign in to your Google account via the setup wizard. You can
launch and open the setup wizard by performing a factory data reset on the device.
If you do not sign in to your Google account via the setup wizard, you cannot restore
the backup data.
168
Device & data manager
Using a Samsung account
1 On the Apps screen, tap Settings → Accounts → Add account → Samsung account,
and then sign into your Samsung account.
2 Tap Settings on the Apps screen.
3 Tap Cloud → Backup, tick the items to back up, and then tap Back up now → Back up.
To restore data, on the Apps screen, tap Settings → Cloud → Restore, select the
items, and then tap Restore now.
Performing a data reset
Delete all settings and data on the device. Before performing a factory data reset, ensure you
back up all important data stored on the device. Refer to Backing up and restoring data for
more information.
On the Apps screen, tap Settings → Backup and reset → Factory data reset → Reset
device → Erase everything. The device automatically restarts.
169
Settings
About Settings
Use this app to configure the device, set app options, and add accounts.
Tap Settings on the Apps screen.
To search for settings by entering keywords, tap
.
QUICK SETTINGS
View the list of your favourite setting options.
To edit the list of favourite setting options, tap → Edit quick settings, select a settings
option, and then tap Done.
NETWORK CONNECTIONS
Wi-Fi
Activate the Wi-Fi feature to connect to a Wi-Fi network and access the Internet or other
network devices.
On the Settings screen, tap Wi-Fi, and then tap the Wi-Fi switch to activate it.
The device can maintain a stable network connection by automatically selecting either
the Wi-Fi or mobile network to use the strongest signal. To automatically switch between
networks, tick Smart network switch.
170
Settings
To use options, tap .
• Scan: Search for available networks.
• Wi-Fi Direct: Activate Wi-Fi Direct and connect devices directly via Wi-Fi to share files.
• Advanced: Customise Wi-Fi settings.
• WPS push button: Connect to a secured Wi-Fi network with a WPS button.
• WPS PIN entry: Connect to a secured Wi-Fi network with a WPS PIN.
• Help: View help information for Wi-Fi.
Setting Wi-Fi sleep policy
Tap → Advanced → Keep Wi-Fi on during sleep.
When the screen is turned off, the device automatically turns off Wi-Fi connections.
When this happens, the device automatically accesses mobile networks if it is set
to use them. This may incur data transfer fees. To avoid additional charges, set this
option to Always.
Setting Network notification
The device can detect open Wi-Fi networks and display an icon on the status bar to notify
when available.
Tap → Advanced and tick Network notification to activate this feature.
171
Settings
Bluetooth
Activate the Bluetooth feature to exchange information over short distances.
On the Settings screen, tap Bluetooth, and then tap the Bluetooth switch to activate it.
To use more options, tap .
• Visibility timeout: Set duration that the device is visible.
• Received files: View received files via Bluetooth.
• Rename device: Change the device name.
• Help: View help information for Bluetooth.
Tethering and Mobile hotspot
Use the device as a mobile hotspot to share the device’s mobile data connection with other
devices. Refer to Tethering and Mobile hotspot for more information.
On the Settings screen, tap Tethering and Mobile hotspot.
• Mobile hotspot: Use the mobile hotspot to share the device’s mobile data connection
with computers or other devices through the Wi-Fi network. You can use this feature
when the network connection is not available.
• USB tethering: Use USB tethering to share the device’s mobile data connection with
a computer via USB. When connected to a computer, the device is used as a wireless
modem for the computer.
• Bluetooth tethering: Use Bluetooth tethering to share the device’s mobile data
connection with computers or other devices via Bluetooth.
Flight mode
This disables all wireless functions on your device. You can use only non-network services.
On the Settings screen, tap Flight mode.
172
Settings
Data usage
Keep track of your data usage amount and customise the settings for the limitation.
On the Settings screen, tap Data usage.
• Mobile data: Set the device to use data connections on any mobile network.
• Set mobile data limit: Set a limit for mobile data usage.
• Data usage cycle: Set a monthly reset date to monitor data usage between periods.
To use more options, tap .
• Data roaming: Set the device to use data connections when you are roaming.
• Restrict background data: Set the device to disable sync in the background while using
a mobile network.
• Auto sync data: Activate or deactivate auto-syncing of apps, such as calendar or email.
You can select what information to sync for each account in Settings → Accounts.
• Show Wi-Fi usage: Set the device to show your data usage via Wi-Fi.
• Mobile hotspots: Select mobile hotspots to prevent apps that are running in the
background from using them.
Location
Change settings for location information permissions.
On the Settings screen, tap Location, and then tap the Location switch to activate it.
• Mode: Select a method to collect your location data.
• RECENT LOCATION REQUESTS: View which apps request your current location
information and their battery usage.
• LOCATION SERVICES: View the location services your device is using.
• My places: Set up profiles that will be used for specific locations when you use GPS, Wi-Fi,
or Bluetooth features to find your current location.
173
Settings
More networks
Customise settings to control networks.
On the Settings screen, tap More networks.
Default messaging app
Select the default app to use for messaging.
Mobile networks
• Mobile data: Set the device to use data connections on any mobile network.
• Data roaming: Set the device to use data connections when you are roaming.
• Access Point Names: Set up access point names (APNs).
• Network mode: Select a network type.
• Network operators: Search for available networks and select a network for roaming.
VPN
Set up and connect to virtual private networks (VPNs).
CONNECT AND SHARE
NFC
Activate the NFC feature to read or write NFC tags that contain information.
On the Settings screen, tap NFC, and then tap the NFC switch to activate it.
• Android Beam: Turn on the Android Beam feature to send data, such as webpages and
contacts, to NFC-enabled devices.
• S Beam: Activate the S Beam feature to send data, such as videos, images, and
documents, to devices that support NFC and Wi-Fi Direct.
• Tap and pay: Set the default payment app for mobile payments.
The payment services list may not include all available payment apps.
174
Settings
Nearby devices
Change settings for sharing content when you connect the device to nearby devices.
On the Settings screen, tap Nearby devices, and then tap the Nearby devices switch to
activate it.
• DEVICE NAME: View the media server name for your device.
• Content to share: Set the device to share your content with other devices.
• Allowed devices: View the list of devices that can access your device.
• Denied devices: View the list of devices that are blocked from accessing your device.
• Download to: Select a memory location for saving media files.
• Download from other devices: Set the device to accept uploads from other devices.
Printing
Configure settings for printer plug-ins installed on the device. You can search for available
printers or add one manually to print files via Wi-Fi or cloud services.
On the Settings screen, tap Printing.
Screen Mirroring
Activate the screen mirroring feature and share your display with others.
On the Settings screen, tap Screen Mirroring.
175
Settings
SOUND AND DISPLAY
Sound
Change settings for various sounds on the device.
On the Settings screen, tap Sound.
• Sound mode: Set the device to use sound mode or silent mode.
• Volume: Adjust the volume level for call ringtones, music and videos, system sounds, and
notifications.
• Ringtones: Add or select a ringtone for incoming calls.
• Vibrations: Add or select a vibration pattern.
• Notifications: Select a ringtone for events, such as incoming messages and missed calls.
• Vibrate when ringing: Set the device to vibrate and play a ringtone for incoming calls.
• Dialling keypad tone: Set the device to sound when you tap the buttons on the keypad.
• Touch sounds: Set the device to sound when you select an app or option on the touch
screen.
• Screen lock sound: Set the device to sound when you lock or unlock the touch screen.
• Sound when tapped: Set the device to sound when a key is touched.
• SAMSUNG APPLICATIONS: Change the notification settings for each app.
• Music effects: Select a sound effect to apply when you adjust to music.
176
Settings
Display
Change the display settings.
On the Settings screen, tap Display.
• Brightness: Set the brightness of the display.
• Font:
– – Font style: Change the font type for display text.
– – Font size: Change the font size.
• Screen rotation: Set the content to rotate automatically when the device is turned.
– – Smart rotation: Set the interface not to rotate according to the orientation of your
face.
• Smart stay: Set the device to prevent the display backlight from turning off while you are
looking at the display.
• Screen timeout: Set the length of time the device waits before turning off the display’s
backlight.
• Screen mode:
– – Adapt Display: Use this mode for optimising the display according to the display
settings.
– – Dynamic: Use this mode to make the display tone more vivid.
– – Standard: Use this mode for normal surroundings.
– – Professional photo: Use this mode to make the display tone look like real colours.
– – Cinema: Use this mode for dim surroundings, such as in a dark room.
• Auto adjust screen tone: Set the device to save power by adjusting the brightness of the
display.
• Daydream: Set the device to launch a screensaver when the device is charging or
connected to a desktop dock.
177
Settings
• LED indicator:
– – Charging: Set the device to turn on the notification light while the battery is charging.
– – Low battery: Set the device to turn on the notification light when the battery is low.
– – Notifications: Set the device to turn on the notification light when you have missed
calls, messages, or notifications.
– – Voice recording: Set the device to turn on the notification light when you record
voice memos.
• Touch key light duration: Set the duration that the Recent apps button and the Back
button’s backlight remains on.
• Increase touch sensitivity: Set the device to allow use of the touch screen with gloves
on.
Depending on the type of material you wear while touching the device, some
commands may not be recognised.
Wallpaper
Change the wallpaper settings.
On the Settings screen, tap Wallpaper.
• Home screen: Select a background image for the Home screen.
• Lock screen: Select a background image for the locked screen.
• Home and lock screens: Select a background image for the Home screen and the locked
screen.
Lock screen
Change the settings for the locked screen.
On the Settings screen, tap Lock screen.
• Screen lock: Activate the screen lock feature. The following options may vary depending
on the screen lock feature selected.
• Dual clock: Set the device to show the dual clock.
178
Settings
• Clock size: Change the clock size.
• Show date: Set the device to show the date with the clock.
• Camera shortcut: Set the device to show the camera shortcut on the locked screen.
This feature may not be available depending on the region or service provider.
• Owner information: Enter your information that is shown with the clock.
• Unlock effect: Select an effect that you see when you unlock the screen.
• Additional information: Set the device to display additional information on the locked
screen.
• Help text: Set the device to show the help text on the locked screen.
Notification panel
Customise the items that appear on the notifications panel.
On the Settings screen, tap Notification panel.
• Brightness adjustment: Set the device to display the brightness adjustment bar on the
notifications panel.
• Recommended apps: Set the device to display a list of recommended apps on the
notifications panel based on your actions, such as connecting a headset to the device.
• Set quick setting buttons: Rearrange the quick setting buttons displayed on the
notifications panel.
Toolbox
Set the device to use the toolbox.
On the Settings screen, tap Toolbox, and then tap the Toolbox switch to activate it.
• APPLICATIONS: View the apps list to display in the toolbox.
• Edit: Select the apps to display in the toolbox.
179
Settings
PERSONALISATION
Easy mode
Set the device to easy mode.
On the Settings screen, tap Easy mode.
• Standard mode: Set the device to standard mode.
• Easy mode: Set the device to easy mode.
• EASY APPLICATIONS: Select apps to apply simpler layouts.
Accessibility
Use this feature to improve accessibility to the device. Refer to About Accessibility for more
information.
On the Settings screen, tap Accessibility.
Blocking mode
Select which notifications will be blocked or set to allow notifications for calls from specified
contacts in blocking mode.
On the Settings screen, tap Blocking mode, and then tap the Blocking mode switch to
activate it.
Private mode
Set the device to prevent others from accessing your personal content by activating private
mode.
On the Settings screen, tap Private mode, and then tap the Private mode switch to activate
it.
• Unlock method: Set or change the unlock method to activate private mode.
180
Settings
Finger Scanner
Register your fingerprint to the device to secure the device or sign in to your Samsung
account.
On the Settings screen, tap Finger Scanner.
• Fingerprint manager: Register or delete fingerprint information.
• Change alternative password: Change the alternative password to use if the device does
not recognise the fingerprint.
• Screen lock: Set an unlock method and an alternative password.
• Verify Samsung account: Set the device to verify your Samsung account with
fingerprints.
• Pay with PayPal: Set the device to verify your PayPal account and to authorise purchases
using your fingerprints.
This feature may not be available depending on the region or service provider.
MOTION
Motions and gestures
Activate the motion recognition feature and change the settings that control motion
recognition on your device.
On the Settings screen, tap Motions and gestures.
• Direct call: Set the device to make a voice call by picking up and holding the device near
your ear while viewing call, message, or contact details.
• Smart alert: Set the device to alert you if you have missed calls or new messages when
you pick up the device.
• Mute/Pause: Set the device to mute incoming calls or alarms, or to pause media playback
by using palm motions or looking away from the screen.
– – Covering screen with hand: Set the device to mute incoming calls or alarms, or to
pause media playback when you cover the screen with your palm.
– – Turning device over: Set the device to mute incoming calls or alarms, or to pause
media playback by placing the device face down.
181
Settings
• Palm swipe to capture: Set the device to capture a screenshot when you sweep your
hand to the left or right across the screen.
Air view
Hover over an item or the screen with your finger to preview content or view information in a
pop-up window.
On the Settings screen, tap Air view, and then tap the Air view switch to activate it.
USER AND BACKUP
Accounts
Add email or SNS accounts.
On the Settings screen, tap Accounts.
Cloud
Change settings for syncing data or files with your Samsung account or Dropbox cloud
storage.
On the Settings screen, tap Cloud.
Backup and reset
Change the settings for managing settings and data.
On the Settings screen, tap Backup and reset.
• Back up my data: Set the device to back up settings and app data to the Google server.
• Backup account: Set up or edit your Google backup account.
• Automatic restore: Set the device to restore settings and app data when the apps are
reinstalled on the device.
• Factory data reset: Reset settings to the factory default values and delete all data.
182
Settings
SYSTEM
Language and input
Change the settings for text input. Some options may not be available depending on the
selected language.
On the Settings screen, tap Language and input.
Language
Select a display language for all menus and apps.
Default
Select a default keyboard type for text input.
Samsung keyboard
To change the Samsung keyboard settings, tap
.
The available options may vary depending on the region or service provider.
• English(UK): Select a default keyboard layout.
• Select input languages: Select languages for text input.
• Predictive text: Activate predictive text mode to predict words based on your input and
show word suggestions. You can also customise the word prediction settings.
• Auto replacement: Set the device to correct misspelled and incomplete words by
tapping the space bar or punctuation mark.
• Auto capitalisation: Set the device to automatically capitalise the first character after a
final punctuation mark, such as a full stop, question mark, or exclamation mark.
• Auto spacing: Set the device to automatically insert a space between words.
• Auto-punctuate: Set the device to insert a full stop when you double-tap the space bar.
183
Settings
• Keyboard swipe:
– – None: Set the device to deactivate the keyboard swipe feature.
– – Continuous input: Set the device to enter text by sweeping on the keyboard.
– – Cursor control: Enable the smart keyboard navigation feature to move the cursor by
scrolling the keyboard.
– – Flick input: Enable or disable the keyboard to enter numbers or symbols when you
tap and hold a key, and then flick your finger upwards.
• Sound: Set the device to sound when a key is touched.
• Character preview: Set the device to display a large image of each character tapped.
• Tap and hold delay: Set the recognition time for tapping and holding the screen.
• Reset settings: Reset Samsung keyboard settings.
Google voice typing
To change the voice input settings, tap
.
• Choose input languages: Select languages for text input.
• Block offensive words: Set the device to prevent the device from recognising offensive
words in voice inputs.
• Offline speech recognition: Download and install language data for offline voice input.
Voice search
• Language: Select a language for voice recognition.
• “Ok Google” hotword detection: Set the device to begin voice recognition when you say
the wake-up command while using the search app.
This feature may not be available depending on the region or service provider.
• Speech output: Set the device to provide voice feedback to alert you to the current
action.
• Block offensive words: Hide offensive words from voice search results.
• Offline speech recognition: Download and install language data for offline voice input.
184
Settings
• Personalised recognition: Set the device to use information from your Google
dashboard to improve speech recognition accuracy.
• Bluetooth headset: Set the device to allow voice input of search keywords via the
Bluetooth headset microphone when a Bluetooth headset is connected.
Text-to-speech options
• PREFERRED TTS ENGINE: Select a speech synthesis engine. To change the settings for
speech synthesis engines, tap .
• Speech rate: Select a speed for the text-to-speech feature.
• Listen to an example: Listen to the spoken text for an example.
• Default language status: View the status of the default language for the text-to-speech
feature.
Notification readout
Set the device to read aloud notifications when you have incoming calls, messages, or events.
Pointer speed
Adjust the pointer speed for the mouse or trackpad connected to your device.
Date and time
Access and alter the following settings to control how the device displays the time and date.
On the Settings screen, tap Date and time.
If the battery remains fully discharged or removed from the device, the time and date
is reset.
• Automatic date and time: Automatically update the time and date when moving across
time zones.
• Set date: Set the current date manually.
• Set time: Set the current time manually.
• Automatic time zone: Set the device to receive time zone information from the network
when you move across time zones.
• Select time zone: Set the home time zone.
• Use 24-hour format: Display time in 24-hour format.
• Select date format: Select a date format.
185
Settings
Safety assistance
Activate emergency mode and set primary contacts and messages. Refer to Emergency mode
for more information.
On the Settings screen, tap Safety assistance.
• Emergency mode: Set the device to activate emergency mode and reduce battery
consumption by using basic functions, such as calling.
• Geo News: Set the device to receive notifications for severe weather conditions.
This feature may not be available depending on the region or service provider.
• Send help messages: Set the device to send help messages by pressing the Power
button three times.
– – Send pictures: Set the device to send photos taken by the front and rear cameras with
the help message.
This feature may not be available depending on the region or service provider.
– – Send sound recording: Set the device to record sound and send it along with the
message to the recipients.
• Manage primary contacts: Select or edit the recipients for help messages.
Battery
View the amount of battery power consumed by your device.
On the Settings screen, tap Battery.
• Display battery percentage: Set the device to display the remaining battery life.
186
Settings
Power saving
Activate power-saving mode and change the settings for power-saving mode. Refer to Power
saving feature for more information.
On the Settings screen, tap Power saving.
• Power saving mode: Activate power-saving mode and change the settings for powersaving mode.
– – Restrict background data: Set the device to prevent apps that are running in the
background from using a mobile data connection.
– – Restrict performance: Set the device to limit various options, such as turning off the
Recent apps button and the Back button’s backlight.
– – Greyscale mode: Set the device to display colours on the screen as grey tones.
• Ultra power saving mode: Extend standby time and reduce battery consumption by
displaying a simpler layout and allowing limited access to an app.
The estimated maximum standby time shows the time remaining before the battery
power runs out if the device is not used. Standby time may vary depending on your
device settings and operating conditions.
Storage
View memory information for your device and memory card, or format a memory card.
On the Settings screen, tap Storage.
Formatting a memory card permanently deletes all data from it.
The actual available capacity of the internal memory is less than the specified
capacity because the operating system and default apps occupy part of the memory.
The available capacity may change when you upgrade the device.
187
Settings
Security
Change settings for securing the device and the SIM or USIM card.
On the Settings screen, tap Security.
• Encrypt device: Set a password to encrypt data saved on the device. You must enter the
password each time you turn on the device.
Charge the battery before enabling this setting because it may take more than an
hour to encrypt your data.
• Encrypt external SD card: Set the device to encrypt files on a memory card.
If you reset your device to the factory defaults with this setting enabled, the device
will not be able to read your encrypted files. Disable this setting before resetting the
device.
• Remote controls: Set the device to allow control of your lost or stolen device remotely
via the Internet. To use this feature, you must sign in to your Samsung account.
– – ACCOUNT REGISTRATION: Add or view your Samsung account.
– – Use wireless networks: Set the device to allow location data collection or to
determine the location of your lost or stolen device via Wi-Fi or mobile networks.
• SIM change alert: Activate or deactivate the Find my mobile feature which helps locate
the device when lost or stolen.
• Go to website: Access the Find my mobile website (findmymobile.samsung.com). You
can track and control your lost or stolen device from the Find my mobile website.
• Set up SIM card lock:
– – Lock SIM card: Activate or deactivate the PIN lock feature to require the PIN before
using the device.
– – Change SIM PIN: Change the PIN used to access SIM or USIM data.
188
Settings
• Make passwords visible: Set the device to display passwords as they are entered.
• Device administrators: View device administrators installed on the device. You can allow
device administrators to apply new policies to the device.
• Unknown sources: Set the device to allow the installation of apps from unknown
sources.
• Verify apps: Set the device to allow Google to check the apps for harmful content before
installing them.
• Security policy updates: Set the device to check and download security updates.
• Send security reports: Set the device to automatically send the updated security reports
to Samsung.
• Storage type: Set a storage type for credential files.
• Trusted credentials: Use certificates and credentials to ensure secure use of various apps.
• Install from device storage: Install encrypted certificates stored on the USB storage.
• Clear credentials: Erase the credential contents from the device and reset the password.
Help
View help information to learn how to use the device and apps or configure important
settings.
On the Settings screen, tap Help.
About device
Access device information, edit the device name, or update device software.
On the Settings screen, tap About device.
189
Settings
APPLICATIONS
Application manager
View and manage the apps on your device.
On the Settings screen, tap Application manager.
Default applications
Select a default setting for using apps.
On the Settings screen, tap Default applications.
Call
Customise the settings for calling features.
On the Settings screen, tap Call.
• Call rejection: Reject calls from specified phone numbers automatically. Add phone
numbers to the reject list.
• Answering and ending calls:
– – Pressing the home key: Set the device to answer a call when you press the Home
button.
– – Using voice commands: Set the device to answer or reject a call with voice
commands.
– – Pressing the power key: Set the device to end a call when pressing the Power button.
190
Settings
• Call-related pop-ups:
– – Call notification pop-ups: Set the device to display a pop-up window when you
receive an incoming call while using apps.
– – In-call status pop-ups: Set the device to display a pop-up window that shows the
status of a call while using apps.
• Show caller information: Set the device to display the caller’s recent social networking
activity when a call comes in.
• Call alerts:
– – Vibrate when answered: Set the device to vibrate when the other party answers a
call.
– – Vibrate when call ends: Set the device to vibrate when the other party ends a call.
– – Call connect tone: Activate or deactivate the call connection tone.
– – Minute minder: Activate or deactivate the minute minder tone.
– – Call end tone: Activate or deactivate the call disconnection tone.
– – Notify during calls: Set the device to alert you to events during a call.
• Call accessories:
– – Automatic answering: Set the device to answer a call automatically when a headset is
connected.
– – Automatic answering timer: Set the length of time the device waits before answering
a call.
– – Outgoing call conditions: Set the device to allow outgoing calls with a Bluetooth
headset when the device is locked.
– – Outgoing call types: Select the type of outgoing calls to make when using a
Bluetooth headset.
191
Settings
• More settings:
– – Caller ID: Display your caller ID to other parties for outgoing calls.
– – Call forwarding: Divert incoming calls to another number.
– – Auto area code: Set the device to automatically insert a prefix (area or country code)
before a phone number.
– – Call barring: Block incoming or outgoing calls.
– – Call waiting: Allow incoming call alerts when a call is in progress.
– – Auto redial: Activate auto redial for calls that were not connected or that were cut off.
– – Fixed Dialling Numbers: Activate or deactivate FDN mode to restrict calls to numbers
in the FDN list. Enter the PIN2 supplied with your SIM or USIM card.
• Ringtones and keypad tones:
– – Ringtones: Add or select a ringtone for incoming calls.
– – Vibrations: Add or select a vibration pattern.
– – Vibrate when ringing: Set the device to vibrate and play a ringtone for incoming calls.
– – Dialling keypad tone: Set the device to sound when buttons on the keypad are
tapped.
• Personalise call sound: Select or personalise the sound quality used during calls when a
headset is connected.
• Hide my video: Select an image to be shown to the other party.
• Service provider: Select your voicemail service provider.
• Voicemail settings: Enter the number to access the voicemail service. Obtain this number
from the service provider.
• Ringtones: Select a ringtone for new voicemails.
• Vibrate: Set the device to vibrate when voicemails are received.
• Accounts: Set the device to accept IP calls and set up your accounts for IP call services.
• Use Internet calling: Set whether to use IP call services for all calls or only for IP calls.
192
Settings
Contacts
Change settings for using contacts.
On the Settings screen, tap Contacts.
• Import/export: Import or export contacts.
• Contacts to display: Select which contacts to display.
• Swipe to call or send msg: Set the device to make a call or send a message when you
drag a contact to the left or right in the contacts list.
• Only contacts with phones: Set the device to display contacts that only have a phone
number.
• Sort by: Select an option for sorting contacts.
• Display contacts by: Select an option for displaying contact names.
• Send contact information: Select a method to share contacts.
• Accounts: Add or edit accounts to sync contacts with.
Email
Change settings for managing and sending emails.
On the Settings screen, tap Email.
• Manage accounts: Manage existing email accounts or add new accounts.
• Display: Change the settings for displaying emails.
• Default display: Set the device to open a specific screen after you delete emails.
• Priority sender settings: Change settings for priority senders.
• Spam addresses: Add email addresses to block.
• Delay email sending: Set the time the device waits before sending emails after you tap
the send button.
193
Settings
Gallery
Change settings for using Gallery.
On the Settings screen, tap Gallery.
• Sync via Wi-Fi only: Set the device to sync content only when the Wi-Fi connection is
activated.
• Tag buddy: Set the device to display contextual tags.
• Face tag: Register the faces in the image as face tags.
Internet
Change settings for using Internet.
On the Settings screen, tap Internet.
• Account: Sign in to a Samsung account.
• Set homepage: Set a default homepage.
• Autofill forms: Set the device to automatically enter user information, such as names or
phone numbers when you fill out forms on webpages.
• Privacy: Manage personal data when visiting webpages.
• Screen and text: Change the settings, adjust the font size, and more when viewing
webpages.
• Content settings: Change the settings for managing cookies from visiting webpages or
set whether or not to display pop-up windows, and more.
• Bandwidth management: Change the bandwidth settings.
194
Settings
Messages
Change settings for using messages.
On the Settings screen, tap Messages.
• Default messaging app: Select the default app to use for messaging.
• Display: Change settings for the messaging window, such as the font size, background
colour, and more.
• Quick responses: Add or edit the message template.
• Text messages: Change settings for text messages.
• Multimedia messages: Change settings for multimedia messages.
• Delete old messages: Set the device to delete old messages.
• Priority senders: Set the device to show priority senders list.
• Push messages: Set an interval for pop-up notifications that alert you to new messages.
• Cell broadcast: Set the device to receive cell broadcast messages.
• Notifications: Set the device to alert you to new messages.
• Signature: Set the device to display your signature on the message.
• Spam filter: Set the device to block messages from specific numbers or that contain
certain words.
• Delay message sending: Set the time the device waits before sending messages after
you tap the send button.
• Safe mode:
– – Allow access to all links: Set the device to allow to open the link on a message when
you tap the link.
– – Potential threat alerts: Set the device to alert you when you install apps that support
messaging feature to prevent phishing.
195
Settings
S Planner
Change settings for using S Planner.
On the Settings screen, tap S Planner.
• First day of week: Select the first day of a week.
• Show week numbers: Set the device to display the number of weeks in a year.
• Hide declined events: Set the device to hide expired events.
• Hide completed tasks: Set the device to hide completed tasks.
• Weather: Set the device to display the weather forecast.
• Lock time zone: Set the device to leave the time zone setting unchanged when moving
across time zones.
• Select time zone: Select the time zone.
• View today according to: Set the calendar to use your home time zone or a selected time
zone.
• Select alert type: Select the notification settings for events.
• Notification sound: Select a ringtone for events or tasks.
• Vibration: Set the device to vibrate to alert you to events or tasks.
• Quick responses: Create templates for sending messages to event participants.
S Voice
Change settings for voice recognition.
On the Settings screen, tap S Voice.
• Language: Select a language for voice recognition.
• Hide offensive words: Hide offensive words from voice search results.
• About: View version information.
• Open via the home key: Set the device to launch S Voice when you press the Home
button twice.
• Voice wake-up: Set the device to start voice recognition by saying a wake-up command
while using S Voice.
• Auto start speakerphone: Set the device to automatically turn on the speakerphone
when making a call with S Voice.
196
Settings
• Show body of message: Set the device to display the text of a new message.
• Check missed events: Set the device to launch S Voice and alert you to missed
notifications when a headset is connected and you press the headset button.
• Personal briefing: Set the device to display events saved in S Planner while using S
Voice.
• Erase S Voice data: Delete the data used by S Voice from the S Voice server.
• Home address: Enter your home address to use location information with the voice
command feature.
• Log in to Facebook: Enter your Facebook account information to use Facebook with S
Voice.
• Sign in to Twitter: Enter your Twitter account information to use Twitter with S Voice.
197
Accessibility
About Accessibility
Accessibility menus are special features for those with certain physical disabilities, such as
poor eyesight or hearing impairment. You can use the following features:
• TalkBack
• Changing the font size
• Magnifying the screen
• Notification reminders
• Reversing the display colours
• Colour adjustment
• Turning off all sounds
• Flash notification
• Adjusting the sound balance
• Mono audio mode
• Customising caption settings
• Assistive menus
• Setting tap and hold delay options
• Interaction control mode
• Changing the method of answering or ending calls
• Single tap mode
• Managing accessibility settings
To use accessibility menus, on the Apps screen, tap Settings → Accessibility.
198
Accessibility
Using the Home button to open accessibility
menus
You can access the following accessibility menus by pressing the Home button three times
quickly.
• Accessibility
• TalkBack
• Negative colours
• Interaction control
On the Apps screen, tap Settings → Accessibility → Direct access, and then tap the Direct
access switch to activate it. Then, select an accessibility menu to open when you press the
Home button three times quickly.
If you select more than one menu, the device displays a pop-up window asking which menu
to use each time you press the Home button three times quickly. To enable Interaction
control on the accessibility menus, activate the feature. On the Apps screen, tap Settings
→ Accessibility → Dexterity and interaction → Interaction control, and then tap the
Interaction control switch to activate it.
Voice feedback (TalkBack)
Activating or deactivating TalkBack
When you activate TalkBack, the device reads aloud the text on the screen or selected
features. This feature is useful if you have difficulty viewing the screen.
1 On the Apps screen, tap Settings → Accessibility → Vision → TalkBack.
2 Tap the TalkBack switch to activate it.
To deactivate TalkBack, tap the TalkBack switch and tap anywhere on the screen twice
quickly.
3 Tap OK.
To deactivate TalkBack, tap OK and tap anywhere on the screen twice quickly.
199
Accessibility
When you activate TalkBack, the device provides voice feedback and reads aloud the features
you select. Also, the device provides voice feedback when the screen turns off, when you
have new notifications, and more.
When you activate Explore by touch while using TalkBack, the device reads selected items
aloud. Firstly, the device reads aloud items on the screen when you tap them. Then, the
device will perform the function or open the app if you tap anywhere on the screen twice
quickly. If Explore by touch is deactivated, the device cannot perform various features that
require finger gestures.
To activate Explore by touch, on the Apps screen, tap Settings → Accessibility → Vision →
TalkBack → Settings, and then tick Explore by touch.
Some features are not available while you are using TalkBack.
Controlling the screen with finger gestures
You can use various finger gestures to control the screen while you are using TalkBack. If
Explore by touch is deactivated, the device cannot perform some of the features that require
finger gestures.
To activate Explore by touch, on the Apps screen, tap Settings → Accessibility → Vision →
TalkBack → Settings, and then tick Explore by touch.
• Exploring the screen: Place a finger on the screen and move your finger to explore the
screen. Select and hold on an item and the device reads aloud the item. When you
release your finger, the item under your finger is selected.
• Selecting items: Tap an item to select it. Or, select and hold on an item while exploring
the screen, and then release your finger.
• Opening the selected item: While selected items are read aloud, when you hear the item
you want, release your finger from the item. Then, tap anywhere on the screen twice
quickly.
• Selecting the previous item: Scroll quickly upwards or to the left on the screen with one
finger.
200
Accessibility
• Selecting the next item: Scroll quickly downwards or to the right on the screen with one
finger.
• Scrolling the lists: Scroll the screen upwards or downwards with two fingers.
• Returning to the previous page: Scroll the screen to the right with two fingers.
• Moving to the next page: Scroll the screen to the left with two fingers.
• Unlocking the screen: Scroll the screen in any direction within the locked screen area with
two fingers.
• Opening the notifications panel: Drag the top of the screen downwards with two fingers.
• Opening the quick setting panel: Drag the top of the screen downwards with three
fingers.
You can configure finger gesture settings for TalkBack in Manage gestures. Refer to
Configuring finger gesture settings for more information.
Configuring finger gesture settings
When you use TalkBack, you can perform actions using finger gestures. You can perform
actions such as, returning to the previous screen, opening the Home screen, and more.
Configure finger gestures before using them.
Configuring settings for vertical gestures
You can use two-part vertical gestures by dragging your finger upwards and downwards from
the bottom of the screen, or vice versa.
On the Apps screen, tap Settings → Accessibility → Vision → TalkBack → Settings →
Manage gestures → Two-part vertical gestures. Then, select one of the following features:
• Move to the first and last items on screen: When you drag your finger upwards and
then downwards on the screen, the first item at the top of the screen is selected. When
you drag your finger downwards and then upwards on the screen, the last item at the
bottom of the screen is selected.
• Cycle through reading granularities: When you drag your finger upwards and then
downwards on the screen, the reading unit changes. The reading unit changes to page,
paragraph, line, word, character, and default. When you drag your finger downwards and
then upwards on the screen, the reading units change in reverse order.
201
Accessibility
Configuring settings for shortcut gestures
Use this feature to configure eight shortcut gestures. You can configure gestures such as,
dragging your finger upwards and then to the right without releasing it, and more. You can
change shortcut gestures or assign features to empty shortcuts.
On the Apps screen, tap Settings → Accessibility → Vision → TalkBack → Settings →
Manage gestures. Select a gesture, and then assign a feature to it.
The following features are available:
• Back button: Return to the previous screen.
• Home button: Open the Home screen.
• Recent apps button: Open the list of recently-used apps.
• Open notifications: Open the notifications panel.
• Open global context menu: Open the global contextual menu. Tap and hold the
screen to open the circular global contextual menu. You can use features, such as Quick
navigation, Read from top, Spell last utterance, and Read from next item. Then,
explore menus by drawing a circle with your finger without releasing it. When you find
the menu you want, release your finger from the menu to select it.
Tap Pause feedback at the top left of the screen to pause voice feedback.
Tap TalkBack Settings at the top right of the screen to access the TalkBack settings. Refer
to Configuring settings for TalkBack for more information.
• Open local context menu: Open the local contextual menu. You can select a unit for
reading text on the screen. When you use this feature while entering text, contextual
menus, such as the cursor control menu, are available. Tap and hold the screen to open
the circular contextual menu. Then, explore menus by drawing a circle with your finger
without releasing it. When you find the menu you want, release your finger from the
menu to select it.
• Read from top: Read items aloud from the first item to the last item in order.
• Read from next item: Read items aloud starting from the item next to the selected item
in order.
202
Accessibility
Changing reading units
When you use TalkBack, you can listen to the text on the screen. You can drag your finger up,
down, left, or right to select the text you want. By default, the device reads text aloud in the
selected area. Or, you can set the device to read text in other reading units, such as lines or
paragraphs.
Changing reading units by using the local contextual menu
1 Select some text to read.
2 Drag your finger upwards, and then to the right without releasing it to open the local
contextual menu.
3 Tap and hold the screen and draw a circle with your finger to explore menus. Then,
release your finger when you hear Change granularity.
4 Tap and hold the screen again and draw a circle with your finger to explore menus. Then,
release your finger when you hear the reading unit you want.
To change the shortcut gesture to open the local contextual menu, refer to Configuring
settings for shortcut gestures.
Changing reading units using two-part vertical gestures
When you drag your finger upwards and then downwards on the screen, the reading unit
changes. The reading unit changes to page, paragraph, line, word, character, and then default.
When you drag your finger downwards and then upwards on the screen, the reading units
change in reverse order.
On the Apps screen, tap Settings → Accessibility → Vision → TalkBack → Settings →
Manage gestures → Two-part vertical gestures → Cycle through reading granularities.
You can listen to the text next to the currently-selected text using the current reading unit.
To listen to the next section of text, drag your finger downwards or to the right on the screen.
Also, you can listen to the text before the currently-selected text using the current reading
unit. To listen to the previous section of text, drag your finger upwards or to the left on the
screen.
203
Accessibility
Pausing TalkBack
Open the global contextual menu by dragging your finger downwards and then to the right
on the screen without releasing it. When you select Pause feedback at the top left of the
screen, TalkBack pauses.
When TalkBack is paused, you can resume it by turning on the screen or other methods. To
change the method of resuming TalkBack, on the Apps screen, tap Settings → Accessibility
→ Vision → TalkBack → Settings → Resume from suspend. Then, select an option.
To change the shortcut gesture to open the global contextual menu, refer to Configuring
settings for shortcut gestures.
Using the quick navigation feature
With the quick navigation feature, you can access menus by drawing a circle on the screen
without scrolling up or down to select an item.
Open the global contextual menu by dragging your finger downwards and then to the right
on the screen without releasing it. Tap and hold the screen and draw a circle around the
menu with your finger to explore the menus. Then, release your finger when you hear Quick
navigation. Tap the screen again and draw a circle around the menu with your finger to
explore the menus. Then, release your finger when you hear the menu you want.
Adding and managing image labels
You can assign labels to images on the screen. The device reads aloud the labels when the
images are selected. Add labels to unlabelled images by using the local contextual menu.
Open the local contextual menu by dragging your finger upwards and then to the right on
the screen without releasing it. Tap and hold the screen and draw a circle around the menu
with your finger to explore the menus. When you hear the add label menu, release your finger
to add labels.
To view the labels, on the Apps screen, tap Settings → Accessibility → Vision → TalkBack
→ Settings → Manage customised labels.
204
Accessibility
Configuring settings for TalkBack
Configure settings for TalkBack for your convenience.
On the Apps screen, tap Settings → Accessibility → Vision → TalkBack → Settings.
Alternatively, open the global contextual menu by dragging your finger downwards and then
to the right on the screen without releasing it. Then, drag your finger to the top right of the
screen and release it when you hear TalkBack Settings.
• Speech volume: Adjust the volume level for voice feedback.
Voice feedback volume can vary depending on the media volume. To adjust the media
volume, press the Volume button up or down while listening to voice feedback. Or, on the
Apps screen, tap Settings → Sound → Volume, and then drag the volume adjustment
bar for the media content to the left or right.
• Use pitch changes: Set the device to read aloud text at a low pitch when it is entered
using a keyboard.
• Keyboard echo: Set the device to read aloud text or symbols entered using a keyboard.
You can also set the type of keyboard to apply this feature to.
• Speak when screen is off: Set the device to provide voice feedback when the screen is
turned off.
• Use proximity sensor: Set the device to pause voice feedback when you place your hand
over the sensor at the top of the device. To resume voice feedback, tap the screen.
• Shake to start continuous reading: Set the device to read aloud the text displayed on
the screen when you shake the device. You can select from various shaking speeds.
• Speak caller ID: Set the device to read the caller’s name aloud when you have an
incoming call.
• Vibration feedback: Set the device to vibrate when you explore the screen.
• Sound feedback: Set the device to emit a sound when you control the screen, such as
scrolling the screen, and more.
205
Accessibility
• Focus speech audio: Set the device to turn the media volume down when the device
reads an item aloud.
• Sound volume: Adjust the volume that sound is played when you touch the screen to
control it. This feature is available when Sound feedback is selected.
• Explore by touch: Set the device to read aloud the items under your finger. For example,
when you tap Apps on the Home screen with your finger, the device reads out “Apps”. To
select Apps, release your finger from it and tap anywhere on the screen twice quickly. You
can move to the page you want by scrolling the screen left or right with two fingers. To
learn about controlling the screen using the explore by touch feature, refer to Controlling
the screen with finger gestures for more information.
• Automatically scroll lists: Set the device to automatically scroll through the rest of the
list not displayed on the screen and read the items aloud.
• Single-tap selection: Set the device to open the selected item by tapping it once.
• Launch “Explore by touch” tutorial: View the tutorial about using the Explore by touch
feature.
• Manage gestures: Assign actions to perform using finger gestures. Refer to Configuring
finger gesture settings for more information.
• Manage customised labels: View the labels you added.
• Resume from suspend: Select a method to resume voice feedback.
• Developer settings: Set options for app development.
Using the device with the screen turned off
Set the device to turn the screen off at all times to keep the content on your screen private.
The screen does not turn on when you press external buttons or tap the screen. Also,
currently-activated features do not turn off.
On the Apps screen, tap Settings → Accessibility → Vision, and then tick Dark screen. You
can activate or deactivate this feature by pressing the Power button twice.
206
Accessibility
Using the rapid key input feature
Set the device to enter a character when you release your finger from the character on the
keyboard. You can use this feature to enter characters instead of releasing your finger and
double-tapping on the screen.
On the Apps screen, tap Settings → Accessibility → Vision, and then tick Rapid key input.
Reading passwords aloud
Set the device to read the password aloud when you enter the password while TalkBack is
activated. Use this feature to make sure that you are entering the right password.
On the Apps screen, tap Settings → Accessibility → Vision, and then tick Speak passwords.
Setting text-to-speech features
Change the settings for text-to-speech features used when TalkBack is activated, such as
languages, speed, and more.
On the Apps screen, tap Settings → Accessibility → Vision → Text-to-speech options, and
then use the following functions:
• Samsung text-to-speech engine / Google Text-to-speech engine: Select an engine for
the text-to-speech feature.
• Speech rate: Select a speed for the text-to-speech feature.
• Listen to an example: Listen to the spoken text for an example. If the device cannot read
examples aloud, tap → Install voice data to download and install voice data for the
text-to-speech feature.
• Default language status: View the status of the current language set for the text-to
speech feature.
207
Accessibility
Entering text using the keyboard
To display the keyboard, tap the text input field, and then tap anywhere on the screen twice
quickly.
When you touch the keyboard with your finger, the device reads aloud the character buttons
under your finger. When you hear the character you want, release your finger from the screen
to select it. The character is entered and the device reads the text aloud.
If Rapid key input is not activated, release your finger from the character you want, and then
tap anywhere on the screen twice quickly. To activate the rapid input feature, on the Apps
screen, tap Settings → Accessibility → Vision, and then tick Rapid key input.
Entering additional characters
Tap and hold a button on the keyboard. If additional characters are available via the button,
a pop-up window appears above the keyboard showing the characters. To select a character,
drag your finger on the screen until you hear the character you want, and then release it.
Changing the input language
To add input languages, on the Apps screen, tap Settings → Language and input. Then, tap
next to Samsung keyboard → Select input languages and select the languages to use.
To change the input language, tap
, and then tap anywhere on the screen twice quickly.
Editing text
Use the local contextual menu to move the cursor or copy and paste text.
Open the local contextual menu by dragging your finger upwards and then to the right on
the screen without releasing it. Tap and hold the screen and draw a circle around the menu
with your finger to explore the menu. Then, release your finger when you hear Change
granularity. Tap the screen again and draw a circle around the menu to explore the menus.
Then release your finger when you hear the reading unit you want.
When you edit text, set the reading unit to either word or character for your convenience. In
selection mode, the device selects text according to the reading unit you selected.
208
Accessibility
Drag your finger up, down, left, or right to listen to the text. When the text you want to edit is
read aloud, use the following actions:
• Deleting text: Tap the delete button on the keyboard.
• Selecting text using selection mode: Activate selection mode to select and listen to
the text. To activate selection mode, open the local contextual menu and select Cursor
control → Start selection mode. Scroll to the left or right to listen to the text before
or next to the currently-selected text. To deactivate selection mode, open the local
contextual menu and select Cursor control → End selection mode.
• Selecting entire text: Open the local contextual menu and select Cursor control →
Select all. All text in the document will be selected.
• Copying or cropping text: Select text using the local contextual menu. Then, open the
local contextual menu and select Cursor control. Select Copy to copy the selected text or
select Cut to cut the selected text. The selected text is copied to the clipboard.
• Pasting text: Place the cursor at the point where the text should be inserted, open the
local contextual menu, and then select Cursor control → Paste.
Entering text by voice
You can enter text by voice. To display the keyboard, tap the text input field, and then tap
anywhere on the screen twice quickly.
When you tap and hold , the device displays a pop-up window showing the keyboard
options. Drag your finger on the screen without releasing it. When is selected, release your
finger. Then, say the words that you want to enter in the text field. The spoken words appear
as text on the screen and the device reads them aloud.
To enter additional text, select the microphone button and say the words.
Changing the input language
While entering text by voice, select English (UK) and select a language to change the input
language.
To add languages to the list, select English (UK) → Add more languages, deselect
Automatic, and then select languages to use.
209
Accessibility
Changing the font size
Use this feature to change the font size. The device provides various font sizes to make the
device more convenient for visually impaired users. Setting the font size to Huge may not be
available in some apps.
On the Apps screen, tap Settings → Accessibility → Vision → Font size.
Magnifying the screen
Use this feature to magnify the screen and to zoom in on a specific area.
On the Apps screen, tap Settings → Accessibility → Vision → Magnification gestures, and
then tap the Magnification gestures switch to activate it.
• Zooming in and out: Tap the screen three times quickly to zoom in on a specific area. Tap
the screen three times quickly again to return.
• Exploring the screen by scrolling: Use two fingers to scroll through the magnified screen.
• Adjusting zoom ratio: Tap the screen with two fingers on the magnified screen. Then,
spread two fingers apart or pinch them together to adjust the ratio.
• Keyboards on the screen cannot be magnified.
• When this feature is activated, the performance of some apps, such as Phone and
Calculator, may be affected.
Setting notification reminders
Use this feature to alert you to notifications that you have not checked at the interval.
On the Apps screen, tap Settings → Accessibility → Vision → Notification reminder, and
then tap the Notification reminder switch to activate it.
To set an interval between alerts, tap Reminder interval.
210
Accessibility
Reversing the display colours
Use this feature to improve screen visibility and to help users recognise text on the screen
more easily. When this feature is activated, the device displays a negative image that reverses
the colours on the screen. Reversing the colours increases the contrast between black and
white.
On the Apps screen, tap Settings → Accessibility → Vision, and then tick Negative colours.
Colour adjustment
Use this feature to adjust how colours are displayed on the screen if you have difficulty in
distinguishing colours. The device changes the colours into more recognisable colours.
1 On the Apps screen, tap Settings → Accessibility → Vision → Colour adjustment.
2 Tap the Colour adjustment switch to activate it.
3 Tap Start.
4 Arrange the colour tiles in order of similarity, starting from the base colour.
5 When you are finished adjusting the colours, tap Done.
If you can distinguish the colours, no more adjustment is required.
6 If the colours cannot be distinguished, tap Camera or Image.
7 Drag the colour adjustment bar to the left or right and tap Done.
To readjust the colour, tap → Readjust colour.
211
Accessibility
Setting flash notification
Set the flash to blink when you have incoming calls, new messages, or notifications.
On the Apps screen, tap Settings → Accessibility → Hearing, and then tick Flash
notification.
Turning off all sounds
Set the device to mute all device sounds, such as media sounds, and the caller’s voice during
a call.
On the Apps screen, tap Settings → Accessibility → Hearing, and then tick Turn off all
sounds.
Caption settings
Samsung caption
On the Apps screen, tap Settings → Accessibility → Hearing → Samsung subtitles (CC),
and then tap the Subtitles (CC) switch to activate it.
Use the following options:
• Alignment: Change the position of the caption.
• Font: Change the font type.
• Size: Change the font size.
• Edge: Change the edge of the subtitle text.
• Font: Change the colour and transparency of the text.
• Background: Change the colour and transparency of the caption box background.
• Caption window: Change the colour and transparency of the caption window.
212
Accessibility
Google caption
On the Apps screen, tap Settings → Accessibility → Hearing → Google subtitles (CC), and
then tap the Google subtitles (CC) switch to activate it.
Use the following options:
• Language: Select a display language for the caption.
• Text size: Change the font size.
• Caption style: Change the caption style.
Adjusting the sound balance
Set the device to adjust the sound balance when using a headset.
To adjust the sound balance, connect a headset to the device. On the Apps screen, tap
Settings → Accessibility → Hearing → Sound balance. Drag the adjustment bar to the left
or right and adjust the sound balance, and then tap Set.
Mono audio
Set the device to switch the sound output from stereo to mono when a headset is connected.
Mono output combines stereo sound into one signal that is played through all headset
speakers. Use this if you have a hearing impairment or if a single earbud is more convenient.
On the Apps screen, tap Settings → Accessibility → Hearing, and then tick Mono audio.
213
Accessibility
Assistive menu
Displaying the assistive shortcut icon
Set the device to display the assistive shortcut icon. You can use the icon to access apps,
features, and settings by tapping assistive menus in the icon. Control the device by tapping
the assistive menus in the icon without exploring the screen. When this feature is launched,
Single tap mode is activated.
1 On the Apps screen, tap Settings → Accessibility → Dexterity and interaction →
Assistant menu.
2 Tap the Assistant menu switch to activate it.
The assistive shortcut icon appears at the bottom right of the screen.
3 Tap Dominant hand to move the assistive shortcut icon to a convenient location.
Accessing assistive menus
The assistive shortcut icon appears as a floating icon for easy access to the assistive menus
from any screen.
When you tap the assistive shortcut icon, the icon expands slightly and the assistive menus
appear on the icon. Tap the up or down arrow to move to other panels or scroll the screen up
or down to select other menus.
214
Accessibility
Using the cursor
On the assistive menu, tap Cursor. A cursor and a touch area where the cursor can be
controlled are displayed on the screen. You can control the screen using small finger
movements on the touch area. Drag your finger on the touch area to move the cursor. Also,
tap the screen to select items under the cursor.
Use the following options:
• /
: Select an item or scroll left or right on the screen.
• /
: Scroll up or down the screen.
• : Move the touch area to another location.
• : Close the touch area.
To change the cursor settings, on the Apps screen, tap Settings → Accessibility → Dexterity
and interaction → Assistant menu, tap the Assistant menu switch to activate it. Then, use
options under TOUCHPAD AND CURSOR SETTINGS.
Using enhanced assistive menus
Set the device to display enhanced assistive menus for selected apps. For example, when you
launch Messages, searching and composing functions appear on the assistive menu.
On the Apps screen, tap Settings → Accessibility → Dexterity and interaction → Assistant
menu → Assistant plus, tap the Assistant plus switch to activate it, and then select apps.
Editing the assistive menus
You can use this feature to edit menus in the assistive shortcut icon.
On the Apps screen, tap Settings → Accessibility → Dexterity and interaction → Assistant
menu, tap the Assistant menu switch to activate it, and then tap Edit. To add or delete
menus, tap or .
215
Accessibility
Setting tap and hold delay options
Set the recognition time for tapping and holding the screen.
On the Apps screen, tap Settings → Accessibility → Dexterity and interaction → Tap and
hold delay, and then select an option.
Interaction control
Activate interaction control mode to restrict the device’s reaction to inputs while using apps.
Use this mode when you want to allow others only limited access to and control of your
media or data.
1 On the Apps screen, tap Settings → Accessibility → Dexterity and interaction →
Interaction control.
2 Tap the Interaction control switch to activate it.
3 Press and hold the Home button and the Volume button down simultaneously while
using an app.
4 Adjust the size of the frame or draw a line around an area that you want to restrict.
5 Tap Done.
The device displays the restricted area. If you tap the screen or press buttons, such as the
Home button, they will not work in this area.
To deactivate interaction control mode, press and hold the Home button and the Volume
button down simultaneously.
216
Accessibility
Answering or ending calls
Change the method of answering or ending calls.
On the Apps screen, tap Settings → Accessibility → Answering and ending calls.
Use the following options:
• Pressing the home key: Set the device to answer a call when you press the Home button.
• Using voice commands: Set the device to answer a call with voice commands.
• Pressing the power key: Set the device to end a call when you press the Power button.
Using single tap mode
Set the device to control incoming calls or notifications by tapping the button instead of
dragging it. When an alarm sounds or a call comes in, tap the button to stop the alarm or
answer the call instead of dragging the button.
On the Apps screen, tap Settings → Accessibility, and then tick Single tap mode.
Managing accessibility settings
Saving accessibility settings in a file
Export the current accessibility settings in a file.
On the Apps screen, tap Settings → Accessibility → Manage accessibility → Import/
Export, select an export option, and then tap OK. The accessibility settings file is saved to the
selected storage location.
217
Accessibility
Importing an accessibility settings file
Import an accessibility settings file and update the current settings.
On the Apps screen, tap Settings → Accessibility → Manage accessibility → Import/
Export, and then select an import option. Select a file to import and tap Done → OK. The
accessibility settings will be updated according to the imported file.
Sharing accessibility settings files
Share accessibility settings files with others via email, Wi-Fi Direct, Bluetooth, and more.
On the Apps screen, tap Settings → Accessibility → Manage accessibility → Share via.
Then, select accessibility files and tap Done. Select a sharing method and follow the onscreen instructions to share the files.
Viewing accessibility services
View accessibility services installed on the device.
On the Apps screen, tap Settings → Accessibility, and view the list of accessibility services
available in SERVICES.
218
Accessibility
Using other useful features
• Using S Voice: You can use S Voice to perform various functions using voice commands.
Launch S Voice and make calls, send messages, and view tasks. Refer to S Voice for more
information.
• Searching by voice: Use voice commands to search for webpage content. Use this feature
when you are on the move and cannot use your hands to enter text. Refer to Voice Search
for more information.
• Using the notifications panel: Drag the status bar downwards to open the notifications
panel. You can view missed calls, new messages, adjust the screen brightness, and more.
Refer to Notifications and quick setting panels for more information.
• Switching to easy mode: Easy mode uses a simpler layout and large icons to provide an
easy user experience. You can add frequently-used apps or shortcuts to the Home screen
for easier access. Refer to Easy mode for more information.
• Using control motions: Control the device with palm motions or gestures. Refer to
Motions and gestures for more information.
• Using the finger scanner: Register your fingerprints to the device to unlock the screen or
verify the Samsung account password. Refer to Finger Scanner for more information.
• Using shortcuts to contacts: Add shortcuts to contacts on the Home screen to make calls
or send messages more conveniently. Refer to Adding shortcuts for contacts to the Home
screen for more information.
• Using the voice recorder: Record or play voice memos. Refer to Voice Recorder for more
information.
219
Troubleshooting
Before contacting a Samsung Service Centre, please attempt the following solutions. Some
situations may not apply to your device.
When you turn on your device or while you are using the device, it
prompts you to enter one of the following codes:
• Password: When the device lock feature is enabled, you must enter the password you set
for the device.
• PIN: When using the device for the first time or when the PIN requirement is enabled, you
must enter the PIN supplied with the SIM or USIM card. You can disable this feature by
using the Lock SIM card menu.
• PUK: Your SIM or USIM card is blocked, usually as a result of entering your PIN incorrectly
several times. You must enter the PUK supplied by your service provider.
• PIN2: When you access a menu requiring the PIN2, you must enter the PIN2 supplied with
the SIM or USIM card. For more information, contact your service provider.
Your device displays network or service error messages
• When you are in areas with weak signals or poor reception, you may lose reception. Move
to another area and try again. While moving, error messages may appear repeatedly.
• You cannot access some options without a subscription. For more information, contact
your service provider.
Your device does not turn on
• When the battery is completely discharged, your device will not turn on. Fully charge the
battery before turning on the device.
• The battery may not be inserted properly. Insert the battery again.
• Wipe both gold-coloured contacts and insert the battery again.
220
Troubleshooting
The touch screen responds slowly or improperly
• If you attach a protective cover or optional accessories to the touch screen, the touch
screen may not function properly.
• If you are wearing gloves, if your hands are not clean while touching the touch screen,
or if you tap the screen with sharp objects or your fingertips, the touch screen may
malfunction.
• The touch screen may malfunction in humid conditions or when exposed to water.
• Restart your device to clear any temporary software bugs.
• Ensure that your device software is upgraded to the latest version.
• If the touch screen is scratched or damaged, visit a Samsung Service Centre.
Your device freezes or has fatal errors
If your device freezes or hangs, you may need to close apps or reinsert the battery and turn
on the device to regain functionality. If your device is frozen and unresponsive, press and hold
the Power button and the Volume button down simultaneously for more than 7 seconds to
restart it.
If this does not solve the problem, perform a factory data reset. On the Apps screen, tap
Settings → Backup and reset → Factory data reset → Reset device → Erase everything.
Before performing the factory data reset, remember to make backup copies of all important
data stored in the device.
If the problem is still not resolved, contact a Samsung Service Centre.
Calls are not connected
• Ensure that you have accessed the right cellular network.
• Ensure that you have not set call barring for the phone number you are dialling.
• Ensure that you have not set call barring for the incoming phone number.
Others cannot hear you speaking on a call
• Ensure that you are not covering the built-in microphone.
• Ensure that the microphone is close to your mouth.
• If using a headset, ensure that it is properly connected.
221
Troubleshooting
Sound echoes during a call
Adjust the volume by pressing the Volume button or move to another area.
A cellular network or the Internet is often disconnected or audio
quality is poor
• Ensure that you are not blocking the device’s internal antenna.
• When you are in areas with weak signals or poor reception, you may lose reception. You
may have connectivity problems due to issues with the service provider’s base station.
Move to another area and try again.
• When using the device while moving, wireless network services may be disabled due to
issues with the service provider’s network.
The battery icon is empty
Your battery is low. Recharge or replace the battery.
The battery does not charge properly (For Samsung-approved
chargers)
• Ensure that the charger is connected properly.
• If the battery terminals are dirty, the battery may not charge properly or the device may
turn off. Wipe both gold-coloured contacts and try charging the battery again.
• The batteries in some devices are not user-replaceable. To have the battery replaced, visit
a Samsung Service Centre.
The battery depletes faster than when first purchased
• When you expose the battery to very cold or very hot temperatures, the useful charge
may be reduced.
• Battery consumption increases when you use messaging features or some apps, such as
games or the Internet.
• The battery is consumable and the useful charge will get shorter over time.
222
Troubleshooting
Your device is hot to the touch
When you use apps that require more power or use apps on your device for an extended
period of time, your device may feel hot to the touch. This is normal and should not affect
your device’s lifespan or performance.
Error messages appear when launching the camera
Your device must have sufficient available memory and battery power to operate the camera
app. If you receive error messages when launching the camera, try the following:
• Charge the battery or replace it with a battery that is fully charged.
• Free some memory by transferring files to a computer or deleting files from your device.
• Restart the device. If you are still having trouble with the camera app after trying these
tips, contact a Samsung Service Centre.
Photo quality is poorer than the preview
• The quality of your photos may vary, depending on the surroundings and the
photography techniques you use.
• If you take photos in dark areas, at night, or indoors, image noise may occur or images
may be out of focus.
Error messages appear when opening multimedia files
If you receive error messages or multimedia files do not play when you open them on your
device, try the following:
• Free some memory by transferring files to a computer or deleting files from your device.
• Ensure that the music file is not Digital Rights Management (DRM)-protected. If the file is
DRM-protected, ensure that you have the appropriate licence or key to play the file.
• Ensure that the file formats are supported by the device. If a file format is not supported,
such as DivX or AC3, install an app that supports it. To confirm the file formats that your
device supports, visit www.samsung.com.
223
Troubleshooting
• Your device supports photos and videos captured with the device. Photos and videos
captured by other devices may not work properly.
• Your device supports multimedia files that are authorised by your network service
provider or providers of additional services. Some content circulated on the Internet,
such as ringtones, videos, or wallpapers, may not work properly.
Another Bluetooth device is not located
• Ensure that the Bluetooth wireless feature is activated on your device.
• Ensure that the Bluetooth wireless feature is activated on the device you wish to connect
to.
• Ensure that your device and the other Bluetooth device are within the maximum
Bluetooth range (10 m).
If the tips above do not solve the problem, contact a Samsung Service Centre.
A connection is not established when you connect the device to a
computer
• Ensure that the USB cable you are using is compatible with your device.
• Ensure that you have the proper driver installed and updated on your computer.
• If you are a Windows XP user, ensure that you have Windows XP Service Pack 3 or higher
installed on your computer.
• Ensure that you have Samsung Kies or Windows Media Player 10 or higher installed on
your computer.
Your device cannot find your current location
GPS signals may be obstructed in some locations, such as indoors. Set the device to use Wi-Fi
or a mobile network to find your current location in these situations.
224
Troubleshooting
Data stored in the device has been lost
Always make backup copies of all important data stored in the device. Otherwise, you cannot
restore data if it is corrupted or lost. Samsung is not responsible for the loss of data stored in
the device.
A small gap appears around the outside of the device case
• This gap is a necessary manufacturing feature and some minor rocking or vibration of
parts may occur.
• Over time, friction between parts may cause this gap to expand slightly.
225
Copyright
Copyright © 2014 Samsung Electronics
This guide is protected under international copyright laws.
No part of this guide may be reproduced, distributed, translated, or transmitted in any form or
by any means, electronic or mechanical, including photocopying, recording, or storing in any
information storage and retrieval system, without the prior written permission of Samsung
Electronics.
Trademarks
• SAMSUNG and the SAMSUNG logo are registered trademarks of Samsung Electronics.
• Bluetooth® is a registered trademark of Bluetooth SIG, Inc. worldwide.
• Wi-Fi®, Wi-Fi Protected Setup™, Wi-Fi CERTIFIED Passpoint™, Wi-Fi Direct™, Wi-Fi
CERTIFIED™, and the Wi-Fi logo are registered trademarks of the Wi-Fi Alliance.
• All other trademarks and copyrights are the property of their respective owners.