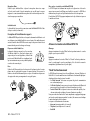
1
Vertrieb durch: ALAN ELECTRONICS GmbH Daimlerstraße 1K - D-63303 Dreieich Deutschland www.alan-electronics.de Vor Benutzung Bedienungsanleitung beachten. Bei Verwendung von Batterien beachten Sie bitte die Umweltbestimmungen. Batterien niemals ins offene Feuer werfen, und nur in dafür vorgesehene Sammelbehälter entsorgen. Prodotto o importato da: CTE INTERNATIONAL s.r.l. Via. R.Sevardi 7- 42124 Reggio Emilia Italia www.cte.it - www.midlandradio.eu Prima dell’uso leggere attentamente le istruzioni. Se il prodotto contiene batterie: non gettare nel fuoco, non disperdere nell’ambiente dopo l’uso, usare gli appositi contenitori per la raccolta. Produced or imported by: CTE INTERNATIONAL s.r.l. Via. R.Sevardi 7 42124 Mancasale Reggio Emilia Italy BTX2 FM ADVANCED INTERCOM SYSTEM Importado por: ALAN COMMUNICATIONS, SA C/Cobalt, 48 - 08940 Cornellà de Llobregat Barcelona España Tel: +34 902 384878 Fax: +34 933 779155 www.midland.es Lea atentamente las instrucciones antes de usar el equipo. si el producto contiene pilas o baterías no las tire al fuego ni las disperse en el ambiente después de su uso, utilice los contenedores apropiados para su reciclaje. M A N UA L E D ’ U S O INSTRUCTION GUIDE BEDIENUNGSANLEITUNG M A N UA L D E I N S T R U CC I O N E S G U I D E D ’ U T I L I S AT I O N M A N UA L D E I N S T R U ÇÕ E S ΟΔΗΓΊΕΣ ΧΡΉΣΗΣ WW W.MIDLA N DR A DIO.E U | ® I Sommario Principali caratteristiche:.......................................................................................................................................................2 Caratteristiche tecniche Midland BTX2 FM...............................................................................................................................2 Ricarica delle batterie............................................................................................................................................................2 Descrizione dispositivo e sistema di fissaggio..........................................................................................................................3 Accensione e spegnimento del BTX2 FM..................................................................................................................................4 Modalità operative.................................................................................................................................................................5 Distanza................................................................................................................................................................................5 Come abbinare un altro dispositivo BTX2 FM...........................................................................................................................5 Compatibilità con i dispositivi della linea BT Midland..............................................................................................................6 Come abbinare più di due dispositivi ad un BTX2 FM................................................................................................................6 Talk 2 All - Abbinamento a dispositivo non Midland.................................................................................................................7 Utilizzo del Navigatore GPS.....................................................................................................................................................9 Utilizzo della funzionalita’ Radio FM.......................................................................................................................................9 Modalità “ FM Radio”..............................................................................................................................................................9 Utilizzo dell’ingresso audio a filo...........................................................................................................................................10 Utilizzo di un ricetrasmettitore PMR446 con cavo...................................................................................................... 10 Configurazioni speciali.........................................................................................................................................................11 Reset di tutti i dispositivi accoppiati .....................................................................................................................................11 Configurazione e aggiornamento firmware...........................................................................................................................12 Uso e avvertimenti specifici..................................................................................................................................................12 Garanzia..............................................................................................................................................................................12 Certificazioni e Conformità di Sicurezza.................................................................................................................................12 Midland BTX2 FM - 1 I MIDLAND BTX2 FM Advanced Intercom System Grazie per aver acquistato Midland BTX2 FM il sistema wireless Intercom pensato per il motociclista. Midland BTX2 FM è un dispositivo da applicare al proprio casco per comunicare con dispositivi Bluetooth, quali Telefonino/MP3 player, Navigatore GPS, ascoltare la radio FM e se abbinato ad un altro Midland BTX2 FM, anche come sistema intercom senza fili fino a 3 presone ad una distanza massima 800mt. Grazie al suo design sottile, aerodinamico ed ai suoi tre tasti centrali grandi e ben riconoscibili Midland BTX2 FM è la soluzione più avanzata e ideale per il motociclista. Principali caratteristiche: Caratteristiche tecniche Midland BTX2 FM ›› ›› ›› ›› ›› ›› ›› ›› Generali: ›› Bluetooth ver. 3.0 stereo (protocollo Headset/Handsfree/A2DP) ›› Sistema AGC per il controllo automatico del volume in base al rumore di fondo ›› Attivazione della comunicazione vocale (VOX) o manuale ›› Comandi manuali per: attivazione telefono, interfono e connessione a filo ›› Completamente resistente all’acqua ›› Batteria al Litio con autonomia fino a 12 ore di conversazione ›› Tempo di ricarica: circa 6 ore Intercom Pilota/Passeggero e moto a moto (distanza massima di 800mt). Connessione fino a 4 persone (con funzione Talk2All Universal Itercom) Radio FM con RDS Supporto per 2 Telefoni Connessione a sistemi di navigazione GPS Connessione a Radio PMR446 con Bluetooth integrato o esterno Connessione AUX a filo per MP3 player e ricetrasmittenti PMR446 Configurazione ed aggiornamento firmware da PC via USB Midland BTX2 FM è disponibile in due versioni: ›› BTX2 FM confezione singola con un solo dispositivo ›› BTX2 FM TWIN confezione doppia con due dispositivi. In base alla versione in vostro possesso nella confezione troverete: BTX2 FM ›› 1 dispositivo di comunicazione BTX2 FM ›› 1 Kit audio completo di due speakers stereo, microfono a braccetto rigido e microfono a filo ›› 1 Sistema di aggancio al casco con bi-adesivo ›› 1 Sistema di aggancio al casco con morsetto ›› 1 cavo audio stereo per collegare un iPod/MP3 Player ›› 1 Alimentatore da muro mini USB BTX2 FM TWIN ›› 2 dispositivi di comunicazione BTX2 FM ›› 2 Kit audio completi di due speakers stereo, microfono a braccetto rigido e microfono a filo ›› 2 Sistemi di aggancio al casco con bi-adesivo ›› 2 Sistemi di aggancio al casco con morsetto ›› 2 cavi audio stereo per collegare un iPod/MP3 Player ›› 1 Alimentatore da muro mini USB con doppia postazione di ricarica I dispositivi della confezione TWIN sono già abbinati tra loro per poter attivare immediatamente la funzione Intercom. 2 - Midland BTX2 FM Connessioni Bluetooth: ›› Con un dispositivo identico per la modalità Intercom Pilota-Passeggero e moto a moto (fino a 800mt) Con dispositivo Bluetooth: ›› Telefonino con MP3 player Stereo (protocollo A2DP), GPS ›› Ricetrasmettitori PMR446 (con Bluetooth integrato o esterno) per comunicazioni di gruppo moto a moto Connessioni a filo: ›› Per sorgente audio stereo come iPod/MP3 player (con cavo opzionale) ›› Per ricetrasmettitori PMR446 (con cavo opzionale) Attenzione: Midland BTX2 FM è stato progettato per essere resistente alla pioggia. Verificate sempre che i gommini di protezione delle prese siano ben chiusi in caso di pioggia. Ricarica delle batterie Assicuratevi che il dispositivo di comunicazione sia completamente carico prima di iniziare ad utilizzarlo. La prima volta sono necessarie almeno 8 ore. Successivamente il tempo si riduce mediamente a 4/6 ore per una ricarica completa. Per ragioni di comodità, il dispositivo può essere rimosso dal casco prima di essere ricaricato. Per caricare il dispositivo di comunicazione, sollevate la protezione in gomma della presa di ricarica e collegate ad essa lo spinotto del caricatore, quindi Infine il BTX2 FM è dotato di un’antenna sollevabile, posizionata sulla parte alta del dispositivo, che, se spostata in posizione verticale, permette di ottenere le massime prestazioni in distanza. Per sollevare l’antenna è sufficiente fare una leggera pressione verso il casco, questa si sgancerà ed immediatamente si posizionerà in verticale. Descrizione dispositivo e sistema di fissaggio Descrizione BTX2 FM Il dispositivo BTX2 FM è dotato di 5 pulsanti, tutti nella parte frontale. I tre pulsanti principali sono pulsanti multifunzione: pulsante Avanti (a sinistra), pulsante Centrale e pulsante Indietro (a destra). I due pulsanti rotondi più piccoli, in alto a destra, sono invece il Volume + ed il volume -. Volume + Avanti Centrale Volume - Indietro Descrizione delle connessioni a filo Presa Ricarica: Permette la ricarica del dispositivo tramite alimentatore mini USB standard Presa Audio Kit: Permette la connessione del kit audio (cuffie stereo e microfono) Presa audio ausiliaria (AUX): Permette la connessione di una sorgente audio come un iPod/MP3 player stereo o un ricetrasmettitore PMR446 Presa ricarica Per chiudere l’antenna basta riportarla nella posizione orizzontale e fare una leggera pressione verso l’esterno in modo che si incastri nell’apposita chiusura. Presa audio kit Presa audio ausiliaria (AUX) Descrizione Kit Audio Il sistema audio si compone di due speaker stereo ultra sottili e di due microfoni intercambiabili, uno a braccetto e l’altro a filo. Il mini connettore del microfono vi permette facilmente di collegare il microfono più adatto al vostro casco. Altoparlanti stereo I due altoparlanti stereo sono dotati di velcro e adesivo per un semplice montaggio all’interno del casco. Attenzione, posizionate gli altoparlanti in corrispondenza delle orecchie, lasciando comunque una minima distanza per poter percepire i rumori/indicazioni provenienti dalla strada. Il microfono può essere fissato al casco in due modi: Midland BTX2 FM - 3 I innestate la spina CA del caricatore ad una presa di rete elettrica. Il LED rosso lampeggerà per tutto il tempo della ricarica. Lasciate l’apparecchio collegato fino a che il LED rosso si spegne o il LED blu rimane acceso fisso. Quando la carica è completa, (LED rosso non più lampeggiante) scollegate il dispositivo dal caricatore. Attenzione: ogni volta che viene inserito (o disinserito) il plug di ricarica, il dispositivo si spegne (per utilizzarlo mentre è in carica è necessario quindi riaccenderlo con il plug inserito). I Microfono a braccetto Posizionate il braccetto del microfono con la parte di Velcro/adesivo tra l’imbottitura e la calotta rigida del casco, in modo che il microfono sia ben posizionato di fronte alla bocca, con il simbolo bianco rivolto verso la bocca stessa. Questo tipo di microfono è adatto per i caschi Jet e Modulari. Microfono a filo Posizionate il microfono, grazie al velcro/adesivo, all’interno del casco di fronte alla bocca. Questo tipo di microfono è più indicato per i caschi integrali. Presa Kit Audio Il Kit Audio infine deve essere collegato, tramite il connettore ad “L” al Midland BTX2 FM nella presa centrale. A Inserimento e sgancio del Midland BTX2 FM Il dispositivo BTX2 FM si aggancia al casco, semplicemente facendolo scorrere verso il basso, in modo che entri nell’apposita sede del sistema di fissaggio da voi scelto (biadesivo o a morsetto). Il dispositivo BTX2 FM viene mantenuto in sede, grazie all’apposita clip di aggancio posizionata nella parte superiore (A). Per sganciare il BTX2 FM è sufficiente premere sulla clip di aggancio e spingere il dispositivo verso l’alto. Descrizione sistema di fissaggio al casco Midland BTX2 FM è fornito di due sistemi differenti di fissaggio al casco: uno con bi-adesivo e l’altro con sistema di aggancio a morsetto. Il sistema di fissaggio permette di “agganciare” in modo sicuro il dispositivo BTX2 FM al vostro casco e di sfilarlo in qualsiasi momento per ricaricarlo o riporlo. Il dispositivo BTX2 FM va fissato sul lato sinistro del casco. Fissaggio con bi-adesivo La piastrina di fissaggio presenta una parte già predisposta con bi-adesivo. Dopo aver pulito la superficie del casco in corrispondenza della zona sulla quale si intende fissare il dispositivo, rimuovete la pellicola del bi-adesivo e posizionate la piastrina di fissaggio al casco esercitando una leggera pressione per alcuni secondi. Fissaggio con morsetto Mediante la chiave a brugola, allentate le due viti del morsetto ed inserite la piastrina posteriore tra l’imbottitura del casco e la calotta esterna rigida. Dopo aver inserito il morsetto, stringete le due viti in modo che risulti stabile e ben fissato. Il fissaggio a morsetto comprende anche un distanziatore in plastica che può essere rimosso nel caso sia necessario ridurre lo spessore. 4 - Midland BTX2 FM Accensione e spegnimento del BTX2 FM Accensione: ›› Tenete premuto il pulsante “Centrale” per circa 3 secondi, fino all’accensione della luce BLU lampeggiante. Spegnimento: ›› Tenete premuti i pulsanti “Centrale” e “Indietro” insieme per circa 3 secondi, fino a che la luce ROSSA emette 3 lampeggi. ›› In questo modo non è possibile spegnere il dispositivo in modo involontario durante l’uso (cosa che potrebbe succedere, specialmente se si utilizzano i guanti). Midland BTX2 FM ha tre modalità di funzionamento distinte: Intercom, Telefono e Radio FM. In base alla modalità attiva in un dato momento, le funzioni del BTX2 FM cambiano e di conseguenza anche i tre pulsanti centrali assumono funzionalità diverse. ›› La modalità “Intercom” permette la gestione della funzionalità intercom per la comunicazione pilota-passeggero. ›› La modalità “Telefono” (Phone), permette la gestione del telefono e le funzioni di player musicale del telefono stesso. I tre pulsanti gestiscono le funzionalità del telefono e della musica (play/pausa- avanti e indietro). ›› La modalità “Radio FM” (FM radio) permette l’ascolto della radio; i tre pulsanti gestiscono la ricerca e la memorizzazione delle stazioni preferite E’ possibile passare da una modalità all’altra semplicemente premendo per 3 secondi il pulsante Centrale. Un annuncio vocale vi indicherà in quale modalità state entrando. La sequenza con cui è possibile scorrere le 2 modalità è la seguente: ›› Intercom (se è stata abbinata almeno ad un altro dispositivo) ›› FM Radio ›› Phone (se è stato abbinato un telefono) E’ possibile sapere in quale modalità si trova il dispositivo semplicemente premendo insieme i pulsanti “Volume+” e “Volume-“. Un annuncio vocale vi indicherà in quale modalità vi trovate. Distanza La distanza massima di comunicazione tra due dispositivi Midland BTX2 FM è di circa 800mt in campo aperto con entrambe le antenne in posizione sollevata. La massima distanza può variare in base all’orientamento della testa o alla presenza di ostacoli e interferenze (i motociclisti devono essere sempre in portata visiva) Come abbinare un altro dispositivo BTX2 FM Per utilizzare la funzionalità Intercom è necessario avere due dispositivi BTX2 FM accesi ed in precedenza abbinati tra loro. I due dispositivi presenti nella stessa confezione (Midland BTX2 FM TWIN) sono già accoppiati tra loro e pronti all’uso, quindi non è necessario attivare questa procedura di abbinamento. Se invece i dispositivi non fanno parte della stessa confezione o avete acquistato un altro BTX2 FM in un secondo momento (per esempio per il passeggero), dovete prima eseguire la procedura di abbinamento. Abbinamento di un altro dispositivo BTX2 FM 1. Attivate la modalità “Setup” su entrambi i dispositivi (Spegnete il BTX2 FM. Tenere premuto il pulsante “Centrale” fino a che la luce non rimane di colore rosso fisso) 2. Tenere premuto il pulsante “Centrale” sul primo dispositivo, fino a che la luce lampeggia alternativamente Rossa e Blu. 3. Tenere premuto il pulsante “Centrale“ sull’altro dispositivo fino a che la luce Rossa e Blu lampeggia alternativamente. 4. Ora i due dispositivi si cercano per completare l’abbinamento. Se l’abbinamento è avvenuto in modo corretto, su entrambi si accende, per un secondo, la luce Blu, per poi tornare in modalità “Setup” con la luce Rossa fissa. 5. Per utilizzare i due dispositivi è necessario uscire dalla modalità di abbinamento (setup): 6. Fare un doppio click sul pulsante “Centrale” . La luce Rossa si spegne e al suo posto lampeggia la luce Blu. Ora potete utilizzare il BTX2 FM. Se per qualsiasi ragione si vuole interrompere la ricerca (luce lampeggiante rossa e blu) e tornare alla fase di setup (luce rossa fissa), è sufficiente fare due click sul pulsante centrale. Utilizzo della funzionalita’ Intercom Per utilizzare la funzionalità intercom, assicuratevi che entrambi i dispositivi siano accesi e precedentemente abbinati tra loro. Attivazione manuale: Premendo il pulsante “Centrale”, indifferentemente da uno dei due dispositivi, la comunicazione dopo alcuni secondi si attiva e rimarrà attiva fino a che non verrà premuto nuovamente il pulsante “Centrale”. Sentirete 1 tono audio a conferma dell’attivazione dell’Intercom e 2 toni audio a conferma della disattivazione. Attivazione vocale (VOX): La funzionalità VOX per l’attivazione vocale dell’Intercom è attiva di fabbrica. E’ sufficiente parlare per aprire la comunicazione Intercom, senza dover togliere le mani dal manubrio. Potrebbero essere necessari alcuni secondi per l’effettiva apertura della comunicazione intercom (un tono audio vi avvisa dell’apertura). Se nessuno parla, dopo 40 secondi l’intercom viene automaticamente chiuso. Per riaprire la comunicazione sarà sufficiente parlare nuovamente. Quando l’Intercom è attivato tramite VOX è possibile comunque disattivarlo senza aspettare il tempo predeterminato, semplicemente premendo il pulsante “Centrale”. E’ possibile disattivare la funzione di attivazione vocale (Vox) seguendo la procedura specificata nel capitolo “Configurazioni speciali”. Attenzione: la funzione VOX è disponibile solo se il dispositivo è stato abbinato sul tasto centrale. Se necessario, è comunque possibile disattivare la funzione VOX, premendo per 7 secondi il pulsante “Indietro”. Un annuncio vocale vi avviserà dell’avvenuta disattivazione. Per riattivarlo è necessario ripetere la stessa procedura. Questa configurazione è memorizzata anche dopo lo spegnimento Midland BTX2 FM - 5 I Modalità operative I Regolazione del volume Midland BTX2 FM è dotato della tecnologia AGC che regola automaticamente il volume di ascolto in base al rumore di fondo. Potete comunque regolare manualmente il volume agendo sui pulsanti “Volume+” e “Volume -“. Attenzione: la regolazione del volume avviene solo nel momento in cui c’è un audio attivo Attenzione: i pulsanti di regolazione volume “Volume +” e “ Volume -” non controllano il volume della sorgente audio a filo. Compatibilità con i dispositivi della linea BT Midland Il BTX2 FM può essere abbinato ai dispositivi Midland BT Next Conference e BTX1 FM. La massima distanza intercom possibile è stabilita dal dispositivo con minore potenza. Per esempio un BTX2 FM abbinato ad un BTX1 FM potrà fare solo 10mt di distanza. Il BTX2 FM è compatibile con la precedente linea di BT Midland (BT Next, BTX2 e BTX1) solo se aggiornati alla versione firmware 2014. abbinare (non è obbligatorio utilizzare lo stesso pulsante su entrambe le unit). 4. Ora i due dispositivi si cercano per completare l’abbinamento. Se l’abbinamento è avvenuto in modo corretto, su entrambi si accende, per un secondo, la luce Blu, per poi tornare in modalità abbinamento con la luce Rossa fissa. 5. Ora potete procedere ad un secondo abbinamento, basta ripetere il punto n.2, utilizzando però un pulsante differente. Per utilizzare i due dispositivi è necessario uscire dalla modalità di abbinamento (setup): ›› Fare un doppio click sul pulsante “Centrale” . La luce Rossa si spegne e al suo posto lampeggia la luce Blu. Ora potete utilizzare il BTX2 FM. Tutte le volte che si apre la comunicazione con una persona, la comunicazione precedente viene interrotta. La comunicazione tra dispositivi non è una “catena” quindi quando due persone stanno parlando, anche se l’altro dispositivo va fuori portata , non potrà interrompere la comunicazione. Solo i dispositivi abbinati sul tasto “Centrale” possono essere attivati con la modalità VOX. Come abbinare più di due dispositivi ad un BTX2 FM Utente già occupato in un’altra conversazione Un dispositivo BTX2 FM può essere abbinato ad un massimo di altri tre dispositivi (per un totale di 4). E’ possibile utilizzare il pulsante “Centrale” ed il pulsante “Indietro” per abbinarsi ad un dispositivo Midland ed il tasto “Avanti” per abbinarsi ad altri dispositivi utilizzando la funzione “Talk2All-Universal Intercom”. Il pulsante utilizzato per l’abbinamento sarà lo stesso utilizzato anche per l’apertura/chiusura dell’intercom. Se tentate di aprire la comunicazione Intercom verso un utente che sta già parlando con qualcun altro o che è impegnato al telefono, avrete un segnale di “occupato” (2 toni audio). Aspettate qualche minuto e riprovate, fino a che non trovate la “linea” libera! La persona che è stata chiamata verrà avvisata che qualcuno la sta cercando con un messaggio vocale che indica il numero del pulsante da cui è giunta la richiesta . Pilota 1 2 3 Passeggero 1 Pilota 2 1. Attivate la modalità “Setup” (Spegnete il BTX2 FM. Tenere premuto il pulsante “Centrale” fino a che la luce non rimane di colore rosso fisso) 2. Scegliete il pulsante a voi più congeniale (Centrale o Indietro) e tenetelo premuto per 3 secondi, fino a che la luce lampeggia alternativamente Rossa e Blu. Il pulsante scelto sarà anche lo stesso che verrà usato per aprire/chiudere l’intercom. 3. Fate la stessa procedura descritta al punto 2 , sull’altro dispositivo che intendete 6 - Midland BTX2 FM In questo modo appena la conversazione sarà terminata, l’utente potrà contattare la persona che lo cercava, semplicemente aprendo l’intercom utilizzando il pulsante corrispondente all’avviso ricevuto. Grazie alla funzione “Talk2 All - Universal Intercom” è possibile abbinare al BTX2 FM anche un intercom di un‘altra marca. 1. Sul BTX2 FM entrate in modalità setup, (spegnete il dispositivo e tenete premuto il pulsante “Centrale” fino a che la luce non rimane di colore rosso fisso) 2. Tenete premuto il pulsante “Avanti” fino a che la luce non lampeggia rossa e blu. 3. Sull’intercom non Midland, seguite le stesse instruzione per abbinare un telefono. Ad abbinamento concluso (la luce rossa/blu smette di lampeggiare). Per aprire la comunicazione dal BTX2 FM premete il tasto “Avanti” Sul dispositivo non Midland potete aprire la comunicazione manualmente premendo il tasto per la chiamata telefonica. Potrebbe essere necessario premere il tasto di chiamata due volte , dipende dal modello del dispositivo non Midland. Attenzione: in questa configurazione il dispositivo non Midland non potrà utilizzare il telefono (essendo già stato abbinato il BTX2 FM al posto del telefono stesso). ›› Telefono (A2DP) Stereo ›› GPS (A2DP) Stereo ›› Dongle (A2DP) Stereo I Talk 2 All - Abbinamento a dispositivo non Midland. ›› Telefono (HFP Mono) ›› GPS mono ›› Radio PMR446 Funzione Background E’ possibile mantenere la connessione audio dei dispositivi abbinati sul pulsante Vol- sempre in sottofondo (“background”), in questo modo l’intercom non verrà interrotto se per esempio il GPS deve parlare o se avete collegato un ricetrasmettitore G8BT. Per attivare la funzione “background”, tenere premuto il pulsante Vol- per 3 sec., la voce “Background ON” vi indicherà l’attivazione. Per disattivare questa funzione ripetere la stessa operazione e la voce “Background DISABLE” vi indicherà la disattivazione. L’impostazione di fabbrica è con la funzione “Background” spenta. Attenzione: la possibilità di utilizzare la funzione “Background” non può essere garantita in quanto dipende anche dalle caratteristiche del dispositivo abbinato Talk2All - Universal Intercom Dispositivo non Midland Utilizzo di altri dispositivi Bluetooth Al BTX2 FM possono essere abbinati altri dispositivi Bluetooth , come il telefono cellulare, il navigatore GPS o una radio PMR446 con Bluetooth integrato o esterno (Dongle). Gli abbinamenti possono avvenire sul pulsante Vol + oppure Vol -: ›› Abbinamento al pulsante Vol+: per il telefono con musica/audio A2DP stereo, dispositivi GPS con audio A2DP stereo o Dongle esterni mono/A2DP stereo. ›› Abbinamento al pulsante Vol-: per un secondo telefono con audio mono (protocollo HFP), dispositivi GPS/Radar detect con audio mono o altri dispositivi con audio mono. Quando un dispositivo è abbinato ai pulsanti Vol+ o Vol -, la modalità “Phone” sarà disponibile Attenzione: le sorgenti audio A2DP stereo sono supportate solo sul pulsante Vol+. Il secondo telefono abbinato sul pulsante Vol - è supportato solo in modalità mono (Hands Free Protocol). Telefono cellulare (abbinamento fino adue telefoni) Il telefono cellulare può essere abbinato sia al pulsante Vol + ( se necessita il supporto per l’audio stereo A2DP) oppure al pulsante Vol -. Quando il telefono è abbinato, la modalità “Phone” sarà disponibile. La telefonata entrante avrà sempre la priorità più alta e interromperà le altre comunicazioni attive (Intercom, Radio FM, Musica). Se arriva una seconda telefonata sull’altro telefono, durante una telefonata già attiva, riceverete una segnalazione audio di notifica Come abbinare un telefonino 1. Attivate sul vostro telefonino la modalità di ricerca dispositivi Bluetooth. Questa funzione dipende dalla marca e modello del vostro telefono (fate riferimento al manuale del telefonino). 2. Attivate la modalità “Setup: spegnete il BTX2 FM e tenete premuto il pulsante “Centrale” fino a che la luce non rimane di colore rosso fisso. 3. Premere il pulsante “Volume+” o “Volume -” fino a quando la luce lampeggia Rosso e Blu. 4. Dopo pochi secondi sul telefonino comparirà il nome “Midland BTX2 FM”, selezionatelo e seguite le istruzioni del vostro telefonino per accettare l’abbinamento. Midland BTX2 FM - 7 I Quando viene richiesto, immettete il codice di abbinamento: 0000 (quattro zeri). Il telefono confermerà se il processo di abbinamento è stato completato con successo. 5. Il BTX2 FM uscirà dalla modalità setup (luce rossa fissa) e passerà automaticamente allo stato di funzionalità normale (luce blu lampeggiante). Ora il telefono è abbinato correttamente. Come utilizzare il telefonino Per utilizzare le funzionalità del telefono è necessario essere in modalità “Phone”. Tenete premuto per 3 secondi il pulsante Centrale. Un annuncio vocale vi indicherà in quale modalità state entrando, quando sentirete “Phone” potrete utilizzare i pulsanti del BTX2 FM per gestire il vostro telefono (vedi tabella B) Rispondere ad una chiamata Quando sentite il telefonino squillare, potete rispondere utilizzando due modalità: Risposta vocale: E’ sufficiente pronunciare una parola qualunque e quindi iniziare a parlare. Risposta manuale: Premere brevemente il pulsante “Avanti” ed iniziare a parlare. Rifiutare una chiamata Se non intendete rispondere al telefono potete lasciarlo squillare, oppure tenere premuto per 3 secondi il pulsante “Avanti” (sentirete un tono audio di conferma). Effettuare una chiamata Ci sono diversi modi per effettuare una chiamata. Dalla tastiera del telefonino: Comporre il numero sulla tastiera del telefonino Premere il pulsante “Invio” sul telefonino Telefono collegato al pulsante “Vol-”: tenete premuto per 3 secondi il pulsante “Indietro”, l’ultimo numero utilizzato verrà richiamato (sentirete un tono audio di conferma) Chiamata vocale: Telefono collegato al pulsante “Vol+”: premete brevemente il pulsante “Avanti”, se il vostro telefonino supporta la chiamata vocale, vi verrà chiesto di pronunciare il nome del contatto che volete chiamare. Telefono collegato al pulsante “Vol-”: premete brevemente il pulsante “Indietro”, se il vostro telefonino supporta la chiamata vocale, vi verrà chiesto di pronunciare il nome del contatto che volete chiamare. Priorità: La telefonata è prioritaria, quindi tutte le altre comunicazioni vengono temporaneamente interrotte. Chiudere una telefonata Ci sono diversi modi per chiudere una telefonata: ›› Aspettare che l’altra parte chiuda la telefonata ›› Premere brevemente il pulsante “Avanti” (sentirete un tono audio di conferma) ›› Premere il pulsante “Chiuso” sul telefonino Utilizzo della funzionalità MP3 player del telefonino I telefonini se abbinati al pulsante “Vol+” posso essere utilizzati anche come player musicali Stereo. Il dispositivo Midland BTX2 FM supporta completamente i protocolli A2DP e AVRCP, i quali consentono di ascoltare musica stereo e di comandare le principali funzioni dell’MP3 player. E’ infatti possibile utilizzare i pulsanti presenti sul BTX2 FM per gestire le seguenti funzioni: Play, Stop/Pause, Avanti ed Indietro. Chiamare l’ultimo numero: Telefono collegato al pulsante “Vol+”: tenete premuto per 3 secondi il pulsante “Avanti”, l’ultimo numero utilizzato verrà richiamato (sentirete un tono audio di conferma) B - Utilizzo pulsanti in modalità Phone Modalità Phone Phone (con musica attiva e Abbinato al pulsante vol+) 8 - Midland BTX2 FM Pulsante Avanti (Telefono su Vol+) Pulsante Centrale Breve: Chiamata vocale /accetta chiamata Lungo: Cambio modalità Lungo: Richiama ultimo numero/ rifiuta chiamata Breve: Avanti una canzone Breve: Play/pause Lungo: Cambio modalità Pulsante Indietro (Telefono su Vol-) Breve: Chiamata vocale /accetta chiamata Lungo: Richiama ultimo numero/ rifiuta chiamata Breve: Indietro una canzone I abbinato correttamente. Navigatore sempre in sottofondo (funzione background). Se si desidera che le indicazioni vocali provenienti dal GPS siano sempre in sottofondo e non interrompano la comunicazione intercom, la funzione “Background” deve essere attiva ed il dispositivo abbinato al “Vol -”. Avanti Play/Pausa Attenzione: la possibilità di utilizzare la funzione “Background” non può essere garantita in quanto dipende anche dalle caratteristiche del dispositivo abbinato Indietro Comandi disponibili in modalità “Phone”: ›› Play/pausa della musica: fare click sul pulsante “Centrale”. ›› Avanti di una canzone: premere il pulsante “Avanti” ›› Indietro di una canzone: premere il pulsante “Indietro” Supporto per annunci vocali stereo (A2DP) BTX2 FM supporta gli annunci vocali stereo provenienti da Navigatori GPS o Applicazioni su smartphone quando abbinati al pulsante “Vol+”. Nel momento in cui entra un annucio vocale, l’intercom o la radio FM sono interrotti per dare prioità all’annuncio stesso. Per default questa caratteristica è attiva; è possibile cambiare la priorità utilizzando il software di configurazione per PC “BT Updater”. Attenzione: Per poter utilizzare le funzionalità del player musicale (Play, Pausa, Avanti, Indietro) dovete essere in modalità “Phone Utilizzo del Navigatore GPS Utilizzo della funzionalita’ Radio FM Il GPS può essere abbinato tramite il pulsante “Volume+” oppure “Volume-“. Pulsante “Vol+” (supporto per l’audio stereo A2DP) Pulsante “Vol-” (supporto per l’audio mono anche in sottofondo) Il BTX2 FM è dotato di un ricevitore radio FM integrato. Per utilizzarlo è sufficiente passare alla modalità “FM Radio”. Modalità “ FM Radio” Come abbinare un Navigatore GPS In generale è possibile abbinare qualunque navigatore GPS per moto che accetti un auricolare Bluetooth. 1. Attivate sul vostro GPS la modalità di ricerca dispositivi auricolari Bluetooth. Questa funzionalità dipende dalla marca e modello del vostro GPS (fate riferimento al manuale del GPS). 2. Attivate la modalità “Setup (Spegnete il BTX2 FM. Tenere premuto il pulsante “Centrale” fino a che la luce non rimane di colore rosso fisso). Premere il pulsante “Volume +” o “Volume -” fino a quando la luce lampeggia Rosso e Blu. 3. Sul GPS comparirà il nome “Midland BTX2 FM”, selezionatelo e seguite le istruzioni per accettare l’abbinamento. Quando viene richiesto, immettete il codice di abbinamento: 0000 (quattro zeri). Il GPS confermerà se il processo di abbinamento è stato completato con successo. 4. Il BTX2 FM uscirà dalla modalità setup (luce rossa fissa) e passerà automaticamente allo stato di funzionalità normale (luce blu lampeggiante). Ora il GPS è Tenete premuto per 3 secondi il pulsante Centrale. Un annuncio vocale vi indicherà in quale modalità state entrando, quando sentirete “FM Radio” potrete utilizzare i pulsanti del BTX2 FM per gestire il ricevitore radio (vedi tabella). Con un click sul pulsante “Avanti” o “Indietro”potete ricercare una stazione radio (funzionalità seek), la ricerca si fermerà automaticamente quando incontrerà una stazione con un segnale sufficientemente forte per garantire una buona ricezione. Se invece tenete premuto lungo (3 sec.) scorrerete avanti e indietro le 6 stazioni memorizzate. Ogni volta che passate da una stazione registrata all’altra un annuncio vocale vi indicherà il numero di memoria in cui vi trovate. Per registrare una stazione radio tenere premuto per 3 sec contemporaneamente i pulsanti “Avanti” e “Indietro”. Sentirete un tono di conferma. La nuova stazione verrà registrata al posto dell’ultima memoria ascoltata. Grazie al sistema RDS, la radio sceglierà sempre il segnale radio più forte disponibile per la stazione che state ascoltando. Il sistema RDS è spento per default, potete attivarlo premendo insieme i pulsanti “Volume+” e “Volume-“ per 3 sec. Un annuncio vocale vi indicherà lo stato. Per disattivarlo ripetete la stessa procedura. C - Modalità con Radio FM Modalità FM Radio Pulsante Avanti (sinistro) Corto: ricerca stazione avanti Lungo: scansione memorie avanti Pulsante Centrale Corto: On/off Lungo: Cambio modalità Pulsante Indietro (destro) Corto : ricerca stazione indietro Lungo: Scansione memorie indietro Midland BTX2 FM - 9 I Intercom con Radio FM Utilizzo dell’ingresso audio a filo In modalità FM radio non è possibile attivare l’intercom in modo manuale, ma può essere utilizzata l’attivazione vocale (VOX) solo verso il dispositivo abbinato sul pulsante “Centrale”. Per attivare l’intercom in modo manuale dovete uscire dalla modalità “FM Radio” e passare alla modalità “Intercom”. Midland BTX2 FM ha disponibile anche un ingresso audio a filo per collegare una sorgente audio Stereo come ad esempio un iPod (o un qualsiasi altro MP3 Player) oppure un ricetrasmettitore PMR446 per la comunicazione di gruppo o ad una distanza superiore a quella concessa dalla tecnologia Bluetooth (entrambe i cavi sono opzionali). Disabilitare/Abilitare la Radio FM Per disabilitare la Radio FM tenere premuto il pulsante “Avanti” per 7 Sec. la voce “FM Radio Disable” confermerà la disattivazione. Per ri-attivare la Radio FM tenere premuto il pulsante “Avanti” per 7 Sec. la voce “FM Radio” confermerà l’attivazione. Ricetrasmettitore PMR446 con Bluetooth integrato o esterno Se possedete un ricetrasmettitore con Bluetooth esterno o integrato (come il G8BT o ) potete abbinarlo al BTX2 FM tramite il pulsante “Volume +“ o “Volume-”. Se abbinato al pulsante “Volume -” e la funzione “Background” è stata attivata, sarà possibile avere la comunicazione radio in sottofondo all’intercom. Abbinamento ed utilizzo Attivate la modalità “Setup (Spegnete il BTX2 FM, tenere premuto il pulsante “Centrale” fino a che la luce non rimane di colore rosso fisso). ›› Premere il pulsante “Volume+” o “Volume -“ fino a quando la luce lampeggia Rosso e Blu. ›› Attivate la modalità di abbinamento sul ricetrasmettitore PMR446, seguendo le istruzioni riportate sul manuale del ricetrasmettitore stesso. Attenzione: nel caso di abbinamento ad una radio G8BT, appena il BTX2 FM ha terminato il pairing (solo luce blu lampeggiante) dovete attivare la connessione seguendo questa procedura: ›› In “Phone Mode” premere brevemente il tasto indietro, questo comando attiverà o disattiverà l’audio con il G8BT. Assicurarsi che la funzione Background sia attiva. Seguite la stessa procedura ogni volta che dovete ricollegare il G8BT al BTX2 FM nel caso fosse stato spento (la procedura di pairing non deve essere ripetuta). In caso di problemi di abbinamento, spegnere e riaccendere il G8BT e riattivare la connessione Bluetooth tenendo premuto il tasto “BT” per 3 sec. 10 - Midland BTX2 FM Ascolto della musica Per ascoltare la musica dall’ingresso a filo è sufficiente collegare la sorgente audio tramite il cavo AUX opzionale. I pulsanti di regolazione volume “Volume +” e “ Volume -” non controllano il volume della sorgente audio a filo. Quindi dovete solamente posizionare il volume del vostro iPod/MP3 Player ad un livello tale che in condizioni normali (bassa velocità) la musica sia adeguata. Attenzione: non alzate mai il volume dell’MP3 Player al massimo, normalmente un volume al 70% può essere quello corretto. Consiglio: fate alcune prove, regolando il volume del vostro iPod/MP3 Player in modo che a bassa velocità il volume in cuffia sia ad un livello ottimale, poi annotatevi il valore in modo che la prossima volta possiate immediatamente riconfigurarlo con il valore corretto. Attivazione/disattivazione dell’ingresso a filo E’ possibile attivare e disattivare l’ingresso a filo semplicemente premendo 3 sec. il pulsante “Centrale” e “Avanti”. Un tono audio vi segnala quando la connessione è aperta, mentre un doppio tono audio quando è chiusa. Utilizzo di un ricetrasmettitore PMR446 con cavo Utilizzate il cavo specifico opzionale per collegare il vostro ricetrasmettitore alla presa AUX 2.5mm del BTX2 FM. Normalmente insieme al cavo viene anche fornito il pulsante PTT da fissare sul manubrio della moto. La comunicazione via radio avviene premendo il pulsante di trasmissione PTT quando si vuole parlare e rilasciandolo quando si ascolta. Non è possibile parlare ed ascoltare contemporaneamente. Se intendete utilizzare un ricetrasmettitore PMR446 per la comunicazione di gruppo e allo stesso tempo volete avere attiva la funzione di Intercom tra due dispositivi BTX2 FM, dovete tenere presente che ogni volta che parlate, se avete abbinato un dispositivo sul tasto Centrale, grazie alla funzione VOX, anche la comunicazione Intercom viene aperta. Per ovviare a questo problema, abbinare il dispositivo con cui volete parlare utilizzando il pulsante “Avanti” o il pulsante “Indietro”, dove la funzione VOX non è attiva. In alternativa se volete utilizzare il pulsante Centrale, potete disattivare la funzione VOX seguendo la procedura spiegata nel capitolo precedente, in modo che quando parlate via radio l’Intercom non venga attivato automaticamente. Per Configurazioni speciali Reset di tutti i dispositivi accoppiati Potrebbe essere necessario eliminare tutti i riferimenti di abbinamento registrati nel BTX2 FM (reset). Procedete quindi come segue: Spegnete il BTX2 FM. Tenere premuto il pulsante centrale (“Centrale”) fino a che la luce non rimane di colore rosso fisso. Tenete ora premuto contemporaneamente i pulsanti “Volume +” e “Volume –“ per 3 secondi, la luce Blu si accenderà fissa per un secondo e poi tornerà di colore rosso fisso. Da questo momento il BTX2 FM non avrà più nessun dispositivo Bluetooth in memoria e potrete procedere ad una nuova sessione di accoppiamento (pairing). Ritorno alla configurazione di default Potrebbe essere necessario ritornare alla configurazione “di fabbrica” , in modo da ottenere un dispositivo “pulito” esattamente come la prima volta che è stato tolto dalla scatola. Spegnete il BTX2 FM. Tenere premuto il pulsante centrale (“Centrale”) fino a che la luce non rimane di colore rosso fisso. Tenete ora premuto contemporaneamente i tre pulsanti “Avanti”, “Centrale” e “Indietro“ per 3 secondi, la luce Blu si accenderà fissa per un secondo e poi tornerà di colore rosso fisso. Fate doppio click sul pulsante “Centrale” per tornare ad utilizzare il BTX2 FM. Attenzione: questa procedura non elimina i riferimenti ai dispositivi accoppiati. Regolazione/disattivazione della funzione Vox (per Intercom e telefono) L’apertura della comunicazione Intercom, può avvenire oltre che manualmente, anche tramite attivazione vocale (VOX). Il corretto funzionamento del VOX dipende dal rumore di fondo, quindi dalla velocità. Per ottenere il migliore risultato, è possibile decidere la soglia di attivazione, scegliendo 4 livelli di sensibilità del microfono: alta, media bassa e molto bassa. Di fabbrica il BTX2 FM è preconfigurato con la sensibilità “bassa”. In aggiunta, è possibile anche disabilitare completamente la funzione VOX e quindi attivare l’Intercom e la risposta alla telefonata solo in modalità manuale. Regolazione della sensibilità del microfono I attivare l’Intercom sarà necessario premere il pulsante “Centrale” manualmente . Attenzione: ricordate che disattivando la funzione di Vox anche la risposta alla telefonata potrà avvenire solo in modalità manuale (premendo il pulsante “Avanti”). 1. Spegnete il BTX2 FM. 2. Tenere premuto il pulsante Centrale fino a che la luce non rimane di colore rosso fisso. Ora il BTX2 FM è in modalità “Setup” . 3. Premete brevemente il pulsante “Indietro” fino a che la luce Blu si accenderà fissa. 4. Ora premete “Volume +” o “Volume -“ per aumentare o diminuire la sensibilità. La luce Rossa lampeggerà indicando che il pulsante è stato premuto (quando raggiungete il limite della regolazione la luce smette di lampeggiare). 5. Premete il pulsante “Indietro”, la luce Blu lampeggerà diverse volte in base alla configurazione della sensibilità in quel momento attiva: 1 volta= Vox disattivo 2 volte=sensibilità molto bassa 3 volte=sensibilità bassa 4 volte= sensibilità media (valore di default) 5 volte= sensibilità alta Ora la luce rossa tornerà ad essere accesa fissa per indicare che le modifiche sono state registrate e siete tornati alla modalità di setup. 6. Se dovete modificare ulteriormente la configurazione della sensibilità ripetete i passi dal punto 2, altrimenti uscite dalla modalità di “Setup” facendo un doppio click sul pulsante “Centrale” . La luce Rossa si spegne e al suo posto lampeggia la luce Blu. Ora potete utilizzare il BTX2 FM. Disattivazione della funzione VOX (per Intercom e Telefono) Seguite tutta la procedura spiegata sopra ma selezionate l’opzione 1 del punto 5 cioè un unico lampeggio (corrispondente al Vox disattivo). Connessione a filo sempre attiva Grazie a questa funzione è possibile mantenere aperta la sorgente audio via filo anche quando l’Intercom o il telefono sono attivi. Questa funzione può essere utile quando si utilizza una ricetrasmittente collegata via filo. Per default questa funzione è attiva. Disattivazione: Entrate in modalità “setup” (luce rossa sempre accesa). Premete contemporaneamente il pulsante “Avanti” e “Centrale” per un secondo. La luce Blu farà due lampeggi per indicare la disattivazione. Uscite dalla modalità “setup” premendo due volte il pulsante Centrale. Attivazione: Fate la stessa procedura; questa volta un lampeggio della luce blu indicherà l’attivazione. Uscite dalla modalità “setup” premendo due volte il pulsante Centrale. Midland BTX2 FM - 11 I Configurazione e aggiornamento firmware Midland BTX2 FM può essere configurato e aggiornato tramite connessione USB al vostro PC, per migliorare la compatibilità con i dispositivi Bluetooth, quali telefoni e GPS o per risolvere problematiche legate alla funzionalità. Il software per PC insieme agli eventuali aggiornamenti del firmware sono disponibili per il download sul sito www.midlandeurope.com nella pagina del prodotto stesso. ATTENZIONE: NON COLLEGATE IL DISPOSITIVO AL COMPUTER PRIMA DI AVER SCARICATO ED INSTALLATO IL SOFTWARE. Certificazioni e Conformità di Sicurezza CE/Informazioni generali Questo prodotto è conforme alla direttiva 99/05/CE e può essere liberamente utilizzato nei paesi dell’UE. Agli utenti non è permesso effettuare variazioni o modifiche di qualsiasi tipo all’apparecchio. Queste ultime, se non espressamente approvate dal produttore, annullano la possibilità di utilizzo dell’apparecchio ed invalidano la garanzia. Per ulteriori informazioni, fate riferimento al nostro sito web: www.cte.it Uso e avvertimenti specifici L’uso assiduo di questi dispositivi può diminuire la vostra capacità di udire suoni esterni e chi vi sta intorno. L’uso di questo dispositivo mentre si sta guidando può diventare un pericolo per voi e per chi vi sta intorno e in alcuni paesi, l’utilizzo del dispositivo potrebbe non essere consentito. L’uso ad un volume troppo alto può causare la perdita permanente dell’udito. Se si avverte un qualsiasi dolore alle orecchie, o fastidio all’udito, diminuite il volume o spegnete il dispositivo. L’uso continuativo ad alto volume, fa sì che l’udito si abitui a tale volume, il quale a lungo andare può causare danni permanenti. È fortemente consigliato l’utilizzo di tale apparato ad un volume adeguato. Garanzia La durata della garanzia è di 24 mesi per l’apparato e di 6 mesi per gli accessori (batterie, caricatori, antenne, auricolari). Per maggiori informazioni visitate il sito www.midlandeurope.com 12 - Midland BTX2 FM Attenzione: L’adattatore di alimentazione è il dispositivo di disconnessione dell’apparato; la base di carica della corrente deve restare vicino all’apparato e facilmente accessibile Index Technical specifications of Midland BTX2 FM............................................................................................................. 14 Charging batteries.................................................................................................................................................. 14 Unit and fixing system description........................................................................................................................... 15 Switching your Midland BTX2 FM on and off.............................................................................................................. 16 Operative “mode”................................................................................................................................................... 16 Maximum Distance................................................................................................................................................. 17 How to pair two BTX2 FM unit.................................................................................................................................. 17 Compatibility with other Midland BT line units......................................................................................................... 17 How to pair BTX2 FM to more than 2 units ................................................................................................................ 17 Talk 2 All - Pairing to a different brand intercom....................................................................................................... 18 Pairing the BTX2 FM to Bluetooth devices................................................................................................................. 18 GPS Navigator........................................................................................................................................................ 20 How to pair the BTX2 FM to a GPS............................................................................................................................. 20 How to listen to the FM Radio.................................................................................................................................. 21 How to use the wired audio input............................................................................................................................ 21 Using a PMR446 transceiver with the cable connection............................................................................................. 22 Setup and special configurations............................................................................................................................. 22 Setup and Firmware update.................................................................................................................................... 23 Use at your own risk.............................................................................................................................................................23 Warranty.............................................................................................................................................................................23 European CE Notice Certification and Safety Approval Information........................................................................................23 Midland BTX2 FM - 13 UK Main features......................................................................................................................................................... 14 MIDLAND BTX2 FM UK Advanced Intercom System BTX2 FM is an intercom communication system solution for motor cyclists.The design is very slim and aerodynamic, all the main functions are easy to operate thanks to the big three buttons placed on the front of the unit. BTX2 FM is fixed on the helmet using the adhesive plate or the screw mounting clamp. Thanks to the audio kit with ultra slim speakers you can enjoy high quality stereo music while riding. Main features Technical specifications of Midland BTX2 FM ›› Intercom driver - passanger or bike to bike (800mt). ›› Connect up to 4 people for intercom communication (using Talk2All-Universal Intercom) ›› FM Radio with RDS ›› Connect your phone to receive and place phone call and listen to stereo music ›› Connect your GPS for voice street indication ›› Connection for PMR466 radio with internal or external Bluetooth ›› AUX wired connection for MP3 player and PMR446 radio ›› Setup and Firmware update via USB connection to a PC General: ›› Bluetooth ver. 3.0 stereo (Headset/Handsfree/A2DP protocol) ›› AGC system automatically controls the volume in relation to background noise ›› Voice (VOX) or manual communications activation ›› Manual controls to enable: telephone, intercom and wire connection ›› Fully waterproof ›› Lithium battery with 12 hours talk time ›› Recharge time: app. 6 hours Midland BTX2 FM is available in two versions: ›› Single BTX2 FM Intercom kit with one unit only ›› Twin BTX2 FM Intercom kit with with two units Depending on the model purchased, the package contains the following parts: BTX2 FM single ›› 1 BTX2 FM communication unit ›› 1 audio kit with two stereo speakers, microphone with boom and wired microphone ›› 1 plate with bi-adhesive strip to fix the unit onto the helmet ›› 1 clamp to fix the unit onto the helmet ›› 1 stereo audio cable for iPod/ or other MP3 players ›› 1 miniUSB wall-mounting power supply BTX2 FM Twin ›› 2 BTX2 FM communication units ›› 2 audio kits with two stereo speakers, microphone with boom and wired microphone ›› 2 plates with bi-adhesive strip to fix the unit onto the helmet ›› 2 clamps to fix the unit onto the helmet ›› 2 stereo audio cables for iPod/ or other MP3 players ›› 1 miniUSB wall-mounting power supply with double plug The units included in the TWIN kit are already paired and can therefore be immediately used in Intercom mode. 14 - Midland BTX2 FM Bluetooth connections: With identical device for Driver to Passanger or Bike to Bike Intercom Bluetooth devices: ›› Mobile phone with MP3 player Stereo (A2DP protocol) and GPS navigator ›› PMR446 transceivers (with built-in or external Bluetooth connection) for group bike-to-bike communications Wire connections: ›› For stereo audio input like iPod/MP3 player (with optional cable) ›› For PMR446 transceivers (with optional cable) Attention: Midland BTX2 FM is designed to withstand rain and water. However, if it is raining, always verify that the rubber caps protecting the sockets are fully fitted. Charging batteries Attention: Make sure that the unit is fully charged before use. Allow at least 8 hours for a full charge before using the unit for the first time. Charge the unit by inserting the wall-charger into the charging socket (lift the rubber cover to insert the plug). The red LED on the unit will start flashing when charging begins. Allow the headset to charge until the unit stops flashing or the blue LED turns on. When the charge is complete (the red LED is not flashing), release the headset from the charger. To lift the antenna, press gently backward and the antenna will automatically lift up. UK Normally, after the first time, it takes 6 hours for a full charge. Attention: every time the mini USB recharging plug is inserted (or detached), the device is automatically turned off. To use it while it is in charge, you should turn the device on with the plug already inserted. Unit and fixing system description BTX2 FM description The BTX2 FM has five buttons on the front; the main three big button are multi functions buttons: the Forward (on the left), the middle button and the “Backward” (on the right), the two small rounded buttons are the Volume + and Volume -. Volume + To close the antenna just press it down and be sure to move it back into the closed position. Volume - Description of the audio kit Forward button Middle button Backward button Description of the wired connections On the bottom of the unit you can find three wired connection: Charger jack: enables to recharge the unit using a standard miniUSB power supply Audio kit jack: enable to connect an audio kit (stereo headset and microphone) Auxiliary audio jack (AUX) 2.5mm: can be used to connect an audio source, like a stereo iPod/MP3 player or PMR446 transceiver Charger jack Audio kit jack The audio system includes two ultra-flat stereo speakers and two interchangeable microphones, which are both supplied with a bracket and wired connection. Fixing the stereo speakers The two stereo speakers have a Velcro/adhesive strip that aids their fixing into your helmet. Beware not to completely cover your ear with the speakers, you must always be able to listen to the traffic sound and your indicators. The microphone can be fixed onto the helmet in two ways: Boom Microphone Place the section with the Velcro/adhesive strip between the padding and the rigid cover of the helmet, so that the microphone is correctly positioned in front of your mouth and that the white symbol is facing your mouth. This type of microphone is suited for Open Faced and Flip Front helmets. Auxiliary audio jack (AUX) In addition the BTX2 FM has a flip up antenna on the top for maximum distance performance. Midland BTX2 FM - 15 UK Wired microphone Using the Velcro/adhesive strip, place the microphone inside the helmet in front of your mouth. This type of microphone is more suited for Full Faced helmets. The mini connector on the microphone allows you choose the microphone that best suits the helmet you are using. Fitting and removing your Midland BTX2 FM The BTX2 FM can be easily fitted onto the helmet by sliding it downwards so that it fits into the slot of the selected fixing device (plate with bi-adhesive strip or clamp). BTX2 FM is maintained in position thanks to the fixing clip located on the upper section (A). To detach the BTX2 FM, simply press the fixing clip and push the unit upwards. Audio kit jack The audio kit must then be connected to the central jack of the Midland BTX2 FM unit using the “L” shaped connector. Description of the installation brackets The Midland BTX2 FM can be fixed onto the helmet in two different ways: By either using the plate with bi-adhesive strip, or the clamp. These methods allow you to safely “fix” the BTX2 FM unit onto your helmet and to remove it at any time in order to recharge or store it. Plate with bi-adhesive strip The fixing plate has a bi-adhesive strip on one of its sides. To fix the plate in place, clean the application area on the helmet surface, remove the biadhesive film and place the fixing plate on the helmet by keeping it contact with the surface for a few seconds. Screw Clamp Using the Allen Key, loosen the two screws on the clamp and place the rear plate between the helmet padding and the external rigid protection. Then, tighten the two screws in order to firmly fix the clamp in place. Inside the clamp is included a small plastic spacer that can be removed to give a tighter fit if required. Switching your Midland BTX2 FM on and off Switching the unit on: Press and hold “Middle” button down for approximately 3 seconds until the BLUE indicator lights. Switching the unit off: Press and hold both “Middle” and “Backward” buttons together for approximately 3 seconds until the RED indicator flashes 3 times, thus lessening the chances that you might turn off the unit accidentally (especially whilst wearing gloves). Operative “mode” The BTX2 FM can operate in three main “mode”: Intercom, Phone and FM Radio. The 3 multi function buttons can have different functionality depending on which mode the unit is at that moment. ›› In “Intercom mode” the middle buttons let you manage the communications between driver and passanger ›› In “Phone mode” you can manage your Bluetooth cellular phone to place/ answer a phone call or to listen to the music (in stereo mode). Please use your phone responsibly and safely. ›› In “FM Radio mode” you can listen to your favourite radio station in stereo, seek for a specific radio station and save it (6 memory are available). You can switch (toggle) from one mode to the other simply pressing the Middle button for 3 seconds. A voice announcement will tell in which mode you are on. The toggle sequence is the following: 16 - Midland BTX2 FM If you need to know in which mode the unit currently is, just press the “Volume + “ and “Volume –“ button together. A voice announcement will tell you the current mode. Maximum Distance You can reach 800mt intercom distance if the flip up antenna is up and if you are in line of site without obstructions and interferences (the riders must be always in sight). second to activate, you will hear a beep tone when the intercom is open. Voice activation (VOX) Simply start talking, after some seconds the communication will be opened and will remain active for the time you are talking. If there is no conversation the intercom will be closed after 40 seconds. If needed you can close the intercom manually without waiting 40 seconds (just press the middle button). Attention: The Voice activation (VOX) can open the intercom communication only to the unit that was paired with the Middle button. If you chose to use a different button, you will be able to active the intercom only manually. If needed, you can disable the VOX feature simply by pressing the Backward button for 7 sec. A voice announcement will advise you when the VOX is disabled. To turn the VOX on again, just press the same button and a voice announcement will advise you that the VOX is now active. This setting is remembered also if you turn off the unit How to pair two BTX2 FM unit Adjusting the volume The two units supplied in the same BTX2 FM box, are already paired and ready to use, which mean you don’t need to perform this procedure. The unit are already paired using the Middle button. If the devices are not part of the same kit, or the units has been purchased separately, you need to first pair it in order to use it. Your Midland BTX2 FM uses AGC technology, which automatically adjusts the listening volume in relation to background noises. However, it is also possible to manually adjust the volume by means of the “Volume +” and “Volume -“buttons. Attention: volume can be adjust only when an audio connection is active. To pair the BTX2 FM to another BTX2 FM unit To pair the BTX2 FM to another BTX2 FM unit, you must first enter the setup mode: 1. Turn off the unit 2. Press and hold down the middle button about 7 sec., until the Red light is on permanently. 3. Now press the Middle button for 3 seconds. The Blue and Red light will flash. 4. Do the same procedure on the other unit, When successfully paired, each unit will have the Blue light on for one second and than go back to the setup mode (Red light always on). 5. Now the pairing procedure is complete, you just need to exit the setup mode before you can use the units: 6. Double click on the Middle button, the Red light will turn off and the Blue light will start flashing. You can use now your BTX2 FM. Attention: the volume buttons (Vol + and Vol -) cannot be used to adjust the volume of the wired audio source. The AGC system with automatically increase the volume on higher speed. How to use the Intercom To use the intercom feature, be sure the both units are turned on and correctly paired together. Manual activation Press the Middle button on one of the two units. Communication is enabled and remains active until you press again the middle button. The intercom need some Compatibility with other Midland BT line units The BTX2 FM is compatible with BT Next Conference and BTX1 FM. When paired the max distance of the intercom is defined from the lower possible. The BTX2 FM is compatible with the previous line of Midland BT (BT Next, BTX2 and BTX1) only if updated to firmware version 2014. How to pair BTX2 FM to more than 2 units One BTX2 FM unit can be paired to maximum three other BT unit, that means 4 in total (three Midland unit + one Talk2All). You can use the Middle and the Backward button to pair to a Midland unit and you can use the “Forward” button to pair the “Talk2All-Universal Intercom” feature. The same button you will use to pair the unit will be also used to open/close the intercom communication. For example you can pair your passenger to the Middle button and another motorbiker to the Backward button. Midland BTX2 FM - 17 UK ›› Intercom mode (if another unit has been paired) ›› FM Radio ›› Phone mode (if a phone has been paired) Every time you turn on the unit, the default mode is Intercom (if it was previously paired to another unit), otherwise it will be Phone (If was paired to a phone). Talk 2 All - Pairing to a different brand intercom Thanks to the “Talk2 All - Universal Intercom”feature it is now possible to pair your BTX2 FM to a different brand intercom available on the market, using “Forward button” 1. On the BTX2 FM enter the setup mode: (With the unit OFF press and hold down the Middle button about 7 sec., until the Red light is on permanently. 2. Press the “Forward” button for 3 seconds, the Red and Blu LED light will flash. 3. On the other intercom (not Midland brand) follow the procedure to pair to a phone. Attention: remember to switch off all the other Bluetooth device, only the two devices involved in the pairing must be turned on. UK Driver 1 Passennger 1 Driver 2 To pair the BTX2 FM to another BTX2 FM unit, you must first enter the setup mode: 1. Turn off the unit 2. Press and hold down the middle button about 7 sec., until the Red light is on permanently. 3. Now press the Middle or the Backward button for 3 seconds. The Blue and Red light will flash. 4. Do the same procedure on the other unit, When successfully paired, each unit will have the Blue light on for one second and than go back to the setup mode (Red light always on). 5. Now the pairing procedure is complete, you just need to exit the setup mode before you can use the units: Double click on the Middle button, the Red light will turn off and the Blue light will start flashing. You can use now your BTX2 FM. Attention: when using this configuration, the other intercom (not Midland brand) will not be able to be paired to a phone. Talk2All - Universal Intercom Dispositivo non Midland Unit already busy If you try to open a intercom connection to another person that is already busy talking with some one else (or is in a middle of a phone conversation), you will hear a “busy” double beep tone. Just wait sometime and try again, maybe this time the “line” is not busy. The person who is called, will be advised that someone is trying to call and will hear a voice announcement with the number of the button from which the request is coming. 2 18 - Midland BTX2 FM If successfully paired the red/blue light will stop flashing and the blu light will slowly flash instead. To open the intercom communication on the BTX2 FM press forward button. On the other intercom just press the phone redial button. Maybe it will be necessary to press the dial button two times, depending on the model of the not Midland intercom. 3 Pairing the BTX2 FM to Bluetooth devices The BTX2 FM unit can be paired to other Bluetooth devices, like Phone, GPS Navigator or PMR446 Radio with built-in or external Bluetooth (dongle). The pairing procedure must be done using the “Volume +” or the “Volume -“ buttons. ›› Pairing to the “Volume +” button: for Phone with music A2DP stereo, GPS Navigator with A2DP audio or external mono/Stereo A2DP dongle. ›› All devices paired to “Volume +” button has higher priority and will interrupt all the other communication (like Intercom, FM Radio and Music). ›› Pairing to the “Volume -” button: for a second phone with mono audio (Hands Free Protocol) for GPS navigators/ Radar detector and other devices which mono audio. Pairing with one or two phone ›› Phone (HFP Mono) ›› GPS mono ›› PMR446 Transceiver The cellular phone can be paired to the “Vol +” (if the support for stereo A2DP is requested) or to the “Vol –“. When a phone is paired to the “Vol +” or “Vol-“ the “Phone” mode is activated. An incoming call has always the higher priority, that means all other communications will be closed (Intercom, FM Radio, Music). If another incoming call will arrive on the second phone, alert sound will notify it. How to pair the BTX2 FM to a Phone When a device is paired to the “Vol +” or “Vol –“ buttons the “Phone” mode is activated. Attention: A2DP audio source are supported only on Vol+. The second phone paired on Vol- can support only mono audio (HFP). Background feature It is possible to keep always in background the audio of the device paired on Vol- button. In this way the Intercom communication will not be interrupted, for example, by the GPS’s street indication or the G8BT radio communication. To activate the “Background” feature just press long the “Vol-” button, the voice “Background ON” will tell you that now is active. To deactivate the “Background” feature just press again long the “Vol-” button, the voice “Background disable” will tell you that now is not active anymore. By default the “Background” feature is off. Attention: we can’t garantee this features because is depending on third part device. To pair the BTX2 FM to a Phone, you must first enter the setup mode: 1. Turn off the unit 2. Press and hold down the middle button about 7 sec., until the Red light is on permanently. 3. Now press for 3 seconds the “Volume +” or “Volume -” button, the Blue and Red light will flash. 4. Enable the Bluetooth device search feature on your mobile phone 5. After some seconds, “Midland BTX2 FM” will be displayed on your mobile phone. Follow the pairing procedure of your Phone. If a pin code is requested you must enter “0000” (four time zero). When successfully paired, the Blue light of the unit will be on for one second and than the unit will exit the setup mode and switch to the working mode (the Blue light will start flashing). You can use now your BTX2 FM together with the Phone. How to use a Phone After pairing your phone to the BTX2 FM unit you must switch to the “Phone” mode in order to use it. Press the middle button until you hear “Phone” from the voice announcement. Now all the three main buttons are dedicated to the phone (see Table B) Answering a call When you hear the phone ring, you can answer in two different ways: Vocally: Simply say one word to answer the call and start talking. B-Phone mode Mode Phone Phone (when music is plaing and paired on “Vol +”) Forward button (Phone on Vol+) Short press: Voice dial /accept or close if it is in progress Long press: redial last number/ or reject Short press: Forward the song Middle button Long press: Change mode Short press: Play/pause Long press: Change mode Backward button (Phone on Vol-) Short press: Voice dial /accept or close if it is in progress Long press: redial last number/ or reject Short press: Backward the song Midland BTX2 FM - 19 UK ›› Phone (A2DP Stereo) ›› GPS (A2DP Stereo) ›› Dongle A2DP Stereo UK Manually: Tap the “Forward” button and start talking. Rejecting a call If you don’t wish to answer, you can let the mobile phone ring or press the “Forward” button for 3 seconds (you will hear one audio confirmation tone). Making a call There are several ways to make a call. From the mobile keypad: Dial the number on the mobile keypad: Press “Send” on the mobile phone. To redial the last number: Phone on Vol+: Press“Forward”button for 3 seconds in order to redial the last number (you will hear one audio confirmation tone). Phone on Vol-: Press“Backward”button for 3 seconds in order to redial the last number (you will hear one audio confirmation tone). To make a voice call: Phone on Vol+: Briefly press“Forward”button. If your mobile phone supports voice calls, you will be asked to speak the name of the contact you wish to call. Phone on Vol-: Briefly press“Backward”button. If your mobile phone supports voice calls, you will be asked to speak the name of the contact you wish to call. Priority: Calls have a high priority, which means that all other communications are temporarily disabled when a call arrives. Ending a call There are several ways to end a call: ›› Wait for the called person to end the call. ›› Press the “Forward” button (you will hear an audio confirmation tone). ›› Press “End” button on the mobile phone. Using the MP3 player feature of the mobile phone The mobile phone, when paired on “Volume +” can be used as stereo MP3 players. The BTX2 FM device fully supports the A2DP and AVRCP protocols that enable you to listen to stereo music and remotely control your mobile phone’s MP3 player. You can even use the buttons on the BTX2 FM unit to control the following play options: Play, Pause, Forward and Backward. 20 - Midland BTX2 FM Forward Play/Pause Backward Available controls: ›› To play/pause music: click on the “Middle” button. ›› To skip forward to the next song: press the “Forward” button. ›› To skip backwards to the previous song: press the “Rear” button.. Priority: the music listening mode has the lowest priority. Therefore, it will always be disabled when another type of communication is enabled. Attention: It is possible to control A2DP Stereo music only in “Phone Mode” GPS Navigator The GPS Navigator can be paired using the “Volume+” or the “Volume-“ button. Volume + button (support for stereo A2DP audio) Volume - button (support for mono audio also in background) How to pair the BTX2 FM to a GPS In general is possible to pair the BTX2 FM to all the GPS for motorbike that support Bluetooth headset connection. To pair the BTX2 FM to a GPS, you must first enter the setup mode: 1. Turn off the unit 2. Press and hold down the “Middle” button about 7 sec., until the Red light is on permanently. 3. Now press firmly (3 sec) the “Volume +” or “Volume -” button, the Blue and Red light will flash. 4. Enable the Bluetooth device search feature on your GPS 5. After some seconds, “Midland BTX2 FM” will be displayed on your GPS. 6. Follow the pairing procedure of your GPS. If a pin code is requested you must enter “0000” (four times zero). 7. When successfully paired, the Blue light of the unit will be on for one second and then the unit will exit the setup mode and switch to the working mode (the Blue light will start flashing). When you pair the GPS to the Volume + button, you loose the possibility to pair the phone to the BTX2 FM unit. You can overcome this limit by pairing the phone directly to the GPS and then the GPS to the BTX2 FM unit. All the phone features are therefore managed by the GPS itself. How to Disable/Enable the FM Radio To keep the intercom open while the GPS give the street indication you must have the “background” feature active and the GPS paired on “Vol-” button. Attention: we can’t garantee this features because is depending on tirth part device. To disable the FM Radio keep pressed the forward button for 7 Sec. it will be confermed by the “FM Radio disable” voice announcement. To enable again the FM Radio keep pressed the forward button for 7 Sec. it will be confermed by the “FM Radio” voice announcement. Support for Stereo (A2DP) voice announcement BTX2 FM support Stereo (A2DP) voice announcement from GPS Navigators or smartphone application when paired on “Vol+” button. When a voice announcement “brake in”, Intercom or FM radio is interrupted to give priority to the announcement itself. By default this features is ON; it’s possible to change the priority using the “BT Updater” PC Software. How to listen to the FM Radio The FM Radio receiver is integrated inside the unit. You just need to switch to the “FM Radio” mode in order to use it. Long press the middle button until you hear “FM radio” from the voice announcement. Now all the three main button are dedicated to the FM Radio (See Table). Press short the Forward or the Backward button to seek the FM Radio station. When you press long the Forward or the Backward button, you can scan up or down the 6 recorded stations. A voice announcement will tell you the number of which memory you are entering. A double beep tone will be played when the last or the first recorded station is reached. To save the station you are listening, press the Forward and Backward buttons together for 3 sec. You will hear a beep tone for confirmation. The station is saved over the last recorded station used. Thanks to the RDS system, the FM Radio will choose the strongest signal available for the radio station you like to listen. The RDS system is OFF by default, if needed you can toggle on/off the RDS pressing together the “Volume +” and “Volume –“ buttons for 3 sec when the radio is on. A voice announcement will tell you the RDS status. FM Radio with intercom When you are in “FM Radio” mode is not possible to manually open the intercom, you can only open it using VOX feature (just talk) to the unit paired on the “Middle” button. To manually activate the intercom you must switch to “Intercom” mode. Pairing to a PMR446 radio with integrated or external Bluetooth The PMR446 Radio can be paired to the “Volume +“ or “Volume -” button. If paired on “Volume -” and the “Background” feature is activated, the PMR446 radio is always in the background even when you talk on the intercom. Pairing procedure ›› Turn off the unit ›› Press and hold down the “Middle” button about 7 sec., until the Red light is on permanently. ›› Now press firmly (3 sec) the “Vol +” or “Vol -” button, the Blue and Red light will flash. ›› Follow now the pairing procedure explained on the manual of the transceiver itself Attention: If you are pairing to a G8BT transceiver, just when the BTX2 FM finish the pairing (only the Blu LED is flashing) you must follow this procedure to activate the Bluetooth connection: ›› Turn off and on the G8BT and then press for 3 sec. the “BT” button. ›› Go to phone mode ›› Press “Backward” button to activate G8BT audio (no need to make the pairing procedure again) You need to have “background” feature active if you want to have the two way radio conversation in background with the intercom How to use the wired audio input Your Midland BTX2 FM is also supplied with a wired audio input (AUX), that can be used to connect an audio source, like an iPod (or any other MP3 Player) or a PMR446 transceiver for group communication or for a coverage increase. Listening to music To listen to music from the wired input, connect the audio source using the optional AUX cable. C-Radio FM mode Mode FM Radio Forward button Short press: seek station up Long press: Scan recorded Middle button Short press: On/off Long press: Change mode Rear button Short press: seek station up Long press: Scan recorded Midland BTX2 FM - 21 UK GPS navigator always in background UK The volume buttons (Vol + and Vol -) cannot be used to adjust the volume of the wired audio source. The AGC system with automatically increase the volume on higher speed. Attention: never set the volume of the MP3 Player to the maximum possible. Normally the best level is about the 70% of the maximum. Hint: We recommend that you perform a few tests adjusting the volume of your iPod/ MP3 player so at the normal speed the Headset volume is suited to your needs. The AGC system will automatically increase the volume on higher speed. Make a note to remember this setting for future trips. Enabling/disabling the wired input If needed the wired input can be enabled or disabled: Enabling/Disabling: Make a Long press on the “Middle” and “Forward” button (you will hear one audio beep tone for enabling confirmation and two audio beep tone for disabling). Using a PMR446 transceiver with the cable connection In order to connect the transceiver to your Midland BTX2 FM, you need to purchase the specific 2.5mm plug AUX cable, sold separately. S ome manufacturers radios use a different pin configuration, so we recommend that you ask your dealer as to which cable is best suited to your needs The cable connected to the transceiver normally has also a PTT button that can be placed on the handlebar of your bike or held in your hand (If you are the passanger rider). To communicate via the attached radio, press the PTT button to speak and release it to listen. It is not possible to talk and listen simultaneously. Adjust the volume of the transceiver to your needs, remembering that the volume adjustment is controlled by the automatic AGC system and that it will therefore be automatically increased in relation to background noise. If you wish to use a PMR446 transceiver for group communications and simultaneously maintain the Intercom feature enabled between two or more BTX2 FM devices, you must remember that every time you talk to communicate with the PMR 446 transceiver (pressing the PTT button), you will also activate the intercom of the BTX2 FM to the unit connected to the “Middle” button (thanks to the VOX feature). To avoid the Intercom activation when you speak on the PMR446, you can decide to pair the BTX2 FM unit on the “Backward” or “Forward” (where the VOX is not active) or if you still want to use the “Middle” button, you must disable the VOX feature, as explained in the previous section. Attention! If you disable the VOX feature, you will only be able to answer incoming phone calls by pressing the “Forward” button. 22 - Midland BTX2 FM Setup and special configurations Resetting all paired devices Sometimes you may find it necessary to delete all the pairing references stored in the BTX2 FM unit (reset operation). To perform this operation you must first enter the setup mode: ›› Turn off the unit ›› Press and hold down the “Middle” button about 7 sec., until the Red light is on permanently. ›› Than simultaneously press and hold down the “Volume +” and “Volume –“ buttons for 3 seconds. The Blue Light will be lit on for 1 sec and than back to steady RED. ›› Double click on the “Middle” button to exit the “Setup” mode and use the BTX2 FM. This procedure deletes all the paired Bluetooth devices stored in the memory and it is therefore possible to start a new “clean” pairing session. Back to factory setting Sometimes you may find it necessary to go back to the factory setting, to reset all the changes/setup already made and have a “clean” unit. To perform this operation you must first enter the setup mode: ›› Turn off the unit ›› Press and hold down the “Middle” button about 7 sec., until the Red light is on permanently. ›› Than simultaneously press and hold down all the three buttons “Forward”“Middle”-“Backward” for 3 seconds. The Blue Light will be lit on for 1 sec and than back to steady RED. ›› Double click on the “Middle” button to exit the “Setup” mode and use the BTX2 FM. Adjusting/ Disabling the VOX feature (Intercom and telephone) The Intercom feature can be enabled both manually and vocally (VOX). The VOX activation is influenced by the background noise and therefore by the speed. For optimum results, it is possible to choose one of the following four microphone sensitivity levels: high, medium, low and very low. The default setting of BTX2 FM is “low”. It is also possible to disable the VOX feature in order to activate the Intercom and phone call answering features in manual mode only. Adjusting the sensitivity of the microphone (VOX) To perform this operation you must first enter the setup mode: 1. Turn off the unit 2. Press and hold down the “Middle” button about 7 sec., until the Red light is on permanently. 3. Your BTX2 FM is now in “Set up mode”. Disabling the VOX feature (Intercom and telephone) Follow all the procedure described in the previous steps and choose the option of only one flash (VOX disabled). Wired connection always in background This feature let you keep the wired connection always on, even when the phone or the intercom is open. This feature can be useful when you connect a PMR446 transceiver. By default this option is on. Disabling: ›› Enter the “Setup” mode: ›› Turn off the unit ›› Press and hold down the “Middle” button about 7 sec., until the Red light is on permanently. ›› Press the “Forward” and “Middle” button together for 3 seconds. The blue LED will flash twice. ›› Double click on the “Middle” button to exit the “Setup” mode and use the BTX2 FM. Enabling: Follow the same procedure up described; now the blue LED will flash once. To exit the “Setup” mode, double click the “Middle” button. Setup and Firmware update It is possible to configure and update the firmware of your BTX2 FM using the USB connection to your PC. On the Midland web site www.midlandeurope.com in the BTX2 FM page you can find the PC software and the new firmware updates if available. ATTENTION DO NOT CONNNECT THE UNIT TO THE PC BEFORE you DOWNLOAD AND INSTALL THE SOFTWARE Use at your own risk The use of the device will impair your ability to hear other sounds and others around you. Listening to music or speaking on a telephone may prevent you from hearing others around you and distract you from riding safely. The use of such device while riding may endanger you and others, and its use, in some areas, could not be allowed. Using this device at a high volume may result in permanent hearing loss. If you experience ringing in your ear or any other hearing related pain, reduce the volume or discontinue using this device. With continued use at high volume, your ears may become accustomed to the sound level, which may result in permanent damage to your hearing. Please use this device at a safe volume level. Warranty The warranty lasts 24 months for the main device and 6 months for the accessories (batteries, chargers, antennas, headsets). For further information about the warranty, please visit www.midlandeurope.com European CE Notice Certification and Safety Approval Information This product is CE marked according to the RTTE Directive (99/5/EC) and is free use in all the EU countries. Users are not permitted to make any changes or modifications to the device. Modifications which are not expressly approved by the producer invalidate the warranty card. For further information, please go to our website: www.cte.it Midland BTX2 FM - 23 UK 4. Press the “Backward” button until the red light indicator changes to a steady blue. 5. Now, press “Volume +” or “Volume -“ to increase or reduce sensitivity. Every time you press the Volume buttons the RED light will flash for confirmation. When you reach the end of the upper and lower limit, the RED light will not flash. 6. Press again the “Backward” button; the Blue light will flash several times, in order to let you know the selected sensitivity: One flash = VOX disabled Twice = very low sensitivity 3 times= low sensitivity 4 times= medium sensitivity (default setting) 5 times = high sensitivity The light indicator is now back to steady RED (“Set up mode”) and the changes are confirmed 7. If needed, you can adjust again the sensitivity repeating the steps from point 1, otherwise exit the Setting mode by double clicking the “Middle” button. Once the red light turns off, the blue led starts blinking. Now you can use your BTX2 FM. UK FCC Compliance Information This device complies with Part 15 of the FCC Rules. Operation is subject to the following two conditions: (1) this device may not cause harmful interference, and (2) this device must accept any interference received, including interference that may cause undesired operation. You are cautioned that changes or modifications not expressly approved by the part responsible for compliance could void the user’s authority to operate the equipment. “This device complies with Industry Canada licence-exempt RSS standard(s). Operation is subject to the following two conditions: (1) this device may not cause interference, and (2) this device must accept any interference, including interference that may cause undesired operation of the device.” “This equipment complies with Industry Canada radiation exposure limits set forth for an uncontrolled environment. “ NOTE: This equipment has been tested and found to comply with the limits for a Class B digital device, pursuant to part 15 of the FCC Rules. These limits are designed to provide reasonable protection against harmful interference in a residential installation. This equipment generates, uses and can radiate radio frequency energy and, if not installed and used in accordance with the instructions, may cause harmful interference to radio communications. However, there is no guarantee that interference will not occur in a particular installation. If this equipment does cause harmful interference to radio or television reception, which can be determined by turning the equipment off and on, the user is encouraged to try to correct the interference by one or more of the following measures: ›› Reorient or relocate the receiving antenna. ›› Increase the separation between the equipment and receiver. ›› Connect the equipment into an outlet on a circuit different from that ›› to which the receiver is connected. ›› Consult the dealer or an experienced radio/TV technician for help. Warning: Direct plug-in ac/dc power supply must be used for disconnecting the transceiver from the mains; the desktop charger must be positioned close to the unit and easily accessible 24 - Midland BTX2 FM Hauptmerkmale...................................................................................................................................................................26 Technische Daten des Midland BTX2 FM................................................................................................................................26 Aufladen des Akkus..............................................................................................................................................................27 Beschreibung des Geräts und Montagehalterung..................................................................................................................27 Ein-/Ausschalten des MIDLAND BTX2 FM...............................................................................................................................28 Betriebsarten......................................................................................................................................................................29 Max. Reichweite...................................................................................................................................................................29 Koppeln (Pairen) von Zwei BTX2 FM- Geräten........................................................................................................................29 Kompatibilität zu anderen Midland BT Line Geräten..............................................................................................................30 Wie verbindet man das BTX2 FM zu mehr als 2 Geräten ............................................................................................. 30 Drei Intercom Geräte verbinden............................................................................................................................................30 Talk 2 All – Kopplung (Pairing) mit einem Intercom Gerät anderer Marken.............................................................................30 Koppeln von Bluetooth Geräten mit dem BTX2 FM................................................................................................................31 Hintergrund“-Funktion........................................................................................................................................................31 Unterstützung von Stereo (A2DP) Sprachansagen.................................................................................................................................... 33 Wiedergabe Vom UKW-Radio................................................................................................................................... 33 Verwenden eines PMR 446 Funkgeräts mit integriertem Bluetooth.......................................................................................34 Verwendung des Audiokabel-Eingangs.................................................................................................................................34 Verwendung eines PMR446-Funkgeräts mit Kabelanschluss.................................................................................................34 Setup und spezielle Konfiguration........................................................................................................................................35 Setup und Firmware-Aktualisierung.....................................................................................................................................36 Benutzung auf eigene Gefahr...............................................................................................................................................36 Gewährleistung...................................................................................................................................................................36 Midland BTX2 FM - 25 D Inhalt MIDLAND BTX2 FM FM Advanced Intercom System D Beim BTX2 FM handelt es sich um eine sehr kompakte und aerodynamische Gegensprech-Kommunikationssystemlösung für Motorradfahrer. Alle wichtigen Funktionen sind dank der drei großen Tasten auf der Vorderseite des Gerätes einfach zu bedienen. Das BTX2 FM wird mit einer Befestigungsplatte und Klebeband oder einer angeschraubten Klemmhalterung am Helm fixiert. Dank seines Audiokits mit ultraflachen Lautsprechern können Sie während der Fahrt hochwertige Stereo-Musik genießen. Hauptmerkmale ›› Reichweite der Gegensprechanlage (Intercom) bis zu 800 mt ›› Verbinden von bis zu drei Personen für Intercomgespräche (Talk2All-Universal Intercom) ›› Anschluss eines Mobiltelefons, um Anrufe anzunehmen und zu tätigen, sowie für die Wiedergabe von Stereo-Musik ›› Anschluss eines GPS-Navigationsgeräts zur Übertragung von Navigationsanweisungen ›› Anschluss eines PMR466 Funkgeräts mit eingebauter oder externer Bluetooth-Verbindung ›› AUX-Kabelanschluss für MP3-Player oder PMR446 Funkgeräte ›› Setup und Firmware-Update über USB-Verbindung mit einem PC Das Midland BTX2 FM FM ist in zwei Versionen erhältlich: ›› BTX2 FM FM Einzel-Intercom Set mit nur einem Gerät ›› BTX2 FM FM Twin-Intercom Set mit zwei Geräten Je nach gekauftem Modell enthält die Packung folgenden Inhalt: ›› BTX2 FM FM Einzel-Intercom Set ›› 1 BTX2 FM Bluetooth Headset ›› 1 Audiokit mit zwei Stereo-Lautsprechern, Schwanenhalsmikrofon und Kabelmikrofon ›› 1 Befestigungsplatte mit zweiseitigem Klebeband zur Befestigung des BTX2 FM am Helm ›› 1 Stereo-Audiokabel zum Anschluss eines iPods oder MP3-Players ›› 1 Klemmhalterung zur Befestigung der Einheit am Helm ›› 1 Steckerladegerät mit Mini USB-Stecker BTX2 FM Twin- Intercom Set ›› 2 BTX2 FM Geräte Sets ›› 2 Audiokits mit zwei Stereo-Lautsprechern, Schwanenhalsmikrofonen und Kabelmikrofonen ›› 2 Befestigungsplatten mit zweiseitigem Klebeband zur Befestigung der Einheiten am Helm ›› 2 Stereo-Audiokabel zum Anschluss eines iPods oder MP3-Players 26 - Midland BTX2 FM ›› 2 Klemmhalterungen zur Befestigung der Einheiten am Helm ›› 1 Steckerladegerät mit 2 Mini-USB Steckern Die Gerätesets im TWIN-Kit sind bereits gekoppelt (gepairt) und können daher sofort als Motorrad-Intercom (Gegensprech- Modus) benutzt werden. Technische Daten des Midland BTX2 FM Allgemein: ›› Bluetooth Vers. 3.0 Stereo (Headset/Freisprechen/A2DP-Protokoll) ›› Das AGC System regelt automatisch die Lautstärke in Abhängigkeit von den Umgebungs- und Fahrgeräuschen ›› Sprachgesteuerte (VOX) oder manuelle Intercom-Aktivierung ›› Manuelle Steuerung zum Aktivieren von: Telefon, Intercom (Gegensprechanlage) und Kabelverbindung ›› Vollständig Regenwasserdicht ›› Lithium-Akku mit 10 Stunden Sprechzeit ›› Ladezeit: ca. 6 Stunden Bluetooth-Verbindungen: ›› Zwei BTX2 FM für Fahrer zu Sozius oder Bike - zu - Bike Intercom Sprechverbindung mit einer maximalen Reichweite bis zu 800 mt Bluetooth-Geräte: ›› Mobiltelefon mit MP3-Player-Stereo (A2DP-Protokoll), GPS ›› PMR446-Funkgerät (mit eingebauter oder externer Bluetooth-Verbindung) für Motorrad zu Motorrad-Gruppenkommunikation Kabelverbindungen: ›› Für Stereo-Audioeingang (iPod/MP3-Player - mit optionalem Kabel) ›› Für PMR446-Funkgerät (mit optionalem Kabel) Achtung: Das Midland BTX2 FM ist regen- und wasserfest konzipiert. Stellen Sie aber dennoch sicher, dass bei Regen die Gummischutzkappen die Anschlüsse vollständig abdecken. Aufladen des Akkus Audio kit jack Charger jack Auxiliary audio jack (AUX) Zusätzlich besitzt das BTX2 FM oben eine ausklappbare Antenne für maximale Reichweite. Drücken Sie die Antenne zum Ausklappen sanft nach hinten. Sie klappt anschließend automatisch aus. Beschreibung des Geräts und Montagehalterung Das BTX2 FM verfügt auf der Vorderseite über fünf Tasten. Die drei großen Haupttasten sind Multi-Funktionstasten: „Weiter“ (links), die „mittlere“ Taste und „Zurück“ (rechts). Die beiden kleinen runden Tasten sind die Lautstärkestärketasten + und -. Volume + Forward button Middle button Volume - Drücken Sie zum Einklappen der Antenne diese nur nach unten und bewegen Sie sie wieder in die verriegelte Position. Backward button Beschreibung der Kabelverbindung ›› Ladebuchse: hier kann das Gerät mit einem Standard Mini-USBNetzteil geladen werden ›› Audioset Buchse: hier können Sie ein Audioset anschließen (Stereo-Headset und Mikrofon) ›› Zusatzbuchse für Audiogeräte (AUX) 2,5mm: hier können Sie eine Audioquelle, wie z. B. einen Stereo iPod/MP3-Player oder PMR446 Funkgerät anschließen Beschreibung des Audiokits Das Audiosystem beinhaltet zwei ultrafache Stereo-Lautsprecher und zwei austauschbare Mikrofone, die jeweils mit Halterung und Kabelverbindung geliefert werden. Befestigung der Stereo-Lautsprecher Die beiden Stereo Lautsprecher besitzen einen Klett-/Klebestreifen zur Befestigung an Ihrem Helm. Midland BTX2 FM - 27 D Achtung: Vergewissern Sie sich, dass das Gerät voll aufgeladen wurde. Bitte laden Sie das Gerät vor der ersten Benutzung für mindestens 8 Stunden auf. Zum Laden das Steckerladegerät in die Ladebuchse stecken (nehmen Sie die Gummischutzkappe ab, um der Stecker einzustecken). Die rote LED am Gerät fängt an zu blinken, sobald der Ladevorgang startet. Laden Sie das Headset, bis die rote LED aufhört zu blinken oder die blaue LED aufleuchtet. Wenn der Ladevorgang abgeschlossen ist (die rote LED blinkt nicht mehr), ziehen Sie den Ladestecker vom Headset ab. Normalerweise dauert beim ersten Mal das volle Aufladen 6 Stunden. Achtung: Jedes Mal, wenn der Mini-USB-Ladestecker eingesteckt (oder abgezogen) wurde, wird das Gerät gleichzeitig automatisch ausgeschaltet. Um das Gerät während des Ladevorgangs weiter zu benutzen, müssen Sie es daher nach dem Einstecken des Ladesteckers noch einmal einschalten. Achten Sie darauf, dass Sie nicht Ihr komplettes Ohr mit dem Lautsprecher abdecken; Sie müssen immer in der Lage sein, Verkehrsgeräusche und Signale zu hören. Das Mikrofon kann auf zwei Arten am Helm befestigt werden: stoff- Abstandshalter, der ggf. entfernt werden kann, damit die Klemmhalterung gegebenenfalls fester geschlossen werden kann. D Schwanenhalsmikrofon Platzieren Sie das Klett-/Klebeband zwischen dem Polster und der harten Schale des Helmes, so dass das Mikrofon korrekt vor Ihrem Mund positioniert ist und das weiße Symbol zu Ihrem Mund zeigt. Diese Mikrofonversion ist für offene und klappbare Helme geeignet. Kabelmikrofon Platzieren Sie das Mikrofon mit dem Klett-/Klebestreifen auf der Innenseite Ihres Helmes vor Ihrem Mund. Diese Mikrofonversion ist eher für Voll- bzw. Integralhelme geeignet. Der Ministecker am Mikrofon erlaubt Ihnen ein Mikrofon zu wählen, das am besten zu Ihrem Helm passt. Audiokit-Buchse Der Audiokit muss anschließend mit einem Winkelstecker an die mittlere Audiobuchse des Midland BTX2 FM angeschlossen werden. Befestigen und Entfernen des Midland BTX2 FM Der BTX2 FM kann leicht am Helm befestigt werden, indem es so nach unten geschoben wird, dass es in die Führung der Montagevorrichtung passt (Platte mit zweiseitigem Klebeband oder Klemmhalterung). Das BTX2 FM wird mit Hilfe der einrastbaren Clips im oberen Teil in Position gehalten (A). Um das BTX2 FM zu entfernen, drücken Sie auf den sichtbaren Clip und schieben das BTX2 FM nach oben. Beschreibung der Montagehalterungen Das Midland BTX2 FM kann auf zwei Arten am Helm befestigt werden: Entweder mit der Montageplatte mit zweiseitigem Klebeband oder mit der Klemmhalterung. Mit diesen Methoden können Sie das BTX2 FM jederzeit sicher an Ihrem Helm befestigen und wieder entfernen, um das Gerät aufzuladen oder zu verstauen. Montageplatte mit zweiseitigem Klebeband Die Montageplatte hat auf einer Seite ein zweiseitiges Klebeband. Reinigen Sie die Kontaktfläche am Helm, bevor Sie die Platte montieren. Entfernen Sie die Schutzfolie des zweiseitigen Klebebandes, platzieren die Montageplatte am Helm und drücken sie für ein paar Sekunden fest auf die Oberfläche. Klemmhalterung Lösen Sie die zwei Schrauben der Klammer mit einem Inbusschlüssel und platzieren die Rückplatte zwischen dem Helmpolster und der äußeren harten Schale. Danach die beiden Schrauben anziehen, um die Klemmhalterung sicher an ihrem Platz zu fixieren. Innerhalb der Klemmhalterung befindet sich ein kleiner Kunst- 28 - Midland BTX2 FM Ein-/Ausschalten des MIDLAND BTX2 FM Einschalten des Geräts: ›› Halten Sie die „mittlere“ Taste für ca. 3 Sekunden gedrückt, bis die BLAUE LED aufleuchtet. Ausschalten des Geräts: ›› Halten Sie die „mittlere“ und die „Zurück“-Taste gleichzeitig für ca. 3 Sekunden gedrückt, bis die ROTE LED 3-mal aufblinkt. Dadurch wird die Gefahr des versehentlichen Ausschaltens des Geräts minimiert (vor allem mit Handschuhen). Das BTX2 FM besitzt 3 Hauptmodi: Intercom, Telefon und UKW Radio Die 2 Multifunktions-Tasten haben unterschiedliche Funktionen und hängen von der Betriebsart ab, in der sich das Gerät aktuell befindet. ›› Im Intercom - Mode können Sie mit den Tasten die Sprechverbindung mit bis zu 3 Teilnehmern steuern, indem jeweils einer mit einem der anderen spricht. Drücken Sie einfach auf eine der 2 Tasten, um das Intercom zu aktivieren. ›› Im Telefon – Mode können Sie mit Ihrem Bluetooth-Mobiltelefon einen Anruf tätigen/annehmen oder Musik wiedergeben (in Stereo). ›› Im UKW Radio Modus können Sie ihren Lieblingssender in Stereoqualität hören. Oder suchen Sie neue Sender und speichern diese in einem der 6 Speicherplätze. Sie können von einem Modus in einen anderen umschalten (hin- und herschalten), indem Sie einfach die „mittlere“ Taste gedrückt halten (3 Sekunden). Eine Sprachansage teilt Ihnen den aktuellen Modus mit. Die Modes schalten in folgender Reihenfolge um: ›› Gegensprech- Modus (wenn ein anderes BTX2 FM früher schon gekoppelt wurde) ›› Telefon-Modus (wenn vorher schon ein Mobiltelefon gekoppelt wurde) ›› UKW Radio Jedes Mal, wenn Sie das BTX2 FM einschalten, wird der Standardmodus Intercom eingeschaltet (wenn es zuvor mit einem anderen Gerät gekoppelt war), andernfalls befindet es sich im Telefon-Modus (wenn es mit einem Telefon gekoppelt war). Wenn Sie wissen möchten, in welchem Modus sich das Gerät gerade befindet, drücken Sie einfach gleichzeitig die Tasten „Lautstärke +“ und „Lautstärke –“. Eine Sprachansage teilt Ihnen den aktuellen Modus mit. Max. Reichweite Sie können bis zu 800 mt. Intercom-Reichweite erreichen, wenn die Antenne ausgeklappt wurde und wenn Sie sich in einem offenen Bereich ohne Hindernisse und Funkstörungen befinden (die Fahrer müssen immer in Sicht sein). Koppeln (Pairen) von Zwei BTX2 FM- Geräten Die beiden Geräte im BTX2 FM- Set sind bereits miteinander gekoppelt und betriebsbereit. In diesem Fall muss das Verfahren nicht durchführt werden. Das jeweils andere Gerät wurde bereits mit der „mittleren“ Taste gekoppelt. Wenn die Geräte nicht aus demselben Kit stammen oder eine der Geräte später zugekauft wurde, müssen Sie die Geräte zuerst koppeln (das benutzen wir im Folgenden anstelle des engl. Begriffs „ pairen“). Um ein BTX2 FM mit einem anderen BTX2 FM zu koppeln, müssen Sie zunächst den Setup-Modus aufrufen: ›› Schalten Sie das Gerät aus. ›› Halten Sie die „mittlere“ Taste ca. 7 Sek. gedrückt, bis die rote LED ständig leuchtet. Jetzt halten Sie die „mittlere“ Taste gedrückt (3 Sek.), bis die BLAUE und die ROTE LED blinken. Führen Sie dasselbe Verfahren auf dem anderen Gerät durch. Nach erfolgreichem Koppeln leuchtet die blaue LED für eine Sekunde an beiden Geräten auf und sie gehen anschließend in den Setup-Modus zurück (die rote LED leuchtet ständig). Nun ist die Kopplung abgeschlossen und Sie müssen nur den Setup-Modus verlassen, bevor Sie die Geräte benutzen können: ›› Doppelklicken Sie auf die „mittlere“ Taste. Die rote LED erlischt und die blaue LED blinkt. Ihre beiden BTX2 FM sind jetzt betriebsbereit. Intercom Funktion Achten Sie darauf, dass beide Geräte eingeschaltet und richtig miteinander gekoppelt sind. Manuelle Aktivierung Drücken Sie an einem der beiden Geräte die „mittlere“ Taste. Die Sprechverbindung wird eingeschaltet und bleibt aktiv, bis Sie erneut die „mittlere“ Taste drücken. Die Intercomanlage benötigt einige Sekunden zur Aktivierung. Sie hören einen Signalton, wenn die Intercom-Funktion aktiviert ist. Sprachsteuerung (VOX) Fangen Sie einfach an zu reden. Nach einigen Sekunden wird die Sprechverbindung aktiviert und bleibt eingeschaltet, solange Sie reden. Wenn nicht mehr geredet wird, wird die Sprechverbindung nach 40 Sekunden wieder abgeschaltet. Bei Bedarf können Sie die Intercom- Funktion ohne eine Wartezeit von 40 Sekunden jederzeit manuell abschalten (drücken Sie einfach die „mittlere“ Taste). Wenn gewünscht, können Sie durch Drücken der „Zurück“-Taste für 7sek. den VOX Modus deaktivieren. Eine Sprachansage bestätigt die Deaktivierung. Um den VOX Modus wieder zu aktivieren, drücken Sie die Taste erneut, bis die Sprachansage die Aktivierung bestätigt. Die aktuelle Einstellung wird auch nach Ausschalten des Gerätes beibehalten. Anpassen der Lautstärke Ihr Midland BTX2 FM benutzt AGC-Technologie, welche automatisch die Hörerlautstärke den Hintergrundgeräuschen anpasst. Sie können aber auch die Lautstärke manuell mit den Tasten „Lautstärke+“ und „Lautstärke-“ anpassen. Achtung: Die Lautstärke kann nur während einer gerade bestehenden Audioverbindung angepasst werden. Achtung: Die Lautstärkeeinstellung (Tasten “Lautstärke+” und “Lautstärke-”) können nicht für die Einstellung der verkabelten Audioquelle (z.B. MP3-Player) verwendet werden. Midland BTX2 FM - 29 D Betriebsarten Drei Intercom Geräte verbinden D Driver 1 Passennger 1 Driver 2 Kompatibilität zu anderen Midland BT Line Geräten Das BTX2 FM lässt sich mit dem BT Next Conference und BTX1 FM verbinden. Die maximale Reichweite der verbundenen Geräte richtet sich nach dem Gerät mit der niedrigsten Reichweite. Das BTX2 FM ist auch zu älteren Geräten der Midland BT Serie (BT Next, BTX1, BTX2) kompatibel, wenn diese auf die Firmware Version 2014 aktualisiert werden. Ein BTX2 FM kann maximal mit 2 anderen Geräten verbunden werden (3 Stück insgesamt). Mit dem mittleren Knopf können Sie ein Midland Gerät verbinden oder benutzen (siehe Abschnitt „Koppeln (Pairen) von Zwei BTX2 FM- Geräten“ und „Intercom Funktion“). Mit dem „Forward“ Knopf können Sie das Midland Gerät mit der „Talk2All-Universal Intercom“ Funktion benutzen oder verbinden. Achtung: um die „Talk2All-Universal Intercom“ Funktion zu nutzen, müssen Sie das andere Gerät als Telefon verbinden. Die Taste, die Sie zum Koppeln des Geräts verwenden, wird auch zum Aktivieren der Sprechverbindung benutzt. Jedes Mal, wenn Sie eine Intercom-Verbindung mit einer Person starten, wird die vorherige Verbindung deaktiviert. Die Verbindung ist keine „Kette“ über evtl. unbeteiligte Geräte. Wenn zwei Personen miteinander sprechen, ist es daher auch nicht möglich, dass die Kommunikation durch eines der anderen Geräte ungewollt unterbrochen wird, falls dieses die maximale Reichweite überschritten haben sollte. Wie verbindet man das BTX2 FM zu mehr als 2 Geräten Das BTX2 FM kann mit bis zu 3 anderen Geräten unserer BT Serie verbunden werden, also insgesamt 4 Geräten (drei Midland Geräte + ein Talk2All). Benutzen Sie die „Mittlere“- und „Zurück“-Taste um Midland Geräte zu koppeln. Auf der „Vorwärts“-Taste können Sie ein Gerät über die „Talk2All“-Funktion verbinden. Die Tasten, über die Sie andere Geräte gekoppelt haben, dient später auch zur Aktivierung/Deaktivierung der Intercom Verbindung. Sie können z.B. den Sozius auf der „Mittleren“ Taste und einen anderen Motorradfahrer auf der „Zurück“Taste verbinden. Bitte starten Sie den Setup Modus, um das BTX2 FM mit anderen BTX2 FM zu koppeln: 1. Schalten Sie das Gerät aus 2. Drücken und halten Sie die “Mittlere”-Taste für ca. 7sek. bis die rote LED durchgängig leuchtet. 3. Drücken Sie nun die „Mittlere“- oder „Zurück“-Taste für 3sek. bis die LED abwechselnd rot und blau blinkt. 4. Wiederholen Sie die Prozedur an dem anderen BTX2 FM Gerät. Bei erfolgreicher Verbindung blinkt die LED an beiden Geräten einmal blau auf und leuchtet anschließend durchgängig rot (Sie sind nun wieder im Setup Modus). 5. Der Kopplungsprozess ist nun abgeschlossen. Verlassen Sie den Setup Modus, um die Geräte zu verwenden: Machen Sie einen Doppelklick auf die “Mittlere”Taste. Die LED wechselt die Farbe von rot auf blau blinkend. Sie können das BTX2 FM nun verwenden. 30 - Midland BTX2 FM Talk2All - Universal Intercom Dispositivo non Midland Talk 2 All – Kopplung (Pairing) mit einem Intercom Gerät anderer Marken. Dank der neuen „ Talk 2 All-Universal Intercom“ Funktion ist es jetzt möglich, Ihr BTX 1 Headset auch mit einem beliebigen anderen Bluetooth kompatiblem Intercom zu verbinden. Verfahren Sie bei Ihrem BTX 1 genauso, als würden Sie ein anderes BTX 1 verbinden: Starten Sie den „Setup Mode“, drücken Sie die „weiter“ taste für 3 Sekunden. Die rote und blaue LED blinken jetzt. Bei dem Intercom der anderen Marke verfahren Sie nach dessen Anleitung so, als würden Sie ein Telefon (Handy) koppeln wollen. Um die Intercom Sprechverbindung zu starten folgen Sie den Anweisungen aus dem Kapitel „Manuelle Aktivierung“. Bei dem anderen Gerät verwenden Sie den Knopf für „Phone Redial – Wahlwiederholung“. Wenn Sie ein Nicht-Midland Produkt verwenden, könnte es sein, dass Sie die Wähltaste 2x drücken müssen. Hinweis: Bei dieser Konfiguration kann das andere Intercom Gerät nicht mehr mit einem weiteren Telefon (Handy) gekoppelt werden. Gerät bereits in aktiver Sprechverbindung ›› Telefon (A2DP Stereo) ›› Navigationsgerät (A2DP Stereo) ›› Dongle (A2DP Stereo) Wenn Sie versuchen, eine Intercom Verbindung zu einer Person herzustellen, die sich bereits in einem Gespräch mit einer anderen Person befindet (oder am Telefonieren ist), werden Sie ein „Besetzt“-Zeichen hören. Warten Sie einfach einen Augenblick bis die „Leitung“ wieder frei ist. D Der Empfänger wird per Sprachansage über die Verbindungsanfrage informiert. Es wird ihm/ihr die Nummer der Taste genannt, über die die Verbindungsanfrage gestellt wurde. ›› Telefon (HFP Mono) ›› Navigationsgerät (Mono) ›› PMR446 Funkgerät Hintergrund“-Funktion 2 3 Koppeln von Bluetooth Geräten mit dem BTX2 FM Das BTX2 FM kann mit anderen Bluetooth Geräten gekoppelt werden, z.B. Telefon, GPS Navigationsgerät oder PMR446 Funkgeräten mit eingebautem oder externem (Dongle) Bluetooth. Die Kopplung wird mittels des „Volume+“ oder „Volume-“ Knopf gestartet. ›› Koppeln Sie folgende Geräte über den „Vol +“ Knopf: Telefone mit Musikwiedergabe über A2DP, GPS Navigationsgeräte und andere externe Geräte die Mono/Stereo A2DP nutzen. ›› Alle Geräte, die über „Volume+“ gekoppelt wurden, haben die höchste Priorität und unterbrechen alle anderen Kommunikationen (wie Intercom, UKW Radio und Musik) ›› Koppeln Sie folgende Geräte über den „Vol-“ Knopf: ein zweites Telefon mit Mono Audioübertragung (Hands Free Protocol) oder GPS Navigationsgeräte und andere Geräte, welche immer im Hintergrund gehört werden sollen. Sie können die Verbindung des Gerätes, das über Vol- verbunden ist, immer im Hintergrund laufen lassen. Dadurch wird die Intercom Verbindung z.B. nicht mehr durch Navigationsansagen oder G8BT Funksprüche unterbrochen. Um die „Hintergrund“-Funktion zu aktivieren, drücken Sie die „Vol-“Taste lange. Die Sprachansage „Background enable“ bestätigt die Aktivierung. Um die „Hintergrund“-Funktion zu deaktivieren, drücken Sie erneut die „Vol“Taste lange. Die Sprachansage „Background off“ bestätigt die Deaktivierung. Standardmäßig ist die „Hintergrund“-Funktion deaktivert Achtung: A2DP Audioquellen werden nur bei Kopplung über „Vol+“ unterstützt. Sobald ein Gerät über die „Vol+“ bzw. die „Vol-“ Taste gekoppelt wurde, ist der Telefonmodus während des Betriebs verfügbar Verbindung zu einem oder zwei Telefonen Mobilfunktelefone können über die „Vol+“Taste (wenn Stereo A2DP unterstützt werden soll) oder die „Vol-“Taste verbunden werden Wenn Sie einen weiteren Anruf auf dem 2.Telefon erhalten, ertönt ein Signalton. Kopplung mit einem Mobilfunktelefon Ein Mobilfunktelefon kann entweder über die „Vol+“ (falls A2DP Stereo unterstützt werden soll) oder über die „Vol-“ Taste. Es ist auch möglich ein Telefon über die „Vol+“ zu koppeln und ein weiteres über die „Vol –“. Das BTX2 FM kontrolliert standardmäßig das Telefon, welche über die „Vol +“ Taste gekoppelt wurde. Sobald ein Gerät über die „Vol+“ bzw. die „Vol-“ Taste gekoppelt wurde, ist der Telefonmodus während des Betriebs verfügbar. Ein eingehender Telefonanruf hat immer die höchste Priorität, das heißt, dass alle anderen Kommunikationen (Intercom, UKW Radio, Musik) unterbrochen werden. Erhalten Sie währenddessen einen weiteren Anruf auf dem zweiten Telefon, dann hören Sie einen Piepton Midland BTX2 FM - 31 D Standard Telefon Wenn Sie zwei Telefone mit dem BT Next Conference verbinden, können Sie wählen, welches das Standard Telefon ist. Dieses Telefon wird dann durch die Knöpfe des BT Geräts gesteuert. - Wenn Sie im Telefonmodus sind, halten Sie den „Vol+“ Knopf für 3 Sekunden gedrückt. Die Sprachansage „Control on plus“ teilt Ihnen mit, dass nun das Telefon auf der „Vol+“ Taste das Standard Telefon ist. Nun können Sie die Funktionen des Telefons, wie Anrufe und den Music Player über das BT Gerät steuern. - Wenn Sie im Telefonmodus sind, halten Sie den „Vol-“ Knopf für 3 Sekunden gedrückt. Die Sprachansage „Control on minus“ teilt Ihnen mit, dass nun das Telefon auf der „Vol-“ Taste das Standard Telefon ist. Nun können Sie die Anrufe des Telefons über das BT Gerät steuern. Das BTX2 FM mit einem Mobiltelefon koppeln Um das BTX2 FM mit einem Mobiltelefon zu koppeln, müssen Sie zunächst den Setup-Modus aufrufen: ›› Schalten Sie das Gerät aus. ›› Halten Sie die „mittlere“ Taste ca. 7 Sek. gedrückt, bis die rote LED ständig leuchtet. ›› Drücken Sie nun die „Volume+“ oder die „Volume-“ Taste für 3 Sekunden. Die LED beginnt abwechselnd blau und rot zu blinken ›› Halten Sie jetzt die „Lautstärke +“ Taste länger gedrückt (3 Sek.), die blaue und die rote LED blinken. Nach einigen Sekunden sehen Sie im Display des Telefons „Midland BTX2 FM“ . Befolgen Sie den Kopplungsvorgang Ihres Telefons. Wenn ein PIN-Code erforderlich ist, geben „0000“ (vier mal Null) ein. Wenn der Kopplungsvorgang erfolgreich war, leuchtet die blaue LED des Geräts für eine Sekunde auf. Anschließend verlässt das Gerät den Setup-Modus automatisch wieder und wechselt in den Betriebsmodus (die blaue LED blinkt). Sie können nun Ihr BTX2 FM zusammen mit dem Telefon benutzen. Mobiltelefon über das BTX2 FM bedienen Nachdem Sie Ihr Mobiltelefon mit dem BTX2 FM gekoppelt haben, müssen Sie in den „Telefon“-Modus wechseln, um es zu verwenden. Drücken Sie die „mittlere“ Taste, bis Sie die Ansage „Telefon“ hören. Nun bedienen alle drei Tasten das Telefon (siehe die Tabelle B). Einen Anruf beantworten Wenn Sie das Telefon klingeln hören, können Sie auf zwei Arten antworten: Sprachgesteuert: Einfach ein Wort sagen, um den Anruf anzunehmen und Sie können das Gespräch starten. Manuell: Tippen Sie auf die „Weiter“-Taste und fangen Sie zu reden. Anruf ablehnen Falls Sie den Anruf nicht annehmen wollen, können Sie das Mobiltelefon klingeln lassen oder halten Sie die „Weiter“-Taste für 3 Sekunden gedrückt (Sie werden einen Bestätigungston hören). Anruf tätigen Es gibt verschiedene Wege einen Anruf zu tätigen. Mit der Tastatur des Mobiltelefons: Wählen Sie die Nummer auf der Tastatur des Mobiltelefons: Drücken Sie „Senden“ auf dem Mobiltelefon. Wahlwiederholung: Telefon über Vol+: Drücken Sie die „Vorwärts”-Taste für 3s, um die Wahlwiederholung zu starten (Sie erhalten einen Bestätigungston). Telefon über Vol-: Drücken Sie die „Zurück”-Taste für 3s, um die Wahlwiederholung zu starten (Sie erhalten einen Bestätigungston) Mit Sprachsteuerung: Telefon über Vol+: Drücken Sie kurz auf die „Vorwärts”-Taste. Wenn Ihr Telefon die Spracheingabe unterstützt, werden Sie aufgefordert, den Namen des gewünschten Kontaktes zu sagen. Telefon über Vol-: Drücken Sie kurz auf die „Zurück”-Taste. Wenn Ihr Telefon die Spracheingabe unterstützt, werden Sie aufgefordert, den Namen des gewünschten Kontaktes zu sagen Priorität: Anrufe haben eine hohe Priorität, was bedeutet: Wenn ein Anruf ankommt, wird jede andere Verbindung vorübergehend deaktiviert. B – TELEFON MODE Modus Telefon Weiter-Taste Mittlere Taste Kurzer Tastendruck: Sprachanwahl/Akzep- Langer Tastendruck: Modus wechseln tieren oder beenden, solange die Anwahl oder das Gespräch noch stattfindet Langer Tastendruck: Wahlwiederholung/ oder eingehenden Anruf ablehnen Telefon (wenn Musik abgespielt wird und Kurzer Tastendruck: Einen Titel weiter über “Vol+” gekoppelt wurde) 32 - Midland BTX2 FM Zurück-Taste Kurz drücken: Sprachwahl / Gespräch annehmen oder auflegen während eines Telefonats Lang drücken: Wahlwiederholung oder Gespräch ablehnen Kurzer Tastendruck: Wiedergabe/Pause Kurzer Tastendruck: Einen Titel zurück Langer Tastendruck: Modus wechseln Die MP3-Player-Funktion des Mobiltelefons benutzen Das Mobilfunktelefon kann als MP3 Player genutzt werden, wenn es über “Volume +” gekoppelt wurde. Das BTX2 FM unterstützt die A2DP- und AVRCP-Protokolle, die es Ihnen ermöglichen, Stereo-Musik zu hören und Ihren MP3 Player im Mobiltelefon fernzusteuern. Sie können auch die Tasten am BT X2 FM- Gerät nutzen, um die Abspielfunktionen (Wiedergabe, Pause, Vorspulen und Zurückspulen) zu steuern: Vorspulen Play / Pause Zurückspulen Verfügbare Bedienelemente: ›› Musik-Wiedergabe/Pause: Klicken Sie auf die „mittlere“ Taste. ›› Zum nächsten Titel springen: Drücken Sie die „Weiter“-Taste. ›› Zum vorherigen Titel gehen: Drücken Sie die „Zurück“-Taste. Priorität: Die Musikwiedergabe hat die niedrigste Priorität. Deshalb wird die Musik immer deaktiviert, wenn ein anderer Kommunikationstyp aktiviert ist. Achtung: A2DP Stereo Musik kann nur im Telefonmodus gesteuert werden. Das BTX2 FM mit einem GPS-Navigationsgerät koppeln Allgemein ist es möglich, das BTX2 FM mit jedem GPS-Navigationsgerät für Motorräder zu koppeln, das Bluetooth Headsets unterstützt. Hinweis: Die meisten für PKW angebotenen Bluetooth-Navigationsgeräte sind auf dem Motorrad nicht brauchbar, da deren Bluetoothmodul nicht headsetfähig ist! Um das BTX2 FM mit einem GPS-Navigationsgerät zu koppeln, müssen Sie zunächst den Setup-Modus aufrufen: ›› Schalten Sie das Gerät aus. ›› Halten Sie die mittlere Taste ca. 7 Sek. gedrückt, bis die rote LED ständig leuchtet. ›› Halten Sie jetzt die Taste „Lautstärke +“ gedrückt (3 Sek.), bis die blaue und die rote LED anfangen zu blinken. Befolgen Sie den Kopplungsvorgang für Ihr GPS-Navigationsgerät. Wenn ein PIN-Code erforderlich ist, geben Sie „0000“ (vier mal Null) ein. Wenn der Kopplungsvorgang erfolgreich war, leuchtet die blaue LED des BTX2 FM für eine Sekunde auf. Anschließend verlässt das Gerät den Setup-Modus und ist betriebsbereit (die blaue LED blinkt). Hinweis: Um die GPS-Navigationsanweisungen im Hintergrund zu hören, stellen Sie sicher, dass die „Bluetooth-Verbindung im Hintergrund“ Funktion aktiviert ist. Wenn Sie das BTX2 FM mit einem GPS-Navigationsgerät über die Taste „Lautstärke +“ koppeln, können Sie das BTX2 FM nicht mit einem Mobiltelefon koppeln. Das Problem können Sie umgehen, indem Sie Ihr Mobiltelefon direkt mit dem GPS-Navigationsgerät koppeln und anschließend das GPS-Gerät mit dem BTX2 FM koppeln. In diesem Fall wird die Bedienung des Mobiltelefons vom GPS-Navibildschirm (Touch Screen) übernommen. Unterstützung von Stereo (A2DP) Sprachansagen Unterstützung von Stereo (A2DP) Sprachansagen Das BTX1 FM unterstützt Stereo (A2DP) Sprachansagen von Navigationsgeräten oder Smartphone Anwendungen. Wenn eine Sprachansage „reinkommt“, wird das Interkom oder UKW Radio unterbrochen und die Sprachansage mit höchster Priorität behandelt. Achtung: die Funktionalität dieser Eigenschaft richtet sich nach dem Gerät des Drittherstellers. Achtung: die Funktionalität dieser Eigenschaft richtet sich nach dem Gerät des Drittherstellers. Wiedergabe Vom UKW-Radio Der UKW-Radioempfänger ist in das Gerät integriert. Sie müssen nur in den „UKW-Radio“-Modus wechseln, um ihn zu benutzen. Drücken Sie die „mittlere“ Taste, bis Sie die Sprachansage „FM-Radio“ hören. Nun bedienen alle drei Tasten das UKW-Radio (siehe Tabelle): Wenn Sie die „Weiter“- oder „Zurück“-Taste kurz drücken, suchen Sie nach einem UKW Sender. Wenn Sie die „Weiter“- oder „Zurück“-Taste lange drücken, können Sie die 6 vorbelegten Sender auf- oder abwärts durchsuchen. Eine Sprachansage teilt Ihnen die Nummer des Speicherplatzes mit, den Sie gerade aufgerufen haben. Sie hören zwei Signaltöne, wenn der letzte oder der erste vorbelegte Sender erreicht wurde. Um den aktuellen Sender zu speichern, halten Sie für 3 Sekunden gleichzeitig die „Weiter“- und „Zurück“-Taste gedrückt. Sie hören einen Bestätigungs-Signalton. Der Sender überschreibt den vorbelegten Sender, der zuletzt verwendet wurde. Dank des RDS-Systems wählt das UKW-Radio für das aktuelle Radioprogramm das jeweils stärkste Signal. Midland BTX2 FM - 33 D Anruf beenden Es gibt verschiedene Wege, einen Anruf zu beenden: ›› Warten Sie, bis die angerufene Person den Anruf beendet. ›› Halten Sie die „Weiter“-Taste für 3 Sekunden gedrückt (Sie hören einen Bestätigungston). ›› Drücken Sie auf dem Mobiltelefon auf die Taste „Beenden“. D Das RDS-System ist standardmäßig deaktiviert. Sie können die RDS-Funktion einbzw. auszuschalten, indem Sie bei eingeschaltetem UKW Radio die Tasten „Lautstärke +“ und „Lautstärke –“ gleichzeitig für 3 Sekunden gedrückt halten. Eine Sprachansage teilt Ihnen den RDS-Status mit. Prozedur selbst ist nicht erforderlich) UKW-Radio und Intercom betreiben Verwendung des Audiokabel-Eingangs Während des Radiohörens können Sie das Intercom nicht manuell starten, sondern Sie können nur die VOX Funktion benutzen. Das funktioniert durch einfaches Sprechen, aber nur dann, wenn Sie vorher das jeweils gewünschte Partnergerät auf die mittlere Taste gekoppelt hatten. Um das Intercom manuell zu aktivieren müssen Sie zuerst in den „Intercom“-Modus wechseln. Ihr Midland BTX2 FM hat auch einen Kabel-Audioeingang (AUX) zur Verbindung mit einer verdrahteten Audioquelle, wie z.B. ein iPod (oder ein beliebiger MP3Player) oder ein PMR446-Funkgerät für die Gruppenkommunikation oder zum Erhöhen der Reichweite. UKW Radio Modus ein-/ausschalten Um den Radiomodus komplett ein- oder auszuschalten, halten Sie die „Weiter“Taste 7 Sekunden lang gedrückt. Eine Sprachansage wird Ihnen den aktuellen Status bestätigen. Verwenden eines PMR 446 Funkgeräts mit integriertem Bluetooth Wenn Sie über ein Funkgerät mit integriertem Bluetooth (wie z.B. Midland G8BT) verfügen. Dann koppeln Sie das Funkgerät über die „Lautstärke –“ Taste ›› Schalten Sie das Gerät aus. ›› Halten Sie die „mittlere“ Taste ca. 7 Sek. gedrückt, bis die rote LED ständig leuchtet. ›› Drücken Sie jetzt (3 sec lang) die „Lautstärke – “ Taste. Die blaue und rote LED blinken. ›› Folgen Sie jetzt der Kopplungs- (Pairing) Prozedur, wie Sie im Handbuch des Funkgeräts beschrieben ist. Achtung: Beim Koppeln eines G8E-BT Funkgeräts müssen Sie nach Abschluss des Koppelns von der BT NEXT Seite her auch noch die Bluetooth Sprechverbindung auf der G8E-BT Seite starten. ›› Schalten Sie das G8E-BT aus und wieder ein ›› Drücken Sie für etwa 3 sec lang den BT Knopf am G8BT Diese Prozedur müssen Sie jedes Mal ausführen, wenn Sie die Sprechverbindung zwischen G8BT und BT NEXT wieder einmal starten möchten. (Die Pairing Sie müssen die „Hintergrund”-Funktion aktiviert haben, wenn die Verbindung zu einem Funkgerät die Intercom Kommunikation nicht unterbrechen soll Musik wiedergeben Um Musik über den Kabeleingang anzuhören, verbinden Sie die Audioquelle über das optional Kabel mit dem BTX2 FM. Der Lautstärkepegel wird automatisch über das AGC-System eingestellt, was bedeutet, dass Sie die Lautstärke am iPod/MP3Player nur so laut einstellen müssen, wie Sie bei normaler Geschwindigkeit Musik hören können. Achtung: Stellen Sie niemals die Lautstärke von Ihrem MP3-Player auf Maximum. Normalerweise liegt der beste Lautstärkepegel bei ca. 70% des Maximums. Tipp: Wir empfehlen Ihnen, ein paar Tests durchzuführen, um die Lautstärke Ihres iPod/MP3-Players so einzustellen, dass sie Ihren Wünschen entspricht. Das AGCSystem regelt bei höheren Geschwindigkeiten automatisch die Lautstärke nach. Merken Sie sich diese Einstellung für künftige Fahrten. Aktivieren/Deaktivieren des Kabeleingangs Der Kabeleingang kann bei Bedarf aktiviert oder deaktiviert werden: Aktivieren/Deaktivieren: Halten Sie etwas länger (ca. 3 s) die „Zurück”-Taste gedrückt (Sie hören bei Aktivierung einen Signalton und bei Deaktivierung zwei Signaltöne zur Bestätigung). Verwendung eines PMR446-Funkgeräts mit Kabelanschluss Um das Funkgerät nutzen zu können, benötigen Sie ein spezielles Kabel (wird separat verkauft), um das Gerät an Ihr Midland BTX2 FM anzuschließen C – UKW RADIO MODE Modus UKW-Radio 34 - Midland BTX2 FM Weiter-Taste Kurzer Tastendruck: Gespeicherte Sender aufwärts Langer Tastendruck: Gefundene Sender speichern Mittlere Taste Kurzer Tastendruck: Ein- und Ausschalten Langer Tastendruck: Modus wechseln Zurück-Taste Kurzer Tastendruck: Gespeicherte Sender abwärts Langer Tastendruck: Gefundene Sender speichern Setup und spezielle Konfiguration Alle Pairing- (Kopplungs-) Informationen zurücksetzen Wurde Ihr BTX2 FM bereits öfter mit anderen Geräten gekoppelt, dann kann die Zahl der gekoppelten Verbindungen irgendwann unübersichtlich werden und es kann angebracht sein, alle im BTX2 FM gespeicherten Kopplungsdaten zu löschen (Reset). Für diese Prozedur rufen Sie zunächst den Setup-Modus auf: ›› Schalten Sie das Gerät aus. ›› Halten Sie die„mittlere“ Taste ca. 7 Sek. gedrückt, bis die rote LED ständig leuchtet. ›› Halten Sie anschließend die „Lautstärke +“ und „Lautstärke –“ Tasten für 3 Sekunden gedrückt. Die blaue LED leuchtet für 1 Sekunde auf und anschließend leuchtet ständig die rote LED. ›› Doppelklicken Sie auf die „mittlere“ Taste, um den Setup-Modus zu verlassen und das BTX2 FM wieder zu verwenden. Dieses Vorgehen löscht alle gespeicherten und gekoppelten Bluetooth-Geräte und ermöglicht einen neuen „sauberen“ Kopplungsablauf. Auf die Werkseinstellungen zurücksetzen Manchmal kann es notwendig sein, zu den Werkseinstellungen zurückzukehren, um alle Änderungen oder Setupeinstellungen zurückzusetzen und ein „sauberes“ Gerät zu erhalten. Zuerst schalten Sie wieder in den Setup-Modus: ›› Schalten Sie das Gerät aus. ›› Halten Sie die „mittlere“ Taste ca. 7 Sek. gedrückt, bis die rote LED ständig leuchtet. ›› Anschließend halten Sie gleichzeitig alle 3 Tasten „Weiter“ – „mittlere Taste“ – „Zurück“ für 3 Sekunden gedrückt. Die blaue LED leuchtet für 1 Sekunde auf und anschließend leuchtet ständig die ROTE LED. ›› Doppelklicken Sie auf die „mittlere“ Taste, um den Setup-Modus zu verlassen und das BTX2 FM zu verwenden. Einstellen/Deaktivieren der VOX-Funktion (Gegensprechanlage und Telefon) Die Gegensprechfunktion kann manuell oder durch Sprache (VOX) aktiviert werden. Diese Funktion wird durch Hintergrundgeräusche beeinflusst und deshalb auch durch die Geschwindigkeit. Für optimale Resultate kann einer der folgenden vier Mikrofon-Empfindlichkeitspegel gewählt werden: hoch, mittel, niedrig und sehr niedrig. Die Werkseinstellung des BTX2 FM ist „niedrig“. Sie können die VOX Funktion auch deaktivieren, um die Gegensprech- und Telefon-Antwortfunktion nur im manuellen Modus zu aktivieren. Einstellen der Mikrofonempfindlichkeit (VOX) Um diese Prozedur auszuführen, müssen Sie zuerst den Setup-Modus aufrufen: ›› Schalten Sie das Gerät aus. ›› Halten Sie die „mittlere“ Taste ca. 7 Sek. gedrückt, bis die rote LED ständig leuchtet. Ihr BTX2 FM befindet sich jetzt im „Setup-Modus“. 1. Drücken Sie die „Zurück“-Taste, bis die rote LED ständig blau leuchtet. 2. Erhöhen oder verringern Sie jetzt die Empfindlichkeit mit den Tasten „Lautstärke +“ oder „Lautstärke –“. Jedes Mal, wenn Sie die Lautstärketasten drücken, blinkt die rote LED zur Bestätigung auf. Wenn Sie den oberen oder unteren Grenzwert erreicht haben, blinkt die rote LED nicht mehr. 3. Drücken Sie erneut die „Zurück“-Taste. Die blaue LED blinkt mehrmals auf, um Ihnen die ausgewählte Empfindlichkeit anzuzeigen: Einmal Aufblinken = VOX deaktiviert Zweimal Aufblinken = sehr geringe Empfindlichkeit Dreimal Aufblinken= geringe Empfindlichkeit Viermal Aufblinken= mittlere Empfindlichkeit , (Werkseinstellung) Fünfmal Aufblinken = hohe Empfindlichkeit Midland BTX2 FM - 35 D (Funkgeräte anderer Hersteller verwenden u.U. eine andere Pin-Belegung). Fragen Sie Ihren Lieferanten, welches Kabel am besten für Ihr Gerät geeignet ist. Das Kabel zum Funkgerät hat normalerweise eine PTT Taste, die am Lenker befestigt werden kann. Es ist aber auch möglich, die PTT Taste z.B. als Beifahrer in der Hand zu halten. Drücken Sie die Sprechtaste (PTT), um über das Funkgerät zu reden und lassen Sie die Taste los, um zu hören. Stellen Sie die Lautstärke des Funkgerätes nach Ihren Bedürfnissen ein und denken Sie daran, dass die Lautstärkeeinstellung automatisch über das AGC-System angepasst wird und automatisch entsprechend der Hintergrund- und Fahrtgeräusche erhöht wird. Falls Sie ein PMR446-Funkgerät für den Funk zu andere Motorradfahrern benutzen und gleichzeitig die Gegensprechfunktion zwischen zwei oder mehr BTX2 FM-Geräten benutzen möchten, müssen Sie daran denken, dass jedes Mal die Gegensprechfunktion des BTX2 FM aktiviert wird, wenn Sie mit dem PMR 446-Funkgerät (Drücken der PTT-Taste) sprechen, das über die „mittlere“ Taste mit dem Gerät gekoppelt ist (dank der VOX-Funktion). Um eine Aktivierung der Gegensprechanlage zu verhindern, wenn Sie über das PMR446 sprechen, können Sie das BTX2 FM-Gerät mit der „Zurück“- oder „Weiter“-Taste koppeln (wobei VOX nicht aktiv ist). Wenn Sie immer noch die „mittlere“ Taste verwenden möchten, müssen Sie die VOX-Funktion deaktivieren, wie im vorherigen Abschnitt beschrieben. Falls Sie die VOX Funktion deaktivieren, können Sie eingehende Anrufe nur durch Drücken der „Weiter”-Taste beantworten. 4. Nun leuchtet rote LED erneut ständig auf („Setup-Modus“) und die Änderungen werden bestätigt. 5. Bei Bedarf kann die Empfindlichkeit durch Wiederholen der Schritte ab Punkt 1 erneut angepasst werden. Ansonsten können Sie den Einstellmodus durch Doppelklicken der „mittleren“ Taste verlassen. Sobald die rote LED erlischt, beginnt die blaue LED zu blinken. Jetzt ist Ihr BTX2 FM betriebsbereit. D Deaktivieren der VOX-Funktion (Gegensprechanlage und Telefon) Wiederholen Sie die Prozedur für die Empfindlichkeitseinstellung des Mikrofons (siehe oben) und wählen Sie die Option, bei der LED nur einmal aufblinkt (VOX deaktiviert). Kabelverbindung stets im Hintergrund Mit dieser Funktion können Sie die Kabelverbindung stets eingeschaltet lassen, auch wenn das Telefon oder die Gegensprechanlage aktiviert sind. Diese Funktion kann nützlich sein, wenn Sie ein PMR446-Funkgerät angeschlossen haben. Werksmäßig ist diese Option eingeschaltet. Deaktivieren: Rufen Sie den „Setup“-Modus auf: ›› Schalten Sie das Gerät aus. ›› Halten Sie die „mittlere“ Taste ca. 7 Sek. gedrückt, bis die rote LED ständig leuchtet. ›› Halten Sie gleichzeitig die „Weiter“-Taste und die „mittlere“ Taste für ca. 3 Sekunden gedrückt. Die blaue LED blinkt zweimal auf. ›› Doppelklicken Sie auf die „mittlere“ Taste, um den „Setup“-Modus zu verlassen und das BTX2 FM zu verwenden. Aktivieren: ›› Wiederholen Sie das oben beschriebene Verfahren. Jetzt blinkt die blaue LED einmal auf. ›› Doppelklicken Sie zum Verlassen des „Setup“-Modus auf die „mittlere“-Taste. Setup und Firmware-Aktualisierung Die Firmware Ihres BTX2 FM kann mittels einer USB-Verbindung mit Ihrem PC konfiguriert und aktualisiert werden. Auf der Website von Midland www.midlandeurope.com finden Sie auf der BTX2 FM-Seite die PC-Software und die neuen Firmware-Aktualisierungen, falls verfügbar. ACHTUNG DAS GERÄT NUR AN DEN PC ANSCHLIESSEN, WENN DIE SOFTWARE HERUNTERGELADEN UND INSTALLIERT WURDE 36 - Midland BTX2 FM Benutzung auf eigene Gefahr Das Benutzen von beidseitigen Audiosets in Helmen kann kann Ihre Fähigkeit, Geräusche und das Verkehrsgeschehen in Ihrer Umgebung wahrzunehmen, beeinträchtigen. Benutzen Sie daher das Bluetooth Set nur, wenn die Verkehrssituation es erlaubt. Beim Motorradfahren kann das Hören von Musik oder das Führen von Telefonaten oder das Benutzen des Intercoms Sie von anderen Ereignissen und vom sicheren Fahren ablenken. Das Benutzen des Bluetooth Sets beim Führen eines Fahrzeugs oder beim Fahrradfahren kann ein ernsthaftes Risiko für Sie oder Ihre Mitmenschen bedeuten und kann, von Land zu Land unterschiedlich, verboten sein. Das Benutzen eines Headsets mit extremer Lautstärkeeinstellung kann bleibende Gehörschäden hervorrufen. Sollten Sie Klingeln in Ihren Ohren oder andere Hörprobleme feststellen, so verringern Sie sofort die Lautstärke oder schalten Sie das Gerät aus. Bei ständigem Gebrauch mit hohen Lautstärken kann sich Ihr Gehör and den erhöhten Lautstärkepegel so gewöhnen, dass die Folge eine permanente Hörschädigung sein kann. Bitte benutzen Sie dieses Gerät nur mit einer sicheren Lautstärke. Gewährleistung Gewährleistungsfrist beträgt 24 Monate ab Kauf-/Lieferdatum (bei Teilen mit beschränkter Lebensdauer wie, Akkus, Ladegeräte, Headsets und Antennen 6 Monate). Für allen Informationen über die Garantie der Artikel, besuchen Sie bitte unsere www.midlandeurope.com Europaische CE Erklarung und Sicherheitshinweise Dieses Produkt trägt das CE Zeichen nach der R&TTE Direktive (99/5/EC). Es ist gültig für alle EU Staaten. Es ist nicht zulässig, nicht mit uns abgesprochene Veränderungen an den Geraten vorzunehmen. Sie gefährden mit Änderungen nicht nur die Gewährleistung, sondern auch das Einhalten der gesetzlichen Grenzwerte. Näheres an technischen Informationen finden Kunden aus dem deutschsprachigen Raum auch unter http://hobbyradio.de, in der Rubrik “Biker Sets”, wo Sie die jeweils neueste Ausgabe der Geräteunterlagen zum Download finden Informationen für Kunden in Deutschland gibt es unter www.alan-electronics.de Características principales....................................................................................................................................................38 Especificaciones técnicas del Midland BTX2 FM......................................................................................................................38 Carga de la batería...............................................................................................................................................................38 Descripción del dispositivo y del sistema de montaje.............................................................................................................39 Encender y apagar el BTX2 FM..............................................................................................................................................40 Modos de operación.............................................................................................................................................................40 Distancia..............................................................................................................................................................................41 Cómo sincronizar otro BTX2 FM.............................................................................................................................................41 Cómo sincronizar más de dos dispositivos a un BTX2 FM............................................................................................. 41 Talk 2 All – Sincronización con un Intercomunicador de otra marca........................................................................................42 Uso de la función Radio FM...................................................................................................................................................45 Cómo usar la entrada de audio por cable.................................................................................................................. 45 Walkie talkie con conexión vía cable.....................................................................................................................................46 Configuraciones especiales ..................................................................................................................................................46 Setup y actualización de Firmware........................................................................................................................................47 Garantía..............................................................................................................................................................................48 Certificaciones Europeas CE..................................................................................................................................................48 Midland BTX2 FM - 37 E Índice Midland BTX2 FM Advanced Intercom System E Gracias por haber adquirido un Midland BTX2 FM, el Sistema Intercom Bluetooth pensado para el motorista. Midland BTX2 FM es un dispositivo que se instala en cualquier tipo de casco y que puede enlazarse con cualquier dispositivo Bluetooth, como teléfonos, reproductores MP3, Navegadores GPS y, sincronizado con otro Midland BT, como sistema Intercom sin hilos. Características principales Especificaciones técnicas del Midland BTX2 FM ›› ›› ›› ›› ›› ›› ›› ›› Generales: ›› Bluetooth ver. 3.0 Estéreo (protocolo Headset/Handsfree/A2DP) ›› Sistema AGC de control automático de volumen dependiendo del ruido de fondo ›› Activación de la comunicación por voz (VOX) o manualmente ›› Controles manuales para activar el teléfono, el Intercom y la conexión por cable ›› Completamente resistente al agua ›› Batería de Litio con autonomía de hasta 12 horas de conversación ›› Tiempo de recarga de batería: 6 horas aproximadamente Intercom piloto/pasajero o moto a moto hasta una distancia máxima de 800 mt. Conexión de hasta 4 Intercom (utlizando la función “Tall2All - Universal Intercom”) Radio FM con RDS Conexión al reproductor mp3 de su teléfono Conexión al Navegador GPS para escuchar las indicaciones de navegación Conexión a un walkie talkie con Bluetooth integrado o externo Entrada Auxiliar mediante cable para conectar un MP3 o un walkie talkie Configuración y actualización de Firmware mediante conexión USB al PC Midland BTX2 FM está disponible en dos versiones: ›› BTX2 FM individual con una unidad Bluetooth. ›› BTX2 FM TWIN con dos unidades Bluetooth sincronizadas. Dependiendo del modelo adquirido, el embalaje contiene lo siguiente: BTX2 FM ›› 1 dispositivo de comunicación BTX2 FM ›› 1 kit de audio con dos altavoces Estéreo HiFi, micrófono de varilla regulable y micrófono de hilo ›› 1 sistema de fijación al casco mediante mordaza ›› 1 sistema de fijación al casco con biadhesivo ›› 1 cable de audio estéreo para conectar un iPod/MP3 ›› 1 cargador con conexión USB BTX2 FM TWIN ›› 2 dispositivos de comunicación BTX2 FM sincronizados. ›› 2 kit de audio con dos altavoces Estéreo HiFi, micrófono de varilla regulable y micrófono de hilo. ›› 2 sistemas de fijación al casco mediante mordaza. ›› 2 sistemas de fijación al casco con biadhesivo. ›› 2 cable de audio estéreo para conectar un iPod o un MP3 ›› 1 cargador doble con conexión USB. Las unidades incluidas en el TWIN están sincronizadas y, por lo tanto, se pueden utilizar inmediatamente en modo Intercom. 38 - Midland BTX2 FM Conexiones Bluetooth: ›› Con otro BTX2 FM para modo Intercom Piloto/Pasajero o Moto/Moto hasta un máximo de 800m de distancia. Con dispositivo Bluetooth: ›› Teléfono móvil con reproductor Estéreo MP3 (protocolo A2DP), GPS ›› Walkie talkie tipo pmr446 (con conexión Bluetooth interna o externa) para comunicación de un grupo ilimitado de motos. Conexiones vía cable: ›› reproductores de audio estéreo iPod/MP3 (con cable opcional) ›› Walkie talkie tipo pmr446 (con cable BT312 opcional) Atención: Midland BTX2 FM se ha diseñado para resistir la lluvia. Verifique siempre que las gomas de protección estén bien cerradas. Carga de la batería Asegúrese de que las unidades están totalmente cargadas antes de su uso. Antes de utilizar las unidades por primera vez, efectúe una carga de al menos 8 horas. Posteriormente, el tiempo de carga se reduce a 4/6 horas para una recarga completa. Por razones de comodidad, la unidad se puede quitar del casco para ser recargada. Para cargar la unidad, retire la protección de goma del conector de carga y conecte el cargador. Después enchufe el alimentador a una toma de red eléctrica. El LED rojo de la unidad empieza a parpadear cuando empieza la carga. Mantenga la carga hasta que el LED rojo deje de parpadear o se encienda el LED azul. Cuando se completa la carga (LED rojo no parpadea), desconecte la unidad del cargador. Atención: cada vez que se conecta o desconecta el USB de carga, la unidad se apaga automáticamente. Si quiere utilizarla mientras se carga, debe encenderla después de que haya conectado el cargador. Además, BTX2 FM incorpora una antena desplegable en la parte superior, para conseguir un alcance máximo. Para levantar la antena basta con efectuar una ligera presión hacia el exterior, ésta se desenganchará y se levantará automáticamente. Descripción del dispositivo y del sistema de montaje Descripción BTX2 FM BTX2 FM dispone de cinco teclas en el frontal: las tres grandes son multifunción: Adelante (izquierda en el dibujo), Central y Atrás (derecha) y las dos pequeñas teclas redondeadas para el control de volumen. Volume - E Volume + Para cerrar la antena basta con bajarla y efectuar una ligera presión hacia el interior de manera que se encastre en la hendidura. Forward button Middle button Backward button Descripción de las conexiones por cable ›› Toma de carga: para la carga del dispositivo mediante el cargador con toma mini USB ›› Toma Kit de Audio: para la conexión del kit de audio (auriculares estéreo y micrófono) ›› Toma de audio auxiliar (AUX) 2,5mm: permite la conexión de un iPod/MP3 estéreo o un transceptor pmr446. Charger jack Audio kit jack Descripción del kit de audio El sistema de audio incluye dos altavoces estéreo ultra planos y dos micrófonos intercambiables, uno de varilla regulable y el otro de hilo. El miniconector del micrófono permite intercambiarlos con suma facilidad. Altavoces estéreo Los altavoces disponen de un velcro adhesivo que le ayudará a montarlos en el interior del casco, entre el acolchado y la calota. Atención, tenga en cuenta no cubrir totalmente su oreja con los altavoces, ya que debe escuchar siempre el sonido ambiente y las indicaciones del tráfico. El micrófono se puede fijar en el casco de dos formas: Micrófono de varilla regulable: Coloque la parte con el adhesivo entre la parte rígida del casco y el acolchado, de manera que el micrófono esté correctamente colocado en frente de su boca y la marca blanca hacia ella. Este tipo de micrófono está diseñado para cascos tipo Modular y Jet. Auxiliary audio jack (AUX) Midland BTX2 FM - 39 Micrófono de hilo Coloque el micrófono en el protector de la barbilla frente a su boca, utilizando el velcro/adhesivo incluido. Este tipo de micrófono ha sido diseñado para su instalación en cascos integrales. Para retirar el BTX2 FM, simplemente presione el clip de fijación y empuje hacia arriba. Conector del kit de audio El kit de audio se conecta a la toma central del BTX2 FM mediante el conector en forma de “L”. E Descripción del sistema de montaje en el casco Midland BTX2 FM se puede fijar en el casco de dos formas: utilizando la lámina con biadhesivo o con la mordaza. Esto le permite fijar de forma segura el BTX2 FM en el casco y poder retirarlo en cualquier momento para recargarlo o guardarlo. El BTX2 FM ha sido diseñado para fijarse en la parte izquierda del casco. Fijación con biadhesivo La lámina de fijación tiene un adhesivo de doble cara en uno de sus lados. Para instalarlo, limpie la zona del casco donde quiera colocarlo, retire el protector del adhesivo y coloque el soporte en el casco apretando durante unos segundos. Fijación con mordaza Mediante la llave Allen, afloje los dos tornillos del soporte y coloque la parte trasera entre la calota y el acolchado. Apriete los dos tornillos de manera que el soporte quede firmemente fijado en el casco. Este soporte incluye un plástico separador, que se puede quitar o poner dependiendo del grosor del casco. Colocación y extracción del Midland BTX2 FM El BTX2 FM se puede colocar fácilmente en su soporte deslizándolo hacia abajo hasta que encaje en la ranura del soporte. El BTX2 FM se mantiene en su posición gracias al clip de fijación de la parte superior del soporte (A). 40 - Midland BTX2 FM Encender y apagar el BTX2 FM Encendido: Mantenga pulsada durante aproximadamente 3 segundos la tecla “Central” hasta que parpadee el LED azul. Apagado: Mantenga pulsadas durante aproximadamente 3 segundos las teclas “Central” y “Atrás” hasta que el LED parpadee tres veces en rojo; de ese modo disminuyen las oportunidades de un apagado accidental, especialmente cuando se llevan puestos los guantes. Modos de operación El BTX2 FM puede operar de tres modos principalmente: Intercom, Teléfono y Radio FM. Las 3 teclas del dispositivo tienen diferentes funciones dependiendo del modo de operación de la unidad. ›› En Modo “Intercom” las teclas le permiten gestionar la comunicación entre piloto/pasajero o moto/moto. ›› En Modo “Teléfono” permiten efectuar o contestar llamadas o activar la música del teléfono. En este caso, las tres teclas gestionan las funciones del teléfono y de la música (play/pausa, adelante, atrás). ›› En Modo “Radio FM” puede escuchar en estéreo sus emisoras de radio favoritas, buscar una emisora y memorizarla (se pueden memorizar hasta 6 emisoras). Puede cambiar de un modo a otro pulsando durante 3 segundos la tecla “Central”. Un mensaje vocal le dirá en que modo se encuentra. La secuencia del cambio de modo es la siguiente: ›› Intercom (si está sincronizado, al menos, con otra unidad) ›› Radio FM ›› Teléfono (si se ha sincronizado con un teléfono) Para saber en qué modalidad se encuentra el BTX2 FM, pulse simultáneamente “Vol +” y “Vol -”: un anuncio vocal le indicará en que modo se encuentra. La distancia máxima de comunicación entre dos Midland BTX2 FM es de 800m si la antena está desplegada y en campo abierto, sin obstáculos. Esta distancia puede reducirse sensiblemente dependiendo de la orientación de la cabeza y de la presencia de obstáculos o interferencias. pulsando la tecla central. Se puede desactivar la función VOX siguiendo el proceso descrito en el capítulo “Configuraciones especiales”. Si es necesario, también se puede desactivar temporalmente la función VOX pulsando durante 7 segundos la tecla “Atrás”. Un mensaje vocal avisará de la desactivación. Para reactivarlo deberá repetir el mismo procedimiento. Cómo sincronizar otro BTX2 FM Ajuste de volumen Para utilizar la función Intercom es necesario tener dos dispositivos BTX2 FM sincronizados. Las dos unidades suministradas en la caja del BTX2 FM Twin están sincronizadas y listas para su uso, lo que significa que no debe realizar este proceso. Si las unidades no son del mismo kit o se han comprado separadamente, necesita sincronizarlas para poder utilizarlas juntas. 1. Apague ambas unidades. Mantenga pulsada la tecla Central hasta que el LED rojo se encienda fijo. Repita el proceso para la otra unidad 2. Pulse la tecla Central del primer dispositivo hasta que el LED parpadee rojo y azul 3. Pulse la tecla Central del segundo dispositivo hasta que el LED parpadee rojo y azul. 4. Los dos dispositivos se buscan para sincronizarse. Cuando se realiza la sincronización, cada unidad tendrá la LED azul fijo durante 1 segundo y después volverá al modo Setup (LED rojo encendido) 5. Haga doble click en la tecla central, el LED rojo se apagará y el LED azul comienza a parpadear (en ambas unidades) 6. Ahora puede usar su BTX2 FM. Si por cualquier razón se quiere interrumpir la búsqueda (LED rojo y azul) y volver al modo Setup (LED rojo fijo), basta con hacer doble click en la tecla central. Midland BTX2 FM utiliza tecnología AGC, la cual ajusta automáticamente el volumen en función del ruido de fondo. Sin embargo, también se puede ajustar el volumen manualmente mediante las teclas “Vol +” y “Vol -“. Atención: el volumen solo se puede ajustar cuando hay una fuente de audio activa Atención: Las teclas de ajuste de volumen no se pueden utilizar para ajustar el volumen de la entrada de audio por cable. Cómo usar el modo Intercom Para usar el Intercom, asegúrese que las dos unidades estén encendidas y sincronizadas. Compatibilidad con dispositivos Midland El BTX2 FM es compatible con BTNext Conference y BTX1 FM. También es compatible con BTNext, BTX2 y BTX1 si están actualizados a la versión de firmware 2014 Puede sincronizar el BTX2 FM a cualquiera de estas unidades pero teniendo en cuenta que la distancia de Intercom será la que marque la unidad de menor alcance. Cómo sincronizar más de dos dispositivos a un BTX2 FM El BTX2 FM se puede sincronizar a un máximo de otras tres unidades (para un total de 4). Se Puede utilizar la tecla “Central” y la tecla “Atrás” para conectarse a un dispositivo Midland y la tecla “Adelante” para enlazarse a dispositivos de otras marcas, usando la función “Talk2All-Universal Intercom”. La misma tecla que utilice para sincronizarlo deberá utilizarla para activar la comunicación con ese dispositivo. Activación manual: Con las unidades encendidas, pulse la tecla central en una de las dos unidades. La comunicación se activa y permanece de este modo hasta que se vuelve a pulsar la tecla central. El Intercom necesita unos segundos para activarse. Cuando se activa se escucha un tono beep de aviso y dos tonos cuando se desactiva. Activación vocal (VOX) La función VOX para la activación por voz, está activada de fábrica. Bastará con comenzar a hablar sin tocar ninguna tecla. Después de unos segundos la comunicación se abrirá y permanecerá activa durante el tiempo que permanezca hablando. Si no hay ninguna conversación, el Intercom se cierra pasados 40 segundos. Si quiere cerrar el Intercom antes de los 40 segundos, puede hacerlo manualmente Driver 1 Passennger 1 Driver 2 Midland BTX2 FM - 41 E Distancia E Recuerde: También puede sincronizar un dispositivo Midland a la tecla “Adelante” con la función “Talk2All-Universal intercom”. El enlace al otro dispositivo debe ser efectuado en lugar del teléfono. 1. Active el modo “Setup” (con la unidad apagada, mantenga pulsada la tecla “Central” hasta que el LED no se quede encendido rojo). 2. Escoja la tecla más conveniente para Ud. (Central o Atrás) y manténgala pulsada durante 3 segundos hasta que el LED parpadee rojo y azul. La tecla escogida será la misma que deberá usar para abrir/cerrar el Intercom. 3. Siga el procedimiento descrito en el punto 2 en el otro dispositivo que desea enlazar (no es obligatorio utiliozar la misma tecla en ambos dispositivos). 4. Ahora, ambos dispositivos se buscan para completar la sincronización. Si todo es correcto, en ambos dispositivos se encenderá durante un segundo el LED azul para después volver a modo “Setup” (LED rojo fijo) 5. Ahora proceda a una segunda sincronización, basta repetir el punto 2 utilizando en este caso una tecla diferente. Para utilizar los dispositivos, deberá salir del modo “Setup” haciendo doble click en la tecla “Central” Cada vez que activa una comunicación con uno de ellos, la conexión anterior se desactiva. La comunicación no es en cadena y, cuando dos dispositivos están hablando, aunque uno de los otros se quede fuera de cobertura, no se interrumpirá la comunicación. De igual modo, mientras dos dispositivos están hablando, el otro dispositivo no puede interrumpir. Recuerde que sólo el dispositivo sincronizado a la tecla “Central” puede ser activado con el modo VOX. Usuario ocupado en otra conversación Si quiere activar el Intercom con una persona que está hablando con un tercero o por teléfono, escuchará un doble pitido indicando que está ocupado. Inténtelo más tarde hasta que la línea esté libre. La persona llamada será avisada que alguien ha querido contactar con él mediante un mensaje vocal que indicará la tecla a la que está asociado el dispositivo en cuestión. 2 3 De esta manera, cuando termine de hablar, el usuario llamado podrá contactar con la persona que quería hablar con él, simplemente abriendo el Intercom usando la tecla correspondiente al aviso recibido. 42 - Midland BTX2 FM Talk 2 All – Sincronización con un Intercomunicador de otra marca Gracias a la función “Talk2 All - Universal Intercom” ahora es posible sincronizar su BTX2 FM con cualquier Intercomunicador del mercado. 1. En el BTX2 FM, entre en modo “SET UP” (apague el dispositivo y pulse la tecla “Central” hasta que el LED no permanezca de color rojo fijo) 2. Mantenga pulsada “Adelante” hasta que el LED parpadee en rojo y azul. 3. En el Intercomunicador no Midland, siga las mismas instrucciones que para enlazar un teléfono. Al finalizar el procedimiento de sincronización el LED deja de parpadear rojo/ azulPara abrir la comunicación intercom en el BTX2 FM, pulse la tecla “Adelante”. En el dispositivop no Midland puede abrir la comunicación manualmente pulsando la tecla de llamada telefónica. Puede ser necesario pulsar la tecla de llamada dos veces, depende del Intercom de la otra marca que esté enlazando. Atención: cuando utilice esta configuración, el otro Intercomunicador no se podrá sincronizar a un teléfono Talk2All - Universal Intercom Dispositivo non Midland Uso de otros dispositivos Bluetooth El BTX2 FM puede ser enlazado a otros dispositivos Bluetooth tales como un teléfono móvil, navegador GPS o walkie talkie con Bluetooth integrado. La sincronización debe efectuarse utilizando la tecla “Vol +”. ›› ›› ›› ›› Phone GPS GPS + Phone PMR446 Radio ›› Background feature ON/OFF Función “Background” Cómo usar el teléfono La modalidad “Background” permite mantener activa siempre de fondo la conexión Bluetooth asignada al botón “Vol -”, también si el Intercom está abierto. Esta función es muy útil para mantener los mensajes del GPS en segundo plano mientras está abierto el Intercom. Activar: mantenga presionado el botón “Vol-” durante 3 segundos: escuchará un anuncio vocal que dirá “Background ON” Desactivar: mantenga presionado el botón “Vol-” durante 3 segundos: escuchará un anuncio vocal que dirá “Background DISABLE” De origen, el BTX2 FM viene con esta función desactivada Después de sincronizar el teléfono al BTX2 FM debe entrar en modo “Teléfono” para poder utilizarlo. Mantenga pulsada durante unos 3 segundos la tecla Central hasta que oiga “Phone”. Ahora las tres teclas principales, están dedicadas al teléfono (Tabla A). Responder a una llamada Cuando el teléfono suena, puede responder de dos maneras: Respuesta vocal: basta que pronuncie una palabra y descolgará automáticamente. Respuesta manual: Pulse brevemente la tecla “Adelante” y ya puede hablar. Teléfono móvil (sincronización de hasta dos teléfonos) El teléfono móvil se puede enlazar a la tecla “Vol+” (si necesita el soporte para audio estéreo A2DP) o a la tecla “Vol-”. Cuando un teléfono esté enlazado, el modo “Teléfono” estará disponible. La llamada entrante tendrá siempre la prioridad más alta e interrumpirá el resto de comunicaciones activas (Intercom, Radio FM, Música). Si llega una segunda llamada en el otro teléfono dunrante una llamada activa sobre el primero, oirá una señal de aviso Cómo sincronizar un teléfono 1. Active en su teléfono el modo de búsqueda de dispositivos Bluetooth. 2. Con el BTX2 FM en modo “Setup” (LED rojo fijo), pulse la tecla “Vol+” o “Vol-” hasta que parpadee el LED rojo y azul. 3. Después de unos segundos, en el display del teléfono aparecerá el nombre “Midland BTX2 FM”. Selecciónelo y siga las instrucciones que aparezcan en pantalla para aceptar el enlace. Si le solicita un código, introduzca “0000” (cuatro ceros). El teléfono confirmará si la sincronización se ha realizado con éxito. 4. El BTX2 FM saldrá del modo setup (led rojo fijo) y pasará automáticamente al estado normald e funcionamiento (led parpadea azul). Ahora el teléfono está correctamente enlazado. Rechazo de una llamada Si no desea contestar una llamada, puede dejar sonar el teléfono o pulsar la tecla “Adelante” durante unos segundos (oirá un tono de confirmación). Realizar una llamada Hay varias maneras de realizar una llamada: Desde el teclado del teléfono (nunca en marcha): Marque el número con el teclado y pulse la tecla de llamada del teléfono. Rellamar al último número: ›› Teléfono enlazado a la tecla “Vol+”: Pulse la tecla “Adelante” durante 3 segundos para llamar al último número (oirá un tono de confirmación). ›› Teléfono enlazado a la tecla “Vol-”: Pulse la tecla “Atrás” durante 3 segundos para llamar al último número (oirá un tono de confirmación). Realizar una llamada por voz: ›› Teléfono enlazado a la tecla “Vol+”: Pulse brevemente la tecla “Adelante”. Si su teléfono soporta la llamada vocal, le pedirá que diga el nombre del contacto al que desea llamar. ›› Teléfono enlazado a la tecla “Vol-”: Pulse brevemente la tecla “Atrás”. Si su teléfono soporta la llamada vocal, le pedirá que diga el nombre del contacto al que desea llamar. Prioridad: Las llamadas son prioritarias, lo que significa que el resto de comunicaciones se desactivan temporalmente al entrar una llamada y se restablecen una vez que la llamada ha finalizado. A-Uso de las teclas en modo Teléfono Modo Teléfono Tecla Adelante (Teléfono en Vol+) Breve: Llamada vocal/aceptar llamada Larga: Rellamada último número/rechazar llamada Teléfono (con música activa Breve: Siguiente canción Tecla Central Larga: Cambio modo y enlazado a Vol+) Breve: Play/pause Larga: Cambio modo Tecla Atrás (Teléfono en Vol-) Breve: Llamada vocal/aceptar llamada Larga: Rellamada último número/rechazar llamada Breve: Canción anterior Midland BTX2 FM - 43 E Atención: la posibilidad de usar esta función depende del dispositivo enlazado por lo que no se puede garantizar que esta funcione en todos los casos. Terminar una llamada Hay varias maneras de terminar una llamada: ›› Esperar a que la otra persona finalice la llamada. ›› Pulse brevemente la tecla “Adelante” (oirá un tono de confirmación). ›› Pulse la tecla de colgar en el teléfono. Uso de la función reproductor MP3 del teléfono Si el teléfono ha sido enlazado a la tecla “Vol+” se puede utilizar como reproductores MP3 estéreo. El Midland BTX2 FM soporta completamente los protocolos A2DP y AVRCP, los cuales permiten escuchar música estéreo y gestionar las funciones principales de reproductor MP3. De hecho, puede utilizar las teclas del BTX2 FM para las siguientes funciones: Play, Stop/Pause, Adelante y Atrás. Navegador GPS con función reproducción Estéreo Si desea utilizar también las funciones de reproductor estéreo del Navegador GPS, deberá sincronizar el GPS a la tecla “Vol+”. En esta configuración, el GPS tendrá la prioridad más alta por lo que el resto de comunicaciones (Intercom, Radio FM, Música) se interrumpirán cuando haya un mensaje del GPS o una llamada en el teléfono. Cuando el GPS está enlazado a la tecla “Vol+”, el modo “Teléfono” está activo. Sincronización a un navegador GPS Se puede sincronizar cualquier navegador GPS para moto que acepte un auricular Bluetooth 1. Active en su GPS la búsqueda de dispositivos auriculares Bluetooth. Esta función depende de cada GPS (consulte el manual de usuario del mismo) E 2. Active el modo “Setup” (Apague el BTX2 FM, mantenga pulsada la tecla “Central” hasta que el LED rojo fijo). Pulsa la tecla “Vol+” o “Vol-“ hasta que el LED parpadee rojo y azul Forward Play/Pausa Backward Navegador GPS Un navegador GPS puede sincronizase usando las teclas de “Vol +” o “Vol -” Tecla Vol + (comandos de audio estéreo A2DP) Si el audio de las indicaciones del navegador es estéreo (lo mismo cuando usa un navegador APP en un smartphone), se debe sincronizar a la tecla “Vol +”. Las indicaciones del navegador siempre interrumpirán la comunicación Intercom. Tecla Vol - (comandos de audio mono en función background) Si el audio de las indicaciones del navegador es mono, se debe sincronizar a la tecla “Vol -”. En este caso las indicaciones siempre se escucharán en background y no interrumpirán la comunicación Intercom. Si la función “Background” está activada, las indicaciones del GPS estarán siempre en background y no interrumpirán la comunicación Intercom. Atención: no podemos garantizar la funcionalidad correcta del brackground, porque depende del dispositivo al que se enlaza que es el que actúa como “master”. Comandos de voz Estéreo (A2DP) BTX2 FM (A2DP) soporta comandos de voz de navegadores GPS o de aplicaciones desmartphones. Cuando un mensaje de voz interrumpe, el Intercom o la radio FM se verán interrumpidas para dar prioridad a estos mensajes de voz. Atención: Es posible controlar la música estéreo A2DP desde el GPS desde el modo “Teléfono”. 44 - Midland BTX2 FM 3. En el GPS aparecerá “Midland BTX2 FM”, selecciónelo y siga las instrucciones para aceptar la sincronización. Si lo pide el GPS, teclee el código “0000” (cuatro ceros). El GPS confirmará que el proceso de sincronización se ha completado con éxito 4. El BTX2 FM saldrá del modo Setup y pasará automáticamente al modo de funcionamiento normal (LED azul intermitente). Ahora, el GPS está sincronizado correctamente. Walkie talkie con Bluetooth El walkie talkie debe sincronizarse con el botón “Vol -” y, de esta manera, si la función “Background” está activada. El walkie talkie siempre se escuchará en background incluso cuando esté hablando por el Intercom. Atención: Si además del walkie talkie desea conectar también el Navegador GPS, deberá hacerlo a través de la tecla “Vol+”. En esta configuración, el GPS tendrá la prioridad más alta, por lo que el resto de comunicaciones como el Intercom, se interrumpirán si hay mensajes del Navegador. Para conectar el Teléfono y el Navegador deberá enlazar el GPS a la tecla “Vol+” del BTX2 FM y el teléfono directamente al GPS. Cómo enlazar un walkie con Bluetooth Si el walkie talkie tiene Bluetooth (como un G8E BT), se puede enlazar usando la tecla “Vol -” • Apague la unidad. Pulse y mantenga pulsada la tecla “Central”, hasta que el LED rojo se quede fijo • Pulse la tecla “Vol-“ durante 3 segundos aproximadamente hasta que el LED parpadee rojo y azul Uso de la función Radio FM BTX2 FM integra un receptor de Radio FM con RDS. Para utilizarlo,sólo tiene que entrar en modo “Radio FM”. Modo “Radio FM” Mantenga pulsada durante 3 segundos la tecla “Central”. Un anuncio vocal le indicará en que modo se encuentra. Cuando hasta que oiga el comando “FM Radio”. Ahora las tres teclas principales están dedicadas a la radio (Tabla C). Con un click sobre la tecla “Adelante” o “Atrás” puede buscar una emisora de radio (función seek), la búsqueda se detendrá automáticamente cuando encuentre una emisora con una señal suficientemente fuerte para garantizar una buena recepción. Si por el contrario mantiene pulsada durante 3 segundos cualquiera de las dos teclas, se desplazará por las 6 emisoras memorizadas. Cada vez que pasa de una memoria a otra, un anuncio vocal le indicará el núemro de memoria en el que se encuentra. Para memorizar la emisora que está escuchando, pulse simultáneamente las teclas “Adelante” y “Atrás” durante 3 segundos. Escuchará un tono de confirmación. La emisora se memoriza en la memoria siguiente a la última escuchada. Gracias al sistema RDS, la radio seleccionará la señal más fuerte disponible de la emisora que esté escuchando. El sistema RDS está desactivado por defecto y para activar/desactivar la función, pulse al mismo tiempo y durante tres segundos las teclas “Vol+” y “Vol–“ mientras la radio está encendida. Un anuncio vocal le indicará el estado. Para desactivarlo, repita el mismo procedimiento. Cómo descactivar/activar la Radio FM En el BTX2 FM la Radio Fm viene activada de fábrica. Desactivar: - Entre en modo “Setup”: apague la unidad y mantenga pulsado el botón Central durante 7 segundos, hasta que el LED Rojo quede fijo. - Presione a la vez la tecla Central y “Vol +” durante 3 segundos- El LED Azul parpadeará dos veces. - Haga doble click en la tecla Central para salir del modo “Setup” y poder usar el BTX2 FM. Activar: Siga el mismo procedimiento descrito, ahora el LED azul parpadeará sólo una vez. Para salir del modo “Setup”,, haga doble click en el botón Central. Intercom con Radio FM En modo “Radio FM” no se puede activar el Intercom en modo manual pero puede usar la activación vocal (VOX) sólo hacia el dispositivo enlazado en el pulsador “Central”. Para activar el Intercom de forma manual deberá salir del modo “Radio FM” y pasar a modo “Intercom”. Cómo usar la entrada de audio por cable Midland BTX2 FM dispone de una entrada de audio por cable (AUX), que puede usarse para conectar una fuente de audio, como un iPod (o cualquier otro reproductor MP3) o un walkie talkie para una comunicación en grupo o para incrementar el alcance. (El cable necesario para conectar un walkie talkie compatible es opcional -BT312) Escuchar Música Para escuchar música desde la entrada por cable, conecte a la toma “AUX” del BT X2 FM el reproductor de audio utilizando el cable suministrado. El nivel de volumen se ajusta con las teclas “Vol+” y “Vol-”, o automáticamente mediante el sistema AGC, de manera que solamente tiene que ajustar el volumen de su reproductor al nivel que le permita escucharlo a una velocidad normal. Atención: no ajuste nunca el volumen del reproductor al nivel máximo, un nivel del 70% es más que suficiente C - Modo Radio FM Modo Radio FM Tecla Adelante Tecla Central Pulsación corta: búsqueda de memoria hacia Pulsación corta: On/off adelante Pulsación larga: Cambio de modo Pulsación larga: Buscar emisoras (arriba) Tecla Atrás Pulsación corta: búsqueda de memoria hacia atrás Pulsación larga: Buscar emisoras abajo (si la radio está apagada, activa/desactiva la conexión AUX) Midland BTX2 FM - 45 E • Active el modo de sincronización en el walkie talkie siguiendo las instrucciones de éste. Atención: en el caso de sincronización a un walkie talkie G8E BT, nada más finalizar ésta en el BTX2 FM (Led azul parpadeando), deberá activar la conexión siguiendo este procedimiento: • Apague y encienda el G8E BT y reactive la conexión Bluetooth manteniendo pulsada durente 3 segundos la tecla “BT” Siga este mismo procedimiento cada vez que quiera conectar el G8E BT al BTX2 FM en el caso de que uno de los dos se apague (el procedimiento de sincronización no debe repetirse) Consejo: realice unas pruebas ajustando el volumen del reproductor a varios niveles para seleccionar el que mejor se adapta a sus preferencias. El sistema AGC aumentará el volumen automáticamente a medida que aumente la velocidad . Activar/Desactivar la entrada por cable (AUX) La entrada de cable se puede activar/desactivar manteniendo pulsadas la teclas “Central” y “Adelante” durante tres segundos. Escuchará un tono de confirmación al activarla y dos tonos al desactivarla. E Walkie talkie con conexión vía cable Para poder usar un walkie talkie es necesario comprar un cable específico (BT312 que se vende por separado) para conectarlo al Midland BTX2 FM. Normalmente, junto al cable se suministra también el pulsador PTT externo para fijación en el manillar de la moto. La comunicación vía radio se efectúa pulsando el PTT (Push To Talk) para hablar y soltándola para escuchar. No se puede hablar y escuchar al mismo tiempo. Si quiere utilizar un walkie talkie para comunicarse en grupo y, al mismo tiempo, mantener el Intercom activo entre dos o más unidades BTX2 FM, debe recordar que cada vez que hable para comunicarse mediante el walkie talkie pulsando el PTT, también activará el Intercom del BTX2 FM sincronizado a la tecla “Central” (gracias a la función VOX). Para evitar esto, enlace el dispositivo con el que quiere hablar, mediante las teclas “Adelante” o “Atrás”, donde la función VOX no está activa. Como alternativa, si quiere usar la tecla “Central”, puede desactivar la función VOX, como se ha explicado en la sección anterior. De este modo, el Intercom no se activará automáticamente cuando hable a través del walkie talkie. Para abrir el Intercom cuando use esta configuración, tendrá que activarlo manualmente pulsando la tecla “Central”. El cable conectado al walkie talkie dispone normalmente del pulsador PTT, que se puede colocar en el manillar o lo puede llevar en la mano si es el pasajero. Ajuste el volumen del walkie talkie al nivel deseado, recordando que el volumen se controla automáticamente mediante el sistema AGC y que ira subiendo en función del ruido de fondo. Configuraciones especiales Algunas funciones del BTX2 FM pueden ser configuradas para responder a exigencias específicas: Reset de todos los dispositivos sincronizados Alguna vez puede resultar necesario borrar todos los dispositivos sincronizados al BTX2 FM. Para realizar esta operación tiene que entrar en modo Setup: • Apague la unidad: mantenga pulsada la tecla “Central” hasta que el LED rojo quede fijo 46 - Midland BTX2 FM • Pulse al mismo tiempo las teclas “Vol+” y “Vol-” durante 3 segundos. El LED azul se enciende durante 1 segundo y volverá a rojo fijo Este proceso borra todos los dispositivos Bluetooth sincronizados almacenados en la memoria y por tanto es posible comenzar una nueva sesión de sincronización desde cero. Volver a los ajustes originales Puede ser necesario volver a los ajustes de fábrica para eliminar todos los cambios y ajustes realizados y tener la unidad “limpia”. Para realizar esta operación tiene que entrar en el modo Setup: • Apague la unidad: mantenga pulsada la tecla “Central” hasta que el LED rojo quede fijo • Pulse al mismo tiempo las teclas “Vol+” y “Vol-” durante 3 segundos. El LED azul se enciende durante 1 segundo y volverá a rojo fijo • Haga doble click en la tecla “Central” para salir del modo “Setup” y usar el BT X2 FM Atención: este proceso no elimina las referencias a los equipos acoplados Ajuste/Desactivación de la función VOX (Intercom y teléfono) La función Intercom se puede activar de dos formas: manualmente o por voz (VOX). La correcta activación del VOX depende del ruido de fondo y, por lo tanto, de la velocidad y del tipo de casco utilizado. Para un resultado óptimo, se puede seleccionar entre cuatro niveles de sensibilidad del micrófono: alto, medio, bajo y muy bajo. El ajuste por defecto es “bajo”. También es posible desactivar el VOX para activar el Intercom y la respuesta de llamadas de teléfono solo en modo manual. Ajuste de la sensibilidad del micrófono (VOX) Para realizar esta operación tiene que entrar en modo Setup: 1. Apague la unidad: mantenga pulsada la tecla “Central” hasta que el LED rojo quede fijo. Ahora está el BTX2 FM en modo “Setup” 2. Pulse brevemente la tecla “Atrás” hasta que el LED azul quede fijo 3. Ahora pulse “Vol+” y “Vol-” para aumentar o disminuir la sensibilidad. El LED rojo parpadeará indicando que ha pulsado una tecla (cuando alcance el límite de la regulación por arriba o por abajo, el LED deja de parpadear) 4. Pulse brevemente la tecla “Atrás”, el LED azul parpadeará varias veces en función de la sensibilidad activa: 1 parpadeo = VOX desactivado 2 parpadeos = sensibilidad muy baja 3 parpadeos = sensibilidad baja 4 parpadeos = sensibilidad media (por defecto) 5 parpadeos = sensibilidad alta Ahora el LED pasa ahora a rojo continuo (modo “Setup”) y los cambios se confirman. Si es necesario, puede volver a ajustar la sensibilidad repitiendo los pasos desde el punto 2, de lo contrario salga del modo “Setup” haciendo doble click en la tecla “Central”. Una vez que el LED rojo se apague, el LED azul comienza a parpadear. Ahora puede usar el BTX2 FM. Consejo: Un correcto ajuste de la sensibilidad le permitirá aprovechar al máximo las posibilidades del dispositivo. Contra más ruido genere el binomio moto-casco, más baja ha de ser la sensibilidad. En un casco tipo Jet y una “custom” se debe ajustar una sensibilidad baja o muy baja. Por el contrario, en un scooter con casco modular o integral, la sensibilidad deberá ser más alta. Efectúe diversas pruebas hasta que encuentre el ajuste que mejor se adapta a sus condiciones de uso. países, existen claras restricciones legales al respecto. El uso de este dispositivo a un volumen alto de forma habitual, puede producir perdida permanente de audición. Si nota algún tipo de dolor alrededor de la oreja o en interior del oído, reduzca el volumen o interrumpa el uso del dispositivo. . Por favor, utilice este dispositivo con un nivel de volumen seguro. Desactivar el modo VOX (Intercom y teléfono) E Siga los pasos descritos anteriormente pero seleccione la opción de un solo parpadeo (VOX desactivado). Atención: recuerde que, desactivando el Vox, también la respuesta a la llamada deberá hacerse manualmente (pulsando la tecla “Adelante”) Conexión por cable siempre activa Esta función permite que la entrada AUX por cable esté siempre activa, incluso cuando el teléfono o el Intercom están funcionando. Esta función es útil cuando conecta un walkie talkie. Por defecto, esta función está activada. Desactivación: • Entre en modo Setup: • Apague la unidad: mantenga pulsada la tecla “Central” durante 3 segundos, hasta que el LED rojo se quede fijo • Mantenga pulsadas las teclas “Adelante” y “Central” durante 3 segundos. El LED azul parpadea tres veces • Doble click en la tecla “Central” para salir del modo “Setup” y usar el BTX2 FM Activación: Siga el proceso descrito anteriormente; ahora el LED azul parpadea una vez. Para salir del modo “Setup”, haga doble click en la tecla “Central”. Setup y actualización de Firmware BTX2 FM puede configurarse y actualizar el firmware a través del PC, conectándolo con un cable USB estándar. En www.midland.es, encontrará toda la información actualizada sobre su dispositivo y podrá descargarse gratuitamente tanto el software de actualización como eventuales nuevas versiones de firmware. ATENCIÓN: NO CONECTE EL DISPOSITIVO AL PC SIN ANTES HABER INSTALADO CORRECTAMENTE EL SOFTWARE DE ACTUALIZACIÓN Uso y advertencias específicas El uso de este dispositivo disminuirá la capacidad de escuchar otros sonidos y el tráfico. Si no se hace adecuadamente, el uso de este dispositivo mientras conduce puede significar un serio peligro para Usted y los de su alrededor y, en algunos Midland BTX2 FM - 47 E Garantía Certificaciones Europeas CE Esta garantía no limita los derechos del usuario reconocidos en las normativas españolas y europeas aplicables en materia de venta de bienes de consumo. Durante el periodo de garantía se reparará, en un periodo de tiempo razonable, cualquier avería imputable a defectos en materiales, diseño o fabricación, libre de cualquier cargo por reparación. En el caso de que la reparación no sea posible, se facilitará al usuario un equipo o accesorio similar o de mejores características. Esta garantía sólo es válida en el país donde se ha adquirido el producto. La garantía comienza en el momento de la compra por parte del primer usuario final. La garantía es por un período de : • 24 meses para la unidad Bluetooth • 6 meses para accesorios: batería, cargador, dispositivos audio y soportes Cualquier reclamación por el producto afectado, debe de comunicarse dentro de un tiempo razonable desde que se apreció el defecto y, en ningún caso, después de que expire el periodo de garantía. Este producto cumple la normativa CE de acuerdo con la Directiva RTTE (99/5/ EC) y es de uso libre en todos los países del UE. No se permite a los usuarios hacer ningún cambio o modificaciones a la unidad. Las modificaciones que no están aprobadas por el fabricante invalidan la garantía. CTE International SRL, declara, bajo su responsabilidad, que este aparato cumple con lo dispuesto en la Directiva 99/05/CE, del Parlamento Europeo y del Consejo de 9 de marzo de 1999, transpuesta a la legislación española mediante el Real Decreto 1890/2000, de 20 de noviembre. © MIDLAND IBERIA. Queda prohibida la reproducción total o parcial sin el permiso por escrito del titular. Para más información, visite nuestra web: www.midland.es La garantía no cubre: • El deterioro del producto por el uso habitual • Defectos causados por el uso o conexión del Producto con accesorios y/o software no original Midland La garantía quedará invalidada: • En caso de apertura, modificación o reparación por personas no autorizadas por Midland o por el uso de recambios no originales • Si el producto ha sido expuesto a condiciones ambientales para las que no ha sido diseñado • En el caso de corrosión, oxidación o derrame de líquido de las baterías • Si el número de serie ha sido retirado, borrado, alterado o es ilegible Nada se deberá al comprador por el tiempo durante el cual, el equipo esté inactivo, ni podrá solicitar resarcimiento o indemnización por gastos soportados, así como por daños directos o indirectos derivados del uso impropio o diferente pal que ha sido diseñado y comercializado. Para tener acceso a esta garantía, es necesario enviar a nuestro servicio técnico (SAT MIDLAND – C/Cobalt, 48 -08940 Cornellà de Llobregat) el producto afectado (equipo y/o accesorio) con una nota explicativa de la anomalía detectada y la factura original de compra, con el nombre, dirección del distribuidor y la fecha de compra. Encontrará información actualizada en WWW.MIDLAND.ES 48 - Midland BTX2 FM Atención: El adaptador de alimentación es el dispositivo de desconexión del aparato; la base de carga de la corriente debe permanecer cerca del aparato y fácilmente accesible. CTE International SRL, declara, bajo su responsabilidad, que este aparato cumple con lo dispuesto en la Directiva 99/05/CE, del Parlamento Europeo y del Consejo de 9 de marzo de 1999, transpuesta a la legislación española mediante el Real Decreto 1890/2000, de 20 de noviembre”. Caractéristiques principales..................................................................................................................................................50 Spécification technique du Midland BTX2 FM........................................................................................................................50 Rechargement des batteries.................................................................................................................................................50 Description du module et fixation ........................................................................................................................................51 Allumer et eteindre votre Midland BTX2 FM..........................................................................................................................52 “Mode” de fonctionnement..................................................................................................................................................52 Distance maximale...............................................................................................................................................................53 Comment coupler deux modules BTX2 FM.............................................................................................................................53 Comment connecter trois Intercom ensemble.......................................................................................................................53 Talk 2 All – Connexion intercom à d’autre marque................................................................................................................54 Couplage du BTX2 FM aux appareils Bluetooth......................................................................................................................54 Utiliser une radio PMR446 avec câble de connexion...............................................................................................................58 Installation et configuration speciale....................................................................................................................................58 Configuration et mise à jour logiciel......................................................................................................................................59 Utilisez à vos risques............................................................................................................................................................59 Certification de notice européenne CE et informations d’agrément aux fins de sécurité..........................................................59 Midland BTX2 FM- 49 F Sommaire MIDLAND BTX2 FM Basic Intercom System Le BTX2 FM est un système de communication Intercom pour Motards. Son design est très fin et aérodynamique, toutes les fonctions sont facilement utilisable grâce au trois grande touché place sur l’avant du module. Le BTX2 FM est fixé sur le casque à l’aide de la plaque adhésive ou de la pince vissée. Grace à son kit audio ultra plat vous pouvez écouter de la musique de haute qualité pendant la conduite. F Caractéristiques principales ›› Distance d’utilisation de l’Intercom jusqu’à 800 mt ›› Connecter jusqu’à quatre personnes pour la communication intercom (en utilisant la fonction Talk2All, « Parler à tous le monde – Intercom universel »). ›› Connectez votre téléphone pour recevoir, passer des appels et écouter de la musique en stéréo. ›› FM Radio avec RDS ›› Connectez une radio PMR446 avec Bluetooth interne ou externe. ›› Connectez votre GPS pour des indications vocales de navigation. ›› Connexion filaire AUX pour un lecteur MP3 et une radio PMR446. Le Midland BTX2 FM est disponible en deux versions: ›› BTX2 FM Single Kit Intercom avec un seul module ›› BTX2 FM Twin Kit Intercom avec deux modules En fonction du modèle choisi, la bôite contient les éléments suivant: BTX2 FM single ›› 1 Module BTX2 FM ›› 1 Kit audio avec deux oreillettes stéréo, microphone tige ou filaire ›› 1 support avec bande double face pour fixé le module sur le casque ›› 1 support pincé pour fixer sur un casque de moto ›› 1 Câble audio stéréo pour iPod/ ou autres lecteurs MP3 ›› 1 Chargeur murale mini USB BTX2 FM TWIN ›› 2 Modules BTX2 FM ›› 2 Kit audio avec deux oreillettes stéréo, microphone tige ou filaire ›› 2 supports avec bande double face pour fixé le module sur le casque ›› 2 supports pincés pour fixer sur un casque de moto ›› 2 Câbles audio stéréo pour iPod/ ou autres lecteurs MP3 ›› 1 Chargeur murale mini USB avec double sortie Les modules qui composent le kit TWIN sont déjà connectés entre eux et peuvent être utilisé directement en mode Intercom. 50 - Midland BTX2 FM Spécification technique du Midland BTX2 FM Générale: ›› Bluetooth ver. 3.0 stéréo (protocole oreillette/main-libre/A2DP) ›› Système AGC pour le contrôle automatique du volume en fonction du bruit de fond. ›› Déclenchement à la voix (VOX) ou manuel de la communication ›› Touche pour activer: le téléphone, l’Intercom et la connexion filaire ›› Waterproof ›› Batterie Lithium avec 12 heures de temps de parole ›› Temps de rechargement: environ 6 heures Connexion Bluetooth: ›› Avec des modules identiques entre le conducteur et le passager ou de moto à moto, la distance maximale est de 800 mt. Périphériques Bluetooth: ›› Téléphone mobile avec lecteur MP3 stéréo (Protocole A2DP), GPS ›› (Radio PMR446 (avec connexion Bluetooth intégrée ou externe) pour une communication en groupe de moto à moto. Connexions filaires: ›› Pour une entrée audio stéréo (iPod/Lecteur MP3 avec câble optionnel) ›› Pour une radio PMR446 (avec câble optionnel) Attention: Le Midland BTX2 FM a été conçu pour résister à la pluie. Cependant, s’il pleut vérifiez que les capuchons en caoutchouc des connecteurs sont bien en place. Rechargement des batteries Attention: Assurez-vous le module soit totalement chargé avant son utilisation. Avant sa première utilisation pour un rechargement totale il faut laissez le module au moins 8 heures en charge. Charger le module en connectant le chargeur mural dans la prise de rechargement (soulevez le capuchon pour insérer la prise). La LED rouge sur le module clignote pendant le chargement. Laissez en charge jusqu’à ce que le module cesse de clignoter ou que la LED passé au bleu. Quand la charge est complète (La LED rouge ne clignote plus), retirez le module du chargeur. Normalement, après la première utilisation, il faut 6 heures pour un rechargement complet. Attention: à chaque fois que le chargeur mini USB est connecté (ou déconnecté), le module est automatiquement éteint. Pour pouvoir l’utiliser pendant le chargement, il faut allumer le module avec le chargeur déjà connecté. En plus le BTX2 FM a une antenne escamotable sur le dessus pour un maximum de distance. Pour soulever l’antenne, appuyez doucement à l’arrière et l’antenne se relève automatiquement. Description du module et fixation Description du BTX2 FM Pour la rabattre, bascule l’antenne en arrière et appuyez en position fermée. Le BTX2 FM possède 5 touches sur l’avant. Les trois principaux sont : Avancé (sur la gauche), la touché centrale et Reculer (sur la droite). Les deux petites touches sont: Volume + et Volume -. Volume - F Volume + Description du kit audio Forward button Middle button Backward button Description des connexions filaires ›› Jack de charge: Permet de recharger le module à l’aide d’un chargeur standard mini USB. ›› Jack kit audio: Permet de connecter le kit audio (Oreillette stéréo et microphone) ›› Jack Auxiliaire Audio (AUX) 2.5mm : Peut être utilisé pour connecter une source audio tel qu’un iPod/lecteur MP3, ou une radio PMR446 Charger jack Audio kit jack Le système audio comprend deux oreillettes ultra-plates stéréo et deux micros interchangeables, qui sont tous deux fourni avec un support et un câble de connexion. Fixation des oreillettes stéréo Les deux oreillettes stéréo on des adhésifs/ Velcro pour faciliter leur fixation dans votre casque. Attention de ne pas totalement recouvrir vos oreilles avec les oreillettes, vous devez toujours être en mesure d’entendre le trafic et les indications routières. Le microphone peut être fixé dans le casque de deux manières différentes: Microphone tige Placez la pièce adhésive/Velcro entre le support et le casque, afin que le microphone soit place devant votre bouche avec le symbole blanc vers vous. Se type de micro est adapté pour les casques jet ou modulable. Auxiliary audio jack (AUX) Midland BTX2 FM- 51 Microphone filaire Utilisez la pièce adhésive/Velcro et placez le microphone dans votre casque en face de votre bouche. Ce type de microphone est conseillé pour les casques intégraux. Le connecteur miniature vous permet de choisir le microphone en fonction du casque que vous utilisez. Mise en place et retrait de votre Midland BTX2 FM Le BTX2 FM peut être facilement mis en place en le glissant vers le bas sur le support que vous avez choisi (Plaque avec double face ou pince). Le BTX2 FM est maintenue en place grâce au clip de fixation situé dans la section supérieur. Pour détacher le BTX2 FM, appuyez simplement sur le clip de fixation et poussez le module vers le haut. Jack du kit audio Le kit audio doit être raccordé au connecteur central du Midland BTX2 FM à l’aide de la prise coudée (en forme de L). Description de l’installation des supports F Le Midland BTX2 FM peut être fixé sur le casque de deux manières différentes: soit avec la plaque et sont adhésif double face ou avec la pince. Cette méthode permet en toute sécurité de fixer le BTX2 FM sur votre casque et de pouvoir le retirer à tout moment afin de pouvoir le recharger ou le ranger. Plaque avec adhésif double face La plaque de fixation a sur une de ses faces une bande adhésive double face. Pour fixer la plaque sur le casque nettoyez la zone d’application, retirez le film protecteur de l’adhésif double face et appliquer la plaque en maintenant une pression pendant quelques secondes sur la zone nettoyée. Pince Utilisez la clef Allen pour dévisser les deux visse de la plaque et placez la contre plaque entre la coque rigide du casque et la mousse interne. Puis resserrer les deux visse afin de fixé fermement la pince en place. Est inclus dans la pince une cale qui peut être retire pour augmenter le serrage de la pince. 52 - Midland BTX2 FM Allumer et eteindre votre Midland BTX2 FM Allumage: Appuyez et maintenez la touche “Milieu” enfoncée pendant environ 3 secondes jusqu’à ce que le voyant soit BLEU. Extinction: Appuyez et maintenez les touches “Milieu” et “Reculer” enfoncées pendant environ 3 secondes jusqu’à ce que le voyant clignote 3 fois. Ceci évite les erreurs de manipulation (spécialement avec le port de gant). “Mode” de fonctionnement Le BTX2 FM peut fonctionner de trois façons différentes : Intercom, Téléphone et Radio FM. Les 3 touches multi fonctions ont différentes fonctionnalité qui dépendent du mode dans lequel se trouve le module. ›› En “Mode Intercom” les boutons vous permet de gérer la communication avec conducteur/passager ›› En “Mode téléphone” vous pouvez gérez votre téléphone mobile Bluetooth pour passez/recevoir des appels ou écouter de la musique (en stéréo). ›› En mode “Radio FM” vous pouvez écouter votre station radio préférée; chercher une station radio spécifique et la sauver (6 mémoires possibles) Vous pouvez basculer d’un mode à l’autre simplement en appuyant longtemps sur la touche centrale (appuyez pendant 3 secondes). Une annonce vocale indique le mode dans lequel vous vous trouvez. La séquence de basculement est la suivante: ›› Intercom (si un autre module a été connecté) ›› Téléphone (si un téléphone a été connecté) ›› Radio FM Distance maximale Vous pouvez atteindre une distance intercom de 800 mt si l’antenne escamotable est en position haute et et s’il n’y a pas d’obstacle ou d’interférence (Le conducteur doit être toujours à vue). Activation vocale (VOX) Il suffit de commencer à parler, après quelques secondes la communication sera ouvert et restera actif pendant le temps ou vous parlerez. S’il n’y a pas de conversation l’Intercom sera fermé au bout de 40 secondes. Si nécessaire, vous pouvez fermer manuellement l’interphone sans attendre 40 secondes (il suffit de presser la touche centrale). Si besoin, vous pouvez désactiver temporairement la fonction VOX en appuyant sur la touché arrière pendant 7 secondes. Une annonce vocale vous indiquera que la fonction VOX est inactive. Pour la réactiver, appuyant sur la même touche et un Beep vous indique que la fonction est à nouveau active (et reste active aussi si vous éteignez le module). Comment coupler deux modules BTX2 FM Réglage du volume Les deux modules fournis dans la même boîte BTX2 FM, sont déjà liés et prêts à utiliser, ce qui signifie que vous n’avez pas besoin d’effectuer cette procédure. Les modules sont déjà couplés en utilisant le bouton central. Si les appareils ne font pas partie du même kit ou les unités ont été acheté séparément, vous devez d’abord les coupler afin de les utiliser. Pour coupler le BTX2 FM à un autre BTX2 FM, vous devez tout d’abord entrer en mode configuration: ›› Éteignez le module ›› Appuyez sur la touche centrale et maintenez-la pendant 7secondes, jusqu’à ce que le voyant soit rouge fixe. ›› Maintenant, appuyez longuement (3 secondes) la touche centrale. La lumière clignote bleue et rouge. Faites la même chose sur l’autre module, quand l’opération a réussi, sur chaque unité la lumière est bleue fixe pendant une seconde et retourne en mode de configuration (la lumière rouge toujours allumé). ›› Maintenant, la procédure de jumelage est terminé, il vous suffit de quitter le mode d’installation avant de pouvoir utiliser les modules: ›› Double-cliquez sur la touche centrale, la lumière rouge s’éteint et le voyant bleu clignote. Vous pouvez maintenant utiliser votre BTX2 FM. Votre Midland BTX2 FM utilise la technologie AGC, qui ajuste automatiquement le volume d’écoute par rapport aux bruits de fond. Toutefois, il est également possible de régler manuellement le volume au moyen des touches “Volume +” et “Volume -”. Attention: Le volume ne peut être réglé que si une connexion audio est active. Attention: le réglage du volume, par les touvhes (“Volume+” et “Volume-”), ne peut pas être utilisé pour régler le volume de la source audio filaire (ex: MP3 player). Comment connecter trois Intercom ensemble. Une unité BTX2 FM peut être connectée au maximum avec 3 autres unités: quatre au total (trois unités Midland + une Talk2All). Vous pouvez utiliser la touche ou arrière pour connecter/utiliser une unité Midland et la touche avant pour connecter/utiliser la fonction « Parler à tous le monde – Intercom universel ». La touche que vous utiliserez pour coupler le module sera la même utilisée pour activer la communication Intercom. Par example, vous pouvez coupler le passager à la touche centrale et un autre module à la touche arrière. Comment utiliser l’intercom Driver 1 Pour utiliser la fonction Intercom, assurez-vous que les deux modules sont correctement couplés ensembles. Activation manuelle Appuyez sur la touche centrale d’un des deux modules. La communication est activée et reste active jusqu’à ce que vous appuyiez à nouveau sur la touche centrale. L’interphone à besoin de quelques secondes pour s’activer, vous entendez un bip sonore lorsque l’Intercom est ouvert. Passennger 1 Driver 2 Midland BTX2 FM- 53 F Chaque fois que vous allumez l’appareil, le mode par défaut est l’Intercom (s’il a été précédemment lié à un autre module), sinon c‘est le Téléphone (Si un téléphone a été connecté). Si vous souhaitez savoir dans quel mode se trouve le module, appuyez sur “Volume + “ et “Volume –“ ensemble. Une voix annonce le mode en cours d’utilisation. Pour coupler le BTX2 FM avec un autre module BTX2, il faut d’abord entrez dans le mode de configuration: 1. Eteignez le module 2. Appuyez sur la touche centrale et maintenez-la pendant 7 secondes jusqù’à ce que le voyant rouge soit fixe 3. Maintenant, appuyez sur la touche centrale ou arrière pendant 3 secondes : la lumière bleue et rouge se met à clignoter. 4. Répétez la même procédure à l’autre module et, lorsque le couplage a réussi, sur chaque module la lumière bleue est fixe pendant une seconde et retourne en mode de configuration (la lumière rouge fixe). 5. Maintenant la procédure de couplage est terminée, il vous suffit de quitter le mode d’installation avant de pouvoir utiliser les modules. Double-cliquez sur la touche centrale, le voyant rouge s’éteint et le voyant bleu clignotera. Maintenant vous pouvez utiliser votre BTX2 FM. Module déjà occupé Si vous essayez d’ouvrir une connexion Intercom avec une personne qui est déjà occupé avec quelqu’un d’autre (ou qui est au milieu d’une conversation téléphonique), vous entendrez un double bip “occupé”. Attendez un moment et essayez à nouveau, peut-être cette fois ci la «ligne» n’est pas occupé. 2 3 La personne reçoit une demande d’Intercom, est avertie que l’on cherche à le joindre par une voix qui annonce le bouton correspondent à la demande. De cette façon dès la fin de la première conversation, elle peut joindre rapidement la personne qui l’avait demandé (annoncé par la voix). F Couplage du BTX2 FM aux appareils Bluetooth Talk2All - Universal Intercom Dispositivo non Midland Talk 2 All – Connexion intercom à d’autre marque Grace à la fonction “Talk2 All - Universal Intercom” il est maitenant possible de connecter votre BTX2 FM à une autre marque d’intercom disponible sur le marcher. Avec le BTX2 FM entrez en mode “set up”: éteignez le module, appuyez sur la touche centrale et maintenez-la pendant 7secondes jusqu’à ce que le voyant soit rouge fixe, appuyez sur la touche arrière pendnat 3 secondes, le voyant rouge et le voyant bleu clignote. Avec l’autre intercom (pas de la marque Midland) suivez la procédure de connexion avec un téléphone. Pour activer la communication intercom avec le BTX2 FM suivez les instructions “Activation manuelle”; sur l’autre intercom appuyez simplement sur la touche téléphone. Il sera peut être nécessaire d’appuyers sur la touché d’appel 2 fois, en fonction de l’Intercom NON-MIDLAND utilisé. Priorité: Quand vous utilisez cette configuration sur un autre intercom que de marque Midland, il ne sera pas possible de connecter un téléphone sur ce dernier. 54 - Midland BTX2 FM BTX2 FM peut être couplé à d’autres appareils Bluetooth, comme un Téléphone, un Navigateur GPS ou une Radio PMR446 avec Bluetooth intégré ou externe (dongle). La procédure de couplage doit être effectuée en utilisant les boutons « Volume + » ou Volume « Volume - ». › Couplage au bouton « Volume + » : destiné à un Téléphone avec de la musique en stéréo A2DP, un Navigateur GPS avec de l’audio A2DP ou un dongle externe mono/Stéréo A2DP. › Tous les appareils couplés au bouton « Volume + » sont prioritaires et interrompent tous les autres modes de communication (tel que l’Intercom, la Radio FM et la Musique). › Couplage au bouton « Volume - » : destiné à un second téléphone avec audio en mono (Protocole mains libres - PML) pour les navigateurs GPS / détecteurs de Radar et les autres appareils dont l’audio en mono doit toujours être en fond sonore. Attention : Les sources audio A2DP ne sont supportées que sur Vol+. Le second téléphone couplé sur Vol - ne peut supporter que de l’audio mono (PML). Lorsqu’un appareil est couplé aux boutons « Vol + » ou « Vol - » le mode « Téléphone » est activé. ›› Téléphone (Stéréo A2DP) ›› GPS (Stéréo A2DP) ›› Dongle (Stéréo A2DP) ›› Téléphone (PML en Mono) ›› GPS en mono ›› Emetteur-récepteur PMR446 Lorsqu’un téléphone est couplé au « Vol + » ou au « Vol - », le mode « Téléphone » est activé. Un appel entrant est toujours prioritaire, cela signifie que tous les autres modes de communication seront coupés (Intercom, Radio FM, Musique). Si un autre appel entrant parvient sur le second téléphone, vous entendrez un bip qui l’indiquera. Lorsqu’un appareil est couplé aux boutons « Vol + » ou « Vol - » le mode « Téléphone » est activé. Attention: Les sources audio A2DP ne sont supportées que sur Vol+. Le second téléphone couplé sur Vol - ne peut supporter que de l’audio mono (PML). Fonction arrière-plan C’est possible maintenir toujours an arrière-plan la connexion audio du module couplé à la touche ‘Vol –‘. De cette façon la communication Intercom ne sera pas interrompue ; par example avec les indications routières sur le GPS ou la communication radio du G8BT. Pour activer la fonction ‘Arrière-plan’ appuyez longuement sur la touche ‘Vol-‘, l’annonce ‘Background on’ vous confirmera que la fonction est active. Pour désactiver la fonction appuyez longuement de nouveau sur la touche ‘Vol-‘ et l’annonce ‘Background disable’ vous confirmera que la fonction n’est plus active. Par défaut, la fonction Arrière-plan est désactivé. Attention : cette fonction est utilisée seulement pour la radio G8BT ou pour les GPS couplés à la touche ‘Vol –‘ Couplage à un ou plusieurs téléphones Le téléphone mobile peut être couplé au « Vol + » (si le support de l’A2DP en stéréo est nécessaire) ou au « Vol - ». Pour coupler le BT Next Conférence avec un téléphone , il faut d’abord entrez dans le mode de configuration: ›› Éteignez le module ›› Appuyez sur la touche centrale et maintenez-la pendant 7secondes, jusqu’à ce que le voyant soit rouge fixe. ›› Appuyez maintenant pendant 3 secondes sur les boutons « Volume + » ou « Volume - », les lumières bleu et rouge s’allumeront. Après quelques secondes votre téléphone affiche « Midland BTX2 FM ». Suivez la procédure de couplage du téléphone. Si un code PIN est nécessaire il faut entrer “0000” (quatre fois zéro). ›› Lorsque le couplage est réussi, le voyant est bleu fixe pendant une seconde et sort du mode de configuration et passer en mode de travail (la lumière bleue se met à clignoter). ›› Vous pouvez maintenant utiliser votre BTX2 FM avec le téléphone. Comment utiliser le telephone Après avoir couplé votre téléphone au BTX2 FM vous devez basculer en mode “téléphone “ afin de pouvoir l’utiliser. Appuyer longuement sur la touche centrale jusqu’à ce que vous entendiez “Téléphone” vocalement. Maintenant, toutes les trois touches sont dédiées au téléphone (voir la table B). Répondre à un appel Quand vous entendez la sonnerie, vous pouvez répondre de deux manières : Vocalement: Prononcez un mot pour décrocher et parlez. B – Mode téléphone Mode Touche avant (Tél. couplé à ‘Vol+’) Touche centrale Touche arrière (Tél. couplé à ‘Vol-’) Téléphone Court: Composition vocale /accepter Long: rappel du dernier numéro/ ou rejeter appel Long: Changement de mode Court: Composition vocale / accepter ou terminer l’appel si est en cours Long: Rappel du dernier numéro / ou rejeter l’appel Téléphone Court: Chanson suivante Court: Lecture/pause Long: Changement de mode Court: Chanson précédente (pendant la lecture de musique et couplé au « Vol + ») Midland BTX2 FM- 55 F Comment coupler le BTX2 FM avec un telephone Manuellement: Appuyez sur la touche “avant” et parlez. F Rejeter un appel Si vous ne voulez pas répondre vous pouvez laisser sonner le téléphone ou appuyer sur la touche “Avant” quelques secondes (vous entendrez une tonalité de confirmation). Passer un appel Il y a plusieur façon de passer un appel. Depuis le clavier du téléphone : Composez le numéroe sur le clavier de votre téléphone et appuyez la touche appel. Rappeler le dernier numéro composé: Tèl. couplé à ‘Vol+’: Appuyez sur la touche “Avant” pendant 3 secondes de manière à rappeler le dernier numéro (vous entendez une tonalité de confirmation). Tél. couplé à ‘Vol-’: Appuyez sur la touche “Arrière” pendant 3 secondes de manière à rappeler le dernier numéro (vous entendez une tonalité de confirmation). Par commande vocale: Tél. couplé à ‘Vol+’: Appuyez brièvement sur la touche “Avant”. Si votre téléphone supporte la reconaissance vocale, vous entendez un message qui vous invite à prononcer le nom du contact à appeler. Tél. couplé à ‘Vol-’: Appuyez brièvement sur la touche “Arrière”. Si votre téléphone supporte la reconaissance vocale, vous entendez un message qui vous invite à prononcer le nom du contact à appeler Priorité: Les appels ont une priorité haute, ce qui signifie que toutes les communications sont temporairements interrompues pendant la réception d’un appel. Terminer un appel Il y a plusieur façon de terminer un appel: ›› Attendez que votre correspondant raccroche. ›› Appuyez sur la touche “avant” pendant 3 secondes (vous entendez une tonalité de confirmation). ›› Appuyez sur la touche “Fin” de votre téléphone. Utiliser la fonction MP3 de votre téléphone Le téléphone mobile couplé au « Volume + » peut être utilisé comme un lecteur MP3 en stéréo. Le BTX2 FM est totalement compatible avec les protocoles A2DP et AVRCP qui vous permet d’écouter de la musique et de controler à distance votre lecteur. Vous pouvez même utiliser les touches de votre BTX2 FM pour controler les actions suivantes : Lecture, Pause, Avancer et Reculer. 56 - Midland BTX2 FM Avant Lecture/Pause Arrière Contrôles disponibles: ›› Lecture/pause : Appuyez sur la touche “Centrale”. ›› Pour avancer les chansons: Appuyez sur la touche “Avant”. ›› Pour reculer les chansons: Appuyez sur la touche “Arrière”. Priorité: L’écoute de la musique à la priorité la plus basse. C’est pourquoi elle sera toujours interrompue par toute autre communication. Attention: Vous ne pouvez contrôler la musique en stéréo A2DP qu’uniquement en «Mode téléphone””. Comment connecter le BTX2 FM à un GPS En général il est possible de connecter le BTX2 FM à tous les GPS pour moto qui supporte le protocole Bluetooth “headset”. Pour connecter le BTX2 FM a un GPS, vous devez d’abord entrez en configuration : 1. Éteignez le module. 2. Appuyez sur la touche centrale et maintenez-la pendant 7secondes, jusqu’à ce que le voyant soit rouge fixe. 3. - Maintenant appuyez sur la touche “Volume +“ pendant 3 secondes le voyant clignote alors rouge et bleu. Suivez la procédure de connexion de votre GPS. Si un code pin est nécessaire vous devez saisir “0000” (4 fois zéro). 4. Quand la connexion à réussi, le voyant reste bleu fixe pendant une seconde puis quitte le mode de configuration. (Le voyant clignote bleu). Vous pouvez maintenant utiliser votre BTX2 FM et votre GPS les indications sonores sont toujours en arrière fond. Comment écouter la radio FM Le récepteur radio FM est intégré dans l’appareil. Vous avez juste besoin de basculer en mode “Radio FM” afin de l’utiliser. Appuyer longuement sur la touche centrale jusqu’a ce que vous entendiez “radio FM” vocalement. Maintenant, toutes les trois touches sont dédiées a la Radio FM (voir la table C). Attention: Appuyez brièvement sur la touche “Avant” ou “Arrière” pour chercher la station de radio FM. Lorsque vous appuyez longuement sur la touche avant ou arrière, vous scannez vers le haut ou le bas les 6 stations enregistrées. Un bip sonore sépare chaque FM radio avec Intercom Lorsque vous êtes en mode “Radio FM” vous ne pouvez pas ouvrir manuellement l’Intercom, vous pouvez uniquement utiliser la fonction VOX avec le module connecté par la touche centrale. Pour une activation manuelle vous devez basculer en mode « Intercom Activer/desactiver la Radio FM Pour désactiver la radio FM, maintenez appuyé sur la touche centrale pendant 7 secondes (vous écouterez l’annonce vocale ‘FM Radio disable’). Pour activer la radio FM de nouveau, maintenez appuyé sur la touche avant pendant 7 secondes (l’annonce vocale annoncera ‘FM radio’) Connexion à une radio PMR446 avec Bluetooth intégré ou externe La radio PMR446 doit être connecté au bouton “Volume –“, ainsi si la fonction ‘Arrière-plan’ est active la radio PMR446 est toujours en fond même pendant une communication Intercom. Attention: Si vous souhaitez connecter un GPS en plus de la radio PMR446, vous devez connecter votre GPS à la touche « volume + ». Dans ce cas les annonces GPS interrompent toutes les autres communications (Intercom, Radio FM, Musique). Quand le GPS est connecté à la touche “Volume +” le mode “Téléphone” est activé. Comment coupler une radio PMR446 avec Bluetooth intégré ce que le voyant rouge soit allumé en permanence ›› Maintenant appuyez sur la touche “Volume +“ pendant 3 secondes le voyant clignote alors rouge et bleu. ›› Suivez la procédure de connexion expliquée dans le manuel de la radio. Attention: Si vous coupler à la radio G8E-BT, des que le BTX2 FM a terminé le couplage (seulement la led bleu clignote), vous devez suivre cette procédure pour activer la connexion Bluetooth: ›› Allumez et éteignez le G8E-BT et appuyez la touche “BT” pour 3 secondes. ›› Suivez la même procédure chaque fois que vous devez connecter le G8E-BT au BTX2 FM (il n’est pas nécessaire répéter de nouveau le couplage) Assurez vous que la fonction “toujours en arrière plan “ soit active, de manière à garder la radio toujours en arrière plan même si vous parler à travers l’Intercom. Comment utiliser l’entrée filaire Votre Midland BTX2 FM est également fourni avec une entrée filaire audio (AUX), qui peut être utilisé pour connecter une source audio, comme un iPod (ou tout autre lecteur MP3) ou un émetteur-récepteur PMR446 pour communiquer en groupe ou pour une augmentation de la couverture. Écouter de la musique F station enregistrée et un double bip se fait entendre lorsque la dernière ou la première station enregistrée est atteint. Pour enregistrer la station que vous écoutez, appuyez sur la touche avant et arrière en même temps pendant 3 secondes. Vous entendez un bip de confirmation. La station est enregistrée après la dernière mémoire utilisée. Grace au système RDS, la radio FM choisi le signal le plus puissant disponible pour la station de radio que vous souhaitez écouter. Le système RDS est désactivée par défaut, si nécessaire, vous pouvez activer / désactiver le RDS en appuyant sur la touche “Volume +” et “Volume -”pendant 3 secondes lorsque la radio est allumée Pour écouter de la musique à partir de l’entrée filaire, branchez la source audio en utilisant le câble optionnel, le réglage du volume, par les touches (“Volume+” et “Volume –“), ne peut pas être utilisé pour régler le volume de la source audio filaire, ce qui signifie que vous avez seulement besoin d’ajuster le volume de votre iPod / lecteur MP3 à un niveau qui vous permettra d’écouter de la musique à vitesse normale. Attention: Ne régler jamais le volume de votre lecteur MP3 au maximum. Astuce: Nous vous recommandons d’effectuer quelques tests de réglage du volume de votre iPod / lecteur MP3 à vitesse normale, afin que le volume du casque soit adapté à vos besoins. Le système AGC va automatiquement augmenter le volume à vitesse plus élevée. Prenez note afin de vous rappeler ce paramétrage pour de futurs voyages. Si votre radio PMR446 possède le Bluetooth intégré (tel que le G8E-BT), vous devez connecter votre radio à l’aide de la touche “Volume +“ : ›› Éteignez l’appareil ›› Appuyez et maintenez enfoncé la touche “centrale” environ 7 secondes, jusqu’à C – Mode RADIO FM Mode Radio FM Touche avant Court: Recherche station avant Long: enregistrer recherche Touche centrale Court: On/off radio Long: Changement de mode Touche arrière Court : Recherche station avant Long: Enregistrer recherche Midland BTX2 FM- 57 Activer/désactiver l’entrée filaire Si nécessaire l’entrée filaire peut être activé ou désactivé: ›› Activation / désactivation: appui long sur la touche “arrière” (vous entendrez un bip sonore de confirmation pour l’activation et deux bip pour la désactivation). F Utiliser une radio PMR446 avec câble de connexion Pour être en mesure d’utiliser l’émetteur-récepteur, il est nécessaire d’acheter un câble spécifique (vendu séparément) pour relier la radio à la prise jack 2.5mm AUX du votre Midland BTX2 FM. Certains fabricants de radios utilisent une configuration de broches différentes, c’est pourquoi nous recommandons de demander à votre revendeur quel câble est le mieux adaptée à vos besoins. Pour communiquer via la radio connectée, appuyez sur le « Push To Talk » (PTT) pour parler et le relâcher pour écouter. Il n’est pas possible de parler et d’écouter simultanément. Le câble relié à l’émetteur-récepteur a normalement un bouton PTT qui peut être placé sur le guidon de votre vélo ou tenue à la main (Si vous êtes le conducteur ou le passager). Réglez le volume de l’émetteur-récepteur à vos besoins, en se rappelant que le réglage du volume est contrôlé par le système automatique AGC et qu’il sera donc automatiquement augmenté par rapport au bruit de fond. Si vous souhaitez utiliser un émetteur-récepteur PMR446 pour les communications de groupe et en même temps maintenir la fonction Intercom entre deux dispositifs BTX2 FM ou plus, vous devez vous rappeler que chaque fois que vous parlez avec l’émetteur-récepteur PMR 446 (en appuyant sur la touche PTT), vous allez également activer l’Intercom vers le BTX2 FM connecté à la touche “centrale” (grâce à la fonction VOX). Désactiver la fonction VOX, comme expliqué dans la section précédente, vous assure que l’intercom ne sera pas automatiquement activé lorsque vous parlez avec la PMR446. Pour ouvrir la fonction Intercom lorsque vous utilisez cette configuration, vous devrez appuyer sur la touche “centrale” manuellement. Attention! Si vous désactivez la fonction VOX, vous ne pourrez répondre aux appels téléphoniques entrants que en appuyant sur la touche “Avant”. Installation et configuration speciale Remise à zéro Parfois, il peut être nécessaire de supprimer toutes les références de couplage enregistrées dans le BTX2 FM (réinitialisation). Pour effectuer cette opération vous devez d’abord entrer en mode configuration: ›› Éteignez l’appareil ›› Appuyez et maintenez enfoncé la touche “centrale” environ 7 secondes, jusqu’à 58 - Midland BTX2 FM ce que le voyant rouge soit allumé en permanence. ›› Appuyez simultanément sur les touches “Volume +”et “Volume -” pendant 3 secondes. La lumière bleue s’allume pendant 1 sec. ›› Double cliquez sur la touche “centrale” pour quitter le mode “Setup” et utiliser le BTX2 FM. Cette procédure supprime tous les appareils couplés par Bluetooth et stockées dans la mémoire, il est donc possible de commencer une nouvelle session “propre” de couplage. Retour en configuration d’usine Parfois, il peut être nécessaire de revenir aux réglages d’usine, pour remettre à zéro toutes les modifications et la configuration déjà faite pour avoir un module “propre”. Pour effectuer cette opération vous devez d’abord entrer en mode configuration ›› Éteignez l’apparei. ›› Appuyez et maintenez enfoncé la touche “centrale” environ 7 seconde, jusqu’à ce que le voyant rouge soit allumé en permanence. ›› Appuyez simultanément en maintenant enfoncée les trois touches “Avant” - “centrale” - “arrière” pendant 3 secondes. La lumière bleue s’allume pendant 1 sec. ›› Double cliquez sur la touche “centrale” pour quitter le mode “Setup” et utiliser le BTX2 FM. Activer/désactiver la fonction VOX (Intercom et téléphone) La fonction Intercom peut être activée manuellement ou vocalement (VOX). L’activation du VOX est influencé par le bruit de fond et donc par la vitesse. Pour des résultats optimaux, il est possible de choisir l’un des quatre niveaux de sensibilité du microphone: haute, moyenne, faible ou très faible. Le réglage par défaut du BTX2 FM est “faible “. Il est également possible de désactiver la fonction VOX pour activer l’Intercom et appel téléphonique fonctionnalités répondant uniquement en mode manuel. Régler la sensibilité du microphone (VOX) 1. Pour cette operation, vous devez entrer dans le mode “Setup”. Avant tout, èteignez l’appareil 2. Appuyez et maintenez enfoncé la touche “centrale” environ 7 seconde, jusqu’à ce que le voyant rouge soit allumé en permanence. 3. Votre BTX2 FM est maintenant “En mode Setup”. 4. Appuyez sur la touche “Arrière” jusqu’à ce que le voyant passé du rouge fixe à bleu fixe. 5. Maintenant, appuyez sur “Volume +” ou “Volume -“ pour augmenter ou réduire la sensibilité. A chaque fois que vous appuyez sur une touche de volume le voyant clignote rouge pour confirmer. Quand vous atteignez la limite supérieure ou inférieure le voyant ne clignote plus. 6. Appuyez une nouvelle fois sur la touche “Arrière”, le voyant clignote bleu plusieurs fois, afin de connaitre le niveau de sensibilité choisi: Un flash = VOX désactivé 2 fois = Sensibilité très basse 3 fois= Sensibilité basse 4 fois= Sensibilité moyenne (Réglage par défaut) 5 fois = Sensibilité haute 7. Le voyant est revenu au Rouge fixe (“Mode Setup”) et les changements sont confirmés. 8. Si besoin, vous pouvez à nouveau régler la sensibilité en repentant les étapes depuis le point 1, sinon quittez le mode configuration en double cliquant sur la touche “centrale”. On fois le voyant rouge éteint, le voyant clignote bleu. Vous pouvez utiliser le BTX2 FM. Utilisez à vos risques L’utilisation de cet appareil altère votre capacité à entendre d’autres sons et d’autres personnes autour de vous. Écouter de la musique ou parler au téléphone vous empêche d’entendre les autres autour de vous. L’utilisation de ces équipements pendant la conduite peut endommager vous et les autres ; dans certains lieux n’est pas autorisé. L’utilisation à un volume élevé peut entraîner une perte auditive permanente. Si vous entendez un sifflement dans l’oreille ou toutes autres écoutes douloureuse associée, réduisez le volume ou cessez d’utiliser cet appareil. Avec l’utilisation continue à volume élevé, vos oreilles s’habituent au niveau sonore, ce qui peu causer des dommages permanents à votre audience. S’il vous plaît utiliser cet appareil à un niveau de volume raisonnable. Désactiver la fonction VOX (Intercom et téléphone) Connexion filaire toujours en arrière plan Cette fonctionnalité vous permet de garder la connexion filaire toujours active, même lorsque le téléphone ou l’Intercom est ouvert. Cette fonctionnalité peut être utile lorsque vous vous connectez un émetteur-récepteur PMR446. Par défaut cette fonction est active. Désactiver: ›› Entrez en mode “Setup”: ›› Éteignez l’appareil ›› Appuyez et maintenez enfoncé la touche “centrale” environ 7 seconde, jusqu’à ce que le voyant rouge soit allumé en permanence. ›› Appuyez sur la touche “avant” et “centrale” pendant 3 secondes. Le voyant clignote bleu deux fois. ›› Double cliquez sur la touche “centrale” pour quitter le mode “Setup” et utiliser le BTX2 FM. Activer: ›› Suivez la même procédure que précédemment, maintenant le voyant clignote bleu une fois. ›› Double cliquez sur la touche “centrale” pour quitter le mode “Setup”. Garantie La garantie s’appliquant a l’appareil principal est d’une durée de 24 mois ; elle est de 6 mois pour les accessoires (batteries, chargeurs, antennes, casques d’écoute). Pour davantage d’informations au sujet de la garantie, veuillez vous rendre sur le site : www.midlandradio.eu F Suivez toute la procédure décrite dans les étapes précédentes et choisissez l’option un flash (VOX désactivé). Certification de notice européenne CE et informations d’agrément aux fins de sécurité Ce produit porte le marquage CE conformément à la directive RTTE (99/5/CE) et peut être librement utilisé dans tous les pays de l’UE. Il est interdit aux utilisateurs d’effectuer des changements ou des modifications sur le dispositif. Les modifications qui ne sont pas expressément approuvées par le producteur rendent nulle la garantie. Pour de plus amples informations, veuillez visiter notre site Internet: www.cte.it Configuration et mise à jour logiciel Il est possible de configurer et de mettre à jour le logiciel embarqué du BTX2 FM en utilisant la connexion USB vers votre PC. Sur le site web Midland www.midlandeurope.com à la page BTX2 FM vous pouvez trouver le logiciel Pc et le firmware pour la mise à jour. ATTENTION NE PAS CONNECTER LE MODULE AU PC AVANT D’AVOIR TELECHARGER ET INSTALLE LE LOGICIEL Midland BTX2 FM- 59 F FCC Compliance Information Conformément à la réglementation d’Industrie Canada, le présent émetteur radio peut fonctionner avec une antenne d’un type et d’un gain maximal (ou inférieur) approuvé pour l’émetteur par Industrie Canada. Dans le but de réduire les risques de brouillage radioélectrique à l’intention des autres utilisateurs, il faut choisir le type d’antenne et son gain de sorte que la puissance isotrope rayonnée équivalente (p.i.r.e.) ne dépasse pas l’intensité nécessaire à l’établissement d’une communication satisfaisante.” Cet émetteur-récepteur radio IC: 3690A-BTX2 FM a été approuvé par Industrie Canada pour fonctionner avec les types d’antennes énumérées ci-dessous avec le gain maximal admissible et nécessaire antenne d’impédance pour chaque type d’antenne indiqué. Types d’antennes ne figurent pas dans cette liste, ou les antennes ayant un gain supérieur au gain maximum indiqué pour ce type, sont strictement interdites pour une utilisation avec cet appareil. “Cet équipement est conforme à l’exposition aux rayonnements IC limites établies pour un environnement non contrôlé. Cet équipement doit être installé et utilisé avec un minimum de 20 cm de distance entre le radiateur et votre corps. “Ce dispositif est conforme à la norme de l’industrie RSS exempts de licence (s). Son fonctionnement est soumis aux deux conditions suivantes: (1) cet appareil ne peut pas provoquer d’interférences et (2) cet appareil doit accepter toute interférence, y compris les interférences qui peuvent causer un mauvais fonctionnement du dispositif.” “Le présent appareil est conforme aux CNR d’Industrie Canada applicables aux appareils radio exempts de licence. L’exploitation est autorisée aux deux conditions suivantes : (1) l’appareil ne doit pas produire de brouillage, et (2) l’utilisateur de l’appareil doit accepter tout brouillage radioélectrique subi, même si le brouillage est susceptible d’en compromettre le fonctionnement.” “Cet équipement est conforme à l’exposition aux rayonnements Industry Canada limites établies pour un environnement non contrôlé “ 60 - Midland BTX2 FM Características principais......................................................................................................................................... 62 Especificações técnicas do Midland BTX2 FM............................................................................................................. 62 Carregar as baterias................................................................................................................................................ 63 Descrição do aparelho e sistema de fixação.............................................................................................................. 63 Ligar e desligar o seu Midland BTX2 FM.................................................................................................................... 64 “Modo” de operação................................................................................................................................................ 65 Distância máxima................................................................................................................................................... 65 Como emparelhar duas unidades BTX2 FM................................................................................................................ 65 Compatibilidade com outras unidades da linha Midland BT....................................................................................... 66 Talk 2 All - Emparelhar a um intercomunicador de marca diferente............................................................................ 66 Emparelhamento do BTX2 FM a dispositivos Bluetooth..........................................................................................................67 Suporte para anúncio de voz estéreo (A2DP)............................................................................................................. 67 Como utilizar a entrada de áudio com fios................................................................................................................ 69 Como ouvir o Rádio FM............................................................................................................................................ 70 Rádio FM com intercomunicador.............................................................................................................................. 70 Como Ativar/Desativar o rádio FM............................................................................................................................ 70 Instalação e configurações especiais........................................................................................................................ 71 Instalação e actualização de firmware..................................................................................................................... 72 Utilize por sua própria conta e risco.......................................................................................................................................72 Garantia..............................................................................................................................................................................72 Informação de autorizações de segurança e de certificação de aviso CE europeu.....................................................................72 Midland BTX2 FM - 61 P Sommario MIDLAND BTX2 FM Sistema intercomunicador avançado O BTX2 FM é uma solução de sistema intercomunicador para motociclistas. O desenho é muito elegante e aerodinâmico, todas as funções principais são fáceis de utilizar graças aos três botões grandes colocados na zona dianteira do aparelho. O BTX2 FM é fixado no capacete utilizando a placa adesiva ou o prendedor de parafuso. Graças ao kit de áudio com altifalantes ultra finos pode desfrutar de música estéreo de grande qualidade enquanto conduz. Características principais ›› Intercomunicação de condutor-passageiro ou de mota a mota (800 m). ›› Conecte até 4 pessoas para comunicação com intercomunicador (usando o intercomunicador Talk2All-Universal) ›› Ligação do seu telefone para receber e efectuar chamadas telefónicas e ouvir música estéreo ›› Rádio FM com RDS ›› Ligação do seu GPS para indicação de rua por voz ›› Ligação para rádio PMR446 com Bluetooth externo ou interno ›› Ligação com fios AUX para leitor de MP3 e rádio PMR446 ›› Programação e actualização do firmware através de ligação USB a um computador P O Midland BTX2 FM encontra-se disponível em duas versões: ›› Kit de intercomunicador BTX2 FM único com apenas um aparelho ›› Kit de intercomunicador BTX2 FM Twin com dois aparelhos Dependendo do modelo adquirido, a embalagem contém os seguintes artigos: BTX2 FM único ›› 1 aparelho de comunicação BTX2 FM ›› 1 kit de áudio com dois altifalantes estéreo, microfone com haste e microfone com fio ›› 1 placa com tira bi-adesiva para fixar o aparelho no capacete ›› 1 prendedor para fixar o aparelho no capacete ›› 1 cabo de áudio estéreo para iPod/ou outros leitores de MP3 ›› 1 fonte de alimentação para montagem na parede miniUSB BTX2 FM Twin ›› 2 aparelhos de comunicação BTX2 FM ›› 2 kits de áudio com dois altifalantes estéreo, microfone com haste e microfone com fio ›› 2 placas com tira bi-adesiva para fixar o aparelho no capacete ›› 2 prendedores para fixar o aparelho no capacete ›› 2 cabos de áudio estéreo para iPod/ou outros leitores de MP3 62 - Midland BTX2 FM ›› 1 fonte de alimentação para montagem na parede miniUSB com ficha dupla As unidades incluídas no kit TWIN já estão emparelhadas e podem portanto ser utilizadas imediatamente no modo de intercomunicador. Especificações técnicas do Midland BTX2 FM Geral: ›› Bluetooth versão 3.0estéreo (Auscultador/Mãos livres/Protocolo A2DP) ›› O sistema AGC controla automaticamente o volume em relação ao ruído de fundo ›› Activação de comunicações manuais ou por voz (VOX) ›› Controlos manuais para permitir o uso de: telefone, intercomunicador e ligação com fios ›› Completamente à prova de água ›› Bateria de lítio com 12 horas de tempo de conversação ›› Tempo de recarregamento: cerca de 6 horas Ligações Bluetooth: Com dispositivo idêntico para modo de intercomunicação de condutor a passageiro ou de mota a mota Dispositivos Bluetooth: ›› telemóvel com leitor MP3 estéreo (protocolo A2DP), GPS (Garmin Zumo e TomTomRider 1 e 2) ›› emissores-receptores PMR446 (com ligação Bluetooth integrada ou externa) para comunicações em grupo de mota a mota Ligações com fios: ›› para entrada de áudio estéreo, como um iPod/leitor de MP3 (com cabo opcional) ›› Para emissores-receptores PMR446 (com cabo opcional) Atenção: O Midland BTX2 FM foi concebido para suportar chuva e água. Contudo, se estiver a chover, verifique sempre se as coberturas de borracha que protegem as tomadas estão introduzidas completamente. Carregar as baterias Atenção: assegure-se de que as baterias estão completamente carregadas antes de usar. Deixe estar a carregar durante 8 horas antes da primeira utilização do aparelho. Carregue as baterias inserindo o carregador de parede na tomada de carregamento (levantando a protecção de borracha para inserir a ficha). O LED vermelho na unidade começa a piscar quando o carregamento tiver início. Deixe que o auricular carregue até que a unidade páre de piscar ou que o LED azul se acenda. Quando a carga estiver completa (o LED vermelho não está a piscar), retire o auricular do carregador. As cargas normais, posteriores, serão de cerca de 6 horas. Atenção: cada vez que a ficha de recarga mini USB é introduzida (ou retirada), o dispositivo é automaticamente desligado. Para o utilizar enquanto estiver a carregar, deve ligar o dispositivo com a ficha já inserida. Charger jack Audio kit jack Auxiliary audio jack (AUX) Para além disso, o BTX2 FM tem uma antena desdobrável na parte superior para um desempenho de alcance máximo. Para levantar a antena, pressione suavemente para trás e a antena levantar-se-á automaticamente. Descrição do aparelho e sistema de fixação Descrição do BTX2 FM O BTX2 FM tem cinco botões na zona dianteira; os três botões grandes principais são botões multifunções: o botão “Forward” (à esquerda), o botão “Middle” e o botão “Rear” (à direita), os dois botões redondos pequenos são o Volume + (aumentar o volume) e o Volume - (diminuir o volume). Volume - Para fechar a antena basta pressionar para baixo e certificar-se de que a coloca na posição fechada. P Volume + Forward button Middle button Backward button Descrição das ligações com fios Descrição do kit de áudio Pode encontrar três ligações para ligação com fios no fundo do dispositivo: Tomada de carregador: permite-lhe recarregar a unidade utilizando uma fonte de alimentação mini USB padrão Tomada de kit de áudio: permite-lhe ligar um kit de áudio (microfone e auricular estéreo) Tomada de áudio auxiliar (AUX): pode ser utilizada para ligar uma fonte de áudio como, por exemplo, um iPod/leitor de MP3 ou emissor-receptor PMR446 O sistema de áudio inclui dois altifalantes estéreo ultraplanos e dois microfones intercomutáveis, os quais são ambos fornecidos com um suporte e uma ligação com fios.Fixar os altifalantes estéreo Os dois altifalantes estéreo têm uma tira adesiva/de velcro que ajuda na sua fixação ao capacete. Midland BTX2 FM - 63 Tenha cuidado para não tapar completamente os ouvidos com os altifalantes, dado que tem sempre de poder escutar o som e as suas indicações de trânsito. O microfone pode ser fixado no capacete de duas maneiras: interior do prendedor está incluído um pequeno espaçador de plástico, que pode ser removido para apertar melhor o prendedor caso seja necessário. Microfone com haste Coloque a secção com a tira adesiva/de velcro entre o almofadado e o canto rígido do capacete, de modo a que o microfone esteja posicionado correctamente em frente da boca e a que o símbolo branco esteja virado para a boca. Este tipo de microfone é adequado para capacetes abertos e de viseira de levantar. Microfone com fios Utilizando a tira adesiva/de velcro, coloque o microfone no interior do capacete em frente da boca. Este tipo de microfone é mais adequado para capacetes integrais. O mini conector no microfone permite-lhe escolher o microfone que melhor se adequa ao capacete que está a utilizar. P Tomada de kit de áudio O kit de áudio deve então ser ligado à tomada central da unidade Midland BTX2 FM utilizando o conector em forma de “L”. Instalar e remover o seu Midland BTX2 FM O BTX2 FM pode ser instalado facilmente no capacete deslizando-o para baixo de modo a que encaixe na ranhura do dispositivo de fixação seleccionado (placa com tira bi-adesiva ou prendedor). O BTX2 FM é mantido na sua posição graças ao prendedor de fixação localizado na secção superior (A). Para desprender o BTX2 FM, basta pressionar o prendedor de fixação e empurrar a unidade para cima. Descrição dos suportes de instalação O Midland BTX2 FM pode ser fixado no capacete de duas maneiras: Quer através da utilização da placa com a tira bi-adesiva ou com o prendedor. Estes métodos permitem-lhe “fixar” com segurança a unidade BTX2 FM no seu capacete e removê-la em qualquer altura para a poder recarregar ou guardar. Placa com tira bi-adesiva A placa de fixação tem uma tira bi-adesiva num dos seus lados. Para fixar a placa na sua posição, limpe a área de aplicação na superfície do capacete, retire a película bi-adesiva e coloque a placa de fixação no capacete mantendo-a em contacto com a superfície durante alguns segundos. Prendedor de parafuso Utilizando a chave sextavada, desaperte os dois parafusos no prendedor e coloque a placa traseira entre o almofadado do capacete e a protecção rígida externa. A seguir, aperte os dois parafusos de modo a fixar firmemente o prendedor na sua posição. No 64 - Midland BTX2 FM Ligar e desligar o seu Midland BTX2 FM Ligar o aparelho: pressione e mantenha pressionado o botão “Middle” (meio) durante cerca de 3 segundos até que o indicador AZUL se acenda. Desligar o aparelho: pressione e mantenha pressionados simultaneamente os botões “Middle” (meio) e “Rear” (retroceder) durante cerca de 3 segundos até que o indicador VERMELHO pisque 3 vezes, diminuindo assim a probabilidade de desligar o aparelho acidentalmente (principalmente quando estiver a utilizar luvas). A BTX2 FM pode operar em três “modos” principais: Intercomunicador, Telefone e rádio FM. Os 3 botões multifuncionais podem ter funcionalidades diferentes dependendo de qual o modo em que a unidade se encontra nesse momento. ›› No ““modo de intercomunicador” os botões do meio deixam-no gerir as comunicações entre o condutor e o passageiro. ›› No “modo de telefone” pode gerir o seu telemóvel Bluetooth para efectuar/ receber uma chamada telefónica ou para ouvir música (em modo estéreo). Utilize o seu telefone de forma responsável e segura. ›› No “Modo Rádio FM” pode ouvir a sua estação de rádio preferida em estéreo, procurar por uma estação de rádio específica e memorizá-la (estão disponíveis 6 memórias). Basta pressionar o botão “Middle” (meio) durante 3 segundos para mudar (alternar) de um modo para outro. Um anúncio de voz irá indicar em que modo se encontra. A sequência de alteração é a seguinte ›› Modo de intercomunicador (se tiver sido emparelhada outra unidade) ›› Modo de telefone (se tiver sido emparelhado um telefone) ›› Rádio FM Cada vez que ligar a unidade, o modo predefinido é o de intercomunicador (se tiver sido emparelhada previamente a outra unidade), caso contrário será o modo de telefone (se tiver sido emparelhada a um telefone). Se necessitar de saber em que modo a unidade se encontra actualmente, basta pressionar os botões “Volume +” e “Volume –” em conjunto. Um anúncio de voz irá indicar o modo actual. Distância máxima Pode alcançar uma distância de intercomunicação de 800 mt se a antena desdobrável estiver levantada e se estiver em linha de vista sem obstruções e interferências (os motociclistas devem estar sempre à vista). Como emparelhar duas unidades BTX2 FM As duas unidades fornecidas na mesma caixa BTX2 FM já estão emparelhadas e prontas a utilizar, o que significa que não é necessário efectuar este procedimento. A unidade já está emparelhada através de utilização do botão “Middle” (meio). Se os dispositivos não constarem no mesmo kit ou se as unidade tiverem sido adquiridas separadamente, primeiro tem de emparelhá-las de modo a poder utilizá-las. Para emparelhar o BTX2 FM a outra unidade BTX2 FM Para emparelhar o BTX2 FM a outra unidade BTX2 FM, tem primeiro de entrar no modo de programação: 1. desligue o aparelho. 2. Pressione e mantenha pressionado o botão “Middle” (meio) durante cerca de 7 segundos até que a luz vermelha esteja permanentemente ligada. 3. Pressione agora o botão “Middle” (meio) durante 3 segundos. A luz vermelha e a azul irão piscar. 4. Realize o mesmo procedimento na outra unidade, quando emparelhadas com êxito, cada unidade terá a luz azul acesa durante um segundo e depois voltará ao modo de programação (luz vermelha sempre acesa). 5. Agora que o procedimento de emparelhamento está completo, necessita apenas de sair do modo de programação antes de poder utilizar as unidades: 6. Efectue duplo clique no botão “Middle” (meio), a luz vermelha irá desligar-se e a luz azul irá começar a piscar. Pode agora utilizar o seu BTX2 FM. Como utilizar o intercomunicador com duas unidades Para utilizar a funcionalidade de intercomunicador, certifique-se que ambas as unidades estão ligadas e emparelhadas correctamente. Atenção: para uma comunicação de intercomunicador entre o motociclista e o passageiro não é preciso manter a antena desdobrável na posição para cima. Para uma intercomunicação mota a mota a antena tem de estar na posição para cima. Activação manual Pressione o botão “Middle” (meio) numa das duas unidades. A comunicação é activada e permanece activa até que pressione novamente o botão “Middle” (meio). O intercomunicador necessita de alguns segundos para activar; irá ouvir um sinal sonoro quando o intercomunicador estiver activado. Activação por voz (VOX) Basta começar a falar e após alguns segundos a comunicação será activada e irá permanecer activa durante o tempo que estiver a falar. Se não existir nenhuma conversação, o intercomunicador é desactivado ao fim de 40 segundos. Se necessário, pode desactivar manualmente o intercomunicador sem esperar 40 segundos (basta pressionar o botão “Middle” (meio). Se necessário, pode desativar a função VOX, simplesmente pressionando o botão de Retroceder por 7 seg. Um anúncio de voz irá avisá-lo quando o VOX estiver desativado. Para ativar a função VOX novamente, basta pressionar o mesmo botão e um anúncio de voz irá avisá-lo de que o VOX está ativo. Esta configuração é memorizada, também, se desligar a unidade. Atenção: a activação por voz (VOX) pode abrir a comunicação de intercomunicador apenas à unidade que foi emparelhada com o botão “Middle” (meio). Se optar por utilizar um botão diferente (“Rear” (retroceder) ou ), apenas poderá activar o intercomunicador manualmente. Ajustar o volume O seu Midland BTX2 FM utiliza tecnologia AGC, a qual ajusta automaticamente o volume de audição em relação ao ruído de fundo. Contudo, também é possível ajustar o volume manualmente através da utilização dos botões “Volume +” e “Volume -”. Midland BTX2 FM - 65 P “Modo” de operação Atenção: o volume só pode ser ajustado se a conexão de áudio estiver activa. Atenção: os botões de volume (Vol + e Vol -) não podem ser utilizados para ajustar o volume de uma fonte de áudio com ligação por fio. O sistema AGC aumenta automaticamente o volume em velocidades mais elevadas. Driver 1 Compatibilidade com outras unidades da linha Midland BT O BTX2 FM é compatível com BT Next Conference e BTX1 FM. Quando emparelhado a distância máxima do intercomunicador é definida a partir o mais baixo possível. O BTX2 FM é compatível com a linha anterior de Midland BT (BT Next, BTX2 e BTX1) somente se atualizado com a versão de firmware 2014. Como emparelhar BTX2 FM a mais de 2 unidades P Uma unidade BTX2 FM pode ser emparelhada com um máximo de três outras unidades BT, o que significa 4 no total (três unidades Midland + um Talk2All). Pode usar o botão de Retroceder e “Middle” (meio) para emparelhar uma unidade Midland e pode usar o botão “Avançar” para emparelhar a funcionalidade “Talk2All-Universal Intercom”. O mesmo botão que usou para emparelhar a unidade também serve para abrir/ fechar a comunicação do intercomunicador. Por exemplo, pode emparelhar o seu passageiro ao botão “Middle” (meio) e outra motocicleta ao botão Retroceder. Para emparelhar o BTX2 FM a outra unidade BTX2 FM, primeiro deve entrar no modo de configuração: 1. Desligar a unidade 2. Pressionar e manter pressionado o botão “Middle”(meio) durante cerca de 7 segundos até que a Luz vermelha esteja permanentemente ligada. 3. Agora, pressionar o botão “Middle”(meio) ou Retroceder durante 3 segundos. A luz azul e vermelha irão piscar. 4. Realizar o mesmo procedimento na outra unidade, quando emparelhadas com êxito, cada unidade terá a luz azul acesa durante um segundo e depois voltará ao modo de configuração (Luz vermelha sempre acesa). 5. Agora que o procedimento de emparelhamento está completo, necessita apenas de sair do modo de configuração antes de poder utilizar as unidades: Efetuar um duplo clique no botão“Middle” (meio), a Luz vermelha irá desligar-se e a luz azul irá começar a piscar. Agora já pode usar o seu BTX2 FM. 66 - Midland BTX2 FM Passennger 1 Driver 2 Cada vez que abrir a ligação do intercomunicador com uma pessoa, a ligação anterior será fechada. A ligação não é uma “corrente”, quando duas pessoas estão a falar não é possível romper (interromper) a comunicação através do afastamento de uma das outras unidades para além do intervalo de distância máxima. Talk 2 All - Emparelhar a um intercomunicador de marca diferente Graças à função “Talk2All - Universal Intercom”, é agora possível emparelhar o seu BTX2 FM a um intercomunicador de uma marca diferente disponível no mercado. 1. No BTX2 FM, entre no modo de configuração: (Com a unidade desligada, pressione e mantenha pressionado o botão “Middle” (meio) durante cerca de 7 segundos até que a luz vermelha esteja permanentemente acesa). 2. Pressione o botão “Forward” (avançar) durante 3 segundos, a luz LED vermelha e a azul irão piscar. 3. No outro intercomunicador (de outra marca que não Midland), siga o procedimento de emparelhamento a um telefone. Quando o emparelhamento tiver sido bem sucedido (a luz vermelha/azul não estará intermitente). Para abrir a comunicação do intercomunidador no BTX2 FM pressione o botão “Forward” (avançar). No outro intercomunicador, basta pressionar o botão de remarcação do telefone. É possível que seja necessário pressionar o botão de remarcação duas vezes, dependendo do modelo do intercomunicador de outra marca. Atenção: quando utilizar esta configuração, não será possível ao outro intercomunicador (de outra marca que não Midland) ser emparelhado com um telefone. › Telefone (A2DP estéreo) › GPS (A2DP estéreo) › Dongle A2DP estéreo ›› Telefone (HFP Mono) ›› GPS mono ›› Emissor-recetor PMR446 Talk2All - Universal Intercom Dispositivo non Midland Se tentar abrir uma ligação de intercomunicação com outra pessoa que já está ocupada a falar com alguém (ou a meio de uma conversa telefónica), irá ouvir um sinal sonoro duplo de“ocupado”. Basta esperar um pouco e tentar novamente, talvez desta vez a “linha” já não esteja ocupada. A pessoa a quem está a ligar, será avisada que alguém está a tentar contactá-la e irá ouvir um anúncio de voz com o número do botão de onde vem o pedido. 2 3 Emparelhamento do BTX2 FM a dispositivos Bluetooth A unidade de conferência BTX2 FM pode ser emparelhada a outros dispositivos Bluetooth, como telemóvel, navegador GPS ou Rádio PMR446 com Bluetooth integrado ou externo (dongle). O procedimento de emparelhamento deve ser efetuado utilizando os botões “Volume+” ou “Volume -“. ›› Emparelhamento com o botão “Volume+”: para telefones com música estéreo A2DP, navegador GPS com áudio A2DP ou dongle externo mono/estéreo A2DP. ›› Todos os dispositivos emparelhados ao botão “Volume +” têm uma prioridade superior e irão interromper todas as outras comunicações (como por exemplo, o intercomunicador, o rádio FM e a música). ›› Emparelhamento com o botão “Volume-”: para um segundo telefone com áudio mono (Protocolo de mãos livres) para navegadores GPS / detetor de Radar e outros dispositivos com áudio mono que devem estar sempre em segundo plano. Funcionalidade de fundo É possível manter sempre em segundo plano a conexão de áudio do dispositivo emparelhado no botão Vol-. Desta forma a comunicação Intercom não será interrompida, por exemplo, pela indicação de ruas do GPS ou da comunicação rádio G8BT. Para ativar a funcionalidade de “Fundo” basta pressionar longamente a tecla “Vol-”, a voz “Background enable” dirá que agora está ativo. Para desativar a funcionalidade de “Fundo” basta pressionar novamente longamente a tecla “Vol-”, a voz “Background off” dirá que já não está ativo. Por definição a funcionalidade de “Fundo” está off Atenção: esta funcionalidade é usada somente para rádios bidirecionais G8BT ou dispositivos GPS emparelhados em “Vol-”. Esta funcionalidade deve estar desligada se tiver um telefone emparelhado na tecla “vol-”. Atenção: Fonte de áudio A2DP são suportadas apenas no Vol+. O segundo telemóvel emparelhado em Vol- pode suportar apenas áudio mono (HFP). Quando um dispositivo está emparelhado aos botões “Vol +” ou “Vol-” o modo de “Telefone” está ativado. Suporte para anúncio de voz estéreo (A2DP) Suporte para anúncio de voz estéreo BTX2 FM (A2DP) de Navegadores GPS ou aplicação de smartphone. Quando um anúncio de voz “irrompe”, o intercomunicador ou rádio FM é interrompido para dar prioridade ao anúncio em si. Atenção: não podemos garantir estas funcionalidades porque dependem de dispositivos de terceira parte. Atenção: não podemos garantir estas funcionalidades porque dependem de dispositivos de terceira parte. Emparelhar com um ou dois telefones O telemóvel pode ser emparelhado com o “Vol +” (se o suporte para A2DP estéreo é solicitado) ou “Vol-”. Midland BTX2 FM - 67 P A unidade está ocupada Emparelhamento a um telefone O telemóvel pode ser emparelhado com o “Vol +” (se o suporte para A2DP estéreo é solicitado) ou a “Vol-”. Também é possível emparelhar dois telefones, um em “Vol +” e um “Vol-”. Por predefinição o telefone emparelhado em Vol+ é aquele controlado pela unidade. Quando um telefone está emparelhado com o “Vol+” ou “Vol-”, o modo de “Telefone” é ativado. Uma chamada recebida tem sempre prioridade superior, o que significa que todas as outras comunicações serão desativadas (Intercomunicador, Rádio FM, Música) Se outra chamada recebida chegar ao segundo telefone, um som de alerta sonoro irá notificá-lo. Telefone predefinido P Quando emparelhar dois telefones à unidade, pode definir qual é o telefone predefinido (o telefone que será controlado pelo botão da unidade) - Quando em modo de “Telefone”, manter pressionado o botão “Vol+” por 3 segundos, a mensagem de voz “Control on plus” dirá que agora o telefone ligado a “Vol+” é o predefinido. Agora pode controlar todas as funcionalidades de telefone/música como leitor de música, chamada de saída. - Quando em modo de “Telefone”, manter pressionado o botão “Vol-” por 3 segundos, a mensagem de voz “Control on minus” dirá que agora o telefone ligado a “Vol-” é o predefinido. Agora pode controlar as funcionalidades de telefone como chamada de saída. Como emparelhar um BTX2 FM a um telefone Para emparelhar o BTX2 FM a um telefone, tem primeiro de entrar no modo de programação: 1. desligue o aparelho. 2. Pressione e mantenha pressionado o botão “Middle” (meio) durante cerca de 7 segundos até que a luz vermelha esteja permanentemente ligada. 3. Agora pressionar por 3 segundos o botão “Volume+” ou “Volume-”, a luz azul e vermelha irão piscar. 4. Active a funcionalidade de busca de dispositivos Bluetooth no seu telemóvel. 5. Após alguns segundos, será apresentado o “Midland BTX2 FM” no seu telemóvel. Siga o procedimento de emparelhamento do seu telefone. Se for solicitado um código PIN deve inserir “0000” (quatro zeros). Quando emparelhado com êxito, a luz azul da unidade ficará acesa durante um segundo e depois o aparelho irá sair do modo de programação e mudar para o modo de funcionamento (a luz azul irá começar a piscar). Pode agora utilizar o seu BTX2 FM juntamente com o telefone. Como utilizar um telefone Depois de emparelhar o seu telefone a uma unidade BTX2 FM deve mudar para o modo “telefone” de modo a utilizá-lo. Pressione o botão “Middle” (meio) até ouvir 68 - Midland BTX2 FM a palavra “telefone” do anúncio de voz. Agora todos os três botões principais correspondem ao telefone (ver Tabela B) Atender uma chamada Quando ouvir o telefone tocar, pode atender de duas maneiras: Vocalmente: basta dizer uma palavra para atender a chamada e começar a falar. Manualmente: toque no botão “Forward” (avançar) e comece a falar. Rejeitar uma chamada Se não desejar atender, pode deixar o telemóvel tocar ou pressionar o botão “Forward” (avançar) durante 3 segundos (irá ouvir um tom de confirmação áudio). Efectuar uma chamada Existem vários modos de efectuar uma chamada. A partir do teclado de um telemóvel: marque o número no teclado do telemóvel: Pressione “Enviar” no telemóvel. Para remarcar o último número: Telefone no Vol+: Pressione o botão “Forward” durante 3 segundos de modo a remarcar o último número (irá ouvir um tom de confirmação áudio). Telefone no Vol-: Pressione o botão “Backward” durante 3 segundos de modo a remarcar o último número (irá ouvir um tom de confirmação áudio). Para efetuar uma chamada de voz: Telefone no Vol+: Pressione brevemente o botão “Forward” . Se o seu telemóvel suportar chamadas de voz, será pedido que soletre o nome do contacto a quem pretende telefonar. Telefone no Vol-: Pressione brevemente o botão de “Backward”. Se o seu telemóvel suportar chamadas de voz, será pedido que soletre o nome do contacto a quem pretende telefonar. Prioridade: As chamadas têm uma prioridade alta, o que significa que todas as outras comunicações são temporariamente desactivadas quando é recebida uma chamada. Terminar uma chamada Existem vários modos de terminar uma chamada: ›› Espere que a pessoa contactada termine a chamada. ›› Pressione o botão “Forward” (avançar) (irá ouvir um tom de confirmação áudio). ›› Pressione o botão “Terminar” no telemóvel. Utilizar a funcionalidade de leitor de MP3 do telemóvel O telemóvel, quando emparelhado em “Volume+” pode ser usado como leitor de MP3 estéreo. A unidade BTX2 FM suporta completamente os protocolos A2DP e AVRCP que permitem ouvir música estéreo e controlar remotamente o leitor de MP3 do seu telemóvel. Pode até mesmo utilizar os botões na unidade BTX2 FM para con- trolar as seguintes opções de reprodução: reprodução, pausa, avançar e retroceder. necessita de ter a função de “segundo plano” activa. Emparelhar a um rádio PMR446 com Bluetooth externo e integrado Avanςar Reproduςão/Pause Retroceder Controlos disponíveis: ›› para reproduzir/pausar música: clique no botão “Middle” (meio). ›› Para avançar para a próxima música: pressione o botão “Forward” (avançar). ›› Para retroceder para a música anterior: pressione o botão “Rear” (retroceder). Prioridade: o modo de reprodução de música tem a menor prioridade. Portanto, estará sempre desactivado quando outro tipo de comunicação estiver activado. Atenção: É possível controlar a música estéreo A2DP apenas no “Modo telefone” Como emparelhar um BTX2 FM a um GPS Geralmente é possível emparelhar o BTX2 FM a todos os GPS para motas que suportam ligação de auscultador Bluetooth. Para emparelhar o BTX2 FM a um GPS, tem primeiro de entrar no modo de configuração: 1. Desligue o aparelho. 2. Pressione e mantenha pressionado o botão “Middle” (meio) durante cerca de 7 segundos até que a luz vermelha esteja permanentemente acesa. 3. Pressione agora com firmeza (3 segundos) o botão “Middle” (meio), e a luz vermelha e a azul irão piscar. 4. Active a funcionalidade de busca de dispositivos Bluetooth no seu GPS. 5. Após alguns segundos, será apresentado o “Midland BTX2 FM” no seu GPS. 6. Siga o procedimento de emparelhamento do seu GPS. Se for solicitado um código PIN tem de inserir “0000” (quatro zeros). 7. Quando emparelhada com sucesso, a luz azul da unidade ficará acesa durante um segundo e depois esta irá sair do modo de configuração e mudar para o modo de funcionamento (a luz azul irá começar a piscar). Quando emparelhar o GPS ao botão Volume +, perde a possibilidade de emparelhar o telefone à unidade BTX2 FM. Pode ultrapassar este limite emparelhando o telefone directamente ao GPS e depois o GPS à unidade BTX2 FM. Todas as funções do telefone serão assim geridas pelo próprio GPS. Navegador GPS sempre em segundo plano Para manter o intercomunicador aberto enquanto o GPS dá a indicação de rua, Como emparelhar um emissor-receptor PMR446 com Bluetooth integrado Se o seu emissor-receptor PMR446 tiver Bluetooth integrado (como o G8BT), tem de emparelhar o emissor-receptor utilizando o botão “Volume +”: ›› Desligue o aparelho. ›› Pressione e mantenha pressionado o botão “Middle” (meio) durante cerca de 7 segundos até que a luz vermelha esteja permanentemente acesa. ›› Pressione agora com firmeza (3 segundos) o botão “Middle” (meio), e a luz vermelha e a azul irão piscar. ›› Siga agora o procedimento de emparelhamento explicado no manual do próprio emissor-receptor. Atenção: se estiver a realizar o emparelhamento a um emissor-receptor G8BT, assim que o BTX2 FM acabar o emparelhamento (apenas o LED azul está a piscar) tem de seguir este procedimento para activar a ligação Bluetooth: ›› desligue e ligue o G8BT e, em seguida, pressione durante 3 segundos o botão “BT”. ›› Siga o mesmo procedimento cada vez que necessitar de voltar a ligar o G8BT ao BTX2 FM (não necessita efectuar novamente o procedimento de emparelhamento). Atenção: lembre-se de que tem de ter a função de “segundo plano” activa se quiser manter a comunicação de rádio bidireccional com o intercomunicador. Como utilizar a entrada de áudio com fios O seu Midland BTX2 FM também possui uma entrada de áudio com fios (AUX), que pode ser utilizada para conectar o aparelho a uma fonte de áudio, como um iPod (ou outros leitores de MP3) ou um emissor-receptor PMR446 para comunicações em grupo ou para aumentar a área de cobertura. Ouvir música Para ouvir música da ligação com fios, ligue o cabo AUX (opcional) à sua fonte de Midland BTX2 FM - 69 P O rádio PMR446 deve ser emparelhado com a tecla “Volume –”, portanto, se a funcionalidade de “Fundo” estiver ativada, o rádio PMR446 está sempre em segundo plano mesmo quando fala no intercomunicador. Atenção: para além de um emissor-receptor PMR446, se pretender ligar também um navegador GPS deve emparelhar o GPS ao botão “Volume +”. Nesta configuração os anúncios de voz da rua do GPS irão interromper todas as outras comunicações (intercomunicador, rádio FM e música). Quando o GPS estiver emparelhado ao botão “Volume +” o modo de “telefone” é activado. audio. Os botões de volume (Vol+ e Vol-) não podem ser usados para ajustar o volume da ligação de audio com fios. O sistema de AGC autenticamente aumentará o volume em velocidades elevadas. Atenção: nunca ajuste o volume do seu leitor MP3 para o máximo possível. Normalmente o melhor nível é a 70% do máximo. Dica: Recomendamos que ensaie alguns testes de ajuste do volume no seu leitor iPOD/MP3 de forma que o volume a baixa velocidade esteja de acordo com as sua preferências. O sistema AGC fará o ajuste automático quando a velocidade subir. Tome nota deste ajustamento para viagens futuras. Activar/Desactivar a ligação com fios Se necessário, a ligação com fio pode ser activada/desactivada: Prima longamente o botão “Rear” (ouvirá um beep confirmando a activação e dois beeps para A DESACTIVAÇÃO P Utilizar um emissor-receptor PMR446 com a ligação por cabo Para ligar o emissor-receptor ao seu Midland BTX2 FM, é necessário comprar o cabo AUX com ficha de 2,5 mm específico, vendido separadamente. A lguns fabricantes de rádios utilizam uma configuração de pinos diferente, pelo que recomendamos que se informe junto do seu vendedor sobre qual o cabo melhor adequado às suas necessidades. O cabo ligado ao emissor-receptor costuma ter também um botão PTT que pode ser colocado no guiador da sua mota ou segurado na sua mão (se for o passageiro). Para comunicar através do rádio ligado, pressione o botão PTT para falar e liberte-o para ouvir. Não é possível falar e ouvir simultaneamente. Ajuste o volume do emissor-receptor às suas necessidades, lembrando-se de que o ajuste do volume é controlado pelo sistema AGC automático e que portanto será aumentado automaticamente em relação ao ruído de fundo. Se pretender utilizar um emissor-receptor PMR446 para comunicações de grupo e simultaneamente manter a funcionalidade de intercomunicador activada entre dois ou mais dispositivos BTX2 FM, tem de lembrar-se que cada vez que falar para comunicar com o emissor-receptor PMR 446 (pressionando o botão PTT), irá também activar o intercomunicador do BTX2 FM à unidade ligada ao botão “Middle” (meio) (graças à função VOX). Para evitar a activação do intercomunicador quando fala no PMR446, pode decidir emparelhar a unidade BTX2 FM aos botões “Rear” (retroceder) ou “Forward” (avançar) (quando a função VOX não está activa) ou, caso ainda queira utilizar o botão “Middle” (meio), tem de desactivar a função VOX, conforme explicado na secção anterior. Atenção! Se desactivar a função VOX, apenas poderá atender chamadas telefónicas pressionando o botão “Forward” (avançar). Como ouvir o Rádio FM O recetor de rádio FM está integrado dentro da unidade. Basta ligar o modo de “rádio FM” de modo a poder utilizá-lo. Pressionar o botão “Middle”(meio) até ouvir a palavra “rádio FM” do anúncio de voz. Agora todos os três botões principais correspondem ao rádio FM (Ver Tabela). Pressionar brevemente o botão Avançar ou Retroceder para procurar uma estação de Rádio FM. Quando pressionar longamente o botão Avançar ou Retroceder pode procurar para cima ou para baixo as 6 estações memorizadas. Um anúncio de voz irá dar-lhe o número da memória em que está a entrar. Será reproduzido um sinal sonoro duplo quando a última ou a primeira estação memorizada for alcançada. Para memorizar a estação que está a ouvir, pressionar os botões Avançar e Retroceder juntamente durante 3 segundos. Ouvirá um sinal sonoro de confirmação. A estação é memorizada na última estação gravada usada. Graças ao sistema RDS, o Rádio FM escolherá o sinal mais forte disponível para a estação de rádio que gostaria de ouvir. O sistema RDS está OFF por predefinição, se necessário pode ligar/desligar o RDS ao pressionar em conjunto os botões “Volume+” e “Volume –” durante 3 segundos quando o rádio está ligado. Um anúncio de voz dirá o estado do RDS. Rádio FM com intercomunicador Quando está em modo de “Rádio FM” não é possível abrir manualmente a intercomunicação, só pode abri-la usando a função VOX (só conversa) à unidade emparelhada no botão “Médio”. Para ativar manualmente o intercomunicador deve alternar para o modo de “Intercomunicador”. Como Ativar/Desativar o rádio FM Para desabilitar a Rádio FM manter pressionado o botão avançar durante 7 segundos, e será confirmado pelo anúncio de voz “Rádio FM desativada”. Para ativar novamente a Rádio FM manter pressionado o botão avançar durante 7 segundos, e será confirmado pelo anúncio de voz “Rádio FM”. Modo C-rádio FM Modo Rádio FM 70 - Midland BTX2 FM Botão "Forward" (avançar) Pressão breve: procurar estação Pressão longa: Procura gravada Botão "Middle" (meio) Pressão breve: ligado/desligado Pressão longa: alterar modo Botão "Rear" (retroceder) Pressão breve: procurar estação Pressão longa: Procura gravada Reposição de todos os dispositivos emparelhados Por vezes pode ser necessário apagar todas as referências de emparelhamento guardadas na unidade BTX2 FM (operação de reposição). Para realizar esta operação deve primeiro entrar no modo de programação: ›› desligue o aparelho. ›› Pressione e mantenha pressionado o botão “Middle” (meio) durante cerca de 7 segundos até que a luz vermelha esteja permanentemente ligada. ›› Em seguida, pressione e mantenha pressionados simultaneamente os botões “Volume +” e “Volume –“ durante 3 segundos. A luz azul ficará acesa durante 1 segundo e depois irá regressar ao VERMELHO constante. ›› Pressione duas vezes o botão “Middle” (meio) para sair do modo de programação e utilize o BTX2 FM. Este procedimento apaga todos os dispositivos Bluetooth emparelhados guardados na memória e é portanto possível iniciar uma sessão de emparelhamento “limpa” nova. Voltar às definições de fábrica Por vezes poderá achar necessário voltar às definições de fábrica, para repor todas as alterações/configurações já efectuadas e ficar com uma unidade “limpa”. Para realizar esta operação deve primeiro entrar no modo de programação: ›› desligue o aparelho. ›› Pressione e mantenha pressionado o botão “Middle” (meio) durante cerca de 7 segundos até que a luz vermelha esteja permanentemente ligada. ›› De seguida, mantenha pressionados simultaneamente os três botões “Forward”-”Middle”-”Rear” (avançar-meio-retroceder) durante 3 segundos. A luz azul ficará acesa durante 1 segundo e depois irá regressar ao VERMELHO constante. ›› Pressione duas vezes o botão “Middle” (meio) para sair do modo de programação e utilize o BTX2 FM. Ajustar/Desactivar a função VOX (intercomunicador e telefone) A função de intercomunicação pode ser activada manualmente ou por voz (VOX). A activação VOX é influenciada pelo ruído de fundo e consequentemente pela velocidade. Para optimização dos resultados, é possível ajustar a sensibilidade do microfone em 4 níveis: alto, médio, baixo e muito baixo. Por predefinição, o BTX2 FM está programado para “baixo”. É possível desactivar a função VOX de forma a que as funcionalidades de intercomunicação e de atendimento telefónico apenas funcionem em modo manual. Ajustar a sensibilidade do microfone (VOX) Para realizar esta operação primeiro tem de entrar no modo de programação: 1. desligue o aparelho. 2. Pressione e mantenha pressionado o botão “Middle” (meio) durante cerca de 7 segundos até que a luz vermelha esteja permanentemente ligada. 3. O seu BTX2 FM está agora no “modo de programação”. 4. Pressione o botão “Rear” (retroceder) até o indicador de luz vermelha mudar para um azul constante. 5. Então, pressione “Volume +” ou “Volume -” para aumentar ou diminuir a sensibilidade. Cada vez que pressionar os botões de volume, a luz vermelha fica intermitente como confirmação. Quando chegar aos limites superior e inferior, a luz vermelha não pisca. 6. Pressione novamente o botão “Rear” (retroceder); a luz azul piscará várias vezes para lhe mostrar a sensibilidade seleccionada: uma vez = VOX desactivada duas vezes = sensibilidade muito baixa 3 vezes= sensibilidade baixa 4 vezes = sensibilidade média (configuração predefinida) 5 vezes = sensibilidade alta O indicador muda novamente para vermelho constante (“modo de programação”), confirmando as alterações. 7. Se necessário, a sensibilidade pode ser reajustada repetindo os passos a partir do ponto 1, ou saindo do modo de programação pressionando duas vezes o botão “Middle” (meio). Quando a luz vermelha se apagar, o LED azul começa a piscar. O seu BTX2 FM está pronto a ser utilizado. Desactivar a função VOX (intercomunicador e telemóvel) Siga todos os procedimentos descritos nos passos anteriores e escolha a opção de apenas piscar uma vez (VOX desactivada). Ligação com fios sempre no fundo Esta funcionalidade ajuda-o a manter a ligação com fios sempre activa, mesmo quando o telefone ou o intercomunicador estiverem activos. Esta funcionalidade pode ser útil quando ligar um emissor-receptor PMR446. Esta opção está activada por predefinição. Desactivação: ›› entre no modo de “programação”: ›› desligue o aparelho. ›› Pressione e mantenha pressionado o botão “Middle” (meio) durante cerca de 7 segundos até que a luz vermelha esteja permanentemente ligada. ›› Pressione simultaneamente os botões “Forward” (avançar) e “Middle” (meio) durante 3 segundos. O LED azul piscará duas vezes. ›› Pressione duas vezes o botão “Middle” (meio) para sair do modo de programação e utilize o BTX2 FM. Activação: siga o mesmo procedimento descrito anteriormente; agora o LED azul piscará uma vez. Para sair do modo de “programação”, pressione duas vezes o botão “Middle” (meio). Midland BTX2 FM - 71 P Instalação e configurações especiais Instalação e actualização de firmware Utilize por sua própria conta e risco É possível configurar e actualizar o firmware do seu BTX2 FM utilizando a ligação USB ao seu computador. No site Web da Midland em www.midlandeurope.com, na página do BTX2 FM encontrará o software do computador e as actualizações do novo firmware, caso estejam disponíveis. ATENÇÃO: NÃO LIGUE O APARELHO AO COMPUTADOR ANTES DE DESCARREGAR E INSTALAR O SOFTWARE O uso do dispositivo prejudicará a sua capacidade para ouvir outros sons e as outras pessoas à sua volta. Ouvir música ou falar ao telefone pode impedi-lo(a) de ouvir as outras pessoas à sua volta e pode distrai-lo(a) de uma condução segura. O uso do dispositivo enquanto conduz pode colocá-lo(a) a si e aos outros em perigo, e o seu uso, em algumas áreas, pode não ser permitido. O uso deste dispositivo com o nível de som elevado pode resultar em danos permanentes na audição. Se começar a ouvir ruídos ou registar outro tipo de dor associada à audição, reduza o som ou deixe de usar este equipamento. Com uso continuado com um volume de som elevado, os seus ouvidos podem ficar acostumados ao nível de som, o que pode resultar em danos permanentes na capacidade auditiva. Por favor, use dentro de um nível de som seguro. Garantia A garantia dura 24 meses para o dispositivo principal e 6 meses para os acessórios (baterias, carregadores, antenas, fones de ouvido). Para obter mais informações sobre a garantia, por favor, visite www.midlandradio.eu Informação de autorizações de segurança e de certificação de aviso CE europeu P Este produto está assinalado com o símbolo CE em conformidade com a directiva RTTE (99/5/EC) e é de utilização livre em todos os países da União Europeia. Os utilizadores não têm autorização para realizar quaisquer alterações ou modificações ao dispositivo. Modificações que não tenham sido expressamente autorizadas pelo fabricante invalidam o cartão de garantia. Para informações adicionais, visite o nosso site Web: www.cte.it A CTE INTERNATIONAL declara que este aparelho cumpre com o disposto na Directiva 1999/5/CE do Parlamento Europeu e do Conselho de 9 de Março de 1999, transposta para a legislação nacional pelo Decreto-Lei n.º 192/2000, de 18 de Agosto. 72 - Midland BTX2 FM Κύρια χαρακτηριστικά .........................................................................................................................................................74 Τεχνικά χαρακτηριστικά του Midland BTX2 FM......................................................................................................................74 Φόρτιση μπαταριών.............................................................................................................................................................75 Περιγραφή της συσκευής και των βασικών μερών της...........................................................................................................75 Ενεργοποίηση και απενεργοποίηση του Midland BTX2 FM......................................................................................................76 Καταστάσεις λειτουργίας......................................................................................................................................................76 Μέγιστη απόσταση εμβέλειας...............................................................................................................................................77 Ζευγάρωμα δύο συσκευών BTX2 FM......................................................................................................................................77 Πώς να χρησιμοποιήσετε την ενδοεπικοινωνία (Intercom).....................................................................................................77 Ρύθμιση της έντασης............................................................................................................................................................77 Πώς να ζευγαρώσετε το BTX2 FM με άλλη συσκευή από τη σειρά ΒΤ.......................................................................................78 Πώς να ζευγαρώσετε τρεις συσκευές ενδοεπικοινωνίας.........................................................................................................78 Talk 2 All - Ζευγάρωμα με συσκευή ενδοεπικοινωνίας διαφορετικής μάρκας...........................................................................78 Χρήση της λειτουργίας MP3 player του κινητού σας τηλεφώνου.............................................................................................81 Πώς να ζευγαρώσετε το BTX2 FM με έναν πλοηγό GPS............................................................................................................81 Πώς να ζευγαρώσετε έναν πομποδέκτη PMR446 με ενσωματωμένο Bluetooth.......................................................................81 Χρήση υποδοχής ενσύρματης σύνδεσης πηγών ήχου.............................................................................................................82 Χρήση πομποδέκτη PMR446 μέσω ενσύρματης σύνδεσης......................................................................................................82 Ρυθμίσεις και Ειδικές Λειτουργίες.........................................................................................................................................83 Εγκατάσταση και αναβάθμιση του Firmware..........................................................................................................................84 Χρήση με δική σας ευθύνη....................................................................................................................................................84 Εγγύηση..............................................................................................................................................................................84 Πιστοποίηση CE και Έγκριση Ασφαλούς Χρήσης.....................................................................................................................84 Midland BTX2 FM - 73 GR Περιεχόμενα MIDLAND BTX2 FM Προηγμένο Σύστημα Ενδοσυνεννόησης Το BTX2 FM είναι ένα σύστημα ενδοεπικοινωνίας για μοτοσικλετιστές.Διαθέτει πολύ λεπτό και αεροδυναμικό σχεδιασμό και όλες οι βασικές λειτουργίες είναι πολύ εύκολες στη χρήση χάρη στα τρία μεγάλα πλήκτρα που βρίσκονται στην πρόσοψη της μονάδας. Το BTX2 FM τοποθετείται πάνω στο κράνος με τη βοήθεια της αυτοκόλλητης βάσης ή με τη βιδωτή βάση στήριξης. Χάρη στο κιτ ακουστικών που διαθέτουν πολύ λεπτό μεγάφωνο, μπορείτε να απολαύσετε υψηλής ποιότητας στερεοφωνική μουσική ενώ οδηγείτε τη μηχανή σας. Κύρια χαρακτηριστικά ›› Ενδοεπικοινωνία Οδηγού - συνεπιβάτη ή μηχανής με μηχανή (800m). ›› Σύνδεση μέχρι και τρία άτομα για ενδοεπικοινωνία (χρησιμοποιώντας το χαρακτηριστικό Talk2All-Universal Intercom). ›› Σύνδεση με το κινητό σας τηλέφωνο για να πραγματοποιήσετε ή να λάβετε κλήσεις και για να ακούσετε μουσική. ›› Σύνδεση με το GPS σας για φωνητική καθοδήγηση μέσω Bluetooth. ›› Σύνδεση με πομποδέκτη PMR446 μέσω ενσωματωμένου ή εξωτερικού Bluetooth. ›› Ενσύρματη σύνδεση AUX για MP3/ΜΡ4 player και πομποδέκτη PMR446. ›› Δυνατότητα αναβάθμισης των ρυθμίσεων και του λογισμικού μέσω του καλωδίου σύνδεσης USB με τον Η/Υ. Το Midland BTX2 FM είναι διαθέσιμο σε δύο εκδόσεις: ›› BTX2 FM Single: σύστημα ενδοεπικοινωνίας με μία μονάδα ›› BTX2 FM Twin: σύστημα ενδοεπικοινωνίας με δύο μονάδες GR Ανάλογα με την έκδοση που επιθυμείτε, η συσκευασία περιέχει τα παρακάτω μέρη: BTX2 FM ›› 1 συσκευή ενδοεπικοινωνίας BTX2 FM. ›› 1 κιτ μικροακουστικών με δύο στερεοφωνικά μεγάφωνα, μικρόφωνο με boom και μικρόφωνο με καλώδιο. ›› 1 βάση με αυτοκόλλητη ταινία διπλής όψεως για στήριξη της συσκευής στο κράνος. ›› 1 σφιγκτήρας για στήριξη της συσκευής στο κράνος. ›› 1 στερεοφωνικό καλώδιο ήχου για σύνδεση iPod ή άλλα MP3 player. ›› 1 επιτοίχιο φορτιστή mini USB. BTX2 FM Twin ›› 2 συσκευές ενδοεπικοινωνίας BTX2 FM. ›› 2 κιτ μικροακουστικών με δύο στερεοφωνικά μεγάφωνα, μικρόφωνο με boom και μικρόφωνο με καλώδιο. ›› 2 βάσεις με αυτοκόλλητη ταινία διπλής όψεως για στήριξη της συσκευής στο κράνος. 74 -Midland BTX2 FM ›› 2 σφιγκτήρες για στήριξη της συσκευής στο κράνος. ›› 2 στερεοφωνικά καλώδια ήχου για σύνδεση iPod ή άλλα MP3/ΜΡ4 player. ›› 1 επιτοίχιο φορτιστή mini USB με διπλό βύσμα. Οι μονάδες της συσκευασίας TWIN είναι ήδη ζευγαρωμένες και μπορούν να χρησιμοποιηθούν άμεσα για ενδοεπικοινωνία. Τεχνικά χαρακτηριστικά του Midland BTX2 FM Γενικά: ›› Bluetooth ver. 3.0 stereo (Headset/Handsfree/ πρωτόκολλο A2DP) ›› Σύστημα AGC που ελέγχει αυτόματα την ένταση της φωνής σε σχέση με τους εξωτερικούς θορύβους ›› Επιλογή έναρξης επικοινωνίας μέσω φωνής (VOX) ή χειροκίνητα ›› Χειροκίνητες λειτουργίες: τηλέφωνο, ενδοεπικοινωνία και ενσύρματη σύνδεση ›› Πλήρως στεγανοποιημένο ›› Μπαταρία Li-Ion αυτονομίας έως και 10 ώρες ομιλίας ›› Χρόνος φόρτισης: περίπου 6 ώρες Συνδέσεις Bluetooth: ›› Με ίδια συσκευή για επικοινωνία Οδηγού-Συνεπιβάτη ή Μηχανής με μηχανή. ›› Συσκευές Bluetooth: ›› Κινητό τηλέφωνο με MP3 Player Stereo (πρωτόκολλο Α2DP), GPS (Garmin Zumo και Tom Tom Rider 1 και 2). ›› Πομποδέκτες PMR446 (με ενσωματωμένη ή εξωτερική συσκευή Bluetooth) για ομαδικές επικοινωνίες μηχανής με μηχανή. Ενσύρματες συνδέσεις: ›› Για είσοδο στερεοφωνικού ήχου όπως iPod/MP3 player (με προαιρετικό καλώδιο.) ›› Για σύνδεση με πομποδέκτες PMR446 (με προαιρετικό καλώδιο.) Προσοχή: Το Μidland BTX2 FM είναι σχεδιασμένο να αντέχει τη βροχή και το νερό. Ωστόσο, σε περίπτωση βροχής, να ελέγχετε πάντα ότι τα λαστιχένια προστατευτικά καλύμματα των υποδοχών είναι τοποθετημένα σωστά. Φόρτιση μπαταριών Προσοχή: Βεβαιωθείτε ότι η συσκευή είναι πλήρως φορτισμένη πριν τη χρήση. Αφήστε τουλάχιστον 8 ώρες (με τη συσκευή απενεργοποιημένη) να περάσουν για να υπάρξει μια πλήρης φόρτιση πριν χρησιμοποιήσετε τη συσκευή για πρώτη φορά. Φορτίστε τη συσκευή εισάγοντας τον επιτοίχιο φορτιστή στην υποδοχή φόρτισης (σηκώστε το λαστιχένιο κάλυμμα για να εισάγετε το βύσμα). Όταν ξεκινήσει η φόρτιση, θα ανάψει η κόκκινη λυχνία LED. Αφήστε τη συσκευή να φορτίσει μέχρι να σταματήσει να αναβοσβήνει η λυχνία LED ή μέχρι να ανάψει η μπλε λυχνία LED. Μόλις ολοκληρωθεί η φόρτιση (παύει να αναβοσβήνει η κόκκινη λυχνία LED), αφαιρέστε τη μονάδα από το φορτιστή. Κανονικά, μετά την πρώτη φόρτιση, απαιτούνται 6 ώρες για μια πλήρη φόρτιση. Προσοχή: φορά που εισάγεται (ή αφαιρείται) το καλώδιο φόρτισης mini USB, η συσκευή αυτόματα απενεργοποιείται. Για να τη χρησιμοποιήσετε ενώ φορτίζει, θα πρέπει να ενεργοποιήσετε τη συσκευή ενώ είναι ήδη συνδεδεμένη με το βύσμα φόρτισης. μικροφώνου Υποδοχή σύνδεσης πηγής ήχου (AUX) 2.5mm: μπορεί να χρησιμοποιηθεί για τη σύνδεση πηγής ήχου όπως MP3 player / iPod ή πομποδέκτη PMR446 Audio kit jack Charger jack Auxiliary audio jack (AUX) Επιπροσθέτως, το BT Χ2 διαθέτει μια λεπτή κεραία στην κορυφή για τη μέγιστη απόσταση εμβέλειας. Περιγραφή της συσκευής και των βασικών μερών της Περιγραφή της συσκευής BTX2 FM T0 BTX2 FM διαθέτει 5 πλήκτρα στο εμπρόσθι μέρος. Τα τρία κυρίως μεγάλα πλήκτρα είναι πλήκτρα πολύ-λειτουργιών: το Forward (στα αριστερά), το μεσαίο πλήκτρο και το Backward (στα δεξιά), τα δύο μικρά στρογγυλά πλήκτρα είναι τα Volume + και Volume - για την αυξομείωση της έντασης. Volume - GR Volume + Για να ανασηκώσετε την κεραία, πιέστε ελαφρά προς τα πίσω και η κεραία θα σηκωθεί αυτόματα. Για να κλείσετε την κεραία απλά πιέστε την προς τα κάτω και βεβαιωθείτε ότι τοποθετήθηκε στην κλειστή θέση. Περιγραφή των αξεσουάρ ήχου Περιγραφή της συσκευής και των βασικών μερών της Το σύστημα ήχου περιλαμβάνει δύο πολύ λεπτά στερεοφωνικά μεγάφωνα και δύο εναλλακτικά μικρόφωνα, τα οποία παρέχονται και τα δύο με βάση στήριξης και καλώδια. Στη βάση της συσκευής βρίσκετε τρείς υποδοχές για ενσύρματες συνδέσεις: Υποδοσχή φόρτισης: σας επιτρέπει τη φόρτιση της συσκευής μέσω mini USB τροφοδοσίας Υποδοχή αξεσουάρ ήχου: σας επιτρέπει τη σύνδεση κεφαλακουστικού και Περιγραφή των στερεοφωνικών μεγαφώνων Τα δύο στερεοφωνικά μεγάφωνα έχουν μια αυτοκόλλητη ταινία που βοηθά την στερέωση Forward button Middle button Backward button Midland BTX2 FM - 75 τους στο κράνος σας. Προσέξτε να μη καλύψετε εντελώς το αυτί σας με τα μεγάφωνα, πρέπει πάντα να είστε σε θέση να ακούτε τους εξωτερικούς ήχους κίνησης. Το μικρόφωνο μπορεί να στερεωθεί στο κράνος με δύο τρόπους: Μικρόφωνο με boom Τοποθετήστε το τμήμα με την αυτοκόλλητη ταινία μεταξύ της επένδυσης και του κελύφους του κράνους έτσι ώστε το μικρόφωνο να είναι τοποθετημένο σωστά μπροστά από το στόμα σας και το άσπρο σύμβολο να βλέπει το στόμα σας. Αυτός ο τύπος μικροφώνου είναι κατάλληλος για τα ανοικτά κράνη. Ενσύρματο μικρόφωνο Χρησιμοποιώντας την αυτοκόλλητη ταινία, τοποθετήστε το μικρόφωνο μέσα στο κράνος μπροστά από το στόμα σας. Αυτός ο τύπος μικροφώνου είναι κατάλληλος για τα κλειστά κράνη. Ο μίνι κονέκτορας στο μικρόφωνο σας επιτρέπει να επιλέγετε το μικρόφωνο που ταιριάζει καλύτερα στο κράνος που χρησιμοποιείτε. Τοποθέτηση και αφαίρεση του Midland BTX2 FM σας Tο BTX2 FM μπορεί να τοποθετηθεί εύκολα επάνω στο κράνος γλιστρώντας το προς τα κάτω ώστε να εφαρμόσει στην υποδοχή της βάσης στήριξης (Βάση με ταινία διπλής όψης ή σφιγκτήρας). Το BTX2 FMμένει στη θέση του χάρη στο κλείστρο που βρίσκεται στο επάνω μέρος (A). Για να αφαιρέσετε το BTX2 FM, απλά πιέστε το κλείστρο και σπρώξτε τη συσκευή προς τα επάνω. Υποδοχή κιτ ακουστικού Το κιτ ακουστικού πρέπει να συνδεθεί στην κεντρική υποδοχή της συσκευής Midland BT Χ2 χρησιμοποιώντας τον κονέκτορα “L” Περιγραφή των βάσεων στήριξης GR Tο Midland BTX2 FM μπορεί να στερεωθεί επάνω στο κράνος με δύο διαφορετικούς τρόπους: Είτε χρησιμοποιώντας την βάση με ταινία διπλής όψης είτε το σφιγκτήρα. Αυτοί οι μέθοδοι θα σας επιτρέψουν να στερεώσετε σταθερά τη συσκευή BT Χ2 στο κράνος σας και να την αφαιρείτε όποια στιγμή επιθυμείτε έτσι ώστε να την φορτίζετε ή να την αποθηκεύετε. Βάση με ταινία διπλής όψης Η βάση στήριξης έχει μια ταινία διπλής όψης σε μια από τις πλευρές του. Για να στερεώσετε τη βάση σταθερά, καθαρίστε την περιοχή τοποθ έτησης στην επιφάνεια του κράνους, αφαιρέστε το προστατευτικό φιλμ της ταινίας και στερεώστε την στο κράνος στο κράνος πιέζοντάς το με πίεση στην επιφάνεια για μερικά δευτερόλεπτα. Βάση Σφιγκτήρα Χρησιμοποιώντας το κλειδί Allen, χαλαρώστε τις δύο βίδες στο σφιγκτήρα και τοποθετήστε τη πλάτη της βάσης μεταξύ της επένδυσης του κράνους και του κελύφους. Κατόπιν, σφίξτε τις δύο βίδες προκειμένου να στερεωθεί σταθερά ο σφιγκτήρας. Ο σφιγκτήρας συνοδεύεται από ένα χώρισμα το οποίο μπορεί να αφαιρεθεί για μεγαλύτερη σύσφιγξη. 76 -Midland BTX2 FM Ενεργοποίηση και απενεργοποίηση του Midland BTX2 FM Ενεργοποίηση της συσκευής: ›› Πιέστε και κρατήστε πατημένο το “Μεσαίο” πλήκτρο για περίπου 3 δευτερόλεπτα μέχρι να ανάψει η ΜΠΛΕ ενδεικτική λυχνία. Απενεργοποίηση της συσκευής: ›› Πιέστε και κρατήστε πατημένα και τα δύο πλήκτρα “Μεσαίο” και “Backward” μαζί για περίπου 3 δευτερόλεπτα μέχρι να αναβοσβήσει η ΚΟΚΚΙΝΗ ενδεικτική λυχνία 3 φορές, χειρισμός ο οποίος μειώνει τις πιθανότητες να σβήσετε την συσκευή σας κατά λάθος (ειδικά όταν φοράτε γάντια). Καταστάσεις λειτουργίας Tο BTX2 FM λειτουργεί σε δύο κύριες καταστάσεις: Ενδοεπικοινωνία (Intercom) και Τηλέφωνο (Phone). Τα τρία πολύ-λειτουργικά πλήκτρα μπορούν να αποκτήσουν διαφορετικό είδος λειτουργίας ανάλογα με την κατάσταση που βρίσκεται η συσκευή τη δεδομένη στιγμή. ›› Στην κατάσταση “Ενδοεπικοινωνία (Intercom)” τα πλήκτρα σας επιτρέπουν να Μέγιστη απόσταση εμβέλειας Η μέγιστη απόσταση εμβέλειας της ενδοεπικοινωνίας σας φτάνει έως και 800m όταν η κεραία είναι σηκωμένη και οι χρήστες βρίσκονται στην ευθεία χωρίς εμπόδια και παρεμβολές (οι οδηγοί πρέπει να έχουν πάντα οπτική επαφή). Ζευγάρωμα δύο συσκευών BTX2 FM Οι δύο συσκευές που περιέχονται στη συσκευασία BTX2 FM Twin, είναι ήδη ζευγαρωμένες και έτοιμες για χρήση πράγμα το οποίο σημαίνει πως δεν χρειάζεται να πραγματοποιήσετε αυτή τη διαδικασία. Οι συσκευές επικοινωνούν πιέζοντας το Μεσαίο πλήκτρο. Αν οι συσκευές δεν προέρχονται από την ίδια συσκευασία ή έχουν αγοραστεί ξεχωριστά, θα πρέπει να τις ζευγαρώσετε προτού τις χρησιμοποιήσετε. Για να ζευγαρώσετε το BTX2 FM με μια άλλη συσκευή BTX2 FM 1. Για να ζευγαρώσετε το BTX2 FM με μια άλλη συσκευή BTX2 FM, θα πρέπει να μεταβείτε στην κατάσταση ρύθμισης (setup): 2. Απενεργοποιήστε τη συσκευή 3. Πιέστε και κρατήστε πατημένο το Μεσαίο πλήκτρο για περίπου 7 δευτ. μέχρι να ανάψει μόνιμα η Κόκκινη λυχνία. 4. Τώρα πιέστε παρατεταμένα (3 δευτ.) το Μεσαίο πλήκτρο. Θα αναβοσβήνουν η Μπλε και Κόκκινη λυχνία. 5. Εφαρμόστε την ίδια διαδικασία και στην άλλη συσκευή. Όταν πραγματοποιηθεί επιτυχώς το ζευγάρωμα, στην κάθε συσκευή θα ανάψει η Μπλε λυχνία για ένα δευτερόλεπτο και θα επανέλθει στην κατάσταση ρύθμισης (setup) (θα είναι αναμμένη μόνιμα η Κόκκινη λυχνία). 6. Τώρα έχει ολοκληρωθεί η διαδικασία ζευγαρώματος, το μόνο που έχετε να κάνετε είναι να βγείτε από την κατάσταση ρύθμισης (setup) πριν χρησιμοποιήσετε τις συσκευές: 7. Πατήστε στιγμιαία δύο φορές το Μεσαίο πλήκτρο, θα σβήσει η Κόκκινη λυχνία και θα αρχίσει να αναβοσβήνει η Μπλε λυχνία. Τώρα μπορείτε να χρησιμοποιήσετε το BTX2 FM σας. Πώς να χρησιμοποιήσετε την ενδοεπικοινωνία (Intercom) Για να χρησιμοποιήσετε την ενδοεπικοινωνία, βεβαιωθείτε ότι οι συσκευές είναι ενεργοποιημένες και σωστά ζευγαρωμένες μεταξύ τους. Χειροκίνητη ενεργοποίηση Πιέστε το Μεσαίο πλήκτρο σε μία από τις 2 συσκευές. Ενεργοποιείται η επικοινωνία και παραμένει ενεργή μέχρι να πατήσετε πάλι το Μεσαίο πλήκτρο. Η ενδοεπικοινωνία χρειάζεται μερικά δευτερόλεπτα για να ενεργοποιηθεί. Θα ενημερωθείτε από εναν ήχο μπιπ. Φωνητική ενεργοποίηση (VOX) Απλά ξεκινήστε να μιλάτε, μετά από μερικά δευτερόλεπτα θα ανοίξει η επικοινωνία και θα παραμείνει ενεργή για όσο μιλάτε. Αν δεν υπάρχει συνομιλία η ενδοεπικοινωνία θα επενεργοποιηθεί μετά από 40 δευτερόλεπτα. Αν χρειαστεί μπορείτε να κλείσετε την ενδοεπικοινωνία χειροκίνητα χωρίς να περιμένετε τα 40 δευτερόλεπτα(πιέστε το Μεσαίο πλήκτρο). Αν είναι απαραίτητο, μπορείτε να απενεργοποιήσετε τη λειτουργία VOX προσωρινά απλά κρατώντας πατημένο το πλήκτρο Backward για 7 δευτερόλεπτα. Δύο ηχητικά σήματα μπιπ θα σας ενημερώσουν για την απενεργοποίηση της λειτουργίας. Για να ενεργοποιήσετε πάλι το VOX, πιέστε το ίδιο πλήκτρο και ένα ηχητικό σήμα μπιπ θα σας ενημερώσει για την ενεργοποίηση (ή μπορείτε να απενεργοποιήσετε και να ενεργοποιήσετε πάλι τη συσκευή). Ρύθμιση της έντασης GR διαχειριστείτε την επικοινωνία Οδηγού-Συνεπιβάτη. ›› Στην κατάσταση “Τηλέφωνο (Phone)” μπορείτε να διαχειριστείτε το κινητό σας τηλέφωνο συνδεδεμένο μέσω Bluetooth για να πραγματοποιήσετε/απαντήσετε σε κλήση ή για να ακούσετε μουσική (στερεοφωνικά). Χρησιμοποιείτε το κινητό σας με ασφάλεια και υπευθυνότητα. Μπορείτε να μεταβείτε από τη μία κατάσταση στην άλλη πατώντας απλώς παρατεταμένα το Μεσαίο πλήκτρο για 3 δευτ. Μια φωνητική ανακοίνωση θα σας ενημερώσει σε ποια κατάσταση βρίσκεστε.Η ακολουθία μετάβασης είναι η εξής: ›› Κατάσταση Ενδοεπικοινωνία (Intercom) (εάν έχει ζευγαρωθεί κι άλλη συσκευή) ›› Κατάσταση Τηλέφωνο (Phone) (εάν έχει ζευγαρωθεί κάποιο τηλέφωνο) Κάθε φορά που ενεργοποιείτε τη συσκευή σας, η κατάσταση στην οποία μπαίνει αυτόματα είναι η Ενδοεπικοινωνία (Intercom) (εάν προηγουμένως έχει ζευγαρωθεί με άλλη συσκευή), διαφορετικά μπαίνει στην κατάσταση Τηλέφωνο (Phone) (εάν είχε ζευγαρωθεί με κάποιο κινητό τηλέφωνο). Σε περίπτωση που θέλετε να διαπιστώσετε ποια είναι η τρέχουσα κατάσταση στην οποία βρίσκεστε, απλά πιέστε τα πλήκτρα “Volume+” και “Volume-“ ταυτόχρονα. Μια ηχητική ειδοποίηση θα σας ενημερώσει για την τρέχουσα κατάσταση. Το Midland BTX2 FM χρησιμοποιεί την τεχνολογία AGC, η οποία ρυθμίζει αυτόματα την ένταση σε σχέση με τον παρασιτικό εξωτερικό θόρυβο. Εντούτοις, είναι επίσης εφικτό να ρυθμιστεί χειροκίνητα η ένταση με τη βοήθεια των πλήκτρων “Volume+“ και “Volume-“. Προσοχή: η ένταση μπορεί να ρυθμιστεί μόνο όταν είναι ενεργή μια ακουστική σύνδεση. Προσοχή: τα πλήκτρα έντασης (Vol + και Vol -) δεν χρησιμεύουν στη ρύθμιση της έντασης των ενσύρματων πηγών ήχου. Το σύστημα AGC θα αυξήσει αυτόματα την ένταση σε υψηλότερη ταχύτητα. Midland BTX2 FM - 77 Πώς να ζευγαρώσετε το BTX2 FM με άλλη συσκευή από τη σειρά ΒΤ Tο BTX2 FM είναι συμβατό με όλες τις συσκευές της σειράς ΒΤ της Midland. Μπορείτε να ζευγαρώσετε το BTX2 FM με συσκευές BT2, BT1 ή BTX1, BT Next και BT City/Eva και μέγιστη απόσταση αυτής με τη μικρότερη εμβέλεια. Για να ζευγαρώσετε το BTX2 FM με άλλη συσκευή της σειράς ΒΤ, θα πρέπει να μεταβείτε στην κατάσταση ρύθμισης (setup) 1. Απενεργοποιήστε τη συσκευή. 2. Πιέστε και κρατήστε πατημένο το Μεσαίο πλήκτρο για περίπου 7 δευτερόλεπτα μέχρι να ανάψει μόνιμα η Κόκκινη λυχνία. 3. Τώρα πιέστε παρατεταμένα (3 δευτ.) το Μεσαίο πλήκτρο, θα αναβοσβήνει η Μπλε και Κόκκινη λυχνία. 4. Ακολουθήστε τη διαδικασία που περιγράφεται στις οδηγίες της άλλης συσκευής. 5. Όταν ολοκληρωθεί επιτυχώς το ζευγάρωμα, κάθε συσκευή θα έχει αναμμένη τη μπλε λυχνία για ένα δευτερόλεπτο και στη συνέχεια θα επιστρέψουν στην κατάσταση ρύθμισης (setup) (Κόκκινη λυχνία μόνιμα αναμμένη). Eπρέπει να βγείτε από την κατάσταση ρύθμισης (setup) πριν κάνετε χρήση αυτών των συσκευών: για το BTX2 FM πιέστε σύντομα δύο φορές το Μεσαίο πλήκτρο, θα σβήσει η Κόκκινη λυχνία και θα αναβοσβήνει Μπλε λυχνία. Για τις άλλες συσκευές ανατρέξτε στα εγχειρίδια χρήσης τους. GR Πώς να ζευγαρώσετε τρεις συσκευές ενδοεπικοινωνίας Μία μονάδα BTX2 FM μπορεί να ζευγαρώσει με έως και 2 μονάδες (3 συνολικά). Μπορείτε να χρησιμοποιήσετε το Μεσαίο πλήκτρο για να ζευγαρώσετε μια συσκευή Midland (βλέπε παράγραφο “Ζευγάρωμα δύο συσκευών BTX2 FM” και “Πώς να χρησιμοποιήσετε την ενδοεπικοινωνία”) και το πλήκτρο “Forward” για ζευγαρωμα/χρήση του χαρακτηριστικού “Talk2All-Universal Intercom”. Driver 1 Προσοχή: για να χρησιμοποιήσετε το χαρακτηριστικό “Talk2All-Universal Intercom” το ζευγάρωμα στην άλλη συσκευή πρέπει να γίνει ως τηλέφωνο. Tο ίδιο πλήκτρο που θα χρησιμοποιήσετε για το ζευγάρωμα, με το ίδιο θα ενεργοποιείτε την επικοινωνία. Θυμηθείτε ότι κάθε συσκευή μπορεί να ζευγαρώσει με άλλες 2 συκευές της επιλογής σας, όπως φαίνεται στην εικόνα παρακάτω. Κάθε φορά που ενεργοποιείτε την ενδοεπικοινωνία με κάποιο άτομο, η προηγούμενη σύνδεση κλείνει. Η σύνδεση δεν είναι αλυσιδωτή, όταν συνομιλούν δύο άτομα δεν είναι εφικτό να διακοπεί η επικοινωνία από μία από αυτές τις συσκευές εκτός της μέγιστης εμβέλειας. Talk2All - Universal Intercom Dispositivo non Midland Talk 2 All - Ζευγάρωμα με συσκευή ενδοεπικοινωνίας διαφορετικής μάρκας Χάρη στο χαρακτηριστικό “Talk2 All - Universal Intercom” είναι πλέον εφικτό το ζευγάρωμα του BTX2 FM σας με συσκευή ενδοεπικοινωνίας διαφορετικής μάρκας. 1. Στο BTX2 FM μεταβείτε σε κατάσταση ρύθμισης (setup): Με απενεργοποιημένη συσκευή πιέστε παρατεταμένα το Μεσαίο πλήκτρο για 7 δευτ., μέχρι να ανάψει μόνιμα η κόκκινη λυχνία. 2. Πιέστε το πλήκτρο “Forward” για 3 δευτ.,θα αναβοσβήνει Μπλε και Κόκκινο η λυχνία. 3. Στην άλλη συσκευή (όχι της Midland) ακολουθήστε τη διαδικασίαζευγαρώματος με κινητό τηλέφωνο. Mόλις ολοκληρωθεί το ζευγάρωμα δεν αναβοσβήνει κάποια λυχνία. Για να ανοίξετε την ενδοεπικοινωνία στο BTX2 FM πιέστε το πλήκτρο forward. Στην άλλη συσκευή ενδοεπικοινωνίας απλά πιέστε το πλήκτρο επανάκλησης. Ίσως χρειαστεί να πιέστε το πλήκτρο κλήσης δύο φορές, ανάλογα από το μοντέλο ενδοεπικοινωνίας. Προσοχή: κατά τη χρήση αυτής της λειτουργίας, η άλλη συσκευή (όχι η Midland) δεν θα μπορεί να ζευγαρώσει με κινητό τηλέφωνο. Passennger 1 2 Driver 2 78 -Midland BTX2 FM 3 Πώς να ζευγαρώσετε το ΒΤX2 FM με συσκευές BLUETOOTH To ΒΤX2 FM μπορεί να ζευγαρώσει με άλλες συσκευές Bluetooth όπως, κινητό τηλέφωνο, πλοηγό GPS ή πομποδέκτη PMR446 με ενσωματωμένο ή εξωτερικό Bluetooth. Η διαδικασία ζευγαρώματος πρέπει να πραγματοποιηθεί με χρήση των πλήκτρων “Volume +” ή “Volume –“. ›› Ζευγάρωμα με το πλήκτρο “Volume +”: για κινητό τηλέφωνο με μουσική A2DP stereo, πλοηγό GPS με A2DP audio ή εξωτερική mono/stereo A2DP πηγή. ›› Όλες οι συσκευές που έχουν ζευγαρώσει με το πλήκτρο “Volume +” έχουν υψηλή προτεραιότητα και θα μπορούν να διακόψουν οποιαδήποτε άλλη επικοινωνία (όπως ενδοεπικοινωνία, ραδιόφωνο FM και μουσική). ›› Ζευγάρωμα με το πλήκτρο “Volume -”: για δεύτερο κινητό τηλέφωνο με μονοφωνικό ήχο (πρωτόκολλο για ελεύθερα χέρια), για πλοηγούς GPS/ ανιχνευτές Radar και άλλες συσκευές των οποίων ο ήχος πρέπει να είναι πάντα στο υπόβαθρο. ›› Προσοχή: η πηγή ήχου A2DP υποστηρίζεται μόνο στο πλήκτρο Vol+. Το δεύτερο κινητό τηλέφωνο που ζευγαρώνει στο Vol- υποστηρίζει μονοφωνικό ήχο (HFP). Όταν μια μονάδα ζευγαρώνει στο πλήκτρο “Volume +” ή στο “ Volume –“, ενεργοποιείται η κατάσταση “Τηλέφωνο (Phone)”. ›› Phone (A2DP Stereo) ›› GPS (A2DP Stereo) ›› Dongle A2DP Stereo ›› Phone (HFP Mono) ›› GPS mono ›› PMR446 Transceiver Προσοχή: Πηγή ήχου A2DP υποστηρίζεται μόνο στο πλήκτρο “Volume+”. Το δεύτερο κινητό τηλέφωνο μπορεί να ζευγαρώσει στο πλήκτρο “Volume – μονοφωνικά (HFP)”. Λειτουργία Υποβάθρου (Background) Είναι εφικτό να διατηρήσετε στο υπόβαθρο πάντα τις συνδέσεις ήχου που έχετε ζευγαρώσει στη μονάδα στο πλήκτρο Volume-. Με αυτό τον τρόπο, η ενδοεπικοινωνία δεν θα διακόπτεται από παράδειγμα τις φωνητικές ενδείξεις του πλοηγού GPS ή την επικοινωνία μέσω πομποδέκτη G8BT. Για να ενεργοποιήσετε τη λειτουργία υποβάθρου “Background” απλά πιέστε παρατεταμένα το πλήκτρο “Volume-“ . Μια φωνητική ειδοποίηση “Background enable” θα σας ενημερώσει για την ενεργοποίηση της. Για να απενεργοποιήσετε τη λειτουργία υποβάθρου “Background” απλά πιέστε παρατεταμένα το πλήκτρο “Volume-“ . Μια φωνητική ειδοποίηση “Background off” θα σας ενημερώσει για την απενεργοποίηση της Ζευγάρωμα με ένα ή δύο κινητά τηλέφωνα Το κινητό τηλέφωνο μπορεί να ζευγαρώσει στο πλήκτρο “Volume +“ (αν απαιτείται η υποστήριξη στερεοφωνικού Α2DP) ή στο πλήκτρο “Volume -”. Όταν ένα κινητό τηλέφωνο ζευγαρώνει με το πλήκτρο “Volume +“ ή το πλήκτρο “Volume -”, ενεργοποιείται η κατάσταση “Τηλέφωνο (Phone)”. Το τηλέφωνο έχει την υψηλότερη προτεραιότητα πράγμα που σημαίνει ότι σε περίπτωση κλήσης, οποιαδήποτε άλλη επικοινωνία θα κλείσει (ενδοεπικοινωνία, ραδιόφωνο FM, μουσική). Αν την ώρα που συνομιλείτε έχετε εισερχόμενη κλήση στο δεύτερο τηλέφωνο, ένας ήχος μπιπ θα σας ενημερώσει σχετικά Ζευγάρωμα με κινητό τηλέφωνο Το κινητό τηλέφωνο μπορεί να ζευγαρώσει στο πλήκτρο “Volume +“ (αν απαιτείται η υποστήριξη στερεοφωνικού Α2DP) ή στο πλήκτρο “Volume -”. Είναι εφικτό το ζευγάρωμα δύο κινητών τηλεφώνων, ένα στο πλήκτρο “Volume +“ και ένα στο πλήκτρο “Volume -”. Εργοστασιακά, το κινητό τηλέφωνο που ζευγαρώνει στο πλήκτρο “Volume +” είναι αυτό που μπορείτε να χειριστείτε από τη μονάδα Όταν ένα κινητό τηλέφωνο ζευγαρώνει με το πλήκτρο “Volume +“ ή το πλήκτρο “Volume -”, ενεργοποιείται η κατάσταση “Τηλέφωνο (Phone)”. Το τηλέφωνο έχει την υψηλότερη προτεραιότητα πράγμα που σημαίνει ότι σε περίπτωση κλήσης, οποιαδήποτε άλλη επικοινωνία θα κλείσει (ενδοεπικοινωνία, ραδιόφωνο FM, μουσική). Αν την ώρα που συνομιλείτε έχετε εισερχόμενη κλήση στο δεύτερο τηλέφωνο, ένας ήχος μπιπ θα σας ενημερώσει σχετικά. Βασικό κινητό τηλέφωνο Όταν ζευγαρώνετε δύο κινητά τηλέφωνα στη μονάδα, μπορείτε να καθορίσετε ποιο θα είναι το βασικό κινητό τηλέφωνο (το κινητό τηλέφωνο που θα χειρίζεστε από το πλήκτρο της μονάδας). ›› Σε κατάσταση “Τηλέφωνο (Phone)”, κρατήστε πατημένο το πλήκτρο “Volume Midland BTX2 FM - 79 GR Συσκευή κατειλημμένη Αν προσπαθήσετε να επικοινωνήσετε με άτομο που συνομιλεί με κάποιον άλλο (ή είναι εν μέσω τηλεφωνικής συνομιλίας), θα ακούσετε διπλό ήχο μπιπ κατειλημμένου. Απλά περιμένετε λίγο και δοκιμάστε ξανά, ίσως αυτή τη φορά η γραμμή να μην είναι κατειλημμένη. Μια φωνητική ειδοποίηση ενημερώνει το άτομο που καλείται, με τον αριθμό του πλήκτρο από το οποίο έρχεται το αίτημα. +“ για 3 δευτερόλεπτα. Η φωνητική ενημέρωση “Control on plus” θα σας επιβεβαιώνει ότι το κινητό τηλέφωνο που έχει ζευγαρώσει με το πλήκτρο “Volume +“ είναι το βασικό. Τώρα μπορείτε να διαχειριστείτε όλες τις λειτουργίες του τηλεφώνου (κλήσεις, μουσική κλπ). ›› Σε κατάσταση “Τηλέφωνο (Phone)”, κρατήστε πατημένο το πλήκτρο “Volume -“ για 3 δευτερόλεπτα. Η φωνητική ενημέρωση “Control on minus” θα σας επιβεβαιώνει ότι το κινητό τηλέφωνο που έχει ζευγαρώσει με το πλήκτρο “Volume -“ είναι το βασικό. Τώρα μπορείτε να διαχειριστείτε όλες τις λειτουργίες του τηλεφώνου (κλήσεις, μουσική κλπ). Πώς να ζευγαρώσετε το ΒΤ ΝΕΧΤ Conference με το κινητό σας τηλέφωνο GR Για να ζευγαρώσετε το ΒΤX2 FM με το κινητό σας τηλέφωνο, θα πρέπει πρώτα να μεταβείτε στην κατάσταση ρύθμισης (setup): ›› Απενεργοποιήστε τη συσκευή ›› Πιέστε και κρατήσετε πατημένο το Μεσαίο πλήκτρο για περίπου 7 δευτ. έως ότου ανάψει μόνιμα η Κόκκινη λυχνία. ›› Τώρα κρατήστε πατημένο για 3 δευτερόλεπτα το πλήκτρο “Volume+” ή το πλήκτρο “Volume -”. Θ αρχίσει να αναβοσβήνει η λυχνία Μπλε και Κόκκινο. ›› Ενεργοποιήστε την ανίχνευση συσκευών Bluetooth στο κινητό σας τηλέφωνο. ›› Μετά από μερικά δευτερόλεπτα θα εμφανιστεί στην οθόνη του κινητού σας τηλεφώνου η ένδειξη “Midland BTX2 FM”. Ακολουθήστε τη διαδικασία ζευγαρώματος του κινητού σας τηλεφώνου. Εάν σας ζητηθεί αριθμός pin θα πρέπει να εισάγετε “0000” (τέσσερα μηδενικά). ›› Όταν ολοκληρωθεί επιτυχώς το ζευγάρωμα, θα ανάψει για ένα δευτερόλεπτο η Μπλε λυχνία και η συσκευή θα βγει από την κατάσταση ρύθμισης και θα μεταβεί σε κατάσταση λειτουργίας (θα αρχίσει να αναβοσβήνει η Μπλε λυχνία). ›› Τώρα μπορείτε να χρησιμοποιήσετε το BTX2 FM σας με το κινητό σας τηλέφωνο Πώς να χρησιμοποιήσετε το κινητό σας τηλέφωνο Μετά το ζευγάρωμα του κινητού τηλεφώνου σας με τη συσκευή BT Next, θα πρέπει να μεταβείτε στην κατάσταση “Τηλέφωνο (Phone)” για να μπορέσετε να το χρησιμοποιήσετε. Πιέστε το Μεσαίο πλήκτρο μέχρι να ακούσετε τη φωνητική ειδοποίηση “Phone” . Τώρα και τα τρία πλήκτρα είναι αφιερωμένα στη χρήση για το τηλέφωνο (βλέπε Πίνακα Β). Απάντηση σε εισερχόμενη κλήση Όταν ακούσετε το τηλέφωνο να “χτυπάει” μπορείτε να απαντήσετε με δύο διαφορετικούς τρόπους: Φωνητικά: Απλά πείτε μια λέξη για να απαντήσετε στην κλήση και αρχίστε να μιλάτε. Χειροκίνητα: Πιέστε το πλήκτρο “Forward” και αρχίστε να μιλάτε. Απόρριψη κλήσης Εάν δεν επιθυμείτε να απαντήσετε στην εισερχόμενη κλήση, μπορείτε να αφήσετε τη συσκευή να “χτυπάει” ή να πιέσετε και να κρατήσετε πατημένο για μερικά δευτερόλεπτα το πλήκτρο “Forward” (θα ακούσετε έναν ήχο ενημέρωσης). Πραγματοποίηση κλήσης Υπάρχουν πολλοί τρόποι για να πραγματοποιήσετε μια κλήση. Από το πληκτρολόγιο του κινητού σας τηλεφώνου: Πληκτρολογήστε τον αριθμό που θέλετε να καλέσετε στο πληκτρολόγιο του κινητού σας τηλεφώνου και πιέστε “κλήση” . Επανάκληση τελευταίου αριθμού: B – Κατάσταση Τηλέφωνο Κατάσταση Πλήκτρο Forward Τηλέφωνο Σύντομο πάτημα πλήκτρου: Φωνητική κλήση/ Παρατεταμένο πάτημα πλήκτρου: αποδοχή ή απόρριψη αν είναι σε εξέλιξη Αλλαγή κατάστασης Παρατεταμένο πάτημα πλήκτρου: επανάκληση τελευταίου αριθμού / απόρριψη εισερχόμενης κλήσης Τηλέφωνο (ενώ παίζει μουσική και είναι ζευγαρωμένο στο πλήκτρο “Volume+”) Σύντομο πάτημα πλήκτρου: Μετάβαση σε επόμενο Σύντομο πάτημα πλήκτρου: Play/pause Σύντομο πάτημα πλήκτρου: Μετάβαση τραγούδι Παρατεταμένο πάτημα πλήκτρου: σε προηγούμενο τραγούδι Αλλαγή κατάστασης 80 -Midland BTX2 FM Μεσαίο πλήκτρο Πλήκτρο Backward Σύντομο πάτημα πλήκτρου: Φωνητική κλήση / αποδοχή ή ολοκλήρωση κλήσης Παρατεταμένο πάτημα πλήκτρου: επανάκληση τελευταίου αριθμού / απόρριψη κλήσης Φωνητική κλήση: Κινητό τηλέφωνο ζευγαρωμένο στο πλήκτρο Volume +: Πιέστε σύντομα το πλήκτρο “Forward”. Αν το κινητό σας τηλέφωνο υποστηρίζει φωνητική κλήση, θα σας ζητηθεί να αναφέρετε το όνομα της επαφής που επιθυμείτε να καλέσετε. Κινητό τηλέφωνο ζευγαρωμένο στο πλήκτρο Volume -: Πιέστε σύντομα το πλήκτρο “Backward”. Αν το κινητό σας τηλέφωνο υποστηρίζει φωνητική κλήση, θα σας ζητηθεί να αναφέρετε το όνομα της επαφής που επιθυμείτε να καλέσετε. Προτεραιότητα: Οι κλήσεις είναι υψηλής προτεραιότητας πράγμα που σημαίνει ότι όλες οι άλλες επικοινωνίες διακόπτονται προσωρινά όταν εισέρχεται μια κλήση Τερματισμός κλήσης: Υπάρχουν πολλοί τρόποι για να τερματίσετε μια κλήση: ›› Περιμένετε μέχρι εκείνος που σας κάλεσε να κλείσει την επικοινωνία. ›› Πιέστε το πλήκτρο “Forward”(θα ακούσετε έναν ήχο επιβεβαίωσης). ›› Πιέστε το πλήκτρο “Τερματισμός” στο κινητό σας τηλέφωνο. Χρήση της λειτουργίας MP3 player του κινητού σας τηλεφώνου Πολλά κινητά τηλέφωνα, όταν ζευγαρώσουν με το πλήκτρο “Volume +”, μπορούν να χρησιμοποιούνται και ως στερεοφωνικά MP3 Player. Η συσκευή BTX2 FM υποστηρίζει απόλυτα τα πρωτόκολλα A2DP και AVRCP, τα οποία σας επιτρέπουν να ακούτε μουσική και να χειρίζεστε από απόσταση το MP3 player του κινητού σας τηλεφώνου. Μπορείτε επίσης, να χρησιμοποιήσετε τα πλήκτρα του BT Next για να χειριστείτε τις παρακάτω επιλογές: Play, Pause, Forward και Backward Διαθέσιμοι χειρισμοί: ›› Play/pause: πιέστε το Μεσαίο πλήκτρο. ›› Για να μεταβείτε σε επόμενο τραγούδι: πιέστε το πλήκτρο “Forward”. ›› Για να μεταβείτε σε προηγούμενο τραγούδι: πιέστε το πλήκτρο ” Backward”. Προτεραιότητα: η κατάσταση στην οποία ακούτε μουσική έχει μικρότερη προτεραιότητα. Επομένως, η κατάσταση αυτή θα απενεργοποιείται μόλις ενεργοποιείται κάποιος άλλος τύπος επικοινωνίας. Προσοχή: Μπορείτε να ακούσετε στερεοφωνική μουσική A2DP από τον πλοηγό GPS μόνο σε κατάσταση “Τηλέφωνο” (Phone).. Πώς να ζευγαρώσετε το BTX2 FM με έναν πλοηγό GPS Γενικά, είναι εφικτό το ζευγάρωμα του BTX2 FM με όλους τους πλοηγούς GPS για μοτοσικλέτα που υποστηρίζουν τη σύνδεση κεφαλακουστικών Bluetooth Για να ζευγαρώσετε το BTX2 FM μ’έναν πλοηγό GPS, πρέπει να μεταβείτε στην κατάσταση ρύθμισης (setup): 1. Απενεργοποιήστε τη συσκευή. 2. Πιέστε και κρατήστε πατημένο το Μεσαίο πλήκτρο για περίπου 7 δευτ. έως ότου ανάψει μόνιμα η Κόκκινη λυχνία. 3. Τώρα πιέστε παρατεταμένα (3 δευτ.) το πλήκτρο “Volume-”, θα αναβοσβήνει Μπλε και Κόκκινο η λυχνία. 4. Ενεργοποιήστε την ανίχνευση συσκευών Bluetooth στον πλοηγό σας. 5. Μετά από μερικά δευτερόλεπτα, θα εμφανιστεί στην οθόνη του πλοηγού GPS σας η ένδειξη “Midland BTX2 FM”. 6. Ακολουθήστε τη διαδικασία ζευγαρώματος στον πλοηγό σας GPS. Εάν σας ζητηθεί αριθμός pin θα πρέπει να εισάγετε “0000” (τέσσερα μηδενικά). 7. Όταν ολοκληρωθεί επιτυχώς το ζευγάρωμα, θα ανάψει για ένα δευτερόλεπτο η Μπλε λυχνία και η συσκευή θα βγει από την κατάσταση ρύθμισης και θα μεταβεί σε κατάσταση λειτουργίας (θα αρχίσει να αναβοσβήνει η Μπλε λυχνία). Αν ζευγαρώσετε τον πλοηγό GPS στο πλήκτρο “Volume+” , χάνετε τη δυνατότητα να ζευγαρώσετε το κινητό σας τηλέφωνο με το BTX2 FM unit. Μπορείτε να προσπεράσετε αυτό το εμπόδιο ζευγαρώνοντας το κινητό τηλέφωνο με τον πλοηγό GPS και στη συνέχεια, τον πλοηγό GPS με το BTX2 FM. Όλες οι λειτουργίες του κινητού τηλεφώνου θα διαχειρίζονται από τον πλοηγό GPS. Πλοηγός GPS μόνιμα ενεργός στο υπόβαθρο Για να διατηρήσετε την ενδοεπικοινωνία ανοιχτή ενώ ο πλοηγός GPS σας δίνει οδηγίες κατεύθυνσης θα πρέπει να έχετε ενεργό το χαρακτηριστικό “υπόβαθρο”. Forward Play/Pause Backward Πώς να ζευγαρώσετε έναν πομποδέκτη PMR446 με ενσωματωμένο Bluetooth Αν ο πομποδέκτης PMR446 σας διαθέτει ενσωματωμένη λειτουργία Bluetooth (όπως το G8BT), θα πρέπει να ζευγαρώσετε τον πομποδέκτη με το πλήκτρο “Volume+“: Midland BTX2 FM - 81 GR Κινητό τηλέφωνο ζευγαρωμένο στο πλήκτρο Volume +: Πιέστε το πλήκτρο “Forward” για 3 δευτερόλεπτα προκειμένου να γίνει επανάκληση του τελευταίου αριθμού κλήσης(θα ακούσετε έναν ήχο επιβεβαίωσης). Κινητό τηλέφωνο ζευγαρωμένο στο πλήκτρο Volume -: Πιέστε το πλήκτρο “Backward” για 3 δευτερόλεπτα προκειμένου να γίνει επανάκληση του τελευταίου αριθμού κλήσης(θα ακούσετε έναν ήχο επιβεβαίωσης). ›› Απενεργοποιήστε τη συσκευή. ›› Πιέστε και κρατήστε πατημένο το Μεσαίο πλήκτρο για περίπου 7 δευτερόλεπτα μέχρι η Κόκκινη λυχνία ανάψει μόνιμα. ›› Πιέστε παρατεταμένα (3 δευτ.) το πλήκτρο Volume -”. Η Μπλε και Κόκκινη λυχνία LED θα αναβοσβήσουν ›› Ακολουθήστε τη διαδικασία ζευγαρώματος όπως περιγράφεται στις οδηγίες χρήσης του ίδιου του πομποδέκτη. Προσοχή: Αν ζευγαρώσετε πομποδέκτη G8BT, μόλις ολοκληρωθεί το ζευγάρωμα με το BTX2 FM(θα αναβοσβήνει μόνο η μπλε λυχνία) θα πρέπει να ακολουθήσετε της εξής διαδικασία για να ενεργοποιήσετε τη σύνδεση Bluetooth: ›› Απενεργοποιήσετε και ενεργοποιήστε το G8BT και στη συνέχεια πιέστε για 3 δευτερόλεπτα το πλήκτρο “BT”. ›› Ακολουθήστε την ίδια διαδικασία κάθε φορά που απαιτείται να συνδέσετε πάλι το G8BT με τη συσκευή BTX2 FM (δεν χρειάζεται να ξανα-ζευγαρώσετε τη συσκευή). Προσοχή: θυμηθείτε να έχετε ενεργό το χαρακτηριστικό “υπόβαθρο” αν θέλετε ταυτόχρονη επικοινωνία με τον πομποδέκτη και την ενδοεπικοινωνία. Χρήση υποδοχής ενσύρματης σύνδεσης πηγών ήχου Το Midland BTX2 FM σας είναι εφοδιασμένο με υποδοχή ενσύρματης σύνδεσης πηγών ήχου (AUX), στην οποία μπορείτε να συνδέσετε iPod (ή οποιοδήποτε MP3 Player) ή πομποδέκτη PMR446 για ομαδικές επικοινωνίες ή για μεγαλύτερη εμβέλεια. GR Πώς να ακούσετε μουσική Για να ακούσετε μουσική ενσύρματα, συνδέστε την πηγή ήχου χρησιμοποιώντας το προαιρετικό καλώδιο AUX. Tα πλήκτρα έντασης (Vol + και Vol -) δεν μπορούν να χρησιμεύσουν για τη ρύθμιση έντασης της ενσύρματης πηγής ήχου. Tο AGC σύστημα θα αυξήσει αυτόματα την ένταση σε μεγαλύτερες ταχύτητες. Προσοχή: μη θέτετε ποτέ την ένταση του MP3 Player στο μέγιστο επίπεδο. Το ιδανικό επίπεδο είναι περίπου το 70% της έντασης Συμβουλή: Σας συστήνουμε να κάνετε κάποιες δοκιμές ρυθμίζοντας την ένταση του iPod/MP3 player σας ώστε η ένταση στα κεφαλακουστικά σας να καλύπτουν τις ανάγκες σας σε κανονική ταχύτητα.Το σύστημα AGC θα αυξάνει την ένταση σε υψηλότερες ταχύτητες. Σημειώστε αυτή τη συμβουλή για μελλοντικά ταξίδια. Ενεργοποίηση/απενεργοποίηση της ενσύρματης υποδοχής Μπορείτε να ενεργοποιήσετε ή να απενεργοποιήσετε την ενσύρματη υποδοχή αν το επιθυμείτε: Ενεργοποίηση/απενεργοποίηση: Παρατεταμένο πάτημα του πλήκτρου “Backward” (θα ακούσετε έναν ήχο μπιπ ως επιβεβαίωση της ενεργοποίησης και δύο ήχους μπιπ ως επιβεβαίωση της απενεργοποίησης). Χρήση πομποδέκτη PMR446 μέσω ενσύρματης σύνδεσης Κατ’ αρχήν, πρέπει να προμηθευτείτε το ειδικό καλώδιο για τη σύνδεση του πομποδέκτη στην υποδοχή AUX 2.5mm του Midland BTX2 FM σας (πωλείται ξεχωριστά). Μερικοί κατασκευαστές πομποδεκτών χρησιμοποιούν διαφορετική συνδεσμολογία για αυτό, σας συνιστούμε να ρωτήσετε τον πωλητή ποιο καλώδιο είναι κατάλληλο για τις ανάγκες σας. Το καλώδιο σύνδεσης για τον πομποδέκτη, συνήθως διαθέτει πλήκτρο ΡΤΤ το οποίο μπορεί να τοποθετηθεί στη λαβή ή στο ταμπλό οργάνων της μηχανής σας ή μπορείτε να το κρατάτε στο χέρι σας (αν είστε ο συνοδηγός). Για να επικοινωνήσετε μέσω του συνδεδεμένου πομποδέκτη, πιέστε το κουμπί μετάδοσης PTT για να μιλήσετε και αφήστε το για να ακούσετε. Δεν είναι δυνατόν να μιλάτε και να ακούτε ταυτόχρονα. Ρυθμίστε την ένταση του πομποδέκτη ανάλογα με τις ανάγκες σας, υπενθυμίζουμε ότι η ρύθμιση της έντασης ελέγχεται από το αυτόματο σύστημα AGC και ότι επομένως θα αυξάνεται αυτόματα σε σχέση με το θόρυβο του περιβάλλοντος. Εάν επιθυμείτε να χρησιμοποιήσετε έναν πομποδέκτη PMR446 για ομαδικές επικοινωνίες και ταυτόχρονα να διατηρήσετε την λειτουργία ενδοεπικοινωνίας (Intercom) ενεργοποιημένη μεταξύ δύο ή περισσοτέρων συσκευών BT Χ2, πρέπει να θυμάστε ότι κάθε φορά που μιλάτε για να επικοινωνήσετε με τον πομποδέκτη PMR446 (πιέζοντας το κουμπί PTT), θα ενεργοποιείτε επίσης την ενδοεπικοινωνία του BT Χ2 με την μονάδα που συνδέεται με το Μεσαίο κουμπί (χάρη στην λειτουργία VOX)Για να αποφύγετε την ενεργοποίηση της ενδοεπικοινωνίας καθώς συνομιλείτε με τον πομποδέκτη PMR446, έχετε την επιλογή να ζευγαρώσετε την συσκευή BT Χ2 με τα πλήκτρα “Backward” ή “Forward” (όπου η λειτουργία VOX δεν είναι ενεργή) ή και στο Μεσαίο πλήκτρο αν θέλετε. Θα πρέπει όμως, να C – Κατάσταση Ράδιο FM Κατάσταση Ράδιο FM Forward (πλήκτρο αριστερά) Σύντομο πάτημα πλήκτρου: αναζήτηση ραδιοφωνικού σταθμού Παρατεταμένο πάτημα πλήκτρου: αποθήκευση σταθμού 82 -Midland BTX2 FM Μεσαίο πλήκτρο Σύντομο πάτημα πλήκτρου: On/Off Παρατεταμένο πάτημα πλήκτρου: αλλαγή κατάστασης Backward (πλήκτρο δεξιά) Σύντομο πάτημα πλήκτρου: αναζήτηση ραδιοφωνικού σταθμού Παρατεταμένο πάτημα πλήκτρου: αποθήκευση σταθμού Προσοχή! Εάν απενεργοποιήσετε την λειτουργία VOX, θα είστε σε θέση να απαντήσετε σε εισερχόμενες κλήσεις μόνο πιέζοντας το Μεσαίο πλήκτρο. ενός από τα τέσσερα επίπεδα ευαισθησίας μικροφώνου: υψηλό, μεσαίο, χαμηλό και πολύ χαμηλό.Η εργοστασιακή ρύθμιση του BTX2 FM είναι “χαμηλό”. Είναι επίσης εφικτή η απενεργοποίηση της λειτουργίας VOX ώστε να πραγματοποιείτε ενδοεπικοινωνία και τηλεφωνικές κλήσεις χειροκίνητα Ρυθμίσεις και Ειδικές Λειτουργίες Ρύθμιση της ευαισθησίας του μικροφώνου (VOX) Διαγραφή (reset) όλων των ζευγαρωμένων συσκευών Για να εκτελέσετε αυτή τη λειτουργία πρέπει πρώτα να μεταβείτε στην κατάσταση ρύθμισης (setup): 1. Απενεργοποιήστε τη συσκευή 2. Πιέστε και κρατήστε πατημένο το Μεσαίο πλήκτρο για περίπου 7 δευτερόλεπτα μέχρι η κόκκινη λυχνία ανάψει μόνιμα πράσινο. 3. Το BTX2 FM σας βρίσκεται τώρα σε κατάσταση ρύθμισης (setup).”. 4. Πιέστε το πλήκτρο “Backward” μέχρι η κόκκινη λυχνία να γίνει μόνιμα μπλε. 5. Τώρα, πιέστε “Volume+” ή “Volume-“ για να αυξήσετε ή να ελαττώσετε την ευαισθησία. Κάθε φορά που πιέζετε τα πλήκτρα έντασης η Κόκκινη λυχνία θα αναβοσβήνει ως επιβεβαίωση. Όταν φτάνετε τα όρια είτε προς τα πάνω είτε προς τα κάτω, η Κόκκινη λυχνία δεν θα αναβοσβήσει. 6. Πιέστε πάλι το πλήκτρο “Backward”; η μπλε λυχνία θα αναβοσβήσει αρκετές φορές προκειμένου να αντιληφθείτε την επιλεγμένη ευαισθησία: Λυχνία αναβοσβήνει μια φορά = απενεργοποίηση VOX Λυχνία αναβοσβήνει δύο φορές = πολύ χαμηλή ευαισθησία Λυχνία αναβοσβήνει τρεις φορές = χαμηλή ευαισθησία Λυχνία αναβοσβήνει τέσσερις φορές = μεσαία ευαισθησία (εργοστασιακή ρύθμιση) Λυχνία αναβοσβήνει πέντε φορές = υψηλή ευαισθησία Η λυχνία ένδειξης είναι πάλι μόνιμα Κόκκινη (κατάσταση ρύθμισης (setup)) και οι επιλογές έχουν πραγματοποιηθεί. 7. Αν χρειαστεί, μπορείτε να ρυθμίσετε ξανά την ευαισθησία επαναλαμβάνοντας τα βήματα από το 1, διαφορετικά βγείτε από την κατάσταση ρύθμισης πιέζοντας σύντομα δύο φορές το Μεσαίο πλήκτρο. Μόλις σβήσει η κόκκινη λυχνία, θα αρχίσει να αναβοσβήνει η μπλε λυχνία. Τώρα μπορείτε να χρησιμοποιήσετε το BTX2 FM σας. Κάποιες φορές ίσως βρείτε αναγκαίο να διαγράψετε όλα όσα αφορούν τις ζευγαρωμένες συσκευές με το BTX2 FM (λειτουργία reset). To perform this operation you must first enter the setup mode: ›› Απενεργοποιήστε τη συσκευή. ›› Πιέστε και κρατήστε πατημένο το Μεσαίο πλήκτρο για περίπου 7 δευτερόλεπτα μέχρι η κόκκινη λυχνία ανάψει μόνιμα πράσινο. ›› Στη συνέχεια πιέστε και κρατήστε πατημένα τα πλήκτρα “Volume+” και “Volume-“ ταυτόχρονα για 3 δευτερόλεπτα. Η Μπλε λυχνία θα ανάψει για 1 δευτερόλεπτο και στη συνέχεια θα γίνει μόνιμα Κόκκινη. ›› Πιέστε σύντομα δύο φορές το Μεσαίο πλήκτρο για να βγείτε από την κατάσταση ρύθμισης (setup) και να χρησιμοποιήσετε το BTX2 FM. Αυτή η διαδικασία διαγράφει όλες τις ζευγαρωμένες συσκευές Bluetooth που είχαν αποθηκευτεί στη μνήμη και είναι εφικτό να ζευγαρώσετε από την αρχή νέες συσκευές. Εργοστασιακές ρυθμίσεις Μερικές φορές ίσως θεωρήσετε απαραίτητο να επαναφέρετε τις εργοστασιακές ρυθμίσεις, να αναιρέσετε όλες τις αλλαγές/ρυθμίσεις που έχουν ήδη πραγματοποιηθεί και να ξεκινήσετε από την αρχή. Για να εκτελέσετε αυτή τη λειτουργία πρέπει πρώτα να μεταβείτε στην κατάσταση ρύθμισης (setup): Απενεργοποιήστε τη συσκευή Πιέστε και κρατήστε πατημένο το Μεσαίο πλήκτρο για περίπου 7 δευτερόλεπτα μέχρι η κόκκινη λυχνία ανάψει μόνιμα πράσινο. Στη συνέχεια πιέστε και κρατήστε πατημένα και τα τρία πλήκτρα “Forward” – Μεσαίο -“Backward“ ταυτόχρονα για 3 δευτερόλεπτα. Η Μπλε λυχνία θα ανάψει για 1 δευτερόλεπτο και στη συνέχεια θα γίνει μόνιμα Κόκκινη. Πιέστε στιγμιαία δύο φορές το Μεσαίο πλήκτρο για να βγείτε από την κατάσταση ρύθμισης (setup) και να χρησιμοποιήσετε το BTX2 FM. Ρύθμιση/Απενεργοποίηση της λειτουργίας VOX (Ενδοεπικοινωνίας και τηλεφώνου) Η ενδοεπικοινωνία (Intercom) μπορεί να ενεργοποιηθεί χειροκίνητα και φωνητικά (VOX). Η ενεργοποίηση του VOX επηρεάζεται από το θόρυβο υποβάθρου και κατ’ επέκταση από την ταχύτητα. Για καλύτερα αποτελέσματα, είναι δυνατή η επιλογή Απενεργοποίηση της λειτουργίας VOX (Ενδοεπικοινωνίας και τηλεφώνου) Ακολουθήστε την παραπάνω διαδικασία και επιλέξτε την επιλογή της λυχνίας να αναβοσβήνει μόνο μια φορά (απενεργοποιείται το VOX). Ενσύρματη σύνδεση πάντα ενεργοποιημένη Αυτό το χαρακτηριστικό σας επιτρέπει να διατηρείτε ενεργοποιημένη πάντα την ενσύρματη σύνδεση ακόμα και αν το τηλέφωνο ή ενδοεπικοινωνία (intercom) είναι ανοιχτά. Αυτό το χαρακτηριστικό μπορεί να είναι χρήσιμο όταν συνδέσετε έναν πομποδέκτη PMR446. Αυτή η επιλογή είναι εργοστασιακά ενεργοποιημένη. Midland BTX2 FM - 83 GR απενεργοποιήσετε τη λειτουργία VOX όπως εξηγείται στην προηγούμενη ενότητα. Απενεργοποίηση: ›› Μεταβείτε στην κατάσταση ρύθμισης “Setup” ›› Απενεργοποιήστε τη συσκευή ›› Πιέστε και κρατήστε πατημένο το Μεσαίο πλήκτρο για περίπου 7 δευτερόλεπτα μέχρι η κόκκινη λυχνία ανάψει μόνιμα ›› Πιέστε συγχρόνως το πλήκτρο “Volume + & Volume -” για 3 δευτερόλεπτα. Η Μπλε λυχνία LED θα αναβοσβήσει 2 φορές. ›› Πατήστε στιγμιαία δύο φορές το Μεσαίο πλήκτρο για να βγείτε από την κατάσταση ρύθμισης “Setup” και να χρησιμοποιήσετε το BTX2 FM. Ενεργοποίηση: ›› Ακολουθήστε την ίδια διαδικασία που περιγράφεται παραπάνω. Τώρα η Μπλε λυχνία LED θα αναβοσβήσει μία φορά. Για να βγείτε από την κατάσταση ρύθμισης “Setup” πατήστε στιγμιαία 2 φορές το Μεσαίο κουμπί. Εγκατάσταση και αναβάθμιση του Firmware Έχετε την δυνατότητα να ρυθμίσετε και να αναβαθμίσετε το Firmware του BT Χ2 χρησιμοποιώντας την σύνδεση USB στον Η/Υ σας. Στην ιστοσελιδα της Midland www.midlandeurope.com στην σελίδα του ΒΤ Χ2 μπορείτε να βρείτε το λογισμικό Η/Υ και τις νέες ενημερωμένες εκδόσεις του Firmware εάν υπάρχουν. ΠΡΟΣΟΧΗ: ΜΗ ΣΥΝΔΕΕΤΕ ΤΗ ΣΥΣΚΕΥΗ ΣΤΟΝ Η/Υ ΠΡΟΤΟΥ ΑΠΟΘΗΚΕΥΣΕΤΕ ΚΑΙ ΕΓΚΑΤΑΣΤΗΣΕΤΕ ΤΟ ΛΟΓΙΣΜΙΚΟ. GR Χρήση με δική σας ευθύνη Η χρήση στης συσκευής θα ελαττώσει την ικανότητά σας να ακούτε άλλους θορύβους γύρω σας. Η συνομιλία στο τηλέφωνο όπως και το να ακούτε μουσική ίσως σας εμποδίσει από το να ακούτε τους γύρω θορύβους και σας αποσπάσει την προσοχή ενώ οδηγείτε. Η χρήση τέτοιων συσκευών κατά την οδήγηση, θέτει σε κίνδυνο την ασφάλεια τη δική σας αλλά και των άλλων και σε κάποιες περιοχές ίσως να μην επιτρέπεται. Η χρήση της συσκευής σε πολύ υψηλή ένταση ίσως προκαλέσει τη μόνιμη απώλεια της ακοής σας. Αν αισθανθείτε κάποιο κουδούνισμα στο αυτί σας ή κάποιο ανάλογο πόνο, ελαττώστε την ένταση ή σταματήστε τη χρήση της συσκευής. Με τη συνεχή χρήση σε υψηλή ένταση, τα αυτιά σας ίσως συνηθίσουν αυτό το επίπεδο έντασης, πράγμα το οποίο μπορεί να οδηγήσει σε μόνιμη βλάβη της ακοής σας.Παρακαλούμε, χρησιμοποιείτε τη συσκευή σε ασφαλές επίπεδο έντασης. Εγγύηση Αυτό το προϊόν καλύπτεται από τους Ευρωπαϊκούς κανόνες εγγύησης και θα πρέπει να επιστρέφεται εκεί από όπου αγοράστηκε για επισκευή ή αντικατάσταση σε περίπτωση μη δυνατότητας επισκευής. Σε περίπτωση που μας επιστραφεί μέσω του προμηθευτή σας, τότε είτε θα το επισκευάσουμε είτε θα το αντικαταστήσουμε 84 -Midland BTX2 FM εντός 15 εργάσιμων ημερών από την ημερομηνία που αναγράφεται στην απόδειξη αγοράς. Πιστοποίηση CE και Έγκριση Ασφαλούς Χρήσης Αυτό το προϊόν είναι πιστοποιημένο κατά CE σύμφωνα με την επιτροπή RTTE (99/5/EC) και είναι ελεύθερης χρήσης σε όλες τις χώρες της Ευρωπαϊκής Ένωσης. Οι χρήστες δεν επιτρέπεται να πραγματοποιούν αλλαγές ή τροποποιήσεις στη συσκευή.Τροποποιήσεις οι οποίες δεν είναι εγκεκριμένες από τον κατασκευαστή, ακυρώνουν τους όρους εγγύησης. Για περισσότερες πληροφορίες, επισκεφτείτε την ιστοσελίδα μας: www.cte.it. Inhoud Hoofdkenmerken..................................................................................................................................................................................................74 Technische specificaties van de Midland BTX2 FM.................................................................................................................................................74 Batterijen opladen................................................................................................................................................................................................74 Beschrijving van de unit en bevestigen van systeem............................................................................................................................................75 Uw Midland BTX2 FM in/uitschakelen...................................................................................................................................................................76 Bedrijfsmodus.......................................................................................................................................................................................................77 Maximum afstand.................................................................................................................................................................................................77 Hoe twee BTX2 FM-units koppelen.......................................................................................................................................................................77 Hoe de BTX2 FM te koppelen aan vorige Midland BT Line units............................................................................................................................78 Hoe drie intercom units te koppelen.....................................................................................................................................................................78 Talk2All - Koppelen met een intercom van een ander merk..................................................................................................................................78 Koppeling van de BTX2 FM aan Bluetooth-toestellen...........................................................................................................................................79 Hoe de bedrade audio-ingang gebruiken..............................................................................................................................................................79 Een PMR446 zendontvanger gebruiken met de kabelverbinding..........................................................................................................................81 Instellen- en Firmware-update.............................................................................................................................................................................81 Garantie Europese EC Mededeling Certificering en Informatie over veiligheidsgoedkeuringen...........................................................................................83 Midland BTX2 FM - 85 NL Instelling en speciale configuratie........................................................................................................................................................................81 MIDLAND BTX2FM Geavanceerd intercomsysteem BTX2 FM is een intercom-communicatiesysteemoplossing voor motorrijders. Het ontwerp is zeer slank en aërodynamisch en alle functies zijn zeer gemakkelijk te bedienen dankzij de drie grote knoppen aan de voorkant van de unit. BTX2 FM wordt bevestigd op de helm via de kleefplaat of de montageklem met schroef. Dankzij de audiokit met ultradunne luidsprekers kunt u genieten van hoogkwalitatieve stereo-muziek tijdens het rijden. Hoofdkenmerken: ›› Intercom tussen berijder en passagier of Bike-to-Bike (800 m). ›› Verbind tot drie mensen voor intercomcommunicatie (met Talk2All - Universal Intercom) ›› Verbind uw telefoon om telefoonoproepen te ontvangen of tot stand te brengen en naar stereomuziek te luisteren ›› Verbind uw GPS voor gesproken straatindicaties ›› Verbinding voor PMR466 radio met interne of externe Bluetooth ›› AUX kabelverbinding voor MP3-speler en PMR446 radio ›› Setup- en Firmware-update via USB-verbinding met een PC Midland BTX2 FM is beschikbaar in twee versies: NL ›› Single BTX2 FM Intercomkit met één unit ›› Twin BTX2 FM Intercomkit met twee units Afhankelijk van het aangekochte model bevat de verpakking onderstaande onderdelen: BTX2 FM single ›› 1 BTX2 FM communicatieunit ›› 1 audiokit met twee stereo luidsprekers, boom-microfoon en microfoon met draad ›› 1 strook met dubbelzijdig klevende strip om de unit op de helm te bevestigen ›› 1 klem om de unit op de helm te bevestigen ›› 1 stereo-audiokabel voor iPod/ of andere MP3-spelers ›› 1 mini USB voeding voor bevestiging aan de wand BTX2 FM Twin ›› 2 BTX2 FM communicatieunits ›› 2 audiokits met twee stereo luidsprekers, boom-microfoon en microfoon met draad ›› 2 stroken met dubbelzijdig klevende strip om de unit op de helm te bevestigen ›› 2 klemmen om de unit op de helm te bevestigen ›› 2 stereo-audiokabels voor iPod/ of andere MP3-spelers ›› 1 mini USB voeding met dubbele plug voor bevestiging aan de wand De units in de Twin kit zijn al gekoppeld en kunnen daarom onmiddellijk worden gebruikt in de Intercom-modus. 86 - Midland BTX2 FM Technische specificaties van Midland BTX2 FM Algemeen: ›› Bluetooth ver. 3.0 stereo (Headset/Handenvrij/A2DP protocol) ›› AGC-systeem controleert automatisch het volume ten opzichte van achtergrondgeluiden ›› Spraak- (VOX) of manuele activatie van de communicatie ›› Manuele besturing om telefoongesprekken, intercom en communicatie met draadverbinding mogelijk te maken ›› Waterbestendig ›› Lithium batterij met 10 uren spreektijd ›› Oplaadtijd: ongev. 6 uur Bluetooth-verbindingen: Met identiek apparaat voor berijder/passagier of Bike-to-Bike Intercom Bluetooth-apparaten: ›› Mobiele telefoon met Stereo MP3-speler (A2DP-protocol), GPS (Garmin Zumo en TomTom Rider 1 en 2) ›› PMR446 zendontvangtoestellen (met ingebouwde of externe Bluetooth-verbinding) voor Bike-to-Bike-communicatie in groep Kabelverbindingen: ›› Voor stereo audio input zoals iPod/MP3-speler (met optionele kabel) ›› Voor PMR446 zendontvangtoestellen (met optionele kabel) Opgelet: Midland BTX2 FM is bestand tegen regen en water. Echter, als het regent, altijd controleren of de rubber doppen ter bescherming van de stopcontacten goed vast zitten. Batterijen opladen Opgelet: Zorg ervoor dat het apparaat volledig is opgeladen voor gebruik. Laad ten minste 8 uur op, zodat het toestel volledig geladen is, alvorens u de unit voor de eerste keer gebruikt. Laad het toestel op door het plaatsen van de wand-lader in het laadstation (hef de rubberen afdekking op om de stekker in de steken). De rode LED op de unit begint te knipperen als het opladen begint. Laat de hoofdtelefoon opladen tot de unit stopt met knipperen of de blauwe LED oplicht. Haal de hoofdtelefoon uit de lader zodra het opladen is voltooid (rode LED knippert niet). Normaal gezien, na de eerste keer, duurt het 6 uur voor een de batterij volledig is opgeladen. Opgelet: telkens dat u de mini USB-oplaadstekker aansluit (of ontkoppelt), wordt het apparaat automatisch uitgeschakeld. Om het apparaat tijdens het opladen te gebruiken, dient u het apparaat in te schakelen met de stekker al aangesloten. Daarnaast heeft de BTX2 FM bovenaan een uitklapantenne voor een maximele afstandsprestatie. Om de antenne uit te klapppen, druk zachtjes achterwaarts en de antenne zal omhoog komen. Beschrijving van de unit en bevestigen van systeem Beschrijving BTX2 FM Forward button Middle button Backward button Beschrijving van de kabelverbindingen Aan de onderkant van de unit, ziet u drie kabelverbindingen: Oplaadaansluiting: mogelijkheid om de unit op te laden door gebruik te maken van de standaard mini-USB-voeding. Audiokitaansluiting: mogelijkheid om een audiokit (stereo headset en microfoon) aan te sluiten. Aux audio-aansluiting (AUX): kan worden gebruikt voor het aansluiten van een audio-bron, zoals een stereo iPod/MP3-speler of PMR446-zendontvangtoestel. Charger jack Audio kit jack Om de antenne te sluiten, druk ze naar beneden en zorg ervoor dat ze terug in de gesloten positie komt. Beschrijving van de audiokit Het audiosysteem bevat twee ultra-platte stereo speakers en twee verwisselbare microfoons, die beide zijn voorzien van een beugel en draadverbinding. De stereo luidsprekers bevestigen De twee stereo luidsprekers hebben een Velcro / zelfklevende strip als hulp voor het vastzetten op uw helm. Let op dat de luidspreker niet uw volledige oor bedekt, u moet altijd in staat zijn om te luisteren naar het verkeer en de geluidsindicatie. De microfoon kan op 2 manieren op de helm worden vastgemaakt: Boom-microfoon Plaats het stuk met de Velcro/zelfklevende strook tussen de vulling en de klep van de helm, zodat de microfoon juist is gepositioneerd aan de voorzijde van uw mond en dat het witte symbool naar de mond is gericht. Dit type microfoon is geschikt voor Auxiliary audio jack (AUX) Midland BTX2 FM - 87 NL De BTX2 FM heeft vijf knoppen aan de voorkant; de belangrijkste drie grote knoppen zijn multifunctionele knoppen: de knop Vooruit (aan de linkerkant), de Middelste knop en de knop Achteruit (aan de rechterkant), de twee kleinere ronde knoppen zijn Volume + en Volume -. Volume + Volume - Open Faced en Flip front helmen. Microfoon met kabel Gebruik de Velcro/zelfklevende strip, plaats de microfoon in de helm aan de voorkant van uw mond. Dit type microfoon is geschikt voor Full Faced helmen. Met de mini-aansluiting van de microfoon kunt u de microfoon gebruiken die het beste past bij de helm. Audiokitaansluiting De audiokit moet vervolgens worden aangesloten op de centrale aansluiting van de Midland BTX2 FM met behulp van de “L” vormige connector. Beschrijving van de montagebeugels De Midland BTX2 FM kan worden vastgemaakt op de helm op twee verschillende manieren: met behulp van de plaat met dubbelzijdig klevende strip, of de klem. Met deze methoden kunt u veilig de BTX2 FM unit op uw helm vastmaken en verwijderen om deze op te laden of op te slaan. Plaatsen en verwijderen van uw Midland BTX2 FM De BTX2 FM kan gemakkelijk worden gemonteerd op de helm door deze naar beneden te schuiven, zodat hij past in de sleuf van het geselecteerde bevestigingsstuk (plaat met dubbelzijdige klevende strip of klem). De BTX2 FM wordt in positie gehouden dankzij de clip aan de bovenkant (A). Om de BTX2 FM los te maken, moet u drukken op de clip en de unit omhoog schuiven. NL Plaat met dubbelzijdig klevende strip De vast te maken plaat heeft een dubbelzijdig klevende strip op een van de zijkanten. Om de plaat op zijn plaats te bevestigen, reinig het bevestigingsgebied op het oppervlak van de helm, verwijder de dubbelzijdige klevende film en plaats de bevestigingsplaat op de helm door deze gedurende enkele seconden in contact te houden met het oppervlak. Schroefklem Met behulp van de inbussleutel, draait u de twee schroeven van de klem los en plaatst u de achterste plaat tussen de helmvulling en de externe harde bescherming. Draai dan de twee schroeven stevig vast om de klem op zijn plaats te bevestigen. Binnenin de klem zit een klein, kunststof tussenstukje dat kan worden verwijderd om de klem steviger te sluiten. Uw Midland BTX2 FM in/uitschakelen Het apparaat inschakelen: Houd de Middelste knop ca. 3 seconden ingedrukt totdat de BLAUWE indicator oplicht. Het apparaat uitschakelen: Houd de Middelste en toets Achteruit ca. 3 seconden gelijktijdig ingedrukt totdat de RODE indicator driemaal knippert. Op deze manier is het onwaarschijnlijk dat u het apparaat per ongeluk uitschakelt (met name wanneer u dikke handschoenen draagt). 88 - Midland BTX2 FM De BTX2 FM kan in twee standen werken: Intercom en telefoon. De 3 multifunctionele toetsen kunnen een verschillende werking hebben afhankelijk in welke modus de unit op dat moment staat. ›› In de “Intercommodus” laten de middelste toetsen u de communicatie tussen berijder en passagier beheren ›› In de “Telefoonmodus” kunt u uw Bluetooth-GSM beheren om een telefoonoproep te doen of te beantwoorden of om naar muziek (in stereo) te luisteren. Zorg dat u uw telefoon op verantwoorde en veilige wijze gebruikt. U kunt van de ene modus naar de andere schakelen door gedurende 3 seconden op de middelste toets te drukken. Een spraakaankondiging zal u vertellen in welke modus u zich bevindt. De schakelvolgorde is als volgt: ›› Intercommodus (als een andere unit gekoppeld werd) ›› Telefoonmodus (als een telefoon gekoppeld werd) Telkens dat u de unit aanzet, is de standaardmodus Intercom (indien eerder met een andere unit gekoppeld werd), anders is het de Telefoon (indien met een telefoon gekoppeld is). Als u wilt weten in welke modus het apparaat op dit moment is, druk dan tegelijkertijd op de toetsen Volume + en Volume –. Een spraakaankondiging vertelt u de modus waarin u zich bevindt. Maximum afstand U kunt een intercomafstand van 800 mt bereiken indien de antenne uitgeklapt is en u in het verlengde van de plaats staat zonder obstructies en belemmeringen (de rijder moet altijd zichtbaar zijn). Hoe twee BTX2 FM units koppelen De twee units die in dezelfde BTX2 FM doos geleverd worden, zijn al gekoppeld en klaar voor gebruik, wat betekent dat u deze procedure niet moet uitvoeren. De units zijn al gekoppeld via de middelste toets. Als de toestellen niet tot dezelfde kit behoren, of ze afzonderlijk aangekocht werden, moet u ze wel eerst koppelen voor u ze kunt gebruiken. Om de BTX2 FM met een andere BTX2 FM unit te koppelen Om de BTX2 FM met een andere BTX2 FM unit te koppelen, moet u naar de instellingsmodus gaan: 1. Schakel het apparaat uit 2. Houd de middelste toets gedurende 7 seconden ingedrukt tot het rode lampje permanent brandt. 3. Druk nu gedurende 3 seconden op de middelste toets. Het blauwe en rode lampje beginnen te knipperen. 4. Voer dezelfde procedure uit op de andere unit. Wanneer ze met succes gekoppeld zijn, zul op elke unit het blauwe lampje één seconde oplichten en de unit zal terug naar de instellingsmodus keren (rode lampje brandt). 5. De koppelingsprocedure is nu voltooid. U moet nu de instellingsmodus afsluiten voor u de units kunt gebruiken: 6. dubbelklik op de middelste toets, het rode lampje gaat uit en het blauwe lampje begint te knipperen. U kunt nu de BTX2 FM gebruiken. Hoe de Intercom gebruiken met twee units Om de intercomfunctie te kunnen gebruiken, dienen beide units ingeschakeld te zijn en al met elkaar gekoppeld te zijn. Let op: Voor Intercomcommunicatie tussen Rijder en Passagier, moet de uiklapantenne niet omhoog staan. Voor Bike-to-Bike intercom moet de antenne in de bovenste positie staan. Handmatige activering Druk op de middelste toets op één van de twee units. De communicatie is ingeschakeld en blijft actief tot u opnieuw op de middelste toets drukt. Het duurt enkele seconden voor de intercom geactiveerd is en u zult een pieptoon horen wanneer de intercom open is. Stemactivering (VOX) Begin te spreken, na enkele seconden wordt de communicatie geopend en zal deze actief blijven gedurende de tijd dat u spreekt. Als er geen conversatie is, wordt de intercom automatisch uitgeschakeld na 40 seconden. U kunt ook de intercom handmatig sluiten zonder 40 seconden te wachten (druk op de middelste toets). U kunt de VOX-functie indien nodig tijdelijk uitschakelen door gedurende 7 seconden op de toets Achteruit te drukken. Twee pieptonen zullen aangeven wanneer de VOX uitgeschakeld is. Om de VOX terug in te schakelen, druk op dezelfde toets. Eén piepgeluid zal aangeven dat de VOX nu actief is (of schakel de unit uit en opnieuw aan). Opgelet: De stemactivering (VOX) kan de intercommunicatie alleen openen met de unit die gekoppeld was via de middelste toets. Als u een andere toets wilt gebruiken (Achteruit), kunt u de intercom alleen handmatig activeren. Aanpassen van het volume Uw Midland BTX2 FM gebruikt AGC-technologie, die zich automatisch aanpast aan het luistervolume in relatie tot achtergrondgeluid. Het is echter ook mogelijk het volume handmatig aan te passen door middel van de “Volume +” en “Volume –“ toetsen. Let op: het volume kan alleen aangepast worden wanneer een audioverbinding actief is. Let op: de volumetoetsen (Vol + en Vol -) kunnen niet gebruikt worden om het volume van de bekabelde audiobron te regelen. Het AGC-systeem zal automatisch het volume luider zetten bij een hogere snelheid. Midland BTX2 FM - 89 NL Bedrijfsmodus Hoe de BTX2 FM te koppelen aan vorige Midland BT Line units De BTX2 FM is compatibel met alle BT line units van Midland. U kunt de BTX2 FM koppelen aan een BT2, BT1 of BTX1, BTNext en BT City/Eva unit en de max afstand van de intercom wordt bepaald vanuit de laagst mogelijke. Om de BTX2 FM met een andere BT line unit te koppelen, moet u naar de instellingsmodus gaan: 1. Schakel het apparaat uit 2. Houd de middelste toets gedurende ongeveer 7 seconden ingedrukt tot het rode lampje permanent brandt. 3. Druk nu lang (3 seconden) op de middelste toets. Het blauwe en rode lampje beginnen te knipperen. 4. Volg de procedure van de handleiding van de andere unit. 5. Wanneer ze met succes gekoppeld zijn, zal op elke unit het blauwe lampje één seconde oplichten en de unit zal terug naar de instellingsmodus keren (rode lampje brandt). Verlaat op beide units de instellingsmodus voordat u ze kunt gebruiken: bij de BTX2 FM dubbelklikt u op de middelste toets, het rode lampje gaat uit en het blauwe lampje begint te knipperen. Voor andere BT line units volgt u de in de betreffende handleiding beschreven procedure. Hoe drie intercom units te koppelen Eén BTX2 FM unit kan aan maximum twee andere units (drie in het totaal) gekoppeld worden. U kunt de middelste toets gebruiken om een Midland unit te koppelen/gebruiken (zie de paragraaf “Hoe twee BTX2 FM-units koppelen” en “Hoe de Intercom gebruiken”) en u kunt de toets “Vooruit” gebruiken om het apparaat te koppelen/gebruiken met de “Talk2All - Universal Intercom”-functie. Let op: om de “Talk2All - Universal Intercom”-functie te gebruiken, moet de andere unit gekoppeld worden als een telefoon. Dezelfde toets die u gebruikt om de unit te koppelen, zal ook gebruikt worden om de intercomcommunicatie te activeren. Onthoud dat iedere unit altijd gekoppeld kan worden met twee andere units van uw keuze, zoals op de afbeelding hieronder getoond wordt. Telkens dat u de intercomverbinding met één persoon opent, wordt de vorige verbinding gesloten. De verbinding is geen “ketting”, wanneer twee persoon aan het praten zijn, is het niet mogelijk om de communicatie te verbreken (onderbreken) door één van de units die uit het maximum afstandbereik rijden. Talk2All - Koppelen met een intercom van een ander merk Talk2All - Universal Intercom Dankzij de functie Dispositivo non“Talk2All Midland - Universal Intercom” is het nu mogelijk uw BTX2 FM te koppelen aan een intercom van een ander merk. 1. Ga op de BTX2 FM naar de instellingsmodus. (Houd, als het apparaat UIT staat, de middelste toets ongeveer 7 seconden ingedrukt tot het rode lampje permanent brandt. 2. Druk gedurende 3 seconden op de toets “Vooruit”, de rode en blauwe LED-lampjes gaan knipperen.) 3. Op de andere intercom (niet van Midland) volgt u de procedure van die unit om een telefoon te koppelen. Als de koppeling succesvol is verlopen, stoppen de rode en blauwe lampjes met knipperen. Om de intercomcommunicatie op de BTX2 FM te openen, drukt u op de toets “Vooruit”. Op de andere intercom drukt u op de toets “Redial” van de telefoonfunctie.Het kan nodig zijn om tweemaal op de kies-toets te drukken, afhankelijk van het model van de unit die niet van Midland is. Opgelet: als u deze configuratie gebruikt, kan de andere intercom (niet van Midland) niet aan een telefoon gekoppeld worden. Unit al bezig Als u probeert een intercomverbinding te openen met een andere persoon die al in gesprek is met iemand anders (of in het midden van een een telefoongesprek is), hoort u een dubbele bezetpieptoon. Wacht enkele tijd en probeer nogmaals, misschien is de lijn dan niet langer bezet. De persoon die gebeld wordt, krijgt te horen dat iemand hem/haar probeert te bellen en zal een spraakaankondiging krijgen met het nummer van de toets waarvan de vraag komt. NL Driver 1 2 Passennger 1 Driver 2 90 - Midland BTX2 FM 3 lefoon of de GPS te koppelen. Koppeling van de BTX2 FM aan Bluetooth-toestellen Hoe de BTX2 FM koppelen met een telefoon De BTX2 FM kan gekoppeld worden aan andere Bluetooth-toestellen, zoals Telefoon, GPS Navigator of PMR446 Radio met ingebouwde›of externe Bluetooth. ›› Phone › Background De ›koppelingsprocedure moet gebeuren via de toetsen “Volume +”.ON/OFF › GPS feature Om de BTX2 FM met een telefoon te koppelen, moet u naar de instellingsmodus gaan: 1. Schakel het apparaat uit 2. Houd de middelste toets gedurende 7 seconden ingedrukt tot het rode lampje permanent brandt. 3. Druk nu gedurende 3 seconden de “Volume +” toets in, de blauwe en rode lampjes zullen knipperen. 4. Schakel de Bluetooth-apparaat zoekfunctie in op uw mobiele telefoon. 5. Na enkele seconden verschijnt “Midland BTX2 FM” op uw GSM. Volg de koppelingsprocedure van uw telefoon. Als de pincode gevraagd wordt, moet u “0000” (vier maal zero) invoeren. Wanneer met succes gekoppeld, gaat het blauwe lampje van de unit één seconde aan en de unit zal de instellingsmode afsluiten en overschakelen op de bedrijfsmodus (het blauwe lampje begint te knipperen). U kunt nu uw BTX2 FM samen met de telefoon gebruiken. Bluetooth-verbinding altijd op de achtergrond Met deze functie kunt u regelen dat de Bluetooth-verbinding onder de toets “Volume +” altijd op de achtergrond is, ook als de intercom open staat (dit is erg handig om de GPS Navigator op de achtergrond te laten terwijl de intercom open is). De achtergrondfunctie in/uitschakelen: Houd de toets “Volume -” gedurende drie seconden ingedrukt, een spraakaankondiging informeert u over de status. De achtergrondfunctie is standaard actief. Koppeling met een telefoon De GSM kan enkel met “Volume +” gekoppeld worden, indien gekoppeld is de telefoonmodus actief. Op deze manier kunnen alle telefoonfuncties beheerd worden en kan naar stereomuziek geluisterd worden. Een binnenkomende oproep heeft hogere prioriteit, dat betekent dat alle andere communicatie gesloten zal worden (Intercom, Muziek). Koppelen met een GPS Navigator De GPS kan gekoppeld worden met de “Volume +” toets, indien gekoppeld is de telefoonmodus actief. Opgelet: Als u zowel met de telefoon als met de GPS moet verbinden, moet u de telefoon aan de GPS zelf koppelen. Koppeling met een PMR446 radio met geïntegreerde of externe Bluetooth De PMR446 Radio moet gekoppeld zijn met de “Volume +” toets. Opgepast: als u een PRM446 met Bluetooth koppelt, is het niet mogelijk om de te- Hoe een telefoon gebruiken Na het koppelen van uw telefoon met de BTX2 FM unit, moet u overschakelen naar de telefoonmodus om alle functies van de telefoon/MP3-speler te kunnen gebruiken. In de status “Intercom” kunt u alleen de binnenkomende oproep beheren. Om de telefoonmodus te activeren, drukt u op de middelste toets tot u een stem hoort die “Telefoon” zegt. De drie hoofdtoetsen zijn nu bruikbaar voor de telefoon (zie Tabel B) Er zijn verschillende manieren om te bellen. Een oproep beantwoorden Bij het horen van de ringtoon kunt u de oproep beantwoorden op twee verschillende manieren: Vocaal: Zeg een woord om de oproep te beantwoorden en begin te praten. Let op dat u dit alleen kunt doen als u de oproep beantwoordt na de derde ringtoon. Opgepast: let op dat sommige telefoons geen ondersteuning geven bij voice answering. Handmatig: Druk op de toets Vooruit en begin te spreken. Een oproep afwijzen Indien u niet wenst te antwoorden, kunt u de mobiele telefoon laten rinkelen of u drukt enkele seconden op de toets Vooruit (u hoort één bevestigingstoon). Opbellen Midland BTX2 FM - 91 NL ›› GPS + Phone ›› PMR446 Radio Er zijn verschillende manieren om te bellen. Hoe de BTX2 FM koppelen met een GPS Via het toetsenpaneel op de mobiele telefoon: Druk het nummer in op het toetsenbord van de gsm. Druk op “Verzenden” op de mobiele telefoon. In het algemeen is het mogelijk de BTX2 FM te koppelen met elke GPS motorfiets die een Bluetooth headset-verbinding ondersteunt. Om de BTX2 FM met een GPS te koppelen, moet u naar de instellingsmodus gaan: 1. Schakel het apparaat uit 2. Houd de middelste toets ongeveer 7 seconden ingedrukt tot het rode lampje permanent brandt. 3. Druk nu lang (3 seconden) op de “Volume +” toets. Het blauwe en rode lampje beginnen te knipperen. 4. Schakel de Bluetooth-apparaat zoekfunctie in op uw GPS. 5. Na enkele seconden verschijnt “Midland BTX2 FM” op uw GPS. 6. Volg de koppelingsprocedure van uw GPS. Als een pincode gevraagd wordt, moet u “0000” (vier maal zero) invoeren. 7. Wanneer met succes gekoppeld, gaat het blauwe lampje van de unit één seconde aan en de unit zal de instellingsmodus afsluiten en overschakelen op de bedrijfsmodus (het blauwe lampje begint te knipperen). Als u de GPS koppelt onder de toets “Volume +” is het niet meer mogelijk uw telefoon te koppelen met de BTX2 FM. U kunt deze limiet omzeilen door de telefoon rechtstreeks met de GPS te koppelen en vervolgens de GPS met de BTX2 FM. Alle telefoonfuncties worden dan door de GPS zelf beheerd. Het laatste nummer opnieuw kiezen Druk gedurende 3 seconden op de toets Vooruit om het laatste nummer opnieuw te kiezen (u hoort één audio bevestigingstoon). Een gesprek beginnen: Druk kort op de toets Vooruit. Als uw mobiele telefoon het toelaat om via spraak te bellen, wordt u gevraagd om de naam te spellen van het contact dat u wilt bellen. Prioriteit: Inkomende gesprekken hebben een hoge prioriteit, wat betekent dat alle andere vormen van communicatie tijdelijk worden uitgeschakeld wanneer er een oproep binnenkomt en automatisch worden geactiveerd zodra het gesprek is beëindigd. Een oproep beëindigen Er zijn verschillende manieren om een gesprek te beëindigen: ›› Wacht tot de opgeroepen persoon het gesprek beëindigt. ›› Druk op de toets Vooruit (u hoort een audio bevestigingstoon) ›› Druk op “Einde”-toets op de mobiele telefoon. Het gebruik van de MP3-speler functie van uw mobiele telefoon Veel mobiele telefoons zijn ontworpen om als stereo MP3-spelers te worden gebruikt. Uw Midland BTX2 FM ondersteunt volledig de A2DP- en AVRCP-protocols die u toelaten om te luisteren naar stereomuziek en om van op afstand de MP3-speler van uw mobiele telefoon te bedienen. U kunt zelfs gebruik maken van de toetsen op de BTX2 FM unit voor volgende opties: Spelen, Pauze, Vooruit en Achteruit. GPS navigator altijd op de achtergrond Om de intercom open te houden terwijl de GPS u straatindicaties geeft, moet u de achtergrondfunctie inschakelen. Hoe een PMR446 zendontvangtoestel koppelen met de geïntegreerde Bluetooth Play/Pausa Backward NL Forward Beschikbare bedieningen: ›› Om puziek te af te spelen/te pauzeren: klik op de middelste toets. ›› Om naar de het volgende nummer te gaan: druk op de toets Vooruit. ›› Om naar de het vorige nummer te gaan: druk op de knop Achteruit. Prioriteit: de muziekluistermodus heeft de laagste prioriteit. Deze zal daarom dus uitgeschakeld worden zodra een ander communicatietype wordt geactiveerd. 92 - Midland BTX2 FM Als uw PMR446 zendontvangtoestel een geïntegreerde Bluetooth (zoals de G8BT) heeft, moet u deze koppelen via de “Volume +” toets: ›› Schakel het apparaat uit ›› Houd de middelste toets ongeveer 7 seconden ingedrukt tot het rode lampje permanent brandt. ›› Druk nu lang (3 seconden) op de “Volume +” toets. Het blauwe en rode lampje beginnen te knipperen. ›› Volg nu de koppelingsprocedure uitgelegd in de handleiding van het zendontvangtoestel zelf Opgelet: Als u koppelt met een G8BT zendontvangtoestel, moet u net wanneer de BTX2 FM FM het koppelen beëindigt (alleen de blauwe LED knippert) deze procedure volgen om de Bluetooth-verbinding te activeren: ›› Schakel de G8BT uit en aan en druk gedurende 3 sec. de “BT” toets in. ›› Volg deze procedure telkens u de G8BT met de BTX2 FM FM moet verbinden (niet nodig om de koppelingsprocedure opnieuw uit te voeren). Hoe de bedrade audio-ingang gebruiken Uw Midland BTX2 FM FM is tevens voorzien van een bekabelde-audio ingang (gemarkeerd met AUX), waarop u een audiobron kunt aansluiten, zoals een iPod (of een andere MP3-speler) of een PMR446 zendontvanger voor communicaties in groepen of voor een groter dekkingsgebied. De bekabelde audio ingang biedt een groter dekkingsbereik t.o.v. het bereik met Bluetooth technologie. Luisteren naar muziek Om naar muziek te luisteren via de kabel ingang, sluit u de audio-bron aan met behulp van de optionele AUX-kabel. De volume buttons (Vol + en Vol -) kunnen niet gebruikt worden om het volume van de bekabelde audio-bron aan te passen. Het AGC systeem zal dit automatisch aanpassen bij hogere snelheden. Let op: zet nooit het volume op de maximale stand, maar op maximaal 70%. Hint: wij raden u aan om een aan paar testen uit te voeren op normale snelheid om het juiste volume niveau van uw audio-bron te bepalen. Het AGC systeem zal het volume niveau bij hogere snelheden automatisch aanpassen. Maak een notitie van de instelling voor toekomstig gebruik. Aan- en uitzetten van de bekabelde audio-bron De bekabelde audio-bron kan aan- en uitgezet worden: Aan- en uitzetten: houdt de ‘rear’ button ingedrukt (zodra u één beep toon hoort is de audio-bron ingeschakeld, hoort u twee beep tonen dan is de audio-bron uitgeschakeld). Een PMR446 zendontvanger gebruiken met de kabelverbinding Om de zendontvanger te kunnen verbinden met uw Midland BTX2 FM FM, moet u de specifieke 2.5 plug AUX-kabel afzonderlijk aankopen. S ommige radiofabrikanten gebruiken een andere pin configuratie, dus raden wij aan uw dealer te vragen naar de kabel die het meest geschikt is voor uw behoeften. De kabel is aangesloten op het zendontvangtoestel en heeft een PTT-toets die op het stuur van uw moto of in uw hand kan worden geplaatst (als u de passagier bent). Om te communiceren via de bijgevoegde radio, drukt u op de “Press to Talk” (PTT)-toets om te spreken en laat u hem los om te luisteren. Het is niet mogelijk om te praten en te luisteren tegelijk. Stel het volume van de zendontvanger in volgens uw behoeften, te beseffen dat de volumeaanpassing wordt beheerst door het automatische AGC-systeem en dat het daarom automatisch worden verhoogd ten opzichte van achtergrondgeluiden. ls u een PMR446 zendontvanger wilt gebruiken voor groepscommunicatie en tegelijkertijd de Intercomfunctie tussen twee BTX2 FM FM- apparaten actief wilt houden, dan dient u niet te vergeten dat de Intercomfunctie telkens geactiveerd wordt wanneer u spreekt d.m.v. de VOX functie van de BTX2 FM(drukken op de PTT-toets) gekoppeld via de middelste toets. Om de Intercom-activering te vermijden wanneer u spreekt op de PMR446, kunt u de BTX2 FM FM unit koppelen met de toets Achteruit of Vooruit (wanneer de VOX niet actief is) of als u de middelste toets wilt blijven gebruiken, moet u de VOX-functie uitschakelen zoals uitgelegd in het vorige deel. Let op! Als u de VOX-functie uitschakelt, zal u alleen binnenkomende telefoons kunnen beantwoorden door op de toets Vooruit te drukken. Instelling en speciale configuratie Terugstellen van alle gekoppelde apparaten Soms vindt u het noodzakelijk om alle gekoppelde verwijzingen te verwijderen (reset) die opgeslagen zijn in de BTX2 FM unit. Om deze procedure uit te voeren, moet u eerst naar de modus Instellen gaan. ›› Schakel het apparaat uit ›› Houd de middelste knop gedurende 7 seconden ingedrukt tot het rode lampje permanent brandt. ›› Houd tegelijkertijd de “Volume +” toets en de “Volume –“ toets ingedrukt gedurende ongeveer 3 seconden. Het blauwe lampje licht gedurende 1 seconde op en gaat dan over naar permanent rood. ›› Dubbelklik op de middelste toets om de modus instellen af te sluiten en de BTX2 FM te gebruiken. Deze procedure verwijdert alle gekoppelde Bluetooth-apparaten die in het geheugen opgeslagen zijn en het is mogelijk om een nieuwe koppelingssessie te maken. Terug naar de fabrieksinstelling Soms vindt u het nodig om terug te keren naar de fabrieksinstelling, om alle wijzigingen/instellingen die u gedaan hebt ongedaan te maken en een “cleane” unit te hebben. Om deze procedure uit te voeren, moet u eerst naar de modus Instellen gaan. ›› Schakel het apparaat uit ›› Houd de middelste knop gedurende 7 seconden ingedrukt tot het rode lampje permanent brandt. ›› Druk dan tegelijkertijd en gedurende 3 seconden de drie toetsen Vooruit, Middelste en Achteruit in. Het blauwe lampje licht gedurende 1 seconde op en gaat dan over naar permanent rood. ›› Dubbelklik op de middelste toets om de modus instellen af te sluiten en de BTX2 Midland BTX2 FM - 93 NL Opgepast: onthoud dat de achtergrondfunctie actief moet zijn als u de tweerichtingen-radiocommunicatie wilt gebruiken samen met de intercom. FM te gebruiken. VOX functie Aanpassen/Uitschakelen (Intercom en telefoon) De intercomfunctie kan worden ingeschakeld, zowel handmatig en vocaal (VOX). De VOX-activering wordt beïnvloed door achtergrondgeluiden en dus door de snelheid. Voor optimale resultaten is het mogelijk om te kiezen voor een van de volgende vier microfoon-gevoeligheidsniveaus: hoog, middelmatig, laag en zeer laag. De standaardinstelling van de BTX2 FM is “laag”. Het is ook mogelijk om de VOX-functie uit te schakelen zodat u de functie voor de Intercom en de functie om telefoons te beantwoorden handmatig kunt activeren. NL Aanpassen van de gevoeligheid van de microfoon (VOX) Om deze procedure uit te voeren, moet u eerst naar de modus Instellen gaan. 1. Schakel het apparaat uit 2. Houd de middelste knop gedurende 7 seconden ingedrukt tot het rode lampje permanent brandt. 3. De BTX2 FM is nu in modus Instellen. 4. Druk op de toets Achteruit tot het rode lampje wijzigt in permanent blauw. 5. Druk nu op de toets “Volume+” of “Volume-“ om de gevoeligheid te verhogen of verlagen. Telkens als u de Volume toetsen indrukt zal het rode lampje knipperen ter bevestiging. Als u de volumelimiet bereikt, zal het rode lampje niet meer knipperen. 6. Druk opnieuw op de toets Achteruit; het blauwe lampje zal verschillende keer knipperen om u de geselecteerde gevoeligheid te doen kennen: Eenmaal knipperen = VOX uitgeschakeld Tweemaal = zeer lage gevoeligheid Driemaal= lage gevoeligheid Viermaal= medium gevoeligheid (standaard instelling) Vijfmaal = hoge gevoeligheid De lichtindicatie gaat nu terug naar permanent rood (“Modus instellen”) en de wijzigingen worden bevestigd. 7. U kunt indien gewenst de gevoeligheid nogmaals aanpassen door de stappen vanaf punt 1 te herhalen, zoniet dubbelklik op de Middelste toets om de Instellingsmodus te verlaten. Waneer het rode lampje uitgaat, begint het blauwe lampje te knipperen. Uw BTX2 FM is nu klaar voor gebruik. De VOX-functie uitschakelen (Intercom en telefoon) Doorloop de gehele procedure beschreven in de bovenstaande stappen en selecteer eenmaal knipperen (VOX uitgeschakeld). Kabelverbinding altijd in de achtergrond U kunt met deze functie de kabelverbinding altijd actief houden, zelfs wanneer de telefoon of intercom open is. Deze functie is handig als u een PMR446 zendontvanger wilt aansluiten. 94 - Midland BTX2 FM Standaard is deze optie ingeschakeld. Uitschakelen: ›› Open de modus Instellen: ›› Apparaat uitschakelen ›› Houd de middelste knop gedurende 7 seconden ingedrukt tot het rode lampje permanent brandt. ›› Druk gedurende 3 seconden gelijktijdig op de knop Vooruit en Middelste. De blauwe LED zal tweemaal knipperen. ›› Dubbelklik op de middelste toets om de modus instellen af te sluiten en de BTX2 FM te gebruiken. Inschakelen: Volg deze procedure als hierboven beschreven; de blauwe LED zal nu eenmaal knipperen. Druk tweemaal op de middelste toets om de modus Instellen af te sluiten. Instellen- en Firmware-update Het is mogelijk om de firmware van uw BTX2 FM te configureren en bij te werken via de USB-verbinding op uw computer. Op de Midland website www.midlandeurope.com in de BTX2 FM pagina vindt u de PC software en de nieuwe firmware-updates indien beschikbaar. LET OP SLUIT DE UNIT NIET OP DE PC AAN VOOR U DE SOFTWARE GEDOWNLOAD EN GEINSTALLEERD HEBT Op eigen risico gebruiken Door het toestel te gebruiken, kunt u anderen en andere geluiden om u heen moeilijker horen. Door naar muziek te luisteren of een gesprek te voeren via een telefoon, kunt u anderen om u heen mogelijk niet horen, wat een gevaar vormt voor de verkeersveiligheid. Het gebruik van een dergelijk toestel tijdens het rijden kan voor u en anderen een gevaar opleveren. Het gebruik ervan is dus in bepaalde gebieden niet toegestaan. Door dit toestel op hoog volume te gebruiken, kunt u permanente gehoorbeschadiging oplopen. Indien u last heeft van piepende oren of andere gehoorgerelateerde pijn, dient u het volume te verlagen of gebruik van dit apparaat te stoppen. Na langdurig gebruik op hoog volume, passen uw oren zich aan op het geluidsniveau, wat vervolgens kan leiden tot permanente gehoorbeschadiging. Gebruik dit apparaat a.u.b. op een veilig volumeniveau. Garantie Dit product is gedenkt door Europese garantieregels en moet teruggebracht worden naar de aankoopplaats voor reparatie of vervanging indien niet repareerbaar. In het geval het product geretourneerd wordt naar ons door uw leverancier, zullen we het ofwel repareren of vervangen binnen de 15 werkdagen van de ontvangst. Europese EC Mededeling Certificering en Informatie over veiligheidsgoedkeuringen. NL Dit product heeft een EC-markering volgens de RTTE Richtlijn (99/5/EC) en kan in alle EU-landen gebruikt worden. De gebruikers mogen geen wijzigingen of modificaties aan het toestel aanbrengen. Wijzigingen die niet uitdrukkelijk zijn goedgekeurd door de producent, maken de garantiekaart ongeldig. Voor meer informatie, ga naar onze website: www.cte.it Midland BTX2 FM - 95 NL 96 - Midland BTX2 FM EC Certificate of Conformity (to EC Directive 99/5 -2004/108- 2006/95/EC) • INFORMAZIONE AGLI UTENTI Ai sensi dell’art. 13 del decreto legislativo 25 luglio 2005, n.151 “Attuazione delle Direttive 2002/95/CE, 2002/96/CE e 2003/108/CE, relative alla riduzione dell’uso di sostanze pericolose nelle apparecchiature elettriche ed elettroniche, nonché allo smaltimento dei rifiuti”. • Il simbolo del cassonetto barrato riportato sulle apparecchiature indica che il prodotto alla fine della propria vita utile deve essere raccolto separatamente dagli altri rifiuti. L’utente dovrà, pertanto, conferire l’apparecchiatura giunta a fine vita agli idonei centri di raccolta differenziata dei rifiuti elettronici ed elettrotecnici, oppure riconsegnarla al rivenditore al momento dell’acquisto di una nuova apparecchiatura di tipo equivalente, in ragione di uno a uno. L’adeguata raccolta differenziata per l’avvio successivo dell’apparecchiatura dismessa al riciclaggio, al trattamento e allo smaltimento ambientalmente compatibile contribuisce ad evitare possibili effetti negativi sull’ambiente e sulla salute e favorisce il riciclo dei materiali di cui è composta l’apparecchiatura. Lo smaltimento abusivo del prodotto da parte dell’utente comporta l’applicazione delle sanzioni amministrative di cui al dlgs. n.22/1997 (articolo 50 e seguenti del dlgs. n.22/1997). • Alle Artikel, die auf der Verpackung oder der Gebrauchanweisung dieses Symbol tragen, dürfen nicht in den normalen Mülltonnen entsorgt werden, sondern müssen an gesonderten Sammelstellen abgegeben werden. Dort werden die Materialien entsprechend ihrer Eigenschaften getrennt und, um einen Beitrag zum Umweltschutz zu liefern, wiederverwertet. • All articles displaying this symbol on the body, packaging or instruction manual of same, must not be thrown away into normal disposal bins but brought to specialised waste disposal centres. Here, the various materials will be divided by characteristics and recycles, thus making an important contribution to environmental protection. • Tous les articles présentant ce symbole sur le corps, l'emballage ou le manuel d'utilisation de celui-ci ne doivent pas être jetés dans des poubelles normales mais être amenés dans des centres de traitement spécialisés. Là, les différents matériaux seront séparés par caractéristiques et recyclés, permettant ainsi de contribuer à la protection de l'environnement. Manufacturer: Address: Products Name: Product Type: • Όλα τα προϊόντα στα οποία εμφανίζεται το ακόλουθο σύμβολο στο σώμα, τη συσκευασία ή το εγχειρίδιο χρήσης τους, δεν πρέπει να εναποθέτονται στους κοινούς κάδους απορριμάτων αλλά να προσκομίζονται στα ειδικά κέντρα αποκομιδής. Εκεί, τα διάφορα υλικά θα πρέπει να διαχωρίζονται ανάλογα με τα χαρακτηριστικά και τα ανακυκλούμενα υκλικά, συμμετέχοντας έτσι ουσιαστικά στην προστασία του περιβάλλοντος. DECLARATION OF CONFORMITY N° 2014032502 Rev 1 C.T.E. International S.r.l. VIA SEVARDI 7 – ZONA INDUSTRIALE MANCASALE – 42124 REGGIO EMILIA BTX2 FM BLUETOOTH HEADSET INTERCOM Brand : MIDLAND The product described above is in conformity with the following Specifications based on sample testing: Item of 99/05/CE or 2004/108/EC • Todos los artículos que exhiban este símbolo en el cuerpo del producto, en el embalaje o en el manual de instrucciones del mismo, no deben ser desechados junto a los residuos urbanos normales sino que deben ser depositados en los centros de recogida especializados. En estos centros, los materiales se dividirán en base a sus características y serán reciclados, para así poder contribuir de manera importante a la protección y conservación del medio ambiente. DO: 7.1.4.4 Rev: 5 Authorised on: 02/02/2010 By : S. Peterlini Signature 3.1.a Standard EN 60065 :2002+A1:2006 +A11 :2008 +A2:2010+A12:2011 Title Edition Audio, video and similar electronic apparatus - Safety requirements Assessment of the compliance of low power electronic and electrical equipment with the basic restrictions related to human exposure to electromagnetic fields (10 MHz to 300 GHz) IEC 62479:2010 (Modified) or date of issue 2011 2010 3.1a EN 62479 3.1b EN 301 489-1 electromagnetic compatibility and Radio spectrum Matters (ERM); Electromagnetic compatibility (EMC) standard for radio equipment and services ; Part 1: common technical requirements V1.9.2 3.1b EN 301 489-17 Electromagnetic compatibility and Radio spectrum Matters (ERM); Electromagnetic Compatibility (EMC) standard for radio equipment; Part 17: Specific conditions for Broadband Data Transmission Systems V2.2.1 Electromagnetic compatibility and Radio spectrum Matters (ERM); Wideband transmission systems; Data transmission equipment operating in the 2,4 GHz ISM band and using wide band modulation techniques; Harmonized EN covering essential requirements under article 3.2 of the R&TTE Directive V1.8.1 3.2 EN 300 328 2004/108/EC EN 55013 +A1 :2003+A2:2006 2004/108/EC EN 55020 +A11 :2011 Sound and television broadcast receivers and associated equipment - Radio disturbance characteristics - Limits and methods of measurement CISPR 13:2001 (Modified) Sound and television broadcast receivers and associated equipment Immunity characteristics - Limits and methods of measurement CISPR 20:2006 Supplementary information to the conformity assessment result on which the declaration is based: Conformity assessment procedures are referred to art. 10(4) linked with Annex III of Directive 1999/5/ec. The test sample fullfils the requirements specified above, on the basis of test result and their evaluation. The product herewith complies with the essential requirements of EC Directive 99/05/EC, 2004/108/EC and following implements and modifications, 2006/95/EC and following implements and modifications, 93/97/EC. Reference to any marking or other indication (e.g. on the product) is exhibited in attachment to this declaration. Reggio Emilia, 25/03/2014 CTE International srl Quality Assurance Responsible Giovanni Bo This document is owned by Cte International srl. It is forbiddeen to reproduce or diffuse it without the authorisation of the Quality Assurance Manager of CTE International srl. 2001 2007 EC Certificate of Conformity (to EC Directive 99/5 -2004/108- 2006/95/EC) • INFORMAZIONE AGLI UTENTI Ai sensi dell’art. 13 del decreto legislativo 25 luglio 2005, n.151 “Attuazione delle Direttive 2002/95/CE, 2002/96/CE e 2003/108/CE, relative alla riduzione dell’uso di sostanze pericolose nelle apparecchiature elettriche ed elettroniche, nonché allo smaltimento dei rifiuti”. • Il simbolo del cassonetto barrato riportato sulle apparecchiature indica che il prodotto alla fine della propria vita utile deve essere raccolto separatamente dagli altri rifiuti. L’utente dovrà, pertanto, conferire l’apparecchiatura giunta a fine vita agli idonei centri di raccolta differenziata dei rifiuti elettronici ed elettrotecnici, oppure riconsegnarla al rivenditore al momento dell’acquisto di una nuova apparecchiatura di tipo equivalente, in ragione di uno a uno. L’adeguata raccolta differenziata per l’avvio successivo dell’apparecchiatura dismessa al riciclaggio, al trattamento e allo smaltimento ambientalmente compatibile contribuisce ad evitare possibili effetti negativi sull’ambiente e sulla salute e favorisce il riciclo dei materiali di cui è composta l’apparecchiatura. Lo smaltimento abusivo del prodotto da parte dell’utente comporta l’applicazione delle sanzioni amministrative di cui al dlgs. n.22/1997 (articolo 50 e seguenti del dlgs. n.22/1997). • Alle Artikel, die auf der Verpackung oder der Gebrauchanweisung dieses Symbol tragen, dürfen nicht in den normalen Mülltonnen entsorgt werden, sondern müssen an gesonderten Sammelstellen abgegeben werden. Dort werden die Materialien entsprechend ihrer Eigenschaften getrennt und, um einen Beitrag zum Umweltschutz zu liefern, wiederverwertet. • All articles displaying this symbol on the body, packaging or instruction manual of same, must not be thrown away into normal disposal bins but brought to specialised waste disposal centres. Here, the various materials will be divided by characteristics and recycles, thus making an important contribution to environmental protection. • Tous les articles présentant ce symbole sur le corps, l'emballage ou le manuel d'utilisation de celui-ci ne doivent pas être jetés dans des poubelles normales mais être amenés dans des centres de traitement spécialisés. Là, les différents matériaux seront séparés par caractéristiques et recyclés, permettant ainsi de contribuer à la protection de l'environnement. Manufacturer: Address: Products Name: Product Type: • Όλα τα προϊόντα στα οποία εμφανίζεται το ακόλουθο σύμβολο στο σώμα, τη συσκευασία ή το εγχειρίδιο χρήσης τους, δεν πρέπει να εναποθέτονται στους κοινούς κάδους απορριμάτων αλλά να προσκομίζονται στα ειδικά κέντρα αποκομιδής. Εκεί, τα διάφορα υλικά θα πρέπει να διαχωρίζονται ανάλογα με τα χαρακτηριστικά και τα ανακυκλούμενα υκλικά, συμμετέχοντας έτσι ουσιαστικά στην προστασία του περιβάλλοντος. DECLARATION OF CONFORMITY N° 2014032502 Rev 1 C.T.E. International S.r.l. VIA SEVARDI 7 – ZONA INDUSTRIALE MANCASALE – 42124 REGGIO EMILIA BTX2 FM BLUETOOTH HEADSET INTERCOM Brand : MIDLAND The product described above is in conformity with the following Specifications based on sample testing: Item of 99/05/CE or 2004/108/EC • Todos los artículos que exhiban este símbolo en el cuerpo del producto, en el embalaje o en el manual de instrucciones del mismo, no deben ser desechados junto a los residuos urbanos normales sino que deben ser depositados en los centros de recogida especializados. En estos centros, los materiales se dividirán en base a sus características y serán reciclados, para así poder contribuir de manera importante a la protección y conservación del medio ambiente. DO: 7.1.4.4 Rev: 5 Authorised on: 02/02/2010 By : S. Peterlini Signature 3.1.a Standard EN 60065 :2002+A1:2006 +A11 :2008 +A2:2010+A12:2011 Title Edition Audio, video and similar electronic apparatus - Safety requirements Assessment of the compliance of low power electronic and electrical equipment with the basic restrictions related to human exposure to electromagnetic fields (10 MHz to 300 GHz) IEC 62479:2010 (Modified) or date of issue 2011 2010 3.1a EN 62479 3.1b EN 301 489-1 electromagnetic compatibility and Radio spectrum Matters (ERM); Electromagnetic compatibility (EMC) standard for radio equipment and services ; Part 1: common technical requirements V1.9.2 3.1b EN 301 489-17 Electromagnetic compatibility and Radio spectrum Matters (ERM); Electromagnetic Compatibility (EMC) standard for radio equipment; Part 17: Specific conditions for Broadband Data Transmission Systems V2.2.1 Electromagnetic compatibility and Radio spectrum Matters (ERM); Wideband transmission systems; Data transmission equipment operating in the 2,4 GHz ISM band and using wide band modulation techniques; Harmonized EN covering essential requirements under article 3.2 of the R&TTE Directive V1.8.1 3.2 EN 300 328 2004/108/EC EN 55013 +A1 :2003+A2:2006 2004/108/EC EN 55020 +A11 :2011 Sound and television broadcast receivers and associated equipment - Radio disturbance characteristics - Limits and methods of measurement CISPR 13:2001 (Modified) Sound and television broadcast receivers and associated equipment Immunity characteristics - Limits and methods of measurement CISPR 20:2006 Supplementary information to the conformity assessment result on which the declaration is based: Conformity assessment procedures are referred to art. 10(4) linked with Annex III of Directive 1999/5/ec. The test sample fullfils the requirements specified above, on the basis of test result and their evaluation. The product herewith complies with the essential requirements of EC Directive 99/05/EC, 2004/108/EC and following implements and modifications, 2006/95/EC and following implements and modifications, 93/97/EC. Reference to any marking or other indication (e.g. on the product) is exhibited in attachment to this declaration. Reggio Emilia, 25/03/2014 CTE International srl Quality Assurance Responsible Giovanni Bo This document is owned by Cte International srl. It is forbiddeen to reproduce or diffuse it without the authorisation of the Quality Assurance Manager of CTE International srl. 2001 2007 Vertrieb durch: ALAN ELECTRONICS GmbH Daimlerstraße 1K - D-63303 Dreieich Deutschland www.alan-electronics.de Vor Benutzung Bedienungsanleitung beachten. Bei Verwendung von Batterien beachten Sie bitte die Umweltbestimmungen. Batterien niemals ins offene Feuer werfen, und nur in dafür vorgesehene Sammelbehälter entsorgen. Prodotto o importato da: CTE INTERNATIONAL s.r.l. Via. R.Sevardi 7- 42124 Reggio Emilia Italia www.cte.it - www.midlandradio.eu Prima dell’uso leggere attentamente le istruzioni. Se il prodotto contiene batterie: non gettare nel fuoco, non disperdere nell’ambiente dopo l’uso, usare gli appositi contenitori per la raccolta. Produced or imported by: CTE INTERNATIONAL s.r.l. Via. R.Sevardi 7 42124 Mancasale Reggio Emilia Italy BTX2 FM ADVANCED INTERCOM SYSTEM Importado por: ALAN COMMUNICATIONS, SA C/Cobalt, 48 - 08940 Cornellà de Llobregat Barcelona España Tel: +34 902 384878 Fax: +34 933 779155 www.midland.es Lea atentamente las instrucciones antes de usar el equipo. si el producto contiene pilas o baterías no las tire al fuego ni las disperse en el ambiente después de su uso, utilice los contenedores apropiados para su reciclaje. M A N UA L E D ’ U S O INSTRUCTION GUIDE BEDIENUNGSANLEITUNG M A N UA L D E I N S T R U CC I O N E S G U I D E D ’ U T I L I S AT I O N M A N UA L D E I N S T R U ÇÕ E S ΟΔΗΓΊΕΣ ΧΡΉΣΗΣ WW W.MIDLA N DR A DIO.E U | ®