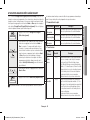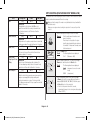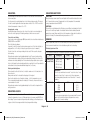
1
MC28H5015** فرن امليكروويف إرشادات ودليل الطهي للمالك إمكانات هائلة شكرًا لشرائك هذا املنتج من .Samsung الرجاء العلم بأن ضمان Samsungال يغطي اتصاالت اخلدمة اخلاصة بشرح تشغيل املنتج أو تصحيح التركيب غير السليم أو تنفيذ عمليات الصيانة والتنظيف العادية. مت إنتاج هذا الدليل باستخدام ورق ُمعاد تدويره بنسبة .% 100 2014-03-21 �� 6:31:35 MC28H5015AW_SG_DE68-04234H-01_AR.indd 1 احملتويات معلومات السالمة معلومات السالمة2 ............................................................................................................................................................. دليل البحث السريع11.......................................................................................................................................................... ميزات الفرن 12......................................................................................................................................................................... الفرن12............................................................................................................................................................................... لوحة التحكم13............................................................................................................................................................... األدوات اإلضافية13............................................................................................................................................................ استخدام الفرن 14.................................................................................................................................................................. طريقة عمل فرن امليكروويف14....................................................................................................................................... التأكد من أن الفرن يعمل بشكل صحيح15................................................................................................................ ضبط الوقت15.................................................................................................................................................................. الطهي/التسخني16......................................................................................................................................................... اختالف مستويات الطاقة والوقت16.............................................................................................................................. ضبط مدة الطهي16........................................................................................................................................................ إيقاف عملية الطهي17................................................................................................................................................... إعداد وضع توفير الطاقة17............................................................................................................................................. استخدام ميزتي التسخني/الطهي التلقائي17............................................................................................................ استخدام ميزات الطهي الصحي 19.............................................................................................................................. استخدام ميزتي تخمير العجائن والزبادي21................................................................................................................. استخدام ميزات فك التجميد السريع22...................................................................................................................... احلمل احلراري23.................................................................................................................................................................. عملية الشواء23............................................................................................................................................................... معا24.......................................................................................................... الطهي باستخدام امليكروويف والشواية ً اجلمع بني امليكروويف واحلمل احلراري24.......................................................................................................................... اختيار امللحقات 25............................................................................................................................................................ استخدام ميزات التأمني ضد عبث األطفال25.............................................................................................................. استخدام ميزات تشغيل/إيقاف تشغيل الصينية الدوارة25...................................................................................... استخدام وظيفة التحمير اليدوي (متوفرة بالطراز MC28H5015C*و MC28H5015Z*فقط)26.......................... استخدام وظيفة الطهي بالبخار (متوفرة بالطراز MC28H5015F*و MC28H5015Z*فقط) 27........................... إعدادات الطهي اليدوي بالبخار27.................................................................................................................................. السيخ الدوار (بالطراز MC28H5015Z*فقط)28.......................................................................................................... استخدام األسياخ العمودية املتعددة29........................................................................................................................ استخدام ميزات إزالة الروائح30...................................................................................................................................... إيقاف تشغيل صفارة التنبيه30..................................................................................................................................... دليل أواني الطهي 30.............................................................................................................................................................. دليل الطهي 31........................................................................................................................................................................ استكشاف املشاكل وإصالحها وكود اخلطأ 40............................................................................................................... استكشاف املشاكل وإصالحها 40................................................................................................................................. كود اخلطأ 41...................................................................................................................................................................... املواصفات الفنية41............................................................................................................................................................... استخدام كتيب اإلرشادات لقد حصلت اآلن على فرن ميكروويف .SAMSUNGتتضمن إرشادات املالك معلومات قيمة تتعلق بالطهي باستخدام فرن امليكروويف: • احتياطات السالمة • األدوات اإلضافية وأدوات الطهي املناسبة • تلميحات مفيدة للطهي • تلميحات للطهي قائمة بالرموز والشعارات املستخدمة حتذير ممارسات عشوائية أو غير آمنة قد ينجم عنها حدوث إصابات جسدية خطيرة أو الوفاة. تنبيه ممارسات عشوائية أو غير آمنة قد ينجم عنها حدوث إصابات جسدية طفيفة أو إحلاق الضرر باملمتلكات. حتذير؛ خطر حريق حتذير؛ سطح ساخن حتذير؛ كهرباء حتذير؛ مواد متفجرة يحظر القيام بهذا اإلجراء. يحظر اللمس. يحظر الفك. ات ّبع التعليمات بدقة. افصل قابس التيار الكهربي من مأخذ احلائط. تأكد من توصيل اجلهاز مبصدر تيار أرضي ملنع حدوث صدمة كهربية. اتصل مبركز اخلدمة للحصول على املساعدة. مالحظة هام العربية 2 - 2014-03-21 �� 6:31:36 MC28H5015AW_SG_DE68-04234H-01_AR.indd 2 إرشادات هامة تتعلق بالسالمة اقرأ اإلرشادات بعناية واحتفظ بها كمرجع في املستقبل. دائما. تأكد من اتّباع احتياطات السالمة ً قبل استخدام امليكروويف ،تأكد من اتباع اإلرشادات اآلتية. حتذير (وظيفة ميكروويف فقط) حتذير :في حالة تعرض الباب أو قفلي الباب للتلف ،يجب عدم تشغيل الفرن حتى يتم إصالح الفرن بواسطة شخص مؤهل. حتذير :في حالة قيام شخص غير الشخص املؤهل بالصيانة أو عملية إصالح يتم خاللها إزالة الغطاء الذي يقي من التعرض ألشعة امليكروويف فإنه بذلك يعرض نفسه للخطر. هذا اجلهاز مخصص لالستخدام املنزلي فقط. حتذير :يجب عدم السماح لألطفال باستخدام الفرن دون مراقبة إال بعد إعطائهم التعليمات املناسبة بحيث يتمكنون من استخدام الفرن بطريقة آمنة واستيعاب اخملاطر التي قد يتعرضون لها نتيجة االستخدام غير الصحيح. 01معلومات السالمة حتذير :مُيكن استخدام هذا اجلهاز من ِقبل األطفال البالغني من العمر 8سنوات أو أكثر أو األشخاص الذين لديهم قدرات عقلية أو حسية أو جسدية ضعيفة أو من لديهم نقص في اخلبرة أو املعرفة إذا مت إعطائهم إرشادات وتوصيات فيما يتعلق باستخدام اجلهاز بطريقة آمنة وأصبحوا ُمدركني جلميع اخملاطر املوجودة .ينبغي على األطفال عدم العبث باجلهاز .ينبغي عدم إجراء عمليات التنظيف وصيانة اجلهاز التي ميكن للمستخدم القيام بها بواسطة األطفال ممن يقل عمرهم عن 8سنوات ودون اخلضوع لإلشراف. استخدم األواني املناسبة لالستخدام في أفران امليكروويف فقط. عند تسخني األطعمة في أواني بالستيكية أو ورقية، احرص على مراقبة الفرن للتمكن من اتخاذ اإلجراءات الالزمة جتن ًبا الشتعالها. فرن امليكروويف مخصص لتسخني األغذية واملشروبات. وقد يؤدي جتفيف األغذية أو األقمشة وتسخني ألواح التدفئة أو نعال البابوج أو قطع اإلسفنج أو األقمشة الرطبة أو املواد املشابهة لذلك إلى مخاطر اإلصابة أو االشتعال أو احلرائق. في حالة تصاعد دخان ،قم بإيقاف تشغيل الفرن أو فصله عن التيار الكهربي واجعل باب الفرن مغلقً ا إلخماد أي اشتعال. حتذير :قد ينتج عن تسخني املشروبات باستخدام فرن امليكروويف حدوث فوران شديد عند غليانها لذا يجب توخي احلذر عند التعامل مع احلاوية. العربية 3 - 2014-03-21 �� 6:31:36 MC28H5015AW_SG_DE68-04234H-01_AR.indd 3 حتذير :ال يجب تسخني السوائل أو األطعمة في حاويات مغلقة حتى ال تتعرض لالنفجار؛ يجب عدم تنظيف اجلهاز باستخدام آلة نفاثة للمياه. حتذير :يجب رج محتويات زجاجات الرضاعة وبرطمانات غذاء األطفال أو تقليبها والتحقق من درجة حرارتها قبل استخدامها لتجنب حدوث أي حروق. يحظر سلق البيض ويحظر كذلك تسخني البيض املسلوق جي ًدا دون تقشيره ألنه قد ينفجر حتى بعد انتهاء عملية التسخني بامليكروويف. يجب تنظيف الفرن بشكل منتظم وإزالة أي بقايا للطعام. مُيكن أن يؤدي اإلهمال في تنظيف الفرن إلى تدهور حالة سطحه مما قد يؤثر بشكل سلبي على اجلهاز وقد ينتج عن ذلك خطورة عند االستخدام. هذا اجلهاز غير مخصص لالستخدام داخل املركبات أو العربات املغطاة أو ما يشبهها. هذا اجلهاز غير مخصص الستخدامه بواسطة أشخاص يعانون من إعاقات جسدية أو حسية أو ذهنية (مبا في ذلك األطفال) أو ممن لديهم نقص في اخلبرة واملعلومات إال إذا خضعوا لإلشراف أو مت تزويدهم بإرشادات تتعلق باستخدام اجلهاز من قبل شخص مسئول عن سالمتهم. يجب مراقبة األطفال لضمان عدم عبثهم باجلهاز. يجب وضع هذه الفرن في االجتاه واالرتفاع الصحيحني بحيث ميكن الوصول إلى جتويف الفرن ومنطقة التحكم بها بسهولة. يجب تشغيل الفرن مع املاء ملدة 10دقائق قبل استخدامه ألول مرة. إذا أصدر الفرن ضجة غريبة أو رائحة حريق أو دخان ،افصل مأخذ الكهرباء على الفور واتصل بأقرب مركز خدمة. يجب وضع امليكروويف بحيث يكون قري ًبا من مأخذ التيار الكهربي بحيث يسهل توصيله. ينبغي استخدام فرن امليكروويف أعلى املنضدة فقط وليس في خزانة. إذا تعرض سلك التيار الكهربي للتلف ،فيجب استبداله بواسطة الشركة املصنّعة أو مسؤول الصيانة التابع لها أو أشخاص مؤهلني بنفس الكفاءة لتجنب التعرض للمخاطر. العربية 4 - 2014-03-21 �� 6:31:36 MC28H5015AW_SG_DE68-04234H-01_AR.indd 4 حتذير (وظيفة الفرن فقط) -اختياري حتذير :عند تشغيل اجلهاز في "وضع اجلمع" ،يجب أال يستخدم األطفال الفرن إال حتت إشراف أشخاص بالغني حلمايتهم من درجات احلرارة الناجتة. يسخن اجلهاز أثناء االستخدام .يجب توخي احلذر لتجنب مالمسة أجزاء التسخني داخل الفرن. حتذير :قد تسخن األجزاء الظاهرة أثناء االستخدام .يجب إبعاد األطفال الصغار عن الفرن. يجب عدم استخدام منظف يعمل بالبخار. حتذير :تأكد من إيقاف تشغيل اجلهاز قبل استبدال املصباح لتجنب التعرض لصدمة كهربية. حتذير :يُصبح اجلهاز واألجزاء التي ميكن الوصول إليها ساخنة أثناء االستخدام. ثم ،يتعني عليك توخي احلذر لتجنّب ملس األجزاء ومن ّ الساخنة. يجب احلفاظ على األطفال أقل من 8سنوات بعي ًدا عن املنتج إال إذا كانوا مراقبني بصفة مستمرة. قد تكون درجة حرارة األسطح مرتفعة عندما يكون اجلهاز قيد التشغيل. قد يصبح الباب أو السطح اخلارجي ساخنًا عندما يكون اجلهاز قيد التشغيل. 01معلومات السالمة يجب أن يكون اجلهاز والسلك اخلاص به بعي ًدا عن متناول األطفال ممن يقل عمرهم عن 8سنوات. مُيكن استخدام هذا اجلهاز من ِقبل األطفال البالغني من العمر 8سنوات أو أكثر أو األشخاص الذين لديهم قدرات عقلية أو حسية أو جسدية ضعيفة أو من لديهم نقص في اخلبرة أو املعرفة إذا مت إعطائهم إرشادات وتوصيات فيما يتعلق باستخدام اجلهاز بطريقة آمنة وأصبحوا ُمدركني جلميع اخملاطر املوجودة .ينبغي على األطفال عدم العبث باجلهاز .ال مُيكن لألطفال إجراء التنظيف وصيانة اجلهاز دون مراقبة. ال تستخدم منظفات كاشطة خشنة أو أدوات كشط معدنية حادة لتنظيف زجاج باب الفرن ألنها قد تؤدي إلى خدش السطح ،مما قد يؤدي إلى كسر الزجاج. هذا اجلهاز غير مخصص ليتم تشغيله بواسطة وسائل للتوقيت اخلارجي أو نظام منفصل للتحكم عن بُعد. العربية 5 - 2014-03-21 �� 6:31:36 MC28H5015AW_SG_DE68-04234H-01_AR.indd 5 تركيب فرن امليكروويف ضع الفرن على سطح أملس مسطح يرتفع عن األرض مبقدار 85سم. يجب أن يكون السطح قويًا بدرجة تكفي لتحمل وزن الفرن بأمان. .1عند تركيب الفرن ،تأكد من تهويته بشكل جيد 10سم من 20سم من أعلى اخللف بترك مسافة 10سم ( 4بوصة) على األقل من اخللف وعلى جانبي الفرن ومسافة 20سم 10سم من 85سم ارتفاع اجلانب عن األرض ( 8بوصة) أعاله. .2قم بإزالة كافة مواد التغليف املوجودة داخل الفرن. .3قم بتركيب احللقة الدوارة والصينية الدوارة .تأكد من دوران الصينية الدوارة بحرية. (الطراز املزوّد بالصينية الدوارة فقط) .4يجب وضع امليكروويف بحيث يكون قري ًبا من مأخذ التيار الكهربي بحيث يسهل توصيله. إذا تعرض سلك التيار الكهربي للتلف ،يجب استبداله من قبل الشركة املصنّعة أو مسؤول الصيانة التابع لها أو أشخاص مؤهلني بنفس الكفاءة لتجنب التعرض للمخاطر. لسالمتك الشخصية ،قم بتوصيل الكبل مبأخذ تيار متردد ذو طرف أرضي مناسب. يحظر تركيب فرن امليكروويف بجوار أشياء تنبعث منها حرارة أو رطوبة ،على سبيل املثال ،وضعه بجوار فرن تقليدي أو مدفئة .يجب االلتزام باملواصفات اخلاصة مبصدر الطاقة اخلاص بالفرن ،وأي كبل آخر يتم استخدامه يجب أن يكون بنفس مقاييس كبل الطاقة الذي يتم توفيره مع الفرن .امسح اجلدران الداخلية وقفل الباب بقطعة قماش مبللة قبل استخدام فرن امليكروويف للمرة األولى. العربية 6 - 2014-03-21 �� 6:31:36 MC28H5015AW_SG_DE68-04234H-01_AR.indd 6 01معلومات السالمة تنظيف فرن امليكروويف يجب تنظيف األجزاء التالية من فرن امليكروويف على فترات منتظمة ملنع تراكم الدهون وبقايا الطعام: • األسطح الداخلية واخلارجية • الباب وقفلي الباب • الصينية الدوارة واحللقة الدوارة (الطراز املزوّد بالصينية الدوارة فقط) تأكد "دو ًما" من نظافة قفلي الباب ومن إغالق الباب بإحكام. مُيكن أن يؤدي اإلهمال في تنظيف الفرن إلى تدهور حالة سطحه مما قد يؤثر بشكل سلبي على اجلهاز وقد ينتج عن ذلك خطورة عند االستخدام. .1قم بتنظيف السطح اخلارجي بقطعة قماش ناعمة وماء دافئ وصابون .اغسله باملاء ثم جففه. .2قم بإزالة أي بقع موجودة على األسطح الداخلية للفرن بقطعة قماش مبللة بالصابون .اغسلها باملاء ثم جففها. .3إلزالة بقايا الطعام والروائح ،ضع كوب به عصير ليمون مخفف في الفرن وقم بالتسخني ملدة عشر دقائق باستخدام أعلى مستوى للطاقة. .4اغسل الطبق املسموح باستخدامه مع غسالة األطباق في أي وقت حتتاج لذلك. يحظر سكب املاء في الفتحات .يحظر استخدام أي مواد كاشطة أو مذيبات كيماوية .كن حريصا ً جدا ً عند تنظيف قفلي الباب لضمان عدم وجود أي بقايا: • متراكمة • متنع إغالق الباب بشكل صحيح نظف جتويف فرن امليكروويف بعد كل مرة تستخدمه فيها ّ مبحلول تنظيف ،ولكن اترك فرن امليكروويف فترة كافية ليبرد قبل التنظيف لتجنب حدوث أي إصابة. عند تنظيف اجلزء العلوي داخل التجويف ،من األفضل لف جزء التسخني حوالي 45درجة وتنظيفه. (طراز السخان املروحي فقط) العربية 7 - 2014-03-21 �� 6:31:37 MC28H5015AW_SG_DE68-04234H-01_AR.indd 7 تخزين فرن امليكروويف وإصالحه يجب مراعاة بعض االحتياطات البسيطة عند تخزين فرن امليكروويف أو صيانته. يجب عدم استخدام الفرن في حالة تعطل الباب أو تلف أقفاله: • كسر إحدى مفصالته • تدهور حالة األقفال • تدهور حالة اجلسم اخلارجي للفرن أو تعرضه لالنثناءات يجب أن تتم صيانة عيوب امليكروويف بواسطة فني صيانة مؤهل. يحظر إزالة اجلسم اخلارجي للفرن .في حالة حدوث أعطال في الفرن واحلاجة إلى صيانته أو إذا كنت تشك في سالمة حالته: • افصله من مقبس الكهرباء باحلائط • اتصل بأقرب مركز خدمة ملا بعد البيع إذا أردت تخزين الفرن اخلاص بك بشكل مؤقت ،اختر مكانًا جافًا وخالي من األتربة. السبب :قد تؤثر األتربة والرطوبة بشكل سلبي على أجزاء الفرن. لم يُصنع فرن امليكروويف لالستخدام التجاري. يجب أال تقوم باستبدال مصباح اإلضاءة بنفسك ألغراض السالمة. الرجاء االتصال بأقرب مركز خدمة عمالء Samsungمعتمد لالستعانة مبهندس مؤهل الستبدال املصباح. حتذير يقتصر تعديل فرن امليكروويف أو إصالحه على فريق العمل املؤهل. ال تسخن السوائل أو األطعمة األخرى في أواني مغلقة عند استخدام وظيفة امليكروويف. يجب عدم استخدام منظفات مائية عالية الضغط أو منظفات نفث البخار للحفاظ على سالمتك. ال تقم بتركيب اجلهاز؛ بالقرب من السخان أو مواد قابلة لالشتعال؛ أو في مكان رطب أو ملوث بالزيت أو مليء باألتربة ،أو في مكان ُمعرض ألشعة الشمس املباشرة واملاء أو في مكان قد يتسرب فيه الغاز؛ أو على أرضية غير مستوية. يجب تثبيت هذا اجلهاز على األرض بشكل سليم وفقً ا للمعايير احمللية والدولية. قم بإزالة جميع املواد الغريبة كاألتربة أو املاء من أطراف قابس التيار الكهربي ونقاط االتصال باستخدام قطعة قماش جافة بصفة دورية. ال تقم بسحب سلك التيار الكهربي أو ثنيه بشكل مفرط أو تضع أشياء ثقيلة عليه. عند تسرب الغاز (مثل غاز البروبان أو الغاز النفطي املسال أو غيره من الغازات) ،قم بالتهوية فورًا دون ملس قابس التيار الكهربي. ال تلمس قابس التيار الكهربي بأي ٍد مبتلة. ال توقف تشغيل اجلهاز عن طريق فصل قابس التيار الكهربي عندما يكون قيد التشغيل. ال تُدخل أصابعك أو أي مواد غريبة إلى الفرن .وفي حالة دخول أي مواد غريبة إلى الفرن (مثل املاء) ،افصل مأخذ الكهرباء واتصل بأقرب مركز خدمة. جتنّب تعريض اجلهاز لضغط مفرط. العربية 8 - 2014-03-21 �� 6:31:40 MC28H5015AW_SG_DE68-04234H-01_AR.indd 8 ال تضع اجلهاز فوق سطح قابل للكسر ،مثل حوض املاء أو سطح زجاجي. ال تستخدم البنزين أو التِنر أو منظفات البخار أو املنظفات ذات الضغط العالي لتنظيف اجلهاز. تأكد من تطابق مستوى فولطية الكهرباء والتردد والتيار الكهربي لديك مع مواصفات املنتج. • • • محول قم بتوصيل قابس التيار الكهربي مبأخذ احلائط بإحكام .ال تستخدم ّ محول كهرباء. إضافيا أو كهرباء متعدد املقابس أو سلكًا ّ ً ال تعلق سلك الكهرباء على شيء معدني أو تُدخله بني أي أشياء أو تضعه وراء الفرن. اغمر اجلزء الذي تعرض للحرق باملاء البارد ملدة 10دقائق على األقل. قم بتغطية مكان احلرق بقطعة جافة ونظيفة من الشاش الطبي. ال تضع دهان كرمي أو زي ًتا أو غسوال ً على احلرق. ال تضع الصينية أو الرف في املاء بعد الطهي بفترة قصيرة؛ فقد يؤدي ذلك إلى كسر الصينية أو الرف أو تلفه. وال تستخدم مقبس كهرباء أو سلك كهرباء تالف أو مأخذ حائط مفكوك. عند تلف قابس أو سلك الكهرباء ،اتصل بأقرب مركز خدمة. 01معلومات السالمة حتذير :قد ينتج عن تسخني املشروبات باستخدام فرن امليكروويف حدوث فوران شديد عند غليانها ،لذا يجب توخي احلذر عند التعامل مع األواني؛ "دوما" ملدة تبلغ 20ثانية على األقل ملنع حدوث مثل هذا املوقف ،انتظر ً بعد إيقاف تشغيل الفرن للسماح مبعادلة درجة احلرارة .قم بالتقليب أثناء "دوما" بعد التسخني. التسخني إذا لزم األمر والتقليب ً في حالة تعرضك لإلصابة باحلروق ،اتبع إرشادات "اإلسعافات األولية" اآلتية: ال تشغل فرن امليكروويف لقلي األطعمة التي حتتوي على دهون عالية، وذلك بسبب عدم القدرة على التحكم في درجة حرارة الزيت .قد يؤدي ذلك إلى فوران السائل الساخن. تصب ما ًء أو ترشه مباشرة داخل الفرن. ال ُ ال تضع أي أشياء على الفرن أو داخله أو على باب الفرن. ال ترش مواد متطايرة ،مثل املبيدات احلشرية على سطح الفرن. ال تخزّن أي مواد قابلة لالشتعال داخل الفرن .توخ احلذر عند تسخني أطباق أو مشروبات حتتوي على الكحول؛ حيث إن أبخرة الكحول قد تلمس جز ًءا ساخنًا بالفرن. يجب إبعاد األطفال عن الباب عند فتحه أو غلقه ألنهم رمبا يحشرون أنفسهم عند الباب أو رمبا تحُ شر أصابعهم داخل الباب. العربية 9 - 2014-03-21 �� 6:31:42 MC28H5015AW_SG_DE68-04234H-01_AR.indd 9 ركّب الفرن وفقً ا للمسافات املذكورة في هذا الدليل( .راجع "تركيب فرن امليكروويف"). تنبيه استخدم األواني املناسبة لالستخدام في أفران امليكروويف "فقط"؛ و"ال" تستخدم األواني املعدنية أو أدوات املائدة ذات الزخارف الذهبية أو الفضية أو املاسكات املعدنية والشوك ،وغيرها من األدوات. قم بإزالة األربطة السلكية من األكياس الورقية والبالستيكية. السبب :قد يحدث ماس كهربائي أو شرارة تؤدي إلى تلف الفرن. ال تستخدم فرن امليكروويف لتجفيف األوراق أو املالبس. حدد مدد تسخني قصيرة ملقادير الطعام القليلة؛ وذلك لتجنّب التسخني الزائد أو تعرّض الطعام لالحتراق. ال تضع كبل الطاقة أو املقبس في املاء ،واحرص على إبعاد كبل الطاقة عن األسطح الساخنة. يحظر سلق البيض ويحظر كذلك تسخني البيض املسلوق جي ًدا دون تقشيره ألنه قد يتفتق حتى بعد انتهاء عملية التسخني بامليكروويف؛ كذلك ال يجب تسخني الزجاجات والبرطمانات واألواني التي مت تفريغها من الهواء واملغلقة بإحكام والبندق غير املقشر والطماطم ،إلخ. يجب توخي احلذر عند توصيل أي أجهزة كهربائية باملقابس القريبة من الفرن. احتياطات لتجنب التعرض احملتمل لقدر كبير من طاقة امليكروويف( .وظيفة امليكروويف فقط) قد يؤدي عدم االلتزام باحتياطات السالمة التالية إلى التعرض ألشعة امليكروويف الضارة. (أ) يجب عدم تشغيل الفرن حتت أي ظرف من الظروف عندما يكون باب الفرن مفتو ًحا أو العبث بقفلي األمان (قفلي الباب) أو وضع أي شيء في فتحتي قفلي األمان. املنظف على أسطح (ب) ال تضع أي شيء بني باب الفرن والسطح األمامي وال تسمح بتراكم فضالت الطعام أو ِّ إحكام اإلغالق .وتأكد من نظافة الباب وأسطح إحكام اإلغالق بواسطة مسحها بعد االستعمال باستخدام قطعة قماش مبلَّلة ثم قطعة قماش جافة ناعمة. (ج) ال تقم بتشغيل امليكروويف في حالة وجود تلف به حتى يتم إصالحه بواسطة فني صيانة أجهزة ميكروويف مؤ َّهل ومدرَّب لدى الشركة املصنعة .ويجب إغالق الباب بإحكام والتأكد من عدم وجود تلف في: ( )1الباب (تعرّضه للثني) ( )2مفصالت الباب (مكسورة أو غير مربوطة بإحكام) ( )3قفال الباب وأسطح إحكام اإلغالق (د) يجب عدم ضبط الفرن أو إصالحه من قبل أي شخص آخر غير فني صيانة أجهزة ميكروويف مؤ َّهل ومدرَّب لدى الشركة املصنِّعة. ال تقم بتغطية فتحات التهوية سواء بقطع من القماش أو الورق؛ إذ قد تشتعل النيران في القماش أو الورق عند تفريغ الهواء الساخن من الفرن. تلقائيا كما قد ترتفع درجة حرارة الفرن بشكل زائد وتتوقف عن العمل ً كاف. حتى تبرد بشكل ٍ دوما قفازات عند إخراج طبق من الفرن لتجنب اإلصابة بحروق استخدم ً غير متوقعة. جزئي أثناء عملية التسخني أو بعد انتهائها ،مع ترك بشكل حرّك السوائل ٍ ٍ السوائل دون تقليب ملدة 20ثانية بعد التسخني مباشرة لتجنّب الغليان املفاجئ. قف بعي ًدا عن الفرن مبقدار طول ذراعك عند فتح باب الفرن لتجنّب التعرّض حلروق من جرّاء الهواء الساخن املندفع منها. ال تقم بتشغيل فرن امليكروويف عندما يكون فارغًا .وعند حدوث ذلك، سيتم إيقاف تشغيل فرن امليكروويف ملدة 30دقيقة للحفاظ على ثم ،فإننا نوصي بوضع كوب ماء داخل الفرن بشكل دائم سالمتك .ومن َّ المتصاص طاقة امليكروويف في حالة تشغيل الفرن بشكل غير مقصود. العربية 10 - 2014-03-21 �� 6:31:44 MC28H5015AW_SG_DE68-04234H-01_AR.indd 10 أريد طهي بعض الطعام. .1ضع الطعام في الفرن .اضغط على الزر ( Start/+30sتشغيل 30+/ثانية). عند إمتام الطهي ،يصدر الفرن صوت تنبيه ويومض بالكلمة النتيجة: " "Endأربع مرات .ثم يصدر الفرن صوت تنبيه مرة كل دقيقة. أرغب في إضافة 30ثانية أخرى إضافية. اضغط على الزر ( Start/+30sتشغيل 30+/ثانية) مرة أو أكثر لكل 30ثانية ترغب في إضافتها. 02دليل البحث السريع ستقوم Samsungبفرض رسوم مقابل استبدال أ ّي أجزاء ملحقة أو إصالح أ ّي عيب جتميلي في حالة تلف الوحدة و/أو تلف األجزاء امللحقة أو فقدها بسبب العميل .العناصر التي يغطيها هذا الشرط: (أ) وجود نتوء أو كشط أو كسر في الباب أو املقبض أو اللوحة اخلارجية أو لوحة التحكم. (ب) كسر في صينية الفرن أو موجهة الدوران أو أداة التدوير أو احلامل السلكي أو فقد أي منهم. • استخدم هذا اجلهاز للغرض اخملصص له فقط كما هو مذكور في دليل اإلرشادات .ال تغطي التحذيرات وإرشادات السالمة املهمة الواردة في هذا الدليل جميع الظروف واملواقف احملتمل حدوثها .لذا ،يقع على عاتقك مسئولية اتباع املنطق السليم والتعامل بحذر ومراعاة االنتباه عند تركيب اجلهاز وصيانته وتشغيله. • ونظرًا ألن إرشادات التشغيل التالية تنطبق على ُطرز متعددة ،فإن خصائص امليكروويف التي تستعمله قد تختلف قليال ً عن تلك املوصوفة في هذا الدليل ،كما أن بعض عالمات التحذير املذكورة قد تكون غير قابلة للتطبيق .إذا كانت لديك أي أسئلة أو استفسارات ،اتصل بأقرب مركز خدمة أو انتقل مباشرة إلى املوقع www.samsung.comللحصول على التعليمات أو املعلومات. • يُستخدم هذا امليكروويف بغرض تسخني الطعام ،ويقتصر على االستخدام املنزلي فقط .ال تقم بتسخني أي نوع من األقمشة أو الوسائد احملببة حتى ال حتترق أو تؤدي إلى نشوب حريق .ولن تتحمل الشركة املصنّعة أي أضرار ناجمة عن االستخدام اخلاطئ للجهاز. • قد يؤدي اإلهمال في تنظيف الفرن إلى تدهور حالة سطحه مما قد يؤثر بشكل سلبي على اجلهاز وقد ينتج عن ذلك خطورة عند االستخدام. دليل البحث السريع بالضغط على الزر ألعلى و ألسفل ،ميكنك ضبط الوقت على النحو الذي تريده. العربية 11 - 2014-03-21 �� 6:31:44 MC28H5015AW_SG_DE68-04234H-01_AR.indd 11 أريد "فك التجميد السريع" لبعض األطعمة. .1اضغط على الزر ( Power Defrostفك التجميد السريع). ميزات الفرن الفرن 4 5 .2قم بتعيني فئة الطهي بالضغط على الزر ألعلى أو ألسفل .اضغط على الزر ( Selectحتديد) لتعيني الفئة املطلوبة. 3 1 2 .3حدد الوزن بالضغط على الزر ألعلى أو ألسفل على النحو املطلوب. .4اضغط على الزر ( Start/+30sتشغيل 30+/ثانية). تبدأ عملية فك التجميد. النتيجة: • عند إمتام الطهي ،يصدر الفرن صوت تنبيه ويومض بالكلمة " "Endأربع مرات .ثم يصدر الفرن صوت تنبيه مرة كل دقيقة. 11 .1مقبض الباب 10 9 7 8 .7الصينية الدوارة .2الباب .8أداة التدوير .3فتحات التهوية .9احللقة الدوارة .4جزء التسخني .10فتحتا قفل األمان .5اإلضاءة 6 .11لوحة التحكم .6قفال الباب العربية 12 - 2014-03-21 �� 6:31:45 MC28H5015AW_SG_DE68-04234H-01_AR.indd 12 األدوات اإلضافية لوحة التحكم نوفر لك العديد من األدوات اإلضافية التي ميكنك استخدامها بطرق متعددة وفقً ا للطراز الذي قمت بشرائه. .1احللقة الدوارة ،يتم وضعها في وسط الفرن. حتمل احللقة الدوارة الصينية الدوارة. الغرض: 03ميزات الفرن .2الصينية الدوارة ،يتم وضعها على احللقة الدوارة مع وضعها مركزها على أداة التدوير. تعتبر الصينية الدوارة هي السطح األساسي للطهي؛ وميكن الغرض: إخراجها بسهولة للتنظيف. .3احلامالن العلوي والسفلي ،يتم وضعهما على الصينية الدوارة. الغرض:ميكن استخدام احلاملني املعدنيني لطهي طبقني في نفس الوقت .ميكن وضع طبق صغير على الصينية الدوارة والطبق اآلخر على الرف .ميكن استخدام الرفني املعدنني في الشواء والطهي باحلمل احلراري والطهي اجملمع. .4طبق التحمير ،يتم وضعه على الصينية الدوارة. (متوفر بالطرازين MC28H5015C*و MC28H5015Z*فقط) يستخدم طبق التحمير لتحمير الطعام من األسفل عن الغرض: طريق استخدام وضع الطهي بامليكروويف أو اجلمع بني الطهي بامليكروويف والشي ،كما يستخدم لتحمير عجائن الفطائر احملالة والبيتزا. .1 .2 .3 .4 .5 .6 .7 .8 الزر التسخني/الطهي التلقائي الزر الطهي الصحي الزر فك التجميد السريع الزر تخمير العجائن/الزبادي الزر احلمل احلراري الزر الشواية الزر ميكروويف الزر جمع .9 .10 .11 .12 .13 .14 .15 .16 .5سيخ الشي الدوار وأداة تدوير أسياخ الشي وسيخ الشي ،يتم وضعها في اإلناء الزجاجي( .بالطراز MC28H5015Z*فقط) يعتبر سيخ الشي الدوار طريقة مالئمة لشي دجاجة كاملة، الغرض: حيث ال حتتاج إلى قلب اللحم .وميكن استخدامه في وضع الطهي والشي اجملمع. الزر تشغيل/إيقاف تشغيل الصينية الدوارة الزر إزالة الروائح الساعة الزر ّ الزر حتديد الزر ألسفل الزر ألعلى الزر إيقاف/توفير الطاقة الزر تشغيل 30+/ثانية (تابع) العربية 13 - 2014-03-21 �� 6:31:46 MC28H5015AW_SG_DE68-04234H-01_AR.indd 13 استخدام الفرن .6وحدة الطهي بالبخار (بالطراز MC28H5015F*و)MC28H5015Z* تستخدم وحدة الطهي بالبخار البالستيكية عند استخدام الغرض: وظيفة الطهي بالبخار. طريقة عمل فرن امليكروويف إن أشعة امليكروويف عبارة عن موجات كهرومغناطيسية عالية التردد ،تعمل الطاقة املنبعثة منها على طهي الطعام أو إعادة تسخينه دون التأثير على شكله أو لونه. ميكنك استخدام فرن امليكروويف فيما يلي: • فك التجميد • التسخني • الطهي يحظر تشغيل فرن امليكروويف دون احللقة الدوارة والصينية الدوارة. يحظر تشغيل وضع "الشواية" و"احلمل احلراري" و"اجلمع" أثناء الطهي بالبخار. وضع التشغيل (وعاء الطهي بالبخار) • تنبيه • • • امليكروويف الشواية جمع احلمل احلراري O x x x عملية الطهي. .1يتم توزيع أشعة امليكروويف التي تتولد بواسطة املاجنترون بشكل متساو أثناء دوران الطعام على الصينية الدوارة .وبذلك يتم طهي الطعام بدرجة متساوية. ال تستخدم "وحدة الطهي بالبخار" هذه أب ًدا مع منتج أو طراز مختلف. فقد يتسبب ذلك في حدوث حريق أو تعرض الفرن للتلف. يحظر استخدام "وحدة الطهي بالبخار" دون وجود ماء أو طعام بداخلها. وعند استخدام "وحدة الطهي بالبخار" هذه ،صب 500مللي من املاء على األقل قبل االستخدام .إذا كان مقدار املاء أقل من 500مللي ،قد يؤدي ذلك إلى عدم اكتمال النضج ،أو قد يتسبب في حدوث حريق أو تعرض الفرن للتلف. يجب توخي احلذر عند إزالة اإلناء من داخل "وحدة الطهي بالبخار" بعد الطهي ،حيث إنه سيكون ساخن ج ًدا. تأكد من أنك قمت بتثبيت الغطاء على "وحدة الطهي بالبخار" حتى يتناسب مع طبق الطهي بالبخار/طبق التحمير. يتفتق البيض أو حبات الكستناء في حالة عدم وضع غطاء وطبق وحدة الطهي بالبخار كما هو موضح بكتيب اإلرشادات. .2ميتص الطعام موجات امليكروويف حتى عمق بوصة واحدة تقري ًبا ( 2.5سم) .ثم تستمر عملية الطهي باستمرار بينما تنتقل احلرارة خالل الطعام. تبعا لنوع اإلناء املستخدم وخصائص الطعام: .3تختلف فترات طهي الطعام ً • الكمية والكثافة • كمية املاء التي يحتوي عليها • درجة احلرارة األولية (مجمد أم ال) يستمر طهي الطعام حتى في حالة إخراج الطعام من الفرن ،ألن األجزاء الداخلية من الطعام يتم طهيها بواسطة التوزيع احلراري .لذلك يجب مراعاة أوقات االنتظار احملددة في وصفات الطهي وفي هذا الكتيب لضمان: • • طهي الطعام بشكل متساو حتى اجلزء الداخلي منه تعرض الطعام بالكامل لنفس درجة احلرارة. العربية 14 - 2014-03-21 �� 6:31:46 MC28H5015AW_SG_DE68-04234H-01_AR.indd 14 التأكد من أن الفرن يعمل بشكل صحيح يتيح لك اإلجراء البسيط التالي التأكد من أن الفرن يعمل بشكل صحيح طول الوقت .إذا ساورتك الشكوك ،راجع القسم الذي يحمل العنوان "استكشاف املشاكل وإصالحها" في صفحة .41-40 أوتوماتيكيا على مضمنة .عند اإلمداد بالكهرباء يتم عرض األرقام " "88:88أو ""12:00 يحتوي فرن امليكروويف على ساعة ّ ً الشاشة. الرجاء ضبط الوقت احلالي .ميكن عرض الوقت بتنسيق 24ساعة أو تنسيق 12ساعة .يجب ضبط الساعة: • عند تركيب فرن امليكروويف للمرة األولى • بعد انقطاع التيار الكهربائي ال تنسى إعادة ضبط الساعة عند التبديل من أو إلى التوقيت الصيفي أو الشتوي. اضغط على الزر ( Start/+30sتشغيل 30+/ثانية) وحدد الوقت إلى 4أو 5دقائق ،بالضغط على الزر ( Start/+30sتشغيل 30+/ثانية)عدد املرات التي تريدها حسب احلاجة. النتيجة:يقوم الفرن بتسخني املاء ملدة 4أو 5دقائق .يجب أن يصل املاء عند ذلك إلى نقطة الغليان. (الساعة). .1اضغط على الزر ّ Clock 04استخدام الفرن يجب توصيل الفرن مبقبس حائط مناسب .يجب أن تكون الصينية الدوارة في موضعها بالفرن .في حالة استخدام مستوى طاقة غير احلد األقصى ( 900 - % 100واط) ،يستغرق املاء وق ًتا أطول حتى يصل إلى مرحلة الغليان. افتح باب الفرن بواسطة جذب املقبض املوجود إلى ميني باب الفرن. ضع كوبًا من املاء على الصينية الدوارة .أغلق الباب. ضبط الوقت .2اضغط على الزر ألعلى أو ألسفل لتعيني نوع عرض الوقت بتنسيق ( 12ساعة أو 24ساعة) .وفي نفس الوقت ،اضغط على الزر ( Selectحتديد) لتعيني نوع العرض. .3اضغط على الزر ألعلى أو ألسفل لضبط الساعة. .4اضغط على الزر ( Selectحتديد). .5اضغط على الزر ألعلى أو ألسفل لضبط الدقائق. .6عند عرض الوقت الصحيح ،اضغط على الزر ( Selectحتديد) لبدء تشغيل الساعة. يظهر الوقت أثناء عدم استخدام فرن امليكروويف. النتيجة: العربية 15 - 2014-03-21 �� 6:31:47 MC28H5015AW_SG_DE68-04234H-01_AR.indd 15 الطهي/التسخني اختالف مستويات الطاقة والوقت يوضح اإلجراء التالي كيفية طهي الطعام أو إعادة تسخينه. متكنك ميزة مستويات الطاقة من حتديد حجم الطاقة الالزمة والوقت املطلوب لطهي الطعام وذلك طبقً ا لنوعية الطعام وكميته .ميكن االختيار من ست مستويات للطاقة. تأكد "دو ًما" من إعدادات الطهي قبل ترك الفرن دون مالحظة. افتح الباب .ضع الطعام في منتصف الصينية الدوارة .أغلق الباب .يحظر تشغيل فرن امليكروويف عندما يكون فارغًا. .1اضغط على الزر ( Microwaveميكروويف). يتم عرض العالمات اآلتية: النتيجة: (وضع امليكروويف) .2اضغط على الزر ألعلى أو ألسفل حتى يتم عرض مستوى الطاقة املناسب. وفي نفس الوقت ،اضغط على الزر ( Selectحتديد) لتعيني مستوى الطاقة. تلقائيا إلى ثوان ،فإنه يتغير ً • إذا لم يتم تعيني مستوى الطاقة في غضون ٍ 5 مرحلة إعداد مدة الطهي. .3قم بتعيني مدة الطهي بالضغط على الزر ألعلى أو ألسفل. يظهر وقت الطهي. النتيجة: .4اضغط على الزر ( Start/+30sتشغيل 30+/ثانية). يضئ مصباح الفرن وتبدأ الصينية الدوارة في الدوران .يبدأ النتيجة: طهي الطعام وعندما ينتهي: • يصدر الفرن صوت تنبيه ويومض بالكلمة ""End أربع مرات. ثم يصدر الفرن صوت التنبيه مرة كل دقيقة. النسبة املئوية مقدار الطاقة مستوى الطاقة عالي % 100 900واط عالي متوسط % 67 600واط متوسط % 50 450واط منخفض متوسط % 33 300واط فك التجميد % 20 180واط منخفض % 11 100واط تتوافق أوقات الطهي املعطاة في وصفات الطعام وفي هذا الكتيب مع مستويات الطاقة احملددة املشار إليها. عند حتديد.... يجب أن يكون وقت الطهي الالزم.... مستوى طاقة أعلى مستوى طاقة أقل أقل أكثر ضبط مدة الطهي أيضا ضبط مدة الطهي بالضغط على الزر ( Start/+30sتشغيل 30+/ثانية). ميكنك ً • • التحقق من مدى نضج الطعام في أي وقت بسهولة عن طريق فتح باب الفرن زيادة مدة الطهي املتبقية لضبط مدة مدة طهي الطعام أثناء الطهي ،اضغط على الزر ( Start/+30sتشغيل 30+/ثانية) مرة واحدة لكل 30ثانية ترغب في إضافتها. •مثال :إلضافة ثالث دقائق ،اضغط على الزر ( Start/+30sتشغيل 30+ /ثانية) ست مرات. لضبط مدة الطهي ،اضغط على الزر ألعلى و ألسفل لتعيني املدة التي تريد إضافتها. العربية 16 - 2014-03-21 �� 6:31:47 MC28H5015AW_SG_DE68-04234H-01_AR.indd 16 إيقاف عملية الطهي استخدام ميزتي التسخني/الطهي التلقائي ميكنك إيقاف عملية الطهي في أي وقت وذلك حتى ميكنك: • التحقق من مدى نضج الطعام • قلب الطعام أو تقليبه حسب احلاجة • اترك الطعام لفترة من الوقت تتضمن/توفر ميزات التسخني/الطهي التلقائي العشرة أوقات طهي مبرمجة مسبقً ا .فهي ال حتتاج إلى ضبط وقت الطهي أو مستوى الطاقة. ميكنك ضبط حجم الطعام بالضغط على الزر ألعلى أو ألسفل. مؤقت مؤقت :افتح الباب أو اضغط على الزر ( stopإيقاف) مرة واحدة. تتوقف عملية الطهي. النتيجة: افتح الباب .ضع الطعام في منتصف الصينية الدوارة .أغلق الباب. .1اضغط على الزر ( Auto Reheat/Cookالتسخني/الطهي التلقائي). الستئناف عملية الطهي ،أغلق الباب مرة أخرى واضغط على الزر Start/+30s (تشغيل 30+ /ثانية). كامل كامل :اضغط على الزر ( Stopإيقاف) مرة واحدة. تتوقف عملية الطهي. النتيجة: إذا كنت ترغب في إلغاء إعدادات الطهي ،فاضغط على الزر Stop/Eco (إيقاف/توفير الطاقة) مرة أخرى. .4حدد نوع الطعام املراد طهيه بالضغط على الزر ألعلى وألسفل .راجع اجلدول املوجود في الصفحة التالية للحصول على شرح لإلعدادات املبرمجة مسبقً ا .وفي نفس الوقت ،اضغط على الزر ( Selectحتديد) لتحديد نوع الطعام. يتميز الفرن بوضع توفير الطاقة. • • للخروج من وضع توفير الطاقة ،افتح الباب أو اضغط على الزر Stop/Eco (إيقاف/توفير الطاقة) وستعرض الشاشة الوقت احلالي .الفرن جاهز لالستخدام. .2اضغط على الزر ألعلى وألسفل لتحديد فئة الطهي. ( : 1التسخني التلقائي :2 ،الطهي التلقائي) .3اضغط على الزر ( Selectحتديد). إعداد وضع توفير الطاقة اضغط على الزر ( Stop/Ecoإيقاف/توفير الطاقة)( .أثناء وضع االستعداد). إيقاف تشغيل الشاشة. النتيجة: 04استخدام الفرن إليقاف الطهي... عندئذ... استخدم فقط األواني املسموح باستخدامها مع امليكروويف. .5حدد حجم الوجبة بالضغط على الزر ألعلى وألسفل. وظيفة توفير الطاقة التلقائية إذا لم حتدد أي وظيفة عندما يكون اجلهاز في منتصف إعداد أو عملية تشغيل مع حالة التوقف املؤقت ،يتم إلغاء الوظيفة ويظهر مؤشر "الساعة" بعد مرور 25دقيقة. يتم إيقاف تشغيل مصباح الفرن بعد مرور 5دقائق في حالة فتح الباب. .6اضغط على الزر ( Start/+30sتشغيل 30+/ثانية). يتم طهي الطعام وفقا ً لإلعداد املبرمج مسبقً ا الذي حددته. النتيجة: • عند إمتام الطهي ،يصدر الفرن صوت تنبيه ويومض بالكلمة " "Endأربع مرات .ثم يصدر الفرن صوت تنبيه مرة كل دقيقة. العربية 17 - 2014-03-21 �� 6:31:47 MC28H5015AW_SG_DE68-04234H-01_AR.indd 17 .2الطهي التلقائي يوضح اجلدول التالي الكميات واإلرشادات املناسبة للتسخني والطهي التلقائي. استخدم قفازات الفرن أثناء إخراج الطعام منه. الكود/الطعام .1تسخني تلقائي املقدار اإلرشادات الكود/الطعام 1-1 الوجبات اجلاهزة (الباردة) 300إلى 350جم 400إلى 450جم ضعها في طبق خزفي وقم بتغطيتها بطبقة من ورق امليكروويف احلراري .يناسب هذا البرنامج الوجبات املكونة من 3مكونات (مثل اللحم بالصلصة واخلضروات وأحد األطباق اجلانبية مثل البطاطس أو األرز أو املعجنات) .اتركه ملدة دقيقتني إلى 3دقائق. 1-2 الرافيلو الصغيرة (مثلجة) 200إلى 250جم 300إلى 350جم ضع قطعة رافيلو صغيرة مثلجة جاهزة في طبق بالستيك مسموح باستخدامه في امليكروويف في منتصف الصينية الدوارة. اثقب غطاء الوجبة اجلاهزة أو قم بتغطية الطبق البالستيكي بطبقة من امليكروويف احلراري .وقلّب بحرص قبل بدء مدة االنتظار وبعدها .يناسب هذا البرنامج الرافيلو والنودلز بالصلصة .اتركها ملدة 3دقائق. 2-1 ثمار البروكلي/خضروات طازجة 2-2 قطع الدجاج 1-3 البيتزا اجملمدة 300إلى 350جم 400إلى 450جم ضع البيتزا اجملمدة على احلامل السفلي. 1-4 وجبات البيتزا اجملمدة 100إلى 150جم 250إلى 300جم ضع البيتزا اجملمدة على الرف السفلي. 2-3 الدجاج املشوي 1-5 الالزانيا اجملمدة 400إلى 450جم 600إلى 650جم اجملمدة في طبق بحجم مناسب مسموح باستخدامه ضع الالزانيا ّ مع امليكروويف .ثم ضع الطبق على الرف السفلي .اتركها ملدة من 3إلى 4دقائق. 2-4 قطع املافن 1-6 أرغفة اخلبز اجملمدة 100إلى 150جرام (قطعتان) 200إلى 250جرام ( 4قطع) 300إلى 350جرام ( 6قطع) يوصى بتسخني الفرن مسبقً ا على درجة حرارة 180درجة مئوية ملدة 5دقائق باستخدام الطريقة العادية .ضع من رغيفني إلى 6أرغفة خبز مجمدة على شكل دائرة على الرف السفلي (في درجة حرارة 18-درجة مئوية) .يناسب هذا البرنامج اخملبوزات الصغيرة اجملمدة مثل أرغفة اخلبز وخبز السياباتا واخلبز الفرنسي الصغير .اتركه ملدة 3إلى 5دقائق. املقدار اإلرشادات 200إلى 250جم 300إلى 350جم 400إلى 450جم زن اخلضراوات بعد غسلها وتنظيفها وتقطيعها إلى أحجام متساوية. ثم ضعها في وعاء زجاجي له غطاء .أضف 30مللي من املاء (ملعقتني كبيرتني) عند طهي كمية من 200إلى 250جم، وأضف 45مللي ( 3مالعق كبيرة) عند طهي كمية من 300إلى 450جم وأضف 60إلى 75مللي ( 4مالعق كبيرة) عند طهي كمية 400إلى 450جم .وقم بالتقليب بعد الطهي .عند طهي كميات أكبر ،قم بالتقليب مرة واحدة أثناء عملية الطهي .اتركها ملدة من دقيقة إلى دقيقتني. 300إلى 400جم (قطعة واحدة) 500إلى 600جم (قطعتان) 700إلى 800جم ( 3قطع) امسح قطع الدجاج بالزيت والتوابل مثل الفلفل األسود وامللح والفلفل احللو .ضعها على شكل دائرة على الرف العلوي مع وضع الناحية التي بها اجللد ألسفل .ثم قم بقلبها مبجرد إصدار الفرن أصوات التنبيه .اتركها ملدة دقيقتني. 1100إلى 1150جم 1200إلى 1250جم امسح الدجاج املثلج بقليل من الزيت والتوابل. ضع جزء الصدر ألسفل ،في منتصف الرف السفلي. قم بقلبها مبجرد إصدار الفرن صوت التنبيه .اضغط على زر "البدء" ملتابعة عملية الطهي .اتركها ملدة 5دقائق. 250إلى 300جم اسكب العجينة في 6إلى 8ورقات أو أكواب من السيليكون لعمل املافان (كل واحدة منها 45جم) وضعها على الرف السفلي .ابدأ تشغيل البرنامج (يتم تسخني الفرن مسبقً ا). أدخل الرف بعد سماع الصوت مع الطعام. العربية 18 - 2014-03-21 �� 6:31:47 MC28H5015AW_SG_DE68-04234H-01_AR.indd 18 استخدام ميزات الطهي الصحي توفر ميزات الطهي الصحي اخلمسة عشر فترات طهي مبرمجة مسبقً ا .فهي ال حتتاج إلى ضبط وقت الطهي أو مستوى الطاقة .ميكنك ضبط حجم الطعام بالضغط على الزر ألعلى أو ألسفل. يوضح اجلدول التالي الكميات وإرشادات الطهي املناسبة حوالي 15خيار طهي مبرمج مسبقً ا .حيث يحتوي هذا اجلدول على إرشادات طهي احلبوب/العجائن واخلضروات والدواجن/األسماك. استخدم قفازات الفرن أثناء إخراج الطعام منه. استخدم فقط األواني املسموح باستخدامها مع امليكروويف. .1اضغط على زر ( Healthy cookالطهي الصحي). .2اضغط على الزر ألعلى أو ألسفل لتحديد فئة الطهي. .3حدد فئة الطهي بالضغط على الزر ( Selectحتديد). .4اضغط على الزر ألعلى أو ألسفل لتحديد نوع الطهي. املقدار اإلرشادات الكود/الطعام 1-1 األرز البني 150إلى 200جم 200إلى 250جم زجاجيا كبيرًا له غطاء من أدوات امليكروويف. استخدم طبقً ا ً ضع كمية مضاعفة من املاء البارد .الرجاء تغطية اإلناء. قم بالتقليب قبل مدة االنتظار وأضف امللح والتوابل .اتركها ملدة 10-5دقائق. 1-2 الكينوا 150إلى 200جم 200إلى 250جم زجاجيا كبيرًا له غطاء من أدوات امليكروويف .ضع استخدم طبقً ا ً كمية مضاعفة من املاء البارد .الرجاء تغطية اإلناء .قم بالتقليب قبل مدة االنتظار وأضف امللح والتوابل .اتركها ملدة من دقيقة إلى 3دقائق. 1-3 املكرونة 100إلى 150جم 200إلى 250جم زجاجيا كبيرًا له غطاء من أدوات امليكروويف. استخدم طبقً ا ً أضف املاء املغلي مبقدار 4أضعاف ومقدارًا ضئيال ً من امللح ثم قلب جي ًدا .ال تضع الغطاء أثناء الطهي .وقم بتغطية الطعام قبل مدة االنتظار وتصفيته جي ًدا فيما بعد .اتركها ملدة من دقيقة إلى 3دقائق. .5حدد نوع الطهي بالضغط على الزر ( Selectحتديد). 04استخدام الفرن افتح الباب .ضع الطعام في منتصف الصينية الدوارة .أغلق الباب. .1احلبوب/العجائن .6اضغط على الزر ألعلى أو ألسفل لتحديد حجم الوجبة .راجع اجلدول املوجود في الصفحة التالية للحصول على شرح لإلعدادات املبرمجة مسبقً ا. .7اضغط على الزر ( Start/+30sتشغيل 30+/ثانية). يتم طهي الطعام وفقا ً لإلعداد املبرمج مسبقا ً الذي حددته. النتيجة: • عند انتهاء الطهي ،يصدر الفرن صوت تنبيه ويضيء بالكلمة " "Endأربع مرات. ثم يصدر الفرن بعد ذلك صوت تنبيه مرة كل دقيقة. العربية 19 - 2014-03-21 �� 6:31:48 MC28H5015AW_SG_DE68-04234H-01_AR.indd 19 .2اخلضروات الكود/الطعام .3الدواجن/األسماك املقدار اإلرشادات 3-1 صدور الدجاج 300إلى 350جم 400إلى 450جم اشطف صدور الدجاج وضعها على طبق خزفي .ثم قم بتغطيتها بطبقة من ورق امليكروويف احلراري ثم اثقب الغطاء .ثم ضع الطبق على الصينية الدوارة .اتركها ملدة دقيقتني. الكود/الطعام املقدار اإلرشادات 2-1 الفاصوليا اخلضراء 200إلى 250جم 300إلى 350جم اغسل الفاصوليا اخلضراء ونظفّها .ثم ضعها في وعاء زجاجي له غطاء بانتظام .أضف 30مللي (ملعقتني كبيرتني) من املاء عند طهي 200إلى 250جرام ،وأضف 45مللي ( 3مالعق كبيرة) من املاء لكل 300إلى 450جرام .ثم ضع الوعاء في منتصف الصينية الدوارة .الرجاء تغطية اإلناء .قم بالتقليب بعد الطهي. اتركها ملدة من دقيقة إلى دقيقتني. 300إلى 350جم 400إلى 450جم اشطف صدور الديك الرومي وضعها في طبق زجاجي عميق مخصص للطهي في امليكروويف .ثم قم بتغطيتها بطبقة من ورق امليكروويف احلراري ثم اثقب الغطاء. ثم ضع الطبق على الصينية الدوارة .اتركها ملدة دقيقتني. 3-2 صدور الديك الرومي 2-2 السبانخ 100إلى 150جم 200إلى 250جم اغسل السبانخ ونظفّها .ثم ضعها في وعاء زجاجي له غطاء. وال تضف أي مقدار من املاء .ثم ضع الوعاء في منتصف الصينية الدوارة .الرجاء تغطية اإلناء .قم بالتقليب بعد الطهي. اتركها ملدة من دقيقة إلى دقيقتني. اشطف صدور الدجاج ،وانقعها ثم ضعها على الرف العلوي. ثم قم بقلبها مبجرد إصدار الفرن أصوات التنبيه. اتركها ملدة دقيقتني. 3-3 صدور الدجاج املشوية 300إلى 350جم 400إلى 450جم 2-3 البطاطس منزوعة القشرة 300إلى 350جم 400إلى 450جم 500إلى 550جم اغسل البطاطس ّ وقشرها وقطعها إلى أنصاف وضعها في وعاء زجاجي بغطاء .أضف 15إلى 30مللي (ملعقة إلى ملعقتني كبيرتني) من املاء .قم بالتقليب بعد الطهي .عند طهي كميات أكبر ،قم بالتقليب مرة واحدة أثناء عملية الطهي. اتركه ملدة 3إلى 5دقائق. 3-4 شرائح السمك املشوي 200إلى 300جم 400إلى 500جم ضع شرائح السمك على احلامل العلوي بشكل متساو .ثم قم بقلبها مبجرد إصدار الفرن أصوات التنبيه. اتركها ملدة من دقيقة إلى دقيقتني. 2-4 البطاطس احملمصة 400إلى 450جم 800إلى 850جم ضع املعجنات الطازجة في طبق من البيركس .ضع الطبق على احلامل السفلي .اتركه ملدة دقيقتني إلى 3دقائق. 3-5 شرائح السلمون املشوية 200إلى 250جم 300إلى 350جم ضع قطع السمك على احلامل العلوي بشكل متساو .ثم قم بقلبها مبجرد إصدار الفرن أصوات التنبيه .اتركها ملدة دقيقتني. 2-5 الباذجنان املشوي 100إلى 150جم 200إلى 250جم اغسل الباذجنان وقطعه إلى شرائح .امسحها بالزيت والتوابل. ضع الشرائح بشكل متساو على الرف العلوي .قلب البطاطس بعد صدور صوت تنبيه .اضغط على ( startتشغيل) للمتابعة (يستمر الفرن في التشغيل إذا لم بالتقليب). اتركها ملدة من دقيقة إلى دقيقتني. 3-6 األسماك املشوية 200إلى 300جم 400إلى 500جم امسح السمك بالكامل (سواء سمك ُمرقّط أو سمك الرأس الذهبية) بقليل من الزيت مع إضافة األعشاب والتوابل. ضع األسماك بجانب بعضهما في اجتاه عكسي على احلامل العلوي .ثم قم بقلبها مبجرد إصدار الفرن أصوات التنبيه. اتركها ملدة 3دقائق. 2-6 الطماطم املشوية 400إلى 450جم 600إلى 650جم اشطف الطماطم وقم بتنظيفها .قطعها إلى أنصاف وضعها على طبق الطهي اخملصص للميكروويف .ثم أضف اجلنب املبشور باألعلى .ثم ضع الطبق على الرف العلوي. اتركها ملدة من دقيقة إلى دقيقتني. العربية 20 - 2014-03-21 �� 6:31:48 MC28H5015AW_SG_DE68-04234H-01_AR.indd 20 استخدام ميزتي تخمير العجائن والزبادي توفر ميزات تخمير العجائن/الزبادي اخلمسة فترات طهي مبرمجة مسبقً ا .فهي ال حتتاج إلى ضبط وقت الطهي أو مستوى الطاقة .ميكنك ضبط فئة "تخمير العجائن/الزبادي" بالضغط على الزر ألعلى أو ألسفل بعد الضغط على الزر ( Dough Proof/Yogurtتخمير العجائن/الزبادي) .ضع الطعام أوال ً في وسط الصينية الدوارة وأغلق الباب. .2حدد نوع الطعام املراد طهيه باستخدام الزر ألعلى وألسفل .يشير رقم 1إلى تخمير العجائن ،بينما يشير رقم 2إلى "الزبادي املنزلي" .يتعني عليك اختيار الرقم الذي تريد استخدامه للطهي بالضغط على الزر ألعلى أو ألسفل .راجع اجلدول املوجود في الصفحة التالية للحصول على شرح لإلعدادات املبرمجة مسبقً ا .وفي نفس الوقت، اضغط على الزر ( Selectحتديد) لتحديد نوع الطعام. .3حدد الطعام بالضغط على الزرألعلى أو ألسفل. .1تخمير العجائن الكود/الطعام 1-1 عجينة البيتزا 300إلى 500جم ضع العجني في وعاء مناسب احلجم وضعه على الرف السفلي. قم بتغطيته بورق األلومنيوم. 1-2 عجينك الكيك 500إلى 800جم ضع العجني في وعاء مناسب احلجم وضعه على الرف السفلي. قم بتغطيته بورق األلومنيوم. 1-3 عجينة اخلبز 600إلى 900جم ضع العجني في وعاء مناسب احلجم وضعه على الرف السفلي. قم بتغطيته بورق األلومنيوم. .2الزبادي املنزلي الكود/الطعام .4اضغط على الزر ( Start/+30sتشغيل 30+/ثانية). املقدار اإلرشادات 04استخدام الفرن .1اضغط على الزر ( Dough Proof/Yogurtتخمير العجائن/الزبادي). يبني اجلدول التالي طريقة استخدام البرامج التلقائية لتخمير العجائن أو حتضير الزبادي املنزلي. 2-1 فناجني صغيرة املقدار اإلرشادات 500جم ضع 150جم من الزبادي في 5أكواب خزفية أو برطمانات زجاجية بالتساوي (لكل واحد 30جرا ًما) .أضف 100مل من اللنب في كل كوب. استخدم لنب محفوظ (درجة حرارة الغرفة؛ % 3.5دسم) .قم بتغطية كل كوب بورق حراري وضعه في شكل دائرة على الصينية الدوارة. وبعد االنتهاء ،احفظه ملدة 6ساعات في ثالجة. نوصي ألول مرة باستخدام خميرة بكتريا زبادي مجففة. 500جم اخلط 150جم من الزبادي الطبيعي مع 500مل من اللنب احملفوظ (درجة حرارة الغرفة؛ % 3.5دسم) .اسكب الزبادي في أوعية زجاجية بالتساوي .قم بتغطية الوعاء بالورق احلراري وضعه على الصينية الدوارة. وبعد االنتهاء ،احفظه ملدة 6ساعات في ثالجة. نوصي ألول مرة باستخدام خميرة بكتريا زبادي مجففة. ال تعمل الصينية الدوارة أثناء حتضير الزبادي. 2-2 إناء كبير العربية 21 - 2014-03-21 �� 6:31:48 MC28H5015AW_SG_DE68-04234H-01_AR.indd 21 استخدام ميزات فك التجميد السريع متكنك ميزات فك التجميد السريع اخلمسة من فك جتميد اللحوم والدواجن واألسماك واخلبز والكعك والفواكه .يتم ضبط تلقائيا .ما عليك سوى حتديد البرنامج والوزن. مدة فك التجميد ومستوى الطاقة ً استخدم فقط األواني املسموح باستخدامها مع امليكروويف. يبني اجلدول التالي برامج فك التجميد السريع املتعددة والكميات املراد فك جتميدها وفترات االنتظار واإلرشادات املناسبة .قم بإزالة كافة أنواع التغليف قبل بدء فك التجميد. ضع اللحوم والدواجن واألسماك على طبق زجاجي مسطح أو على طبق خزفي ،وقم بترتيب اخلبز والكيك على ورق املطبخ. الكود/الطعام افتح الباب .ضع الطعام اجملمد في إناء خزفي في منتصف الصينية الدوارة .أغلق الباب. .1اضغط على الزر ( Power Defrostفك التجميد السريع). .2حدد نوع الطعام املراد طهيه بالضغط على الزر ألعلى أو ألسفل. راجع اجلدول املوجود في الصفحة التالية للحصول على شرح لإلعدادات املبرمجة مسبقً ا .وفي نفس الوقت ،اضغط على الزر ( Selectحتديد) لتحديد نوع الطعام. .3حدد حجم الوجبة بالضغط على الزر ألعلى أو ألسفل. 1 اللحوم 2 الدواجن 3 السمك 4 .4اضغط على الزر ( Start/+30sتشغيل 30+/ثانية). النتيجة: • تبدأ عملية فك التجميد. • يصدر الفرن صوت تنبيه أثناء عملية فك التجميد ليذكرك بقلب الطعام( .باستثناء الفواكه) .5في حالة إصدار صوت تنبيه وتوقف التشغيل ،يتعني عليك قلب الطعام (على سبيل املثال :اللحوم والدواجن والسمك) .واضغط على الزر ( Start/+30sتشغيل 30+/ثانية) مرة أخرى إلنهاء عملية فك التجميد. عند إمتام الطهي ،يصدر الفرن صوت تنبيه ويومض بالكلمة النتيجة: " "Endأربع مرات .ثم يصدر الفرن صوت تنبيه مرة كل دقيقة. اخلبز /الكيك 5 الفاكهة املقدار اإلرشادات 200إلى 1500جم قم بحماية احلواف بورق األملونيوم ،ثم قلّب اللحوم عندما يُصدر الفرن صوت تنبيه .يتناسب هذا البرنامج مع اللحم البقري وحلم الضأن وشرائح الستيك وقطع اللحم واللحم املفروم .اتركها ملدة من 20إلى 90دقيقة. 200إلى 1500جم قم بحماية أطراف األرجل واألجنحة باستخدام ورق األملونيوم ،ثم قلّب الدواجن ،عندما يُصدر الفرن صوت تنبيه .يناسب هذا البرنامج الدجاجة الكاملة أو أجزاء الدجاج .اتركها ملدة من 20إلى 90دقيقة. 200إلى 1500جم قم بتغليف ذيل السمكة باستخدام ورق األملونيوم ،ثم قلّب األسماك عندما يُصدر الفرن صوت تنبيه .يناسب هذا البرنامج األسماك الكاملة وشرائح السمك الفيليه .اتركها ملدة من 20إلى 80دقيقة. 125إلى 1000جم أفقيا على قطعة من ورق املطبخ وقم بقلبه عندما يُصدر الفرن ضع اخلبز ً صوت تنبيه .وضع الكعك على طبق خزفي وقم بقلبه ،إن أمكن، عند إصدار الفرن صوت تنبيه( .يظل الفرن يعمل ويتوقف عند فتح بابه). يناسب هذا البرنامج كافة أنواع اخلبز سواء كان كامال ً أو شرائح وأرغفة اخلبز بأنواعه واخلبز الفرنساوي الطويل .ضع أرغفة اخلبز في شكل دائرة. يناسب هذا البرنامج كافة أنواع الكيك اخملبوز والبسكويت وكيك اجلنب والفطيرة احملالة .وال يناسب احللوى وكيك الفواكه والكرمية وكذلك الكيك املغطى بالشوكوالتة .اتركها ملدة من 10إلى 60دقيقة. 100إلى 600جم وزّع الفاكهة بشكل متساو في طبق زجاجي مسطح. يناسب هذا البرنامج كافة أنواع الفاكهة. اتركه ملدة 5إلى 20دقيقة. العربية 22 - 2014-03-21 �� 6:31:48 MC28H5015AW_SG_DE68-04234H-01_AR.indd 22 احلمل احلراري عملية الشواء ميك ِّنك وضع الطهي باستخدام احلمل احلراري من طهي الطعام بنفس طريقة الفرن التقليدي .ال يتم استخدام وضع امليكروويف .ميكنك تعيني درجة احلرارة كما تريد في نطاق يتراوح ما بني 40درجة مئوية و 200درجة مئوية .ويكون احلد األقصى ملدة الطهي 60دقيقة. • استخدم دو ًما قفازات الفرن عند ملس األشياء املوجودة في الفرن ،إذ أنها تكون ساخنة ج ًدا. • ميكنك احلصول على نتائج أفضل للطهي والتحمير عند استخدام الرف السفلي. تأكد من وجود جزء التسخني في الوضع األفقي .افتح الباب وضع اإلناء على الرف السفلي وضعه على الصينية الدوارة. متكنك الشواية من تسخني الطعام وحتميره بشكل سريع دون استخدام أشعة امليكروويف. • استخدم دو ًما قفازات الفرن عند ملس األشياء املوجودة في الفرن ،إذ أنها تكون ساخنة ج ًدا. • ميكنك احلصول على نتائج أفضل في الطهي والشي عند استخدام الرف العلوي. 04استخدام الفرن .1اضغط على زر ( Convectionاحلمل احلراري). تظهر العالمات اآلتية: النتيجة: (وضع حمل حراري) 180درجة مئوية (درجة احلرارة) .1افتح الباب وضع الطعام على الرف. .2اضغط على زر ( Grillالشواية). تظهر املؤشرات اآلتية: النتيجة: (وضع الشواية) • ال ميكنك تعيني درجة احلرارة للشواية. .2اضبط درجة احلرارة بالضغط على الزر ألعلى أو ألسفل( .درجة احلرارة 40 :إلى 200 درجة مئوية ،بفاصل 10درجات مئوية) تلقائيا إلى مرحلة ثوان ،فإنه يتغير ً • إذا لم يتم تعيني درجة احلرارة في غضون ٍ 5 إعداد مدة الطهي. .3قم بتعيني مدة الشي بالضغط على الزر ألعلى أو ألسفل. • احلد األقصى ملدة الشي هو 60دقيقة. .4اضغط على الزر ( Start/+30sتشغيل 30+/ثانية). يبدأ الشي. النتيجة: • عند إمتام الطهي ،يصدر الفرن صوت تنبيه ويومض بالكلمة " "Endأربع مرات .ثم يصدر الفرن صوت تنبيه مرة كل دقيقة. .3اضغط على الزر ( Selectحتديد). .4قم بتعيني مدة الطهي بالضغط على الزر ألعلى أو ألسفل. (إذا كنت تريد التسخني املسبق للميكروويف ،تخطى هذه اخلطوة). .5اضغط على الزر ( Start/+30sتشغيل 30+/ثانية). يبدأ الطهي. النتيجة: • عند إمتام الطهي ،يصدر الفرن صوت تنبيه ويومض بالكلمة " "Endأربع مرات .ثم يصدر الفرن صوت تنبيه مرة كل دقيقة. العربية 23 - 2014-03-21 �� 6:31:49 MC28H5015AW_SG_DE68-04234H-01_AR.indd 23 معا الطهي باستخدام امليكروويف والشواية ً اجلمع بني امليكروويف واحلمل احلراري معا وذلك للطهي والتحمير في نفس الوقت بشكل سريع. أيضا الطهي باستخدام امليكروويف والشواية ً ميكنك ً استخدم دو ًما أدوات الطهي املسموح باستخدامها مع امليكروويف والفرن .تعتبر األطباق املصنوعة من الزجاج واألطباق متساو. اخلزفية مثالية عند الطهي باستخدام أشعة امليكروويف حيث تسمح بتخللها إلى الطعام بشكل ٍ استخدم "دو ًما" قفازات الفرن عند ملس األدوات املستخدمة في الفرن ،نظرا ً لشدة حرارته. ميكنك حتسني عملية الطهي والشي إذا استخدمت احلامل العلوي. افتح الباب .ضع الطعام على الرف املالئم لنوع الطعام الذي ترغب في طهيه .ضع احلامل على الصينية الدوارة .أغلق الباب. يستخدم أسلوب الطهي اجملمع كال ً من طاقة امليكروويف والتسخني باحلمل احلراري .ال حتتاج إلى التسخني املسبق للفرن حيث تتوفر طاقة امليكروويف بشكل فوري. يوجد العديد من األطعمة التي ميكن طهيها باستخدام اجلمع بني الطهي بأشعة امليكروويف واحلمل احلراري ،نذكر منها: • اللحوم والدواجن املشوية • الفطائر والكيك • أطباق البيض واجلنب استخدم دو ًما أدوات الطهي املسموح باستخدامها مع امليكروويف والفرن .تعتبر األطباق املصنوعة من الزجاج واألطباق متساو. اخلزفية مثالية عند الطهي باستخدام أشعة امليكروويف حيث تسمح بتخللها إلى الطعام بشكل ٍ استخدم "دو ًما" قفازات الفرن عند ملس األدوات املستخدمة في الفرن ،نظرا ً لشدة حرارته. ميكنك احلصول على أفضل عملية للطهي والتحميص إذا استخدمت احلامل السفلي. .1اضغط على الزر ( Combiجمع). تظهر العالمات اآلتية: النتيجة: ( Cb-1امليكروويف +الشواية) .2اجعل شاشة العرض تشير إلى Cb-1بالضغط على الزر ألعلى أو ألسفل ،ثم اضغط على الزر ( Selectحتديد). تظهر العالمات اآلتية: النتيجة: (وضع اجلمع بني امليكروويف والشواية) 600واط (الطاقة الناجتة) افتح الباب .ضع الطعام على الصينية الدوارة أو الرف السفلي ،ثم ضعه على الصينية الدوارة .أغلق الباب .يجب أن يكون جزء التسخني في الوضع األفقي. .1اضغط على الزر ( Combiجمع). تظهر العالمات اآلتية: النتيجة: ( Cb-1امليكروويف +الشواية) .3حدد مستوى الطاقة املناسب بالضغط على الزر ألعلى أو ألسفل حتى يتم عرض مقدار الطاقة الناجتة ( 600و 450و 300واط) .في نفس الوقت ،اضغط على الزر ( Selectحتديد) لتعيني مستوى الطاقة. • ال ميكنك تعيني درجة احلرارة للشواية. تلقائيا إلى ثوان ،فإنه يتغير ً • إذا لم يتم تعيني مستوى الطاقة في غضون ٍ 5 مرحلة إعداد مدة الطهي. .2اجعل شاشة العرض تشير إلى Cb-2بالضغط على الزر ألعلى أو ألسفل، ثم اضغط على الزر ( Selectحتديد). تظهر العالمات اآلتية: النتيجة: (وضع اجلمع بني امليكروويف والطهي بالطريقة العادية) 600واط (الطاقة الناجتة) .4قم بتعيني مدة الطهي بالضغط على الزر ألعلى أو ألسفل. • احلد األقصى ملدة الطهي 60دقيقة. .3حدد مستوى الطاقة املناسب بالضغط على الزر ألعلى أو ألسفل حتى يتم عرض مقدار الطاقة الناجتة ( 600و 450و 300و 180و 100واط) .في نفس الوقت ،اضغط على الزر ( Selectحتديد) لتعيني مستوى الطاقة. تلقائيا إلى ثوان ،فإنه يتغير ً • إذا لم يتم تعيني مستوى الطاقة في غضون ٍ 5 مرحلة إعداد مدة الطهي( .درجة احلرارة االفتراضية 180 :درجة مئوية) .5اضغط على الزر ( Start/+30sتشغيل 30+/ثانية). النتيجة: • تبدأ عملية الطهي اجملمع. • عند إمتام الطهي ،يصدر الفرن صوت تنبيه ويومض بالكلمة " "Endأربع مرات .ثم يصدر الفرن صوت تنبيه مرة كل دقيقة. .4حدد درجة احلرارة املناسبة بالضغط على الزر ألعلى أو ألسفل. (درجة احلرارة 200 :إلى 40درجة مئوية). وفي نفس الوقت ،اضغط على الزر ( Selectحتديد) لتعيني درجة احلرارة. تلقائيا إلى مرحلة ثوان ،فإنه يتغير ً • إذا لم يتم تعيني درجة احلرارة في غضون ٍ 5 إعداد مدة الطهي. العربية 24 - 2014-03-21 �� 6:31:50 MC28H5015AW_SG_DE68-04234H-01_AR.indd 24 استخدام ميزات التأمني ضد عبث األطفال مت تزويد فرن امليكروويف ببرنامج أمان خاص ضد عبث األطفال ،وهو يتيح "تأمني" الفرن بحيث ال يتمكن األطفال أو أي شخص غير معتاد على استخدام الفرن من تشغيله عن طريق اخلطأ. .5قم بتعيني مدة الطهي بالضغط على الزر ألعلى أو ألسفل. • احلد األقصى ملدة الطهي 60دقيقة. .6اضغط على الزر ( Start/+30sتشغيل 30+/ثانية). النتيجة: • تبدأ عملية الطهي اجملمع. • يتم تسخني الفرن إلى درجة احلرارة املطلوبة ثم تستمر عملية الطهي باستخدام امليكروويف حتى انتهاء املدة الالزمة للطهي. • عند إمتام الطهي ،يصدر الفرن صوت تنبيه ويومض بالكلمة " "Endأربع مرات .ثم يصدر الفرن صوت تنبيه مرة كل دقيقة. .2إللغاء تأمني الفرن ،اضغط على الزر ألعلى وألسفل في نفس الوقت( .ملدة ثالث ثوان) ميكنك استخدام الفرن بشكل طبيعي. النتيجة: 04استخدام الفرن .1اضغط على الزر ألعلى وألسفل في نفس الوقت( .ملدة ثالث ثوان) النتيجة: • يتم تأمني الفرن (ال ميكن تشغيل أي من الوظائف). • تعرض الشاشة احلرف "."L استخدام ميزات تشغيل/إيقاف تشغيل الصينية الدوارة اختيار امللحقات يتيح لك الزر ( Turntable on/offتشغيل/إيقاف تشغيل الصينية الدوارة) استخدام أطباق كبيرة متأل الفرن بالكامل عن طريق إيقاف دوران الصينية الدوارة (في وضع الطهي اليدوي فقط). ال يتطلب الطهي باحلمل احلراري أدوات طهي خاصة .إال أنه يجب استخدام أدوات الطهي التي ميكنك استخدامها في الفرن العادي فقط. ستكون النتائج غير مرضية في هذه احلالة حيث ستكون درجة نضج الطعام غير متساوية .نوصي بإدارة الطبق نصف دورة أثناء عملية الطهي يدوياً. عادةً ال تتناسب احلاويات املسموح باستخدامها مع امليكروويف مع الطهي باحلمل احلراري؛ حيث يحظر استخدام األواني واألطباق البالستيكية واألكواب الورقية واملناشف وهكذا. إذا كنت ترغب في حتديد أسلوب الطهي اجملمع (الشواية وامليكروويف أو احلمل احلراري) ،استخدم فقط األطباق املسموح باستخدامها مع امليكروويف والفرن. حتذير للحصول على مزيد من التفاصيل حول أواني الطهي واألدوات املناسبة ،راجع "دليل أدوات الطهي" صفحة 30إلى .31 ال تقم بتشغيل الصينية الدوارة أب ًدا دون وجود طعام في الفرن. السبب :قد يتسبب ذلك في حدوث حريق أو تعرض الفرن للتلف. .1اضغط على الزر ( Turntable on/offتشغيل/إيقاف تشغيل الصينية الدوارة). لن تدور الصينية الدوارة. النتيجة: تظهر العالمات اآلتية: .2إلعادة تشغيل دوران الصينية الدوارة مرة أخرى ،اضغط على الزر ( Turntable on/offتشغيل/إيقاف تشغيل الصينية الدوارة) مرة أخرى. تعود الصينية الدوارة للدوران. النتيجة: ال يتوفر الزر ( Turntable on/offتشغيل/إيقاف تشغيل) إال في وضع الطهي اليدوي فقط. العربية 25 - 2014-03-21 �� 6:31:50 MC28H5015AW_SG_DE68-04234H-01_AR.indd 25 استخدام وظيفة التحمير اليدوي (متوفرة بالطراز MC28H5015C*و MC28H5015Z*فقط) عند الطهي في فرن امليكروويف ،باستخدام الشواية أو وضع امليكروويف في األفران التي جتمع بني الشواية والطريقة العادية للطهي ،عادة ما يصبح اجلزء السفلي من املعجنات والبيتزا طري وندي .يساعدك طبق التحمير على إكساب الطعام املطهي املظهر الهش .ميكن كذلك استخدام طبق التحمير في إعداد اللحم والبيض والسجق ،وغيرها من األصناف. أو احلامل العلوي احلامل السفلي طبق التحمير .9اضغط على الزر ( Start/+30sتشغيل 30+/ثانية). يبدأ الطهي. النتيجة: • عند إمتام الطهي ،يصدر الفرن صوت تنبيه ويومض بالكلمة " "Endأربع مرات .ثم يصدر الفرن صوت تنبيه مرة كل دقيقة. قبل استخدام طبق التحمير ،قم بتسخينه عن طريق حتديد وضع اجلمع ملدة تتراوح من 3إلى 5دقائق: معا( .مستوى الطاقة 600واط) • استخدام الطهي بالطريقة العادية ( 200درجة مئوية) وأشعة امليكروويف ً • اجلمع بني الشواية وامليكروويف( .مستوى الطاقة 600واط) .1قم بالتسخني املسبق لطبق التحمير ،كما ذكرنا أعاله. .2امسح الطبق بالزيت عند طهي أطعمة ،مثل اللحم والبيض ،وذلك ليتم حتميرها بشكل جيد. استخدم القفازات دو ًما نظرًا للسخونة الشديدة لطبق التحمير. .4ضع طبق التحمير على احلامل املعدني (أو على الصينية الدوارة) في امليكروويف. الرجاء مالحظة أن طبق التحمير مغطى بطبقة من التيفال غير املضادة للخدش .يحظر استخدام أدوات حادة مثل السكني لتقطيع الطعام املوجود بطبق التحمير. .3ضع الطعام في طبق التحمير. .5اضغط على الزر ( Combiجمع) .حدد وضع اجلمع بالضغط على الزر ألعلى و ألسفل. وبعد ذلك ،اضغط على الزر ( Selectحتديد). (امليكروويف +الشواية) Cb-1 (امليكروويف +احلمل احلراري) Cb-2 استخدم أدوات بالستيكية لتجنب خدش سطح الطبق أو قم بإخراج الطعام من الطبق قبل التقطيع. ال تضع أي أدوات غير مقاومة للحرارة في طبق التحمير (األوعية البالستيكية على سبيل املثال). يحظر وضع طبق التحمير في الفرن في عدم وجود الصينية الدوارة. .6حدد مستوى الطاقة املناسب بالضغط على الزر ألعلى أو ألسفل حتى تصل إلى الطاقة الناجتة املناسبة .في نفس الوقت ،اضغط على الزر ( Selectحتديد) لتعيني مستوى الطاقة. تلقائيا إلى ثوان ،فإنه يتغير ً • إذا لم يتم تعيني مستوى الطاقة في غضون ٍ 5 مرحلة إعداد مدة الطهي. كيفية تنظيف طبق التحمير قم بتنظيف طبق التحمير باملاء الدافئ ومادة منظفة وقم بشطفه باملاء. ال تستخدم فرشاة للكشط أو قطعة إسفنج خشنة ،وإال ستتعرض الطبقة العلوية من الطبق للتلف. الرجاء مالحظة يحظر تنظيف طبق التحمير في غسالة األطباق. .7في حالة استخدام وضع "امليكروويف +احلمل احلراري" ،حدد أوال ً درجة احلرارة املناسبة بالضغط على الزر ألعلى و ألسفل .في نفس الوقت ،اضغط على الزر ( Selectحتديد) لتعيني درجة احلرارة. تلقائيا إلى ثوان ،فإنه يتغير ً • إذا لم يتم تعيني مستوى الطاقة في غضون ٍ 5 مرحلة إعداد مدة الطهي( .درجة احلرارة االفتراضية 180 :درجة مئوية) .8حدد مدة الطهي بالضغط على الزر ألعلى و ألسفل حتى يتم عرض مدة الطهي املناسبة. العربية 26 - 2014-03-21 �� 6:31:50 MC28H5015AW_SG_DE68-04234H-01_AR.indd 26 استخدام وظيفة الطهي بالبخار (متوفرة بالطراز MC28H5015F*و MC28H5015Z*فقط) استخدم وحدة الطهي بالبخار البالستيكية عند استخدام وظيفة الطهي بالبخار. ضع أوال ً وحدة الطهي بالبخار البالستيكية في وسط الصينية الدوارة وأغلق الباب. إعدادات الطهي اليدوي بالبخار الطعام اخلرشوف .1اضغط على الزر ( Microwaveميكروويف). اإلرشادات اغسل ثمار اخلرشوف ونظفها باملاء .ثم ضعها داخل الوعاء .وقم بإضافة ملعقة واحدة كبيرة من عصير الليمون .وقم بوضع الغطاء .اتركها ملدة من دقيقة إلى دقيقتني. خضراوات طازجة اخلضروات اجملمدة مكونات وحدة الطهي بالبخار وعاء غطاء صينية إدخال طريقة استخدام وحدة الطهي بالبخار + الوعاء +الغطاء 300جم 600واط 8-7 اإلرشادات ضع اخلضروات اجملمدة في سلة الوعاء .ثم قم بإضافة ملعقة واحدة كبيرة من املاء. وقم بوضع الغطاء .قم بتقليبه جيدا ً بعد الطهي وبعد وقت االنتظار. اتركه ملدة دقيقتني إلى 3دقائق. شرائح اللحم الطازج نبذة عن الطهي بالبخار 300جم 900واط 5-4 اإلرشادات زن اخلضروات (مثل ،ثمار البروكلي والقرنبيط واجلزر والفلفل) بعد غسلها وتنظيفها وتقطيعها إلى قطع متساوية .ثم ضع السلة داخل الوعاء. قم بتوزيع اخلضراوات داخل السلة .ثم قم بإضافة 2مالعق كبيرة من املاء .وقم بوضع الغطاء .اتركها ملدة من دقيقة إلى دقيقتني. .3قم بتعيني مدة الطهي بالضغط على الزر ألعلى وألسفل. .4اضغط على الزر ( Start/+30sتشغيل 30+/ثانية). يبدأ الطهي. النتيجة: • عند إمتام الطهي ،يصدر الفرن صوت تنبيه ويومض بالكلمة " "Endأربع مرات .ثم يصدر الفرن صوت تنبيه مرة كل دقيقة. 300جرام (قطعة إلى قطعتني) 900واط 6-5 04استخدام الفرن .2اضغط على الزر ألعلى وألسفل إلى الوضع املطلوب حتى يتم عرض مستوى الطاقة املناسب .في نفس الوقت ،اضغط على الزر ( Selectحتديد) لتعيني مستوى الطاقة. تلقائيا إلى ثوان ،فإنه يتغير ً • إذا لم يتم تعيني مستوى الطاقة في غضون ٍ 5 مرحلة إعداد مدة الطهي. املقدار الطاقة الوقت (بالدقيقة) 300جم املرحلة األولى 900 :واط 2-1 املرحلة الثانية 450 :واط 6-5 اإلرشادات اشطف شرائح السمك بأنواعه اخملتلفة مثل البولق والسمك األحمر والساملون ،وقم بتجهيزه .انثر عصير الليمون فوقه .ثم ضع السلة داخل الوعاء. وضع الشرائح جن ًبا إلى جنب .أضف 100مللي من املاء البارد .وقم بوضع الغطاء. اتركها ملدة من دقيقة إلى دقيقتني. صدور الدجاج 300جم املرحلة األولى 900 :واط 2-1 املرحلة الثانية 600 :واط 8-7 اإلرشادات اشطف صدور الدجاج .وقطّ عها بالسكني مرتني أو ثالث مرات. ثم ضع السلة داخل الوعاء .ضع صدور الدجاج جن ًبا إلى جنب. أضف 100مللي من املاء البارد .وقم بوضع الغطاء .اتركها ملدة من دقيقة إلى دقيقتني. + الوعاء وصينية اإلدخال +الغطاء (تابع) العربية 27 - 2014-03-21 �� 6:31:51 MC28H5015AW_SG_DE68-04234H-01_AR.indd 27 السيخ الدوار (بالطراز MC28H5015Z*فقط) الطعام األرز املقدار الطاقة الوقت (بالدقيقة) 250جم 900واط 18-15 يكون سيخ الشي الدوار مفيدا ً عند الشي ،حيث أنك ال حتتاج إلى قلب اللحم .وميكن استخدام سيخ الشي الدوار عند الطهي باستخدام امليكروويف والطهي بالطريقة العادية معاً. تأكد من توزيع اللحم بشكل متساو على السيخ وأن السيخ يدور بحرية دون إعاقة. استخدم دو ًما قفازات الفرن عند ملس األشياء املوجودة في الفرن ،إذ أنها تكون ساخنة ج ًدا. اإلرشادات ضع األرز املسلوق في الوعاء .أضف 500مللي من املاء البارد .وقم بوضع الغطاء. بعد انتهاء الطهي اترك األرز األبيض ملدة 5دقائق واألرز البني ملدة 10دقائق. اتركها ملدة 10-5دقائق. البطاطس احملشوة 500جم 900واط .1ضع قطع اللحم حول السيخ بحيث مير السيخ من منتصفها. ضع الدجاجة حول السيخ بحيث مير السيخ بني صدر الدجاجة مثال: وعظمها. ضع سيخ الشي الدوار بشكل مستقيم على اإلناء الزجاجي وضع اإلناء على الصينية الدوارة .امسح اللحم بقليل من الزيت والتوابل لتحميره. 8-7 اإلرشادات زن البطاطس وقم بتنظيفها ثم ضعها في الوعاء .ثم قم بإضافة 3مالعق كبيرة من املاء .وقم بوضع الغطاء .اتركه ملدة دقيقتني إلى 3دقائق. اليخني (مثلج) 400جم 600واط .2اضغط على الزر ( Combiجمع). تظهر العالمات اآلتية: النتيجة: ( Cb-1امليكروويف +الشواية) 6-5 اإلرشادات ضع اليخني في الوعاء .وقم بوضع الغطاء .قلبه جيدا ً قبل االنتظار. اتركها ملدة من دقيقة إلى دقيقتني. قطع اخلبز اجملمدة احملشوة باملربى خشاف الفواكه 150جم 600واط .3اجعل شاشة العرض تشير إلى Cb-2بالضغط على الزر ألعلى أو ألسفل ،ثم اضغط على الزر ( Selectحتديد). تظهر العالمات اآلتية: النتيجة: (وضع اجلمع بني امليكروويف والطهي بالطريقة العادية) 600واط (الطاقة الناجتة) 2-1 اإلرشادات بلل سطح العجائن احملشوة باملاء البارد .ضع قطعة واحدة أو قطعتني من العجائن اجملمدة بجوار بعضها في السلة .أدخل السلة في اإلناء .وقم بوضع الغطاء. اتركه ملدة دقيقتني إلى 3دقائق. 250جم 900واط .4حدد مستوى الطاقة املناسب بالضغط على الزر ألعلى أو ألسفل حتى يتم عرض مقدار الطاقة الناجتة ( 600و 450و 300و 180و 100واط) .في نفس الوقت ،اضغط على الزر ( Selectحتديد) لتعيني مستوى الطاقة. تلقائيا إلى ثوان ،فإنه يتغير ً • إذا لم يتم تعيني مستوى الطاقة في غضون ٍ 5 مرحلة إعداد مدة الطهي( .درجة احلرارة االفتراضية 180 :درجة مئوية) 4-3 اإلرشادات زن الفواكه الطازجة (مثل ،التفاح والكمثرى والبرقوق واملشمش واملاجنو واألناناس) بعد تقشيرها وغسلها وتقطيعها إلى قطع أو مكعبات متساوية .ثم ضعها داخل الوعاء. أضف ملعقة إلى ملعقتني كبيرتني من املاء وملعقة إلى ملعقتني كبيرتني من السكر وضع الغطاء .اتركه ملدة دقيقتني إلى 3دقائق. .5حدد درجة احلرارة املناسبة بالضغط على الزر ألعلى أو ألسفل. (درجة احلرارة 200 :إلى 40درجة مئوية) .وفي نفس الوقت ،اضغط على الزر ( Selectحتديد) لتعيني درجة احلرارة. تلقائيا إلى مرحلة ثوان ،فإنه يتغير ً • إذا لم يتم تعيني درجة احلرارة في غضون ٍ 5 إعداد مدة الطهي. .6قم بتعيني مدة الطهي بالضغط على الزر ألعلى أو ألسفل. • احلد األقصى ملدة الطهي 60دقيقة. العربية 28 - 2014-03-21 �� 6:31:51 MC28H5015AW_SG_DE68-04234H-01_AR.indd 28 استخدام ميزة الشي باستخدام األسياخ املتعددة بواسطة أسياخ الكباب .4ضع اإلناء الزجاجي باألسياخ املتعددة في وسط الصينية الدوارة. تأكد من وجود جزء التسخني اخلاص بالشواية في موضعه الصحيح عند اجلدار اخللفي لتجويف الفرن وليس باألعلى قبل بدء عملية الشي. إخراج األسياخ املتعددة من الفرن بعد انتهاء عملية الشي .2قم بفك األسياخ املتعددة من حامل األسياخ مستخدما ً القفازات أيضاً. األسياخ املتعددة اخلاصة بشي الكباب ميكنك باستخدام أسياخ الكباب الستة شي اللحم والدواجن واألسماك واخلضراوات (مثل البصل أو الفلفل أو الكوسة) والفاكهة املقطعة. ميكنك حتضير الطعام السابق ذكره باستخدام أسياخ شي الكباب عند الطهي بالطريقة العادية أو األسلوب اجملمع. أداة تدوير أسياخ الشي، سيخ شي الكباب .3ضع سيخ الشي الدوار في اإلناء الزجاجي ثم ضع أداة األسياخ املتعددة به. .1استخدم قفازات الفرن عند إخراج اإلناء الزجاجي مع األسياخ املتعددة من الفرن ،حيث يكون ساخنا ً جداً. استخدام األسياخ العمودية املتعددة أسياخ متعددة .2ضع نفس كمية الطعام في كل سيخ. 04استخدام الفرن .7اضغط على الزر ( Start/+30sتشغيل 30+/ثانية). النتيجة: • تبدأ عملية الطهي اجملمع. • يتم تسخني الفرن إلى درجة احلرارة املطلوبة ثم تستمر عملية الطهي باستخدام امليكروويف حتى انتهاء املدة الالزمة للطهي. • عند إمتام الطهي ،يصدر الفرن صوت تنبيه ويومض بالكلمة " "Endأربع مرات .ثم يصدر الفرن صوت تنبيه مرة كل دقيقة. • عند اكتمال طهي الطعام ،قم بإزالة السيخ بحرص مستخدما ً قفازات حلماية يديك. .1إلعداد الكباب باستخدام ميزة األسياخ املتعددة ،استخدم األسياخ الستة. سيخ الشي الدوار .3قم بإزالة األسياخ بحرص ،واستخدم شوكة إلخراج قطع الطعام من األسياخ. ال تصلح غسالة األطباق في تنظيف األسياخ املتعددة .لذا ،يجب تنظيفها يدويا ً باستخدام املاء الدافئ ومسحوق تنظيف .أخرج األسياخ العمودية املتعددة من الفرن بعد االستخدام. اإلناء الزجاجي العربية 29 - 2014-03-21 �� 6:31:51 MC28H5015AW_SG_DE68-04234H-01_AR.indd 29 استخدام ميزات إزالة الروائح استخدم هذه امليزة بعد طهي األطعمة ذات الروائح النفاذة أو عند تصاعد دخان كثيف من داخل الفرن. نظف أوال ً الفرن من الداخل. تلقائيا بعد االنتهاء .1اضغط على الزر ( Deodorisationإزالة الروائح) وستبدأ العملية ً من التنظيف. مت حتديد مدة 5دقائق لعملية إزالة الروائح. دليل أواني الطهي للطهي باستخدام فرن امليكروويف ،يجب أن تتمكن أشعة امليكروويف من اختراق الطعام دون أن تنعكس على األطباق أو متتصها األطباق املستخدمة. لذا ،يجب احلرص عند اختيار أدوات الطهي .إذا كان وعاء الطهي يحمل عالمة مسموح باستخدامها مع امليكروويف ،فال داعي للقلق. يسرد اجلدول التالي األنواع اخملتلفة ألدوات الطهي ويشير إلى ما إذا كان ميكن استخدامها في فرن امليكروويف أم ال وإلى كيفية استخدامها. أوعية الطهي أيضا ضبط مدة إزالة الروائح بالضغط على الزر ( Start/+30sتشغيل 30+/ثانية). ميكنك ً الوقت األقصى لعملية التخلص من الروائح هو 15دقيقة. ورق األملونيوم مسموح باستخدامها مع امليكروويف ✓✗ إيقاف تشغيل صفارة التنبيه ميكنك إيقاف تشغيل صوت التنبيه وقتما تريد. .1اضغط على الزر ( Start/+30sتشغيل 30+/ثانية) و( Stop/Ecoإيقاف/توفير الطاقة) في نفس الوقت( .ملدة ثانية واحدة) يتوقف الفرن عن إصدار أصوات تنبيه لإلشارة إلى انتهاء العملية. النتيجة: طبق التحمير ✓ األواني الصينية واخلزفية ✓ .2لتشغيل ميزة إصدار صوت التنبيه مرة أخرى ،اضغط على الزرين ( Start/+30sتشغيل 30+/ثانية) و( Stop/Ecoإيقاف/توفير الطاقة) مرة أخرى في نفس الوقت( .ملدة ثانية واحدة) يعود الفرن للعمل بشكل طبيعي. النتيجة: األطباق الكرتون املصنوعة من البوليستر التي تستخدم مرة واحدة ✓ تعليقات ميكن استخدامه بكميات صغيرة حلماية أسطح األطعمة من النضج الزائد .قد يحدث ماس كهربائي إذا كان ورق األملونيوم قري ًبا ج ًدا من جدار الفرن أو إذا مت استخدام كميات كبيرة منه. ال يتم تسخينه مسبقً ا ألكثر من 8دقائق. تكون األواني اخلزفية واألواني الفخارية واألواني اخلزفية املطلية واألواني الصينية عادة مناسبة ،ما لم تكن مزينة بزخارف معدنية. يتم تغليف بعض األطعمة اجملمدة في هذه األطباق. تغليف األطعمة السريعة • األكواب املصنوعة من البولستير ✓ ميكن استخدامها في تدفئة الطعام .قد تتسبب احلرارة الزائدة في صهر األدوات املصنوعة من الفوم. • األكياس الورقية أو الصحف ✗ قد حتترق. • الورق املعاد تصنيعه أو األدوات الزجاجية املزينة بزخارف معدنية ✗ قد يتسبب في حدوث ماس كهربائي. العربية 30 - 2014-03-21 �� 6:31:52 MC28H5015AW_SG_DE68-04234H-01_AR.indd 30 أوعية الطهي مسموح باستخدامها مع امليكروويف دليل الطهي تعليقات أشعة امليكروويف األدوات الزجاجية • من الفرن إلى أدوات املائدة ✓ • األدوات الزجاجية الرقيقة ✓ • البرطمانات الزجاجية ✓ ميكن استخدامها ،ما لم تكن مزينة بزخارف معدنية. الطهي ميكن استخدامها في تدفئة األطعمة والسوائل. قد يتعرض الزجاج الرقيق للكسر أو الشرخ بسبب التسخني املفاجئ. أدوات الطهي اخلاصة بالطهي في امليكروويف: يجب أن تسمح أدوات الطهي لطاقة امليكروويف بتخللها للحصول على أفضل نتيجة .تنعكس أشعة امليكروويف بواسطة املعادن مثل اإلستنلس واألملونيوم والنحاس ،إال أنها ميكن أن تتخلل اخلزف والزجاج والبالستيك عالوة على الورق واخلشب. لذا يحظر دو ًما طهي الطعام في أواني معدنية. يجب إزالة الغطاء .مناسب للتدفئة فقط. املعادن • األطباق ✗ • أربطة أكياس الفريزر ✗ • األطباق واألكواب ومناديل املائدة وورق املطبخ ✓ • الورق املعاد تصنيعه ✗ األطعمة التي ميكن طهيها في امليكروويف: ميكن طهي العديد من أنواع الطعام في امليكروويف ،مثل اخلضراوات الطازجة أو اجملمدة والفاكهة واملعجنات واألرز واحلبوب أيضا إعداد أنواع عديدة من الصلصة والكسترد واحلساء والسجق املدخن واألطعمة احملفوظة واألسماك واللحوم .كما ميكن ً مثاليا ألي طعام يتم جتهيزه في والصلصة املتبلة في فرن امليكروويف .وبشكل عام ،يكون الطهي باستخدام امليكروويف ً أيضا امليكروويف في فك جتميد الزبد أو الشوكوالتة ،للحصول على أمثلة (راجع الفصل الذي درج التسخني .كما يُستخدم ً يتضمن التلميحات واألساليب الفنية). قد تتسبب في حدوث ماس كهربائي أو نشوب حريق. الورق تستخدم في طهي الطعام الذي يستغرق فترات أيضا المتصاص قصيرة وفي تدفئة الطعام .وتستخدم ً الرطوبة الزائدة. تغطية الطعام أثناء الطهي تعتبر تغطية الطعام أثناء الطهي أمرًا في غاية األهمية ،حيث يتصاعد البخار الناجت عن تبخر املاء ويساهم في عملية الطهي .وميكن تغطيه الطعام بطرق مختلفة :على سبيل املثال ،باستخدام أطباق خزفية أو بالستيكية أو بطبقة من ورق امليكروويف احلراري. قد يتسبب في حدوث ماس كهربائي. البالستيك • األواني ✓ • الورق احلراري ✓ • أكياس الفريزر ✓✗ الورق الشمعي أو الدهني ✓ :مستحسن ✓ ✓✗ 05دليل أواني الطهي تتخلل طاقة امليكروويف الطعام بالفعل ،ويتم ذلك بسبب اجنذابها للمكونات املائية والذهنية والسكرية وامتصاصها لها. تتسبب أشعة امليكروويف في حتريك اجلزيئات املوجودة في الطعام بشكل سريع .وينشأ عن هذه احلركة السريعة للجزيئات احتكاك ينتج عنه حرارة تؤدي إلى طهي الطعام. خاصة إذا كانت مقاومة للحرارة .قد يحدث التواء لبعض أنواع البالستيك األخرى أو يتغير لونها عند درجات احلرارة املرتفعة .ال تستخدم البالستيك املصنوع من امليالمني. فترات االنتظار تتمثل أهمية مدة االنتظار بعد انتهاء عملية الطهي في أنها تسمح مبعادلة درجة احلرارة درجة احلرارة بني أجزاء الطعام الداخلية. ميكن استخدامه لالحتفاظ بالرطوبة .ال يجب أن يالمس الطعام .توخ احلذر عند إزالة طبقة الورق احلراري حيث ينبعث بخار ساخن. فقط إذا كانت حتتمل درجة الغليان أو إذا كانت صاحلة لالستخدام في الفرن .ال يجب أن تكون محكمة اإلغالق. عند الضرورة ،اثقبها بشوكة. ميكن استخدامه لالحتفاظ بالرطوبة ومنع تناثر الطعام. :يستخدم بحذر ✗ :غير آمن العربية 31 - 2014-03-21 �� 6:31:52 MC28H5015AW_SG_DE68-04234H-01_AR.indd 31 دليل طهي اخلضراوات اجملمدة دليل طهي اخلضراوات الطازجة استخدم أوعية مناسبة مصنوعة من البيركس لها غطاء .قم بطهي الطعام مع وضع الغطاء مدة احلد األدنى – راجع اجلدول. تابع عملية الطهي حتى حتصل على النتيجة املطلوبة. قلب الطعام مرتني أثناء الطهي ومرة بعد الطهي .أضف امللح أو التوابل أو الزبد بعد الطهي .اترك الطعام مغطى أثناء مدة االنتظار. استخدم أوعية مناسبة مصنوعة من البيركس لها غطاء .أضف 30إلى 45مللي من املاء البارد (ملعقتني إلى 3مالعق كبيرة) لكل 250جرام ما لم يوصى بكمية أخرى من املاء – راجع اجلدول .قم بطهي الطعام مع وضع الغطاء مدة احلد األدنى – راجع اجلدول .تابع عملية الطهي حتى حتصل على النتيجة املطلوبة .قلب الطعام مرة أثناء الطهي ومرة بعد الطهي .أضف امللح أو التوابل أو الزبد بعد الطهي .قم بتغطية الطعام أثناء مدة االنتظار التي تبلغ 3دقائق. قطّ ع اخلضراوات الطازجة إلى قطع ذات أحجام متساوية .كلما مت تقطيعها إلى قطع أصغر مت تلميح: طهيها بسرعة أكبر. الطعام السبانخ املقدار الطاقة الوقت (بالدقيقة) 150جم 600واط 6-5 اإلرشادات أضف 15مللي (ملعقة كبيرة) من املاء البارد .قدمها بعد مدة انتظار من دقيقتني إلى 3دقائق. البروكلي 300جم 600واط البازالء 300جم 8-7 اإلرشادات أضف 15مللي (ملعقة كبيرة) من املاء البارد .قدمها بعد مدة انتظار من دقيقتني إلى 3دقائق. الفاصوليا اخلضراء 300جم 600واط 8.5-7.5 اإلرشادات أضف 30مللي (ملعقتني كبيرتني) من املاء البارد .قدمها بعد مدة انتظار من دقيقتني إلى 3دقائق. اخلضراوات املشكلة (اجلزر /البازالء /الذرة) اخلضراوات املشكلة (الطريقة الصينية) 300جم 600واط البروكلي الكرنب املسلوق اجلزر 300جم 250جم 900واط 5-4.5 اإلرشادات قّطع اجلزر إلى شرائح ذات أحجام متساوية .قدمها بعد مدة انتظار 3دقائق. القرنبيط 250جم 500جم 900واط 5.5-5 8.5-7.5 اإلرشادات قّطع الثمار إلى قطع ذات أحجام متساوية .قطّ ع الثمار الكبيرة إلى أنصاف. ضع السيقان إلى الوسط .قدمها بعد مدة انتظار 3دقائق. اإلرشادات أضف 15مللي (ملعقة كبيرة) من املاء البارد .قدمها بعد مدة انتظار من دقيقتني إلى 3دقائق. 600واط 250جم 900واط 6.5-6 اإلرشادات أضف 60إلى 75مللي ( 5إلى 6مالعق كبيرة) من املاء .قدمها بعد مدة انتظار 3دقائق. 8-7 8.5-7.5 250جم 500جم 900واط 5-4.5 8-7 اإلرشادات قّطع الثمار إلى قطع ذات أحجام متساوية .ضع السيقان باجتاه الوسط. قدمها بعد مدة انتظار 3دقائق. 9-8 اإلرشادات أضف 30مللي (ملعقتني كبيرتني) من املاء البارد .قدمها بعد مدة انتظار من دقيقتني إلى 3دقائق. 600واط الطعام املقدار الطاقة الوقت (بالدقيقة) الكوسة اإلرشادات أضف 15مللي (ملعقة كبيرة) من املاء البارد .قدمها بعد مدة انتظار من دقيقتني إلى 3دقائق. 250جم 900واط 4.5-4 اإلرشادات قطّ ع الكوسة إلى شرائح .أضف 30مللي (ملعقتني كبيرتني) من املاء أو قطعة من الزبد. يستمر الطهي حتى تنضج .قدمها بعد مدة انتظار 3دقائق. العربية 32 - 2014-03-21 �� 6:31:52 MC28H5015AW_SG_DE68-04234H-01_AR.indd 32 دليل طهي األرز واملعجنات الطعام الباذجنان املقدار الطاقة الوقت (بالدقيقة) 250جم 900واط 4-3.5 األرز: البصل األخضر 250جم 900واط املعجنات: 4.5-4 اإلرشادات قطّ ع البصل األخضر إلى شرائح سميكة .قدمها بعد مدة انتظار 3دقائق. عيش الغراب 125جم 250جم 900واط 2-1.5 3-2.5 اإلرشادات جهز عيش الغراب إما كقطع صغيرة كاملة أو قطعه إلى شرائح. ال تضف أي مقدار من املاء .انثر عصير الليمون فوقه .وأضف امللح والفلفل. يصفى قبل التقدمي .قدمها بعد مدة انتظار 3دقائق. البصل 250جم 900واط الفلفل 250جم بطاطس 250جم 500جم 5-4.5 5-4 8-7 اللفت 250جم 6-5.5 250جم 375جم 21-20 23-22 900واط اإلرشادات ضع كمية مضاعفة من املاء البارد .قدمها بعد مدة انتظار 5دقائق. األرز اخمللط (أرز +أرز بري) اإلرشادات زن البطاطس التي مت تقشيرها واقطعها إلى أنصاف أو إلى أرباع ذات أحجام متساوية. قدمها بعد مدة انتظار 3دقائق. 900واط اإلرشادات ضع كمية مضاعفة من املاء البارد .قدمها بعد مدة انتظار 5دقائق. 5.5-5 قطّ ع الفلفل إلى شرائح صغيرة. 900واط األرز األبيض (مسلوق) 250جم 375جم 900واط 16-15 18.5-17.5 األرز البني (مسلوق) اإلرشادات قطّ ع البصل إلى شرائح أو أنصاف .أضف 15مللي (ملعقة كبيرة) من املاء. قدمها بعد مدة انتظار 3دقائق. 900واط الطعام املقدار الطاقة الوقت (بالدقيقة) 05دليل أواني الطهي اإلرشادات قطع الباذجنان إلى شرائح صغيرة وانثر ملعقة كبيرة من عصير الليمون عليه. قدمها بعد مدة انتظار 3دقائق. استخدم إنا ًء كبيرًا مصنوعًا من البيركس ذو غطاء مع مراعاة أن حجم األرز يتضاعف أثناء الطهي. قم بتغطية الطبق أثناء الطهي. بعد انتهاء مدة الطهي ،قم بتقليب األرز وأضف امللح والتوابل والزبد قبل بدء مدة االنتظار. مالحظة :رمبا ال ميتص األرز مقدار املاء بالكامل بعد انتهاء مدة الطهي. استخدم إنا ًء كبيرًا مصنوعًا من البيركس .أضف املاء املغلي ومقدارًا ضئيال ً من امللح ثم قلب جي ًدا. ال تضع الغطاء أثناء الطهي. قلب من حني آلخر أثناء الطهي وبعد انتهائه .وقم بتغطية الطعام أثناء مدة االنتظار وتصفيته جي ًدا فيما بعد. الذرة اخمللطة (أرز +حبوب) املعجنات 250جم 17-16 900واط اإلرشادات أضف 500مللي من املاء البارد .قدمها بعد مدة انتظار 5دقائق. 250جم 18-17 900واط اإلرشادات أضف 400مللي من املاء البارد .قدمها بعد مدة انتظار 5دقائق. 250جم 11-10 900واط اإلرشادات أضف 1000مللي من املاء الساخن .قدمها بعد مدة انتظار 5دقائق. الشعيرية سريعة التحضير (إندومي) عبوة صغيرة ( 80جم) عبوة كبيرة ( 120جم) 900واط 7.5-7 9.5-9 اإلرشادات استخدم إنا ًء من البيركس .ضع الشعرية ،وأضف 350مل من املاء الفاتر في اإلناء .قم بالطهي مع تغطية اإلناء بلفافة ،واثقبها أكثر من مرة .بعد الطهي ،قم بتصفية املاء ،ومزج توابل اإلندومي. اإلرشادات قطّ ع اللفت إلى مكعبات صغيرة .قدمها بعد مدة انتظار 3دقائق. العربية 33 - 2014-03-21 �� 6:31:52 MC28H5015AW_SG_DE68-04234H-01_AR.indd 33 إعادة التسخني إعادة تسخني طعام األطفال يقوم فرن امليكروويف بتسخني الطعام في وقت أقل من الوقت الذي يستغرقه درج إعادة التسخني اخلاص باألفران التقليدية. استخدم مستويات الطاقة وفترات إعادة التسخني املوجودة في اجلدول التالي كدليل .مت وضع املدد املوجودة في هذا اجلدول على أساس أن السوائل تكون بدرجة حرارة احلجرة التي تتراوح ما بني 18+إلى 20 +وأن الطعام املثلج تتراوح درجة حرارته ما بني 5+إلى 7+درجة مئوية. طعام األطفال: قم بتفريغه في طبق خزفي عميق .قم بتغطيته بغطاء بالستيكي .يقلب جي ًدا بعد إعادة التسخني! اتركه في الفرن ملدة من دقيقتني إلى 3دقائق قبل التقدمي .قلبه مرة أخرى وتأكد من درجة حرارته. تكون درجة احلرارة املوصى بها عند التقدمي :بني 30إلى 40درجة مئوية. لنب األطفال: ضع اللنب في قارورة زجاجية معقمة .ارفع الغطاء أثناء إعادة التسخني .ال تقم أب ًدا بتسخني زجاجة اللنب اخلاصة بالطفل مع وضع اجلزء املطاطي عليها ،حيث قد تنفجر الزجاجة إذا تعرضت للتسخني الزائد .رج الزجاجة جي ًدا قبل مدة االنتظار ومرة أخرى قبل التقدمي! تأكد دو ًما من درجة حرارة طعام أو لنب األطفال قبل إعطاءه للطفل .تكون درجة احلرارة املوصى بها عند التقدمي :حوالي 37درجة مئوية. الترتيب والتغطية جتنب إعادة تسخني األطعمة كبيرة احلجم مثل قطع اللحم الكبيرة ،حيث يجب طهيها بشكل زائد وجتفيفها قبل أن يبدأ انبعاث الهواء الساخن من الوسط .لذا يكون إعادة تسخني القطع الصغيرة أكثر جنا ًحا. مستويات الطاقة والتقليب ميكن إعادة تسخني بعض األطعمة باستخدام طاقة تصل إلى 900واط ،بينما يجب تسخني بعض األطعمة األخرى باستخدام طاقة تصل إلى 600واط أو 450واط أو حتى 300واط. راجع اجلداول للحصول على إرشادات. يفضل بشكل عام إعادة تسخني الطعام باستخدام مستويات طاقة منخفضة إذا كان الطعام سريع النضج ،أو إذا كان بكميات كبيرة ،أو إذا كان يسخن بسرعة كبيرة (مثل فطائر اللحم املفروم). قلّب الطعام أثناء إعادة التسخني للحصول على أفضل النتائج .يفضل التقليب مرة أخرى قبل التقدمي إن أمكن. توخ احلذر عند تسخني السوائل وأطعمة األطفال .لتجنب فوران السوائل واحتمال التعرض لإلصابة باحلروق ،قم بالتقليب قبل التسخني وأثناءه وبعده .اترك الطعام أو السوائل في فرن امليكروويف أثناء فترة االنتظار .نوصي بوضع ملعقة بالستيك أو ملعقة مصنوعة من الزجاج في السوائل .جتنب التسخني الزائد (أو الغليان) حيث يؤدي إلى إفساد الطعام .من األفضل تقدير مدة أقل للطهي وإضافة مدة تسخني إضافية عند احلاجة. التسخني وفترات االنتظار من املفيد مالحظة املدة التي استغرقها إعادة تسخني الطعام في املرة األولى للرجوع إليها في املستقبل. تأكد دو ًما من انبعاث البخار الساخن من الطعام الذي مت إعادة تسخينه. دع الطعام في الفرن لفترة قصيرة بعد إعادة التسخني للسماح مبعادلة درجة احلرارة بني أجزائه الداخلية. تتراوح مدة االنتظار املوصى بها بعد إعادة التسخني بني دقيقتني و 4دقائق ،ما لم يوصى مبدة أخرى في اجلدول. أيضا الفصل الذي يتضمن احتياطات السالمة. توخ املزيد من احلذر عند تسخني السوائل أو أطعمة األطفال .راجع ً مالحظة: يجب التأكد بعناية من طعام األطفال خاصة قبل تقدميه لتجنب تعرض األطفال لإلصابة باحلروق .استخدم مستويات الطاقة وفترات التسخني املوجودة في اجلدول التالي كإرشادات إلعادة التسخني. تسخني السوائل والطعام استخدم مستويات الطاقة ومدد التسخني املوجودة في اجلدول التالي كإرشادات إلعادة التسخني. الطعام املقدار الطاقة الوقت (بالدقيقة) املشروبات (القهوة والشاي واملاء) 150مللي (كوب واحد) 900واط 1.5-1 450مللي ( 3أكواب) 3.5-3 600مللي ( 4أكوب) 4-3.5 اإلرشادات تصب املشروبات في األكواب وتُسخن دون غطاء :ضع فنجانا ً واحدا ً في الوسط واثنني متقابلني وثالثة فناجني على شكل دائرة .تترك في فرن امليكروويف أثناء مدة االنتظار وتُقلب جيداً .قدمها بعد مدة انتظار من دقيقة إلى دقيقتني. إعادة تسخني السوائل اترك دو ًما مدة انتظار تصل إلى 20ثانية على األقل بعد إيقاف تشغيل الفرن للسماح مبعادلة درجة احلرارة بني أجزاء الطعام الداخلية .قم بالتقليب أثناء التسخني إذا لزم األمر والتقليب "دو ًما" بعد التسخني .لتجنب الفوران واحتمال التعرض لإلصابة باحلروق ،ضع ملعقة مصنوعة من البالستيك أو عصا مصنوعة من الزجاج في املشروبات وتقليبها قبل وأثناء وبعد التسخني. 300مللي (كوبان) 2.5-2 احلساء (مثلج) 250جم 350جم 450جم 550جم 900واط 3-2.5 3.5-3 4-3.5 5-4.5 اإلرشادات يصب في طبق خزفي عميق أو سلطانية خزفية .قم بتغطيته بغطاء بالستيكي. يقلب جيدا ً بعد إعادة التسخني .قلب الطعام مرة أخرى قبل التقدمي. قدمه بعد مدة انتظار من دقيقتني إلى 3دقائق. العربية 34 - 2014-03-21 �� 6:31:52 MC28H5015AW_SG_DE68-04234H-01_AR.indd 34 تسخني طعام ولنب األطفال الطعام اليخني (بارد) املقدار الطاقة الوقت (بالدقيقة) 350جم 600واط 5.5-4.5 املعجنات بالصلصة (مثلجة) املعجنات احملشوة بالصلصة (مثلجة) الوجبات املغلفة (مثلجة) 350جم 600واط 350جم 350جم 450جم طعام األطفال (حبوب +لنب +فاكهة) 5-4 اإلرشادات ضع املعجنات احملشوة (على سبيل املثال ،رافيولي ،تورتليني) في طبق خزفي عميق. قم بتغطيته بغطاء بالستيكي .قم بالتقليب من حني آلخر أثناء إعادة التسخني ومرة أخرى قبل مدة االنتظار والتقدمي .قدمها بعد مدة انتظار 3دقائق. 600واط طعام األطفال (خضروات +حلوم) 4.5-3.5 اإلرشادات ضع املعجنات (اإلسباجتي أو الشرائح) في طبق خزفي مسطح. ثم قم بتغطيتها بطبقة من ورق امليكروويف احلراري .قلب الطعام قبل تقدميه. قدمه بعد مدة انتظار 3دقائق. 600واط الطعام لنب األطفال تشيز فوندو (خليط مكون من اجلنب الذائب والزبد والبيض) جاهز للتقدمي (مثلج) 400جم 190جم 600واط 30ثانية اإلرشادات فرغ احملتويات في طبق عميق من اخلزف .الرجاء تغطية اإلناء .وقم بالتقليب بعد مدة الطهي. قلب جيدا ً وتأكد من درجة احلرارة بعناية قبل التقدمي. قدمها بعد مدة انتظار من دقيقتني إلى 3دقائق. 190جم 5-4.5 6.5-5.5 600واط 20ثانية اإلرشادات فرغ احملتويات في طبق عميق من اخلزف .الرجاء تغطية اإلناء .وقم بالتقليب بعد مدة الطهي. قلب جيدا ً وتأكد من درجة احلرارة بعناية قبل التقدمي. قدمها بعد مدة انتظار من دقيقتني إلى 3دقائق. 100مللي 200مللي 300واط 30إلى 40ثانية دقيقة إلى دقيقة و 10ثوان اإلرشادات قلب اللنب أو رجه جيدا ً ثم صبه في زجاجة معقمة .ضعها في منتصف الصينية الدوارة .ال تضع الغطاء أثناء الطهي .رجه جيدا ً وتأكد من درجة احلرارة بعناية قبل التقدمي. قدمها بعد مدة انتظار من دقيقتني إلى 3دقائق. اإلرشادات ضع وجبة مكونة من مكونني أو ثالث مكونات مثلجة في طبق خزفي. قم بالتغطية بطبقة من ورق امليكروويف احلراري .قدمها بعد مدة انتظار 3دقائق. 600واط املقدار الطاقة الوقت 06دليل الطهي اإلرشادات ضع اليخني في طبق خزفي عميق .قم بتغطيته بغطاء بالستيكي. قم بالتقليب من حني آلخر أثناء إعادة التسخني ومرة أخرى قبل مدة االنتظار والتقدمي. قدمه بعد مدة انتظار من دقيقتني إلى 3دقائق. استخدم مستويات الطاقة ومدد التسخني املوجودة في اجلدول التالي كإرشادات إلعادة لتسخني. 7-6 اإلرشادات ضع التشيز فوندو اجلاهز للتقدمي في إناء بيركس مناسب احلجم ذو غطاء. قم بالتقليب من حني آلخر أثناء التسخني وبعده .قلب جيدا ً قبل التقدمي. قدمها بعد مدة انتظار من دقيقة إلى دقيقتني. العربية 35 - 2014-03-21 �� 6:31:52 MC28H5015AW_SG_DE68-04234H-01_AR.indd 35 فك التجميد تعد أشعة امليكروويف أسلوبًا ممتازًا في إذابة التجميد عن الطعام .تقوم أشعة امليكروويف بإذابة التجميد عن الطعام برفق خالل فترة زمنية قصيرة .ويفيد ذلك بشكل كبير في حالة استقبال ضيوف بشكل مفاجئ. الطعام السمك يجب أن يتم فك التجميد الدواجن جي ًدا قبل طهيها .فك أي أربطة معدنية وانزعها من مادة التغليف للسماح بإخراج السائل الذي مت إذابته. ضع الطعام اجملمد على طبق دون غطاء .قم بتصفية الطبق من أي سائل وإخراج محتوياته قدر اإلمكان. افحص الطعام من حني آلخر للتأكد من عدم وصوله إلى درجة الدفء. إذا بدأت األجزاء الصغيرة والرفيعة من الطعام اجملمد الوصول إلى درجة الدفء ،ميكنك حمايتها عن طريق لفها بشرائط صغيرة من ورق األملونيوم أثناء فك التجميد. عندما يصبح السطح اخلارجي للدواجن داف ًئا ،قم بإيقاف عملية فك التجميد واتركها ملدة 20دقيقة قبل املتابعة. اترك األسماك واللحوم والدواجن لفترة حتى يتم إكمال عملية إذابة التجميد .تختلف مدة االنتظار لعملية إذابة التجميد التامة حسب الكمية املطلوب إذابة التجميد عنها .الرجاء الرجوع للجدول املوجود أدناه. تتم عملية إذابة جتميد األطعمة غير السميكة بشكل أفضل عن األطعمة السميكة كما حتتاج تلميح: الكميات األصغر إلى وقت أقل من الكميات األكبر .تذكر هذا التلميح أثناء جتميد الطعام وإذابة التجميد عنه. إذابة جتميد األطعمة اجملمدة بدرجة حرارة تتراوح ما بني 18-إلى 20-درجة مئوية ،استخدم اجلدول التالي كدليل. الطعام اللحوم اللحم املفروم شرائح اللحم الدواجن قطع الدجاج دجاجة كاملة املقدار الطاقة الوقت (بالدقيقة) 250جم 500جم 180واط 7-6 13-8 250جم 180واط 8-7 السمك الفيليه 200جم 180واط 7-6 سمك كامل 400جم 180واط 13-11 الفاكهة التوت اخلبز أرغفة اخلبز (كل رغيف حوالي 50جرام) التوست /الشطائر اإلرشادات ضع اللحوم على الصينية الدوارة .قم بحماية احلواف الرفيعة بورق األملونيوم. قم بتقليبها في منتصف مدة إذابة التجميد! قدمها بعد مدة انتظار من 15إلى 30دقيقة. 500جم (قطعتان) 180واط 15-14 1200جم 180واط 34-32 املقدار الطاقة الوقت (بالدقيقة) اإلرشادات ضع السمك اجملمد في وسط طبق خزفي مسطح .ضع األجزاء الرفيعة أسفل األجزاء السميكة .قم بحماية الرقائق الرفيعة من شرائح السمك وذيل السمك الكامل بورق األملونيوم .قم بتقليبها في منتصف مدة إذابة التجميد! قدمها بعد مدة انتظار من 10إلى 25دقيقة. 300جم 180واط 7-6 اإلرشادات قم بتوزيع الفاكهة على طبق زجاجي دائري مسطح (ذو قطر كبير). قدمها بعد مدة انتظار من 5إلى 10دقائق. 2قطع 4قطع 180واط 1.5-1 3-2.5 250جم 180واط 4.5-4 اإلرشادات أفقيا على ورق املطبخ في منتصف الصينية الدوارة. ضع األرغفة على شكل دائرة أو ً اقلبها بعد مرور نصف الوقت اخملصص إلذابة التجميد! قدمها بعد مدة انتظار من 5 إلى 20دقيقة. اإلرشادات ضع أوال ً قطع الدجاج مع وضع الناحية التي بها اجللد ألسفل ،أو الدجاجة الكاملة مع وضع ناحية الصدر ألسفل في طبق خزفي مسطح .قم بحماية األجزاء الرفيعة مثل األجنحة واألطراف بورق األملونيوم .قم بتقليبها في منتصف مدة إذابة التجميد! قدمها بعد مدة انتظار من 15إلى 60دقيقة. العربية 36 - 2014-03-21 �� 6:31:52 MC28H5015AW_SG_DE68-04234H-01_AR.indd 36 الشواية دليل شي األطعمة الطازجة قم بتسخني الشواية ملدة دقيقتني إلى 3دقائق عند استخدام وظيفة الشواء. استخدم مستويات الطاقة ومدد التسخني املوجودة في اجلدول التالي كإرشادات للشواء. استخدم قفازات الفرن أثناء إخراجها. يوجد جزء التسخني اخلاص بالشواية حتت سقف جتويف الفرن .وتعمل الشواية أثناء غلق الباب ودوران الصينية الدوارة. متساو .ويؤدي التسخني املسبق للشواية ملدة 3إلى 5دقائق إلى إمتام يؤدي دوران الصينية الدوارة إلى حتمير الطعام بشكل ٍ عملية حتمير الطعام بشكل أسرع. شرائح التوست األطعمة املناسبة للشواء: قطع اللحم والسجق وشرائح اللحم والهامبرجر وشرائح اللحم والفخذ وشرائح السمك الرفيعة والشطائر وجميع أنواع التوست املغطى باإلضافات. 4قطع (لكل 25جم) الشواية فقط 4-3 3-2 اإلرشادات ضع شرائح التوست جن ًبا إلى جنب على الرف العلوي. مالحظة هامة: الرجاء تذكر وضع الطعام على الرف العلوي في كل مرة تستخدم فيها وضع الشواية فقط ،ما لم يوصى باتباع أية إرشادات أخرى. الطماطم املشوية يجمع وضع الطهي هذا بني احلرارة املنبعثة من الشواية مع سرعة طهي امليكروويف .وهو يعمل فقط أثناء غلق الباب ودوران الصينية الدوارة .نتيجة لدوران الصينية الدوارة ،يتم حتمير الطعام بشكل متساو .وتتوفر ثالثة أوضاع مجمعة في هذا الطراز: 600واط +الشواية و 450واط +الشواية و 300واط +الشواية. توست بالطماطم -اجلنب 400جم ( 2قطع) 300واط +الشواية 6-5 06دليل الطهي أدوات الطهي اخلاصة بالشواء: يجب أن تكون غير قابلة لالشتعال وميكن أن تتضمن جزء معدني .ال تستخدم أدوات طهي مصنوعة من أي نوع من أنواع البالستيك ،حيث ميكن أن تنصهر. الطعام الطازج املقدار الطاقة املرحلة األولى (دقيقة) املرحلة الثانية (دقيقة) - اإلرشادات قطّ ع الطماطم إلى أنصاف .ضع فوقها بعضا ً من اجلنب .ضعها على شكل دائرة في طبق بايركس مسطح .ثم ضعه على الرف العلوي .اتركه ملدة دقيقتني إلى 3دقائق. امليكروويف +الشواية أدوات الطهي اخلاصة بالطهي باستخدام امليكروويف +الشواية الرجاء استخدام أدوات الطهي التي ميكن أن تتخللها أشعة امليكروويف .ويجب أن تكون أدوات الطهي غير قابلة لالشتعال. ال تستخدم أدوات الطهي املعدنية في وضع االستخدام اجملمع .ال تستخدم أدوات طهي مصنوعة من أي نوع من أنواع البالستيك ،حيث ميكن أن تنصهر. الطعام املناسب لطهيه باستخدام امليكروويف +الشواية: تشتمل األطعمة املناسبة للطهي باستخدام األسلوب اجملمع كافة أنواع األطعمة املطهية الذي يحتاج إلى إعادة تسخني وحتمير (مثل املعجنات اخملبوزة) ،عالوة على األطعمة التي تتطلب وق ًتا قصيرًا لتحمير الطبقة العليا منها .ميكن أيضا ً استخدام هذا األسلوب مع قطع الطعام ذات احلجم السميك لتحمير الطبقة العليا منها (مثل قطع الدجاج ،مع قلبها في منتصف مدة الطهي) .الرجاء مراجعة جدول الشواء للحصول على املزيد من التفاصيل. مالحظة هامة: الرجاء تذكر وضع الطعام على الرف العلوي في كل مرة تستخدم فيها وضع اجلمع (امليكروويف +الشواية) ،ما لم يوصى باتباع أية إرشادات أخرى .الرجاء مراجعة اإلرشادات املوجودة في اجلدول التالي. يجب قلب الطعام إذا كنت ترغب في حتمير وجهيه. هاواي توست (شرائح اللحم واألناناس واجلنب) البطاطس املشوية 4قطع ( 300جم) 300واط +الشواية 5-4 - اإلرشادات قم بتحميص شرائح اخلبز أوالً .ضع التوست املغطى باإلضافات على الرف العلوي. اتركه ملدة دقيقتني إلى 3دقائق. 4قطع ( 500جرام) 300واط +الشواية 6-5 - اإلرشادات قم بتحميص شرائح اخلبز أوالً .ضع التوست املغطى باإلضافات على الرف العلوي. اتركه ملدة دقيقتني إلى 3دقائق. 500جم 600واط +الشواية 8-7 - اإلرشادات قطع البطاطس إلى أنصاف .ضعها على هيئة دائرة على الرف العلوي على أن توضع الناحية املقطوعة على الشواية. البطاطس/ اخلضراوات احملمصة (مثلجة) 450جم 450واط +الشواية 11-9 - اإلرشادات ضع الطعام الطازج في طبق صغير من البايركس .ثم ضعه على الرف العلوي. بعد الطهي ،اتركها ملدة تتراوح ما بني دقيقتني إلى 3دقائق. (تابع) العربية 37 - 2014-03-21 �� 6:31:52 MC28H5015AW_SG_DE68-04234H-01_AR.indd 37 احلمل احلراري الطعام الطازج التفاح اخملبوز املقدار الطاقة املرحلة األولى (دقيقة) املرحلة الثانية (دقيقة) ثمرتان من التفاح (الثمرة الواحدة 400جرام) 300واط +الشواية 8-7 - الطهي باحلمل احلراري هو األسلوب التقليدي املعروف للطهي في الفرن العادي باستخدام الهواء الساخن. يوجد جزء التسخني واملروحة عند اجلدار اخللفي ،وذلك حتى يدور الهواء الساخن. هذا الوضع مدعوم بواسطة أجزاء التسخني العلوية. اإلرشادات بعضا من شرائح اللوز على سطحها. انزع لُب ثمرات التفاح وقم بحشوها بالزبيب واملربى .ضع ً ضع ثمرات التفاح في طبق ُمسطح من البايركس .ثم ضع الطبق مباشرةً على الرف السفلي. قطع الدجاج 500جم (قطعتان) 300واط +الشواية 10-8 8-6 اإلرشادات امسح قطع الدجاج بقليل من الزيت والتوابل .ضعها على شكل دائرة على الرف العلوي. بعد اكتمال الشواء اتركه ملدة دقيقتني إلى 3دقائق. الدجاج املشوي 1200جم 450واط +الشواية 19-18 17 اإلرشادات بقليل من الزيت والتوابل .ضع الدجاجة على الرف السفلي .بعد انتهاء امسح الدجاجة ٍ الشواء اتركه ملدة 5دقائق. األسماك املشوية 400إلى 500جم 300واط +الشواية 7-5 6.5-5.5 اإلرشادات امسح السمك بالكامل بقليل من الزيت مع إضافة األعشاب والتوابل. ضع سمكتني إلى جانب بعضهما (في اجتاه عكسي) على الرف العلوي. بعد اكتمال الشواء اتركه ملدة دقيقتني إلى 3دقائق. موز اجلنة (بالنتني) ثمرة واحدة ( 200جم) 450واط +الشواية 9-8.5 أدوات الطهي اخلاصة باحلمل احلراري: ميكنك استخدام جميع أدوات الطهي وأوراق التغليف -أي شيء ميكنك استخدامه مع الفرن التقليدي. األطعمة التي ميكن طهيها باحلمل احلراري: يجب صنع جميع أنواع البسكويت واخلبز والكيك بهذه الطريقة وكذلك الكيك الغني بالفاكهة العجائن والسوفليه. امليكروويف +الطهي بالطريقة العادية يجمع هذا الوضع بني طاقة امليكروويف والهواء الساخن وهو بذلك يقلل من الوقت الالزم للطهي مع إعطاء الطعام وجه محمر وهش. الطهي باحلمل احلراري هو األسلوب التقليدي املعروف للطهي في الفرن العادي باستخدام الهواء الساخن الذي يدور بواسطة مروحة موجودة في اجلدار اخللفي للفرن. أدوات الطهي اخلاصة بالطهي باستخدام وضع امليكروويف واحلمل حراري: يجب أن تسمح مبرور أشعة امليكروويف خاللها .يجب أن تكون قابلة لالستخدام داخل الفرن (مثل الزجاج أو األواني الفخارية أو الصينية غير املزينة بزخارف معدنية)؛ مثل أدوات الطهي املوضحة في جزء امليكروويف والشواية. األطعمة املناسبة للطهي باستخدام وضع ميكروويف واحلمل احلراري: جميع أنواع اللحوم والدواجن باإلضافة إلى الطواجن واألطباق الطازجة اجملهزة والكيك اإلسفنجي وكيك الفاكهة والفطائر واخلضراوات املشوية واخلبز. - اإلرشادات ادهن السمك بالكامل بقليل من الزيت مع إضافة األعشاب والتوابل. ضع سمكتني إلى جانب بعضهما (في اجتاه عكسي) على الرف العلوي. بعد اكتمال الشواء اتركه ملدة دقيقتني إلى 3دقائق. البطاطا احللوة (يام) 200جم 600واط +الشواية 9.5-9 - اإلرشادات ادهن السمك بالكامل بقليل من الزيت مع إضافة األعشاب والتوابل. ضع سمكتني إلى جانب بعضهما (في اجتاه عكسي) على الرف العلوي. بعد اكتمال الشواء اتركه ملدة دقيقتني إلى 3دقائق. العربية 38 - 2014-03-21 �� 6:31:52 MC28H5015AW_SG_DE68-04234H-01_AR.indd 38 دليل الطهي باستخدام وضع احلمل احلراري لألطعمة الطازجة واألطعمة اجملمدة قم بتسخني الفرن بالطريقة العادية باستخدام وظيفة التسخني املسبق التلقائي وصوال ً إلى درجة احلرارة املطلوبة .استخدم مستويات الطاقة ومدد التسخني املوجودة في اجلدول التالي كإرشادات للطهي باستخدام وضع احلمل احلراري .استخدم قفازات الفرن أثناء إخراجها. بيتزا مجمدة (مخبوزة) 300جم املرحلة األولى 300واط 200 +درجة مئوية املرحلة الثانية "الشواية" 12-11 3-2 اخلبز أرغفة اخلبز الطازجة املعجنات الالزانيا اجملمدة 400جم املرحلة األولى 450واط 200 +درجة مئوية املرحلة الثانية "احلمل احلراري" 200درجة مئوية 16-15 6-5 اإلرشادات ضع املعجنات في طبق بيركس زجاجي مناسب احلجم أو اتركها في تغليفها األصلي (مع التأكد من أن التغليف يناسب حرارة أشعة امليكروويف والفرن) .ضع املعجنات اجملهزة اجملمدة على الرف السفلي .بعد الطهي ،اتركها ملدة تتراوح ما بني دقيقتني إلى 3دقائق. الدجاج املشوي 1000إلى 1100جم 450واط 200 +درجة مئوية كيك املاربل (العجينة الطازجة) الكعك (عجينة طازجة) 20 200جم (قطعة واحدة) 180واط 200 +درجة مئوية 10-8 - اإلرشادات ضع اخلبز الفرنساوي املثلج على ورق اخلبز على الرف السفلي. بعد اخلبز اتركه ملدة دقيقتني إلى 3دقائق. الكيك 13-10 اإلرشادات امسح اللحم البقري/حلم الضأن بالزيت والتوابل ،الفلفل وامللح والفلفل احللو. ضع اللحم على الرف السفلي ،ولكن في البداية ضع اجلزء السمني لألسفل. بعد النضج لف اللحم في ورق األلومنيوم واتركه ملدة 10إلى 15دقيقة. 22-20 خبز بالثوم (مثلج ومخبوز مسبقً ا) قطع الكيك الصغيرة (العجينة الطازجة) اللحوم اللحم البقري/ حلم الضأن املشوي (متوسط) 1200إلى 1300جم 600واط 180 +درجة مئوية 23-20 6قطع ( 350جم) 100واط 180 +درجة مئوية 10-8 - اإلرشادات ضع أرغفة اخلبز على شكل دائرة على الرف السفلي .اتركه ملدة دقيقتني إلى 3دقائق. البيتزا اإلرشادات ضع البيتزا على الرف السفلي. بعد اخلبز اتركه ملدة دقيقتني إلى 3دقائق. الطاقة 06دليل الطهي الطعام الطازج املقدار الطاقة املرحلة األولى (دقيقة) املرحلة الثانية (دقيقة) الطعام الطازج املقدار املرحلة األولى (دقيقة) املرحلة الثانية (دقيقة) الكيك اجملمد 500جم 180درجة مئوية فقط 43-38 - اإلرشادات ضع العجينة الطازجة في طبق خبيز معدني أسود مستطيل صغير (طوله حوالي 25سم). ضع الكيك على الرف السفلي .بعد اخلبز اتركه ملدة 5إلى 10دقائق. 28 × 10جم 160درجة مئوية فقط 28-26 - اإلرشادات ضع العجينة الطازجة بالتساوي في أكواب ورقية وضعها على صينية اخلبز على الرف السفلي. بعد اخلبز اتركه ملدة 5دقائق. 200إلى 250جم 200درجة مئوية فقط 20-15 - اإلرشادات ضع الكرواسون املثلج على ورق اخلبز على الرف السفلي. 1000جم 180واط 180 +درجة مئوية 20-18 - اإلرشادات ضع الكيك اجملمد على الرف السفلي مباشرة .بعد فك التجميد، اتركها لتدفأ ملدة تتراوح بني 15إلى 20دقيقة. اإلرشادات بقليل من الزيت والتوابل .ضع الدجاجة على جنبها بحيث يكون أحد جانبي امسح الدجاجة ٍ صدر الدجاجة إلى أسفل واآلخر على الرف السفلي .اتركها ملدة 5دقائق. العربية 39 - 2014-03-21 �� 6:31:53 MC28H5015AW_SG_DE68-04234H-01_AR.indd 39 تلميحات ونصائح استكشاف املشاكل وإصالحها وكود اخلطأ إذابة الزبد ضع 50جم من الزبد في طبق زجاجي عميق صغير .قم بتغطيته بغطاء بالستيكي. ثم قم بالتسخني ملدة من 30إلى 40ثانية باستخدام طاقة تبلغ 900واط حتى تتم إذابة الزبد. استكشاف املشاكل وإصالحها إذا صادفت أي من املشاكل املذكورة أدناه حاول تنفيذ أي من احللول املقدمة. إذابة الشوكوالتة ضع 100جم من الشوكوالتة في طبق زجاجي عميق صغير. ثم قم بالتسخني ملدة من 3إلى 5دقائق ،باستخدام طاقة تبلغ 450واط ،حتى تتم إذابة الشوكوالتة. قم بتقليب الشوكوالتة مرة أو مرتني أثناء الذوبان .استخدم قفازات الفرن أثناء إخراجها! يُعد ذلك أمرًا عاديًا. • التكثيف داخل الفرن. • وجود تيار هواء حول الباب واجلسم اخلارجي. • انعكاس الضوء حول الباب واجلسم اخلارجي. • انبعاث البخار من حول الباب والفتحات. إذابة العسل اجملمد اجملمد في طبق زجاجي عميق صغير. ضع 20جم من العسل ّ قم بتسخينه ملدة من 20إلى 30ثانية باستخدام طاقة تبلغ 300واط ،حتى تتم إذابة العسل. إذابة اجليالتني ضع أوراق اجليالتني اجلافة ( 10جم) ملدة 5دقائق في املاء البارد. ضع اجليالتني الذي مت جتفيفه في وعاء بايركس صغير. قم بالتسخني ملدة دقيقة واحدة باستخدام طاقة تصل إلى 300واط .قم بالتقليب بعد اإلذابة. عمل اجليلي/الغطاء الثلجي (للكعك واجلاتوه) امزج اجليلي سريع التحضير ( 14جم تقري ًبا) مع 40جم من السكر و 250مللي من املاء البارد .ضعه في إناء بايركس دون غطاء ملدة 3.5أو 4.5دقيقة باستخدام طاقة تبلغ 900واط حتى يصبح لون اجليلي/الغطاء الثلجي شفافًا .قم بتقليبه مرتني أثناء الطهي. صنع املربى ضع 600جم من الفاكهة (على سبيل املثال توت مشكل) في وعاء زجاجي مناسب من البيركس له غطاء. أضف 300جم من السكر وقم بالتقليب جي ًدا. قم بالطهي مع وضع الغطاء ملدة من 10إلى 12دقيقة باستخدام طاقة تبلغ 900واط. ثم قم بالتقليب عدة مرات أثناء الطهي .قم بتفريغها في برطمانات مربى زجاجية صغيرة احلجم لها غطاء محكم. واتركها مغطاة ملدة 5دقائق. الطعام زائد النضج أو نيئ. • هل مت حتديد املدة املناسبة لطهي هذا النوع من الطعام؟ • هل مت اختيار مستوى الطاقة املناسب؟ مصباح الضوء ال يعمل. • ينبغي عدم استبدال مصباح الضوء بيديك ألسباب وقائية .يُرجى االتصال بأقرب مركز خدمة عمالء معتمد من مهندسا محترفًا الستبدال املصباح. ،Samsungلكي يرسلوا إليك ً إعداد البودجن يقلب مسحوق البودجن مع السكر واللنب ( 500مللي) مع اتباع تعليمات الشركات املصنعة والتقليب اجليد .استخدم وعاء من البيركس بحجم مناسب له غطاء .وقم بتغطيته أثناء الطهي ملدة ½ 6إلى ½ 7دقيقة باستخدام طاقة تبلغ 900واط. قم بالتقليب عدة مرات أثناء الطهي. حتميص قطع اللوز ضع 30جم من اللوز املقطع بالتساوي في طبق خزفي متوسط احلجم. قم بتقليب قطع اللوز عدة مرات أثناء عملية التحميص ملدة 3.5إلى 4.5دقيقة باستخدام طاقة تبلغ 600واط. اتركه في الفرن ملدة دقيقتني إلى 3دقائق .استخدم قفازات الفرن أثناء إخراجها! ال يبدأ تشغيل الفرن عند الضغط على الزر ( Start/+30sتشغيل 30+/ثانية). • هل الباب مغلق جي ًدا؟ لم يتم طهي الطعام على اإلطالق. • هل قمت بضبط املؤقت بشكل صحيح و/أو الضغط على الزر ( Start/+30sتشغيل 30+/ثانية)؟ • هل الباب مغلق؟ • هل قمت بزيادة احلمل على الدائرة الكهربائية مما تسبب في انقطاع سلك املنصهر أو فصل التيار الكهربائي؟ يتسبب الفرن في حدوث تشويش على أجهزة الراديو أو التلفزيون. • قد يُالحظ تشويش بسيط على أجهزة التلفزيون أو الراديو عند تشغيل الفرن .يُعد ذلك أمرًا عاديًا .حلل هذه املشكلة ضع الفرن بعي ًدا عن أجهزة التلفزيون والراديو وأجهزة االستقبال الهوائي. • في حالة حدوث تشويش من جانب املعالج املصغر للفرن ،قد يتم إعادة تعيني شاشة العرض .حلل هذه املشكلة ،قم بفصل مأخذ التيار وإعادة توصيله مرة أخرى .أعد ضبط الوقت. انبعاث شرارة وإصدار صوت فرقعة داخل الفرن (ماس كهربائي). • هل تستخدم طبقً ا به زخارف معدنية؟ • هل تركت شوكة أو أداة معدنية أخرى داخل الفرن؟ • هل ورق األملونيوم قريب جدا ً من اجلدران الداخلية؟ العربية 40 - 2014-03-21 �� 6:31:53 MC28H5015AW_SG_DE68-04234H-01_AR.indd 40 الدخان والروائح الكريهة عند التشغيل األولي. •إنها حالة مؤقتة نتيجة تسخني املكون اجلديد .سيختفي الدخان والروائح متا ًما بعد التشغيل ملدة 10دقائق. إلزالة الروائح بسرعة أكبر ،الرجاء تشغيل فرن امليكروويف مع وضع تشكيلة ليمون أو عصير ليمون في اخلزانة. املواصفات الفنية تسعى شركة SAMSUNGجاهدة إلى حتسني جودة منتجاتها باستمرار .لذا ،تخضع مواصفات التصميم وإرشادات املستخدم للتغيير دون إشعار مسبق. الطراز مصدر التيار الكهربي استهالك الطاقة اتصل بالبائع احمللي أو بخدمة ما بعد البيع ملنتجات .SAMSUNG الطاقة القصوى امليكروويف الشواية (جزء التسخني) الطهي باستخدام وضع احلمل احلراري (جزء التسخني) كود اخلطأ تشير الرسالة " "SEإلى. • تنظيف املفاتيح والتحقق مما إذا كان هناك ماء على السطح حول املفتاح .قم بإيقاف تشغيل فرن امليكروويف وحاول ضبطه مرة ثانية .في حال ظهورها ثانية ،اتصل مبركز خدمة عمالء Samsungاحمللي. تظهر الرسالة ""E-24 •تظهر الرسالة " "E-24على شاشة العرض قبل أن ترتفع درجة حرارة الفرن بشكل زائد .وفي حالة ظهور الرسالة " ،"E-24اضغط على الزر ( Stop/Ecoإيقاف/توفير الطاقة) لالستفادة من وضع التهيئة .وبعد أن يبرد الفرن ،قم بتشغيله .في حال ظهور الرسالة " "E-24مرة أخرى ،اتصل مبركز خدمة عمالء Samsungاحمللي التابع لك. الطاقة الناجتة تردد التشغيل األبعاد (العرض × العمق × االرتفاع) إذا كنت ترغب في احلصول على أي رمز غير مدرج أعاله أو إذا كان احلل املقترح ال يحل املشكلة ،فيمكنك االتصال مبركز خدمة عمالء SAMSUNGاحمللي. من اخلارج جتويف الفرن احلجم الوزن الصافي 230فولت إلى 50هرتز تيار متردد 2900واط 1400واط 1500واط 2100واط احلد األقصى 100واط 900/واط 6مستويات ()IEC-705 2450ميجاهرتز 310 × 474.8 × 517مم 235.5 × 327 × 358مم 07استكشاف املشكالت وحلها واملواصفات الفنية إذا لم تساعدك اإلرشادات السابقة في حل املشكلة ،فاتصل بأقرب مركز خدمة عمالء تابع لشركة .SAMSUNG برجاء قراءة املعلومات اآلتية؛ • طراز الفرن ورقم التسلسل اخلاص به ،عادةً ما يكون مطبوعا ً على اجلزء اخللفي من الفرن • التفاصيل اخلاصة بالضمان واضحا للمشكلة • جهز شر ًحا ً MC28H5015** 28لترًا 17.5كيلوجرام تقري ًبا العربية 41 - 2014-03-21 �� 6:31:53 MC28H5015AW_SG_DE68-04234H-01_AR.indd 41 مذكرة MC28H5015AW_SG_DE68-04234H-01_AR.indd 42 مذكرة 2014-03-21 �� 6:31:53 مذكرة MC28H5015AW_SG_DE68-04234H-01_AR.indd 43 مذكرة 2014-03-21 �� 6:31:53 www.samsung.com/ae/support (English) www.samsung.com/ae_ar/support (Arabic) www.samsung.com/eg/support www.samsung.com/n_africa/support www.samsung.com/pk/support www.samsung.com/n_africa/support www.samsung.com/Levant/support (English) www.samsung.com/iran/support www.samsung.com/n_africa/support www.samsung.com/sa/support www.samsung.com/sa_en/support (English) www.samsung.com/tr/support www.samsung.com/africa_en/support www.samsung.com/africa_fr/support www.samsung.com/support 800-SAMSUNG (726-7864) 800-SAMSUNG(726-7864) 183-2255 (183-CALL) 8000-4726 800-2255 (800-CALL) 08000-726786 16580 021 36 11 00 0800-Samsung (72678) 80-1000-12 0800-22273 06 5777444 18252273 021-8255 080 100 2255 920021230 444 77 11 0800-726-7864 0800-10077 0302-200077 8000 0077 800-00-0077 7095-0077 0800 545 545 0800 300 300 0685 88 99 00 9999 200 499999 1969 0860 SAMSUNG (726 7864) 8007260000 08 197 267 864 0211 350370 847267864 / 827267864 U.A.E OMAN KUWAIT BAHRAIN QATAR EGYPT ALGERIA PAKISTAN TUNISIA JORDAN SYRIA IRAN MOROCCO SAUDI ARABIA TURKEY NIGERIA GHANA Cote D’ Ivoire SENEGAL CAMEROON KENYA UGANDA TANZANIA RWANDA BURUNDI DRC SUDAN SOUTH AFRICA BOTSWANA NAMIBIA ZAMBIA MOZAMBIQUE DE68-04234H-01 MC28H5015AW_SG_DE68-04234H-01_AR.indd 44 2014-03-21 �� 6:31:53 MC28H5015** Manuel d'utilisation un monde de possibilités Nous vous remercions d’avoir choisi ce produit Samsung. Mode d'emploi et guide de cuisson Veuillez noter que la garantie Samsung n’inclut pas les déplacements du service après-vente pour expliquer le fonctionnement de l’appareil, corriger une installation non correcte ou exécuter des travaux de nettoyage ou d’entretien réguliers. Ce manuel est en papier recyclé à 100 %. MC28H5015AW_SG_DE68-04234H-01_FR.indd 1 2014-03-21 �� 5:05:06 sommaire consignes de sécurité Consignes de sécurité................................................................................. 2 Présentation rapide...................................................................................... 11 Fonctions du four......................................................................................... 12 Four............................................................................................................. 12 Tableau de commande................................................................................ 13 Accessoires................................................................................................. 13 Utilisation du four......................................................................................... 14 Fonctionnement d'un four micro-ondes....................................................... 14 Vérification du bon fonctionnement de votre four......................................... 15 Réglage de l'horloge.................................................................................... 15 Cuisson/Réchauffage.................................................................................. 16 Puissances et temps de cuisson.................................................................. 16 Réglage du temps de cuisson..................................................................... 16 Arrêt de la cuisson....................................................................................... 17 Réglage du mode d'économie d'énergie..................................................... 17 Utilisation des fonctions Réchauffage/Cuisson automatiques....................... 17 Utilisation des fonctions de réalisation de plats sains................................... 19 Utilisation du mode Pâte levée/Yaourt.......................................................... 21 Utilisation des fonctions de décongélation................................................... 22 Cuisson par convection............................................................................... 23 Faire griller................................................................................................... 23 Combinaison micro-ondes et gril................................................................. 24 Combinaison micro-ondes et convection..................................................... 24 Choix des accessoires................................................................................. 25 Utilisation des fonctions Sécurité enfants..................................................... 25 Utilisation des fonctions Turntable Marche/Arrêt du plateau......................... 25 Utilisation de la fonction de cuisson croustillante manuelle (Modèles MC28H5015C*, MC28H5015Z* uniquement)............................... 26 Utilisation de la fonction manuelle de cuisson-vapeur (Modèles MC28H5015F*, MC28H5015Z* uniquement)................................ 27 Réglages de la cuisson vapeur manuelle..................................................... 27 Cuisson au tournebroche (Modèle MC28H5015Z* uniquement)................... 28 Utilisation de la multi-broche verticale.......................................................... 29 Utilisation des fonctions de désodorisation.................................................. 30 Arrêt du signal sonore.................................................................................. 30 Guide des récipients.................................................................................... 30 Guide de cuisson.......................................................................................... 31 Dépannage et code d'erreur....................................................................... 40 Dépannage.................................................................................................. 40 Code d'erreur.............................................................................................. 41 Caractéristiques techniques....................................................................... 41 UTILISATION DU MANUEL D'UTILISATION Vous venez d'acquérir un four micro-ondes SAMSUNG. Ce manuel contient de nombreux conseils et instructions sur son utilisation : • Consignes de sécurité • Récipients et ustensiles recommandés • Conseils utiles • Conseils de cuisson LÉGENDES DES SYMBOLES ET DES ICÔNES AVERTISSEMENT Risques ou manipulations dangereuses susceptibles d'entraîner des blessures graves, voire mortelles. ATTENTION Risques ou manipulations dangereuses susceptibles d'entraîner des blessures légères ou des dégâts matériels. Avertissement ; Risque d'incendie Avertissement ; Surface chaude Avertissement ; Electricité Avertissement ; Matière explosive Interdit. NE PAS toucher. NE PAS démonter. Suivez scrupuleusement les consignes. Débranchez la prise murale. Assurez-vous que l'appareil est relié à la terre afin d'éviter tout risque d'électrocution. Contactez le service d'assistance technique. Remarque Important Français - 2 MC28H5015AW_SG_DE68-04234H-01_FR.indd 2 2014-03-21 �� 5:05:07 AVERTISSEMENT (Fonction micro-ondes uniquement) AVERTISSEMENT : si la porte ou les joints de la porte sont endommagés, le four ne doit pas être utilisé tant que ces pièces n'ont pas été réparées par une personne qualifiée. AVERTISSEMENT : il est très dangereux pour toute personne non habilitée d'effectuer des manipulations ou des réparations impliquant le démontage de l'habillage de protection contre les micro-ondes. Cet appareil est destiné à une utilisation domestique uniquement. AVERTISSEMENT : n'autorisez un enfant à utiliser le four sans surveillance que si vous lui avez donné les instructions appropriées lui permettant de se servir de l'appareil en toute sécurité et de comprendre les dangers qu'implique une mauvaise utilisation. AVERTISSEMENT : cet appareil peut être utilisé par des enfants à partir de 8 ans et des personnes ayant des capacités physiques, sensorielles ou mentales réduites ou un manque d'expérience et de connaissance uniquement s'ils sont assistés ou si vous leur avez donné les instructions appropriées leur permettant de se servir de l'appareil en toute sécurité et de comprendre les risques encourus. Les enfants ne doivent pas jouer avec l'appareil. Le nettoyage et l'entretien de l'appareil ne doivent pas être effectués par un enfant âgé de moins de 8 ans si celui-ci est sans surveillance. Utilisez uniquement des ustensiles adaptés à la cuisson au four micro-ondes. Lorsque vous faites réchauffer des aliments dans des récipients en plastique ou en papier, veillez à ce que ces derniers ne s'enflamment pas. 01 CONSIGNES DE SÉCURITÉ CONSIGNES DE SÉCURITÉ IMPORTANTES LISEZ ATTENTIVEMENT CE MANUEL ET CONSERVEZ-LE PRÉCIEUSEMENT EN VUE D'UNE CONSULTATION ULTÉRIEURE. Assurez-vous que ces consignes de sécurité sont respectées à tout moment. Avant d'utiliser le four, vérifiez que les instructions suivantes sont suivies. Français - 3 MC28H5015AW_SG_DE68-04234H-01_FR.indd 3 2014-03-21 �� 5:05:08 Ce four micro-ondes est prévu pour faire chauffer des aliments et des liquides. Le séchage des aliments ou de vêtements et le chauffage de plaques chauffantes, pantoufles, éponges, chiffon mouillé ou similaire peut entraîner des blessures, des flammes ou un incendie. Si de la fumée s'échappe de l'appareil, laissez la porte de celui-ci fermée afin d'étouffer les flammes et éteignez-le ou débranchez-le de la prise murale. AVERTISSEMENT : si vous faites réchauffer des liquides au four micro-ondes, l'ébullition peut survenir à retardement ; faites donc bien attention lorsque vous sortez le récipient du four. AVERTISSEMENT : avant de consommer le contenu des biberons et des petits pots pour bébé, vérifiez-en toujours la température pour éviter tout risque de brûlure ; pour ce faire, mélangez-en le contenu ou secouez-les. Ne faites jamais réchauffer d'œufs (frais ou durs) dans leur coquille car ils risquent d'éclater, et ce même une fois le cycle de cuisson terminé. Le four doit être nettoyé régulièrement afin d'en retirer tout reste de nourriture. En négligeant la propreté de votre four, vous risquez d'en détériorer les surfaces et par conséquent, d'en réduire la durée de vie et de créer des situations dangereuses. L'appareil n'est pas destiné à être installé dans un véhicule (ex. : caravane ou tout autre véhicule similaire). Cet appareil n'est pas conçu pour être utilisé par des personnes (y compris les enfants) inexpérimentées ou dont les capacités physiques, sensorielles ou mentales sont réduites, sauf si celles-ci sont sous la surveillance ou ont reçu les instructions d'utilisation appropriées de la personne responsable de leur sécurité. Les enfants ne doivent pas utiliser l'appareil sans la surveillance d'un adulte. Si le cordon d'alimentation de l'appareil est endommagé, il devra être remplacé par le fabricant, son réparateur agréé ou par toute personne qualifiée afin d'éviter tout danger. AVERTISSEMENT : les liquides ou autres aliments ne doivent pas être réchauffés dans des récipients fermés car ils risquent d'exploser. Ne tentez jamais de nettoyer le four au jet d'eau. Français - 4 MC28H5015AW_SG_DE68-04234H-01_FR.indd 4 2014-03-21 �� 5:05:08 AVERTISSEMENT (Fonction du four uniquement) - En option AVERTISSEMENT : en raison des températures élevées que le four génère, l'appareil ne doit être utilisé par des enfants que sous la surveillance d'un adulte lorsqu'il fonctionne en mode combiné. Cet appareil devient très chaud pendant son utilisation. Prenez garde à ne pas toucher les éléments chauffants situés à l'intérieur du four. AVERTISSEMENT : les parties accessibles peuvent devenir très chaudes pendant l'utilisation. Les enfants en bas âge doivent être tenus à l'écart du four. Un nettoyeur vapeur ne doit pas être utilisé. AVERTISSEMENT : afin d'éviter tout risque d'électrocution, veillez à ce que l'appareil soit hors tension avant de procéder au remplacement de l'ampoule. AVERTISSEMENT : L'appareil et ses parties accessibles chauffent pendant l'utilisation. Prenez garde à ne pas toucher les éléments chauffants. Les enfants de moins de 8 ans ne doivent pas s'approcher de l'appareil s'ils sont sans surveillance. Lors de l'utilisation du four, les surfaces accessibles peuvent devenir très chaudes. Lors de l'utilisation du four, la porte ou la surface extérieure peut devenir chaude. Maintenez l'appareil et son cordon hors de la portée des enfants âgés de moins de 8 ans. 01 CONSIGNES DE SÉCURITÉ Ce four doit être positionné dans une direction appropriée et à une hauteur permettant un accès facile à la zone intérieure et aux commandes. Avant d'utiliser votre four pour la première fois, celui-ci doit fonctionner pendant 10 minutes avec de l'eau. Si l'appareil génère un bruit anormal, une odeur de brûlé ou de la fumée, débranchez immédiatement la prise et contactez le service de dépannage le plus proche. Installez le four à micro-ondes de telle façon que la prise reste facilement accessible. Le four micro-ondes est destiné à être posé sur un comptoir ou un plan de travail uniquement ; il ne doit pas être installé dans un meuble. Français - 5 MC28H5015AW_SG_DE68-04234H-01_FR.indd 5 2014-03-21 �� 5:05:08 cet appareil peut être utilisé par des enfants à partir de 8 ans et des personnes ayant des capacités physiques, sensorielles ou mentales réduites ou un manque d'expérience et de connaissance uniquement s'ils sont assistés ou si vous leur avez donné les instructions appropriées leur permettant de se servir de l'appareil en toute sécurité et de comprendre les risques encourus. Les enfants ne doivent pas jouer avec l'appareil. Le nettoyage et l'entretien de l'appareil ne doivent pas être effectués par un enfant si celui-ci est sans surveillance. N'utilisez jamais de produits abrasifs ou de grattoirs métalliques pour nettoyer la porte du four ; ils pourraient en rayer la surface et, par conséquent, casser le verre. L'appareil n'est pas conçu pour être utilisé avec une minuterie extérieure ou une télécommande. INSTALLATION DU FOUR MICRO-ONDES Placez le four sur une surface plane située à 85 cm au-dessus du sol. Cette surface doit être suffisamment résistante pour supporter le poids du four en toute sécurité. 20 cm au- 10 cm à 1.Lorsque vous installez votre four, dessus l'arrière assurez une ventilation adéquate de celui-ci en laissant un espace d'au 10 cm sur 85 cm aules côtés dessus du sol moins 10 cm à l'arrière et sur les côtés et un espace de 20 cm audessus. 2.Retirez tout élément d'emballage de l'intérieur du four. 3.Installez l'anneau et le plateau. Vérifiez que le plateau tourne librement. (Modèle à plateau tournant uniquement) 4.Installez le four à micro-ondes de telle façon que la prise reste facilement accessible. Si le cordon d'alimentation de l'appareil est endommagé, il devra être remplacé par le fabricant, son réparateur agréé ou par toute personne qualifiée afin d'éviter tout danger. Pour votre propre sécurité, ce câble doit être relié à une prise murale avec mise à la terre à courant alternatif appropriée. Français - 6 MC28H5015AW_SG_DE68-04234H-01_FR.indd 6 2014-03-21 �� 5:05:08 NETTOYAGE DU FOUR MICRO-ONDES Pour empêcher l'accumulation de graisses et de résidus d'aliments, nettoyez régulièrement les éléments suivants : • Les surfaces intérieures et extérieures • La porte et les joints d'étanchéité • Le plateau tournant et l'anneau de guidage (Modèle à plateau tournant uniquement) Veillez TOUJOURS à ce que les joints de la porte soient propres et à ce que celle-ci se ferme correctement. En négligeant la propreté de votre four, vous risquez d'en détériorer les surfaces et par conséquent, d'en réduire la durée de vie et de créer des situations dangereuses. 1.Nettoyez l'extérieur avec un chiffon doux et de l'eau savonneuse tiède. Rincez et séchez. 2.Éliminez les traces de projections situées sur les surfaces intérieures du four à l'aide d'un chiffon imbibé d'eau savonneuse. Rincez et séchez. 3.Si votre four est très sale ou si une odeur désagréable s'en dégage, placez une tasse d'eau citronnée dans le four et faites-la chauffer pendant dix minutes à pleine puissance. 4.Nettoyez le plateau si nécessaire, ce dernier étant adapté au lave-vaisselle. Ne laissez JAMAIS s'écouler d'eau dans les orifices de ventilation. N'utilisez JAMAIS de produits abrasifs ou de solvants chimiques. Nettoyez avec un soin tout particulier les joints de la porte afin qu'aucune particule : • ne s'y accumule ; • ne nuise à l'étanchéité de la porte. Nettoyez l'intérieur du four micro-ondes après chaque utilisation avec un produit de nettoyage non agressif, mais laissez-le refroidir avant pour éviter toute blessure. 01 CONSIGNES DE SÉCURITÉ N'installez pas le four dans un environnement chaud ou humide (ex. : à côté d'un radiateur ou d'un four traditionnel). Respectez les caractéristiques électriques du four ; si vous utilisez une rallonge, celle-ci doit correspondre aux normes du câble d'alimentation d'origine. Avant d'utiliser votre four pour la première fois, nettoyez les surfaces intérieures et le joint d'étanchéité de la porte à l'aide d'un chiffon humide. Français - 7 MC28H5015AW_SG_DE68-04234H-01_FR.indd 7 2014-03-21 �� 5:05:08 Pour faciliter le nettoyage de la partie supérieure de la cavité du four, inclinez la résistance d'environ 45°. (Modèle à élément chauffant oscillant uniquement) RANGEMENT ET ENTRETIEN DU FOUR MICRO-ONDES Pour le rangement ou la réparation de votre four micro-ondes, vous devez respecter quelques précautions simples. N'utilisez pas le four si la porte ou ses joints sont endommagés : • Charnière cassée • Joints détériorés • Habillage déformé ou embouti Seul un technicien spécialisé en micro-ondes peut effectuer les réparations. Ne retirez JAMAIS l'habillage du four. Si le four est en panne ou nécessite une intervention technique : • débranchez-le de l'alimentation ; • appelez le service après-vente le plus proche. Si vous souhaitez entreposer temporairement votre four, choisissez un endroit sec et non poussiéreux. Pourquoi ? La poussière et l'humidité risquent de détériorer certains éléments du four. Ce four micro-ondes n'est pas conçu pour une utilisation commerciale. Vous ne devez pas remplacer vous-même l'ampoule pour des raisons de sécurité. Veuillez contacter le service d'assistance Samsung le plus proche afin qu'un ingénieur qualifié remplace l'ampoule. AVERTISSEMENT Seul un personnel qualifié est autorisé à modifier ou réparer l'appareil. Ne faites pas chauffer de liquides ou d'autres aliments dans des récipients fermés hermétiquement pour la fonction Micro-ondes. Pour votre sécurité, ne nettoyez jamais l'appareil à l'aide d'un nettoyeur haute pression (eau ou vapeur). N'installez pas cet appareil à proximité d'un élément chauffant ou d'un produit inflammable ; N'installez pas cet appareil dans un endroit humide, graisseux ou poussiéreux et veillez à ce qu'il ne soit pas exposé directement à la lumière du soleil ou à une source d'eau (eau de pluie). N'installez pas cet appareil dans un endroit susceptible de présenter des fuites de gaz. Cet appareil doit être correctement relié à la terre en conformité aux normes locales et nationales. Français - 8 MC28H5015AW_SG_DE68-04234H-01_FR.indd 8 2014-03-21 �� 5:05:09 Ne versez et ne vaporisez jamais d'eau directement sur le four. Ne posez pas d'objets sur le dessus du four, à l'intérieur ou sur la porte. Ne vaporisez pas de substances volatiles (ex. : insecticide) sur la surface du four. N'entreposez aucun produit inflammable dans le four. Soyez particulièrement vigilant lors du réchauffage de plats de service ou de boissons contenant de l'alcool ; en cas de contact avec une partie chaude du four, les vapeurs risquent de s'enflammer. Veillez à ce que les enfants soient éloignés de la porte lors de son ouverture ou de sa fermeture car ils pourraient se cogner contre la porte ou se prendre les doigts dedans. AVERTISSEMENT : Si vous faites réchauffer des liquides au four micro-ondes, l'ébullition peut survenir à retardement ; faites donc bien attention lorsque vous sortez le récipient du four. Pour éviter cette situation, laissez-les TOUJOURS reposer au moins une vingtaine de secondes une fois le four éteint, ceci afin de permettre à la température de s'homogénéiser. Remuez SYSTÉMATIQUEMENT le contenu une fois le temps de cuisson écoulé (et pendant la cuisson si nécessaire). En cas d'accident, effectuez les gestes de PREMIERS SECOURS suivants : • immergez la zone brûlée dans de l'eau froide pendant au moins 10 minutes ; • recouvrez-la d'un tissu propre et sec ; • n'appliquez aucune crème, huile ou lotion ; Ne trempez pas la plaque ou la grille dans l'eau peu de temps après la cuisson car cela pourrait entraîner la cassure ou abîmer la plaque ou la grille. N'utilisez pas le four à micro-ondes pour une cuisson à bain d'huile car la température de l'huile ne peut pas être contrôlée. Cela pourrait entraîner un débordement soudain du liquide chaud. 01 CONSIGNES DE SÉCURITÉ Retirez régulièrement toute substance étrangère (poussière ou eau) présente sur les bornes et les points de contact de la prise d'alimentation à l'aide d'un chiffon sec. Ne tirez pas sur le cordon d'alimentation et faites en sorte de ne jamais le plier à l'excès ou poser d'objets lourds dessus. En cas de fuite de gaz (propane, GPL, etc.), aérez immédiatement la pièce sans toucher la prise d'alimentation. Ne touchez pas la prise d'alimentation si vous avez les mains mouillées. N'éteignez pas l'appareil en débranchant le cordon d'alimentation. N'insérez pas vos doigts ou de substances étrangères (ex. : eau) dans l'appareil ; si de l'eau pénètre dans l'appareil, débranchez le cordon d'alimentation et contactez votre centre de dépannage le plus proche. N'exercez pas de pression excessive ni de choc sur l'appareil. Ne placez pas le four sur un support fragile, comme un évier ou un objet en verre N'utilisez pas de benzène, de diluant, d'alcool ou de nettoyeur vapeur ou haute pression pour nettoyer l'appareil. Veillez à ce que la tension, la fréquence et l'intensité du courant soient conformes aux caractéristiques de l'appareil. Branchez correctement la fiche dans la prise murale. N'utilisez pas d'adaptateur multiprise, de rallonge ou de transformateur électrique. N'accrochez pas le cordon d'alimentation sur un objet métallique, ne le faites pas passer entre des objets ou derrière le four. N'utilisez jamais une fiche ou un cordon d'alimentation endommagé(e) ou une prise murale mal fixée. Si la prise ou le cordon d'alimentation est endommagé(e), contactez le centre de dépannage le plus proche. Français - 9 MC28H5015AW_SG_DE68-04234H-01_FR.indd 9 2014-03-21 �� 5:05:11 Ne faites jamais fonctionner le four à vide. Le four microondes s'arrête automatiquement pendant 30 minutes pour des raisons de sécurité. Nous vous recommandons de laisser en permanence un verre d'eau à l'intérieur du four ; ainsi, si vous le mettez en marche par inadvertance alors qu'il est vide, l'eau absorbera les micro-ondes. Installez le four en respectant les dégagements indiqués dans le manuel (voir Installation du four micro-ondes). Soyez prudent lorsque vous branchez d'autres appareils électriques sur une prise située à proximité du four. ATTENTION Seuls les ustensiles qui sont adaptés aux fours microondes peuvent être utilisés ; N'utilisez JAMAIS de récipients métalliques, de vaisselle comportant des ornements dorés ou argentés, de brochettes, de fourchettes, etc. Retirez les attaches métalliques des sacs en papier ou en plastique. Pourquoi ? Des arcs électriques ou des étincelles risqueraient de se former et d'endommager les parois du four. N'utilisez pas votre four micro-ondes pour sécher des papiers ou des vêtements. Utilisez des temps de cuisson ou de chauffe réduits pour les petites quantités d'aliments afin de leur éviter de surchauffer et de brûler. Évitez que le câble électrique ou la prise n'entre en contact avec de l'eau et maintenez le câble éloigné de la chaleur. Ne faites jamais chauffer d'œufs (frais ou durs) dans leur coquille car ils risquent d'exploser, et ce même une fois le cycle de cuisson terminé ; ne faites jamais réchauffer de bouteilles, de pots ou de récipients fermés hermétiquement ou emballés sous vide. Il en va de même pour les noix dans leur coquille ou encore les tomates etc. Ne couvrez jamais les orifices de ventilation du four avec un torchon ou du papier. Ils risquent de s'enflammer lorsque l'air chaud est évacué du four. Le four peut également surchauffer et se mettre hors tension lui-même automatiquement et rester arrêté jusqu'à ce qu'il soit suffisamment refroidi. Utilisez toujours des maniques pour retirer un plat du four afin d'éviter toute brûlure accidentelle. Remuez les liquides à la moitié du temps de chauffe et laissez reposer au moins 20 secondes une fois le temps écoulé pour éviter les projections brûlantes. Lorsque vous ouvrez la porte du four, maintenez une certaine distance entre vous et l'appareil pour éviter d'être brûlé par l'air chaud ou la vapeur sortant du four. CONSIGNES PERMETTANT D'ÉVITER UNE EXPOSITION EXCESSIVE AUX MICRO-ONDES. (FONCTION MICRO-ONDES UNIQUEMENT) La non-observation des consignes de sécurité suivantes peut se traduire par une exposition dangereuse à l'énergie des micro-ondes. (a) Ne tentez jamais d'utiliser le four porte ouverte, de modifier les systèmes de verrouillage (loquets) ou d'insérer un objet dans les orifices de verrouillage de sécurité. (b) Ne placez aucun objet entre la façade du four et la porte et ne laissez aucune tache ni aucun reste de produit d'entretien s'accumuler sur les surfaces assurant l'étanchéité. Maintenez la porte et les joints d'étanchéité propres en permanence : après chaque utilisation du four, essuyez-les d'abord avec un chiffon humide, puis avec un chiffon doux et sec. (c) Si le four est endommagé, NE L'UTILISEZ PAS tant qu'il n'a pas été réparé par un technicien micro-ondes qualifié formé par le fabricant. Il est impératif que la porte du four ferme correctement et que les éléments suivants ne soient pas endommagés : (1) Porte (déformée) (2) Charnières de la porte (cassées ou desserrées) (3) Joints de la porte et surfaces d'étanchéité (d) Le four doit être réglé ou réparé exclusivement par un technicien micro-ondes qualifié formé par le fabricant. Français - 10 MC28H5015AW_SG_DE68-04234H-01_FR.indd 10 2014-03-21 �� 5:05:12 présentation rapide Si vous souhaitez faire cuire des aliments. 1. Enfournez les aliments. Appuyez sur le bouton Start/+30s (Départ/+30s). Résultat : Lorsque la cuisson est terminée, un signal sonore retentit et le message « End » (Fin) clignote à quatre reprises. Le four émet ensuite un signal sonore toutes les minutes. Je souhaite ajouter 30 secondes supplémentaires. Appuyez sur le bouton Start/+30s (Départ/+30s) autant de fois que vous souhaitez ajouter de tranches de 30 secondes. En appuyant sur les boutons Haut et Bas, vous pouvez régler la durée que vous souhaitez. 02 PRÉSENTATION RAPIDE Samsung facturera les travaux de réparation lorsqu'un accessoire doit être réparé ou un défaut esthétique corrigé, si l'endommagement de l'appareil et/ou l'endommagement ou la perte de l'accessoire a été occasionné par le client. Les éléments concernés par cette stipulation sont : (a) une porte, une poignée, un panneau extérieur ou le tableau de commandes bosselé(e), rayé(e) ou brisé(e). (b) un plateau, un guide de plateau roulant, un coupleur, ou une grille métallique brisé(e) ou manquant(e). • Utilisez ce four uniquement pour l'usage auquel il est destiné (tel que décrit dans ce manuel). Les avertissements et les consignes de sécurité importantes contenus dans ce manuel ne sont pas exhaustifs. Il est de votre responsabilité de faire appel à votre bon sens et de faire preuve de prudence et de minutie lors de l'installation, de l'entretien et de l'utilisation du four. • Ces consignes d'utilisation couvrant plusieurs modèles, les caractéristiques de votre four micro-ondes peuvent différer légèrement de celles décrites dans ce manuel et certains symboles d'avertissement peuvent ne pas s'appliquer. Pour toute question, contactez votre centre de dépannage le plus proche ou recherchez de l'aide et des informations en ligne sur www.samsung.com. • Ce four micro-ondes est prévu pour faire chauffer des aliments. Il est uniquement destiné à un usage domestique. Ne faites jamais chauffer de textiles ou de coussins remplis de grains, car ceux-ci pourraient s'enflammer. Le fabricant ne peut être tenu responsable des dommages provoqués par une utilisation non conforme ou incorrecte de l'appareil. • En négligeant la propreté de votre four, vous risquez d'en détériorer les surfaces et par conséquent, d'en réduire la durée de vie et de créer des situations dangereuses. Français - 11 MC28H5015AW_SG_DE68-04234H-01_FR.indd 11 2014-03-21 �� 5:05:13 fonctions du four Je souhaite faire décongeler des aliments. 1. Appuyez sur le bouton Power Defrost (Décongélation). FOUR 1 2 4 3 5 2. Réglez la catégorie de cuisson en appuyant sur les boutons Haut ou Bas. Appuyez sur le bouton Select (Sélectionner) pour régler la température désirée. 3. Réglez le poids en appuyant sur les boutons Haut ou Bas selon les besoins. 4. Appuyez sur le bouton Start/+30s (Départ/+30s). Résultat : la décongélation démarre. • Lorsque la cuisson est terminée, un signal sonore retentit et le message « End » (Fin) clignote à quatre reprises. Le four émet ensuite un signal sonore toutes les minutes. 6 7 8 1. POIGNÉE 2. PORTE 3. ORIFICES DE VENTILATION 4. ÉLÉMENT CHAUFFANT 5. ÉCLAIRAGE 6. LOQUETS DE LA PORTE 9 10 11 7. TURNTABLE (PLATEAU TOURNANT) 8. COUPLEUR 9. ANNEAU DE GUIDAGE 10. ORIFICES DU SYSTÈME DE VERROUILLAGE DE SÉCURITÉ 11. TABLEAU DE COMMANDE Français - 12 MC28H5015AW_SG_DE68-04234H-01_FR.indd 12 2014-03-21 �� 5:05:14 TABLEAU DE COMMANDE ACCESSOIRES Selon le modèle de votre four micro-ondes, vous disposez de plusieurs accessoires à fonctionnalités multiples. 2. Plateau tournant : à placer sur l'anneau de guidage en emboîtant la partie centrale sur le coupleur. Fonction : Ce plateau constitue la principale surface de cuisson ; il peut être facilement retiré pour être nettoyé.  1. BOUTON RÉCHAUFFAGE/ CUISSON AUTOMATIQUES 2. BOUTON DE RÉALISATION DE PLATS SAINS 3. BOUTON DE DÉCONGÉLATION 4. BOUTON PÂTE LEVÉE/YAOURT 5. BOUTON CONVECTION 6. BOUTON GRIL 7. BOUTON MICRO-ONDES 8. BOUTON CUISSON COMBINÉE 9. BOUTON MARCHE/ARRÊT DU PLATEAU TOURNANT 10. BOUTON DÉSODORISATION 11. BOUTON HORLOGE 12. BOUTON SÉLECTIONNER 13. BOUTON BAS 14. BOUTON HAUT 15. BOUTON ARRÊT/ÉCO 16. BOUTON DÉPART/+30 Français - 13 MC28H5015AW_SG_DE68-04234H-01_FR.indd 13 3. Grille supérieure, grille inférieure : à placer sur le plateau. Fonction : Ces grilles métalliques vous permettent de faire cuire deux plats simultanément. Vous pouvez par exemple poser un plat de petite taille sur le plateau et un deuxième sur la grille. Les grilles métalliques peuvent être utilisées en modes Gril, Cuisson par convection et Cuisson combinée. 03 FONCTIONS DU FOUR 1. Anneau de guidage : à placer au centre du four. Fonction : l'anneau de guidage sert de support au plateau. 4. Plat croustilleur : à placer sur le plateau tournant. (Modèles MC28H5015C*, MC28H5015Z* uniquement) Fonction : Le plat croustilleur permet de faire dorer les aliments en utilisant les modes de cuisson combinée gril ou micro-ondes et de conserver le croustillant des pâtisseries et de la pâte à pizza. 5. Tournebroche, coupleur de rôtissoire et brochette : à placer dans la cocotte en verre. (Modèle MC28H5015Z* uniquement) Fonction : Le tournebroche permet de faire rôtir un poulet en toute simplicité, car la viande n'a pas besoin d'être retournée. Il peut également être utilisé pour la cuisson combinée au gril. (Suite) 2014-03-21 �� 5:05:15 6. Cuiseur-vapeur (Modèles MC28H5015F*, MC28H5015Z* uniquement) Fonction : en mode Cuisson vapeur, utilisez le cuiseurvapeur en plastique. N'UTILISEZ JAMAIS le four à micro-ondes sans l'anneau de guidage et le plateau tournant. N'UTILISEZ JAMAIS les fonctions Gril, Convection ou Cuisson combinée avec le cuiseur-vapeur. Mode de fonctionnement (Cuiseur-vapeur) ATTENTION MO GRIL O x CUISSON COMBINÉE x CONV utilisation du four FONCTIONNEMENT D'UN FOUR MICRO-ONDES Les micro-ondes sont des ondes électromagnétiques à haute fréquence. L'énergie qu'elles dégagent permet de faire cuire ou réchauffer les aliments sans en altérer la forme ni la couleur. Vous pouvez utiliser votre four à micro-ondes pour : • Décongélation • Faire réchauffer • cuire. Principe de cuisson. 1. Les micro-ondes générées par le magnétron sont réfléchies sur les parois du four et réparties de façon homogène à l'intérieur du four pendant la cuisson grâce à la rotation du plateau sur lequel sont placés les produits. Ce procédé assure donc une cuisson homogène des aliments. x • N'utilisez jamais ce cuiseur vapeur avec un produit ou modèle différent. Le cuiseur pourrait prendre feu ou causer des dommages irrémédiables sur l'appareil. • N'utilisez jamais le cuiseur vapeur sans eau ou aliments à l'intérieur. Avant d'utiliser ce cuiseur, versez-y au moins 500 ml d'eau. Si la quantité d'eau est inférieure à 500 ml, la cuisson risque d'être incomplète ou le cuiseur peut prendre feu ou causer des dommages irrémédiables sur l'appareil. • Après la cuisson, retirez le récipient du cuiseur avec précaution afin de ne pas vous brûler. • Veillez à placer le couvercle sur le cuiseur de telle façon qu'il s'emboîte correctement dans le plat du cuiseur vapeur/plat croustilleur. Les œufs ou les châtaignes risquent d'éclater si le couvercle et le plat du cuiseur vapeur ne sont pas placés comme indiqué dans les consignes d'installation. 2. Les micro-ondes sont absorbées par les aliments sur une profondeur d'environ 2,5 cm. La cuisson se poursuit au fur et à mesure que la chaleur se diffuse dans les aliments. 3. Les temps de cuisson varient en fonction du récipient utilisé et des propriétés des aliments : • quantité et densité ; • teneur en eau ; • température initiale (aliment réfrigéré ou non) La chaleur se diffusant à l'intérieur des aliments de façon progressive, la cuisson se poursuit en dehors du four. Les temps de repos mentionnés dans les recettes et dans ce livret doivent donc être respectés afin d'assurer : • une cuisson uniforme et à cœur ; • une température homogène. Français - 14 MC28H5015AW_SG_DE68-04234H-01_FR.indd 14 2014-03-21 �� 5:05:15 RÉGLAGE DE L'HORLOGE VÉRIFICATION DU BON FONCTIONNEMENT DE VOTRE FOUR La procédure suivante vous permet de vérifier à tout moment que votre four fonctionne correctement. En cas de doute, reportez-vous à la section intitulée « Dépannage » située en pages 40 et 41. N'oubliez pas de changer l'heure lors du passage à l'heure d'hiver ou à l'heure d'été. Appuyez sur le bouton Start/+30s (Départ/+30s) et réglez la durée sur 4 ou 5 minutes en appuyant sur le bouton Start/+30s (Départ/+30s) autant de fois que nécessaire. Résultat :L'eau est chauffée pendant 4 ou 5 minutes. L'eau doit entrer en ébullition. 1. Appuyez sur le bouton Clock (Horloge). 2. Appuyez sur les boutons Haut ou Bas pour régler le mode d'affichage de l'heure (12H ou 24H). Appuyez ensuite sur le bouton Select (Sélectionner) pour sélectionner le mode d'affichage. 04 UTILISATION DU FOUR Le four doit être branché sur une prise murale appropriée. Le plateau doit être correctement positionné dans le four. Si une puissance autre que la puissance maximale (100 % - 900 W) est utilisée, l'eau mettra plus longtemps à bouillir. Ouvrez la porte du four en tirant sur la poignée située sur le côté droit de la porte. Placez un verre d'eau sur le plateau. Refermez la porte. Votre four micro-ondes est équipé d'une horloge. Lors de la mise sous tension, « 88:88 » puis « 12:00 » s'affiche automatiquement. Réglez l'heure actuelle. Vous pouvez afficher l'heure au format 24 ou 12 heures. Vous devez régler l'horloge : • à l'installation initiale ; • après une coupure de courant. 3. Appuyez sur les boutons Haut ou Bas pour régler les heures. 4. Appuyez sur le bouton Select (Sélectionner). 5. Appuyez sur les boutons Haut ou Bas pour régler les minutes. 6. Lorsque l'heure affichée est correcte, appuyez sur le bouton Select (Sélectionner) pour lancer l'horloge. Résultat : l'heure est affichée lorsque le four à micro-ondes n'est pas en cours d'utilisation. Français - 15 MC28H5015AW_SG_DE68-04234H-01_FR.indd 15 2014-03-21 �� 5:05:16 CUISSON/RÉCHAUFFAGE PUISSANCES ET TEMPS DE CUISSON Suivez les instructions ci-dessous lorsque vous souhaitez faire cuire ou réchauffer des aliments. La fonction Puissance vous permet d'adapter la quantité d'énergie dispersée et, par conséquent, le temps nécessaire à la cuisson ou au réchauffage des aliments en fonction de leur catégorie et de leur quantité. Vous pouvez sélectionner six puissances différentes. Vérifiez TOUJOURS les réglages de cuisson avant de laisser le four sans surveillance. Puissance Ouvrez la porte. Placez les aliments au centre du plateau. Refermez la porte. Ne mettez jamais le four en route lorsqu'il est vide. 1. Appuyez sur le bouton Microwave (Micro-ondes). Résultat : Les indications suivantes s'affichent : (mode micro-ondes) 2. Appuyez sur les boutons Haut ou Bas jusqu'à ce que la puissance appropriée soit affichée. Appuyez ensuite sur le bouton Select (Sélectionner) pour sélectionner la puissance. • Si la puissance n'est pas sélectionnée dans les 5 secondes, l'affiche passe automatiquement à l'étape de réglage du temps de cuisson. 3. Réglez le temps de cuisson en appuyant sur les boutons Haut ou Bas. Résultat : le temps de cuisson s'affiche. Pourcentage Puissance en watts 100 % 67 % 50 % 33 % 20 % 11 % 900 W 600 W 450 W 300 W 180 W 100 W Les temps de cuisson indiqués dans les recettes et dans ce livret correspondent à la puissance spécifique indiquée. Si vous choisissez... Le temps de cuisson doit être... une puissance élevée une puissance faible réduit augmenté RÉGLAGE DU TEMPS DE CUISSON Pour régler le temps de cuisson, appuyez sur le bouton Start/+30s (Départ/+30s). 4. Appuyez sur le bouton Start/+30s (Départ/+30s). Résultat : ÉLEVÉE MOYENNEMENT ÉLEVÉE MOYENNE MOYENNEMENT FAIBLE DÉCONGÉLATION FAIBLE L'éclairage du four est activé et le plateau commence à tourner. La cuisson démarre. Lorsqu'elle est terminée : • Un signal sonore retentit et le message « End » (Fin) clignote à quatre reprises. Le four émet ensuite un signal sonore toutes les minutes. • Pour surveiller la progression de la cuisson, il vous suffit d'ouvrir la porte ; • Augmentez le temps de cuisson restant. Pour régler le temps de cuisson des aliments, appuyez sur le bouton Start/+30s (Départ/+30s) autant de fois que vous souhaitez ajouter de tranches de 30 secondes. • Exemple : pour ajouter trois minutes, appuyez six fois sur le bouton Start/+30s (Départ/+30s). Pour régler le temps de cuisson, appuyez sur les boutons Haut et Bas en fonction de ce que vous souhaitez ajouter. Français - 16 MC28H5015AW_SG_DE68-04234H-01_FR.indd 16 2014-03-21 �� 5:05:18 ARRÊT DE LA CUISSON UTILISATION DES FONCTIONS RÉCHAUFFAGE/ CUISSON AUTOMATIQUES Vous pouvez arrêter la cuisson à tout moment pour : • contrôler la cuisson ; • retourner ou mélanger les aliments ; • les laisser reposer. Vous devez... Temporairement Temporairement : Ouvrez la porte et appuyez une fois sur le bouton Stop/Eco (Arrêt/Éco). Résultat : La cuisson s'arrête. Définitivement Utilisez uniquement de la vaisselle adaptée à la cuisson aux micro-ondes. Ouvrez la porte. Placez les aliments au centre du plateau. Refermez la porte. Pour reprendre la cuisson, refermez la porte et appuyez sur le bouton Start/+30s (Départ/+30s). Définitivement : Appuyez une fois sur le bouton Stop/Eco (Arrêt/Éco). Résultat : La cuisson s'arrête. 1. Appuyez sur le bouton Auto Reheat/Cook (Réchauffage/Cuisson automatiques). Si vous désirez annuler les réglages de cuisson, appuyez de nouveau sur le bouton Stop/Eco (Arrêt/Éco). 3. Appuyez sur le bouton Select (Sélectionner). 2. Appuyez sur les boutons Haut et Bas pour sélectionner la catégorie de cuisson. (1 : Réchauffage automatique, 2 : Cuisson automatique) 04 UTILISATION DU FOUR Pour arrêter la cuisson... Les 10 fonctions de Auto Reheat/Cook (Réchauffage/Cuisson automatiques) comprennent/proposent des temps de cuisson préprogrammés. Vous n'avez donc besoin de régler ni le temps de cuisson, ni la puissance. Vous pouvez régler la quantité en appuyant sur les boutons Haut ou Bas. 4. Sélectionnez le type d'aliments que vous souhaitez faire cuire en appuyant sur les boutons Haut et Bas. Reportez-vous au tableau de la page suivante pour obtenir une description des divers programmes pré-réglés. Appuyez ensuite sur le bouton Select (Sélectionner) pour sélectionner le type d'aliment. RÉGLAGE DU MODE D'ÉCONOMIE D'ÉNERGIE Le four possède un mode d'économie d'énergie. • Appuyez sur le bouton Stop/Eco (Arrêt/Éco). (En mode Standby (Veille).) Résultat : affichage désactivé. 5. Sélectionnez la quantité en appuyant sur les boutons Haut et Bas. • Pour désactiver le mode Économie d'énergie, ouvrez la porte ou appuyez sur le bouton Stop/ Eco (Arrêt/Éco) ; l'écran affiche alors l'heure actuelle. Le four peut alors être utilisé. 6. Appuyez sur le bouton Start/+30s (Départ/+30s). Résultat : Fonction d'économie d'énergie automatique Si vous ne sélectionnez aucune fonction lorsque l'appareil est en cours de réglage ou de fonctionnement en état d'arrêt temporaire, la fonction est annulée et l'horloge s'affiche après 25 minutes. Le voyant Oven (Four) s'éteint après 5 minutes lorsque la porte est ouverte. Les aliments sont cuits en fonction du réglage préprogrammé sélectionné. • Lorsque la cuisson est terminée, un signal sonore retentit et le message « End » (Fin) clignote à quatre reprises. Le four émet ensuite un signal sonore toutes les minutes. Français - 17 MC28H5015AW_SG_DE68-04234H-01_FR.indd 17 2014-03-21 �� 5:05:19 Le tableau suivant répertorie les quantités et instructions appropriées pour un réchauffage et une cuisson automatiques. Utilisez des maniques pour sortir votre plat du four. 1. Auto Reheat (Réchauffage automatique) Code/Aliment Quantité Consignes 1-1 Plats préparés (réfrigérés) 300 à 350 g 400 à 450 g 1-2 Ravioles (réfrigérées) 200 à 250 g 300 à 350 g 1-3 Pizza surgelée 1-4 Mini-pizzas surgelées 1-5 Lasagnes surgelées 1-6 Petits pains surgelés 300 à 350 g 400 à 450 g Placez les aliments dans une assiette en céramique et recouvrez-la d'un film plastique spécial microondes. Ce programme convient à la cuisson de plats composés de trois aliments différents (ex. : viande en sauce, légumes et accompagnements tels que pommes de terre, riz ou pâtes). Laissez reposer 2 à 3 minutes. Versez les mini ravioli cuisinés dans un plat en plastique adapté à la cuisson micro-ondes et placez celui-ci au centre du plateau. Percez le film du plat préparé ou recouvrez le plat en plastique de film étirable. Remuez avec précaution avant et après le temps de repos. Ce programme convient à la cuisson des ravioli ainsi qu'à celle des pâtes en sauce. Laissez reposer 3 minutes. Placez la pizza surgelée sur la grille inférieure. 100 à 150 g 250 à 300 g Placez les pizzas surgelées sur la grille inférieure. 400 à 450 g 600 à 650 g Placez les lasagnes surgelées dans un plat adapté au four et suffisamment grand. Posez le plat sur la grille inférieure. Laissez reposer 3 à 4 minutes. 100 à 150 g (2 morceaux). 200 à 250 g (4 morceaux). 300 à 350 g (6 morceaux). Il est recommandé de faire préchauffer le four à 180 °C pendant 5 minutes à l'aide de la fonction de convection. Placez de 2 à 6 petits pains surgelés (-18 °C) en cercle sur la grille inférieure. Ce programme convient aux viennoiseries surgelées telles que les petits pains, les ciabatta et les petites baguettes. Laissez reposer 3 à 5 minutes. 2. Cuisson automatique Code/Aliment Quantité Consignes 2-1 Brocolis en morceaux/ Légumes frais 200 à 250 g 300 à 350 g 400 à 450 g Pesez les légumes après les avoir lavés, rincés et coupés en morceaux de même taille. Mettez-les dans une cocotte en verre et couvrez. Ajoutez 30 ml (2 cuillères à soupe) d'eau pour la cuisson d'une portion de 200 à 250 g, 45 ml (3 cuillères à soupe) pour une portion de 300 à 450 g et 60 à 75 ml (4 cuillères à soupe) pour une portion de 400 à 450 g. Remuez après cuisson. Lorsque vous faites cuire des quantités plus importantes, remuez une fois en cours de cuisson. Laissez reposer 1 à 2 minutes. Badigeonnez les morceaux de poulet d'huile et saupoudrez-les de poivre, de sel et de paprika. Disposez-les en cercle sur la grille supérieure, côté peau vers le bas. Retournez dès que le signal sonore retentit. Laissez reposer 2 minutes. 2-2 Morceaux de poulet 2-3 Poulet rôti 2-4 Muffins 300 à 400 g (1 morceau) 500 à 600 g (2 morceaux) 700 à 800 g (3 morceaux) 1100 à 1150 g 1200 à 1250 g 250 à 300 g Badigeonnez le poulet réfrigéré d'huile et saupoudrez d'épices. Tournez le côté poitrine vers le bas, au centre de la grille inférieure. Retournez dès que le signal sonore retentit. Appuyez sur le bouton Départ pour reprendre la cuisson. Laissez reposer 5 minutes. Versez la pâte dans 6 à 8 récipients en papier ou en silicone pour les muffins (45 g chacun) et placez-les sur la grille inférieure. Démarrez le programme (le four est préchauffé). Lorsque le signal sonore retentit, insérez la grille avec la nourriture. Français - 18 MC28H5015AW_SG_DE68-04234H-01_FR.indd 18 2014-03-21 �� 5:05:19 UTILISATION DES FONCTIONS DE RÉALISATION DE PLATS SAINS Les 15 fonctions Healthy Cooking (Réalisation de plats sains) proposent des temps de cuisson pré-programmés. Vous n'avez donc besoin de régler ni le temps de cuisson, ni la puissance. Vous pouvez régler la quantité en appuyant sur les boutons Haut ou Bas. Utilisez des maniques pour sortir votre plat du four. 1. Céréales/pâtes Ouvrez la porte. Placez les aliments au centre du plateau. Refermez la porte. 1. Appuyez sur le bouton Healthy cook (Réalisation de plats sains). Quantité Consignes 1-1 Riz complet Code/Aliment 150 à 200 g 200 à 250 g 1-2 Quinoa 150 à 200 g 200 à 250 g 1-3 Macaroni 100 à 150 g 200 à 250 g Utilisez un grand plat en verre équipé d'un couvercle Ajoutez deux volumes d'eau froide. Faites cuire à couvert. Remuez avant de laisser reposer puis salez ou ajoutez des herbes. Laissez reposer 5 à 10 minutes. Utilisez un grand plat en verre équipé d'un couvercle Ajoutez deux volumes d'eau froide. Faites cuire à couvert. Remuez avant de laisser reposer puis salez ou ajoutez des herbes. Laissez reposer 1 à 3 minutes. Utilisez un grand plat en verre équipé d’un couvercle Ajoutez quatre volumes d'eau bouillante, une pincée de sel et remuez bien. Faites cuire le tout sans couvrir. Remuez avant de laisser reposer à couvert, puis égouttez soigneusement. Laissez reposer 1 à 3 minutes. 2. Appuyez sur le bouton Haut ou Bas pour sélectionner la catégorie de cuisson. 3. Sélectionnez la catégorie de cuisson en appuyant sur le bouton Select (Sélectionner). 4. Appuyez sur le bouton Haut ou Bas pour sélectionner le type de cuisson. 5. Sélectionnez le type de cuisson en appuyant sur le bouton Select (Sélectionner). 6. Appuyez sur les boutons Haut ou Bas pour sélectionner la quantité. Reportez-vous au tableau de la page suivante pour obtenir une description des divers programmes pré-réglés. 7. Appuyez sur le bouton Start/+30s (Départ/+30s). Résultat : 04 UTILISATION DU FOUR Utilisez uniquement de la vaisselle adaptée à la cuisson aux micro-ondes. Le tableau suivant répertorie les quantités et instructions appropriées au sujet des 15 options de cuisson pré-programmées. Il est composé de céréales/pâtes, légumes et volailles/poissons. Les aliments sont cuits en fonction du programme pré-réglé sélectionné. • Lorsque la cuisson est terminée, un signal sonore retentit et « End » (Fin) clignote à quatre reprises. Le four émet ensuite un signal sonore toutes les minutes. Français - 19 MC28H5015AW_SG_DE68-04234H-01_FR.indd 19 2014-03-21 �� 5:05:20 2. Légumes Code/Aliment 2-1 Haricots verts 2-2 Épinards 2-3 Pommes de terre épluchées 3. Volaille/Poisson Quantité Consignes Code/Aliment Quantité Consignes 200 à 250 g 300 à 350 g Rincez et nettoyez les haricots verts. Répartissezles dans une cocotte en verre et couvrez. Ajoutez 30 ml d'eau (2 cuillères à soupe) pour la cuisson d'une portion de 200 à 250 g et ajoutez 45 ml (3 cuillères à soupe) pour 300 à 450 g. Placez le bol au centre du plateau tournant. Faites cuire à couvert. Remuez après cuisson Laissez reposer 1 à 2 minutes. Rincez et nettoyez les épinards. Mettez-les dans une cocotte en verre et couvrez. N'ajoutez pas d'eau. Placez le bol au centre du plateau tournant. Faites cuire à couvert. Remuez après cuisson Laissez reposer 1 à 2 minutes. Lavez et épluchez les pommes de terre, coupezles en deux et mettez-les dans une cocotte en verre et couvrez. Ajoutez 15 à 30 ml d'eau (1 à 2 cuillères à soupe) Remuez après cuisson Lorsque vous faites cuire des quantités plus importantes, remuez une fois en cours de cuisson. Laissez reposer 3 à 5 minutes. Mettez le gratin frais dans un plat en Pyrex. Placez le plat sur la grille inférieure. Laissez reposer 2 à 3 minutes. 3-1 Blancs de poulet 300 à 350 g 400 à 450 g 3-2 Blancs de dinde 300 à 350 g 400 à 450 g 3-3 Blancs de poulet grillés 300 à 350 g 400 à 450 g 3-4 Filets de poisson grillés 3-5 Steaks de saumon grillé 3-6 Poisson grillé 200 à 300 g 400 à 500 g Rincez les blancs de poulet et placez-les sur une assiette en céramique. Recouvrez avec un film plastique résistant aux micro-ondes et percez le film. Posez le plat sur le plateau tournant. Laissez reposer 2 minutes. Rincez les blancs de dinde et placez-les dans un plat profond en verre adapté au micro-ondes. Recouvrez avec un film plastique résistant aux micro-ondes et percez le film. Posez le plat sur le plateau tournant. Laissez reposer 2 minutes. Rincez les blancs de poulet, faites-les mariner puis placez-les sur la grille supérieure. Retournez dès que le signal sonore retentit. Laissez reposer 2 minutes. Placez les filets de poisson uniformément sur la grille supérieure. Retournez dès que le signal sonore retentit. Laissez reposer 1 à 2 minutes. 100 à 150 g 200 à 250 g 300 à 350 g 400 à 450 g 500 à 550 g 2-4 Gratin de pommes de terre 2-5 Aubergines grillées 400 à 450 g 800 à 850 g 2-6 Tomates grillées 400 à 450 g 600 à 650 g 100 à 150 g 200 à 250 g Rincez et émincez les aubergines. Badigeonnezles d'huile et d'épices. Placez les tranches uniformément sur la grille supérieure. Retournez lorsque le signal sonore retentit. Appuyez sur Start (Départ) pour continuer. (Le four continue de fonctionner si vous ne retournez pas.) Laissez reposer 1 à 2 minutes. Rincez et nettoyez les tomates. Coupez-les en deux et placez-les dans un plat adapté au microondes. Parsemez de fromage râpé. Placez le plat sur la grille supérieure. Laissez reposer 1 à 2 minutes. 200 à 250 g 300 à 350 g Placez les steaks de poisson uniformément sur la grille hauteur maxi. Retournez dès que le signal sonore retentit. Laissez reposer 2 minutes. 200 à 300 g 400 à 500 g Badigeonnez le poisson (truite ou dorade) d'huile, puis ajoutez des herbes et des épices. Placez les poissons côte à côte (tête contre queue) sur la grille supérieure. Retournez dès que le signal sonore retentit. Laissez reposer 3 minutes. Français - 20 MC28H5015AW_SG_DE68-04234H-01_FR.indd 20 2014-03-21 �� 5:05:20 UTILISATION DU MODE PÂTE LEVÉE/YAOURT 1. Appuyez sur le bouton Dough Proof/Yogurt (Pâte levée/yaourt). 2. Sélectionnez le type d'aliments que vous souhaitez faire cuire en appuyant sur les boutons Haut ou Bas. Le numéro 1 correspond à la pâte levée et le numéro 2 correspond au yaourt maison. Vous devez choisir le numéro que vous souhaitez utiliser pour la cuisson en appuyant sur les boutons Haut ou Bas. Reportez-vous au tableau de la page suivante pour obtenir une description des divers programmes pré-réglés. Appuyez ensuite sur le bouton Select (Sélectionner) pour sélectionner le type d'aliment. Le tableau suivant indique comment utiliser les programmes automatiques pour le levage de la pâte ou la préparation des yaourts maison. 1. Fermentation de la pâte Code/Aliment Quantité Consignes 300 à 500 g Placez la pâte dans un bol de taille appropriée et placez 1-1 celui-ci sur la grille inférieure. Recouvrez d'aluminium. Pâte à pizza 500 à 800 g Placez la pâte dans un bol de taille appropriée et placez 1-2 celui-ci sur la grille inférieure. Recouvrez d'aluminium. Pâte pour gâteau 600 à 900 g Placez la pâte dans un bol de taille appropriée et placez 1-3 celui-ci sur la grille inférieure. Recouvrez d'aluminium. Pâte à pain 2. Yaourt maison Code/ Aliment Quantité Consignes 2-1 Petites tasses 500 g 2-2 Grand bol 500 g Répartissez uniformément 150 g de yaourt nature dans 5 tasses en céramique ou dans des petits ramequins (30 g chacun). Ajoutez 100 ml de lait dans chaque tasse. Utilisez du lait longue conservation (température ambiante ; 3,5 % de matière grasse). Couvrez-les de film plastique et placez-les en cercle sur le plateau tournant. Une fois terminé, placez-les 6 heures au réfrigérateur. Pour la première tentative, nous recommandons d'utiliser un ferment sec de yaourt avec des bactéries. Mélangez 150 g de yaourt nature avec 500 ml de lait longue conservation (température ambiante ; 3,5 % de matière grasse). Versez uniformément dans un grand bol en verre. Couvrez-les avec du film plastique et placezles sur le plateau tournant. Une fois terminé, placez-les 6 heures au réfrigérateur. Pour la première tentative, nous recommandons d'utiliser un ferment sec de yaourt avec des bactéries. 3. Sélectionnez l'aliment en appuyant sur les boutons Haut ou Bas. 4. Appuyez sur le bouton Start/+30s (Départ/+30s). Le plateau tournant ne fonctionne pas pendant la cuisson de yaourt. 04 UTILISATION DU FOUR Les 5 fonctions Dough Proof/Yogurt (Pâte levée/Yaourt) proposent des temps de cuisson pré-programmés. Vous n'avez donc besoin de régler ni le temps de cuisson, ni la puissance. Vous pouvez régler la catégorie de pâte levée/yaourt en appuyant sur les boutons Haut ou Bas après avoir appuyé sur le bouton Dough Proof/Yogurt (Pâte levée/yaourt). Placez le plat au centre du plateau tournant, puis refermez la porte. Français - 21 MC28H5015AW_SG_DE68-04234H-01_FR.indd 21 2014-03-21 �� 5:05:21 UTILISATION DES FONCTIONS DE DÉCONGÉLATION Les 5 fonctions Power Defrost (Décongélation) permettent de faire décongeler de la viande, de la volaille, du poisson, du pain, des gâteaux ou des fruits. Le temps de décongélation et la puissance se règlent automatiquement. Il vous suffit de sélectionner le programme et le poids correspondant aux aliments à décongeler. N'utilisez que des plats adaptés à la cuisson aux micro-ondes. Ouvrez la porte. Placez l'aliment surgelé dans un plat en céramique au centre du plateau. Refermez la porte. Le tableau suivant répertorie les divers programmes de Power Defrost (Décongélation), les quantités, les temps de repos et les instructions appropriées. Éliminez tous les éléments d'emballage des aliments avant de démarrer la décongélation. Placez la viande, la volaille ou le poisson sur une assiette plate en verre ou en céramique et le pain ou le gâteau sur du papier absorbant. Code/ Aliment Quantité Consignes Protégez les extrémités avec de l'aluminium. Retournez la viande au signal sonore. Ce programme convient à la décongélation du bœuf, de l'agneau, du porc, des côtelettes ou des émincés. Laissez reposer 20 à 90 minutes. Protégez les extrémités des cuisses et des ailes avec de l'aluminium. Retournez la volaille au signal sonore. Ce programme convient aussi bien à la décongélation d'un poulet entier qu'à celle de morceaux. Laissez reposer 20 à 90 minutes. Protégez la queue d'un poisson entier avec du papier d'aluminium. Retournez le poisson au signal sonore. Ce programme convient aussi bien à la cuisson des poissons entiers qu'à celle des filets. Laissez reposer 20 à 80 minutes. Placez le pain bien à plat sur une feuille de papier absorbant et retournez-le au signal sonore. Posez le gâteau sur une assiette en céramique et, si possible, retournez-le au signal sonore (le four continue de fonctionner et s'arrête automatiquement lorsque vous ouvrez la porte). Ce programme convient à la décongélation de toutes sortes de pains, en tranches ou entier, ainsi qu'à celle des petits pains et des baguettes. Disposez les petits pains en cercle. Ce programme convient à la décongélation de toutes sortes de gâteaux à base de levure ainsi qu'à celle des biscuits, de la tarte au fromage et de la pâte feuilletée. Il n'est pas adapté à la cuisson des pâtes brisées, des gâteaux à la crème et aux fruits ou des gâteaux nappés de chocolat. Laissez reposer 10 à 60 minutes. Répartissez uniformément les fruits dans un récipient en verre à fond plat. Ce programme convient à la décongélation de toutes sortes de fruits. Laissez reposer 5 à 20 minutes. 1. Appuyez sur le bouton Power Defrost (Décongélation). 1 Viande 200 à 1500 g 2. Sélectionnez le type d'aliments que vous souhaitez faire cuire en appuyant sur les boutons Haut ou Bas. Reportez-vous au tableau de la page suivante pour obtenir une description des divers programmes pré-réglés. Appuyez ensuite sur le bouton Select (Sélectionner) pour sélectionner le type d'aliment. 3. Sélectionnez la quantité en appuyant sur les boutons Haut ou Bas. 2 Volaille 200 à 1500 g 3 Poisson 200 à 1500 g 4 Pain/ gâteaux 125 à 1000 g 5 Fruits 100 à 600 g 4. Appuyez sur le bouton Start/+30s (Départ/+30s). Résultat : • La phase de décongélation commence. • Un signal sonore vous rappelant de retourner l'aliment retentit en cours de décongélation. (hormis les fruits) 5. Si le four émet un signal sonore et que son fonctionnement cesse, il est nécessaire de retourner les aliments (ex : Viande, volaille, poisson). Puis appuyez de nouveau sur le bouton Start/+30s (Départ/+30s) pour poursuivre la décongélation. Résultat : Lorsque la cuisson est terminée, un signal sonore retentit et le message « End » (Fin) clignote à quatre reprises. Le four émet ensuite un signal sonore toutes les minutes. Français - 22 MC28H5015AW_SG_DE68-04234H-01_FR.indd 22 2014-03-21 �� 5:05:21 FAIRE GRILLER Le mode Cuisson par convection vous permet de faire cuire les aliments comme dans un four traditionnel. Le mode Micro-ondes n'est pas utilisé. Vous pouvez régler la température à votre convenance entre 40 °C et 200 °C. Le temps de cuisson maximal est de 60 minutes. • Les récipients étant très chauds, veillez à toujours porter des maniques lorsque vous devez les manipuler. • La cuisson sera plus homogène et l'aliment uniformément doré si vous utilisez la grille inférieure. Vérifiez que l'élément chauffant est en position horizontale. Ouvrez la porte, placez le récipient sur la grille inférieure et réglez le plateau. Le gril permet de faire chauffer et dorer des aliments rapidement, sans utiliser la cuisson par micro-ondes. • Les récipients étant très chauds, veillez à toujours porter des maniques lorsque vous devez les manipuler. • Pour obtenir de meilleurs résultats, utilisez la grille supérieure. 2. Appuyez sur le bouton Grill (Gril). 1. Appuyez sur le bouton Convection. Résultat : Les indications suivantes s'affichent : 180 °C 1. Ouvrez la porte et placez les aliments sur la grille. Résultat : Les indications suivantes s'affichent : (mode gril) • La température du gril n'est pas réglable. (mode Convection) (température) 2. Sélectionnez la température en appuyant sur le bouton Haut ou Bas. (Température : 40~200 °C, par intervalle de 10 °C) • Si la température n'est pas sélectionnée dans les 5 secondes, l'affiche passe automatiquement à l'étape de réglage du temps de cuisson. 3. Appuyez sur le bouton Select (Sélectionner). 4. Réglez le temps de cuisson en appuyant sur les boutons Haut ou Bas. (Si vous souhaitez préchauffer le four, ignorez cette étape.) 5. Appuyez sur le bouton Start/+30s (Départ/+30s). Résultat : la cuisson démarre. • Lorsque la cuisson est terminée, un signal sonore retentit et le message « End » (Fin) clignote à quatre reprises. Le four émet ensuite un signal sonore toutes les minutes. 3. Réglez le temps de cuisson au gril en appuyant sur le bouton Haut ou Bas. • Le temps de cuisson maximal dans ce mode est de 60 minutes. 04 UTILISATION DU FOUR CUISSON PAR CONVECTION 4. Appuyez sur le bouton Start/+30s (Départ/+30s). Résultat : la cuisson démarre. • Lorsque la cuisson est terminée, un signal sonore retentit et le message « End » (Fin) clignote à quatre reprises. Le four émet ensuite un signal sonore toutes les minutes. Français - 23 MC28H5015AW_SG_DE68-04234H-01_FR.indd 23 2014-03-21 �� 5:05:22 COMBINAISON MICRO-ONDES ET GRIL COMBINAISON MICRO-ONDES ET CONVECTION Vous pouvez également combiner la cuisson par micro-ondes et la cuisson au gril afin de faire cuire et dorer rapidement, en une seule fois. Utilisez TOUJOURS des ustensiles adaptés à la cuisson aux micro-ondes et au four traditionnel. Les plats en verre ou en céramique conviennent parfaitement, car ils laissent les micro-ondes pénétrer les aliments de façon uniforme. Les récipients pouvant devenir très chauds, veillez à TOUJOURS porter des maniques lorsque vous devez les manipuler. Pour une cuisson et des grillades optimales, utilisez la grille supérieure. Ouvrez la porte. Placez les aliments sur la grille la mieux adaptée au type d'aliments à cuire. Placez la grille sur le plateau tournant. Refermez la porte. La cuisson combinée utilise à la fois l'énergie des micro-ondes et la fonction de convection. Aucun préchauffage n'est requis puisque l'énergie des micro-ondes est disponible immédiatement. De nombreux aliments peuvent être cuits en mode combiné, en particulier : • les viandes rôties et les volailles ; • les tartes et les gâteaux ; • les plats à base d'œufs et de fromage. Utilisez TOUJOURS des ustensiles adaptés à la cuisson aux micro-ondes et au four traditionnel. Les plats en verre ou en céramique conviennent parfaitement, car ils laissent les micro-ondes pénétrer les aliments de façon uniforme. Les récipients pouvant devenir très chauds, veillez à TOUJOURS porter des maniques lorsque vous devez les manipuler. Pour une cuisson et un brunissage optimaux, utilisez la grille inférieure. Ouvrez la porte. Placez les aliments sur le plateau ou sur la grille inférieure qui doit ensuite être placée sur celui-ci. Refermez la porte. L'élément chauffant doit se trouver en position horizontale. 1. Appuyez sur le bouton Combi (Cuisson combinée). Résultat : Les indications suivantes s'affichent : Cb - 1 (Micro-ondes + Gril) 2. Appuyez sur les boutons Haut ou Bas jusqu'à ce que l'affichage indique Cb - 1, puis appuyez sur le bouton Select (Sélectionner). Résultat : Les indications suivantes s'affichent : 600 W 1. Appuyez sur le bouton Combi (Cuisson combinée). (mode combiné micro-ondes et gril) (puissance de sortie) 3. Réglez la puissance appropriée en appuyant sur les boutons Haut ou Bas jusqu'à ce que la puissance adéquate soit affichée (600, 450, 300 W). Appuyez ensuite sur le bouton Select (Sélectionner) pour sélectionner la puissance. • La température du gril n'est pas réglable. • Si la puissance n'est pas sélectionnée dans les 5 secondes, l'affiche passe automatiquement à l'étape de réglage du temps de cuisson. 4. Réglez le temps de cuisson en appuyant sur les boutons Haut ou Bas. • Le temps de cuisson maximal est de 60 minutes. 5. Appuyez sur le bouton Start/+30s (Départ/+30s). Résultat : • La cuisson combinée démarre. • Lorsque la cuisson est terminée, un signal sonore retentit et le message « End » (Fin) clignote à quatre reprises. Le four émet ensuite un signal sonore toutes les minutes. Résultat : Les indications suivantes s'affichent : Cb - 1 (Micro-ondes + Gril) 2. Appuyez sur les boutons Haut ou Bas jusqu'à ce que l'affichage indique Cb - 2, puis appuyez sur le bouton Select (Sélectionner). Résultat : Les indications suivantes s'affichent : (mode combiné Micro-ondes et Convection) 600 W (puissance de sortie) 3. Réglez la puissance appropriée en appuyant sur les boutons Haut ou Bas jusqu'à ce que la puissance adéquate soit affichée (600, 450, 300, 180, 100 W). Appuyez ensuite sur le bouton Select (Sélectionner) pour sélectionner la puissance. • Si la puissance n'est pas sélectionnée dans les 5 secondes, l'affiche passe automatiquement à l'étape de réglage du temps de cuisson. (Par défaut : 180 °C) Français - 24 MC28H5015AW_SG_DE68-04234H-01_FR.indd 24 2014-03-21 �� 5:05:23 UTILISATION DES FONCTIONS SÉCURITÉ ENFANTS Votre four micro-ondes est équipé d'une sécurité enfants qui vous permet de verrouiller les boutons de l'appareil afin d'éviter qu'un enfant ou que toute autre personne non habituée ne puisse le faire fonctionner accidentellement. 1. Appuyez simultanément sur les boutons Haut et Bas. (Trois secondes) Résultat : • Le four est verrouillé (aucune fonction ne peut être sélectionnée). • L'écran affiche un « L ». 6. Appuyez sur le bouton Start/+30s (Départ/+30s). Résultat : • La cuisson combinée démarre. • Le four est chauffé à la température appropriée, puis la cuisson aux micro-ondes se poursuit jusqu'à la fin du temps de cuisson. • Lorsque la cuisson est terminée, un signal sonore retentit et le message « End » (Fin) clignote à quatre reprises. Le four émet ensuite un signal sonore toutes les minutes. CHOIX DES ACCESSOIRES La cuisson par convection traditionnelle ne requiert pas d'ustensiles particuliers. Vous devez néanmoins faire uniquement appel à des ustensiles que vous utiliseriez dans un four normal. Les plats adaptés à la cuisson aux micro-ondes ne sont généralement pas conçus pour la cuisson par convection ; n'utilisez pas de récipients plastique, de plats de service, de gobelets en papier, de serviettes, etc. 2. Pour déverrouiller le four, appuyez à nouveau simultanément sur les boutons Haut et Bas. (Trois secondes) Résultat : Le four peut à nouveau être utilisé normalement. 04 UTILISATION DU FOUR 4. Sélectionnez la température appropriée en appuyant sur les boutons Haut ou Bas. (Température : 200~40 °C) Appuyez ensuite sur le bouton Select (Sélectionner) pour sélectionner la température. • Si la température n'est pas sélectionnée dans les 5 secondes, l'affiche passe automatiquement à l'étape de réglage du temps de cuisson. 5. Réglez le temps de cuisson en appuyant sur les boutons Haut ou Bas. • Le temps de cuisson maximal est de 60 minutes. UTILISATION DES FONCTIONS TURNTABLE MARCHE/ARRÊT DU PLATEAU Le bouton Turntable on/off (Marche/Arrêt du plateau) permet d'arrêter la rotation de celui-ci (uniquement en mode de cuisson manuel) afin que vous puissiez utiliser des plats de grande taille. Les résultats seront en revanche moins satisfaisants, car la cuisson ne sera pas totalement uniforme. Il est recommandé de faire tourner le plat d'un demi-tour plusieurs fois en cours de cuisson. Ne faites jamais tourner le plateau si le four est vide. AVERTISSEMENT Pourquoi ? Le four pourrait s'enflammer ou être gravement endommagé. 1. Appuyez sur le bouton Turntable on/off (Marche/Arrêt du plateau). Résultat : Le plateau ne tourne pas. Les indications suivantes s'affichent : Si vous souhaitez sélectionner un mode de cuisson combinée (micro-ondes et gril ou convection), utilisez uniquement des plats adaptés à la cuisson aux micro-ondes et au four traditionnel. 2. Pour réenclencher la rotation du plateau, appuyez de nouveau sur le bouton Turntable on/off (Marche/Arrêt du plateau). Résultat : Le plateau tourne. Pour de plus amples détails sur les ustensiles les plus adaptés, reportez-vous au guide des récipients en pages 30-31. Le bouton Turntable on/off (Marche/arrêt du plateau) est uniquement disponible en mode de cuisson manuelle. Français - 25 MC28H5015AW_SG_DE68-04234H-01_FR.indd 25 2014-03-21 �� 5:05:24 UTILISATION DE LA FONCTION DE CUISSON CROUSTILLANTE MANUELLE (MODÈLES MC28H5015C*, MC28H5015Z* UNIQUEMENT) Les fours micro-ondes traditionnels ne permettent généralement pas, en mode gril/ convection, de donner une consistance croustillante aux aliments (ex. : pâtisseries ou pizzas). Le plat croustilleur Samsung est parfaitement adapté à ce type de cuisson. Vous pouvez également l'utiliser pour faire cuire du lard, des œufs ou encore des saucisses. 8. Sélectionnez le temps de cuisson en appuyant sur les boutons Haut et Bas jusqu'à ce que le temps de cuisson approprié s'affiche. 9. Appuyez sur le bouton Start/+30s (Départ/+30s). Résultat : ou  Plat croustilleur Grille inférieure Grille supérieure 1. Faites préchauffer le plat croustilleur comme indiqué ci-dessus. 2. Pour faire cuire des aliments tels que du bacon ou des œufs, badigeonnez le plat d’huile afin de leur donner une jolie couleur dorée. 3. Disposez les aliments dans le plat croustilleur. 4. Posez le plat croustilleur sur la grille métallique (ou le plateau tournant) dans le micro-ondes. 5. Appuyez sur le bouton Combi (Cuisson combinée). Sélectionnez le mode Combi (Cuisson combinée) en appuyant sur les boutons Haut et Bas. Appuyez ensuite sur le bouton Select (Sélectionner). Cb - 1 Cb - 2 (Micro-ondes + Grill) (Micro-ondes + Convection) 6. Réglez la puissance appropriée en appuyant sur les boutons Haut ou Bas jusqu'à obtenir la puissance appropriée. Appuyez ensuite sur le bouton Select (Sélectionner) pour sélectionner la puissance. • Si la puissance n'est pas sélectionnée dans les 5 secondes, l'affiche passe automatiquement à l'étape de réglage du temps de cuisson. 7. Si vous utilisez le mode micro-ondes + convection, sélectionnez la température appropriée en appuyant sur les boutons Haut et Bas. Appuyez ensuite sur le bouton Select (Sélectionner) pour régler la température. • Si la puissance n'est pas sélectionnée dans les 5 secondes, l'affiche passe automatiquement à l'étape de réglage du temps de cuisson. (Par défaut : 180 °C) la cuisson démarre. • Lorsque la cuisson est terminée, un signal sonore retentit et le message « End » (Fin) clignote à quatre reprises. Le four émet ensuite un signal sonore toutes les minutes. Avant d'utiliser le plat croustilleur, faites-le préchauffer pendant 3 à 5 minutes en sélectionnant le mode combiné : • Combinaison de la cuisson par convection (200 °C) et de la cuisson par microondes. (puissance : 600 W) • Combinaison des modes Gril et Micro-ondes (puissance : 600 W) Utilisez toujours des maniques lorsque vous manipulez le plat croustilleur. Important : le plat croustilleur est recouvert d'une couche en Téflon non résistante aux rayures. N'utilisez pas d'objets tranchants (ex. : couteau) lorsque vous découpez les aliments directement dans le plat. Utilisez des accessoires en plastique afin d'éviter toute rayure ou retirez les aliments du plat avant de les découper. Ne posez aucun récipient non résistant à la chaleur sur le plat lorsque celui-ci est chaud (ex. : bols en plastique). Ne placez jamais le plat croustilleur dans le four sans le plateau tournant. Comment nettoyer le plat croustilleur ? Lavez le plat à l'eau chaude savonneuse et rincez-le à l'eau claire. N'utilisez ni grattoir ni éponge métallique ; ils risqueraient d'endommager le revêtement supérieur du plat. Remarque : le plat croustilleur ne peut pas être mis au lave-vaisselle. Français - 26 MC28H5015AW_SG_DE68-04234H-01_FR.indd 26 2014-03-21 �� 5:05:25 UTILISATION DE LA FONCTION MANUELLE DE CUISSON-VAPEUR (MODÈLES MC28H5015F*, MC28H5015Z* UNIQUEMENT) Lorsque le mode Cuisson vapeur pure est activé, utilisez le cuiseur-vapeur en plastique. Placez le cuiseur-vapeur en plastique au centre du plateau tournant, puis refermez la porte. RÉGLAGES DE LA CUISSON VAPEUR MANUELLE Type d'aliment Artichauts 1. Appuyez sur le bouton Microwave (Micro-ondes). 4. Appuyez sur le bouton Start/+30s (Départ/+30s). Résultat : la cuisson démarre. • Lorsque la cuisson est terminée, un signal sonore retentit et le message « End » (Fin) clignote à quatre reprises. Le four émet ensuite un signal sonore toutes les minutes. Conseil pour la cuisson à la vapeur Légumes frais Légumes surgelés Filets de poisson frais Éléments du cuiseur-vapeur Bol Plateau Couvercle Utilisation du cuiseur-vapeur + Bol + couvercle Blancs de poulet + Bol avec plateau + couvercle Français - 27 MC28H5015AW_SG_DE68-04234H-01_FR.indd 27 Puissance Temps (min) 300 g 900 W 5-6 (1 à 2 morceaux) Consignes Rincez et nettoyez les artichauts. Placez-les dans le bol. Ajoutez une cuillère à soupe de jus de citron. Couvrez. Laissez reposer 1 à 2 minutes. 300 g 900 W 4-5 Consignes Pesez les légumes (ex : brocolis, choux-fleurs, carottes, poivrons) après les avoir lavés, rincés et coupés en morceaux de même taille. Placez le panier dans le bol. Répartissez uniformément les légumes dans le panier. Ajoutez 2 cuillères à soupe d'eau. Couvrez. Laissez reposer 1 à 2 minutes. 300 g 600 W 7-8 Consignes Placez les légumes surgelés dans le panier et déposez ce dernier dans le bol. Ajoutez 1 cuillère à soupe d'eau. Couvrez. Remuez bien une fois la cuisson terminée et le temps de repos écoulé. Laissez reposer 2 à 3 minutes. 300 g 1ère étape : 900 W 1-2 2ème étape : 450 W 5-6 Consignes Rincez et préparez les filets de poisson (ex. : lieu, sébaste ou saumon). Arrosez de jus de citron. Placez le panier dans le bol. Déposez les filets côte à côte. Ajoutez 100 ml d'eau froide. Couvrez. Laissez reposer 1 à 2 minutes. 300 g 1ère étape : 900 W 1-2 2ème étape : 600 W 7-8 Consignes Rincez et préparez les blancs de poulet. Pratiquez 2 ou 3 incisions en surface à l'aide d'un couteau. Placez le panier dans le bol. Disposez les blancs de poulet côte à côte. Ajoutez 100 ml d'eau froide. Couvrez. Laissez reposer 1 à 2 minutes. (Suite) 04 UTILISATION DU FOUR 2. Appuyez sur les boutons Haut et Bas jusqu'à ce que la puissance appropriée soit affichée. Appuyez ensuite sur le bouton Select (Sélectionner) pour sélectionner la puissance. • Si la puissance n'est pas sélectionnée dans les 5 secondes, l'affiche passe automatiquement à l'étape de réglage du temps de cuisson. 3. Réglez le temps de cuisson en appuyant sur les boutons Haut et Bas. Quantité 2014-03-21 �� 5:05:25 Type d'aliment Riz Pommes de terre au four Plat mijoté (réfrigéré) Beignets surgelés à la confiture Compote de fruits Quantité Puissance Temps (min) 250 g 900 W 15-18 Consignes Placez du riz étuvé dans le bol. Ajoutez 500 ml d'eau froide. Couvrez. Après la cuisson, laissez reposer (riz blanc = 5 minutes, riz complet = 10 minutes). Laissez reposer 5 à 10 minutes. 500 g 900 W 7-8 Consignes Pesez et rincez les pommes de terre, puis placez-les dans le bol. Ajoutez 3 cuillères à soupe d'eau. Couvrez. Laissez reposer 2 à 3 minutes. 400 g 600 W 5-6 Consignes Placez le plat mijoté dans le bol. Couvrez. Remuez bien avant de laisser reposer. Laissez reposer 1 à 2 minutes. 150 g 600 W 1-2 Consignes Humectez la surface des beignets avec de l'eau froide. Placez 1 ou 2 beignets surgelés côte à côte dans le panier. Insérez le panier dans le bol. Couvrez. Laissez reposer 2 à 3 minutes. CUISSON AU TOURNEBROCHE (MODÈLE MC28H5015Z* UNIQUEMENT) La rôtissoire permet de préparer des grillades en toute simplicité, car elle vous évite d'avoir à retourner la viande. Elle peut être utilisée pour la cuisson combinée microondes et convection. Assurez-vous que le poids de la viande est réparti uniformément sur la broche et que cette dernière tourne uniformément. Les récipients étant très chauds, veillez à toujours porter des maniques lorsque vous devez les manipuler. 250 g 900 W 3-4 Consignes Pesez les fruits frais (ex : pommes, poires, prunes, abricots, mangues ou ananas) après les avoir pelés, lavés et coupés en morceaux ou cubes de même taille. Placez-les dans le bol. Ajoutez 1 à 2 cuillères à soupe d'eau et 1 à 2 cuillères à soupe de sucre. Couvrez. Laissez reposer 2 à 3 minutes. 1. Enfilez la pièce de viande en son milieu sur le tournebroche. Exemple : enfoncez le tournebroche entre la colonne vertébrale et la poitrine du poulet. Placez le tournebroche à la verticale dans la cocotte en verre avant de poser cette dernière sur le plateau. Pour que la viande prenne une belle couleur dorée, badigeonnez-la d'huile aromatisée. 2. Appuyez sur le bouton Combi (Cuisson combinée). Résultat : Les indications suivantes s'affichent : Cb - 1 (Micro-ondes + Grill) 3. Appuyez sur les boutons Haut ou Bas jusqu'à ce que l'affichage indique Cb - 2, puis appuyez sur le bouton Select (Sélectionner). Résultat : Les indications suivantes s'affichent : (mode combiné Micro-ondes et Convection) 600 W (puissance de sortie) 4. Réglez la puissance appropriée en appuyant sur les boutons Haut ou Bas jusqu'à ce que la puissance adéquate soit affichée (600, 450, 300, 180, 100 W). Appuyez ensuite sur le bouton Select (Sélectionner) pour sélectionner la puissance. • Si la puissance n'est pas sélectionnée dans les 5 secondes, l'affiche passe automatiquement à l'étape de réglage du temps de cuisson. (Par défaut : 180 C) Français - 28 MC28H5015AW_SG_DE68-04234H-01_FR.indd 28 2014-03-21 �� 5:05:26 UTILISATION DE LA MULTI-BROCHE À KEBAB 1. Pour préparer des kebabs à l'aide de la multi-broche, utilisez les 6 pics fournis avec votre four. 2. Enfilez la même quantité d’aliments sur chaque pic. 3. Placez le tournebroche dans la cocotte en verre et insérez la multi-broche à l’intérieur. 4. Placez la cocotte en verre avec la multi-broche au centre du plateau tournant. Vérifiez que l'élément chauffant du gril est situé dans le fond du four et non en haut avant de lancer la cuisson. RETRAIT DE LA MULTI-BROCHE APRÈS CUISSON 1. Assurez-vous de porter des maniques pour retirer la cocotte et la multibroche du four afin d'éviter toute brûlure. 2. Toujours muni de vos maniques, retirez la multi-broche de son support. 04 UTILISATION DU FOUR 5. Sélectionnez la température appropriée en appuyant sur les boutons Haut ou Bas. (Température : 200~40 °C) Appuyez ensuite sur le bouton Select (Sélectionner) pour sélectionner la température. • Si la température n'est pas sélectionnée dans les 5 secondes, l'affiche passe automatiquement à l'étape de réglage du temps de cuisson. 6. Réglez le temps de cuisson en appuyant sur les boutons Haut ou Bas. • Le temps de cuisson maximal est de 60 minutes. 7. Appuyez sur le bouton Start/+30s (Départ/+30s). Résultat : • La cuisson combinée démarre. • Le four est chauffé à la température appropriée, puis la cuisson aux microondes se poursuit jusqu'à la fin du temps de cuisson. • Lorsque la cuisson est terminée, un signal sonore retentit et le message « End » (Fin) clignote à quatre reprises. Le four émet ensuite un signal sonore toutes les minutes. • Une fois la viande cuite, retirez délicatement le tournebroche en portant des maniques. 3. Retirez soigneusement les pics un par un et détachez-en les aliments en vous aidant d'une fourchette. La multi-broche ne doit pas être passée au lave-vaisselle. Nettoyez-la à la main avec de l'eau chaude et du liquide-vaisselle. Retirez la multi-broche verticale du four après utilisation. UTILISATION DE LA MULTI-BROCHE VERTICALE MULTI-BROCHE À KEBAB Utilisez la multi-broche équipée de ses 6 pics à kebab afin de confectionner des préparations à base de viande, de volaille, de poisson ou de légumes (ex. : oignons, poivrons ou courgettes) ou de fruits coupés en morceaux. Pour faire cuire ce type d'aliment avec les pics, utilisez le mode Convection ou Combiné. Coupleur de rôtissoire kebab, brochette Multi-broche Rôtissoire Cocotte en verre Français - 29 MC28H5015AW_SG_DE68-04234H-01_FR.indd 29 2014-03-21 �� 5:05:26 UTILISATION DES FONCTIONS DE DÉSODORISATION Pour éliminer la fumée ou les odeurs de cuisson à l'intérieur du four, utilisez la fonction de désodorisation. Commencez par nettoyer l'intérieur du four. 1. Appuyez sur le Deodorisation (Désodorisation). Il démarre ensuite automatiquement, après avoir terminé le nettoyage. La durée de désodorisation est réglée par défaut sur 5 minutes. guide des récipients Pour faire cuire des aliments dans le four micro-ondes, il est nécessaire que les microondes pénètrent dans les aliments sans être réfléchies ou absorbées par le plat utilisé. Le choix du type de récipient est donc essentiel. Pour cela, assurez-vous que celui-ci présente une mention spécifiant qu'il convient à une cuisson aux micro-ondes (ex. : « adapté aux micro-ondes »). Le tableau suivant répertorie la liste des divers types de récipient ainsi que leur méthode d'utilisation dans un four micro-ondes. Vous pouvez également régler la durée de Deodorisation (Désodorisation) en appuyant sur le bouton Start/+30s (Départ/+30s). La durée maximale est fixée à 15 minutes. Récipient Adapté à la cuisson aux micro-ondes Papier aluminium ✓✗ Plat croustilleur Porcelaine et terre cuite ✓ ✓ Plats jetables en carton ou en polyester Emballages de fastfood ✓ • Tasses en polystyrène ✓ • Sacs en papier ou journal • Papier recyclé ou ornements métalliques ✗ Peuvent être utilisés pour faire réchauffer des aliments. Une température trop élevée peut faire fondre le polystyrène. Peuvent s'enflammer. ✗ Peuvent créer des arcs électriques. • Plat allant au four ✓ • Plats en cristal ✓ • Pots en verre ✓ Peuvent être utilisés sauf s'ils sont ornés de décorations métalliques. Peuvent être utilisés pour faire réchauffer des aliments ou des liquides. Les objets fragiles peuvent se briser ou se fendre s'ils sont brusquement soumis à une chaleur excessive. Retirez-en le couvercle. Pour faire réchauffer uniquement. ARRÊT DU SIGNAL SONORE Le signal sonore peut être désactivé à tout moment. 1. Appuyez simultanément sur les boutons Start/+30s (Départ/+30s) et Stop/Eco (Arrêt/Éco). (une seconde) Résultat : Le four n'émet plus de signal sonore à la fin d'une fonction. 2. Pour réactiver le signal sonore, appuyez à nouveau simultanément sur les boutons Start/+30s (Départ/+30s) et Stop/Eco (Arrêt/Éco). (une seconde) Résultat : Le four fonctionne normalement. Remarques Peut être utilisé en petite quantité afin d'empêcher toute surcuisson de certaines zones peu charnues. Des arcs électriques peuvent se former si l'aluminium est placé trop près des parois du four ou si vous en avez utilisé en trop grande quantité. Le temps de préchauffage ne doit pas excéder 8 minutes. S'ils ne comportent pas d'ornements métalliques, les récipients en céramique, en terre cuite, en faïence et en porcelaine sont généralement adaptés. Certains aliments surgelés sont emballés dans ce type de plat. Plats en verre Français - 30 MC28H5015AW_SG_DE68-04234H-01_FR.indd 30 2014-03-21 �� 5:05:29 guide de cuisson Récipient Adapté à la cuisson aux micro-ondes MICRO-ONDES Remarques Métal ✗ ✗ • Attaches métalliques des sacs de congélation Peuvent provoquer des arcs électriques ou s'enflammer. CUISSON Papier • Assiettes, tasses, serviettes de table et papier absorbant • Papier recyclé ✓ Pour des temps de cuisson courts ou de simples réchauffages. Pour absorber l'excès d'humidité. ✗ Peuvent créer des arcs électriques. • Récipients ✓ • Film étirable ✓ Tout particulièrement s'il s'agit de thermoplastique résistant à la chaleur. Certaines matières plastiques peuvent se voiler ou se décolorer lorsqu'elles sont soumises à des températures élevées. N'utilisez pas de plastique mélaminé. Peut être utilisé afin de retenir l'humidité. Ne doit pas entrer en contact avec les aliments. Soyez particulièrement vigilant lorsque vous retirez le film du récipient ; la vapeur s'échappant à ce moment est très chaude. Uniquement s'ils supportent la température d'ébullition ou s'ils sont adaptés à la cuisson au four. Ne doivent pas être fermés hermétiquement. Perforez-en la surface avec une fourchette si nécessaire. Peut être utilisé afin de retenir l'humidité et d'empêcher les projections. Plastique • Sacs de congélation ✓✗ Papier paraffiné ou sulfurisé ✓ : recommandé ✓ ✓✗ : à utiliser avec précaution ✗ : risqué Récipients utilisés pour la cuisson aux micro-ondes Pour une efficacité maximale, les récipients doivent laisser l'énergie des microondes les traverser. Les micro-ondes sont réfléchies par les métaux, tels que l'acier inoxydable, l'aluminium et le cuivre, mais peuvent traverser la céramique, le verre, la porcelaine, le plastique, le papier ou le bois. Les aliments ne doivent donc jamais être cuits dans des récipients métalliques. Aliments convenant à la cuisson par micro-ondes Une grande variété d'aliments convient à la cuisson par micro-ondes : les légumes frais ou surgelés, les fruits, les pâtes, le riz, le blé, les haricots, le poisson et la viande. Les sauces, les crèmes, les soupes, les desserts vapeur, les confitures et les condiments à base de fruits peuvent également être réchauffés dans un four micro-ondes. En résumé, la cuisson par micro-ondes convient à tout aliment habituellement préparé sur une table de cuisson classique (ex. : faire fondre du beurre ou du chocolat - voir le chapitre des conseils, techniques et astuces). Cuisson à couvert Il est très important de couvrir les aliments pendant la cuisson car l'évaporation de l'eau contribue au processus de cuisson. Vous pouvez les couvrir de différentes manières : avec une assiette en céramique, un couvercle en plastique ou un film plastique spécial micro-ondes. Temps de repos Il est important de respecter le temps de repos lorsque la cuisson est terminée afin de laisser la température s'homogénéiser à l'intérieur des aliments. 05 GUIDE DES RÉCIPIENTS • Plats Les micro-ondes sont d'abord attirées puis absorbées par l'eau, la graisse et le sucre contenus dans les aliments. En pénétrant dans les aliments, les micro-ondes provoquent une excitation des molécules. Cette agitation crée des mouvements de friction qui génèrent la chaleur nécessaire à la cuisson des aliments. Français - 31 MC28H5015AW_SG_DE68-04234H-01_FR.indd 31 2014-03-21 �� 5:05:29 Guide de cuisson pour les légumes surgelés Utilisez une cocotte en Pyrex avec couvercle adaptée à la cuisson au four. Couvrez le tout pendant la durée minimale de cuisson (reportez-vous au tableau). Poursuivez la cuisson selon votre goût. Remuez deux fois pendant la cuisson et une fois après. Ajoutez du sel, des herbes ou du beurre après la cuisson. Laissez reposer à couvert. Type d'aliment Épinards Brocolis Petits pois Haricots verts Jardinière de légumes (carottes/petits pois/maïs) Légumes variés (à la chinoise) Quantité Puissance Temps (min) 150 g 600 W 5-6 Consignes Ajoutez 15 ml (1 cuillère à soupe) d'eau froide. Servez après avoir laissé reposer 2 à 3 minutes. 300 g 600 W 8-9 Consignes Ajoutez 30 ml (2 cuillère à soupe) d'eau froide. Servez après avoir laissé reposer 2 à 3 minutes. 300 g 600 W 7-8 Consignes Ajoutez 15 ml (1 cuillère à soupe) d'eau froide. Servez après avoir laissé reposer 2 à 3 minutes. 300 g 600 W 7½-8½ Consignes Ajoutez 30 ml (2 cuillère à soupe) d'eau froide. Servez après avoir laissé reposer 2 à 3 minutes. 300 g 600 W 7-8 Consignes Ajoutez 15 ml (1 cuillère à soupe) d'eau froide. Servez après avoir laissé reposer 2 à 3 minutes. 300 g 600 W Guide de cuisson pour les légumes frais Utilisez une cocotte en Pyrex avec couvercle adaptée à la cuisson au four. Ajoutez 30 à 45 ml d'eau froide (2 à 3 cuillerées à soupe) par volume de 250 g, sauf si une autre quantité est recommandée (reportez-vous au tableau). Couvrez le tout pendant la durée minimale de cuisson (reportez-vous au tableau). Poursuivez la cuisson selon votre goût. Remuez une fois pendant et une fois après la cuisson. Ajoutez du sel, des herbes ou du beurre après la cuisson. Laissez reposer à couvert pendant 3 minutes. Conseil : coupez les légumes frais en morceaux de taille égale. Plus les morceaux seront petits, plus ils cuiront vite. Type d'aliment Brocolis Choux de Bruxelles Carottes Chou-fleur 7½-8½ Consignes Ajoutez 15 ml (1 cuillère à soupe) d'eau froide. Servez après avoir laissé reposer 2 à 3 minutes. Courgettes Quantité Puissance Temps (min) 250 g 500 g 900 W 4½-5 7-8 Consignes Préparez des sommités de taille égale. Disposez les brocolis en orientant les tiges vers le centre. Servez après avoir laissé reposer 3 minutes. 250 g 6-6½ 900 W Consignes Ajoutez 60 à 75 ml (5 à 6 cuillères à soupe) d'eau. Servez après avoir laissé reposer 3 minutes. 250 g 4½-5 900 W Consignes Coupez les carottes en rondelles de taille égale. Servez après avoir laissé reposer 3 minutes. 250 g 5-5½ 900 W 500 g 7½-8½ Consignes Préparez des sommités de taille égale. Coupez les plus gros morceaux en deux. Orientez les tiges vers le centre. Servez après avoir laissé reposer 3 minutes. 250 g 4-4½ 900 W Consignes Coupez les courgettes en rondelles. Ajoutez 30 ml (2 cuillères à soupe) d'eau ou une noix de beurre. Faites-les cuire jusqu'à ce qu'elles soient tendres. Servez après avoir laissé reposer 3 minutes. Français - 32 MC28H5015AW_SG_DE68-04234H-01_FR.indd 32 2014-03-21 �� 5:05:30 Guide de cuisson pour le riz et les pâtes Type d'aliment Aubergines Champignons Oignons Poivrons Pommes de terre Chou-rave Puissance Temps (min) 250 g 3½-4 900 W Consignes Coupez les aubergines en fines rondelles et arrosez-les d'un filet de jus de citron. Servez après avoir laissé reposer 3 minutes. 250 g 900 W 4-4½ Consignes Coupez les poireaux en épaisses rondelles. Servez après avoir laissé reposer 3 minutes. 125 g 900 W 1½-2 250 g 2½-3 Consignes Coupez les champignons en morceaux ou prenez des petits champignons entiers. N'ajoutez pas d'eau. Arrosez de jus de citron. Salez et poivrez. Égouttez avant de servir. Servez après avoir laissé reposer 3 minutes. 250 g 900 W 5-5½ Consignes Émincez les oignons ou coupez-les en deux. Ajoutez seulement 15 ml (1 cuillère à café) d'eau. Servez après avoir laissé reposer 3 minutes. 250 g 900 W 4½-5 Coupez les poivrons en fines lamelles. 250 g 900 W 4-5 500 g 7-8 Consignes Pesez les pommes de terre épluchées et coupez-les en deux ou quatre morceaux de taille égale. Servez après avoir laissé reposer 3 minutes. 250 g 900 W 5½-6 Consignes Coupez le chou-rave en petits dés. Servez après avoir laissé reposer 3 minutes. Riz : Pâtes : Type d'aliment Riz blanc (étuvé) Riz complet (étuvé) Riz mélangé (riz + riz sauvage) Céréales mélangées (riz + céréales) Pâtes Indomie utilisez une grande cocotte en Pyrex avec couvercle car le riz double de volume pendant la cuisson. Faites cuire à couvert. Une fois le temps de cuisson écoulé, remuez avant de laisser reposer puis salez ou ajoutez des herbes et du beurre. Remarque : il est possible que le riz n'ait pas absorbé toute la quantité d'eau une fois le temps de cuisson écoulé. utilisez une grande cocotte en Pyrex. Ajoutez de l'eau bouillante, une pincée de sel et remuez bien. Faites cuire sans couvrir. Remuez de temps en temps pendant et après la cuisson. Laissez reposer à couvert, puis égouttez soigneusement. Quantité Puissance Temps (min) 250 g 900 W 15-16 375 g 17½-18½ Consignes Ajoutez deux volumes d'eau froide. Servez après avoir laissé reposer 5 minutes. 250 g 900 W 20-21 375 g 22-23 Consignes Ajoutez deux volumes d'eau froide. Servez après avoir laissé reposer 5 minutes. 250 g 900 W 16-17 Consignes Ajoutez 500 ml d'eau froide. Servez après avoir laissé reposer 5 minutes. 250 g 900 W 17-18 Consignes Ajoutez 400 ml d'eau froide. Servez après avoir laissé reposer 5 minutes. 250 g 900 W 10-11 Consignes Ajoutez 1 litre d'eau chaude. Servez après avoir laissé reposer 5 minutes. 06 GUIDE DE CUISSON Poireaux Quantité 1 Petit emballage 900 W 7-7½ (80 g) 1 Grand emballage 9-9½ (120 g) Consignes Utilisez une cocotte en Pyrex. Mettez les nouilles et ajoutez 350 ml d’eau à température dans le bol. Cuisez en couvrant avec un film que vous percez plusieurs fois. Après la cuisson, videz l’eau et mélangez avec des épices indomie. Français - 33 MC28H5015AW_SG_DE68-04234H-01_FR.indd 33 2014-03-21 �� 5:05:30 FAIRE RÉCHAUFFER FAIRE RÉCHAUFFER DES ALIMENTS POUR BÉBÉ Votre four micro-ondes permet de faire réchauffer les aliments bien plus rapidement que le four traditionnel ou la table de cuisson. Reportez-vous aux puissances et temps de cuisson figurant dans le tableau ci-dessous. Le calcul des temps de réchauffage dans le tableau est basé sur une température ambiante comprise entre +18 et +20 °C pour les liquides et sur une température comprise entre +5 et +7 °C pour les aliments réfrigérés. ALIMENTS POUR BÉBÉ : Versez les aliments dans une assiette creuse en céramique. Recouvrez le récipient d'un couvercle en plastique. Remuez bien après le réchauffage ! Laissez reposer pendant 2 à 3 minutes avant de servir. Remuez de nouveau et vérifiez la température. Température de service recommandée : entre 30 et 40°C. LAIT POUR BÉBÉ : Versez le lait dans un biberon en verre stérilisé. Faites réchauffer sans couvrir. Ne faites jamais chauffer un biberon encore muni de sa tétine, car il pourrait exploser en cas de surchauffe. Secouez-le bien avant de le laisser reposer quelques instants, puis secouez-le à nouveau avant de servir. Vérifiez toujours la température du lait ou des aliments pour bébé avant de les servir. Température de service recommandée : env. 37 °C. Disposition et cuisson à couvert Évitez de faire réchauffer de trop grandes quantités d'aliments seul d'un coup (ex. : grosse pièce de viande) afin de garantir une cuisson uniforme et à cœur. Il vaut mieux faire réchauffer de petites quantités en plusieurs fois. Puissances et mélange Certains aliments peuvent être réchauffés à 900 W alors que d'autres doivent l'être à 600 W, 450 W ou même 300 W. Consultez les tableaux pour plus de renseignements. Pour faire réchauffer des aliments délicats, en grande quantité ou se réchauffant très rapidement (ex. : tartelettes), il est préférable d'utiliser une puissance faible. Remuez bien ou retournez les aliments pendant le réchauffage pour obtenir de meilleurs résultats. Si possible, remuez de nouveau avant de servir. Soyez particulièrement vigilant lorsque vous faites réchauffer des liquides ou des aliments pour bébé. Pour éviter toute projection bouillante de liquides et donc d'éventuelles brûlures, remuez avant, pendant et après la cuisson. Laissez-les reposer dans le four micro-ondes le temps recommandé. Nous vous conseillons de laisser une cuillère en plastique ou un bâtonnet en verre dans les liquides. Évitez de faire surchauffer les aliments (au risque de les détériorer). Il vaut mieux sous-estimer le temps de cuisson et rajouter quelques minutes supplémentaires le cas échéant. Temps de réchauffage et de repos Lorsque vous faites réchauffer un type d'aliment pour la première fois, notez le temps nécessaire pour pouvoir vous y référer ultérieurement. Vérifiez toujours que les aliments réchauffés sont uniformément chauds. Laissez les aliments reposer pendant un court laps de temps après le réchauffage pour que la température s'homogénéise. Le temps de repos recommandé après le réchauffage est généralement compris entre 2 et 4 minutes (à moins qu'un autre temps ne soit indiqué dans le tableau). Soyez particulièrement vigilant lorsque vous faites réchauffer des liquides ou des aliments pour bébé. Reportez-vous également au chapitre sur les consignes de sécurité. REMARQUE : Les aliments pour bébé doivent être soigneusement contrôlés avant d'être servis afin d'éviter toute brûlure. Reportez-vous aux puissances et temps de cuisson figurant dans le tableau suivant pour connaître les temps de chauffe adaptés à chaque type d'aliment. Faire réchauffer des liquides et des aliments Reportez-vous aux puissances et temps de cuisson figurant dans ce tableau pour connaître les temps de chauffe adaptés à chaque type d'aliment. Type d'aliment Quantité Puissance Temps (min) Boissons (café, thé et eau) 150 ml (1 tasse) 300 ml (2 tasses) 900 W 1-1½ 2-2½ Soupe (réfrigérée) FAIRE RÉCHAUFFER DES LIQUIDES Une fois le cycle terminé, laissez toujours reposer les liquides au moins 20 secondes à l'intérieur du four afin que la température s'homogénéise. Remuez SYSTÉMATIQUEMENT le contenu une fois le temps de cuisson écoulé (et pendant la cuisson si nécessaire). Pour éviter toute projection de liquide bouillant, et donc toute brûlure, placez une cuillère ou un bâtonnet en verre dans les boissons et remuez avant, pendant et après le réchauffage. 450 ml (3 tasses) 3-3½ 600 ml (4 tasses) 3½-4 Consignes Versez la boisson dans les tasses et faites réchauffer sans couvrir. Pour faire réchauffer une tasse, placez-la au centre, 2 tasses, placez-les l'une en face de l'autre et 3 tasses, disposez-les en cercle. Laissez-les reposer dans le four à micro-ondes le temps nécessaire et remuez bien. Servez après avoir laissé reposer 1 à 2 minutes. 250 g 900 W 2½-3 350 g 3-3½ 450 g 3½-4 550 g 4½-5 Consignes Versez la soupe dans une assiette creuse ou un bol en céramique. Recouvrez le récipient d'un couvercle en plastique. Remuez bien après le réchauffage. Remuez à nouveau avant de servir. Servez après avoir laissé reposer 2 à 3 minutes. Français - 34 MC28H5015AW_SG_DE68-04234H-01_FR.indd 34 2014-03-21 �� 5:05:30 Faire réchauffer des aliments et du lait pour bébé Type d'aliment Plat mijoté (réfrigéré) Pâtes farcies en sauce (réfrigérées) Plat préparé (réfrigéré) Fondue savoyarde prête à servir (réfrigérée) Puissance Temps (min) 350 g 600 W 4½-5½ Reportez-vous aux puissances et temps de cuisson figurant dans ce tableau pour connaître les temps de chauffe adaptés à chaque type d'aliment. Type d'aliment Consignes Placez le plat mijoté dans une assiette creuse en céramique. Recouvrez le récipient d'un couvercle en plastique. Remuez de temps à autre pendant le réchauffage et à nouveau avant de laisser reposer et servir. Servez après avoir laissé reposer 2 à 3 minutes. 350 g 600 W 3½-4½ Consignes Placez les pâtes (ex. : spaghetti ou pâtes aux œufs) dans une assiette plate en céramique. Recouvrez-les de film étirable spécial micro-ondes. Remuez avant de servir. Servez après avoir laissé reposer 3 minutes. 350 g 600 W 4-5 Consignes Mettez les pâtes farcies (ex. : ravioli, tortellini) dans une assiette creuse en céramique. Recouvrez le récipient d'un couvercle en plastique. Remuez de temps en temps pendant le réchauffage, puis de nouveau avant de laisser reposer et de servir. Servez après avoir laissé reposer 3 minutes. 350 g 600 W 4½-5 450 g 5½-6½ Consignes Placez le plat réfrigéré composé de 2 à 3 aliments sur une assiette en céramique. Recouvrez le tout de film étirable spécial micro-ondes. Servez après avoir laissé reposer 3 minutes. 400 g 600 W 6-7 Quantité Puissance Heure 190 g 600 W 30 s. Aliments pour bébé Consignes (légumes + Versez les aliments dans une assiette creuse en céramique. Faites viande) cuire à couvert. Remuez après la cuisson. Avant de servir, remuez bien et vérifiez la température. Servez après avoir laissé reposer 2 à 3 minutes. 190 g 600 W 20 s. Bouillie pour bébé (céréales Consignes + lait + fruits) Versez les aliments dans une assiette creuse en céramique. Faites cuire à couvert. Remuez après la cuisson. Avant de servir, remuez bien et vérifiez la température. Servez après avoir laissé reposer 2 à 3 minutes. 100 ml 300 W 30 à 40 s. Lait pour bébé 200 ml 1 min à 1 min 10 s. Consignes Remuez ou agitez bien avant de verser le tout dans un biberon en verre stérilisé. Placez le récipient au centre du plateau. Faites cuire le tout sans couvrir. Avant de servir, agitez bien et vérifiez la température. Servez après avoir laissé reposer 2 à 3 minutes. 06 GUIDE DE CUISSON Pâtes en sauce (réfrigérées) Quantité Consignes Mettez la fondue savoyarde prête à servir dans une cocotte en Pyrex de taille adéquate et couvrez. Remuez de temps en temps pendant et après le réchauffage. Remuez bien avant de servir. Servez après avoir laissé reposer 1 à 2 minutes. Français - 35 MC28H5015AW_SG_DE68-04234H-01_FR.indd 35 2014-03-21 �� 5:05:30 FAIRE DÉCONGELER Les micro-ondes constituent un excellent moyen de décongeler les aliments. Elles permettent de faire décongeler progressivement les aliments en un temps record. Cela peut se révéler fort utile si vous recevez du monde à l'improviste. La volaille doit être entièrement décongelée avant cuisson. Retirez toute attache métallique et tout emballage de la volaille afin de permettre au liquide produit pendant la décongélation de s'écouler. Placez les aliments congelés dans un plat sans couvrir. Retournez à la moitié du temps de décongélation, videz le liquide et retirez les abats dès que possible. Vérifiez les aliments de temps à autre afin de vous assurer qu'ils ne chauffent pas. Si les parties les plus fines des aliments commencent à cuire pendant la décongélation, protégez-les en les enveloppant de fines bandes d'aluminium. Si la volaille commence à cuire en surface, arrêtez la décongélation et laissez reposer pendant 20 minutes avant de la poursuivre. Laissez le poisson, la viande et la volaille reposer afin de compléter la phase de décongélation. Le temps de repos pour une décongélation complète dépend du poids de l'aliment. Reportez-vous au tableau ci-dessous. Conseil : les aliments fins se décongèlent mieux que les aliments plus épais et de petites quantités se décongèlent plus rapidement que des grandes. Tenez compte de cette différence pendant vos opérations de congélation et de décongélation des aliments. Pour faire décongeler des aliments dont la température est comprise entre -18 et -20°C, suivez les instructions figurant dans le tableau ci-contre. Type d'aliment Viande Viande hachée Escalopes de porc Volaille Morceaux de poulet Quantité Puissance Temps (min) 250 g 500 g 180 W 6-7 8-13 250 g 180 W 7-8 Consignes Placez la viande sur le plateau tournant. Protégez les parties les plus fines avec de l'aluminium. Retournez à la moitié du temps de décongélation. Servez après avoir laissé reposer 15 à 30 minutes. 500 g (2 morceaux). 180 W Type d'aliment Poulet entier Poisson Filets de poisson Poisson entier Fruits Baies Pain Petits pains (environ 50 g chacun) Tartine/Sandwich 14-15 Quantité Puissance Temps (min) 1200 g 180 W 32-34 Consignes Posez tout d'abord les morceaux de poulet côté peau vers le bas (ou côté poitrine vers le bas dans le cas d'un poulet entier) dans une assiette plate en céramique. Recouvrez les parties les plus fines (ex. : ailes et extrémités) d'aluminium. Retournez à la moitié du temps de décongélation. Servez après avoir laissé reposer 15 à 60 minutes. 200 g 180 W 6-7 400 g 180 W 11-13 Consignes Placez le poisson surgelé au centre d'une assiette plate en céramique. Glissez les parties les plus fines sous les plus épaisses. Recouvrez les extrémités les plus fines des filets et la queue du poisson entier d'aluminium. Retournez à la moitié du temps de décongélation. Servez après avoir laissé reposer 10 à 25 minutes. 300 g 180 W 6-7 Consignes Disposez les fruits dans un récipient rond en verre et à fond plat (de grand diamètre). Servez après avoir laissé reposer 5 à 10 minutes. 2 portions 4 portions 180 W 1-1½ 2½-3 250 g 180 W 4-4½ Consignes Disposez les petits pains en cercle (ou le pain entier à plat) sur du papier absorbant, au centre du plateau tournant. Retournez à la moitié du temps de décongélation. Servez après avoir laissé reposer 5 à 20 minutes. Français - 36 MC28H5015AW_SG_DE68-04234H-01_FR.indd 36 2014-03-21 �� 5:05:31 Guide de cuisson au gril pour aliments frais L'élément chauffant du gril est situé sous la paroi supérieure du four. Il fonctionne lorsque la porte est fermée et que le plateau tourne. La rotation du plateau permet de dorer uniformément les aliments. Le préchauffage du gril pendant 3 à 5 minutes permet de dorer les aliments plus rapidement. Ustensiles pour la cuisson au gril : Les ustensiles doivent résister aux flammes ; ils peuvent donc contenir du métal. N'utilisez pas d'ustensiles en plastique, car ils pourraient fondre. Aliments convenant à la cuisson au gril : Côtelettes, saucisses, steaks, hamburgers, tranches de bacon et de jambon fumé, filets de poisson, sandwiches et tous types de tartine garnie. Remarque importante : Lorsque seul le mode gril est utilisé, rappelez-vous que les aliments doivent être mis sur la grille supérieure, sauf indications contraires. Préchauffez le gril (fonction Gril) pendant 2 à 3 minutes. Reportez-vous aux puissances et aux temps de cuisson figurant dans ce tableau pour connaître les consignes relatives à la cuisson au gril. Utilisez des maniques pour sortir votre plat du four. Aliments frais Tartines grillées Tomates grillées MICRO-ONDES + GRIL Ce mode associe la chaleur rayonnante du gril à la vitesse de cuisson des microondes. Il fonctionne uniquement lorsque la porte est fermée et que le plateau tourne. La rotation du plateau permet de faire dorer les aliments uniformément. Trois modes de cuisson combinée sont disponibles sur ce modèle : 600 W + gril, 450 W + gril et 300 W + gril. Ustensiles pour la cuisson Micro-ondes + Gril Utilisez des ustensiles qui laissent passer les micro-ondes. Les ustensiles doivent résister aux flammes. N'utilisez pas d'ustensiles métalliques en mode combiné. N'utilisez pas d'ustensiles en plastique, car ils pourraient fondre. Aliments convenant à la cuisson Micro-ondes + Gril : Les aliments convenant à la cuisson combinée comprennent tous les types d'aliments cuits devant être réchauffés et dorés (ex. : pâtes cuites) ainsi que les aliments devant dorer en surface et donc nécessitant un temps de cuisson court. Ce mode peut également être utilisé pour des aliments plus épais qui gagnent en saveur lorsque leur surface est croustillante et dorée (ex. : morceaux de poulet à retourner à mi-cuisson). Reportez-vous au tableau relatif au gril pour de plus amples détails. Remarque importante : Lorsque vous utilisez le mode combiné (micro-ondes + gril), les aliments doivent être placés sur la grille supérieure, sauf indications contraires. Reportez-vous aux consignes du tableau suivant. Les aliments doivent être retournés à mi-cuisson pour être dorés des deux côtés. Tartine tomatefromage Tartine Hawaï (jambon, ananas, tranches de fromage) Pommes de terre au four Gratin de pommes de terre/légumes (réfrigéré) Quantité Puissance 1 étape (min.) 2 étape (min.) 4 portions gril seul 3-4 2-3 (25 g/tartine) Consignes Placez les tartines côte à côte sur la grille supérieure. 400 g 300 W + Gril 5-6 (2 morceaux). Consignes Coupez les tomates en deux. Parsemez-les d'un peu de fromage. Disposez-les en cercle dans un plat en Pyrex. Placez-les sur la grille supérieure. Laissez reposer 2 à 3 minutes. 4 morceaux 300 W + Gril 4-5 (300 g) Consignes Faites d'abord griller les tranches de pain. Placez la tartine garnie sur la grille supérieure. Laissez reposer 2 à 3 minutes. 4 morceaux 300 W + Gril 5-6 (500 g) Consignes Faites d'abord griller les tranches de pain. Placez la tartine garnie sur la grille supérieure. Laissez reposer 2 à 3 minutes. 500 g 600 W + Gril 7-8 Consignes Coupez les pommes de terre en deux. Disposez-les en cercle sur la grille supérieure, côté chair tourné vers le gril. 450 g 450 W + Gril 9-11 Consignes Mettez le gratin frais dans un petit plat en Pyrex. Placez le plat sur la grille supérieure. Laissez reposer 2 à 3 minutes une fois la cuisson terminée. 06 GUIDE DE CUISSON GRIL (Suite) Français - 37 MC28H5015AW_SG_DE68-04234H-01_FR.indd 37 2014-03-21 �� 5:05:31 CONVECTION Aliments frais Pommes au four Morceaux de poulet Poulet rôti Poisson grillé Plantain Yam Quantité Puissance 1 étape (min.) 2 étape (min.) 2 pommes 300 W + Gril 7-8 (environ 400 g) Consignes Retirez le cœur des pommes et farcissez-les de raisins secs et de confiture. Parsemez d'amandes effilées. Disposez les pommes dans un plat en Pyrex. Placez le plat directement sur la grille inférieure. 500 g 300 W + Gril 8-10 6-8 (2 morceaux). Consignes Badigeonnez les morceaux de poulet d’huile et d’épices. Disposez-les en cercle sur la grille supérieure. Laissez reposer 2 à 3 minutes après le passage sous le gril. 1200 g 450 W + Gril 18-19 17 Consignes Badigeonnez le poulet d’huile et d’épices. Placez le poulet sur la grille inférieure. Laissez reposer 5 minutes une fois la cuisson au gril terminée. 400 à 500 g 300 W + Gril 5-7 5½-6½ Consignes Badigeonnez le poisson d'huile, puis ajoutez des herbes et des épices. Placez deux poissons côte à côte (tête contre queue) sur la grille supérieure. Laissez reposer 2 à 3 minutes après le passage sous le gril. 1 pièce (200 g) 450 W + Gril 8½-9 Consignes Épluchez et coupez le plantain sur 1 cm d’épaisseur et placez-le sur le plat croustilleur avec la grille. Badigeonnez tous les côtés avec de l’huile. Si le plantain se ramollit, réduisez la durée sur 1 à 2 minutes. Laissez reposer 1 à 2 minutes. 200 g 600 W + Gril 9-9½ Consignes Épluchez et coupez le yam sur 1,5 cm d’épaisseur et placez-le sur le plat croustilleur avec la grille puis badigeonnez tous les côtés avec de l’huile. Posez-le sur la grille hauteur maxi. puis lancez la cuisson. Laissez reposer 1 à 2 minutes. La cuisson par convection est le mode de cuisson employé dans les fours traditionnels à air chaud. L'élément chauffant et le ventilateur sont situés sur la paroi du fond afin de permettre à l'air chaud de circuler. Ce mode est pris en charge par l'élément chauffant supérieur. Ustensiles pour la cuisson par convection : Tous les ustensiles, moules et plaques à pâtisserie que vous utilisez d'habitude dans un four à convection traditionnel peuvent être utilisés. Aliments convenant à la cuisson par convection : tous les biscuits, les petits pains et les gâteaux peuvent être cuits de cette manière ainsi que les gâteaux aux fruits, la pâte à choux et les soufflés. MICRO-ONDES + CONVECTION Ce mode associe l'énergie des micro-ondes à l'air chaud, ce qui réduit le temps de cuisson tout en donnant aux aliments un aspect doré et une surface croustillante. La cuisson par convection est le mode de cuisson employé dans les fours traditionnels à chaleur tournante munis d'un ventilateur sur la paroi du fond. Ustensiles pour la cuisson micro-ondes + convection : doivent laisser passer les micro-ondes, doivent être adaptés à la cuisson au four traditionnel (ex. : ustensiles en verre, terre cuite ou porcelaine sans ornements métalliques et décrits dans la cuisson micro-ondes + gril). Aliments convenant à la cuisson micro-ondes + convection : viandes, volailles ainsi que plats en cocotte et gratins, gâteaux de Savoie, gâteaux aux fruits, tartes, crumbles, légumes grillés, scones et pains. Français - 38 MC28H5015AW_SG_DE68-04234H-01_FR.indd 38 2014-03-21 �� 5:05:31 Guide de cuisson par convection pour les aliments frais et surgelés Faites préchauffer le four à convection à la température désirée à l'aide de la fonction de préchauffage automatique. Reportez-vous aux puissances et aux temps de cuisson figurant dans ce tableau pour connaître les instructions relatives à la cuisson par convection. Utilisez des maniques pour sortir votre plat du four. PIZZA Pizza surgelée (déjà cuite) Quantité Puissance 300 g 1 étape 300 W + 200 °C 2 étapes Gril 1 étape (min.) 2 étape (min.) 11-12 2-3 Pain à l'ail (réfrigéré, précuit) Consignes Placez la pizza sur la grille inférieure. Laissez reposer 2 à 3 minutes après la cuisson. PÂTES Lasagnes surgelées 400 g 1 étape 450 W + 200 °C 2 étapes Convection 200 °C 15-16 5-6 Consignes Placez-les dans un plat en Pyrex de taille adéquate ou laissez-les dans leur emballage d'origine (si celui-ci est conçu pour la cuisson aux micro-ondes et au four traditionnel). Placez le gratin de pâtes encore surgelé sur la grille hauteur mini. Laissez reposer 2 à 3 minutes une fois la cuisson terminée. VIANDE Rôti de bœuf/Rôti d'agneau (à point) Poulet rôti PAIN Petits pains frais 1200 à 1300 g 600 W + 180 °C 20-23 10-13 Consignes Badigeonnez le bœuf/l'agneau d'huile et saupoudrez de poivre, sel et paprika. Placez la viande sur la grille inférieure, côté gras vers le bas. Après la cuisson, recouvrez-la de papier d'aluminium et laissez reposer 10 à 15 minutes. 1000 à 1100 g 450 W + 200 °C 20-22 20 Consignes Badigeonnez le poulet d'huile et saupoudrez d'épices. Placez tout d'abord le poulet poitrine vers le bas, puis vers le haut sur la grille inférieure. Laissez reposer 5 minutes. GÂTEAU Gâteau marbré (pâte fraîche) Gâteaux de petite taille (pâte fraîche) Cookies (pâte fraîche) Gâteau surgelé Quantité Puissance 1 étape (min.) 2 étape (min.) 6 morceaux 100 W + 180 °C 8-10 (350 g) Consignes Disposez les petits pains en cercle sur la grille inférieure. Laissez reposer 2 à 3 minutes. 200 g (1) 180 W + 200 °C 8-10 Consignes Placez la baguette surgelée sur du papier sulfurisé sur la grille inférieure. Laissez reposer 2 à 3 minutes après la cuisson. 500 g 180 °C uniquement 38-43 Consignes Versez la pâte fraîche dans un petit moule rectangulaire en métal à revêtement noir de 25 cm. Placez le moule sur la grille inférieure. Laissez reposer 5 à 10 minutes après la cuisson. 10 x 28 g 160 °C uniquement 26-28 Consignes Remplissez les tasses en papier de pâte fraîche et posez-les sur la plaque à pâtisserie sur la grille hauteur mini. Laissez reposer 5 minutes après la cuisson. 200 à 250 g 200 °C uniquement 15-20 Consignes Placez les croissants surgelés sur du papier sulfurisé sur la grille inférieure. 1000 g 180 W + 180 °C 18-20 Consignes Placez le gâteau surgelé directement sur la grille inférieure. Une fois la décongélation et le préchauffage terminés, laissez reposer pendant 15 à 20 minutes. 06 GUIDE DE CUISSON Aliments frais Aliments frais Français - 39 MC28H5015AW_SG_DE68-04234H-01_FR.indd 39 2014-03-21 �� 5:05:31 TRUCS ET ASTUCES FAIRE FONDRE DU BEURRE Mettez 50 g de beurre dans un petit plat creux en verre. Recouvrez le récipient d'un couvercle en plastique. Faites chauffer pendant 30 à 40 secondes à 900 W jusqu'à ce que le beurre ait entièrement fondu. FAIRE FONDRE DU CHOCOLAT Mettez 100 g de chocolat dans un petit plat creux en verre. Faites chauffer pendant 3 à 5 minutes à 450 W jusqu'à ce que le chocolat ait entièrement fondu. Remuez une ou deux fois en cours de cuisson. Utilisez des maniques pour sortir le plat du four. FAIRE FONDRE DU MIEL CRISTALLISÉ Mettez 20 g de miel cristallisé dans un petit plat creux en verre. Faites chauffer pendant 20 à 30 secondes à 300 W jusqu'à ce que le miel ait entièrement fondu. FAIRE FONDRE DE LA GÉLATINE Faites tremper des feuilles de gélatine (10 g) pendant 5 minutes dans de l'eau froide. Placez la gélatine égouttée dans un petit bol en Pyrex. Faites chauffer pendant 1 minute à 300 W. Remuez une fois fondue. CONFECTIONNER UN GLAÇAGE (POUR GÂTEAUX) Mélangez le glaçage instantané (environ 14 g) avec 40 g de sucre et 250 ml d'eau froide. Faites cuire à découvert dans une cocotte en Pyrex pendant 3 minutes 30 à 4 minutes 30 à 900 W, jusqu'à ce que le glaçage devienne transparent. Remuez deux fois en cours de cuisson. FAIRE DE LA CONFITURE Mettez 600 g de fruits (ex. : mélange de fruits) dans une cocotte en Pyrex et couvrez. Ajoutez 300 g de sucre spécial confiture et remuez bien. Faites cuire à couvert pendant 10 à 12 minutes à 900 W. Remuez plusieurs fois en cours de cuisson. Videz directement dans de petits pots à confiture munis de couvercles quart de tour. Laissez reposer 5 minutes à couvert. FAIRE UN PUDDING Mélangez la préparation pour pudding avec du sucre et du lait (500 ml) en suivant les instructions du fabricant et remuez bien. Utilisez une cocotte en Pyrex de taille adaptée et munie d'un couvercle. Couvrez et faites cuire pendant 6 minutes 30 à 7 minutes 30 à 900 W. Remuez plusieurs fois en cours de cuisson. FAIRE DORER DES AMANDES EFFILÉES Disposez uniformément 30 g d'amandes effilées sur une assiette en céramique de taille moyenne. Remuez-les plusieurs fois pendant 3 minutes 30 à 4 minutes 30 à 600 W au cours du brunissage. Laissez reposer dans le four pendant 2 à 3 minutes. Utilisez des maniques pour sortir le plat du four. dépannage et code d'erreur DÉPANNAGE Si vous rencontrez l'un des problèmes décrits ci-dessous, essayez les solutions proposées. Ceci est tout à fait normal. • De la condensation se forme à l'intérieur du four. • De l'air circule autour de la porte et du four. • Un reflet lumineux apparaît autour de la porte et du four • De la vapeur s'échappe du pourtour de la porte ou par les orifices de ventilation. Le four ne démarre pas lorsque vous appuyez sur le bouton Start/+30s (Départ/+30s). • La porte est-elle bien fermée ? Les aliments ne sont pas du tout cuits. • Avez-vous réglé le temps de cuisson et/ou appuyé sur le bouton Start/+30s (Départ/+30s) ? • La porte est-elle bien fermée ? • L'alimentation secteur a-t-elle disjoncté ou le fusible a-t-il fondu à la suite d'une surcharge électrique ? Les aliments sont trop ou pas assez cuits. • Avez-vous indiqué un temps de cuisson adapté au type d'aliment ? • Avez-vous choisi la puissance appropriée ? L'ampoule ne fonctionne pas. • Vous ne devez pas remplacer vous-même l'ampoule pour des raisons de sécurité. Veuillez contacter le service d'assistance Samsung le plus proche afin qu'un ingénieur qualifié remplace l'ampoule. Le four provoque des interférences sur les radios ou les téléviseurs. • Ce phénomène, bien que modéré, peut en effet survenir lorsque le four fonctionne. Ceci est tout à fait normal. Pour remédier à ce problème, installez le four loin des téléviseurs, postes de radio ou antennes. • Si le microprocesseur du four détecte une interférence, l'afficheur peut être réinitialisé. Pour remédier à ce problème, déconnectez le cordon d'alimentation puis rebranchez-le. Réglez à nouveau l'horloge. Des étincelles et des craquements se produisent à l'intérieur du four (arcs électriques). • Avez-vous utilisé un plat comportant des ornements métalliques ? • Avez-vous laissé une fourchette ou un autre ustensile métallique dans le four ? • L'aluminium que vous avez utilisé se situe-t-il trop près des parois du four ? Français - 40 MC28H5015AW_SG_DE68-04234H-01_FR.indd 40 2014-03-21 �� 5:05:32 Contactez ensuite votre revendeur local ou le service après-vente SAMSUNG. CODE D'ERREUR Le message « SE » s'affiche. • Nettoyez les touches et assurez-vous de l'absence d'eau sur la surface entourant la touche. Éteignez le four à micro-ondes et réessayez. Si ce phénomène se poursuit, contactez votre service d'assistance clientèle SAMSUNG local. Le message « E-24 » s'affiche. • Le message « E - 24 » s'affiche automatiquement avant que le four à micro-ondes ne surchauffe. Si le message « E - 24 » s'affiche, appuyez sur la touche Stop/Eco (Arrêt/Éco) pour lancer le mode Initialisation. Une fois le four refroidi, tentez de le faire fonctionner. Si le message « E-24 » apparaît à nouveau, contactez votre service d'assistance clientèle SAMSUNG local. Si un code non répertorié ci-dessus s'affiche, ou si les solutions suggérées ne suffisent pas à résoudre le problème, contactez votre service d'assistance clientèle SAMSUNG local. caractéristiques techniques SAMSUNG s'efforce sans cesse d'améliorer ses produits. Les caractéristiques et le mode d'emploi de ce produit peuvent être modifiés sans préavis. Modèle Alimentation Consommation d'énergie Puissance maximale Micro-ondes Gril (élément chauffant) Convection (élément chauffant) MC28H5015** 230 V ~ 50 Hz CA 2900 W 1400 W 1500 W 2100 W maxi. Puissance de sortie 100 W/900 W - 6 niveaux (IEC-705) Fréquence de fonctionnement 2450 MHz Dimensions (L x P x H) Extérieures Intérieures Capacité Poids Net 517 x 474,8 x 310 mm 358 x 327 x 235,5 mm 28 litres 17,5 kg env. 07 DÉPANNAGE ET CARACTÉRISTIQUES TECHNIQUES De la fumée et des mauvaises odeurs apparaissent lors du fonctionnement initial. • C'est une condition temporaire lors du chauffage d'un nouveau composant. La fumée et les odeurs disparaissent complètement au bout de 10 minutes de fonctionnement. Pour éliminer les mauvaises odeurs plus rapidement, veuillez actionner le four micro-ondes en insérant un citron ou du jus de citron dans l'enceinte. Si le problème ne peut être résolu à l'aide des instructions ci-dessus, contactez votre service après-vente SAMSUNG. Munissez-vous des informations suivantes : • Les numéros de modèle et de série figurant normalement à l'arrière du four • Les détails concernant votre garantie • Une description claire du dysfonctionnement Français - 41 MC28H5015AW_SG_DE68-04234H-01_FR.indd 41 2014-03-21 �� 5:05:32 MÉMO MC28H5015AW_SG_DE68-04234H-01_FR.indd 42 MÉMO 2014-03-21 �� 5:05:32 MÉMO MC28H5015AW_SG_DE68-04234H-01_FR.indd 43 MÉMO 2014-03-21 �� 5:05:32 U.A.E OMAN KUWAIT BAHRAIN QATAR EGYPT ALGERIA PAKISTAN TUNISIA JORDAN SYRIA IRAN MOROCCO SAUDI ARABIA TURKEY NIGERIA GHANA Cote D’ Ivoire SENEGAL CAMEROON KENYA UGANDA TANZANIA RWANDA BURUNDI DRC SUDAN SOUTH AFRICA BOTSWANA NAMIBIA ZAMBIA MOZAMBIQUE 800-SAMSUNG (726-7864) 800-SAMSUNG(726-7864) 183-2255 (183-CALL) 8000-4726 800-2255 (800-CALL) 08000-726786 16580 021 36 11 00 0800-Samsung (72678) 80-1000-12 0800-22273 06 5777444 18252273 021-8255 080 100 2255 920021230 444 77 11 0800-726-7864 0800-10077 0302-200077 8000 0077 800-00-0077 7095-0077 0800 545 545 0800 300 300 0685 88 99 00 9999 200 499999 1969 0860 SAMSUNG (726 7864) 8007260000 08 197 267 864 0211 350370 847267864 / 827267864 www.samsung.com/ae/support (English) www.samsung.com/ae_ar/support (Arabic) www.samsung.com/eg/support www.samsung.com/n_africa/support www.samsung.com/pk/support www.samsung.com/n_africa/support www.samsung.com/Levant/support (English) www.samsung.com/iran/support www.samsung.com/n_africa/support www.samsung.com/sa/support www.samsung.com/sa_en/support (English) www.samsung.com/tr/support www.samsung.com/africa_en/support www.samsung.com/africa_fr/support www.samsung.com/support DE68-04234H-01 MC28H5015AW_SG_DE68-04234H-01_FR.indd 44 2014-03-21 �� 5:05:32 MC28H5015** Microwave Oven imagine the possibilities Thank you for purchasing this Samsung product. Owner’s instructions & Cooking guide Please be advised that the Samsung warranty does NOT cover service calls to explain product operation, correct improper installation, or perform normal cleaning or maintenance. This manual is made with 100 % recycled paper. MC28H5015AW_SG_DE68-04234H-01_EN.indd 1 2014-03-21 �� 10:38:48 contents safety information Safety information........................................................................................ 2 Quick look-up guide..................................................................................... 11 Oven features................................................................................................ 12 Oven........................................................................................................... 12 Control panel............................................................................................... 13 Accessories................................................................................................. 13 Oven use........................................................................................................ 14 How a microwave oven works..................................................................... 14 Checking that your oven is operating correctly............................................. 15 Setting the time........................................................................................... 15 Cooking/Reheating...................................................................................... 16 Power levels and time variations.................................................................. 16 Adjusting the cooking time.......................................................................... 16 Stopping the cooking.................................................................................. 17 Setting the energy save mode..................................................................... 17 Using the auto reheat/cook features............................................................ 17 Using the healthy cooking features.............................................................. 19 Using the dough proof/yogurt features........................................................ 21 Using the power defrost features................................................................. 22 Convection.................................................................................................. 23 Grilling......................................................................................................... 23 Combining microwave and grill.................................................................... 24 Combining microwave and convection........................................................ 24 Choosing the accessories........................................................................... 25 Using the child lock features........................................................................ 25 Using the turntable on/off features............................................................... 25 Using the manual crusty cook function (Only MC28H5015C*, MC28H5015Z* model use)....................................... 26 Using the steam cook function (Only MC28H5015F*, MC28H5015Z* model use)........................................ 27 Manual steam cook settings........................................................................ 27 Spit-roasting (Only MC28H5015Z* model use)............................................. 28 Using the vertical multi-spit.......................................................................... 29 Using the deodorisation features................................................................. 30 Switching the beeper off.............................................................................. 30 Cookware guide........................................................................................... 30 Cooking guide............................................................................................... 31 Troubleshooting and error code................................................................. 40 Troubleshooting........................................................................................... 40 Error code................................................................................................... 41 Technical specifications.............................................................................. 41 USING THIS INSTRUCTION BOOKLET You have just purchased a SAMSUNG microwave oven. Your Owner’s Instructions contain valuable information on cooking with your microwave oven: • Safety precautions • Suitable accessories and cookware • Useful cooking tips • Cooking tips LEGEND FOR SYMBOLS AND ICONS WARNING Hazards or unsafe practices that may result in severe personal injury or death. CAUTION Hazards or unsafe practices that may result in minor personal injury or property damage. Warning; Fire hazard Warning; Hot surface Warning; Electricity Warning; Explosive material Do NOT attempt. Do NOT touch. Do NOT disassemble. Follow directions explicitly. Unplug the power plug from the wall socket. Make sure the machine is grounded to prevent electric shock. Call the service center for help. Note Important English - 2 MC28H5015AW_SG_DE68-04234H-01_EN.indd 2 2014-03-21 �� 10:38:49 WARNING (Microwave function only) WARNING: If the door or door seals are damaged, the oven must not be operated until it has been repaired by a competent person. WARNING: It is hazardous for anyone other than a competent person to carry out any service or repair operation that involves the removal of a cover which gives protection against exposure to microwave energy. This appliance is intended to be used in household only. WARNING: Only allow children to use the oven without supervision when adequate instructions have been given so that the child is able to use the oven in a safe way and understands the hazards of improper use. WARNING: This appliance can be used by children aged from 8 years and above and persons with reduced physical, sensory or mental capabilities or lack of experience and knowledge if they have been given supervision or instruction concerning use of the appliance in a safe way and understand the hazards involved. Children shall not play with the appliance. Cleaning and user maintenance shall not be made by children unless they are aged from 8 years and above and supervised. Only use utensils that are suitable for use in microwave ovens. When heating food in plasitic or paper containers, keep an eye on the oven due to the possibility of ignitions. 01 SAFETY INFORMATION IMPORTANT SAFETY INSTRUCTIONS READ CAREFULLY AND KEEP FOR FUTURE REFERENCE. Make sure that these safety precautions are obeyed at all times. Before using the oven, confirm that the following instructions are followed. English - 3 MC28H5015AW_SG_DE68-04234H-01_EN.indd 3 2014-03-21 �� 10:38:49 The microwave oven is intended for heating food and beverages. Drying of food or clothing and heating of warming pads, slippers, sponges, damp cloth and similar may lead to risk of injury, ignition or fire. If smoke is emitted, switch off or unplug the appliance and keep the door closed in order to stifle any flames. WARNING: Microwave heating of beverages can result in delayed eruptive boiling, therefore care must be taken when handling the container. WARNING: The contents of feeding bottles and baby food jars shall be stirred or shaken and the temperature checked before consumption, in order to avoid burns. Eggs in their shell and whole hard-boiled eggs should not be heated in microwave ovens since they may explode, even after microwave heating has ended. The oven should be cleaned regularly and any food deposites removed. Failure to maintain the oven in a clean conditioin could lead to deterioration of the surface that could adversely affect the life of the appliance and possibly result in a hazardous situation. The appliance is not intended for installing in road vehicles, caravans and similar vehicles etc. This appliance is not intended for use by persons (including children) with reduced physical, sensory or mental capabilities, or lack of experience and knowledge, unless they have been given supervision or instruction concerning use of the appliance by a person responsible for their safety. Children should be supervised to ensure that they do not play with the appliance. If the supply cord is damaged, it must be replaced by the manufacturer, its service agent or similarly qualified persons in order to avoid a hazard. WARNING: Liquids or other foods must not be heated in sealed containers since they are liable to explode; English - 4 MC28H5015AW_SG_DE68-04234H-01_EN.indd 4 2014-03-21 �� 10:38:50 During use the appliance becomes hot. Care should be taken to avoid touching heating elements inside the oven. WARNING: Accessible parts may become hot during use. Young children should be kept away. A steam cleaner is not to be used. WARNING: Ensure that the appliance is switched off before replacing the lamp to avoid the possibility of electric shock. WARNING: The appliance and its accessible parts become hot during use. Care should be taken to avoid touching heating elements. Children less than 8 years of age shall be kept away unless continuously supervised. The temperature of accessible surfaces may be high when the appliance is operating. The door or the outer surface may get hot when the appliance is operating. Keep the appliance and its cord out of reach of children less than 8 years. WARNING (Oven function only) - Optional WARNING: When the appliance is operated in the combination mode, children should only use the oven under adult supervision due to the temperatures generated. 01 SAFETY INFORMATION The appliance should not be cleaned with a water jet. This oven should be positioned proper direction and height permitting easy access to cavity and control area. Before using the your oven first time, oven should be operated with the water during 10 minute and then used. If the oven generates a strange noise, a burning smell, or smoke is emitted, unplug the power plug immediately and contact your nearest service center. The microwave oven has to be positioned so that plug is accessible. The microwave oven is intended to be used on the counter or counter top use only, the microwave oven shall not be placed in a cabinet. English - 5 MC28H5015AW_SG_DE68-04234H-01_EN.indd 5 2014-03-21 �� 10:38:50 This appliance can be used by children aged from 8 years and above and persons with reduced physical, sensory or mental capabilities or lack of experience and knowledge if they have been given supervision or instruction concerning use of the appliance in a safe way and understand the hazards involved. Children shall not play with the appliance. Cleaning and user maintenance shall not be made by children without supervision. Do not use harsh abrasive cleaners or sharp metal scrapers to clean the oven door glass since they can scratch the surface, which may result in shattering of the glass. Appliances are not intended to be operated by means of an external timer or separate remote-control system. INSTALLING YOUR MICROWAVE OVEN Place the oven on a flat level surface 85 cm above the floor. The surface should be strong enough to safety bear the weight of the oven. 20 cm 10 cm 1.When you install your oven, above behind make sure there is adequate ventilation for your oven by 85 cm of 10 cm on leaving at least 10 cm (4 inches) the floor the side of space behind and, on the sides of the oven and 20 cm (8 inches) of space above. 2.Remove all packing materials inside the oven. 3.Install the roller ring and turntable. Check that the turntable rotates freely. (Turntable type model only) 4.This microwave oven has to be positioned so that plug is accessible. If the supply cord is damaged, it must be replaced by the manufacturer, its service agent or similarly qualified persons in order to avoid a hazard. For your personal safety, plug the cable into a proper AC earthed socket. English - 6 MC28H5015AW_SG_DE68-04234H-01_EN.indd 6 2014-03-21 �� 10:38:50 CLEANING YOUR MICROWAVE OVEN The following parts of your microwave oven should be cleaned regularly to prevent grease and food particles from building up: •Inside and outside surfaces •Door and door seals •Turntable and Roller rings (Turntable type model only) ALWAYS ensure that the door seals are clean and the door closes properly. Failure to maintain the oven in a clean condition could lead to deterioration of the surface that could adversely affect the life of the appliance and possibly result in a hazardous situation. 1.Clean the outside surfaces with a soft cloth and warm, soapy water. Rinse and dry. 2.Remove any splashes or stains on the inside surfaces of oven with a soapy cloth. Rinse and dry. 3.To loosen hardened food particles and remove smells, place a cup of diluted lemon juice in the oven and heat for ten minutes at maximum power. 4.Wash the dishwasher-safe plate whenever necessary. DO NOT spill water in the vents. NEVER use any abrasive products or chemical solvents. Take particular care when cleaning the door seals to ensure that no particles: •Accumulate •Prevent the door from closing correctly Clean the microwave oven cavity right after each use with a mild detergent solution, but let the microwave oven cool down before cleaning in order to avoid injury. 01 SAFETY INFORMATION Do not install the microwave oven in hot or damp surroundings like next to a traditional oven or radiator. The power supply specifications of the oven must be respected and any extension cable used must be of the same standard as the power cable supplied with the oven. Wipe the interior and the door seal with a damp cloth before using your microwave oven for the first time. English - 7 MC28H5015AW_SG_DE68-04234H-01_EN.indd 7 2014-03-21 �� 10:38:50 When cleaning the upper part inside the cavity, it will be convenient to turn heater downward by 45 ° and clean it. (Swing heater model only) STORING AND REPAIRING YOUR MICROWAVE OVEN A few simple precautions should be taken when storing or having your microwave oven serviced. The oven must not be used if the door or door seals are damaged: •Broken hinge •Deteriorated seals •Distorted or bent oven casing Only a qualified microwave service technician should perform repair NEVER remove the outer casing from the oven. If the oven is faulty and needs servicing or you are in doubt about its condition: •Unplug it from the wall socket •Contact the nearest after-sales service centre If you wish to store your oven away temporarily, choose a dry, dustfree place. Reason : Dust and damp may adversely affect the working parts in the oven. This microwave oven is not intended for commercial use. The Light bulb should not be replaced in person for safety reasons. Please contact nearest authorised Samsung customer care, to arrange for a qualified engineer to replace the bulb. WARNING Only qualified staff should be allowed to modify or repair the appliance. Do not heat liquids and other food in sealed containers for microwave function. For your safety, do not use high-pressure water cleaners or steam jet cleaners. Do not install this appliance; near heater, inflammable material; in a humid, oily or dusty location, in a location exposed to direct sunlight and water or where gas may leak; on un level ground. This appliance must be properly grounded in accordance with local and national codes. Remove all foreign substances such as dust or water from the power plug terminals and contact points using a dry cloth on a regular basis. English - 8 MC28H5015AW_SG_DE68-04234H-01_EN.indd 8 2014-03-21 �� 10:38:51 Do not pull or excessively bend or place heavy objecton the power cord. Do not pour or directly spray water onto the oven. In the event of a gas leak (such as propane gas, LP gas, etc.), ventilate immediately without touching the power plug. Do not place objects on the oven, inside or on the door of the oven. Do not touch the power plug with wet hands. Do not store flammable materials in the oven. Take special care when heating dishes or drinks that contain alcohol as alcohol vapours may contact a hot part of the oven. Do not turn the appliance off by unplugging the power plug while an operation is in progress. Do not insert fingers or foreign substances, If any foreign substance such as water has entered the appliance, unplug the power plug and contact your nearest service centre. Keep children away from the door when opening or closing it as they may bump themselves on the door or catch their fingers in the door. WARNING: Microwave heating of beverages can result in delayed eruptive boiling, therefore care must be taken when handling the container; To prevent this situation ALWAYS allow a standing time of at least 20 seconds after the oven has been switched off so that the temperature can equalize. Stir during heating, if necessary, and ALWAYS stir after heating. In the event of scalding, follow these FIRST AID instructions: Do not apply excessive pressure or impact to the appliance. Do not place the oven over a fragile object such as a sink or glass object. Do not use benzene, thinner, alcohol, steam cleaner or high pressure cleaner to clean the appliance. Ensure that the power voltage, frequency and current are the same as those of the product specifications. 01 SAFETY INFORMATION Do not spray volatile material such as insecticide onto the surface of the oven. • Immerse the scalded area in cold water for at least 10 minutes. • Cover with a clean, dry dressing. • Do not apply any creams, oils or lotions. Plug the power plug into the wall socket firmly. Do not use a multiple plug adapter, an extension cord or an electric transformer. Do not put the tray or rack in water shortly after cooking because it may cause breakage or damage of the tray or rack. Do not hook the power cord on a metal object, insert the power cord between the objects or behind the oven. Do not operate the microwave oven for deep fat frying because the oil temperature cannot be controlled. This could result in a sudden boil over of the hot liquid. Do not use a damaged power plug, damaged power cord or loose wall socket. When the power plug or power cord is damaged, contact your nearest service centre. English - 9 MC28H5015AW_SG_DE68-04234H-01_EN.indd 9 2014-03-21 �� 10:38:53 Do not operate the microwave oven when it is empty. The microwave oven will automatically shut down for 30 minutes for safety purposes. We recommend placing a glass of water inside the oven at all times to absorb microwave energy in case the microwave oven is started accidentally. CAUTION Only use utensils that are suitable for use in microwave ovens; DO NOT use any metallic containers, Dinnerware with gold or silver trimmings, Skewers, forks, etc. Remove wire twist ties from paper or plastic bags. Reason: Electric arcing or sparking may occur and may damage the oven. Install the oven in compliance with the clearances stated in this manual. (See installing your microwave oven.) Take care when connecting other electrical appliances to sockets near the oven. Do not use your microwave oven to dry papers or clothes. Use shorter times for smaller amounts of food to prevent overheating and burning food. PRECAUTIONS TO AVOID POSSIBLE EXPOSURE TO EXCESSIVE MICROWAVE ENERGY.(MICROWAVE FUNCTION ONLY) Do not immerse the power cable or power plug in water and keep the power cable away from heat. Failure to observe the following safety precautions may result in harmful exposure to microwave energy. (a) Under no circumstances should any attempt be made to operate the oven with the door open or to tamper with the safety interlocks (door latches) or to insert anything into the safety interlock holes. (b) Do NOT place any object between the oven door and front face or allow food or cleaner residues to accumulate on sealing surfaces. Ensure that the door and door sealing surfaces are kept clean by wiping after use first with a damp cloth and then with a soft dry cloth. (c) Do NOT operate the oven if it is damaged until it has been repaired by a qualified microwave service technician trained by the manufacturer. It is particularly important that the oven door closes properly and that there is no damage to the: (1) door (bent) (2) door hinges (broken or loose) (3) door seals and sealing surfaces (d) The oven should not be adjusted or repaired by anyone other than a properly qualified microwave service technician trained by the manufacturer. Eggs in their shell and whole hard-boiled eggs should not be heated in microwave ovens since they may explode, even after microwave heating has ended; Also do not heat airtight or vacuum-sealed bottles, jars, containers, nuts inshells, tomatoes etc. Do not cover the ventilation slots with cloth or paper. They may catch fire as hot air escapes from the oven. The oven may also overheat and switch itself off automatically, and will remain off until it cools sufficiently. Always use oven mitts when removing a dish from the oven to avoid unintentional burns. Stir liquids halfway during heating or after heating ends and allow the liquid stand at least 20 seconds after heating to prevent eruptive boiling. Stand at arms length from the oven when opening the door to avoid getting scalded by escaping hot air or steam. English - 10 MC28H5015AW_SG_DE68-04234H-01_EN.indd 10 2014-03-21 �� 10:38:54 quick look-up guide I want to cook some food. 1. Place the food in the oven. Press the Start/+30s button. Result: When cooking has finished, the oven will beep and flash “End” 4 times. The oven will then beep one time per minute. I want to add an extra 30 seconds. Press the Start/+30s button one or more times for each extra 30 seconds that you wish to add. By Pressing the Up and Down Button, You can set the time as you want. 02 QUICK LOOK-UP GUIDE Samsung will charge a repair fee for replacing an accessory or repairing a cosmetic defect if the damage to the unit and/or damage to or loss of the accessory was caused by the customer. Items this stipulation covers include: (a) A Dented, Scratched, or Broken Door, Handle, Out-Panel, or Control Panel. (b) A Broken or missing Tray, Guide Roller, Coupler, or Wire Rack. • Use this appliance only for its intended purpose as described in this instruction manual. Warnings and Important Safety Instructions in this manual do not cover all possible conditions and situations that may occur. It is your responsibility to use common sense, caution, and care when installing, maintaining, and operating your appliance. • Because these following operating instructions cover various models, the characteristics of your microwave oven may differ slightly from those described in this manual and not all warning signs may be applicable. If you have any questions or concerns, contact your nearest service centre or find help and information online at www.samsung.com. • This microwave oven is supposed for heating food. It is intended for domestic home-use only. Do not heat any type of textiles or cushions filled with grains, which could cause burns and fire. The manufacturer cannot be held liable for damage caused by improper or incorrect use of the appliance. • Failure to maintain the oven in a clean condition could lead to deterioration of the surface that could adversely affect the life of the appliance and possible result in a hazardous situation. English - 11 MC28H5015AW_SG_DE68-04234H-01_EN.indd 11 2014-03-21 �� 10:38:54 oven features I want to Power Defrost some food. 1. Press the Power Defrost button. OVEN 1 2 4 3 5 2. Set the cooking category by pressing the Up or Down button. Press the Select button to set desired. 3. Select the weight by pressing the Up or Down button as required. 4. Press the Start/+30s button. Result: Defrosting starts. • When cooking has finished, the oven will beep and flash “End” 4 times. The oven will then beep one time per minute. 6 7 8 9 10 11 1. DOOR HANDLE 7. TURNTABLE 2. DOOR 8. COUPLER 3. VENTILATION HOLES 9. ROLLER RING 4. HEATING ELEMENT 10.SAFETY INTERLOCK HOLES 5. LIGHT 11.CONTROL PANEL 6. DOOR LATCHES English - 12 MC28H5015AW_SG_DE68-04234H-01_EN.indd 12 2014-03-21 �� 10:38:55 CONTROL PANEL ACCESSORIES Depending on the model that you have purchased, you are supplied with several accessories that can be used in a variety of ways. 1. Roller ring, to be placed in the centre of the oven. Purpose: The roller ring supports the turntable. 3. High rack, Low rack, to be placed on the turntable. Purpose: The metal racks can be used to cook two dishes at the same time. A small dish may be placed on the turntable and a second dish on the rack. The metal racks can be used in grill, convection and combination cooking. 1. 2. 3. 4. 5. 6. 7. 8. AUTO REHEAT/COOK BUTTON HEALTHY COOKING BUTTON POWER DEFROST BUTTON DOUGH PROOF/YOGURT BUTTON CONVECTION BUTTON GRILL BUTTON MICROWAVE BUTTON COMBI BUTTON 03 OVEN FEATURES 2.Turntable, to be placed on the roller ring with the centre fitting on to the coupler. Purpose: The turntable serves as the main cooking surface; it can be easily removed for cleaning. 4. Crust plate, to be placed on the turntable. (Only MC28H5015C*, MC28H5015Z* Model use) Purpose: The crust plate is used to brown botton of food by using the microwave or grill combination cooking modes and to keep pastry and pizza dough crispy. 9. TURNTABLE ON/OFF BUTTON 10. DEODORISATION BUTTON 11. CLOCK BUTTON 12. SELECT BUTTON 13. DOWN BUTTON 14. UP BUTTON 15. STOP/ECO BUTTON 16. START/+30 BUTTON 5. Roasting spit, coupler barbecue and Skewer to be placed in the glass bowl. (Only MC28H5015Z* Model use) Purpose: The roasting spit is a convenient of barbecuing a chicken, as the meat does not have to be turned over. It can be used for grill combination cooking. (continued) English - 13 MC28H5015AW_SG_DE68-04234H-01_EN.indd 13 2014-03-21 �� 10:38:56 6. Steam cooker (Only MC28H5015F*, MC28H5015Z* Model use) Purpose: The plastic steam cooker when using power steam function. DO NOT operate the microwave oven without the roller ring and turntable. DO NOT operate the Grill, Convection and Combi mode with Steam cooker. Operation mode (Steam cooker) CAUTION MW O GRILL x COMBI x CONV oven use HOW A MICROWAVE OVEN WORKS Microwaves are high-frequency electromagnetic waves; the energy released enables food to be cooked or reheated without changing either the form or the colour. You can use your microwave oven to: • Defrost • Reheat • Cook Cooking principle. x 1. The microwaves generated by the magnetron reflected at cavity and are distributed uniformly as the food rotates on the turntable. The food is thus cooked evenly. • Never use this Pro Steamer with a different product or model. It may cause a fire or fatal damage to the product. • Do not use the Pro Steamer without water or food inside. When you use this Pro Steamer, pour at least 500 ml of water before use. If the amount of water is less than 500 ml, it may cause incomplete cooking, or may cause a fire or fatal damage to the product. • Caution must be taken when removing the container from inside the Pro Steamer after cooking, as it will be very hot. • Make sure you install the cover onto the Pro Steamer so that it fits into the Steam plate / Crusty plate. The eggs or the chestnuts would be explode without setting the steam cover and steam plate as instructed on the Instruction book. 2. The microwaves are absorbed by the food up to a depth of about 1 inch (2.5 cm). Cooking then continues as the heat is dissipated within the food. 3. Cooking times vary according to the container used and the properties of the food: • Quantity and density • Water content • Initial temperature (refrigerated or not) As the centre of the food is cooked by heat dissipation, cooking continues even when you have taken the food out of the oven. Standing times specified in recipes and in this booklet must therefore be respected to ensure: • Even cooking of the food right to the centre • The same temperature throughout the food. English - 14 MC28H5015AW_SG_DE68-04234H-01_EN.indd 14 2014-03-21 �� 10:38:57 SETTING THE TIME CHECKING THAT YOUR OVEN IS OPERATING CORRECTLY The following simple procedure enables you to check that your oven is working correctly at all times. If you are in doubt, refer to the section entitled “Troubleshooting” on the page 40-41. Press the Start/+30s button and set the time to 4 or 5 minutes, by pressing the Start/+30s button the appropriate number of times. Result:The oven heats the water for 4 or 5 minutes. The water should then be boiling. Do not forget to reset the clock when you switch to and from summer and winter time. 1. Press the Clock button. 04 OVEN USE The oven must be plugged into an appropriate wall socket. The turntable must be in position in the oven. If a power level other than the maximum (100 % - 900 W) is used, the water takes longer to boil. Open the oven door by pulling the handle on the right side of the door. Place a glass of water on the turntable. Close the door. Your microwave oven has an inbuilt clock. When power is supplied, “88:88” and then “12:00” is automatically displayed on the display. Please set the current time. The time can be displayed in either the 24-hour or 12-hour notation. You must set the clock: • When you first install your microwave oven • After a power failure 2. Press the Up or Down button to set time display type (12H or 24H). At that time, press the Select button to set the display type. 3. Press the Up or Down button to set the hour. 4. Press the Select button. 5. Press the Up or Down button to set the minute. 6. When the right time is displayed, press the Select button to start the clock. Result: The time is displayed whenever you are not using the microwave oven. English - 15 MC28H5015AW_SG_DE68-04234H-01_EN.indd 15 2014-03-21 �� 10:38:58 COOKING/REHEATING POWER LEVELS AND TIME VARIATIONS The following procedure explains how to cook or reheat food. The power level function enables you to adapt the amount of energy dissipated and thus the time required to cook or reheat your food, according to its type and quantity. You can choose between six power levels. ALWAYS check your cooking settings before leaving the oven unattended. Open the door. Place the food in the centre of the turntable. Close the door. Never switch the microwave oven on when it is empty. 1. Press the Microwave button. Result: The following indications are displayed: (microwave mode) 2. Press the Up or Down button until the appropriate power level is displayed. At that time, press the Select button to set the power level. • If don't set the power level within 5 seconds, Automatically changes to the cooking time setting stage. 3. Set the Cooking time by pressing the Up or Down button. Result: The cooking time is displayed. 4. Press the Start/+30s button. Result: The oven light comes on and the turntable starts rotating. Cooking starts and when it has finished: • The oven beep and flash “End” 4 times. The oven will then beep one time per minute. Power level Percentage Output HIGH MEDIUM HIGH MEDIUM MEDIUM LOW DEFROST LOW 100 % 67 % 50 % 33 % 20 % 11 % 900 W 600 W 450 W 300 W 180 W 100 W The cooking times given in recipes and in this booklet correspond to the specific power level indicated. If you select a... Then the cooking time must be... Higher power level Lower power level Decreased Increased ADJUSTING THE COOKING TIME You can adjust the cooking time by pressing the Start/+30s. • Check how cooking is progressing at any time simply by opening the door • Increase the remaining cooking time To adjust the cooking time of your food during cooking, press the Start/+30s button once for each 30 seconds that you wish to add. • Example: To add three minutes, press the Start/+30s button six times. To adjust the cooking time of press the UP and DOWN button that you wish to add. English - 16 MC28H5015AW_SG_DE68-04234H-01_EN.indd 16 2014-03-21 �� 10:38:58 STOPPING THE COOKING USING THE AUTO REHEAT/COOK FEATURES You can stop cooking at any time so that you can: • Check the food • Turn the food over or stir it • Leave it to stand The 10 Auto Reheat/Cook features include/provide pre-programmed cooking times. You do not need to set either the cooking times or the power level. You can adjust the size of the serving by pressing the Up or Down button. Use only recipients that are microwave-safe. Then... Temporarily Temporarily : Open the door or Press the stop button once. Result: Cooking stops. Completely Open the door. Place the food in the centre of the turntable. Close the door. To resume cooking, close the door again and press the Start/+30s button. Completely : Press the stop button once. Result: Cooking stops. If you wish to cancel the cooking settings, press the Stop/Eco button again. SETTING THE ENERGY SAVE MODE 1. Press the Auto Reheat/Cook button. 2. Press the Up and Down button to select Cook category. (1 : Auto Reheat, 2 : Auto Cook) 04 OVEN USE To stop the cooking... 3. Press the Select button. 4. Select the type of food that you are cooking by pressing the Up and Down button. Refer to the table on the following page for a description of the various pre-programmed settings. At that time, press the Select button to select the type of food. The oven has an energy save mode. • Press the Stop/Eco button. (During Standby mode.) Result : Display off. • To remove energy save mode, open the door or press the Stop/Eco button and then display shows current time. The oven is ready for use. Auto energy saving function If you do not select any function when appliance is in the middle of setting or operating with temporary stop condition, function is canceled and clock will be displayed after 25 minutes. Oven Lamp will be turned off after 5 minutes with door open condition. 5. Select the size of the serving by Press the Up and Down button. 6. Press the Start/+30s button. Result: The food is cooked according to the preprogrammed setting selected. • When cooking has finished, the oven will beep and flash “End” 4 times. The oven will then beep one time per minute. English - 17 MC28H5015AW_SG_DE68-04234H-01_EN.indd 17 2014-03-21 �� 10:38:59 The following table presents quantities and appropriate instructions for auto reheat and cook. Use oven gloves when taking out food. Code/Food 2-1 Broccoli Florets/ Fresh Vegetables 1. Auto Reheat Code/Food 2. Auto Cook Serving Size Instructions 1-1 Ready Meal (chilled) 300-350 g 400-450 g 1-2 Mini Ravioli (chilled) 200-250 g 300-350 g 1-3 Frozen Pizza 1-4 Frozen Pizza Snacks 1-5 Frozen Lasagne 300-350 g 400-450 g Put on a ceramic plate and cover with microwave cling film. This programme is suitable for meals consisting of 3 components (e.g. meat with sauce, vegetables and a side dish like potatoes, rice or pasta). Stand for 2-3 minutes. Put chilled ready mini ravioli in a microwave proof plastic dish in the centre of turntable. Pierce film of ready product or cover plastic dish with microwave cling film. Stir carefully before and after standing time. This programme is suitable for ravioli, as well as for noodles in sauce. Stand for 3 minutes. Put frozen pizza on the low rack. 1-6 Frozen Bread Rolls 100-150 g (2 pcs) 200-250 g (4 pcs) 300-350 g (6 pcs) 100-150 g 250-300 g Put frozen pizza snacks on the low rack. 400-450 g 600-650 g Put frozen lasagne into a suitable sized ovenproof dish. Put dish on low rack. Stand for 3-4 minutes. We recommend to preheat the oven to 180 °C for 5 minutes using the convection function. Put 2 to 6 frozen bread rolls (-18 °C) in a circle on the low rack. This program is suitable for small frozen bakery products as bread rolls, ciabatta rolls and small baguettes. Stand for 3-5 minutes. 2-2 Chicken Pieces 2-3 Roast Chicken 2-4 Muffins Serving Size Instructions 200-250 g 300-350 g 400-450 g Weigh the vegetables after washing, cleaning and cutting into similar size. Put them into a glass bowl with lid. Add 30 ml (2 tablespoons) water when cooking for 200-250 g, add 45 ml (3 tablespoons) for 300-450 g and add 60-75 ml (4 tablespoons) for 400-450 g. Stir after cooking. When cooking higher quantities stir once during cooking. Stand for 1-2 minutes. Brush the chicken pieces with oil and spice them with pepper, salt and paprika. Put them in a circle on the high rack with the skin-side down. Turnover, as soon as the beep sounds. Stand for 2 minutes. 300-400 g (1 pc) 500-600 g (2 pcs) 700-800 g (3 pcs) 1100-1150 g 1200-1250 g 250-300 g Brush chilled chicken with oil and spices. Put breast-side-down, in the middle of the low rack. Turnover, as soon as the oven beeps. Push start button to continue process. Stand for 5 minutes. Pour dough into 6-8 paper or silicone cups for muffins (each 45 g) and set on low rack. Start programme (oven is preheating). After beep sounds insert rack with food. English - 18 MC28H5015AW_SG_DE68-04234H-01_EN.indd 18 2014-03-21 �� 10:38:59 USING THE HEALTHY COOKING FEATURES The 15 Healthy Cooking features provide pre-programmed cooking times. You do not need to set either the cooking times or the power level. You can adjust the size of the serving by pressing the Up or Down button. The following table presents quantities and appropriate instructions about 15 preprogrammed cooking options. This is composed of Grain/Pasta, Vegetables and Poultry/ Fish. Use only recipients that are microwave-safe. Use oven gloves when taking out food. 1. Grain/Pasta 1. Press the Healthy cook button. Code/Food 2. Press the Up or Down button to select cook category. 3. Select the cook category by pressing the Select button. 4. Press the Up or Down button to select cook type. Serving Size Instructions 1-1 Brown Rice 150-200 g 200-250 g Use a large glass ovenware dish with lid. Add cold water of double quantity. Cook covered. Stir before standing time and add salt and herbs. Stand for 5-10 minutes. 1-2 Quinoa 150-200 g 200-250 g 1-3 Macaroni 100-150 g 200-250 g Use a large glass ovenware dish with lid. Add cold water of double quantity. Cook covered. Stir before standing time and add salt and herbs. Stand for 1-3 minutes. Use a large glass ovenware dish with lid. Add hot boiling water of 4 times, a pinch of salt and stir well. Cook uncovered. Stir before standing time and drain thoroughly afterwards. Stand for 1-3 minutes. 5. Select the cook type by pressing the Select button. 04 OVEN USE Open the door. Place the food in the centre of the turntable. Close the door. 6. Press the Up or Down button to select serving size. Refer to the table on the following page for a description of the various pre-programmed settings. 7. Press the Start/+30s button. Result: The food is cooked according to the preprogrammed setting selected. • When cooking has finished, the oven will beep and flash “End” 4 times. The oven will then beep one time per minute. English - 19 MC28H5015AW_SG_DE68-04234H-01_EN.indd 19 2014-03-21 �� 10:38:59 2. Vegetables Code/Food 2-1 Green Beans 3. Poultry/Fish Serving Size Instructions Code/Food Serving Size Instructions 200-250 g 300-350 g Rinse and clean green beans. Put them evenly into a glass bowl with lid. Add 30 ml (2 tablespoons) water when cooking for 200-250 g and add 45 ml (3 tablespoons) for 300-450 g. Put bowl in the centre of turntable. Cook covered. Stir after cooking. Stand for 1-2 minutes. Rinse and clean spinach. Put into a glass bowl with lid. Do not add water. Put bowl in the centre of turntable. Cook covered. Stir after cooking. Stand for 1-2 minutes. Wash and peel potatoes, cut into halves and put into a glass bowl with lid. Add 15-30 ml of water (1-2 tablespoons). Stir after cooking. When cooking higher quantities stir once during cooking. Stand for 3-5 minutes. Put the fresh potato gratin into a glass pyrex dish. Put the dish on the low rack. Stand for 2-3 minutes. Rinse and slice eggplants. Brush with oil and spices. Put slices evenly on the high rack. Turnover after beep sounds. Press start to continue (The oven keeps operating if you do not turnover). Stand for 1-2 minutes. Rinse and clean tomatoes. Cut them into halves and put in an ovenware dish. Add grated cheese on top. Put dish on the high rack. Stand for 1-2 minutes. 3-1 Chicken Breasts 300-350 g 400-450 g 3-2 Turkey Breasts 300-350 g 400-450 g Rinse chicken breast and put on a ceramic plate. Cover with microwave cling film and pierce film. Put dish on the turntable. Stand for 2 minutes. Rinse turkey breast and put on deep glass ovenware dish. Cover with microwave cling film and pierce film. Put dish on the turntable. Stand for 2 minutes. 3-3 Grilled Chicken Breasts 300-350 g 400-450 g Rinse chicken breast, marinate and put them on the high rack. Turnover as soon as the beep sounds. Stand for 2 minutes. 3-4 Grilled Fish Fillets 3-5 Grilled Salmon Steaks 3-6 Roast Fish 200-300 g 400-500 g Put fish fillets evenly on the high rack. Turnover as soon as the beep sounds. Stand for 1-2 minutes. 200-250 g 300-350 g Put fish steaks evenly on the high rack. Turnover as soon as the beep sounds. Stand for 2 minutes. 200-300 g 400-500 g Brush skin of whole fish (trout or gilthead) with oil and add herbs and spices. Put fish side by side, head to tail on the high rack. Turnover as soon as the beep sounds. Stand for 3 minutes. 2-2 Spinach 100-150 g 200-250 g 2-3 Peeled Potatoes 300-350 g 400-450 g 500-550 g 2-4 Potatoes Gratin 400-450 g 800-850 g 2-5 Grilled Eggplants 100-150 g 200-250 g 2-6 Grilled Tomatoes 400-450 g 600-650 g English - 20 MC28H5015AW_SG_DE68-04234H-01_EN.indd 20 2014-03-21 �� 10:38:59 USING THE DOUGH PROOF/YOGURT FEATURES The 5 Dough Proof/Yogurt features provide pre-programmed cooking times. You do not need to set either the cooking times or the power level. You can adjust the dough proof/yogurt category by pressing the Up or Down button after press the Dough Proof/ Yogurt button. First, place the food in the centre of the turntable and close the door. 2. Select the type of food that you are cooking by Up or Down button. No.1 is Dough Proof and No.2 is Homemade Yogurt. You have to choose the number that you want to use for cooking by pressing the Up or Down button. Refer to the table on the following page for a description of the various pre-programmed settings. At that time, press the Select button to select the type of food. 3. Select the food by pressing the Up or Down button. 1. Dough Proof Code/Food Serving Size 1-1 Pizza Dough 1-2 Cake Dough 1-3 Bread Dough 300-500 g Put dough in suitable sized bowl and set on the low rack. Cover with aluminium foil. Instructions 500-800 g Put dough in suitable sized bowl and set on the low rack. Cover with aluminium foil. 600-900 g Put dough in suitable sized bowl and set on the low rack. Cover with aluminium foil. 04 OVEN USE 1. Press the Dough Proof/Yogurt button. The following table presents how to use the auto programmes for rising yeast dough or homemade yogurt. 2. Homemade Yogurt Code/Food Serving Size Instructions 2-1 Small Cups 500 g 2-2 Large Bowl 500 g Distribute 150 g natural yogurt into 5 ceramic cups or small glass jars evenly (30 g each). Add 100 ml milk into each cup. Use long-life milk (room-temperature; 3,5 % fat). Cover each with cling film and set in a circle on turntable. After finish, keep 6 hours in a refrigerator. For the first time we recommend to use dried yoghurt bacteria ferment. Mix 150 g natural yogurt with 500 ml long-life milk (room-temperature; 3,5 % fat). Pour evenly into large glass bowl. Cover with cling film and set on turntable. After finish, keep 6 hours in a refrigerator. For the first time we recommend to use dried yoghurt bacteria ferment. 4. Press the Start/+30s button. Turntable is not operating during yogurt cooking. English - 21 MC28H5015AW_SG_DE68-04234H-01_EN.indd 21 2014-03-21 �� 10:38:59 USING THE POWER DEFROST FEATURES The 5 Power Defrost feature enables you to defrost meat, poultry, fish, bread, cake and fruit. The defrost time and power level are set automatically. You simply select the programme and the weight. Use only containers that are microwave-safe. Open the door. Place the frozen food on a ceramic in the centre of the turntable. Close the door. 1. Press the Power Defrost button. 2. Select the type of food that you are cooking by pressing the Up or Down button. Refer to the table on the following page for a description of the various pre-programmed settings. At that time, press the Select button to select the type of food. 3. Select the size of the serving by pressing the Up or Down button. 4. Press the Start/+30s button. Result: • Defrosting begins. • The oven beeps through defrosting to remind you to turn the food over. (except fruit) 5. If oven will beep and operate stop, must turn the food over (ex: Meat, Poultry, Fish). And press the Start/+30s button again to finish defrosting. Result: When cooking has finished, the oven will beep and flash “End” 4 times. The oven will then beep one time per minute. The following table presents the various Power Defrost programmes, quantities and appropriate instructions. Remove all kind of package material before defrosting. Place meat, poultry and fish on a flat glass plate or on a ceramic plate, arrange bread and cake on kitchen paper. Serving Size Instructions 1 Meat Code/Food 200-1500 g 2 Poultry 200-1500 g 3 Fish 200-1500 g 4 Bread/Cake 125-1000 g 5 Fruit 100-600 g Shield the edges with aluminium foil. Turn the meat over, when the oven beeps. This programme is suitable for beef, lamb, pork, steaks, chops, minced meat. Stand for 20-90 minutes. Shield the leg and wing tips with aluminium foil. Turn the poultry over, when the oven beeps. This programme is suitable for whole chicken as well as for chicken portions. Stand for 20-90 minutes. Shield the tail of a whole fish with aluminium foil. Turn the fish over, when the oven beeps. This programme is suitable for whole fishes as well as for fish fillets. Stand for 20-80 minutes. Put bread horizontally on a piece of kitchen paper and turn over, as soon as the oven beeps. Place cake on a ceramic plate and if possible, turn over, as soon as the oven beeps. (Oven keeps operating and is stopped, when you open the door.) This programme is suitable for all kinds of bread, sliced or whole, as well as for bread rolls and baguettes. Arrange bread rolls in a circle. This programme is suitable for all kinds of yeast cake, biscuit, cheese cake and puff pastry. It is not suitable for short/crust pastry, fruit and cream cakes as well as for cake with chocolate topping. Stand for 10-60 minutes. Spread fruits evenly into a flat glass dish. This programme is suitable for all kind of fruits. Stand for 5-20 minutes. English - 22 MC28H5015AW_SG_DE68-04234H-01_EN.indd 22 2014-03-21 �� 10:39:00 GRILLING The convection mode enables you to cook food in the same way as in a traditional oven. The microwave mode is not used. You can set the temperature, as required, in a range varying from 40 °C to 200 °C. The maximum cooking time is 60 minutes. • Always use oven gloves when touching the recipients in the oven, as they will be very hot. • You can get better cooking and browning, if you use the low rack. Check that the heating element is in the horizontal position. Open the door and place the recipient on the low rack and set on turntable. The grill enables you to heat and brown food quickly, without using microwaves. • Always use oven gloves when touching the recipients in the oven, as they will be very hot. • You can get better cooking and grilling results, if you use the high rack. 1. Press the Convection button. Result: The following indications are displayed: 180 °C 1. Open the door and place the food on the rack. 2. Press the Grill button. Result: The following indications are displayed: (grill mode) • You cannot set the temperature of the grill. (convection mode) (temperature) 2. Set the temperature by pressing the Up or Down button. (Temperature : 40~200 °C, 10 °C interval) • If don't set the temperature within 5 seconds, Automatically changes to the cooking time setting stage. 3. Press the Select button. 4. Set the cooking time by pressing the Up or Down button. (If you want to preheat the oven, omit this step.) 04 OVEN USE CONVECTION 3. Set the grilling time by pressing the Up or Down button. • The maximum grilling time is 60 minutes. 4. Press the Start/+30s button. Result: Grilling starts. • When cooking has finished, the oven will beep and flash “End” 4 times. The oven will then beep one time per minute. 5. Press the Start/+30s button. Result: Cooking starts. • When cooking has finished, the oven will beep and flash “End” 4 times. The oven will then beep one time per minute. English - 23 MC28H5015AW_SG_DE68-04234H-01_EN.indd 23 2014-03-21 �� 10:39:01 COMBINING MICROWAVE AND GRILL COMBINING MICROWAVE AND CONVECTION You can also combine microwave cooking with the grill, to cook quickly and brown at the same time. ALWAYS use microwave-safe and oven-proof cookware. Glass or ceramic dishes are ideal as they allow the microwaves to penetrate the food evenly. ALWAYS use oven gloves when touching the recipients in the oven, as they will be very hot. You can improve cooking and grilling, if you use the high rack. Open the door. Place the food on the rack best suited to the type of food to be cooked. Place the rack on the turntable. Close the door. Combination cooking uses both microwave energy and convection heating. No preheating is required as the microwave energy is immediately available. Many foods can be cooked in combination mode, particularly: • Roast meats and poultry • Pies and cakes • Egg and cheese dishes 1. Press the Combi button. Result: The following indications are displayed: Cb - 1 (Microwave + Grill) Open the door. Place the food on the turntable or on the low rack which should then be placed on the turntable. Close the door. The heating element must be in the horizontal position. 2. Make the display indicating Cb - 1 by pressing the Up or Down button, and then press the Select button. Result: The following indications are displayed: 600 W ALWAYS use microwave-safe and oven-proof cookware. Glass or ceramic dishes are ideal as they allow the microwaves to penetrate the food evenly. ALWAYS use oven gloves when touching the recipients in the oven, as they will be very hot. You can get better cooking and browning, if you use the low rack. (microwave & grill combi mode) (output power) 3. Select the appropriate power level by pressing the Up or Down button until the corresponding output power is displayed (600, 450, 300 W). At that time, press the Select button to set the power level. • You cannot set the temperature of the grill. • If don't set the power level within 5 seconds, Automatically changes to the cooking time setting stage. 4. Set the cooking time by pressing the Up or Down button. • The maximum cooking time is 60 minutes. 5. Press the Start/+30s button. Result: • Combination cooking starts. • When cooking has finished, the oven will beep and flash “End” 4 times. The oven will then beep one time per minute. 1. Press the Combi button. Result: The following indications are displayed: Cb - 1 (Microwave + Grill) 2. Make the display indicating Cb - 2 by pressing the Up or Down button, and then press the Select button. Result: The following indications are displayed: 600 W (microwave & convection combi mode) (output power) 3. Select the appropriate power level by pressing the Up or Down button until the corresponding output power is displayed (600, 450, 300, 180, 100 W). At that time, press the Select button to set the power level. • If don't set the power level within 5 seconds, Automatically changes to the cooking time setting stage. (Default: 180 °C ) English - 24 MC28H5015AW_SG_DE68-04234H-01_EN.indd 24 2014-03-21 �� 10:39:01 USING THE CHILD LOCK FEATURES Your microwave oven is fitted with a special child lock programme, which enables the oven to be “locked” so that children or anyone unfamiliar with it cannot operate it accidentally. 1. Press the Up and Down button at the same time. (Three second) Result : • The oven is locked (no functions can be selected). • The display shows “L”. 5. Set the cooking time by pressing the Up or Down button. • The maximum cooking time is 60 minutes. 6. Press the Start/+30s button. Result: • Combination cooking starts. • The oven is heated to the required temperature and then microwave cooking continues until the cooking time is over. • When cooking has finished, the oven will beep and flash “End” 4 times. The oven will then beep one time per minute. 2. To unlock the oven, press the Up and Down button at the same time. (Three second) Result : The oven can be used normally. USING THE TURNTABLE ON/OFF FEATURES The Turntable on/off button enables you to use large dishes which fill the whole oven by stopping the turntable from rotating (only manual cooking mode). CHOOSING THE ACCESSORIES Traditional convection cooking does require cookware. You should, however, use only cookware that you would use in your normal oven. 04 OVEN USE 4. Select the appropriate temperature by pressing the Up or Down button. (Temperature : 200~40 °C) At that time, press the Select button to set the temperature. • If don't set the temperature within 5 seconds, Automatically changes to the cooking time setting stage. The results will be less satisfactory in this case as the cooking is less even. We recommend that you turn the dish by hand halfway through the cooking process. WARNING Microwave-safe containers are not usually suitable for convection cooking; don’t use plastic containers, dishes, paper cups, towels, etc. If you wish to select a combined cooking mode (microwave and grill or convection), use only recipients that are microwave-safe and oven-proof. For further details on suitable cookware and utensils, refer to the Cookware Guide on page 30-31. Never operate the turntable without food in the oven. Reason: This may cause fire or damage to the unit. 1. Press the Turntable on/off button. Result: The turntable will not rotate. The following indications are displayed: 2. To switch the turntable rotating back on, press the Turntable on/off button again. Result: The turntable will rotate. This Turntable on/off button is available only during manual cooking mode. English - 25 MC28H5015AW_SG_DE68-04234H-01_EN.indd 25 2014-03-21 �� 10:39:02 USING THE MANUAL CRUSTY COOK FUNCTION (ONLY MC28H5015C*, MC28H5015Z* MODEL USE) Normally when cooking in microwave oven, using grill or microwave mode in grill/ convection ovens, foods like pastries and pizza become soggy from button side. Using the Samsung Crusty plate helps to gain a crispy cookde result of your food. The crusty plate can also be used for bacon, eggs, sausages, etc. or Crusty plate Low rack High rack 8. Select the cooking time by press Up and Down button until the appropriate cooking time is displayed. 9. Press the Start/+30s button. Result: Cooking starts. • When cooking has finished, the oven will beep and flash “End” four times. The oven will then beep one time per minute. Before using the crusty plate, preheat it by selecting the combination mode for 3 to 5 minutes: 1. Preheat the crusty plate, as described above. 2. Brush the plate with oil if you are cooking food, such as bacon and eggs, in order to brown the food nicel. • Combination of convection (200 ºC) and microwaves. (600 W power level) • Combination of grill and microwaves. (600 W power level) 3. Place the food on the crusty plate. 4. Place the crusty plate on the metal rack (or turntable) in the microwave. 5. Press the Combi Button. Select the combi mode by pressing Up and Down button. After then Press the Select button. Cb - 1 (Microwave + Grill) Cb - 2 (Microwave + Convection) 6. Select the appropriate power level by pressing the Up or Down button until the appropriate output power. At that time, press the Select button to set the power level. • If don't set the power level within 5 seconds, Automatically changes to the cooking time setting stage. 7. If use the MW+Convection mode, select the appropriate temperature by pressing the Up and Down button. At that time, press the Select button to set temperature. • If don't set the power level within 5 seconds, Automatically changes to the cooking time setting stage. (Default: 180 °C ) Use oven gloves at all times as the crusty plate will become very hot. Please note that the crusty plate has a teflon layer which is not scratch-resistant. Do not use any sharp objects like a knife to cut on the crusty plate. Use plastic accessories to avoid scratches on the surface of the crusty plate or remove the food from the plate before cutting. Do not place any recipients on the crusty plate that are not heat-resistant (plastic bowls for example). Never place the crusty plate in the oven without the turntable. How to clean the Crusty Plate Clean the crusty plate with warm water and detergent and rinse off with clean water. Do not use a scrubbing brush or a hard sponge otherwise the top layer will be damaged. Please note The crusty plate is not dishwasher-safe. English - 26 MC28H5015AW_SG_DE68-04234H-01_EN.indd 26 2014-03-21 �� 10:39:02 USING THE STEAM COOK FUNCTION (ONLY MC28H5015F*, MC28H5015Z* MODEL USE) MANUAL STEAM COOK SETTINGS Use the plastic steam cooker when using pure steam function. First, place the plastic steam cooker in the center of the turntable and close the door. Food Artichokes 2. Press the Up and Down button to desired until the appropriate power level is displayed. At that time, press the Select button to set the power level. • If don't set the power level within 5 seconds, Automatically changes to the cooking time setting stage. Fresh Vegetables 3. Set the cooking time by pressing Up and Down button. Frozen Vegetables 4. Press the Start/+30s button. Result: Cooking starts. • When cooking has finished, the oven will beep and flash “End” four times. The oven will then beep one time per minute. Fresh Fish Fillets Steam cooking hint Components of steam cooker Chicken Breast Bowl Insert tray Lid Handling of steam cooker + Bowl + Lid + Power Time (min.) 04 OVEN USE 1. Press the Microwave button. Serving Size 300 g (1-2 pcs) 900 W 5-6 Instructions Rinse and clean artichokes. Put into bowl. Add one tablespoon lemon juice. Cover with lid. Stand for 1-2 minutes. 300 g 900 W 4-5 Instructions Weigh the vegetables (e.g. broccoli florets, cauliflower florets, carrots, pepper) after washing, cleaning and cutting into similar size. Put basket into bowl. Distribute vegetables in basket. Add 2 tablespoons water. Cover with lid. Stand for 1-2 minutes. 300 g 600 W 7-8 Instructions Put the frozen vegetables into the basket in bowl. Add 1 tablespoon water. Cover wit lid. Stir well after cooking and standing. Stand for 2-3 minutes. 300 g 1st stage: 900 W 1-2 2nd stage: 450 W 5-6 Instructions Rinse and prepare fish fillets, such as Pollack, rose fish or salmon. Sprinkle with lemon juice. Put basket into bowl. Add fillets side by side. Add 100 ml cold water. Cover with lid. Stand for 1-2 minutes. 300 g 1st stage: 900 W 1-2 2nd stage: 600 W 7-8 Instructions Rinse and chicken breasts. Cut surface 2-3 times with a knife. Put basket into bowl. Add chicken breasts side by side. Add 100 ml cold water. Cover with lid. Stand for 1-2 minutes. (continued) Bowl with insert tray + Lid English - 27 MC28H5015AW_SG_DE68-04234H-01_EN.indd 27 2014-03-21 �� 10:39:03 SPIT-ROASTING (ONLY MC28H5015Z* MODEL USE) Food Rice Jacket Potatoes Stew (chilled) Frozen Yeast Dumpling with Jam Filling Fruit Compote Serving Size Power Time (min.) 250 g 900 W 15-18 Instructions Put parboiled rice into the bowl. Add 500 ml cold water. Cover with lid. After cooking let stand white rice for 5 minutes, brown rice for 10 minutes. Stand for 5-10 minutes. 500 g 900 W 7-8 Instructions Weigh and rinse the potatoes and put them into bowl. Add 3 tablespoons water. Cover with lid. Stand for 2-3 minutes. 400 g 600 W 5-6 Instructions Put stew into the bowl. Cover with lid. Stir well before standing. Stand for 1-2 minutes. 150 g 600 W 1-2 Instructions Moist the top of filled dumplings with cold water. Put 1-2 frozen dumplings side by side into the basket. Insert basket in bowl. Cover with lid. Stand for 2-3 minutes. 250 g 900 W 3-4 Instructions Weigh the fresh fruits (e.g. apples, pears, plums, apricots, mangoes or pineapple) after peeling, washing and cutting into similar sizes or cubes. Put into bowl. Add 1-2 tablespoons water and 1-2 tbsp. sugar. Cover with lid. Stand for 2-3 minutes. The barbecue spit is useful for grilling, as you do not need to turn the meat over. It can be used for combined microwave and Convection cooking. Make sure that the weight of the meat is evenly distributed on the spit and that the spit rotates evenly. Always use oven gloves when touching the recipients in the oven, as they will be very hot. 1. Push the roasting spit through the centre of the meat. Example: Push the spit between the backbone and breast of a chicken. Place the spit on its upright on the glass bowl the glass bowl and the glass bowl onto the turntable. To help brown the meat, brush it with and spices oil. 2. Press the Combi button. Result: The following indications are displayed: Cb - 1 (Microwave + Grill) 3. Make the display indicating Cb - 2 by pressing the Up or Down button, and then press the Select button. Result: The following indications are displayed: 600 W (microwave & convection combi mode) (output power) 4. Select the appropriate power level by pressing the Up or Down button until the corresponding output power is displayed (600, 450, 300, 180, 100 W). At that time, press the Select button to set the power level. • If don't set the power level within 5 seconds, Automatically changes to the cooking time setting stage. (Default: 180 °C ) English - 28 MC28H5015AW_SG_DE68-04234H-01_EN.indd 28 2014-03-21 �� 10:39:03 USE OF THE MULTI-SPIT WITH KEBAB SKEWERS 6. Set the cooking time by pressing the Up or Down button. • The maximum cooking time is 60 minutes. 7. Press the Start/+30s button. Result: • Combination cooking starts. • The oven is heated to the required temperature and then microwave cooking continues until the cooking time is over. • When cooking has finished, the oven will beep and flash “End” 4 times. The oven will then beep one time per minute. • When the meat has been fully cooked, carefully remove the spit, using oven gloves to protect your hands. 1. For preparing kebabs with the multi-spit use the 6 skewers. 2. Put the same amount of food on each skewer. 3. Place the roasting-spit into the glass bowl and insert the multi-spit into it. 4. Put the glass bowl with the multi-spit in the centre of the turntable. Make sure that the grill heating element is in the right position at the back wall of the cavity and not at the top before starting the grilling process. REMOVING THE MULTI-SPIT FROM THE OVEN AFTER GRILLING 04 OVEN USE 5. Select the appropriate temperature by pressing the Up or Down button. (Temperature : 200~40 °C) At that time, press the Select button to set the temperature. • If don't set the temperature within 5 seconds, Automatically changes to the cooking time setting stage. 1. Use oven gloves for taking for glass bowl with the multi-spit out of the oven, because it will be very hot. 2. Remove multi-spit out of the spit stand by using oven gloves as well. 3. Carefully remove the skewers and use a fork for removing the food pieces from the skewers. The multi--is not suitable for cleaning in the dishwasher. Therefore clean it with warm water and washing up liquid by hand. Remove the vertical multi-spit from the oven, after use. USING THE VERTICAL MULTI-SPIT MULTI-SPIT FOR KEBAB Using the multi-spit with 6 kebab skewers you can easily barbecue meat, poultry, fish, vegetables (like onions, peppers or courgettes) and fruit which have been cut into pieces. You can prepare the above food with the kebab skewers by using convection or combination mode. Coupler Kebab, Skewer Multi-Spit Barbecue Spit Glass Bowl English - 29 MC28H5015AW_SG_DE68-04234H-01_EN.indd 29 2014-03-21 �� 10:39:03 USING THE DEODORISATION FEATURES Use the feature after cooking odorous food or when there is a lot of smoke in the oven interior. First clean the oven interior. 1. Press the Deodorisation button than it will start automatically, after you have finished cleaning. cookware guide To cook food in the microwave oven, the microwaves must be able to penetrate the food, without being reflected or absorbed by the dish used. Care must therefore be taken when choosing the cookware. If the cookware is marked microwave-safe, you do not need to worry. The following table lists various types of cookware and indicates whether and how they should be used in a microwave oven. The deodorisation time has been specified as 5 minutes. Cookware You can also adjust Deodorisation time by pressing the Start/+30s button. The maximum deodorisation time is 15 minutes. Microwavesafe Aluminum foil ✓✗ Crust plate China and earthenware ✓ ✓ Disposable polyester cardboard dishes Fast-food packaging ✓ • Polystyrene cups containers • Paper bags or newspaper • Recycled paper or metal trims ✓ SWITCHING THE BEEPER OFF You can switch the beeper off whenever you want. 1. Press the Start/+30s and Stop/Eco button at the same time. (one second) Result: The oven does not beep to indicate the end of a function. 2. To switch the beeper back on, press the Start/+30s and Stop/Eco buttons again at the same time. (one second) Result: The oven operates normally. Comments Can be used in small quantities to protect areas against overcooking. Arcing can occur if the foil is too close to the oven wall or if too much foil is used. Do not preheat for more than 8 minutes. Porcelain, pottery, glazed earthenware and bone china are usually suitable, unless decorated with a metal trim. Some frozen foods are packaged in these dishes. ✗ Can be used to warm food. Overheating may cause the polystyrene to melt. May catch fire. ✗ May cause arcing. English - 30 MC28H5015AW_SG_DE68-04234H-01_EN.indd 30 2014-03-21 �� 10:39:04 cooking guide Cookware Microwavesafe MICROWAVES Comments Glassware ✓ • Fine glassware ✓ • Glass jars ✓ Can be used, unless decorated with a metal trim. Can be used to warm foods or liquids. Delicate glass may break or crack if heated suddenly. Must remove the lid. Suitable for warming only. Metal • Dishes • Freezer bag twist ties ✗ ✗ May cause arcing or fire. ✓ For short cooking times and warming. Also to absorb excess moisture. ✗ May cause arcing. ✓ Particularly if heat-resistant thermoplastic. Some other plastics may warp or discolour at high temperatures. Do not use Melamine plastic. Can be used to retain moisture. Should not touch the food. Take care when removing the film as hot steam will escape. Only if boilable or oven-proof. Should not be airtight. Prick with a fork, if necessary. Can be used to retain moisture and prevent spattering. Paper • Plates, cups, napkins and kitchen paper • Recycled paper Plastic • Containers • Cling film ✓ • Freezer bags ✓✗ Wax or greaseproof paper ✓ ✓ : Recommended ✓✗ : Use caution ✗ COOKING Cookware for microwave cooking: Cookware must allow microwave energy to pass through it for maximum efficiency. Microwaves are reflected by metal, such as stainless steel, aluminium and copper, but they can penetrate through ceramic, glass, porcelain and plastic as well as paper and wood. So food must never be cooked in metal containers. Food suitable for microwave cooking: Many kinds of food are suitable for microwave cooking, including fresh or frozen vegetables, fruit, pasta, rice, grains, beans, fish, and meat. Sauces, custard, soups, steamed puddings, preserves, and chutneys can also be cooked in a microwave oven. Generally speaking, microwave cooking is ideal for any food that would normally be prepared on a hob. Melting butter or chocolate, for example (see the chapter with tips, techniques and hints). 05 COOKWARE GUIDE • Oven-to-tableware Microwave energy actually penetrates food, attracted and absorbed by its water, fat and sugar content. The microwaves cause the molecules in the food to move rapidly. The rapid movement of these molecules creates friction and the resulting heat cooks the food. Covering during cooking To cover the food during cooking is very important, as the evaporated water rises as steam and contributes to cooking process. Food can be covered in different ways: e.g. with a ceramic plate, plastic cover or microwave suitable cling film. Standing times After cooking is over food the standing time is important to allow the temperature to even out within the food. : Unsafe English - 31 MC28H5015AW_SG_DE68-04234H-01_EN.indd 31 2014-03-21 �� 10:39:04 Cooking Guide for frozen vegetables Cooking Guide for fresh vegetables Use a suitable glass pyrex bowl with lid. Cook covered for the minimum time – see table. Continue cooking to get the result you prefer. Stir twice during cooking and once after cooking. Add salt, herbs or butter after cooking. Cover during standing time. Use a suitable glass pyrex bowl with lid. Add 30-45 ml cold water (2-3 tbsp.) for every 250 g unless another water quantity is recommended – see table. Cook covered for the minimum time – see table. Continue cooking to get the result you prefer. Stir once during and once after cooking. Add salt, herbs or butter after cooking. Cover during a standing time of 3 minutes. Hint: Cut the fresh vegetables into even sized pieces. The smaller they are cut, the quicker they will cook. Food Spinach Broccoli Peas Green Beans Serving Size Power Time (min.) 150 g 600 W 5-6 Instructions Add 15 ml (1 tbsp.) cold water. Serve after 2-3 minutes standing. 300 g 600 W 8-9 Instructions Add 30 ml (2 tbsp.) cold water. Serve after 2-3 minutes standing. 300 g 600 W 7-8 Instructions Add 15 ml (1 tbsp.) cold water. Serve after 2-3 minutes standing. 300 g 600 W 7½-8½ Instructions Add 30 ml (2 tbsp.) cold water. Serve after 2-3 minutes standing. 300 g 600 W 7-8 Instructions Add 15 ml (1 tbsp.) cold water. Serve after 2-3 minutes standing. Mixed Vegetables (Carrots/Peas/ Corn) 300 g 600 W 7½-8½ Mixed Vegetables Instructions (Chinese style) Add 15 ml (1 tbsp.) cold water. Serve after 2-3 minutes standing. Food Broccoli Brussels Sprouts Carrots Cauliflower Courgettes Egg plants Serving Size Power Time (min.) 250 g 500 g 900 W 4½-5 7-8 Instructions Prepare even sized florets. Arrange the stems to the centre. Serve after 3 minutes standing. 250 g 6-6½ 900 W Instructions Add 60-75 ml (5-6 tbsp.) water. Serve after 3 minutes standing. 250 g 4½-5 900 W Instructions Cut carrots into even sized slices. Serve after 3 minutes standing. 250 g 5-5½ 900 W 500 g 7½-8½ Instructions Prepare even sized florets. Cut big florets into halves. Arrange stems to the centre. Serve after 3 minutes standing. 250 g 4-4½ 900 W Instructions Cut courgettes into slices. Add 30 ml (2 tbsp.) water or a knob of butter. Cook until just tender. Serve after 3 minutes standing. 250 g 3½-4 900 W Instructions Cut egg plants into small slices and sprinkle with 1 tablespoon lemon juice. Serve after 3 minutes standing. English - 32 MC28H5015AW_SG_DE68-04234H-01_EN.indd 32 2014-03-21 �� 10:39:04 Cooking Guide for rice and pasta Food Leeks Onions Pepper Potatoes Turnip Cabbage Power Rice: Time (min.) 250 g 900 W 4-4½ Instructions Cut leeks into thick slices. Serve after 3 minutes standing. 125 g 900 W 1½-2 250 g 2½-3 Instructions Prepare small whole or sliced mushrooms. Do not add any water. Sprinkle with lemon juice. Spice with salt and pepper. Drain before serving. Serve after 3 minutes standing. 250 g 900 W 5-5½ Instructions Cut onions into slices or halves. Add only 15 ml (1 tbsp.) water. Serve after 3 minutes standing. 250 g 900 W 4½-5 Cut pepper into small slices. 250 g 900 W 4-5 500 g 7-8 Instructions Weigh the peeled potatoes and cut them into similar sized halves or quarters. Serve after 3 minutes standing. 250 g 900 W 5½-6 Instructions Cut turnip cabbage into small cubes. Serve after 3 minutes standing. Pasta: Food White Rice (Parboiled) Brown Rice (Parboiled) Mixed Rice (Rice + Wild rice) Mixed Corn (Rice + Grain) Pasta Indomie Use a large glass pyrex bowl with lid - rice doubles in volume during cooking. Cook covered. After the cooking time is over, stir before standing time and salt or add herbs and butter. Remark: the rice may not have absorbed all water after the cooking time is finished. Use a large glass pyrex bowl. Add boiling water, a pinch of salt and stir well. Cook uncovered. Stir occasionally during and after cooking. Cover during standing time and drain thoroughly afterwards. Serving Size Power Time (min.) 250 g 900 W 15-16 375 g 17½-18½ Instructions Add cold water of double quantity. Serve after 5 minutes standing. 250 g 900 W 20-21 375 g 22-23 Instructions Add cold water of double quantity. Serve after 5 minutes standing. 250 g 900 W 16-17 Instructions Add 500 ml cold water. Serve after 5 minutes standing. 250 g 900 W 17-18 Instructions Add 400 ml cold water. Serve after 5 minutes standing. 250 g 900 W 10-11 Instructions Add 1000 ml hot water. Serve after 5 minutes standing. 1 Small pack(80 g) 900 W 7-7½ 1 Big pack(120 g) 9-9½ Instructions Use a glass pyrex bowl. Put the noodle and add room temperature 350 ml water in bowl. Cook covered with wrap and pierce at several times. After cooking, drain water and mix indomie spices. 05 COOKWARE GUIDE Mushrooms Serving Size English - 33 MC28H5015AW_SG_DE68-04234H-01_EN.indd 33 2014-03-21 �� 10:39:04 REHEATING REHEATING BABY FOOD Your microwave oven will reheat food in a fraction of the time that conventional ovens hobs normally take. Use the power levels and reheating times in the following chart as a guide. The times in the chart consider liquids with a room temperature of about +18 to +20 °C or a chilled food with a temperature of about +5 to +7 °C. BABY FOOD: Empty into a deep ceramic plate. Cover with plastic lid. Stir well after reheating! Let stand for 2-3 minutes before serving. Stir again and check the temperature. Recommended serving temperature: between 30-40 °C. BABY MILK: Pour milk into a sterilised glass bottle. Reheat uncovered. Never heat a baby’s bottle with teat on, as the bottle may explode if overheated. Shake well before standing time and again before serving ! Always carefully check the temperature of baby milk or food before giving it to the baby. Recommended serving temperature: ca. 37 °C. Arranging and covering Avoid reheating large items such as joint of meat - they tend to overcook and dry out before the centre is piping hot. Reheating small pieces will be more successful. Power levels and stirring Some foods can be reheated using 900 W power while others should be reheated using 600 W, 450 W or even 300 W. Check the tables for guidance. In general, it is better to reheat food using a lower power level, if the food is delicate, in large quantities, or if it is likely to heat up very quickly (mince pies, for example). Stir well or turn food over during reheating for best results. When possible, stir again before serving. Take particular care when heating liquids and baby foods. To prevent eruptive boiling of liquids and possible scalding, stir before, during and after heating. Keep them in the microwave oven during standing time. We recommend putting a plastic spoon or glass stick into the liquids. Avoid overheating (and therefore spoiling) the food. It is preferable to underestimate cooking time and add extra heating time, if necessary. Heating and standing times When reheating food for the first time, it is helpful to make a note of the time taken - for future reference. Always make sure that the reheated food is piping hot throughout. Allow food to stand for a short time after reheating - to let the temperature even out. The recommended standing time after reheating is 2-4 minutes, unless another time is recommended in the chart. Take particular care when heating liquids and baby food. See also the chapter with the safety precautions. REMARK: Baby food particularly needs to be checked carefully before serving to prevent burns. Use the power levels and times in the next table as a guide lines for reheating. Reheating Liquids and Food Use the power levels and times in this table as a guide lines for reheating. Food Drinks (Coffee, Tea and Water) Soup (Chilled) REHEATING LIQUIDS Always allow a standing time of at least 20 seconds after the oven has been switched off to allow the temperature to even out. Stir during heating, if necessary, and ALWAYS stir after heating. To prevent eruptive boiling and possible scalding, you should put a spoon or glass stick into the beverages and stir before, during and after heating. Serving Size Power Time (min.) 150 ml (1 cup) 900 W 1-1½ 300 ml (2 cups) 2-2½ 450 ml (3 cups) 3-3½ 600 ml (4 cups) 3½-4 Instructions Pour into cups and reheat uncovered: 1 cup in the centre, 2 cups opposite of each other, 3 cups in a circle. Keep in microwave oven during standing time and stir well. Serve after 1-2 minutes standing. 250 g 900 W 2½-3 350 g 3-3½ 450 g 3½-4 550 g 4½-5 Instructions Pour into a deep ceramic plate or deep ceramic bowl. Cover with plastic lid. Stir well after reheating. Stir again before serving. Serve after 2-3 minutes standing. English - 34 MC28H5015AW_SG_DE68-04234H-01_EN.indd 34 2014-03-21 �� 10:39:04 Reheating Baby Food and Milk Food Stew (Chilled) Filled Pasta with Sauce (Chilled) Plated Meal (Chilled) Power Use the power levels and times in this table as guide lines for reheating. Time (min.) 350 g 600 W 4½-5½ Instructions Put stew in a deep ceramic plate. Cover with plastic lid. Stir occasionally during reheating and again before standing and serving. Serve after 2-3 minutes standing. 350 g 600 W 3½-4½ Instructions Put pasta (e.g. spaghetti or egg noodles) on a flat ceramic plate. Cover with microwave cling film. Stir before serving. Serve after 3 minutes standing. 350 g 600 W 4-5 Instructions Put filled pasta (e.g. ravioli, tortellini) in a deep ceramic plate. Cover with plastic lid. Stir occasionally during reheating and again before standing and serving. Serve after 3 minutes standing. 350 g 600 W 4½-5 450 g 5½-6½ Instructions Plate a meal of 2-3 chilled components on a ceramic dish. Cover with microwave cling-film. Serve after 3 minutes standing. 400 g 600 W 6-7 Food Baby Food (Vegetables + Meat) Baby Porridge (Grain + Milk + Fruit) Baby Milk Serving Size Power Time 190 g 600 W 30 sec. Instructions Empty into ceramic deep plate. Cook covered. Stir after cooking time. Before serving, stir well and check the temperature carefully. Serve after 2-3 minutes standing. 190 g 600 W 20 sec. Instructions Empty into ceramic deep plate. Cook covered. Stir after cooking time. Before serving, stir well and check the temperature carefully. Serve after 2-3 minutes standing. 100 ml 300 W 30-40 sec. 200 ml 1 min. to 1 min. 10 sec. Instructions Stir or shake well and pour into a sterilized glass bottle. Place into the centre of turntable. Cook uncovered. Before serving, shake well and check the temperature carefully. Serve after 2-3 minutes standing. 06 COOKING GUIDE Pasta with Sauce (Chilled) Serving Size Cheese Fondue Ready-To-Serve Instructions (Chilled) Put the ready-to-serve cheese fondue in a suitable sized glass pyrex bowl with lid. Stir occasionally during and after reheating. Stir well before serving. Serve after 1-2 minutes standing. English - 35 MC28H5015AW_SG_DE68-04234H-01_EN.indd 35 2014-03-21 �� 10:39:04 DEFROSTING Microwaves are an excellent way of defrosting frozen food. Microwaves gently defrost frozen food in a short period of time. This can be of great advantage, if unexpected guests suddenly show up. Frozen poultry must be thoroughly thawed before cooking. Remove any metal ties and take it out of any wrapping to allow thawed liquid to drain away. Put the frozen food on a dish without cover. Turn over half way, drain off any liquid and remove any giblets as soon as possible. Check the food occasionally to make sure that it does not feel warm. If smaller and thinner parts of the frozen food start to warm up, they can be shield by wrapping very small strips of aluminium foil around them during defrosting. Should poultry start to warm up on the outer surface, stop thawing and allow it to stand for 20 minutes before continuing. Leave the fish, meat and poultry to stand in order to complete defrosting. The standing time for complete defrosting will vary depending on the quantity defrosted. Please refer to the table below. Hint: Flat food defrosts better than thick and smaller quantities need less time than bigger ones. Remember this hint while freezing and defrosting food. For defrosting of frozen food with a temperature of about -18 to -20 °C, use the following table as a guide. Food Meat Minced Meat Pork Steaks Serving Size Power Time (min.) 250 g 500 g 180 W 6-7 8-13 250 g 180 W 7-8 Instructions Place the meat on turntable. Shield thinner edges with aluminium foil. Turn over after half of defrosting time! Serve after 15-30 minutes standing. Food Poultry Chicken Pieces Whole Chicken Fish Fish Fillets Whole Fish Fruits Berries Bread Bread Rolls (Each ca. 50 g) Toast/Sandwich Serving Size Power Time (min.) 500 g (2 pcs) 180 W 14-15 1200 g 180 W 32-34 Instructions First, put chicken pieces first skin-side down, whole chicken first breast-side-down on a flat ceramic plate. Shield the thinner parts like wings and ends with aluminium foil. Turn over after half of defrosting time! Serve after 15-60 minutes standing. 200 g 180 W 6-7 400 g 180 W 11-13 Instructions Put frozen fish in the middle of a flat ceramic plate. Arrange the thinner parts under the thicker parts. Shield narrow ends of fillets and tail of whole fish with aluminium foil. Turn over after half of defrosting time! Serve after 10-25 minutes standing. 300 g 180 W 6-7 Instructions Spread fruit on a flat, round glass dish (with a large diameter). Serve after 5-10 minutes standing. 2 pcs 4 pcs 180 W 1-1½ 2½-3 250 g 180 W 4-4½ Instructions Arrange rolls in a circle or bread horizontally on kitchen paper in the middle of turntable. Turn over after half of defrosting time! Serve after 5-20 minutes standing. English - 36 MC28H5015AW_SG_DE68-04234H-01_EN.indd 36 2014-03-21 �� 10:39:04 GRILL Grill Guide for Fresh Food The grill-heating element is located underneath the ceiling of the cavity. It operates while the door is closed and the turntable is rotating. The turntable’s rotation makes the food brown more evenly. Preheating the grill for 3-5 minutes will make the food brown more quickly. Preheat the grill with the grill-function for 2-3 minutes. Use the power levels and times in this table as guide lines for grilling. Use oven gloves when taking out. Food suitable for grilling: Chops, sausages, steaks, hamburgers, bacon and gammon rashers, thin fish portions, sandwiches and all kinds of toast with toppings. Important remark: Whenever the grill only mode is used, please remember that food must be placed on the high rack, unless another instruction is recommended. MICROWAVE + GRILL This cooking mode combines the radiant heat that is coming from the grill with the speed of microwave cooking. It operates only while the door is closed and the turntable is rotating. Due to the rotation of the turntable, the food browns evenly. Three combination modes are available with this model: 600 W + Grill, 450 W + Grill and 300 W + Grill. Cookware for cooking with microwave + grill Please use cookware that microwaves can pass through. Cookware should be flameproof. Do not use metal cookware with combination mode. Do not use any type of plastic cookware, as it can melt. Food suitable for microwave + grill cooking: Food suitable for combination mode cooking include all kinds of cooked food which need reheating and browning (e.g. baked pasta), as well as foods which require a short cooking time to brown the top of the food. Also, this mode can be used for thick food portions that benefit from a browned and crispy top (e.g. chicken pieces, turning them over half way through cooking). Please refer to the grill table for further details. Important remark: Whenever the combination mode (microwave + grill) is used, the food should be placed on the high rack, unless another instruction is recommended. Please refer to the instructions in the following chart. The food must be turned over, if it is to be browned on both sides. Fresh food Toast Slices Grilled Tomatoes TomatoCheese Toast Toast Hawaii (Ham, Pineapple, Cheese slices) Baked Potatoes Gratin Potatoes/ Vegetables (Chilled) Serving Size Power 1 step (min.) 2 step (min.) 4 pcs Grill only 3-4 2-3 (each 25 g) Instructions Put toast slices side by side on the high rack. 400 g (2 pcs) 300 W + Grill 5-6 Instructions Cut tomatoes into halves. Put some cheese on top. Arrange in a circle in a flat glass pyrex dish. Place it on the high rack. Stand for 2-3 minutes. 4 pcs (300 g) 300 W + Grill 4-5 Instructions Toast the bread slices first. Put the toast with topping on the high rack. Stand for 2-3 minutes. 4 pcs (500 g) 300 W + Grill 5-6 Instructions Toast the bread slices first. Put the toast with topping on the high rack. Stand for 2-3 minutes. 500 g 600 W + Grill 7-8 Instructions Cut potatoes into halves. Put them in a circle on the high rack with the cut side to the grill. 450 g 450 W + Grill 9-11 Instructions Put the fresh gratin into a small glass pyrex dish. Put the dish on the high rack. After cooking stand for 2-3 minutes. (continued) 06 COOKING GUIDE Cookware for grilling: Should be flameproof and may include metal. Do not use any type of plastic cookware, as it can melt. English - 37 MC28H5015AW_SG_DE68-04234H-01_EN.indd 37 2014-03-21 �� 10:39:05 CONVECTION Fresh food Baked Apples Chicken Pieces Roast Chicken Roast Fish Plantain Yam Serving Size Power 1 step (min.) 2 step (min.) 2 apples 300 W + Grill 7-8 (ca. 400 g) Instructions Core the apples and fill them with raisins and jam. Put some almond slices on top. Put apples on a flat glass pyrex dish. Place the dish directly on the low rack. 500 g (2 pcs) 300 W + Grill 8-10 6-8 Instructions Brush chicken pieces with oil and spices. Put them in a circle on the high rack. After grilling stand for 2-3 minutes. 1200 g 450 W + Grill 18-19 17 Instructions Brush the chicken oil and spices. Put the chicken on the low rack. After grilling stand for 5 minutes. 400-500 g 300 W + Grill 5-7 5½-6½ Instructions Brush skin of whole fish with oil and add herbs and spices. Put two fishes side by side (head to tail) on the high rack. After grilling stand for 2-3 minutes. 1 ea (200 g) 450 W + Grill 8½-9 Instructions Peel and slice plantain 1 cm thick. Put on the crusty plate with high rack. Brush all sides with oil. If plantain becomes soft, reduce time 1~2 minute soft type. Stand for 1-2 minutes. 200 g 600 W + Grill 9-9½ Instructions Peel and slice yam 1.5 cm thick and put on the crusty plate and brush all sides with oil. Put it on the high rack and cook. Stand for 1-2 minutes. Cooking with convection is the traditional and well known method of cooking food in a traditional oven with hot air. The heating element and the fan position is at the back-wall, so that the hot air is circulating. This mode is supported by the top heating element. Cookware for convection cooking: All conventional ovenproof cookware, baking tins and sheets – anything you would normally use in a traditional convection oven – can be used. Food suitable for convection cooking: All biscuits, individual scones, rolls and cakes should be made by this mode as well as rich fruit cakes, choux pastry and soufflés. MICROWAVE + CONVECTION This mode combines the microwave energy with the hot air and is therefore reducing the cooking time while giving the food a brown and crispy surface. Cooking with convection is the traditional and well known method of cooking food in an oven with hot air circulated by a fan on the back-wall. Cookware for cooking with microwaves + convection: Should be able to let the microwaves pass through. Should be ovenproof (like glass, pottery or china without metal trims); similar to the cookware described under Microwave + Grill. Food suitable for Microwave + Convection cooking: All kinds of meats and poultry as well as casseroles and gratin dishes, sponge cakes and light fruit cakes, pies and crumbles, roast vegetables, scones and breads. English - 38 MC28H5015AW_SG_DE68-04234H-01_EN.indd 38 2014-03-21 �� 10:39:05 Convection Guide for fresh and frozen food Preheat the convection with the auto pre-heat function to the desired temperature. Use the power levels and times in this table as guide lines for convection cooking. Use oven gloves when taking out. PIZZA Frozen Pizza (Ready baked) Serving Size Power 300 g 1 step 300 W + 200 °C 2 step Grill 1 step (min.) 2 step (min.) 11-12 2-3 Instructions Place the pizza on the low rack. After baking stand for 2-3 minutes. PASTA Frozen Lasagne 400 g 1 step 450 W + 200 °C 2 step Convt. 200 °C 15-16 5-6 Instructions Put into a suitable sized glass pyrex dish or leave in the original packaging (take care that this is suitable for microwaves and oven heat). Put frozen pasta gratin on the low rack. After cooking stand for 2-3 minutes. MEAT Roast Beef/ Roast Lamb (Medium) Roast Chicken 1200-1300 g 600 W + 180 °C 20-23 10-13 Instructions Brush beef/ lamb with oil and spice it with pepper, salt and paprika. Put it on the low rack, first with the fat side down. After cooking wrap in aluminium foil and stand for 10-15 minutes. 1000-1100 g 450 W + 200 °C 20-22 20 Instructions Brush chicken with oil and spices. Put chicken first breast side down, second side breast side up on the low rack. Stand for 5 minutes. BREAD Fresh Bread Rolls Garlic Bread (Chilled, Prebaked) CAKE Marble Cake (Fresh Dough) Small Cakes (Fresh Dough) Cookies (Fresh Dough) Frozen Cake Serving Size Power 1 step (min.) 2 step (min.) 6 pcs (350 g) 100 W + 180 °C 8-10 Instructions Put bread rolls in a circle on the low rack. Stand for 2-3 minutes. 200 g (1 pc) 180 W + 200 °C 8-10 Instructions Put the chilled baguette on baking paper on the low rack. After baking stand for 2-3 minutes. 500 g Only 180 °C 38-43 Instructions Put the fresh dough in a small rectangular black metal baking dish (length 25 cm). Put the cake on the low rack. After baking stand for 5-10 minutes. 10 x 28 g Only 160 °C 26-28 Instructions Fill the fresh dough evenly in paper cups and set on baking tray on the low rack. After baking stand for 5 minutes. 200-250 g Only 200 °C 15-20 Instructions Put the chilled croissants on baking paper on the low rack. 1000 g 180 W + 180 °C 18-20 Instructions Put the frozen cake directly on the low rack. After defrost and warming stand for 15-20 minutes. 06 COOKING GUIDE Fresh food Fresh food English - 39 MC28H5015AW_SG_DE68-04234H-01_EN.indd 39 2014-03-21 �� 10:39:05 troubleshooting and error code TIPS AND TRICKS MELTING BUTTER Put 50 g butter into a small deep glass dish. Cover with plastic lid. Heat for 30-40 seconds using 900 W, until butter is melted. TROUBLESHOOTING If you have any of the problems listed below try the solutions given. MELTING CHOCOLATE Put 100 g chocolate into a small deep glass dish. Heat for 3-5 minutes, using 450 W until chocolate is melted. Stir once or twice during melting. Use oven gloves while taking out! This is normal. • Condensation inside the oven. • Air flow around the door and outer casing. • Light reflection around the door and outer casing. • Steam escaping from around the door or vents. MELTING CRYSTALLIZED HONEY Put 20 g crystallized honey into a small deep glass dish. Heat for 20-30 seconds using 300 W, until honey is melted. The oven does not start when you press the Start/+30s button. • Is the door completely closed? MELTING GELATINE Lay dry gelatine sheets (10 g) for 5 minutes into cold water. Put drained gelatine into a small glass pyrex bowl. Heat for 1 minute using 300 W. Stir after melting. COOKING GLAZE/ICING (FOR CAKE AND GATEAUX) Mix instant glaze (approximately 14 g) with 40 g sugar and 250 ml cold water. Cook uncovered in a glass pyrex bowl for 3½ to 4½ minutes using 900 W, until glaze/icing is transparent. Stir twice during cooking. COOKING JAM Put 600 g fruits (for example mixed berries) in a suitable sized glass pyrex bowl with lid. Add 300 g preserving sugar and stir well. Cook covered for 10-12 minutes using 900 W. Stir several times during cooking. Empty directly into small jam glasses with twist-off lids. Stand on lid for 5 minutes. COOKING PUDDING Mix pudding powder with sugar and milk (500 ml) by following the manufacturers instructions and stir well. Use a suitable sized glass pyrex bowl with lid. Cook covered for 6½ to 7½ minutes using 900 W. Stir several times well during cooking. BROWNING ALMOND SLICES Spread 30 g sliced almonds evenly on a medium sized ceramic plate. Stir several times during browning for 3½ to 4½ minutes using 600 W. Let it stand for 2-3 minutes in the oven. Use oven gloves while taking out! The food is not cooked at all. • Have you set the timer correctly and/or pressed the Start/+30s button? • Is the door closed? • Have you overloaded the electric circuit and caused a fuse to blow or a breaker to be triggered? The food is either overcooked or undercooked. • Was the appropriate cooking length set for the type of food? • Was an appropriate power level chosen? The light bulb is not working. • The Light bulb should not be replaced in person for safety reasons. Please contact nearest authorised Samsung customer care, to arrange for a qualified engineer to replace the bulb. The oven causes interference with radios or televisions. • Slight interference may be observed on televisions or radios when the oven is operating. This is normal. To solve this problem, install the oven away from televisions, radios and aerials. • If interference is detected by the oven’s microprocessor, the display may be reset. To solve this problem, disconnect the power plug and reconnect it. Reset the time. Sparking and cracking occur inside the oven (arcing). • Have you used a dish with metal trimmings? • Have you left a fork or other metal utensil inside the oven? • Is aluminum foil too close to the inside walls? English - 40 MC28H5015AW_SG_DE68-04234H-01_EN.indd 40 2014-03-21 �� 10:39:05 Smoke and bad smell when initial operating. • It’s a temporary condition by new component heating. Smoke and smell will disappear completely after 10 minutes operation. To remove smell more quickly, please operate microwave oven with putting lemon formation or lemon juice in the cabinet. • The model and serial numbers, normally printed on the rear of the oven • Your warranty details • A clear description of the problem Model Power source Then contact your local dealer or SAMSUNG aftersales service. “SE” message indicates. • Clean the keys and check if there is water on the surface around key. Turn off the microwave oven and try setting again. If it occurs again, call your local SAMSUNG Customer Care Centre. “E-24” message indicates • Before the microwave can overheat, the "E-24" message appears on the display. If the "E-24" message appears, press the Stop/Eco key to utilize the initialization mode. After the oven cools, try operating the oven. If the "E-24" message appears again, contact your local Samsung Customer Care Centre. MC28H5015** 230 V ~ 50 Hz AC Power consumption Maximum power Microwave Grill (heating element) Convection (heating element) ERROR CODE For any codes not listed above, or if the suggested solution does not solve the problem, contact your local SAMSUNG Customer Care Centre. SAMSUNG strives to improve its products at all times. Both the design specifications and these user instructions are thus subject to change without notice. 2900 W 1400 W 1500 W Max. 2100 W Output power 100 W / 900 W - 6 levels (IEC-705) Operating frequency 2450 MHz Dimensions (W x D x H) Outside Oven cavity Volume 517 x 474.8 x 310 mm 358 x 327 x 235.5 mm 28 liter Weight Net 07 TROUBLESHOOTING & TECHNICAL SPEC If the above guidelines do not enable you to solve the problem, then contact your local SAMSUNG customer service centre. Please have the following information read; technical specifications 17.5 kg approx. English - 41 MC28H5015AW_SG_DE68-04234H-01_EN.indd 41 2014-03-21 �� 10:39:05 MEMO MC28H5015AW_SG_DE68-04234H-01_EN.indd 42 MEMO 2014-03-21 �� 10:39:05 MEMO MC28H5015AW_SG_DE68-04234H-01_EN.indd 43 MEMO 2014-03-21 �� 10:39:05 U.A.E OMAN KUWAIT BAHRAIN QATAR EGYPT ALGERIA PAKISTAN TUNISIA JORDAN SYRIA IRAN MOROCCO SAUDI ARABIA TURKEY NIGERIA GHANA Cote D’ Ivoire SENEGAL CAMEROON KENYA UGANDA TANZANIA RWANDA BURUNDI DRC SUDAN SOUTH AFRICA BOTSWANA NAMIBIA ZAMBIA MOZAMBIQUE 800-SAMSUNG (726-7864) 800-SAMSUNG(726-7864) 183-2255 (183-CALL) 8000-4726 800-2255 (800-CALL) 08000-726786 16580 021 36 11 00 0800-Samsung (72678) 80-1000-12 0800-22273 06 5777444 18252273 021-8255 080 100 2255 920021230 444 77 11 0800-726-7864 0800-10077 0302-200077 8000 0077 800-00-0077 7095-0077 0800 545 545 0800 300 300 0685 88 99 00 9999 200 499999 1969 0860 SAMSUNG (726 7864) 8007260000 08 197 267 864 0211 350370 847267864 / 827267864 www.samsung.com/ae/support (English) www.samsung.com/ae_ar/support (Arabic) www.samsung.com/eg/support www.samsung.com/n_africa/support www.samsung.com/pk/support www.samsung.com/n_africa/support www.samsung.com/Levant/support (English) www.samsung.com/iran/support www.samsung.com/n_africa/support www.samsung.com/sa/support www.samsung.com/sa_en/support (English) www.samsung.com/tr/support www.samsung.com/africa_en/support www.samsung.com/africa_fr/support www.samsung.com/support DE68-04234H-01 MC28H5015AW_SG_DE68-04234H-01_EN.indd 44 2014-03-21 �� 10:39:05