1
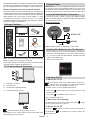
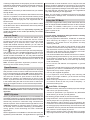
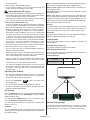
Contents
Dear SHARP customer........................................................ 2
Important safety precautions............................................... 2
LCD Screen..................................................................... 3
Package Contents............................................................... 4
TV Control button & Operation............................................ 4
Connect Power.................................................................... 4
Antenna/Cable/Satellite Connection.................................... 4
Installing The Batteries Into The Remote............................ 4
Switching On/Off.................................................................. 4
To Switch the TV On....................................................... 4
To Switch the TV to Standby........................................... 4
To Switch the TV Off....................................................... 4
Viewing remote control - TV................................................ 5
First Time Installation.......................................................... 7
Aerial Installation............................................................. 7
Cable Installation............................................................. 7
Satellite Installation (depends on the model).................. 7
Media Playback via USB Input............................................ 7
Media Browser Menu...................................................... 7
Changing Image Size: Picture Formats............................... 7
Using the Channel List........................................................ 7
Quick Menu......................................................................... 8
Teletext............................................................................ 8
Electronic Programme Guide (EPG) .............................. 8
Recording a Programme..................................................... 8
Timeshift Recording............................................................. 8
Instant Recording................................................................ 8
Watching Recorded Programmes....................................... 8
Recording Configuration...................................................... 8
Connectivity Functions........................................................ 8
Connecting TV to a Home Network................................. 8
Configuring Network Settings.......................................... 9
Information On Menu Items............................................. 9
Connecting to your mobile device via WiFi..................... 9
Using MIRACAST........................................................... 9
Using DLNA Network Service......................................... 9
Internet Portal.................................................................... 10
Open Browser................................................................... 10
Netflix................................................................................ 10
HBBTV System................................................................. 10
Using the 3D Mode............................................................ 10
Precautions................................................................... 10
Operating the 3D Mode................................................. 11
Horizontal Viewing Angle.............................................. 11
Vertical Viewing Angle................................................... 11
Specifications.................................................................... 12
Licence Notifications......................................................... 12
EC Declaration of Conformity............................................ 12
Supported File Formats for USB Media Browser.............. 13
Disclaimers for services using the Internet........................ 13
End of life disposal............................................................ 14
IMPORTANT NOTICE
This guide is just a summary of the full instruction book. For
more detailed explanations please refer to the full instruction
book which can be found at http://www.sharp.eu, go to
Service > Service & Downloads and click on your country flag.
We strongly recommend that you read the full manual to take
more advantage of all the functionality of this TV.
English - 1 -
Dear SHARP customer
Thank you for your purchase of the SHARP LCD colour TV
product. To ensure safety and many years of trouble-free
operation of your product, please read Important safety
precautions carefully before using this product.
Important safety precautions
• Cleaning—Unplug the AC cord from the AC outlet before
cleaning the product. Use a damp cloth to clean the product.
Do not use liquid cleaners or aerosol cleaners.
SPECIAL NOTE FOR USERS IN THE U.K.
The mains lead of this product is fitted with a non-rewireable
(moulded) plug incorporating a 5A fuse. Should the fuse need
to be replaced, a BSI or ASTA approved BS 1362 fuse marked
or
and of the same rating as above, which is also
indicated on the pin face of the plug, must be used.
ASA
Always refit the fuse cover after replacing the fuse. Never use
the plug without the fuse cover fitted.
In the unlikely event of the socket outlet in your home not
being compatible with the plug supplied, cut off the mains
plug and fit an appropriate type.
DANGER:
• Use a soft damp cloth to gently wipe the panel when it is
dirty. To protect the panel, do not use a chemical cloth to
clean it. Chemicals may cause damage or cracks in the
cabinet of the TV.
• Water and moisture—Do not use the product near water,
such as bathtub, washbasin, kitchen sink, laundry tub,
swimming pool and in a wet basement.
• Do not place vases or any other waterfilled containers on this product. The
water may spill onto the product causing
fire or electric shock.
• To prevent any fault and unsafe situations,
please do not place any objects on top of the set.
The fuse from the cut-off plug should be removed and the
cut-off plug destroyed immediately and disposed of in a
safe manner.
• If any solid object or liquid falls into the cabinet, unplug the
TV and have it checked by qualified personnel before
operating it any further.
Under no circumstances should the cut-off plug be inserted
elsewhere into a 5A socket outlet, as a serious electric shock
may occur.
• Stand—Do not place the product on
an unstable cart, stand, tripod or table.
Doing so can cause the product to fall,
resulting in serious personal injuries as
well as damage to the product. Use only
a cart, stand, tripod, bracket or table
recommended by the manufacturer or
sold with the product. When mounting
the product on a wall, be sure to follow the manufacturer’s
instructions. Use only the mounting hardware recommended
by the manufacturer.
To fit an appropriate plug to the mains lead, follow the
instructions below:
IMPORTANT:
The wires in the mains lead are coloured in accordance with
the following code:
Blue: Neutral
Brown: Live
As the colours of the wires in the mains lead of this product
may not correspond with the coloured
markings identifying the terminals in your plug, proceed as
follows:
• The wire which is coloured blue must be connected to the
plug terminal which is marked N or coloured black.
• The wire which is coloured brown must be connected to the
plug terminal which is marked L or coloured red.
Ensure that neither the brown nor the blue wire is connected
to the earth terminal in your three pin plug.
Before replacing the plug cover make sure that:
• If the new fitted plug contains a fuse, its value is the same
as that removed from the cut-off plug.
• The cord grip is clamped over the sheath of the mains lead,
and not simply over the lead wires.
IF YOU HAVE ANY DOUBT, CONSULT A QUALIFIED
ELECTRICIAN.
• When relocating the product placed on a cart, it must be
moved with utmost care. Sudden stops, excessive force
and uneven floor surface can cause the product to fall
from the cart.
• Ventilation—The vents and other openings in the cabinet
are designed for ventilation. Do not cover or block these
vents and openings since insufficient ventilation can cause
overheating and/or shorten the life of the product. For
ventilation, leave a free space of at least 10 cm all around
the set. Do not place the product on a bed, sofa, rug or other
similar surface, since they can block ventilation openings.
This product is not designed for built-in installation; do
not place the product in an enclosed place such as a
bookcase or rack, unless proper ventilation is provided or
the manufacturer’s instructions are followed.
• Use this device in moderate climates.
• The LCD panel used in this product is made of glass.
Therefore, it can break when the product is dropped or
impact applied. If the LCD panel is broken, be careful not
to be injured by broken glass.
• Heat sources—Keep the product away
from heat sources such as radiators,
heaters, stoves and other heat-generating
products (including amplifiers).
English - 2 -
• To prevent fire, never place any type of candle or naked
flames on the top or near the TV set.
• To prevent fire or shock hazard, do not place the AC cord
under the TV set or other heavy items.
• Headphones—Do not set the volume at a high level.
Hearing experts advise against extended listening at high
volume levels.
• Do not display a still picture for a long time, as this could
cause an afterimage to remain.
• There is power consumption always if main plug is
connected.
•
Servicing—Do not attempt to service the product
yourself. Removing covers can expose you to high voltage
and other dangerous conditions. Request a qualified person
to perform servicing.
LCD Screen
The LCD panel is a very high technology product, giving you
fine picture details.
Due to the very large number of pixels, occasionally a few
non-active pixels may appear on the screen as a fixed point
of blue, green or red. This is within product specifications and
does not constitute a fault.
Precautions when transporting the TV
When transporting the TV, never carry it by holding onto
the speakers. Be sure to always carry the TV by two people
holding it with two hands—one hand on each side of the TV.
WARNING
To prevent the spread of fire, keep
candles or other open flames away from
this product at all times.
Waste Disposal
• Packaging and packaging aids are recyclable and should
principally be recycled. Packaging materials, such as a foil
bag should be kept away from children
• Batteries, including those which are heavy metal free,
should not be disposed of with household waste. Please
dispose of used batteries in an environmentally friendly
manner. Find out about the legal regulations which apply
in your area.
• Do not try to recharge batteries, there is a danger of
explosion. Replace batteries only with the same or
equivalent type.
• Batteries should not be exposed to excessive heat such as
sunshine, fire or the like.
This symbol on the product or on its packaging
means that your electrical and electronic device
should be disposed at the end of its service life
separately from your household wastes. There
are separate collection systems for recycling in
the EU. For more information, please contact
the local authority or the dealer where you
purchased the product.
Disconnecting the Device
The mains plug is used to disconnect the TV set from the
mains and therefore it must remain readily operable.
Installation
To prevent injury, this device must be securely attached to
the wall in accordance with the installation instructions when
mounted to the wall (if the option is available).
Warning
Do not leave your TV in standby or operating mode when
you leave your house.
Power Source
The TV set should be operated only from a 220-240V AC,
50Hz outlet. Ensure that you select the correct voltage setting
for your convenience.
Do not place the set, a piece of furniture, etc. on the power
cord (mains lead) or pinch the cord.
Power Cord
Handle the power cord by the plug. Do not unplug the
appliance by pulling from the power cord and never touch the
power cord with wet hands as this could cause a short circuit
or electric shock. Never make a knot in the cord or tie it with
other cords. The power cords should be placed in such a way
that they are not likely to be stepped on. A damaged power
cord can cause fire or give you an electric shock. When it is
damaged and needs to be replaced, it should be done by
qualified personnel.
Connection to a Television Distribution System
(Cable TV etc.) from Tuner
Device connected to the protective earthing of the building
installation through the mains connection or through other
apparatus with a connection to protective earthing-and to
a television distribution system using coaxial cable, may in
some circumstances create a fire hazard.
Connection to a cable distribution system has therefore to
be provided through a device providing electrical isolation
below a certain frequency range (galvanic isolator, see EN
60728-11).
Lightning
In case of storm and lightning or when going on holiday,
disconnect the power cord from the wall outlet.
Replacement Parts
When replacement parts are required, make sure that the
service technician has used replacement parts, which are
specified by the manufacturer or have the same specifications
as the original one. Unauthorized substitutions may result in
fire, electrical shock or other hazards.
The Standby Off/On button doesn´t separate this device
completely from mains. Moreover the device consumes power
in the standby operation. In order to separate the device
completely from mains, the mains plug has to be pulled from
the mains socket. Because of that the device should be set
up in a way, that an unobstructed access to mains socket is
guaranteed, so that in case of emergency the mains plug can
English - 3 -
be pulled immediately. To exclude the danger of fire, the power
cord should principally be separated from the mains socket
prior to a longer period of non-usage, i.e. during vacations.
Electrical device not in the hands of children
Never let children use any electrical device unsupervised.
Children cannot always recognise possible dangers. Batteries
/ accumulators can be life threatening when swallowed.
Store batteries out of the reach of small children. In case
of swallowing a battery medical aid has to be sought
immediately. Also keep the packaging foils away from children
as there is danger of suffocation.
Package Contents
LED TV
Connect Power
IMPORTANT: The TV set is designed to operate on 220-240V
AC, 50 Hz socket. After unpacking, allow the TV set to reach
the ambient room temperature before you connect the set to
the mains. Plug the power cable to the mains socket outlet.
Antenna/Cable/Satellite Connection
Connect the aerial or cable TV plug to the AERIAL INPUT
(ANT.) or satellite lead to the SATELLITE INPUT(LNB) located
on the rear side of the TV.
Rear side of the TV:
SATELLITE
Batteries: 2 X AAA
TV
AERIAL
Quick Guide
1 X Video & Audio Connection
Cable
CABLE
Note: Satellite support is depending on the model.
Installing The Batteries Into The Remote
• Remove the back cover to reveal the battery compartment.
Remote Control
3D Glasses
Nero media home CD
Note: You should check the accessories after purchasing.
Make sure that each accessory is included.
• Insert two size AAA batteries. Note the correct polarity(+
or -). Do not mix old and new batteries. Replace only with
same or equivalent type.
• Place the cover back on.
As the manufacturer’s specification supports communication
on cable lengths shall be smaller than 3m.
TV Control button & Operation
Switching On/Off
To Switch the TV On
2. TV/AV button
Connect the power cord to the mains socket. Switch the “
” button on the TV to position “|” so the TV will switch to
standby mode. Then the standby LED lights up.
3. Programme Up/Down buttons
To switch on the TV from standby mode either:
4. Volume Up/Down buttons
• Press the “ ” button, P+ / P- or a numeric button on the
remote control.
1. Standby / On button
• Press the “
” or P/CH+/- button on the TV.
The TV will then switch on.
To Switch the TV to Standby
To switch the TV to low power standby press the “
on the remote control or on the TV.
” button
To Switch the TV Off
, switch is used for turning the TV on or off.
Switch the “
as illustrated - “
LED will go out.
The position of the control buttons and power switch may
differ depending on the model.
English - 4 -
” button on bottom of the TV to position 2
”, to isolate the TV from the mains, the
Viewing remote control - TV
a)
1. Standby / On
2. Channel list
3. Volume up / down
4. Menu on/off
5. OK / Confirm
6. Return / Back
7. Internet Portal
8. My button 1 / YouTube (*)
9. a) (RC4847) My button 2 (**)
b) (RC4848) Press this button to launch the
Netflix application.
TV
10. Coloured buttons (Red, Green, Yellow, Blue)
11. Mono-Stereo Dual I-II / Current language
12. Fast rewind (in media browser mode)
13. Pause (in media browser mode) / Timeshift recording
14. Programme recording
15. Play (in media browser mode)
16. Stop (in media browser mode)
17. Fast forward (in media browser mode)
18. Subtitle on-off / Subtitle (in media browser mode)
19. Image size
20. Teletext - Mix
21. Media Browser
22. Electronic programme guide
23. Exit
24. Navigation buttons
25. Quick menu On-Off
26. Info / Reveal (in TXT mode)
27. Programme up / down
28. Mute
29. Previous programme
30. Numeric buttons
b)
31. AV / Source
Note: The Remote Control range is approximately 7m / 23ft.
Using My button 1 (*)
This button’s main function is to run YouTube link. However, if
you want to change this function, you can press MY BUTTON 1
for five seconds when on a desired source, channel or link, until
the “MY BUTTON IS SET” message is displayed on the screen.
This confirms that the selected MY BUTTON is now associated
with the selected function. Note that if you perform first time
installation, MY BUTTON 1 will return to its default function.
Using My Button 2 (**)
Press MY BUTTON 2 for five seconds when on a desired
source, channel or link, until the “MY BUTTON IS SET”
message is displayed on the screen. This confirms that the
selected MY BUTTON is now associated with the selected
function.
English - 5 -
Viewing the Connections
Connector
Type
Cables
Device
Scart
Connection
(back)
VGA
Connection
(back)
PC/YPbPr
Audio
Connection
(back)
HDMI
Connection
(back&side)
SPDIF
(Optical Out)
Connection
(back)
Side AV
(Audio/Video)
Connection
(side)
Side AV
Connection Cable
(supplied)
Headphone
Connection
(side)
Note: When connecting a
device via the YPbPr or Side AV
input, you must use connection
cables to enable connection.
For Side AV input you should
use the supplied cable. See
the illustrations on the left side.
| To enable PC audio, you will
need to use PC/YPBPR AUDIO
CONNECTION WHITE & RED
inputs. | If an external device
is connected via the SCART
socket, the TV will automatically
switch to AV mode.| When
receiving DTV channels (Mpeg4
H.264) or while in Media
Browser mode, output will not
be available via the scart socket.
| When using the wall mounting
kit (available from third party in
the market), we recommend that
you plug all your cables into the
back of the TV before mounting
on the wall. | Insert or remove
the CI module only when the
TV is SWITCHED OFF. You
should refer to the module
instruction manual for details of
the settings. | Each USB input
of your TV supports devices up
to 500mA. Connecting devices
that have current value above
500mA may damage your TV.
| By connecting an HDMI cable
to your TV, you have to use
only a shielded HDMI cable to
guarantee a sufficient immunity
against parasitic frequency
radiation.
YPbPr Video
Connection
(side)
USB
Connection
(side)
CI
Connection
(side)
Subw out
LAN
CAM
module
If you want to
connect a device to
the TV, make sure
that both the TV and the
device are turned off before
making any connection. After
the connection is done, you
can turn on the units and use
them.
Subwoofer
Connection
(back)
Ethernet (LAN)
Connection
(back)
English - 6 -
First Time Installation
When turned on for the first time, the language selection
screen is displayed. Select the desired language and press
OK.
On the next screen, set your preferences using the navigation
buttons and when finished, press OK to continue.
You can activate Store Mode option at this point. This option
is intended only for store use. It is recommended to select
Home Mode for home use. If Store Mode is selected, a
confirmation screen will be displayed. Select YES to proceed.
This option will be available in Other Settings menu and can
be turned off/on later.
If Home Mode is selected, Store Mode will not be available
after the First Time Installation. Press OK button to continue.
Aerial Installation
If you select Aerial option from the search type selection
screen, the television will search for digital terrestrial TV
broadcasts. After all the available stations are stored, the
Channel List will be displayed on the screen.
While the search continues a message will appear, asking
whether you want to sort channels according to the LCN(*).
Select Yes and press OK to confirm.
(*) LCN is the Logical Channel Number system that organizes
available broadcasts in accordance with a recognizable
channel sequence (if available).
Press MENU button to quit channel list and watch TV.
Cable Installation
If you select Cable option and press OK button on the remote
control a confirmation screen will be displayed. Select YES
and press OK to proceed. To cancel operation, select NO
and press OK. You can select frequency ranges from this
screen. Enter the frequency range manually by using the
numeric buttons. When finished, press OK button to start
automatic search.
Note: Searching duration will change depending on the
selected search step.
Satellite Installation (depends on the model)
If you select Satellite option from the search type selection
screen, you can set a satellite and watch satellite channels.
When you select Satellite installation, Antenna Type menu
will be displayed. You can select Antenna type as Direct,
Unicable or DiSEqC switch.
Direct: If you have a single receiver and a direct satellite dish,
select this antenna type. After selecting Direct, another menu
screen will be displayed. Select an available satellite and press
OK to scan for services.
Unicable: If you have multiple receivers and a unicable
system, select this antenna type. Press OK to continue.
Configure settings by following instructions on the screen.
Press OK to scan for services.
DiSEqC switch: If you have multiple satellite dishes and
a DiSEqC switch, select this antenna type. After selecting
DiSEqC switch, another menu screen will be displayed. You
can set four DiSEqC options (if available). Press GREEN
button to scan all satellites or press YELLOW button to
scan only the highlighted satellite. To save and exit press
OK button.
Note: Do not turn off the TV while initializing first time
installation.
(*) Some options may not be available depending on the
country selection.
Media Playback via USB Input
You can connect a 2.5” and 3.5” inch (hdd with external
power supply) external hard disk drives or USB memory
stick to your TV by using the USB inputs of the TV.
IMPORTANT! Back up your files before making any
connections to the TV. The Manufacturer will not be
responsible for any file damage or data loss.
Certain types of USB devices (e.g. MP3 Players) or USB
hard disk drives/memory sticks may not be compatible
with this TV. The TV supports FAT32 and NTFS disk
formatting but recording will not be available with NTFS
formatted disks.
While formatting a USB hard disk that has 1TB (Tera Byte)
or more file capacity, you can experience problems with the
formatting process.
Quickly plugging and unplugging USB devices, is a very
hazardous operation. This may cause physical damage to
the USB player and the USB device itself. Do not pull out the
USB module while playing a file.
Media Browser Menu
You can play photo, music, and video files stored on a USB
storage device or on a media server. Connect a USB disk
to one of the USB inputs located on the side of the TV. Or
connect your media server to the same network with the TV.
Press the “media browser button ” on the remote or
press the MENU button and select Media Browser tab by
using Left/Right buttons and press OK. Main media browser
screen will be displayed.
Select the media type to be listed and press OK.
If there is more than one media source available, a list of
devices and servers will be displayed. Highlight the device
or server from the list and press OK.
If you press the MENU button while in the Media Browser mode
you can access Picture, Sound and Settings menu options.
Pressing the MENU button again will exit from this screen.
You can set your Media Browser preferences by using the
settings menu.
Changing Image Size: Picture Formats
Programmes can be watched in different picture formats,
depending on the transmission received. You can change the
aspect ratio (image size) of the TV for viewing the picture in
” button repeatedly to
different zoom modes. Press “
change the image size. You can shift the screen up or down
by using “
” or “
” buttons while in 14:9 Zoom, Cinema
or Subtitle.
Using the Channel List
The TV sorts all stored stations in the channel list. You can
edit this channel list, set favourites or set active stations to be
listed by using the Channel List menu options. Press MENU
button to view main menu. Select Channel List item by using
Left or Right button. Press OK to view menu contents. Select
Edit Channel List to manage all stored channels. Use Up or
Down and OK buttons to select Edit Channel List. Press Up
or Down button to select the channel that will be processed.
Press Left or Right button to select a function. Use P+/Pbuttons to move page up or down. Press MENU button to exit.
English - 7 -
Quick Menu
Quick Settings menu allows you to access some options
quickly. Press Q.MENU button on the remote control to view
quick menu. This menu content may differ depending on the
model of your TV.
Teletext
“
” Teletext / Mix: Activates video text mode when pressed
once (if available in your broadcast). Press again to view
analogue teletext page. Press again to place the teletext
screen over the programme (mix). Pressing again will quit
the teletext mode.
Electronic Programme Guide (EPG)
Some, but not all channels send information about the current
and next programmes. Press the “
EPG menu.
” button to view the
You can Record or Set Timer after you have selected a
programme in EPG menu.
Recording a Programme
Your TV supports recording of digital broadcasts. To do this
a USB stroge device should be connected to the TV. The TV
should be switched off while connecting the storage device.
Then switch on the TV to enable recording feature.
The connected USB device should have at least 1 GB capacity
and should have USB 2.0 compatibility. Otherwise an error
message will be displayed.
If the writing speed of the connected USB disk is not
sufficient, recording may fail and timeshifting feature may
not be available.
The files of the recorded programmes will not be available
to be played on a computer. You can play the recordings
only via your TV.
Lip Sync delay may occur during the timeshifting.
The TV can record programmes up to ten hours.
Recorded programmes are split into 4GB partitions.
Recordings of HD programmes can occupy bigger size on
the USB disk depending on the broadcast’s resolution. For
this reason it is recommended to use USB hard disk drives
for recording HD programmes.
Do not plug out the USB/HDD during the recording. This may
harm the connected USB/HDD.
Multipartiton support is available. Maximum two different
partitions are supported. If the disk have more than two
partitions, crash may occur. First partition of the usb disk is
used for PVR ready features. It also must be formatted as
primary partition to be used for PVR ready features.
Some stream packets may not be recorded because of signal
problems, so sometimes video may freezes during playback.
the paused programme from the stopped moment. You will
see the timeshift gap between the real and the timeshifted
programme in the info bar.
(STOP) button to stop timeshift recording and
Press the
return to the live broadcast.
Timeshift cannot be used while in radio mode.
You cannot use the timeshift fast reverse feature before
advancing the playback with the fast forward option.
Instant Recording
Press
(RECORD) button to start recording an event
instantly while watching a programme. You can press
(RECORD) button on the remote control again to record the
next event on the EPG. In this case, OSD will display the
(STOP) button
programmed events for recording. Press
to cancel instant recording. Switching to a different broadcast
or source; and viewing Media Browser are not available during
the recording.
Watching Recorded Programmes
Press MENU button. Highlight Media Browser and press OK.
Select Recordings Library item and press OK. Recordings
Library screen will be displayed. Select a recorded item
from the list (if previously recorded) and press OK to view
Play Options.
(STOP) button to stop a playback and return to
Press
Recordings Library.
Recording Configuration
Select Recording Configuration item in the Settings menu
to configure recording settings.
Format Disk: You can use Format Disk feature for formatting
the connected USB disk.
IMPORTANT: Note that ALL the data stored on the USB disk
will be lost and then the disk format will be converted to FAT32
if you activate this feature. If your USB disk malfunctions, you
can try formatting the USB disk. In most cases formatting the
USB disk will restore normal operation; however, ALL the data
stored on the USB disk will be lost in such a case.
Connectivity Functions
Connecting TV to a Home Network
Connectivity feature allows the TV to connect to the home
network wired or wirelessly. You can use this networking
system to connect to the Internet Portal or to access photo,
video and audio files that are stored on a media server
connected to the network and play/display them on the TV.
Wired connection
Connect the TV to the modem/router via a LAN cable (not
supplied). Select Network Type as Wired Device in Network
Settings menu and press OK to connect.
Record, Play, Pause, Display (for PlayListDialog) keys could
not be used when teletext is ON. If a recording starts from
timer when teletext is ON, teletext is automatically turned
off. Also teletext usage is disabled when there is ongoing
recording or playback.
Broadband ISP
connection
LAN (ethernet)
cable
Timeshift Recording
Press
(PAUSE) button while watching a broadcast for
switching to timeshifting mode. In timeshifting mode, the
programme is paused and simultaneously recorded to the
connected USB disk. Press (PLAY) button again to watch
English - 8 -
LAN input on the rear
side of the TV
Wireless connection
Connecting to your mobile device via WiFi
To connect the TV to the home network wirelessly just select
Network Type as Wireless Device in Network Settings
menu and press OK button. The TV will search for available
networks. Select the desired network and press OK. The TV
has a built-in WLAN system and has no need for additional
devices to connect to a wireless network.
If your mobile device has WiFi feature, you can connect it to
your TV via a router, in order to access the content in your
device. For this, your mobile device must have an appropriate
sharing software.
Broadband
ISP
connection
Connect your mobile device to the router/modem and then
activate the sharing software on your mobile device. Then,
select files that you want to share with your TV.
If the connection is established correctly, you will be able to
access the shared files from your mobile device via the Media
Browser of your TV.
Enter the Media Browser menu and the playback device
selection OSD will be displayed. Select your mobile device
and press the OK button to continue.
If available, you can download a virtual remote controller
application from the server of your mobile device application
provider. You can control the TV via your wireless handheld
device using this application. To do this enable the Virtual
Remote feature from the Settings/Other Settings menu
by pressing Left or Right button. Connect the TV and the
mobile device to the same network and start the application.
Note: This feature may not be supported on all mobile
devices.
TV (Built-In WLAN system)
About Using Connectivity Feature
Using MIRACAST
PC/HDD/Media Player or any other devices that are DLNA
1.5 compatible should be used with wired connection for
higher playback quality.
When you connect a device such as a Miracast compatible
smartphone or tablet to this TV, you can enjoy video and
audio from the device on the TV’s large screen and speakers.
Install Nero Media Home software(supplied) to your PC to
use it as a media server.
1. Switch the TV source to “ Screen Mirroring”.
While using the wireless connection type, consider that the TV
cannot connect to the networks with hidden SSID.
Configuring Network Settings
Your TV’s network settings include wired and wireless
connection options. If you are connecting the TV via ethernet
input, select Network Type as Wired Device. Select
Wireless Device option if you are going to connect the TV
to your network wirelessly.
After selecting Network Type press OK to connect.
You can press YELLOW button to scan available networks
for wireless connection. Afterwards, a list of networks will be
displayed. Select your network from the list and press OK.
If the selected network is protected with a password, key in
the correct code. You can also use virtual keyboard to enter
the password.
Wait until the IP the address is shown on the screen. This
means that the connection is now established.
2. Enable the Miracast function on the Miracast
supported device and connect to the TV.
(The TV changes according to the behavior of the device).
Note: This feature can be used only if the mobile device
supports Miracast. Scanning and connecting processes differ
according to the programme you use. Android based mobile
devices should have the software version V4.1.2 and above.
Using DLNA Network Service
The DLNA standard allows you to view and play photos,
music and videos stored in a DLNA compliant media server
connected to your home network.
Install Nero Media Home software (for PC’s or laptops) or
appropriate sharing software (for other devices)
The DLNA function cannot be used if the server programme
is not installed onto your PC. Prepare your PC with the
provided Nero Media Home programme. Install the propriate
application onto your mobile device.
Enable Media Renderer feature
To disconnect from a network, you should highlight Network
Type and press OK.
Press MENU button. Select Settings and press OK. Highlight
Media Renderer and set as Enabled.
Information On Menu Items
Connect to a Wired or Wireless Network
Network Type: Network type can be selected as Wired or
Wireless device, in accordance with the active connection
to the TV set.
See the previous chapters for detailed information.
Configuration Status: This section displays the status of
the connection.
IP Address: If an active connection is available, the IP
address will be displayed on this section. If you want to
configure IP address preferences, press GREEN button and
switch to the advanced mode.
Play Shared Files via Media Browser
Select Media Browser from the main menu and press OK.
The Media browser will then be displayed.
DLNA support is only available in Folder mode. To enable
folder mode, select to the Settings tab in the main media
browser menu and press OK. Highlight View Style and set
as to Folder. Press the BACK button to go to upper menu.
Select the desired media type and press OK.
English - 9 -
If sharing configurations are set properly, the device selection
OSD will be displayed after selecting the desired media type.
Select media server or network that you want to connect
and press OK.
Subtitle files do not work if you watch videos from your network
through DLNA.
You can connect only one television with DLNA to the same
network. If a problem occurs with the DLNA network, please
switch your television off at the wall socket and back on
again. Trick mode and jump are not supported with the
DLNA function.
There may be some PC’s which may not be able to utilize
the DLNA function due to administrator and security settings
(such as business PC’s).
SHARP corporation bears no responsibility regarding the
content and quality of the content provided by the content
serve provider.
Internet Portal
Portal feature adds your TV a feature that allows you to
connect to a server on the Internet and view the content
provided by this server over your Internet connection. Portal
feature allows you to view the music, video, clip or web
content with defined shortcuts. Whether you can view this
content without interruption depends on the connection speed
provided by your internet service provider.
Press “ ” button on the remote to open internet portal page.
You will see icons of the available applications and services
on the portal screen. Use the navigaiton buttons on your
remote to select the desired one. You may view the desired
content by pressing OK after selecting. Press BACK/RETURN
button to return back to the previous screen or EXIT to quit
internet portal mode
Note: Possible application dependent problems may be
caused by the content service provider.
Open Browser
Open Browser function is one of the applications on the portal
that provides access to internet. Select the internet browser
logo on the portal page and press OK to launch the browser.
Logos of certain predefined websites will be displayed. You
can select one of them for quick access or enter the URLaddress of a website in the address bar on the top of the
screen. To perform searches on the internet enter a keyword
in the adress dialog box and move the cursor to search icon
using the navigation buttons on the remote and press OK.
Netflix
Netflix is a provider of on-demand internet streaming media.
Press the NETFLIX button on the remote to launch the
application.
HBBTV System
HbbTV (Hybrid Broadcast Broadband TV) is a standard that
seamlessly combines TV services delivered via broadcast with
services delivered via broadband and also enables access to
Internet only services for consumers using connected TV’s
and set-top boxes. Services delivered through HbbTV include
traditional broadcast TV channels, catch-up services, videoon-demand, EPG, interactive advertising, personalisation,
voting, games, social networking and other multimedia
applications.
HbbTV applications are available on channels where they are
signalled by the broadcaster. The applications are generally
launched with a small red button icon to notify the user that
there is an HbbTV application on that channel. The user then
should press the red button to open the application page. To
close the application pressing the red button again. It should
be noted that the operation and control of the applications
may differ depending on the application.
Note: You can enable or disable this feature from the Other
Settings menu in Settings menu. This feature is not availlable
for UK models.
Using the 3D Mode
This product supports the viewing of 3D content from devices
such as a High Definition Satellite Receiver or Blu-ray Player
via HDMI, PC,YPBPR, USB inputs or via an available
broadcast. You need to wear the supplied 3D Glasses to
watch contents in 3D.
Precautions
For your safety ; Read these safety precautions carefully
before using the 3D function.
• You may experience discomfort, headaches or dizziness
while watching 3D images. If you experience such
symptoms, you should remove 3D glasses and stop
watching 3D mode.
• Do not watch in 3D mode for long periods of time. Allow
yourself occasional rests. During viewing, if you experience
any discomforts such as eye-strain, headache or nausea;
take off the 3D glasses and stop watching in 3D mode.
Consult a doctor if the discomforts persist.
• It is recommended that an adult should check on children,
including teenagers because they may be more sensitive
to the effects of watching 3D. If they experience similar
discomforts mentioned above, have them stop watching
in 3D immediately.
• Do not use the 3D Glasses as sunglasses or general
eyeglasses.
• Do not move around while watching in 3D and wearing the
glasses as your vision is modified and you may run into
objects which may result in injuries.
• Use only the supplied 3D glasses.
• If you experience screen flickering when watching 3D
images in poor light conditions, you should turn the lamp
off or dim the light.
• While wearing headphones do not adjust the volume
to excessive levels as this may result in temporary or
permanent hearing loss.
CAUTION - 3D Images
• Read these safety instructions carefully to prevent damage
and ensure your personal safety.
• Consult an optometrist if you experience any diffictulties
while watching in 3D with your 3D glasses.
The following people should not use the 3D Mode:
• Pregnant women, seniors, people with heart conditions, as
well as people who can get easily nauseous.
• When watching in 3D be aware of your surroundings. Do
not watch in an environment with breakable objects nearby.
• Do not apply spray cleaners directly onto the surface of the
3D Glasses.This may result in discoloration and cracks and
may cause the screen display to peel off.
• Make sure the cleaning cloth is soft and does not contain
any foreign material or dust. Using a dirty cloth will damage
English - 10 -
your 3D glasses.
• Do not drop or bend the 3D glasses.
• If the receiving range is out of the specified range, the
screen may not be viewable as 3D video.
Health Warning! - 3D Images
• When watching 3D images, you should leave a distance of
at least twice the screen width between you and the screen,
and you should keep the screen at eye level.
• Please prevent children under the age of 5 from watching
3D. It may affect their vision development.
Photosensitive Seizure Warning
• If you or a member of your family has a history of epilepsy
or seizure, please consult with your doctor before watching
3D TV. It is possible that some viewers may experience a
seizure or epilepsy when exposed to certain conditions,
including flashing lights or images in TV or video games.
• Sometimes certain symptoms can occur in unspecified
conditions even if you do not have any previous history.
In such a case, if you experience any of the following
symptoms, immediately stop watching the 3D TV and
consult a doctor: altered vision, visual or facial instability,
such as eye or muscle twitching, dizziness or lightheadedness, visual transition or unconscious action,
convulsion, loss of conscience, confusion or disorientation,
loss of directional sense, cramps, or nausea.
• You can reduce the risk of photosensitization seizure by
taking the following actions:
• While watching the 3D TV, do take frequent breaks. If you
have vision that is different in each eye, you should watch
the TV after taking vision correction measures.
Auto: Automatically switches to 3D mode if 3D information is
detected from a digital broadcast or a HDMI source.
Side by Side: Displays 3D content which is originally in a
form of side by side.
Top bottom: Displays 3D content which is originally in a form
of top and bottom.
Game: When playing 1:1 games on your TV, each player can
enjoy the game with a full screen using this feature. To do this,
the game you want to play has to support dualplay. And you
need to put on the proper Dual Play glasses(sold separately).
Off: 3D function mode is turned off.
2D Only
If content is 3D but you want to watch it in 2D, you can switch
to 2D only mode. There are 2 options (LEFT and RIGHT) to
select which side of the content you want to watch in 2D.
Virtual 3D
Conversion from 2D to 3D. You can adjust the field of
depth to various settings or turn it off.
Left/Right Swap
You can use this setting to shift the phase of the 3D left/
right broadcast.
3D Depth Sense (optional)
This setting enables the control of 3D depth.
3D Viewing Information
Refer to the size / distance guidelines below to experience
3D in the best possible way.
Viewing Distance
• Some viewers may feel disoriented afler watching 3D.
Therefore, after you watch 3D, take a moment to regain
awareness of your surrounding before moving.
• You must look straight ahead and the TV must be at eye
level while wearing the 3D glasses. The picture may not
be visible or may look dark if you do not stay within the
viewing angle.
Size (inch)
42
50
Viewing distance (m)
1,5
1,8
Horizontal Viewing Angle
Operating the 3D Mode
• You can enjoy viewing 3D images on your TV by wearing
the supplied 3D Glasses. Note that this TV’s 3D feature
works only with its specific 3D glasses.
• Press the “SOURCE connected input.
” button and select the
45
• You should select suitable 3D Mode before viewing.
45
• To view 3D contents or programmes in 3D mode you must
wear the supplied 3D Glasses.
3D Settings
Press the MENU button on the remote and select the Picture
icon and press OK. Select 3D Settings and press OK to
display settings menu.
You can use the Q.MENU button on the remote for quick
acces to 3D Mode and Virtual 3D settings.
You can use these settings to enable and customize 3D
feature of your TV.
3D Mode
You can customize the 3D mode settings to provide the best
viewing experience. Select one of these modes to experience
3D image viewing.
Vertical Viewing Angle
It is strongly recommended that the TV is placed at a height
as same as the eye level of the viewer. In case that is not
possible, tilt the TV accordingly in its stand or wall mount.
English - 11 -
UHF (BAND U)
HYPERBAND
NUMBER OF PRESET CHANNELS
1000
10.000 (if satellite is supported)
CHANNEL INDICATOR
On Screen Display
RF AERIAL INPUT
75 Ohm (unbalanced)
OPERATING VOLTAGE
220-240V AC, 50 Hz.
AUDIO
German + Nicam Stereo
OPERATION TEMPERATURE AND OPERATION
HUMIDITY
0ºC up to 40ºC, 85% humidity max
PANEL 16:9
Licence Notifications
Manufactured under license from Dolby Laboratories.
Dolby and the double-D symbol are trademarks of Dolby
Laboratories.
3D Viewing Information - continued
1080p@24
FP
720p@50
FP
720p@60
FP
1080p FC
720p FC
1080i FC
OTHER
HDMI
Supported
Supported
Supported
SBS, TB
SBS, TB
SBS
Not
Supported
MBV
Not
Supported
Not
Supported
Not
Supported
SBS, TB
SBS, TB
SBS
Not
Supported
MBP
Not
Supported
Not
Supported
Not
Supported
SBS, TB
SBS, TB
SBS
DTV
Not
Supported
Not
Supported
Not
Supported
SBS, TB
SBS, TB
SBS
OTHER
Not
Supported
Not
Supported
Not
Supported
SBS, TB
SBS, TB
SBS
(*)
Please note that if you apply 720p FC TB input; the picture
will be scaled smaller than the original size in the middle
of the screen.
SBS: Side By Side
TB: Top Bottom
MBP: Media Browser Picture
MBV: Media Browser Video
FC: Frame Compatible
FP: Frame Pack
in MBP: Supported only when, the image’s height is
multiples of 2 and the image’s width is multiples of 16 and if
the image width is equal to the panel width or wider.
in DTV: Supported only when, the image’s height is between
1700 and 1900 and the image’s width is equal to 1280 or 720.
(*): Not supported if the image provides 1080i resolution.
Specifications
TV BROADCASTING
PAL B/G I/I’ D/K
SECAM L/L’ D/K
DIGITAL RECEPTION
FULLY INTEGRATED DIGITAL TERRESTRIAL-CABLE
TV(DVB-T-C)
(DVB-T2 COMPLIANCE AND DVB-S/S2 SUPPORT IS
DEPENDING ON THE MODEL)
RECEIVING CHANNELS
VHF (BAND I/III)
English
All other company or product names are trademarks or
registered trademarks of their respective companies.
Netflix and the Netflix logo are the registered trademarks of
Netflix, Inc.
The Wi-Fi CERTIFIED Logo is a certification mark of the
Wi-Fi Alliance.
The Wi-Fi Protected Setup Mark is a mark of the Wi-Fi
Alliance.
Wi-Fi CERTIFIED Miracast™ and Miracast™ are trademarks
of Wi-Fi Alliance.
“DLNA ®, the DLNA Logo and DLNA CERTIFIED ® are
trademarks, service marks, or certification marks of the Digital
Living Network Alliance.”
“HDMI, the HDMI logo and High-Definition Multimedia Interface
are trademarks or registered trademarks of HDMI Licensing LLC.”
“YouTube and the YouTube logo are trademarks of Google
Inc.”
The “HD TV 1080P” Logo is a trademark of DIGITALEUROPE.
The DVB logo is the registered trademark of the Digital Video
Broadcasting—DVB—project.
EC Declaration of Conformity
Hereby, SHARP Electronics (Europe) GmbH declares that
the TV set is in compliance with the essential requirements
and other relevant provisions of Directive 1999/5/EC.
The declaration of conformity may be consulted at:
http://www.sharp.eu/documents-of-conformity
Note:
Usage of this LCD TV is permitted in Europe.
This LCD TV is designed for indoor use only.
- 12 -
Supported File Formats for USB Media
Browser
DISCLAIMERS
Media
Extension
Format
Video
.dat, .mpg, .mpeg
Mpeg1-2
.ts, .trp, .tp, .m2ts
MPEG2 , H.264, VC1,
AVS, MVC
.vob
MPEG2
.mkv
MPEG1-2-4, H.264
.mp4
MPEG4, XviD, H.264
.avi
MPEG2-4, Xvid, H.264
.fla, .flv
H.264, Sorenson H.263
.3gp
MPEG4, H.264
.asf, .wmv
VC1
.mp3
MPEG1/2 Layer 1/2/3
(MP3)
.wav
LPCM
.WMA/ASF
WMA, WMA Pro
.m4a/ .aac
AAC, HEAAC
.pcm
PCM
(works only with
video files)
AC3
Audio
This SHARP device facilitates the access to content and
services provided by third parties.
EAC3
G711 A/mu-law
.png
Baseline
Progressive
non-interlace
interlace
.bmp
Subtitle
.sub
-
.srt
-
• SHARP is not responsible, nor liable, for customer servicerelated issues related to the third party content or services.
Any questions, comments or service-related inquiries
relating to the third party content or service should be
made directly to the applicable content or service provider.
• A L L T H I R D PA RT Y C O N T E N T O R S E RV I C E S
ACCESSIBLE VIA THIS DEVICE IS PROVIDED TO
YOU ON AN “AS-IS” AND “AS AVAILABLE” BASIS AND
SHARP AND ITS AFFILIATES MAKE NO WARRANTY
OR REPRESENTATION OF ANY KIND TO YOU, EITHER
EXPRESS OR IMPLIED, INCLUDING, WITHOUT
LIMITATION, ANY WARRANTIES OF MERCHANTABILITY,
NON-INFRINGEMENT, FITNESS FOR A PARTICULAR
PURPOSE OR ANY WARRANTIES OF SUITABILITY,
AVA I L A B I L I T Y, A C C U R A C Y, C O M P L E T E N E S S ,
S E C U R I T Y, T I T L E , U S E F U L N E S S , L A C K O F
NEGLIGENCE OR ERROR-FREE OR UNINTERRUPTED
OPERATION OR USE OF THE CONTENT OR SERVICES
PROVIDED TO YOU OR THAT THE CONTENT OR
SERVICES WILL MEET YOUR REQUIREMENTS OR
EXPECTATIONS.
IMA-ADPCM/MSADPCM
.jpeg
The content and services accessible via this device belong to
and may be proprietary to third parties. Therefore, any use of
such third party content and services must be in accordance
with any authorization or terms of use provided by such
content or service provider. SHARP shall not be liable to you or
any third party for your failure to abide by such authorization or
terms of use. Unless otherwise specifically authorized by the
applicable content or service provider, all third party content
and services provided are for personal and non-commercial
use; you may not modify, copy, distribute, transmit, display,
perform, reproduce, upload, publish, license, create derivative
works from, transfer or sell in any manner or medium any
content or services available via this device.
• You may not be able to access content or services from the
device for a variety of reasons which may be unrelated to
the device itself, including, but not limited to, power failure,
other Internet connection, or failure to configure your device
properly. SHARP, its directors , officers, employees, agents,
contractors and affiliates shall not be liable to you or any
third party with respect to such failures or maintenance
outages, regardless of cause or whether or not it could
have been avoided.
LPCM
Picture
Disclaimers for services using the
Internet
• SHARP IS NOT AN AGENT OF AND ASSUMES NO
RESPONSIBILITY FOR THE ACTS OR OMISSIONS OF
THIRD PARTY CONTENT OR SERVICE PROVIDERS,
NOR ANY ASPECT OF THE CONTENT OR SERVICE
RELATED TO SUCH THIRD PARTY PROVIDERS.
Refer to the extended version of this
manual on the Sharp web for more details.
• IN NO EVENT WILL SHARP AND/OR ITS AFFILIATES
BE LIABLE TO YOU OR ANY THIRD PARTY FOR ANY
DIRECT, INDIRECT, SPECIAL, INCIDENTAL, PUNITIVE,
CONSEQUENTIAL OR OTHER DAMAGES, WHETHER
THE THEORY OF LIABILITY IS BASED ON CONTRACT,
TORT, NEGLIGENCE, BREACH OF WARRANTY, STRICT
LIABILITY OR OTHERWISE AND WHETHER OR NOT
SHARP AND/OR ITS AFFILIATES HAVE BEEN ADVISED
OF THE POSSIBILITY OF SUCH DAMAGES.
English - 13 -
End of life disposal
English - 14 -