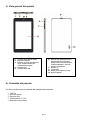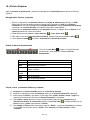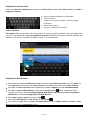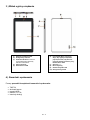
1
Intenso TAB 734 Long Manual V1.0 Bedienungsanleitung TAB 734 Vielen Dank, dass Sie sich für das TAB 734 entschieden haben. Folgen Sie bitte dieser Anleitung, um über die wichtigsten Funktionen des Gerätes informiert zu werden. 1.) Inhaltsverzeichnis 1.) Inhaltsverzeichnis .................................................................................................................................................................................. 1 2.) Hinweise ................................................................................................................................................................................................ 2 3.) Geräteüberblick ..................................................................................................................................................................................... 4 4.) Packungsinhalt ...................................................................................................................................................................................... 4 5.) Laden des Akkus ................................................................................................................................................................................... 5 6.) Nutzung einer Micro SD/SDHC/SDXC Karte ......................................................................................................................................... 5 7.) Übertragung von Daten zwischen dem Gerät und einem Computer ..................................................................................................... 5 8.) Touchscreen .......................................................................................................................................................................................... 6 9.) WIFI ....................................................................................................................................................................................................... 6 Automatische Verbindung ........................................................................................................................................................................... 6 Manuelle Verbindung .................................................................................................................................................................................. 7 10.) Der Startbildschirm .............................................................................................................................................................................. 8 Ansicht ........................................................................................................................................................................................................ 8 Entsperren des Displays ............................................................................................................................................................................. 8 Statusleisten ............................................................................................................................................................................................... 9 Anpassung des Startbildschirms ............................................................................................................................................................... 10 Verschiedene Startbildschirme nutzen...................................................................................................................................................... 10 Vorinstallierte Anwendungen auf dem Startbildschirm .............................................................................................................................. 11 11.) Anwendungsübersicht ....................................................................................................................................................................... 11 12.) Versand / Empfang von E-Mails ........................................................................................................................................................ 12 Einrichtung Ihres E-Mail Postfaches ......................................................................................................................................................... 12 Verwaltung der E-Mail Accounts ............................................................................................................................................................... 13 Anzeige von E-Mail Nachrichten ............................................................................................................................................................... 13 Schreiben von E-Mail Nachrichten............................................................................................................................................................ 13 13.) Web Browser ..................................................................................................................................................................................... 14 Nutzung der virtuellen Tastatur ................................................................................................................................................................. 14 Nutzung des Web Browsers ..................................................................................................................................................................... 15 14.) System Einstellungen ........................................................................................................................................................................ 15 Einstellungsübersicht der wichtigsten Einstellungen ................................................................................................................................. 16 15.) Verwaltung von Anwendungen .......................................................................................................................................................... 17 Installation von Anwendungen .................................................................................................................................................................. 17 Deinstallation von Anwendungen .............................................................................................................................................................. 17 16.) Datei Explorer .................................................................................................................................................................................... 18 Durch Dateien und Ordner navigieren ...................................................................................................................................................... 18 Die Toolbar nutzen.................................................................................................................................................................................... 18 Dateien und Ordner kopieren, verschieben und umbenennen.................................................................................................................. 18 17.) Eingeschränkte Garantiebedingungen............................................................................................................................................... 19 18.) Technische Daten .............................................................................................................................................................................. 19 19.) Wartung des Gerätes......................................................................................................................................................................... 20 20.) Säuberung des Gerätes..................................................................................................................................................................... 20 21.) Entsorgung von Elektro-Altgeräten .................................................................................................................................................... 20 22.) Lizenzinformation............................................................................................................................................................................... 21 EG Konformitätserklärung ............................................................................................................................................................................ 25 Dieses Handbuch enthält unter Umständen nicht alle Funktionen Ihres Gerätes. Für die Nutzung von Anwendungen die von Drittanbietern stammen, kontaktieren Sie bitte den Anbieter. Bitte beachten Sie, dass alle Angaben ohne vorherige Ankündigung geändert werden können. Aktuelle Informationen finden Sie unter www.intenso.de Markenzeichen Google™, das Google™-Logo und Android™ sind Marken von Google™. Alle anderen Produkt- oder Servicenamen sind Eigentum ihrer jeweiligen Inhaber. DE - 1 2.) Hinweise Vermeiden Sie einen harten Aufprall des Gerätes. Legen Sie es nicht auf schräge Flächen, um einen Sturz des Gerätes zu vermeiden. Verwenden Sie das Gerät nicht in extrem kalten, heißen, feuchten oder staubigen Gebieten. Setzen Sie es ebenfalls keinen direkten Sonnenstrahlen aus. Vermeiden Sie die Nutzung auf sandigen Plätzen. Verwenden Sie das Gerät nicht in explosionsgefährdeten Umgebungen, wie zum Beispiel an den Zapfsäulen einer Tankstelle. Vermeiden Sie die Benutzung auf Kissen, Sofas oder anderen Gegenständen, die eine Wärmeentwicklung unterstützen, da die Gefahr einer Überhitzung des Gerätes besteht. Führen Sie häufiger Datensicherungen durch, um einen möglichen Datenverlust zu vermeiden. Wir sind nicht haftbar für einen eventuellen Datenverlust. Trennen Sie die Verbindung nicht, wenn Daten übertragen werden oder das Gerät formatiert wird. Dies kann zu Datenverlust führen. Bilder und Filme können durch Rechte Dritter geschützt sein. Das Abspielen ohne Lizenz kann Copyright Rechte verletzen. Vermeiden Sie das Benutzen in stark magnetisierten Feldern. Schützen Sie das Gerät vor Nässe. Wenn Feuchtigkeit in das Gerät eintritt, schalten Sie es bitte unverzüglich aus, danach säubern und trocknen Sie bitte das Gerät. Verwenden Sie bitte keine chemischen Lösungen, um das Gerät zu säubern. Hier bitte nur ein trockenes Tuch verwenden. Keine offenen Flammen, beispielsweise angezündete Kerzen, in die Nähe oder auf dem Gerät platzieren. Wir sind nicht haftbar für Schäden bei einer Fehlfunktion, für Datenverlust, fehlerhafter Handhabung, eigenhändiger Reparatur des Geräts oder Wechseln des Akkus. Sollte das Gerät einmal nicht auf Ihre Eingaben reagieren, benutzen Sie bitte den Reset-Knopf auf der Rückseite des Gerätes, um es neu zu starten. Bei Nichtverwendung trennen Sie bitte das Netzteil von der Stromversorgung. Die Steckdose muss sich in der Nähe des Gerätes befinden und leicht zugänglich sein. Betreiben Sie den Netzadapter nur an geerdeten Steckdosen mit AC 100-240V~, 50/60 Hz. Wenn Sie sich der Stromversorgung am Aufstellungsort nicht sicher sind, fragen Sie beim betreffenden Energieversorger nach. Benutzen Sie nur das beiliegende Netzadapter- und Netzanschlusskabel. Um die Stromversorgung zu Ihrem Gerät zu unterbrechen, ziehen Sie das Netzteil aus der Steckdose. Halten Sie beim Abziehen immer das Netzteil selbst fest. Ziehen Sie nie an der Leitung. DE - 2 Öffnen Sie nicht das Gehäuse des Netzadapters. Bei geöffnetem Gehäuse besteht Lebensgefahr durch elektrischen Schlag. Es enthält keine zu wartenden Teile. Bei längerer Nichtverwendung entlädt sich der Akku des Gerätes langsam. Vor der Wiederverwendung muss dieser erneut aufgeladen werden. Bitte beachten Sie die umweltgerechte Entsorgung des Gerätes oder des Akkus. Bitte zerlegen Sie das Gerät nicht in Einzelteile, und versuchen Sie bitte nicht, es selbst zu reparieren, da die Garantie in diesem Fall erlischt. Nutzen Sie das Gerät nicht an Orten, wo die Nutzung von Mobilgeräten verboten ist. Nutzen Sie das Gerät nicht in der Nähe anderer elektronischer Geräte, da es durch die Hochfrequenzsignale zu Störungen kommen kann. Nutzen Sie das Gerät nicht in der Nähe eines Schrittmachers, in einem Krankenhaus oder in der Nähe medizinischer Geräte, da es durch die Hochfrequenzsignale zu Störungen kommen kann. Halten Sie mindestens 15cm Abstand von einem Schrittmacher. Wenden Sie sich bitte an den Hersteller dieser Geräte, um Informationen über die gemeinsame Nutzung zu erhalten. Bitte beachten Sie, dass eine dauerhaft hohe Lautstärke zu bleibenden Hörschäden führen kann. Um ein mögliches Gesundheitsrisiko durch zu hohe Lautstärke zu vermeiden, empfehlen wir Ihnen nur die beigefügten Kopfhörer zu verwenden. Aus Gründen der Verkehrssicherheit darf das Gerät während der Fahrt nicht vom Fahrzeugführer selbst bedient werden. DE - 3 3.) Geräteüberblick (1) 3.5mm Kopfhörerbuchse (2) Integriertes Mikrofon (3) Ladestatus LED. Leuchtet während des Ladens rot auf. Leuchtet gelb, sobald der Akku vollständig aufgeladen wurde. (4) Front Kamera (5) Micro-USB Buchse (6) Ein / Aus Taste: Lange drücken, um das Ausschaltmenü zu öffnen; kurz drücken, um das Display aus dem Ruhemodus zu reaktivieren. (7) Lautstärke + / (8) Touchscreen (9) Micro-SD Kartenslot (10) Lautsprecher 4.) Packungsinhalt Bitte überprüfen Sie den Packungsinhalt auf Vollständigkeit: TAB 734 USB Kabel Netzteil 5V 1.2A Bedienungsanleitung DE - 4 5.) Laden des Akkus Bitte laden Sie den Akku des Gerätes vor der ersten Benutzung vollständig auf. Verbinden Sie dazu das beiliegende Netzteil mit dem Gerät und einer Steckdose. Das vollständige Laden dauert ca. 5 Stunden. Der Ladezustand wird an der vorderen, linken Seite des Geräts angezeigt. Die LED leuchtet während des Aufladens Rot und wechselt zu Gelb, wenn der Akku vollständig geladen ist. Hinweise: a. Bei 15% verbleibender Restleistung des Akkus erhalten Sie eine Warnmeldung auf das Display. Sie sollten das Gerät nun zum Aufladen des Akkus über das Netzteil mit einer Steckdose verbinden, um eventuellen Datenverlust zu vermeiden und die Lebensdauer des Akkus zu erhöhen. b. Sie können das Gerät nutzen, während Sie die Batterie aufladen. Um eine langanhaltende Batterie-Lebensdauer zu gewährleisten, bitten wir Sie, das Gerät nicht zu nutzen. c. Um eine gute Performance zu gewährleisten, muss der eingebaute Akku häufig genutzt werden. Wenn Sie das Gerät nur selten gebrauchen, laden Sie den Akku bitte mindestens einmal im Monat vollständig auf. d. Stellen Sie sicher, dass Sie nur das mitgelieferte Netzteil zum Aufladen benutzen. 6.) Nutzung einer Micro SD/SDHC/SDXC Karte Dieses Gerät kann Daten direkt von einer Micro SD/SDHC/SDXC Karte mit einer maximalen Kapazität von 64 GB lesen. Um eine Micro SD/SDHC Karte zu nutzen, stecken Sie bitte die Karte in den dafür vorgesehenen Micro SD Slot auf der linken Seite des Gerätes. Nutzen Sie den vorinstallierten Explorer, um auf die auf der Speicherkarte vorhandenen Daten zuzugreifen. Bitte wählen Sie hierzu im Explorer das Verzeichnis „SD Card“ aus. 7.) Übertragung von Daten zwischen dem Gerät und einem Computer 1.) Verbinden Sie das Gerät mit Hilfe des beiliegenden USB Kabels mit einem Computer. 2.) Auf dem Gerät wird nun der Bildschirm für die USB Verbindung angezeigt. Tippen Sie kurz auf „USBSpeicher aktivieren“. Das Gerät wird als Wechseldatenträger erkannt und Sie erhalten die Info „USBSpeicher in Verwendung“. Nach kurzem Tippen auf die Home-Taste können Sie Ihr Gerät normal weiternutzen. Sie haben nun von Ihrem Computer Zugriff auf den internen Speicher des Gerätes und können Dateien auf das Gerät kopieren, löschen oder verschieben. 3.) Wenn eine USB Verbindung mit dem Computer besteht, wird Ihnen in der Statusleiste oben links ein USB Symbol angezeigt. In der erweiterten Statusleiste (zum Öffnen bitte die Leiste mit dem Finger nach unten ziehen) bekommen Sie zusätzliche Informationen und können die USB Verbindung aktivieren bzw. deaktivieren. Um den Speicher zu deaktivieren, wählen Sie “USB-Speicher deaktivieren” aus. Wählen Sie beim Computer die Funktion „Sicher Entfernen“ trennen. aus, um das Gerät vom Computer zu Hinweis: Die vorinstallierten Anwendungen und das Android™ Betriebssystem nehmen einen Teil des vorhandenen internen Speichers ein. Aus diesem Grunde steht Ihnen nicht der gesamte interne Speicher zur Verfügung. DE - 5 8.) Touchscreen Dieses Gerät wird über einen Touchscreen gesteuert. Sie können mit Ihren Fingern durch leichtes Tippen auf den Touchscreen ganz einfach Anwendungen starten, Texte auf der virtuellen Tastatur eingeben und durch wischen in die jeweilige Richtung zwischen den einzelnen Startbildschirmen wechseln. Bitte entfernen Sie die Display Schutzfolie vor der Verwendung des Gerätes. Der Touchscreen erkennt geringe elektrische Ladungen, wie sie beispielsweise vom menschlichen Finger abgegeben wird und bestimmt so den Eingabepunkt. Nutzen Sie für die Eingabe also idealerweise Ihre Fingerspitzen. Die Bedienung mit einem Stift oder anderen spitzen Gegenständen ist nicht möglich. Der Touchscreen sollte nicht mit Wasser oder anderen elektrischen Vorrichtungen in Berührung kommen, um Fehlfunktionen und dauerhafte Defekte zu vermeiden. Hinweise: a. Wird der Touchscreen zwei Minuten lang nicht bedient, wechselt das Gerät in den Standby Modus. Drücken Sie kurz die Ein / Aus Taste, um in den aktiven Modus zu wechseln. b. Um ungewünschte Eingaben zu verhindern, ist automatisch eine Tastensperre aktiviert. Entriegeln Sie bitte die Tastensperre auf dem Touchscreen. Berühren Sie das geschlossene Schloss auf dem Display und halten Sie dieses gedrückt. Ziehen Sie nun das Schloss auf das soeben erschienende geöffnete Schloss Bildschirm ist nun entsperrt. und lösen Sie dann Ihren Finger vom Display. Der Sie können das Gerät in alle Richtungen drehen. Es verfügt über einen Sensor, der das Display automatisch ausrichtet. 9.) WIFI Um das Gerät mit dem Internet zu verbinden, benötigen Sie eine WLAN Verbindung. Um diese herzustellen, öffnen Sie in den Einstellungen die WLAN Einstellungen. Hinweis: Bitte beachten Sie, dass sich ein WLAN Netz in Reichweite ihrer aktuellen Position befinden muss. Automatische Verbindung Öffnen Sie über die Einstellungen die WLAN Einstellungen. Hier können Sie die WLAN Funktion ganz einfach aktivieren oder deaktivieren. Schieben Sie den virtuellen Schalter einfach aus der Position „An“ nach links, um die WLAN Funktion zu deaktivieren. Die Anzeige wechselt nun zu „Aus“. Um die deaktivierte WLAN Funktion wieder zu aktivieren, schieben Sie den virtuellen Schalter einfach nach rechts. DE - 6 In den WLAN-Einstellungen werden Ihnen auf der rechten Seite alle verfügbaren Netzwerke sowie alle bereits genutzten Netzwerke angezeigt. Tippen Sie bitte auf das gewünschte Netzwerk und geben Sie gegebenenfalls den passenden WLAN Schlüssel (Passwort) ein, um eine Verbindung herzustellen. Bestätigen Sie das gegebenenfalls eingegebene Passwort durch tippen auf die Enter Taste und tippen Sie nun auf Verbinden. Nach einem kurzen Moment ist die Verbindung hergestellt. Hinweise: a) Wenn das Gerät in den Standby Modus wechselt, wird WLAN automatisch deaktiviert. Dies verringert den Stromverbrauch und führt so automatisch zu einer längeren Akkulaufzeit. Wenn das Gerät wieder in den aktiven Modus wechselt, wird automatisch die WLAN Verbindung wiederhergestellt. Dies kann einige Sekunden dauern. b) Die Liste der aktuell auffindbaren WLAN Netzwerke wird automatisch aktualisiert. c) Wenn die WLAN Funktion aktiviert ist, verbindet sich das Gerät automatisch mit einem bereits konfigurierten Netzwerk, sofern es sich in Reichweite befindet. d) Wenn sich ein unbekanntes WLAN Netzwerk in Reichweite befindet, wird ein Informationsfeld eingeblendet. Manuelle Verbindung Um manuell nach einem erreichbaren WLAN Netz zu suchen, gehen Sie bitte wie folgt vor: (1) Öffnen Sie die Einstellungen. (2) Öffnen Sie jetzt die WLAN-Einstellungen und tippen Sie auf die drei Punkte oben rechts und wählen Sie anschließend „Scannen“. (3) Sollte das WLAN Netz nicht in der Liste der verfügbaren Netzwerke erscheinen, wählen Sie den Punkt “Netzwerk hinzufügen” aus, um von Hand die Netzwerk SSID, das Sicherheitsprotokoll und das gegebenenfalls zugehörige Passwort einzugeben. Zur Bestätigung Ihrer Eingaben tippen Sie bitte auf „Speichern“. DE - 7 10.) Der Startbildschirm Ansicht Entsperren des Displays Wird der Touchscreen zwei Minuten lang nicht bedient, wechselt das Gerät in den Standby Modus. Drücken Sie kurz die Ein / Aus Taste, um in den aktiven Modus zu wechseln. Das Display ist zum Schutz vor ungewünschten Eingaben gesperrt. Berühren Sie das geschlossene Schloss auf dem Display und halten Sie dieses gedrückt. Ziehen Sie nun das Schloss auf das soeben erschienende geöffnete Schloss und lösen Sie dann Ihren Finger vom Display. Der Bildschirm ist nun entsperrt. Ziehen Sie das Schloss Symbol mit Ihrem Finger in Pfeilrichtung Hinweis: Ziehen Sie das Schloss Symbol zum erscheinenden Kamera Symbol, um direkt die Kameraanwendung zu öffnen. DE - 8 Statusleisten Die Statusleisten finden Sie im oberen und unteren Bereich des Startbildschirms. Die obere Statusleiste teilt sich in zwei Bereiche. Ziehen Sie die Leiste auf der linken Seite herunter, werden Ihnen, falls vorhanden, die aktuellen Benachrichtigungen angezeigt. Ziehen Sie die Leiste auf der rechten Seite herunter, werden Ihnen die Schnellzugrifffelder für verschiedene Einstellungen angezeigt. In der unteren Statusleiste haben Sie die Möglichkeit, zur vorherigen Anzeige zu wechseln, oder die gegebenenfalls eingeblendete Tastatur auszublenden, direkt den Startbildschirm aufzurufen und die zuletzt genutzten Prorgramme angezeigt zu bekommen. DE - 9 Anpassung des Startbildschirms Sie können Ihren Startbildschirm ganz einfach an Ihre individuellen Bedürfnisse anpassen. Wenn Sie ein Icon löschen möchten, tippen Sie etwas länger mit Ihrem Finger auf das Icon und schieben Sie es dann in das eingeblendete X-Symbol. Nehmen Sie den Finger nun vom Touchscreen und das Icon wird gelöscht. Wenn Sie ein Icon aus der Anwendungsübersicht auf den Startbildschirm positionieren wollen, tippen Sie in der Anwendungsübersicht etwas länger auf das Icon und der Startbildschirm erscheint. Schieben Sie das Icon an die gewünschte Stelle und lösen Sie den Finger vom Touchscreen. Das Icon wurde nun dem Startbildschirm hinzugefügt. Wenn Sie ein Icon auf ein anderes Icon legen, wird automatisch ein Ordner mit beiden Icons angelegt. Tippen Sie auf den Ordner, um alle darin abgelegten Icons angezeigt zu bekommen und wählen Sie dann das gewünschte Icon durch kurzes Tippen aus. Sie können dem Startbildschirm außerdem Widgets hinzufügen. Öffnen Sie dazu bitte die Anwendungsübersicht. Tippen Sie als nächstes auf das Wort Widgets. Es werden Ihnen nun alle auf dem Gerät verfügbaren Widgets angezeigt. Das Hinzufügen eines Widgets auf den Startbildschirm funktioniert genau, wie das Hinzufügen eines Icons. Wenn Sie das Hintergrundbild ändern möchten, tippen Sie einfach auf eine freie Stelle auf einem Startbildschirm und halten Sie den Finger solange auf das Display gedrückt, bis das Hintergrundauswahlmenü erscheint. Verschiedene Startbildschirme nutzen Ihnen stehen fünf individuell einzurichtende Startbildschirme zur Verfügung. Durch eine leichte Wischbewegung nach links oder rechts, können Sie ganz leicht zwischen Ihnen wechseln. Durch Drücken der Home-Taste gelangen Sie immer automatisch zum mittleren Startbildschirm zurück. DE - 10 Vorinstallierte Anwendungen auf dem Startbildschirm A Verknüpfung zur Google™ Suche B Lesezeichen Übersicht für den Chrome™ Browser C Kontakte, Gmail™, Anwendungsübersicht, Chrome™ und Google+™ D Google Playstore™ , YouTube™ , Hangouts™ , Maps™ , und Local™ 11.) Anwendungsübersicht Tippen Sie kurz auf das Anwendungsübersicht Icon, um die Anwendungsübersicht zu öffnen. Sie sehen nun eine Übersicht aller vorinstallierten und bereits von Ihnen installierten Anwendungen. Öffnen Sie die gewünschte Anwendung durch kurzes Tippen auf das entsprechende Icon. Anwendungsübersicht DE - 11 12.) Versand / Empfang von E-Mails Auf diesem Gerät ist eine E-Mail Anwendung vorinstalliert. Sie können damit Ihre bereits bestehende E-Mail Adresse nutzen, um E-Mails zu versenden und zu empfangen. Hinweis: Für diese Funktion ist eine WLAN Verbindung zum Internet erforderlich . Öffnen Sie die Anwendung über das „E-Mail“ Icon, welches Sie im Anwendungsmenü finden. Einrichtung Ihres E-Mail Postfaches (1) Starten Sie die E-Mail Anwendung durch Tippen auf das E-Mail Symbol. Sie werden nun aufgefordert Ihr E-Mail Postfach einzurichten. (2) Geben Sie Ihre E-Mail Adresse sowie Ihr zugehöriges Passwort ein und tippen Sie dann auf „Weiter“. Anschließend benennen Sie Ihr Konto und legen Ihren angezeigten Namen für ausgehende Nachrichten fest. Tippen Sie auf „Fertig“ um die Einrichtung abzuschließen. Ihr E-Mail Postfach wird als Standard Postfach ausgewählt, wenn Sie die Option “E-Mails standardmäßig von diesem Konto senden” auswählen. (3) Sie können Ihr E-Mail Postfach auch manuell einrichten. Geben Sie Ihre E-Mail Adresse und Ihr zugehöriges Passwort ein und tippen Sie anschließend auf “Manuelles Setup”, um die E-Mail Server Informationen einzugeben. (4) Wählen Sie zwischen den Servertypen POP3, IMAP oder Exchange für eingehende E-Mails aus. Hinweis: Wenn Sie nicht wissen, welche Einstellungen Sie vornehmen müssen, kontaktieren Sie bitte Ihren E-Mail Provider, Ihren Netzwerkadministrator oder suchen Sie mit Begriffen wie etwa „POP Adresse“ und „Namen Ihres Provider“ nach den benötigten Informationen im Internet. (5) Geben Sie die benötigten Informationen ein (Server, Port etc.). (6) Wählen Sie den Servertyp für ausgehende E-Mails aus und geben Sie die benötigten Informationen ein. (7) Tippen Sie “Weiter”, um im Menü fortzufahren. Die E-Mail Anwendung überprüft nun die getätigten Server Einstellungen. Nach erfolgreichem Anlegen sehen Sie die Meldung “Your account is set up, and email is on its way”. Ihr Konto ist jetzt eingerichtet. (8) Vergeben Sie einen Namen für Ihr Postfach und tippen Sie auf „Fertig“, um den Vorgang abzuschließen. Hinweis: Sollten Sie mehr als einen Email Account besitzen, wird bei jedem Start der E-Mail Anwendung das Standard Konto aufgerufen. DE - 12 Verwaltung der E-Mail Accounts Hinzufügen eines neuen Postfaches: (1) Öffnen Sie die E-Mail Anwendung und tippen Sie auf die Menü Taste zum Anzeigen der weiteren Optionen. Wählen Sie den Menüpunkt „Einstellungen und anschließend “Konto hinzufügen”, um ein neues Postfach anzulegen. (2) Folgen Sie dem Einrichtungsassistenten, um ein neues Postfach anzulegen. Löschen eines Postfaches: (1) Öffnen Sie die E-Mail Anwendung und tippen Sie auf die Menü Taste zum Anzeigen der weiteren Optionen. Wählen Sie den Menüpunkt „Einstellungen“ und anschließend “Konto entfernen”, um das gewünschte Postfach zu löschen. Überprüfen der Kontoeigenschaften: (1) Öffnen Sie die E-Mail Anwendung und tippen Sie auf die Menü Taste zum Anzeigen der weiteren Optionen und wählen Sie „Einstellungen“ aus. Auf der linken Seite des Menüs werden jetzt alle bereits angelegten Postfächer angezeigt. (2) Tippen auf das gewünschte Postfach, um die Kontoeinstellungen anzuzeigen. (3) Tippen Sie auf die zu ändernde “Kontoeinstellung“, um die gewünschten Einträge vorzunehmen. Anzeige von E-Mail Nachrichten Öffnen Sie die E-Mail Anwendung durch kurzes Tippen auf das E-Mail Icon. Ihr bereits angelegtes Postfach wird nun angezeigt. Durch eine vertikale Wischbewegung können Sie durch Ihre E-Mails scrollen. Tippen Sie kurz auf eine bestimmte E-Mail, um diese zu öffnen. Tippen und halten Sie den Finger auf einer bestimmten E-Mail Nachricht, um weitere Optionen angezeigt zu bekommen. Es erscheint nun ein Infofeld. Hier können Sie jetzt die E-Mail öffnen, beantworten, weiterleiten oder löschen. Schreiben von E-Mail Nachrichten (1) Tippen Sie in der E-Mail Übersicht auf das Email Symbol in der oberen Menüleiste und es öffnet sich ein neues Fenster, indem Sie eine neue Email verfassen können. (2) Geben Sie nun die E-Mail Adresse des Empfängers, einen Betreff und den Text in die dafür vorgesehen Felder ein. Sie können ebenfalls „Cc/Bcc“ hinzufügen, um eine E-Mail an mehrere User zu schreiben. (3) Tippen Sie auf „Senden“, um die E-Mail abzuschicken. Tippen Sie auf „Speichern“, um die eingegebene E-Mail als Entwurf zu speichern. Wenn Sie auf das „Mülleimer Symbol“ tippen, wird die aktuell eingegebene E-Mail wieder entfernt. DE - 13 13.) Web Browser Um den Web Browser zu starten, tippen Sie bitte auf das Browser Icon in der Anwendungsübersicht. Um eine Internetseite zu öffnen, tippen Sie bitte auf das Eingabefeld für die Internetadresse. Die virtuelle Tastatur öffnet sich nun und Sie können jetzt die Adresse der gewünschten Internetseite eingeben. Tippen Sie auf die Enter-Taste, um Ihre Eingabe zu bestätigen und die Internetseite zu öffnen. Hinweis: Nicht alle Netzwerke bieten einen Internetzugriff. Einige Netzwerke bieten nur einen Zugriff auf andere verbundene lokale Rechner und keine Internetverbindung. Nutzung der virtuellen Tastatur Tippen Sie auf das Eingabefeld zum Öffnen der virtuellen Tastatur. Sie können nun Texte eingeben oder Internetseiten aufrufen. a. Caps Lock (Groß- und Kleinschreibung) b. Rücksprungtaste c. Aufruf des Menüs für die Nummern, Zeichen und Sonderzeichen Eingabe d. Space Taste (Leerzeicheneingabe) e. Enter Taste ( Bestätigung Ihrer Eingabe) Eingabe von Sonderzeichen Um ein Sonderzeichen wie etwa “ä” einzugeben, tippen Sie lange mit Ihrem Finger auf die Taste „a“ um das Sonderzeichenmenü aufzurufen. Gleiten Sie nun mit dem Finger auf das gewünschte Sonderzeichen, beispielsweise das „ä“ und lösen Sie den Finger wieder vom Display. Sie haben nun ein „ä“ eingeben. DE - 14 Nutzung des Web Browsers Sie können durch die Anzeige im Display scrollen, indem Sie eine vertikale Wischbewegung mit Ihrem Finger durchführen. Bitte beginnen Sie die Wischbewegung nicht auf einem Menüpunkt oder Link, da ansonsten die vorhandene Verknüpfung geöffnet werden würde. Um einen Internetlink zu öffnen, tippen Sie ganz einfach auf den Link. Die neue Seite öffnet sich automatisch. Um das Web Browser Menü zu öffnen, drücken Sie bitte die Menü-Taste . Hier stehen Ihnen verschiedene Funktionen zur Verfügung. Unter anderem können Sie hier die geöffnete Webseite aktualisieren, einen neuen Tab öffnen, Webseiten offline lesbar machen oder zu den Web Browser Einstellungen wechseln. Um zu der vorherigen Seite zurückzugehen, drücken Sie bitte die Zurück-Taste . Um direkt zum Startbildschirm zurückzukehren, drücken Sie bitte auf die Home-Taste . Um einen Text einzugeben, tippen Sie auf das entsprechende Feld und nutzen Sie die virtuelle Tastatur zur Eingabe des Textes. Hinweis: Für diese Funktion ist eine WLAN Verbindung zum Internet erforderlich. 14.) System Einstellungen Tippen Sie im Anwendungsmenü auf das Einstellungen Icon, um die System Einstellungen aufzurufen. Auf der linken Seite des Menüs finden Sie die einzelnen Kategorien. Durch kurzes Drücken auf den jeweils ausgewählten Menüeintrag, werden die verfügbaren Einstellmöglichkeiten angezeigt. Beachten Sie bitte, dass eventuell nicht alle von Android™ angebotenen Funktionen mit diesem Gerät kompatibel sind. Wenn Sie alle Einstellungen vorgenommen haben, können sie mit der Zurück Taste in das zuletzt aufgerufene Menü zurückkehren, oder mit der Home Taste direkt auf den Startbildschirm wechseln.Ihre getätigten Eingaben werden automatisch gespeichert. DE - 15 Einstellungsübersicht der wichtigsten Einstellungen Drahtlos & WLAN Nehmen Sie hier Ihre WLAN-Einstellungen vor. Netzwerke Mehr Hier können Sie weitere Netzwerkeinstellungen vornehmen. Stellen Sie hier die gewünschte Lautstärke und den gewünschten Benachrichtigungston ein. Weiterhin können Sie einen Bestätigungston bei Berührung des Touchscreens und einen Hinweiston beim Entsperren der Displaysperre aktivieren bzw. deaktivieren. Töne Display Helligkeit – Displayhelligkeit anpassen. Hintergrund – Auswahl des gewünschten Hintergrundes. Ruhezustand – Verzögerung vor der automatischen Displayabschaltung anpassen. Schriftgröße – Einstellen der gewünschten Schriftgröße. Gerät Speicher Hier bekommen Sie Informationen über den internen Speicher und - falls eingesetzt - über Ihre MicroSD-Karte. Weiterhin können Sie den Inhalt des Speichers löschen. Akku Hier bekommen Sie Informationen über den Ladezustand des eingebauten Akkus. Apps Hier können Sie Ihre installierten Anwendungen verwalten und Informationen über die Anwendungen erhalten. Standortdienste Hier können Sie diversen Android™ Anwendungen erlauben, Ihren aktuellen Standort über Drahtlosnetzwerke festzustellen und zu nutzen (z.B. Google Maps™). Sie können weiterhin festlegen, ob Google™ Suchergebnisse und andere Dienste an Ihren Standort anpassen darf. Sicherheit Hier können Sie beispielsweise eine Bildschirmsperre einrichten und weitere sicherheitsrelevante Einstellungen vornehmen. Sprache & Eingabe Hier können Sie beispielsweise Ihre bevorzugte Sprache einstellen, dem persönlichen Wörterbuch verschiedene Wörter hinzufügen und diverse Einstellungen an der Tastatur vornehmen. Sichern & Zurücksetzen Hier können Sie Ihre Systemeinstellungen und Anwendungsdaten auf Konten Konto hinzufügen Hier können Sie verschiedene Konten hinzufügen. System Datum & Uhrzeit Hier können Sie das Datum, die Uhrzeit, die Zeitzone und das Anzeigeformat festlegen. Über das Tablet Zeigt Ihnen Informationen über das Gerät. Nutzer Google™-Servern sichern. Des Weiteren können Sie die Werkseinstellungen wiederherstellen. ACHTUNG: Dazu werden alle auf dem Gerät gespeicherten Daten gelöscht. DE - 16 15.) Verwaltung von Anwendungen Vorinstallierte Anwendungen Dieses Gerät wird mit bereits vorinstallierten Anwendungen ausgeliefert. Eine Übersicht der bereits installierten Anwendungen finden Sie in der Anwendungsübersicht . Um eine dieser Anwendungen zu öffnen, tippen Sie kurz auf das zugehörige Icon. Installation von Anwendungen Um Anwendungen auf dem Gerät zu installieren, führen Sie bitte die folgenden Schritte aus: (1) Öffnen Sie die gewünschte Quelle für den Download von Anwendungen, beispielsweise den Google Playstore™. Hierzu müssen Sie sich zuerst mit Ihrem bestehenden Playstore™ Konto anmelden, oder ein neues Playstore™ Konto einrichten. Folgen Sie dazu einfach den Anweisungen auf dem Bildschirm. (2) Nach erfolgreicher Anmeldung steht Ihnen nun die große Anwendungsauswahl des Google Playstore™ zur Verfügung. Wählen Sie die gewünschte Anwendung aus, tippen Sie auf Installieren und bestätigen Sie gegebenenfalls die Zugriffsberechtigungen der Anwendung. Der Download startet nun und der Fortschritt wird Ihnen in der oberen linken Statusbar angezeigt. (3) Nach dem Download der Anwendung wird diese nun automatisch installiert. Sie finden die neue Anwendung nach erfolgreicher Installation im Anwendungsmenü. Den Installationsfortschritt finden Sie in der oberen linken Statusbar. Deinstallation von Anwendungen (1) Öffnen Sie bitte die System Einstellungen durch kurzes Tippen auf das Einstellungen Icon in der Anwendungsübersicht. (2) Tippen Sie jetzt kurz auf den Menüpunkt “Apps”, um in die Anwendungseinstellungen zu gelangen. (3) Wählen Sie zwischen den Menüoberpunkten “Heruntergeladen, Speicher, Aktiv und Alle” die gewünschte Anwendungsübersicht durch kurzes Tippen aus. (4) Wählen Sie als nächstes durch kurzes Tippen die Anwendung aus, die Sie deinstallieren möchten. (5) Tippen Sie nun auf “Deinstallieren” und bestätigen Sie Ihre Eingabe mit OK, um die Anwendung vom Gerät zu deinstallieren. Hinweis: Sie können vorinstallierte Software nicht löschen. DE - 17 16.) Datei Explorer Öffnen Sie die Anwendungsübersicht und tippen Sie anschließend kurz auf das Explorer Icon, um den Datei Explorer zu starten. Durch Dateien und Ordner navigieren Ihnen stehen der interne Speicher (Internal Memory), die Speicherkarte (SD Card) und USB zur Auswahl. Tippen Sie auf den gewünschten Speicherort, um die darauf enthaltenen Dateien als Liste angezeigt zu bekommen. Sollte keine Speicherkarte eingesetzt, oder kein Speichermedium über den USB Anschluss verbunden sein, wird Ihnen dies mit „… is unmounted“ mitgeteilt. Mit einer vertikalen Wischbewegung können Sie nun durch Ihre Dateien und Ordner scrollen. Öffnen Sie eine Datei oder einen Ordner durch kurzes Tippen. Sie können einen Schritt Voroder Zurückwechseln indem Sie die entsprechenden Icons kurz antippen. Um in der Dateistruktur eine Ebene höher zu kommen, tippen Sie kurz auf das LevelUp Icon . Mit dem Home Icon wechseln Sie direkt in das Hauptverzeichnis. Die Toolbar nutzen Tippen auf die Menü Taste und dort auf „Hide Toolbar“, um die Toolbar aus- und einzublenden Home Direkt in das Hauptverzeichnis wechseln. LevelUp Multi Eine Ebene höher wechseln. Mehrere Dateien auswählen. Editor Kopieren, löschen, verschieben, einfügen oder umbenennen einer Datei oder eines Ordners. New Folder Back Legen Sie ein neues Verzeichnis an. Einen Schritt zurück. Next Einen Schritt vorwärts. Dateien und Ordner kopieren, verschieben und umbenennen 1.) 2.) 3.) 4.) 5.) 6.) 7.) Navigieren Sie zu der gewünschten Datei in der Dateiübersicht. Tippen und halten Sie den Finger auf der Datei, bis ein Infofeld erscheint. Wählen Sie nun die gewünschte Funktion aus. Sie haben die Wahl zwischen Kopieren (Copy), Löschen (Delete), Verschieben (Move), Einfügen (Paste) – hierfür muss sich eine Datei in der Zwischenablage befinden - und Umbenennen (Rename). Zum kopieren oder verschieben tippen Sie kurz auf das entsprechende Icon (Copy / Move) und navigieren Sie anschließend in das Zielverzeichnis. Tippen Sie anschließend auf das Editor Icon und wählen Sie durch kurzes Tippen „Paste“, um die Datei einzufügen. Um eine Datei zu löschen tippen Sie auf „Delete“ und bestätigen Sie zur Sicherheit nochmals mit „Delete“. Zum Abbrechen tippen Sie kurz auf „Cancel“. Zum Umbenennen einer Datei tippen Sie auf „Rename“ und geben Sie anschließend über die virtuelle Tastatur den neuen Dateinamen ein. Bestätigen Sie Ihre Eingabe mit „OK“ oder brechen Sie den Vorgang mit „Cancel“ ab. Sie können mehrere Dateien und Ordner gleichzeitig kopieren, löschen oder verschieben. Tippen Sie dazu auf das Multi Icon und anschließend auf die gewünschten Dateien. Die markierten Dateien werden nun in einer anderen Farbe angezeigt. Tippen Sie auf das Editor Icon , um die gewünschte Aktion durchzuführen. DE - 18 17.) Eingeschränkte Garantiebedingungen Die Garantie deckt nur den Ersatz dieses Intenso Produkts ab. Die Garantie gilt nicht für normale Verschleißerscheinungen, die sich aus fehlerhaftem, unsachgemäßem Gebrauch, Nachlässigkeit, Unfall, Inkompatibilität, oder aus mangelhafter Leistung einer bestimmten Computer Hardware oder Computer Software ergeben. Es besteht kein Garantieanspruch bei Nichteinhaltung der Intenso Bedienungsanleitung sowie bei unsachgemäßer Montage, Gebrauch oder bei Defekten durch andere Geräte. Wird das Produkt Erschütterungen, elektrostatischer Entladungen, Wärme- oder Feuchtigkeitseinwirkungen jenseits der Produktspezifikationen ausgesetzt, besteht kein Garantieanspruch. Intenso haftet nicht für Datenverluste oder jegliche, auftretende Begleitschäden oder Folgeschäden, für die Verletzung der Garantiebedingungen oder für sonstige Schäden, gleich welche Ursache zugrunde liegt. Dieses Produkt ist nicht für eine kommerzielle Nutzung oder für medizinische und spezielle Anwendungen vorgesehen, in denen der Ausfall des Produktes Verletzungen, Todesfälle oder erhebliche Sachschäden verursachen kann. 18.) Technische Daten CPU Arbeitsspeicher Betriebssystem Kompatible Betriebssysteme Anschlussmöglichkeiten WLAN G-Sensor Photo Format Audio Format Video Format Display Kamera SNR Frequenzbereich Netzteil Interne Batterie 1.0 GHz Dualcore based on Cortex A9 1 GB DDR 3 Android 4.2.2 Windows XP / Vista / 7 / 8 / Linux 2,4 und höher / Mac 10.6 und höher Kopfhörer, Micro SD (SDHC/SDXC), micro USB WiFi (802.11 b/g/n) 360 Grad Rotation JPEG, BMP, GIF, PNG MP3, WMA, WAV, OGG, FLAC, APE MPEG1, MPEG 4, FLV TFT LCD Display, 1024 x 600 Pixel 0,3 MP Front Kamera >= 80 dB 20 Hz – 20 KHz (V) AC Adapter (HUONIO HNBC050120UE): AC Input 100-240V~50/60Hz, DC Output 5V / 1.2A Wiederaufladbarer Lithium-Ionen Polymer Akku DE - 19 19.) Wartung des Gerätes Sprühen oder Tragen Sie niemals eine Flüssigkeit direkt auf das Display oder Gehäuse auf. 20.) Säuberung des Gerätes Wischen Sie Gehäuse, Rahmen und Display vorsichtig mit einem weichen, fussel- und chemikalienfreien Tuch ab. Verwenden Sie nur Reinigungsmittel, die speziell für Displays bestimmt sind. 21.) Entsorgung von Elektro-Altgeräten Die mit diesem Symbol gekennzeichneten Geräte unterliegen der europäischen Richtlinie 2002/96/EC. Alle Elektro- und Elektroaltgräte müssen getrennt vom Hausmüll über die dafür vorgesehenen staatlichen Stellen entsorgt werden. Mit der ordnungsgemäßen Entsorgung von Elektro-Altgeräten vermeiden Sie Umweltschäden. DE - 20 22.) Lizenzinformation HINWEIS! Sehr geehrte Kundin, sehr geehrter Kunde, bei Interesse können Sie und jeder Dritte den Quelltext der verwendeten GPL/LGPL von der Intenso Homepage http://www.intenso.de herunterladen. Der Quelltext des gesuchten Produkts ist für jeden zugänglich über Auswahl der gültigen Produktkategorie und des gewünschten Gerätes. In den Produktdetails finden Sie den Menüpunkt „Treiber“. Öffnen Sie dieses Menü, um den zugehörigen GPL/LGPL Quelltext herunterzuladen. Gegen eine Kostenpauschale von 15 € ist es ebenfalls möglich diesen Quelltext per Postzustellung zu erhalten. Gerne können Sie uns auch telefonisch zu dem Thema erreichen unter der kostenpflichtigen Rufnummer 0900-1504030 (0,39€/Minute aus dem deutschen Festnetz. Mobilfunkpreise können abweichen.) oder per Mail an [email protected] Weitere Informationen über die GPL/LGPL-Lizenzen finden Sie unter www.gnu.org GNU GENERAL PUBLIC LICENSE Version 2, June 1991 Copyright (C) 1989, 1991 Free Software Foundation, Inc. 51 Franklin Street, Fifth Floor, Boston, MA 02110-1301, USA Everyone is permitted to copy and distribute verbatim copies of this license document, but changing it is not allowed. Preamble The licenses for most software are designed to take away your freedom to share and change it. By contrast, the GNU General Public License is intended to guarantee your freedom to share and change free software-to make sure the software is free for all its users. This General Public License applies to most of the Free Software Foundation's software and to any other program whose authors commit to using it. (Some other Free Software Foundation software is covered by the GNU Lesser General Public License instead.) You can apply it to your programs, too. When we speak of free software, we are referring to freedom, not price. Our General Public Licenses are designed to make sure that you have the freedom to distribute copies of free software (and charge for this service if you wish), that you receive source code or can get it if you want it, that you can change the software or use pieces of it in new free programs; and that you know you can do these things. To protect your rights, we need to make restrictions that forbid anyone to deny you these rights or to ask you to surrender the rights. These restrictions translate to certain responsibilities for you if you distribute copies of the software, or if you modify it. For example, if you distribute copies of such a program, whether gratis or for a fee, you must give the recipients all the rights that you have. You must make sure that they, too, receive or can get the source code. And you must show them these terms so they know their rights. We protect your rights with two steps: (1) copyright the software, and (2) offer you this license which gives you legal permission to copy, distribute and/or modify the software. Also, for each author's protection and ours, we want to make certain that everyone understands that there is no warranty for this free software. If the software is modified by someone else and passed on, we want its recipients to know that what they have is not the original, so that any problems introduced by others will not reflect on the original authors' reputations. Finally, any free program is threatened constantly by software patents. We wish to avoid the danger that redistributors of a free program will individually obtain patent licenses, in effect making the program proprietary. To prevent this, we have made it clear that any patent must be licensed for everyone's free use or not licensed at all. The precise terms and conditions for copying, distribution and modification follow. TERMS AND CONDITIONS FOR COPYING, DISTRIBUTION AND MODIFICATION 0. This License applies to any program or other work which contains a notice placed by the copyright holder saying it may be distributed under the terms of this General Public License. The "Program", below, refers to any such program or work, and a "work based on the Program" means either the Program or any derivative work under copyright law: that is to say, a work containing the Program or a portion of it, either verbatim or with modifications and/or translated into another language. (Hereinafter, translation is included without limitation in the term "modification".) Each licensee is addressed as "you". Activities other than copying, distribution and modification are not covered by this License; they are outside DE - 21 its scope. The act of running the Program is not restricted, and the output from the Program is covered only if its contents constitute a work based on the Program (independent of having been made by running the Program). Whether that is true depends on what the Program does. 1. You may copy and distribute verbatim copies of the Program's source code as you receive it, in any medium, provided that you conspicuously and appropriately publish on each copy an appropriate copyright notice and disclaimer of warranty; keep intact all the notices that refer to this License and to the absence of any warranty; and give any other recipients of the Program a copy of this License along with the Program. You may charge a fee for the physical act of transferring a copy, and you may at your option offer warranty protection in exchange for a fee. 2. You may modify your copy or copies of the Program or any portion of it, thus forming a work based on the Program, and copy and distribute such modifications or work under the terms of Section 1 above, provided that you also meet all of these conditions: a) You must cause the modified files to carry prominent notices stating that you changed the files and the date of any change. b) You must cause any work that you distribute or publish, that in whole or in part contains or is derived from the Program or any part thereof, to be licensed as a whole at no charge to all third parties under the terms of this License. c) If the modified program normally reads commands interactively when run, you must cause it, when started running for such interactive use in the most ordinary way, to print or display an announcement including an appropriate copyright notice and a notice that there is no warranty (or else, saying that you provide a warranty) and that users may redistribute the program under these conditions, and telling the user how to view a copy of this License. (Exception: if the Program itself is interactive but does not normally print such an announcement, your work based on the Program is not required to print an announcement.) These requirements apply to the modified work as a whole. If identifiable sections of that work are not derived from the Program, and can be reasonably considered independent and separate works in themselves, then this License, and its terms, do not apply to those sections when you distribute them as separate works. But when you distribute the same sections as part of a whole which is a work based on the Program, the distribution of the whole must be on the terms of this License, whose permissions for other licensees extend to the entire whole, and thus to each and every part regardless of who wrote it. Thus, it is not the intent of this section to claim rights or contest your rights to work written entirely by you; rather, the intent is to exercise the right to control the distribution of derivative or collective works based on the Program. In addition, mere aggregation of another work not based on the Program with the Program (or with a work based on the Program) on a volume of a storage or distribution medium does not bring the other work under the scope of this License. 3. You may copy and distribute the Program (or a work based on it, under Section 2) in object code or executable form under the terms of Sections 1 and 2 above provided that you also do one of the following: a) Accompany it with the complete corresponding machine-readable source code, which must be distributed under the terms of Sections 1 and 2 above on a medium customarily used for software interchange; or, b) Accompany it with a written offer, valid for at least three years, to give any third party, for a charge no more than your cost of physically performing source distribution, a complete machine-readable copy of the corresponding source code, to be distributed under the terms of Sections 1 and 2 above on a medium customarily used for software interchange; or, c) Accompany it with the information you received as to the offer to distribute corresponding source code. (This alternative is allowed only for noncommercial distribution and only if you received the program in object code or executable form with such an offer, in accord with Subsection b above.) The source code for a work means the preferred form of the work for making modifications to it. For an executable work, complete source code means all the source code for all modules it contains, plus any associated interface definition files, plus the scripts used to control compilation and installation of the executable. However, as a special exception, the source code distributed need not include anything that is normally distributed (in either source or binary form) with the major components (compiler, kernel, and so on) of the operating system on which the executable runs, unless that component itself accompanies the executable. If distribution of executable or object code is made by offering access to copy from a designated place, then offering equivalent access to copy the source code from the same place counts as distribution of the source code, even though third parties are not compelled to copy the source along with the object code. 4. You may not copy, modify, sublicense, or distribute the Program except as expressly provided under this License. Any attempt otherwise to copy, modify, sublicense or distribute the Program is void, and will automatically terminate your rights under this License. However, parties who have received copies, or rights, DE - 22 from you under this License will not have their licenses terminated so long as such parties remain in full compliance. 5. You are not required to accept this License, since you have not signed it. However, nothing else grants you permission to modify or distribute the Program or its derivative works. These actions are prohibited by law if you do not accept this License. Therefore, by modifying or distributing the Program (or any work based on the Program), you indicate your acceptance of this License to do so, and all its terms and conditions for copying, distributing or modifying the Program or works based on it. 6. Each time you redistribute the Program (or any work based on the Program), the recipient automatically receives a license from the original licensor to copy, distribute or modify the Program subject to these terms and conditions. You may not impose any further restrictions on the recipients' exercise of the rights granted herein. You are not responsible for enforcing compliance by third parties to this License. 7. If, as a consequence of a court judgment or allegation of patent infringement or for any other reason (not limited to patent issues), conditions are imposed on you (whether by court order, agreement or otherwise) that contradict the conditions of this License, they do not excuse you from the conditions of this License. If you cannot distribute so as to satisfy simultaneously your obligations under this License and any other pertinent obligations, then as a consequence you may not distribute the Program at all. For example, if a patent license would not permit royalty-free redistribution of the Program by all those who receive copies directly or indirectly through you, then the only way you could satisfy both it and this License would be to refrain entirely from distribution of the Program. If any portion of this section is held invalid or unenforceable under any particular circumstance, the balance of the section is intended to apply and the section as a whole is intended to apply in other circumstances. It is not the purpose of this section to induce you to infringe any patents or other property right claims or to contest validity of any such claims; this section has the sole purpose of protecting the integrity of the free software distribution system, which is implemented by public license practices. Many people have made generous contributions to the wide range of software distributed through that system in reliance on consistent application of that system; it is up to the author/donor to decide if he or she is willing to distribute software through any other system and a licensee cannot impose that choice. This section is intended to make thoroughly clear what is believed to be a consequence of the rest of this License. 8. If the distribution and/or use of the Program is restricted in certain countries either by patents or by copyrighted interfaces, the original copyright holder who places the Program under this License may add an explicit geographical distribution limitation excluding those countries, so that distribution is permitted only in or among countries not thus excluded. In such case, this License incorporates the limitation as if written in the body of this License. 9. The Free Software Foundation may publish revised and/or new versions of the General Public License from time to time. Such new versions will be similar in spirit to the present version, but may differ in detail to address new problems or concerns. Each version is given a distinguishing version number. If the Program specifies a version number of this License which applies to it and "any later version", you have the option of following the terms and conditions either of that version or of any later version published by the Free Software Foundation. If the Program does not specify a version number of this License, you may choose any version ever published by the Free Software Foundation. 10. If you wish to incorporate parts of the Program into other free programs whose distribution conditions are different, write to the author to ask for permission. For software which is copyrighted by the Free Software Foundation, write to the Free Software Foundation; we sometimes make exceptions for this. Our decision will be guided by the two goals of preserving the free status of all derivatives of our free software and of promoting the sharing and reuse of software generally. NO WARRANTY 11. BECAUSE THE PROGRAM IS LICENSED FREE OF CHARGE, THERE IS NO WARRANTY FOR THE PROGRAM, TO THE EXTENT PERMITTED BY APPLICABLE LAW. EXCEPT WHEN OTHERWISE STATED IN WRITING THE COPYRIGHT HOLDERS AND/OR OTHER PARTIES PROVIDE THE PROGRAM "AS IS" WITHOUT WARRANTY OF ANY KIND, EITHER EXPRESSED OR IMPLIED, INCLUDING, BUT NOT LIMITED TO, THE IMPLIED WARRANTIES OF MERCHANTABILITY AND FITNESS FOR A PARTICULAR PURPOSE. THE ENTIRE RISK AS TO THE QUALITY AND PERFORMANCE OF THE PROGRAM IS WITH YOU. SHOULD THE PROGRAM PROVE DEFECTIVE, YOU ASSUME THE COST OF ALL NECESSARY SERVICING, REPAIR OR CORRECTION. 12. IN NO EVENT UNLESS REQUIRED BY APPLICABLE LAW OR AGREED TO IN WRITING WILL ANY COPYRIGHT HOLDER, OR ANY OTHER PARTY WHO MAY MODIFY AND/OR REDISTRIBUTE THE PROGRAM AS PERMITTED ABOVE, BE LIABLE TO YOU FOR DAMAGES, INCLUDING ANY GENERAL, DE - 23 SPECIAL, INCIDENTAL OR CONSEQUENTIAL DAMAGES ARISING OUT OF THE USE OR INABILITY TO USE THE PROGRAM (INCLUDING BUT NOT LIMITED TO LOSS OF DATA OR DATA BEING RENDERED INACCURATE OR LOSSES SUSTAINED BY YOU OR THIRD PARTIES OR A FAILURE OF THE PROGRAM TO OPERATE WITH ANY OTHER PROGRAMS), EVEN IF SUCH HOLDER OR OTHER PARTY HAS BEEN ADVISED OF THE POSSIBILITY OF SUCH DAMAGES. END OF TERMS AND CONDITIONS How to Apply These Terms to Your New Programs If you develop a new program, and you want it to be of the greatest possible use to the public, the best way to achieve this is to make it free software which everyone can redistribute and change under these terms. To do so, attach the following notices to the program. It is safest to attach them to the start of each source file to most effectively convey the exclusion of warranty; and each file should have at least the "copyright" line and a pointer to where the full notice is found. one line to give the program's name and an idea of what it does. Copyright (C) yyyy name of author This program is free software; you can redistribute it and/or modify it under the terms of the GNU General Public License as published by the Free Software Foundation; either version 2 of the License, or (at your option) any later version. This program is distributed in the hope that it will be useful, but WITHOUT ANY WARRANTY; without even the implied warranty of MERCHANTABILITY or FITNESS FOR A PARTICULAR PURPOSE. See the GNU General Public License for more details. You should have received a copy of the GNU General Public License along with this program; if not, write to the Free Software Foundation, Inc., 51 Franklin Street, Fifth Floor, Boston, MA 02110-1301, USA. Also add information on how to contact you by electronic and paper mail. If the program is interactive, make it output a short notice like this when it starts in an interactive mode: Gnomovision version 69, Copyright (C) year name of author Gnomovision comes with ABSOLUTELY NO WARRANTY; for details type `show w'. This is free software, and you are welcome to redistribute it under certain conditions; type `show c' for details. The hypothetical commands `show w' and `show c' should show the appropriate parts of the General Public License. Of course, the commands you use may be called something other than `show w' and `show c'; they could even be mouse-clicks or menu items--whatever suits your program. You should also get your employer (if you work as a programmer) or your school, if any, to sign a "copyright disclaimer" for the program, if necessary. Here is a sample; alter the names: Yoyodyne, Inc., hereby disclaims all copyright interest in the program `Gnomovision' (which makes passes at compilers) written by James Hacker. signature of Ty Coon, 1 April 1989 Ty Coon, President of Vice DE - 24 Intenso GmbH Datum: 17.12.2013 EG Konformitätserklärung Wir, die Intenso GmbH, mit Sitz in der Diepholzerstr. 15 in 49377 Vechta, Deutschland erklären auf eigene Verantwortung, dass das Produkt: Modell: 7“ Intenso TAB 734 (Artikel Nr. 5509854) Beschreibung: Tablet-Computer auf das sich diese Erklärung bezieht, mit den folgenden Richtlinien und Normen konform ist: R&TTE Richtlinie 1999/5/EG EN 301 489-1 V1.9.2 EN 301 489-17 V2.1.1 EN 300 328 V1.7.1 : 2006-10 EN 55022:2010 (Class B) EN 55024:2010 EN 61000-3-2:2006+A1 :2009+A2 :2009 (Class D) EN 61000-3-3:2008 Niederspannungsrichtlinie 2006/95/EG EN 60950-1:2006+A11:2009+A1:2010+A12:2011+A12:Berichtigung 2012 Öko-Design Richtlinie 2009/125/EG 1275/2008 278/2009 ROHS Richtlinie 2011/65/EU Die auf das oben angeführte Gerät bezogenen technischen Unterlagen sind an folgender Stelle hinterlegt: Intenso GmbH Diepholzerstr. 15, 49377 Vechta, Deutschland Autorisierte Person: ____________________________ Geschäftsführer: Thomas Pöhlking DE - 25 Instruction manual TAB 734 Thank you for choosing the TAB734. Please follow these instructions in order to be informed about the key functions of the device. 1.) Contents 1.) Contents ................................................................................................................................................................................................ 1 2.) Notes ..................................................................................................................................................................................................... 2 3.) Device overview..................................................................................................................................................................................... 4 4.) Package contents .................................................................................................................................................................................. 4 5.) Charging the battery .............................................................................................................................................................................. 5 6.) Using a Micro SD/SDHC/SDXC Card .................................................................................................................................................... 5 7.) Transfer of Data between Device and Computer ................................................................................................................................... 5 8.) Touchscreen .......................................................................................................................................................................................... 6 9.) WiFi ....................................................................................................................................................................................................... 6 Automatic connection.................................................................................................................................................................................. 6 Manual connection ...................................................................................................................................................................................... 7 10.) The Home Screen................................................................................................................................................................................ 8 View ............................................................................................................................................................................................................ 8 Unlocking the screen .................................................................................................................................................................................. 8 Status bar ................................................................................................................................................................................................... 9 Adjusting the main screen......................................................................................................................................................................... 10 Using several home screens ..................................................................................................................................................................... 10 Pre-installed applications and widgets on the home screen ..................................................................................................................... 11 11.) Applications overview ........................................................................................................................................................................ 11 Applications overview ............................................................................................................................................................................... 11 12.) Sending / Receiving E-Mails .............................................................................................................................................................. 12 Setting up your e-mail box ........................................................................................................................................................................ 12 Managing email accounts ......................................................................................................................................................................... 13 Viewing e-mail messages ......................................................................................................................................................................... 13 Writing email messages ............................................................................................................................................................................ 13 13.) Web browser ..................................................................................................................................................................................... 14 Using the virtual keyboard ........................................................................................................................................................................ 14 Special character input ............................................................................................................................................................................. 14 Using the web browser ............................................................................................................................................................................. 15 14.) System settings ................................................................................................................................................................................. 15 15.) Managing Applications....................................................................................................................................................................... 17 Installing applications ................................................................................................................................................................................ 17 Uninstalling applications ........................................................................................................................................................................... 17 16.) File Explorer ...................................................................................................................................................................................... 18 Navigating through files and folders.......................................................................................................................................................... 18 Using the toolbar ....................................................................................................................................................................................... 18 Copy, move and rename files and folders................................................................................................................................................. 18 17.) Limited Warranty Terms .................................................................................................................................................................... 19 18.) Technical Data ................................................................................................................................................................................... 19 19.) Maintenance of the Device ................................................................................................................................................................ 20 20.) Cleaning the Device........................................................................................................................................................................... 20 21.) Disposal of Used Electronic Equipment ............................................................................................................................................. 20 22.) Licenceinformation about GNU/LGPL................................................................................................................................................ 21 EC Declaration of Conformity........................................................................................................................................................................ 25 This manual may not contain all the features of your device. For the use of third-party applications, please contact the respective manufacturer. Please note that all details can be modified without previous announcement. Current information can be found at www.intenso.de. Trademarks Google™, the Google™ logo and Android ™ are trademarks of Google Inc. All other product or service names are the property of their respective owners. EN - 1 2.) Notes Avoid hard impacts to the device. Do not place it on inclined surfaces to prevent the device from falling down. Do not use the device in extremely cold, hot, humid or dusty areas; also do not expose to direct sunlight. Do not use it on sandy places. Do not use it in hazardous environments, such as fuelling pumps at petrol stations. Avoid using it on cushions, sofas or other objects that foster heat generation, due to the risk of overheating. Perform frequent data backups to avoid potential data loss. We are not liable for any loss of data. Do not disconnect when data is being transferred or the device formatted. This can cause data loss. Images and movies can be protected by third-party rights. Playing without a license can violate copyrights. Avoid use in highly magnetic fields. Protect the unit from moisture. Should moisture enter the unit, please turn it off immediately, clean it and dry the unit. Please do not use chemical solvents to clean the device. Use only a dry cloth. Do not place open flames, such as lighted candles, near or on the device. We are not liable for damages caused by malfunctions, data losses, incorrect handling, own repairs to the device or changing of the batteries. Should the device not respond to your requests, please restart the device by pressing the reset button on the back of it. When not in use, please disconnect the mains adaptor from the power supply. The outlet must be near the equipment and easily accessible. Only use the AC adapter with grounded outlets with AC 100-240V, 50/60 Hz. If you are not sure about the power supply at installation site, please ask the relevant energy services. Use only the included AC adapter and power cord. To interrupt the power supply to your unit, unplug the AC adapter from the outlet. Always hold the adapter firmly when disconnecting the power supply. Never pull on the line. Do not open the housing of the power adapter. With open housing, there is danger of electrical shock. It contains no user-serviceable parts. When not in use, the battery of the device discharges slowly. Prior to reuse it must be recharged. EN - 2 Please observe environmentally sound disposal of the device and the battery. Please do not disassemble into parts or try to repair it yourself because in these cases the warranty expires. Do not use the device in places where the use of mobile devices is prohibited. Do not use the device in the vicinity of other electronic devices because the high-frequency signals can cause interferences. Do not use it near a pacemaker, in a hospital or near medical equipment, because the highfrequency signals may cause interferences. Keep a distance of at least 15 cm from a pacemaker. Please contact the manufacturer of these devices to obtain information about joint use. If you use earphones or headsets on full blast you could cause a durable damage to your hearing. Please consider that a continuously high volume can cause permanent hearing damage. To avoid an eventual health risk caused by too high volume, we recommend you to use the included headsets. For reasons of traffic safety, the device may not be operated by the driver himself while driving. EN - 3 3.) Device overview (1) (2) (3) (4) (5) 3.5mm headphone jack Built-in microphone Loading Status LED. A red light flashes while loading. A yellow light flashes, as soon as the battery is completely loaded Front Camera Micro USB Socket (6) On / Off button: Press and hold to turn the unit off, press briefly to switch between standby and active mode (7) Volume +/(8) Touchscreen (9) Micro SD Card solt (10) Integrated speaker 4.) Package contents Please check if the contents are complete: TAB 734 USB cable Power supply 5V 1.2A User Manual EN - 4 5.) Charging the battery Fully charge the battery of the device before using it for the first time. To this end connect the supplied power cable with the device and a socket. The complete charging process takes about 5 hours. The charging status is displayed at the front left side of the device. The LED lights up Red during the charging process, and changes to Yellow as soon as the battery is fully charged. Notes a. With 15% remaining residual power of the battery you will get a warning message on the display. To recharge the battery, you should now connect the device using the AC adapter to an electrical outlet to avoid possible data loss and increase the battery life. b. You can use the device while charging the battery. To ensure long-lasting battery life, we ask you not to use the device. c. To ensure good performance, the built-in battery must be used frequently. If you use the device often, please charge the battery fully at least once a month. d. Make sure you use only the included AC adapter for charging. 6.) Using a Micro SD/SDHC/SDXC Card This device can read data directly from a Micro SD/SDHC/SDXC card with a maximum capacity of 64 GB. To use a Micro SD/SDHC/SDXC card, please insert the card in the designated Micro SD Slot on the left side of the device. Use the pre-installed Explorer to access the data on the memory card. To do that, please select the directory “SD Card” in the Explorer. 7.) Transfer of Data between Device and Computer 1.) Connect the device using the included USB cable to a computer. 2.) On the device the screen for the USB connection is now displayed. Tap briefly "Turn on USB Storage". The device is recognized as a removable disk and you get the info "USB memory in use". After briefly tapping the home button you can continue to use your device normally. You have now have access to the internal memory of the device from your computer and can copy, delete or transfer files to your device. 3.) If an USB connection with the computer exists, the USB icon is displayed in the status bar. You can get additional information in the extended status bar and you can activate or deactivate the USB connection. Select `Turn off USB storage´ to deactivate the memory. Select the function `Remove safely´ on the computer to separate the device from the computer. Note: The pre-installed applications and the Android™ operating system take up some of the existing internal memory. For this reason, you cannot dispose of the entire internal memory. EN - 5 8.) Touchscreen This device is operated via touchscreen. You can easily start applications by tapping the touchscreen lightly with your fingers, enter texts on the virtual keyboard and switch between the individual main screens by wiping in the respective direction. Please remove the protective film from the display before using the device. The touchscreen detects small electrical charges, as for example emitted by human fingers, and thus determines the input point. Use for input ideally your fingertips. Operation with a pen or other sharp objects is not possible. The touchscreen should not be exposed to water or other electrical devices to avoid malfunctions and permanent defects. Notes a. If the touchscreen is not operated for two minutes, the device goes into standby mode. Briefly press the on / off button to switch to active mode. b. To prevent unwanted input, a lock mode is activated automatically. Please unlock the keypad on the touchscreen by simply dragging the lock icon from the bottom to the top of the screen. The device will now switch to the home screen. Touch the closed lock on the display and keep it pressed. Draw the lock now to the open lock your finger from the display. The screen is now unlocked. just appearing on the display and release You can rotate the device in all directions. It has a sensor that directs the display automatically. 9.) WiFi You need a WLAN connection to connect the device to the internet. Open the WLAN settings in the settings menu to establish it. Note: Please note that a wireless network must be located within the range of your current location. Automatic connection Open the WLAN settings via the settings menu. Here you can quite simply activate or deactivate the WLAN function. Just slide the virtual switch from the position “On” to the left to deactivate the WLAN function. Now, the display changes to “Off“. To reactivate the deactivated WLAN function, just slide the virtual switch to the right. On the right hand side of the WIFI settings, all available networks as well as all already used networks are shown. EN - 6 Tap on the desired network and, if required, enter the appropriate WiFi key (password) to establish a connection. Confirm the entered password, if necessary, by touching the enter key and then select Connect. After a short while you are connected. Notes a) If the device goes into standby mode, WiFi is turned off automatically. This reduces power consumption and thus automatically leads to a longer battery life. When the device returns to active mode, the WiFi will automatically re-connect. This may take a few seconds. b) The list of currently searchable WiFi networks will be updated automatically. c) If the WiFi function is enabled, the device automatically connects to an already configured network, provided it is within range. d) If an unknown wireless network is in range, an information box will appear. Manual connection In order to search for an accessible WiFi network manually, please proceed as follows: (1) Open the settings. (2) Now open the WLAN settings and tap the three points in the upper right corner and then select “scanning“. (3) Should the WiFi network not appear in the list of available networks then select the item `Add network´ in order to enter the network SSID, the security protocol and the possibly related password. Tap `Save´ to confirm your entries. EN - 7 10.) The Home Screen View Unlocking the screen If the touchscreen is not used for two minutes, the device changes into standby mode. Press the on/off button for a short time to return to the active mode. The locked display is protecting against undesired input. Touch the closed lock on the display and keep it pressed. Draw the lock now to the open lock just appearing on the display and release your finger from the display. The screen is now unlocked. Drag the lock icon with your finger in the direction of the arrow Advice: Draw the lock symbol to the appearing camera symbol to open the camera application directly. EN - 8 Status bar The status bars are located in the top and bottom area of the start screen. The top status bar is divided into two areas. If you pull down the bar on the left side, then the current messages are displayed, if existing. If you pull down the bar on the right side, the quick access fields for various settings are displayed. In the bottom status bar, you have the option to switch to the previous display or to fade out the possible faded in keyboard, directly call up the start screen, view the programmes used last and to change the volume of the device. EN - 9 Adjusting the main screen You can adjust the main screen easily to your individual needs. If you want to delete an icon, tap the icon with your finger for a short while and then push it into the displayed X icon. Now take your finger from the touchscreen and the icon is deleted. If you want to position an icon from the application overview on the main screen, tap the icon in the application overview for a short while and the main screen appears. Move the icon to the desired position and take your finger from the touchscreen. The icon is now added to the main screen. If you move an icon on another icon, a folder containing both icons is automatically created. Tap the folder to view the containing icons and then select the desired icon by tapping it briefly. You can also add Widgets to the start screen. To do that, please open the application overview. Then you tap the word Widgets. All Widgets available on the device will now be displayed. Adding a Widget to the start screen works in the same way as adding an icon. If you want to change your background image, just tap a free place on the main screen and keep pressing the display until the background selection menu appears. Using several home screens Five main screens that can be individually set-up are provided. You can easily switch between them by wiping the screen lightly to the left or right. Pressing the home button will always take you automatically back to the middle home screen. EN - 10 Pre-installed applications and widgets on the home screen A Link to Google™ search B Bookmark overview for Chrome™ Browser C Contacts, Gmail™, Applications overview, Chrome™ and Google+™ D Google Play Store™ , YouTube™ , Hangouts™ , Maps™ , and Local™ 11.) Applications overview Tap briefly on the applications overview icon to open the applications overview. You will see a list of all pre-installed applications as well as those you have already installed. Open the desired application by briefly tapping the appropriate icon. Applications overview EN - 11 12.) Sending / Receiving E-Mails An e-mail application is pre-installed in this device. You can use your existing e-mail address to send and receive e-mails. Note: For this function, a wireless Internet connection is required . Open the application with the "Email" icon which is found on the application menu. Setting up your e-mail box (1) Start the e-mail application by tapping on the Email icon. You are now prompted to set-up your e-mail account. (2) Enter your e-mail address and the corresponding password and then tap "Next". Then name your account and fix the name that will be displayed on outgoing messages. Tap "Done" to complete the set-up. Your e-mail mailbox is selected as the default mailbox if you select the option "Send emails from this account by default". (3) You can set up your e-mail account manually as well. Enter your e-mail address and associated password and then tap on "Manual Setup" to enter the e-mail server information. (4) Choose from the server types POP3, IMAP or Exchange for incoming e-mails. Note: If you do not know what settings you need to make, please contact your e-mail provider, your network administrator or search terms such as "POP address" and "name of your provider" for the required information on the Internet. (5) Enter the required information (server, port, etc.). (6) Select the server type for outgoing e-mails and enter the required information. (7) Tap "Next" to continue in the menu. The e-mail application will check the server settings made. After successful set-up you will see the message: "Your account is set up, and email is on its way". Your account is now set up. (8) Enter a name for your mailbox, then tap "Done" to complete the process. Note: If you have more than one email account, each time you start the e-mail application, the default account is called up. EN - 12 Managing email accounts Adding a new mailbox: (1) Open the email application and tap the menu key to display additional options. Select the menu item `Settings´ and subsequently `Add account´ to create a new mailbox. (2) Follow the instructions of the Setup Wizard to create a new mailbox. Deleting a mailbox: (1) Open the email application and tap the menu key to display additional options. Select the menu item `Settings´ and subsequently `Delete account´ to delete the desired mailbox. Checking the account properties: (1) Open the email application and tap the menu key to display additional options and then select `Settings´. All already created mailboxes will now be displayed on the left side of the menu. (2) Tap the desired mailbox to display the account settings. (3) Tap the `Account setting´ you wish to change in order to make the desired entries. Viewing e-mail messages Open the e-mail application by briefly tapping the e-mail icon. The mailbox you already created is displayed. You can scroll through your e-mail with a vertical sweeping motion. Tap briefly on a particular e-mail to open it. Tap and hold your finger on a particular e-mail in order to display more options – an info box will be displayed. You can now open, reply, forward or delete the e-mail. Writing email messages (1) Tap the Email icon in the top menu bar of the email overview and a new window will open, where you can write a new email. (2) Now enter the email address of the recipient, a subject line and the text into the designated fields. You can also add `Cc/Bcc´ to send this email to several users. (3) Tap `Send´ to send the email. Tap `Save´ to save the entered email as a draft. When you tap the `dustbin´ icon, the currently entered email will be deleted. EN - 13 13.) Web browser To launch the web browser, tap on the Browser icon on the home screen. To open a website, tap on the upper input field for the Internet address. The virtual keyboard now opens and you can enter the address of the desired website. To open the website, tap "Go" or tap on the arrow icon next to the input field. Note: Not all networks provide Internet access. Some networks offer access only to other related local computers but not Internet connection. Using the virtual keyboard Tap the box to open the virtual keyboard. You can now enter text or websites. a. Caps lock (case sensitive) b. Return button c. Calling up the menu for numbers, characters and special character input d. Space bar (no character input) e. Go (confirmation of your input) Special character input In order to enter a special character such as `ä´, tap the `a´ key with your finger for a long time to call up the special character menu. Now glide with your finger to the desired special character, for example an `ä´ and take your finger from the display. You now have entered an `ä´. EN - 14 Using the web browser You can scroll through the display by performing a vertical sweeping motion with your finger. Please do not start the sweeping motion on a menu item or link because otherwise the existing link will open. To open an Internet link, simply tap on the link. The new page will open automatically. Press the menu key to open the web browser menu. Here multiple functions are provided. Among other things you can refresh the opened website here, open a new tab, make offline websites readable or switch to the web browser settings. To return to the previous page, please press the back button . To go directly back to home screen, press the home button . To enter a text, tap the appropriate field and use the virtual keyboard for entering the text. Note: For this function, a wireless Internet connection is required. In playback mode you can further adjust your settings. Tap briefly on the Menu button . Library – a list of all existing music files will be displayed. Party shuffle – turns on/off Party Shuffle mode. Add to playlist – adds currently playing title to a playlist. Delete – deletes the current title. Sound effects – sets a sound effect to the music playback. 14.) System settings Tap the settings icon in the application menu to call up the system settings. You can find the individual categories on the left side of the menu. The available setting options are displayed by briefly pressing each selected menu item. Please note that possibly not all functions offered by Android™ are compatible with the device. When you have adjusted all settings you can return to the previous menu with the Return key switch to the main screen directly with the Home key EN - 15 , or . Your entries will be saved automatically. Setting overview of key settings WiFi & Networks WiFi Here you can adjust the WiFi settings. More Here you can adjust additional network settings. Specify the desired volume and sound for messages here. Also you can activate or deactivate a confirmation sound when touching the screen and an indication sound when unlocking the display lock. Sounds Display Brightness – Adjust display brightness. Background – Selection of the background. Idle state– Adjust the delay before automatic display deactivation. Font size – set-up of the desired font size. Memory Here you can get information about the internal memory and – if inserted – about your MicroSD card. Also you can delete the memory content. Battery Here you can get information about the state of charge of the integrated batteries. Apps Here you can manage installed applications and get information about them. Location services Here you can allow multiple Android™ applications to determine and use you current position via WiFi networks (e.g. Google Maps™). You can also determine, if Google™ may adapt search results and other services to your location. Security Here you can set-up a screen lock, for example, or implement other securityrelevant settings. Language & input Here you can set your preferred language, for example, or add various words to your personal dictionary or adjust. Save & reset Here you can save your system settings and application data on Google™ servers. Furthermore you can reset the factory settings. CAUTION: In doing so, all data saved on the device will be deleted. Accounts Add account Here you can add different accounts. System Date & time Here you can set the date, time, time zone, and the display format. About the Tablet Shows additional information about the device. Device User EN - 16 15.) Managing Applications Pre-installed applications This device is delivered with pre-installed applications. You will find an overview of the applications already installed in the application overview . To open one of these applications, tap on the corresponding icon. Installing applications To install applications on the device, perform the following steps: (1) Open the desired source for downloading applications, for example the pre-installed Google Playstore™. To do that, you first have to login with your existing Playstore™ account or create a new Playstore™ account. Just follow the instructions on the screen. (2) After the successful login, a large selection of applications of the Google Playstore™ is available to you. Select the desired application, tap on install and possibly confirm the access authorisation for this application. The download will start now and the progress is displayed in the upper left corner of the advanced status bar. (3) After downloading the application, it is automatically installed. You can find the new application in the applications menu after installation was successful. You can see the installation progress in the upper left corner of the advanced status bar. Uninstalling applications (1) Open the system settings by briefly tapping the settings icon in the application overview. (2) Now tap the menu item `Apps´ briefly to get to the application settings. (3) Choose the desired application overview in the menu items `Download, memory, active and all´ by tapping it briefly. (4) Now select the application you want to deinstall by tapping it briefly. (5) Now tap `Deinstall´ and confirm your entry with OK to deinstall the application from the device. Note: You cannot delete pre-installed software. EN - 17 16.) File Explorer Open the applications overview and then tap briefly on the Explorer icon to start the file explorer. Navigating through files and folders The internal memory, memory card (SD Card) and USB are available. Tap the desired storage location in order to display the files contained on a list. If no memory card is inserted, or no storage device is mounted over the USB connection, you will be informed with "... is unmounted." With a vertical sweeping motion, you can now scroll through your files and folders. Open a file or folder by tapping briefly. You can jump backwards or forwards by briefly tapping the respective icons. To go one level higher in the file structure, tap on the LevelUp icon . With the Home icon you can go directly to the main directory. Using the toolbar Tap the menu key and then `Hide Toolbar´ in order to fade the toolbar in or out. Home Go directly to the main directory. LevelUp Multi Go one level higher. Select multiple files. Editor Copy, move, delete, paste, or rename a file or folder. New Folder Create a new folder. Back Next One step back. One step forward. Copy, move and rename files and folders 1.) 2.) 3.) 4.) 5.) 6.) 7.) Navigate to the desired file in the file browser. Tap and hold your finger on the file until an info box appears. Now select the desired function. You can choose between Copy, Delete, Move, Paste – to do so, a file must be in the clipboard – and Rename. To copy or move, tap briefly on the appropriate icon (Copy/Move) and then navigate to the target directory. Then tap on the editor icon and select by briefly tapping "Paste" to insert the file. To delete a file, tap "Delete" and confirm for safety again with "Delete". To cancel, tap briefly the "Cancel". To rename a file, tap on "Rename" and then enter the new file name over the virtual keyboard. Confirm your entry with "OK" or cancel the process with "Cancel". You can simultaneously copy, delete or move several files and folders. Tap on the multi icon and then tap the desired files. The marked files are now displayed in a different colour. Tap the editor icon to perform the desired action. EN - 18 17.) Limited Warranty Terms The warranty covers only the replacement of this Intenso product. The warranty does not cover normal wear and tear resulting from faulty, improper use, negligence, accident, incompatibility, or poor performance of specific computer hardware or computer software. There is no warranty in the case of non-compliance with the Intenso user manual, improper installation, use, or defects caused by other equipment. Warranty is also excluded if the product is subjected to the effects of vibration, electrostatic discharge, heat or moisture beyond the product specifications. Intenso is not liable for data loss or any collateral damage, or consequential damages, for breach of warranty or for any other damage, whatever the underlying cause. This product is not intended for commercial use or for medical and special applications in which the failure of the product may cause injury, death or substantial property damage. 18.) Technical Data CPU Main memory Operating system Compatible operating systems Connection options Wireless G-Sensor Photo format Audio format Video format Display Camera SNR Frequency range Power Supply Internal Battery 1.0 GHz Dualcore based on Cortex A9 1 GB DDR 3 Android 4.2.2 Windows XP / Vista / 7 / 8 / Linux 2.4 and higher / Mac 10.6 and higher Headphone, Micro SD (SDHC/SDHX), micro USB WiFi (802.11 b/g/n) 360 degree rotation JPEG, BMP, GIF, PNG MP3, WMA, WAV, OGG, FLAC, APE MPEG1, MPEG 4, FLV TFT LCD Display, 1024 x 600 Pixel 0,3 MP front camera >= 80 dB 20 Hz – 20 KHz (V) AC Adapter (HUONIO HNBC050120UE): AC Input 100240V~50/60Hz, DC Output 5V / 1.2A Rechargeable lithium-ion polymer battery EN - 19 19.) Maintenance of the Device Never spray or apply a liquid directly onto the screen or casing. 20.) Cleaning the Device Wipe the casing, frame and screen gently with a soft, lint-free cloth. Use only detergents specifically designed for displays. 21.) Disposal of Used Electronic Equipment Equipment marked with this symbol is subject to the European Directive 2002/96/EC. All electrical devices and used electrical equipment must be disposed of separately from household waste over the appropriate government agencies. Proper disposal of old electronic equipment helps avoid environmental damage. EN - 20 22.) Licenceinformation about GNU/LGPL Notice of GNU GENERAL PUBLIC LICENSE and LESSER GENERAL PUBLIC LICENCE Dear Customer, If interested, you and any third party can download the source code of used GPL / LGPL from Intenso Webpage http://www.intenso.de . The source code of the desired product is available to anyone on the selection of valid product category and the desired device. In the product details you will find the entry "drivers". Open this menu to download the corresponding GPL / LGPL code. For a fee of 35 € (delivery to another country as Germany), it is also possible to obtain this code by postal delivery. More information about the GPL/LGPL-Licence can you find on following website www.gnu.org GNU GENERAL PUBLIC LICENSE Version 2, June 1991 Copyright (C) 1989, 1991 Free Software Foundation, Inc. 51 Franklin Street, Fifth Floor, Boston, MA 02110-1301, USA Everyone is permitted to copy and distribute verbatim copies of this license document, but changing it is not allowed. Preamble The licenses for most software are designed to take away your freedom to share and change it. By contrast, the GNU General Public License is intended to guarantee your freedom to share and change free software-to make sure the software is free for all its users. This General Public License applies to most of the Free Software Foundation's software and to any other program whose authors commit to using it. (Some other Free Software Foundation software is covered by the GNU Lesser General Public License instead.) You can apply it to your programs, too. When we speak of free software, we are referring to freedom, not price. Our General Public Licenses are designed to make sure that you have the freedom to distribute copies of free software (and charge for this service if you wish), that you receive source code or can get it if you want it, that you can change the software or use pieces of it in new free programs; and that you know you can do these things. To protect your rights, we need to make restrictions that forbid anyone to deny you these rights or to ask you to surrender the rights. These restrictions translate to certain responsibilities for you if you distribute copies of the software, or if you modify it. For example, if you distribute copies of such a program, whether gratis or for a fee, you must give the recipients all the rights that you have. You must make sure that they, too, receive or can get the source code. And you must show them these terms so they know their rights. We protect your rights with two steps: (1) copyright the software, and (2) offer you this license which gives you legal permission to copy, distribute and/or modify the software. Also, for each author's protection and ours, we want to make certain that everyone understands that there is no warranty for this free software. If the software is modified by someone else and passed on, we want its recipients to know that what they have is not the original, so that any problems introduced by others will not reflect on the original authors' reputations. Finally, any free program is threatened constantly by software patents. We wish to avoid the danger that redistributors of a free program will individually obtain patent licenses, in effect making the program proprietary. To prevent this, we have made it clear that any patent must be licensed for everyone's free use or not licensed at all. The precise terms and conditions for copying, distribution and modification follow. TERMS AND CONDITIONS FOR COPYING, DISTRIBUTION AND MODIFICATION 0. This License applies to any program or other work which contains a notice placed by the copyright holder saying it may be distributed under the terms of this General Public License. The "Program", below, refers to any such program or work, and a "work based on the Program" means either the Program or any derivative work under copyright law: that is to say, a work containing the Program or a portion of it, either verbatim or with modifications and/or translated into another language. (Hereinafter, translation is included without limitation in the term "modification".) Each licensee is addressed as "you". Activities other than copying, distribution and modification are not covered by this License; they are outside its scope. The act of running the Program is not restricted, and the output from the Program is covered only if its contents constitute a work based on the Program (independent of having been made by running the Program). Whether that is true depends on what the Program does. 1. You may copy and distribute verbatim copies of the Program's source code as you receive it, in any EN - 21 medium, provided that you conspicuously and appropriately publish on each copy an appropriate copyright notice and disclaimer of warranty; keep intact all the notices that refer to this License and to the absence of any warranty; and give any other recipients of the Program a copy of this License along with the Program. You may charge a fee for the physical act of transferring a copy, and you may at your option offer warranty protection in exchange for a fee. 2. You may modify your copy or copies of the Program or any portion of it, thus forming a work based on the Program, and copy and distribute such modifications or work under the terms of Section 1 above, provided that you also meet all of these conditions: a) You must cause the modified files to carry prominent notices stating that you changed the files and the date of any change. b) You must cause any work that you distribute or publish, that in whole or in part contains or is derived from the Program or any part thereof, to be licensed as a whole at no charge to all third parties under the terms of this License. c) If the modified program normally reads commands interactively when run, you must cause it, when started running for such interactive use in the most ordinary way, to print or display an announcement including an appropriate copyright notice and a notice that there is no warranty (or else, saying that you provide a warranty) and that users may redistribute the program under these conditions, and telling the user how to view a copy of this License. (Exception: if the Program itself is interactive but does not normally print such an announcement, your work based on the Program is not required to print an announcement.) These requirements apply to the modified work as a whole. If identifiable sections of that work are not derived from the Program, and can be reasonably considered independent and separate works in themselves, then this License, and its terms, do not apply to those sections when you distribute them as separate works. But when you distribute the same sections as part of a whole which is a work based on the Program, the distribution of the whole must be on the terms of this License, whose permissions for other licensees extend to the entire whole, and thus to each and every part regardless of who wrote it. Thus, it is not the intent of this section to claim rights or contest your rights to work written entirely by you; rather, the intent is to exercise the right to control the distribution of derivative or collective works based on the Program. In addition, mere aggregation of another work not based on the Program with the Program (or with a work based on the Program) on a volume of a storage or distribution medium does not bring the other work under the scope of this License. 3. You may copy and distribute the Program (or a work based on it, under Section 2) in object code or executable form under the terms of Sections 1 and 2 above provided that you also do one of the following: a) Accompany it with the complete corresponding machine-readable source code, which must be distributed under the terms of Sections 1 and 2 above on a medium customarily used for software interchange; or, b) Accompany it with a written offer, valid for at least three years, to give any third party, for a charge no more than your cost of physically performing source distribution, a complete machine-readable copy of the corresponding source code, to be distributed under the terms of Sections 1 and 2 above on a medium customarily used for software interchange; or, c) Accompany it with the information you received as to the offer to distribute corresponding source code. (This alternative is allowed only for noncommercial distribution and only if you received the program in object code or executable form with such an offer, in accord with Subsection b above.) The source code for a work means the preferred form of the work for making modifications to it. For an executable work, complete source code means all the source code for all modules it contains, plus any associated interface definition files, plus the scripts used to control compilation and installation of the executable. However, as a special exception, the source code distributed need not include anything that is normally distributed (in either source or binary form) with the major components (compiler, kernel, and so on) of the operating system on which the executable runs, unless that component itself accompanies the executable. If distribution of executable or object code is made by offering access to copy from a designated place, then offering equivalent access to copy the source code from the same place counts as distribution of the source code, even though third parties are not compelled to copy the source along with the object code. 4. You may not copy, modify, sublicense, or distribute the Program except as expressly provided under this License. Any attempt otherwise to copy, modify, sublicense or distribute the Program is void, and will automatically terminate your rights under this License. However, parties who have received copies, or rights, from you under this License will not have their licenses terminated so long as such parties remain in full compliance. 5. You are not required to accept this License, since you have not signed it. However, nothing else grants you permission to modify or distribute the Program or its derivative works. These actions are prohibited by EN - 22 law if you do not accept this License. Therefore, by modifying or distributing the Program (or any work based on the Program), you indicate your acceptance of this License to do so, and all its terms and conditions for copying, distributing or modifying the Program or works based on it. 6. Each time you redistribute the Program (or any work based on the Program), the recipient automatically receives a license from the original licensor to copy, distribute or modify the Program subject to these terms and conditions. You may not impose any further restrictions on the recipients' exercise of the rights granted herein. You are not responsible for enforcing compliance by third parties to this License. 7. If, as a consequence of a court judgment or allegation of patent infringement or for any other reason (not limited to patent issues), conditions are imposed on you (whether by court order, agreement or otherwise) that contradict the conditions of this License, they do not excuse you from the conditions of this License. If you cannot distribute so as to satisfy simultaneously your obligations under this License and any other pertinent obligations, then as a consequence you may not distribute the Program at all. For example, if a patent license would not permit royalty-free redistribution of the Program by all those who receive copies directly or indirectly through you, then the only way you could satisfy both it and this License would be to refrain entirely from distribution of the Program. If any portion of this section is held invalid or unenforceable under any particular circumstance, the balance of the section is intended to apply and the section as a whole is intended to apply in other circumstances. It is not the purpose of this section to induce you to infringe any patents or other property right claims or to contest validity of any such claims; this section has the sole purpose of protecting the integrity of the free software distribution system, which is implemented by public license practices. Many people have made generous contributions to the wide range of software distributed through that system in reliance on consistent application of that system; it is up to the author/donor to decide if he or she is willing to distribute software through any other system and a licensee cannot impose that choice. This section is intended to make thoroughly clear what is believed to be a consequence of the rest of this License. 8. If the distribution and/or use of the Program is restricted in certain countries either by patents or by copyrighted interfaces, the original copyright holder who places the Program under this License may add an explicit geographical distribution limitation excluding those countries, so that distribution is permitted only in or among countries not thus excluded. In such case, this License incorporates the limitation as if written in the body of this License. 9. The Free Software Foundation may publish revised and/or new versions of the General Public License from time to time. Such new versions will be similar in spirit to the present version, but may differ in detail to address new problems or concerns. Each version is given a distinguishing version number. If the Program specifies a version number of this License which applies to it and "any later version", you have the option of following the terms and conditions either of that version or of any later version published by the Free Software Foundation. If the Program does not specify a version number of this License, you may choose any version ever published by the Free Software Foundation. 10. If you wish to incorporate parts of the Program into other free programs whose distribution conditions are different, write to the author to ask for permission. For software which is copyrighted by the Free Software Foundation, write to the Free Software Foundation; we sometimes make exceptions for this. Our decision will be guided by the two goals of preserving the free status of all derivatives of our free software and of promoting the sharing and reuse of software generally. NO WARRANTY 11. BECAUSE THE PROGRAM IS LICENSED FREE OF CHARGE, THERE IS NO WARRANTY FOR THE PROGRAM, TO THE EXTENT PERMITTED BY APPLICABLE LAW. EXCEPT WHEN OTHERWISE STATED IN WRITING THE COPYRIGHT HOLDERS AND/OR OTHER PARTIES PROVIDE THE PROGRAM "AS IS" WITHOUT WARRANTY OF ANY KIND, EITHER EXPRESSED OR IMPLIED, INCLUDING, BUT NOT LIMITED TO, THE IMPLIED WARRANTIES OF MERCHANTABILITY AND FITNESS FOR A PARTICULAR PURPOSE. THE ENTIRE RISK AS TO THE QUALITY AND PERFORMANCE OF THE PROGRAM IS WITH YOU. SHOULD THE PROGRAM PROVE DEFECTIVE, YOU ASSUME THE COST OF ALL NECESSARY SERVICING, REPAIR OR CORRECTION. 12. IN NO EVENT UNLESS REQUIRED BY APPLICABLE LAW OR AGREED TO IN WRITING WILL ANY COPYRIGHT HOLDER, OR ANY OTHER PARTY WHO MAY MODIFY AND/OR REDISTRIBUTE THE PROGRAM AS PERMITTED ABOVE, BE LIABLE TO YOU FOR DAMAGES, INCLUDING ANY GENERAL, SPECIAL, INCIDENTAL OR CONSEQUENTIAL DAMAGES ARISING OUT OF THE USE OR INABILITY TO USE THE PROGRAM (INCLUDING BUT NOT LIMITED TO LOSS OF DATA OR DATA BEING RENDERED INACCURATE OR LOSSES SUSTAINED BY YOU OR THIRD PARTIES OR A FAILURE OF THE PROGRAM TO OPERATE WITH ANY OTHER PROGRAMS), EVEN IF SUCH HOLDER OR OTHER EN - 23 PARTY HAS BEEN ADVISED OF THE POSSIBILITY OF SUCH DAMAGES. END OF TERMS AND CONDITIONS How to Apply These Terms to Your New Programs If you develop a new program, and you want it to be of the greatest possible use to the public, the best way to achieve this is to make it free software which everyone can redistribute and change under these terms. To do so, attach the following notices to the program. It is safest to attach them to the start of each source file to most effectively convey the exclusion of warranty; and each file should have at least the "copyright" line and a pointer to where the full notice is found. one line to give the program's name and an idea of what it does. Copyright (C) yyyy name of author This program is free software; you can redistribute it and/or modify it under the terms of the GNU General Public License as published by the Free Software Foundation; either version 2 of the License, or (at your option) any later version. This program is distributed in the hope that it will be useful, but WITHOUT ANY WARRANTY; without even the implied warranty of MERCHANTABILITY or FITNESS FOR A PARTICULAR PURPOSE. See the GNU General Public License for more details. You should have received a copy of the GNU General Public License along with this program; if not, write to the Free Software Foundation, Inc., 51 Franklin Street, Fifth Floor, Boston, MA 02110-1301, USA. Also add information on how to contact you by electronic and paper mail. If the program is interactive, make it output a short notice like this when it starts in an interactive mode: Gnomovision version 69, Copyright (C) year name of author Gnomovision comes with ABSOLUTELY NO WARRANTY; for details type `show w'. This is free software, and you are welcome to redistribute it under certain conditions; type `show c' for details. The hypothetical commands `show w' and `show c' should show the appropriate parts of the General Public License. Of course, the commands you use may be called something other than `show w' and `show c'; they could even be mouse-clicks or menu items--whatever suits your program. You should also get your employer (if you work as a programmer) or your school, if any, to sign a "copyright disclaimer" for the program, if necessary. Here is a sample; alter the names: Yoyodyne, Inc., hereby disclaims all copyright interest in the program `Gnomovision' (which makes passes at compilers) written by James Hacker. signature of Ty Coon, 1 April 1989 Ty Coon, President of Vice EN - 24 Intenso GmbH Date: December 17th 2013 EC Declaration of Conformity We, the company Intenso GmbH, with headquarters located at: Diepholzerstr. 15 in 49377 Vechta, Germany Declare under our sole responsibility that the product: Model: 7” Intenso TAB 734 (item no. 5509854) Description: Tablet computer is in conformity with the provisions of the following Council Directives: Directive R&TTE 1999/5/CE EN 301 489-1 V1.9.2 EN 301 489-17 V2.1.1 EN 300 328 V1.7.1 : 2006-10 EN 55022:2010 (Class B) EN 55024:2010 EN 61000-3-2:2006+A1 :2009+A2 :2009 (Class D) EN 61000-3-3:2008 Low Voltage Directive 2006/95/EC EN 60950-1:2006+A11:2009+A1:2010+A12:2011+A12: correction 2012 Ecodesign Directive 2009/125/EC 1275/2008 278/2009 ROHS Directive 2011/65/EU The technical documents related to the device mentioned above have been deposited at: Intenso GmbH Diepholzerstr. 15, 49377 Vechta. Germany Authorized Representative: ______________________________ Executive Director: Thomas Pöhlking EN - 25 Istruzioni per l’uso di TAB 734 Molte grazie per aver scelto il TAB 734. La invitiamo a leggere e seguire le presenti istruzioni, che Le forniranno informazioni relativamente alle più importanti funzioni dell’apparecchio. 1.) Indice 1.) Indice ..................................................................................................................................................................................................... 1 2.) Note ....................................................................................................................................................................................................... 2 3.) Quadro generale dell’apparecchio ......................................................................................................................................................... 4 4.) Contenuto della confezione ................................................................................................................................................................... 4 5.) Caricamento della batteria ..................................................................................................................................................................... 5 6.) Utilizzo di una scheda Micro SD/SDHC/SDXC ...................................................................................................................................... 5 7.) Trasmissione di dati tra l’apparecchio e un computer ............................................................................................................................ 5 8.) Touchscreen .......................................................................................................................................................................................... 6 9.) WIFI ....................................................................................................................................................................................................... 6 Connessione automatica ............................................................................................................................................................................ 6 Collegamento manuale ............................................................................................................................................................................... 7 10.) La schermata iniziale ........................................................................................................................................................................... 8 Visualizzazione ........................................................................................................................................................................................... 8 Sblocco del display ..................................................................................................................................................................................... 8 Barra dello status ........................................................................................................................................................................................ 9 Adattamento della schermata di avvio ...................................................................................................................................................... 10 Utilizzare diverse schermate iniziali .......................................................................................................................................................... 10 Applicazioni già installate sulla schermata iniziale .................................................................................................................................... 11 11.) Menù principale applicazioni .............................................................................................................................................................. 11 12.) Invio / ricezione di e-mails ................................................................................................................................................................. 12 Configurazione della Sua casella di posta elettronica ............................................................................................................................... 12 Gestione degli account e-mail................................................................................................................................................................... 13 Visualizzazione delle e-mails .................................................................................................................................................................... 13 Scrivere messaggi e-mail.......................................................................................................................................................................... 13 13.) Browser internet................................................................................................................................................................................. 14 Utilizzo della tastiera virtuale .................................................................................................................................................................... 14 Inserimento di caratteri speciali ................................................................................................................................................................ 14 Utilizzo del browser internet ...................................................................................................................................................................... 15 14.) Impostazioni sistema ......................................................................................................................................................................... 15 Panoramica delle impostazioni principali .................................................................................................................................................. 16 15.) Gestione di applicazioni ..................................................................................................................................................................... 17 Installazione di applicazioni ...................................................................................................................................................................... 17 Disinstallazione di applicazioni ................................................................................................................................................................. 17 16.) File Explorer ...................................................................................................................................................................................... 18 Navigare attraverso files e cartelle............................................................................................................................................................ 18 Utilizzare la barra degli strumenti .............................................................................................................................................................. 18 Copiare, spostare e rinominare files e cartelle .......................................................................................................................................... 18 17.) Condizioni di garanzia limitate ........................................................................................................................................................... 19 18.) Dati tecnici ......................................................................................................................................................................................... 19 19.) Manutenzione dell’apparecchio ......................................................................................................................................................... 20 20.) Pulizia dell’apparecchio ..................................................................................................................................................................... 20 21.) Smaltimento di vecchi apparecchi elettrici ......................................................................................................................................... 20 22.) Licenza informazione ......................................................................................................................................................................... 21 Dichiarazione di conformità .......................................................................................................................................................................... 25 Questo manuale non contiene eventualmente tutte le funzioni del Suo apparecchio. Per l’utilizzo di applicazioni derivanti da fornitori terzi, contatti il rispettivo fornitore. Consideri che tutte le informazioni possono essere modificate senza preavviso. Può trovare informazioni attuali su www.intenso.de. Marchio di fabbrica Google™, il logo Google™ e Android™ sono marchi di Google Inc. Tutti gli altri nomi di prodotti e servizi sono proprietà del rispettivo possessore. IT - 1 2.) Note Evitare forti impatti sull’apparecchio. Non depositarlo su superfici oblique al fine di evitare una caduta. Non utilizzare l’apparecchio in zone estremamente fredde, calde, umide o polverose. Non esporlo alla luce solare diretta. Evitare l’utilizzo in posti sabbiosi. Non utilizzare l’apparecchio in zone a rischio d’esplosione, come ad esempio distributori di carburante presso una stazione di servizio. Evitare l’utilizzo su cuscini, divani o altri oggetti che supportano una potenziale fonte di calore, in quanto si creerebbe pericolo di surriscaldamento dell’apparecchio. Esegua spesso il backup dei dati per evitare una loro possibile perdita. Non siamo responsabili per eventuali perdite di dati. Non interrompere la connessione mentre i dati vengono trasmessi o l’apparecchio viene formattato. Potrebbe verificarsi la perdita dei dati. Immagini e video possono essere protetti da diritti di terzi. La loro esecuzione senza licenza può violare diritti di copyright. Evitare l’utilizzo in presenza di forti campi magnetici. Proteggere l’apparecchio dall’acqua. Se dell’umidità penetrasse nell’apparecchio, spegnerlo immediatamente, quindi pulirlo e asciugarlo. Non utilizzare soluzioni chimiche per pulire l’apparecchio. Utilizzare solo un panno asciutto. Non collocare in prossimità dell’apparecchio fiamme aperte, ad esempio candele accese. Non siamo responsabili per danni causati da un malfunzionamento per perdita di dati, utilizzo improprio, riparazione per conto proprio dell’apparecchio o sostituzione della batteria. Se l’apparecchio non dovesse reagire ai comandi, utilizzare il pulsante reset sul retro dell’apparecchio per riavviarlo. Se l’apparecchio non viene utilizzato, staccare l’alimentatore della corrente. La presa deve trovarsi nei pressi dell’apparecchio ed essere facilmente accessibile. Utilizzare l’adattatore solo con prese con messa a terra da AC 100-240V~, 50/60 Hz. In caso d’insicurezza riguardo l’alimentazione di corrente presso la collocazione dell’apparecchio, informarsi presso il fornitore d’energia in questione. Utilizzare solo il cavo dell’adattatore e di rete in fornitura. Per interrompere l’alimentazione di corrente all’apparecchio, estrarre l’alimentatore dalla presa. Tenere sempre ben fermo il trasformatore mentre lo si estrae. Non tirare mai il filo. Non aprire l’alloggiamento dell’adattatore. Aprendo l’alloggiamento sussiste pericolo di morte per scossa elettrica. Non contiene componenti che possono essere riparate. IT - 2 Se non si utilizza l’apparecchio per lungo tempo, la batteria si scarica lentamente. Prima del riutilizzo, quest’ultima dev’essere quindi ricaricata. Smaltire l’apparecchio o la batteria nel rispetto dell’ambiente. Non scomporre l’apparecchio in pezzi singoli e non cercare di ripararlo per conto proprio, in quanto la garanzia in questo caso decadrebbe. Non utilizzare l’apparecchio in posti dove l’utilizzo di apparecchi mobili è vietato. Non utilizzare l’apparecchio in prossimità di altri apparecchio elettronici, in quanto potrebbe verificarsi un’interferenza col segnale d’alta frequenza. Non utilizzare l’apparecchio nei pressi di pacemaker, in un ospedale o nei pressi di apparecchi medici, in quanto potrebbe verificarsi un’interferenza col segnale d’alta frequenza. Rivolgersi al produttore di questo apparecchio per ricevere informazioni su un utilizzo in concomitanza con altri dispositivi. Quando si utilizzano degli auricolari o delle cuffie ad un volume troppo elevato si possono verificare dei danni duraturi all’udito. La preghiamo di considerare che il volume costantemente elevato potrebbe causare danni permanenti all’udito. Al fine di evitare un possibile rischio alla salute causato da un volume troppo elevato, Le consigliamo di utilizzare le cuffie contenute nel volume di consegna. Per motivi di sicurezza nel traffico, l’apparecchio non può essere utilizzato durante la guida dal conducente stesso. IT - 3 3.) Quadro generale dell’apparecchio (1) (2) (3) (4) (5) Porta 3.5mm per cuffie Microfono integrato Indicatore di ricarica: rosso durante il procedimento di ricarica – giallo a ricarica completa. Fotocamera frontale Porta micro USB (6) Tasto On / Off: premere a lungo per spegnere l’apparecchio; premere brevemente per passare dalla modalità standby alla modalità attiva (7) Volume + / (8) Touchscreen (9) Slot per micro scheda SD (10) Altoparlanti integrati 4.) Contenuto della confezione Verificare la completezza del contenuto del pacchetto: TAB 734 Cavo USB Trasformatore 5V 1.2A Istruzioni IT - 4 5.) Caricamento della batteria Ricaricare completamente la batteria prima del primo utilizzo. Collegare l’alimentatore in dotazione all’apparecchio e a una presa. La ricarica completa dura circa 5 ore. Lo stato della ricarica viene visualizzato sul lato anteriore sinistro dell’apparecchio. Il LED s’illumina di rosso durante la ricarica e diventa giallo quando la batteria è completamente carica. Nota: a. Quando la carica rimasta della batteria raggiunge il 15%, riceverà un avviso sul display. Dovrebbe quindi ricaricare la batteria tramite il trasformatore inserito in una presa, al fine di evitare la perdita di dati e aumentare la durata della batteria. b. Può utilizzare l’apparecchio mentre la batteria viene ricaricata. Per garantire una lunga durata della batteria, è opportuno non utilizzare l’apparecchio nel frattempo. c. Per garantire una buona performance, la batteria incorporata dev’essere utilizzata spesso. Se utilizza solo raramente l’apparecchio, carichi completamente la batteria minimo una volta al mese. d. Si assicuri di utilizzare solo il trasformatore dotato in fornitura per il caricamento. 6.) Utilizzo di una scheda Micro SD/SDHC/SDXC Questo dispositivo può leggere dati direttamente da una scheda micro SD/SDHC/SDXC con una capacità massima di 64 GB. Per utilizzare una scheda micro SD/SDHC/SDXC, inserire la scheda nello slot apposito sul lato sinistro del dispositivo. Utilizzare l’Explorer preinstallato per accedere ai dati presenti sulla scheda di memoria. Selezionare quindi nell’Explorer la cartella “SD Card”. 7.) Trasmissione di dati tra l’apparecchio e un computer 1.) Collegare l’apparecchio con l’aiuto del cavo USB allegato con un computer. 2.) Sull’apparecchio comparirà quindi la schermata per il collegamento USB. Toccare brevemente “Attivare memoria USB”. L’apparecchio verrà riconosciuto come supporto di memoria rimuovibile e riceverà il messaggio “Memoria USB in utilizzo”. Dopo aver toccato brevemente il tasto Home, si potrà continuare ad utilizzare normalmente l’apparecchio. Avrà ora accesso dal Suo computer alla memoria interna dell’apparecchio e potrà copiare, cancellare o spostare files sull’apparecchio. 3.) Se vi è una connessione USB con il computer, nella barra di stato si vedrà il simbolo USB. Nella barra di stato ampliata sono disponibili maggiori informazioni ed è possibile attivare o disattivare la connessione USB. Per disattivare la memoria, selezionare “Disattiva memoria USB”. Sul computer selezionare la funzione „Rimozione sicura“ computer. , per staccare il dispositivo dal Nota: Le applicazioni già installate e il sistema operativo Android™ occupano una parte della memoria interna. Per questo motivo non è a Sua disposizione l’intera memoria interna. IT - 5 8.) Touchscreen Questo dispositivo viene comandato mediante un touch screen. Toccando lievemente con le dita il touch screen si possono avviare in modo molto semplice le applicazioni, inserire testi sulla tastiera virtuale e scorrendo nella relativa direzione, si può navigare tra le diverse schermate. Rimuova la pellicola di protezione dal display prima di utilizzare l’apparecchio. Il touchscreen riconosce cariche elettriche minime, come ad esempio quella trasmessa dal dico umano e stabilisce così il punto d’inserimento. Si consiglia quindi di utilizzare la punta delle dita per l’inserimento. L’utilizzo con un pennino o un altro oggetto appuntito non è possibile. Il touchscreen non dovrebbe entrare in contatto con l’acqua o altri dispositivi elettrici, al fine di evitare malfunzionamenti e difetti permanenti. Nota: a. Se il touchscreen non viene utilizzato per due minuti, l’apparecchio passa nella modalità standby. Premere brevemente il tasto On / Off per passare alla modalità attiva. b. Per evitare inserimenti involontari, il blocco tasti si attiva automaticamente. Sbloccare i tasti dal touchscreen. Trascinare a questo scopo il simbolo del lucchetto dal basso verso l’altro sul display. L’apparecchio passerà ora alla schermata iniziale. Toccare il lucchetto chiuso sul display e tenerlo premuto. Trascinare quindi il lucchetto sul lucchetto aperto rilasciare il dito dal display. Lo schermo è ora sbloccato. appena comparso e Può girare l’apparecchio in tutte le direzioni. Dispone di un sensore che orienta automaticamente il display. 9.) WIFI Per collegare il dispositivo a Internet, è necessaria una connessione WLAN. Per configurarla, aprire le impostazioni WLAN nelle impostazioni. Nota: Consideri che una rete WLAN deve trovarsi nel raggio della Sua posizione attuale. Connessione automatica Aprire le impostazioni WLAN tramite le impostazioni. Qui è possibile attivare o disattivare la funzione WLAN in tutta semplicità. Spingere semplicemente l’interruttore virtuale dalla posizione “ON” verso sinistra per disattivare la funzione WLAN. La visualizzazione passerà su “OFF”. Per riattivare la funzione WLAN disattivata, spingere semplicemente l’interruttore virtuale verso destra. Nelle impostazioni WIFI vengono visualizzate a destra tutte le reti disponibili e tutte le reti già utilizzate. IT - 6 Tocchi la rete desiderata e inserisca eventualmente la chiave WLAN (password) corretta per stabilire una connessione. Confermate l’eventuale password inserita premendo il tasto Enter e premete Collega. Dopo breve tempo la connessione è stabilita. Nota: a) Se l’apparecchio passa nella modalità standby, la WLAN viene disattivata automaticamente. Questo riduce il consumo di corrente e contribuisce così ad una durata maggiore della batteria. Se l’apparecchio passa di nuovo nella modalità attiva, il collegamento WLAN verrà ripristinato automaticamente. Questo può durare qualche secondo. b) La lista attuale delle reti WLAN trovate viene aggiornata automaticamente. c) Se la funzione WLAND è attiva, l’apparecchio si collegherà automaticamente con una rete già configurata, se si trova nel suo raggio. d) Se una rete WLAN sconosciuta si trova nei paraggi, viene visualizzato un campo con le relative informazioni. Collegamento manuale Per cercare manualmente una rete Wifi raggiungibile, procedere come segue: (1) Aprire le Impostazioni. (2) Aprire ora le impostazioni WLAN, premere i tre punti in alto a destra e selezionare infine “Cerca”. (3) Se la rete Wifi non compare nell’elenco delle reti disponibili, selezionare la voce “Aggiungi rete“ per inserire manualmente la rete SSID, il protocollo di sicurezza ed eventualmente la relativa password. Per confermare i dati inseriti, toccare “Salva“. IT - 7 10.) La schermata iniziale Visualizzazione Sblocco del display Se il touchscreen non viene utilizzato per due minuti, l’apparecchio passa automaticamente alla modalità standby. Premere brevemente il tasto on / off per passare alla modalità attiva. Il display è bloccato per impedire digitazioni involontarie. Toccare il lucchetto chiuso sul display e tenerlo premuto. Trascinare quindi il lucchetto sul lucchetto aperto appena comparso e rilasciare il dito dal display. Lo schermo è ora sbloccato. Trascini il simbolo del lucchetto con le dita nella direzione della freccia. Nota: Trascinare il simbolo del lucchetto sul simbolo comparso della fotocamera per aprire direttamente l’applicazione della fotocamera. IT - 8 Barra dello status La barra dello status si trova nella parte superiore e inferiore della schermata iniziale. La barra superiore si suddivide in due ambiti. Se si trascina la barra verso il basso a sinistra, verranno visualizzate, se presenti, le notifiche attuali. Se si trascina la barra verso il basso a destra, verranno visualizzati i campi di accesso rapido per diverse impostazioni. La barra inferiore offre la possibilità di: passare alla schermata precedente o nascondere la tastiera, se visualizzata, aprire direttamente la schermata iniziale, visualizzare i programmi utilizzati di recente e regolare il volume del dispositivo. IT - 9 Adattamento della schermata di avvio È possibile adattare la schermata di avvio alle proprie esigenze individuali in modo molto semplice. Se si vuole cancellare un’icona, toccare un po’ più a lungo con il dito l’icona e spostarla sul simbolo X scoperto. Togliere ora il dito dal touch screen e l’icona viene cancellata. Se si desidera spostare un’icona dalla panoramica delle applicazioni alla schermata iniziale, premere un pò più a lungo sull’icona nella panoramica delle applicazioni: comparirà la schermata iniziale. Spostare l’icona nel punto desiderato e togliere il dito dal touch screen. L’icona è stata aggiunta alla schermata iniziale. Se si posiziona un’icona su un’altra icona, viene creata automaticamente una cartella che contiene le due icone. Toccare la cartella per visualizzare le icone in essa contenute e selezionare poi toccandola brevemente l’icona desiderata. Inoltre, è possibile aggiungere widget alla schermata iniziale. Per farlo, aprire la panoramica delle applicazioni e premere la parola Widget: verranno visualizzati tutti i widget disponibili sul dispositivo. L’aggiunta di un widget sulla schermata iniziale funziona esattamente come l’aggiunta di un’icona. Se si desidera cambiare l’immagine dello sfondo, toccare semplicemente un punto libero della schermata iniziale e tenere premuto il dito sul display fino a che compare il menu di selezione dello sfondo. Utilizzare diverse schermate iniziali Sono a Sua disposizione cinque schermate individuali impostabili in modo personale. Con un leggero sfioramento verso sinistra o destra, può passare facilmente da una all’altra. Premendo il tasto Home tornerà sempre automaticamente alla fermata iniziale nel mezzo. IT - 10 Applicazioni già installate sulla schermata iniziale A Collegamento alla ricerca Google™ B Bookmark Panoramica per il browser Chrome ™ C Contatti, Gmail™, Menù principale applicazioni, Chrome™ e Google+™ D Google Play Store™ , YouTube™ , Hangouts™ , Maps™ e Local™ 11.) Menù principale applicazioni Tocchi brevemente l’icona del Menù principale applicazioni per aprire il menù principale delle applicazioni. Visualizzerà quindi un quadro d’insieme di tutte le applicazioni predefinite e da Lei già installate. Apra l’applicazione desiderata toccando brevemente la relativa icona. Menù principale applicazioni IT - 11 12.) Invio / ricezione di e-mails Su questo apparecchio è già installata un’applicazione per le e-mails. Può in questo modo utilizzare i Suoi account già esistenti per inviare e ricevere e-mails. Nota: Per questa funzione è necessario un collegamento WLAN ad internet. Apra l’applicazione tramite l’icona „E-Mail“ che si trova nel menù delle applicazioni. Configurazione della Sua casella di posta elettronica (1) Avvii l’applicazione dell’e-mail toccando il simbolo E-Mail. Le verrà quindi richiesto di configurare la Sua casella di posta elettronica. (2) Inserisca il Suo indirizzo e-mail e la relativa password, quindi tocchi “Avanti”. Infine dia un nome al Suo account e stabilisca il Suo nome che deve essere visualizzato per la posta in uscita. Tocchi “Finito” per concludere la configurazione. La Sua casella di posta elettronica viene selezionata come casella standard se seleziona l’opzione “Inviare e-mails sempre da questo account”. (3) Può configurare la Sua casella di posta elettronica anche manualmente. Inserisca il Suo indirizzo email e la relativa password, quindi tocchi infine “Setup manuale” per registrare le informazioni sul server dell’account. (4) Selezioni il tipo di server POP3, IMAP o Exchange per ricevere le e-mails. Nota: Se non sa come configurare le impostazioni, contatti il gestore del Suo account, il Suo amministratore di rete oppure cerchi in internet le relative informazioni necessarie indicando termini come „Indirizzo POP“ e „Nome del mio provider“. (5) Inserisca le informazioni necessarie (server, porta ecc.). (6) Selezioni il tipo di server per inviare le e-mails e inserisca le informazioni necessarie. (7) Tocchi “Avanti” per procedere nel menù. L’applicazione dell’e-mail verificherà le impostazioni del server dell’account. Dopo aver portato a buon fine la configurazione, visualizzerete il messaggio “Your account is set up, and email is on its way”. Il Suo account è ora configurato. (8) Dia un nome alla Sua casella di posta e tocchi „Finito“ per concludere la procedura. Nota: Se dovesse possedere più di un account, ad ogni avvio dell’applicazione dell’e-mail verrà aperto l’account predefinito. IT - 12 Gestione degli account e-mail Aggiungere una nuova casella di posta: (1) Aprire l’applicazione E-mail e toccare il tasto di menu per visualizzare le altre opzioni. Selezionare la voce di menu “Impostazioni e poi “Aggiungi account”, per creare una nuova casella di posta. (2) Seguire i tutorial di configurazione per creare una nuova casella di posta. Cancellare una casella di posta: (1) Aprire l’applicazione E-mail e toccare il tasto di menu per visualizzare le altre opzioni. Selezionare la voce di menu “Impostazioni” e poi “Elimina account”, per cancellare la casella di posta desiderata. Controllo delle caratteristiche dell’account: (1) Aprire l’applicazione E-mail e toccare il tasto di menu per visualizzare le altre opzioni e selezionare “Impostazioni“. Sul lato sinistro del menu vengono ora visualizzate tutte le caselle di posta già create. (2) Toccare la casella di posta desiderata per visualizzare le impostazioni dell’account. (3) Toccare l’“Impostazione account“ da cambiare, per eseguire le modifiche desiderate. Visualizzazione delle e-mails Apra l’applicazione dell’e-mail con un breve tocco sull’icona E-mail. Visualizzerà la casella di posta già impostata. Con un movimento di sfioramento in verticale può far scorrere le e-mails. Tocchi brevemente una certa e-mail per aprirla. Tocchi e mantenga il dito su una certa e-mail per visualizzare le impostazioni avanzate. Apparirà quindi un campo informativo. Qui può ora aprire l’e-mail, rispondere, inoltrarla o cancellarla. Scrivere messaggi e-mail (1) Nella schermata della e-mail, toccare il simbolo E-mail nella barra di menu superiore; si apre una nuova finestra nella quale si può scrivere una nuova e-mail. (2) Inserire ora l’indirizzo e-mail del destinatario, un oggetto e il testo negli appositi campi. Si può aggiungere anche „Cc/Bcc“ per inviare una e-mail a più destinatari. (3) Toccare la voce “Invia“, per inviare l’e-mail. Toccare “Salva“, per salvare come bozza l’e-mail creata. Toccando il “Simbolo cestino“ l’attuale e-mail viene eliminata. Nota: Per questa funzione è necessario un collegamento WLAN ad internet. IT - 13 13.) Browser internet Per avviare il browser internet, tocchi l’icona del Browser nella schermata iniziale. Per aprire un sito internet, tocchi il campo superiore per inserire l’indirizzo internet. La tastiera virtuale si aprirà e poi potrà inserire l’indirizzo del sito internet desiderato. Clicchi su “Vai” o sul simbolo della freccia di fianco al campo d’inserimento per aprire il sito internet. Nota: Non tutte le reti offrono un accesso a internet. Alcune reti offrono un accesso ad altri computer collegati localmente e non un collegamento a internet. Utilizzo della tastiera virtuale Tocchi il campo d’inserimento per aprire la tastiera virtuale. Può quindi inserire testi o aprire siti internet. a. Blocco maiuscole (caratteri minuscoli o maiuscoli) b. Tasto per cancellare c. Apertura del menù per inserire numeri, lettere e caratteri speciali d. Barra spaziatrice (inserimento di uno spazio) e. Vai (Conferma dell’inserimento) Inserimento di caratteri speciali Per inserire un carattere speciale, come per esempio “ä”, toccare a lungo col dito il tasto “a“ per richiamare il menu dei segni speciali. Ora col dito trascinare il segno speciale che si desidera, per esempio “ä“ e staccare di nuovo il dito dal display. È stata inserita una “ä“. IT - 14 Utilizzo del browser internet Può far scorrere la visualizzazione sul display eseguendo un movimento di sfioramento in verticale con il dito. Non inizi il movimento da un punto del menù o da un link, altrimenti verrà aperto il collegamento presente. Per aprire un link, tocchi semplicemente il link. La nuova pagina si aprirà automaticamente. Per aprire il menu Web Browser, premere il tasto menu . Qui sono disponibili diverse funzioni. Fra le altre cose, qui si può aggiornare il sito web aperto, aprire un nuovo tab, rendere leggibili i siti web offline oppure passare alle Impostazioni del Web Browser. Per tornare indietro alla pagina precedente, prema il tasto Indietro . Per tornare indietro direttamente alla schermata iniziale, prema il tasto Home . Per inserire un testo, tocchi il campo corrispondente e utilizzi la tastiera virtuale per inserire il testo. Nota: Per questa funzione è necessario un collegamento WLAN ad internet. 14.) Impostazioni sistema Toccare nel menu Applicazioni l’icona Impostazioni per richiamare le impostazioni di sistema. Sul lato sinistro del menu si trovano le singole categorie. Premendo brevemente sulla voce di menu che interessa, vengono visualizzate le possibilità di configurazione disponibili. Si prega di notare che eventualmente alcune funzioni offerte da Android™ potrebbero non essere compatibili con questo dispositivo. Una volta eseguite tutte le impostazioni, con il tasto Indietro si può tornare al menu richiamato per ultimo, oppure con il tasto Home si può passare direttamente alla schemata di avvio. Gli inserimenti eseguiti saranno salvati automaticamente. IT - 15 Panoramica delle impostazioni principali Wireless & reti Wifi Eseguire qui le proprie impostazioni Wifi. Altro Qui si possono eseguire altre impostazioni di rete. Qui si imposta il volume desiderato e il tono di avviso desiderato. È inoltre possibile attivare o disattivare un tono di conferma quando si tocca il touch-screen e un tono di avviso quando si sblocca il blocco del display. Suoni Display display. Dimensione caratteri – impostazione della dimensione carattere desiderata. Dispositivo Utente Luminosità – adattamento della luminosità del display. Sfondo – selezione dello sfondo preferito. Riposo – adattamento del ritardo prima dello spegnimento automatico del Memoria Qui si trovano informazioni sulla memoria interna e – se utilizzata – su una scheda Micro SD. È inoltre possibile cancellare il contenuto della memoria. Batteria Qui si trovano informazioni sullo stato di carica della batteria integrata. Apps Qui si possono gestire le applicazioni installate e ricevere informazioni sulle applicazioni. Servizi sede Qui si può permettere a diverse applicazioni Android™ di rilevare e usare la Sua sede attuale per mezzo di reti wireless (p.es. Google Maps™). È inoltre possibile definire se Google™ possa adattare i risultati di ricerca e altri servizi alla Sua sede. Sicurezza Qui si può configurare ad esempio il blocco dello schermo ed eseguire altre impostazioni importanti per la sicurezza. Lingua & inserimento Qui si può impostare per esempio la propria lingua preferita, aggiungere diverse voci al proprio vocabolario personale ed eseguire diverse impostazioni per la tastiera. Salvare & resettare Qui si possono salvare le proprie impostazioni di sistema e i dati delle applicazioni su server Google™. Inoltre si possono ripristinare le impostazioni iniziali di fabbrica. ATTENZIONE: per farlo, vengono cancellati tutti i dati salvati sul dispositivo. Conti Aggiungere un conto Qui può aggiungere diversi conti. Data & ora Qui si possono definire data, ora, fuso orario e formato della visualizzazione. Info sul tablet Mostra informazioni sul dispositivo. Sistema IT - 16 15.) Gestione di applicazioni Applicazioni già installate Questo apparecchio viene fornito con delle applicazioni già installate. Può trovare una panoramica delle applicazioni già installate nel menù principale delle applicazioni . Per aprire una di queste applicazioni, tocchi brevemente la rispettiva icona. Installazione di applicazioni Per installare applicazioni sull’apparecchio, esegua i seguenti passi: (1) Aprire la sorgente desiderata per il download di applicazioni, ad esempio il Google Playstore™ già installato. A tale scopo è necessario prima accedere al Playstore™ con il proprio account esistente oppure crearne uno nuovo. Seguire semplicemente le istruzioni sulla schermata. (2) Dopo aver effettuato l’accesso avrete a disposizione una vasta scelta di applicazioni del Google Playstore™. Selezionare l’applicazione desiderata, premere installare e confermare eventualmente i diritti di accesso dell’applicazione. Inizierà quindi il download e il suo avanzamento verrà indicato sulla barra di status estesa in alto a sinistra. (3) Dopo il download dell’applicazione, quest’ultima verrà automaticamente installata. Dopo essere stata installata, la nuova applicazione si troverà nel menù delle applicazioni. L’avanzamento dell’installazione si trova sulla barra di status estesa in alto a sinistra. Disinstallazione di applicazioni (1) Aprire le Impostazioni di sistema toccando brevemente l’icona Impostazioni nella panoramica delle applicazioni. (2) Toccare ora la voce di menu “Apps”, per accedere alle Impostazioni delle applicazioni. (3) Scegliere tra le voci principali di menu “Scaricato, memoria USB, attivo e” la panoramica applicazioni desiderata toccandola brevemente. (4) Poi, toccandola, selezionare l’applicazione che si vuole disinstallare. (5) Toccare ora “Disinstalla” e confermare la scelta con OK, per disinstallare l’applicazione dal dispositivo. Nota: Non può eliminare software già installati in dotazione. IT - 17 16.) File Explorer Apra il menù principale delle applicazioni e tocchi infine brevemente l’icona Explorer per avviare il File Explorer. Navigare attraverso files e cartelle Può scegliere la memoria interna (internal memory), la scheda di memoria (SD Card) e l’USB. Tocchi la destinazione desiderata per visualizzare i files contenuti come lista. Se non è stata inserita una scheda di memoria o un supporto di memoria connesso tramite il collegamento, Le sarà comunicato che il dispositivo in questione „… non è installato“. Con un movimento di sfioramento in verticale può far scorrere quindi i Suoi files e le Sue cartelle. Può effettuare un passo avanti o indietro cliccando brevemente sulla rispettiva icona. Per raggiungere all’interno della struttura di una cartella un livello superiore, tocchi brevemente l’icona LevelUp . Con l’icona Home può passare direttamente all’indice principale. Utilizzare la barra degli strumenti Toccare il tasto menu e su di esso “Hide Toolbar“, per visualizzare e nascondere la barra degli strumenti Home LevelUp Passa direttamente all’indice principale. Passa a un livello superiore. Multi Editor Seleziona più files. Copia, cancella, sposta, incolla o rinomina un file o una cartella. New Folder Creare una nuova cartella. Back Un passo indietro. Next Un passo avanti. Copiare, spostare e rinominare files e cartelle 1.) Navighi fino a raggiungere il file desiderato nella panoramica dei files. 2.) Tocchi e mantenga il dito sul file fino a quando compare un campo informativo. 3.) Selezioni la funzione desiderata. Può scegliere tra copiare (copy), eliminare (delete), spostare 4.) (move), incollare (paste) – per questo il files deve trovarsi copiato negli appunti - e rinominare (rinomina). Per copiare o spostare, tocchi brevemente l’icona corrispondente (copy / move) e navighi infine fino all’indice. Tocchi infine l’icona Editor e selzioni con un breve tocco „Incolla“, per incollare un file. 5.) Per cancellare un file, tocchi „Elimina“ e confermi ancora per sicurezza con „Elimina“. Per annullare, tocchi brevemente „Annulla“. 6.) Per rinominare un file, tocchi „Rinomina“ e inserisca infine attraverso la tastiera virtuale il nuovo nome del file. Confermi il Suo inserimento con „OK“ annulli il processo con „Annulla“. 7.) Può copiare, eliminare o spostare contemporaneamente più files e cartelle. Tocchi a questo scopo l’icona Multi e infine i files desiderati. I files marcati verranno quindi visualizzati in un altro colore. Tocchi l’icona Editor IT - 18 per eseguire l’azione desiderata. 17.) Condizioni di garanzia limitate La garanzia copre solo la sostituzione di questo prodotto Intenso. La garanzia non vale per normale usura derivante da uso errato o improprio, trascuratezza, incidente, incompatibilità o da altre prestazioni manchevoli di un certo hardware o software. Non sussiste garanzia col mancato rispetto delle istruzioni Intenso, così come col montaggio e uso improprio o con difetti causati da altri apparecchi. Se il prodotto viene esposto a scosse, scariche elettrostatiche, calore o umidità non in conformità alle specifiche del prodotto, non sussiste alcuna garanzia. Intenso non è responsabile per perdite di dati o per danni concomitanti e conseguenti, per la violazione delle condizioni di garanzia o per altri danni indipendentemente dalla loro causa. Questo prodotto non è previsto per un uso commerciale o per applicazioni mediche o di altro genere dove il mancato funzionamento del prodotto possa causare ferimenti, morte o notevoli danni materiali. 18.) Dati tecnici CPU Memoria Sistema operativo Sistemi operativi compatibili Possibilità di collegamento WLAN Sensore G Formato foto Formato audio Formato video Display Fotocamera SNR Campo di frequenza Trasformatore Batteria interna 1.0 GHz Dualcore based on Cortex A9 1 GB DDR 3 Android 4.2.2 Windows XP / Vista / 7 / 8 / Linux 2,4 e più recenti / Mac 10.6 e più recenti Cuffie, Micro SD (SDHC/SDXC), micro USB WiFi (802.11 b/g/n) 360 Grad Rotation JPEG, BMP, GIF, PNG MP3, WMA, WAV, OGG, FLAC, APE MPEG1, MPEG 4, FLV TFT LCD Display, 1024 x 600 Pixel Fotocamera frontale 0,3 MP >= 80 dB 20 Hz – 20 KHz (V) AC Adapter (HUONIO HNBC050120UE): AC Input 100240V~50/60Hz, DC Output 5V / 1.2A Batteria ricaricabile agli ioni di litio-polimero IT - 19 19.) Manutenzione dell’apparecchio Non spruzzare o applicare mai un liquido direttamente sul display o sull’alloggiamento. 20.) Pulizia dell’apparecchio Pulisca l’alloggiamento, il telaio e il display con attenzione tramite un panno morbido, non sfilacciato e privo di sostanze chimiche. Utilizzi detergenti solo se sono previsti per displays. 21.) Smaltimento di vecchi apparecchi elettrici Gli apparecchi contrassegnati da questo simbolo sono soggetti alla direttiva europea 2002/96/EC. Tutti gli apparecchi elettrici vecchi e non devono essere smaltiti separatamente dai rifiuti domestici presso i luoghi previsti dallo stato. Con uno smaltimento corretto dei vecchi apparecchi elettrici evita danni all’ambiente. IT - 20 22.) Licenza informazione Notice of GNU GENERAL PUBLIC LICENSE and LESSER GENERAL PUBLIC LICENCE Dear Customer, If interested, you and any third party can download the source code of used GPL / LGPL from Intenso Webpage http://www.intenso.de . The source code of the desired product is available to anyone on the selection of valid product category and the desired device. In the product details you will find the entry "drivers". Open this menu to download the corresponding GPL / LGPL code. For a fee of 35 € (delivery to another country as Germany), it is also possible to obtain this code by postal delivery. More information about the GPL/LGPL-Licence can you find on following website www.gnu.org GNU GENERAL PUBLIC LICENSE Version 2, June 1991 Copyright (C) 1989, 1991 Free Software Foundation, Inc. 51 Franklin Street, Fifth Floor, Boston, MA 02110-1301, USA Everyone is permitted to copy and distribute verbatim copies of this license document, but changing it is not allowed. Preamble The licenses for most software are designed to take away your freedom to share and change it. By contrast, the GNU General Public License is intended to guarantee your freedom to share and change free software-to make sure the software is free for all its users. This General Public License applies to most of the Free Software Foundation's software and to any other program whose authors commit to using it. (Some other Free Software Foundation software is covered by the GNU Lesser General Public License instead.) You can apply it to your programs, too. When we speak of free software, we are referring to freedom, not price. Our General Public Licenses are designed to make sure that you have the freedom to distribute copies of free software (and charge for this service if you wish), that you receive source code or can get it if you want it, that you can change the software or use pieces of it in new free programs; and that you know you can do these things. To protect your rights, we need to make restrictions that forbid anyone to deny you these rights or to ask you to surrender the rights. These restrictions translate to certain responsibilities for you if you distribute copies of the software, or if you modify it. For example, if you distribute copies of such a program, whether gratis or for a fee, you must give the recipients all the rights that you have. You must make sure that they, too, receive or can get the source code. And you must show them these terms so they know their rights. We protect your rights with two steps: (1) copyright the software, and (2) offer you this license which gives you legal permission to copy, distribute and/or modify the software. Also, for each author's protection and ours, we want to make certain that everyone understands that there is no warranty for this free software. If the software is modified by someone else and passed on, we want its recipients to know that what they have is not the original, so that any problems introduced by others will not reflect on the original authors' reputations. Finally, any free program is threatened constantly by software patents. We wish to avoid the danger that redistributors of a free program will individually obtain patent licenses, in effect making the program proprietary. To prevent this, we have made it clear that any patent must be licensed for everyone's free use or not licensed at all. The precise terms and conditions for copying, distribution and modification follow. TERMS AND CONDITIONS FOR COPYING, DISTRIBUTION AND MODIFICATION 0. This License applies to any program or other work which contains a notice placed by the copyright holder saying it may be distributed under the terms of this General Public License. The "Program", below, refers to any such program or work, and a "work based on the Program" means either the Program or any derivative work under copyright law: that is to say, a work containing the Program or a portion of it, either verbatim or with modifications and/or translated into another language. (Hereinafter, translation is included without limitation in the term "modification".) Each licensee is addressed as "you". Activities other than copying, distribution and modification are not covered by this License; they are outside its scope. The act of running the Program is not restricted, and the output from the Program is covered only if its contents constitute a work based on the Program (independent of having been made by running the Program). Whether that is true depends on what the Program does. 1. You may copy and distribute verbatim copies of the Program's source code as you receive it, in any IT - 21 medium, provided that you conspicuously and appropriately publish on each copy an appropriate copyright notice and disclaimer of warranty; keep intact all the notices that refer to this License and to the absence of any warranty; and give any other recipients of the Program a copy of this License along with the Program. You may charge a fee for the physical act of transferring a copy, and you may at your option offer warranty protection in exchange for a fee. 2. You may modify your copy or copies of the Program or any portion of it, thus forming a work based on the Program, and copy and distribute such modifications or work under the terms of Section 1 above, provided that you also meet all of these conditions: a) You must cause the modified files to carry prominent notices stating that you changed the files and the date of any change. b) You must cause any work that you distribute or publish, that in whole or in part contains or is derived from the Program or any part thereof, to be licensed as a whole at no charge to all third parties under the terms of this License. c) If the modified program normally reads commands interactively when run, you must cause it, when started running for such interactive use in the most ordinary way, to print or display an announcement including an appropriate copyright notice and a notice that there is no warranty (or else, saying that you provide a warranty) and that users may redistribute the program under these conditions, and telling the user how to view a copy of this License. (Exception: if the Program itself is interactive but does not normally print such an announcement, your work based on the Program is not required to print an announcement.) These requirements apply to the modified work as a whole. If identifiable sections of that work are not derived from the Program, and can be reasonably considered independent and separate works in themselves, then this License, and its terms, do not apply to those sections when you distribute them as separate works. But when you distribute the same sections as part of a whole which is a work based on the Program, the distribution of the whole must be on the terms of this License, whose permissions for other licensees extend to the entire whole, and thus to each and every part regardless of who wrote it. Thus, it is not the intent of this section to claim rights or contest your rights to work written entirely by you; rather, the intent is to exercise the right to control the distribution of derivative or collective works based on the Program. In addition, mere aggregation of another work not based on the Program with the Program (or with a work based on the Program) on a volume of a storage or distribution medium does not bring the other work under the scope of this License. 3. You may copy and distribute the Program (or a work based on it, under Section 2) in object code or executable form under the terms of Sections 1 and 2 above provided that you also do one of the following: a) Accompany it with the complete corresponding machine-readable source code, which must be distributed under the terms of Sections 1 and 2 above on a medium customarily used for software interchange; or, b) Accompany it with a written offer, valid for at least three years, to give any third party, for a charge no more than your cost of physically performing source distribution, a complete machine-readable copy of the corresponding source code, to be distributed under the terms of Sections 1 and 2 above on a medium customarily used for software interchange; or, c) Accompany it with the information you received as to the offer to distribute corresponding source code. (This alternative is allowed only for noncommercial distribution and only if you received the program in object code or executable form with such an offer, in accord with Subsection b above.) The source code for a work means the preferred form of the work for making modifications to it. For an executable work, complete source code means all the source code for all modules it contains, plus any associated interface definition files, plus the scripts used to control compilation and installation of the executable. However, as a special exception, the source code distributed need not include anything that is normally distributed (in either source or binary form) with the major components (compiler, kernel, and so on) of the operating system on which the executable runs, unless that component itself accompanies the executable. If distribution of executable or object code is made by offering access to copy from a designated place, then offering equivalent access to copy the source code from the same place counts as distribution of the source code, even though third parties are not compelled to copy the source along with the object code. 4. You may not copy, modify, sublicense, or distribute the Program except as expressly provided under this License. Any attempt otherwise to copy, modify, sublicense or distribute the Program is void, and will automatically terminate your rights under this License. However, parties who have received copies, or rights, from you under this License will not have their licenses terminated so long as such parties remain in full compliance. 5. You are not required to accept this License, since you have not signed it. However, nothing else grants you permission to modify or distribute the Program or its derivative works. These actions are prohibited by IT - 22 law if you do not accept this License. Therefore, by modifying or distributing the Program (or any work based on the Program), you indicate your acceptance of this License to do so, and all its terms and conditions for copying, distributing or modifying the Program or works based on it. 6. Each time you redistribute the Program (or any work based on the Program), the recipient automatically receives a license from the original licensor to copy, distribute or modify the Program subject to these terms and conditions. You may not impose any further restrictions on the recipients' exercise of the rights granted herein. You are not responsible for enforcing compliance by third parties to this License. 7. If, as a consequence of a court judgment or allegation of patent infringement or for any other reason (not limited to patent issues), conditions are imposed on you (whether by court order, agreement or otherwise) that contradict the conditions of this License, they do not excuse you from the conditions of this License. If you cannot distribute so as to satisfy simultaneously your obligations under this License and any other pertinent obligations, then as a consequence you may not distribute the Program at all. For example, if a patent license would not permit royalty-free redistribution of the Program by all those who receive copies directly or indirectly through you, then the only way you could satisfy both it and this License would be to refrain entirely from distribution of the Program. If any portion of this section is held invalid or unenforceable under any particular circumstance, the balance of the section is intended to apply and the section as a whole is intended to apply in other circumstances. It is not the purpose of this section to induce you to infringe any patents or other property right claims or to contest validity of any such claims; this section has the sole purpose of protecting the integrity of the free software distribution system, which is implemented by public license practices. Many people have made generous contributions to the wide range of software distributed through that system in reliance on consistent application of that system; it is up to the author/donor to decide if he or she is willing to distribute software through any other system and a licensee cannot impose that choice. This section is intended to make thoroughly clear what is believed to be a consequence of the rest of this License. 8. If the distribution and/or use of the Program is restricted in certain countries either by patents or by copyrighted interfaces, the original copyright holder who places the Program under this License may add an explicit geographical distribution limitation excluding those countries, so that distribution is permitted only in or among countries not thus excluded. In such case, this License incorporates the limitation as if written in the body of this License. 9. The Free Software Foundation may publish revised and/or new versions of the General Public License from time to time. Such new versions will be similar in spirit to the present version, but may differ in detail to address new problems or concerns. Each version is given a distinguishing version number. If the Program specifies a version number of this License which applies to it and "any later version", you have the option of following the terms and conditions either of that version or of any later version published by the Free Software Foundation. If the Program does not specify a version number of this License, you may choose any version ever published by the Free Software Foundation. 10. If you wish to incorporate parts of the Program into other free programs whose distribution conditions are different, write to the author to ask for permission. For software which is copyrighted by the Free Software Foundation, write to the Free Software Foundation; we sometimes make exceptions for this. Our decision will be guided by the two goals of preserving the free status of all derivatives of our free software and of promoting the sharing and reuse of software generally. NO WARRANTY 11. BECAUSE THE PROGRAM IS LICENSED FREE OF CHARGE, THERE IS NO WARRANTY FOR THE PROGRAM, TO THE EXTENT PERMITTED BY APPLICABLE LAW. EXCEPT WHEN OTHERWISE STATED IN WRITING THE COPYRIGHT HOLDERS AND/OR OTHER PARTIES PROVIDE THE PROGRAM "AS IS" WITHOUT WARRANTY OF ANY KIND, EITHER EXPRESSED OR IMPLIED, INCLUDING, BUT NOT LIMITED TO, THE IMPLIED WARRANTIES OF MERCHANTABILITY AND FITNESS FOR A PARTICULAR PURPOSE. THE ENTIRE RISK AS TO THE QUALITY AND PERFORMANCE OF THE PROGRAM IS WITH YOU. SHOULD THE PROGRAM PROVE DEFECTIVE, YOU ASSUME THE COST OF ALL NECESSARY SERVICING, REPAIR OR CORRECTION. 12. IN NO EVENT UNLESS REQUIRED BY APPLICABLE LAW OR AGREED TO IN WRITING WILL ANY COPYRIGHT HOLDER, OR ANY OTHER PARTY WHO MAY MODIFY AND/OR REDISTRIBUTE THE PROGRAM AS PERMITTED ABOVE, BE LIABLE TO YOU FOR DAMAGES, INCLUDING ANY GENERAL, SPECIAL, INCIDENTAL OR CONSEQUENTIAL DAMAGES ARISING OUT OF THE USE OR INABILITY TO USE THE PROGRAM (INCLUDING BUT NOT LIMITED TO LOSS OF DATA OR DATA BEING RENDERED INACCURATE OR LOSSES SUSTAINED BY YOU OR THIRD PARTIES OR A FAILURE OF THE PROGRAM TO OPERATE WITH ANY OTHER PROGRAMS), EVEN IF SUCH HOLDER OR OTHER IT - 23 PARTY HAS BEEN ADVISED OF THE POSSIBILITY OF SUCH DAMAGES. END OF TERMS AND CONDITIONS How to Apply These Terms to Your New Programs If you develop a new program, and you want it to be of the greatest possible use to the public, the best way to achieve this is to make it free software which everyone can redistribute and change under these terms. To do so, attach the following notices to the program. It is safest to attach them to the start of each source file to most effectively convey the exclusion of warranty; and each file should have at least the "copyright" line and a pointer to where the full notice is found. one line to give the program's name and an idea of what it does. Copyright (C) yyyy name of author This program is free software; you can redistribute it and/or modify it under the terms of the GNU General Public License as published by the Free Software Foundation; either version 2 of the License, or (at your option) any later version. This program is distributed in the hope that it will be useful, but WITHOUT ANY WARRANTY; without even the implied warranty of MERCHANTABILITY or FITNESS FOR A PARTICULAR PURPOSE. See the GNU General Public License for more details. You should have received a copy of the GNU General Public License along with this program; if not, write to the Free Software Foundation, Inc., 51 Franklin Street, Fifth Floor, Boston, MA 02110-1301, USA. Also add information on how to contact you by electronic and paper mail. If the program is interactive, make it output a short notice like this when it starts in an interactive mode: Gnomovision version 69, Copyright (C) year name of author Gnomovision comes with ABSOLUTELY NO WARRANTY; for details type `show w'. This is free software, and you are welcome to redistribute it under certain conditions; type `show c' for details. The hypothetical commands `show w' and `show c' should show the appropriate parts of the General Public License. Of course, the commands you use may be called something other than `show w' and `show c'; they could even be mouse-clicks or menu items--whatever suits your program. You should also get your employer (if you work as a programmer) or your school, if any, to sign a "copyright disclaimer" for the program, if necessary. Here is a sample; alter the names: Yoyodyne, Inc., hereby disclaims all copyright interest in the program `Gnomovision' (which makes passes at compilers) written by James Hacker. signature of Ty Coon, 1 April 1989 Ty Coon, President of Vice IT - 24 Intenso GmbH Data:17 dicembre 2013 Dichiarazione di conformità Noi, la Intenso GmbH, con sede in Diepholzer Str. 15 a 49377 Vechta, Deutschland dichiariamo su nostra responsabilità che il prodotto: Modello: 7” Intenso TAB 734 (articolo n° 5509854) Descrizione: Tablet computer è conforme alle seguenti direttive e norme: Direttiva R&TTE 1999/5/EG EN 301 489-1 V1.9.2 EN 301 489-17 V2.1.1 EN 300 328 V1.7.1 : 2006-10 EN 55022:2010 (Class B) EN 55024:2010 EN 61000-3-2:2006+A1 :2009+A2 :2009 (Class D) EN 61000-3-3:2008 Direttiva Bassa Tensione 2006/95/EG EN 60950-1:2006+A11:2009+A1:2010+A12:2011+A12:correzione 2012 Direttiva Ecodesign 2009/125/EG 1275/2008 278/2009 Direttiva ROHS 2011/65/EU La documentazione tecnica riferita all’apparecchio sopra citato è stata depositata presso il seguente luogo: Intenso GmbH Diepholzer Str. 15, 49377 Vechta, Deutschland Persona autorizzata: ___________________________________ Amministratore delegato: Thomas Pöhlking IT - 25 Mode d'emploi TAB 734 Merci d'avoir choisi TAB734. Suivez ces instructions pour connaître les fonctions clés de l'appareil. 1.) Contenu 1.) Contenu ................................................................................................................................................................................................. 1 2.) Remarques ............................................................................................................................................................................................ 2 3.) Aperçu de l'appareil ............................................................................................................................................................................... 4 4.) Contenu de l'emballage ......................................................................................................................................................................... 4 5.) Chargement de la batterie ..................................................................................................................................................................... 5 6.) Utilisation d'une carte Micro SD / SDHC / SDXC ................................................................................................................................... 5 7.) Transmission de données entre l'appareil et un ordinateur ................................................................................................................... 5 8.) Écran tactile ........................................................................................................................................................................................... 6 9.) WIFI ....................................................................................................................................................................................................... 6 Connexion automatique .............................................................................................................................................................................. 6 Connexion manuelle ................................................................................................................................................................................... 7 10.) L'écran d'accueil .................................................................................................................................................................................. 8 Affichage ..................................................................................................................................................................................................... 8 Déverrouillage de l'écran ............................................................................................................................................................................ 8 Barre d'état ................................................................................................................................................................................................. 9 Réglage de l'écran principal ...................................................................................................................................................................... 10 Utiliser différents écrans d'accueil ............................................................................................................................................................. 10 Applications préinstallées sur l'écran d'accueil ......................................................................................................................................... 11 11.) Aperçu des applications..................................................................................................................................................................... 11 12.) Expédition / réception des e-mails ..................................................................................................................................................... 12 Configuration de votre boîte aux lettres électronique ................................................................................................................................ 12 Gérer les comptes d'emails....................................................................................................................................................................... 13 Affichage des e-mails................................................................................................................................................................................ 13 Ecrire des messages d'email .................................................................................................................................................................... 13 13.) Navigateur Web ................................................................................................................................................................................. 14 Utilisation du clavier virtuel ....................................................................................................................................................................... 14 Saisie de caractères spéciaux .................................................................................................................................................................. 14 Utilisation du navigateur Web ................................................................................................................................................................... 15 14.) Paramètres système .......................................................................................................................................................................... 15 15.) Gestion des applications.................................................................................................................................................................... 17 Installation des applications ...................................................................................................................................................................... 17 Désinstallation des applications ................................................................................................................................................................ 17 16.) Explorateur de fichiers ....................................................................................................................................................................... 18 Naviguer à travers les fichiers et les dossiers ........................................................................................................................................... 18 Utilisez la barre d'outils ............................................................................................................................................................................. 18 Copier, déplacer et renommer des fichiers et dossiers ............................................................................................................................. 18 17.) Conditions de garantie limitée ........................................................................................................................................................... 19 18.) Données techniques .......................................................................................................................................................................... 20 19.) Entretien de l'appareil ........................................................................................................................................................................ 20 20.) Entretien de l'appareil ........................................................................................................................................................................ 20 21.) Élimination des vieux équipements électroniques ............................................................................................................................. 20 20.) Licence information............................................................................................................................................................................ 21 Déclaration de conformité CE ................................................................................................................................................................... 25 Ce manuel ne contient peut-être pas toutes les fonctions de votre appareil. Pour utilisation des applications de fournisseurs tiers, veuillez contacter le fabricant. Veuillez noter que toutes les instructions peuvent être modifiées sans préavis. Vous trouverez des informations actuelles à l'adresse www.intenso.de Marques Google ™, le logo Google ™ et Android ™ sont des marques commerciales de Google Inc. Tous les autres noms de produits ou de services sont la propriété de leurs propriétaires respectifs. FR - 1 2.) Remarques Éviter les chocs violents sur l'appareil. Ne pas le poser sur des surfaces inclinées afin d'éviter que l'appareil ne chute. Ne pas utiliser l'appareil dans des conditions extrêmement froides, chaudes, humides ou poussiéreuses. Ne pas exposer non-plus au rayonnement solaire direct. Éviter d'utiliser sur des endroits sablonneux. Ne pas utiliser dans des environnements présentant un risque d'explosion, comme par exemple aux pompes d'une station essence. Éviter l'utilisation de coussins, canapés ou autres objets qui favorisent un développement de la chaleur, car il y a un risque de surchauffe de l'appareil. Effectuer de fréquentes sauvegardes de données, pour éviter d'éventuelles pertes de données. Nous ne sommes pas responsables d’une perte de données éventuelle. Ne pas débrancher la connexion quand les données sont encours de transfert ou l'appareil en cours de formatage. Ceci peut entraîner la perte de données. Les images et les films peuvent être protégés des tiers par des droits. Écouter sans licence peut violer les droits d'auteur. Éviter l'utilisation dans des champs hautement magnétiques. Protéger l'appareil de l'humidité. Si l'humidité pénètre dans l'appareil, veuillez immédiatement l’éteindre, puis veuillez nettoyer et sécher l'appareil. Veuillez ne pas utiliser de solvants chimiques pour nettoyer l'appareil. Veuillez n'utilisez ici qu'un chiffon sec. Ne pas placer de flammes nues, telles que des bougies allumées, à proximité de l'appareil ou sur celui-ci. Nous ne sommes pas responsables des dommages en cas de fonctionnement défectueux, ni des pertes de données dues à une mauvaise manipulation, une réparation de l'appareil par vos propres moyens ou un changement de batterie. Si pour une fois l'appareil venait à ne pas répondre à vos entrées, veuillez utiliser le bouton de réinitialisation à l'arrière de l'appareil pour le faire redémarrer. Lorsqu'il n'est pas utilisé, veuillez débrancher l'adaptateur secteur de l'alimentation électrique. La prise doit se trouver dans les environs de l'appareil et être facilement accessible. N'utiliser l'adaptateur de courant que pour les prises reliées à la terre avec AC 100-240V~, 50/60 Hz Si vous n'êtes pas sûr de l'alimentation sur le lieu de montage, veuillez vous adresser à votre fournisseur d'énergie concerné. Veuillez utiliser uniquement l’adaptateur de courant et le câble de raccordement au réseau fournis. Pour interrompre l'alimentation de votre appareil, débranchez l'adaptateur secteur de la prise. Tenir fermement l'adaptateur secteur en vous déconnectant. Ne tirez jamais sur le câble FR - 2 Ne pas ouvrir le boîtier de l'adaptateur de courant. Lorsque le boîtier est ouvert, il existe un danger de mort par électrocution. Il ne contient aucune pièce réparable. Si elle n'est pas utilisée de façon prolongée, la batterie de l'appareil se décharge lentement. Avant d'être réutilisée, celle-ci doit à nouveau rechargée. Veuillez respecter l'élimination écologique de l'appareil ou de la batterie. Veuillez ne pas démonter l'appareil en pièces détachées et veuillez ne pas tenter de le réparer vous-même, la garantie expirant dans ce cas. Ne pas utiliser l'appareil dans des endroits où l'utilisation d'appareils mobiles est interdite. Ne pas utiliser l'appareil à proximité d'autres appareils électroniques, car cela peut entraîner des troubles dus aux signaux à haute fréquence. Ne pas utiliser l'appareil à proximité d'un stimulateur cardiaque, dans un hôpital ou à proximité d'équipement médical, car cela peut entraîner des troubles dus aux signaux à haute fréquence. Garder au moins 15cm de distance avec un stimulateur cardiaque. Veuillez contacter le fabricant de ces appareils pour recevoir des informations concernant l'utilisation commune. Lors de l´utilisation d’écouteurs ou de casque avec volume trop fort, l’ouïe peut être durablement endommagée. Nous vous prions de considérer qu’un volume constantement élevé peut causer des dommages auditifs permanents. Pour éviter un risque potentiel pour la santé causé par le volume trop élevé, nous vous recommandons d'utiliser les écouteurs inclus. Pour des raisons de sécurité routière, l'appareil ne peut pas être utilisé pendant la conduite par le conducteur lui-même. FR - 3 3.) Aperçu de l'appareil (1) (2) (3) (4) (5) Prise casque de 3,5 mm Microphone intégré Témoin de charge : rouge lorsque le chargement est en cours – jaune lorsque le chargement est complet. Caméra frontale Emplacement Micro USB (6) Touche On / Off : Appuyez longuement pour mettre l'appareil hors tension, appuyez brièvement pour alterner entre le mode veille et actif. (7) Volume + / (8) Touchscreen (9) Emplacement carte Micro SD (10) Haut-parleur intégré 4.) Contenu de l'emballage Veuillez vérifier l'intégralité du contenu de l'emballage : TAB 734 Câble USB Adaptateur secteur 5V 1.2A Manuel d'utilisation FR - 4 5.) Chargement de la batterie Veuillez charger la batterie complètement avant la première utilisation de l'appareil. Pour cela, connectez l'adaptateur secteur fourni à l'appareil et à une prise de courant. La charge complète prend environ 5 heures. L'état de charge est affiché sur le côté avant droit de l'appareil. La LED est rouge pendant la charge et passe au jaune lorsque la batterie est complètement chargée. Remarques : a. A 15% de la puissance résiduelle de la batterie, vous obtenez un message d'avertissement sur l'écran. Vous devriez maintenant connecter l'appareil au secteur avec une prise pour charger la batterie afin d'éviter d'éventuelles pertes de données et augmenter la durée de vie de la batterie. b. Vous pouvez utiliser l'appareil pendant le chargement de la batterie. Pour garantir à la batterie une longue durée de vie, nous vous demandons de ne pas utiliser l'appareil. c. Pour assurer une bonne performance, la batterie intégrée doit être utilisée fréquemment. Si vous n'utilisez l'appareil que rarement, veuillez recharger la batterie complètement au moins une fois par mois. d. Assurez-vous de n'utiliser que l'adaptateur secteur fourni pour le chargement. 6.) Utilisation d'une carte Micro SD / SDHC / SDXC Cet appareil peut lire des données directement à partir d’une carte micro SD/SDHC/SDXC d’une capacité maximale de 64 GB. Pour utiliser une carte micro SD/SDHC/SDXC, veuillez insérer la carte dans le port micro SD prévu à cet effet situé sur le côté gauche de l’appareil. Utilisez l’explorateur préinstallé pour accéder aux données se trouvant sur la carte mémoire. Pour ce faire, veuillez sélectionner le dossier « Carte SD » dans l’explorateur. 7.) Transmission de données entre l'appareil et un ordinateur 1.) Branchez l'appareil à un ordinateur en utilisant le câble USB ci-joint. 2.) L'écran pour la connexion USB s’affiche à présent sur l’appareil. Tapez brièvement sur «Activer la mémoire USB». L'appareil est reconnu comme support de données amovible et vous obtenez l'information «mémoire USB en utilisation». Après avoir brièvement tapé sur la touche Accueil, vous pouvez continuer à utiliser votre appareil normalement. Vous avez maintenant accès aux données internes de votre appareil depuis votre ordinateur et vous pouvez copier, supprimer ou déplacer des données sur l'appareil. 3.) Si une connexion USB avec l'ordinateur existe, l'icône USB s'affiche dans la barre d'état. Vous pouvez obtenir des informations supplémentaires dans la barre d'état élargie et vous pouvez activer ou désactiver la connexion USB. Sélectionnez « Désactiver le disque USB » pour désactiver le disque. Sélectionnez la fonction « Retirer en toute sécurité » périphérique de l'ordinateur. sur l'ordinateur pour retirer le Note : Les applications préinstallées et le système d'exploitation Android ™ prennent une partie de la mémoire interne existante..Pour cette raison, toute la mémoire interne n'est pas disponible. FR - 5 8.) Écran tactile Ce périphérique est actionné via l'écran tactile. Vous pouvez facilement lancer des applications en appuyant sur l'écran tactile avec vos doigts, saisir des textes sur le clavier virtuel et basculer entre les différents écrans principaux en faisant glisser le doitgt dans la direction respective. Veuillez retirer le film de protection de l'écran avant d'utiliser l'appareil. L'écran tactile détecte de petites charges électriques, comme celles émises par les doigts humains et détermine ainsi le point d'entrée. Utilisez alors idéalement le bout de vos doigts pour l'entrée. L'opération avec un stylo ou d'autres objets pointus n'est pas possible. L'écran tactile ne doit pas entrer en contact avec l'eau ou d'autres appareils électriques afin d’éviter des dysfonctionnements et des défauts durables. Remarques : a. Si l'écran tactile n'est pas exploité pendant deux minutes, l'appareil passe en mode veille. Appuyez brièvement sur la touche ON / OFF pour passer en mode actif. b. Pour empêcher des entrées non autorisées, un mode verrouillage est activé automatiquement. Veuillez déverrouiller le mode verrouillage sur l'écran tactile. Touchez le verrou fermé sur l'écran et maintenez appuyé. Maintenant faites glissez le verrou vers le verrou ouvert qui apparaît sur l'écran et retirez votre doigt de l'écran. L'écran est maintenant déverrouillé. Vous pouvez faire pivoter l'appareil dans toutes les directions. Il possède un capteur qui dirige l'écran automatiquement. 9.) WIFI Vous avez besoin d'une connexion WLAN pour connecter l'appareil à Internet. Ouvrez les paramètres WLAN dans le menu des réglages activez-la. Note : Veuillez noter qu'un réseau sans fil doit se trouver à portée de votre emplacement actuel. Connexion automatique Ouvrez les paramètres WLAN via le menu des paramètres. Ici, vous pouvez tout simplement activer ou désactiver la fonction WLAN. Il suffit de faire glisser le commutateur virtuel de la position «On» vers la gauche pour désactiver la fonction WLAN. Maintenant, l'affichage change sur "OFF". Pour réactiver la fonction WLAN désactivée, faites glisser le commutateur virtuel vers la droite. Sur le côté droit des paramètres WIFI, tous les réseaux disponibles ainsi que tous les réseaux déjà utilisés sont affichés. FR - 6 Veuillez taper sur le réseau désiré et si nécessaire, entrez la clé sans fil appropriée (mot de passe) pour établir une connexion. Confirmez le mot de passe saisi, au besoin, en touchant la touche entrer et ensuite sélectionnez Connexion. Après un bref instant la connexion sera établie. Remarques : a) Si l'appareil passe en mode veille, la Wi-Fi est automatiquement désactivée. Cela réduit la consommation d'énergie et entraîne donc automatiquement une plus grande autonomie de la batterie. Lorsque l'appareil revient au mode actif, la connexion sans fil est à nouveau établie automatiquement. Cela peut prendre quelques secondes. b) La liste des réseaux sans fil repérables est automatiquement mise à jour. c) Si la fonction sans fil est activée, l'appareil se connecte automatiquement à un réseau déjà configuré, à condition qu'il soit à portée. d) Si un réseau sans fil inconnu se trouve à portée, une boîte d'information apparaît. Connexion manuelle Afin de rechercher un réseau WiFi accessible manuellement, procédez comme suit : (1) Ouvrez les paramètres. (2) Maintenant, ouvrez les paramètres WLAN et appuyez sur les trois points dans le coin supérieur droit, puis sélectionnez "Analyse". (3) Si le réseau WiFi ne figure pas dans la liste des réseaux disponibles alors sélectionnez l'option « Ajouter un réseau » afin de saisir le SSID du réseau, le protocole de sécurité et le mot de passe possiblement lié. Appuyez sur « Enregistrer »pour confirmer votre saisie. FR - 7 10.) L'écran d'accueil Affichage Déverrouillage de l'écran Si l'écran tactile n'est pas utilisé pendant deux minutes, l'appareil se met en mode Standby. Appuyez sur le bouton «Marche/Arrêt» pendant une courte période pour revenir en mode actif. L'affichage verrouillé empêche les saisies involontaires. Touchez le verrou fermé sur l'écran et maintenez appuyé. Maintenant faites glissez le verrou vers le verrou ouvert qui apparaît sur l'écran et retirez votre doigt de l'écran. L'écran est maintenant déverrouillé. Déplacer l'icône de verrouillage avec votre doigt dans le sens de la flèche. Conseil : Faites glisser le symbole du verrou vers le symbole d'appareil photo qui apparaît pour ouvrir l'application appareil-photo directement. FR - 8 Barre d'état Vous trouverez la barre d’état dans les parties supérieure et inférieure de l’écran de départ. La barre d’état supérieure est divisée en deux sections. Tirez la barre de gauche vers le bas pour faire apparaître, si disponibles, les notifications actuelles. Tirez la barre de droite vers le bas pour faire apparaître le champ d’accès rapide pour différents paramètres. La barre d’état inférieure vous offre la possibilité de passer à l’écran précédent, de cacher le clavier qui apparaît à l’écran, d’atteindre directement l’écran de départ, d’obtenir une liste des programmes récemment utilisés et d’ajuster le volume. FR - 9 Réglage de l'écran principal Vous pouvez régler l'écran principal facilement selon vos besoins particuliers. Si vous souhaitez supprimer une icône, appuyez sur l'icône avec le doigt pendant une courte période, puis poussez-la dans l'icône X affichée. Maintenant, retirez votre doigt de l'écran tactile et l'icône est supprimée. Si vous souhaitez déplacer une icône de l' aperçu des applications vers l'écran principal, appuyez sur l'icône dans l'aperçu des applications pendant une courte période et l'écran principal s'affiche. Déplacez l'icône vers la position désirée et retirez votre doigt de l'écran tactile. L'icône est désormais ajoutée à l'écran principal. Si vous déplacez une icône sur une autre icône, un dossier contenant les deux icônes est automatiquement créé. Appuyez sur le dossier pour afficher les icônes contenues puis sélectionner l'icône souhaitée en tapant brièvement dessuss Vous pouvez également ajouter des widgets à l'écran de démarrage. Pour ce faire, ouvriez la présentation de l'application. Ensuite, vous tapez le mot Widgets. Tous les widgets disponibles sur l'appareil s'afficheront. Vous ajoutez un widget à l'écran de démarrage de la même manière que vous ajoutez une icône. Si vous voulez changer votre image de fond, appuyez simplement sur une place libre dans l'écran principal et continuez à appuyer sur l'écran jusqu'à ce que le menu de sélection d'arrière plan apparaisse. Utiliser différents écrans d'accueil Cinq écrans principaux peuvent être individuellement configurés. Vous pouvez facilement passer de l'un à l'autre en faisant glisser le doigt légèrement sur l'écran vers la gauche ou la droite. En appuyant sur la touche accueil, vous arrivez toujours à revenir à l'écran d'accueil central. FR - 10 Applications préinstallées sur l'écran d'accueil A Lien vers Google™ search B Bookmark Aperçu pour le navigateur Chrome ™ C Contacts, Gmail™, Aperçu des applications, Chrome™ et Google+™ D Google Play Store™ , YouTube™ , Hangouts™ , Maps™ et Local™ 11.) Aperçu des applications Tapez brièvement sur l'icône Aperçu des applications pour ouvrir l‘aperçu des applications. Vous voyez maintenant un aperçu de toutes les applications pré-installées et des applications que vous avez déjà installées. Ouvrez l'application souhaitée en tapant brièvement sur l'icône correspondante. Aperçu des applications FR - 11 12.) Expédition / réception des e-mails Une application de messagerie électronique est préinstallée sur cet appareil. Vous pouvez ainsi utiliser votre adresse e-mail existante pour envoyer et recevoir des e-mails. Note : Pour cette fonction, une connexion internet sans fil est nécessaire. Ouvrez l'application par l'intermédiaire de l'icône «E-mail» que vous trouvez dans le menu des applications. Configuration de votre boîte aux lettres électronique (1) Démarrez l'application e-mail en tapant sur l'icône e-mail. Vous êtes maintenant invité à mettre en place votre boîte aux lettres électroniques. (2) Entrez votre adresse e-mail et votre mot de passe associé, puis tapez sur «Suivant». Ensuite, renommez votre compte et définissez votre nom affiché pour les messages sortants. Tapez sur «Terminé» pour terminer l'installation. Votre boîte aux lettres électronique est sélectionnée comme boîte par défaut si vous sélectionnez l'option «Envoyer des e-mails de ce compte par défaut». (3) Vous pouvez également configurer votre boîte aux lettres électronique manuellement. Entrez votre adresse e-mail et votre mot de passe associé, puis tapez sur «Configuration manuelle» pour saisir les informations du serveur e-mail. (4) Choisissez parmi les types de serveurs POP3, IMAP ou Exchange pour e-mails entrants. Note : Si vous ne savez pas quels paramètres que vous devez effectuer, veuillez contacter votre fournisseur de messagerie électronique, votre administrateur réseau ou recherchez sur internet des termes tels que «adresse POP» et «nom de votre fournisseur» selon les informations requises. (5) Entrez les informations requises (serveur, port, etc.) (6) Sélectionnez le type de serveur pour les e-mails sortants et entrez les informations requises. (7) Tapez sur «Suivant» pour poursuivre dans le menu. L'application e-mail vérifie à présent les modifications apportées à la configuration du serveur. Après avoir réussi à créer un dossier, vous voyez le message «Votre compte est créé, et l'e-mail est en cours de création». Votre compte est maintenant mis en place. (8) Entrez un nom pour votre boîte aux lettres, puis tapez sur «Terminé» pour terminer le processus. Note : Si vous deviez posséder plus d'un compte e-mail, le compte par défaut est appelé lors de chaque démarrage de l'application email. FR - 12 Gérer les comptes d'emails Ajouter une nouvelle boîte de réception: (1) Ouvrez l'application email et appuyez sur la touche menu pour afficher des options supplémentaires. Sélectionnez l'option de menu « Paramètres » puis « Ajouter un compte »pour créer une nouvelle boîte aux lettres. (2) Suivez les instructions de l'Assistant Installation pour créer une nouvelle boîte aux lettres Supprimer une boîte de réception: (1) Ouvrez l'application email et appuyez sur la touche menu pour afficher des options supplémentaires. Sélectionnez l'option de menu « Paramètres » puis « Supprimer un compte »pour supprimer une la boîte aux lettres désirée. Vérifier les propriétés du compte: (1) Ouvrez l'application email et appuyez sur la touche menu pour afficher des options supplémentaires, puis sélectionnez « Paramètres ». Toutes les boîtes aux lettres déjà créées s'affichent alors sur le côté gauche du menu. (2) Appuyez sur la boîte aux lettres souhaitée pour afficher les paramètres du compte (3) Appuyez sur «Paramètres du Compte »que vous souhaitez modifier dans le but de faire les saisies souhaitées. Affichage des e-mails Ouvrez l'application e-mail en tapant brièvement sur l'icône e-mail. Votre boîte aux lettres déjà créée s'affiche à présent. Par un mouvement de balayage vertical, vous pouvez faire défiler vos e-mails. Tapez brièvement sur un e-mail spécifique pour ouvrir celui-ci. Tapez et maintenez votre doigt sur un e-mail particulier afin d'afficher plus d'options. Un champ d'information apparaît à présent. Vous pouvez maintenant ouvrir l'e-mail, y répondre, le transférer ou le supprimer. Ecrire des messages d'email (1) Appuyez sur l'icône email dans la barre de menu en haut de l'aperçu email et une nouvelle fenêtre s'ouvre, où vous pouvez écrire un nouveau message. (2) Saisissez l'adresse électronique du destinataire, une ligne d'objet et le texte dans les champs désignés. Vous pouvez également ajouter « Cc / Cci » pour envoyer cet e-mail à plusieurs utilisateurs. (3) Appuyez sur `Envoyer 'pour envoyer l'email. Appuyez sur « Enregistrer » pour sauvegarder l'email saisi en tant que brouillon. Lorsque vous appuyez sur l'icône « poubelle », l'email actuellement saisi sera supprimé. FR - 13 13.) Navigateur Web Pour lancer le navigateur Web, veuilez taper sur l'icône navigateur de'l'écran d'accueil. Pour ouvrir une page Web, veuillez taper sur le champ de saisie supérieur pour l'adresse internet. Le clavier virtuel s'ouvre à présent et vous pouvez entrer l'adresse du site web désiré. Tapez sur «Go» ou sur l'icône de flèche près du champ de saisie pour ouvrir la page web. Note : Tous les réseaux ne fournissent pas un accès Internet. Certains réseaux offrent un accès uniquement à d'autres ordinateurs connectés localement et aucune connexion Internet. Utilisation du clavier virtuel Tapez sur le champ de saisie pour ouvrir le clavier virtuel. Vous pouvez maintenant saisir du texte ou appeler des pages Internet. Saisie de caractères spéciaux a. Caps Lock (Écriture en majuscule et en minuscule) b. Touche de retour en arrière c. Appel du menu pour entrer les nombres, caractères et caractères spéciaux d. Barre d'espace (Entrée d'espace) e. Entrée (confirmation de votre entrée) Pour saisir un caractère spécial tel que « ä », appuyez sur la touche « a »avec votre doigt pendant une longue période pour appeler le menu des caractères spéciaux. Maintenant glisser avec votre doigt sur le caractère spécial souhaité, par exemple un « ä » et retirez votre doigt de l'écran. Vous avez maintenant saisi un « ä ». FR - 14 Utilisation du navigateur Web Vous pouvez faire défiler l'affichage à l'écran en effectuant un mouvement de balayage vertical avec vos doigts. Veuillez ne pas amorcer le mouvement de balayage sur un élément de menu ou un lien, sinon l'opération existante serait ouverte. Pour ouvrir un lien Internet, tapez simplement sur le lien. La nouvelle page s'ouvre automatiquement. Appuyez sur la touche menu pour ouvrir le menu du navigateur Web. Là, de multiples fonctions sont fournies. Parmi d'autres choses pouvez actualiser le site Web ouvert ici, multiples Webs. Pour revenir à la page précédente, veuillez appuyer sur la touche retour . Pour aller directement à l'écran d'accueil, veuillez appuyez sur la touche Accueil . Pour entrer du texte, tapez sur le champ approprié et utilisez le clavier virtuel pour saisir du texte. Note : Pour cette fonction, une connexion Internet sans fil est nécessaire. 14.) Paramètres système Appuyez sur l'icône des paramètres dans le menu des applications pour appeler les paramètres système. Vous pouvez trouver les différentes catégories sur le côté gauche du menu. Les options de configuration disponibles sont affichées en appuyant brièvement sur chaque option de menu sélectionnée. Notez que toutes les fonctions offertes par Android ™ ne sont peut-être pas compatibles avec l'appareil. Lorsque vous avez réglé tous les paramètres vous pouvez revenir au menu précédent avec la touche Retour , ou passer à l'écran principal directement avec la touche Accueil automatiquement enregistrées. FR - 15 . Vos saisies seront Présentation de la configuration des réglages principaux WiFi & Réseaux WiFi Ici vous pouvez régler les paramètres WiFi. Plus Ici vous pouvez régler des paramètres réseau supplémentaires. Spécifiez le volume désiré et le son pour les messages ici. Vous pouvez aussi activer ou désactiver un son de confirmation lorsque vous touchez l'écran et un son indicatif lors du déverrouillage de la serrure d'affichage. Sons Affchage Luminosité– Régler la luminosité de l'écran. Fond d'écran – Sélection du fond d'écran. Mode veille state– Réglez le délai avant la désactivation automatique de l'affichage. Taille de la police – configuration de la taille de police souhaitée. Périphérique Utilisateur Mémoire Ici, vous pouvez obtenir des informations sur la mémoire interne et - si elle est insérée - sur votre carte MicroSD. Vous pouvez aussi supprimer le contenu de la mémoire. Batterie Ici, vous pouvez obtenir des informations sur l'état de charge des batteries intégrées.. Apps ci vous pouvez gérer les applications installées et d'obtenir des renseignements à leur sujet. Localisation de services Ici, vous pouvez autoriser plusieurs applications Android ™ pour déterminer et utilisez la position actuelle via les réseaux WiFi (par exemple Google Maps ™). Vous pouvez également déterminer si Google ™ peut adapter les résultats de recherche et d'autres services à votre position. Sécurité Ici vous pouvez mettre en place un verrouillage de l'écran, par exemple, ou la mise en œuvre d'autres paramètres de sécurité. Langue & Clavier Ici vous pouvez définir votre langue préférée, par exemple, ou ajouter des mots différents à votre dictionnaire personnel ou régler le clavier. Enregistrer & Ici, vous pouvez enregistrer vos paramètres système et données réinitialiser d'application sur les serveurs Google™. De plus vous pouvez réinitialiser les réglages par défaut. ATTENTION : Ce faisant, toutes les données sauvegardées sur le périphérique seront supprimées. Comptes Ajouter un compte Permet l’ajout de différents comptes. Date & heure Ici vous pouvez définir la date, l'heure, le fuseau horaire et le format d'affichage. A propos de la tablette Affiche des informations supplémentaires sur le périphérique. Système FR - 16 15.) Gestion des applications Applications préinstallées Cet appareil est livré avec des applications déjà préinstallées. Vous trouverez un aperçu des applications déjà installées dans l'aperçu des applications . Pour ouvrir une de ces applications, tapez brièvement sur l'icône correspondante. Installation des applications Pour installer des applications sur l'appareil, veuillez effectuez les opérations suivantes : (1) Ouvrez la source désirée pour le téléchargement des applications, par exemple Google Playstore ™ préinstallée. Pour ce faire, vous devez d'abord vous connecter avec votre compte Playstore ™ existant ou créer un nouveau compte Playstore ™.Il suffit de suivre les instructions à l'écran. (2) Après vous être connecté, un grand choix d'applications Google Playstore ™ vous sera disponible. Sélectionnez l'application souhaitée, appuyez sur installer et éventuellement confirmer l'autorisation d'accès pour cette application. Le téléchargement va commencer maintenant et la progression s'affiche dans le coin supérieur gauche de la barre d'état avancée. (3) Après avoir téléchargé l'application, elle est automatiquement installée. Vous trouverez la nouvelle application dans le menu des applications après sont installation. Vous pouvez voir la progression de l'installation dans le coin supérieur gauche de la barre d'état avancée. Désinstallation des applications (1) Ouvrez les paramètres système en appuyant sur l'icône des paramètres dans l'aperçu d'application. (2) Maintenant, appuyez sur l'option de menu « Apps » brièvement pour accéder aux paramètres d'applications. (3) Choisissez l'aperçu d'applications souhaité dans les options de menu « Télécharger, mémoire, active et tous »en tapant brièvement dessus. (4) Maintenant, sélectionnez l'application que vous souhaitez désinstaller en tapant brièvement dessus. (5) Maintenant, appuyez sur « Désinstallez » et validez votre entrée avec OK pour désinstaller l'application du périphérique. Note : Vous ne pouvez pas supprimer les logiciels préinstallés. FR - 17 16.) Explorateur de fichiers Ouvrez l'aperçu des applications, puis tapez brièvement sur l'icône Explorateur pour démarrer le fichier Explorateur. Naviguer à travers les fichiers et les dossiers Vous pouvez choisir entre l la mémoire interne (internal Memory), la carte mémoire (SD Card) et USB. Tapez sur l'emplacement d'enregistrement voulu afin d'afficher les fichiers qu'il contient sous forme de liste. Si aucune carte mémoire n'était insérée ou qu'aucun dispositif de stockage n'était connecté via la connexion USB, vous en êtes informé par «... est démonté». Avec un mouvement vertical de balayage, vous pouvez maintenant faire défiler vos fichiers et dossiers. Ouvrez un fichier ou un dossier en tapant brièvement. Vous pouvez faire basculer en avant ou en arrière en tapant brièvement sur les icônes correspondantes. Pour parvenir à un niveau plus haut dans la structure du fichier, tapez brièvement sur l'icône LevelUp . Avec l'icône Accueil, aller directement dans le répertoire principal. Utilisez la barre d'outils Appuyez sur la touche Menu , puis « Masquer la barre d'outils » afin de faire apparaître ou disparaître la barre d'outils. Accueil Aller directement dans le répertoire principal. LevelUp Multi Aller à un niveau supérieur. Sélectionner plusieurs fichiers. Editeur Copier, déplacer, supprimer, insérer ou renommer un fichier ou un dossier. Nouveau dossier Créer un nouveau dossier. Retour Une étape en arrière. Suivant Une étape en avant. Copier, déplacer et renommer des fichiers et dossiers 1.) 2.) 3.) 4.) Accédez au fichier souhaité dans l'aperçu des fichiers. Tapez et maintenez votre doigt sur le fichier jusqu'à ce qu'un champ d'information apparaisse. Maintenant, sélectionnez la fonction désirée. Vous avez le choix entre Copier (Copy), Supprimer (Delete), Déplacer (Move), Coller (Paste) - pour cela, un fichier doit se trouver dans le presse-papiers - et Renommer (Rename). Pour copier ou Déplacer, tapez brièvement sur l'icône appropriée Icône (Copy / Move) et naviguez ensuite dans le répertoire de destination. Tapez ensuite sur l'icône Editeur et sélectionnez «Coller» en tapant brièvement pour insérer le fichier. FR - 18 5.) 6.) 7.) Pour supprimer un fichier, tapez sur «Supprimer» et confirmez à nouveau avec «Supprimer» pour la sécurité. Pour annuler, tapez brièvement sur «Annuler». Pour renommer un fichier, tapez sur «Renommer», puis entrez le nouveau nom de fichier sur le clavier virtuel. Confirmez votre entrée avec «OK» ou annuler la procédure avec «Annuler». Vous pouvez copier, supprimer ou déplacer simultanément plusieurs fichiers et dossiers. Pour cela, tapez sur l'icône Multi puis sur les fichiers souhaités. Les fichiers marqués s'affichent maintenant dans une autre couleur. Tapez sur l'icône Editeur pour effectuer l'action souhaitée. 17.) Conditions de garantie limitée La garantie couvre uniquement le remplacement de ce produit Intenso. La garantie ne couvre pas l'usure normale résultant d'une mauvaise, d’une inappropriée, d'une négligence, d'un accident, d’une incompatibilité ou d'une mauvaise performance d'un matériel informatique ou de logiciels informatiques définis. Il n'y a aucun bénéfice de la garantie en cas de non-respect du manuel utilisateur Intenso ainsi qu'en cas de mauvaise installation, utilisation, ou en cas de défauts causés par d'autres équipements. Si l'appareil est exposé à des vibrations, des décharges électrostatiques, aux effets de la chaleur ou de l'humidité au-delà des spécifications du produit, il n'est plus garanti. Intenso n'est pas responsable des pertes de données ou de la survenue de tout autre dommage collatéral ou dommage consécutif, de la violation des conditions de garantie ou de tout autre dommage, quelle qu'en soit la cause sous-jacente. Ce produit n'est pas destiné à un usage commercial ni à des applications médicales et spéciales dans laquelle la défaillance du produit peut entraîner des blessures, la mort ou des dommages matériels considérables. FR - 19 18.) Données techniques CPU Mémoire principale Système d'exploitation Systèmes d'exploitation compatibles Options de connexion Sans fil Gyroscope 3 axes Format photo Format audio Format vidéo Affichage Caméra SNR Gamme de fréquence Alimentation Batterie interne 1.0 GHz Dualcore based on Cortex A9 1 Go de DDR 3 Android 4.2.2 Windows XP / Vista / 7 / 8 / Linux 2.4 et ultérieur / Mac 10.6 et supérieur Casque, Micro SD (SDHC/SDXC), micro USB WiFi (802.11 b / g / n) Rotation de 360 degrés JPEG, BMP, GIF, PNG MP3, WMA, WAV, OGG, FLAC, APE MPEG1, MPEG 4, FLV Écran TFT LCD, 1024 x 600 pixels Caméra frontale 0,3 MP > = 80 dB 20 Hz - 20 KHz (V) AC Adapter (HUONIO HNBC050120UE): AC Input 100240V~50/60Hz, DC Output 5V / 1.2A Batterie lithium ion et polymère rechargeable 19.) Entretien de l'appareil Ne pulvérisez ou n'appliquez jamais un liquide directement sur l'écran ou le boîtier. 20.) Entretien de l'appareil Essuyez délicatement le boîtier, le cadre et l'écran avec un chiffon doux, non pelucheux et sans produit chimique. N'utiliser que des détergents spécialement conçus pour les écrans. 21.) Élimination des vieux équipements électroniques Les équipements marqués avec ce symbole sont soumis à la directive européenne 2002/96/EC. Tous les appareils électriques et les déchets d'équipement électroniques et électriques doivent être éliminés séparément des ordures ménagères en utilisant les lieux prévus par l'état à cet effet. Éviter d'endommager l'environnement en éliminant les vieux équipements électroniques. FR - 20 20.) Licence information Notice of GNU GENERAL PUBLIC LICENSE and LESSER GENERAL PUBLIC LICENCE Dear Customer, If interested, you and any third party can download the source code of used GPL / LGPL from Intenso Webpage http://www.intenso.de . The source code of the desired product is available to anyone on the selection of valid product category and the desired device. In the product details you will find the entry "drivers". Open this menu to download the corresponding GPL / LGPL code. For a fee of 35 € (delivery to another country as Germany), it is also possible to obtain this code by postal delivery. More information about the GPL/LGPL-Licence can you find on following website www.gnu.org GNU GENERAL PUBLIC LICENSE Version 2, June 1991 Copyright (C) 1989, 1991 Free Software Foundation, Inc. 51 Franklin Street, Fifth Floor, Boston, MA 02110-1301, USA Everyone is permitted to copy and distribute verbatim copies of this license document, but changing it is not allowed. Preamble The licenses for most software are designed to take away your freedom to share and change it. By contrast, the GNU General Public License is intended to guarantee your freedom to share and change free software-to make sure the software is free for all its users. This General Public License applies to most of the Free Software Foundation's software and to any other program whose authors commit to using it. (Some other Free Software Foundation software is covered by the GNU Lesser General Public License instead.) You can apply it to your programs, too. When we speak of free software, we are referring to freedom, not price. Our General Public Licenses are designed to make sure that you have the freedom to distribute copies of free software (and charge for this service if you wish), that you receive source code or can get it if you want it, that you can change the software or use pieces of it in new free programs; and that you know you can do these things. To protect your rights, we need to make restrictions that forbid anyone to deny you these rights or to ask you to surrender the rights. These restrictions translate to certain responsibilities for you if you distribute copies of the software, or if you modify it. For example, if you distribute copies of such a program, whether gratis or for a fee, you must give the recipients all the rights that you have. You must make sure that they, too, receive or can get the source code. And you must show them these terms so they know their rights. We protect your rights with two steps: (1) copyright the software, and (2) offer you this license which gives you legal permission to copy, distribute and/or modify the software. Also, for each author's protection and ours, we want to make certain that everyone understands that there is no warranty for this free software. If the software is modified by someone else and passed on, we want its recipients to know that what they have is not the original, so that any problems introduced by others will not reflect on the original authors' reputations. Finally, any free program is threatened constantly by software patents. We wish to avoid the danger that redistributors of a free program will individually obtain patent licenses, in effect making the program proprietary. To prevent this, we have made it clear that any patent must be licensed for everyone's free use or not licensed at all. The precise terms and conditions for copying, distribution and modification follow. TERMS AND CONDITIONS FOR COPYING, DISTRIBUTION AND MODIFICATION 0. This License applies to any program or other work which contains a notice placed by the copyright holder saying it may be distributed under the terms of this General Public License. The "Program", below, refers to any such program or work, and a "work based on the Program" means either the Program or any derivative work under copyright law: that is to say, a work containing the Program or a portion of it, either verbatim or with modifications and/or translated into another language. (Hereinafter, translation is included without limitation in the term "modification".) Each licensee is addressed as "you". Activities other than copying, distribution and modification are not covered by this License; they are outside its scope. The act of running the Program is not restricted, and the output from the Program is covered only if its contents constitute a work based on the Program (independent of having been made by running the Program). Whether that is true depends on what the Program does. 1. You may copy and distribute verbatim copies of the Program's source code as you receive it, in any FR - 21 medium, provided that you conspicuously and appropriately publish on each copy an appropriate copyright notice and disclaimer of warranty; keep intact all the notices that refer to this License and to the absence of any warranty; and give any other recipients of the Program a copy of this License along with the Program. You may charge a fee for the physical act of transferring a copy, and you may at your option offer warranty protection in exchange for a fee. 2. You may modify your copy or copies of the Program or any portion of it, thus forming a work based on the Program, and copy and distribute such modifications or work under the terms of Section 1 above, provided that you also meet all of these conditions: a) You must cause the modified files to carry prominent notices stating that you changed the files and the date of any change. b) You must cause any work that you distribute or publish, that in whole or in part contains or is derived from the Program or any part thereof, to be licensed as a whole at no charge to all third parties under the terms of this License. c) If the modified program normally reads commands interactively when run, you must cause it, when started running for such interactive use in the most ordinary way, to print or display an announcement including an appropriate copyright notice and a notice that there is no warranty (or else, saying that you provide a warranty) and that users may redistribute the program under these conditions, and telling the user how to view a copy of this License. (Exception: if the Program itself is interactive but does not normally print such an announcement, your work based on the Program is not required to print an announcement.) These requirements apply to the modified work as a whole. If identifiable sections of that work are not derived from the Program, and can be reasonably considered independent and separate works in themselves, then this License, and its terms, do not apply to those sections when you distribute them as separate works. But when you distribute the same sections as part of a whole which is a work based on the Program, the distribution of the whole must be on the terms of this License, whose permissions for other licensees extend to the entire whole, and thus to each and every part regardless of who wrote it. Thus, it is not the intent of this section to claim rights or contest your rights to work written entirely by you; rather, the intent is to exercise the right to control the distribution of derivative or collective works based on the Program. In addition, mere aggregation of another work not based on the Program with the Program (or with a work based on the Program) on a volume of a storage or distribution medium does not bring the other work under the scope of this License. 3. You may copy and distribute the Program (or a work based on it, under Section 2) in object code or executable form under the terms of Sections 1 and 2 above provided that you also do one of the following: a) Accompany it with the complete corresponding machine-readable source code, which must be distributed under the terms of Sections 1 and 2 above on a medium customarily used for software interchange; or, b) Accompany it with a written offer, valid for at least three years, to give any third party, for a charge no more than your cost of physically performing source distribution, a complete machine-readable copy of the corresponding source code, to be distributed under the terms of Sections 1 and 2 above on a medium customarily used for software interchange; or, c) Accompany it with the information you received as to the offer to distribute corresponding source code. (This alternative is allowed only for noncommercial distribution and only if you received the program in object code or executable form with such an offer, in accord with Subsection b above.) The source code for a work means the preferred form of the work for making modifications to it. For an executable work, complete source code means all the source code for all modules it contains, plus any associated interface definition files, plus the scripts used to control compilation and installation of the executable. However, as a special exception, the source code distributed need not include anything that is normally distributed (in either source or binary form) with the major components (compiler, kernel, and so on) of the operating system on which the executable runs, unless that component itself accompanies the executable. If distribution of executable or object code is made by offering access to copy from a designated place, then offering equivalent access to copy the source code from the same place counts as distribution of the source code, even though third parties are not compelled to copy the source along with the object code. 4. You may not copy, modify, sublicense, or distribute the Program except as expressly provided under this License. Any attempt otherwise to copy, modify, sublicense or distribute the Program is void, and will automatically terminate your rights under this License. However, parties who have received copies, or rights, from you under this License will not have their licenses terminated so long as such parties remain in full compliance. 5. You are not required to accept this License, since you have not signed it. However, nothing else grants you permission to modify or distribute the Program or its derivative works. These actions are prohibited by FR - 22 law if you do not accept this License. Therefore, by modifying or distributing the Program (or any work based on the Program), you indicate your acceptance of this License to do so, and all its terms and conditions for copying, distributing or modifying the Program or works based on it. 6. Each time you redistribute the Program (or any work based on the Program), the recipient automatically receives a license from the original licensor to copy, distribute or modify the Program subject to these terms and conditions. You may not impose any further restrictions on the recipients' exercise of the rights granted herein. You are not responsible for enforcing compliance by third parties to this License. 7. If, as a consequence of a court judgment or allegation of patent infringement or for any other reason (not limited to patent issues), conditions are imposed on you (whether by court order, agreement or otherwise) that contradict the conditions of this License, they do not excuse you from the conditions of this License. If you cannot distribute so as to satisfy simultaneously your obligations under this License and any other pertinent obligations, then as a consequence you may not distribute the Program at all. For example, if a patent license would not permit royalty-free redistribution of the Program by all those who receive copies directly or indirectly through you, then the only way you could satisfy both it and this License would be to refrain entirely from distribution of the Program. If any portion of this section is held invalid or unenforceable under any particular circumstance, the balance of the section is intended to apply and the section as a whole is intended to apply in other circumstances. It is not the purpose of this section to induce you to infringe any patents or other property right claims or to contest validity of any such claims; this section has the sole purpose of protecting the integrity of the free software distribution system, which is implemented by public license practices. Many people have made generous contributions to the wide range of software distributed through that system in reliance on consistent application of that system; it is up to the author/donor to decide if he or she is willing to distribute software through any other system and a licensee cannot impose that choice. This section is intended to make thoroughly clear what is believed to be a consequence of the rest of this License. 8. If the distribution and/or use of the Program is restricted in certain countries either by patents or by copyrighted interfaces, the original copyright holder who places the Program under this License may add an explicit geographical distribution limitation excluding those countries, so that distribution is permitted only in or among countries not thus excluded. In such case, this License incorporates the limitation as if written in the body of this License. 9. The Free Software Foundation may publish revised and/or new versions of the General Public License from time to time. Such new versions will be similar in spirit to the present version, but may differ in detail to address new problems or concerns. Each version is given a distinguishing version number. If the Program specifies a version number of this License which applies to it and "any later version", you have the option of following the terms and conditions either of that version or of any later version published by the Free Software Foundation. If the Program does not specify a version number of this License, you may choose any version ever published by the Free Software Foundation. 10. If you wish to incorporate parts of the Program into other free programs whose distribution conditions are different, write to the author to ask for permission. For software which is copyrighted by the Free Software Foundation, write to the Free Software Foundation; we sometimes make exceptions for this. Our decision will be guided by the two goals of preserving the free status of all derivatives of our free software and of promoting the sharing and reuse of software generally. NO WARRANTY 11. BECAUSE THE PROGRAM IS LICENSED FREE OF CHARGE, THERE IS NO WARRANTY FOR THE PROGRAM, TO THE EXTENT PERMITTED BY APPLICABLE LAW. EXCEPT WHEN OTHERWISE STATED IN WRITING THE COPYRIGHT HOLDERS AND/OR OTHER PARTIES PROVIDE THE PROGRAM "AS IS" WITHOUT WARRANTY OF ANY KIND, EITHER EXPRESSED OR IMPLIED, INCLUDING, BUT NOT LIMITED TO, THE IMPLIED WARRANTIES OF MERCHANTABILITY AND FITNESS FOR A PARTICULAR PURPOSE. THE ENTIRE RISK AS TO THE QUALITY AND PERFORMANCE OF THE PROGRAM IS WITH YOU. SHOULD THE PROGRAM PROVE DEFECTIVE, YOU ASSUME THE COST OF ALL NECESSARY SERVICING, REPAIR OR CORRECTION. 12. IN NO EVENT UNLESS REQUIRED BY APPLICABLE LAW OR AGREED TO IN WRITING WILL ANY COPYRIGHT HOLDER, OR ANY OTHER PARTY WHO MAY MODIFY AND/OR REDISTRIBUTE THE PROGRAM AS PERMITTED ABOVE, BE LIABLE TO YOU FOR DAMAGES, INCLUDING ANY GENERAL, SPECIAL, INCIDENTAL OR CONSEQUENTIAL DAMAGES ARISING OUT OF THE USE OR INABILITY TO USE THE PROGRAM (INCLUDING BUT NOT LIMITED TO LOSS OF DATA OR DATA BEING RENDERED INACCURATE OR LOSSES SUSTAINED BY YOU OR THIRD PARTIES OR A FAILURE OF THE PROGRAM TO OPERATE WITH ANY OTHER PROGRAMS), EVEN IF SUCH HOLDER OR OTHER FR - 23 PARTY HAS BEEN ADVISED OF THE POSSIBILITY OF SUCH DAMAGES. END OF TERMS AND CONDITIONS How to Apply These Terms to Your New Programs If you develop a new program, and you want it to be of the greatest possible use to the public, the best way to achieve this is to make it free software which everyone can redistribute and change under these terms. To do so, attach the following notices to the program. It is safest to attach them to the start of each source file to most effectively convey the exclusion of warranty; and each file should have at least the "copyright" line and a pointer to where the full notice is found. one line to give the program's name and an idea of what it does. Copyright (C) yyyy name of author This program is free software; you can redistribute it and/or modify it under the terms of the GNU General Public License as published by the Free Software Foundation; either version 2 of the License, or (at your option) any later version. This program is distributed in the hope that it will be useful, but WITHOUT ANY WARRANTY; without even the implied warranty of MERCHANTABILITY or FITNESS FOR A PARTICULAR PURPOSE. See the GNU General Public License for more details. You should have received a copy of the GNU General Public License along with this program; if not, write to the Free Software Foundation, Inc., 51 Franklin Street, Fifth Floor, Boston, MA 02110-1301, USA. Also add information on how to contact you by electronic and paper mail. If the program is interactive, make it output a short notice like this when it starts in an interactive mode: Gnomovision version 69, Copyright (C) year name of author Gnomovision comes with ABSOLUTELY NO WARRANTY; for details type `show w'. This is free software, and you are welcome to redistribute it under certain conditions; type `show c' for details. The hypothetical commands `show w' and `show c' should show the appropriate parts of the General Public License. Of course, the commands you use may be called something other than `show w' and `show c'; they could even be mouse-clicks or menu items--whatever suits your program. You should also get your employer (if you work as a programmer) or your school, if any, to sign a "copyright disclaimer" for the program, if necessary. Here is a sample; alter the names: Yoyodyne, Inc., hereby disclaims all copyright interest in the program `Gnomovision' (which makes passes at compilers) written by James Hacker. signature of Ty Coon, 1 April 1989 Ty Coon, President of Vice FR - 24 Intenso GmbH Date : 17 décembre 2013 Déclaration de conformité CE Nous, Intenso GmbH, avec siège à Diepholzer Str. 15 à 49377 Vechta, Allemagne déclarons sous notre responsabilité que le produit : Modèle : 7” Intenso TAB 734 (n° article 5509854) Description : ordinateur tablette est conforme aux directives et normes suivantes : directive R&TTE 1999/5/CE EN 301 489-1 V1.9.2 EN 301 489-17 V2.1.1 EN 300 328 V1.7.1 : 2006-10 EN 55022:2010 (Class B) EN 55024:2010 EN 61000-3-2:2006+A1 :2009+A2 :2009 (Class D) EN 61000-3-3:2008 directive basse tension 2006/95/CE EN 60950-1:2006+A11:2009+A1:2010+A12:2011+A12:correction 2012 directive conception écologique 2009/125/CE 1275/2008 278/2009 directive ROHS 2011/65/EU Les documents techniques faisant référence à l'appareil cité en haut sont déposés à l'endroit suivant : Intenso GmbH Diepholzer Str. 15, 49377 Vechta, Allemagne Personne autorisée : ____________________________ Directeur général : Thomas Pöhlking FR - 25 Manual de instrucciones TAB 734 Muchas gracias por haberse decidido por el TAB734. Por favor siga las instrucciones de este manual para estar informado sobre las funciones más importantes de este dispositivo. 1.) Índice 1.) Índice ..................................................................................................................................................................................................... 1 2.) Avisos .................................................................................................................................................................................................... 2 3.) Vista general del aparato ....................................................................................................................................................................... 4 4.) Contenido del paquete........................................................................................................................................................................... 4 5.) Carga de la batería ................................................................................................................................................................................ 5 6.) Empleo de la tarjeta Micro SD/SDHC/SDXC ......................................................................................................................................... 5 7.) Transferencia de datos entre el aparato y un ordenador ....................................................................................................................... 5 8.) Pantalla táctil ......................................................................................................................................................................................... 6 9.) WIFI ....................................................................................................................................................................................................... 6 Conexión automática .................................................................................................................................................................................. 6 Conexión manual ........................................................................................................................................................................................ 7 10.) Pantalla inicial ...................................................................................................................................................................................... 8 Visualización ............................................................................................................................................................................................... 8 Desbloqueo de la pantalla .......................................................................................................................................................................... 8 Barra de estado .......................................................................................................................................................................................... 9 Adaptación de la pantalla de inicio ........................................................................................................................................................... 10 Empleo de diversas pantallas iniciales ..................................................................................................................................................... 10 Aplicaciones preinstaladas en la pantalla inicial ....................................................................................................................................... 11 11.) Resumen de las aplicaciones ............................................................................................................................................................ 11 Resumen de aplicaciones ......................................................................................................................................................................... 11 12.) Enviar / recibir e-mails ....................................................................................................................................................................... 12 Instalar su cuenta de email ....................................................................................................................................................................... 12 Administración de una cuenta de correo electrónico ................................................................................................................................ 13 Agregar un buzón de correo nuevo: ......................................................................................................................................................... 13 Borrar un buzón de correo: ....................................................................................................................................................................... 13 Comprobación de las propiedades de las cuentas: .................................................................................................................................. 13 Ver mensajes de email ............................................................................................................................................................................. 13 Escribir mensajes de correo electrónico ................................................................................................................................................... 13 13.) Web Browser ..................................................................................................................................................................................... 14 Utilización del teclado virtual ..................................................................................................................................................................... 14 Inserción de símbolos ............................................................................................................................................................................... 14 Empleo del Web Browsers........................................................................................................................................................................ 15 14.) Configuraciones del sistema .............................................................................................................................................................. 15 Resumen de las configuraciones mas importantes .................................................................................................................................. 16 15.) Gestión de aplicaciones..................................................................................................................................................................... 17 Instalación de las aplicaciones ................................................................................................................................................................. 17 Desinstalación de aplicaciones ................................................................................................................................................................. 17 16.) Fichero Explorer ................................................................................................................................................................................ 18 Navegar entre ficheros y carpetas ............................................................................................................................................................ 18 Utilizar la barra de herramientras .............................................................................................................................................................. 18 Copiar, mover y renombrar ficheros y carpetas ........................................................................................................................................ 18 17.) Condiciones de garantía limitada....................................................................................................................................................... 19 18.) Datos técnicos ................................................................................................................................................................................... 20 19.) Manutención del aparato ................................................................................................................................................................... 20 20.) Limpieza del aparato ......................................................................................................................................................................... 20 21.) Eliminación de aparatos electrónicos fuera de uso ........................................................................................................................... 20 22.) La licencia información ...................................................................................................................................................................... 21 Declaración de conformidad CE ............................................................................................................................................................... 25 Es posible que este manual no contenga todas las funciones de su aparato. Para hacer uso de aplicaciones que provienen de operadores terceros, le rogamos que contacte a su operador. Tenga en cuenta que cualquier especificación puede ser modificada sin previo aviso. Si desea conocer informaciones actuales, consulte la página www.intenso.de Marca Google™, Google™-Logo y Android™ son marcas de Google Inc.. Todos los demás nombres de productos o servicios son propiedad de sus dueños respectivos. ES - 1 2.) Avisos Evite un impacto brusco del aparato. No coloque el aparato en superficies inclinadas para evitar su caída. No haga uso del aparato en lugares extremadamente fríos, calientes, húmedos o repletos de polvo. Evite también la exposición directa al sol del aparato. Evite su utilización en lugares arenosos. No emplee el aparato en las proximidades de lugares con riesgo de explosión, como puede ser el surtidor de una gasolinera. Evite su empleo en cojines, sofás u otros objetos que fomenten la creación de calor, pues existe el riesgo de sobrecalentamiento del aparato. Guarde sus datos de forma regular para evitar una posible pérdida de datos. No nos hacemos responsables en el caso de una eventual pérdida de datos. No separe la conexión mientras transfiere datos o cuando se va a formatear el aparato. Esta separación puede conllevar una pérdida de datos. Imágenes y videos pueden estar protegidos por los derechos de terceras personas. La reproducción sin licencia puede violar los derechos de autor. Evite el empleo del aparato en campos altamente magnetizados. Proteja a su aparato de la humedad. Si entra humedad en el aparato, apáguelo inmediatamente y dispóngase a limpiarlo y secarlo. No emplee soluciones químicas a la hora de limpiar el aparato. Utilice simplemente un paño seco para limpiarlo. No coloque llamas abiertas, como pueden ser velas encendidas, cerca o sobre el aparato. No nos hacemos responsables de daños producidos a causa de un funcionamiento incorrecto, pérdida de datos, manejo incorrecto, y propia reparación del aparato o cambio de batería. En el caso de que el aparato no reaccione a sus entradas, le rogamos que emplee el botón de reset que se encuentra en el reverso del aparato para que pueda reiniciarse. Cuando no lo vaya a utilizar, retire el transformador de la fuente de energía. El enchufe ha de encontrarse cerca del aparato y ser de fácil acceso Haga uso del transformador solo en tomas de tierra con AC 100-240V~, 50/60 Hz. En caso de no tener la certeza de que la fuente de energía local sea segura, consulte al distribuidor de energía respectivo. Emplee únicamente el transformador y el cable de conexión a la red ha recibido con este aparato. Para interrumpir el abastecimiento de energía de su aparato, retire la fuente de alimentación de la corriente. Sujete con cuidado el transformador en el momento de retirarlo del enchufe. No apriete nunca el cable. ES - 2 Nunca abra la caja del adaptador de red. En caso de apertura de la caja se corre peligro de vida debido al choque eléctrico. No contiene piezas que requieran manutención. En caso de no utilizar el aparato durante un periodo prolongado, la batería comienza a descargarse lentamente. Antes de volver a utilizar el aparato, debe recargarla. Le rogamos que elimine el aparato o la batería de manera ecológica. Por favor no desmonte los componentes del aparato ni intente repararlo por sí mismo, pues en ese caso la garantía expira. No emplee el aparato en lugares en que la utilización de aparatos móviles se encuentre prohibida. No utilice el aparato cerca de otros aparatos eléctricos, ya que puede ocasionar interferencias debido a las señales de alta frecuencia. No utilice el aparato cerca de un marcapasos, en un hospital o próximo a aparatos médicos, pues puede causar interferencias debido a las señales de alta frecuencia. Mantenga una distancia mínima de 15 cm respecto a la posición de un marcapasos. Consulte al productor de ese aparato en concreto para obtener información sobre su empleo común. El uso de auriculares a un volumen demasiado alto puede causar daños irreparables en el oído. Tenga en cuenta que el constante volumen alto puede ocasionar una pérdida permanente del oído. Para evitar posibles riesgos de saludo causados por un volumen demasiado alto le recomendamos la utlización del auricular incluido en la entrega. Por motivos de seguridad vial, este aparato no debe ser usado por el conductor durante cualquier trayecto. ES - 3 3.) Vista general del aparato (1) (2) (3) (4) (5) Conector de auricular de 3.5mm Micrófono integrado Indicador de carga: Rojo durante la carga - amarillo cuando está completamente cargado. Cámara frontal Casquillo micro USB (6) Botón on / off: mantenga el botón pulsado para apagar el aparato; apriete el botón brevemente para cambiar de Standby o “botón de guardia“ a Modo Activo (7) Volumen + / (8) Touchscreen (9) Ranura para la tarjeta micro SD (10) Altavoz integrado 4.) Contenido del paquete Por favor verifique que el contenido del paquete está completo: TAB 734 Auricular estéreo Cable de USB Transformador 5V 1.2A Manual de instrucciones ES - 4 5.) Carga de la batería Por favor, cargue la batería por completo antes del primer uso del dispositivo. Conecte el adaptador de corriente incluido con el dispositivo a una toma de corriente. La carga completa dura unas 5 horas. El estado de carga se muestra en el lado delantero izquierdo del dispositivo. La luz del LED se ilumina en rojo durante la carga y cambia a amarillo cuando la batería está totalmente cargada. Indicaciones: a. Cuando a la batería le quede menos del 15% de carga, aparecerá en la pantalla un mensaje de advertencia. Entonces debe conectar el aparato a un enchufe empleando el transformador para proceder a la recarga de la batería, con el fin de evitar la pérdida de datos y aumentar la duración de la batería. b. Puede utilizar el aparato mientras la batería se recarga. Sin embargo, para asegurar la larga duración de la batería, le rogamos que no haga uso del aparato mientras la batería está cargando. c. Para asegurar el buen funcionamiento del aparato, la batería integrada debe ser utilizada de forma habitual. Si no emplea el aparato habitualmente, recargue la batería completamente al menos una vez al mes. d. Asegúrese de que solo emplea el transformador incluido en el paquete para recargar la batería. 6.) Empleo de la tarjeta Micro SD/SDHC/SDXC Este dispositivo puede leer datos directamente desde una tarjeta Micro SD/SDHC/SDXC con una capacidad máxima de 64 GB. Para poder usar una tarjeta Micro SD/SDHC/SDXC introdúzcala en la ranura Micro SD Slot prevista en la parte izquierda del dispositivo. Use el explorador preinstalado para poder acceder a los datos en la tarjeta de memoria. Escoja en el explorador el índice “SD Card”. 7.) Transferencia de datos entre el aparato y un ordenador 1.) Conecte el aparato al ordenador con ayuda del cable de USB que se le proporciona. 2.) En el aparato se muestra ahora la pantalla con la conexión USB. Pulse brevemente la tecla de activación de la memoria de USB. El aparato se reconocerá como soporte de datos móviles y usted recibirá la información de la memoria de USB en funcionamiento. Tras pulsar brevemente la tecla Home, puede volver a utilizar el aparato de forma normal. Desde su ordenador tiene ahora acceso a la memoria interna del aparato y puede copiar, eliminar o mover datos del aparato. 3.) Si existe una conexión USB con el ordenador, le aparecerá un símbolo de USB en la barra de estado. En la barra de estado ampliada obtendrá información adicional y podrá activar o desactivar la conexión USB. Para desactivar la memoria, elija “desactivar memoria USB“. Elija en el ordenador la función “Retirar de forma segura“ ordenador. para separar el dispositivo del Nota: las aplicaciones instaladas en el sistema operativo Android™ ocupan una parte de la memoria interna dada. Por este motivo no se encuentra la totalidad de la memoria interna a su disposición. ES - 5 8.) Pantalla táctil Este dispositivo se maneja mediante una pantalla táctil. Puede iniciar aplicaciones, introducir textos con el teclado virtual, pulsando brevemente en la pantalla táctil y cambiar entre las diversas pantallas de inicio deslizándolas hacia la dirección deseada. Por favor retire la película protectora de la pantalla antes de utilizar el aparato. La pantalla táctil identifica pequeñas cargas eléctricas, tales como las emitidas por los dedos de la mano, definiéndose así como punto de entrada. Por consiguiente, es preferible que utilice las puntas de sus dedos para efectuar las entradas. Su empleo por medio de un bolígrafo o de otro objeto agudo no es posible. La pantalla táctil no ha de entrar en contacto con agua u otros equipamientos eléctricos para evitar un mal funcionamiento del aparato o defectos permanentes. Advertencias: a. Si la pantalla táctil no se usa durante dos minutos, el aparato pasa a encontrarse en modo Standby. Pulsen brevemente la tecla On/Off para cambiar al modo activo. b. El bloqueo del teclado se encuentra activado automáticamente con el fin de evitar entradas no deseadas. Por favor desbloquee el teclado de la pantalla táctil. Toque el candado cerrado en la pantalla y manténgalo presionado. A continuación presione sobre el candado para que aparezca un candado abierto y quite el dedo de la pantalla. La pantalla está desbloqueada ahora. El aparato puede girar en todas las direcciones, pues dispone de un sensor que ajusta la pantalla automáticamente. 9.) WIFI Para conectar el aparato con su Internet necesita una conexión WIFI. Para activarla, abra los ajustes en los ajustes WIFI. Advertencia: tenga en cuenta que necesita tener una red de WLAN al alcance desde su posición actual. Conexión automática Sitúese en Ajustes y abra los ajustes WIFI. Aquí puede activar o desactivar de forma fácil la función WIFI. Simplemente desplace el interruptor virtual desde la posición “Encendido“ hacia la izquierda para desactivar la función WIFI. La pantalla cambia ahora a “Apagado“. Para volver a activar la función WIFI desactivada, desplace el interruptor virtual hacia la derecha. En la configuración inalámbrica aparecen en el lado derecho todas las redes disponibles y todas las redes ya utilizadas. ES - 6 Por favor escoja la red deseada y escriba la contraseña (password) para esa red WLAN, de modo que se pueda establecer una conexión. Dado el caso, confirme la contraseña introducida, tecleándol, luego pulse Enter y, por último, haga clic en Conectar. Después de un momento se establece la conexión. Notas: a) Si se cambia al aparato al modo Standby, la WLAN se desactivará automáticamente. Esto reduce el consumo de energía y conduce automáticamente al aumento de la duración de la batería. Cuando el aparato vuelve a pasar al modo activo, la conexión WLAN se restaura automáticamente. Esta operación puede durar unos segundos. b) La lista de las redes WLAN que se encuentran actualmente disponibles se actualiza automáticamente. c) Cuando la función WLAN se encuentra activada, el aparato se conecta automáticamente a una red anteriormente configurada, siempre que se encuentre al alcance. d) Cuando una red WLAN desconocida se encuentra al alcance, aparece un panel informativo en la pantalla. Conexión manual Para buscar de forma manual una red WLAN accesible, proceda como sigue: (1) Abra los Ajustes. (2) Ahora abra los Ajustes Wi-Fi y pulse en “Escanear“. (3) En el caso de que la red Wi-Fi no aparezca en la lista de redes disponibles, seleccione el punto “Añadir red” para introducir manualmente la red SSID, el protocolo de seguridad y, en caso de ser necesario, la contraseña correspondiente. Para confirmar su entrada de datos, pulse “Guardar“. ES - 7 10.) Pantalla inicial Visualización Desbloqueo de la pantalla Si no utiliza la pantalla táctil durante más de dos minutos, el dispositivo cambio a modo Standby. Presione brevemente el botón On/Off para activarlo. La pantalla está protegida para evitar entradas no deseadas. Toque el candado cerrado en la pantalla y manténgalo presionado. A continuación presione sobre el candado para que aparezca un candado abierto y quite el dedo de la pantalla. La pantalla está desbloqueada ahora Mueva el símbolo de cerradura con sus dedos en la dirección que indica la flecha Nota: apriete el icono del candado para que aparezca el icono de la cámara para ir directamente a la aplicación. ES - 8 Barra de estado Las barras de estado se encuentran en la parte superior e inferior de la pantalla estándar. La barra de estado superior se divide en dos partes. Si arrastra la barra del lado izquierdo hacia abajo, se mostrarán las notificaciones actuales, en caso de que existan. Si arrastra la barra del lado derecho hacia abajo, se muestran los campos de acceso rápido para diversos ajustes. En la barra de estado inferior tiene la posibilidad de cambiar a la pantalla anterior o bien de ocultar el teclado virtual, acceder directamente a la pantalla de inicio, visualizar los últimos programas utilizados y ajustar el volumen del aparato. ES - 9 Adaptación de la pantalla de inicio Puede adaptar su pantalla de inicio de forma muy simple a sus necesidades individuales. Si desea borrar un icono, mantenga pulsado con el dedo el icono y arrástrelo hacia símbolo X que se muestra. Ahora retire el dedo de la pantalla táctil y el icono será borrado. Si desea posicionar un icono de la vista general de aplicaciones en la pantalla de inicio, mantenga pulsado el icono en la vista general de aplicaciones y aparecerá la pantalla de inicio. Arrastre el icono hacia el lugar deseado y retire el dedo de la pantalla táctil. El icono le ha sido añadido de esta forma a la pantalla de inicio. Si posiciona un icono encima del otro, automáticamente se crea una carpeta con ambos iconos. Pulse en la carpeta para ver todos los iconos guardados en ella y elija el icono deseado pulsando brevemente sobre él. Puede añadir además Widgets a la pantalla de inicio. Para ello, abra el resumen de aplicaciones. Pulse primero en la palabra Widgets. Ahora se muestran todos los Widgets disponibles en su aparato. El añadido de un Widget a la pantalla de inicio funciona exactamente como el añadido de un Icono. Si desea cambiar el fondo de pantalla, pulse en un lugar libre en una pantalla de inicio y mantenga el dedo en la pantalla hasta que aparezca el menu de selección de fondos de pantalla. Empleo de diversas pantallas iniciales Tiene a su disposición cinco pantallas de inicio configurables individualmente. Arrastrando ligeramente hacia la izquierda o la derecha, se puede cambiar fácilmente entre las unas y las otras. Pulsando la tecla “Home“ se vuelve siempre automáticamente hasta la pantalla de inicio central. ES - 10 Aplicaciones preinstaladas en la pantalla inicial A Enlace a la búsqueda con Google™ B Descripcion general de marcadores para el navegador Chrome™ C Contactos, Gmail™, Anwendungsübersicht, Chrome™ y Google+™ D Google Play Store™ , YouTube™ , Hangouts™ , Maps™ y Local™ 11.) Resumen de las aplicaciones Pulse con brevedad el icono del resumen de aplicaciones, con el fin de abrir el resumen de aplicaciones dado. Ahora visualiza un resumen de todas las aplicaciones preinstaladas e instaladas por su cuenta. Abra la aplicación deseada con un breve clic en el icono correspondiente. Resumen de aplicaciones ES - 11 12.) Enviar / recibir e-mails Este aparato cuenta con una aplicación de email preinstalada. Se le permite utilizar su cuenta de email para enviar y recibir emails. Advertencia: esta función requiere una conexión a Internet WLAN. Abra esta aplicación a través del icono “E-Mail“, que se encuentra en el menú de aplicaciones. Instalar su cuenta de email (1) Inicie la aplicación de email pinchando en el símbolo de e-mail. Ahora se le invita a instalar su cuenta de e-mail. (2) Inserte su dirección de e-mail así como su respectiva contraseña y pulse “siguiente“. Ponga un nombre a su cuenta y establezca su nombre para los mensajes enviados. Pulse la tecla “terminar“ para concluir la configuración. Su cuenta de e-mail pasará a ser la cuenta general en caso de que tenga la opción de “enviar emails por defecto desde esa cuenta“. (3) También puede instalar su cuenta de email manualmente. Introduzca su dirección de e-mail y la contraseña correspondiente, y pulse el “setup manual“ para insertar las informaciones del servidor de e-mail. (4) Seleccione entre tipos de servidores (Servertypen POP3, IMAP o Exchange) para la recepción de emails. Advertencia: si desconoce qué configuraciones ha de efectuar, consulte por favor a su proveedores por e-mail, su administrador de red, o busque las informaciones requeridas en Internet partiendo de los términos “Dirección POP“ y “nombre de su proveedor“. (5) Introduzca la siguiente información (Servicio, Puerto etc.). (6) Elija el tipo de servidor para los e-mails a enviar e inserte las informaciones necesarias. (7) Pulse “continuar” para continuar con el menú. La aplicación de e-mail verifica ahora las configuraciones del servicio efectuadas. Una vez concluida la instalación de manera satisfactoria aparece el siguiente aviso: “tu cuenta está instalada y los emails están de camino”. Su cuenta está ahora configurada. (8) Proporcione un nombre a su cuenta y pulse terminar para concluir el proceso. Nota: si posee más de una dirección de correo electrónico, tendrá acceso a la cuenta general siempre que se inicie la aplicación de email. ES - 12 Administración de una cuenta de correo electrónico Agregar un buzón de correo nuevo: (1) Abra la aplicación de correo electrónico y pulse en la tecla Menu para mostrar las opciones adicionales. Seleccione el punto de menu “Ajustes“ y después “Añadir cuenta“, para crear un nuevo buzón de correo. (2) Siga el asistente de configuración para crear un nuevo buzón de correo. Borrar un buzón de correo: (1) Abra la aplicación de correo electrónico y pulse en la tecla Menu para mostrar las opciones adicionales. Seleccione el punto de menu “Ajustes“ y después “Eliminar cuenta“, para borrar la cuenta deseada Comprobación de las propiedades de las cuentas: (1) Abra la aplicación de correo electrónico y pulse en la tecla Menu para mostrar las opciones adicionales y seleccione “Ajustes“. En el lado izquierdo del menu aparecerán todos los buzones de correo creados. (2) Pulse en el buzón de correo deseado para mostrar los ajustes de la cuenta. (3) Pulse en las “propiedades de cuenta“ a ser cambiadas para efectuar los cambios deseados Ver mensajes de email Abra la aplicación de e-mail haciendo un breve click sobre el icono del e-mail. Su buzón se puede ahora visualizar. A través de movimientos verticales puede desplazar sus e-mails. Haga click en un e-mail determinado con el fin de abrirlo. Mantenga el dedo pulsado en un e-mail determinado, para poder visualizar otras opciones. Ahora aparece un panel de información. Usted puede aquí abrir el e-mail, contestarlo, reenviarlo o eliminarlo. Escribir mensajes de correo electrónico (1) Pulse en la vista general del correo electrónico en el símbolo Email en la barra de menu superior y se abrirá una ventana nueva, en el cual puede escribir un nuevo correo electrónico. (2) Ahora introduzca la dirección de correo electrónico del destinatario, un asunto y el texto en los campos previstos para ello. También puede añadir „“CC/CCO“ para enviar un correo electrónico a varios destinatarios. (3) Pulse en “Enviar“, para enviar el correo electrónico. Pulse en “Guardar“ para guardar el correo electrónico introducido como borrador. Si pulsa en el “Símbolo de la papelera“, se borrará el correo electrónico introducido actualmente. ES - 13 13.) Web Browser Para iniciar el Web Browser, pinche en el icono Browser que se encuentra en la pantalla inicial. Para abrir una página de Internet, pulse en la parte superior de las entradas para visualizar la dirección de Internet. El teclado virtual se abre ahora y usted puede elegir la dirección de la página de Internet deseada. Pinche en “comenzar“ o en el símbolo al lado del campo de entradas para abrir la página web. Advertencia: no todas las redes ofrecen acceso a la red. Algunas redes ofrecen solo acceso a otros ordenadores locales conectados y no conexión a Internet. Utilización del teclado virtual Pinche en el campo de entradas para abrir el teclado virtual. Puede componer un texto o acceder a páginas de Internet. a. Caps Lock (letras mayúsculas o minúsculas) b. Tecla para “volver“ c. Acceso al menú de números, símbolos y caracteres especiales d. Space Taste (espacio o entrada en blanco) e. Comenzar (confirmación de su entrada) Inserción de símbolos Para insertar un carácter especial como por ejemplo “ä”, mantenga pulsado con su dedo la tecla “a“ para acceder al menú de caracteres especiales. Deslice su dedo ahora al carácter especial deseado, por ejemplo la “ä“ y despegue el dedo de la pantalla. De esta forma habrá introducido una “ä“. ES - 14 Empleo del Web Browsers Puede desplazarse por la pantalla efectuando un movimiento de desplazamiento vertical con sus dedos. Por favor no comience el movimiento en un punto del menú o link, pues en ese caso podrían abrirse otras aplicaciones existentes. Para abrir un link de Internet, pinche suavemente sobre el link. La nueva página se abrirá de forma automática. Para abrir el Menu del navegador web pulse la tecla de menu . Aquí tiene a su disposición distintas funciones. Entre otras, puede actualizar la página web abierta, abrir una pestaña nueva, configurar una página para que se pueda leer sin conexión o bien cambiar a los ajustes del navegador web. Para volver a una página ya visitada, pulse la tecla “volver“ . Para regresar directamente a la pantalla de inicio, pulse la tecla “Home“ . Para insertar un texto, pinche en el campo correspondiente y emplee el teclado virtual para insertar el texto. Advertencia: esta función requiere una conexión a Internet WLAN. 14.) Configuraciones del sistema Pulse en el menu de aplicaciones en el icono de Ajustes para acceder a los ajustes de sistema. En la parte izquierda del menu podrá encontrar distintas categorías. Pulsando brevemente en la entrada del menu elegido anteriormente se muestran las posibilidades de ajuste disponibles. Por favor tenga en cuenta que no todas las funciones ofrecidas por Android™ son compatibles con este dispositivo. Una vez haya efectuado todos los ajustes podrá volver al menú anterior con la tecla Volver o bien cambiar directamente a la pantalla de inicio con la tecla Inicio guardan automáticamente. ES - 15 Los datos introducidos se Resumen de las configuraciones mas importantes Redes y redes inalámbricas Wi-Fi Efectúe aquí sus ajustes para Wi-Fi. Más Aquí puede efectuar más ajustes de red. Ajuste aquí el volumen deseado y el sonido deseado para las notificaciones.. Además puede activar o desactivar un tono de confirmación al tocar la pantalla táctil y un tono de advertencia al desbloquear el bloqueo de pantalla. Sonidos Pantalla Brillo – Ajustar brillo de la pantalla. Fondo – Selección del fondo deseado. Estado de reposo – Ajuste el retardo en apagar la pantalla automáticamente. Tamaño de letra – Ajuste del tamaño de letra deseado. Dispositivo Memoria Aquí obtendrá información sobre la memoria interna y, en el caso de ser utilizada, de su tarjeta MicroSD. Además puede eliminar el contenido de la memoria. Usuario Cuentas Batería Aquí obtendrá información sobre el estao de carga de la batería integrada. Aplicaciones Aquí podrá administrar las aplicaciones instaladas y obtener información sobre las aplicaciones. Servicios de ubicación Aquí podrá permitir a las distintas aplicaciones Android™ reconocer su ubicación mediante redes inalámbricas y utilizar esta información (p.ej. Google Maps™). Además podrá establecer si desea que Google™ pueda adaptar los resultados de búsqueda a su ubicación. Seguridad Aquí podrá, por ejemplo, establecer un bloqueo de pantalla y efectuar otros ajustes relevantes en cuanto a seguridad. Idioma e introducción Aquí podrá ajustar, por ejemplo, su idioma preferido, añadir palabras diversas al diccionario personalizado y efectuar ajustes en el teclado.. Guardar y restablecer Aquí podrá guardar sus ajustes de sistema y sus datos de aplicación en servidores de Google™. Además, también puede restablecer los ajustes de fábrica. ATENCIÓN: En ese caso se borrarán todos los datos guardados en el dispositivo. Añadir cuentas Aquí puede añadir diferentes cuentas. Hora y fecha Aquí podrá ajustar la fecha, la hora, la zona horaria el formato de visualización. Sistema Sobre la tableta Le muestra información sobre el dispositivo. ES - 16 15.) Gestión de aplicaciones Aplicaciones pre-instaladas Este aparato se entrega con aplicaciones preinstaladas. La idea de estas aplicaciones se encuentra en el resumen de aplicaciones . Para proceder a la apertura de estas aplicaciones ha de pulsar brevemente el botón correspondiente. Instalación de las aplicaciones Para instalar aplicaciones en el aparato, rogamos que siga los pasos siguientes: (1) Abra la fuente deseada para la descarga de aplicaciones, por ejemplo el preinstalado Google Playstore™. Para ello debe iniciar sesión primero con su cuenta existente de Playstore™ o crear una cuenta nueva de Playstore™. Para ello, siga simplemente las instrucciones en la pantalla. (2) Después de iniciar sesión con éxito tiene a su disposición la amplia elección de aplicaciones del Google Playstore™. Seleccione la aplicación deseada, pulse en instalar y confirme en caso necesario la autorización de acceso de la aplicación. La descarga comienza ahora y el progreso se muestra en la barra de estado ampliada de arriba a la izquierda. (3) Después de la descarga de la aplicación, ésta se instala automáticamente. Podrá encontrar la aplicación nueva en el menú de aplicaciones una vez instalada con éxito. Puede ver el progreso de la instalación en la barra de estado ampliada de arriba a la izquierda. Desinstalación de aplicaciones (1) Por favor abra los ajustes de sistema pulsando brevemente el icono Ajustes en la vista general de las aplicaciones. (2) Pulse ahora brevemente en el punto de menu “Aplicaciones”, para llegar a los Ajustes de Aplicación. (3) Seleccione entre los puntos primarios “bajados, memoria USB, activo y todos ” la vista general deseada, pulsando brevemente. (4) Ahora elige la aplicación que desea desinstalar, pulsando brevemente. (5) Ahora pulse en“Desinstalar” y confirme con OK, para desinstalar la aplicación del dispositivo. Advertencia: no se puede eliminar Software que ya haya sido preinstalado ES - 17 16.) Fichero Explorer Abra el resumen de aplicaciones y seleccione rápidamente el icono Explorer para iniciar los ficheros Explorer. Navegar entre ficheros y carpetas Tiene a su disposición una memoria interna, una tarjeta de memoria (tarjeta SD) y un USB. Seleccione su lugar de almacenamiento preferido para visualizar una lista de los ficheros contenidos Si no se ha insertado ninguna tarjeta de memoria o ningún dispositivo de memoria conectado a la conexión de USB, se recibirá la información “desmontada“. A través de un movimiento vertical puede desplazar ficheros y carpetas. Abra un fichero o una carpeta pulsando dos veces brevemente. Puede seleccionar un icono de “paso adelante“ y “paso hacia atrás“ Para subir el nivel de la estructura de los ficheros, pulse brevemente el icono LevelUp. . Con el icono de Home se puede ir directamente al directorio principal. Utilizar la barra de herramientras Pulse en la tecla Menu y luego en “Ocultar barra de herramientas“, para mostrar u ocultar la barra de herramientas. Home Ir directamente al directorio principal. LevelUp Subir un nivel. Multi Seleccionar varios ficheros. Copiar, apagar, mover, insertar o cambiar el nombre de un fichero o carpeta. Crea una carpeta nueva. Editor Carpeta nueva Back Dar un paso atrás. Next Dar un paso hacia delante. Copiar, mover y renombrar ficheros y carpetas 1.) 2.) 3.) 4.) 5.) Navegue por el fichero deseado dentro de la lista de los ficheros. Haga clic y mantenga el dedo en el fichero hasta que el panel de información aparezca. Ahora escoja la función que desee. Puede elegir entre copiar, eliminar, mover y pegar -se requiere la existencia de un fichero de memoria temporal- y renombrar. Para copiar o mover presione el icono correspondiente (copy/move) y navegue hasta el directorio de destino. A continuación marque el icono de editor y escoja mediante un clic breve la opción “paste“ para insertar el fichero. Para apagar el fichero pulse brevemente la opción “delete“ y confírmelo de nuevo por razones de seguridad con la misma opción “delete“. Para cancelar pulse brevemente la opción “cancelar“. ES - 18 6.) 7.) Para renombrar un fichero haga clic en la opción “rename“ y, a continuación, escriba el nuevo nombre del fichero en el teclado virtual. Confirme con “OK“ o interrumpa presionando la opción “cancel“. Puede copiar, eliminar o mover varios ficheros y carpetas simultáneamente. Para ello pulse el Multi icono y, a continuación, seleccione los ficheros que desee. Los ficheros seleccionados aparacerán en otro color. Pulse el botón de editar icono para efectuar la acción deseada. 17.) Condiciones de garantía limitada La garantía cubre solamente la sustitución de este producto de Intenso. La garantía no es válida en el caso de desgastes resultantes de un uso inadecuado, negligencia, accidentes, incompatibilidad, o rendimiento insuficiente por parte de un cierto Hardware o Software de ordenador. El derecho a la garantía expira en caso de incumplimiento de las instrucciones elaboradas por Intenso así como en caso de montaje o uso indebido o defectos causados por otros aparatos. En caso de que el producto esté expuesto a vibraciones, descargas electroestáticas, influencia del calor o de la humedad, o en cualquier otro caso en que se exponga al producto más allá de sus especificaciones, no existe derecho a garantía. Intenso no se responsabiliza por la pérdida de datos o por daños colaterales o subsecuentes, por la violación de las condiciones de garantía y por otros daños, independientemente de cuáles sean sus causas. Este producto no se debe destinar a un uso comercial o a niveles medicinales o especiales, en los que una avería del producto pueda causar lesiones, fallecimiento o elevados daños materiales. ES - 19 18.) Datos técnicos CPU Memoria Sistema operativo Sistemas operativos compatibles Posibilidades de conectar WLAN G-Sensor Formato de fotografía Formato de audio Formato de video Pantalla Cámara SNR Área de frecuencia Transformador Batería integrada 1.0 GHz Dualcore based on Cortex A9 1 GB DDR 3 Android 4.2.2 Windows XP / Vista / 7 / 8 / Linux 2,4 y superior / Mac 10.6 y superior Auriculares, Micro SD (SDHC/SDXC), micro USB WiFi (802.11 b/g/n) Rotación de 360 grados JPEG, BMP, GIF, PNG MP3, WMA, WAV, OGG, FLAC, APE MPEG1, MPEG 4, FLV TFT LCD pantalla, 1024 x 600 Pixels 0,3 MP cámara frontal >= 80 dB 20 Hz – 20 KHz (V) AC Adapter (HUONIU HNBC050120UE): AC Input 100240V~50/60Hz, DC Output 5V / 1.2A Batería recargable de iones de litio y polímero 19.) Manutención del aparato Nunca rocíe o acerque un aerosol o un líquido directamente a la pantalla o cubierta del aparato 20.) Limpieza del aparato Limpie la caja, el armazón y la pantalla con un paño reblandecido, libre de pelusa y de químicos. Utilice únicamente detergentes que son exclusivos para limpiar pantallas. 21.) Eliminación de aparatos electrónicos fuera de uso Los aparatos identificados con este símbolo están sujetos a la Directiva Europea 2002/96/EC. Todos los equipamientos eléctricos y electrónicos han de separarse de la basura doméstica y deben ser eliminados por las respectivas instituciones públicas. La eliminación debida de equipamientos electrónicos evita la contaminación del medio ambiente. ES - 20 22.) La licencia información Notice of GNU GENERAL PUBLIC LICENSE and LESSER GENERAL PUBLIC LICENCE Dear Customer, If interested, you and any third party can download the source code of used GPL / LGPL from Intenso Webpage http://www.intenso.de . The source code of the desired product is available to anyone on the selection of valid product category and the desired device. In the product details you will find the entry "drivers". Open this menu to download the corresponding GPL / LGPL code. For a fee of 35 € (delivery to another country as Germany), it is also possible to obtain this code by postal delivery. More information about the GPL/LGPL-Licence can you find on following website www.gnu.org GNU GENERAL PUBLIC LICENSE Version 2, June 1991 Copyright (C) 1989, 1991 Free Software Foundation, Inc. 51 Franklin Street, Fifth Floor, Boston, MA 02110-1301, USA Everyone is permitted to copy and distribute verbatim copies of this license document, but changing it is not allowed. Preamble The licenses for most software are designed to take away your freedom to share and change it. By contrast, the GNU General Public License is intended to guarantee your freedom to share and change free software-to make sure the software is free for all its users. This General Public License applies to most of the Free Software Foundation's software and to any other program whose authors commit to using it. (Some other Free Software Foundation software is covered by the GNU Lesser General Public License instead.) You can apply it to your programs, too. When we speak of free software, we are referring to freedom, not price. Our General Public Licenses are designed to make sure that you have the freedom to distribute copies of free software (and charge for this service if you wish), that you receive source code or can get it if you want it, that you can change the software or use pieces of it in new free programs; and that you know you can do these things. To protect your rights, we need to make restrictions that forbid anyone to deny you these rights or to ask you to surrender the rights. These restrictions translate to certain responsibilities for you if you distribute copies of the software, or if you modify it. For example, if you distribute copies of such a program, whether gratis or for a fee, you must give the recipients all the rights that you have. You must make sure that they, too, receive or can get the source code. And you must show them these terms so they know their rights. We protect your rights with two steps: (1) copyright the software, and (2) offer you this license which gives you legal permission to copy, distribute and/or modify the software. Also, for each author's protection and ours, we want to make certain that everyone understands that there is no warranty for this free software. If the software is modified by someone else and passed on, we want its recipients to know that what they have is not the original, so that any problems introduced by others will not reflect on the original authors' reputations. Finally, any free program is threatened constantly by software patents. We wish to avoid the danger that redistributors of a free program will individually obtain patent licenses, in effect making the program proprietary. To prevent this, we have made it clear that any patent must be licensed for everyone's free use or not licensed at all. The precise terms and conditions for copying, distribution and modification follow. TERMS AND CONDITIONS FOR COPYING, DISTRIBUTION AND MODIFICATION 0. This License applies to any program or other work which contains a notice placed by the copyright holder saying it may be distributed under the terms of this General Public License. The "Program", below, refers to any such program or work, and a "work based on the Program" means either the Program or any derivative work under copyright law: that is to say, a work containing the Program or a portion of it, either verbatim or with modifications and/or translated into another language. (Hereinafter, translation is included without limitation in the term "modification".) Each licensee is addressed as "you". Activities other than copying, distribution and modification are not covered by this License; they are outside its scope. The act of running the Program is not restricted, and the output from the Program is covered only if its contents constitute a work based on the Program (independent of having been made by running the Program). Whether that is true depends on what the Program does. 1. You may copy and distribute verbatim copies of the Program's source code as you receive it, in any ES - 21 medium, provided that you conspicuously and appropriately publish on each copy an appropriate copyright notice and disclaimer of warranty; keep intact all the notices that refer to this License and to the absence of any warranty; and give any other recipients of the Program a copy of this License along with the Program. You may charge a fee for the physical act of transferring a copy, and you may at your option offer warranty protection in exchange for a fee. 2. You may modify your copy or copies of the Program or any portion of it, thus forming a work based on the Program, and copy and distribute such modifications or work under the terms of Section 1 above, provided that you also meet all of these conditions: a) You must cause the modified files to carry prominent notices stating that you changed the files and the date of any change. b) You must cause any work that you distribute or publish, that in whole or in part contains or is derived from the Program or any part thereof, to be licensed as a whole at no charge to all third parties under the terms of this License. c) If the modified program normally reads commands interactively when run, you must cause it, when started running for such interactive use in the most ordinary way, to print or display an announcement including an appropriate copyright notice and a notice that there is no warranty (or else, saying that you provide a warranty) and that users may redistribute the program under these conditions, and telling the user how to view a copy of this License. (Exception: if the Program itself is interactive but does not normally print such an announcement, your work based on the Program is not required to print an announcement.) These requirements apply to the modified work as a whole. If identifiable sections of that work are not derived from the Program, and can be reasonably considered independent and separate works in themselves, then this License, and its terms, do not apply to those sections when you distribute them as separate works. But when you distribute the same sections as part of a whole which is a work based on the Program, the distribution of the whole must be on the terms of this License, whose permissions for other licensees extend to the entire whole, and thus to each and every part regardless of who wrote it. Thus, it is not the intent of this section to claim rights or contest your rights to work written entirely by you; rather, the intent is to exercise the right to control the distribution of derivative or collective works based on the Program. In addition, mere aggregation of another work not based on the Program with the Program (or with a work based on the Program) on a volume of a storage or distribution medium does not bring the other work under the scope of this License. 3. You may copy and distribute the Program (or a work based on it, under Section 2) in object code or executable form under the terms of Sections 1 and 2 above provided that you also do one of the following: a) Accompany it with the complete corresponding machine-readable source code, which must be distributed under the terms of Sections 1 and 2 above on a medium customarily used for software interchange; or, b) Accompany it with a written offer, valid for at least three years, to give any third party, for a charge no more than your cost of physically performing source distribution, a complete machine-readable copy of the corresponding source code, to be distributed under the terms of Sections 1 and 2 above on a medium customarily used for software interchange; or, c) Accompany it with the information you received as to the offer to distribute corresponding source code. (This alternative is allowed only for noncommercial distribution and only if you received the program in object code or executable form with such an offer, in accord with Subsection b above.) The source code for a work means the preferred form of the work for making modifications to it. For an executable work, complete source code means all the source code for all modules it contains, plus any associated interface definition files, plus the scripts used to control compilation and installation of the executable. However, as a special exception, the source code distributed need not include anything that is normally distributed (in either source or binary form) with the major components (compiler, kernel, and so on) of the operating system on which the executable runs, unless that component itself accompanies the executable. If distribution of executable or object code is made by offering access to copy from a designated place, then offering equivalent access to copy the source code from the same place counts as distribution of the source code, even though third parties are not compelled to copy the source along with the object code. 4. You may not copy, modify, sublicense, or distribute the Program except as expressly provided under this License. Any attempt otherwise to copy, modify, sublicense or distribute the Program is void, and will automatically terminate your rights under this License. However, parties who have received copies, or rights, from you under this License will not have their licenses terminated so long as such parties remain in full compliance. 5. You are not required to accept this License, since you have not signed it. However, nothing else grants you permission to modify or distribute the Program or its derivative works. These actions are prohibited by ES - 22 law if you do not accept this License. Therefore, by modifying or distributing the Program (or any work based on the Program), you indicate your acceptance of this License to do so, and all its terms and conditions for copying, distributing or modifying the Program or works based on it. 6. Each time you redistribute the Program (or any work based on the Program), the recipient automatically receives a license from the original licensor to copy, distribute or modify the Program subject to these terms and conditions. You may not impose any further restrictions on the recipients' exercise of the rights granted herein. You are not responsible for enforcing compliance by third parties to this License. 7. If, as a consequence of a court judgment or allegation of patent infringement or for any other reason (not limited to patent issues), conditions are imposed on you (whether by court order, agreement or otherwise) that contradict the conditions of this License, they do not excuse you from the conditions of this License. If you cannot distribute so as to satisfy simultaneously your obligations under this License and any other pertinent obligations, then as a consequence you may not distribute the Program at all. For example, if a patent license would not permit royalty-free redistribution of the Program by all those who receive copies directly or indirectly through you, then the only way you could satisfy both it and this License would be to refrain entirely from distribution of the Program. If any portion of this section is held invalid or unenforceable under any particular circumstance, the balance of the section is intended to apply and the section as a whole is intended to apply in other circumstances. It is not the purpose of this section to induce you to infringe any patents or other property right claims or to contest validity of any such claims; this section has the sole purpose of protecting the integrity of the free software distribution system, which is implemented by public license practices. Many people have made generous contributions to the wide range of software distributed through that system in reliance on consistent application of that system; it is up to the author/donor to decide if he or she is willing to distribute software through any other system and a licensee cannot impose that choice. This section is intended to make thoroughly clear what is believed to be a consequence of the rest of this License. 8. If the distribution and/or use of the Program is restricted in certain countries either by patents or by copyrighted interfaces, the original copyright holder who places the Program under this License may add an explicit geographical distribution limitation excluding those countries, so that distribution is permitted only in or among countries not thus excluded. In such case, this License incorporates the limitation as if written in the body of this License. 9. The Free Software Foundation may publish revised and/or new versions of the General Public License from time to time. Such new versions will be similar in spirit to the present version, but may differ in detail to address new problems or concerns. Each version is given a distinguishing version number. If the Program specifies a version number of this License which applies to it and "any later version", you have the option of following the terms and conditions either of that version or of any later version published by the Free Software Foundation. If the Program does not specify a version number of this License, you may choose any version ever published by the Free Software Foundation. 10. If you wish to incorporate parts of the Program into other free programs whose distribution conditions are different, write to the author to ask for permission. For software which is copyrighted by the Free Software Foundation, write to the Free Software Foundation; we sometimes make exceptions for this. Our decision will be guided by the two goals of preserving the free status of all derivatives of our free software and of promoting the sharing and reuse of software generally. NO WARRANTY 11. BECAUSE THE PROGRAM IS LICENSED FREE OF CHARGE, THERE IS NO WARRANTY FOR THE PROGRAM, TO THE EXTENT PERMITTED BY APPLICABLE LAW. EXCEPT WHEN OTHERWISE STATED IN WRITING THE COPYRIGHT HOLDERS AND/OR OTHER PARTIES PROVIDE THE PROGRAM "AS IS" WITHOUT WARRANTY OF ANY KIND, EITHER EXPRESSED OR IMPLIED, INCLUDING, BUT NOT LIMITED TO, THE IMPLIED WARRANTIES OF MERCHANTABILITY AND FITNESS FOR A PARTICULAR PURPOSE. THE ENTIRE RISK AS TO THE QUALITY AND PERFORMANCE OF THE PROGRAM IS WITH YOU. SHOULD THE PROGRAM PROVE DEFECTIVE, YOU ASSUME THE COST OF ALL NECESSARY SERVICING, REPAIR OR CORRECTION. 12. IN NO EVENT UNLESS REQUIRED BY APPLICABLE LAW OR AGREED TO IN WRITING WILL ANY COPYRIGHT HOLDER, OR ANY OTHER PARTY WHO MAY MODIFY AND/OR REDISTRIBUTE THE PROGRAM AS PERMITTED ABOVE, BE LIABLE TO YOU FOR DAMAGES, INCLUDING ANY GENERAL, SPECIAL, INCIDENTAL OR CONSEQUENTIAL DAMAGES ARISING OUT OF THE USE OR INABILITY TO USE THE PROGRAM (INCLUDING BUT NOT LIMITED TO LOSS OF DATA OR DATA BEING RENDERED INACCURATE OR LOSSES SUSTAINED BY YOU OR THIRD PARTIES OR A FAILURE OF THE PROGRAM TO OPERATE WITH ANY OTHER PROGRAMS), EVEN IF SUCH HOLDER OR OTHER ES - 23 PARTY HAS BEEN ADVISED OF THE POSSIBILITY OF SUCH DAMAGES. END OF TERMS AND CONDITIONS How to Apply These Terms to Your New Programs If you develop a new program, and you want it to be of the greatest possible use to the public, the best way to achieve this is to make it free software which everyone can redistribute and change under these terms. To do so, attach the following notices to the program. It is safest to attach them to the start of each source file to most effectively convey the exclusion of warranty; and each file should have at least the "copyright" line and a pointer to where the full notice is found. one line to give the program's name and an idea of what it does. Copyright (C) yyyy name of author This program is free software; you can redistribute it and/or modify it under the terms of the GNU General Public License as published by the Free Software Foundation; either version 2 of the License, or (at your option) any later version. This program is distributed in the hope that it will be useful, but WITHOUT ANY WARRANTY; without even the implied warranty of MERCHANTABILITY or FITNESS FOR A PARTICULAR PURPOSE. See the GNU General Public License for more details. You should have received a copy of the GNU General Public License along with this program; if not, write to the Free Software Foundation, Inc., 51 Franklin Street, Fifth Floor, Boston, MA 02110-1301, USA. Also add information on how to contact you by electronic and paper mail. If the program is interactive, make it output a short notice like this when it starts in an interactive mode: Gnomovision version 69, Copyright (C) year name of author Gnomovision comes with ABSOLUTELY NO WARRANTY; for details type `show w'. This is free software, and you are welcome to redistribute it under certain conditions; type `show c' for details. The hypothetical commands `show w' and `show c' should show the appropriate parts of the General Public License. Of course, the commands you use may be called something other than `show w' and `show c'; they could even be mouse-clicks or menu items--whatever suits your program. You should also get your employer (if you work as a programmer) or your school, if any, to sign a "copyright disclaimer" for the program, if necessary. Here is a sample; alter the names: Yoyodyne, Inc., hereby disclaims all copyright interest in the program `Gnomovision' (which makes passes at compilers) written by James Hacker. signature of Ty Coon, 1 April 1989 Ty Coon, President of Vice ES - 24 Intenso GmbH Fecha:17de diciembre de 2013 Declaración de conformidad CE Nosotros, la empresa Intenso GmbH, con sede social en la Diepholzer Str. 15 en 49377 Vechta, Alemania declaramos bajo nuestra responsabilidad que el producto: Modelo: 7” Intenso TAB 734 (Artículo Nº 5509854) Descripción: Ordenador-tabla cumple con las siguientes directrices y normativas: Normativa R&TTE 1999/5/CE EN 301 489-1 V1.9.2 EN 301 489-17 V2.1.1 EN 300 328 V1.7.1 : 2006-10 EN 55022:2010 (Class B) EN 55024:2010 EN 61000-3-2:2006+A1 :2009+A2 :2009 (Class D) EN 61000-3-3:2008 Normativa de baja tensión 2006/95/CE EN 60950-1:2006+A11:2009+A1:2010+A12:2011+A12: corrección 2012 Normativa de diseño ecológico 2009/125/CE 1275/2008 278/2009 Normativa de ROHS 2011/65/EU Los documentos técnicos relaciones con el dispositivo arriba mencionado han sido depositados en: Intenso GmbH Diepholzer Str. 15, 49377 Vechta. Alemania Persona autorizada: ____________________________ Director ejecutivo: Thomas Pöhlking ES - 25 Manual de instruções TAB 734 Obrigado por ter escolhido o nosso produto TAB734. Siga as seguintes orientações, para obter maiores informações sobre este aparelho. 1.) Índice 1.) Índice ..................................................................................................................................................................................................... 1 2.) Avisos .................................................................................................................................................................................................... 2 3.) Resumo do aparelho ............................................................................................................................................................................. 4 4.) Conteúdo da embalagem ...................................................................................................................................................................... 4 5.) Carregar a bateria.................................................................................................................................................................................. 5 6.) Utilizar um cartão micro SD/SDHC/SDXC ............................................................................................................................................. 5 7.) Transferência de dados entre o aparelho e o computador .................................................................................................................... 5 8.) Ecrã táctil ............................................................................................................................................................................................... 6 9.) WIFI ....................................................................................................................................................................................................... 6 Ligação automática ..................................................................................................................................................................................... 6 Conexão manual ......................................................................................................................................................................................... 7 10.) O ecrã inicial ........................................................................................................................................................................................ 8 Visualização................................................................................................................................................................................................ 8 Desbloquear o ecrã..................................................................................................................................................................................... 8 Barras de status .......................................................................................................................................................................................... 9 Ajustando a tela principal .......................................................................................................................................................................... 10 Utilizar diversos ecrãs iniciais ................................................................................................................................................................... 10 Aplicações pré-instaladas no ecrã inicial .................................................................................................................................................. 11 11.) Resumo das aplicações..................................................................................................................................................................... 11 12.) Enviar / receber emails ...................................................................................................................................................................... 12 Instalar a conta de e-mail.......................................................................................................................................................................... 12 Gerenciando uma conta E-mail ................................................................................................................................................................ 13 Ver mensagens de e-mail ......................................................................................................................................................................... 13 Escrever mensagens via e-mail ................................................................................................................................................................ 13 13.) Web Browser ..................................................................................................................................................................................... 13 Utilização do teclado virtual ...................................................................................................................................................................... 14 Inserir símbolos ........................................................................................................................................................................................ 14 Utilização do Web Browser ....................................................................................................................................................................... 14 14.) Configurações do sistema ................................................................................................................................................................. 15 Resumo das principais definições ............................................................................................................................................................ 15 15.) Gerir aplicações ................................................................................................................................................................................. 16 Instalar aplicações .................................................................................................................................................................................... 16 Desinstalar aplicações .............................................................................................................................................................................. 16 16.) Ficheiro Explorer................................................................................................................................................................................ 17 Navegar por ficheiros e pastas ................................................................................................................................................................. 17 Utilizar a barra de ferramentas ................................................................................................................................................................. 17 Copiar, mover e renomear ficheiros e pastas ........................................................................................................................................... 17 17.) Condições de garantia limitada ......................................................................................................................................................... 18 18.) Dados técnicos .................................................................................................................................................................................. 18 19.) Manutenção do aparelho ................................................................................................................................................................... 19 20.) Limpeza do aparelho ......................................................................................................................................................................... 19 21.) Eliminação de aparelhos electrónicos fora de uso ............................................................................................................................ 19 22.) Licença informação............................................................................................................................................................................ 20 Declaração de conformidade CE ................................................................................................................................................................... 24 Este manual pode eventualmente não conter todas as funções do seu aparelho. Para utilizar aplicações de operadores terceiros, contacte o operador. Por favor note que todas as especificações podem ser alteradas sem pré-aviso. Para informações actuais consulte www.intenso.de Marca Google™, e Google™-Logo e Android™ são marcas da Google Inc. Todos os outros nomes de produtos ou serviços pertencem aos respectivos proprietários. PT - 1 2.) Avisos Evite um embate duro do aparelho. Não o coloque em superfícies inclinadas para assim evitar uma queda do aparelho. Não utilize o aparelho em zonas extremamente frias, quentes, húmidas ou cheias de pó. Evite também a exposição directa ao sol. Evite a utilização em lugares arenosos. Não utilize o aparelho em proximidades com risco a explosões, tais como bombas de gasolina. Evite a utilização sob almofadas, sofás ou outros objectos que apoiem a criação de calor, pois existe risco de sobre-aquecimento do aparelho. Guarde regularmente os seus dados para evitar uma eventual perda de dados. Não somos responsáveis por uma eventual perda de dados. Não separe a ligação no momento de transferência de dados ou formatação do aparelho, pois pode causar uma perda de dados. Imagens e filmes podem estar protegidos por direitos de terceiros. A reprodução sem licença pode violar direitos de autor. Evite a utilização em campos altamente magnetizados. Proteja o seu aparelho de humidade. Se entrar humidade no aparelho, desligue-o imediatamente, limpe e seque-o. Não utilize soluções químicas para limpar o aparelho. Utilize apenas um pano seco. Não posicione chamas abertas, tais como velas acesas, perto ou em cima do aparelho. Não somos responsáveis por danos em caso de funcionamento incorrecto, por perda de dados, manuseamento incorrecto, reparações do aparelho ou troca de bateria feitas por mão própria. Caso o aparelho não reaja às suas entradas, utilize o botão de repôr no verso do aparelho para o voltar a iniciar. Quando não o utilizar, retire o transformador da fonte de energia. A tomada deve se encontrar perto do aparelho e ser de fácil acesso. Utilize o transformador apenas em tomadas ligadas à terra com AC 100-240V~, 50/60 Hz. Caso não tenha certeza da fonte de energia no local de colocação, consulte o respectivo distribuidor de energia. Utilize apenas o transformador e o cabo de ligação à rede fornecidos. Para interromper o abastecimento de energia para o seu aparelho, retire o transformador da tomada. Segure o transformador sempre quando o retirar da tomada. Nunca puxe pelo fio. Não abra a caixa do adaptador de rede. Em caso de caixa aberta existe perigo de vida devido a choque eléctrico. Não contém peças que requeiram manutenção. Em caso de não-utilização durante um longo período, a bateria do aparelho descarrega-se lentamente. Antes de a voltar a utilizar, deve recarregá-la. PT - 2 Por favor elimine o aparelho ou a bateria de forma ecológica. Por favor não desmonte o aparelho em componentes e não tente repará-lo por si mesmo, pois a garantia expira nesse caso. Não utilize o aparelho em locais, onde a utilização de aparelhos móveis seja proibido. Não use o aparelho perto de outros aparelhos eléctricos, pois pode causar interferências devido aos sinais de alta frequência. Não utilize o aparelho perto de marca-passos, em hospitais ou perto de aparelhos médicos, pois pode causar interferências devido aos sinais de alta frequência. Mantenha uma distância mínima de 15cm de um marca-passos. Consulte o produtor desses aparelhos para obter informações sobre a utilização comum. A utilização de auriculares e auscultadores num volume demasiado alto pode causar danos permanentes no aparelho auditivo. Tenha em conta que um volume constantemente alto pode causar danos auditivos permanentes. Para evitar possíveis riscos para a saúde devido a um volume demasiadamente alto, recomendamos utilizar apenas os auriculares fornecidos. Por motivos de segurança no trânsito, o aparelho não deve ser utilizado pelo condutor durante a condução. PT - 3 3.) Resumo do aparelho (1) (2) (3) (4) (5) Conector de auricular 3.5mm Microfone integrado Indicador de carga: vermelho durante o processo de carga – amarelo se estiver completamente carregada. Câmara na frente Tomada micro USB (6) Botão de ligar / desligar: mantenha premido para desligar o aparelho; premir brevemente para mudar entre standby e modo activo. Tomada micro USB (7) (8) (9) (10) Volume + / Touchscreen Leitor de cartões micro SD Altifalante integrado 4.) Conteúdo da embalagem Por favor verifique se o conteúdo da embalagem está completo: TAB 734 Auricular Stereo Cabo USB Transformador 5V 1.2A Manual de instruções PT - 4 5.) Carregar a bateria Carregue completamente a bateria do aparelho antes da primeira utilização. Para tal, conecte o adaptador com o aparelho e uma tomada. O carregamento completo demora cerca de 5 horas. O estado de carregamento é indicado na parte da frente do lado esquerdo do aparelho. O LED fica vermelho durante o carregamento e muda para amarelo quando a bateria estiver completamente carregada. Notas: a. Ao atingir 15% do rendimento restante da bateria, receberá um aviso no ecrã. Deve agora ligar o transformador a uma tomada para carregar a bateria, evitar uma eventual perda de dados e aumentar a duração do transformador. b. Pode utilizar o aparelho enquanto carregar a bateria. No entanto e para garantir uma duração duradoura da bateria, pedimos que não utilize o aparelho. c. Para assegurar um bom rendimento deve utilizar regularmente a bateria integrada. Caso utilizar raramente o aparelho, carregue a bateria pelo menos uma vez por mês completamente. d. Assegure-se que utilize apenas o transformador fornecido para carregar a bateria. 6.) Utilizar um cartão micro SD/SDHC/SDXC Este dispositivo pode ler dados diretamente desde um cartão Micro SD/ SDHC/ SDXC com uma capacidade máxima de 64GB. Para utilizar o cartão Micro SD/ SDHC/ SDXC, insira o cartão na respetiva ranhura Micro SD no lado esquerdo do dispositivo. Utilize o explorador pré-instalado para aceder aos dados no cartão de memória. Selecione assim no explorador a diretoria „SD Card“. 7.) Transferência de dados entre o aparelho e o computador Ligue o aparelho através do cabo USB fornecido a um computador 1.) No aparelho visualiza-se então o ecrã para a ligação com USB. 2.) Toque brevemente em „activar memória USB“. O aparelho é reconhecido como suporte de dados móvel e recebe a informação „memória USB em utilização“. Tocando brevemente no botão Home permite-lhe continuar a utilizar o aparelho de forma normal. Desde o seu computador tem agora acesso à memória interna do aparelho permitindo-lhe copiar, apagar ou mover dados no aparelho. 3.) Quando houver uma conexão USB no seu computador, aparecerá na barra de tarefas um símbolo USB. A barra de tarefas avançada mostra informações adicionais para ativar e desativar a conexão USB. Para desativar o dispositivo de memória, clique sobre “desativar dispositivo USB”. Clique sobre a função “remover hardware com segurança“ USB do seu computador. , para remover o dispositivo Nota: As aplicações pré-instaladas e o sistema operativo Android™ ocupam uma parte da memória. Por essa razão não tem a memória inteira à sua disposição. PT - 5 8.) Ecrã táctil Este aparelho é comandado por um Touchscreen. Com seus dedos poderá clicar suavemente no Touchscreen para facilmente iniciar a aplicação, digitar textos em teclado virtual e arrastando na respectiva direção modificar as telas principais. Por favor retire a película protectora do ecrã antes de utilizar o aparelho. O ecrã táctil identifica pequenas cargas eléctricas, tais como as emitidas pelo dedo humano e define assim o ponto de entrada. Portanto é preferível utilizar as pontas dos dedos para fazer entradas. A utilização através de um lápis ou outro objecto pontiagudo não é possível. O ecrã táctil não deve entrar em contacto com água ou outros equipamentos eléctricos para assim evitar um mau funcionamento e avarias permanentes. Nota: a. Caso o ecrã táctil não é utilizado durante dois minutos, o aparelho passa para standby. Prima brevemente na tecla para ligar / desligar para ir para o modo activo. b. O bloqueio do teclado encontra-se activado automaticamente para evitar entradas indesejadas. Desbloqueie o teclado no ecrã táctil. Toque no cadeado fechado no mostrador e mantenha-o pressionado. Arraste agora o cadeado para o cadeado aberto que apareceu agora no mostrador e solte o seu dedo do mostrador. O ecrã está agora desbloqueado. Pode rodar o aparelho para todas as direcções, pois possui um sensor que ajusta o ecrã automaticamente. 9.) WIFI Necessita de uma ligação WLAN para ligar o dispositivo à internet. Abra as definições WLAN, no menu definições, para a configurar. Note: Por favor considere que necessita de uma rede de WLAN no alcance da sua posição actual. Ligação automática Abra as definições WLAN através do menu de definições. Aqui, basta ativar ou desativar a função WLAN. Deslize apenas o botão virtual da posição “Ligado” para a esquerda, para desativar a função WLAN. Neste momento, o visor altera-se para “Desligado”. Para voltar a ativar ou desativar a função WLAN, basta deslizar o botão virtual para a direita. Nas configurações WLAN são-lhe mostradas, do lado direito, todas as redes disponíveis, assim como todas as redes anteriormente utilizadas. PT - 6 Toque na rede pretendida e insira caso necessário a chave de WLAN (palavra-passe) adequada para estabelecer uma ligação. Confirme eventualmente a palavra-passe tocando na tecla Enter e toque agora em conectar. Após um breve momento, a ligação é estabelecida. Notas: a) Se o aparelho entrar em standby, o WLAN é automaticamente desactivado, reduzindo assim o consumo de energia e aumentando a duração da bateria. Quando o aparelho voltar para o modo activo, a conexão com o WLAN é reestabelecida automaticamente. Isso pode demorar uns segundos. b) A lista das redes WLAN actualmente disponíveis é actualizada automaticamente. c) Com a função de WLAN activada, o aparelho conecta-se automaticamente a uma rede anteriormente configurada, caso esteja no alcance. d) Caso se encontrar uma rede de WLAN desconhecida no alcance, surge uma informação. Conexão manual Siga as instruções abaixo para procurar uma rede Wi-Fi acessível: (1) Clique em configurações. (2) Clique “configurações Wi-Fi” e depois clique sobre “transferir dados“. (3) Se a rede Wi-Fi não aparecer na lista das redes disponíveis, clique sobre o ponto “adicionar rede” e digite manualmente a rede SSID, o protocolo de segurança e também a sua respectiva senha. Para confirmar os dados, clique sobre “Salvar“. PT - 7 10.) O ecrã inicial Visualização Desbloquear o ecrã Se o ecrã tátil não for utilizado durante dois minutos, o aparelho muda para o modo de espera. Pressione brevemente a tecla Ligar / Desligar para mudar para o modo ativo. O mostrador está bloqueado para proteger de uma utilização acidental. Toque no cadeado fechado no mostrador e mantenha-o pressionado. Arraste agora o cadeado para o cadeado aberto que apareceu agora no mostrador e solte o seu dedo do mostrador. O ecrã está agora desbloqueado. Puxe o símbolo da fechadura com o seu dedo na direcção da seta Aviso: Arraste o símbolo do cadeado para o símbolo da câmara que apareceu para abrir diretamente a aplicação da câmara. PT - 8 Barras de status As barras de status encontram-se na parte superior e inferior do ecrã inicial. A barra superior de status divide-se em duas áreas. Ao puxar a barra no lado esquerdo para baixo pode visualizar, caso disponível, os avisos atuais. Ao puxar a barra no lado direito para baixo, pode visualizar os campos de acesso rápido para as diversas configurações. Na barra de status inferior tem a possibilidade de voltar para o ecrã anterior ou ocultar o teclado eventualmente visualizado, aceder diretamente ao ecrã inicial, visualizar os últimos programas utilizados e ajustar o volume do aparelho. PT - 9 Ajustando a tela principal É possível ajustar facilmente a tela principal de acordo com as necessidades individuais. Para cancelar um ícone, toque com seus dedos por alguns segundos sobre o ícone e arraste-o até símbolo X visualizado. Tire o dedo do Touchscreen e o ícone será cancelado. Para posicionar um ícone da lista de aplicações na tela principal clique por alguns segundos com o dedo sobre o ícone da aplicação desejada, que este aparecerá na tela principal. Arraste o ícone para a posição desejada e tire o dedo do Touchscreen. O ícone foi posicionado na tela principal. Se um ícone for posicionado sobre outro ícone, automaticamente se abrirá uma pasta com ambos os ícones. Toque a pasta para visualizar os ícones registrados e toque suavemente sobre um ícone para escolher o desejado. Pode ainda acrescentar Widgets ao menu inicial. Para fazê-lo, queira abrir a visão geral da aplicação. De seguida, toque na palavra Widgets. Todos os Widgets disponíveis no dispositivo são agora exibidos. Adicionar um Widget ao menu inicial é feito da mesma forma que acrescentar um ícone. Para modificar a imagem de fundo, toque sobre um espaço livre da tela inicial e segure com o dedo até aparecer sobre o display o menu de imagens de fundo para escolher uma nova imagem. Utilizar diversos ecrãs iniciais É possível adaptar individualmente, escolhendo entre as cinco telas principais disponíveis. Um simples movimento de arrastar com o dedo para a esquerda ou direita, poderá mudar de uma para a outra. Prima a tecla Home para voltar automaticamente ao ecrã inicial central. PT - 10 Aplicações pré-instaladas no ecrã inicial A Atalho para Pesquisa Google™ B Visão geral do marcadores para o navegador Chrome ™ C Contactos, Gmail™, Anwendungsübersicht, Chrome™ e Google+™ D Google Playstore™ , YouTube™ , Hangouts™ , Maps™ e Local™ 11.) Resumo das aplicações Toque brevemente no ícone do resumo das aplicações para abrir o resumo das aplicações. Visualiza então um resumo de todas as aplicações pré-instaladas e anteriormente instaladas por si. Abra a aplicação pretendida tocando brevemente no ícone correspondente. Resumo das aplicações PT - 11 12.) Enviar / receber emails A aplicação de email está pré-instalada neste aparelho. Esta aplicação permite-lhe utilizar o seu actual endereço para enviar e receber emails. Nota: Esta função requer uma ligação WLAN à Internet. Abra a aplicação através do ícone „email “ no menu das aplicações. Instalar a conta de e-mail (1) Inicie a aplicação de email tocando no símbolo de email. Será convidado/a a instalar a sua conta de email. (2) Insira o seu endereço de email e a respectiva palavra-passe e toque em „continuar“. A seguir insira um nome para a sua conta e defina o nome apresentado para as mensagens enviadas. Toque em „terminar“ para concluir a configuração. A sua conta de email será seleccionada como conta geral se seleccionar a opção “enviar emails por defeito desde esta conta”. (3) Também pode instalar a sua conta de email manualmente. Insira o seu endereço de email e a respectiva palavra-passe e toque em “Configuração manual” para inserir as informações do servidor de email. (4) Seleccione um dos tipos de servidores POP3, IMAP ou Exchange para a recepção de emails. Nota: Se não tiver a certeza quais as configurações a efectuar, contacte os fornecedores de serviços de email, o seu administrador de rede ou pesquise na internet por palavras-chave, tais como „endereço POP“ e „nome do seu fornecedor de serviços“ para obter as informações requeridas. (5) Insira as informações requeridas (servidor, porta, etc.). (6) Seleccione o tipo de servidor para emails a enviar e insira as informações requeridas. (7) Toque em “continuar” para continuar com o menu. A aplicação de email verifica então as configurações do servidor efectuadas. Concluída com sucesso a instalação visualiza-se a mensagem “Your account is set up, and email is on its way”. A sua conta está configurada. (8) Insira um nome para a sua conta e toque em „terminar“ para concluir o processo. Nota: Caso possua mais de uma conta de email, terá acesso à conta geral sempre que iniciar a aplicação de email PT - 12 Gerenciando uma conta E-mail Adicionando uma nova conta: (1) Abra a aplicação de E-Mail e clique sobre a tecla menu para mostrar outras opções. Escolha „configuração e depois “acrescentar conta”, para adicionar um novo endereço. (2) Siga as instruções de configuração, para adicionar um novo endereço. Cancelar um endereço: (1) Abra a aplicação de E-Mail e clique sobre a tecla menu para mostrar outras opções. Selecione o ponto "configuração" e depois “cancelar conta”, para cancelar o endereço desejado. Verificando as propriedades da conta: (1) Abra a aplicação de E-Mail e clique sobre a tecla menu para mostrar outras opções e selecione „configuração“. No lado esquerdo do menu irá aparecer, então, todos os endereços ativados. (2) Clique sobre o endereço desejado, para visualizar as propriedades da conta. (3) Clique sobre “propriedades da conta“, para completar os registros. Ver mensagens de e-mail Abra a aplicação de email tocando brevemente no ícone de email para ver a conta de email criada. Um movimento vertical permite-lhe deslocar-se pelos seus emails. Toque brevemente num email que pretende abrir. Mantenha o dedo numa mensagem de email para ver mais opções. Surge uma mensagem de informações. Então pode abrir, responder, reencaminhar ou apagar emails. Escrever mensagens via e-mail (1) Clique no símbolo de E-mail na barra superior do menu e se abrirá uma nova janela, onde poderá escrever um e-mail. (2) Escreva o endereço de e-mail do destinatário, um objeto e o texto nas respectivas lacunas. É também possível adicionar “Cc/Bcc“, para escrever um e-mail a mais de um destinatário. (3) Clique sobre “enviar”, para enviar o e-mail. Clique sobre “salvar“, para salvar o e-mail digitado como rascunho. Se clicar sobre o “símbolo lixeira“, o e-mail apenas digitado será cancelado. 13.) Web Browser Para iniciar o Web Browser toque no ícone do browser no ecrã principal. Insira o endereço de internet no campo superior de entradas para abrir uma página da internet. Surge então o teclado virtual para assim poder inserir o endereço da página pretendida na internet. Toque em „começar“ ou no símbolo da seta ao lado do campo de entradas para abrir a página da internet. Nota: Nem todas as redes fornecem o acesso à internet. Algumas redes oferecem apenas o acesso a outros computadores conectados a nível local, mas não uma ligação à internet. PT - 13 Utilização do teclado virtual Toque no campo de entradas para aceder ao teclado virtual. Pode então inserir textos ou aceder a páginas da internet. a. Caps Lock (letras maiúsculas ou minúsculas) b. Tecla para voltar c. Aceder ao menu para os números, sinais e entradas de símbolos d. Space Taste (espaço) e. começar ( confirmar a sua entrada) Inserir símbolos Para digitar símbolos especiais, como por exemplo “ä”, toque por alguns segundos com seus dedos sobre a letra ”a“, que aparecerá o menu dos símbolos especiais. Deslize o dedo sobre o símbolo desejado, por exemplo, o “ä“ e leve-o novamente do display, Assim, o “ä“ foi introduzido. Utilização do Web Browser Pode deslocar-se pela visualização no ecrã se efectuar um movimento vertical com o seu dedo. Por favor não inicie o movimento num ponto no menu ou num link, pois pode abrir o atalho existente. Para abrir um link na internet toque simplesmente no link. A página nova abre automaticamente. Para abrir o menu do Web Browser, clique sobre o teclado menu . Serão visualizadas várias funções. Entre elas, é possível atualizar páginas Web abertas, abrir um novo Tab, ler as páginas Web off-line ou mudar as configurações do Web Browser. Para voltar à página anterior prima em voltar . Para voltar directamente ao ecrã inicial prima em Home . Para inserir um texto toque no campo correspondente e utilize o teclado virtual para inserir o texto. Nota: Esta função requer uma ligação WLAN à Internet. PT - 14 14.) Configurações do sistema Clique no menu das aplicações sobre o ícone de configuração, para ativar a configuração do sistema. No lado esquerdo do menu estão as localizadas as categorias. Clicando levemente no respectivo menu, irá apareceras possibilidades de configuração disponíveis. Considere que, eventualmente, nem todas as funções do Android™são compatíveis com este aparelho. Quando todas as configurações tiverem sido completadas, com a tecla Voltar é possível tornar ao último menu executado, ou com a tecla Home voltar diretamente para a tela principal .As alterações feitas serão salvadas automaticamente. Resumo das principais definições Sem fios & redes Wi-Fi Para configurar sua rede Wi-Fi. Outros Outras possibilidades de configuração de rede. Ajustar o volume desejado e o tom de comunicação desejado. Também é possível ativar e desativar umtoque de confirmação tocando o Touchscreen e um toque de notificação para bloquear e desbloquear o display. Som Display Brilho – Ajustar o nível do brilho da tela. Imagem de fundo– Lista de possíveis imagens de fundo. Stand-by – Ajustar o retardamento para desligar o display automaticamente. Tamanho dos carácteres – Ajustar o tamanho dos caracteres. Memória Informações sobre a memória interna e -caso esteja disponível- do cartão Aparelho de memória Micro SD. É sempre possível cancelar o conteúdo da memória. Bateria Informações sobre o atual nível da bateria interna. Aplicações Possibilidades de administrar as aplicações instaladas e obter informações sobre as aplicações. Serviço local Possibilidade de aceitar diversos aplicativos Android, verificar o nível atual de sinal de rede e utilizar a rede (p.ex. Google Maps™). É possível estabelecer se os resultados de busca do Google e outros serviços se adaptam nesta localização. Segurança Ativar e desativar o bloqueio e da tela e outras configurações relevantes à segurança. Idioma & Teclado Seleciona o idioma preferido, adiciona ou edita novas palavras no dicionário pessoal e configura as opções do teclado na tela. Salvar & Salvar as configurações do sistema e os dados de aplicações em servidores Reposição Google. É possível estabelecer a reposição dos dados de fábrica. ATENÇÃO: Todos os dados salvos no aparelho serão perdidos. Contas Adicionar conta Aqui, poderá encontrar diferentes contas. Sistema Data & Hora Ajusta a data, o relógio interno, o fuso horário e seleciona o formato de apresentação. Sobre o Tablet Informações sobre o aparelho. Usuário PT - 15 15.) Gerir aplicações Aplicações pré-instaladas Este aparelho é fornecido com aplicações pré-instaladas. O resumo das aplicações mostra um resumo sobre as aplicações anteriormente instaladas. Para abrir uma dessas aplicações toque brevemente no respectivo ícone. Instalar aplicações Para instalar aplicações no aparelho siga os seguintes passos: (1) Abra o ficheiro desejado para fazer transferência de aplicações. Por exemplo, o Google Playstore™ previamente instalado. Para fazê-lo, deve iniciar sessão com a sua conta Playstore™ pré-existente ou criar uma nova conta Playstore™. Basta seguir as instruções no ecrã. (2) Após o início de sessão bem-sucedido, uma grande seleção de aplicações do Google Playstore™ está agora disponível. Selecione a aplicação desejada, toque em instalar e possivelmente confirmar o acesso autorizado para esta aplicação. A transferência irá agora iniciar e o progresso será exibido no canto superior esquerdo da barra de estado avançada. (3) Após transferir a aplicação, esta é automaticamente instalada. Pode encontrar a nova aplicação no menu de aplicações, após a instalação ter sido bem-sucedida. Pode visualizar o progresso da instalação no canto superior esquerdo da barra de estado avançada. Desinstalar aplicações (1) Abra configuração do sistema clicando rápido sobre o ícone de configuração na lista de aplicações. (2) Clique rapidamente no menu “Apps”, para entrar na configuração das aplicações. (3) Selecione entre um dos pontos “fazer um download, dispositivo de memória, ativo e todos” com um leve toque a aplicação desejada. (4) Então, selecione clicando rapidamente sobre a aplicação que deve ser desinstalada. (5) Clique sobre “desinstalar” e confirme com um OK, para que a aplicação seja desinstalada do aparelho. Nota: Não é possível de apagar software pré-instalada. PT - 16 16.) Ficheiro Explorer Abra o resumo das aplicações e toque a seguir brevemente no ícone do Explorer para iniciar o ficheiro Explorer. Navegar por ficheiros e pastas Tem a memória interna (internal Memory), o cartão de memória (SD Card) e o USB à escolha. Toque no local de armazenamento pretendido para visualizar uma lista dos ficheiros nele contidos. Caso não esteja inserido nenhum cartão de memória ou nenhum dispositivo de memória esteja ligado à conexão de USB receberá a informação „… is unmounted“. Um movimento vertical permite-lhe deslocar-se entre os ficheiros e as pastas. Abra um ficheiro ou uma pasta tocando brevemente. Toque brevemente no respectivo ícone para avançar ou voltar um passo atrás . Para subir um nível na estrutura dos ficheiros toque brevemente no ícone LevelUp . O ícone Home permite-lhe ir directamente para a directoria principal. Utilizar a barra de ferramentas Clique sobre a tecla menu e depois sobre „barra de instrumentos escondida“, para visualizar ou não a barra de instrumentos Home Ir directamente para a directoria principal. LevelUp Multi Subir um nível. Seleccionar vários ficheiros. Editor New Folder Copiar, apagar, mover, inserir ou renomear um ficheiro ou uma pasta. Abra um novo diretório. Back Voltar um passo atrás. Next Avançar um passo. Copiar, mover e renomear ficheiros e pastas 1.) Navegar para o ficheiro pretendido na listagem dos ficheiros 2.) Mantenha o dedo no ficheiro até surgir uma informação. 3.) Seleccione a função pretendida. Pode então seleccionar entre copiar (Copy), apagar (Delete), 4.) 5.) 6.) 7.) mover (Move), inserir (Paste) – o que requer que exista um ficheiro na memória temporária - e renomear (Rename). Para copiar ou mover toque brevemente no ícone correspondente (Copy / Move) e navegue para a directoria de destino. Toque a seguir no ícone do editor e seleccione „colar“ tocando brevemente para assim inserir o ficheiro. Para apagar um ficheiro toque brevemente em „apagar“ e volte a confirmar para a sua segurança com „apagar“. Para cancelar toque brevemente em „cancelar“. Para renomear um ficheiro toque brevemente em „renomear“ e insira a seguir o novo nome do ficheiro através do teclado virtual. Confirme com „OK“ ou cancele o processo com „cancelar“. Pode copiar, apagar ou mover vários ficheiros ou pastas simultaneamente. Toque no ícone Multi e a seguir no ficheiro pretendido. Os ficheiros seleccionados são apresentados numa outra cor. Toque no ícone do Editor para efectuar a acção pretendida. PT - 17 17.) Condições de garantia limitada A garantia cobre apenas a substituição deste produto da Intenso. A garantia não é válida em caso de desgastes normais resultantes de uso inadequado, negligência, acidentes, incompatibilidade ou rendimento insuficiente de um certa hardware ou software de computador. O direito a garantia expira em caso de não-cumprimento com o manual de instruções da Intenso, bem como em caso de montagem e uso indevido ou defeitos causados por outros aparelhos. Caso o produto esteja sujeito a vibrações, descargas electrostáticas, influências de calor ou humidade que não estejam incluidas nas especificações do produto, não tem direito a garantia. A Intenso não se responsabiliza por perda de dados ou danos colaterais ou subsequentes, pela violação das condições de garantia ou outros danos independente das suas causas. Este produto não se destina ao uso comercial ou a nível medicinal ou especial, nos quais uma falha do produto pode causar lesões, mortes ou elevados danos materiais. 18.) Dados técnicos CPU Memória Sistema operativo Sistemas operativos compatíveis Possibilidades de conectar WLAN G-Sensor Formato de fotografia Formato de audio Formato de vídeo Ecrã Câmara SNR Area de frequência Transformador Bateria integrada 1.0 GHz Dualcore based on Cortex A9 1 GB DDR 3 Android 4.2.2 Windows XP / Vista / 7 / 8 / Linux 2,4 e superior / Mac 10.6 e superior Auriculares, Micro SD (SDHC/SDXC), micro USB WiFi (802.11 b/g/n) Rotação em 360 graus JPEG, BMP, GIF, PNG MP3, WMA, WAV, OGG, FLAC, APE MPEG1, MPEG 4, FLV TFT LCD Display, 1024 x 600 Pixel 0,3 MP câmara na frente >= 80 dB 20 Hz – 20 KHz (V) AC Adapter (HUONIO HNBC050120UE): AC Input 100240V~50/60Hz, DC Output 5V / 1.2A Bateria recarregável de iões-litio de polímero PT - 18 19.) Manutenção do aparelho Nunca borrife ou aplique no ecrã ou na caixa do aparelho algum líquido. 20.) Limpeza do aparelho Limpe a caixa, a armação e o ecrã com um pano macio que não largue pêlos e que não contenha produtos químicos. Utilize apenas detergentes especiais para o ecrã. 21.) Eliminação de aparelhos electrónicos fora de uso Aparelhos identificados com este símbolo estão sujeitos à Directiva Europeia 2002/96/EC. Todos os equipamentos eléctricos e electrónicos devem ser separados do lixo doméstico e eliminados pelas respectivas instituições públicas. A eliminação devida de equipamentos electrónicos evita a poluição do ambiente. PT - 19 22.) Licença informação Notice of GNU GENERAL PUBLIC LICENSE and LESSER GENERAL PUBLIC LICENCE Dear Customer, If interested, you and any third party can download the source code of used GPL / LGPL from Intenso Webpage http://www.intenso.de . The source code of the desired product is available to anyone on the selection of valid product category and the desired device. In the product details you will find the entry "drivers". Open this menu to download the corresponding GPL / LGPL code. For a fee of 35 € (delivery to another country as Germany), it is also possible to obtain this code by postal delivery. More information about the GPL/LGPL-Licence can you find on following website www.gnu.org GNU GENERAL PUBLIC LICENSE Version 2, June 1991 Copyright (C) 1989, 1991 Free Software Foundation, Inc. 51 Franklin Street, Fifth Floor, Boston, MA 02110-1301, USA Everyone is permitted to copy and distribute verbatim copies of this license document, but changing it is not allowed. Preamble The licenses for most software are designed to take away your freedom to share and change it. By contrast, the GNU General Public License is intended to guarantee your freedom to share and change free software-to make sure the software is free for all its users. This General Public License applies to most of the Free Software Foundation's software and to any other program whose authors commit to using it. (Some other Free Software Foundation software is covered by the GNU Lesser General Public License instead.) You can apply it to your programs, too. When we speak of free software, we are referring to freedom, not price. Our General Public Licenses are designed to make sure that you have the freedom to distribute copies of free software (and charge for this service if you wish), that you receive source code or can get it if you want it, that you can change the software or use pieces of it in new free programs; and that you know you can do these things. To protect your rights, we need to make restrictions that forbid anyone to deny you these rights or to ask you to surrender the rights. These restrictions translate to certain responsibilities for you if you distribute copies of the software, or if you modify it. For example, if you distribute copies of such a program, whether gratis or for a fee, you must give the recipients all the rights that you have. You must make sure that they, too, receive or can get the source code. And you must show them these terms so they know their rights. We protect your rights with two steps: (1) copyright the software, and (2) offer you this license which gives you legal permission to copy, distribute and/or modify the software. Also, for each author's protection and ours, we want to make certain that everyone understands that there is no warranty for this free software. If the software is modified by someone else and passed on, we want its recipients to know that what they have is not the original, so that any problems introduced by others will not reflect on the original authors' reputations. Finally, any free program is threatened constantly by software patents. We wish to avoid the danger that redistributors of a free program will individually obtain patent licenses, in effect making the program proprietary. To prevent this, we have made it clear that any patent must be licensed for everyone's free use or not licensed at all. The precise terms and conditions for copying, distribution and modification follow. TERMS AND CONDITIONS FOR COPYING, DISTRIBUTION AND MODIFICATION 0. This License applies to any program or other work which contains a notice placed by the copyright holder saying it may be distributed under the terms of this General Public License. The "Program", below, refers to any such program or work, and a "work based on the Program" means either the Program or any derivative work under copyright law: that is to say, a work containing the Program or a portion of it, either verbatim or with modifications and/or translated into another language. (Hereinafter, translation is included without limitation in the term "modification".) Each licensee is addressed as "you". Activities other than copying, distribution and modification are not covered by this License; they are outside its scope. The act of running the Program is not restricted, and the output from the Program is covered only if its contents constitute a work based on the Program (independent of having been made by running the Program). Whether that is true depends on what the Program does. 1. You may copy and distribute verbatim copies of the Program's source code as you receive it, in any PT - 20 medium, provided that you conspicuously and appropriately publish on each copy an appropriate copyright notice and disclaimer of warranty; keep intact all the notices that refer to this License and to the absence of any warranty; and give any other recipients of the Program a copy of this License along with the Program. You may charge a fee for the physical act of transferring a copy, and you may at your option offer warranty protection in exchange for a fee. 2. You may modify your copy or copies of the Program or any portion of it, thus forming a work based on the Program, and copy and distribute such modifications or work under the terms of Section 1 above, provided that you also meet all of these conditions: a) You must cause the modified files to carry prominent notices stating that you changed the files and the date of any change. b) You must cause any work that you distribute or publish, that in whole or in part contains or is derived from the Program or any part thereof, to be licensed as a whole at no charge to all third parties under the terms of this License. c) If the modified program normally reads commands interactively when run, you must cause it, when started running for such interactive use in the most ordinary way, to print or display an announcement including an appropriate copyright notice and a notice that there is no warranty (or else, saying that you provide a warranty) and that users may redistribute the program under these conditions, and telling the user how to view a copy of this License. (Exception: if the Program itself is interactive but does not normally print such an announcement, your work based on the Program is not required to print an announcement.) These requirements apply to the modified work as a whole. If identifiable sections of that work are not derived from the Program, and can be reasonably considered independent and separate works in themselves, then this License, and its terms, do not apply to those sections when you distribute them as separate works. But when you distribute the same sections as part of a whole which is a work based on the Program, the distribution of the whole must be on the terms of this License, whose permissions for other licensees extend to the entire whole, and thus to each and every part regardless of who wrote it. Thus, it is not the intent of this section to claim rights or contest your rights to work written entirely by you; rather, the intent is to exercise the right to control the distribution of derivative or collective works based on the Program. In addition, mere aggregation of another work not based on the Program with the Program (or with a work based on the Program) on a volume of a storage or distribution medium does not bring the other work under the scope of this License. 3. You may copy and distribute the Program (or a work based on it, under Section 2) in object code or executable form under the terms of Sections 1 and 2 above provided that you also do one of the following: a) Accompany it with the complete corresponding machine-readable source code, which must be distributed under the terms of Sections 1 and 2 above on a medium customarily used for software interchange; or, b) Accompany it with a written offer, valid for at least three years, to give any third party, for a charge no more than your cost of physically performing source distribution, a complete machine-readable copy of the corresponding source code, to be distributed under the terms of Sections 1 and 2 above on a medium customarily used for software interchange; or, c) Accompany it with the information you received as to the offer to distribute corresponding source code. (This alternative is allowed only for noncommercial distribution and only if you received the program in object code or executable form with such an offer, in accord with Subsection b above.) The source code for a work means the preferred form of the work for making modifications to it. For an executable work, complete source code means all the source code for all modules it contains, plus any associated interface definition files, plus the scripts used to control compilation and installation of the executable. However, as a special exception, the source code distributed need not include anything that is normally distributed (in either source or binary form) with the major components (compiler, kernel, and so on) of the operating system on which the executable runs, unless that component itself accompanies the executable. If distribution of executable or object code is made by offering access to copy from a designated place, then offering equivalent access to copy the source code from the same place counts as distribution of the source code, even though third parties are not compelled to copy the source along with the object code. 4. You may not copy, modify, sublicense, or distribute the Program except as expressly provided under this License. Any attempt otherwise to copy, modify, sublicense or distribute the Program is void, and will automatically terminate your rights under this License. However, parties who have received copies, or rights, from you under this License will not have their licenses terminated so long as such parties remain in full compliance. 5. You are not required to accept this License, since you have not signed it. However, nothing else grants you permission to modify or distribute the Program or its derivative works. These actions are prohibited by PT - 21 law if you do not accept this License. Therefore, by modifying or distributing the Program (or any work based on the Program), you indicate your acceptance of this License to do so, and all its terms and conditions for copying, distributing or modifying the Program or works based on it. 6. Each time you redistribute the Program (or any work based on the Program), the recipient automatically receives a license from the original licensor to copy, distribute or modify the Program subject to these terms and conditions. You may not impose any further restrictions on the recipients' exercise of the rights granted herein. You are not responsible for enforcing compliance by third parties to this License. 7. If, as a consequence of a court judgment or allegation of patent infringement or for any other reason (not limited to patent issues), conditions are imposed on you (whether by court order, agreement or otherwise) that contradict the conditions of this License, they do not excuse you from the conditions of this License. If you cannot distribute so as to satisfy simultaneously your obligations under this License and any other pertinent obligations, then as a consequence you may not distribute the Program at all. For example, if a patent license would not permit royalty-free redistribution of the Program by all those who receive copies directly or indirectly through you, then the only way you could satisfy both it and this License would be to refrain entirely from distribution of the Program. If any portion of this section is held invalid or unenforceable under any particular circumstance, the balance of the section is intended to apply and the section as a whole is intended to apply in other circumstances. It is not the purpose of this section to induce you to infringe any patents or other property right claims or to contest validity of any such claims; this section has the sole purpose of protecting the integrity of the free software distribution system, which is implemented by public license practices. Many people have made generous contributions to the wide range of software distributed through that system in reliance on consistent application of that system; it is up to the author/donor to decide if he or she is willing to distribute software through any other system and a licensee cannot impose that choice. This section is intended to make thoroughly clear what is believed to be a consequence of the rest of this License. 8. If the distribution and/or use of the Program is restricted in certain countries either by patents or by copyrighted interfaces, the original copyright holder who places the Program under this License may add an explicit geographical distribution limitation excluding those countries, so that distribution is permitted only in or among countries not thus excluded. In such case, this License incorporates the limitation as if written in the body of this License. 9. The Free Software Foundation may publish revised and/or new versions of the General Public License from time to time. Such new versions will be similar in spirit to the present version, but may differ in detail to address new problems or concerns. Each version is given a distinguishing version number. If the Program specifies a version number of this License which applies to it and "any later version", you have the option of following the terms and conditions either of that version or of any later version published by the Free Software Foundation. If the Program does not specify a version number of this License, you may choose any version ever published by the Free Software Foundation. 10. If you wish to incorporate parts of the Program into other free programs whose distribution conditions are different, write to the author to ask for permission. For software which is copyrighted by the Free Software Foundation, write to the Free Software Foundation; we sometimes make exceptions for this. Our decision will be guided by the two goals of preserving the free status of all derivatives of our free software and of promoting the sharing and reuse of software generally. NO WARRANTY 11. BECAUSE THE PROGRAM IS LICENSED FREE OF CHARGE, THERE IS NO WARRANTY FOR THE PROGRAM, TO THE EXTENT PERMITTED BY APPLICABLE LAW. EXCEPT WHEN OTHERWISE STATED IN WRITING THE COPYRIGHT HOLDERS AND/OR OTHER PARTIES PROVIDE THE PROGRAM "AS IS" WITHOUT WARRANTY OF ANY KIND, EITHER EXPRESSED OR IMPLIED, INCLUDING, BUT NOT LIMITED TO, THE IMPLIED WARRANTIES OF MERCHANTABILITY AND FITNESS FOR A PARTICULAR PURPOSE. THE ENTIRE RISK AS TO THE QUALITY AND PERFORMANCE OF THE PROGRAM IS WITH YOU. SHOULD THE PROGRAM PROVE DEFECTIVE, YOU ASSUME THE COST OF ALL NECESSARY SERVICING, REPAIR OR CORRECTION. 12. IN NO EVENT UNLESS REQUIRED BY APPLICABLE LAW OR AGREED TO IN WRITING WILL ANY COPYRIGHT HOLDER, OR ANY OTHER PARTY WHO MAY MODIFY AND/OR REDISTRIBUTE THE PROGRAM AS PERMITTED ABOVE, BE LIABLE TO YOU FOR DAMAGES, INCLUDING ANY GENERAL, SPECIAL, INCIDENTAL OR CONSEQUENTIAL DAMAGES ARISING OUT OF THE USE OR INABILITY TO USE THE PROGRAM (INCLUDING BUT NOT LIMITED TO LOSS OF DATA OR DATA BEING RENDERED INACCURATE OR LOSSES SUSTAINED BY YOU OR THIRD PARTIES OR A FAILURE OF THE PROGRAM TO OPERATE WITH ANY OTHER PROGRAMS), EVEN IF SUCH HOLDER OR OTHER PT - 22 PARTY HAS BEEN ADVISED OF THE POSSIBILITY OF SUCH DAMAGES. END OF TERMS AND CONDITIONS How to Apply These Terms to Your New Programs If you develop a new program, and you want it to be of the greatest possible use to the public, the best way to achieve this is to make it free software which everyone can redistribute and change under these terms. To do so, attach the following notices to the program. It is safest to attach them to the start of each source file to most effectively convey the exclusion of warranty; and each file should have at least the "copyright" line and a pointer to where the full notice is found. one line to give the program's name and an idea of what it does. Copyright (C) yyyy name of author This program is free software; you can redistribute it and/or modify it under the terms of the GNU General Public License as published by the Free Software Foundation; either version 2 of the License, or (at your option) any later version. This program is distributed in the hope that it will be useful, but WITHOUT ANY WARRANTY; without even the implied warranty of MERCHANTABILITY or FITNESS FOR A PARTICULAR PURPOSE. See the GNU General Public License for more details. You should have received a copy of the GNU General Public License along with this program; if not, write to the Free Software Foundation, Inc., 51 Franklin Street, Fifth Floor, Boston, MA 02110-1301, USA. Also add information on how to contact you by electronic and paper mail. If the program is interactive, make it output a short notice like this when it starts in an interactive mode: Gnomovision version 69, Copyright (C) year name of author Gnomovision comes with ABSOLUTELY NO WARRANTY; for details type `show w'. This is free software, and you are welcome to redistribute it under certain conditions; type `show c' for details. The hypothetical commands `show w' and `show c' should show the appropriate parts of the General Public License. Of course, the commands you use may be called something other than `show w' and `show c'; they could even be mouse-clicks or menu items--whatever suits your program. You should also get your employer (if you work as a programmer) or your school, if any, to sign a "copyright disclaimer" for the program, if necessary. Here is a sample; alter the names: Yoyodyne, Inc., hereby disclaims all copyright interest in the program `Gnomovision' (which makes passes at compilers) written by James Hacker. signature of Ty Coon, 1 April 1989 Ty Coon, President of Vice PT - 23 Intenso GmbH Data:17 de dezembro de 2013 Declaração de conformidade CE Nós, a Intenso GmbH, com sede em Diepholzer Str. 15, 49377 Vechta, Alemanha declaramos sob a nossa responsabilidade que o produto: Modelo: 7” TAB 734 (Nº de artigo 5509854) Descrição: Tablet PC se encontra em conformidade com as seguintes diretivas e normas: Diretiva R&TTE 1999/5/EG EN 301 489-1 V1.9.2 EN 301 489-17 V2.1.1 EN 300 328 V1.7.1 : 2006-10 EN 55022:2010 (Class B) EN 55024:2010 EN 61000-3-2:2006+A1 :2009+A2 :2009 (Class D) EN 61000-3-3:2008 Diretiva de baixa tensão 2006/95/EG EN 60950-1:2006+A11:2009+A1:2010+A12:2011+A12: correção 2012 Diretiva de Eco-Design 2009/125/EG 1275/2008 278/2009 Diretiva de ROHS 2011/65/EU Os documentos técnicos relativos ao aparelho acima especificado, estão arquivados no seguinte local: Intenso GmbH Diepholzer Str. 15, 49377 Vechta, Alemanha Pessoa autorizada: ____________________________ Gerente: Thomas Pöhlking PT - 24 Instrukcja obsługi TAB 734 Serdecznie dziękujemy za decyzję o korzystaniu z TAB 734 firmy Intenso. Prosimy o zapoznanie się z tą instrukcją, aby uzyskać informacje o najważniejszych funkcjach tego urządzenia. 1.) Spis treści 1.) Spis treści .............................................................................................................................................................................................. 1 2.) Ostrzeżenia ........................................................................................................................................................................................... 2 3.) Widok ogólny urządzenia....................................................................................................................................................................... 4 4.) Zawartość opakowania .......................................................................................................................................................................... 4 5.) Ładowanie akumulatora......................................................................................................................................................................... 5 6.) Korzystanie z karty micro SD/SDHC/SDCX ........................................................................................................................................... 5 7.) Przenoszenie danych pomiędzy urządzeniem a komputerem ............................................................................................................... 5 8.) Ekran dotykowy ..................................................................................................................................................................................... 6 9.) WIFI ....................................................................................................................................................................................................... 6 Połączenie automatyczne ........................................................................................................................................................................... 6 Połącznie ręczne ........................................................................................................................................................................................ 7 10.) Ekran startowy ..................................................................................................................................................................................... 8 Widok .......................................................................................................................................................................................................... 8 Odblokowywanie wyświetlacza ................................................................................................................................................................... 8 Listwy stanu ................................................................................................................................................................................................ 9 Dopasowanie ekranu startowego .............................................................................................................................................................. 10 Używanie różnych ekranów startowych .................................................................................................................................................... 10 Zainstalowane fabrycznie aplikacje na ekranie startowym........................................................................................................................ 11 11.) Przegląd aplikacji ............................................................................................................................................................................... 11 12.) Wysyłanie / odbieranie wiadomości e-mail ........................................................................................................................................ 12 Konfigurowanie skrzynki e-mail ................................................................................................................................................................ 12 Zarządzanie kontami e-mail ...................................................................................................................................................................... 13 Wyświetlanie wiadomości e-mail .............................................................................................................................................................. 13 Pisanie wiadomości e-mail........................................................................................................................................................................ 13 13.) Przeglądarka internetowa .................................................................................................................................................................. 14 Korzystanie z wirtualnej klawiatury ........................................................................................................................................................... 14 Wprowadzanie znaków specjalnych ......................................................................................................................................................... 14 Korzystanie z przeglądarki internetowej.................................................................................................................................................... 15 14.) Ustawienia systemowe ...................................................................................................................................................................... 15 Przegląd ustawień – najważniejsze ustawienia ........................................................................................................................................ 16 15.) Zarządzanie aplikacjami .................................................................................................................................................................... 17 Instalacja aplikacji ..................................................................................................................................................................................... 17 Odinstalowywanie aplikacji ....................................................................................................................................................................... 17 16.) Eksplorator plików.............................................................................................................................................................................. 18 Nawigacja pomiędzy plikami i folderami ................................................................................................................................................... 18 Używanie paska narzędzi ......................................................................................................................................................................... 18 Kopiowanie, przenoszenie i zmiana nazwy pliku i folderu......................................................................................................................... 18 17.) Warunki ograniczonej gwarancji ........................................................................................................................................................ 19 18.) Dane techniczne ................................................................................................................................................................................ 19 19.) Konserwacja urządzenia.................................................................................................................................................................... 20 20.) Czyszczenie urządzenia .................................................................................................................................................................... 20 21.) Utylizacja zużytych urządzeń elektrycznych ...................................................................................................................................... 20 22.) Licencja informacja ............................................................................................................................................................................ 21 Deklaracja zgodności UE............................................................................................................................................................................... 25 Niniejsza instrukcja może nie zawierać opisu wszystkich funkcji Twojego urządzenia. W przypadku korzystania z aplikacji zewnętrznych dostawców, w celu uzyskania informacji prosimy o kontakt z danym dostawcą. Prosimy pamiętać, że wszystkie dane mogą zostać zmienione bez wcześniejszego powiadomienia. Aktualne informacje można znaleźć na stronie www.intenso.de Znaki firmowe Google™, logo Google™ i Android™ są markami firmy Google Inc.: Wszystkie inne nazwy produktów i usług są własnością swoich właścicieli. PL - 1 2.) Ostrzeżenia Należy unikać mocnego uderzania urządzenia. Nie należy kłaść urządzenia na pochyłych powierzchniach, aby uniknąć upadku urządzenia. Nie należy używać urządzenia w warunkach bardzo niskich lub wysokich temperatur, wysokiej wilgotności lub zapylenia. Nie należy również narażać urządzenia na bezpośrednie promieniowanie słoneczne. Należy unikać używania w zapiaszczonych miejscach. Nie używać urządzenia w miejscach zagrożenia wybuchowego, np. przy dystrybutorach paliwa na stacjach paliw. Należy unikać używania na poduszkach, sofach i innych przedmiotach, które wspomagają wytwarzanie ciepła, ponieważ istnieje wtedy niebezpieczeństwo przegrzania urządzenia. Należy często przeprowadzać zabezpieczanie danych, aby uniknąć możliwej utraty danych. Nie odpowiadamy za ewentualną utratę danych. Nie przerywać połączenia podczas przesyłania danych lub formatowania urządzenia. Może to prowadzić do utraty danych. Zdjęcia i filmy mogą być chronione prawami autorskimi osób trzecich. Odtwarzanie bez posiadania licencji może być naruszeniem praw autorskich. Należy unikać używania w mocnym polu magnetycznym. Należy chronić urządzenie przed wilgocią. Jeśli wilgoć przedostanie się do urządzenia, należy je bezzwłocznie wyłączyć, następnie oczyścić i wysuszyć. Do czyszczenia urządzenia nie używać roztworów chemicznych. Proszę używać wyłącznie suchej szmatki. W pobliżu lub na urządzeniu nie umieszczać otwartego ognia, np. świec. Nie odpowiadamy za szkody powstałe w wyniku wadliwego działania, utraty danych, nieprawidłowej obsługi, samodzielnych napraw urządzenia lub wymiany akumulatora. Jeśli urządzenie przestało reagować na próby wprowadzania poleceń, należy użyć znajdujący się z tyłu urządzenia przycisk Reset, aby je ponownie uruchomić. W przypadku nieużywania proszę odłączyć zasilacz od źródła zasilania. Gniazdko sieciowe musi znajdować się w pobliżu urządzenia i być łatwo dostępne. Zasilacz należy podłączać wyłącznie do uziemionych gniazdek sieciowych o napięciu AC 100240V~, 50/60 Hz. Jeśli nie jesteś pewny parametrów prądu w miejscu, w których korzystasz z urządzenia, to skontaktuj się z odpowiednim dostawcą prądu. Należy korzystać wyłącznie z załączonego zasilacza i przewodu sieciowego. Aby przerwać zasilanie urządzenia, należy wyjąć zasilacz z gniazdka sieciowego. Podczas wyciągania należy zawsze chwytać bezpośrednio zasilacz. Nigdy nie ciągnąć za przewód. Nie otwierać obudowy zasilacza. Otwarta obudowa stwarza zagrożenie dla życia powodowane porażeniem elektrycznym. Zasilacz nie zawiera części podlegających konserwacji. PL - 2 Podczas dłuższe nieużywania akumulator urządzenie powoli się rozładowuje. Przed ponownym użyciem konieczne jest jego ponowne naładowanie. Proszę zwrócić uwagę na niestanowiącą zagrożenia dla środowiska utylizację urządzenia lub akumulatora. Proszę nie rozbierać urządzenia na podzespoły, ani nie próbować go samodzielnie naprawiać, gdyż w takim przypadku wygasa gwarancja. Nie używać urządzenia w miejscach, w których obowiązuje zakaz używania urządzeń przenośnych. Nie używać urządzenia w pobliżu innych urządzeń elektronicznych, gdyż w wyniku sygnałów wysokiej częstotliwości może dojść do zakłóceń. Nie używać urządzenia w pobliżu rozruszników serca, w szpitalach lub w pobliżu urządzeń medycznych, ponieważ w wyniku sygnałów wysokiej częstotliwości może dojść do zakłóceń. Należy utrzymywać odstęp min. 15 cm od rozruszników serca. Proszę zwrócić się do producentów tych urządzeń, aby uzyskać informacje dotyczące jednoczesnego ich używania. Korzystanie ze słuchawek nausznych lub dousznych przy zbyt dużej głośności może doprowadzić do stałego uszkodzenia organów słuchu. Prosimy zwrócić uwagę, że długotrwałe oddziaływanie wysokiej głośności może prowadzić do trwałego uszkodzenia słuchu. Aby uniknąć możliwego ryzyka zdrowotnego spowodowanego przez wysoką głośność, zalecamy używanie wyłącznie zawartych w zestawie słuchawek. Ze względu na bezpieczeństwo ruchu podczas jazdy urządzenie nie może być obsługiwane przez osobę prowadzącą pojazd. PL - 3 3.) Widok ogólny urządzenia (1) (2) (3) (4) (5) Gniazdo słuchawek 3,5mm Zintegrowany mikrofon Kontrolka ładowania: czerwona podczas ładowania, żółta kiedy całkowicie naładowana. Kamera przednia Gniazdo micro USB Przycisk WŁ./WYŁ.: Przycisnąć długo, aby wyłączyć urządzenie, przycisnąć krótko, aby zmieniać pomiędzy trybami czuwania i pracy. Gniazdo micro USB (7) Głośność + / (8) Ekran dotykowy (9) Gniazdo karty Micro SD (10) Zintegrowane głośniki (6) 4.) Zawartość opakowania Proszę sprawdzić kompletność zawartości opakowania: TAB 734 słuchawki stereo przewód USB zasilacz 5V 1.2A Instrukcja obsługi PL - 4 5.) Ładowanie akumulatora Proszę przed pierwszy użyciem całkowicie naładować akumulator urządzenia. W tym celu należy połączyć załączony zasilacz z urządzeniem i gniazdem sieciowym. Pełne ładowanie trwa ok. 5 godzin. Stan naładowania wyświetlany jest z przodu, po lewej stronie urządzenia. Dioda LED świeci się podczas ładowania na czerwono i świeci na żółto, kiedy kiedy akumulator jest w pełni naładowany. Wskazówki: a. Przy 15% pozostającej mocy akumulatora na wyświetlaczu pojawi się ostrzeżenie. W takiej sytuacji powinno się podłączyć urządzenie poprzez zasilacz z gniazdkiem sieciowym w celu naładowania akumulatora, aby uniknąć ewentualnej utraty danych i podnieść żywotność akumulatora. b. Z urządzenia można korzystać podczas ładowania akumulatora. Aby zachować jak najdłuższą żywotność akumulatora, prosimy o nie korzystanie z urządzenia. c. Aby zapewnić jak najlepszą wydajność, konieczne jest częste korzystanie z wbudowanego akumulatora. Jeśli urządzenie jest rzadko używane, to proszę przynajmniej raz w miesiącu w pełni naładować akumulator. d. Należy zapewnić, że używany jest wyłącznie dostarczony z urządzeniem zasilacz. 6.) Korzystanie z karty micro SD/SDHC/SDCX Urządzenie to może odczytywać dane bezpośrednio z karty Micro SD/SDHC/SDXC Karte o maksymalnej pojemności 64 GB. Aby używać karty Micro SD/SDHC/SDXC, należy włożyć tę kartę do przeznaczonego do tego dniazda Micro SD po lewej stronie urządzenia. Aby uzyskać dostęp do danych zapisanych na karcie pamięci należy skorzystać z zainstalowanego fabrycznie Eksploatora. Należy w tym celu wybrać w Eksploatorze folder „SD Card”. 7.) Przenoszenie danych pomiędzy urządzeniem a komputerem 1.) Urządzenie połączyć za pomocą załączonego przewodu USB z komputerem 2.) Na urządzeniu wyświetlony zostanie ekran połączenia USB. Należy krótko nacisnąć na „Aktywowanie pamięci USB”. Urządzenie zostanie rozpoznane jako wymienny nośnik pamięci i wyświetlona zostanie informacja „Pamięć USB w użyciu”. Po krótkim naciśnięciu na przycisk Home można normalnie korzystać z urządzenia. Teraz posiadasz dostęp ze swojego komputera do wewnętrznej pamięci urządzenia i możesz kopiować, usuwać lub przenosić pliki na urządzenie. 3.) Jeśli istnieje połączenie USB z komputerem, to w pasku stanu wyświetla się symbol USB. W rozszerzonym pasku stanu wyświetlane są dodatkowe informacje oraz można aktywować wzgl. deaktywować połączenie USB. Aby deaktywować nośnik danych, należy wybrać opcję „Deaktywuj pamięć USB”. Na komputerze należy wybrać funkcję „Bezpieczne usuwanie” komputera. , aby odłączyć urządzenie od Wskazówka: Fabrycznie zainstalowane aplikacje oraz system operacyjny Android™ zajmują część zainstalowanej pamięci wewnętrznej. Z tego powodu do dyspozycji nie jest dostępna całość wewnętrznej pamięci. PL - 5 8.) Ekran dotykowy Urządzenie jest sterowane za pomocą ekranu dotykowego. Delikatnie naciskając palcem na ekran dotykowy można bardzo łatwo uruchamiać aplikacje, wpisywać teksty za pomocą wirtualnej klawiatury i przez przesuwanie palcem w odpowiednim kierunku przełączać pomiędzy pojedynczymi ekranami startowymi. Proszę usunąć folię ochronną wyświetlacza przed użyciem urządzenia. Ekran dotykowy rozpoznaje drobne ładunki elektryczne, jak na przykład te przekazywane przez ludzki palec i ustala w ten sposób punkt wprowadzania. Do wprowadzania najlepiej więc używać opuszków palców. Obsługa za pomocą pisaka lub innego ostro zakończonego przedmiotu jest niemożliwa. Ekran dotykowy nie powinien mieć kontaktu z wodą lub innymi urządzeniami elektrycznymi, aby uniknąć błędnego działania i trwałych uszkodzeń. Wskazówki: a. Jeśli ekran dotykowy nie jest obsługiwany przez dwie minuty, to urządzenie przechodzi w tryb czuwania. Aby przejść w tryb aktywny, należy krótko nacisnąć przycisk WŁ./WYŁ. b. Aby uniemożliwić niezamierzone wprowadzanie, aktywowana jest automatyczny blokada przycisków. Blokadę proszę odblokować na ekranie dotykowym. Dotknij na wyświetlaczu zamkniętej kłódki i przytrzymaj ją naciśniętą. Przeciągnij teraz tę kłódkę na właśnie wyświetloną otwartą kłódkę i następnie cofnij swój palec z wyświetlacza. Ekran jest teraz odblokowany. Urządzenie można obracać we wszystkie strony. Jest ono wyposażono w czujnik, który automatycznie dostosowuje wyświetlacz. 9.) WIFI Aby połączyć urządzenie z Internetem, konieczne jest połączenie z siecią bezprzewodową. Wskazówka: Należy zwrócić uwagę, że w bieżącej pozycji konieczny jest zasięg sieci bezprzewodowej. Połączenie automatyczne W opcji Einstellungen (Ustawienia) proszę wybrać opcję WLAN Einstellungen (Ustawienia sieci bezprzewodowej). W tym miejscu można w prosty sposób włączyć lub wyłączyć funkcję sieci bezprzewodowej. Aby wyłączyć sieć bezprzewodową należy przesunąć wirtualny przełącznik z pozycji „An“ („sieć włączona”) w lewo. Teraz wskazanie na wyświetlaczu zmieni się na „Aus“ („sieć wyłączona”). Aby ponownie włączyć wyłączoną funkcję sieci bezprzewodowej wystarczy przesunąć wirtualny przełącznik w prawo. W ustawieniach Wi-Fi po prawej stronie wyświetlane są wszystkie dostępne sieci oraz wszystkie sieci, z których dotąd korzystano. PL - 6 Teraz należy nacisnąć na wybraną sieć i wprowadzić odpowiednie hasło sieciowe, aby ustanowić połączenie. Potwierdź ewentualnie wprowadzone hasło naciskając przycisk Enter i naciśnij krótko na Połącz. Po krótkiej chwili połączenie zostanie ustanowione. Wskazówki: a) Kiedy urządzenie przechodzi w tryb czuwania, to połączenie z siecią bezprzewodową jest automatycznie deaktywowane. Ogranicza to zużycie prądu i prowadzi w ten sposób automatycznie do dłuższej pracy akumulatora. Kiedy urządzenie ponownie przełącza się w tryb aktywny, to połączenie z siecią bezprzewodową zostaje automatycznie odnowione. Może to trwać kilka sekund. b) Lista aktualnie dostępnych sieci bezprzewodowych jest automatycznie aktualizowana. c) Kiedy aktywna jest funkcja sieci bezprzewodowej, to urządzenie automatycznie łączy się z już skonfigurowaną siecią, jeśli znajduje się w jej zasięgu. d) Jeśli w zasięgu znajduje się nieznana sieć bezprzewodowa, to wyświetlane jest pole informacyjne. Połącznie ręczne Aby ręcznie wyszukać dostępną sieć bezprzewodową, należy postępować następująco: (1) Należy nacisną na ikonę WiFi na stronie startowej albo w przeglądzie aplikacji. (2) Następnie należy otworzyć ustawienia sieci bezprzewodowej oraz podmenu. W tym celu należy nacisnąć na symbol menu i wybrać w wyświetlonym menu punkt „Scan”. (3) Jeśli sieć bezprzewodowa nie została wyświetlona na liście dostępnych sieci, należy przewinąć w dół i wybrać punkt „Dodaj sieć bezprzewodową”, aby ręcznie wprowadzić SSID sieci, protokół zabezpieczeń i przynależne hasło. Aby potwierdzić wprowadzone dane należy nacisnąć na „Zapisz”. PL - 7 10.) Ekran startowy Widok Odblokowywanie wyświetlacza Jeśli ekran dotykowy nie jest obsługiwany przez dwie minuty, to urządzenie przechodzi w tryb czuwania. Aby przejść w tryb aktywny, należy krótko nacisnąć przycisk WŁ./WYŁ. Wyświetlacz jest zablokowany w celu ochrony przed niezamierzonym wprowadzaniem. Dotknij na wyświetlaczu zamkniętej kłódki i przytrzymaj ją naciśniętą. Przeciągnij teraz tę kłódkę na właśnie wyświetloną otwartą kłódkę i następnie cofnij swój palec z wyświetlacza. Ekran jest teraz odblokowany. Pociągnij palcem symbol kłódki zgodnie z kierunkiem strzałki. Wskazówka: Przeciągnij symbol kłódki na wyświetlony symbol kamery, aby bezpośrednio otworzyć aplikację aparatu fotograficznego. PL - 8 Listwy stanu Listwy stanu znajdują się w górnym i dolnym obszarze ekranu startowego. Górna listwa stanu podzielona jest na dwa obszary. Pociągnięcie w dół lewej strony powoduje wyświetlenie, jeśli występują, aktualnych powiadomień. Pociągnięcie prawej strony powoduje wyświetlenie pól szybkiego dostępu różnych ustawień. W dolnej listwie stanu istnieje możliwość powrotu do poprzedniego ekranu, lub wyłączenia ewentualnie wyświetlanej klawiatury, bezpośredniego przejścia do ekranu startowego, wyświetlenia ostatnio używanych programów oraz regulacji głośności urządzenia. PL - 9 Dopasowanie ekranu startowego Ekran startowy można bardzo łatwo dopasować do swoich indywidualnych potrzeb. Aby usunąć ikonę, należy troszkę dłużej nacisnąć palcem na tę ikonę i przeciągnąć ją do wyświetlonego symbol X. Teraz należy puścić palec z ekranu dotykowego i ikona zostanie usunięta. Aby umieścić ikonę z przeglądu aplikacji na ekranie startowym, należy nacisnąć w przeglądzie aplikacji trochę dłużej na wybraną ikonę i wyświetli się ekran startowy. Należy teraz przesunąć tę ikonę na wybrane miejsce i puścić palec z ekranu dotykowego. Ikona została dodana do ekranu startowego. Jeśli na ikonę położy się inną ikonę, to automatycznie założony zostanie folder zawierający obie ikony. Naciśnięcie na folder powoduje wyświetlenie wszystkich zawartych w nim ikon i umożliwia po przez krótkie naciśnięcie wybór dowolnej ikony. Ponadto na ekranie powitalnym można dodawać różne widżety. W tym celu należy wywołać opcję Anwendungsübersicht („Przegląd aplikacji”), a następnie kliknąć na słowo Widgets (widżety). Teraz zostaną wyświetlone wszystkie widżety dostępne na urządzeniu. Aby dodać nowy widżet do ekranu powitalnego należy postępować w taki sam sposób, jak w przypadku dodawania ikony. Aby zmienić tło pulpitu, należy po prostu nacisnąć na wolne miejsce na ekranie startowym i przytrzymać palec tak długo na wyświetlaczu, aż wyświetli się menu wyboru tła pulpitu. Używanie różnych ekranów startowych Dostępnych jest pięć ekranów startowych do indywidualnego skonfigurowania. Poprzez lekki ruch przesunięcia w lewo lub prawo można bardzo łatwo pomiędzy nimi przełączać. Naciśnięcie przycisku Home powoduje automatyczny powrót do środkowego ekranu startowego. PL - 10 Zainstalowane fabrycznie aplikacje na ekranie startowym A Skrót klawiszowy wyszukiwania Google™ B Zakładka Informacje dla przeglądarki Chrome ™ C Kontakty, Gmail™, Przegląd aplikacji, Chrome™ i Google+™ D Google Playstore™ , YouTube™ , Hangouts™ , Maps™ i Local™ 11.) Przegląd aplikacji Naciskając krótko na ikonę przeglądu aplikacji otwiera się przegląd aplikacji. Wyświetlony zostanie przegląd wszystkich aplikacji zainstalowanych fabrycznie i przez użytkownika. Wybraną aplikację otwiera się po przez krótkie naciśnięcie odpowiedniej ikony. Przegląd aplikacji PL - 11 12.) Wysyłanie / odbieranie wiadomości e-mail Na tym urządzeniu zainstalowana jest fabrycznie aplikacja e-mail. Używając jej można korzystać z już istniejącego adresu e-mail, aby wysyłać i odbierać wiadomości e-mail. Wskazówka: Ta funkcja wymaga połączenia poprzez sieć bezprzewodową z Internetem . Aplikację tę otwiera się używając ikony „e-mail”, która znajduje się w menu aplikacji. Konfigurowanie skrzynki e-mail (1) Naciskając na symbol e-mail należy uruchomić aplikację e-mail. Wyświetlona zostanie prośba o skonfigurowanie skrzynki e-mail. (2) Należy wpisać swój adres e-mail oraz odpowiednie hasło i następnie nacisnąć „Dalej”. Następnie należy nazwać swoje konto i ustawić nazwę wyświetlaną dla wiadomości wychodzących. Aby zakończyć konfigurację należy nacisnąć „Gotowe”. Skrzynka e-mail zostaje wybrana jako skrzynka standardowa, jeśli wybrana została opcja „Wiadomości e-mail wysyłaj standardowo z tego konta”. (3) Skrzynka e-mail może być również konfigurowana ręcznie. W tym celu należy wprowadzić adres e-mail i odpowiednie hasło i nacisnąć następnie na „Ręczna konfiguracja”, aby wprowadzić dane serwerów e-mail. (4) Należy wybrać spośród serwerów typu POP3, IMAP lub Exchange dla poczty przychodzącej. Wskazówka: Jeśli nie wiesz, jakie masz wybrać ustawienia, to skontaktuj się z Twoim dostawcą usługi e-mail, Twoim administratorem sieci lub wyszukaj niezbędne informacje w Internecie używając np. pojęć „adres POP” i „nazwa Twojego dostawcy”. (5) Wprowadź dane (serwer, port itd.). (6) Teraz należy wybrać typ serwera dla poczty wychodzącej i wprowadzić niezbędne dane. (7) Aby przejść dalej w menu, należy nacisnąć „Dalej”. Aplikacja e-mail sprawdzić teraz wprowadzone ustawienia serwerów. Po udanej konfiguracji wyświetlony zostanie komunikat „Your account is set up, and email is on its way”. Konto jest teraz skonfigurowane. (8) Teraz należy nazwać skrzynkę pocztową i nacisnąć na „Gotowe”, aby zakończyć proces. Wskazówka: Jeśli posiadasz więcej kont e-mail, to przy każdym uruchomieniu aplikacji e-mail wywoływane będzie konto standardowe. PL - 12 Zarządzanie kontami e-mail Dodawanie nowej skrzynki pocztowej: (1) Należy otworzyć aplikację e-mail i nacisnąć przycisk Menu aby wyświetlić dalsze opcje. Aby założyć nową skrzynkę pocztową, należy wybrać punkt menu „Ustawienia” i następnie „Dodaj konto”. (2) Następnie należy postępować zgodnie z poleceniami kreatora, aby założyć nową skrzynkę pocztową. Usuwanie skrzynki pocztowej: (1) Należy otworzyć aplikację e-mail i nacisnąć przycisk Menu aby wyświetlić dalsze opcje. Aby założyć usunąć skrzynkę pocztową, należy wybrać punkt menu „Ustawienia” i następnie „Usuń konto”. Sprawdzanie właściwości konta: (1) Należy otworzyć aplikację e-mail i nacisnąć przycisk Menu , aby wyświetlić dalsze opcje oraz należy wybrać opcję „Ustawienia”. Po lewej stronie menu wyświetlone teraz zostaną wszystkie już założone skrzynki pocztowe. (2) Aby wyświetlić ustawienia konta, należy nacisnąć na wybraną skrzynkę pocztową. (3) Aby wprowadzić zmiany, należy nacisnąć „Ustawienia konta”. Wyświetlanie wiadomości e-mail Przez krótkie naciśnięcie na ikonę e-mail otwiera się aplikację e-mail. Wyświetlona zostanie już założona skrzynka pocztowa. Pionowym ruchem przesunięcia można przewijać wiadomości e-mail. Aby otworzyć konkretną wiadomość e-mail, należy krótko na nią nacisnąć. Aby wyświetlić dodatkowe opcje należy nacisnąć i przytrzymać konkretną wiadomość e-mail. Wyświetlone zostanie pole informacyjne. Tutaj można teraz otworzyć, odpowiedź na, przesłać dalej lub usunąć wiadomość e-mail. Pisanie wiadomości e-mail (1) W widoku ogólnym e-maili należy nacisnąć symbol e-mail w górnym pasku menu i otwarte zostanie nowe okno, w którym można utworzyć nową wiadomość e-mail. (2) Teraz należy wpisać adres e-mail odbiorcy, temat i tekst w przeznaczonych do tego polach. Można również dodać odbiorców „DW/UDW”, aby wysłać wiadomość do kilku użytkowników. (3) Aby wysłać wiadomość e-mail, należy nacisnąć na „Wyślij”. Naciskając na „Zapisz”, zapisuje się wiadomość e-mail jako wersję roboczą. Jeśli naciśnie się na symbol kosza, to wprowadzana właśnie wiadomość e-mail zostanie usunięta. PL - 13 13.) Przeglądarka internetowa Aby uruchomić przeglądarkę internetową należy nacisnąć na ikonę Przeglądarka na ekranie startowym. Aby otworzyć stronę internetową, należy nacisnąć na górne pole wprowadzania adresu internetowego. Wirtualna klawiatura otworzy się i można wpisać adres wybranej strony internetowej. Następnie należy nacisnąć przycisk „Przejdź” lub symbol strzałki obok pola wprowadzania, aby otworzyć tę stronę internetową. Wskazówka: Nie wszystkie sieci zapewniają dostęp do Internetu. Niektóre sieci zapewniają jedynie dostęp do podłączonych serwerów lokalnych, a nie połączenie z Internetem. Korzystanie z wirtualnej klawiatury Aby otworzyć wirtualną klawiaturę należy nacisnąć na pole wprowadzania. Teraz można wprowadzać tekst lub wywołać strony internetowe. a. Caps Lock (pisanie dużych i małych liter) b. Backspace (cofnięcie o jedną pozycję) c. Wywołanie menu do wprowadzania cyfr, znaków i znaków specjalnych d. Spacja e. Przejdź (potwierdzenie wprowadzonych danych) Wprowadzanie znaków specjalnych Aby wprowadzić znak specjalny, np. „ą”, należy długo nacisnąć palcem na klawisz „a”, aby wywołać menu znaków specjalnych. Następnie należy przesunąć palec na wybrany znak specjalny, na przykład „ą” i zdjąć palec z wyświetlacza. Wprowadzona została litera „ą”. PL - 14 Korzystanie z przeglądarki internetowej Obraz wyświetlany na ekranie można przewijać wykonując palcami pionowy ruch przesunięcia. Proszę nie rozpoczynać ruchu na punkcie menu lub linku, gdyż otworzy się wtedy odpowiednie łącze. Aby otworzyć link internetowy należy po prostu nacisnąć na ten link. Nowa strona otworzy się automatycznie. Aby otworzyć menu przeglądarki internetowej należy nacisnąć przycisk Menu . Tutaj do dostępne są różne funkcje. Między innymi można tutaj aktualizować otwartą stronę internetową, otworzyć nową kartę, zachować stronę do odczytu offline albo przejść do ustawień przeglądarki internetowej. Aby cofnąć się do poprzedniej strony, należy nacisnąć przycisk Wstecz . Aby cofnąć się bezpośrednio do ekranu startowego, należy nacisnąć przycisk Home . Aby wprowadzić tekst, należy nacisnąć na odpowiednie pole i skorzystać z wirtualnej klawiatury do wprowadzania tekstu. Wskazówka: Ta funkcja wymaga połączenia poprzez sieć bezprzewodową z Internetem. 14.) Ustawienia systemowe Naciskając w menu aplikacji na ikonę ustawień, wywołuje się ustawienia systemowe. Po lewej stronie menu znajdują się pojedyncze kategorie. Krótkie naciśnięcie wybranego punktu menu powoduje wyświetlenie dostępnych możliwości ustawień. Należy zwrócić uwagę, że ewentualnie nie wszystkie funkcje dostępne w systemie Android™ są kompatybilne z tym urządzeniem. Jeśli dokonano wszystkich ustawień, to za pomocą przycisku wstecz można powrócić do ostatniego wywołanego menu lub przyciskiem Home przejść bezpośrednio do ekranu startowego. Dokonane zmiany zostaną automatycznie zapisane. PL - 15 Przegląd ustawień – najważniejsze ustawienia Komunikacja WiFi Tutaj dokonuje się ustawień sieci bezprzewodowej. bezprzewodowa i sieci Więcej Tutaj można dokonać dalszych ustawień sieciowych. Dźwięki Ustawianie głośności i wybór dźwięku powiadomienia. Ponadto można aktywować wzgl. deaktywować dźwięk potwierdzenia dotknięcia ekranu dotykowego oraz dźwięk ostrzeżenia odblokowywania ekranu. Wyświetlacz Jasność – regulacja jasności wyświetlacza. Tło – Wybór tła. Stan czuwania – Ustawianie opóźnienia automatycznego wyłączania wyświetlacza. Wielkość czcionki – Ustawianie wybranej wielkości pisma. Urządzenie Pamięć Tutaj można uzyskać informacje o wewnętrznej pamięci i – o ile zainstalowana – o karcie microSD. Ponadto można usunąć zawartość pamięci. Akumulator Tutaj uzyskuje się informacje o stanie ładowania wbudowanego akumulatora. Aplikacje Tutaj można zarządzać zainstalowanymi aplikacjami i otrzymać dalsze informacje o aplikacjach. Lokalizacja Tutaj można zezwolić różnym aplikacją Android™, na ustalenie aktualnej lokalizacji w oparciu o sieci bezprzewodowe i korzystanie z tego (np. Google Maps™). Ponadto można ustawić, czy Google™ może dopasowywać do bieżącej lokalizacji wyniki wyszukiwania i inne usługi. Bezpieczeństwo Tutaj można dokonać ustawień blokady ekranu oraz innych związanych z bezpieczeństwem funkcji. Język i wprowadzanie Tutaj można na przykład ustawić preferowany język, dodawać do osobistego słownika różne wyrazy oraz dokonywać różnych ustawień klawiatury. Zabezpieczanie i Tutaj można zabezpieczyć na serwerach Google™ swoje ustawienia zerowanie systemowe oraz dane aplikacji. Ponadto można powrócić do ustawień fabrycznych. UWAGA: W tym celu usuwane są wszystkie zapisane na urządzeniu dane. Rachunki Dodaj konto Tutaj można dodać różne konta. System Data i czas Tutaj można ustawić datę, czas, strefę czasową oraz format wyświetlania. O tablecie Wyświetlane są informacje o urządzeniu. Użytkownik PL - 16 15.) Zarządzanie aplikacjami Aplikacje zainstalowane fabrycznie Urządzenie to dostarczane jest z zainstalowanymi fabrycznie aplikacjami. Przegląd już zainstalowanych aplikacji znajduje się w przeglądzie aplikacji Aby otworzyć te aplikacje, należy krótko nacisnąć na odpowiednią ikonę. Instalacja aplikacji (1) Proszę otworzyć wybrane źródło z którego będą pobierane aplikacje (np. preinstalowany Google Playstore™). W tym celu należy najpierw zalogować się na swoje istniejące konto Playstore™ lub utworzyć nowe konto Playstore™. W tym celu wystarczy postępować zgodnie ze wskazówkami pojawiającymi się na ekranie. (2) Po udanym zalogowaniu macie Państwo do dyspozycji wiele aplikacji znajdujących się w Google Playstore™. Proszę wybrać żądaną aplikację, kliknąć na Installieren (Instaluj) i ewentualnie wyrazić zgodę na zezwolenie dostępu przez aplikację. Teraz rozpoczyna się pobieranie, a w lewym, górnym rozszerzonym pasku stanu jest wyświetlany postęp procesu. (3) Po ukończeniu pobierania aplikacja instaluje się automatycznie. Po udanej instalacji nowa aplikacja będzie dostępna w menu aplikacji. Postęp procesu instalacji jest wyświetlany w lewym, górnym rozszerzonym pasku stanu. Odinstalowywanie aplikacji (1) Należy otworzyć Ustawienia systemu naciskając krótko na ikonę Ustawienia w przeglądzie aplikacji. (2) Teraz należy krótko nacisnąć na punkt menu „Aplikacje”, aby przejść do ustawień aplikacji. (3) Krótkim naciśnięciem należy wybrać jeden z głównych punktów menu: Pobieranie, Pamięć USB, Aktywna i Wszystkie. (4) Przez krótkie naciśnięcie należy następnie wybrać aplikację, która ma zostać odinstalowana. (5) Należy teraz nacisnąć na „Odinstaluj” i potwierdzić wybór przyciskiem OK, aby odinstalować z urządzenia daną aplikację. Wskazówka: Zainstalowanego fabrycznie oprogramowania nie można usunąć. PL - 17 16.) Eksplorator plików Aby uruchomić eksploratora plików, należy otworzyć przegląd aplikacji i następnie krótko nacisnąć na ikonę eksploratora. Nawigacja pomiędzy plikami i folderami Do wyboru istnieją wewnętrzna pamięć (internal Memory), karta pamięci (SD Card) i USB. Aby wyświetlić jako listę zawarte na wybranym nośniku pliki, należy nacisnąć na wybrany nośnik. Jeśli nie włożono karty pamięci lub żadnego nośnika danych nie podłączono do portu USB, pojawi się dla nich komunikat „… is unmounted”. Za pomocą pionowego ruchu przesunięcia można przewijać pliki i foldery. Za pomocą krótkiego naciśnięcia otwiera się pliki i foldery. Można przejść do przodu – lub cofnąć się o krok krótko naciskając odpowiednią ikonę. Aby w strukturze plików przejść o poziom wyżej, należy krótko nacisnąć na ikonę LevelUp . Ikoną Home przechodzi się bezpośrednio do głównego folderu. Używanie paska narzędzi Należy nacisnąć na przycisk Menu i następnie na „Hide Toolbar”, aby ukryć wzgl. wyświetlić pasek narzędzi. Home Przejście bezpośrednio do głównego folderu. LevelUp Multi Przejście o poziom wyżej. Wybór kilku plików. Editor Kopiowanie, usuwanie, przenoszenie, wstawianie lub zmiana nazwy pliku lub folderu. New Folder Tworzenie nowego folderu. Back Krok w tył. Next Krok w przód. Kopiowanie, przenoszenie i zmiana nazwy pliku i folderu 1.) Najpierw należy przejść do wybranego pliku w podglądzie plików. 2.) Należy nacisnąć i przytrzymać palec na pliku, aż wyświetli się pole informacyjne. 3.) Teraz należy wybrać funkcję. Do wyboru są kopiowanie (Copy), usuwanie (Delete), 4.) przenoszenie (Move), wstawianie (Paste) – w tym celu plik musi znajdować się w schowku – oraz zmiana nazwy (Rename). Aby skopiować lub przenieść, należy krótko nacisnąć na odpowiednią ikonę (Copy / Move) i następnie przejść do folderu docelowego. Następnie należy nacisnąć na ikonę edytora i wybrać przez krótkie naciśnięcie „Paste”, aby wkleić plik. 5.) Aby usunąć plik należy nacisnąć na „Delete” i potwierdzić zabezpieczenie przez ponowne naciśnięcie „Delete”. Aby anulować należy krótko nacisnąć na „Cancel”. 6.) Aby zmienić nazwę pliku, należy nacisnąć na „Rename” i następnie wpisać używając wirtualnej klawiatury nową nazwę pliku. Wprowadzoną nazwę należy potwierdzić naciskając „OK” lub anulować proces naciskając „Cancel”. 7.) Można jednocześnie kopiować, usuwać lub przenosić kilka plików i folderów. W tym celu należy nacisnąć ikonę Multi i następnie nacisnąć na wybrane pliki. Zaznaczone pliki zostaną teraz wyświetlone w innym kolorze. Naciskając na ikonę Editor przeprowadzić wybrane działanie. PL - 18 można 17.) Warunki ograniczonej gwarancji Gwarancja obejmuje wyłącznie wymianę niniejszego produktu firmy Intenso. Gwarancja nie obejmuje normalnych objawów zużycia, które są wynikiem niewłaściwego, nieprawidłowego użytkowania, niestaranności, wypadku, niekompatybilności lub jest wynikiem niewystarczającej wydajności konkretnego sprzętu lub oprogramowania komputerowego. Roszczenia gwarancyjne nie obejmują przypadków wynikających z niestosowania się do Instrukcji obsługi firmy Intenso oraz nieprawidłowego montażu, użytkowania lub uszkodzenia spowodowanego przez inne urządzenie. Jeśli produkt poddany został wstrząsom, wyładowaniom elektrycznym, temperaturze i wilgotności spoza zakresu specyfikacji produktu, to brak jest podstaw do roszczeń gwarancyjnych. Firma Intenso nie odpowiada za utratę danych lub jakiekolwiek szkody towarzyszące lub następstwa, za przekroczenie warunków gwarancji lub inne szkody bez względu na ich powód. Produkt ten nie jest przeznaczony do wykorzystania komercyjnego lub zastosowań medycznych i specjalnych, w przypadku których awaria produktu może spowodować zranienia, śmierć lub znaczne szkody materialne. 18.) Dane techniczne CPU Pamięć operacyjna System operacyjny Kompatybilne systemy operacyjne Możliwości podłączeń Sieć bezprzewodowa Czujnik przeciążenia Format zdjęć Format audio Format wideo Wyświetlacz Kamera SNR Zakres częstotliwości Zasilacz Akumulator wewnętrzny 1.0 GHz Dualcore based on Cortex A9 1 GB DDR 3 Android 4.2.2 Windows XP / Vista / 7 / 8 / Linux 2,4 lub nowszy / Mac 10.6 lub nowszy Słuchawki, micro SD (SDHC/SDXC), micro USB WiFi (802.11 b/g/n) obrót 360 stopni JPEG, BMP, GIF, PNG MP3, WMA, WAV, OGG, FLAC, APE MPEG1, MPEG 4, FLV wyświetlacz TFT LCD, 1024 x 600 pikseli przednia kamera 0,3 MP >= 80 dB 20 Hz – 20 KHz (V) AC Adapter (HUONIO HNBC050120UE): AC Input 100240V~50/60Hz, DC Output 5V / 1.2A akumulator litowo-polimerowy PL - 19 19.) Konserwacja urządzenia Nie wolno pryska lub nanosić płynu bezpośrednio na wyświetlacz lub obudowę. 20.) Czyszczenie urządzenia Obudowę, ramkę i wyświetlacz ostrożnie przetrzeć miękką, niekłaczącą i wolną od substancji chemicznych szmatką. Używać wyłącznie środków czyszczących przeznaczonych specjalnie dla wyświetlaczy. 21.) Utylizacja zużytych urządzeń elektrycznych Urządzenia oznaczone tym symbolem podlegają europejskiej dyrektywie 2002/96/WE. Wszystkie urządzenie elektrycznie i elektroniczne muszą być utylizowane niezależnie od odpadów komunalnych, przez wyznaczone do tego instytucje. Poprzez prawidłową utylizację zużytych urządzeń elektronicznych zapobiega się skażeniu środowiska naturalnego. PL - 20 22.) Licencja informacja Notice of GNU GENERAL PUBLIC LICENSE and LESSER GENERAL PUBLIC LICENCE Dear Customer, If interested, you and any third party can download the source code of used GPL / LGPL from Intenso Webpage http://www.intenso.de . The source code of the desired product is available to anyone on the selection of valid product category and the desired device. In the product details you will find the entry "drivers". Open this menu to download the corresponding GPL / LGPL code. For a fee of 35 € (delivery to another country as Germany), it is also possible to obtain this code by postal delivery. More information about the GPL/LGPL-Licence can you find on following website www.gnu.org GNU GENERAL PUBLIC LICENSE Version 2, June 1991 Copyright (C) 1989, 1991 Free Software Foundation, Inc. 51 Franklin Street, Fifth Floor, Boston, MA 02110-1301, USA Everyone is permitted to copy and distribute verbatim copies of this license document, but changing it is not allowed. Preamble The licenses for most software are designed to take away your freedom to share and change it. By contrast, the GNU General Public License is intended to guarantee your freedom to share and change free software-to make sure the software is free for all its users. This General Public License applies to most of the Free Software Foundation's software and to any other program whose authors commit to using it. (Some other Free Software Foundation software is covered by the GNU Lesser General Public License instead.) You can apply it to your programs, too. When we speak of free software, we are referring to freedom, not price. Our General Public Licenses are designed to make sure that you have the freedom to distribute copies of free software (and charge for this service if you wish), that you receive source code or can get it if you want it, that you can change the software or use pieces of it in new free programs; and that you know you can do these things. To protect your rights, we need to make restrictions that forbid anyone to deny you these rights or to ask you to surrender the rights. These restrictions translate to certain responsibilities for you if you distribute copies of the software, or if you modify it. For example, if you distribute copies of such a program, whether gratis or for a fee, you must give the recipients all the rights that you have. You must make sure that they, too, receive or can get the source code. And you must show them these terms so they know their rights. We protect your rights with two steps: (1) copyright the software, and (2) offer you this license which gives you legal permission to copy, distribute and/or modify the software. Also, for each author's protection and ours, we want to make certain that everyone understands that there is no warranty for this free software. If the software is modified by someone else and passed on, we want its recipients to know that what they have is not the original, so that any problems introduced by others will not reflect on the original authors' reputations. Finally, any free program is threatened constantly by software patents. We wish to avoid the danger that redistributors of a free program will individually obtain patent licenses, in effect making the program proprietary. To prevent this, we have made it clear that any patent must be licensed for everyone's free use or not licensed at all. The precise terms and conditions for copying, distribution and modification follow. TERMS AND CONDITIONS FOR COPYING, DISTRIBUTION AND MODIFICATION 0. This License applies to any program or other work which contains a notice placed by the copyright holder saying it may be distributed under the terms of this General Public License. The "Program", below, refers to any such program or work, and a "work based on the Program" means either the Program or any derivative work under copyright law: that is to say, a work containing the Program or a portion of it, either verbatim or with modifications and/or translated into another language. (Hereinafter, translation is included without limitation in the term "modification".) Each licensee is addressed as "you". Activities other than copying, distribution and modification are not covered by this License; they are outside its scope. The act of running the Program is not restricted, and the output from the Program is covered only if its contents constitute a work based on the Program (independent of having been made by running the Program). Whether that is true depends on what the Program does. 1. You may copy and distribute verbatim copies of the Program's source code as you receive it, in any PL - 21 medium, provided that you conspicuously and appropriately publish on each copy an appropriate copyright notice and disclaimer of warranty; keep intact all the notices that refer to this License and to the absence of any warranty; and give any other recipients of the Program a copy of this License along with the Program. You may charge a fee for the physical act of transferring a copy, and you may at your option offer warranty protection in exchange for a fee. 2. You may modify your copy or copies of the Program or any portion of it, thus forming a work based on the Program, and copy and distribute such modifications or work under the terms of Section 1 above, provided that you also meet all of these conditions: a) You must cause the modified files to carry prominent notices stating that you changed the files and the date of any change. b) You must cause any work that you distribute or publish, that in whole or in part contains or is derived from the Program or any part thereof, to be licensed as a whole at no charge to all third parties under the terms of this License. c) If the modified program normally reads commands interactively when run, you must cause it, when started running for such interactive use in the most ordinary way, to print or display an announcement including an appropriate copyright notice and a notice that there is no warranty (or else, saying that you provide a warranty) and that users may redistribute the program under these conditions, and telling the user how to view a copy of this License. (Exception: if the Program itself is interactive but does not normally print such an announcement, your work based on the Program is not required to print an announcement.) These requirements apply to the modified work as a whole. If identifiable sections of that work are not derived from the Program, and can be reasonably considered independent and separate works in themselves, then this License, and its terms, do not apply to those sections when you distribute them as separate works. But when you distribute the same sections as part of a whole which is a work based on the Program, the distribution of the whole must be on the terms of this License, whose permissions for other licensees extend to the entire whole, and thus to each and every part regardless of who wrote it. Thus, it is not the intent of this section to claim rights or contest your rights to work written entirely by you; rather, the intent is to exercise the right to control the distribution of derivative or collective works based on the Program. In addition, mere aggregation of another work not based on the Program with the Program (or with a work based on the Program) on a volume of a storage or distribution medium does not bring the other work under the scope of this License. 3. You may copy and distribute the Program (or a work based on it, under Section 2) in object code or executable form under the terms of Sections 1 and 2 above provided that you also do one of the following: a) Accompany it with the complete corresponding machine-readable source code, which must be distributed under the terms of Sections 1 and 2 above on a medium customarily used for software interchange; or, b) Accompany it with a written offer, valid for at least three years, to give any third party, for a charge no more than your cost of physically performing source distribution, a complete machine-readable copy of the corresponding source code, to be distributed under the terms of Sections 1 and 2 above on a medium customarily used for software interchange; or, c) Accompany it with the information you received as to the offer to distribute corresponding source code. (This alternative is allowed only for noncommercial distribution and only if you received the program in object code or executable form with such an offer, in accord with Subsection b above.) The source code for a work means the preferred form of the work for making modifications to it. For an executable work, complete source code means all the source code for all modules it contains, plus any associated interface definition files, plus the scripts used to control compilation and installation of the executable. However, as a special exception, the source code distributed need not include anything that is normally distributed (in either source or binary form) with the major components (compiler, kernel, and so on) of the operating system on which the executable runs, unless that component itself accompanies the executable. If distribution of executable or object code is made by offering access to copy from a designated place, then offering equivalent access to copy the source code from the same place counts as distribution of the source code, even though third parties are not compelled to copy the source along with the object code. 4. You may not copy, modify, sublicense, or distribute the Program except as expressly provided under this License. Any attempt otherwise to copy, modify, sublicense or distribute the Program is void, and will automatically terminate your rights under this License. However, parties who have received copies, or rights, from you under this License will not have their licenses terminated so long as such parties remain in full compliance. 5. You are not required to accept this License, since you have not signed it. However, nothing else grants you permission to modify or distribute the Program or its derivative works. These actions are prohibited by PL - 22 law if you do not accept this License. Therefore, by modifying or distributing the Program (or any work based on the Program), you indicate your acceptance of this License to do so, and all its terms and conditions for copying, distributing or modifying the Program or works based on it. 6. Each time you redistribute the Program (or any work based on the Program), the recipient automatically receives a license from the original licensor to copy, distribute or modify the Program subject to these terms and conditions. You may not impose any further restrictions on the recipients' exercise of the rights granted herein. You are not responsible for enforcing compliance by third parties to this License. 7. If, as a consequence of a court judgment or allegation of patent infringement or for any other reason (not limited to patent issues), conditions are imposed on you (whether by court order, agreement or otherwise) that contradict the conditions of this License, they do not excuse you from the conditions of this License. If you cannot distribute so as to satisfy simultaneously your obligations under this License and any other pertinent obligations, then as a consequence you may not distribute the Program at all. For example, if a patent license would not permit royalty-free redistribution of the Program by all those who receive copies directly or indirectly through you, then the only way you could satisfy both it and this License would be to refrain entirely from distribution of the Program. If any portion of this section is held invalid or unenforceable under any particular circumstance, the balance of the section is intended to apply and the section as a whole is intended to apply in other circumstances. It is not the purpose of this section to induce you to infringe any patents or other property right claims or to contest validity of any such claims; this section has the sole purpose of protecting the integrity of the free software distribution system, which is implemented by public license practices. Many people have made generous contributions to the wide range of software distributed through that system in reliance on consistent application of that system; it is up to the author/donor to decide if he or she is willing to distribute software through any other system and a licensee cannot impose that choice. This section is intended to make thoroughly clear what is believed to be a consequence of the rest of this License. 8. If the distribution and/or use of the Program is restricted in certain countries either by patents or by copyrighted interfaces, the original copyright holder who places the Program under this License may add an explicit geographical distribution limitation excluding those countries, so that distribution is permitted only in or among countries not thus excluded. In such case, this License incorporates the limitation as if written in the body of this License. 9. The Free Software Foundation may publish revised and/or new versions of the General Public License from time to time. Such new versions will be similar in spirit to the present version, but may differ in detail to address new problems or concerns. Each version is given a distinguishing version number. If the Program specifies a version number of this License which applies to it and "any later version", you have the option of following the terms and conditions either of that version or of any later version published by the Free Software Foundation. If the Program does not specify a version number of this License, you may choose any version ever published by the Free Software Foundation. 10. If you wish to incorporate parts of the Program into other free programs whose distribution conditions are different, write to the author to ask for permission. For software which is copyrighted by the Free Software Foundation, write to the Free Software Foundation; we sometimes make exceptions for this. Our decision will be guided by the two goals of preserving the free status of all derivatives of our free software and of promoting the sharing and reuse of software generally. NO WARRANTY 11. BECAUSE THE PROGRAM IS LICENSED FREE OF CHARGE, THERE IS NO WARRANTY FOR THE PROGRAM, TO THE EXTENT PERMITTED BY APPLICABLE LAW. EXCEPT WHEN OTHERWISE STATED IN WRITING THE COPYRIGHT HOLDERS AND/OR OTHER PARTIES PROVIDE THE PROGRAM "AS IS" WITHOUT WARRANTY OF ANY KIND, EITHER EXPRESSED OR IMPLIED, INCLUDING, BUT NOT LIMITED TO, THE IMPLIED WARRANTIES OF MERCHANTABILITY AND FITNESS FOR A PARTICULAR PURPOSE. THE ENTIRE RISK AS TO THE QUALITY AND PERFORMANCE OF THE PROGRAM IS WITH YOU. SHOULD THE PROGRAM PROVE DEFECTIVE, YOU ASSUME THE COST OF ALL NECESSARY SERVICING, REPAIR OR CORRECTION. 12. IN NO EVENT UNLESS REQUIRED BY APPLICABLE LAW OR AGREED TO IN WRITING WILL ANY COPYRIGHT HOLDER, OR ANY OTHER PARTY WHO MAY MODIFY AND/OR REDISTRIBUTE THE PROGRAM AS PERMITTED ABOVE, BE LIABLE TO YOU FOR DAMAGES, INCLUDING ANY GENERAL, SPECIAL, INCIDENTAL OR CONSEQUENTIAL DAMAGES ARISING OUT OF THE USE OR INABILITY TO USE THE PROGRAM (INCLUDING BUT NOT LIMITED TO LOSS OF DATA OR DATA BEING RENDERED INACCURATE OR LOSSES SUSTAINED BY YOU OR THIRD PARTIES OR A FAILURE OF THE PROGRAM TO OPERATE WITH ANY OTHER PROGRAMS), EVEN IF SUCH HOLDER OR OTHER PL - 23 PARTY HAS BEEN ADVISED OF THE POSSIBILITY OF SUCH DAMAGES. END OF TERMS AND CONDITIONS How to Apply These Terms to Your New Programs If you develop a new program, and you want it to be of the greatest possible use to the public, the best way to achieve this is to make it free software which everyone can redistribute and change under these terms. To do so, attach the following notices to the program. It is safest to attach them to the start of each source file to most effectively convey the exclusion of warranty; and each file should have at least the "copyright" line and a pointer to where the full notice is found. one line to give the program's name and an idea of what it does. Copyright (C) yyyy name of author This program is free software; you can redistribute it and/or modify it under the terms of the GNU General Public License as published by the Free Software Foundation; either version 2 of the License, or (at your option) any later version. This program is distributed in the hope that it will be useful, but WITHOUT ANY WARRANTY; without even the implied warranty of MERCHANTABILITY or FITNESS FOR A PARTICULAR PURPOSE. See the GNU General Public License for more details. You should have received a copy of the GNU General Public License along with this program; if not, write to the Free Software Foundation, Inc., 51 Franklin Street, Fifth Floor, Boston, MA 02110-1301, USA. Also add information on how to contact you by electronic and paper mail. If the program is interactive, make it output a short notice like this when it starts in an interactive mode: Gnomovision version 69, Copyright (C) year name of author Gnomovision comes with ABSOLUTELY NO WARRANTY; for details type `show w'. This is free software, and you are welcome to redistribute it under certain conditions; type `show c' for details. The hypothetical commands `show w' and `show c' should show the appropriate parts of the General Public License. Of course, the commands you use may be called something other than `show w' and `show c'; they could even be mouse-clicks or menu items--whatever suits your program. You should also get your employer (if you work as a programmer) or your school, if any, to sign a "copyright disclaimer" for the program, if necessary. Here is a sample; alter the names: Yoyodyne, Inc., hereby disclaims all copyright interest in the program `Gnomovision' (which makes passes at compilers) written by James Hacker. signature of Ty Coon, 1 April 1989 Ty Coon, President of Vice PL - 24 Intenso GmbH Data:17 grudzień 2013 Deklaracja zgodności UE My, Intenso GmbH, z siedzibą Diepholzer Str. 15 w 49377 Vechta, Niemcy deklarujemy na władną odpowiedzialność, że produkt: Model: 7” TAB 734 (artykuł nr 5509854) Opis: komputer typu tablet jest zgodny z następującymi dyrektywami i normami: Dyrektywa R&TTE 1999/5/WE EN 301 489-1 V1.9.2 EN 301 489-17 V2.1.1 EN 300 328 V1.7.1 : 2006-10 EN 55022:2010 (Class B) EN 55024:2010 EN 61000-3-2:2006+A1 :2009+A2 :2009 (Class D) EN 61000-3-3:2008 Dyrektywa niskonapięciowa 2006/95/WE EN 60950-1:2006+A11:2009+A1:2010+A12:2011+A12:korekta 2012 Dyrektywa w sprawie ekoprojektu 2009/125/EG 1275/2008 278/2009 Dyrektywa ROHS 2011/65/EU Dokumentacja techniczna dotycząca wyżej wymienionego urządzenia została złożona w następującym miejscu: Intenso GmbH Diepholzer Str. 15, 49377 Vechta, Niemcy Osoba upoważniona: ____________________________ Zarządzający przedsiębiorstwem: Thomas Pöhlking PL - 25 Руководство пользователя TAB 734 Мы благодарим Вас за то, что Вы выбрали TAB 734. Внимательно прочтите это руководство, чтобы узнать о важнейших функциях устройства. 1.) Содержание 1.) Содержание.......................................................................................................................................................................................... 1 2.) Советы .................................................................................................................................................................................................. 2 3.) Обзор устройства................................................................................................................................................................................. 4 4.) Содержание упаковки .......................................................................................................................................................................... 4 5.) Зарядка аккумулятора ......................................................................................................................................................................... 5 6.) Использование карты MICRO SD/SDHC/SDXC ................................................................................................................................. 5 7.) Перенос данных между устройством и компьютером. ...................................................................................................................... 5 8.) Сенсорный экран ................................................................................................................................................................................. 6 9.) WIFI ....................................................................................................................................................................................................... 6 Автоматическое соединение .................................................................................................................................................................... 6 Установка соединения вручную ............................................................................................................................................................... 7 10.) Пусковой экран................................................................................................................................................................................... 8 Вид ............................................................................................................................................................................................................. 8 Разблокирование экрана .......................................................................................................................................................................... 8 Строка состояния ...................................................................................................................................................................................... 9 Настройка вида стартового экрана ........................................................................................................................................................ 10 Использование разных пусковых экранов............................................................................................................................................. 10 Предустановленные приложения на пусковом экране ........................................................................................................................ 11 11.) Обзор приложений ........................................................................................................................................................................... 11 12.) Отправка / прием электронных писем ............................................................................................................................................ 12 Настройка вашего почтового ящика ...................................................................................................................................................... 12 Управление учетными записями электронной почты ........................................................................................................................... 13 Для введения необходимых сведений нажмите на «Настройки учетной записи», которые необходимо изменить. ...................... 13 Отображение новостей E-Mail................................................................................................................................................................ 13 Написание электронных писем .............................................................................................................................................................. 13 13.) Интернет браузер ............................................................................................................................................................................ 14 Использование виртуальной клавиатуры ............................................................................................................................................. 14 Ввод специальных знаков ...................................................................................................................................................................... 14 Использование интернет браузера ....................................................................................................................................................... 15 14.) Системные настройки ...................................................................................................................................................................... 15 Обзор настроек ....................................................................................................................................................................................... 16 15.) Управление приложениями ............................................................................................................................................................. 17 Уствновка приложенй разного назначения ........................................................................................................................................... 17 Удаление приложений. ........................................................................................................................................................................... 17 16.) Обозреватель файлов ..................................................................................................................................................................... 18 Навигация сквозь данные и папки ......................................................................................................................................................... 18 Использовать инструментальную панель ............................................................................................................................................. 18 Копировать, перемещать и переименовывать данные ........................................................................................................................ 18 17.) Ограничение гарантийного срока ................................................................................................................................................... 19 18.) Технические данные ........................................................................................................................................................................ 19 19.) Обслуживание устройства .............................................................................................................................................................. 20 20.) Очистка устройства ......................................................................................................................................................................... 20 21.) Утилизация электрического оборудования .................................................................................................................................... 20 22.) лице́нзия информа́ция..................................................................................................................................................................... 21 ЕС Заявление о соответствии товара ................................................................................................................................................... 25 Данное устройство не может содержать все особенности вашего устройства. Для использования приложений от сторонних и третьих компаний, пожалуйста, свяжитесь с производителем. Обратите внимание, что все детали могут быть изменены. Актуальную информацию можно найти на сайте www.intenso.de Торговый знак Google™, логотип Google™ и Android™ являются торговыми марками Google Inc.: Все остальные названия продуктов и сервисов являются собственностью соответствующих владельцев. RUS - 1 2.) Советы Избегайте сильного ударения или падения устройства. Не кладите устройства на наклонные поверхности, дабы избегать падение устройства. Не используйте устройство в экстремально холодных, жарких, влажных или пыльных регионах или местах. Избегайте попадание на устройство прямых солнечных лучей. Не используйте устройство в песочных местах. Не используйте устройство в взрывоопасном окружении, например вблизи около бензоколонок на заправках Не используйте устройство на подушках, диванах или других предметах, которые поддерживают нагрев устройства. Есть опасность перегрева устройства. Проводите чаще резервные копии данных для обеспечения сохранения ваших файлов. Мы не отвечаем за потерю ваших данных. Не отсоединяйте и не прерывайте контакт или связь при переносе данных или когда осуществляется форматирование устройства. Это может привести к потере данных. Фильмы и картинки могут быть защищены от просмотра третьими лицами. Просмотр без лицензии нарушает право собственности владельца. Избегайте использование в сильно намагниченных полях. Берегите устройство от влаги. При попадании в устройство влажности, немедленно прочистите устройство и просушите устройство. Не используйте химические растворы для очистки устройства. Используйте только сухую салфетку. Не устанавливайте вблизи устройства предметы с открытым огнем, такие как например горящие свечи. Мы не отвечаем за причиненные дефекты при ошибочном использовании, потерю данных, самостоятельного ремонта устройства или замены аккумулятора. В случае, если устройство не реагирует на ваши действия или ввод данных, используйте кнопку перезагрузки на обратной стороне устройства. Когда вы не используйте устройство, отсоедините его от сети высокого напряжения. Следите за тем, чтобы розетка находилась вблизи устройства для быстрого и легкого доступа к ней. Эксплуатируйте сетевой адаптер только с заземленными розетками с AC 100-240В~, 50/60 Гц. Если вы не уверены в обеспечении качества проводимого напряжения, обратитесь к вашему поставщику электроэнергии. Используйте только оригинальный сетевой адаптер и сетевой кабель для подключения. Для прекращения подачи электроэнергии к вашему устройству вытяните сетевой кабель из розетки. При извлечении касайтесь всегда только сетевой части. Никогда не тяните за непосредственный кабель. RUS - 2 Открывать корпус сетевого адаптера запрещено. При открытом сетевом адаптере угрожает опасность смерти. В нем не содержится никаких вспомогательных или обслуживающих деталей. При долгом не использовании устройства аккумулятор медленно разряжается. Перед использованием необходимо зарядить заново аккумулятор Соблюдайте пожалуйста, экологический безопасный и приемлемый способ утилизации устройства и аккумулятора. Не пытайтесь разложить или разобрать устройство на отдельные части, и не пытайтесь его самостоятельно чинить. Это нарушает и погашает действительный гарантийный срок. Не используйте устройство в местах, где запрещено использовать мобильные устройства. Не используйте устройства вблизи других электронных устройств, т.к. это способно привести к ошибкам по причине высокочастотных сигналов. Не используйте устройство по счету шагов в больнице или вблизи медицинских приборов, т.к. по причине высокочастотных сигналов могут возникать ошибки других аппаратов. Держите устройство как минимум на расстоянии в 15см к другим устройствам. Обратитесь к производителю этих аппаратов для получения более подробной информации и совместного использования. Korzystanie ze słuchawek nausznych lub dousznych przy zbyt dużej głośności może doprowadzić do stałego uszkodzenia organów słuchu. Prosimy zwrócić uwagę, że długotrwałe oddziaływanie wysokiej głośności może prowadzić do trwałego uszkodzenia słuchu. Aby uniknąć możliwego ryzyka zdrowotnego spowodowanego przez wysoką głośność, zalecamy używanie wyłącznie zawartych w zestawie słuchawek. По правилам дорожно-транспортных перевозок запрещается использовать устройство во время управления транспортным средством. RUS - 3 3.) Обзор устройства (1) (2) (3) (4) (5) Разъем для наушников 3.5mm Встроенный микрофон Индикатор заряда батареи: красный - во время зарядки; желтый – когда батарея полностью заряжена. Передняя камера Разъем Micro USB Кнопка Вкл / Выкл: Держать нажатой для выключения устройства; быстрое нажатие приводит к переключению режимов из активного в режим ожидания (7) Громкость + / (8) Сенсорный экран (9) Разъем для карт памяти Micro SD (10) Встроенные громкоговорители (6) 4.) Содержание упаковки Проверьте обязательно полноценность содержания и устройств в упаковке: TAB 734 Наушники Stereo USB кабель Сетевой адаптер 5В 1.2A Инструкция по эксплуатации RUS - 4 5.) Зарядка аккумулятора Полностью зарядите аккумуляторную батарею устройства перед первым использованием. Для этого соедините сетевой блок питания, входящий в комплект поставки, с устройством, и вставьте его в розетку. Полная зарядка аккумулятора занимает примерно 5 часов. Индикатор зарядки расположен в передней левой части корпуса устройства. Во время зарядки светодиодный индикатор горит красным цветом, а при полной зарядке аккумулятора - желтым. Внимание: a. Вы получите предупреждающий сигнал и сообщение при состоянии заряда аккумулятора в 15. Вам необходимо для зарядки вашего устройства соединить его с помощью сетевого адаптера с розеткой. Таким образом вы предотвратите потерю данных и сохраните срок службы вашего аккумулятора. b. Вы можете пользоваться устройством во время его зарядки. Для обеспечения долгого срока службы батареи мы просим вас во время зарядки устройством не пользоваться. c. Для достижения хороших показателей, встроенным аккумулятором необходимо пользоваться достаточно часто. В случае, если вы редко используйте устройство, то заряжайте хотя бы один раз в месяц полностью аккумулятор. d. Будьте уверены в использовании только оригинального сетевого адаптера, который входит в комплект поставки продукта. 6.) Использование карты MICRO SD/SDHC/SDXC Данное устройство может считывать данные непосредственно с карты памяти «Micro SD/SDHC/SDXC», c максимальной вместимостью – 64 Гбайта. Чтобы воспользоваться картой памяти «Micro SD/SDHC/SDXC», вставьте ее в соответствующий слот «Micro SD Slot» с левой стороны устройства. Чтобы получить доступ к данным, имеющимся на данной карте памяти, воспользуйтесь заранее установленной программой «Проводник» (Explorer), при этом откройте в данной программе каталог с названием «SD Card». 7.) Перенос данных между устройством и компьютером. 1.) Соедините устройство с помощью предоставленного кабеля USB с компьютером. 2.) На экране высвечивается теперь знак соединения с кабелем USB. Нажмите быстро на «активировать память USB». Идет распознание устройства как носителя данных и информации и вы получите информацию «память USB активна». При быстром нажатии на кнопку Home вы можете дальше пользоваться вашим устройством. Теперь у вас есть доступ с компьютера на внутреннюю память вашего устройства и возможность копировать, удалять или перемещать любую хранящуюся на устройстве информацию. 3.) При установленном USB-соединении с компьютером в строке состояния будет активирован значок USB. В расширенной строке состояния предоставляется дополнительная информация и здесь же можно активировать или деактивировать USB-соединение. Для деактивации накопителя следует выбрать «Деактивировать USB-накопитель». Для отключения устройства выберите на компьютере функцию «Безопасное извлечение» . Внимание: Установленная на системе устройства операционная система Android™ занимает часть внутренней памяти устройства – примерно 1 Гб. По этой причине вам доступен не весь размер внутренней памяти. RUS - 5 8.) Сенсорный экран Это устройство управляется при помощи сенсорного экрана. Приложение запускается легким нажатием на экран. Также сенсорный экран позволяет вводить тексты на виртуальной клавиатуре и, пролистывая в соответствующем направлении, переходить от одного стартового экрана к другому. Удалите, пожалуйста, защитную пленку с экрана перед началом использования устройства. Сенсорный экран распознает и реагирует на малейшие электрические разряды, как например в пальцах человека, и служит этим пунктом ввода информации. Используйте в идеальном варианте для ввода информации ваши кончики пальцев. Запрещено эксплуатировать устройство с помощью ручки, карандаша или других заостренных предметов. Не допускайте попадание воды в устройство или контактное сопряжение с другими электрическими приборами. Это может вызывать ошибки и фатальные дефекты. Внимание: a. Если вы более двух минут не задействуйте сенсорный экран, он меняет режим на энергосберегающий модус ожидания. Нажмите кнопку ВКЛ/ВЫКЛ для включения активного режима. b. Для безопасного предотвращения случайного нажатия и ввода информации автоматический включается и активируется блокировка кнопок. Разблокируйте защиту кнопок на сенсорном экране. Прикоснитесь к символу «закрытый замок» на дисплее и удерживайте его. Перетяните «замок», пока он не «откроется» отпустите палец. Экран разблокируется. , а затем Поворачивая устройство в любую сторону, аппарат автоматический выстраивается по вашему положению просмотра и наклона. Это возможно благодаря специального сенсора, встроенного в устройство. 9.) WIFI Для выхода в Интернет используйте соединение WIFI. Для установки соединения используйте иконку WIFI в стартовом окне, или выберите пункт Настройки WIFI в меню Настройки. Внимание: Соблюдайте расстояние сети WLAN и вашего устройства для обеспечения соединения в актуальной позиции Автоматическое соединение Откройте настройки WLAN в меню настроек. Здесь Вы можете активировать или деактивировать функцию WLAN. Просто уберите виртуальный коммутатор с позиции «Включено» слева, чтобы отключить функцию WLAN. Теперь на дисплее появится сообщение «Выключено». Для повторной активации или деактивации функции WLAN перенесите виртуальный коммутатор на правую сторону. RUS - 6 В Настройках WIFI в правой колонке приведен список доступных сетей, а также всех используемых сетей. Выберите желаемую вами сеть и введите по требованию для желаемой сети подходящий пароль для установления соединения. Для подтверждения введенного пароля нажмите на кнопку Enter, а затем на кнопку Установить соединение. Через некоторое время будет установлено соединение. Внимание: a) Если ваше устройство переходит в режим ожидания, тогда соединение WLAN автоматический деактивируется. Это обеспечивает экономию потребления электроэнергии и сохраняет заряд вашего аккумулятора. Когда возвращайтесь в активный режим, соединение автоматический восстанавливается. Это занимает несколько секунд. b) Список актуально найденных сетей WLAN обновляется автоматический. c) Когда функция WLAN активна, устройство соединяется автоматический с настроенной сетью при попадании в поле раздачи сигнала. d) При попадании в поле неизвестной сети WLAN, на экран выводится информационное поле и соединении. Установка соединения вручную Для поиска доступного беспроводного соединения по локальной сети выполните следующие действия: (1) Откройте Настройки. (2) Теперь откройте настройки WLAN и выберите три пункта в правом верхнем углу, затем нажмите «сканирование». (3) Если беспроводная локальная сеть не появилась в списке сетей, находящихся в зоне доступа, выберите пункт «Добавить сеть», чтобы вручную ввести сеть SSID, протокол безопасности и, если необходимо, соответствующий пароль. Для подтверждения ввода данных нажмите на «Сохранить». RUS - 7 10.) Пусковой экран Вид Разблокирование экрана Если сенсорный экран не используется в течение двух минут, устройство переходит в режим ожидания. Нажмите на кнопку вкл. / выкл., не удерживая ее, и устройство перейдет в рабочий режим. Дисплей защищен от непреднамеренного ввода данных. Прикоснитесь к символу «закрытый замок» на дисплее и удерживайте его. Перетяните «замок», пока он не «откроется» , а затем отпустите палец. Экран разблокируется. Протяните символ в помощью вашего пальца в сторону направляющей полосы Примечание: перетяните символ «замок» к появляющемуся на экране символу «камера». Теперь вы можете непосредственно использовать камеру. RUS - 8 Строка состояния Строки состояния расположены в верхней и нижней части экрана запуска. Верхняя строка состояния разделена на две области. Если Вы опустите строку состояния на левую сторону, отобразится текущее сообщение, если таковое имеется. Если Вы опустите строку состояния на правую сторону, отобразятся панели быстрого доступа для настроек. В нижней строке состояния Вы можете перейти к предыдущему экрану или закрыть при помощи клавиатуры, напрямую вызвать экран запуска, просмотреть последние использующиеся программы и изменить громкость устройства. RUS - 9 Настройка вида стартового экрана Вы можете очень легко настроить вид стартового экрана. Для удаления иконки нажмите на неё пальцем, удерживая чуть дольше и затем переместите иконку на появившийся значок «X». Затем уберите палец с экрана, и иконка будет удалена. Для установки иконки на стартовом экране из списка приложений нажмите, немного удерживая, на иконку в списке приложений, и появится стартовый экран. Передвиньте иконку на желаемое место и уберите палец с экрана. Теперь иконка добавлена на стартовый экран. При наложении одной иконки на другую автоматически будет создана папка с обеими иконками. Для отображения всех иконок, входящих в папку, нажмите на неё и выберите необходимую иконку, быстро нажав на неё. Вы также можете добавить виджеты на экран запуска. Ддя этого, пожалуйста, откройте обзор приложений. Затем нажмете на слово Виджеты. После этого отобразятся все виджеты, доступные на устройстве. Добавление виджета на экран запуска осществляется так же, как и добавление значка. Для изменения фоновой заставки просто нажмите на любое свободное пространство стартового экрана и удерживайте палец на экране, пока не появиться меню выбора фоновой заставки. Затем выберите источник желаемого изображения и действуйте следующим образом: Использование разных пусковых экранов У Вас есть возможность персонализировать пять видов стартовых экранов. Чтобы выбрать нужный стартовый экран, пролистайте по экрану слева направо или наоборот. Нажав кнопку Home вы всегда возвращайтесь в средний исходный пусковой экран RUS - 10 Предустановленные приложения на пусковом экране A Ярлык для поиска в Google™ B Обзор Закладки для браузера Chrome ™ C связи, Gmail™, Anwendungsübersicht, Chrome™ и Google+™ D Google Playstore™ , YouTube™ , Hangouts™ , Maps™ и Local™ 11.) Обзор приложений Нажмите коротко на иконку обзор приложений, для открытия обзора приложений. Теперь вы сможете увидеть все предустановленные и вами уже установленные приложения. Откройте желаемую вами программу с помощью короткого нажатия на соответствующую иконку. Обзор приложений RUS - 11 12.) Отправка / прием электронных писем На этом устройстве установленная программа для работы с электронной почтой. С этой программой вы можете использовать уже ваш существующий электронный адрес, для того чтобы отправлять и принимать электронную почту. Внимание: для этой функции необходимо соединение WLAN. Откройте приложение с помощью иконки „E-Mail“, которую вы сможете найти в меню приложений. Настройка вашего почтового ящика (1) Запустите приложение E-Mail помощью нажатия на символ E-Mail. Теперь вам необходимо настроить ваш почтовый ящик. (2) Введите ваш актуальный электронный адрес и соответствующий пароль и нажмите на „далее“. Заведите ваш почтовый ящик и дайте ему название, установите имя и имя для исходящей почты. Нажмите на „Готово“ для завершения настройки почтового ящика. Ваш почтовый ящик будет использован как стандартный и исходный почтовый ящик, если вы выберите опцию “отправлять письма исходя всегда из этого ящика”. (3) Вы также можете настроить ваш почтовый ящик в ручную. Задайте ваш электронный адрес и соответствующий к ящику пароль и нажмите после этого на “Ручная установка”. Задайте все необходимые данные и информацию для почтового сервера. (4) Сделайте выбор между серверами POP3, IMAP или Exchange для входящих электронных писем. Внимание: Если вы не знаете какие настройки задавать для правильной работы почтового ящика, контактируйте вашего провайдера, системного администратора или ищите эти названии „POP адрес“ и „Имя провайдера“ в сети интернет для получения точной информации. (5) Задайте требуемую информацию (сервер, порт и др.). (6) Выберите тип сервера для исходящей почти и задайте всю необходимую информацию. . (7) Нажмите на “Далее”для того чтобы продолжить настройку в меню. Приложение для электронной почти сейчас проверяет все заданные параметры с настройками сервера. После успешной проверки вы увидите сообщение “Ваш почтовый ящик успешно установлен, поздравляем и желаем хорошей работы”. Ваш почтовый ящик теперь настроен. (8) Дайте имя почтовому ящику, нажмите на „Готово“ для завершения процедуры. Внимание: В случае если у вас больше одного почтового ящика, то при загрузке проверяется всегда то, которое выставленное как стандартное или по умолчанию. RUS - 12 Управление учетными записями электронной почты Добавление нового почтового ящика: (1) Для появления других элементов управления откройте приложение Email и нажмите на кнопку Меню . Для введения нового почтового ящика выберите пункт Меню Настройки и далее «Новая учетная запись». (2) Для создания нового почтового ящика следуйте инструкциям мастера настроек. Удаление почтового ящика: (1) Для вызова других элементов управления откройте приложение Email и нажмите на кнопку Меню . Для удаления выбранного почтового ящика выберите пункт меню «Настройки» и далее «Удаление учетной записи». Проверка свойств учетной записи: (1) Для вызова других элементов управления откройте приложение Email и нажмите на кнопку Меню , а затем выберите «Настройки». В левой стороне меню появятся все созданные почтовые ящики. (2) Для появления установок учетной записинажмите на почтовый ящик. Для введения необходимых сведений нажмите на «Настройки учетной записи», которые необходимо изменить. Отображение новостей E-Mail Откройте приложение с помощью иконки „E-Mail“, которую вы сможете найти в меню приложений. Отображается ваш уже установленный почтовый ящик. С помощью вертикального скользящего движения вы можете пролистывать ваши электронные адреса. Нажмите коротко на определенный адрес для того чтобы его открыть. Нажмите и держите нажатым на определенную новость от вашего почтового ящика, для получения дальнейших опции для настройки. Появиться информационное поле. Здесь вы имеете возможность электронное письмо открыть, на него ответить, переслать или удалить. Написание электронных писем (1) Нажатием на значок Email в верхней строке Меню в меню Email открывается новое окно, в котором Вы сможете написать новое электронное сообщение. (2) Ведите электронный адрес получателя, тему и текст в соответствующие поля. Для отправки сообщения нескольким пользователям можно добавить адреса в поля «Копия/Скрытая копия». (3) Нажмите клавишу «Отправить» для отправки электронного сообщения. Чтобы сохранить черновик электронного сообщения, нажмите «Сохранить». Нажатие на значок «Корзина» удалит введённое электронное сообщение. RUS - 13 13.) Интернет браузер Для запуска интернет браузера нажмите на иконку с символом браузера в режиме активного использования на пусковом экране. Для открытия интернет странички нажмите на верхнее поле ввода и введите в это поле адрес и название вашей интернет странички. Появится виртуальная клавиатура и вы сможете ввести адрес и название вашей желаемой интернет странички. Когда вы набрали полный адрес, нажмите на кнопку „вперед“ или на символ стрелочки в поле ввода данных, с целью запустить вашу желаемую страницу в сети интернет. Внимание: Не все сети предоставляют соединение с сетью интернет. Некоторые сети предоставляют только выход на локальные устройства и не имеет связь с сетью интернет. Использование виртуальной клавиатуры Для открытия виртуальной клавиатуры нажмите на поле ввода информации. Теперь вы можете вводить тексты и открывать интернет странички после ввода корректно адреса. a. Caps Lock (Написание большими буквами) b. Обратно или отменить c. Открыть меню для ввода цифр, знаков и специальных знаков. d. Space Taste (Кнопка для пробела) e. Los ( Подтверждение вашего ввода) Ввод специальных знаков Для ввода специальных символов таких, как «ä», нажмите на кнопку «a» и удерживайте ее несколько секунд для вызова меню специальных символов. Затем скользните по экрану к необходимому специальному символу, например, «ä» и уберите палец с экрана. Теперь символ «ä» введен. RUS - 14 Использование интернет браузера Вы имеете возможность прокрутить экран вниз. Для этого выполните вертикальное движение пальцем вниз. Не начинайте выполнять движение прокрутки на кнопке меню или ссылке, иначе будет открыта следующая программа вместо прокрутки дисплея. Для того, чтобы открыть ссылку в интернет, нажмите просто на ссылку. Страница будет открыта автоматический. Для открытия Меню веб-браузера, нажмите на кнопку Меню . В Меню представлены различные функции. Здесь можно также обновить открытую веб-страницу, открыть новую вкладку, выбрать автономный режим для чтения веб-страниц и сменить настройки веббраузера. Для возврата на обратную страницу, нажмите на кнопку назад . Чтобы вернутся напрямую на экран запуска, нажмите на кнопку Home . Для ввода текста нажмите на соответствующее поле и используйте виртуальную клавиатуру для ввода текста в поле. Внимание: для этой функции необходимо соединение WLAN. 14.) Системные настройки Для вызова системы установок нажмите в меню приложений на иконку Настройки. На левой стороне меню находятся отдельные категории. Для вызова списка настроек необходимо коротко нажать на соответствующий элемент меню. Обратите внимание, что, возможно, не все функции, предлагаемые Android™, представлены в данном устройстве. После внесения всех изменений в настройки, нажав на кнопку Назад , можно вернуться вранее вызванное меню, или при помощи кнопки Домой вернуться сразу на стартовый экран. Данные, введённые Вами, будут автоматически сохранены. RUS - 15 Обзор настроек Беспроводное соединение и сети Беспроводная локальная сеть Настройки беспроводной локальной сети Больше Другие настройки сети Настройка громкости звука и сигнала сообщений. Активировать/деактивировать сигнал-подтверждение при касании экрана и сигнал-оповещение при снятии блокировки экрана Сигналы Экран Яркость – настройка яркости экрана Фон – выбор фона поворота экрана при повороте устройства Режим ожидания – настройка времени задержки перед автоматическим Устройство Пользователь отключением экрана Размер шрифта – настроить желаемый размер шрифта Накопитель Информация о внутреннем накопителе и, карте памяти, если она установлена. Кроме того, Вы можете удалить информацию с накопителя Аккумулятор Информация о состоянии загрузки встроенного аккумулятора Приложения Управление приложениями и информация о них. Службы местоположения Разрешение использования приложений Android™ для определения Вашего местоположения при помощи беспроводных сетей (например, карт Google ™). Разрешение/запрещение выведения результатов поиска Google™ относительно Вашего местоположения Безопасность Установка блокировки экрана и другие настройки безопасности. Язык и ввод данных Выбор языка, добавление слов в личный словарь, изменение настроек клавиатуры Сохранение и восстановление Сохранение всех настроек системы и данных приложений на сервере Google™ с дальнейшей возможностью восстановления всех текущих настроек. ВНИМАНИЕ: При этом все данные, сохранённые на устройстве, будут удалены Счета Добавление счета Добавление различных счетов. Система Дата и время Настройки даты, времени, часового пояса и формата их отображения О планшете Информация об устройстве RUS - 16 15.) Управление приложениями Установленные приложения Устройство поставляется с уже заранее установленными программами. Обзор этих приложений находиться в обзоре приложений . К этим программам относятся видео проигрыватель, аудио проигрыватель, интернет браузер, будильник, калькулятор и еще несколько других программ. Для открытия одного из этих приложений, просто нажмите на него или соответствующий логотип. Уствновка приложенй разного назначения Для установки приложений на вашем устройстве, выполите, пожалуйста, следующие процедурные шаги: (1) Откройте нужный источник для загрузки приложений, например, предварительно установленный Google Playstore™. Для этого сначала войдите в существующую учётную запись Playstore™ или создайте новую учетную запись Playstore™. Следуйте инструкциям на экране. (2) После успешного входа в систему Вы увидите большой выбор приложений из Google Playstore ™. Выберите необходимое приложение, нажмите на установку и подтвердите право доступа к данному приложению. Начнётся загрузка, прогресс которой будет отображаться в верхнем левом углу расширенной строки состояния. (3) После загрузки приложение установится автоматически. Вы можете найти новое приложение в меню приложений после успешного завершения установки. Прогресс установки будет отображаться в верхнем левом углу расширенной строки состояния. Удаление приложений. (1) В списке приложений откройте Настройки системы, короткого нажав на иконку «Настройки». (2) Выберите «Приложения» в меню, чтобы перейти к настройкам приложений. (3) При помощи короткого нажатия выберите необходимый список приложений из верхних пунктов меню «Загруженные, USB-накопитель, Активные, Все». (4) Затем при помощи короткого нажатия выберите приложение, которое следует удалить. (5) Нажмите на «Удалить» и подтвердите ввод, нажав на OK, для удаления приложения с устройства. Внимание: Предустановленные программы удалению не подлежат. RUS - 17 16.) Обозреватель файлов Откройте обзор приложений и нажмите на иконку с надписью обозреватель файлов для запуска данного приложения. Навигация сквозь данные и папки Вам предоставлены внутренняя память (внутренняя память), карта памяти (SD карта) а также USB на выбор. Нажмите на желаемый носитель информации для отображения на нем всех содержащихся документов и файлов в виде списка. Если к вашему устройство не подключено никаких карт памяти или других средств хранения информации, тогда вы получите сообщение „… устройство не подключено“. С помощью вертикального скользящего движения вы можете прокручивать все папки и файлы. Откройте файл или папку в помощью легкого нажатия. Вы можете возратиться всегда на шаг назад или вперед с помощью нажатия на соответствующюю иконку. Для перемещения на один уровень выше в структуре данных , нажмите коротко на иконку Выше на один уровень . С помощью иконки Home вы напрямую попадайте в гравное меню вашего каталога данных. Использовать инструментальную панель Для скрытия и отображения панели инструментов нажмите на кнопку Меню , и «Скрыть панель» инструментов». Home LevelUp Напрямую в домашнюю директорию каталога. На один уровень выше. Multi Editor New Folder Выбор нескольких файлов. Копировать, удалять, перемещать, вставлять переименовывать данные, файлы или папки. Создать новую папку. Back Next На один шаг назад На один шаг вперед и Копировать, перемещать и переименовывать данные 1.) Перейдите к вашим желаемым данным в обзоре и просмотре файлов. 2.) Нажмите и удерживайте нажатым палец на файле до тех пор, пока не появится информационное поле. 3.) Выберите теперь желаемую функцию. Вы можете выбрать между Копировать (Copy), 4.) Удалить (Delete), Переместить (Move), Вставить (Paste) – для этого файл должен находится во временном разделе, и Переименовать (Rename). Для копирования или перемещения соответствующего значки нажмите на соответствие иконки (Copy / Move) и перейдите в ключевое и конечное расписание вашей директории. После этого нажмите на иконку Правка и выберите с помощью короткого нажатия „Вставить“, для того чтобы переместить файл. 5.) Для удаления файла нажмите на „Удалить“ и подтвердите в целях безопасности еще раз повторно команду „Удалить“. Для отмены нажмите коротко на „Отменить“. RUS - 18 6.) Для переименования одного файла нажмите на „Переименовать“ и введите через виртуальную клавиатуру новое название вашего файла или папки. Подтвердите ваш выбор с помощью нажатия кнопки „OK“ или отмените процедуру с помощью нажатии на кнопку „Отменить“. 7.) Вы можете одновременно несколько файлов копировать, удалять или перемещать. Нажмите для этого на иконку Мульти и за этим на ваши желаемые объекты для операции. Выбранные файлы будут отображены теперь в другом цвете. Нажмите также на икноку Изменить , для того чтобы совершить желаемую операцию. 17.) Ограничение гарантийного срока Гарантия покрывает только возмещение продукта Интензо. Гарантия не покрывает и не обеспечивает возмещение явлений предусмотренного износа, который возник по причине ошибочного применения или использования устройства не в предусмотренных целях, а так же царапин, падении, несовместимости с другими устройствами или пот причине вредоносного использования вместе с какими либо программными или внешними устройствами, сопряженными с вашим устройством. Гарантия также не действительна при нарушении каких либо из шагов или правил по использованию устройства Интензо согласно инструкции по эксплуатации, а также при нанесении дефекта при установке или использовании через третьи предметы. При создании условии электрический- статистических разрядов, нагрева или охлаждения за рамками технической спецификации продукта, гарантийный срок перестает действовать. Интензо не несет ответственность за потерю данных или любых других сопровождающих повреждений или последствий, которые приводят к нарушению условий гарантийного срока. Этот продукт не предназначен для использования в коммерческих или медицинских целях, а также для специального применения, в котором сбой устройства может привести к повреждениям, смерти или имущественному ущербу. 18.) Технические данные CPU Оперативная память Операционная система Совместимые системы Подключения WLAN G-сенсор Формат фотографий Формат аудио Формат видео Экран Камера SNR Диапазон частот Сетевой адаптер Встроенный аккумулятор 1.0 GHz Dualcore based on Cortex A9 1 GБ DDR 3 Android 4.2.2 Windows XP / Vista / 7 / 8 / Linux 2,4 или выше / Mac 10.6 или выше наушники, Micro SD (SDHC/SDXC), micro USB WiFi (802.11 b/g/n) 360 градусов JPEG, BMP, GIF, PNG MP3, WMA, WAV, OGG, FLAC, APE MPEG1, MPEG 4, FLV TFT LCD экран, 1024 x 600 пикселей 0,3 МП, передняя камера >= 80 dB 20 Гц – 20 КГц (V) AC Adapter (HUONIO HNBC050120UE): AC Input 100240V~50/60Hz, DC Output 5V / 1.2A Заряжаемый аккумулятор Lithium-Ionen Polymer RUS - 19 19.) Обслуживание устройства Опрыскивание или нанесение жидкости на поверхность устройства строго запрещено. Никогда не наносите жидкость на экран или корпус данного устройства. 20.) Очистка устройства Протирать устройство, экран и корпус мягкой, натуральной, чистой и сухо й тканью. Используйте только те средства ухода, которые специально предназначены для сенсорных экранов. 21.) Утилизация электрического оборудования Все устройства имеющие данную маркировку принадлежат к списку товаров включенных в директиву ЕС 2002/96/. Все электротовары и устаревшие электротовары утилизируются раздельно от домашнего мусора на специально оборудованных точках или государственных местах утилизации и переработки. Соблюдая порядок утилизации вы сохраняете природу окружающей среды. RUS - 20 22.) лице́нзия информа́ция Notice of GNU GENERAL PUBLIC LICENSE and LESSER GENERAL PUBLIC LICENCE Dear Customer, If interested, you and any third party can download the source code of used GPL / LGPL from Intenso Webpage http://www.intenso.de . The source code of the desired product is available to anyone on the selection of valid product category and the desired device. In the product details you will find the entry "drivers". Open this menu to download the corresponding GPL / LGPL code. For a fee of 35 € (delivery to another country as Germany), it is also possible to obtain this code by postal delivery. More information about the GPL/LGPL-Licence can you find on following website www.gnu.org GNU GENERAL PUBLIC LICENSE Version 2, June 1991 Copyright (C) 1989, 1991 Free Software Foundation, Inc. 51 Franklin Street, Fifth Floor, Boston, MA 02110-1301, USA Everyone is permitted to copy and distribute verbatim copies of this license document, but changing it is not allowed. Preamble The licenses for most software are designed to take away your freedom to share and change it. By contrast, the GNU General Public License is intended to guarantee your freedom to share and change free software-to make sure the software is free for all its users. This General Public License applies to most of the Free Software Foundation's software and to any other program whose authors commit to using it. (Some other Free Software Foundation software is covered by the GNU Lesser General Public License instead.) You can apply it to your programs, too. When we speak of free software, we are referring to freedom, not price. Our General Public Licenses are designed to make sure that you have the freedom to distribute copies of free software (and charge for this service if you wish), that you receive source code or can get it if you want it, that you can change the software or use pieces of it in new free programs; and that you know you can do these things. To protect your rights, we need to make restrictions that forbid anyone to deny you these rights or to ask you to surrender the rights. These restrictions translate to certain responsibilities for you if you distribute copies of the software, or if you modify it. For example, if you distribute copies of such a program, whether gratis or for a fee, you must give the recipients all the rights that you have. You must make sure that they, too, receive or can get the source code. And you must show them these terms so they know their rights. We protect your rights with two steps: (1) copyright the software, and (2) offer you this license which gives you legal permission to copy, distribute and/or modify the software. Also, for each author's protection and ours, we want to make certain that everyone understands that there is no warranty for this free software. If the software is modified by someone else and passed on, we want its recipients to know that what they have is not the original, so that any problems introduced by others will not reflect on the original authors' reputations. Finally, any free program is threatened constantly by software patents. We wish to avoid the danger that redistributors of a free program will individually obtain patent licenses, in effect making the program proprietary. To prevent this, we have made it clear that any patent must be licensed for everyone's free use or not licensed at all. The precise terms and conditions for copying, distribution and modification follow. TERMS AND CONDITIONS FOR COPYING, DISTRIBUTION AND MODIFICATION 0. This License applies to any program or other work which contains a notice placed by the copyright holder saying it may be distributed under the terms of this General Public License. The "Program", below, refers to any such program or work, and a "work based on the Program" means either the Program or any derivative work under copyright law: that is to say, a work containing the Program or a portion of it, either verbatim or with modifications and/or translated into another language. (Hereinafter, translation is included without limitation in the term "modification".) Each licensee is addressed as "you". Activities other than copying, distribution and modification are not covered by this License; they are outside its scope. The act of running the Program is not restricted, and the output from the Program is covered only if its contents constitute a work based on the Program (independent of having been made by running the Program). Whether that is true depends on what the Program does. 1. You may copy and distribute verbatim copies of the Program's source code as you receive it, in any RUS - 21 medium, provided that you conspicuously and appropriately publish on each copy an appropriate copyright notice and disclaimer of warranty; keep intact all the notices that refer to this License and to the absence of any warranty; and give any other recipients of the Program a copy of this License along with the Program. You may charge a fee for the physical act of transferring a copy, and you may at your option offer warranty protection in exchange for a fee. 2. You may modify your copy or copies of the Program or any portion of it, thus forming a work based on the Program, and copy and distribute such modifications or work under the terms of Section 1 above, provided that you also meet all of these conditions: a) You must cause the modified files to carry prominent notices stating that you changed the files and the date of any change. b) You must cause any work that you distribute or publish, that in whole or in part contains or is derived from the Program or any part thereof, to be licensed as a whole at no charge to all third parties under the terms of this License. c) If the modified program normally reads commands interactively when run, you must cause it, when started running for such interactive use in the most ordinary way, to print or display an announcement including an appropriate copyright notice and a notice that there is no warranty (or else, saying that you provide a warranty) and that users may redistribute the program under these conditions, and telling the user how to view a copy of this License. (Exception: if the Program itself is interactive but does not normally print such an announcement, your work based on the Program is not required to print an announcement.) These requirements apply to the modified work as a whole. If identifiable sections of that work are not derived from the Program, and can be reasonably considered independent and separate works in themselves, then this License, and its terms, do not apply to those sections when you distribute them as separate works. But when you distribute the same sections as part of a whole which is a work based on the Program, the distribution of the whole must be on the terms of this License, whose permissions for other licensees extend to the entire whole, and thus to each and every part regardless of who wrote it. Thus, it is not the intent of this section to claim rights or contest your rights to work written entirely by you; rather, the intent is to exercise the right to control the distribution of derivative or collective works based on the Program. In addition, mere aggregation of another work not based on the Program with the Program (or with a work based on the Program) on a volume of a storage or distribution medium does not bring the other work under the scope of this License. 3. You may copy and distribute the Program (or a work based on it, under Section 2) in object code or executable form under the terms of Sections 1 and 2 above provided that you also do one of the following: a) Accompany it with the complete corresponding machine-readable source code, which must be distributed under the terms of Sections 1 and 2 above on a medium customarily used for software interchange; or, b) Accompany it with a written offer, valid for at least three years, to give any third party, for a charge no more than your cost of physically performing source distribution, a complete machine-readable copy of the corresponding source code, to be distributed under the terms of Sections 1 and 2 above on a medium customarily used for software interchange; or, c) Accompany it with the information you received as to the offer to distribute corresponding source code. (This alternative is allowed only for noncommercial distribution and only if you received the program in object code or executable form with such an offer, in accord with Subsection b above.) The source code for a work means the preferred form of the work for making modifications to it. For an executable work, complete source code means all the source code for all modules it contains, plus any associated interface definition files, plus the scripts used to control compilation and installation of the executable. However, as a special exception, the source code distributed need not include anything that is normally distributed (in either source or binary form) with the major components (compiler, kernel, and so on) of the operating system on which the executable runs, unless that component itself accompanies the executable. If distribution of executable or object code is made by offering access to copy from a designated place, then offering equivalent access to copy the source code from the same place counts as distribution of the source code, even though third parties are not compelled to copy the source along with the object code. 4. You may not copy, modify, sublicense, or distribute the Program except as expressly provided under this License. Any attempt otherwise to copy, modify, sublicense or distribute the Program is void, and will automatically terminate your rights under this License. However, parties who have received copies, or rights, from you under this License will not have their licenses terminated so long as such parties remain in full compliance. 5. You are not required to accept this License, since you have not signed it. However, nothing else grants you permission to modify or distribute the Program or its derivative works. These actions are prohibited by RUS - 22 law if you do not accept this License. Therefore, by modifying or distributing the Program (or any work based on the Program), you indicate your acceptance of this License to do so, and all its terms and conditions for copying, distributing or modifying the Program or works based on it. 6. Each time you redistribute the Program (or any work based on the Program), the recipient automatically receives a license from the original licensor to copy, distribute or modify the Program subject to these terms and conditions. You may not impose any further restrictions on the recipients' exercise of the rights granted herein. You are not responsible for enforcing compliance by third parties to this License. 7. If, as a consequence of a court judgment or allegation of patent infringement or for any other reason (not limited to patent issues), conditions are imposed on you (whether by court order, agreement or otherwise) that contradict the conditions of this License, they do not excuse you from the conditions of this License. If you cannot distribute so as to satisfy simultaneously your obligations under this License and any other pertinent obligations, then as a consequence you may not distribute the Program at all. For example, if a patent license would not permit royalty-free redistribution of the Program by all those who receive copies directly or indirectly through you, then the only way you could satisfy both it and this License would be to refrain entirely from distribution of the Program. If any portion of this section is held invalid or unenforceable under any particular circumstance, the balance of the section is intended to apply and the section as a whole is intended to apply in other circumstances. It is not the purpose of this section to induce you to infringe any patents or other property right claims or to contest validity of any such claims; this section has the sole purpose of protecting the integrity of the free software distribution system, which is implemented by public license practices. Many people have made generous contributions to the wide range of software distributed through that system in reliance on consistent application of that system; it is up to the author/donor to decide if he or she is willing to distribute software through any other system and a licensee cannot impose that choice. This section is intended to make thoroughly clear what is believed to be a consequence of the rest of this License. 8. If the distribution and/or use of the Program is restricted in certain countries either by patents or by copyrighted interfaces, the original copyright holder who places the Program under this License may add an explicit geographical distribution limitation excluding those countries, so that distribution is permitted only in or among countries not thus excluded. In such case, this License incorporates the limitation as if written in the body of this License. 9. The Free Software Foundation may publish revised and/or new versions of the General Public License from time to time. Such new versions will be similar in spirit to the present version, but may differ in detail to address new problems or concerns. Each version is given a distinguishing version number. If the Program specifies a version number of this License which applies to it and "any later version", you have the option of following the terms and conditions either of that version or of any later version published by the Free Software Foundation. If the Program does not specify a version number of this License, you may choose any version ever published by the Free Software Foundation. 10. If you wish to incorporate parts of the Program into other free programs whose distribution conditions are different, write to the author to ask for permission. For software which is copyrighted by the Free Software Foundation, write to the Free Software Foundation; we sometimes make exceptions for this. Our decision will be guided by the two goals of preserving the free status of all derivatives of our free software and of promoting the sharing and reuse of software generally. NO WARRANTY 11. BECAUSE THE PROGRAM IS LICENSED FREE OF CHARGE, THERE IS NO WARRANTY FOR THE PROGRAM, TO THE EXTENT PERMITTED BY APPLICABLE LAW. EXCEPT WHEN OTHERWISE STATED IN WRITING THE COPYRIGHT HOLDERS AND/OR OTHER PARTIES PROVIDE THE PROGRAM "AS IS" WITHOUT WARRANTY OF ANY KIND, EITHER EXPRESSED OR IMPLIED, INCLUDING, BUT NOT LIMITED TO, THE IMPLIED WARRANTIES OF MERCHANTABILITY AND FITNESS FOR A PARTICULAR PURPOSE. THE ENTIRE RISK AS TO THE QUALITY AND PERFORMANCE OF THE PROGRAM IS WITH YOU. SHOULD THE PROGRAM PROVE DEFECTIVE, YOU ASSUME THE COST OF ALL NECESSARY SERVICING, REPAIR OR CORRECTION. 12. IN NO EVENT UNLESS REQUIRED BY APPLICABLE LAW OR AGREED TO IN WRITING WILL ANY COPYRIGHT HOLDER, OR ANY OTHER PARTY WHO MAY MODIFY AND/OR REDISTRIBUTE THE PROGRAM AS PERMITTED ABOVE, BE LIABLE TO YOU FOR DAMAGES, INCLUDING ANY GENERAL, SPECIAL, INCIDENTAL OR CONSEQUENTIAL DAMAGES ARISING OUT OF THE USE OR INABILITY TO USE THE PROGRAM (INCLUDING BUT NOT LIMITED TO LOSS OF DATA OR DATA BEING RENDERED INACCURATE OR LOSSES SUSTAINED BY YOU OR THIRD PARTIES OR A FAILURE OF THE PROGRAM TO OPERATE WITH ANY OTHER PROGRAMS), EVEN IF SUCH HOLDER OR OTHER RUS - 23 PARTY HAS BEEN ADVISED OF THE POSSIBILITY OF SUCH DAMAGES. END OF TERMS AND CONDITIONS How to Apply These Terms to Your New Programs If you develop a new program, and you want it to be of the greatest possible use to the public, the best way to achieve this is to make it free software which everyone can redistribute and change under these terms. To do so, attach the following notices to the program. It is safest to attach them to the start of each source file to most effectively convey the exclusion of warranty; and each file should have at least the "copyright" line and a pointer to where the full notice is found. one line to give the program's name and an idea of what it does. Copyright (C) yyyy name of author This program is free software; you can redistribute it and/or modify it under the terms of the GNU General Public License as published by the Free Software Foundation; either version 2 of the License, or (at your option) any later version. This program is distributed in the hope that it will be useful, but WITHOUT ANY WARRANTY; without even the implied warranty of MERCHANTABILITY or FITNESS FOR A PARTICULAR PURPOSE. See the GNU General Public License for more details. You should have received a copy of the GNU General Public License along with this program; if not, write to the Free Software Foundation, Inc., 51 Franklin Street, Fifth Floor, Boston, MA 02110-1301, USA. Also add information on how to contact you by electronic and paper mail. If the program is interactive, make it output a short notice like this when it starts in an interactive mode: Gnomovision version 69, Copyright (C) year name of author Gnomovision comes with ABSOLUTELY NO WARRANTY; for details type `show w'. This is free software, and you are welcome to redistribute it under certain conditions; type `show c' for details. The hypothetical commands `show w' and `show c' should show the appropriate parts of the General Public License. Of course, the commands you use may be called something other than `show w' and `show c'; they could even be mouse-clicks or menu items--whatever suits your program. You should also get your employer (if you work as a programmer) or your school, if any, to sign a "copyright disclaimer" for the program, if necessary. Here is a sample; alter the names: Yoyodyne, Inc., hereby disclaims all copyright interest in the program `Gnomovision' (which makes passes at compilers) written by James Hacker. signature of Ty Coon, 1 April 1989 Ty Coon, President of Vice RUS - 24 Интензо ГмбХ Дата:17.12.2013 ЕС Заявление о соответствии товара Мы, компания Интензо ГмбХ, с местонахождением в Германии, город Вехта, улица Дипхольцерштрассе 15, заявляем на собственной ответственности , что следующий продукт: Модель: 7“ TAB 734 (Номер артикула 5509854) Описание: Компьютер-планшет соответствует следующим директивам и стандартам: Директива R&TTE 1999/5/ЕС EN 301 489-1 V1.9.2 EN 301 489-17 V2.1.1 EN 300 328 V1.7.1 : 2006-10 EN 55022:2010 (Class B) EN 55024:2010 EN 61000-3-2:2006+A1 :2009+A2 :2009 (Class D) EN 61000-3-3:2008 Директива низкого напряжения 2006/95/ЕС EN 60950-1:2006+A11:2009+A1:2010+A12:2011+A12: исправле́ние 2012 Директива экологического дизайна 2009/125/ЕС 1275/2008 278/2009 Директива ROHS 2011/65/EU Технические документы на выше приведенную модель данного устройства находятся в следующем месте: Интензо ГмбХ Дипхолцерштрассе 15, 49377 Вехта, Германия Уполномоченная личность: ___________________________________ Управляющий директор: Томас Пёлькинг RUS - 25