1
㻝㻌㻛㻌㻣㻜㻡
[A] Important Safety Instructions
[A-01] Installation
[A-02] Power Supply
[A-03] Handling
[A-04] Maintenance and Inspections
[A-05] Consumables
[B] Legal Notices
[B-01] Legal Notices
[B-02] Legal Limitations on the Usage of Your Product and the Use of Images
[C] Using the e-Manual
[C-02] How to Use the e-Manual
[C-03] Installing the e-Manual
[C-04] Viewing the e-Manual
[C-05] Searching for Information
[C-06] Uninstalling the e-Manual
[D] Specifications and Parts
[D-02] Parts and Their Functions
[D-03] Optional Accessories
[D-04] Dimensions of Each Part
[D-05] Printer Specifications
[D-06] Consumables
[D-07] Location of the Serial Number
[E] Printer Installation and Software Installation
[E-02] Installation Conditions of the Printer
[E-03] Confirming the Supplied Accessories
[E-04] Carrying the Printer to the Installation Site and Removing the Packing Materials
[E-05] Preparing the Toner Cartridges
[E-06] Connecting the Power Cord
[E-07] Loading Paper and Registering the Paper Size
[E-08] Paper Feeder
[E-09] Printer Driver System Requirements
[E-10] Installing from CD-ROM Setup
[E-11] Installing with Plug and Play
[E-12] The Tasks That Should Be Performed to Print in a Network Environment
[E-13] Print Server Environment (Printer Sharing)
[E-14] Configuring the Print Server
[E-15] Installation on Clients
[E-16] To Check the Processor Version of Windows Vista or Server 2008
[E-17] Printing Configuration Page Print
[E-18] Printing a Test Page in Windows
[E-19] Uninstalling the Printer Driver Using [Canon LBP7210C Uninstaller]
[E-20] Uninstalling the Printer Driver in [Control Panel]
[E-21] Uninstalling the USB Class Driver
[F] Printing
[F-02] Installing the Printer Driver
[F-03] Turning the Printer On/Off
[F-04] Printing (Basic Procedure)
[F-05] Canceling a Job
[F-06] Changing the Default Values for Printing Preferences
㻞㻌㻛㻌㻣㻜㻡
6
7
9
11
13
16
17
18
22
23
24
27
31
33
40
44
45
51
52
53
57
58
59
60
63
66
71
76
77
89
101
103
112
123
124
126
139
155
156
158
160
164
168
171
172
174
177
183
189
[F-07] Various Sheets in the Printer Driver
[F-08] Checking the Printer Status Using the Printer Status Window
[F-09] Checking by the Remote UI
[F-10] How to Use Help
[F-11] Usable Paper and Unusable Paper
[F-12] Printable Area
[F-13] Storing Paper or Printouts
[F-14] Paper Loading Orientation
[F-15] Paper Source
[F-16] Output Tray
[F-17] Loading Standard Size Paper (Other Than Index Cards and Envelopes)
[F-18] Loading Index Cards
[F-19] Loading Envelopes
[F-20] Loading Custom Size Paper (Non-Standard Size Paper)
[F-21] 1-sided Printing and 2-sided Printing
[F-22] Printing Multiple Pages on One Sheet
[F-23] Printing a Color Document in Black and White
[F-24] Printing Data with Different Orientations in the Same Job
[F-25] Printing with a Gutter
[F-26] Selecting the Paper Output Method
[F-27] Printing with the Page 180 Degrees Rotated
[F-28] Selecting Paper for Each Page
[F-29] Scaling Print Output
[F-30] Printing an Image Larger than A4 Size (Poster Printing)
[F-31] Adding a Watermark to a Document to Be Printed (Watermark Printing)
[F-32] Printing Borders, the Printing Date, etc.
[F-33] Booklet Printing
[F-34] Combining Jobs before Printing
[F-35] Performing Printing Appropriate for Particular Print Data
[F-36] Correcting Rough-Textured Images
[F-37] Adjusting the Toner Density
[F-38] Printing with Brightness and Contrast Adjusted
[F-39] Adjusting the Color
[F-40] Matching the Color on the Display
[F-41] Calibrating the Printer
[F-42] Correcting "Out-of-Register Colors"
[F-43] Using Preview to Configure the Printing Preferences
[F-44] Saving Frequently Used Printing Preferences (Profiles)
[G] Maintenance
[G-02] Checking the Printer Status Using the Printer Status Window
[G-03] Checking by the Remote UI
[G-04] When a Message Appears
[G-05] Replacing Toner Cartridges
[G-06] Handling Toner Cartridges
[G-07] Storing Toner Cartridges
[G-08] Loading Standard Size Paper (Other Than Index Cards and Envelopes)
[G-09] Loading Index Cards
[G-10] Loading Envelopes
[G-11] Loading Custom Size Paper (Non-Standard Size Paper)
㻟㻌㻛㻌㻣㻜㻡
191
199
203
207
213
220
222
224
226
229
231
243
247
259
273
279
282
285
288
291
294
297
300
305
308
313
316
319
324
326
329
332
335
338
344
348
352
355
361
362
363
364
366
375
378
379
380
381
382
[G-12] Performing Printing Appropriate for Particular Print Data
[G-13] Correcting Rough-Textured Images
[G-14] Adjusting the Toner Density
[G-15] Printing with Brightness and Contrast Adjusted
[G-16] Adjusting the Color
[G-17] Matching the Color on the Display
[G-18] Calibrating the Printer
[G-19] Correcting "Out-of-Register Colors"
[G-20] Cleaning the Inside of the Printer
[G-21] Cleaning the Outside of the Printer
[G-22] Moving the Printer
[G-23] Paper Feeder
[G-24] Handling the Printer
[G-25] Location of the Serial Number
[H] Troubleshooting
[H-02] The Printer Driver Cannot Be Installed or Uninstalled
[H-03] When Installing the Printer Diver from the CD-ROM, the Printer Is Not Recognized
Automatically after Connecting the USB Cable
[H-04] When the Printer Driver Is Installed by Auto Setup, the Printer Cannot Be Searched for
[H-05] The Printer to Be Used Cannot Be Searched for in NetSpot Device Installer
[H-06] The Print Server for Connection Cannot Be Found
[H-07] The Shared Printer Cannot Be Accessed
[H-08] Printing Does Not Work
[H-09] There Is a Problem with the Printer Power Supply
[H-10] Checking the USB Port
[H-11] Checking Bi-directional Communication
[H-12] All the Indicators on the Network Board Are Off
[H-13] The ERR Indicator on the Network Board Is On
[H-14] The ERR Indicator on the Network Board Blinks at an Interval of Four Times
[H-15] The ERR Indicator on the Network Board Is Constantly Blinking
[H-16] Checking the IP Address
[H-17] Checking Standard TCP/IP Port
[H-18] Specifying Standard TCP/IP Port
[H-19] Checking the Printer on the Print Server
[H-20] A Message Appears in the Printer Status Window
[H-21] Registering the Paper Size for the Paper Drawer
[H-22] The Printer Cannot Be Connected to the Network
[H-23] Paper Curls or Creases
[H-24] Poor Print Quality
[H-25] Streaks (lines) Appear
[H-26] Unevenness, Smudge Marks, etc. Appear
[H-27] Printing Is Faint, Is Faded, Has a Problem with Color, etc.
[H-28] Printout Is Skewed, Missing, or Has Unneeded Space
[H-29] Data Is Printed Diagonally
[H-30] Adjusting the Color or Image Quality
[H-31] Paper Jams
[H-32] Precautions When Removing Jammed Paper
[H-33] Clearing Paper Jams (Drawer Area)
[H-34] Clearing Paper Jams (Multi-purpose Tray Area)
㻠㻌㻛㻌㻣㻜㻡
383
384
385
386
387
388
389
390
391
394
396
401
402
404
405
406
408
409
410
411
412
413
428
429
430
432
433
434
435
436
438
439
443
444
450
452
458
462
463
465
474
480
483
484
486
488
490
496
[H-35] Clearing Paper Jams (Output Area)
[H-36] The Alarm Indicator Is On or Blinking
[H-37] The Alarm Indicator Is On
[H-38] The Alarm Indicator Is Blinking
[H-39] Miscellaneous Problems
[H-40] Changing the Setting for Spooling at Host
[H-41] Allow Profile Selection or Editing
[I] Network Settings
[I-02] Auto Setup (Recommended Method)
[I-03] Manual Setup (Windows XP/Server 2003 Only)
[I-04] Setting the IP Address
[I-05] Configuring the Protocol Settings
[I-06] Setting Items
[I-07] Initializing the Network Settings
[I-08] Settings for Adding a Port
[I-09] Changing the Network Transmission Speed or Transfer Mode
[I-10] Changing the Port Name of the Printer
[I-11] Checking and Specifying the Unicast Communication Mode
[I-12] Checking the MAC Address
[I-13] Print Server Environment (Printer Sharing)
[I-14] Configuring the Print Server
[I-15] Installation on Clients
[J] Managing and Configuring the Printer
[J-02] Printer Status Window
[J-03] Remote UI
[J-04] FTP Client
[J-05] NetSpot Device Installer
[J-06] Setting and Changing the Administrator Password
[J-07] Specifying and Changing the Device Name or Administrator Information
[J-08] Checking by the Remote UI
[J-09] Printing Status Print to Check the Printer Status
[J-10] Setting the Energy-saving Mode
[J-11] Updating the Network Board Firmware
[J-12] Restricting the Users Who Can Print with IP Addresses
[J-13] Restricting the Users Who Can Monitor and Change the Settings Using the SNMP Protocol
[J-14] Restricting the Users Who Can Perform Multicast Discovery
[J-15] Restricting the Users Who Can Access with MAC Addresses
[J-16] Restricting the FTP Access from End-users
[J-17] Obtaining and Checking the Security Access Logs
㻡㻌㻛㻌㻣㻜㻡
500
503
504
508
509
513
515
517
519
535
546
564
575
580
585
587
591
594
597
599
600
601
602
603
606
621
625
636
643
647
653
657
662
668
674
681
687
693
697
[A] Important Safety Instructions
Please read these "Important Safety Instructions" thoroughly before operating the printer.
As these instructions are intended to prevent injury to the user and other persons or destruction of property, always pay
attention to these instructions.
Also, as it may result in unexpected accidents or injuries, do not perform any operation unless otherwise specified in the
manual. Improper operation or use of this machine could result in personal injury and/or damage requiring extensive
repair that may not be covered under your Limited Warranty.
Descriptions of Warnings and Cautions
The following are descriptions of warnings and cautions used in this e-Manual to explain handling restrictions,
precautions, and instructions that should be observed for your safety.
WARNING
Indicates a warning about operations that can result in death or serious injury if not performed
correctly.
You must follow the information in this warning to ensure safe use of the printer.
CAUTION
Indicates a caution concerning operations that may lead to injury to persons, or damage to
property if not performed correctly.
You must follow the information in this caution to ensure safe use of the printer.
Important Safety Instructions
Important Safety Instructions
Installation
Power Supply
Handling
Maintenance and Inspections
Consumables
㻢㻌㻛㻌㻣㻜㻡
[A-01] Installation
WARNING
Do not install the printer in a location near alcohol, paint thinner, or other
flammable substances. If flammable substances come into contact with electrical
parts inside the printer, this may result in a fire or electrical shock.
Do not place the following items on the printer.
Necklaces and other metal objects
Cups, vases, flowerpots, and other containers filled with water or
liquids
If these items come into contact with a high-voltage area inside the printer, this
may result in a fire or electrical shock.
If these items are dropped or spilled inside the printer, immediately turn off the
power switch (1) and disconnect the interface cables if they are connected (2).
Then, unplug the power plug from the AC power outlet (3) and contact your local
authorized Canon dealer.
When installing or removing the optional accessories, be sure to turn the printer
off, unplug the power plug, and then disconnect all the interface cables and power
cord from the printer. Otherwise, the power cord or interface cables may be
damaged, resulting in a fire or electrical shock.
CAUTION
Do not install the printer in unstable locations, such as on unsteady platforms or
inclined floors, or in locations subject to excessive vibrations, as this may cause the
printer to fall or tip over, resulting in personal injury.
The ventilation slots are provided for proper ventilation of working parts inside the
printer. Never place the printer on a soft surface, such as a bed, sofa, or rug.
Blocking the slots can cause the printer to overheat, resulting in a fire.
Do not install the printer in the following locations, as this may result in a fire or
electrical shock.
㻣㻌㻛㻌㻣㻜㻡
A damp or dusty location
A location exposed to smoke and steam, such as near a cookery or
humidifier
A location exposed to rain or snow
A location near a water faucet or water
A location exposed to direct sunlight
A location subject to high temperatures
A location near open flames
When installing the printer, gently lower the printer to the installation site so as not
to catch your hands between the printer and the floor or between the printer and
other equipment, as this may result in personal injury.
When connecting the interface cable, connect it properly by following the
instructions in the e-Manual. If not connected properly, this may result in
malfunction or electrical shock.
When moving the printer, follow the instructions in the e-Manual to hold it
correctly. Failure to do so may cause you to drop the printer, resulting in personal
injury.
"Moving the Printer"
"Carrying the Printer to the Installation Site and Removing the Packing
Materials"
㻤㻌㻛㻌㻣㻜㻡
[A-02] Power Supply
WARNING
Do not damage or modify the power cord. Also, do not place heavy objects on the
power cord or pull on or excessively bend it, as this can cause electrical damage,
resulting in fire or electrical shock.
Keep the power cord away from all heat sources. Failure to do so can cause the
power cord insulation to melt, resulting in a fire or electrical shock.
The power cord should not be taut, as this may lead to a loose connection and
cause overheating, which could result in a fire.
The power cord may become damaged if it is stepped on, fixed with staples, or if
heavy objects are placed on it. Continued use of a damaged power cord can lead to
an accident, such as a fire or electrical shock.
Do not plug or unplug the power plug with wet hands, as this can result in
electrical shock.
Do not plug the power cord into a multiplug power strip, as this can result in a fire
or electrical shock.
Do not bundle up or tie up the power cord in a knot, as this can result in a fire or
electrical shock.
Insert the power plug completely into the AC power outlet. Failure to do so can
result in a fire or electrical shock.
If excessive stress is applied to the connection part of the power cord, it may
damage the power cord or the wires inside the machine may disconnect. This could
result in a fire. Avoid the following situations:
Connecting and disconnecting the power cord frequently.
Tripping over the power cord.
The power cord is bent near the connection part, and continuous
stress is being applied to the power outlet or the connection part.
Applying a shock to the power connector.
Do not use power cords other than the one provided, as this can result in a fire or
electrical shock.
As a general rule, do not use extension cords. Using an extension cord may result
in a fire or electrical shock.
CAUTION
Do not use a power supply voltage other than that listed herein, as this may result
in a fire or electrical shock.
Always grasp the power plug when unplugging the power plug. Do not pull on the
power cord, as this may expose the core wire of the power cord or damage the cord
insulation, causing electricity to leak, resulting in a fire or electrical shock.
Leave sufficient space around the power plug so that it can be unplugged easily. If
objects are placed around the power plug, you may be unable to unplug it in an
emergency.
㻥㻌㻛㻌㻣㻜㻡
㻝㻜㻌㻛㻌㻣㻜㻡
[A-03] Handling
WARNING
Do not disassemble or modify the printer. There are high-temperature and highvoltage components inside the printer which may result in a fire or electrical shock.
Electrical equipment can be hazardous if not used properly. Do not allow children
to touch the power cord, cables, internal gears, or electrical parts.
If the printer makes an unusual noise or emits smoke, heat, or an unusual smell,
immediately turn off the power switch and disconnect the interface cables if they
are connected. Then, unplug the power plug from the AC power outlet and contact
your local authorized Canon dealer. Continued use can result in a fire or electrical
shock.
Do not use flammable sprays near the printer. If flammable substances come into
contact with electrical parts inside the printer, this may result in a fire or electrical
shock.
Always turn off the power switch and unplug the power plug and interface cables
before moving the printer. Failure to do so can damage the cables or cords,
resulting in a fire or electrical shock.
Confirm that the power plug or power connecter is inserted completely after
moving the printer. Failure to do so can result in an overheating and fire.
Do not drop paper clips, staples, or other metal objects inside the printer. Also, do
not spill water, liquids, or other flammable substances (alcohol, benzene, paint
thinner, etc.) inside the printer. If these items come into contact with a high-voltage
area inside the printer, this may result in a fire or electrical shock. If these items are
dropped or spilled inside the printer, immediately turn off the power switch and
disconnect the interface cables if they are connected. Then, unplug the power plug
from the AC power outlet and contact your local authorized Canon dealer.
When plugging or unplugging a USB cable when the power plug is plugged into
an AC power outlet, do not touch the metal part of the connector, as this can result
in electrical shock.
CAUTION
Do not place heavy objects on the printer. The object or the printer may fall,
resulting in personal injury.
Turn off the power switch when the printer will not be used for a long period of
time, such as overnight. Turn off the printer and unplug the power plug if the
printer will not be used for an extended period of time, such as for several days.
Open or close covers and install or remove drawers gently and carefully. Be careful
not to hurt your fingers.
Keep your hands and clothing away from the roller in the output area. Even if the
printer is not printing, the roller may suddenly rotate and catch your hands or
clothing, resulting in personal injury.
The output slot is hot during and immediately after printing. Do not touch the area
surrounding the output slot, as this may result in burns.
㻝㻝㻌㻛㻌㻣㻜㻡
Printed paper may be hot immediately after being output. Be careful when
removing the paper and aligning the removed paper, especially after continuous
printing. Failure to do so may result in burns.
The laser beam used in the printer can be harmful to human bodies. The laser beam
is confined in the laser scanner unit by a cover, so there is no danger of the laser
beam escaping during normal printer operation. Read the following remarks and
instructions for safety.
Never open covers other than those indicated in this manual.
Do not remove the caution label attached to the cover of the laser
scanner unit.
If the laser beam should escape and enter your eyes, exposure may
cause damage to your eyes.
㻝㻞㻌㻛㻌㻣㻜㻡
[A-04] Maintenance and Inspections
WARNING
When cleaning the printer, turn off the printer and computer, remove the interface
cables, and then unplug the power plug. Failure to do so can result in a fire or
electrical shock.
Unplug the power plug from the AC power outlet periodically and clean the area
around the base of the power plug's metal pins and the AC power outlet with a dry
cloth to remove all dust and grime. In damp, dusty, or smoky locations, dust can
build up around the power plug and become damp, which can cause a short circuit,
resulting in a fire.
Clean the printer with a well wrung out cloth dampened with water or mild
detergent diluted with water. Do not use alcohol, benzene, paint thinner, or other
flammable substances. If flammable substances come into contact with electrical
parts inside the printer, this may result in a fire or electrical shock.
Some areas inside the printer are subject to high voltage. When removing jammed
paper or when inspecting the inside of the printer, be careful not to allow
necklaces, bracelets, or other metal objects to touch the inside of the printer, as this
can result in burns or electrical shock.
Do not dispose of used toner cartridges in open flames. This may cause the toner
remaining inside the cartridges to ignite, resulting in burns or fire.
If you accidentally spill or scatter toner, carefully gather the toner particles together
or wipe them up with a soft, damp cloth in a way that prevents inhalation. Never
use a vacuum cleaner that does not have safeguards against dust explosions to
clean up spilled toner. Doing so may cause a malfunction in the vacuum cleaner, or
result in a dust explosion due to static discharge.
Confirm that the power plug or power connecter is inserted completely after
cleaning the printer. Failure to do so can result in an overheating and fire.
Check the power cord and plug regularly. The following conditions may result in
fire, so contact your local authorized Canon dealer or the Canon help line.
There are burn marks on the power plug.
The blade on the power plug is deformed or broken.
The power is turned OFF or ON when bending the power cord.
The coating of the power cord is damaged, cracked, or dented.
A part of the power cord becomes hot.
Check regularly that the power cord, plug, and connector are not handled in the
following manner. Failure to do so can result in a fire or electrical shock.
The power connector is loosened.
The power plug is loosened.
Stress is being applied to the power cord by a heavy object or by
fixing it with staples.
The power cord is tied in a bundle.
A part of the power cord is put in an aisle.
The power cord is put in front of the heating appliance.
㻝㻟㻌㻛㻌㻣㻜㻡
CAUTION
Never attempt to service this printer yourself, except as explained in this manual.
There are no user serviceable parts inside the printer. Adjust only those controls
that are covered in the operating instructions. Improper adjustment could result in
personal injury and/or damage requiring extensive repair that may not be covered
under your Limited Warranty.
The fixing unit and its surroundings inside the printer become hot during use.
When removing jammed paper or when inspecting the inside of the printer, do not
touch the fixing unit and its surroundings, as this may result in burns.
When removing jammed paper or when inspecting the inside of the machine, do
not expose yourself to the heat emitted from the fixing unit and its surroundings for
a prolonged period of time. Doing so may result in low temperature burns, even
though you did not touch the fixing unit and its surroundings directly, as this may
result in burns.
If paper is jammed, remove the jammed paper so that any pieces of paper do not
remain inside the printer according to the displayed message. Also, do not put your
hands forcibly in the parts other than those directed on the screen. Failure to do so
may result in burns or injuries.
When removing jammed paper or replacing a toner cartridge, be careful not to get
any toner on your hands or clothing, as this will dirty your hands or clothing. If
toner gets on your hands or clothing, wash them immediately with cold water.
Washing with warm water sets the toner, making it impossible to remove the toner
stains.
When removing jammed paper, be careful not to allow the toner on the paper to
scatter. The toner may get into your eyes or mouth. If toner gets into your eyes or
mouth, wash them immediately with cold water and consult a physician.
When loading paper or removing jammed paper, be careful not to cut your hands
with the edges of the paper.
When removing a toner cartridge, remove the toner cartridge carefully so as to
prevent the toner from scattering and getting into your eyes or mouth. If toner gets
into your eyes or mouth, wash them immediately with cold water and consult a
physician.
Do not attempt to disassemble the toner cartridge. The toner may scatter and get
into your eyes or mouth. If toner gets into your eyes or mouth, wash them
㻝㻠㻌㻛㻌㻣㻜㻡
immediately with cold water and consult a physician.
If toner leaks from the toner cartridge, be careful not to inhale the toner or allow it
to come into direct contact with your skin. If the toner comes into contact with
your skin, wash with soap. If the skin becomes irritated or you inhale the toner,
consult a physician immediately.
㻝㻡㻌㻛㻌㻣㻜㻡
[A-05] Consumables
WARNING
Do not dispose of used toner cartridges in open flames. This may cause the toner to
ignite, resulting in burns or fire.
Do not store toner cartridges or paper in a location exposed to open flames. This
may cause the toner or paper to ignite, resulting in burns or fire.
When disposing of a toner cartridge, place the toner cartridge into a bag to prevent
the toner from scattering, and then dispose of the toner cartridge according to local
regulations.
If you accidentally spill or scatter toner, carefully gather the toner particles together
or wipe them up with a soft, damp cloth in a way that prevents inhalation. Never
use a vacuum cleaner that does not have safeguards against dust explosions to
clean up spilled toner. Doing so may cause a malfunction in the vacuum cleaner, or
result in a dust explosion due to static discharge.
CAUTION
Keep the toner cartridges and other consumables out of the reach of small children.
If the toner or other parts are ingested, consult a physician immediately.
Do not attempt to disassemble the toner cartridge. The toner may scatter and get
into your eyes or mouth. If toner gets into your eyes or mouth, wash them
immediately with cold water and consult a physician.
If toner leaks from the toner cartridge, be careful not to inhale the toner or allow it
to come into direct contact with your skin. If the toner comes into contact with
your skin, wash with soap. If the skin becomes irritated or you inhale the toner,
consult a physician immediately.
If the sealing tape is pulled out forcefully or stopped at midpoint, toner may spill
out. If the toner gets into your eyes or mouth, wash them immediately with cold
water and immediately consult a physician.
㻝㻢㻌㻛㻌㻣㻜㻡
[B] Legal Notices
This section describes regulations regarding use and disposal of the printer, classification of the printer under the
International ENERGY STAR Program, and legal notices and trademarks used in the e-Manual. Please read this
information thoroughly before operating the printer.
Legal Notices
Legal Notices
Legal Notices
Legal Limitations on the Usage of Your Product and the Use of Images
Legal Limitations on the Usage of Your Product and the Use of Images
㻝㻣㻌㻛㻌㻣㻜㻡
[B-01] Legal Notices
Product Name
EMC requirements of EC Directive
Laser Safety
International Energy Star-Program
WEEE Directive
Trademarks
Copyright
Disclaimer
Product Name
Safety regulations require the product's name to be registered.
In some regions where this product is sold, the following name(s) in parentheses ( ) may be registered instead.
LBP7210Cdn (F159800)
EMC requirements of EC Directive
This equipment conforms with the essential EMC requirements of EC Directive. We declare that this product
conforms with the EMC requirements of EC Directive at nominal mains input 230 V, 50 Hz although the rated
input of the product is 220 to 240 V, 50/60 Hz. Use of shielded cable is necessary to comply with the technical
EMC requirements of EC Directive.
Laser Safety
This product is certified as a Class 1 laser product under IEC60825-1:2007 and EN60825-1:2007. This means
that the product does not produce hazardous laser radiation.
Since radiation emitted inside the product is completely confined within protective housings and external
covers, the laser beam cannot escape from the machine during any phase of user operation. Do not remove
protective housings or external covers, except as directed by the equipment's manuals.
The label shown below is attached to the laser scanner unit inside the machine.
㻝㻤㻌㻛㻌㻣㻜㻡
CLASS 1 LASER PRODUCT
LASER KLASSE 1
APPAREIL À LASER DE CLASSE 1
APPARECCHIO LASER DI CLASSE 1
PRODUCTO LÁSER DE CLASE 1
APARELHO A LASER DE CLASSE 1
LUOKAN 1 LASER-TUOTE
LASERPRODUKT KLASS 1
CAUTION
Use of controls, adjustments, or performance of procedures other than those specified in this
manual may result in hazardous radiation exposure.
International ENERGY STAR Program
As an ENERGY STAR® Partner, Canon Inc. has determined that this product meets the ENERGY STAR
Program for energy efficiency.
The International ENERGY STAR Office Equipment Program is an international program that promotes energy
saving through the use of computers and other office equipment.
The program backs the development and dissemination of products with functions that effectively reduce energy
consumption. It is an open system in which business proprietors can participate voluntarily.
The targeted products are office equipment, such as computers, displays, printers, facsimiles, and copiers. The
standards and logos are uniform among participating nations.
㻝㻥㻌㻛㻌㻣㻜㻡
WEEE Directive
European Union (and EEA) only.
This symbol indicates that this product is not to be disposed of with your household waste, according to the
WEEE Directive (2002/96/EC) and your national law. This product should be handed over to a designated
collection point, e.g., on an authorized one-for-one basis when you buy a new similar product or to an authorized
collection site for recycling waste electrical and electronic equipment (EEE). Improper handling of this type of
waste could have a possible negative impact on the environment and human health due to potentially hazardous
substances that are generally associated with EEE. At the same time, your cooperation in the correct disposal of
this product will contribute to the effective usage of natural resources. For more information about where you can
drop off your waste equipment for recycling, please contact your local city office, waste authority, approved
WEEE scheme or your household waste disposal service. For more information regarding return and recycling of
WEEE products, please visit www.canon-europe.com/environment.
(EEA: Norway, Iceland and Liechtenstein)
Trademarks
Canon, the Canon Logo, LBP, NetSpot, and PageComposer are trademarks of Canon Inc.
Adobe, Adobe Acrobat, and Adobe Reader are trademarks of Adobe Systems Incorporated.
Microsoft, Windows, Windows Vista, Windows Server and Internet Explorer are either registered
trademarks or trademarks of Microsoft Corporation in the United States and/or other countries.
Ethernet is a trademark of Xerox Corporation.
Other product and company names herein may be the trademarks of their respective owners.
Copyright
Copyright 2012 by Canon Inc. All rights reserved.
No part of this publication may be reproduced or transmitted in any form or by any means,
electronic or mechanical, including photocopying and recording, or by any information storage or
retrieval system without the prior written permission of Canon Inc.
Disclaimer
㻞㻜㻌㻛㻌㻣㻜㻡
The information in this manual is subject to change without notice.
CANON INC. MAKES NO WARRANTY OF ANY KIND WITH REGARD TO THIS
MATERIAL, EITHER EXPRESS OR IMPLIED, EXCEPT AS PROVIDED HEREIN,
INCLUDING WITHOUT LIMITATION, THEREOF, WARRANTIES AS TO
MARKETABILITY, MERCHANTABILITY, FITNESS FOR A PARTICULAR PURPOSE OF
USE OR AGAINST INFRINGEMENT OF ANY PATENT. CANON INC. SHALL NOT BE
LIABLE FOR ANY DIRECT, INCIDENTAL, OR CONSEQUENTIAL DAMAGES OF ANY
NATURE, OR LOSSES OR EXPENSES RESULTING FROM THE USE OF THIS MATERIAL.
㻞㻝㻌㻛㻌㻣㻜㻡
[B-02] Legal Limitations on the Usage of Your Product and the Use of Images
Using your product to scan, print or otherwise reproduce certain documents, and the use of such images as scanned,
printed or otherwise reproduced by your product, may be prohibited by law and may result in criminal and/or civil
liability. A non-exhaustive list of these documents is set forth below. This list is intended to be a guide only. If you are
uncertain about the legality of using your product to scan, print or otherwise reproduce any particular document, and/or of
the use of the images scanned, printed or otherwise reproduced, you should consult in advance with your legal advisor
for guidance.
Paper Money
Travelers Checks
Money Orders
Food Stamps
Certificates of Deposit
Passports
Postage Stamps (canceled or uncanceled)
Immigration Papers
Identifying Badges or Insignias
Internal Revenue Stamps (canceled or uncanceled)
Selective Service or Draft Papers
Bonds or Other Certificates of Indebtedness
Checks or Drafts Issued by Governmental Agencies
Stock Certificates
Motor Vehicle Licenses and Certificates of Title
Copyrighted Works/Works of Art without Permission of Copyright Owner
㻞㻞㻌㻛㻌㻣㻜㻡
[C] Using the e-Manual
㻞㻟㻌㻛㻌㻣㻜㻡
[C-02] How to Use the e-Manual
Symbols Used in the e-Manual
Keys and Buttons Used in the e-Manual
Displays Used in the e-Manual
Illustrations Used in This Manual
Abbreviations Used in the e-Manual
Symbols Used in the e-Manual
The following are descriptions of warnings and cautions used in the e-Manual to explain handling restrictions,
precautions, and instructions that should be observed for your safety.
WARNING
Indicates a warning about operations that can result in death or serious injury if not performed
correctly.
You must follow the information in this warning to ensure safe use of the printer.
CAUTION
Indicates a caution concerning operations that may lead to injury to persons, or damage to
property if not performed correctly.
You must follow the information in this caution to ensure safe use of the printer.
IMPORTANT
Indicates operational requirements and restrictions.
Be sure to read these items carefully to ensure correct printer operation and avoid printer damage.
NOTE
Indicates a clarification of an operation.
It is recommended that you read this note.
INFORMATION
Indicates additional useful information about an operation.
It is recommended that you read this information.
Keys and Buttons Used in the e-Manual
㻞㻠㻌㻛㻌㻣㻜㻡
The following are examples of how control panel keys and on-screen buttons are depicted in the e-Manual.
Control panel keys
<Key icon> + (Key name)
Example: Press the
(Cancel Job) key.
Buttons and items on the computer display
[Names of buttons and items]
Example: Click [OK].
Select [Paper Source].
Displays Used in the e-Manual
Most of the operations in the e-Manual are described using screenshots from Windows XP Professional. Displayed
screens may differ from those in the e-Manual depending on your environment.
Items that should be selected or buttons that should be clicked are enclosed in a red frame (
).
When multiple items or buttons can be clicked on the screen shot of computer operation screen, all buttons are marked.
Select the button which suits your needs.
NOTE
Example Screenshot
Click [Next].
㻞㻡㻌㻛㻌㻣㻜㻡
Illustrations Used in This Manual
Although the power cord used in this manual is as the one in the following illustration, the form of the power cord may
differ depending on the country or region.
Abbreviations Used in the e-Manual
Abbreviations of Operating Systems
In the e-Manual, operating systems are abbreviated as follows.
• Microsoft
• Microsoft
• Microsoft
• Microsoft
• Microsoft
• Microsoft
Windows
Windows
Windows
Windows
Windows
Windows
XP operating system:
Windows
Server 2003 operating system: Windows
Vista operating system:
Windows
Server 2008 operating system: Windows
7 operating system:
Windows
operating system:
Windows
㻞㻢㻌㻛㻌㻣㻜㻡
XP
Server 2003
Vista
Server 2008
7
[C-03] Installing the e-Manual
Install the e-Manual included in the supplied CD-ROM on your computer using the following procedure.
IMPORTANT
If your hard disk does not have sufficient space to install the printer driver
A message indicating that your hard disk does not have sufficient space appears during
installation.
Cancel the installation, free up space on your hard disk, and then reinstall the software.
Turn on the computer and start Windows.
Log on as a user with administrative rights.
IMPORTANT
If you are not sure about your administrative rights
Contact your system administrator.
Insert the supplied CD-ROM "User Software" into the CD-ROM drive of your computer.
If the CD-ROM is already in the drive, eject the disk and reinsert it into the drive.
ĺ CD-ROM Setup appears.
It may take time to display CD-ROM Setup depending on your environment.
NOTE
If CD-ROM Setup does not appear
Display it using the following procedure.
(The CD-ROM drive name is indicated as "D:" in this manual. The CD-ROM drive name may
differ depending on the computer you are using.)
Windows XP and Server 2003
1. From the [Start] menu, select [Run].
2. Enter "D:\English\MInst.exe", and then click [OK].
Windows Vista and Server 2008
1. Enter "D:\English\MInst.exe" in [Start Search] under the [Start]
menu.
2. Press the [ENTER] key on the keyboard.
㻞㻣㻌㻛㻌㻣㻜㻡
If the [AutoPlay] dialog box appears (Windows Vista and Server 2008)
Click [Run AUTORUN.EXE].
If the [User Account Control] dialog box appears (Windows Vista and Server 2008)
Click [Continue].
Click [Custom Installation].
Perform the following procedure.
(1) Clear the [Printer Driver] check box.
(2) Click [Install].
Read the contents of License Agreement, and then click [Yes].
㻞㻤㻌㻛㻌㻣㻜㻡
ĺ The installation starts.
Wait until the following screen disappears.
It may take time to install the software depending on your environment.
Check the installation results, and then click [Next].
㻞㻥㻌㻛㻌㻣㻜㻡
Restart your computer.
(1) Select the [Restart Computer Now (Recommended)] check box.
(2) Click [Restart].
NOTE
Removing the CD-ROM
You can remove the CD-ROM from the CD-ROM drive after the installation is completed.
When viewing the e-Manual
"Viewing the e-Manual"
"Searching for Information"
After Installation
The following shortcut icon and folders are added to the following locations.
Desktop
[LBP7210C e-Manual]
[All Programs] under the [Start] menu
[Canon LBP7210C] - [LBP7210C e-Manual]
㻟㻜㻌㻛㻌㻣㻜㻡
[C-04] Viewing the e-Manual
Read the e-Manual to find information on the printer operations and familiarize yourself with the more detailed features.
You can view the e-Manual using either of the following methods.
Viewing the e-Manual Installed on a Computer
Viewing the e-Manual from the CD-ROM
Viewing the e-Manual Installed on a Computer
Double-click the icon of the e-Manual on the desktop.
NOTE
Viewing the e-Manual from the [Start] menu
Windows XP, Server 2003, Vista, and Server 2008
)URPWKH>6WDUW@PHQXVHOHFW>$OO3URJUDPV@ĺ>&DQRQ/%3&@ĺ
[LBP7210C e-Manual].
Installing the e-Manual
"Installing the e-Manual"
Viewing the e-Manual from the CD-ROM
Insert the supplied CD-ROM "User Software" into the CD-ROM drive of your computer.
If the CD-ROM is already in the drive, eject the disk and reinsert it into the drive.
ĺ CD-ROM Setup appears.
It may take time to display CD-ROM Setup depending on your environment.
NOTE
If CD-ROM Setup does not appear
Display it using the following procedure.
(The CD-ROM drive name is indicated as "D:" in this manual. The CD-ROM drive name may
differ depending on the computer you are using.)
Windows XP, and Server 2003
1. From the [Start] menu, select [Run].
㻟㻝㻌㻛㻌㻣㻜㻡
2. Enter "\D:English\MInst.exe", and then click [OK].
Windows Vista and Server 2008
1. Enter "D:\English\MInst.exe" in [Start Search] under the [Start]
menu.
2. Press the [ENTER] key on the keyboard.
If the [AutoPlay] dialog box appears (Windows Vista and Server 2008)
Click [Run AUTORUN.EXE].
If the [User Account Control] dialog box appears (Windows Vista and Server 2008)
Click [Continue].
Click [Display Manuals].
Click [
].
ĺ The e-Manual is displayed.
㻟㻞㻌㻛㻌㻣㻜㻡
[C-05] Searching for Information
You can search for the desired information by clicking the buttons or entering keywords on the top page.
(1) Contents
You can search for a topic from the contents in which all the items are listed.
(Example)
If you want to search for an installation procedure of the printer driver
(2) Printing, Network Settings, Managing and Configuring the Printer
You can search for a topic from the list classified into respective operations.
(Example)
If you want to search for a basic printing procedure
㻟㻟㻌㻛㻌㻣㻜㻡
(3) Maintenance
You can search for a topic from the list of various maintenance for the printer.
(Example)
If you want to search for the procedure for replacing toner cartridges
(4) Troubleshooting
You can search for troubleshooting.
(Example)
㻟㻠㻌㻛㻌㻣㻜㻡
If you want to search for a procedure for clearing a paper jam
(5) Basic Information
If you want to search for basic printer information etc.
(Example)
If you want to search for the printer specifications
(6) Search for Useful Features
You can search for a topic from the list of Useful Features.
(Example)
If you want to search for the procedure to print multiple pages on one sheet
㻟㻡㻌㻛㻌㻣㻜㻡
(7) Search for Index
You can search for printer terms.
(Example)
If you want to search for the procedure for loading Envelopes
(8) Search by Keyword
㻟㻢㻌㻛㻌㻣㻜㻡
You can search for a topic by entering keywords.
(Example)
If you want to search for the procedure for adding a watermark to a document to be printed (watermark printing)
(9) Search for Finished Images
You can search for a topic from the list of finished images of printout results.
(Example)
If you want to search for the procedure for enlarging or reducing pages to be printed
㻟㻣㻌㻛㻌㻣㻜㻡
(10) Print Manual
You can print the e-Manual.
If you want to print all pages of the e-Manual
Select [All Chapters].
If you want to print all pages for one category of the e-Manual
Select the desired category.
㻟㻤㻌㻛㻌㻣㻜㻡
NOTE
If you want to print selected pages
Display the page you want to print, and then click [Print This Page].
㻟㻥㻌㻛㻌㻣㻜㻡
[C-06] Uninstalling the e-Manual
The process of removing the e-Manual to restore the computer to the same state as before the e-Manual was installed is
referred to as uninstallation. To uninstall the e-Manual, perform the following procedure.
IMPORTANT
Uninstallation by a user with administrative rights
A user without administrative rights cannot perform the uninstallation. To perform the
uninstallation, be sure to log on as a user with administrative rights.
Contact your system administrator if you are not sure about your administrative rights.
Insert the supplied CD-ROM "User Software" into the CD-ROM drive of your computer.
If the CD-ROM is already in the drive, eject the disk and reinsert it into the drive.
ĺ CD-ROM Setup appears.
It may take time to display CD-ROM Setup depending on your environment.
NOTE
If CD-ROM Setup does not appear
Display it using the following procedure.
(The CD-ROM drive name is indicated as "D:" in this manual. The CD-ROM drive name may
differ depending on the computer you are using.)
Windows XP and Server 2003
1. From the [Start] menu, select [Run].
2. Enter "D:\English\MInst.exe", and then click [OK].
Windows Vista and Server 2008
1. Enter "D:\English\MInst.exe" in [Start Search] under the [Start]
menu.
2. Press the [ENTER] key on the keyboard.
If the [AutoPlay] dialog box appears (Windows Vista and Server 2008)
Click [Run AUTORUN.EXE].
If the [User Account Control] dialog box appears (Windows Vista and Server 2008)
Click [Continue].
Click [Additional Software Programs].
㻠㻜㻌㻛㻌㻣㻜㻡
Click [Start] in [Manual Uninstaller].
Click [Uninstall].
ĺ The uninstallation starts. Please wait a moment.
Depending on your environment, the uninstallation may take a long time.
㻠㻝㻌㻛㻌㻣㻜㻡
Click [Exit].
Click [Back].
Click [Exit].
NOTE
㻠㻞㻌㻛㻌㻣㻜㻡
Removing the CD-ROM
You can remove the CD-ROM from the CD-ROM drive after the uninstallation is completed.
㻠㻟㻌㻛㻌㻣㻜㻡
[D] Specifications and Parts
㻠㻠㻌㻛㻌㻣㻜㻡
[D-02] Parts and Their Functions
Front View
Rear View
Interior View
Multi-purpose Tray
Paper Drawer
Control Panel
CAUTION
Do not block the ventilation slots.
Blocking the ventilation slots may cause the printer to overheat, resulting in a fire.
Front View
(1) Front Cover
Open when replacing toner cartridges.
"Replacing Toner Cartridges"
(2) Multi-purpose Tray
(3) Manual Feed Transport Guide
Open when removing paper jammed in the multi-purpose tray.
"Clearing Paper Jams (Multi-purpose Tray Area)"
(4) Paper Drawer
(5) Output Tray
(6) Power Switch
(7) Control Panel
The control panel has the indicators which show the printer status and the key which can cancel a job.
(8) Ventilation Slots
Ventilate air to cool the insides of the printer.
Provide sufficient clearance around the ventilation slots so that heat can dissipate.
(9) Lift Handles
㻠㻡㻌㻛㻌㻣㻜㻡
Rear View
(1) Reset Button
To initialize the network settings, turn on the printer while pressing this button.
"Initializing the Network Settings"
(2) LAN Connector
(3) USB Connector
(4) 100 Indicator (Green)
Turns on when the printer is connected to the network by 100BASE-TX.
(Does not turn on when connected by 10BASE-T.)
(5) LNK Indicator (Green)
Turns on when the printer is connected to the network properly.
(6) ERR Indicator (Orange)
Turns on or blinks if the network board of the printer is not operating properly.
(7) Ventilation Slots
Ventilate air to cool the insides of the printer.
Provide sufficient clearance around the ventilation slots so that heat can dissipate.
(8) Lift Handles
(9) Power Socket
(10) Rear Cover
Open when removing paper jammed inside the printer.
"Paper Jams"
(11) Rating Label
The current value indicated in this rating label shows the average power current consumption.
Interior View
㻠㻢㻌㻛㻌㻣㻜㻡
(1) Y (Yellow) Toner Cartridge Slot
The Y (yellow) toner cartridge is installed in this slot.
(2) M (Magenta) Toner Cartridge Slot
The M (magenta) toner cartridge is installed in this slot.
(3) C (Cyan) Toner Cartridge Slot
The C (cyan) toner cartridge is installed in this slot.
(4) K (Black) Toner Cartridge Slot
The K (black) toner cartridge is installed in this slot.
(5) Toner Cartridge Tray
Tray for installing the toner cartridges.
"Replacing Toner Cartridges"
Multi-purpose Tray
(1) Paper Guides
Adjust the guides to match the width of the paper.
(2) Auxiliary Tray
Be sure to pull out this tray when loading paper in the multi-purpose tray.
(3) Tray Extension
Open to prevent the paper from hanging out of the multi-purpose tray when loading long-size paper, such as A4.
NOTE
㻠㻣㻌㻛㻌㻣㻜㻡
How to load paper
"Loading Standard Size Paper (Other Than Index Cards and Envelopes)"
"Loading Index Cards"
"Loading Envelopes"
"Loading Custom Size Paper (Non-Standard Size Paper)"
Paper Drawer
(1) Lock Release Lever
Hold this lever to slide the paper guides.
(2) Lock Release Lever
While holding this lever, pull out the paper drawer when loading paper longer than A4 size.
(3) Paper Guides
Adjust the position of the paper guides to the paper size.
NOTE
How to load paper
"Loading Standard Size Paper (Other Than Index Cards and Envelopes)"
"Loading Index Cards"
"Loading Envelopes"
"Loading Custom Size Paper (Non-Standard Size Paper)"
Control Panel
The control panel has the indicator lights which show the printer status and the button which can cancel a job.
㻠㻤㻌㻛㻌㻣㻜㻡
* Unlike in the above illustration, the indicator names are indicated above the respective icons depending on the country
or region.
Indicators
Number Name
Status
Refer to
A toner cartridge needs to be
replaced.
(1)
Toner Indicator
(On)
"Replacing Toner Cartridges"
(Orange)
The printer cannot print
because a toner cartridge needs
to be replaced.
One or more toner cartridges
are not installed in the correct
positions.
(Blinking)
"Loading Standard Size Paper
Printing cannot be performed
(2)
Load Paper Indicator
because no paper is loaded.
(Orange)
Paper of the correct size is not
(Blinking)
loaded.
(Other Than Index Cards and
Envelopes)"
"Loading Index Cards"
"Loading Envelopes"
"Loading Custom Size Paper
(Non-Standard Size Paper)"
(3)
Paper Jam Indicator
A paper jam has occurred and
(Orange)
printing cannot be performed.
(Blinking)
㻠㻥㻌㻛㻌㻣㻜㻡
"Paper Jams"
A service call has occurred and
printing cannot be performed.
(4)
Alarm Indicator
"The Alarm Indicator Is On"
(On)
(Orange)
An error has occurred and
"The Alarm Indicator Is
printing cannot be performed.
Blinking"
(Blinking)
The printer is ready to print.
(5)
Ready Indicator
-
(On)
(Green)
The printer is busy printing,
preparing to print, shutting
-
down or cleaning.
(Blinking)
The
(Cancel Job) key has
been pressed.
(6)
Cancel Job Indicator
(On)
"Canceling a Job"
(Orange)
A job is being canceled.
(Blinking)
Key
Number Name
(6)
Function
Refer to
Cancel Job
Press this key to cancel the job that is currently being printed or a job
"Canceling a
Key
with an error.
Job"
NOTE
Checking detailed information about the printer status
You can check detailed information about the printer status using the Printer Status Window from
your computer.
"Checking the Printer Status Using the Printer Status Window"
㻡㻜㻌㻛㻌㻣㻜㻡
[D-03] Optional Accessories
The following optional accessories are available in order to make full use of the printer functions. Purchase them in
accordance to your needs.
For the optional accessories, contact your local authorized Canon dealer.
Paper Feeder
In addition to the supplied multi-purpose tray and paper drawer, up to three paper sources can be used by installing the
optional paper feeder.
The paper feeder can be loaded with up to 250 sheets of plain paper (80 g/m 2) of the following sizes.
Standard sizes
A4, B5, A5, Legal, Letter, Executive, Statement, Foolscap, Envelope DL, Envelope No.10 (COM10),
Envelope C5, and Envelope B5
Custom paper size
Width 100.0 to 215.9 mm; Length 148.0 to 355.6 mm
IMPORTANT
Use a paper feeder designed for this printer.
Be sure to use a paper feeder designed for this printer.
NOTE
How to Install the Paper Feeder
"Paper Feeder"
㻡㻝㻌㻛㻌㻣㻜㻡
[D-04] Dimensions of Each Part
Printer unit
Standard configuration
With the paper feeder installed
Paper Feeder Unit PF-701
㻡㻞㻌㻛㻌㻣㻜㻡
[D-05] Printer Specifications
Hardware Specifications
Software Specifications
Hardware Specifications
Type
Desktop page printer
Printing method
Electrophoto method (On-demand fixing)
Black and white printing:
20 pages/min. (1-sided printing) *1*2
10 pages/min. / 5 sheets/min. (2-sided
Printing speed
printing) *1*2
(Plain paper (60 to 90 g/m 2 ), when printing
A4 paper continuously)
Color printing:
20 pages/min. (1-sided printing) *1*2
10 pages/min. / 5 sheets/min. (2-sided
printing) *1*2
Warm up time
(Time from power on to printer ready)
22 seconds or less *3
Recovery time
(Time from power save mode to printer
Approx. 9 seconds *4
ready)
Black and white printing: 16 seconds or less *4
First print time (When printing A4 paper)
Drawer 1
Color printing: 16 seconds or less *4
Standard sizes:
A4, B5, A5, Legal, Letter, Executive, Statement, Foolscap,
Envelope DL, Envelope No.10 (COM10), Envelope C5, and
Drawer 2 (Optional)
Envelope B5
Custom paper sizes:
100.0 to 215.9 mm wide and 148.0 to 355.6 mm long
Paper size
Standard sizes:
A4, B5, A5, Legal, Letter, Executive, Statement, Foolscap,
Envelope DL, Envelope No.10 (COM10), Envelope C5,
Multi-purpose tray
Envelope B5, Envelope Monarch, and Index Card
Custom paper sizes:
76.2 to 215.9 mm wide and 127.0 to 355.6 mm long
㻡㻟㻌㻛㻌㻣㻜㻡
Drawer 1
Paper
capacity
Approx. 250 sheets
Drawer 2 (Optional)
Multi-purpose tray
Approx. 50 sheets
Automatic 2-sided printing
A4, B5, Legal, Letter, Executive, and Foolscap
Paper output method
Face-down
Output tray capacity
Approx. 125 sheets
LwAd (declared A-weighted sound power level (1 B = 10
dB))
Noise
During standby: 4.3 B or less
(measured in accordance with ISO 7779,
During operation: 6.7 B or less
declared noise emission in accordance with
LpAm (declared A-weighted sound pressure level (bystander
ISO 9296)
position))
During standby: Approx. 24 dB
During operation: Approx. 52 dB
Operating environment
Temperature range: 10 to 30 °C (50 to 86
Operating environment (Printer unit only)
°F)
Humidity range: 20 to 80 % RH (no
condensation)
USB interface
Hi-Speed USB/USB
Host
interface
Network interface
User interface
Power supply
Shared 10BASE-T/100BASE-TX (RJ-45)
Full duplex/Half duplex
Nine LED indicators
one operation key
220 to 240 V (±10%), 50/60 Hz (±2 Hz)
Maximum: 1,170 W or less
Average during operation: 430 W or less
Average during standby: Approx. 20 W
Power consumption (at 20 °C (68 °F))
Average during sleep mode: Approx. 3.2 W
Even if the power of the printer is turned OFF, power is consumed only
slightly while the power plug is inserted into the AC power outlet.
To cut the power consumption completely, unplug the power plug from the
AC power outlet.
Canon Cartridge 718 Black *5
Canon Cartridge 718 Yellow *5
Consumables Toner Cartridges
Canon Cartridge 718 Magenta *5
㻡㻠㻌㻛㻌㻣㻜㻡
Canon Cartridge 718 Cyan *5
Printer unit and included
Printer unit (excluding toner cartridges): Approx. 22.3 kg
parts
Toner cartridge (each): Approx. 0.7 kg
Weight
Toner cartridge (each) *6: Approx. 0.7 kg
Consumables and optional
accessories
Paper Feeder Unit PF-701 (including the drawer): Approx.
4.0 kg
*1 The print speed may slow depending on the paper settings for the size, type, and number of copies.
*2 If the printer is used continuously for an extended period of time, the internal temperature of the printer may increase,
activating a safety mechanism and pausing printing temporarily.
*3 May vary depending on the usage conditions, such as the availability of the optional accessories and installation
environment.
*4 May vary depending on the output environment.
*5 The average yield of the toner cartridges is as follows.
Replacement toner cartridges
Average yield of K (Black) toner cartridge: 3,400 pages
Average yield of Composite C (Cyan), M (Magenta), and Y (Yellow) toner cartridges:
2,900 pages
Toner cartridges included with this printer
Average yield of K (Black) toner cartridge: 1,200 pages
Average yield of Composite C (Cyan), M (Magenta), and Y (Yellow) toner cartridges:
1,400 pages
The average yield is on the basis of "ISO/IEC 19798"* when printing A4 size paper with the default print density
setting.
* "ISO/IEC 19798" is the global standard related to "Method for the determination of toner cartridge yield for color
printers and multi-function devices that contain printer components" issued by ISO (International Organization for
Standardization).
*6 Weight of genuine Canon toner cartridges (Black, Yellow, Magenta, and Cyan)
Canon Cartridge 718 Black
Canon Cartridge 718 Yellow
Canon Cartridge 718 Magenta
Canon Cartridge 718 Cyan
Software Specifications
Printing software
Canon Advanced Printing Technology (CAPT) software
Data can be printed with a margin of 5.0 mm.
Printable area
(10 mm for envelopes) *1
Supported protocol
TCP/IP
㻡㻡㻌㻛㻌㻣㻜㻡
Network board
TCP/IP
Frame type: Ethernet II
Printing software
Windows Standard TCP/IP Port (Port 9100) *2
*1 When printing data in the entire printable area of an envelope, you may not be able to obtain the optimum print
quality.
It is recommended that you configure the document to print the data smaller than the printable area.
*2 This printer supports Raw only. It does not support LPR.
㻡㻢㻌㻛㻌㻣㻜㻡
[D-06] Consumables
The following consumables are provided for this printer. Purchase them at your local authorized Canon dealer.
Use the following table as rough guides to replace consumables. However, you may need the replacement earlier than the
described lifetimes depending on the printer installation environment or paper size.
Consumables
Replacement Timing
Use
Canon Cartridge 718 Black
Canon Cartridge 718 Yellow
Canon Cartridge 718 Magenta
Canon Cartridge 718 Cyan
Average yield of the toner cartridges
Replacement toner cartridges
Average yield of K (Black) toner cartridge:
3,400 pages
Toner Cartridges
Average yield of Composite C (Cyan), M
(Magenta), and Y (Yellow) toner cartridges:
There are four types of
2,900 pages
cartridges. Each
Toner cartridges included with this printer
Average yield of K (Black) toner cartridge:
1,200 pages
cartridge consists of
one color toner.
"Replacing Toner
Cartridges"
Average yield of Composite C (Cyan), M
(Magenta), and Y (Yellow) toner cartridges:
1,400 pages
The average yield is on the basis of "ISO/IEC 19798"* when printing A4 size
paper with the default print density setting.
* "ISO/IEC 19798" is the global standard related to "Method for the
determination of toner cartridge yield for color printers and multi-function
devices that contain printer components" issued by ISO (International
Organization for Standardization).
NOTE
Toner and Toner Cartridge Availability
Toner cartridge for this machine will be available for at least seven (7) years (or any such longer
period as required by applicable laws) after production of this machine model has been
discontinued.
㻡㻣㻌㻛㻌㻣㻜㻡
[D-07] Location of the Serial Number
The serial number for this printer can be found at the location shown in the following figure.
Inside of the Printer Unit
Outside View of the Packaging Box
IMPORTANT
The serial number is required for receiving maintenance service.
The labels on which the serial number is indicated are required for printer service or maintenance.
Do not remove them.
㻡㻤㻌㻛㻌㻣㻜㻡
[E] Printer Installation and Software Installation
㻡㻥㻌㻛㻌㻣㻜㻡
[E-02] Installation Conditions of the Printer
In order to use this printer in a safe and trouble-free manner, install the printer in a place that fulfills the following
conditions.
Temperature and Humidity Conditions
Power Supply Requirements
Installation Requirements
Installation Space
IMPORTANT
Important Safety Instructions
Before installing the printer, be sure to read "Important Safety Instructions".
Temperature and Humidity Conditions
Temperature range: 10 to 30 °C (50 to 86 °F)
Humidity range: 20 to 80 % RH (no condensation)
IMPORTANT
Protecting the printer from condensation
To prevent condensation from forming inside the printer in the following cases, let
the printer adjust to the ambient temperature and humidity for at least two hours
before use.
When the room where the printer is installed is heated rapidly
When the printer is moved from a cool or dry location to a hot or
humid location
If water droplets (condensation) form inside the printer, this can result in paper
jams or poor print quality.
When using an ultrasonic humidifier
When you are using an ultrasonic humidifier, it is therefore recommended that you use purified
water or other water that is free of impurities.
If you use tap water or well water, impurities in the water will be dispersed through the air. This
can be trapped inside the printer, causing degradation in print quality.
Power Supply Requirements
220 to 240 V (±10%), 50/60 Hz (±2 Hz)
㻢㻜㻌㻛㻌㻣㻜㻡
IMPORTANT
Precautions when connecting the power cord
Use an AC power outlet exclusively for the printer. Do not use the other sockets of
the AC power outlet.
Do not plug the power plug into the auxiliary outlet on a computer.
Do not use the same AC power outlet for both the printer and any of the following
equipment.
Copy machine
Air conditioner
Shredder
Equipment that consumes a large amount of electricity
Equipment that generates electrical noise
Miscellaneous precautions
The following is the maximum power consumption of the printer.
1,170 W or less for the 220 to 240 V model
Electrical noise or a dramatic drop in mains voltage may cause the printer or
computer to operate incorrectly or lose data.
Installation Requirements
A location with sufficient space
A location with good ventilation
A location with a flat, even surface
A location able to fully support the weight of the printer
WARNING
Do not install the printer in a location near alcohol, paint thinner, or other flammable
substances.
If flammable substances come into contact with electrical parts inside the printer, it may result in
a fire or electrical shock.
CAUTION
Do not install the printer in the following locations, as this may result in a fire or electrical
shock.
A damp or dusty location
A location exposed to smoke and steam, such as near a cookery or humidifier
A location exposed to rain or snow
㻢㻝㻌㻛㻌㻣㻜㻡
A location near a water faucet or water
A location exposed to direct sunlight
A location subject to high temperatures
A location near open flames
Do not install the printer in the following locations, as this may cause the printer to fall or
tip over, resulting in personal injury.
Unstable surface
A location subject to excessive vibrations
IMPORTANT
Do not install the printer in the following locations, as this may result in damage to the
printer.
A location subject to dramatic changes in temperature or humidity
A location subject to condensation
A poorly ventilated location
(If you use the printer for a long time or to perform a large amount of printing in a
poorly ventilated room, the ozone or other odors generated by the printer may
create an uncomfortable working environment. In addition, chemical particles are
dispersed during printing; therefore, it is important to provide adequate ventilation.)
A location near equipment that generates magnetic or electromagnetic waves
A laboratory or location where chemical reactions occur
A location exposed to salt air, corrosive gases, or toxic gases
A location, such as on a carpet or mat, that may warp from the weight of the
printer or where the printer is liable to sink
Installation Space
Required installation space
Refer to the following dimensions of each part and ensure the installation space.
㻢㻞㻌㻛㻌㻣㻜㻡
[E-03] Confirming the Supplied Accessories
Confirming the Contents of the Box
CD-ROM Setup
Confirming the Contents of the Box
Make sure that all the following items are contained in the box before installing the printer.
If an item is missing or damaged, please contact your local authorized Canon dealer.
NOTE
This printer includes two "User Software" CD-ROMs.
You can use either CD-ROM.
About the toner cartridges included with this printer
The average yield of the included toner cartridges is as follows.
Average yield of K (Black) toner cartridge: 1,200 pages
㻢㻟㻌㻛㻌㻣㻜㻡
Average yield of Composite C (Cyan), M (Magenta), and Y
(Yellow) toner cartridges: 1,400 pages
The average yield is on the basis of "ISO/IEC 19798"* when printing A4 size paper
with the default print density setting.
* "ISO/IEC 19798" is the global standard related to "Method for the determination
of toner cartridge yield for color printers and multi-function devices that contain
printer components" issued by ISO (International Organization for
Standardization).
The included toner cartridges differ from replacement toner cartridges.
For purchasing replacement toner cartridges, see "When a Message Appears".
About interface cables
This printer does not come with an interface cable.
Have an appropriate one available for the computer you are using or the connecting
method.
Use a USB cable with the following symbol.
CD-ROM Setup
When the supplied CD-ROM is inserted into the CD-ROM drive, the following CD-ROM Setup appears automatically.
Operations such as software installation can be performed from the CD-ROM Setup.
Easy Installation
Installs the printer driver and the e-Manual at the same time.
㻢㻠㻌㻛㻌㻣㻜㻡
Custom Installation
Allows you to install the printer driver only or the e-Manual only.
Additional Software Programs
Allows you to start the following software program.
• NetSpot Device Installer
"NetSpot Device Installer"
• Manual Uninstaller
"Uninstalling the e-Manual"
• Auto Shutdown Tool
"Setting the Energy-saving Mode"
Display Manuals
Allows you to view the HTML e-Manual.
You can click the [
] button next to [e-Manual] to display the e-Manual.
Exit
Closes CD-ROM Setup.
NOTE
If CD-ROM Setup does not appear
Display it using the following procedure.
(The CD-ROM drive name is indicated as "D:" in this manual. The CD-ROM drive name may
differ depending on the computer you are using.)
Windows XP and Server 2003
1. From the [Start] menu, select [Run].
2. Enter "D:\English\MInst.exe", and then click [OK].
Windows Vista and Server 2008
1. Enter "D:\English\MInst.exe" in [Start Search] under the [Start]
menu.
2. Press the [ENTER] key on the keyboard.
If the [AutoPlay] dialog box appears (Windows Vista and Server 2008)
Click [Run AUTORUN.EXE].
If the [User Account Control] dialog box appears (Windows Vista and Server 2008)
Click [Continue].
㻢㻡㻌㻛㻌㻣㻜㻡
[E-04] Carrying the Printer to the Installation Site and Removing the Packing Materials
Step 1: Carrying the Printer to the Installation Site
Step 2: Removing the Packing Materials of the Printer
CAUTION
Unpack the printer unit in a location with sufficient space.
Be sure to unpack the printer in a location with sufficient space.
IMPORTANT
When installing the optional paper feeder
Install the paper feeder before taking the printer out of the box.
For details on installing the paper feeder, see "Paper Feeder".
Store the removed packing materials.
They are required when transporting the printer for relocation or maintenance.
NOTE
About the packing materials
The packing materials may be changed in form or placement, or may be added or removed
without notice.
Step 1: Carrying the Printer to the Installation Site
Pull out the drawer.
Carry the printer to the installation site.
Carry the printer with two or more people by holding the lift handles on the lower portion
of the printer and lifting it up at the same time.
㻢㻢㻌㻛㻌㻣㻜㻡
CAUTION
Be sure to take the printer out of the plastic bag
Do not place the printer in the plastic bag when carrying it. If you do so, you may drop the
printer, resulting in personal injury.
Carry the printer with two or more people.
This printer weighs approximately 25.1 kg. Please be careful not to hurt your back or other
portions of your body when carrying the printer.
Be sure to hold the lift handles.
Do not hold the printer by the front portion, output area, or any portions other than the lift
handles. If you do so, you may drop the printer, resulting in personal injury.
㻢㻣㻌㻛㻌㻣㻜㻡
Pay attention to the balance.
The rear portion (A) of the printer is relatively heavy. Be careful not to become off-balance when
lifting the printer. If you do so, you may drop the printer, resulting in personal injury.
Put the printer down at the installation site.
CAUTION
Put the printer down slowly and carefully.
Be careful not to hurt your hands or fingers.
Step 2: Removing the Packing Materials of the Printer
Remove all the orange tape if it is attached to the printer when performing the following procedure.
Open the rear cover.
Open it completely.
㻢㻤㻌㻛㻌㻣㻜㻡
IMPORTANT
If a loud noise occurs when you open the rear cover
If the packing materials inside the printer come off when you open the rear cover, a loud noise
occurs. However, this is not a printer malfunction. Proceed to the following procedure.
Remove the two packing materials with tape.
(1) Remove the tape.
(2) Remove the packing materials with tape gently and firmly in the direction of the
arrow.
㻢㻥㻌㻛㻌㻣㻜㻡
IMPORTANT
If a loud noise occurs when you remove the packing materials with tape
A loud noise occurs when you remove the packing materials with tape. However, this is not a
printer malfunction.
Remove the packing materials completely.
Make sure that the following packing materials are completely removed.
Close the rear cover.
Close it securely.
㻣㻜㻌㻛㻌㻣㻜㻡
[E-05] Preparing the Toner Cartridges
Before using the printer, pull out the sealing tape of the toner cartridges installed in the printer.
Precautions when Preparing the Toner Cartridges
Preparing the Toner Cartridges
Precautions when Preparing the Toner Cartridges
CAUTION
Precautions if you get toner on your hands or clothing
If toner gets on your hands or clothing, wash them immediately with cold water.
Washing with warm water sets the toner, making it impossible to remove the toner stains.
IMPORTANT
About disposal of the removed packing materials
Dispose of the packing materials according to local regulations.
Be careful of counterfeit toner cartridges
Please be aware that there are counterfeit Canon toner cartridges in the marketplace. Use of
counterfeit toner cartridge may result in poor print quality or machine performance. Canon is not
responsible for any malfunction, accident or damage caused by the use of counterfeit toner
cartridge.
For more information, see http://www.canon.com/counterfeit.
NOTE
Handling toner cartridges
"Handling Toner Cartridges"
Preparing the Toner Cartridges
Gently open the front cover.
㻣㻝㻌㻛㻌㻣㻜㻡
Pull out the toner cartridge tray.
(1) Press the lever on the handle.
(2) Pull out the toner cartridge tray until it stops.
NOTE
Order of the toner cartridges
Hold down the toner cartridge as shown in the figure.
㻣㻞㻌㻛㻌㻣㻜㻡
Pull out the sealing tape.
(1) While holding the toner cartridge, hook your finger into the tab to remove it.
(2) Pull out the sealing tape (approx. 50 cm long) straight in the direction of the arrow
gently.
CAUTION
Be careful not to allow the toner to scatter.
Do not pull out the sealing tape forcefully or stop at midpoint, as this may cause toner to spill out.
If toner gets into your eyes or mouth, wash them immediately with cold water and consult a
physician.
IMPORTANT
Pull the sealing tape completely out of the toner cartridge.
Do not pull out the sealing tape in the direction other than the arrow. If the tape is
severed, this may become difficult to pull out completely.
If the sealing tape stops at midpoint, pull it out of the toner cartridge completely.
If any tape remains in the toner cartridge, this may result in poor print quality.
Do not touch the toner cartridge memory (A).
㻣㻟㻌㻛㻌㻣㻜㻡
This may result in damage to the cartridge.
Pull out the sealing tapes of all the toner cartridges.
Make sure that all four sealing tapes have been removed.
Close the toner cartridge tray.
Push it into the printer firmly.
Gently close the front cover.
㻣㻠㻌㻛㻌㻣㻜㻡
CAUTION
Precautions when closing the front cover
Be careful not to catch your fingers.
IMPORTANT
If you cannot close the front cover
Make sure that the toner cartridge tray is closed.
Do not try to forcefully close the front cover, as this may damage the printer.
Do not leave the front cover open for a long time with the toner cartridges installed.
This may result in deterioration in print quality.
㻣㻡㻌㻛㻌㻣㻜㻡
[E-06] Connecting the Power Cord
IMPORTANT
Precautions when connecting the power cord
Do not plug the power plug of the printer into an auxiliary outlet on a computer.
One AC power outlet should be used exclusively for the printer.
Do not connect this printer to an uninterruptible power source.
This may cause printer malfunction or breakdown in the event of a power failure.
Plug the supplied power cord into the power socket firmly.
Plug the power plug into the AC power outlet.
NOTE
The form of the supplied power cord
The form of the supplied power cord may differ from the one in the above illustration.
㻣㻢㻌㻛㻌㻣㻜㻡
[E-07] Loading Paper and Registering the Paper Size
This section describes only the procedure for loading standard size paper (other than Index Cards and envelopes) in the
paper drawer and multi-purpose tray.
Loading Standard Size Paper (Other Than Index Cards and Envelopes) in the Paper Drawer
Loading Standard Size Paper (Other Than Index Cards and Envelopes) in the Multi-purpose Tray
See the following items when loading non-standard size paper.
"Loading Index Cards"
"Loading Envelopes"
"Loading Custom Size Paper (Non-Standard Size Paper)"
Loading Standard Size Paper (Other Than Index Cards and Envelopes) in the Paper
Drawer
The following standard size paper (other than Index Cards and envelopes) can be loaded in the paper drawer.
Paper Type
Paper Size
A4 (210.0 mm x 297.0 mm)
B5 (182.0 mm x 257.0 mm)
A5 (148.0 mm x 210.0 mm)
Plain paper (60 to 90 g/m 2 )
Legal (8.50 in. x 14.00 in.)
Heavy paper (86 to 163 g/m 2 ) Letter (8.50 in. x 11.00 in.)
Executive (7.25 in. x 10.50 in.)
Foolscap (8.50 in. x 13.00 in.)
Statement (5.50 in. x 8.50 in.)
Label
A4 (210.0 mm x 297.0 mm)
Coated paper
Letter (8.50 in. x 11.00 in.)
Step 1: Loading Paper in the Paper Drawer
Step 2: Registering the Size of Paper
IMPORTANT
Detailed information about usable paper
"Usable Paper and Unusable Paper"
Handling the paper drawer
"Paper Source"
NOTE
How to load paper in Drawer 2 (optional paper feeder)
Load the paper in Drawer 2 in the same manner as you load the paper in Drawer 1.
㻣㻣㻌㻛㻌㻣㻜㻡
Step 1: Loading Paper in the Paper Drawer
Pull out the paper drawer.
CAUTION
Be sure to remove the paper drawer.
If paper is loaded while the paper drawer is partially pulled out, the paper drawer may drop or the
printer may become damaged resulting in personal injury.
Slide the paper guides to the position of the size of the paper to be loaded.
Slide the side paper guides.
(1) Hold the lock release lever.
(2) Slide the paper guides to the position of the size of the paper to be loaded.
Align the position of (A) with the size mark of the paper to be loaded.
The side paper guides move together.
Slide the paper guide at the front center.
(1) Hold the lock release lever.
㻣㻤㻌㻛㻌㻣㻜㻡
(2) Slide the paper guides to the position of the size of the paper to be loaded.
Align the position of (A) with the size mark of the paper to be loaded.
Pull out the paper drawer before loading Legal size paper.
(1) Hold the lock release lever at the front right.
(2) Adjust the length of the paper drawer.
NOTE
Size abbreviation on the paper guides
Paper Size
Paper Guides
Legal
LGL
Letter
LTR
Executive
EXEC
B5
JIS B5
When loading labels or coated paper, fan them a few sheets at a time, and then align the
edges.
㻣㻥㻌㻛㻌㻣㻜㻡
CAUTION
Be careful when handling paper.
Handle paper carefully not to cut your hands with the edges of the paper.
IMPORTANT
Be careful when handling labels or coated paper.
If you are using labels or coated paper, fan them thoroughly and load them again. If
they are not fanned enough, multiple sheets of paper may be fed at once, causing
paper jams.
When fanning or aligning coated paper, try to hold the edges to avoid touching the
printing surface.
Take care not to mark or stain the printing surface of coated paper with
fingerprints, dust, or oil. This may result in poor print quality.
Load the paper so that the edges of the stacked paper are aligned with the front side of the
paper drawer.
CAUTION
Be careful when handling paper.
Handle paper carefully not to cut your hands with the edges of the paper.
㻤㻜㻌㻛㻌㻣㻜㻡
IMPORTANT
Be sure to load paper in portrait orientation.
Be sure to check the position of the paper guides.
If the paper guide is set at a wrong position, this may result in misfeeds.
Paper drawer capacity
Paper Type
Paper Capacity
Plain paper (Ex. 80 g/m 2 )
Approx. 250 sheets
Heavy paper (Ex. 91 g/m 2 )
Approx. 200 sheets
Heavy paper (Ex. 128 g/m 2 )
Approx. 150 sheets
Label
Approx. 50 sheets
Coated paper
Approx. 50 sheets
When using paper that has been poorly cut
If you use paper that has been poorly cut, multiple sheets of paper may be fed at once. In this
case, fan the paper thoroughly, and then align the edges of the stack properly on a hard, flat
surface.
NOTE
When printing paper with a letterhead or logo
See "Paper Loading Orientation" and load the paper in the proper orientation.
Hold down the paper, then set it under the hooks (A) on the paper guides.
Make sure that the paper stack does not exceed the load limit mark lines (B).
㻤㻝㻌㻛㻌㻣㻜㻡
IMPORTANT
Do not load the paper stack which exceeds the load limit mark lines.
Be sure that the paper stack does not exceed the load limit mark lines. If the paper stack exceeds
the load limit mark lines, this may result in misfeeds.
Insert the paper drawer into the printer.
Push it into the printer firmly.
CAUTION
Precautions when inserting the paper drawer
Be careful not to catch your fingers.
Step 2: Registering the Paper Size
This printer's paper drawer cannot automatically detect the paper size. Therefore, you need to register the size of
the loaded paper.
Install the printer driver, and then register the paper size using the following procedure.
㻤㻞㻌㻛㻌㻣㻜㻡
Display the Printer Status Window.
Click [
] in the Windows task tray, and then select the printer name.
NOTE
When displaying the Printer Status Window from the printer driver
Click [
] (Display Printer Status Window) in locations such as in the [Page Setup] sheet.
)URPWKH>2SWLRQV@PHQXVHOHFW>'HYLFH6HWWLQJV@ĺ>'UDZHU6HWWLQJV@
NOTE
When registering a paper size
As you cannot register a paper size while printing is in progress, make sure that the printer is idle
before registering the paper size.
However, you can register a paper size while one of the following messages is displayed.
<Specified Paper Different from Set Paper>
<Out of Paper>
Register the paper size.
(1) Select the size of the paper loaded in the paper drawer.
• Drawer 1: The paper drawer supplied with the printer unit
• Drawer 2: The paper drawer of the optional paper feeder
(2) Click [OK].
㻤㻟㻌㻛㻌㻣㻜㻡
Loading Standard Size Paper (Other Than Index Cards and Envelopes) in the Multipurpose Tray
The following standard size paper (other than Index Cards and envelopes) can be loaded in the multi-purpose tray.
Paper Type
Paper Size
A4 (210.0 mm x 297.0 mm)
B5 (182.0 mm x 257.0 mm)
A5 (148.0 mm x 210.0 mm)
Plain paper (60 to 90 g/m 2 )
Legal (8.50 in. x 14.00 in.)
Heavy paper (86 to 176 g/m 2 ) Letter (8.50 in. x 11.00 in.)
Executive (7.25 in. x 10.50 in.)
Foolscap (8.50 in. x 13.00 in.)
Statement (5.50 in. x 8.50 in.)
Transparency
Label
A4 (210.0 mm x 297.0 mm)
Letter (8.50 in. x 11.00 in.)
Coated paper
IMPORTANT
Detailed information about usable paper
"Usable Paper and Unusable Paper"
Handling the multi-purpose tray
"Paper Source"
Open the multi-purpose tray.
Holding the opening at the center of the printer, open the multi-purpose tray.
IMPORTANT
㻤㻠㻌㻛㻌㻣㻜㻡
Be sure to insert the paper drawer.
If the paper drawer is not inserted, you cannot print from the multi-purpose tray.
Pull out the auxiliary tray.
IMPORTANT
Be sure to pull out the auxiliary tray.
Be sure to pull out the auxiliary tray when loading paper in the multi-purpose tray.
When loading long-size paper such as A4 etc, open the tray extension.
Spread the paper guides a little wider than the actual paper width.
㻤㻡㻌㻛㻌㻣㻜㻡
When loading transparencies, labels, or coated paper, fan them a few sheets at a time, and
then align the edges.
CAUTION
Be careful when handling paper.
Handle paper carefully not to cut your hands with the edges of the paper.
IMPORTANT
Be careful when handling transparencies, labels, or coated paper.
Be sure to fan the transparencies, labels, or coated paper thoroughly before loading
them. If they are not fanned enough, multiple sheets of paper may be fed at once,
causing paper jams.
When fanning or aligning the transparencies or coated paper, try to hold the edges
to avoid touching the printing surface.
Take care not to mark or stain the printing surface of the transparencies or coated
paper with fingerprints, dust, or oil. This may result in poor print quality.
Gently load the paper stack under the load limit guides (A) until it touches the back of the
tray.
Make sure that the paper stack does not exceed the load limit mark lines (B).
㻤㻢㻌㻛㻌㻣㻜㻡
CAUTION
Be careful when handling paper.
Handle paper carefully not to cut your hands with the edges of the paper.
IMPORTANT
Be sure to load paper in portrait orientation.
Multi-purpose tray capacity
Paper Type
Paper Capacity
Plain paper (Ex. 80 g/m 2 )
Approx. 50 sheets
Heavy paper (Ex. 91 g/m 2 )
Approx. 30 sheets
Heavy paper (Ex. 128 g/m 2 )
Approx. 20 sheets
Transparency (black-and-white printing only)
Approx. 20 sheets
Label
Approx. 20 sheets
Coated paper
Approx. 20 sheets
㻤㻣㻌㻛㻌㻣㻜㻡
Be sure that the paper stack does not exceed the load limit mark lines. If the paper stack exceeds
the load limit mark lines, this may result in misfeeds.
Precautions when loading paper in the multi-purpose tray
Load the paper so that it is straight.
If the rear edge of the paper stack is not properly aligned, this may result in
misfeeds or paper jams.
If the paper is curled or folded at corners, flatten it before loading it in the printer.
If you use paper that has been poorly cut, multiple sheets of paper may be fed at
once. In this case, fan the paper thoroughly, and then align the edges of the stack
properly on a hard, flat surface.
NOTE
When printing paper with a letterhead or logo
See "Paper Loading Orientation" and load the paper in the proper orientation.
Align the paper guides with the width of the paper.
IMPORTANT
Be sure to align the paper guides with the width of the paper.
If the paper guides are too loose or too tight, this may result in misfeeds or paper jams.
㻤㻤㻌㻛㻌㻣㻜㻡
[E-08] Paper Feeder
The paper feeder is to be installed at the bottom of the printer.
Moving the Printer
Removing the Packing Materials and Installing the Paper Feeder
Specifying the Status of the Paper Feeder
Loading Paper in the Paper Feeder and Registering the Paper Size
Removing the Paper Feeder
WARNING
When installing the paper feeder
Be sure to turn the printer off, unplug the power plug, and then disconnect all the interface cables
and power cord from the printer.
Otherwise, the power cord or interface cables may be damaged, resulting in a fire or electrical
shock.
IMPORTANT
Do not touch the connector (A) on the paper feeder.
This may result in damage to the printer or misfeeds.
When printing from Drawer 2 (paper feeder)
Make sure that Drawer 1 is set before printing from Drawer 2.
㻤㻥㻌㻛㻌㻣㻜㻡
Moving the Printer
When installing the paper feeder in the printer after installing the printer, move the printer to an appropriate location
temporarily using the following procedure.
WARNING
When moving the printer
Always turn off the power switch and unplug the power plug and interface cables.
Failure to do so can damage the cables or cords, resulting in a fire or electrical shock.
CAUTION
Do not carry the printer with the paper drawer installed.
If you do so, the paper drawer may drop, resulting in personal injury.
Turn the printer off, then disconnect the cables from the printer.
(1) Turn the printer off.
(2) If the interface cables are connected, turn the computer off, and then disconnect the
interface cables from the printer.
(3) Unplug the power plug from the AC power outlet.
Remove the power cord from the printer.
Pull out the paper drawer.
㻥㻜㻌㻛㻌㻣㻜㻡
Move the printer from the installation site.
Carry the printer with two or more people by holding the lift handles on the lower portion
of the printer and lifting it up at the same time.
CAUTION
Carry the printer with two or more people.
This printer weighs approximately 25.1 kg. Please be careful not to hurt your back or other
portions of your body when carrying the printer.
Be sure to hold the lift handles.
Do not hold the printer by the front portion, output area, or any portions other than the lift
handles. If you do so, you may drop the printer, resulting in personal injury.
㻥㻝㻌㻛㻌㻣㻜㻡
Pay attention to the balance.
The rear portion (A) of the printer is relatively heavy. Be careful not to become off-balance when
lifting the printer. If you do so, you may drop the printer, resulting in personal injury.
IMPORTANT
Do not carry the printer with a cover or tray open.
Make sure that the front cover and multi-purpose tray are closed before carrying the printer.
㻥㻞㻌㻛㻌㻣㻜㻡
Removing the Packing Materials and Installing the Paper Feeder
CAUTION
Put the printer or paper feeder down slowly and carefully.
Be careful not to hurt your hands or fingers.
Do not carry the printer with the paper drawer installed.
If you do so, the paper drawer may drop, resulting in personal injury.
Do not carry the printer with the paper feeder installed.
If you do so, the paper feeder may drop resulting in personal injury.
IMPORTANT
About disposal of the removed packing materials
Dispose of the packing materials according to local regulations.
About the packing materials
The packing materials may be changed in form or placement, or may be added or removed
without notice.
Remove all the orange tape if it is attached to the paper feeder when performing the following procedure.
Take the paper feeder out of the box.
Pull out the paper drawer.
㻥㻟㻌㻛㻌㻣㻜㻡
Place the paper feeder at the installation site.
When carrying the paper feeder, hold the lift handles on both sides with both hands as
shown in the figure.
IMPORTANT
Precautions for the installation site
Do not install the paper feeder on a platform that may warp from the weight of the printer and
optional accessories, or where the printer is liable to sink (such as a carpet or mat).
Gently place the printer on the paper feeder so that each surface of the printer is flush with
the front or side surfaces of the paper feeder.
㻥㻠㻌㻛㻌㻣㻜㻡
Also, match the positioning pins (A) and connector (B) when placing the printer.
IMPORTANT
If the printer cannot be placed on the paper feeder properly
If the printer cannot be placed on the paper feeder properly, lift the printer once, hold it
horizontally, and place it again.
If you try to place the printer forcefully without lifting it, the connector and positioning pins may
be broken.
Insert the paper drawers in the printer and paper feeder.
Connect the LAN cable to the printer as needed.
㻥㻡㻌㻛㻌㻣㻜㻡
Connect the power cord to the printer.
Plug the power plug into the AC power outlet.
Connect the USB cable to the printer as needed.
IMPORTANT
When loading paper in the paper drawer for the first time after installing the paper feeder
Before loading paper, be sure to turn on the printer once.
Specifying the Status of the Paper Feeder
Specify the status of the paper feeder after installing it.
Open the [Printers and Faxes] or [Printers] folder.
Windows XP Professional and Server 2003
From the [Start] menu, select [Printers and Faxes].
Windows XP Home Edition
From the [Start] menu, select [Control Panel], and then click [Printers and
2WKHU+DUGZDUH@ĺ>3ULQWHUVDQG)D[HV@
Windows Vista
From the [Start] menu, select [Control Panel], and then click [Printer].
Windows Server 2008
From the [Start] menu, select [Control Panel], and then double-click
[Printers].
Right-click the icon for this printer, and then select [Properties] from the pop-up menu.
㻥㻢㻌㻛㻌㻣㻜㻡
Obtain the status of the paper feeder.
(1) Display the [Device Settings] sheet.
(2) Click [Get Device Status].
ĺ The status of the paper feeder is obtained automatically.
NOTE
If the status of the paper feeder cannot be obtained automatically
Select the [250 Sheet Drawer] check box in [Paper Source Options].
Loading Paper in the Paper Feeder and Registering the Paper Size
Load paper in the paper drawer of the paper feeder (Drawer 2) in the same manner as you load paper in the paper drawer
supplied with the printer unit (Drawer 1).
For details on the procedure for loading paper in the paper drawer, see the following procedures.
"Loading Standard Size Paper (Other Than Index Cards and Envelopes)"
"Loading Envelopes"
"Loading Custom Size Paper (Non-Standard Size Paper)"
This printer's paper drawer cannot automatically detect the paper size. Therefore, you need to register the size of the
paper loaded in the paper drawer of the paper feeder (Drawer 2).
㻥㻣㻌㻛㻌㻣㻜㻡
Removing the Paper Feeder
WARNING
When removing the paper feeder
Be sure to turn the printer off, unplug the power plug, and then disconnect all the interface cables
and power cord from the printer.
Otherwise, the power cord or interface cables may be damaged, resulting in a fire or electrical
shock.
CAUTION
Do not carry the printer with the paper drawer installed.
If you do so, the paper drawer may drop, resulting in personal injury.
Do not carry the printer with the paper feeder installed.
If you do so, the paper feeder may drop resulting in personal injury.
IMPORTANT
When moving or servicing the printer
Remove the paper feeder and paper drawer.
Turn the printer off.
㻥㻤㻌㻛㻌㻣㻜㻡
If the interface cables are connected, turn the computer off, and then disconnect the
interface cables from the printer.
Unplug the power plug from the AC power outlet.
Remove the power cord from the printer.
Pull out the paper drawers from the printer and paper feeder.
Lift the printer unit and remove it from the paper feeder.
Move the paper feeder.
Move back the printer to the installation site.
Insert the paper drawer into the printer.
Connect the LAN cable to the printer as needed.
Connect the power cord to the printer.
㻥㻥㻌㻛㻌㻣㻜㻡
Plug the power plug into the AC power outlet.
Connect the USB cable to the printer as needed.
㻝㻜㻜㻌㻛㻌㻣㻜㻡
[E-09] Printer Driver System Requirements
The printer driver is software required for printing with this printer. Be sure to install the printer driver in the computer
you are using.
The following system environment is required to use the printer driver.
Operating System
• Windows
• Windows
• Windows
• Windows
• Windows
• Windows
• Windows
XP Professional or Home Edition
XP Professional x64 Edition
Server 2003
Server 2003 x64 Editions
Vista (32-bit or 64-bit version)
Server 2008 (32-bit or 64-bit version)
7 (32-bit or 64-bit version)
For details on the procedures, instructions, and so on for Windows 7, refer to those for Windows Vista.
For details on the latest status of the supported operating systems and Service Pack, see the Canon Web
site (http://www.canon.com/).
Minimum System Requirements
Windows XP and Server 2003
CPU
Windows Vista and Server 2008
300 MHz or more
CPU and RAM conforming to recommended
Available
memory
system requirements for Windows Vista or
128 MB or more
Server 2008
(RAM)
Available hard
The disk space displayed on the printer driver installation window
disk space
Recommended System Requirements
Windows XP and Server 2003
CPU
Windows Vista and Server 2008
1.2 GHz or more
CPU and RAM conforming to recommended
Available
memory
system requirements for Windows Vista or
256 MB or more
Server 2008
(RAM)
Interface
• When connecting with USB
Hi-Speed USB/USB
• When connecting to a network
Connector: 10BASE-T or 100BASE-TX
Protocol: TCP/IP
㻝㻜㻝㻌㻛㻌㻣㻜㻡
NOTE
About available memory
The actual amount of available memory varies depending on the system configuration of your
computer and the software currently in use.
In any of the above system environments, print quality is not guaranteed.
About unidirectional communication equipment
The printer performs bi-directional communication. Operation of the printer when connected
via unidirectional communication equipment has not been tested, and as a result, Canon cannot
guarantee printer operation if the printer is connected using unidirectional print servers, USB
hubs or switching devices.
㻝㻜㻞㻌㻛㻌㻣㻜㻡
[E-10] Installing from CD-ROM Setup
This section describes the procedure for installing the printer driver from the supplied CD-ROM (CD-ROM Setup) on a
computer connected to the printer with a USB cable.
Step 1: Connecting a USB Cable
Step 2: Installing the Printer Driver from CD-ROM
Step 3: After the Installation
IMPORTANT
If your hard disk does not have sufficient space to install the printer driver
A message indicating that your hard disk does not have sufficient space appears during
installation.
Cancel the installation, free up space on your hard disk, and then reinstall the software.
Step 1: Connecting a USB Cable
WARNING
When the power plug is plugged into the AC power outlet
When plugging or unplugging a USB cable, do not touch the metal part of the connecter, as this
may result in electrical shock.
IMPORTANT
Do not plug or unplug the USB cable while the printer or computer is on.
This may cause the printer to malfunction.
About unidirectional communication equipment
The printer performs bi-directional communication. Operation of the printer when connected via
unidirectional communication equipment has not been tested, and as a result, Canon cannot
guarantee printer operation if the printer is connected using unidirectional print servers, USB hubs
or switching devices.
NOTE
About the USB cable
This printer does not come with a USB cable. Have an appropriate one available for the computer
you are using.
Use a USB cable with the following symbol.
㻝㻜㻟㻌㻛㻌㻣㻜㻡
Make sure that the printer and computer are off.
Do not turn the printer on during the following procedure unless instructed.
Connect the B-type (square) end of the USB cable to the USB connector on the printer.
Connect the A-type (flat) end of the USB cable to the USB port on the computer.
Step 2: Installing the Printer Driver from CD-ROM
Turn on the computer and start Windows.
Log on as a user with administrative rights.
IMPORTANT
If you are not sure about your administrative rights
Contact your system administrator.
If a wizard or dialog box appears through the Plug and Play automatic setup
Click [Cancel], turn off the printer, and then use this procedure to install the printer driver.
㻝㻜㻠㻌㻛㻌㻣㻜㻡
Insert the supplied CD-ROM "User Software" into the CD-ROM drive of your computer.
If the CD-ROM is already in the drive, eject the disk and reinsert it into the drive.
ĺ CD-ROM Setup appears.
It may take time to display CD-ROM Setup depending on your environment.
NOTE
If CD-ROM Setup does not appear
Display it using the following procedure.
(The CD-ROM drive name is indicated as "D:" in this manual. The CD-ROM drive name may
differ depending on the computer you are using.)
Windows XP and Server 2003
1. From the [Start] menu, select [Run].
2. Enter "D:\English\MInst.exe", and then click [OK].
Windows Vista and Server 2008
1. Enter "D:\English\MInst.exe" in [Start Search] under the [Start]
menu.
2. Press the [ENTER] key on the keyboard.
If the [AutoPlay] dialog box appears (Windows Vista and Server 2008)
Click [Run AUTORUN.EXE].
If the [User Account Control] dialog box appears (Windows Vista and Server 2008)
Click [Continue].
Click [Easy Installation].
The printer driver and the e-Manual are installed.
㻝㻜㻡㻌㻛㻌㻣㻜㻡
NOTE
If you do not want to install the e-Manual
Click [Custom Installation].
Click [Install].
NOTE
If you selected [Custom Installation] in Step 4
(1) Clear the [e-Manual] check box.
(2) Click [Install].
Read the contents of License Agreement, and then click [Yes].
㻝㻜㻢㻌㻛㻌㻣㻜㻡
Click [Next].
Select the method of installation.
(1) Select [Install with USB Connection].
(2) Click [Next].
NOTE
If a message that prompts you to restart the computer appears
Restart the computer and install the printer driver again.
㻝㻜㻣㻌㻛㻌㻣㻜㻡
If you are using Windows Vista or Server 2008
The following screen appears. Click [Yes].
Select [No] only if you do not use a LAN cable to connect the printer to a computer on
which the printer driver is being installed.
Click [Yes].
When the following screen is displayed, press the power switch to turn on the printer.
ĺ Installation of the printer driver starts automatically.
It may take time to install the software depending on your environment.
Installation of the e-Manual starts automatically after the printer driver installation.
Wait until the following screen disappears.
㻝㻜㻤㻌㻛㻌㻣㻜㻡
It may take time to install the software depending on your environment.
NOTE
If the USB cable is connected but the printer is not automatically recognized
"The Printer Driver Cannot Be Installed or Uninstalled"
If you selected [Custom Installation] in Step 4
The e-Manual is not installed.
Check the installation results, and then click [Next].
NOTE
If the printer driver is not installed properly
"The Printer Driver Cannot Be Installed or Uninstalled"
Restart your computer.
(1) Select the [Restart Computer Now (Recommended)] check box.
(2) Click [Restart].
㻝㻜㻥㻌㻛㻌㻣㻜㻡
NOTE
Removing the CD-ROM
You can remove the CD-ROM from the CD-ROM drive after the installation is completed.
When viewing the e-Manual
"Viewing the e-Manual"
"Searching for Information"
Step 3: After the Installation
The following icons, folders, etc. are added to the following locations.
[Printers and Faxes] folder ([Printers] folder for Windows Vista and Server 2008)
Printer icon for this printer
Task tray
Printer Status Window icon
The icon does not appear if you did not restart your computer after the printer driver installation.
㻝㻝㻜㻌㻛㻌㻣㻜㻡
[All Programs] under the [Start] menu
[Canon Printer Uninstaller] - [Canon LBP7210C Uninstaller]
Desktop
[LBP7210C e-Manual]
The icon does not appear if you did not install the e-Manual.
[All Programs] under the [Start] menu
[Canon LBP7210C] - [LBP7210C e-Manual]
The icon does not appear if you did not install the e-Manual.
㻝㻝㻝㻌㻛㻌㻣㻜㻡
[E-11] Installing with Plug and Play
This section describes the procedure for installing the printer driver with Plug and Play on a computer connected to the
printer with a USB cable.
Step 1: Connecting a USB Cable
Step 2: Installing the Printer Driver with Plug and Play
Step 3: After the Installation
IMPORTANT
If your hard disk does not have sufficient space to install the printer driver
A message indicating that your hard disk does not have sufficient space appears during
installation.
Cancel the installation, free up space on your hard disk, and then reinstall the software.
Step 1: Connecting a USB Cable
WARNING
When the power plug is plugged into the AC power outlet
When plugging or unplugging a USB cable, do not touch the metal part of the connecter, as this
may result in electrical shock.
IMPORTANT
Do not plug or unplug the USB cable while the printer or computer is on.
This may cause the printer to malfunction.
About unidirectional communication equipment
The printer performs bi-directional communication. Operation of the printer when connected via
unidirectional communication equipment has not been tested, and as a result, Canon cannot
guarantee printer operation if the printer is connected using unidirectional print servers, USB hubs
or switching devices.
NOTE
About the USB cable
This printer does not come with a USB cable. Have an appropriate one available for the computer
you are using.
Use a USB cable with the following symbol.
㻝㻝㻞㻌㻛㻌㻣㻜㻡
Make sure that the printer and computer are off.
Connect the B-type (square) end of the USB cable to the USB connector on the printer.
Connect the A-type (flat) end of the USB cable to the USB port on the computer.
Press the power switch to turn the printer on.
㻝㻝㻟㻌㻛㻌㻣㻜㻡
Step 2: Installing the Printer Driver with Plug and Play
The procedure for installing the printer driver with Plug and Play varies depending on your operating system. See the
following according to your operating system.
Windows Vista and Server 2008
Windows XP and Server 2003
IMPORTANT
If you cannot install the printer driver with Plug and Play (Windows 7)
You may not be able to install the printer driver properly due to the Windows restriction even
after detecting the printer with Plug and Play.
Click [What can I do if my device did not install properly?], and then see Windows Help or
reinstall the printer driver in "Installing from CD-ROM Setup."
Windows Vista and Server 2008
NOTE
About the screenshots
This procedure is described using screenshots from Windows Vista.
Turn the computer on and start up Windows Vista or Server 2008.
Log on as a user with administrative rights.
IMPORTANT
If you are not sure about your administrative rights
Contact your system administrator.
Click [Locate and install driver software (recommended)].
㻝㻝㻠㻌㻛㻌㻣㻜㻡
IMPORTANT
If you have previously installed the printer driver for this printer to your computer
The printer driver is installed automatically without displaying the preceding dialog box.
If you want to update the printer driver (or want to install it manually), install the printer driver
after uninstalling it once.
"Uninstalling the Printer Driver Using [Canon LBP7210C Uninstaller]"
NOTE
If the [User Account Control] dialog box appears
Click [Continue].
If [Allow Windows to search online for driver software for your CanonLBP7210C?] appears
Click [Don't search online].
Click [I don't have the disc. Show me other options.].
Click [Browse my computer for driver software (advanced)].
㻝㻝㻡㻌㻛㻌㻣㻜㻡
Insert the supplied CD-ROM "User Software" into the CD-ROM drive of your computer,
and then click [Browse].
If CD-ROM Setup appears, click [Exit].
Select the folder in which the printer driver is included.
If you are using 32-bit Windows Vista or Server 2008
(1) Select the folders in the supplied CD-ROM: [English] - [32bit] - [Driver].
(2) Click [OK].
If you are using 64-bit Windows Vista or Server 2008
㻝㻝㻢㻌㻛㻌㻣㻜㻡
(1) Select the folders in the supplied CD-ROM: [English] - [x64] - [Driver].
(2) Click [OK].
NOTE
If you are not sure whether you are using a 32-bit operating system or 64-bit operating
system
"To Check the Processor Version of Windows Vista or Server 2008"
Click [Next].
ĺ The installation starts.
Click [Close].
㻝㻝㻣㻌㻛㻌㻣㻜㻡
NOTE
If the screen for selecting the printer driver appears
Even if which printer driver is selected, there is no problem with the installation because the same
printer driver is installed.
Removing the CD-ROM
You can remove the CD-ROM from the CD-ROM drive after the installation is completed.
Windows XP and Server 2003
Turn the computer on and start up Windows XP or Server 2003.
Log on as a user with administrative rights.
IMPORTANT
If you are not sure about your administrative rights
Contact your system administrator.
Insert the supplied CD-ROM "User Software" into the CD-ROM drive of your computer.
㻝㻝㻤㻌㻛㻌㻣㻜㻡
If CD-ROM Setup appears, click [Exit].
Select the method of installation.
If the following dialog box appears
(1) Select [Install from a list or specific location (Advanced)].
(2) Click [Next].
If the following dialog box appears
(1) Select [No, not this time].
(2) Click [Next].
(3) Select [Install from a list or specific location (Advanced)].
(4) Click [Next].
㻝㻝㻥㻌㻛㻌㻣㻜㻡
Perform the following procedure.
(1) Select [Search for the best driver in these locations].
(2) Clear the [Search removable media (floppy, CD-ROM)] check box.
(3) Select the [Include this location in the search] check box.
(4) Click [Browse].
Select the folder in which the printer driver is included.
If you are using 32-bit Windows XP or Server 2003
(1) Select the folders in the supplied CD-ROM: [English] - [32bit] - [Driver].
(2) Click [OK].
If you are using 64-bit Windows XP or Server 2003
㻝㻞㻜㻌㻛㻌㻣㻜㻡
(1) Select the folders in the supplied CD-ROM: [English] - [x64] - [Driver].
(2) Click [OK].
Click [Next].
ĺ The installation starts.
Click [Finish].
NOTE
Removing the CD-ROM
You can remove the CD-ROM from the CD-ROM drive after the installation is completed.
㻝㻞㻝㻌㻛㻌㻣㻜㻡
Step 3: After the Installation
The following icons and folders are added to the following locations.
[Printers and Faxes] folder ([Printers] folder for Windows Vista and Server 2008)
Printer icon for this printer
Task tray
Printer Status Window icon
The icon does not appear if you did not restart your computer after the printer driver installation.
[All Programs] under the [Start] menu
[Canon Printer Uninstaller] - [Canon LBP7210C Uninstaller]
㻝㻞㻞㻌㻛㻌㻣㻜㻡
[E-12] The Tasks That Should Be Performed to Print in a Network Environment
There are the following two methods to install the printer driver on a computer connected by a LAN cable (the tasks that
should be performed to print in a network environment).
The procedures for setting the IP address or creating a port required to print in a network environment vary depending on
the installation method.
Auto Setup (Recommended Method)
Performs the following operations which are required for printing all at once.
Manual Setup (Windows XP and Server 2003 Only)
Performs the following operations which are required for printing one at a time.
If you are using Windows Vista or Server 2008, you cannot print using a port created by "Manual Setup".
Be sure to install the printer driver using "Auto Setup".
㻝㻞㻟㻌㻛㻌㻣㻜㻡
[E-13] Print Server Environment (Printer Sharing)
If you share the printer in the print server environment, you can perform printing from other computers that are not
directly connected to this printer.
*1
*2
*3
*4
The term "Print Server" is the computer directly connected to the printer.
The term "Client" is a computer connected to the printer via a network.
The term "Local Installation" indicates that the printer driver is installed using the supplied CD-ROM.
The term "Download Installation" indicates that the printer driver is downloaded from the print server to client
computers and is installed without using the supplied CD-ROM.
*5 If a 64-bit operating system is running on the print server, the download installation for the following client
computers on which a 32-bit operating system is running is not supported due to the Windows restriction.
• Windows XP (on which no service pack or SP1 is installed)
• Windows Server 2003 (on which no service pack is installed)
If you download and install the printer driver on any of the above 32-bit operating systems, you may fail to install the
driver and may not be able to open the printing preferences dialog box.
When using the print server environment, perform any one of the following tasks.
For the print server
1. Install the printer driver.
• If the printer and print server are connected by a USB cable
"Installing from CD-ROM Setup"
"Installing with Plug and Play"
• If the printer and print server are connected by a LAN cable
"Auto Setup (Recommended Method)"
"Manual Setup (Windows XP/Server 2003 Only)"
2. Configure the print server.
"Configuring the Print Server"
For client computers
Install the printer driver.
㻝㻞㻠㻌㻛㻌㻣㻜㻡
"Installation on Clients"
㻝㻞㻡㻌㻛㻌㻣㻜㻡
[E-14] Configuring the Print Server
Step 1: Before Sharing the Printer
Step 2: Sharing the Printer
Step 1: Before Sharing the Printer
Check the settings of your network.
Perform the following procedure.
Windows XP
From the [Start] menu, select [Control Panel], and then click [Network and
,QWHUQHW&RQQHFWLRQV@ĺ>1HWZRUN&RQQHFWLRQV@
Windows Server 2003
)URPWKH>6WDUW@PHQXVHOHFW>&RQWURO3DQHO@ĺ>1HWZRUN&RQQHFWLRQV@
ĺ>/RFDO$UHD&RQQHFWLRQ@
Windows Vista
From the [Start] menu, select [Control Panel], and then click [View
QHWZRUNVWDWXVDQGWDVNV@ĺ>0DQDJHQHWZRUNFRQQHFWLRQV@
Windows Server 2008
From the [Start] menu, select [Control Panel], double-click [Network and
Sharing Center], and then click [Manage network connections].
Display the [Local Area Connection Properties] dialog box.
Windows XP Vista, and Server 2008
Right-click the [Local Area Connection] icon, then select [Properties]
from the pop-up menu.
Windows Server 2003
Click [Properties].
㻝㻞㻢㻌㻛㻌㻣㻜㻡
NOTE
If the [User Account Control] dialog box appears (Windows Vista and Server 2008)
Click [Continue].
Make sure that [File and Printer Sharing for Microsoft Networks] is selected.
(1) Make sure that the [File and Printer Sharing for Microsoft Networks] check box is
selected.
(If the check box is not selected, select it.)
(2) Click [OK].
Step 2: Sharing the Printer
Printer sharing settings vary depending on your operating system. See the following setting procedure according to your
operating system.
32-bit Operating System (Windows XP, Server 2003, Vista, and Server 2008)
64-bit Operating System (Windows XP, Server 2003, Vista, and Server 2008)
NOTE
㻝㻞㻣㻌㻛㻌㻣㻜㻡
To check the processor version of Windows Vista or Server 2008
If you are not sure whether you are using 32-bit Windows Vista or 64-bit Windows Vista, see "To
Check the Processor Version of Windows Vista or Server 2008".
32-bit Operating System (Windows XP, Server 2003, Vista, and Server 2008)
NOTE
If you are using Windows XP
The printer cannot be shared on a network with the operating system default settings (the settings
immediately after installation).
Before sharing the printer on a network, run [Network Setup Wizard] to enable the printer sharing
settings.
For more details, see Windows Help.
Open the [Printers and Faxes] or [Printers] folder.
Windows XP Professional and Server 2003
From the [Start] menu, select [Printers and Faxes].
Windows XP Home Edition
From the [Start] menu, select [Control Panel], and then click [Printers and
2WKHU+DUGZDUH@ĺ>3ULQWHUVDQG)D[HV@
Windows Vista
From the [Start] menu, select [Control Panel], and then click [Printer].
Windows Server 2008
From the [Start] menu, select [Control Panel], and then double-click
[Printers].
Right-click the icon for this printer, and then select [Sharing] from the pop-up menu.
Perform the following procedure.
Windows XP and Server 2003
Select [Share this printer]. Change [Share name] as needed.
Windows Vista and Server 2008
㻝㻞㻤㻌㻛㻌㻣㻜㻡
Select the [Share this printer] check box. Change [Share name] as needed.
Proceed to the following procedures according to clients' operating systems.
Client
Some users are using a 64-bit operating system. ĺ7RStep 4
No user is using a 64-bit operating system.
ĺ7RStep 10
NOTE
If [Change sharing options] appears (Windows Vista and Server 2008)
Click [Change sharing options].
If the [User Account Control] dialog box appears, click [Continue].
About [Share name]
Do not use spaces or special characters.
Insert the supplied CD-ROM "User Software" into the CD-ROM drive of your computer,
and then click [Additional Drivers].
If CD-ROM Setup appears, click [Exit].
㻝㻞㻥㻌㻛㻌㻣㻜㻡
NOTE
When updating an additional driver (replacement driver)
Perform the following procedure.
1. Uninstall the printer driver on the print server.
"Uninstalling the Printer Driver Using [Canon LBP7210C Uninstaller]"
2. Install the new printer driver on the print server.
• If the printer and print server are connected by a USB cable
"Installing from CD-ROM Setup"
"Installing with Plug and Play"
• If the printer and print server are connected by a LAN cable
"Auto Setup (Recommended Method)"
"Manual Setup (Windows XP/Server 2003 Only)"
3. Reinstall the additional driver.
Select the additional driver.
(1) Select the [x64] check box.
(2) Click [OK].
㻝㻟㻜㻌㻛㻌㻣㻜㻡
Click [Browse].
Open the folders in the supplied CD-ROM: [English] - [x64] - [Driver].
Select the INF file.
(1) Select [CNACDSTD.INF].
(2) Click [Open].
Click [OK].
ĺ Installation of the additional driver starts.
NOTE
Removing the CD-ROM
You can remove the CD-ROM from the CD-ROM drive after the installation of the additional
driver is completed.
㻝㻟㻝㻌㻛㻌㻣㻜㻡
Click [Close] or [OK].
ĺ The printer icon changes to the shared printer icon.
IMPORTANT
To clear the printer sharing settings
To clear the printer sharing settings, use the following procedures.
Windows XP and Server 2003
Select [Do not share this printer] in the [Sharing] sheet.
Windows Vista and Server 2008
Clear the [Share this printer] check box in the [Sharing] sheet.
If [Change sharing options] appears, click [Change sharing options].
If the [User Account Control] dialog box appears, click [Continue].
64-bit Operating System (Windows XP, Server 2003, Vista, and Server 2008)
NOTE
If you are using Windows XP
The printer cannot be shared on a network with the operating system default settings (the settings
immediately after installation).
Before sharing the printer on a network, run [Network Setup Wizard] to enable the printer sharing
settings.
For more details, see Windows Help.
About the screenshots
㻝㻟㻞㻌㻛㻌㻣㻜㻡
This procedure is described using screenshots from Windows Vista.
Open the [Printers and Faxes] or [Printers] folder.
Windows XP and Server 2003
From the [Start] menu, select [Printers and Faxes].
Windows Vista
From the [Start] menu, select [Control Panel], and then click [Printer].
Windows Server 2008
From the [Start] menu, select [Control Panel], and then double-click
[Printers].
Display the [Sharing] sheet.
Right-click the icon for this printer, and then select [Sharing] from the pop-up menu.
Perform the following procedure.
Change [Share name] as needed.
Windows XP and Server 2003
Select [Share this printer]. Change [Share name] as needed.
Windows Vista and Server 2008
Select the [Share this printer] check box. Change [Share name] as needed.
㻝㻟㻟㻌㻛㻌㻣㻜㻡
Proceed to the following procedures according to clients' operating systems.
Client
Some users are using a 32-bit operating system.
ĺ7RStep 4
No user is using a 32-bit operating system.
ĺ7RStep 10
NOTE
If [Change sharing options] appears (Windows Vista and Server 2008)
Click [Change sharing options].
If the [User Account Control] dialog box appears, click [Continue].
About [Share name]
Do not use spaces or special characters.
Insert the supplied CD-ROM "User Software" into the CD-ROM drive of your computer,
and then click [Additional Drivers].
If CD-ROM Setup appears, click [Exit].
㻝㻟㻠㻌㻛㻌㻣㻜㻡
NOTE
About the download installation for client computers on which a 32-bit operating system is
running
If a 64-bit operating system is running on the print server, the download installation for the
following client computers on which a 32-bit operating system is running is not supported due to
the Windows restriction.
Windows XP (on which no service pack or SP1 is installed)
Windows Server 2003 (on which no service pack is installed)
If you download and install the printer driver on any of the above 32-bit operating systems, you
may fail to install the driver and may not be able to open the printing preferences dialog box.
When updating an additional driver (replacement driver)
Perform the following procedure.
1. Uninstall the printer driver on the print server.
"Uninstalling the Printer Driver Using [Canon LBP7210C Uninstaller]"
2. Install the new printer driver on the print server.
• If the printer and print server are connected by a USB cable
"Installing from CD-ROM Setup"
"Installing with Plug and Play"
• If the printer and print server are connected by a LAN cable
"Auto Setup (Recommended Method)"
"Manual Setup (Windows XP/Server 2003 Only)"
3. Reinstall the additional driver.
Select the additional driver.
Windows XP and Server 2003
(1) Select the check box for [Windows XP and Windows Server 2003] in
the [Version] column.
(2) Click [OK].
㻝㻟㻡㻌㻛㻌㻣㻜㻡
Windows Vista and Server 2008
(1) Select the check box for [x86] in the [Processor] column.
(2) Click [OK].
Click [Browse].
Open the folders in the supplied CD-ROM: [English] - [32bit] - [Driver].
Select the INF file.
(1) Select [CNACDSTK.INF].
(2) Click [Open].
㻝㻟㻢㻌㻛㻌㻣㻜㻡
Click [OK].
ĺ Installation of the additional driver starts.
NOTE
Removing the CD-ROM
You can remove the CD-ROM from the CD-ROM drive after the installation of the additional
driver is completed.
Click [Close] or [OK].
ĺ The printer icon changes to the shared printer icon.
IMPORTANT
To clear the printer sharing settings
To clear the printer sharing settings, use the following procedures.
Windows XP and Server 2003
Select [Do not share this printer] in the [Sharing] sheet.
Windows Vista and Server 2008
Clear the [Share this printer] check box in the [Sharing] sheet.
If [Change sharing options] appears, click [Change sharing options].
㻝㻟㻣㻌㻛㻌㻣㻜㻡
If the [User Account Control] dialog box appears, click [Continue].
㻝㻟㻤㻌㻛㻌㻣㻜㻡
[E-15] Installation on Clients
There are two ways to install the printer driver on client computers: Local installation and download installation.
Local installation
You can install the printer driver using the supplied CD-ROM.
Installing from CD-ROM Setup
Download installation
You can install the printer driver without using the supplied CD-ROM, but by downloading the printer driver from the
print server. There are the following two ways to download and install the printer driver.
Installing from the [Printers and Faxes] Folder or the [Printers] Folder
Installing from [Windows Explorer]
NOTE
Precautions when downloading and installing the printer driver
If a 64-bit operating system is running on the print server, the download installation for the
following client computers on which a 32-bit operating system is running is not supported due to
the Windows restriction.
• Windows XP (in which no service pack or SP1 is installed)
• Windows Server 2003 (in which no service pack is installed)
If you download and install the printer driver on any of the above 32-bit operating
systems, you may fail to install the driver and may not be able to open the printing
preferences dialog box.
Installing from CD-ROM Setup
Turn on the computer and start Windows.
Log on as a user with administrative rights.
IMPORTANT
If you are not sure about your administrative rights
Contact your system administrator.
Insert the supplied CD-ROM "User Software" into the CD-ROM drive of your computer.
㻝㻟㻥㻌㻛㻌㻣㻜㻡
If the CD-ROM is already in the drive, eject the disk and reinsert it into the drive.
ĺ CD-ROM Setup appears.
It may take time to display CD-ROM Setup depending on your environment.
NOTE
If CD-ROM Setup does not appear
Display it using the following procedure.
(The CD-ROM drive name is indicated as "D:" in this manual. The CD-ROM drive name may
differ depending on the computer you are using.)
Windows XP and Server 2003
1. From the [Start] menu, select [Run].
2. Enter "D:\English\MInst.exe", and then click [OK].
Windows Vista and Server 2008
1. Enter "D:\English\MInst.exe" in [Start Search] under the [Start]
menu.
2. Press the [ENTER] key on the keyboard.
If the [AutoPlay] dialog box appears (Windows Vista and Server 2008)
Click [Run AUTORUN.EXE].
If the [User Account Control] dialog box appears (Windows Vista and Server 2008)
Click [Continue].
Click [Easy Installation].
The printer driver and the e-Manual are installed.
NOTE
If you do not want to install the e-Manual
㻝㻠㻜㻌㻛㻌㻣㻜㻡
Click [Custom Installation].
Click [Install].
NOTE
If you selected [Custom Installation] in Step 4
(1) Clear the [e-Manual] check box.
(2) Click [Install].
Read the contents of License Agreement, and then click [Yes].
㻝㻠㻝㻌㻛㻌㻣㻜㻡
Click [Next].
Select the method of installation.
(1) Select [Manually Set Port to Install].
(2) Click [Next].
Click [Add Port].
㻝㻠㻞㻌㻛㻌㻣㻜㻡
Select a port to be added.
(1) Select [Network].
(2) Click [OK].
Select a shared printer.
(1) Select a shared printer on the print server.
(2) Click [OK].
NOTE
If you are not sure about the print server name (the computer name of the print server)
Ask your print server administrator about the problem.
Select whether or not to use the printer as the default printer.
(1) If you want to use the printer as the default printer, select the [Set as Default] check
box.
㻝㻠㻟㻌㻛㻌㻣㻜㻡
(2) Click [Next].
Click [Start].
NOTE
If you are using Windows Vista or Server 2008
The following screen appears. Click [Yes].
Select [No] only if you do not use a LAN cable to connect the printer to a computer on which
the printer driver is being installed.
Click [Yes].
ĺ Installation of the printer driver starts.
㻝㻠㻠㻌㻛㻌㻣㻜㻡
It may take time to install the software depending on your environment.
Installation of the e-Manual starts automatically after the printer driver installation.
Wait until the following screen disappears.
It may take time to install the software depending on your environment.
NOTE
If you are using Windows Vista or Server 2008
The [Printers] dialog box appears. Click [Install driver].
If you selected [Custom Installation] in Step 4
The e-Manual is not installed.
Check the installation results, and then click [Next].
NOTE
If the printer driver is not installed properly
"The Printer Driver Cannot Be Installed or Uninstalled"
㻝㻠㻡㻌㻛㻌㻣㻜㻡
Restart your computer.
(1) Select the [Restart Computer Now (Recommended)] check box.
(2) Click [Restart].
NOTE
Removing the CD-ROM
You can remove the CD-ROM from the CD-ROM drive after the installation is completed.
When viewing the e-Manual
"Viewing the e-Manual"
"Searching for Information"
Installing from the [Printers and Faxes] Folder or the [Printers] Folder
The procedure for installing the printer driver from the [Printers and Faxes] folder or the [Printers] folder varies
depending on your operating system.
See the following according to your operating system.
Windows Vista and Server 2008
Windows XP and Server 2003
Windows Vista and Server 2008
NOTE
About the screenshots
This procedure is described using screenshots from Windows Vista.
㻝㻠㻢㻌㻛㻌㻣㻜㻡
Turn the computer on and start up Windows Vista or Server 2008.
Log on to Windows Vista or Server 2008.
Open the [Printers] folder.
Windows Vista
From the [Start] menu, select [Control Panel], and then click [Printer].
Windows Server 2008
From the [Start] menu, select [Control Panel], and then double-click
[Printers].
Click [Add a printer].
Click [Add a network, wireless or Bluetooth printer].
ĺ Searching for the printer on the network starts automatically.
Click [The printer that I want isn't listed].
㻝㻠㻣㻌㻛㻌㻣㻜㻡
Perform the following procedure.
(1) Select [Select a shared printer by name].
(2) Click [Next].
Select a shared printer.
(1) Select a shared printer on the print server.
(2) Click [Select].
NOTE
㻝㻠㻤㻌㻛㻌㻣㻜㻡
Specifying the network path directly
Specify the network path as "\\the print server name (the computer name of the print server)\the
printer name".
If you are not sure about the print server name (the computer name of the print server)
Ask your print server administrator about the problem.
Click [Install driver].
NOTE
If the [User Account Control] dialog box appears
Click [Continue].
Click [Next].
NOTE
If another printer driver has already been installed
[Set as the default printer] is displayed. To set the printer as the default printer, select the check
box.
Click [Finish].
㻝㻠㻥㻌㻛㻌㻣㻜㻡
NOTE
Printing a test page
Click [Print a test page].
ĺ A confirmation dialog box appears. Click [Close] to close the dialog box.
Windows XP and Server 2003
Turn the computer on and start up Windows XP or Server 2003.
Log on to Windows XP or Server 2003.
NOTE
When logging on as a user without administrative rights
A user without administrative rights can also install the printer driver.
Open the [Printers and Faxes] folder.
Windows XP Professional and Server 2003
From the [Start] menu, select [Printers and Faxes].
Windows XP Home Edition
From the [Start] menu, select [Control Panel], and then click [Printers and
2WKHU+DUGZDUH@ĺ>3ULQWHUVDQG)D[HV@
Display [Add Printer Wizard].
Windows XP
㻝㻡㻜㻌㻛㻌㻣㻜㻡
Click [Add a printer].
Windows Server 2003
Double-click [Add Printer].
Click [Next].
Select a printer type.
(1) Select [A network printer, or a printer attached to another computer].
(2) Click [Next].
Perform the following procedure.
㻝㻡㻝㻌㻛㻌㻣㻜㻡
(1) Select [Connect to this printer (or to browse for a printer, select this option and click
Next)].
(2) Click [Next].
Select a shared printer.
(1) Select a shared printer on the print server.
(2) Click [Next].
NOTE
If the [Connect to Printer] dialog box appears
Follow the directions in the message.
Specifying the network path directly
Specify the network path as "\\the print server name (the computer name of the print server)\the
printer name".
If you are not sure about the print server name (the computer name of the print server)
Ask your print server administrator about the problem.
When the following screen appears, select whether or not to use this printer as the default
printer.
(1) If you want to use the printer as the default printer, select [Yes].
㻝㻡㻞㻌㻛㻌㻣㻜㻡
(2) Click [Next].
Click [Finish].
Installing from [Windows Explorer]
Turn on the computer and start Windows.
Log on to Windows.
Display [Windows Explorer].
Windows XP, Server 2003, Vista, and Server 2008
)URPWKH>6WDUW@PHQXVHOHFW>$OO3URJUDPV@ĺ>$FFHVVRULHV@ĺ
[Windows Explorer].
Perform the following procedure.
(1) Select the print server from [My Network Places] (from [Network] for Windows
㻝㻡㻟㻌㻛㻌㻣㻜㻡
Vista and Server 2008).
(2) Double-click the shared printer icon or drag and drop the icon into the [Printers and
Faxes] folder or [Printers] folder.
NOTE
If you are not sure about the print server name (the computer name of the print server)
Ask your print server administrator about the problem.
Follow the on-screen instructions to install the printer driver.
㻝㻡㻠㻌㻛㻌㻣㻜㻡
[E-16] To Check the Processor Version of Windows Vista or Server 2008
If you are not sure whether you are using 32-bit Windows Vista/Server 2008 or 64-bit Windows Vista/Server 2008, you
can check that using the following procedure.
NOTE
About the screenshots
This procedure is described using screenshots from Windows Vista.
From the [Start] menu, select [Control Panel].
Display [System].
Windows Vista
&OLFN>6\VWHPDQG0DLQWHQDQFH@ĺ>6\VWHP@
Windows Server 2008
Double-click [System].
Check the processor version.
For a 32-bit operating system
[32-bit Operating System] is displayed.
For a 64-bit operating system
[64-bit Operating System] is displayed.
㻝㻡㻡㻌㻛㻌㻣㻜㻡
[E-17] Printing Configuration Page Print
After installing the printer driver, check the operations by Configuration Page Print.
Configuration Page Print is used to print the settings of the printer unit, the total number of printed pages, and other
printer information.
NOTE
Load A4 size paper.
The Configuration Page Print is set to print on A4 size paper.
Be sure to load A4 size paper when printing the Configuration Page Print.
Load A4-size paper in the multi-purpose tray or paper drawer.
"Loading Standard Size Paper (Other Than Index Cards and Envelopes)"
Display the Printer Status Window.
Click [
] in the Windows task tray, and then select the printer name.
NOTE
When displaying the Printer Status Window from the printer driver
Click [
] (Display Printer Status Window) in locations such as in the [Page Setup] sheet.
)URPWKH>2SWLRQV@PHQXVHOHFW>8WLOLW\@ĺ>&RQILJXUDWLRQ3DJH3ULQW@
Click [OK].
㻝㻡㻢㻌㻛㻌㻣㻜㻡
ĺ Configuration Page Print is printed.
NOTE
Sample of Configuration Page Print
This is a sample of Configuration Page Print. The contents may differ from the Configuration
Page Print printed by your printer.
If Configuration Page Print is not printed properly
"Printing Does Not Work"
㻝㻡㻣㻌㻛㻌㻣㻜㻡
[E-18] Printing a Test Page in Windows
You can check the operations of the printer driver by printing a test page in Windows.
IMPORTANT
If an error message appears in the Printer Status Window
Follow the on-screen instructions to solve the problem, and then print a test page.
"Printer Status Window"
Load A4-size paper in the multi-purpose tray or paper drawer.
"Loading Standard Size Paper (Other Than Index Cards and Envelopes)"
Open the [Printers and Faxes] or [Printers] folder.
Windows XP Professional and Server 2003
From the [Start] menu, select [Printers and Faxes].
Windows XP Home Edition
From the [Start] menu, select [Control Panel], and then click [Printers and
2WKHU+DUGZDUH@ĺ>3ULQWHUVDQG)D[HV@
Windows Vista
From the [Start] menu, select [Control Panel], and then click [Printer].
Windows Server 2008
From the [Start] menu, select [Control Panel], and then double-click
[Printers].
Right-click the icon for this printer, and then select [Properties] from the pop-up menu.
Print a test page.
(1) Display the [General] sheet.
(2) Click [Print Test Page].
㻝㻡㻤㻌㻛㻌㻣㻜㻡
ĺ The test page is printed.
NOTE
If the test page is not printed properly
"Printing Does Not Work"
㻝㻡㻥㻌㻛㻌㻣㻜㻡
[E-19] Uninstalling the Printer Driver Using [Canon LBP7210C Uninstaller]
The process of removing the printer driver to restore the computer to the same state as before the printer driver was
installed is referred to as uninstallation. To uninstall the printer driver, perform the following procedure.
IMPORTANT
Uninstallation by a user with administrative rights
A user without administrative rights cannot perform the uninstallation. To perform the
uninstallation, be sure to log on as a user with administrative rights.
Contact your system administrator if you are not sure about your administrative rights.
Disconnect the USB cable before uninstalling the printer driver (Windows 7).
Be sure to disconnect the USB cable before uninstalling the printer driver.
NOTE
If a user without administrative rights installed the printer driver
The printer driver may not be able to uninstalled successfully using [Canon LBP7210C
Uninstaller] depending on your operating system.
In this case, uninstall the printer driver using the following procedure.
1. Open the [Printers and Faxes] or [Printers] folder.
Windows XP Professional and Server 2003
From the [Start] menu, select [Printers and Faxes].
Windows XP Home Edition
From the [Start] menu, select [Control Panel], and then click
>3ULQWHUVDQG2WKHU+DUGZDUH@ĺ>3ULQWHUVDQG)D[HV@
Windows Vista
From the [Start] menu, select [Control Panel], and then click
[Printer].
Windows Server 2008
From the [Start] menu, select [Control Panel], and then double-click
[Printers].
2. Right-click the icon for this printer, then select [Delete] from the pop-up menu.
3. Click [Yes].
4. Uninstall the printer driver using [Canon LBP7210C Uninstaller].
Close the following files and programs if open.
Help file
Printer Status Window
㻝㻢㻜㻌㻛㻌㻣㻜㻡
Control Panel
Other applications
Run [Canon LBP7210C Uninstaller].
Windows XP, Server 2003, Vista, and Server 2008
)URPWKH>6WDUW@PHQXVHOHFW>$OO3URJUDPV@ĺ>&DQRQ3ULQWHU
8QLQVWDOOHU@ĺ>&DQRQ/%3&8QLQVWDOOHU@
NOTE
If the [User Account Control] dialog box appears (Windows Vista and Server 2008)
Click [Continue].
Perform the following procedure.
If this printer is displayed
(1) Select this printer.
(2) Click [Delete].
If this printer is not displayed
Click [Delete].
㻝㻢㻝㻌㻛㻌㻣㻜㻡
Click [Yes].
If the printer is used as a shared printer, the following screen appears. Read the contents
of the message, and then click [Yes].
ĺ The uninstallation starts. Please wait a moment.
Depending on your environment, the uninstallation may take a long time.
NOTE
If you are using Windows Vista and Server 2008
The following dialog box appears. Read the contents of the message, and then click [Yes] or [Yes
To All].
Click [Exit].
Open the [Printers and Faxes] or [Printers] folder.
Windows XP Professional and Server 2003
From the [Start] menu, select [Printers and Faxes].
Windows XP Home Edition
From the [Start] menu, select [Control Panel], and then click [Printers and
2WKHU+DUGZDUH@ĺ>3ULQWHUVDQG)D[HV@
Windows Vista
㻝㻢㻞㻌㻛㻌㻣㻜㻡
From the [Start] menu, select [Control Panel], and then click [Printer].
Windows Server 2008
From the [Start] menu, select [Control Panel], and then double-click
[Printers].
Make sure that the icon for this printer is not displayed in the [Printers and Faxes] or
[Printers] folder.
IMPORTANT
If the icon for this printer is displayed
1. Right-click the icon, and then select [Delete] from the pop-up menu.
2. Click [Yes].
Be sure to delete the icon. Unless you delete the icon, you cannot install the printer driver
again.
Restart Windows.
IMPORTANT
If the uninstallation fails
"Uninstalling the Printer Driver in [Control Panel]"
Uninstallation of the e-Manual
The installed e-Manual are not uninstalled by uninstalling the printer driver.
See "Uninstalling the e-Manual" and uninstall the e-Manual.
㻝㻢㻟㻌㻛㻌㻣㻜㻡
[E-20] Uninstalling the Printer Driver in [Control Panel]
If you cannot uninstall the printer driver using [Canon LBP7210C Uninstaller], use the following procedure to uninstall
the printer driver.
Perform the following procedure.
Windows XP
From the [Start] menu, select [Control Panel], and then click [Add or
Remove Programs].
Windows Server 2003
)URPWKH>6WDUW@PHQXVHOHFW>&RQWURO3DQHO@ĺ>$GGRU5HPRYH
Programs].
Windows Vista
From the [Start] menu, select [Control Panel], and then click [Uninstall a
program].
Windows Server 2008
From the [Start] menu, select [Control Panel], and then double-click
[Programs and Features].
Perform the following procedure.
Windows XP and Server 2003
(1) Select [Canon LBP7210C].
(2) Click [Change/Remove].
Windows Vista and Server 2008
(1) Select [Canon LBP7210C].
(2) Click [Uninstall/Change].
NOTE
㻝㻢㻠㻌㻛㻌㻣㻜㻡
If [Canon LBP7210C] is not listed
"Uninstalling the USB Class Driver"
If the [User Account Control] dialog box appears (Windows Vista and Server 2008)
Click [Continue].
Perform the following procedure.
If this printer is displayed
(1) Select this printer.
(2) Click [Delete].
If this printer is not displayed
Click [Delete].
Click [Yes].
If the printer is used as a shared printer, the following screen appears. Read the contents
of the message, and then click [Yes].
㻝㻢㻡㻌㻛㻌㻣㻜㻡
ĺ The uninstallation starts. Please wait a moment.
Depending on your environment, the uninstallation may take a long time.
NOTE
If you are using Windows Vista and Server 2008
The following dialog box appears. Read the contents of the message, and then click [Yes] or [Yes
To All].
Click [Exit].
Open the [Printers and Faxes] or [Printers] folder.
Windows XP Professional and Server 2003
From the [Start] menu, select [Printers and Faxes].
Windows XP Home Edition
From the [Start] menu, select [Control Panel], and then click [Printers and
2WKHU+DUGZDUH@ĺ>3ULQWHUVDQG)D[HV@
Windows Vista
From the [Start] menu, select [Control Panel], and then click [Printer].
Windows Server 2008
From the [Start] menu, select [Control Panel], and then double-click
[Printers].
Make sure that the icon for this printer is not displayed in the [Printers and Faxes] or
[Printers] folder.
㻝㻢㻢㻌㻛㻌㻣㻜㻡
IMPORTANT
If the icon for this printer is displayed
1. Right-click the icon, and then select [Delete] from the pop-up menu.
2. Click [Yes].
Be sure to delete the icon. Unless you delete the icon, you cannot install the printer driver
again.
Restart Windows.
IMPORTANT
Uninstallation of the e-Manual
The installed e-Manual are not uninstalled by uninstalling the printer driver.
See "Uninstalling the e-Manual" and uninstall the e-Manual.
㻝㻢㻣㻌㻛㻌㻣㻜㻡
[E-21] Uninstalling the USB Class Driver
Uninstall the USB class driver under the following circumstances.
If the printer driver installed using a USB connection cannot be uninstalled properly
If you cannot install the printer driver properly even after reinstalling it
Check the following.
Check that the printer and computer are connected using a USB cable.
Check that the printer is on.
Perform the following procedure.
Windows XP
From the [Start] menu, select [Control Panel], and then click [Add or
Remove Programs].
Windows Server 2003
)URPWKH>6WDUW@PHQXVHOHFW>&RQWURO3DQHO@ĺ>$GGRU5HPRYH
Programs].
Windows Vista
From the [Start] menu, select [Control Panel], and then click [Uninstall a
program].
Windows Server 2008
From the [Start] menu, select [Control Panel], and then double-click
[Programs and Features].
Make sure that [Canon LBP7210C] is not displayed.
(1) Make sure that [Canon LBP7210C] is not displayed in the dialog box.
(2) Click [ ] to close the dialog box.
NOTE
If [Canon LBP7210C] is displayed
See "Uninstalling the Printer Driver in [Control Panel]" and delete [Canon LBP7210C] in the
㻝㻢㻤㻌㻛㻌㻣㻜㻡
dialog box.
Display [Device Manager].
Windows XP
1. From the [Start] menu, select [Control Panel].
2. &OLFN>3HUIRUPDQFHDQG0DLQWHQDQFH@ĺ>6\VWHP@
3. &OLFNWKH>+DUGZDUH@WDEĺ>'HYLFH0DQDJHU@
Windows Server 2003
1. )URPWKH>6WDUW@PHQXVHOHFW>&RQWURO3DQHO@ĺ>6\VWHP@
2. &OLFNWKH>+DUGZDUH@WDEĺ>'HYLFH0DQDJHU@
Windows Vista
1. From the [Start] menu, select [Control Panel].
2. &OLFN>+DUGZDUHDQG6RXQG@ĺ>9LHZKDUGZDUHDQG
devices].
Windows Server 2008
1. From the [Start] menu, select [Control Panel].
2. Double-click [Device Manager].
NOTE
If the [User Account Control] dialog box appears (Windows Vista and Server 2008)
Click [Continue].
Double-click [Universal Serial Bus controllers].
Right-click [USB Printing Support], then select [Uninstall] from the pop-up menu.
㻝㻢㻥㻌㻛㻌㻣㻜㻡
IMPORTANT
Do not uninstall any other device drivers.
If you uninstall them by mistake, Windows may not operate properly.
NOTE
If [USB Printing Support] is not displayed
The USB class driver is not installed properly.
If the USB class driver is under [Other Devices]
The USB class driver is not installed properly. Select [Unknown device], and then uninstall it.
Click [OK].
Click [
] to close the [Device Manager] dialog box.
Disconnect the USB cable from the computer, and then restart Windows.
㻝㻣㻜㻌㻛㻌㻣㻜㻡
[F] Printing
㻝㻣㻝㻌㻛㻌㻣㻜㻡
[F-02] Installing the Printer Driver
The printer driver is software required for printing from an application.
The procedure for installing the printer driver varies depending on the system environment. See the following according
to your system environment.
If the printer and computer are connected by a USB cable
"Installing from CD-ROM Setup"
"Installing with Plug and Play"
If the printer and computer are connected by a LAN cable
"Auto Setup (Recommended Method)"
"Manual Setup (Windows XP/Server 2003 Only)"
Using a Print Server
㻝㻣㻞㻌㻛㻌㻣㻜㻡
If your computer is the print server
If the printer and print server are connected by a USB cable
"Installing from CD-ROM Setup"
"Installing with Plug and Play"
If the printer and print server are connected by a LAN cable
"Auto Setup (Recommended Method)"
"Manual Setup (Windows XP/Server 2003 Only)"
If your computer is a client computer
"Installation on Clients"
㻝㻣㻟㻌㻛㻌㻣㻜㻡
[F-03] Turning the Printer On/Off
Turning On the Printer
Turning Off the Printer
Turning On the Printer
Press the power switch to turn the printer On.
ĺ All the indicators on the printer blink, and the printer initiates a self-diagnostic test on
the printer unit and optional accessories.
If the self-diagnostic test result is normal
The
print.
(Ready) indicator (green) turns on, and the printer is ready to
If the self-diagnostic test result is not normal
The
(Alarm) indicator (orange) turns on or blinks.
"The Alarm Indicator Is On or Blinking"
IMPORTANT
㻝㻣㻠㻌㻛㻌㻣㻜㻡
Do not turn the printer on immediately after turning it off.
If you want to cycle the power of the printer, wait at least 10 seconds before turning it on again.
If the printer does not operate properly
"Problem Diagnosis Menu"
If an error message appears in the Printer Status Window
"A Message Appears in the Printer Status Window"
When turning on the printer for the first time after the printer installation
Before turning on the printer, be sure to remove the sealing tape from the toner
cartridges installed in the printer.
"Preparing the Toner Cartridges"
If the printer is turned on before the sealing tape is removed, an error message is
displayed in the Printer Status Window.
Before turning on the printer, be sure to insert the paper drawer in the printer.
Although a sheet of blank paper may be output, this is not an error.
Turning Off the Printer
Check that the printer is not performing the following operations.
Printing
While the printer is running a self-diagnostic test immediately after turning
the power on (All the indicators are blinking)
Press the power switch to turn the printer Off.
IMPORTANT
Precautions when turning off the printer
If you turn the printer off, all print data remaining in the printer memory will be erased.
㻝㻣㻡㻌㻛㻌㻣㻜㻡
Power consumption when the power is off (when the power switch is not pressed)
Even if the power of the printer is turned off, power is consumed only slightly while the power
plug is inserted into the AC power outlet. To cut the power consumption completely, unplug the
power plug from the AC power outlet.
㻝㻣㻢㻌㻛㻌㻣㻜㻡
[F-04] Printing (Basic Procedure)
This section describes the basic procedure for printing from an application, taking Adobe Reader 7.0 as an example.
The printing procedure may differ depending on the application you are using.
NOTE
When installing the printer driver
"Procedure for Installing the Printer and the Printer Driver"
Load paper in the paper drawer or multi-purpose tray.
NOTE
How to load paper
"Loading Standard Size Paper (Other Than Index Cards and Envelopes)"
"Loading Index Cards"
"Loading Envelopes"
"Loading Custom Size Paper (Non-Standard Size Paper)"
Open the PDF file to be printed using Adobe Reader.
Select [Print] from the [File] menu.
Configure the printing preferences.
(1) Select this printer.
(2) Configure the printing preferences.
㻝㻣㻣㻌㻛㻌㻣㻜㻡
NOTE
Changing the printer name
You can change the printer name in the [Printers and Faxes] or [Printers] folder.
Click [Properties].
Specify the setting for [Print Style].
(1) Display the [Finishing] sheet.
(2) Select [2-sided Printing] or [1-sided Printing].
㻝㻣㻤㻌㻛㻌㻣㻜㻡
Specify the settings for [Page Size] and [Output Size].
(1) Display the [Page Setup] sheet.
(2) Select the page size of the document created by an application.
(3) Select the size of the paper loaded in the paper source as needed.
IMPORTANT
If the [Page Size] setting and [Output Size] setting are not the same
The print is automatically reduced or enlarged to fit on the page.
When printing from the paper drawer
Use the following procedure to check that the [Output Size] setting and [Register Paper Sizes]
setting are the same.
1. Click [
] (Display Printer Status Window).
2. )URPWKH>2SWLRQV@PHQXVHOHFW>'HYLFH6HWWLQJV@ĺ>'UDZHU6HWWLQJV@
3. Check that the [Register Paper Sizes] setting is the same as the [Output Size]
㻝㻣㻥㻌㻛㻌㻣㻜㻡
setting.
Specify the settings for [Paper Source] and [Paper Type].
(1) Display the [Paper Source] sheet.
(2) Select the paper source you want to use.
(3) Select the type of the paper loaded in the paper source.
NOTE
When [Paper Selection] is set to a setting other than [Same Paper for All Pages]
The [Paper Source] setting changes as follows.
[First Page]
[Second Page]
[Cover Page]
[Other Pages]
[Last Page]
[Cover Sheets]
Select the paper source to be used for each page.
Using Preview to specify the setting for [Paper Source]
You can also specify the setting for [Paper Source] using Preview.
"Using Preview to Configure the Printing Preferences"
When printing paper of a type other than plain paper or envelopes from the paper drawer
Select [Drawer 1] or [Drawer 2] (optional) in [Paper Source].
㻝㻤㻜㻌㻛㻌㻣㻜㻡
If you select [Auto], you cannot print from the paper drawer. (Paper is fed from the multipurpose tray.)
About [Paper Type]
Specify the setting according to the paper type as follows.
Paper Type
Plain paper
Heavy paper
Setting for [Paper Type] in the Printer Driver
60 to 74 g/m 2
[Plain Paper L] *1
60 g/m 2
[Plain Paper L2]*3
70 to 90 g/m 2
[Plain Paper]*1*2
86 to 119 g/m 2
[Heavy Paper 1]*2
120 to 128 g/m 2
[Heavy Paper 2]
129 to 176 g/m 2
[Heavy Paper 3]
Transparency (black-and-white printing only)
[Transparency]
Label
[Labels]
100 to 110 g/m 2
[Coated Paper 1]
120 to 130 g/m 2
[Coated Paper 2]
155 to 165 g/m 2
[Coated Paper 3]
210 to 220 g/m 2
[Coated Paper 4]
Coated paper
[Envelope]
Envelope
[Envelope H]*5
*1 If you want to print paper of 70 to 74 g/m 2 , you can specify either of [Plain Paper] or [Plain Paper L].*3
*2 If you want to print paper of 86 to 90 g/m 2 , you can specify either of [Plain Paper] or [Heavy Paper 1].*4
*3 If the printed paper curls (the printed side curls outward) when printed 60 g/m 2 paper with [Plain Paper L] selected, select [Plain Paper L2].
*4 If either setting causes the following problems etc., specify the other setting to print.
Output paper curls.
Residual images appear on non-printed areas.
The toner does not fix onto paper well, and the printing comes out faint.
*5 If you want to improve the toner fixation when printed with [Envelope] selected, select [Envelope H].
Specify the other printing preferences in the [Page Setup], [Finishing], [Paper Source], and
[Quality] sheets as needed.
㻝㻤㻝㻌㻛㻌㻣㻜㻡
NOTE
For details on the settings
See Help.
"How to Use Help"
Confirm the settings, then click [OK].
ĺ The [Print] dialog box reappears.
NOTE
About the settings
It is recommended that you check the [Page Setup] sheet and [Paper Source] sheet
settings each time you print a document.
The settings that are specified here apply only to jobs to be printed from the same
application. Exiting the application resets the changed settings to the default
settings.
For details on the procedure for changing the default values for printing
preferences, see "Changing the Default Values for Printing Preferences".
Click [OK].
ĺ The printer starts printing.
NOTE
If the printer cannot print properly
"Printing Does Not Work"
㻝㻤㻞㻌㻛㻌㻣㻜㻡
[F-05] Canceling a Job
This printer allows you to cancel a print job using any one of the following methods.
Canceling a Print Job Using the Print Queue
Canceling a Print Job Using the Printer Status Window
Canceling a Print Job Using the Cancel Job Key
Canceling a Print Job Using the Remote UI
Canceling a Print Job Using the Print Queue
Display the Printer Status Window.
Click [
] in the Windows task tray, and then select the printer name.
NOTE
When displaying the Printer Status Window from the printer driver
Click [
] (Display Printer Status Window) in locations such as in the [Page Setup] sheet.
Click [
] (Print Queue).
ĺ The print queue is displayed.
NOTE
㻝㻤㻟㻌㻛㻌㻣㻜㻡
Displaying the print queue
You can also use the following procedure to display the print queue.
1. Open the [Printers and Faxes] or [Printers] folder.
Windows XP Professional and Server 2003
From the [Start] menu, select [Printers and Faxes].
Windows XP Home Edition
From the [Start] menu, select [Control Panel], and then click
>3ULQWHUVDQG2WKHU+DUGZDUH@ĺ>3ULQWHUVDQG)D[HV@
Windows Vista
From the [Start] menu, select [Control Panel], and then click
[Printer].
Windows Server 2008
From the [Start] menu, select [Control Panel], and then double-click
[Printers].
2. Double-click the icon of this printer.
For details on the print queue
See Windows Help.
Right-click the job that you want to cancel, then select [Cancel] from the pop-up menu.
NOTE
About print jobs from other users
Print jobs from other users are not displayed.
(For the print server environment, all print jobs are displayed on the print server.)
If an error has occurred with a print job from another user, use the
cancel the job.
"Canceling a Print Job Using the Cancel Job Key"
Clicking [Yes] cancels the print job.
Canceling a Print Job Using the Printer Status Window
㻝㻤㻠㻌㻛㻌㻣㻜㻡
(Cancel Job) key to
Display the Printer Status Window.
Click [
] in the Windows task tray, and then select the printer name.
NOTE
When displaying the Printer Status Window from the printer driver
Click [
] (Display Printer Status Window) in locations such as in the [Page Setup] sheet.
Clicking [
] (Cancel Job) cancels the print job.
NOTE
About print jobs from other users
While another user's job is being printed, you cannot cancel the job.
(For the print server environment, you can cancel print jobs on the print server.)
If an error has occurred with a print job from another user, use the
(Cancel Job) key to
cancel the job.
"Canceling a Print Job Using the Cancel Job Key"
Canceling a Print Job Using the Cancel Job Key
If an error has occurred with a print job from another user, use the
Pressing the
(Cancel Job) key to cancel the job.
(Cancel Job) key on the control panel cancels the job.
㻝㻤㻡㻌㻛㻌㻣㻜㻡
NOTE
If print jobs cannot be canceled even when the
(Cancel Job) key is pressed
You cannot cancel the following pages or jobs.
• Pages of which data has been received already
• Jobs of which print copy is one sheet of paper
If the printer switches from one print job to another while the
(Cancel Job)
key is being pressed (if the job when the key is pressed and the job when the key
is released are different), both the jobs cannot be canceled.
Depending on the settings for the [Settings of the Cancel Job Key] dialog box in
the Printer Status Window, you may not be able to cancel a job.
About operation of the
(Cancel Job) key
When the key is released, the printer begins canceling the job.
The following are the meanings of the
(Cancel Job) indicator (orange).
• While the key is being pressed: Blinking
• While a job is being canceled: On
Specifying the types of jobs which the
(Cancel Job) key can cancel
You can specify the types of jobs which can be canceled in the [Settings of the Cancel Job Key]
dialog box in the Printer Status Window.
For details on the [Settings of the Cancel Job Key] dialog box, see Help.
"How to Use Help"
Canceling a Print Job Using the Remote UI
Display the Printer Status Window.
Click [
] in the Windows task tray, and then select the printer name.
㻝㻤㻢㻌㻛㻌㻣㻜㻡
NOTE
When displaying the Printer Status Window from the printer driver
Click [
] (Display Printer Status Window) in locations such as in the [Page Setup] sheet.
Select [Remote UI] from the [Options] menu.
NOTE
If you cannot select [Remote UI]
You cannot select [Remote UI] if the printer and computer cannot communicate via a network.
When starting the Remote UI directly from a web browser
"Remote UI"
From the [Job Manager] menu, select [Print Job].
NOTE
㻝㻤㻣㻌㻛㻌㻣㻜㻡
About [Document Name]
A job file name of up to 20 characters can be displayed. If the number of characters exceeds 20,
the characters after the limited number are not displayed, or some characters are not displayed
properly.
Also, depending on the application, the application name may be added to the beginning of the
file name.
About [Interface Name]
If you print via USB, [Local] is displayed in [Interface Name]. If you print via the network,
nothing is displayed in the field.
Clicking [Delete] cancels the print job.
NOTE
About the pages in process of printing
The pages in process of printing when [Delete] is clicked will be printed.
About print jobs from other users
You can also cancel print jobs from other users.
㻝㻤㻤㻌㻛㻌㻣㻜㻡
[F-06] Changing the Default Values for Printing Preferences
The printing preferences that are specified in "Printing (Basic Procedure)" apply only to jobs to be printed from the same
application.
Exiting the application resets the changed settings to the default settings.
You can change the default values for printing preferences which apply to all jobs using the following procedure.
Open the [Printers and Faxes] or [Printers] folder.
Windows XP Professional and Server 2003
From the [Start] menu, select [Printers and Faxes].
Windows XP Home Edition
From the [Start] menu, select [Control Panel], and then click [Printers and
2WKHU+DUGZDUH@ĺ>3ULQWHUVDQG)D[HV@
Windows Vista
From the [Start] menu, select [Control Panel], and then click [Printer].
Windows Server 2008
From the [Start] menu, select [Control Panel], and then double-click
[Printers].
Right-click the icon for this printer, then select [Printing Preferences] from the pop-up
menu.
Specify the default value for printing preferences in the [Page Setup], [Finishing], [Paper
Source], and [Quality] sheets.
㻝㻤㻥㻌㻛㻌㻣㻜㻡
NOTE
For details on the settings
See Help.
"How to Use Help"
Confirm the settings, then click [OK]. The default values for printing preferences are
changed.
ĺ The [Printers and Faxes] folder or the [Printers] folder reappears.
㻝㻥㻜㻌㻛㻌㻣㻜㻡
[F-07] Various Sheets in the Printer Driver
You can switch among the sheets in the printer driver by clicking the tabs across the top of the dialog box.
This section describes the sheets to be displayed.
Opening the printing preferences dialog box in an application
[Page Setup] Sheet
[Finishing] Sheet
[Paper Source] Sheet
[Quality] Sheet
Opening the printing preferences dialog box from the [Printers and Faxes] or [Printers] folder
(when selecting [Printing Preferences])
[Page Setup] Sheet
[Finishing] Sheet
[Paper Source] Sheet
[Quality] Sheet
Opening the printing preferences dialog box from the [Printers and Faxes] or [Printers] folder
㻝㻥㻝㻌㻛㻌㻣㻜㻡
(when [Properties] is selected)
[Device Settings] Sheet
[Profile] Sheet
NOTE
About the sheets displayed by Windows
The following sheets are displayed by Windows.
[General] Sheet
[Sharing] Sheet
[Ports] Sheet
[Advanced] Sheet
[Color Management] Sheet
[Security] Sheet
For details on the above sheets, see Windows Help.
About the printer driver
The functions of the printer driver may be changed due to upgrade.
[Page Setup] Sheet
㻝㻥㻞㻌㻛㻌㻣㻜㻡
(1) "Combining Jobs before Printing"
(2) "Using Preview to Configure the Printing Preferences"
(3) "Printing Multiple Pages on One Sheet"
(4) "Printing an Image Larger than A4 Size (Poster Printing)"
(5) "Scaling Print Output"
(6) "Adding a Watermark to a Document to Be Printed (Watermark Printing)"
(7) "Printing Borders, the Printing Date, etc."
(8) "Loading Custom Size Paper (Non-Standard Size Paper)"
NOTE
For details on the settings
㻝㻥㻟㻌㻛㻌㻣㻜㻡
See Help.
"How to Use Help"
[Finishing] Sheet
(1) "Combining Jobs before Printing"
(2) "Using Preview to Configure the Printing Preferences"
(3) "Printing with a Gutter"
(4) "1-sided Printing and 2-sided Printing"
(5) "Booklet Printing"
(6) "Printing Data with Different Orientations in the Same Job"
(7) "Selecting the Paper Output Method"
(8) "Printing with the Page 180 Degrees Rotated"
NOTE
㻝㻥㻠㻌㻛㻌㻣㻜㻡
For details on the settings
See Help.
"How to Use Help"
[Paper Source] Sheet
(1) "Combining Jobs before Printing"
(2) "Using Preview to Configure the Printing Preferences"
(3) "Selecting Paper for Each Page"
NOTE
For details on the settings
See Help.
"How to Use Help"
[Quality] Sheet
㻝㻥㻡㻌㻛㻌㻣㻜㻡
(1) "Combining Jobs before Printing"
(2) "Performing Printing Appropriate for Particular Print Data"
(3) "Printing a Color Document in Black and White"
(4) "Correcting Rough-Textured Images"
(5) "Adjusting the Toner Density"
(6) "Adjusting the Color"
(7) "Printing with Brightness and Contrast Adjusted"
(8) "Matching the Color on the Display"
NOTE
㻝㻥㻢㻌㻛㻌㻣㻜㻡
For details on the settings
See Help.
"How to Use Help"
[Device Settings] Sheet
NOTE
For details on the settings
See Help.
"How to Use Help"
[Profile] Sheet
㻝㻥㻣㻌㻛㻌㻣㻜㻡
NOTE
For details on the settings
See Help.
"How to Use Help"
㻝㻥㻤㻌㻛㻌㻣㻜㻡
[F-08] Checking the Printer Status Using the Printer Status Window
Displaying the Printer Status Window
Checking the Printer Status
About the [Consumables Information] Dialog Box
Display Printer Status Window
There are the following two ways to display the Printer Status Window.
Click [
Click [
] in the Windows task tray, and then select the printer name.
] (Display Printer Status Window) in locations such as in the [Page Setup] sheet in the printer
driver.
NOTE
Displaying the Printer Status Window automatically
When the Printer Status Window is not displayed, the Printer Status Window icon is displayed
automatically under the following situations.
When an error has occurred while printing
When a toner cartridge needs to be replaced soon while printing
When a toner cartridge has reached the end of its life while printing
Clicking this icon can display the Printer Status Window.
㻝㻥㻥㻌㻛㻌㻣㻜㻡
The icon may not be displayed even under the above situations depending on the settings
for the [Preferences (Users)] or [Preferences (Administrators)] dialog box in the Printer
Status Window.
For details on the [Preferences (Users)] or [Preferences (Administrators)] dialog box, see
Help.
"How to Use Help"
Checking the Printer Status
The Printer Status Window allows you to check the printer status (such as the operation status and job information).
(1) [Consumables Information]: Displays the [Consumables Information] dialog box.
You can check the status of the toner cartridges in the [Consumables Information] dialog
box.
About the [Consumables Information] Dialog Box
(2) [Icon]:
Displays the printer status.
The printer is ready to print or in the sleep mode.
Printing is paused.
Printer problems need to be corrected.
Displays a warning.
The printer is in an error condition.
(3) [Message Area]:
Displays messages about the printer status.
(4) [Message Area] (Auxiliary): Displays additional information (situation explanation, solutions, etc.) if an error or other
such event occurs.
(5) [Animation Area]:
Displays the printer status using an animated graphic. This area displays the printing
progress or error conditions depending on the printer status.
Also, according to the printer status, the background color changes as follows.
㻞㻜㻜㻌㻛㻌㻣㻜㻡
• Blue: Ready to print.
• Orange: An error is occurring.
• Red:
A service error is occurring.
(6) [Job Information Area]:
(7) [Progress Bar]:
Displays information about the job.
Displays the printing progress of the current job. The bar gradually grows indicating the
printing progress.
NOTE
For details on the settings other than those related to the printer status
See Help.
"How to Use Help"
About the [Consumables Information] Dialog Box
Clicking [
box.
] (Consumables Information) on the Printer Status Window displays the [Consumables Information] dialog
You can also display the dialog box by selecting [Consumables Information] from the [Options] menu.
You can check the status of the toner cartridges in the [Consumables Information] dialog box.
[Toner Cartridge Information]:
Displays the status of the toner cartridges of each color. The contents and solutions of the status bars and messages are
as follows.
Status Bar
Message
<Available>:
Contents and Solutions
Continue using as normal.
You can continue to print.
<Replacement
Have ready a new toner cartridge of the indicated color.
Needed Soon>
It is recommended that you replace the toner cartridge before
printing a large amount of data.
When the black toner cartridge has reached the end of its
life, the printer stops printing, and you cannot continue the
㻞㻜㻝㻌㻛㻌㻣㻜㻡
job.
When any of the toner cartridges (other than black) has
<Replace Cartridge>
reached the end of its life, you can print only in black and
white.
Replace the toner cartridge of the indicated color with a new
one.
The printer stops printing.
Toner cartridges with print quality that cannot be guaranteed
or used toner cartridges that have reached their lifetime may
<Check Cartridge>
be inserted.
Continuing to use these cartridges may cause a malfunction,
so replacing these cartridges with new cartridges is
recommended.
The printer stops printing.
<Insert Cartridge>
Install the toner cartridges in the correct positions.
㻞㻜㻞㻌㻛㻌㻣㻜㻡
[F-09] Checking by the Remote UI
Displaying the Remote UI
Checking the Printer Status
Displaying the Remote UI
Display the Printer Status Window.
Click [
] in the Windows task tray, and then select the printer name.
NOTE
When displaying the Printer Status Window from the printer driver
Click [
] (Display Printer Status Window) in locations such as in the [Page Setup] sheet.
Select [Remote UI] from the [Options] menu.
ĺ The Remote UI is displayed.
NOTE
If you cannot select [Remote UI]
You cannot select [Remote UI] if the printer and computer cannot communicate via a network.
When starting the Remote UI directly from a web browser
"Remote UI"
Checking the Printer Status
㻞㻜㻟㻌㻛㻌㻣㻜㻡
By obtaining information from the printer, you can display the current printer status and printer information in the
Remote UI.
To check the printer status, select [Status] or [Features] from the [Device Manager] menu.
[Status] Page
You can check the statuses of the paper sources and toner cartridges or other information.
[Features] Page
You can check the availability of the optional accessories and the total number of the printed pages.
[Status] Page
㻞㻜㻠㻌㻛㻌㻣㻜㻡
(1) [Device Status]:
Displays messages about the printer status.
Also, according to the printer status, the indicator color changes as follows.
(green):
Normal
(The printer is ready to print.)
(yellow):
Some attention is required although this status does not affect the job.
(A Warning message is being displayed.)
(red):
Cannot print for some reason.
(An Error message is being displayed.)
(blinking red): A problem has occurred in the printer, and the printer does not operate properly.
(A service call is being displayed.)
(2) [Error Information]:
When clicked, displays information (situation explanation, solutions, etc.) about the error occurring in the
printer.
(3) [Paper Information]:
Displays information about the paper sources.
(A): The names of each paper source
(B): The icons that indicate the amount of paper remaining in each paper source
(C): The sizes of paper in each paper source
(4) [Consumables]:
Displays the status of the toner cartridges of each color. The contents and solutions of the messages are as
follows.
Message
Contents and Solutions
㻞㻜㻡㻌㻛㻌㻣㻜㻡
<Available>
Continue using as normal.
You can continue to print.
<Replacement
Have ready a new toner cartridge of the indicated color.
Needed Soon>
It is recommended that you replace the toner cartridge before printing a large amount
of data.
When the black toner cartridge has reached the end of its life, the printer stops
printing, and you cannot continue the job.
<Replace Cartridge>
When any of the toner cartridges (other than black) has reached the end of its life,
you can print only in black and white.
Replace the toner cartridge of the indicated color with a new one.
The printer stops printing.
Toner cartridges with print quality that cannot be guaranteed or used toner cartridges
<Check Cartridge>
that have reached their lifetime may be inserted.
Continuing to use these cartridges may cause a malfunction, so replacing these
cartridges with new cartridges is recommended.
The printer stops printing.
<Insert Cartridge>
Install the toner cartridges in the correct positions.
[Features] Page
(1) Displays information about the maximum print speed, the total number of printed pages, etc.
㻞㻜㻢㻌㻛㻌㻣㻜㻡
[F-10] How to Use Help
For details on each setting in the printer driver or the Printer Status Window, see the instructions in Help.
Use Help as follows.
Click [Help].
When displaying Help from the Printer Status Window, select [Help Topics] from the
[Help] menu.
Display the option you would like information on.
Displaying the Option You Would Like Information on with Contents
Displaying the Option You Would Like Information on with Index
Retrieving a Word or Phrase Included in Help and Displaying the Option
You Would Like Information on
Displaying the Option You Would Like Information on with Contents
㻞㻜㻣㻌㻛㻌㻣㻜㻡
The following describes how to display a topic using [Orientation] in the [Page Setup] sheet as an example.
Perform the following procedure.
(1) Display the [Contents] sheet.
(2) Select a sheet, dialog box, and others for your desired option.
Click the desired option.
Displaying the Option You Would Like Information on with Index
The following describes how to display a topic using [Edit Watermark] in the [Page Setup] sheet as an example.
㻞㻜㻤㻌㻛㻌㻣㻜㻡
Perform the following procedure.
(1) Display the [Index] sheet.
(2) Enter keywords for the desired option.
Double-click the desired option.
Click the desired option.
㻞㻜㻥㻌㻛㻌㻣㻜㻡
Retrieving a Word or Phrase Included in Help and Displaying the Option You
Would Like Information on
The following describes how to display a topic using [Page Layout] in the [Page Setup] sheet as an example.
Perform the following procedure.
(1) Display the [Search] sheet.
(2) Enter a word or phrase related to the desired option.
Click [List Topics].
㻞㻝㻜㻌㻛㻌㻣㻜㻡
Double-click a sheet, dialog box, and others for your desired option in the listed topics.
Click the desired option.
㻞㻝㻝㻌㻛㻌㻣㻜㻡
㻞㻝㻞㻌㻛㻌㻣㻜㻡
[F-11] Usable Paper and Unusable Paper
Usable Paper
Unusable Paper
Usable Paper
Paper Size
Paper Type
Paper Size
The following shows the paper sizes that can be used with this printer.
: The paper is available for 1-sided printing and automatic 2-sided printing.
: The paper is available for only 1-sided printing.
: The paper cannot be used for printing.
Paper Source
Paper Size
Multi-purpose Tray Drawer 1 Drawer 2 (Optional)
A4 (210.0 mm x 297.0 mm)
B5 (182.0 mm x 257.0 mm)
A5 (148.0 mm x 210.0 mm)
Legal (8.50 in. x 14.00 in.)
Foolscap (8.50 in. x 13.00 in.)
Letter (8.50 in. x 11.00 in.)
Executive (7.25 in. x 10.50 in.)
Statement (5.50 in. x 8.50 in.)
㻞㻝㻟㻌㻛㻌㻣㻜㻡
Envelope DL (110.0 mm x 220.0 mm)
Envelope No.10 (COM10) (104.7 mm x 241.3 mm)
Envelope C5 (162.0 mm x 229.0 mm)
Envelope Monarch (98.4 mm x 190.5 mm)
Envelope B5 (176.0 mm x 250.0 mm)
Index Card (102.0 x 152.0 mm, 127.0 x 203.0 mm)
*1
Custom paper size
*2
*2
*1 Custom size paper that is 76.2 to 215.9 mm wide and 127.0 to 355.6 mm long can be loaded.
*2 Custom size paper that is 100.0 to 215.9 mm wide and 148.0 to 355.6 mm long can be loaded.
IMPORTANT
About print speed
The print speed may drop depending on the settings for the paper size, paper type,
and number of copies.
When continuously printing paper that is less than 202.0 mm wide, the print speed
may drop gradually.
Paper Type
The following shows the paper types that can be used with this printer.
: The paper is available for 1-sided printing and automatic 2-sided printing.
: The paper is available for only 1-sided printing.
: The paper cannot be used for printing.
Paper Source
Setting for [Paper Type] in the
Paper Type
Printer Driver
60 to 74 g/m 2
[Plain Paper L] *2
㻞㻝㻠㻌㻛㻌㻣㻜㻡
Multi-purpose Tray Drawer 1
Drawer 2
(Optional)
Plain paper*1
Heavy paper
60 g/m 2
[Plain Paper L2]*5
70 to 90 g/m 2
[Plain Paper]*2*3
86 to 119 g/m 2
[Heavy Paper 1]*3
120 to 128 g/m 2
[Heavy Paper 2]
129 to 176 g/m 2
[Heavy Paper 3]
Transparency (black-and-white
printing only)
Label
*6
*7
*7
[Envelope]
*9
*9
[Envelope H]*8
*9
*9
[Transparency]
[Labels]
100 to 110 g/m 2
[Coated Paper 1]
120 to 130 g/m 2
[Coated Paper 2]
155 to 165 g/m 2
[Coated Paper 3]
210 to 220 g/m 2
[Coated Paper 4]
Coated paper
Envelope
*1 Recycled paper can be used as plain paper.
*2 If you want to print paper of 70 to 74 g/m 2, you can specify either of [Plain Paper] or [Plain Paper L].*4
*3 If you want to print paper of 86 to 90 g/m 2, you can specify either of [Plain Paper] or [Heavy Paper 1]. *4
*4 If either setting causes the following problems etc., specify the other setting to print.
Output paper curls.
Residual images appear on non-printed areas.
The toner does not fix onto paper well, and the printing comes out faint.
*5 If the printed paper curls (the printed side curls outward) when printed 60 g/m 2 paper with [Plain Paper L]
selected, select [Plain Paper L2].
*6 164 to 176 g/m 2 heavy paper cannot be printed using 2-sided printing.
*7 You can load 129 to 163 g/m 2 heavy paper.
*8 If you want to improve the toner fixation when printed with [Envelope] selected, select [Envelope H].
㻞㻝㻡㻌㻛㻌㻣㻜㻡
*9 Envelope Monarch cannot be loaded.
IMPORTANT
About print speed
The print speed may drop depending on the settings for the paper size, paper type, and number of
copies.
Plain paper
This printer can print plain paper (60 to 90 g/m 2) of the following sizes.
• Standard paper size: A4, B5, A5, Legal, Letter, Executive, Foolscap, Statement
• Custom paper size: Width 76.2 to 215.9 mm; Length 127.0 to 355.6 mm
Paper of A4, B5, Legal, Letter, Executive, or Foolscap size is available for automatic 2-sided printing.
Recycled paper can be used as plain paper.
Heavy paper
This printer can print heavy paper (86 to 176 g/m 2) of the following sizes.
• Standard paper size: A4, B5, A5, Legal, Letter, Executive, Foolscap, Statement
• Custom paper size: Width 76.2 to 215.9 mm; Length 127.0 to 355.6 mm
Paper of A4, B5, Legal, Letter, Executive, or Foolscap size is available for automatic 2-sided printing.
164 to 176 g/m 2 heavy paper cannot be printed using 2-sided printing.
IMPORTANT
About print speed
The print speed drops when printing on heavy paper.
Transparency
This printer can print A4 and Letter size transparencies.
IMPORTANT
Precautions when using transparencies
Transparencies can only be printed in black and white.
Thoroughly fan the transparencies before loading them as they may stick to each
other.
Take care not to mark or stain the printing surface of the transparencies with
fingerprints, dust, or oil.
The print speed drops when printing on transparencies.
Label
This printer can print A4 and Letter size labels.
㻞㻝㻢㻌㻛㻌㻣㻜㻡
IMPORTANT
Precautions when using labels
Do not use the following types of labels. Using inappropriate labels may result in
paper jams that are difficult to clear or may result in damage to the printer.
Peeled labels or partly used labels
Coated labels that are easily peeled off from the backing sheet
Labels with uneven adhesive
The print speed drops when printing labels.
Coated paper
This printer can print the following coated paper.
• Size: A4, Letter
• Weight: 100 to 110 g/m 2, 120 to 130 g/m 2, 155 to 165 g/m 2, 210 to 220 g/m 2
Envelope
This printer can print the following envelopes.
IMPORTANT
Precautions when using envelopes
Do not use the following types of envelopes. Using inappropriate envelopes may
result in paper jams that are difficult to clear or may result in damage to the
printer.
Envelopes with fasteners or snaps
Envelopes with address windows
Envelopes with adhesive on the surface
Wrinkled or creased envelopes
Poorly manufactured envelopes in which the glued parts are uneven
Irregularly-shaped envelopes
Before loading envelopes, flatten the stack of envelopes to release any remaining
air, and press the fold lines along the edges tight.
Do not print on the reverse side (glued side) of envelopes.
The print speed drops when printing on envelopes.
㻞㻝㻣㻌㻛㻌㻣㻜㻡
NOTE
When printing on envelopes
They may become creased.
Unusable Paper
Do not use the following types of paper, as these may cause paper jams, printer malfunction, or damage to the printer.
Paper That Was Stored Poorly
Paper with Holes or Perforations
Paper with Adhesive or a Special Coating
Paper with Unwanted Substances Attached
Paper That Is Difficult for Toner to Adhere to
Paper That Was Stored Poorly
Creased or folded paper
Torn or damaged paper
Wrinkled paper
Curled paper
Wet or moist paper
Paper with rough edges
Irregularly-shaped paper
Paper with Holes or Perforations
Paper with binding holes
Paper with perforations
Paper with Adhesive or a Special Coating
Heat-sensitive paper
Paper with adhesive
Carbon paper
Labels that are easily peeled off
Treated color paper
㻞㻝㻤㻌㻛㻌㻣㻜㻡
Specially coated paper (coated paper for ink jet printers, etc.)
Paper that contains ink that melts, burns, evaporates or emits harmful gases at or lower than the
heating temperature of the fixing unit
Paper with Unwanted Substances Attached
Paper with staples, clips, ribbons or tape
Paper that has already been printed by a copy machine or another printer (The reverse side of the
paper is also unusable.)
Paper That Is Difficult for Toner to Adhere to
Paper with rough surfaces
Paper containing thick fibers
Paper with an extremely rough or smooth surface
Paper that is thicker or thinner than the specified usable paper
Paper Type
㻞㻝㻥㻌㻛㻌㻣㻜㻡
[F-12] Printable Area
Plain Paper, Heavy Paper, Transparencies, Labels, and Coated Paper
Envelope
NOTE
If you want to extend the printable area
Specify the following settings in the printer driver.
1. Click [Advanced Settings] in the [Finishing] sheet.
2. Set [Print with Upper Left of Sheet as Starting Point] to [On].
Depending on the print data to be printed, the edge of paper may be missing
partly during printing or may blot during color printing.
Plain Paper, Heavy Paper, Transparencies, Labels, and Coated Paper
You can print in the area up to 5 mm of the edges of the paper.
Envelope
This printer can print on the following area.
You may have to change the printable area before printing, depending on the application you use.
㻞㻞㻜㻌㻛㻌㻣㻜㻡
IMPORTANT
When printing on envelopes
It is recommended that you configure the document to print the data smaller than the printable
area.
When printing data in the entire printable area, you may not be able to obtain the optimum print
quality.
㻞㻞㻝㻌㻛㻌㻣㻜㻡
[F-13] Storing Paper or Printouts
Storing Paper
Storing Printouts
Storing Paper
The quality of paper may deteriorate if stored improperly even when the paper meets the normal specifications.
Inferior paper may cause misfeeds, paper jams, or deterioration in print quality.
How to store paper
Observe the following guidelines when storing and handling paper.
Store paper on a flat surface.
To help paper avoid moisture or dryness, keep paper in its wrapper until it is ready to be used.
Do not place paper in the condition where it may curl or become creased.
Do not store paper vertically or store too many stacks of paper in one pile.
Do not store paper in the following locations.
A location exposed to direct sunlight
A location subject to high humidity
A dry location
A location with a temperature or humidity that differs significantly from the location where it will be used
If you print on damp paper
If you print on damp paper, steam may be emitted from the printer output area.
Because moisture in the paper is evaporating due to the heat generated when toner fixes, this is not a malfunction. (This
is likely to occur when the room temperature is low.)
WARNING
If you experience a burnt odor
If you experience a burnt odor, immediately turn off the printer, unplug the power plug from the
AC power outlet, and then contact your local authorized Canon dealer. Continued use can result in
a fire or electrical shock.
Storing Printouts
When handling or storing paper printed by this printer, be careful of the following points.
How to store printouts
Store printouts on a flat surface.
Avoid storing printouts in folders made of PVC material, as this may cause the toner to melt and stick to
㻞㻞㻞㻌㻛㻌㻣㻜㻡
the PVC material. Toner may peel when printouts are folded or creased.
Store printouts in the condition where they are not folded or creased as toner may peel.
Put printouts in a binder when storing for a long period of time (two years or longer).
Printouts may discolor when stored for a long period of time.
Avoid storing printouts in a location subject to high temperatures.
Precautions when sticking printouts with adhesive
Be sure to use insoluble adhesive.
Test the adhesive on an unneeded printout before using.
Before stacking printouts that stuck with adhesive, check that the adhesive has completely dried.
㻞㻞㻟㻌㻛㻌㻣㻜㻡
[F-14] Paper Loading Orientation
To print paper with letterheads or logos, load the paper in the proper orientation as follows.
in the table indicates the feeding directions.
Portrait Layout
Landscape Layout
Paper drawer (1-sided printing)
(With the printing side facing up)
(With the printing side facing up)
(With the front side facing down)
(With the front side facing down)
(With the printing side facing up)
(With the printing side facing up)
(With the front side facing down)
(With the front side facing down)
Paper drawer (automatic 2-sided
printing)
Multi-purpose tray (1-sided printing)
Multi-purpose tray (automatic 2sided printing)
NOTE
Loading orientation of envelopes
㻞㻞㻠㻌㻛㻌㻣㻜㻡
See "Loading Envelopes".
㻞㻞㻡㻌㻛㻌㻣㻜㻡
[F-15] Paper Source
Paper Source Type
Paper Capacity of Paper Source
Selecting a Paper Source
Precautions for Handling the Multi-purpose Tray or Paper Drawer
Paper Source Type
This printer has the following paper sources.
(A): Multi-purpose Tray
(B): Drawer 1
(C): Drawer 2 (Optional)
IMPORTANT
When printing from the multi-purpose tray or Drawer 2
Make sure that Drawer 1 is set before printing from Drawer 2.
Paper Capacity of Paper Source
: The paper source cannot be used.
Paper Source
Paper Type
Multi-purpose Tray Drawer 1
Drawer 2 (Optional)
Plain paper (Ex. 80 g/m 2 )
Approx. 50 sheets
Approx. 250 sheets
Approx. 250 sheets
Heavy paper (Ex. 91 g/m 2 )
Approx. 30 sheets
Approx. 200 sheets
Approx. 200 sheets
Heavy paper (Ex. 128 g/m 2 )
Approx. 20 sheets
Approx. 150 sheets
Approx. 150 sheets
㻞㻞㻢㻌㻛㻌㻣㻜㻡
Transparency (black-and-white printing only)
Approx. 20 sheets
Label
Approx. 20 sheets
Approx. 50 sheets
Approx. 50 sheets
Coated paper
Approx. 20 sheets
Approx. 50 sheets
Approx. 50 sheets
Envelope
Approx. 5 sheets
Approx. 10 sheets
Approx. 10 sheets
Selecting a Paper Source
A paper source can be selected in the [Paper Source] sheet in the printer driver.
Select [Paper Source].
(1) Display the [Paper Source] sheet.
(2) Select the paper source you want to use.
NOTE
When [Paper Selection] is set to a setting other than [Same Paper for All Pages]
The [Paper Source] setting changes as follows.
[First Page]
[Second Page]
[Cover Page]
[Other Pages]
[Last Page]
[Cover Sheets]
Select the paper source to be used for each page.
㻞㻞㻣㻌㻛㻌㻣㻜㻡
When printing paper of a type other than plain paper or envelopes from the paper drawer
Select [Drawer 1] or [Drawer 2] (optional).
If you select [Auto], you cannot print from the paper drawer. (Paper is fed from the multipurpose tray.)
How to display the printer driver
"Printing (Basic Procedure)"
"Changing the Default Values for Printing Preferences"
Click [OK].
Precautions for Handling the Multi-purpose Tray or Paper Drawer
Be careful of the following points when handling the multi-purpose tray or paper drawer.
Be sure to turn the printer on once when loading paper in the paper drawer for the first time after installing
the paper feeder.
Observe the following points during printing. This may result in paper jams or damage to the printer.
Do not pull out the paper drawer.
Do not touch the paper in the multi-purpose tray or pull it out.
Refill the paper drawer after all the loaded paper runs out. If the paper drawer is refilled when paper still
remains in the drawer, this may result in misfeeds.
Do not put anything other than the printing paper on the multi-purpose tray. Also, do not press on top of
or apply excessive force to the multi-purpose tray. This may result in damage to the multi-purpose tray.
Do not touch the black rubber pad (A) in the paper drawer. This may result in misfeeds.
If you are printing from the multi-purpose tray or Drawer 2 (optional), make sure that Drawer 1 is set
before printing.
Remove the paper loaded in the multi-purpose tray before closing it.
Also. keep the multi-purpose tray closed when it is not used.
㻞㻞㻤㻌㻛㻌㻣㻜㻡
[F-16] Output Tray
Output Tray
Paper Capacity of the Output Tray
Output Tray
Printed paper is output to the output tray on the top of the printer with the printed side facing down.
CAUTION
Keep your hands and clothing away from the roller in the output area.
Even if the printer is not printing, the roller may suddenly rotate and catch your hands or clothing,
resulting in personal injury.
Precautions when removing jammed paper
Printed paper may be hot immediately after being output. Be careful when removing the paper
and aligning the removed paper, especially after continuous printing. Failure to do so may result
in burns.
IMPORTANT
Do not touch the paper until it is output completely during automatic 2-sided printing.
The paper is first output partially after the front side is printed, and then it is fed again to be
printed on the reverse side.
Do not touch the output tray and its surroundings when removing paper.
The area surrounding the output tray is hot during and immediately after printing. Do not touch
the area surrounding the output tray when removing paper or clearing a paper jam.
㻞㻞㻥㻌㻛㻌㻣㻜㻡
NOTE
If the message <Output Tray Is Full> appears
If the message <Output Tray Is Full> appears in the Printer Status Window, remove the paper
from the output tray.
Paper Capacity of the Output Tray
Paper Type
Paper Capacity*
Plain paper (Ex. 80 g/m 2 )
Approx. 125 sheets
Heavy paper (Ex. 91 g/m 2 )
Approx. 50 sheets
Heavy paper (Ex. 128 g/m 2 )
Approx. 50 sheets
Transparency (black-and-white printing only)
Approx. 10 sheets
Label
Approx. 10 sheets
Coated paper
Approx. 50 sheets
Envelope
Approx. 10 sheets
* Actual paper capacity varies depending on the installation environment and paper type to be used.
㻞㻟㻜㻌㻛㻌㻣㻜㻡
[F-17] Loading Standard Size Paper (Other Than Index Cards and Envelopes)
Loading Standard Size Paper (Other Than Index Cards and Envelopes) in the Paper Drawer
Loading Standard Size Paper (Other Than Index Cards and Envelopes) in the Multi-purpose Tray
Loading Standard Size Paper (Other Than Index Cards and Envelopes) in the Paper
Drawer
The following standard size paper (other than Index Cards and envelopes) can be loaded in the paper drawer.
Paper Type
Paper Size
A4 (210.0 mm x 297.0 mm)
B5 (182.0 mm x 257.0 mm)
A5 (148.0 mm x 210.0 mm)
Plain paper (60 to 90 g/m 2 )
Legal (8.50 in. x 14.00 in.)
Heavy paper (86 to 163 g/m 2 ) Letter (8.50 in. x 11.00 in.)
Executive (7.25 in. x 10.50 in.)
Foolscap (8.50 in. x 13.00 in.)
Statement (5.50 in. x 8.50 in.)
Label
A4 (210.0 mm x 297.0 mm)
Coated paper
Letter (8.50 in. x 11.00 in.)
Step 1: Loading Paper in the Paper Drawer
Step 2: Registering the Size of Paper
IMPORTANT
Detailed information about usable paper
"Usable Paper and Unusable Paper"
Handling the paper drawer
"Paper Source"
NOTE
How to load paper in Drawer 2 (optional paper feeder)
Load the paper in Drawer 2 in the same manner as you load the paper in Drawer 1.
Step 1: Loading Paper in the Paper Drawer
Pull out the paper drawer.
㻞㻟㻝㻌㻛㻌㻣㻜㻡
CAUTION
Be sure to remove the paper drawer.
If paper is loaded while the paper drawer is partially pulled out, the paper drawer may drop or the
printer may become damaged resulting in personal injury.
Slide the paper guides to the position of the size of the paper to be loaded.
Slide the side paper guides.
(1) Hold the lock release lever.
(2) Slide the paper guides to the position of the size of the paper to be loaded.
Align the position of (A) with the size mark of the paper to be loaded.
The side paper guides move together.
Slide the paper guide at the front center.
(1) Hold the lock release lever.
(2) Slide the paper guides to the position of the size of the paper to be loaded.
Align the position of (A) with the size mark of the paper to be loaded.
㻞㻟㻞㻌㻛㻌㻣㻜㻡
Pull out the paper drawer before loading Legal size paper.
(1) Hold the lock release lever at the front right.
(2) Adjust the length of the paper drawer.
NOTE
Size abbreviation on the paper guides
Paper Size Paper Guide
Legal
LGL
Letter
LTR
Executive
EXEC
B5
JIS B5
When loading labels or coated paper, fan them a few sheets at a time, and then align the
edges.
㻞㻟㻟㻌㻛㻌㻣㻜㻡
CAUTION
Be careful when handling paper.
Handle paper carefully not to cut your hands with the edges of the paper.
IMPORTANT
Be careful when handling labels or coated paper.
If you are using labels or coated paper, fan them thoroughly and load them again. If
they are not fanned enough, multiple sheets of paper may be fed at once, causing
paper jams.
When fanning or aligning coated paper, try to hold the edges to avoid touching the
printing surface.
Take care not to mark or stain the printing surface of coated paper with
fingerprints, dust, or oil. This may result in poor print quality.
Load the paper so that the edges of the stacked paper are aligned with the front side of the
paper drawer.
CAUTION
Be careful when handling paper.
Handle paper carefully not to cut your hands with the edges of the paper.
㻞㻟㻠㻌㻛㻌㻣㻜㻡
IMPORTANT
Be sure to load paper in portrait orientation.
Be sure to check the position of the paper guides.
If the paper guide is set at a wrong position, this may result in misfeeds.
Paper drawer capacity
Paper Type
Paper Capacity
Plain paper (Ex. 80 g/m 2 )
Approx. 250 sheets
Heavy paper (Ex. 91 g/m 2 )
Approx. 200 sheets
Heavy paper (Ex. 128 g/m 2 ) Approx. 150 sheets
Label
Approx. 50 sheets
Coated paper
Approx. 50 sheets
When using paper that has been poorly cut
If you use paper that has been poorly cut, multiple sheets of paper may be fed at once. In this
case, fan the paper thoroughly, and then align the edges of the stack properly on a hard, flat
surface.
NOTE
When printing paper with a letterhead or logo
See "Paper Loading Orientation" and load the paper in the proper orientation.
Hold down the paper, then set it under the hooks (A) on the paper guides.
Make sure that the paper stack does not exceed the load limit mark lines (B).
㻞㻟㻡㻌㻛㻌㻣㻜㻡
IMPORTANT
Do not load the paper stack which exceeds the load limit mark lines.
Be sure that the paper stack does not exceed the load limit mark lines. If the paper stack exceeds
the load limit mark lines, this may result in misfeeds.
Insert the paper drawer into the printer.
Push it into the printer firmly.
CAUTION
Precautions when inserting the paper drawer
Be careful not to catch your fingers.
Step 2: Registering the Size of Paper
This printer's paper drawer cannot automatically detect the paper size. Therefore, you need to register the size of
the loaded paper.
Register the paper size using the following procedure.
㻞㻟㻢㻌㻛㻌㻣㻜㻡
Display the Printer Status Window.
Click [
] in the Windows task tray, and then select the printer name.
NOTE
When displaying the Printer Status Window from the printer driver
Click [
] (Display Printer Status Window) in locations such as in the [Page Setup] sheet.
)URPWKH>2SWLRQV@PHQXVHOHFW>'HYLFH6HWWLQJV@ĺ>'UDZHU6HWWLQJV@
NOTE
When registering a paper size
As you cannot register a paper size while printing is in progress, make sure that the printer is idle
before registering the paper size.
However, you can register a paper size while one of the following messages is displayed.
<Specified Paper Different from Set Paper>
<Out of Paper>
Register the paper size.
(1) Select the size of the paper loaded in the paper drawer.
• Drawer 1: The paper drawer supplied with the printer unit
• Drawer 2: The paper drawer of the optional paper feeder
(2) Click [OK].
㻞㻟㻣㻌㻛㻌㻣㻜㻡
Loading Standard Size Paper (Other Than Index Cards and Envelopes) in the Multipurpose Tray
The following standard size paper (other than Index Cards and envelopes) can be loaded in the multi-purpose tray.
Paper Type
Paper Size
A4 (210.0 mm x 297.0 mm)
B5 (182.0 mm x 257.0 mm)
A5 (148.0 mm x 210.0 mm)
Plain paper (60 to 90 g/m 2 )
Legal (8.50 in. x 14.00 in.)
Heavy paper (86 to 176 g/m 2 ) Letter (8.50 in. x 11.00 in.)
Executive (7.25 in. x 10.50 in.)
Foolscap (8.50 in. x 13.00 in.)
Statement (5.50 in. x 8.50 in.)
Transparency
Label
A4 (210.0 mm x 297.0 mm)
Letter (8.50 in. x 11.00 in.)
Coated paper
IMPORTANT
Detailed information about usable paper
"Usable Paper and Unusable Paper"
Handling the multi-purpose tray
"Paper Source"
Open the multi-purpose tray.
Holding the opening at the center of the printer, open the multi-purpose tray.
IMPORTANT
㻞㻟㻤㻌㻛㻌㻣㻜㻡
Be sure to insert the paper drawer.
If the paper drawer is not inserted, you cannot print from the multi-purpose tray.
Pull out the auxiliary tray.
IMPORTANT
Be sure to pull out the auxiliary tray.
Be sure to pull out the auxiliary tray when loading paper in the multi-purpose tray.
When loading long-size paper such as A4 etc, open the tray extension.
Spread the paper guides a little wider than the actual paper width.
㻞㻟㻥㻌㻛㻌㻣㻜㻡
When loading transparencies, labels, or coated paper, fan them a few sheets at a time, and
then align the edges.
CAUTION
Be careful when handling paper.
Handle paper carefully not to cut your hands with the edges of the paper.
IMPORTANT
Be careful when handling transparencies, labels, or coated paper.
Be sure to fan the transparencies, labels, or coated paper thoroughly before loading
them. If they are not fanned enough, multiple sheets of paper may be fed at once,
causing paper jams.
When fanning or aligning the transparencies or coated paper, try to hold the edges
to avoid touching the printing surface.
Take care not to mark or stain the printing surface of the transparencies or coated
paper with fingerprints, dust, or oil. This may result in poor print quality.
Gently load the paper stack under the load limit guides (A) until it touches the back of the
tray.
Make sure that the paper stack does not exceed the load limit mark lines (B).
㻞㻠㻜㻌㻛㻌㻣㻜㻡
CAUTION
Be careful when handling paper.
Handle paper carefully not to cut your hands with the edges of the paper.
IMPORTANT
Be sure to load paper in portrait orientation.
Multi-purpose tray capacity
Paper Type
Paper Capacity
Plain paper (Ex. 80 g/m 2 )
Approx. 50 sheets
Heavy paper (Ex. 91 g/m 2 )
Approx. 30 sheets
Heavy paper (Ex. 128 g/m 2 )
Approx. 20 sheets
Transparency (black-and-white printing only) Approx. 20 sheets
Label
Approx. 20 sheets
Coated paper
Approx. 20 sheets
㻞㻠㻝㻌㻛㻌㻣㻜㻡
Be sure that the paper stack does not exceed the load limit mark lines. If the paper stack exceeds
the load limit mark lines, this may result in misfeeds.
Precautions when loading paper in the multi-purpose tray
Load the paper so that it is straight.
If the rear edge of the paper stack is not properly aligned, this may result in
misfeeds or paper jams.
If the paper is curled or folded at corners, flatten it before loading it in the printer.
If you use paper that has been poorly cut, multiple sheets of paper may be fed at
once. In this case, fan the paper thoroughly, and then align the edges of the stack
properly on a hard, flat surface.
NOTE
When printing paper with a letterhead or logo
See "Paper Loading Orientation" and load the paper in the proper orientation.
Align the paper guides with the width of the paper.
IMPORTANT
Be sure to align the paper guides with the width of the paper.
If the paper guides are too loose or too tight, this may result in misfeeds or paper jams.
㻞㻠㻞㻌㻛㻌㻣㻜㻡
[F-18] Loading Index Cards
The following Index Card sizes are supported.
102.0 x 152.0 mm
127.0 x 203.0 mm
Index Card can be loaded only in the multi-purpose tray.
IMPORTANT
Detailed information about usable paper
"Usable Paper and Unusable Paper"
Handling the multi-purpose tray
"Paper Source"
Open the multi-purpose tray.
Holding the opening at the center of the printer, open the multi-purpose tray.
IMPORTANT
Be sure to insert the paper drawer.
If the paper drawer is not inserted, you cannot print from the multi-purpose tray.
Pull out the auxiliary tray.
㻞㻠㻟㻌㻛㻌㻣㻜㻡
IMPORTANT
Be sure to pull out the auxiliary tray.
Be sure to pull out the auxiliary tray when loading paper in the multi-purpose tray.
Spread the paper guides a little wider than the Index Card width.
Gently load the Index Card stack under the load limit guides (A) until it touches the back of
the tray.
Make sure that the paper stack does not exceed the load limit mark lines (B).
㻞㻠㻠㻌㻛㻌㻣㻜㻡
CAUTION
Be careful when handling Index Cards.
Handle Index Cards carefully not to cut your hands with the edges of the paper.
IMPORTANT
Be sure to load Index Cards in portrait orientation.
Multi-purpose tray capacity for Index Card
Up to approximately 20 Index Cards can be loaded in the multi-purpose tray.
Be sure that the paper stack does not exceed the load limit mark lines. If the Index Card stack
exceeds the load limit mark lines, this may result in misfeeds.
If Index Card is curled
Bend it in the opposite direction to flatten it before loading.
Align the paper guides with the width of Index Card.
㻞㻠㻡㻌㻛㻌㻣㻜㻡
IMPORTANT
Be sure to align the paper guides with the width of Index Card.
If the paper guides are too loose or too tight, this may result in misfeeds or paper jams of Index
Cards.
㻞㻠㻢㻌㻛㻌㻣㻜㻡
[F-19] Loading Envelopes
Loading Envelopes in the Paper Drawer
Loading Envelopes in the Multi-purpose Tray
Envelope Monarch can be loaded only in the multi-purpose tray.
Loading Envelopes in the Paper Drawer
The following envelopes can be loaded in the paper drawer.
Envelope No.10 (COM10) (104.7 mm x 241.3 mm)
Envelope DL (110.0 mm x 220.0 mm)
Envelope C5 (162.0 mm x 229.0 mm)
Envelope B5 (176.0 mm x 250.0 mm)
Step 1: Loading Envelopes in the Paper Drawer
Step 2: Registering the Size of Paper
IMPORTANT
Loading orientation of envelopes
Load envelopes in the correct orientation as follows.
(
: Feeding direction)
Detailed information about usable paper
"Usable Paper and Unusable Paper"
Handling the paper drawer
㻞㻠㻣㻌㻛㻌㻣㻜㻡
"Paper Source"
NOTE
How to load envelopes in Drawer 2 (optional paper feeder)
Load the paper in Drawer 2 in the same manner as you load the paper in Drawer 1.
Step 1: Loading Envelopes in the Paper Drawer
Pull out the paper drawer.
CAUTION
Be sure to remove the paper drawer.
If paper is loaded while the paper drawer is partially pulled out, the paper drawer may drop or the
printer may become damaged resulting in personal injury.
Align the envelopes.
1. Place the stack of envelopes on a flat surface, flatten them to release any
remaining air, and be sure that the edges are pressed tightly.
㻞㻠㻤㻌㻛㻌㻣㻜㻡
2. Loosen any stiff corners of the envelopes and flatten curls as shown in the
figure.
3. Align the edges of the envelopes on a flat surface.
CAUTION
Be careful when handling envelopes.
Handle envelopes carefully not to cut your hands with the edges of the envelopes.
Load the envelopes so that the edges of them are aligned with the rear side of the paper
drawer.
㻞㻠㻥㻌㻛㻌㻣㻜㻡
CAUTION
Be careful when handling envelopes.
Handle envelopes carefully not to cut your hands with the edges of the envelopes.
IMPORTANT
Loading orientation of envelopes
See the instruction described at the top of the procedure.
Load envelopes with the front side (non-glued side) facing up.
You cannot print on the reverse side (glued side) of envelopes.
Paper drawer capacity for envelopes
Approx. 10 sheets
Align the paper guides with the envelopes.
Slide the side paper guides.
(1) Hold the lock release lever.
(2) Slide the paper guides to be aligned with the width of the envelopes.
The side paper guides move together.
㻞㻡㻜㻌㻛㻌㻣㻜㻡
Slide the paper guide at the front center.
(1) Hold the lock release lever.
(2) Slide the paper guides to be aligned with the length of the envelopes.
IMPORTANT
Be sure to align the paper guides with the width of the envelopes.
If the paper guides are too loose or too tight, this may result in misfeeds or paper jams.
Hold down the envelopes, then set them under the hooks (A) on the paper guides.
㻞㻡㻝㻌㻛㻌㻣㻜㻡
Make sure that the paper stack does not exceed the load limit mark lines (B).
IMPORTANT
Do not load the envelope stack which exceeds the load limit mark lines.
Be sure that the paper stack does not exceed the load limit mark lines. If the envelope stack
exceeds the load limit mark lines, this may result in misfeeds.
Insert the paper drawer into the printer.
Push it into the printer firmly.
CAUTION
Precautions when inserting the paper drawer
Be careful not to catch your fingers.
Step 2: Registering the Size of Paper
㻞㻡㻞㻌㻛㻌㻣㻜㻡
This printer's paper drawer cannot automatically detect the paper size. Therefore, you need to register the size of
the loaded paper.
Register the paper size using the following procedure.
Display the Printer Status Window.
Click [
] in the Windows task tray, and then select the printer name.
NOTE
When displaying the Printer Status Window from the printer driver
Click [
] (Display Printer Status Window) in locations such as in the [Page Setup] sheet.
)URPWKH>2SWLRQV@PHQXVHOHFW>'HYLFH6HWWLQJV@ĺ>'UDZHU6HWWLQJV@
NOTE
When registering a paper size
As you cannot register a paper size while printing is in progress, make sure that the printer is idle
before registering the paper size.
However, you can register a paper size while one of the following messages is displayed.
<Specified Paper Different from Set Paper>
<Out of Paper>
Register the paper size.
(1) Select the size of the paper loaded in the paper drawer.
• Drawer 1: The paper drawer supplied with the printer unit
• Drawer 2: The paper drawer of the optional paper feeder
(2) Click [OK].
㻞㻡㻟㻌㻛㻌㻣㻜㻡
Loading Envelopes in the Multi-purpose Tray
The following envelopes can be loaded in the multi-purpose tray.
Envelope Monarch (98.4 mm x 190.5 mm)
Envelope No.10 (COM10) (104.7 mm x 241.3 mm)
Envelope DL (110.0 mm x 220.0 mm)
Envelope C5 (162.0 mm x 229.0 mm)
Envelope B5 (176.0 mm x 250.0 mm)
IMPORTANT
Loading orientation of envelopes
Load envelopes in the correct orientation as follows.
(
: Feeding direction)
Detailed information about usable paper
"Usable Paper and Unusable Paper"
Handling the multi-purpose tray
"Paper Source"
Open the multi-purpose tray.
Holding the opening at the center of the printer, open the multi-purpose tray.
㻞㻡㻠㻌㻛㻌㻣㻜㻡
IMPORTANT
Be sure to insert the paper drawer.
If the paper drawer is not inserted, you cannot print from the multi-purpose tray.
Pull out the auxiliary tray.
IMPORTANT
Be sure to pull out the auxiliary tray.
Be sure to pull out the auxiliary tray when loading paper in the multi-purpose tray.
Spread the paper guides a little wider than the actual envelope width.
㻞㻡㻡㻌㻛㻌㻣㻜㻡
Align the envelopes.
1. Place the stack of envelopes on a flat surface, flatten them to release any
remaining air, and be sure that the edges are pressed tightly.
2. Loosen any stiff corners of the envelopes and flatten curls as shown in the
figure.
3. Align the edges of the envelopes on a flat surface.
㻞㻡㻢㻌㻛㻌㻣㻜㻡
CAUTION
Be careful when handling envelopes.
Handle envelopes carefully not to cut your hands with the edges of the envelopes.
Gently load the envelope stack under the load limit guides (A) until it touches the back of
the tray.
Make sure that the paper stack does not exceed the load limit mark lines (B).
CAUTION
Be careful when handling envelopes.
Handle envelopes carefully not to cut your hands with the edges of the envelopes.
IMPORTANT
Loading orientation of envelopes
See the instruction described at the top of the procedure.
Load envelopes with the front side (non-glued side) facing up.
You cannot print on the reverse side (glued side) of envelopes.
㻞㻡㻣㻌㻛㻌㻣㻜㻡
Multi-purpose tray capacity for envelopes
Up to approximately 5 envelopes can be loaded in the multi-purpose tray.
Be sure that the paper stack does not exceed the load limit mark lines. If the envelope stack
exceeds the load limit mark lines, this may result in misfeeds.
Align the paper guides with the width of the envelopes.
IMPORTANT
Be sure to align the paper guides with the width of the envelopes.
If the paper guides are too loose or too tight, this may result in misfeeds or paper jams.
㻞㻡㻤㻌㻛㻌㻣㻜㻡
[F-20] Loading Custom Size Paper (Non-Standard Size Paper)
Loading Custom Size Paper in the Paper Drawer
Loading Custom Size Paper in the Multi-purpose Tray
Loading Custom Size Paper in the Paper Drawer
The following custom size paper can be loaded in the paper drawer.
Width 100.0 to 215.9 mm; Length 148.0 to 355.6 mm
Step 1: Loading Custom Size Paper in the Paper Drawer
Step 2: Registering the Size of Paper
Step 3: Registering a Custom Paper Size
IMPORTANT
Detailed information about usable paper
"Usable Paper and Unusable Paper"
Handling the paper drawer
"Paper Source"
NOTE
How to load custom size paper in Drawer 2 (optional paper feeder)
Load the paper in Drawer 2 in the same manner as you load the paper in Drawer 1.
Step 1: Loading Custom Size Paper in the Paper Drawer
Pull out the paper drawer.
CAUTION
㻞㻡㻥㻌㻛㻌㻣㻜㻡
Be sure to remove the paper drawer.
If paper is loaded while the paper drawer is partially pulled out, the paper drawer may drop or the
printer may become damaged resulting in personal injury.
Load the custom size paper so that the edges of the paper stack are aligned with the rear
side of the paper drawer.
CAUTION
Be careful when handling paper.
Handle paper carefully not to cut your hands with the edges of the paper.
IMPORTANT
Be sure to load paper in portrait orientation.
Paper drawer capacity
Paper Type
Paper Capacity
Plain paper (Ex. 80 g/m 2 )
Approx. 250 sheets
Heavy paper (Ex. 91 g/m 2 )
Approx. 200 sheets
Heavy paper (Ex. 128 g/m 2 ) Approx. 150 sheets
㻞㻢㻜㻌㻛㻌㻣㻜㻡
When using paper that has been poorly cut
If you use paper that has been poorly cut, multiple sheets of paper may be fed at once. In this
case, fan the paper thoroughly, and then align the edges of the stack properly on a hard, flat
surface.
NOTE
When printing paper with a letterhead or logo
See "Paper Loading Orientation" and load the paper in the proper orientation.
Align the paper guides with the loaded paper.
Slide the side paper guides.
(1) Hold the lock release lever.
(2) Slide the paper guides to be aligned with the width of the loaded paper.
The side paper guides move together.
Slide the paper guide at the front center.
(1) Hold the lock release lever.
(2) Slide the paper guides to be aligned with the length of the loaded paper.
㻞㻢㻝㻌㻛㻌㻣㻜㻡
IMPORTANT
Be sure to align the paper guides with the width of the paper.
If the paper guides are too loose or too tight, this may result in misfeeds or paper jams.
Hold down the paper, then set it under the hooks (A) on the paper guides.
Make sure that the paper stack does not exceed the load limit mark lines (B).
IMPORTANT
Do not load the paper stack which exceeds the load limit mark lines.
㻞㻢㻞㻌㻛㻌㻣㻜㻡
Be sure that the paper stack does not exceed the load limit mark lines. If the paper stack exceeds
the load limit mark lines, this may result in misfeeds.
Insert the paper drawer into the printer.
Push it into the printer firmly.
CAUTION
Precautions when inserting the paper drawer
Be careful not to catch your fingers.
Step 2: Registering the Size of Paper
This printer's paper drawer cannot automatically detect the paper size. Therefore, you need to register the size of
the loaded paper.
Register the paper size using the following procedure.
Display the Printer Status Window.
Click [
] in the Windows task tray, and then select the printer name.
NOTE
When displaying the Printer Status Window from the printer driver
Click [
] (Display Printer Status Window) in locations such as in the [Page Setup] sheet.
)URPWKH>2SWLRQV@PHQXVHOHFW>'HYLFH6HWWLQJV@ĺ>'UDZHU6HWWLQJV@
㻞㻢㻟㻌㻛㻌㻣㻜㻡
NOTE
When registering a paper size
As you cannot register a paper size while printing is in progress, make sure that the printer is idle
before registering the paper size.
However, you can register a paper size while one of the following messages is displayed.
<Specified Paper Different from Set Paper>
<Out of Paper>
Register the paper size.
(1) Select [Custom].
• Drawer 1: The paper drawer supplied with the printer unit
• Drawer 2: The paper drawer of the optional paper feeder
(2) Click [OK].
Step 3: Registering a Custom Paper Size
If printing custom size paper, you need to register the custom paper size in the printer driver previously.
Register the custom paper size using the following procedure.
Open the [Printers and Faxes] or [Printers] folder.
Windows XP Professional and Server 2003
From the [Start] menu, select [Printers and Faxes].
Windows XP Home Edition
From the [Start] menu, select [Control Panel], and then click [Printers and
2WKHU+DUGZDUH@ĺ>3ULQWHUVDQG)D[HV@
Windows Vista
㻞㻢㻠㻌㻛㻌㻣㻜㻡
From the [Start] menu, select [Control Panel], and then click [Printer].
Windows Server 2008
From the [Start] menu, select [Control Panel], and then double-click
[Printers].
Right-click the icon for this printer, then select [Printing Preferences] from the pop-up
menu.
Display the [Custom Paper Size Settings] dialog box.
(1) Display the [Page Setup] sheet.
(2) Click [Custom Paper Size].
Specify the custom paper size.
㻞㻢㻡㻌㻛㻌㻣㻜㻡
[Name of Custom Paper Size]: Enter the name of the custom paper size to be added. Up to
31 characters can be entered.
[Unit]:
Select the unit to be used when setting the custom paper size.
[Paper Size]:
Specify the height and width of the custom paper size
([Height]
[Width]).
Specify the custom paper size in portrait orientation
([Height]
[Width]) within user-definable sizes.
Register the custom paper size.
(1) Click [Register].
(2) Confirm that the registered custom paper size is added to [Paper List].
(3) Click [OK].
NOTE
The number of custom paper sizes which can be registered
The number varies depending on the system environment.
Loading Custom Size Paper in the Multi-purpose Tray
The following custom size paper can be loaded in the multi-purpose tray.
Width 76.2 to 215.9 mm; Length 127.0 to 355.6 mm
Step 1: Loading Custom Size Paper in the Multi-purpose Tray
Step 2: Registering a Custom Paper Size
IMPORTANT
Detailed information about usable paper
"Usable Paper and Unusable Paper"
Handling the multi-purpose tray
"Paper Source"
㻞㻢㻢㻌㻛㻌㻣㻜㻡
Step 1: Loading Custom Size Paper in the Multi-purpose Tray
Open the multi-purpose tray.
Holding the opening at the center of the printer, open the multi-purpose tray.
IMPORTANT
Be sure to insert the paper drawer.
If the paper drawer is not inserted, you cannot print from the multi-purpose tray.
Pull out the auxiliary tray.
IMPORTANT
Be sure to pull out the auxiliary tray.
Be sure to pull out the auxiliary tray when loading paper in the multi-purpose tray.
When loading long-size paper, open the tray extension.
㻞㻢㻣㻌㻛㻌㻣㻜㻡
Spread the paper guides a little wider than the actual paper width.
Gently load the paper stack under the load limit guides (A) until it touches the back of the
tray.
Make sure that the paper stack does not exceed the load limit mark lines (B).
CAUTION
Be careful when handling paper.
㻞㻢㻤㻌㻛㻌㻣㻜㻡
Handle paper carefully not to cut your hands with the edges of the paper.
IMPORTANT
Be sure to load paper in portrait orientation.
Multi-purpose tray capacity
Paper Type
Paper Capacity
Plain paper (Ex. 80 g/m 2 )
Approx. 50 sheets
Heavy paper (Ex. 91 g/m 2 )
Approx. 30 sheets
Heavy paper (Ex. 128 g/m 2 ) Approx. 20 sheets
Be sure that the paper stack does not exceed the load limit mark lines. If the paper stack exceeds
the load limit mark lines, this may result in misfeeds.
Precautions when loading paper in the multi-purpose tray
Load the paper so that it is straight.
If the rear edge of the paper stack is not properly aligned, this may result in
misfeeds or paper jams.
If the paper is curled or folded at corners, flatten it before loading it in the printer.
If you use paper that has been poorly cut, multiple sheets of paper may be fed at
once. In this case, fan the paper thoroughly, and then align the edges of the stack
properly on a hard, flat surface.
NOTE
When printing paper with a letterhead or logo
See "Paper Loading Orientation" and load the paper in the proper orientation.
Align the paper guides with the width of the paper.
㻞㻢㻥㻌㻛㻌㻣㻜㻡
IMPORTANT
Be sure to align the paper guides with the width of the paper.
If the paper guides are too loose or too tight, this may result in misfeeds or paper jams.
Step 2: Registering a Custom Paper Size
If printing custom size paper, you need to register the custom paper size in the printer driver previously.
Register the custom paper size using the following procedure.
Open the [Printers and Faxes] or [Printers] folder.
Windows XP Professional and Server 2003
From the [Start] menu, select [Printers and Faxes].
Windows XP Home Edition
From the [Start] menu, select [Control Panel], and then click [Printers and
2WKHU+DUGZDUH@ĺ>3ULQWHUVDQG)D[HV@
Windows Vista
From the [Start] menu, select [Control Panel], and then click [Printer].
Windows Server 2008
From the [Start] menu, select [Control Panel], and then double-click
[Printers].
Right-click the icon for this printer, then select [Printing Preferences] from the pop-up
menu.
㻞㻣㻜㻌㻛㻌㻣㻜㻡
Display the [Custom Paper Size Settings] dialog box.
(1) Display the [Page Setup] sheet.
(2) Click [Custom Paper Size].
Specify the custom paper size.
[Name of Custom Paper Size]: Enter the name of the custom paper size to be added. Up to
31 characters can be entered.
[Unit]:
Select the unit to be used when setting the custom paper size.
[Paper Size]:
Specify the height and width of the custom paper size
([Height]
[Width]).
Specify the custom paper size in portrait orientation
([Height]
[Width]) within user-definable sizes.
㻞㻣㻝㻌㻛㻌㻣㻜㻡
Register the custom paper size.
(1) Click [Register].
(2) Confirm that the registered custom paper size is added to [Paper List].
(3) Click [OK].
NOTE
The number of custom paper sizes which can be registered
The number varies depending on the system environment.
㻞㻣㻞㻌㻛㻌㻣㻜㻡
[F-21] 1-sided Printing and 2-sided Printing
You can select whether to print on one side or both sides of each sheet of paper. The default setting is 2-sided printing.
The following paper can be used for automatic 2-sided printing.
Paper Type
Paper Size
A4 (210.0 mm x 297.0 mm)
B5 (182.0 mm x 257.0 mm)
Plain paper (60 to 90 g/m 2 )
Legal (8.50 in. x 14.00 in.)
Heavy paper (86 to 163 g/m 2 )
Letter (8.50 in. x 11.00 in.)
Executive (7.25 in. x 10.50 in.)
Foolscap (8.50 in. x 13.00 in.)
Coated Paper (100 to 110 g/m 2 , 120 to 130 g/m 2 , 155 to 165 g/m 2 )
A4 (210.0 mm x 297.0 mm)
Letter (8.50 in. x 11.00 in.)
IMPORTANT
Precautions when performing automatic 2-sided printing
You cannot perform automatic 2-sided printing on paper other than the above.
Do not touch the paper during automatic 2-sided printing until it is output
completely. The paper is first output partially after the front side is printed, and
then it is fed again to be printed on the reverse side.
NOTE
In the case where the last page is 1-sided printing
In cases such as where the last page for the 2-sided printing is 1-sided printing, specifying the
following setting allows you to print faster than normal automatic 2-sided printing.
1. Click [Advanced Settings] in the [Finishing] sheet.
2. Set [Print Last Page in 1-sided Mode when 2-sided Printing is Set] to [On].
However, when performing 2-sided printing on punched paper or previously printed paper, the
orientation or printing surface of the last page may differ from other pages. In this case, specify
[Off].
㻞㻣㻟㻌㻛㻌㻣㻜㻡
Load paper in the paper drawer or multi-purpose tray.
NOTE
Paper loading orientation
On automatic 2-sided printing, the reverse side of the paper is printed first, therefore the paper
should be loaded in the opposite orientation to that for 1-sided printing.
If printing on such paper with letterheads, in which faces and directional orientations are specified,
see "Paper Loading Orientation" and load the paper in the proper orientation.
How to load paper
"Loading Standard Size Paper (Other Than Index Cards and Envelopes)"
Select [Print] from the [File] menu in the application.
NOTE
About the printing procedure
The printing procedure may differ depending on the application you are using.
For details on the printing procedures, see the instruction manual supplied with the application.
Open the printing preferences dialog box.
(1) Select this printer.
(2) Click [Properties] or [Preferences].
㻞㻣㻠㻌㻛㻌㻣㻜㻡
Specify the settings for [Page Size] and [Output Size].
(1) Display the [Page Setup] sheet.
(2) Select the page size of the document created by an application.
(3) Select the size of the paper loaded in the paper source as needed.
IMPORTANT
If the [Page Size] setting and [Output Size] setting are not the same
The print is automatically reduced or enlarged to fit on the page.
When printing from the paper drawer
Use the following procedure to check that the [Output Size] setting and [Register Paper Sizes]
setting are the same.
1. Click [
] (Display Printer Status Window).
2. )URPWKH>2SWLRQV@PHQXVHOHFW>'HYLFH6HWWLQJV@ĺ>'UDZHU6HWWLQJV@
3. Check that the [Register Paper Sizes] setting is the same as the [Output Size]
㻞㻣㻡㻌㻛㻌㻣㻜㻡
setting.
Specify the setting for [Print Style].
(1) Display the [Finishing] sheet.
(2) Select [2-sided Printing].
NOTE
Using Preview to specify [2-sided Printing]
You can specify [2-sided Printing] using Preview.
"Using Preview to Configure the Printing Preferences"
Specify the settings for [Paper Source] and [Paper Type].
(1) Display the [Paper Source] sheet.
(2) Select the paper source you want to use.
(3) Select the type of the paper loaded in the paper source.
㻞㻣㻢㻌㻛㻌㻣㻜㻡
NOTE
When printing paper of a type other than plain paper from the paper drawer
Select [Drawer 1] or [Drawer 2] (optional) in [Paper Source].
If you select [Auto], you cannot print from the paper drawer. (Paper is fed from the multipurpose tray.)
About [Paper Type]
Specify the setting according to the paper type as follows.
Paper Type
Setting for [Paper Type] in the Printer Driver
60 to 74 g/m 2
[Plain Paper L] *1
70 to 90 g/m 2
[Plain Paper]*1*2
86 to 119 g/m 2
[Heavy Paper 1]*2
Plain paper
Heavy paper
120 to 128 g/m 2 [Heavy Paper 2]
129 to 163 g/m 2 [Heavy Paper 3]
100 to 110 g/m 2 [Coated 1]
Coated Paper 120 to 130 g/m 2 [Coated 2]
155 to 165 g/m 2 [Coated 3]
*1 If you want to print paper of 70 to 74 g/m 2 , you can specify either of [Plain Paper] or [Plain Paper L].*3
*2 If you want to print paper of 86 to 90 g/m 2 , you can specify either of [Plain Paper] or [Heavy Paper 1].*3
*3 If either setting causes the following problems etc., specify the other setting to print.
Output paper curls.
Residual images appear on non-printed areas.
The toner does not fix onto paper well, and the printing comes out faint.
㻞㻣㻣㻌㻛㻌㻣㻜㻡
Confirm the settings, then click [OK].
ĺ The [Print] dialog box reappears.
Click [OK] or [Print].
ĺ The printer starts printing.
㻞㻣㻤㻌㻛㻌㻣㻜㻡
[F-22] Printing Multiple Pages on One Sheet
You can print multiple pages on one sheet.
This is a printing method which is referred to as intensive printing or N-page Print.
IMPORTANT
About the application function to print a document as a collated set of copies
Some applications provide a function to print a document as a collated set of copies. Do not use
this function when printing multiple pages on one sheet.
The document may not be printed properly.
Select [Print] from the [File] menu in the application.
NOTE
About the printing procedure
The printing procedure may differ depending on the application you are using.
For details on the printing procedures, see the instruction manual supplied with the application.
Open the printing preferences dialog box.
(1) Select this printer.
(2) Click [Properties] or [Preferences].
㻞㻣㻥㻌㻛㻌㻣㻜㻡
Specify the setting for [Page Layout].
(1) Display the [Page Setup] sheet.
(2) Select the number of pages to be printed on one sheet.
NOTE
If you cannot specify the setting
If [Spooling at Host] in the [Device Settings] sheet is set to [Disabled], [Page Layout] is grayed
out and cannot be specified.
See "Changing the Setting for Spooling at Host" and change the setting for [Spooling at Host] to
[Auto].
Using Preview to specify the setting for [Page Layout]
You can also specify the setting for [Page Layout] using Preview.
㻞㻤㻜㻌㻛㻌㻣㻜㻡
"Using Preview to Configure the Printing Preferences"
Specify the page order layout on paper.
NOTE
About the options for [Page Order]
The options for [Page Order] differ depending on the paper orientation and the number of pages
to be printed on one sheet.
Confirm the settings, then click [OK].
ĺ The [Print] dialog box reappears.
Click [OK] or [Print].
ĺ The printer starts printing.
NOTE
Using Preview to specify the setting for page layout
"Using Preview to Configure the Printing Preferences"
㻞㻤㻝㻌㻛㻌㻣㻜㻡
[F-23] Printing a Color Document in Black and White
Color documents can be printed in black and white using only black toner.
It is convenient if you use this option when printing a test page of color documents.
Select [Print] from the [File] menu in the application.
NOTE
About the printing procedure
The printing procedure may differ depending on the application you are using.
For details on the printing procedures, see the instruction manual supplied with the application.
Open the printing preferences dialog box.
(1) Select this printer.
(2) Click [Properties] or [Preferences].
㻞㻤㻞㻌㻛㻌㻣㻜㻡
Specify the setting for [Color Mode].
(1) Display the [Quality] sheet.
(2) Select [Black and White].
NOTE
Using Preview to specify the setting for [Color Mode]
You can also specify the setting for [Color Mode] using Preview.
"Using Preview to Configure the Printing Preferences"
Confirm the settings, then click [OK].
ĺ The [Print] dialog box reappears.
Click [OK] or [Print].
㻞㻤㻟㻌㻛㻌㻣㻜㻡
ĺ The printer starts printing.
㻞㻤㻠㻌㻛㻌㻣㻜㻡
[F-24] Printing Data with Different Orientations in the Same Job
When printing a document with pages in different orientations in the same job, you can specify the paper alignment and
gutter settings for output.
Select [Print] from the [File] menu in the application.
NOTE
About the printing procedure
The printing procedure may differ depending on the application you are using.
For details on the printing procedures, see the instruction manual supplied with the application.
Open the printing preferences dialog box.
(1) Select this printer.
(2) Click [Properties] or [Preferences].
㻞㻤㻡㻌㻛㻌㻣㻜㻡
Perform the following procedure.
(1) Display the [Finishing] sheet.
(2) Select the [Print in Different Orientations] check box.
Specify the paper alignment and gutter settings for output.
(1) Click [Details].
(2) Specify the settings for each option as needed.
(3) Confirm the settings, then click [OK].
㻞㻤㻢㻌㻛㻌㻣㻜㻡
ĺ The [Finishing] sheet reappears.
NOTE
For details on the settings
See Help.
"How to Use Help"
Click [OK].
ĺ The [Print] dialog box reappears.
Click [OK] or [Print].
ĺ The printer starts printing.
㻞㻤㻣㻌㻛㻌㻣㻜㻡
[F-25] Printing with a Gutter
You can specify a gutter of 0 to 30 mm for the paper to be printed.
When a gutter is specified, the position of the page image is adjusted to make room for the gutter. At this point, you can
select whether to reduce the image size to fit the remaining space.
Select [Print] from the [File] menu in the application.
NOTE
About the printing procedure
The printing procedure may differ depending on the application you are using.
For details on the printing procedures, see the instruction manual supplied with the application.
Open the printing preferences dialog box.
(1) Select this printer.
(2) Click [Properties] or [Preferences].
㻞㻤㻤㻌㻛㻌㻣㻜㻡
Specify the setting for [Binding Location].
(1) Display the [Finishing] sheet.
(2) Select an edge on which the gutter is to be located.
NOTE
Using Preview to specify the setting for [Binding Location]
You can also specify the setting for [Binding Location] using Preview.
"Using Preview to Configure the Printing Preferences"
Set the gutter.
(1) Click [Gutter].
(2) Specify the settings for each option as needed.
(3) Confirm the settings, then click [OK].
㻞㻤㻥㻌㻛㻌㻣㻜㻡
ĺ The [Finishing] sheet reappears.
NOTE
For details on the settings
See Help.
"How to Use Help"
Click [OK].
ĺ The [Print] dialog box reappears.
Click [OK] or [Print].
ĺ The printer starts printing.
㻞㻥㻜㻌㻛㻌㻣㻜㻡
[F-26] Selecting the Paper Output Method
You can select the paper output method before printing.
If you do not specify the paper output method
Printouts of a complete job are grouped.
For example, if you are printing three copies of a three-page document, printouts of a complete job are
grouped, arranged in this page order: "1, 1, 1", "2, 2, 2", "3, 3, 3".
If you collate the printouts
Printouts of a complete job are collated.
For example, if you are printing three copies of a three-page document, printouts of a complete job are
grouped, arranged in this page order: "1, 2, 3", "1, 2, 3", "1, 2, 3".
Select [Print] from the [File] menu in the application.
NOTE
㻞㻥㻝㻌㻛㻌㻣㻜㻡
About the printing procedure
The printing procedure may differ depending on the application you are using.
For details on the printing procedures, see the instruction manual supplied with the application.
Open the printing preferences dialog box.
(1) Select this printer.
(2) Click [Properties] or [Preferences].
Specify the setting for [Finishing].
(1) Display the [Finishing] sheet.
(2) Select a paper output method.
NOTE
Using Preview to specify the setting for [Finishing]
㻞㻥㻞㻌㻛㻌㻣㻜㻡
You can also specify the setting for [Finishing] using Preview.
"Using Preview to Configure the Printing Preferences"
Confirm the settings, then click [OK].
ĺ The [Print] dialog box reappears.
Click [OK] or [Print].
ĺ The printer starts printing.
㻞㻥㻟㻌㻛㻌㻣㻜㻡
[F-27] Printing with the Page 180 Degrees Rotated
You can print with the print data rotated 180 degrees when the orientation of the paper loaded in a paper source differs
from the orientation of the document.
This option is useful for printing envelopes and Index Card that can be fed only in specific orientations.
Select [Print] from the [File] menu in the application.
NOTE
About the printing procedure
The printing procedure may differ depending on the application you are using.
For details on the printing procedures, see the instruction manual supplied with the application.
Open the printing preferences dialog box.
(1) Select this printer.
(2) Click [Properties] or [Preferences].
㻞㻥㻠㻌㻛㻌㻣㻜㻡
Display the [Advanced Settings] dialog box.
(1) Display the [Finishing] sheet.
(2) Click [Advanced Settings].
Specify the setting for [Rotate Print Data 180 Degrees].
(1) Select [Rotate Print Data 180 Degrees].
(2) Select [On].
(3) Click [OK].
㻞㻥㻡㻌㻛㻌㻣㻜㻡
ĺ The [Finishing] sheet reappears.
Click [OK].
ĺ The [Print] dialog box reappears.
Click [OK] or [Print].
ĺ The printer starts printing.
㻞㻥㻢㻌㻛㻌㻣㻜㻡
[F-28] Selecting Paper for Each Page
You can select paper for each page, such as for printing the front cover on a different type of paper.
Select [Print] from the [File] menu in the application.
NOTE
About the printing procedure
The printing procedure may differ depending on the application you are using.
For details on the printing procedures, see the instruction manual supplied with the application.
Open the printing preferences dialog box.
(1) Select this printer.
(2) Click [Properties] or [Preferences].
㻞㻥㻣㻌㻛㻌㻣㻜㻡
Specify the setting for [Paper Selection].
(1) Display the [Paper Source] sheet.
(2) Select the pages for which paper is specified.
[Different for Cover and Others] can be selected only if [Print Style] in the
[Finishing] sheet is set to [Booklet Printing].
NOTE
If you cannot specify the setting
If [Spooling at Host] in the [Device Settings] sheet is set to [Disabled], settings other than [Same
Paper for All Pages] are grayed out and cannot be specified.
See "Changing the Setting for Spooling at Host" and change the setting for [Spooling at Host] to
[Auto].
Select the paper source to be used for each page.
㻞㻥㻤㻌㻛㻌㻣㻜㻡
NOTE
Using Preview to select a paper source
You can also select a paper source using Preview.
"Using Preview to Configure the Printing Preferences"
Confirm the settings, then click [OK].
ĺ The [Print] dialog box reappears.
Click [OK] or [Print].
ĺ The printer starts printing.
㻞㻥㻥㻌㻛㻌㻣㻜㻡
[F-29] Scaling Print Output
You can print with automatic scaling according to the paper size or arbitrary scaling.
Printing with Automatic Scaling According to the Paper Size
Printing with Arbitrary Scaling
Printing with Automatic Scaling According to the Paper Size
Select [Print] from the [File] menu in the application.
NOTE
About the printing procedure
The printing procedure may differ depending on the application you are using.
For details on the printing procedures, see the instruction manual supplied with the application.
Open the printing preferences dialog box.
(1) Select this printer.
(2) Click [Properties] or [Preferences].
㻟㻜㻜㻌㻛㻌㻣㻜㻡
Specify the settings for [Page Size] and [Output Size].
(1) Display the [Page Setup] sheet.
(2) Select the page size of the document created by an application.
(3) Select the size of the paper loaded in the paper source.
ĺ The print data will be automatically reduced or enlarged according to the settings
specified in [Page Size] and [Output Size].
Confirm the settings, then click [OK].
ĺ The [Print] dialog box reappears.
Click [OK] or [Print].
ĺ The printer starts printing.
㻟㻜㻝㻌㻛㻌㻣㻜㻡
Printing with Arbitrary Scaling
NOTE
When [Page Layout] is set to a setting other than [1 on 1]
You cannot specify the scaling factor arbitrarily.
Select [Print] from the [File] menu in the application.
NOTE
About the printing procedure
The printing procedure may differ depending on the application you are using.
For details on the printing procedures, see the instruction manual supplied with the application.
Open the printing preferences dialog box.
(1) Select this printer.
(2) Click [Properties] or [Preferences].
㻟㻜㻞㻌㻛㻌㻣㻜㻡
Specify the settings for [Page Size] and [Output Size].
(1) Display the [Page Setup] sheet.
(2) Select the page size of the document created by an application.
(3) Select the size of the paper loaded in the paper source as needed.
Specify the scaling factor.
(1) Select the [Manual Scaling] check box.
(2) Specify the desired scaling factor.
Confirm the settings, then click [OK].
ĺ The [Print] dialog box reappears.
㻟㻜㻟㻌㻛㻌㻣㻜㻡
Click [OK] or [Print].
ĺ The printer starts printing.
㻟㻜㻠㻌㻛㻌㻣㻜㻡
[F-30] Printing an Image Larger than A4 Size (Poster Printing)
You can magnify and divide a single page image to print it out on multiple sheets of paper. You can make one large
poster by joining these printouts together.
Select [Print] from the [File] menu in the application.
NOTE
About the printing procedure
The printing procedure may differ depending on the application you are using.
For details on the printing procedures, see the instruction manual supplied with the application.
Open the printing preferences dialog box.
(1) Select this printer.
(2) Click [Properties] or [Preferences].
㻟㻜㻡㻌㻛㻌㻣㻜㻡
Specify the setting for poster printing.
(1) Display the [Page Setup] sheet.
(2) Select [Poster [N x N]] (N = 2, 3, 4) from [Page Layout].
ĺ A layout image of the printed paper appears on Preview.
NOTE
If you cannot specify the setting
If [Spooling at Host] in the [Device Settings] sheet is set to [Disabled], [Page Layout] is grayed
out and cannot be specified.
See "Changing the Setting for Spooling at Host" and change the setting for [Spooling at Host] to
[Auto].
㻟㻜㻢㻌㻛㻌㻣㻜㻡
Confirm the settings, then click [OK].
ĺ The [Print] dialog box reappears.
Click [OK] or [Print].
ĺ The printer starts printing.
㻟㻜㻣㻌㻛㻌㻣㻜㻡
[F-31] Adding a Watermark to a Document to Be Printed (Watermark Printing)
You can superimpose watermarks (such as [COPY] and [DRAFT]) over the documents created by an application.
Additionally, you can add new watermarks as well as edit or delete the added watermarks.
Printing with a Watermark
Adding, Editing, or Deleting a Watermark
Printing with a Watermark
Select [Print] from the [File] menu in the application.
NOTE
About the printing procedure
The printing procedure may differ depending on the application you are using.
For details on the printing procedures, see the instruction manual supplied with the application.
Open the printing preferences dialog box.
(1) Select this printer.
(2) Click [Properties] or [Preferences].
㻟㻜㻤㻌㻛㻌㻣㻜㻡
Select a watermark.
(1) Display the [Page Setup] sheet.
(2) Select the [Watermark] check box.
(3) Select the character string to be printed as a watermark.
NOTE
If you cannot select the [Watermark] check box
If [Spooling at Host] in the [Device Settings] sheet is set to [Disabled], [Watermark] is grayed out
and cannot be specified.
See "Changing the Setting for Spooling at Host" and change the setting for [Spooling at Host] to
[Auto].
Confirm the settings, then click [OK].
ĺ The [Print] dialog box reappears.
㻟㻜㻥㻌㻛㻌㻣㻜㻡
Click [OK] or [Print].
ĺ The printer starts printing.
Adding, Editing, or Deleting a Watermark
Display the [Edit Watermark] dialog box.
(1) Display the [Page Setup] sheet.
(2) Select the [Watermark] check box.
(3) Click [Edit Watermark].
NOTE
If you cannot select the [Watermark] check box
If [Spooling at Host] in the [Device Settings] sheet is set to [Disabled], [Watermark] is grayed out
and cannot be specified.
See "Changing the Setting for Spooling at Host" and change the setting for [Spooling at Host] to
[Auto].
Add, edit, or delete a watermark.
Adding a watermark
(1) Click [Add].
(2) Specify the settings for each option as needed.
㻟㻝㻜㻌㻛㻌㻣㻜㻡
Editing a watermark
(1) Select a watermark you want to edit from [Watermark List].
(2) Edit the watermark.
You cannot edit the default watermarks.
Deleting a watermark
(1) Select a watermark you want to delete from [Watermark List].
(2) Click [Delete].
You cannot delete the default watermarks or a watermark which is being selected in
the printing preferences dialog box.
(3) Click [Yes].
㻟㻝㻝㻌㻛㻌㻣㻜㻡
NOTE
For details on the settings
See Help.
"How to Use Help"
Confirm the settings, then click [OK].
ĺ The [Page Setup] sheet reappears.
㻟㻝㻞㻌㻛㻌㻣㻜㻡
[F-32] Printing Borders, the Printing Date, etc.
You can print a border, the date, and page numbers on the document to be printed.
Select [Print] from the [File] menu in the application.
NOTE
About the printing procedure
The printing procedure may differ depending on the application you are using.
For details on the printing procedures, see the instruction manual supplied with the application.
Open the printing preferences dialog box.
(1) Select this printer.
(2) Click [Properties] or [Preferences].
㻟㻝㻟㻌㻛㻌㻣㻜㻡
Display the [Page Options] dialog box.
(1) Display the [Page Setup] sheet.
(2) Click [Page Options].
NOTE
If you cannot click [Page Options]
If [Spooling at Host] in the [Device Settings] sheet is set to [Disabled], [Page Options] is grayed
out and cannot be specified.
See "Changing the Setting for Spooling at Host" and change the setting for [Spooling at Host] to
[Auto].
Specify the settings for borders, the printing date, etc.
(1) Specify the settings for each option as needed.
(2) Confirm the settings, then click [OK].
㻟㻝㻠㻌㻛㻌㻣㻜㻡
ĺ The [Page Setup] sheet reappears.
NOTE
For details on the settings
See Help.
"How to Use Help"
Click [OK].
ĺ The [Print] dialog box reappears.
Click [OK] or [Print].
ĺ The printer starts printing.
㻟㻝㻡㻌㻛㻌㻣㻜㻡
[F-33] Booklet Printing
Booklet printing allows you to make a booklet by folding printouts in half.
For example, when making a booklet of 8 pages, 2 sheets are used in total because 2 pages are printed on each side of
paper.
Also, if you want to make a booklet of large amount of pages, you can make it by specifying the number of sheets to be
folded in half and binding them.
Select [Print] from the [File] menu in the application.
NOTE
About the printing procedure
The printing procedure may differ depending on the application you are using.
For details on the printing procedures, see the instruction manual supplied with the application.
Open the printing preferences dialog box.
(1) Select this printer.
(2) Click [Properties] or [Preferences].
㻟㻝㻢㻌㻛㻌㻣㻜㻡
Specify the setting for [Print Style].
(1) Display the [Finishing] sheet.
(2) Select [Booklet Printing].
NOTE
If you cannot specify the setting
If [Spooling at Host] in the [Device Settings] sheet is set to [Disabled], [Booklet Printing] is
grayed out and cannot be specified.
See "Changing the Setting for Spooling at Host" and change the setting for [Spooling at Host] to
[Auto].
Specify the detailed settings for booklet printing as needed.
(1) Click [Booklet].
(2) Specify the settings for each option as needed.
㻟㻝㻣㻌㻛㻌㻣㻜㻡
(3) Confirm the settings, then click [OK].
ĺ The [Finishing] sheet reappears.
NOTE
For details on the settings
See Help.
"How to Use Help"
Click [OK].
ĺ The [Print] dialog box reappears.
Click [OK] or [Print].
ĺ The printer starts printing.
㻟㻝㻤㻌㻛㻌㻣㻜㻡
[F-34] Combining Jobs before Printing
You can combine two or more jobs into one.
You can also change the settings for the combined job and edit jobs of different applications.
You can also preview the job.
Select [Print] from the [File] menu in the application.
NOTE
About the printing procedure
The printing procedure may differ depending on the application you are using.
For details on the printing procedures, see the instruction manual supplied with the application.
Open the printing preferences dialog box.
(1) Select this printer.
(2) Click [Properties] or [Preferences].
㻟㻝㻥㻌㻛㻌㻣㻜㻡
Select [Edit and Preview] from [Output Method].
NOTE
If you cannot select [Edit and Preview]
If [Spooling at Host] in the [Device Settings] sheet is set to [Disabled], [Edit and Preview] is
grayed out and cannot be specified.
See "Changing the Setting for Spooling at Host" and change the setting for [Spooling at Host] to
[Auto].
Click [OK].
㻟㻞㻜㻌㻛㻌㻣㻜㻡
Specify the printing preferences in each sheet, then click [OK].
ĺ The [Print] dialog box reappears.
Click [OK] or [Print].
ĺ The list of jobs are displayed in the [Canon PageComposer] dialog box.
NOTE
Specifying the setting to always display the [Canon PageComposer] dialog box when
performing printing
Set [Output Method] to [Edit and Preview] as a default value for printing preferences, and then
select the [Lock] check box.
For details on the procedure for changing the default values for printing preferences, see
"Changing the Default Values for Printing Preferences".
Repeat Step 1 to 6 to combine the desired jobs.
Combine the jobs.
㻟㻞㻝㻌㻛㻌㻣㻜㻡
(1) Select the jobs that you want to combine.
(2) Select [Combine] from the [Edit] menu.
NOTE
If the jobs whose printing preferences are disabled by combining is selected
The following screen appears. Click [OK].
Perform the following procedure.
(1) Enter the name of the combined job.
(2) Click [Combine].
Print the combined job.
㻟㻞㻞㻌㻛㻌㻣㻜㻡
(1) Select the combined job.
(2) Select [Print] from the [File] menu.
ĺ The printer starts printing.
NOTE
Combined jobs are not saved.
After the combined job is printed, the job is deleted from Canon PageComposer.
The job is also deleted if Canon PageComposer is closed without printing the job.
For more details on Canon PageComposer
See Help for Canon PageComposer.
Help is displayed by clicking [Help] in the [Help] menu.
㻟㻞㻟㻌㻛㻌㻣㻜㻡
[F-35] Performing Printing Appropriate for Particular Print Data
Selecting the appropriate mode for the contents of the document allows you to perform optimum printing.
Select [Print] from the [File] menu in the application.
NOTE
About the printing procedure
The printing procedure may differ depending on the application you are using.
For details on the printing procedures, see the instruction manual supplied with the application.
Open the printing preferences dialog box.
(1) Select this printer.
(2) Click [Properties] or [Preferences].
Specify the setting for [Objective].
(1) Display the [Quality] sheet.
㻟㻞㻠㻌㻛㻌㻣㻜㻡
(2) Select the appropriate mode for the contents of the document.
Selecting each mode displays a comment on the mode under the list.
NOTE
When changing the printing preferences for the selected mode
Click [Settings].
Confirm the settings, then click [OK].
ĺ The [Print] dialog box reappears.
Click [OK] or [Print].
ĺ The printer starts printing.
㻟㻞㻡㻌㻛㻌㻣㻜㻡
[F-36] Correcting Rough-Textured Images
If image data such as photographic images are enlarged in size in an application and printed, the printed images may look
rough or jagged.
You can correct and smooth out this kind of low-resolution image data.
Select [Print] from the [File] menu in the application.
NOTE
About the printing procedure
The printing procedure may differ depending on the application you are using.
For details on the printing procedures, see the instruction manual supplied with the application.
Open the printing preferences dialog box.
(1) Select this printer.
(2) Click [Properties] or [Preferences].
㻟㻞㻢㻌㻛㻌㻣㻜㻡
Display the [Custom Settings] dialog box.
(1) Display the [Quality] sheet.
(2) Click [Settings].
Specify the setting for image correction.
(1) Select the [Enable Image Correction] check box.
(2) Click [OK].
㻟㻞㻣㻌㻛㻌㻣㻜㻡
ĺ The [Quality] sheet reappears.
Click [OK].
ĺ The [Print] dialog box reappears.
Click [OK] or [Print].
ĺ The printer starts printing.
㻟㻞㻤㻌㻛㻌㻣㻜㻡
[F-37] Adjusting the Toner Density
You can print with the toner density of each color (black, yellow, magenta, and cyan) adjusted.
Select [Print] from the [File] menu in the application.
NOTE
About the printing procedure
The printing procedure may differ depending on the application you are using.
For details on the printing procedures, see the instruction manual supplied with the application.
Open the printing preferences dialog box.
(1) Select this printer.
(2) Click [Properties] or [Preferences].
㻟㻞㻥㻌㻛㻌㻣㻜㻡
Display the [Custom Settings] dialog box.
(1) Display the [Quality] sheet.
(2) Click [Settings].
Adjust the toner density.
(1) Adjust the density by moving the [Toner Density] slider of each color from side to
side.
(2) Confirm the settings, then click [OK].
㻟㻟㻜㻌㻛㻌㻣㻜㻡
ĺ The [Quality] sheet reappears.
Click [OK].
ĺ The [Print] dialog box reappears.
Click [OK] or [Print].
ĺ The printer starts printing.
㻟㻟㻝㻌㻛㻌㻣㻜㻡
[F-38] Printing with Brightness and Contrast Adjusted
You can perform color printing with the brightness and contrast adjusted.
Select [Print] from the [File] menu in the application.
NOTE
About the printing procedure
The printing procedure may differ depending on the application you are using.
For details on the printing procedures, see the instruction manual supplied with the application.
Open the printing preferences dialog box.
(1) Select this printer.
(2) Click [Properties] or [Preferences].
㻟㻟㻞㻌㻛㻌㻣㻜㻡
Display the [Color Settings] dialog box.
(1) Display the [Quality] sheet.
(2) Select the [Manual Color Settings] check box.
(3) Click [Color Settings].
Adjust the brightness and contrast.
(1) Display the [Color Adjustment] sheet.
(2) Adjust the brightness and contrast by dragging the [Brightness] and [Contrast] sliders.
㻟㻟㻟㻌㻛㻌㻣㻜㻡
Confirm the settings, then click [OK].
ĺ The [Quality] sheet reappears.
Click [OK].
ĺ The [Print] dialog box reappears.
Click [OK] or [Print].
ĺ The printer starts printing.
㻟㻟㻠㻌㻛㻌㻣㻜㻡
[F-39] Adjusting the Color
You can perform color printing with the color adjusted.
Select [Print] from the [File] menu in the application.
NOTE
About the printing procedure
The printing procedure may differ depending on the application you are using.
For details on the printing procedures, see the instruction manual supplied with the application.
Open the printing preferences dialog box.
(1) Select this printer.
(2) Click [Properties] or [Preferences].
㻟㻟㻡㻌㻛㻌㻣㻜㻡
Display the [Color Settings] dialog box.
(1) Display the [Quality] sheet.
(2) Select the [Manual Color Settings] check box.
(3) Click [Color Settings].
Adjust the color.
(1) Display the [Color Adjustment] sheet.
(2) Adjust the color by moving [Preview Image] at the center of the adjustment grid.
When [Preview Image] is at the center, the image has not been adjusted.
㻟㻟㻢㻌㻛㻌㻣㻜㻡
NOTE
About the color adjustment
There are three methods to adjust color as follows:
Clicking the color buttons surrounding the adjustment grid deepens
the color by one increment.
Clicking a desired color on the adjustment grid moves [Preview
Image] to the clicked point.
Drag [Preview Image] onto the desired color.
The X (horizontal) and Y (vertical) values for [Adjusted Position] show the
position of [Preview Image].
A sample image after adjustment is displayed in [Preview].
Confirm the settings, then click [OK].
ĺ The [Quality] sheet reappears.
Click [OK].
ĺ The [Print] dialog box reappears.
Click [OK] or [Print].
ĺ The printer starts printing.
㻟㻟㻣㻌㻛㻌㻣㻜㻡
[F-40] Matching the Color on the Display
The methods for adjusting the color on the screen (RGB) and in the printer (YMC) are different. Therefore, color in a
photo etc. viewed on the screen may not match that of the printout.
Using the color matching function to correct color of a printout, you can adjust the color of the printout to more closely
match the color you see on the display.
You can also adjust the color by brightness without performing matching.
Using the Matching Function to Correct Color
Adjusting Color by Brightness (Gamma Adjustment)
Using the Matching Function to Correct Color
Using the color matching function, you can adjust the color of the printout to more closely match the color you see on the
display.
Select [Print] from the [File] menu in the application.
NOTE
About the printing procedure
The printing procedure may differ depending on the application you are using.
For details on the printing procedures, see the instruction manual supplied with the application.
Open the printing preferences dialog box.
(1) Select this printer.
(2) Click [Properties] or [Preferences].
㻟㻟㻤㻌㻛㻌㻣㻜㻡
Display the [Color Settings] dialog box.
(1) Display the [Quality] sheet.
(2) Select the [Manual Color Settings] check box.
(3) Click [Color Settings].
Specify the setting for [Matching Mode].
(1) Display the [Matching] sheet.
(2) Select [Driver Matching Mode].
㻟㻟㻥㻌㻛㻌㻣㻜㻡
Specify the setting for [Matching Method].
(1) Set [Matching Method] to [Perceptual [Monitor Color Matched]].
(2) Select a profile you want to use.
(3) Confirm the settings, then click [OK].
ĺ The [Quality] sheet reappears.
NOTE
About the options for [Monitor Profile]
The profiles registered in your computer are displayed.
About [Application Color Matching Priority]
If the check box is cleared, you can prioritize the color matching process specified in the printer
driver.
If you want to prioritize the color matching in the application, select the check box.
Click [OK].
ĺ The [Print] dialog box reappears.
㻟㻠㻜㻌㻛㻌㻣㻜㻡
Click [OK] or [Print].
ĺ The printer starts printing.
Adjusting Color by Brightness (Gamma Adjustment)
You can adjust the brightness of the printout results without spoiling the lightest parts and darkest parts of the image
data.
Use this option when the printout result is brighter than the original image or when you want to change the brightness of
the image.
Select [Print] from the [File] menu in the application.
NOTE
About the printing procedure
The printing procedure may differ depending on the application you are using.
For details on the printing procedures, see the instruction manual supplied with the application.
Open the printing preferences dialog box.
(1) Select this printer.
(2) Click [Properties] or [Preferences].
㻟㻠㻝㻌㻛㻌㻣㻜㻡
Display the [Color Settings] dialog box.
(1) Display the [Quality] sheet.
(2) Select the [Manual Color Settings] check box.
(3) Click [Color Settings].
Specify the setting for [Matching Mode].
(1) Display the [Matching] sheet.
(2) Select [Gamma Adjustment].
㻟㻠㻞㻌㻛㻌㻣㻜㻡
Specify the setting for [Gamma].
(1) Select a value for gamma.
The larger the number is, the darker in color the data is printed.
(2) Confirm the settings, then click [OK].
ĺ The [Quality] sheet reappears.
Click [OK].
ĺ The [Print] dialog box reappears.
Click [OK] or [Print].
ĺ The printer starts printing.
㻟㻠㻟㻌㻛㻌㻣㻜㻡
[F-41] Calibrating the Printer
Perform calibration when the color has changed and the data is not printed in the correct colors (specified colors) or in
other cases.
Calibrating the Printer Immediately (Manual Calibration)
Automatically Performing Calibration or Correction of "Out-of-Register Colors" Immediately after the
Printer Is Turned On
NOTE
Calibration time
It takes approximately 60 seconds.
Calibrating the Printer Immediately (Manual Calibration)
IMPORTANT
Precautions when calibrating the printer
If you perform calibration frequently, this may affect the life of the toner cartridges.
Display the Printer Status Window.
Click [
] in the Windows task tray, and then select the printer name.
NOTE
When displaying the Printer Status Window from the printer driver
Click [
] (Display Printer Status Window) in locations such as in the [Page Setup] sheet.
)URPWKH>2SWLRQV@PHQXVHOHFW>8WLOLW\@ĺ>&DOLEUDWLRQ@
㻟㻠㻠㻌㻛㻌㻣㻜㻡
Click [OK].
Automatically Performing Calibration or Correction of "Out-of-Register Colors"
Immediately after the Printer Is Turned On
You can specify whether calibration or correction of "Out-of-Register Colors" should be automatically performed
immediately after the printer is turned on.
IMPORTANT
Precautions when performing calibration or correction of "Out-of-Register Colors"
The computer* connected to the printer needs to be running before you perform calibration or
correction of "Out-of-Register Colors".
* The print server for when the printer is shared on a network
Display the Printer Status Window.
Click [
] in the Windows task tray, and then select the printer name.
NOTE
When displaying the Printer Status Window from the printer driver
Click [
] (Display Printer Status Window) in locations such as in the [Page Setup] sheet.
㻟㻠㻡㻌㻛㻌㻣㻜㻡
)URPWKH>2SWLRQV@PHQXVHOHFW>'HYLFH6HWWLQJV@ĺ>6WDUWXS6HWWLQJV@
You can configure the printer operation for immediately after the printer is turned on.
(1) Select whether or not to perform calibration or correction of "Out-of-Register
Colors".
[Execute Later]: Only correction of a phenomenon of "Out-of-Register Colors" is
performed on completion of the first printing after the printer is
turned on.
Only correction of a phenomenon of "Out-of-Register Colors" is
[Execute
performed immediately after the printer is turned on.
Immediately
(Level 1)]:
Calibration and correction of "Out-of-Register Colors" are performed
[Execute
immediately after the printer is turned on.
Immediately
(Level 2)]:
(2) Click [OK].
IMPORTANT
When [Execute Later] is selected
If correction of a phenomenon of "Out-of-Register Colors" is performed for some reason before
the printer is turned ON and performs first printing, another correction of a phenomenon of "Outof-Register Colors" is not performed after completion of the first printing even if [Execute Later]
is selected.
When [Execute Immediately (Level 1)] or [Execute Immediately (Level 2)] is selected
Calibration and correction of "Out-of-Register Colors" may not be performed immediately after
the printer is turned on depending on the inside state of the printer.
When less than eight hours has elapsed from the time the printer was turned Off until the
time the printer was turned On again
Calibration or correction of a phenomenon of "Out-of-Register Colors" may not be performed
immediately after the printer is turned On or after completion of the first printing.
㻟㻠㻢㻌㻛㻌㻣㻜㻡
When eight or more hours has elapsed from the time the printer entered the sleep mode
until the time the sleep mode was canceled
Calibration or correction of a phenomenon of "Out-of-Register Colors" will be performed
according to the setting of [Quality Correction] when the sleep mode is canceled.
* Depending on your environment, calibration or correction of a phenomenon of "Out-of-Register
Colors" may be performed even if less than eight hours has elapsed.
㻟㻠㻣㻌㻛㻌㻣㻜㻡
[F-42] Correcting "Out-of-Register Colors"
If a phenomenon of "Out-of-Register Colors" occurs, correct it.
Correcting "Out-of-Register Colors" Immediately (Manual Correction of "Out-of-Register Colors")
Automatically Performing Calibration or Correction of "Out-of-Register Colors" Immediately after the
Printer Is Turned On
NOTE
Correction time
It takes approximately 50 seconds.
Correcting "Out-of-Register Colors" Immediately (Manual Correction of "Out-ofRegister Colors")
IMPORTANT
Precautions when correcting "Out-of-Register Colors"
If "Out-of-Register Colors" are corrected frequently, this may affect the life of the toner
cartridges.
Display the Printer Status Window.
Click [
] in the Windows task tray, and then select the printer name.
NOTE
When displaying the Printer Status Window from the printer driver
Click [
] (Display Printer Status Window) in locations such as in the [Page Setup] sheet.
)URPWKH>2SWLRQV@PHQXVHOHFW>8WLOLW\@ĺ>2XWRI5HJLVWHU&RORUV&RUUHFWLRQ@
㻟㻠㻤㻌㻛㻌㻣㻜㻡
Click [OK].
Automatically Performing Calibration or Correction of "Out-of-Register Colors"
Immediately after the Printer Is Turned On
You can specify whether calibration or correction of "Out-of-Register Colors" should be automatically performed
immediately after the printer is turned on.
IMPORTANT
Precautions when performing calibration or correction of "Out-of-Register Colors"
The computer* connected to the printer needs to be running before you perform calibration or
correction of "Out-of-Register Colors".
* The print server for when the printer is shared on a network
Display the Printer Status Window.
Click [
] in the Windows task tray, and then select the printer name.
NOTE
When displaying the Printer Status Window from the printer driver
Click [
] (Display Printer Status Window) in locations such as in the [Page Setup] sheet.
㻟㻠㻥㻌㻛㻌㻣㻜㻡
)URPWKH>2SWLRQV@PHQXVHOHFW>'HYLFH6HWWLQJV@ĺ>6WDUWXS6HWWLQJV@
You can configure the printer operation for immediately after the printer is turned on.
(1) Select whether or not to perform calibration or correction of "Out-of-Register
Colors".
[Execute Later]: Only correction of a phenomenon of "Out-of-Register Colors" is
performed on completion of the first printing after the printer is
turned On.
Only correction of a phenomenon of "Out-of-Register Colors" is
[Execute
performed immediately after the printer is turned On.
Immediately
(Level 1)]:
Calibration and correction of "Out-of-Register Colors" are performed
[Execute
immediately after the printer is turned on.
Immediately
(Level 2)]:
(2) Click [OK].
IMPORTANT
When [Execute Later] is selected
If correction of a phenomenon of "Out-of-Register Colors" is performed for some reason before
the printer is turned ON and performs first printing, another correction of a phenomenon of "Outof-Register Colors" is not performed after completion of the first printing even if [Execute Later]
is selected.
When [Execute Immediately (Level 1)] or [Execute Immediately (Level 2)] is selected
Calibration and correction of "Out-of-Register Colors" may not be performed immediately after
the printer is turned on depending on the inside state of the printer.
When less than eight hours has elapsed from the time the printer was turned Off until the
time the printer was turned ON again
Calibration or correction of a phenomenon of "Out-of-Register Colors" may not be performed
immediately after the printer is turned on or after completion of the first printing.
㻟㻡㻜㻌㻛㻌㻣㻜㻡
When eight or more hours has elapsed from the time the printer entered the sleep mode
until the time the sleep mode was canceled
Calibration or correction of a phenomenon of "Out-of-Register Colors" will be performed
according to the setting of [Quality Correction] when the sleep mode is canceled.
* Depending on your environment, calibration or correction of a phenomenon of "Out-of-Register
Colors" may be performed even if less than eight hours has elapsed.
㻟㻡㻝㻌㻛㻌㻣㻜㻡
[F-43] Using Preview to Configure the Printing Preferences
Using Preview in the [Page Setup], [Finishing], or [Paper Source] sheet in the printer driver, you can configure the
printing preferences.
Depending on which icon on the upper left on Preview ([ ] or [
]) is selected, the specifiable options vary.
When [ ] is selected
You can specify the following settings according to the clicked position on Preview.
[Binding Location]: Left-click an edge of the document image.
[Page Layout]:
Repeatedly left-click within the document image or right-click on Preview.
[Color Mode]:
Right-click on Preview.
The use of the buttons at the bottom of the preview pane is as follows.
Button
Use
By clicking the button, you can switch the mode between [1-sided Printing] and [2-sided Printing].
•
[1-sided Printing]
•
[2-sided Printing]
By clicking the button, you can specify the setting for [Color Mode].
•
[Auto Detect]
•
[Black and White]
㻟㻡㻞㻌㻛㻌㻣㻜㻡
•
[Color]
When [
] is selected
You can specify the following settings according to the clicked position on Preview.
[Paper Source]*: Left-click a paper source image (the multi-purpose tray or paper drawer).
If you want to switch the paper source automatically according to the size or type of paper to be
printed, left-click [Auto] on the lower right on the preview pane.
[Finishing]:
Right-click on Preview.
[Print Style]:
Right-click on Preview.
* If you have selected any one of the following in [Paper Selection], you can specify the paper source for each page.
(Select the page to be specified by right-clicking.)
[Different for First, Others, and Last]
[Different for First, Second, Others, and Last]
[Different for Cover and Others]
If [Transparency Cover Sheets] in [Paper Selection] is selected, you can specify a paper source (paper drawer) used for
[Cover Sheets].
The use of the buttons at the bottom of the preview pane is as follows.
Button
Use
By clicking the button, you can switch the mode between [1-sided Printing] and [2-sided Printing].
•
[1-sided Printing]
㻟㻡㻟㻌㻛㻌㻣㻜㻡
•
[2-sided Printing]
By clicking the button, you can specify the setting for [Color Mode].
•
[Auto Detect]
•
[Black and White]
•
[Color]
㻟㻡㻠㻌㻛㻌㻣㻜㻡
[F-44] Saving Frequently Used Printing Preferences (Profiles)
If you save frequently used printing preferences as a "Profile", you can perform printing using the saved preferences by
simply selecting the "Profile".
Also, some are registered as the default "Profiles".
Selecting a "Profile"
Adding a "Profile"
Editing an Added "Profile"
Deleting an Added "Profile"
IMPORTANT
The settings that cannot be added as a "Profile"
The settings using the following options in the [Quality] sheet - [Custom Settings] dialog box
cannot be added as a "Profile".
[Color Halftones]
[B & W Halftones]
[Use Pure Black]
[Prioritize Printing of Colored Lines and Text]
Selecting a "Profile"
Select [Print] from the [File] menu in the application.
NOTE
About the printing procedure
The printing procedure may differ depending on the application you are using.
For details on the printing procedures, see the instruction manual supplied with the application.
Open the printing preferences dialog box.
㻟㻡㻡㻌㻛㻌㻣㻜㻡
(1) Select this printer.
(2) Click [Properties] or [Preferences].
Select a "Profile".
NOTE
If you cannot select a "Profile"
When the [Allow Profile Selection] check box in the [Profile] sheet is cleared,
[Profile] is grayed out and cannot be specified.
See "Allow Profile Selection or Editing" and select the [Allow Profile Selection]
check box.
If the printer name has been changed, any added "Profiles" cannot be used. To use
the added "Profiles", change the printer name to its previous one.
㻟㻡㻢㻌㻛㻌㻣㻜㻡
Click [OK].
ĺ The [Print] dialog box reappears.
Click [OK] or [Print].
ĺ The printer starts printing.
Adding a "Profile"
Specify printing references in the printer driver.
Specify each option in the [Page Setup], [Finishing], [Paper Source], and [Quality] sheets.
Click [Add].
NOTE
If you cannot click [Add]
When the [Allow Profile Selection] and [Allow Setting Edition] check boxes in the [Profile] sheet
are cleared, [Add] is grayed out and cannot be specified.
See "Allow Profile Selection or Editing" and select the [Allow Profile Selection] and [Allow
Setting Edition] check boxes.
Specify information about the "Profiles".
㻟㻡㻣㻌㻛㻌㻣㻜㻡
[Name]:
[Icon]:
[Comment]:
Enter the name for the "Profile". Up to 31 characters can be entered.
You can select the icon for the "Profile".
Enter the comment for the "Profile". Up to 255 characters can be
entered.
[View Settings]: Display the [View Settings] dialog box.
The [View Settings] dialog box allows you to check the current printer
driver settings.
Click [OK].
ĺ The original sheet reappears.
Make sure that the name of the added "Profile" is in [Profile].
Editing an Added "Profile"
You can change information about an added "Profile" or export a "Profile" as a file.
Click [Edit].
NOTE
If you cannot click [Edit]
㻟㻡㻤㻌㻛㻌㻣㻜㻡
When the [Allow Profile Selection] and [Allow Setting Edition] check boxes in the [Profile] sheet
are cleared, [Edit] is grayed out and cannot be specified.
See "Allow Profile Selection or Editing" and select the [Allow Profile Selection] and [Allow
Setting Edition] check boxes.
Edit information about the "Profiles".
NOTE
For details on the settings
See Help.
"How to Use Help"
Click [OK].
ĺ The original sheet reappears.
Deleting an Added "Profile"
Click [Edit].
㻟㻡㻥㻌㻛㻌㻣㻜㻡
NOTE
If you cannot click [Edit]
When the [Allow Profile Selection] and [Allow Setting Edition] check boxes in the [Profile] sheet
are cleared, [Edit] is grayed out and cannot be specified.
See "Allow Profile Selection or Editing" and select the [Allow Profile Selection] and [Allow
Setting Edition] check boxes.
Delete a "Profile".
(1) Select a "Profile" you want to delete.
(2) Click [Delete].
You cannot delete the default "Profiles" or a "Profile" which is being selected in
the printing preferences dialog box.
(3) Click [Yes].
Click [OK].
ĺ The original sheet reappears.
㻟㻢㻜㻌㻛㻌㻣㻜㻡
[G] Maintenance
㻟㻢㻝㻌㻛㻌㻣㻜㻡
[G-02] Checking the Printer Status Using the Printer Status Window
"Checking the Printer Status Using the Printer
Status Window"
㻟㻢㻞㻌㻛㻌㻣㻜㻡
[G-03] Checking by the Remote UI
"Checking by the Remote UI"
㻟㻢㻟㻌㻛㻌㻣㻜㻡
[G-04] When a Message Appears
Toner cartridges are consumable products. When a toner cartridge is nearing the end of its life, a message will appear in
the Printer Status Window. Follow the directions in the message.
Message
[Message Area] (Auxiliary)
The <Toner Color>* toner cartridge needs to be replaced
soon.
Contents and Solutions
• You can continue to print.
• Have ready a new toner cartridge of the indicated color.
• It is recommended that you replace the toner cartridge before
printing a large amount of data.
[Message Area]
• The printer stops printing.
Check the Toner Cartridges.
• You can continue printing as is by clicking [
]
(Resolve Error), however, as this may result in damage to
[Message Area] (Auxiliary)
the printer, it is recommended to replace the toner cartridge
(<Toner Color>* )
with a new one.
Toner cartridges with print quality that cannot be
guaranteed due to their decreasing lifetime etc., or used
toner cartridges that have reached their lifetime, may have
been inserted.
Continuing to use these cartridges may cause a
malfunction, so replacing these cartridges with new
cartridges is recommended.
[Message Area]
Toner Cartridge Replacement Required
• When the black toner cartridge has reached the end of its
life, the printer stops printing, and you cannot continue the
job.
[Message Area] (Auxiliary)
The life of the <Toner Color>* toner cartridge has come to
• When any of the toner cartridges (other than black) has
reached the end of its life, you can print only in black and
an end. Open the front cover to replace the toner cartridge.
white.
• Replace the toner cartridge of the indicated color with a new
one.
* Black, yellow, magenta, or cyan will appear in <Toner Color>. (More than one color may appear.)
IMPORTANT
About replacement toner cartridges
For optimum print quality, using Canon genuine toner cartridges is recommended.
Model Name Supported Canon Genuine Toner Cartridge
Canon Cartridge 718 Black
LBP7210Cdn
Canon Cartridge 718 Yellow
Canon Cartridge 718 Magenta
Canon Cartridge 718 Cyan
Be careful of counterfeit toner cartridges
㻟㻢㻠㻌㻛㻌㻣㻜㻡
Please be aware that there are counterfeit Canon toner cartridges in the marketplace. Use of
counterfeit toner cartridge may result in poor print quality or machine performance. Canon is not
responsible for any malfunction, accident or damage caused by the use of counterfeit toner
cartridge.
For more information, see http://www.canon.com/counterfeit.
NOTE
Average yield of the toner cartridges
Replacement toner cartridges
Average yield of K (Black) toner cartridge: 3,400 pages
Average yield of Composite C (Cyan), M (Magenta), and Y
(Yellow) toner cartridges: 2,900 pages
Toner cartridges included with this printer
Average yield of K (Black) toner cartridge: 1,200 pages
Average yield of Composite C (Cyan), M (Magenta), and Y
(Yellow) toner cartridges: 1,400 pages
The average yield is on the basis of "ISO/IEC 19798"* when printing A4 size paper with the
default print density setting.
* "ISO/IEC 19798" is the global standard related to "Method for the determination of toner
cartridge yield for color printers and multi-function devices that contain printer components"
issued by ISO (International Organization for Standardization).
About the life of the toner cartridges
The life of the toner cartridges is affected by the following conditions.
Printing environment and conditions
Spaced printing
Paper size and paper type settings
Printing ratio
Toner is used even when printing with a low printing ratio.
Color printing
Multiple color toner cartridges may reach the end of their life at the
same time.
Printer configuration
Black-and-white printing may affect the life of the color toner
cartridges.
Checking the status of the toner cartridges of each color
You can check the status of each of the color toner cartridges in the [Consumables Information]
dialog box in the Printer Status Window.
"Checking the Printer Status Using the Printer Status Window"
㻟㻢㻡㻌㻛㻌㻣㻜㻡
[G-05] Replacing Toner Cartridges
Precautions when Replacing Toner Cartridges
Replacing Toner Cartridges
NOTE
Checking the status of the toner cartridges of each color
You can check the status of each of the color toner cartridges in the [Consumables Information]
dialog box in the Printer Status Window.
"Checking the Printer Status Using the Printer Status Window"
Precautions when Replacing Toner Cartridges
WARNING
Do not dispose of a used toner cartridge in open flames.
This may cause the toner remaining inside the cartridges to ignite, resulting in burns or fire.
CAUTION
Precautions if you get toner on your hands or clothing
If toner gets on your hands or clothing, wash them immediately with cold water.
Washing with warm water sets the toner, making it impossible to remove the toner stains.
IMPORTANT
About replacement toner cartridges
For optimum print quality, using Canon genuine toner cartridges is recommended.
Model Name Supported Canon Genuine Toner Cartridge
Canon Cartridge 718 Black
LBP7210Cdn
Canon Cartridge 718 Yellow
Canon Cartridge 718 Magenta
Canon Cartridge 718 Cyan
Be careful of counterfeit toner cartridges
Please be aware that there are counterfeit Canon toner cartridges in the marketplace. Use of
counterfeit toner cartridge may result in poor print quality or machine performance. Canon is not
responsible for any malfunction, accident or damage caused by the use of counterfeit toner
cartridge.
For more information, see http://www.canon.com/counterfeit.
㻟㻢㻢㻌㻛㻌㻣㻜㻡
About disposal of the removed packing materials
Dispose of the packing materials according to local regulations.
NOTE
Handling toner cartridges
"Handling Toner Cartridges"
About the packing materials
The packing materials may be changed in form or placement, or may be added or removed
without notice.
Replacing Toner Cartridges
NOTE
About the power of the printer
You can replace the toner cartridges either when the power of the printer is turned on or when it
is turned off.
Gently open the front cover.
Pull out the toner cartridge tray.
(1) Press the lever on the handle.
(2) Pull out the toner cartridge tray until it stops.
㻟㻢㻣㻌㻛㻌㻣㻜㻡
NOTE
Order of the toner cartridges
Hold the toner cartridge to be replaced by its handle and pull it straight up and out of the
printer.
IMPORTANT
Hold the toner cartridges properly.
㻟㻢㻤㻌㻛㻌㻣㻜㻡
When handling the toner cartridges, hold them properly as shown in the figure. Do not place it
vertically or upside-down.
Do not touch the high-voltage contacts (A).
This may result in damage to the cartridge.
Take out the new toner cartridge from the protective bag.
You can open the protective bag with your hands from the notch.
When opening the protective bag with scissors, be careful not to damage the toner
cartridge.
㻟㻢㻥㻌㻛㻌㻣㻜㻡
IMPORTANT
Do not touch the toner cartridge memory (A) or the electrical contacts (B).
This may result in damage to the cartridge.
Keep the protective bag.
Keep the protective bag for the toner cartridge. You will need it when you remove the toner
cartridge for printer maintenance or other purposes.
Shake the toner cartridge to evenly distribute the toner inside the cartridge.
Hold the toner cartridge as shown in the figure and shake it gently 5 or 6 times.
Do not remove the drum protective cover (A).
CAUTION
If toner gets into your eyes or mouth
Wash them immediately with cold water and consult a physician.
IMPORTANT
Be sure to perform this operation.
If toner is not distributed evenly, this may result in deterioration in print quality.
㻟㻣㻜㻌㻛㻌㻣㻜㻡
Be sure to shake the toner cartridge gently.
If you do not shake the cartridge gently, toner may spill out.
Place the toner cartridge on a flat surface.
Pull out the sealing tape.
(1) While holding the toner cartridge, hook your finger into the tab to remove it.
(2) Pull out the sealing tape (approx. 50 cm long) straight in the direction of the arrow
gently.
CAUTION
Be careful not to allow the toner to scatter.
Do not pull out the sealing tape forcefully or stop at midpoint, as this may cause toner to spill out.
If toner gets into your eyes or mouth, wash them immediately with cold water and consult a
physician.
IMPORTANT
Pull the sealing tape completely out of the toner cartridge.
Do not pull the sealing tape diagonally, upwards, or downwards. If the tape is
severed, this may become difficult to pull out completely.
If the sealing tape stops at midpoint, pull it out of the toner cartridge completely.
㻟㻣㻝㻌㻛㻌㻣㻜㻡
If any tape remains in the toner cartridge, this may result in poor print quality.
Dispose of the removed sealing tape according to local regulations.
Remove the drum protective cover (A).
IMPORTANT
Do not touch the drum (A).
Print quality may deteriorate if you touch or damage the drum (A) at the bottom of the toner
cartridge.
Keep the drum protective cover.
Keep the removed drum protective cover. You will need it when you remove the toner cartridge
for printer maintenance or other purposes.
Install the toner cartridge.
㻟㻣㻞㻌㻛㻌㻣㻜㻡
IMPORTANT
Precautions when installing toner cartridges
When handling the toner cartridges, be careful not to let the drum impact the frame
of the toner cartridge tray.
The position of the toner cartridges in the printer is determined by the toner color.
Install the toner cartridges in the slots that have labels of the same color.
Install the toner cartridges securely into the printer.
Close the toner cartridge tray.
Push it into the printer firmly.
㻟㻣㻟㻌㻛㻌㻣㻜㻡
Gently close the front cover.
CAUTION
Precautions when closing the front cover
Be careful not to catch your fingers.
IMPORTANT
If you cannot close the front cover
Make sure that the toner cartridge tray is closed.
Do not try to forcefully close the front cover, as this may damage the printer.
Do not leave the front cover open for a long time with the toner cartridges installed.
This may result in deterioration in print quality.
㻟㻣㻠㻌㻛㻌㻣㻜㻡
[G-06] Handling Toner Cartridges
The toner cartridges consist of light-sensitive components and precision mechanical components.
Handling the toner cartridges without due care may result in damage to the toner cartridges or deterioration in print
quality.
Observe the following points when handling the toner cartridges.
WARNING
Do not dispose of a used toner cartridge in open flames.
This may cause the toner remaining inside the cartridges to ignite, resulting in burns or fire.
CAUTION
Precautions if you get toner on your hands or clothing
If toner gets on your hands or clothing, wash them immediately with cold water.
Washing with warm water sets the toner, making it impossible to remove the toner stains.
IMPORTANT
Do not touch the toner cartridge memory (A) or the electrical contacts (B).
This may result in damage to the cartridge.
Do not touch the drum (C).
Print quality may deteriorate if you touch or damage the drum (C) at the bottom of the toner
cartridge.
㻟㻣㻡㻌㻛㻌㻣㻜㻡
Hold the toner cartridges properly.
When handling the toner cartridges, hold them properly as shown in the figure. Do not place it
vertically or upside-down.
When removing a toner cartridge which is being used from the printer
Immediately attach the drum protective cover * to the toner cartridge and place it into the
protective bag*, or wrap it with a thick cloth.
* The packing material in which the toner cartridge is originally packed.
Replace a toner cartridge with that of the same color.
When replacing a toner cartridge, be sure to replace the toner cartridge of the same color.
Other precautions
Do not expose the toner cartridges to direct sunlight or strong light.
Do not disassemble or modify the toner cartridges.
Condensation (water droplets on the inside or outside) may form on the toner
cartridges when they are brought into an environment with a sudden change in
temperature or humidity.
When moving a new toner cartridge to a location with change in temperature, leave
the cartridge in the protective bag at the new location for two or more hours to
allow it to adjust to the new temperature.
Keep toner cartridges away from products that generate magnetic waves, such as a
computer or computer display.
㻟㻣㻢㻌㻛㻌㻣㻜㻡
Be careful of counterfeit toner cartridges
Please be aware that there are counterfeit Canon toner cartridges in the marketplace. Use of
counterfeit toner cartridge may result in poor print quality or machine performance. Canon is not
responsible for any malfunction, accident or damage caused by the use of counterfeit toner
cartridge.
For more information, see http://www.canon.com/counterfeit.
㻟㻣㻣㻌㻛㻌㻣㻜㻡
[G-07] Storing Toner Cartridges
Storing Toner Cartridges
IMPORTANT
Precautions when storing toner cartridges
In order to use toner cartridges in a safe and trouble-free manner, store them in a place that fulfills
the following conditions.
Do not store the toner cartridges in a location exposed to direct sunlight.
Do not store the toner cartridges in a location subject to high temperature or
humidity or in a location with dramatic changes in temperature or humidity.
• Storage temperature range: 0 to 35 °C (32 to 95 °F)
• Storage humidity range: 35 to 85% RH (no condensation)
Do not store the toner cartridges in a location exposed to corrosive gases, such as
ammonia, salt air, or large amounts of dust.
Keep the toner cartridges out of the reach of small children.
Store the toner cartridges in the same orientation as when they are installed in the printer.
Do not store the toner cartridges vertically or upside-down.
When removing a toner cartridge which is being used from the printer
Immediately attach the drum protective cover * to the toner cartridge and place it into the
protective bag*, or wrap it with a thick cloth.
* The packing material in which the toner cartridge is originally packed.
About new toner cartridges
Do not take a new toner cartridge out of the protective bag until it is ready to be used.
NOTE
About condensation
Even when the toner cartridges are stored within the recommended humidity range, water droplets
may form on the inside or outside of the cartridges when moved to an environment with a sudden
change in temperature or humidity. The formation of water droplets is called condensation.
Condensation can adversely affect the print quality of the toner cartridges.
㻟㻣㻤㻌㻛㻌㻣㻜㻡
[G-08] Loading Standard Size Paper (Other Than Index Cards and Envelopes)
"Loading Standard Size Paper (Other Than Index
Cards and Envelopes)"
㻟㻣㻥㻌㻛㻌㻣㻜㻡
[G-09] Loading Index Cards
"Loading Index Cards"
㻟㻤㻜㻌㻛㻌㻣㻜㻡
[G-10] Loading Envelopes
"Loading Envelopes"
㻟㻤㻝㻌㻛㻌㻣㻜㻡
[G-11] Loading Custom Size Paper (Non-Standard Size Paper)
"Loading Custom Size Paper (Non-Standard Size
Paper)"
㻟㻤㻞㻌㻛㻌㻣㻜㻡
[G-12] Performing Printing Appropriate for Particular Print Data
"Performing Printing Appropriate for Particular
Print Data"
㻟㻤㻟㻌㻛㻌㻣㻜㻡
[G-13] Correcting Rough-Textured Images
"Correcting Rough-Textured Images"
㻟㻤㻠㻌㻛㻌㻣㻜㻡
[G-14] Adjusting the Toner Density
"Adjusting the Toner Density"
㻟㻤㻡㻌㻛㻌㻣㻜㻡
[G-15] Printing with Brightness and Contrast Adjusted
"Printing with Brightness and Contrast Adjusted"
㻟㻤㻢㻌㻛㻌㻣㻜㻡
[G-16] Adjusting the Color
"Adjusting the Color"
㻟㻤㻣㻌㻛㻌㻣㻜㻡
[G-17] Matching the Color on the Display
"Matching the Color on the Display"
㻟㻤㻤㻌㻛㻌㻣㻜㻡
[G-18] Calibrating the Printer
"Calibrating the Printer"
㻟㻤㻥㻌㻛㻌㻣㻜㻡
[G-19] Correcting "Out-of-Register Colors"
"Correcting "Out-of-Register Colors""
㻟㻥㻜㻌㻛㻌㻣㻜㻡
[G-20] Cleaning the Inside of the Printer
Cleaning the Fixing Roller (Cleaning 1)
Cleaning the Transfer Belt (Cleaning 2)
Cleaning the Fixing Roller (Cleaning 1)
If the printed paper has smudge marks, clean the fixing roller using the following procedure.
IMPORTANT
Have A4 size plain paper ready.
The fixing roller cannot be cleaned with any plain paper other than A4.
Be sure to load A4 size plain paper when cleaning the fixing roller.
Load A4-size plain paper in the multi-purpose tray or paper drawer.
"Loading Standard Size Paper (Other Than Index Cards and Envelopes)"
Display the Printer Status Window.
Click [
] in the Windows task tray, and then select the printer name.
NOTE
When displaying the Printer Status Window from the printer driver
Click [
] (Display Printer Status Window) in locations such as in the [Page Setup] sheet.
)URPWKH>2SWLRQV@PHQXVHOHFW>8WLOLW\@ĺ>&OHDQLQJ@
㻟㻥㻝㻌㻛㻌㻣㻜㻡
Click [OK].
ĺ The paper is fed into the printer, and the printer starts cleaning the fixing roller.
The cleaning is finished when the paper is output completely.
Cleaning the fixing roller cannot be canceled. Please wait until it is completed.
IMPORTANT
Do not touch the paper until it is output completely while cleaning the fixing roller.
The paper is once output partially after the front side is printed, and then it is fed again to clean
the fixing roller.
NOTE
Cleaning time for the fixing roller
It takes approximately 80 seconds.
Cleaning the Transfer Belt (Cleaning 2)
If the transfer belt of the ITB unit has dirt, this may result in deterioration in print quality. In this case, clean the transfer
belt using the following procedure.
Display the Printer Status Window.
Click [
] in the Windows task tray, and then select the printer name.
㻟㻥㻞㻌㻛㻌㻣㻜㻡
NOTE
When displaying the Printer Status Window from the printer driver
Click [
] (Display Printer Status Window) in locations such as in the [Page Setup] sheet.
)URPWKH>2SWLRQV@PHQXVHOHFW>8WLOLW\@ĺ>&OHDQLQJ@
Click [OK].
ĺ The message <Cleaning> appears in the Printer Status Window, and the printer starts
cleaning the transfer belt.
The cleaning is finished after the preceding message disappears.
Cleaning the transfer belt cannot be canceled. Please wait until it is completed.
NOTE
Cleaning time for the transfer belt
It takes approximately 50 seconds.
㻟㻥㻟㻌㻛㻌㻣㻜㻡
[G-21] Cleaning the Outside of the Printer
Periodically clean the outer surfaces and ventilation slots of the printer to maintain the optimal printing quality.
When cleaning the printer, be careful of the following points in order to prevent electrical shocks or printer malfunctions.
WARNING
Turn off the printer and unplug the power plug from the AC power outlet.
Failure to do so can result in a fire or electrical shock.
Do not use alcohol, benzene, paint thinner, or other flammable substances.
If flammable substances come into contact with electrical parts inside the printer, this may result
in a fire or electrical shock.
IMPORTANT
Precautions when cleaning the outside of the printer
Do not use a cleaning agent other than water or a mild detergent diluted with water,
as this may deform or crack the plastic materials in the printer.
When using a mild detergent, be sure to dilute it with water.
This printer does not need grease or oil. Do not apply grease or oil.
Turn the printer off, then disconnect the cables from the printer.
(1) Turn the printer off.
(2) If the interface cables are connected, turn the computer off, and then disconnect the
interface cables from the printer.
(3) Unplug the power plug from the AC power outlet.
Clean the printer with a soft, well wrung out cloth dampened with water or mild detergent
diluted with water.
㻟㻥㻠㻌㻛㻌㻣㻜㻡
NOTE
When using a mild detergent for cleaning
Be sure to wipe away any detergent remaining on the surface with a soft cloth dampened with
water.
After wiping off any dirt, wipe the printer with a dry cloth.
When the printer is completely dry, plug the power plug into the AC power outlet.
Connect the USB cable to the printer as needed.
㻟㻥㻡㻌㻛㻌㻣㻜㻡
[G-22] Moving the Printer
When changing the location of the printer or moving the printer for maintenance, be sure to perform the following
procedure.
WARNING
When moving the printer
Always turn off the power switch and unplug the power plug and interface cables.
Failure to do so can damage the cables or cords, resulting in a fire or electrical shock.
CAUTION
Do not carry the printer with the paper drawer installed.
If you do so, the paper drawer may drop, resulting in personal injury.
NOTE
About installation sites
"Installation Conditions of the Printer"
Turn the printer off, then disconnect the cables from the printer.
(1) Turn the printer off.
(2) If the interface cables are connected, turn the computer off, and then disconnect the
interface cables from the printer.
(3) Unplug the power plug from the AC power outlet.
Remove the power cord from the printer.
㻟㻥㻢㻌㻛㻌㻣㻜㻡
Pull out the paper drawer.
Move the printer from the installation site.
Carry the printer with two or more people by holding the lift handles on the lower portion
of the printer and lifting it up at the same time.
CAUTION
Carry the printer with two or more people.
This printer weighs approximately 25.1 kg. Please be careful not to hurt your back or other
portions of your body when carrying the printer.
Be sure to hold the lift handles.
㻟㻥㻣㻌㻛㻌㻣㻜㻡
Do not hold the printer by the front portion, output area, or any portions other than the lift
handles. If you do so, you may drop the printer, resulting in personal injury.
Pay attention to the balance.
The rear portion (A) of the printer is relatively heavy. Be careful not to become off-balance when
lifting the printer. If you do so, you may drop the printer, resulting in personal injury.
Do not carry the printer with the paper feeder installed.
If you do so, the paper feeder may drop resulting in personal injury.
㻟㻥㻤㻌㻛㻌㻣㻜㻡
IMPORTANT
Do not carry the printer with a cover or tray open.
Make sure that the front cover and multi-purpose tray are closed before carrying the printer.
NOTE
If the optional paper feeder is installed
Place the paper feeder on the new installation site before carrying the printer to the site.
For details on the procedure for installing the paper feeder, see "Paper Feeder".
Put the printer unit down carefully at the new installation site.
CAUTION
Put the printer down slowly and carefully.
Be careful not to hurt your hands or fingers.
Insert the paper drawer into the printer.
Push it into the printer firmly.
㻟㻥㻥㻌㻛㻌㻣㻜㻡
CAUTION
Precautions when inserting the paper drawer
Be careful not to catch your fingers.
Connect the LAN cable to the printer as needed.
Connect the power cord to the printer.
Plug the power plug into the AC power outlet.
Connect the USB cable to the printer as needed.
INFORMATION
When transporting the printer unit
To prevent damage to the printer during transport, perform the following.
Remove the toner cartridges.
Securely pack the printer in the original box with packing materials.
If the original box and packing materials are not available, find an appropriate
box along with packing materials and pack the printer and the parts
appropriately.
㻠㻜㻜㻌㻛㻌㻣㻜㻡
[G-23] Paper Feeder
"Paper Feeder"
㻠㻜㻝㻌㻛㻌㻣㻜㻡
[G-24] Handling the Printer
This printer consists of various electronic and precision optical parts. Read the following section so that you can handle
the printer properly.
For details on handling the printer, also read "Handling".
Do not place any objects other than printing paper on the printer, trays, or covers. This may result in
damage to the printer.
Do not leave any covers open longer than required. Exposing the printer to direct sunlight or strong light
may result in deterioration in print quality.
Avoid shaking the printer. This may result in poor print quality or damage to the printer.
Do not open the covers on the printer during printing. This may result in damage to the printer.
Handle each cover gently when opening or closing it. Failure to do so may result in damage to the printer.
If you want to put a cover on the printer to prevent dust from entering the printer, turn the power off and
allow the printer to cool down sufficiently before covering the printer.
If you do not plan to use the printer for a long period of time, unplug the power plug from the AC power
outlet.
Do not use or store the printer in a room where chemicals are used.
The output tray and its surroundings become hot during or immediately after using the printer. Do not
touch the output tray and its surroundings when removing the jammed paper or performing the related
operation.
㻠㻜㻞㻌㻛㻌㻣㻜㻡
㻠㻜㻟㻌㻛㻌㻣㻜㻡
[G-25] Location of the Serial Number
"Location of the Serial Number"
㻠㻜㻠㻌㻛㻌㻣㻜㻡
[H] Troubleshooting
㻠㻜㻡㻌㻛㻌㻣㻜㻡
[H-02] The Printer Driver Cannot Be Installed or Uninstalled
This section describes solutions for when you cannot install or uninstall the printer driver.
The Printer Driver Cannot Be Installed
The Printer Driver Cannot Be Uninstalled
The Printer Driver Cannot Be Installed
Select a problem during the installation from any of the following.
Connection with a
USB cable
When Installing the Printer Diver from the CD-ROM, the Printer Is Not
Recognized Automatically after Connecting the USB Cable
Connection with a
LAN cable
When the Printer Driver Is Installed by Auto Setup, the Printer Cannot Be
Searched for
The Printer to Be Used Cannot Be Searched for in NetSpot Device Installer
Connection via the
print server
(client)
The Print Server for Connection Cannot Be Found
The Shared Printer Cannot Be Accessed
The Printer Driver Cannot Be Uninstalled
If you cannot uninstall the printer driver using the uninstaller, implement the following solutions.
Solution 1
Uninstalling the Printer Driver in [Control Panel]
㻠㻜㻢㻌㻛㻌㻣㻜㻡
Solution 2
(Only when connecting
with USB)
Uninstalling the USB Class Driver
NOTE
If a user without administrative rights installed the printer driver
The printer driver may not be able to uninstalled successfully using [Canon LBP7210C
Uninstaller] depending on your operating system.
In this case, uninstall the printer driver using the following procedure.
1. Open the [Printers and Faxes] or [Printers] folder.
Windows XP Professional and Server 2003
From the [Start] menu, select [Printers and Faxes].
Windows XP Home Edition
From the [Start] menu, select [Control Panel], and then click
>3ULQWHUVDQG2WKHU+DUGZDUH@ĺ>3ULQWHUVDQG)D[HV@
Windows Vista
From the [Start] menu, select [Control Panel], and then click
[Printer].
Windows Server 2008
From the [Start] menu, select [Control Panel], and then double-click
[Printers].
2. Right-click the icon for this printer, then select [Delete] from the pop-up menu.
3. Click [Yes].
4. Uninstall the printer driver using [Canon LBP7210C Uninstaller].
"Uninstalling the Printer Driver Using [Canon LBP7210C Uninstaller]"
㻠㻜㻣㻌㻛㻌㻣㻜㻡
[H-03] When Installing the Printer Diver from the CD-ROM, the Printer Is Not Recognized
Automatically after Connecting the USB Cable
When installing the printer driver from the CD-ROM, the printer is not recognized automatically after
connecting the USB cable.
Cause 1
The USB cable was already connected and the printer was turned on before the printer driver was
installed.
Solution
Perform the following procedure.
1.
2.
3.
4.
Turn the printer off.
Disconnect the USB cable.
Connect the USB cable again.
Turn the printer on.
Cause 2
The printer is not turned on.
Solution
Turn the printer on.
Cause 3
The USB cable is not connected properly.
Solution
Make sure that the printer and computer are properly connected with the USB cable.
Cause 4
An inappropriate USB cable is being used.
Solution
Use a USB cable that is appropriate for the USB interface environment of the printer and has the
following symbol.
The following is the USB interface environment of this printer.
Hi-Speed USB
USB
Cause 5
The USB class driver is installed.
Solution
Uninstall the USB class driver.
"Uninstalling the USB Class Driver"
㻠㻜㻤㻌㻛㻌㻣㻜㻡
[H-04] When the Printer Driver Is Installed by Auto Setup, the Printer Cannot Be Searched
for
When the printer driver is installed by Auto Setup, the printer cannot be searched for.
Cause 1
The printer is not turned on.
Solution
Turn the printer on.
Cause 2
The printer and cable are not connected properly.
Solution
Make sure that the printer is connected to the network by an appropriate cable, and then cycle the
power of the printer.
㻠㻜㻥㻌㻛㻌㻣㻜㻡
[H-05] The Printer to Be Used Cannot Be Searched for in NetSpot Device Installer
The printer to be used cannot be searched for in NetSpot Device Installer.
Cause 1
The printer is not turned on.
Solution
Turn the printer on.
Cause 2
The printer and cable are not connected properly.
Solution
Make sure that the printer is connected to the network by an appropriate cable, and then cycle the
power of the printer.
Cause 3
An operating system equipped with Windows Firewall is being used.
Solution
If Windows Firewall is enabled, you need to add "NetSpot Device Installer" to Windows Firewall.
Perform either of the following procedures.
Adding "NetSpot Device Installer" to the [Exceptions] sheet in the [Windows Firewall]
dialog box (See Readme of NetSpot Device Installer.)
Installing NetSpot Device Installer (You can add it to Windows Firewall during the
installation.)
To display Readme of NetSpot Device Installer, click [ ] in [NetSpot Device Installer for TCP/IP] in
the [Additional Software Programs] screen in CD-ROM Setup.
㻠㻝㻜㻌㻛㻌㻣㻜㻡
[H-06] The Print Server for Connection Cannot Be Found
The print server for connection cannot be found.
Cause 1
The interface cable is not connected properly.
Solution
Connect the print server to the client computer with the interface cable properly.
Cause 2
The print server has not been started up.
Solution
Start up the print server.
Cause 3
The printer is not specified as a shared printer.
Solution
Specify the printer as a shared printer.
"Configuring the Print Server"
Cause 4
The user does not have permission to access the print server or printer.
Solution
Ask your network administrator to change the user permissions.
Cause 5
[Network discovery] is not set to [On]. (Windows Vista and Server 2008)
Solution
Perform the following procedure.
Windows Vista
1. From the [Start] menu, select [Control Panel].
2. Click [View network status and tasks].
3. Set [Network discovery] to [On].
Windows Server 2008
1. From the [Start] menu, select [Control Panel].
2. Double-click [Network and Sharing Center].
3. Set [Network discovery] to [On].
㻠㻝㻝㻌㻛㻌㻣㻜㻡
[H-07] The Shared Printer Cannot Be Accessed
The shared printer cannot be accessed.
Cause 1
The user of the computer to be used has not been registered, or the password has not been specified
yet.
Solution
Register the user of the computer to be used or specify the password on the print server.
Contact your network administrator for more details.
Cause 2
The path to the network is not correct.
Solution 1 Check the following.
1. Display [Windows Explorer].
Windows XP, Server 2003, Vista, and Server 2008
)URPWKH>6WDUW@PHQXVHOHFW>$OO3URJUDPV@ĺ>$FFHVVRULHV@ĺ
[Windows Explorer].
2. Select the print server from [My Network Places] (from [Network] for Windows Vista
and Server 2008), then confirm the icon for this printer.
If you cannot find the icon for this printer
Ask your network administrator about the problem.
If you can find the icon for this printer
You can install the printer driver by performing either of the following procedures and
following the instructions on the screen.
Double-clicking the icon for this printer
Dragging and dropping the icon for this printer into the [Printers and
Faxes] folder or [Printers] folder
Solution 2 If you want to specify the network path directly, check if the network path is specified correctly as
"\\the print server name (the computer name of the print server)\the printer name".
㻠㻝㻞㻌㻛㻌㻣㻜㻡
[H-08] Printing Does Not Work
<Question 1> Is the printer turned on?
On
Off
Cannot be turned on
Turn on the printer.
There Is a Problem with the Printer Power Supply
<<Previous question
<Question 2> Check the indicators on the printer unit.
㻠㻝㻟㻌㻛㻌㻣㻜㻡
The
(Ready)
indicator is on.
The
(Ready)
indicator is blinking.
The Toner indicator is
on or blinking.
The printer is operating. Please wait a moment.
Replacing Toner Cartridges
The (Load Paper)
indicator is blinking.
"Loading
"Loading
"Loading
"Loading
The
(Paper Jam)
indicator is blinking.
Paper Jams
(Alarm)
The
indicator is on.
(Alarm)
The
indicator is blinking.
Standard Size Paper (Other Than Index Cards and Envelopes)"
Index Cards"
Envelopes"
Custom Size Paper (Non-Standard Size Paper)"
The Alarm Indicator Is On
The Alarm Indicator Is Blinking
<<Previous question
<Question 3> How are the printer and computer connected?
With a USB cable
㻠㻝㻠㻌㻛㻌㻣㻜㻡
With a LAN cable
Via the print server
(client)
<<Previous question
<Question 4> Is the USB cable connected properly?
Try the following points.
If you are using a hub, connect the printer to the computer directly.
If you are using a long USB cable, replace it with the short one.
The cable is connected
properly.
If you have another USB cable, use it.
Nevertheless, if printing does not work, proceed to <Question 5>.
The cable is not
connected properly.
Connect the cable properly.
㻠㻝㻡㻌㻛㻌㻣㻜㻡
<<Previous question
<Question 5> Can you print a test page?
Printing a Test Page in Windows
Printable
Printing can be performed from the printer driver. Check the printing preferences in the
application.
Not printable
<<Previous question
<Question 6> Is the port to be used selected correctly?
Checking the USB Port
㻠㻝㻢㻌㻛㻌㻣㻜㻡
The port is selected
correctly.
The port is not
selected correctly.
The port to be used
cannot be found.
Select the correct port.
Install the printer driver again.
Installing from CD-ROM Setup
Installing with Plug and Play
<<Previous question
<Question 7> Is bi-directional communication enabled?
Checking Bi-directional Communication
Enabled
Not enabled
Enable bi-directional communication and restart the computer and printer.
<<Previous question
<Question 8> Try the following points.
㻠㻝㻣㻌㻛㻌㻣㻜㻡
Disable resident software including security software.
If any other USB connection devices are connected to your computer, disconnect those unneeded.
If any other drivers or software of USB connection devices are installed on your computer,
uninstall those unneeded.
Connect the USB cable to another USB port on your computer.
Connect the printer to another computer with a USB cable.
Nevertheless, if printing does not work, proceed to <Question 9>.
Not printable
<<Previous question
<Question 9> Install the printer driver again.
Uninstalling the Printer Driver Using [Canon LBP7210C Uninstaller]
Installing from CD-ROM Setup
Installing with Plug and Play
Nevertheless, if printing does not work, proceed to <Question 10>.
Not printable
<<Previous question
<Question 10> Uninstall the USB class driver, and then install the printer driver again.
Uninstalling the USB Class Driver
Uninstalling the Printer Driver Using [Canon LBP7210C Uninstaller]
Installing from CD-ROM Setup
Installing with Plug and Play
Not printable
Nevertheless, if printing does not work, contact your local authorized Canon dealer.
<<Previous question
<Question 11> Is the LAN cable connected properly?
㻠㻝㻤㻌㻛㻌㻣㻜㻡
The cable is connected
properly.
The cable is not
connected properly.
Connect the cable properly.
<<Previous question
<Question 12> Check the indicators on the network board.
The LNK or 100
indicator is on.
All the indicators are
off.
All the Indicators on the Network Board Are Off
The ERR indicator is
on.
The ERR Indicator on the Network Board Is On
㻠㻝㻥㻌㻛㻌㻣㻜㻡
The ERR indicator
blinks at an interval of
four times.
The ERR Indicator on the Network Board Blinks at an Interval of Four Times
The ERR indicator is
constantly blinking.
The ERR Indicator on the Network Board Is Constantly Blinking
<<Previous question
<Question 13> Can you print a test page?
Printing a Test Page in Windows
Printable
Printing can be performed from the printer driver. Check the printing preferences in the
application.
Not printable
<<Previous question
<Question 14> Is the IP address set properly?
Checking the IP Address
The IP address is set
properly.
㻠㻞㻜㻌㻛㻌㻣㻜㻡
The IP address is not
set properly.
Set the IP address properly.
Setting the IP Address
<<Previous question
<Question 15> Is the port to be used selected correctly?
Checking Standard TCP/IP Port
The port is selected
correctly.
The port is not
selected correctly.
Select the correct port.
The port to be used
cannot be found.
Create the port.
Specifying Standard TCP/IP Port
You changed the IP
address.
Create the port.
Specifying Standard TCP/IP Port
You are using a port
created by "Manual
Install the printer driver again.
㻠㻞㻝㻌㻛㻌㻣㻜㻡
Setup" on Windows
Vista or Server 2008.
Auto Setup (Recommended Method)
<<Previous question
<Question 16> Is there any problem with the computer that is trying to print a document?
Check the following points.
The printer is specified as the default printer.
The TCP/IP protocol is running.
The users who can print are not restricted.
Restricting the Users Who Can Print with IP Addresses
Nevertheless, if printing does not work, proceed to <Question 17>.
Not printable
<<Previous question
<Question 17> Is the unicast communication mode specified?
Checking and Specifying the Unicast Communication Mode
The normal mode (the
broadcast
communication mode)
is specified.
㻠㻞㻞㻌㻛㻌㻣㻜㻡
The unicast
communication mode
is specified.
Reset it to the normal mode or contact your network administrator.
Checking and Specifying the Unicast Communication Mode
<<Previous question
<Question 18> Try the following points.
Connect the printer and computer with a cross cable.
Nevertheless, if printing does not work, proceed to <Question 19>.
Not printable
<<Previous question
<Question 19> Install the printer driver again.
Uninstalling the Printer Driver Using [Canon LBP7210C Uninstaller]
Auto Setup (Recommended Method)
Manual Setup (Windows XP/Server 2003 Only)
Nevertheless, if printing does not work, proceed to <Question 20>.
Not printable
<<Previous question
<Question 20> Can you print from another computer connected to the printer with a LAN cable?
Try the following point.
Printable
Disable resident software including security software.
㻠㻞㻟㻌㻛㻌㻣㻜㻡
Not printable
Contact your local authorized Canon dealer.
<<Previous question
<Question 21> Is the printer connected to the print server properly?
The cable is connected
properly.
The cable is not
connected properly.
Connect the cable properly.
<<Previous question
<Question 22> Can your computer be connected to the print server or the shared printer?
Can be connected
㻠㻞㻠㻌㻛㻌㻣㻜㻡
Cannot be connected
The Print Server for Connection Cannot Be Found
The Shared Printer Cannot Be Accessed
<<Previous question
<Question 23> Is there any problem with the print server?
Check the following points.
The print server is connected to the network properly.
The additional driver (alternate driver) is updated properly.
Configuring the Print Server
Printing can be performed from the print server.
Nevertheless, if printing does not work, proceed to <Question 24>.
Not printable
<<Previous question
<Question 24> Can you print a test page?
Printing a Test Page in Windows
Printable
Printing can be performed from the printer driver. Check the printing preferences in the
application.
Not printable
㻠㻞㻡㻌㻛㻌㻣㻜㻡
<<Previous question
<Question 25> Is the printer on the print server displayed on the network?
Checking the Printer on the Print Server
Displayed
Not displayed
Ask your network administrator about the problem.
<<Previous question
<Question 26> Install the printer driver again.
Uninstalling the Printer Driver Using [Canon LBP7210C Uninstaller]
Installation on Clients
Change the method for installing the printer driver. (Example: If you performed the local installation last time,
change the installation method to the download installation.)
Nevertheless, if printing does not work, proceed to <Question 27>.
Not printable
<<Previous question
<Question 27> Can you print from another computer (client) connected to the printer via the print
server?
㻠㻞㻢㻌㻛㻌㻣㻜㻡
Printable
Not printable
Disable resident software including security software.
Contact your local authorized Canon dealer.
㻠㻞㻣㻌㻛㻌㻣㻜㻡
[H-09] There Is a Problem with the Printer Power Supply
There is a problem with the printer power supply.
Cause 1
The power plug is unplugged from the AC power outlet.
Solution
Plug the power plug into the AC power outlet.
Cause 2
The printer is plugged to an extension cord or multiple power strip.
Solution
Plug the power plug directly into an AC power outlet.
Cause 3
The breakers have tripped.
Solution
Reset the breakers on the switch board.
Cause 4
There is a break in the power cord.
Solution
If the printer can be turned on after replacing the power cord with one that is of the same type, then
purchase a new power cord and replace the broken one.
㻠㻞㻤㻌㻛㻌㻣㻜㻡
[H-10] Checking the USB Port
Check the USB port using the following procedure.
Open the [Printers and Faxes] or [Printers] folder.
Windows XP Professional and Server 2003
From the [Start] menu, select [Printers and Faxes].
Windows XP Home Edition
From the [Start] menu, select [Control Panel], and then click [Printers and
2WKHU+DUGZDUH@ĺ>3ULQWHUVDQG)D[HV@
Windows Vista
From the [Start] menu, select [Control Panel], and then click [Printer].
Windows Server 2008
From the [Start] menu, select [Control Panel], and then double-click
[Printers].
Right-click the icon for this printer, and then select [Properties] from the pop-up menu.
Display the [Ports] sheet.
Check whether the port to be used is selected properly.
㻠㻞㻥㻌㻛㻌㻣㻜㻡
[H-11] Checking Bi-directional Communication
Check bi-directional communication using the following procedure.
Open the [Printers and Faxes] or [Printers] folder.
Windows XP Professional and Server 2003
From the [Start] menu, select [Printers and Faxes].
Windows XP Home Edition
From the [Start] menu, select [Control Panel], and then click [Printers and
2WKHU+DUGZDUH@ĺ>3ULQWHUVDQG)D[HV@
Windows Vista
From the [Start] menu, select [Control Panel], and then click [Printer].
Windows Server 2008
From the [Start] menu, select [Control Panel], and then double-click
[Printers].
Right-click the icon for this printer, and then select [Properties] from the pop-up menu.
Display the [Ports] sheet.
Check if the [Enable bidirectional support] check box is selected.
IMPORTANT
Do not clear the [Enable bidirectional support] check box
If the check box is cleared, you cannot perform printing.
NOTE
㻠㻟㻜㻌㻛㻌㻣㻜㻡
If you changed the setting
Restart the computer and printer.
㻠㻟㻝㻌㻛㻌㻣㻜㻡
[H-12] All the Indicators on the Network Board Are Off
All the indicators on the network board are off.
Cause 1
The LAN cable is not connected properly or broken.
Solution 1 Remove the LAN cable once, then connect it again.
Solution 2 Replace the LAN cable with another one, then connect it.
Cause 2
The cable is connected to the UP-LINK (cascade) port on the hub.
Solution 1 Connect the LAN cable to the port on the hub with an " X " mark.
Solution 2 If the hub has an UP-LINK (cascade) switch, switch to " X ".
Cause 3
A cross LAN cable is being used.
Solution 1 Replace the cable with a straight LAN cable.
Solution 2 Connect the cross LAN cable to the UP-LINK (cascade) port on the hub. If the hub has an UP-LINK
(cascade) switch, switch to the " = " side.
NOTE
About the cross-type LAN cable
Use this type of cable when connecting the printer directly to a computer.
Cause 4
Cannot communicate with the hub.
Solution
Make sure that the power of the hub is on.
Cause 5
The hardware of the network board is in an abnormal condition.
Solution
Report the problems to your local authorized Canon dealer.
㻠㻟㻞㻌㻛㻌㻣㻜㻡
[H-13] The ERR Indicator on the Network Board Is On
The ERR indicator on the network board is on.
Cause 1
The LAN cable is not connected properly or broken.
Solution 1 Make sure the LAN cable is connected properly.
Solution 2 Replace the LAN cable with a proper one and check if there is no disconnection or damage.
Solution 3 If the ERR indicator still comes on even after applying the Solution 1 and 2, contact your local
authorized Canon dealer for servicing.
㻠㻟㻟㻌㻛㻌㻣㻜㻡
[H-14] The ERR Indicator on the Network Board Blinks at an Interval of Four Times
The ERR indicator on the network board blinks at an interval of four times.
Cause
Solution
The network board was reset (the printer was turned on while pressing the reset button on the network
board), resetting the network board to the default settings.
Turn the printer off, wait at least 10 seconds, and then turn it on.
㻠㻟㻠㻌㻛㻌㻣㻜㻡
[H-15] The ERR Indicator on the Network Board Is Constantly Blinking
The ERR indicator on the network board is constantly blinking.
Cause
Solution
The hardware of the network board is in an abnormal condition.
Contact your local authorized Canon dealer for servicing.
㻠㻟㻡㻌㻛㻌㻣㻜㻡
[H-16] Checking the IP Address
Use the following procedure to make sure that the IP address is set properly.
Run Command Prompt.
Windows XP, Server 2003, Vista, and Server 2008
)URPWKH>6WDUW@PHQXVHOHFW>$OO3URJUDPV@ĺ>$FFHVVRULHV@ĺ
[Command Prompt].
Enter "ping <the IP address of the printer>", then press the [ENTER] key on your
keyboard.
Input Example: "ping 192.168.0.215"
If the IP address is set properly, the following result is displayed. (This indicates that four
packets were sent and four packets were successfully received.)
Packets: Sent = 4, Received = 4, Lost = 0 (0% loss),
Contact your network administrator if the following result is displayed.
Packets: Sent = 4, Received = 0, Lost = 4 (100% loss),
Enter "exit", and then press [ENTER] on the keyboard to exit Command Prompt.
NOTE
When using DHCP, BOOTP, or RARP
Consult your network administrator and perform either of the following settings.
Set the DNS Dynamic Update function.
"Configuring the Protocol Settings"
Configure DHCP or other settings so that the same IP address is always assigned to
the printer when the printer is started.
"Configuring the Protocol Settings"
Checking and configuring the subnet
Enter the following command using Command Prompt.
"ipconfig"
Make sure that the computer and printer are on the same subnet.
Example:
When the following values are specified for your computer, the IP address of the
printer needs to be "192.168.0.xxx" (xxx indicates an arbitrary number.)
Subnet mask: "255.255.255.0"
㻠㻟㻢㻌㻛㻌㻣㻜㻡
IP address: "192.168.0.10"
㻠㻟㻣㻌㻛㻌㻣㻜㻡
[H-17] Checking Standard TCP/IP Port
Check Standard TCP/IP Port using the following procedure.
Open the [Printers and Faxes] or [Printers] folder.
Windows XP Professional and Server 2003
From the [Start] menu, select [Printers and Faxes].
Windows XP Home Edition
From the [Start] menu, select [Control Panel], and then click [Printers and
2WKHU+DUGZDUH@ĺ>3ULQWHUVDQG)D[HV@
Windows Vista
From the [Start] menu, select [Control Panel], and then click [Printer].
Windows Server 2008
From the [Start] menu, select [Control Panel], and then double-click
[Printers].
Right-click the icon for this printer, and then select [Properties] from the pop-up menu.
Display the [Ports] sheet.
Check whether the port to be used is selected properly.
㻠㻟㻤㻌㻛㻌㻣㻜㻡
[H-18] Specifying Standard TCP/IP Port
IMPORTANT
If you are using Windows Vista or Server 2008
You cannot use Standard TCP/IP Port to be created here.
Uninstall the printer driver, and then install the printer driver again from CD-ROM Setup.
"Uninstalling the Printer Driver Using [Canon LBP7210C Uninstaller]"
"Auto Setup (Recommended Method)"
Open the [Printers and Faxes] or [Printers] folder.
Windows XP Professional and Server 2003
From the [Start] menu, select [Printers and Faxes].
Windows XP Home Edition
From the [Start] menu, select [Control Panel], and then click [Printers and
Other Hardware] [Printers and Faxes].
Right-click the icon for this printer, and then select [Properties] from the pop-up menu.
Perform the following procedure.
(1) Display the [Ports] sheet.
(2) Click [Add Port].
㻠㻟㻥㻌㻛㻌㻣㻜㻡
Select the port type.
(1) Select [Standard TCP/IP Port].
(2) Click [New Port].
Click [Next].
Enter the IP address or name of the printer.
(1) Enter the IP address or name * of the printer in [Printer Name or IP Address].
* The DNS name to be registered on the DNS server (up to 78 characters)
(2) Click [Next].
IMPORTANT
If the printer cannot be detected
㻠㻠㻜㻌㻛㻌㻣㻜㻡
The following screen appears. Perform either of the following operations.
• Follow the on-screen instructions and search again for the printer.
• Specify the setting for [Device Type].
(1) Select [Standard], and then select [Canon Network Printing Device with P9100].
(2) Click [Next].
NOTE
If you are not sure about the value to enter
The value to be entered varies depending on how the IP address of the printer was set.
For more details, see "Settings for Adding a Port" or ask your network administrator.
Click [Finish].
Click [Close].
㻠㻠㻝㻌㻛㻌㻣㻜㻡
Click [Apply].
Click [OK].
NOTE
Deleting an unnecessary port
Select the port you want to delete on the [Ports] sheet, and then click [Delete Port].
㻠㻠㻞㻌㻛㻌㻣㻜㻡
[H-19] Checking the Printer on the Print Server
Check the printer using the following procedure.
Display [Windows Explorer].
Windows XP, Server 2003, Vista, and Server 2008
)URPWKH>6WDUW@PHQXVHOHFW>$OO3URJUDPV@ĺ>$FFHVVRULHV@ĺ
[Windows Explorer].
Select the print server from [My Network Places] (from [Network] for Windows Vista and
Server 2008).
Check if the icon for this printer is displayed.
㻠㻠㻟㻌㻛㻌㻣㻜㻡
[H-20] A Message Appears in the Printer Status Window
This section describes solutions for when a message appears in the Printer Status Window.
The message type varies depending on the icon.
It is a pause message
(the state where the
printer pauses for
checking).
It is an error
message (a printer
error for which
printer problems
need to be
corrected).
It is a warning
message (an error
which disables
communication with
the printer).
It is an abnormality
message (a service
call).
Abnormality message
Error message(continued)
Service Error
Paper Jam inside Printer
Scanner Error
Calibration Error
Fixing Unit Error
Insufficient Disk Space
No Toner Cartridge
Warning message
Toner Cartridges Not Set in
Correct Positions
Incompatible Printer
Cannot Communicate with
Server
Packing Materials on Toner
Cartridges
Communication Error
Network Board Error
Toner Cartridge Replacement
Required
Cannot Communicate with
Printer
Check the Toner Cartridges
Output Tray Is Full
Incorrect Port
Updating Firmware
Printer Not Ready
Error message
Out-of-Register Colors
Correction Error
Insufficient Memory
Cannot Print
Specified Paper Different from
Set Paper
Out of Paper
Could Not Print
Check the Printed Output
Pause message
㻠㻠㻠㻌㻛㻌㻣㻜㻡
Cover Open
Check the Paper
Service Error
Cause
Solution
The printer is in an abnormal condition.
Turn the printer off, wait for a while, and then turn it on again. If the service error appears
even after cycling the power of the printer, turn the printer off, and then contact your local
authorized Canon dealer. When contacting your Canon dealer, please report the displayed
error code and problems.
Scanner Error
Cause
Solution
The scanner is in an abnormal condition.
Turn the printer off, wait for a while, and then turn it on again. If the scanner error appears
even after cycling the power of the printer, turn the printer off, and then contact your local
authorized Canon dealer.
Fixing Unit Error
Cause
Solution
The fixing unit is in an abnormal condition.
Turn the printer off, unplug the power plug from the AC power outlet, and then contact
your local authorized Canon dealer.
Incompatible Printer
Cause
Solution
The connected printer cannot be used.
Connect to the supported printer.
Cannot Communicate with Server
Cause
Solution
The client computer cannot communicate with the print server.
Check the status of the print server and your computer.
Communication Error
Cause
The USB cable is not connected, or the printer is not turned on.
Solution 1 Connect the USB cable.
Solution 2 Turn the printer on.
Network Board Error
Cause
The LAN cable is not connected, or the printer is not turned on.
Solution 1 Connect the LAN cable.
Solution 2 Turn the printer on.
Cannot Communicate with Printer
Cause 1
Because the bi-directional communication function is not enabled, the computer cannot
㻠㻠㻡㻌㻛㻌㻣㻜㻡
communicate with the printer.
Solution
Enable bi-directional communication and restart the computer and printer.
Checking Bi-directional Communication
Cause 2
The computer cannot communicate with the printer redirected in the terminal connection
environment.
Solution
The Firewall settings etc. may be the cause.
Check the communication settings for the server, clients, etc.
Incorrect Port
Cause
Solution
The printer is connected to a port which the printer does not support.
Check the port.
Checking the USB Port
Checking Standard TCP/IP Port
Out-of-Register Colors Correction Error
Cause
The printer could not properly adjust the print start position of each toner cartridge.
Solution 1 Cancel the job, and then correct "Out-of-Register Colors" again.
Correcting "Out-of-Register Colors"
Solution 2 Clicking [
] (Resolve Error) continues printing (only when [
enabled).
However, a phenomenon of "Out-of-Register Colors" may occur.
] (Resolve Error) is
Cannot Print
Cause
Solution
Printing cannot be performed due to security restrictions.
Contact your administrator.
Could Not Print
Cause
Data transfer to the printer timed out, or a transfer error has occurred.
Solution 1 Clicking [
] (Resolve Error) continues printing (only when [
enabled).
However, the error message may appear again.
] (Resolve Error) is
Solution 2 Click [Cancel Job], and then print again.
Check the Printed Output
Cause
You may not be able to obtain appropriate printout results.
Solution 1 Clicking [
] (Resolve Error) continues printing (only when [
enabled). However, the error message may appear again.
Solution 2 Click [Cancel Job], and then print again.
Cover Open
Cause
A cover is open.
㻠㻠㻢㻌㻛㻌㻣㻜㻡
] (Resolve Error) is
Solution
Close the displayed cover.
Paper Jam inside Printer
Cause 1
A paper jam has occurred.
Solution
Remove the jammed paper according to the displayed message.
Clearing Paper Jams (Drawer Area)
Clearing Paper Jams (Multi-purpose Tray Area)
Clearing Paper Jams (Output Area)
Cause 2
Because the paper drawer was not inserted, you could not print from the multi-purpose
tray.
Solution
Insert the paper drawer, and then push it into the printer firmly.
To resume printing, open and close the rear cover once.
Calibration Error
Cause
Calibration could not be finished properly.
Solution 1 Cancel the job, and then perform calibration again.
Calibrating the Printer
Solution 2 Clicking [
] (Resolve Error) continues printing (only when [
enabled).
However, data may not be printed in correct color.
] (Resolve Error) is
Insufficient Disk Space
Cause
Solution
The disk space on the computer or server is insufficient.
Delete unnecessary files.
Click [
] (Resolve Error) to resume printing after deleting the unnecessary files (only
] (Resolve Error) is enabled).
when [
No Toner Cartridge
Cause
Solution
The toner cartridge of the indicated color is not installed.
Install the toner cartridge.
Replacing Toner Cartridges
Toner Cartridges Not Set in Correct Positions
Cause
Solution
The toner cartridges are not installed in the correct positions.
Install the toner cartridges in the correct positions.
Replacing Toner Cartridges
Packing Materials on Toner Cartridges
Cause
Solution
The sealing tape is attached to the toner cartridge of the indicated color.
Remove the sealing tape.
Replacing Toner Cartridges
㻠㻠㻣㻌㻛㻌㻣㻜㻡
Toner Cartridge Replacement Required
Cause
Solution
The toner cartridge of the indicated color has reached the end of its life.
Replace the toner cartridge with a new one.
Replacing Toner Cartridges
Check the Toner Cartridges
Cause 1
Any of the toner cartridges are not installed properly.
Solution 1 Install the toner cartridge again.
Replacing Toner Cartridges
Solution 2 Cycle the power of the printer.
Turning the Printer On/Off
Cause 2
Any of the toner cartridges are damaged.
Solution
Replace the toner cartridge with a new one.
Replacing Toner Cartridges
Cause 3
Toner cartridges with print quality that cannot be guaranteed due to their decreasing
lifetime etc., or used toner cartridges that have reached their lifetime, may have been
inserted.
Solution
Continuing to use these cartridges may cause a malfunction, so replacing these cartridges
with new cartridges is recommended.
Replacing Toner Cartridges
Output Tray Is Full
Cause
Solution
The output tray is filled with printed paper.
Remove the paper from the output tray.
Updating Firmware
Cause
Solution
The firmware is being updated.
Please wait a moment.
Printer Not Ready
Cause
Solution
The packing material (sheet) is left in the output area.
Turn off the printer once, remove the sheet, and then turn on the printer again.
Carrying the Printer to the Installation Site and Removing the Packing Materials
Insufficient Memory
Cause
Solution
The memory on the computer or server is insufficient.
Exit unnecessary applications.
Out of Paper
㻠㻠㻤㻌㻛㻌㻣㻜㻡
Cause
The paper to be printed is not loaded in a paper source.
Solution 1 Load the indicated paper in the paper source.
Solution 2 If the indicated paper is loaded in the paper source, register the paper size again.
Registering the Paper Size for the Paper Drawer
Solution 3 Clicking [
] (Resolve Error) allows the printer to print on the currently loaded paper
] (Resolve Error) is enabled).
(only when [
If no paper is loaded in the paper drawer, however, paper may be fed from the multipurpose tray.
Specified Paper Different from Set Paper
Cause
Paper of the size different from that of the job was printed.
Solution 1 Load the indicated paper in the paper source.
Solution 2
If the indicated paper is loaded in the paper source, register the paper size again.
Registering the Paper Size for the Paper Drawer
Solution 3 Clicking [
(only when [
] (Resolve Error) allows the printer to print on the currently loaded paper
] (Resolve Error) is enabled).
Check the Paper
Cause
Printing is stopped to check if the paper loaded in the multi-purpose tray is appropriate.
Solution 1 If appropriate paper is loaded, click [
Error) is enabled).
] (Resolve Error) (only when [
Solution 2 Load appropriate paper.
㻠㻠㻥㻌㻛㻌㻣㻜㻡
] (Resolve
[H-21] Registering the Paper Size for the Paper Drawer
This printer's paper drawer cannot automatically detect the paper size. Therefore, you need to register the size of the
loaded paper.
Register the paper size using the following procedure.
Display the Printer Status Window.
Click [
] in the Windows task tray, and then select the printer name.
NOTE
When displaying the Printer Status Window from the printer driver
Click [
] (Display Printer Status Window) in locations such as in the [Page Setup] sheet.
)URPWKH>2SWLRQV@PHQXVHOHFW>'HYLFH6HWWLQJV@ĺ>'UDZHU6HWWLQJV@
NOTE
When registering a paper size
As you cannot register a paper size while printing is in progress, make sure that the printer is idle
before registering the paper size.
However, you can register a paper size while one of the following messages is displayed.
<Specified Paper Different from Set Paper>
<Out of Paper>
Register the paper size.
(1) Select the size of the paper loaded in the paper drawer.
• Drawer 1: The paper drawer supplied with the printer unit
• Drawer 2: The paper drawer of the optional paper feeder
㻠㻡㻜㻌㻛㻌㻣㻜㻡
(2) Click [OK].
㻠㻡㻝㻌㻛㻌㻣㻜㻡
[H-22] The Printer Cannot Be Connected to the Network
<Question 1> Is the LAN cable connected properly?
The cable is connected
properly.
The cable is not
connected properly.
Connect the cable properly.
<<Previous question
<Question 2> Check the indicators on the network board.
The LNK or 100
indicator is on.
All the indicators are
㻠㻡㻞㻌㻛㻌㻣㻜㻡
off.
All the Indicators on the Network Board Are Off
The ERR indicator is
on.
The ERR Indicator on the Network Board Is On
The ERR indicator
blinks at an interval of
four times.
The ERR Indicator on the Network Board Blinks at an Interval of Four Times
The ERR indicator is
constantly blinking.
The ERR Indicator on the Network Board Is Constantly Blinking
<<Previous question
<Question 3> Can you print a test page?
Printing a Test Page in Windows
Printable
Printing can be performed from the printer driver. Check the printing preferences in the
application.
Not printable
<<Previous question
<Question 4> Is the IP address set properly?
㻠㻡㻟㻌㻛㻌㻣㻜㻡
Checking the IP Address
The IP address is set
properly.
The IP address is not
set properly.
Set the IP address properly.
Setting the IP Address
<<Previous question
<Question 5> Is the port to be used selected correctly?
Checking Standard TCP/IP Port
The port is selected
correctly.
The port is not
selected correctly.
Select the correct port.
The port to be used
cannot be found.
Create the port.
Specifying Standard TCP/IP Port
You changed the IP
address.
Create the port.
Specifying Standard TCP/IP Port
㻠㻡㻠㻌㻛㻌㻣㻜㻡
You are using a port
created by "Manual
Setup" on Windows
Vista or Server 2008.
Install the printer driver again.
Auto Setup (Recommended Method)
<<Previous question
<Question 6> Is there any problem with the computer that is trying to print a document?
Check the following points.
The printer is specified as the default printer.
The TCP/IP protocol is running.
The users who can print are not restricted.
Restricting the Users Who Can Print with IP Addresses
Nevertheless, if printing does not work, proceed to <Question 7>.
Not printable
<<Previous question
<Question 7> Is the unicast communication mode specified?
Checking and Specifying the Unicast Communication Mode
The normal mode (the
broadcast
㻠㻡㻡㻌㻛㻌㻣㻜㻡
communication mode)
is specified.
The unicast
communication mode
is specified.
Reset it to the normal mode or contact your network administrator.
Checking and Specifying the Unicast Communication Mode
<<Previous question
<Question 8> Try the following points.
Connect the printer and computer with a cross cable.
Nevertheless, if printing does not work, proceed to <Question 9>.
Not printable
<<Previous question
<Question 9> Install the printer driver again.
Uninstalling the Printer Driver Using [Canon LBP7210C Uninstaller]
Auto Setup (Recommended Method)
Manual Setup (Windows XP/Server 2003 Only)
Nevertheless, if printing does not work, proceed to <Question 10>.
Not printable
<<Previous question
<Question 10> Can you print from another computer connected to the printer with a LAN cable?
㻠㻡㻢㻌㻛㻌㻣㻜㻡
Try the following point.
Printable
Not printable
Disable resident software including security software.
Contact your local authorized Canon dealer.
㻠㻡㻣㻌㻛㻌㻣㻜㻡
[H-23] Paper Curls or Creases
If printed paper curls or creases, implement the following solutions.
Paper Curls
Paper Creases
Paper Curls
Cause 1
Paper is damp due to being stored under unsuitable conditions.
Solution
Replace the paper with new paper in an unopened package.
Storing Paper or Printouts
Cause 2
Appropriate paper is not being used.
Solution
Replace the paper with that which can be used with this printer.
Usable Paper and Unusable Paper
Cause 3
Depending on the paper type or the operating environment, the paper may curl as either of
the following.
Side View
Front View
Solution 1 Perform the following procedure in the printer driver.
1. Display the [Paper Source] sheet.
2. Set [Paper Type] as follows.
Current Setting Changed Setting
[Plain Paper L]
[Plain Paper L2]
[Plain Paper]
[Plain Paper L]
㻠㻡㻤㻌㻛㻌㻣㻜㻡
[Heavy Paper 1]
[Plain Paper]
[Heavy Paper 2]
[Heavy Paper 1]
[Heavy Paper 3]
[Heavy Paper 2]
[Envelope H]
[Envelope]
[Coated Paper 2]
[Coated Paper 1]
[Coated Paper 3]
[Coated Paper 2]
[Coated Paper 4]
[Coated Paper 3]
If you perform the above procedure, the toner does not fix onto paper well, and
the print may come out faint.
Solution 2 Perform the following procedure in the printer driver.
1. Display the [Finishing] sheet.
2. Click [Advanced Settings].
3. Set [Special Print Mode] to [Special Settings 5].
Normally, use the printer with [Special Print Mode] set to [Off]. Specify [Special Settings
5] only if the described problems occur.
IMPORTANT
When [Special Settings 5] is selected
The printing speed drops.
Cause 4
Depending on the paper type or the operating environment, the paper may curl as either of
the following.
Side View
Front View
Solution 1 Perform the following procedure in the printer driver.
1. Display the [Paper Source] sheet.
2. Set [Paper Type] as follows.
Current Setting Changed Setting
[Plain Paper L2]
[Plain Paper L]
[Plain Paper L]
[Plain Paper]
[Plain Paper]
[Heavy Paper 1]
[Heavy Paper 1]
[Heavy Paper 2]
[Heavy Paper 2]
[Heavy Paper 3]
[Envelope]
[Envelope H]
[Coated Paper 1]
[Coated Paper 2]
㻠㻡㻥㻌㻛㻌㻣㻜㻡
[Coated Paper 2]
[Coated Paper 3]
[Coated Paper 3]
[Coated Paper 4]
If you perform the above procedure, residual images may appear on non-printed
areas.
Solution 2 Perform the following procedure in the printer driver.
1. Display the [Finishing] sheet.
2. Click [Advanced Settings].
3. Set [Special Print Mode] to [Special Settings 6].
Normally, use the printer with [Special Print Mode] set to [Off]. Specify [Special Settings
6] only if the described problems occur.
Paper Creases
Cause 1
Paper is not loaded properly in the paper drawer or multi-purpose tray.
Solution
Load the paper properly in the paper drawer or multi-purpose tray.
Loading Standard Size Paper (Other Than Index Cards and Envelopes)
Loading Index Cards
Loading Envelopes
Loading Custom Size Paper (Non-Standard Size Paper)
Cause 2
Paper is damp due to being stored under unsuitable conditions.
Solution
Replace the paper with new paper in an unopened package.
Storing Paper or Printouts
Cause 3
Appropriate paper is not being used.
Solution
Replace the paper with that which can be used with this printer.
Usable Paper and Unusable Paper
Cause 4
There is a foreign object inside the printer.
Solution
Remove the foreign object inside the printer.
Cause 5
Depending on the paper type or the operating environment (high humidity or high
temperature environment), the paper may crease.
Solution 1 Perform the following procedure in the printer driver.
1. Display the [Paper Source] sheet.
2. Set [Paper Type] as follows.
Current Setting Changed Setting
[Plain Paper L]
[Plain Paper L2]
[Plain Paper]
[Plain Paper L]
[Heavy Paper 1]
[Plain Paper]
[Heavy Paper 2]
[Heavy Paper 1]
[Heavy Paper 3]
[Heavy Paper 2]
[Envelope H]
[Envelope]
[Coated Paper 2]
[Coated Paper 1]
㻠㻢㻜㻌㻛㻌㻣㻜㻡
[Coated Paper 3]
[Coated Paper 2]
[Coated Paper 4]
[Coated Paper 3]
If you perform the above procedure, the toner does not fix onto paper well, and
the print may come out faint.
Solution 2 Perform the following procedure in the printer driver.
1. Display the [Finishing] sheet.
2. Click [Advanced Settings].
3. Set [Special Print Mode] to [Special Settings 5].
Normally, use the printer with [Special Print Mode] set to [Off]. Specify [Special Settings
5] only if the described problems occur.
IMPORTANT
When [Special Settings 5] is selected
The printing speed drops.
㻠㻢㻝㻌㻛㻌㻣㻜㻡
[H-24] Poor Print Quality
NOTE
About the color adjustment or image quality correction which this printer can perform
See "Adjusting the Color or Image Quality".
Contacting your local authorized Canon dealer
If a problem that is not indicated in the e-Manual occurs, if none of the suggested measures solve
the problem, or if you cannot determine the problem, contact your local authorized Canon dealer.
When using the printer in a certain environment
If you use the printer in a certain environment or print certain paper, the data may not be printed
properly or result in deterioration in print quality.
To solve such problems, a service engineer may specify the print settings according to the
operating environment or the paper.
The settings specified by the service engineer are registered in [Service Settings] in [Special Print
Mode] in the printer driver.
If you want to use [Service Settings], print with [Service Settings] specified, following the
instructions of the service engineer.
㻠㻢㻞㻌㻛㻌㻣㻜㻡
[H-25] Streaks (lines) Appear
If streaks (lines) appear on printout results, perform the following solutions.
Thin Lateral Streaks (lines) Appear
Thin Longitudinal Streaks (lines) Appear
White Streaks (lines) Appear
Thin Lateral Streaks (lines) Appear
Cause
Solution
If the printer has not printed for an extended period of time, thin lateral streaks may appear
in halftone areas of the printed paper.
Perform the following procedure in the printer driver.
1. Display the [Finishing] sheet.
2. Click [Advanced Settings].
3. Set [Special Print Mode] to [Special Settings 14].
Normally, use the printer with [Special Print Mode] set to [Off]. Specify [Special Settings
14] only if the described problems occur.
Thin Longitudinal Streaks (lines) Appear
Cause
Solution
When printing images, thin longitudinal streaks may appear on the printed images.
Perform the following procedure in the printer driver.
1. Display the [Finishing] sheet.
2. Click [Advanced Settings].
3. Set [Special Print Mode] to [Special Settings 9].
Normally, use the printer with [Special Print Mode] set to [Off]. Specify [Special Settings
9] only if the described problems occur.
㻠㻢㻟㻌㻛㻌㻣㻜㻡
White Streaks (lines) Appear
Cause
Solution
The drum in any of the toner cartridges has deteriorated.
Replace the toner cartridge with a new one.
㻠㻢㻠㻌㻛㻌㻣㻜㻡
[H-26] Unevenness, Smudge Marks, etc. Appear
If unevenness, smudge marks, etc. appear on printout results, perform the following solutions.
Printed Pages Have White Specks
Residual Images Appear on Non-printed Areas
Printing Is Uneven
Colors Are Uneven or Not Printed Smoothly
The Toner Does Not Fix onto the Paper Well
The Printed Paper Has Smudge Marks
㻠㻢㻡㻌㻛㻌㻣㻜㻡
The Back of the Printed Paper Has Smudge Marks
Poor Print Quality Including Spotty or Scaly Print Occurs
Smudge Marks of Spattering Toner Appear around the Text or Patterns
Toner Was Placed on Non-printed Areas
The Overall Print Result Is Dark
Printed Pages Have White Specks
Cause 1
Appropriate paper is not being used.
㻠㻢㻢㻌㻛㻌㻣㻜㻡
Solution
Replace with paper that meets printing specifications.
"Usable Paper and Unusable Paper"
Cause 2
The paper is moist.
Solution
Replace the paper with new paper in an unopened package.
"Loading Standard Size Paper (Other Than Index Cards and Envelopes)"
"Loading Index Cards"
"Loading Envelopes"
"Loading Custom Size Paper (Non-Standard Size Paper)"
Cause 3
The drum in any of the toner cartridges has deteriorated.
Solution
Replace the toner cartridge with a new one.
"Replacing Toner Cartridges"
Residual Images Appear on Non-printed Areas
Cause 1
Appropriate paper is not being used.
Solution
Replace with paper that meets printing specifications.
"Usable Paper and Unusable Paper"
Cause 2
Depending on the printing pattern or paper type, images on the second previous page may
be printed faintly on continuous printing.
Solution 1 Perform the following procedure in the printer driver.
1. Display the [Finishing] sheet.
2. Click [Advanced Settings].
3. Set [Special Print Mode] to [Special Settings 12].
Normally, use the printer with [Special Print Mode] set to [Off]. Specify [Special Settings
12] only if the described problems occur.
Solution 2 If Solution 1 does not solve the problem, perform the following procedure in the printer
driver.
1. Display the [Finishing] sheet.
2. Click [Advanced Settings].
3. Set [Special Print Mode] to [Special Settings 13].
Normally, use the printer with [Special Print Mode] set to [Off]. Specify [Special Settings
13] only if the described problems occur.
Cause 3
Residual images appear depending on the printer status.
Solution
Perform the following procedure in the printer driver.
1. Display the [Finishing] sheet.
2. Click [Advanced Settings].
3. Set [Special Print Mode] to [Special Settings 4].
Normally, use the printer with [Special Print Mode] set to [Off]. Specify [Special Settings
4] only if the described problems occur.
IMPORTANT
Precautions when specifying [Special Settings 4]
Toner fixation may deteriorate. In this case, do not specify
[Special Settings 4].
㻠㻢㻣㻌㻛㻌㻣㻜㻡
Cause 4
The drum in any of the toner cartridges has deteriorated.
Solution
Replace the toner cartridge with a new one.
"Replacing Toner Cartridges"
Cause 5
Depending on the paper type or the operating environment (high humidity or high
temperature environment), residual images may appear on non-printed areas.
Solution 1 Perform the following procedure in the printer driver.
1. Display the [Paper Source] sheet.
2. Set [Paper Type] as follows.
Current Setting Changed Setting
[Plain Paper L]
[Plain Paper L2]
[Plain Paper]
[Plain Paper L]
[Heavy Paper 1]
[Plain Paper]
[Heavy Paper 2]
[Heavy Paper 1]
[Heavy Paper 3]
[Heavy Paper 2]
[Envelope H]
[Envelope]
[Coated Paper 2]
[Coated Paper 1]
[Coated Paper 3]
[Coated Paper 2]
[Coated Paper 4]
[Coated Paper 3]
If you perform the above procedure, the toner does not fix onto paper well, and
the print may come out faint.
Solution 2 Perform the following procedure in the printer driver.
1. Display the [Finishing] sheet.
2. Click [Advanced Settings].
3. Set [Special Print Mode] to [Special Settings 5].
Normally, use the printer with [Special Print Mode] set to [Off]. Specify [Special Settings
5] only if the described problems occur.
IMPORTANT
When [Special Settings 5] is selected
The printing speed drops.
Printing Is Uneven
Cause 1
Paper is too moist or too dry.
Solution
Replace the paper with new paper in an unopened package.
"Loading Standard Size Paper (Other Than Index Cards and Envelopes)"
"Loading Index Cards"
"Loading Envelopes"
㻠㻢㻤㻌㻛㻌㻣㻜㻡
"Loading Custom Size Paper (Non-Standard Size Paper)"
Cause 2
The toner cartridge has run out of toner, has deteriorated, or is damaged.
Solution
Check the status of the toner cartridges.
Replace the toner cartridge that is almost empty with a new one.
"Checking the Printer Status Using the Printer Status Window"
"Replacing Toner Cartridges"
Cause 3
The drum in any of the toner cartridges has deteriorated.
Solution
Replace the toner cartridge with a new one.
"Replacing Toner Cartridges"
Colors Are Uneven or Not Printed Smoothly
Cause
Solution
Large characters, wide lines, or diagrams with high color density were printed.
Perform the following procedure in the printer driver.
1. Display the [Finishing] sheet.
2. Click [Advanced Settings].
3. Select the appropriate mode for [Special Smoothing Mode].
Normally, select [Mode 1] for [Special Smoothing Mode].
If the following conditions occur when [Mode 1] is selected, select any setting between
[Mode 2] and [Mode 6].
If gradations cannot be printed smoothly
Select [Mode 2].
If the following problems occur at the same time
Gradations cannot be printed smoothly.
The areas around large characters or thick lines (especially those with low
color density) are not printed smoothly.
Select [Mode 3].
If the areas around large characters or thick lines (especially those with
low color density) are not printed smoothly
Select [Mode 4].
If strip-shaped unevenness appears on gradations
㻠㻢㻥㻌㻛㻌㻣㻜㻡
Select [Mode 5].
If shaded patterns deviate (incorrect shaded patterns occur)
Select [Mode 6].
IMPORTANT
Precautions when specifying [Special Smoothing Mode]
When [Mode 2] or [Mode 3] is selected, areas
around diagrams may not be printed smoothly.
When [Mode 3] or [Mode 4] is selected, color
unevenness may appear on large characters and
thick lines.
When [Mode 5] is selected, characters, lines, and
areas around diagrams may not be printed
smoothly.
When [Mode 6] is selected, color unevenness
may appear on characters, lines, diagrams, and
images (photographs etc.).
The Toner Does Not Fix onto the Paper Well
Cause 1
Appropriate paper is not being used.
Solution
Replace with paper that meets printing specifications.
"Usable Paper and Unusable Paper"
Cause 2
Depending on the paper type or the operating environment (low humidity or low
temperature environment), the toner may not fix onto paper well, and the printing may
appear faded.
Solution 1 Perform the following procedure in the printer driver.
1. Display the [Paper Source] sheet.
2. Set [Paper Type] to [Heavy Paper 1], [Heavy Paper 2], or [Heavy Paper 3].
Solution 2 Perform the following procedure in the printer driver.
1. Display the [Finishing] sheet.
2. Click [Advanced Settings].
3. Set [Special Print Mode] to [Special Settings 3].
Normally, use the printer with [Special Print Mode] set to [Off]. Specify [Special Settings
3] only if the described problems occur.
㻠㻣㻜㻌㻛㻌㻣㻜㻡
IMPORTANT
When using thin paper
Do not specify [Special Settings 3]. This may result in paper
wound around the fixing unit or other problems.
Solution 3 Perform the following procedure in the printer driver.
1. Display the [Paper Source] sheet.
2. Set [Paper Type] as follows.
Current Setting Changed Setting
[Plain Paper L2]
[Plain Paper L]
[Plain Paper L]
[Plain Paper]
[Plain Paper]
[Heavy Paper 1]
[Heavy Paper 1]
[Heavy Paper 2]
[Heavy Paper 2]
[Heavy Paper 3]
[Envelope]
[Envelope H]
[Coated Paper 1]
[Coated Paper 2]
[Coated Paper 2]
[Coated Paper 3]
[Coated Paper 3]
[Coated Paper 4]
If you perform the above procedure, residual images may appear on non-printed
areas.
Solution 4 Perform the following procedure in the printer driver.
1. Display the [Finishing] sheet.
2. Click [Advanced Settings].
3. Set [Special Print Mode] to [Special Settings 6].
Normally, use the printer with [Special Print Mode] set to [Off]. Specify [Special Settings
6] only if the described problems occur.
Cause 3
A problem has occurred inside the printer.
Solution
(Alarm) indicator is on, perform the solution using the procedure in "The
When the
Alarm Indicator Is On".
The Printed Paper Has Smudge Marks
Cause
Solution
The fixing roller inside the printer is dirty.
Clean the fixing roller.
"Cleaning the Inside of the Printer"
IMPORTANT
Cleaning the fixing roller
㻠㻣㻝㻌㻛㻌㻣㻜㻡
The cleaning process takes approximately 80
seconds to complete.
The cleaning process cannot be canceled.
The Back of the Printed Paper Has Smudge Marks
Cause
The size of the print data was larger than that of the loaded paper.
Solution
Check if the size of the print data matches that of the loaded paper.
Poor Print Quality Including Spotty or Scaly Print Occurs
Cause
Solution
Images of blue color system were printed.
Perform the following procedure in the printer driver.
1. Display the [Finishing] sheet.
2. Click [Advanced Settings].
3. Set [Special Print Mode] to [Special Settings 11].
Normally, use the printer with [Special Print Mode] set to [Off]. Specify [Special Settings
11] only if the described problems occur.
Smudge Marks of Spattering Toner Appear around the Text or Patterns
Cause 1
Appropriate paper is not being used.
Solution
Replace with paper that meets printing specifications.
"Usable Paper and Unusable Paper"
Cause 2
Depending on the paper type or the operating environment, smudge marks of spattering
toner may appear.
Solution
Perform the following procedure in the printer driver.
1. Display the [Finishing] sheet.
2. Click [Advanced Settings].
3. Set [Special Print Mode] to [Special Settings 7].
Normally, use the printer with [Special Print Mode] set to [Off]. Specify [Special Settings
7] only if the described problems occur.
Toner Was Placed on Non-printed Areas
Cause
Solution
When printing on glossy paper, toner may be placed on the non-printed areas.
Perform the following procedure in the printer driver.
1. Display the [Finishing] sheet.
2. Click [Advanced Settings].
3. Set [Special Print Mode] to [Special Settings 8].
Normally, use the printer with [Special Print Mode] set to [Off]. Specify [Special Settings
8] only if the described problems occur.
The Overall Print Result Is Dark
Cause 1
The setting for [Toner Density] is not appropriate.
㻠㻣㻞㻌㻛㻌㻣㻜㻡
Solution
Adjust [Toner Density] in the printer driver to a lighter setting.
"Adjusting the Toner Density"
Cause 2
The printer is exposed to direct sunlight or strong light.
Solution
Move the printer to a place where it will not be exposed to direct sunlight or strong light.
If the printer is exposed to a strong light source, move the printer away from the light
source.
㻠㻣㻟㻌㻛㻌㻣㻜㻡
[H-27] Printing Is Faint, Is Faded, Has a Problem with Color, etc.
If printout is faint, faded, has a problem with color, etc., perform the following solutions.
The Overall Print Result Is Faint
The Toner Does Not Fix onto the Paper Well
Thin Lines Are Faded or Halftone Images Are Faint
Colored Lines and Text Appear Faded
Colored Text Appears Blurred
Data Is Not Printed in the Correct Color (Specified Color), or Colored Text Appears
Blurred Due to "Out-of-Register Colors"
㻠㻣㻠㻌㻛㻌㻣㻜㻡
Thin Lines or Fill Patterns Are Not Printed with the Specified Colors or Do Not
Appear At All
Shaded Patterns Are Not Printed in the Correct Color (Specified Color)
Photographs etc. Are Printed in Different Colors from Those Displayed on the
Monitor
Fill Patterns and Borders Are Not Printed in the Correct Color (Specified Color)
Even When the Same Color Is Specified for Them
The Overall Print Result Is Faint
Cause 1
The setting for [Toner Density] is not appropriate.
Solution
Adjust [Toner Density] in the printer driver to a darker setting.
"Adjusting the Toner Density"
Cause 2
[Toner Save] is enabled.
Solution
Perform the following procedure in the printer driver.
1. Display the [Quality] sheet.
2. Click [Settings].
3. Clear the [Toner Save] check box.
㻠㻣㻡㻌㻛㻌㻣㻜㻡
The Toner Does Not Fix onto the Paper Well
Cause 1
Appropriate paper is not being used.
Solution
Replace with paper that meets printing specifications.
"Usable Paper and Unusable Paper"
Cause 2
Depending on the paper type or the operating environment (low humidity or low
temperature environment), the toner may not fix onto paper well, and the printing may
appear faded.
Solution 1 Perform the following procedure in the printer driver.
1. Display the [Paper Source] sheet.
2. Set [Paper Type] to [Heavy Paper 1], [Heavy Paper 2], or [Heavy Paper 3].
Solution 2 Perform the following procedure in the printer driver.
1. Display the [Finishing] sheet.
2. Click [Advanced Settings].
3. Set [Special Print Mode] to [Special Settings 3].
Normally, use the printer with [Special Print Mode] set to [Off]. Specify [Special Settings
3] only if the described problems occur.
IMPORTANT
When using thin paper
Do not specify [Special Settings 3]. This may result in paper
wound around the fixing unit or other problems.
Solution 3 Perform the following procedure in the printer driver.
1. Display the [Paper Source] sheet.
2. Set [Paper Type] as follows.
Current Setting Changed Setting
[Plain Paper L2]
[Plain Paper L]
[Plain Paper L]
[Plain Paper]
[Plain Paper]
[Heavy Paper 1]
[Heavy Paper 1]
[Heavy Paper 2]
[Heavy Paper 2]
[Heavy Paper 3]
[Envelope]
[Envelope H]
[Coated Paper 1]
[Coated Paper 2]
[Coated Paper 2]
[Coated Paper 3]
[Coated Paper 3]
[Coated Paper 4]
If you perform the above procedure, residual images may appear on non-printed
areas.
㻠㻣㻢㻌㻛㻌㻣㻜㻡
Solution 4 Perform the following procedure in the printer driver.
1. Display the [Finishing] sheet.
2. Click [Advanced Settings].
3. Set [Special Print Mode] to [Special Settings 6].
Normally, use the printer with [Special Print Mode] set to [Off]. Specify [Special Settings
6] only if the described problems occur.
Cause 3
A problem has occurred inside the printer.
Solution
(Alarm) indicator is on, perform the solution using the procedure in "The
When the
Alarm Indicator Is On".
Thin Lines Are Faded or Halftone Images Are Faint
Cause 1
Appropriate paper is not being used.
Solution
Replace with paper that meets printing specifications.
"Usable Paper and Unusable Paper"
Cause 2
Depending on the paper type or the operating environment (especially in a high-humidity
environment), thin lines may be faded or halftone areas may be faint.
Solution
Perform the following procedure in the printer driver.
1. Display the [Finishing] sheet.
2. Click [Advanced Settings].
3. Set [Special Print Mode] to [Special Settings 2].
Normally, use the printer with [Special Print Mode] set to [Off]. Specify [Special Settings
2] only if the described problems occur.
Colored Lines and Text Appear Faded
Cause
Solution
Thin lines or text are being used.
Perform the following procedure in the printer driver.
1. Display the [Quality] sheet.
2. Click [Settings].
3. Select the [Prioritize Printing of Colored Lines and Text] check box.
Colored Text Appears Blurred
Cause
Solution
A bold font is being used for the colored text.
Perform the following procedure in the printer driver.
1.
2.
3.
4.
5.
Display the [Quality] sheet.
Select the [Manual Color Settings] check box.
Click [Color Settings].
Display the [Matching] sheet.
Set [Matching Method] to [Perceptual [Monitor Color Matched]].
Data Is Not Printed in the Correct Color (Specified Color), or Colored Text Appears Blurred Due to
"Out-of-Register Colors"
Cause 1
Any of the toner cartridges are not installed properly.
㻠㻣㻣㻌㻛㻌㻣㻜㻡
Solution
Make sure that the toner cartridge is installed properly.
"Replacing Toner Cartridges"
Cause 2
Any of the four color toner cartridges is almost out of toner, or the drum in any of the toner
cartridges has deteriorated.
Solution 1 Correct the "Out-of-Register Colors" on the Printer Status Window.
"Correcting 'Out-of-Register Colors'"
Solution 2 Check the status of the toner cartridges.
Replace the toner cartridge that is almost empty with a new one.
"Checking the Printer Status Using the Printer Status Window"
"Replacing Toner Cartridges"
Cause 3
Appropriate paper is not being used.
Solution
Replace with paper that meets printing specifications.
"Usable Paper and Unusable Paper"
Cause 4
Data was sent before completing calibration or when the printer was turned on.
Solution
Make sure that calibration is completed before sending data to the printer.
NOTE
Calibrating the printer after it is turned on
Use [Startup Settings] on the Printer Status Window to configure
this setting.
"Calibrating the Printer"
Thin Lines or Fill Patterns Are Not Printed with the Specified Colors or Do Not Appear At All
Cause 1
Some of the colors cannot be reproduced because of the combination of colors or patterns.
Solution 1 Adjust the colors in the application and print again.
See the instruction manual supplied with the application.
Solution 2 Change the patterns in the application and print again.
See the instruction manual supplied with the application.
Cause 2
The colors may appear different depending on the halftone pattern.
Solution 1 Readjust to a darker color and print again.
See the instruction manual supplied with the application.
Solution 2 Reload paper to change the feeding direction, then print again.
Shaded Patterns Are Not Printed in the Correct Color (Specified Color)
Cause
The shaded pattern of the print data and the dither pattern of the printer are interfering with
one another.
Solution 1 Print again without specifying a shaded pattern in the application.
See the instruction manual supplied with the application.
Solution 2 Perform the following procedure in the printer driver.
1. Display the [Quality] sheet.
2. Click [Settings].
3. Set [Color Halftones] or [B & W Halftones] to [Gradation] or [Color Tone].
㻠㻣㻤㻌㻛㻌㻣㻜㻡
Photographs etc. Are Printed in Different Colors from Those Displayed on the Monitor
Cause
The methods for adjusting the color on the screen (RGB) and in the printer (YMC) are
different. Therefore, the color on the screen may not be printed out exactly as it appears.
Solution 1 Perform the following procedure in the printer driver.
1.
2.
3.
4.
5.
Display the [Quality] sheet.
Select the [Manual Color Settings] check box.
Click [Color Settings].
Display the [Matching] sheet.
Set [Matching Method] to [Perceptual [Monitor Color Matched]].
Solution 2 Perform the following procedure in the printer driver.
1.
2.
3.
4.
5.
6.
Display the [Quality] sheet.
Select the [Manual Color Settings] check box.
Click [Color Settings].
Display the [Matching] sheet.
Select [Gamma Adjustment] from [Matching Mode].
Change the gamma value for [Gamma].
NOTE
About the gamma adjustment
The higher the gamma value, the darker the colors in the image
become when printed.
Fill Patterns and Borders Are Not Printed in the Correct Color (Specified Color) Even When the
Same Color Is Specified for Them
Cause
Solution
A special process may be applied depending on the line width of the border so that thin
lines are printed clearly.
Perform the following procedure in the printer driver.
1.
2.
3.
4.
5.
6.
Display the [Quality] sheet.
Select the [Manual Color Settings] check box.
Click [Color Settings].
Display the [Matching] sheet.
Select [Gamma Adjustment] from [Matching Mode].
Change the gamma value for [Gamma].
NOTE
About the gamma adjustment
The higher the gamma value, the darker the colors in the image
become when printed.
㻠㻣㻥㻌㻛㻌㻣㻜㻡
[H-28] Printout Is Skewed, Missing, or Has Unneeded Space
If printout is skewed, missing, has unneeded space, etc., perform the following solutions.
A Portion of the Page Is Not Printed
The Printing Position Is Skewed
The Printing Position Is Skewed Slightly Depending on the Color to Be Printed
The Next Page Is Printed from Halfway across the Previous Page
A Portion of the Page Is Not Printed
Cause 1
The scale factor is incorrect.
Solution 1 Perform the following procedure in the printer driver.
1. Display the [Page Setup] sheet.
2. Clear the [Manual Scaling] check box.
If the check box is cleared, the scale factor will be set according to [Page Size] and [Output
Size] automatically.
Solution 2 Perform the following procedure in the printer driver.
1. Display the [Page Setup] sheet.
2. Select the [Manual Scaling] check box, then specify an appropriate scale
factor according to the paper size to be used.
㻠㻤㻜㻌㻛㻌㻣㻜㻡
Cause 2
The position of the paper is incorrect.
Solution
Load the paper properly.
"Loading Standard Size Paper (Other Than Index Cards and Envelopes)"
"Loading Index Cards"
"Loading Envelopes"
"Loading Custom Size Paper (Non-Standard Size Paper)"
Cause 3
A document with no margins was printed.
Solution 1 Data is printed with a margin of 5 mm (10 mm for envelopes). Provide a margin around
the data.
IMPORTANT
When printing on Index Cards or envelopes
Printing data in the entire printable area may result in a
deterioration in print quality.
Adjust the data to a size slightly smaller than the printable area.
Solution 2 Perform the following procedure in the printer driver.
1. Display the [Finishing] sheet.
2. Click [Advanced Settings].
3. Set [Print with Upper Left of Sheet as Starting Point] to [On].
However, depending on the print data to be printed, the edge of paper may be missing
partly during printing or may blot during color printing.
The Printing Position Is Skewed
Cause 1
[Gutter] is specified.
Solution
Perform the following procedure in the printer driver.
1. Display the [Finishing] sheet.
2. Click [Gutter].
3. Set [Gutter] to "0".
Cause 2
"Top Margin" and "Paper Position" in the application are not specified properly.
Solution
Specify the settings for "Top Margin" and "Paper Position" in the application properly.
See the instruction manual supplied with the application.
The Printing Position Is Skewed Slightly Depending on the Color to Be Printed
Cause
Depending on the print image, a phenomenon of "Out-of-Register Colors" may be slightly
conspicuous due to the structure of laser printers.
Laser printers are manufactured with technology of high precision. A
phenomenon of "Out-of-Register Colors" may be slightly conspicuous
depending on the print image. Please note that this is due to the structure of
laser printers and is not a printer malfunction.
Solution 1 Correct the "Out-of-Register Colors" on the Printer Status Window.
"Correcting 'Out-of-Register Colors'"
Solution 2 Perform the following procedure in the printer driver.
㻠㻤㻝㻌㻛㻌㻣㻜㻡
1. Display the [Quality] sheet.
2. Click [Settings].
3. Set [Use Pure Black] to [Never].
The Next Page Is Printed from Halfway across the Previous Page
Cause
Solution
"Line Spacing" or "Lines/Page" in the application is not specified properly.
Specify the settings for "Line Spacing" or "Lines/Page" in the application so that the data
fits in one page, and then print again.
See the instruction manual supplied with the application.
㻠㻤㻞㻌㻛㻌㻣㻜㻡
[H-29] Data Is Printed Diagonally
If data is printed diagonally, perform the following solutions.
Data Is Printed Diagonally on Small Size Paper
Data Is Printed Diagonally on Small Size Paper
Cause 1
The position of the paper guides is not aligned with the paper.
Solution
Align the paper guides with the paper.
If the paper guides are too loose or too tight, this may result in misfeeds.
Cause 2
Data is printed from the multi-purpose tray.
Solution
Load paper in the paper drawer.
"Loading Envelopes"
"Loading Custom Size Paper (Non-Standard Size Paper)"
㻠㻤㻟㻌㻛㻌㻣㻜㻡
[H-30] Adjusting the Color or Image Quality
This printer allows you to perform the following adjustments and corrections.
Correcting Rough-Textured Images
Adjusting the Toner Density
Printing with Brightness and Contrast Adjusted
Adjusting the Color
Matching the Color on the Display
Calibrating the Printer
㻠㻤㻠㻌㻛㻌㻣㻜㻡
Correcting "Out-of-Register Colors"
㻠㻤㻡㻌㻛㻌㻣㻜㻡
[H-31] Paper Jams
When a paper jam occurs, the
Window.
(Paper Jam) indicator (orange) blinks, and a message appears in the Printer Status
Remove the jammed paper according to the displayed message.
Precautions When Removing Jammed Paper
Paper Jam Area
(1) Drawer area
Message
<Drawers>
(2) Multi-purpose tray area <Multi-purpose Tray>
(3) Output area
<Output area>
Clearance Procedure
Clearing Paper Jams (Drawer Area)
Clearing Paper Jams (Multi-purpose Tray
Area)
Clearing Paper Jams (Output Area)
NOTE
㻠㻤㻢㻌㻛㻌㻣㻜㻡
If the Printer Status Window is not displayed
"Printer Status Window"
㻠㻤㻣㻌㻛㻌㻣㻜㻡
[H-32] Precautions When Removing Jammed Paper
WARNING
Be careful not to allow jewelry or other metal objects to touch the inside of the printer.
There are some areas inside the printer which are subject to high voltages. If metal objects touch
the inside of the printer, this may result in a fire or electrical shock.
CAUTION
Precautions when removing jammed paper
Make sure that the fixing unit is completely cool before removing the jammed
paper. Touching the fixing unit when it is still hot may result in burns.
The output slot is hot during and immediately after printing. Do not touch the area
surrounding the output slot, as this may result in burns.
Printed paper may be hot immediately after being output. Be careful when
removing the paper and aligning the removed paper, as this may result in burns.
Be careful not to get any toner on your hands or clothing.
If toner gets on your hands or clothing, wash them immediately with cold water.
Washing with warm water sets the toner, making it impossible to remove the toner
stains.
When removing jammed paper, be careful not to allow the toner on the paper to
scatter.
If toner scatters and gets into your eyes or mouth, wash them immediately with
cold water and consult a physician.
When removing jammed paper, be careful not to cut your hands with the edges of
the paper.
Keep your hands and clothing away from the roller in the output area after
removing jammed paper.
The roller may suddenly rotate and catch your hands or clothing, resulting in
personal injury.
㻠㻤㻤㻌㻛㻌㻣㻜㻡
IMPORTANT
Precautions when operating the printer
Leave the printer on when removing the jammed paper. If the power is turned off,
the data being printed will be deleted.
Removing jammed paper with excess force may cause the paper to tear or damage
the inside of the printer.
Pull out the jammed paper in the direction indicated.
If the paper is torn, remove all remaining pieces of paper.
After the jammed paper is cleared, the next printed paper may have toner stains.
Do not touch the transfer roller (A), as this may result in deterioration in print
quality.
The area surrounding the output tray is hot during and immediately after printing.
Do not touch the area surrounding the output tray when removing paper or clearing
a paper jam.
㻠㻤㻥㻌㻛㻌㻣㻜㻡
[H-33] Clearing Paper Jams (Drawer Area)
Open the rear cover.
Open it completely.
Pull out the paper drawer.
If the paper feeder is installed, pull out the paper drawer of the paper feeder also.
Remove the jammed paper by pulling it gently in the direction of the arrow.
In case of the printer unit
㻠㻥㻜㻌㻛㻌㻣㻜㻡
In case of the paper feeder
Remove the jammed paper by pulling it gently in the direction of the arrow.
㻠㻥㻝㻌㻛㻌㻣㻜㻡
Close the duplex print transport guide.
(1) Hold the tabs (A) on both sides.
(2) Close the guide firmly until it clicks.
㻠㻥㻞㻌㻛㻌㻣㻜㻡
Remove the jammed paper by pulling it gently in the direction of the arrow.
(1) Pull out the top edge of the paper.
(2) Remove the paper by pulling it gently.
Insert the paper drawer into the printer.
Push it into the printer firmly.
㻠㻥㻟㻌㻛㻌㻣㻜㻡
If the paper feeder is installed, insert the paper drawer of the paper feeder also.
CAUTION
Precautions when inserting the paper drawer
Be careful not to catch your fingers.
Close the rear cover.
Close it securely.
ĺ The
(Paper Jam) indicator turns off, and the printer is ready to print.
IMPORTANT
㻠㻥㻠㻌㻛㻌㻣㻜㻡
If the
(Paper Jam) indicator does not turn off even after removing the paper
Paper may be jammed in another area. Check another area also and remove the paper.
Also, check if the paper drawer is inserted into the printer firmly.
㻠㻥㻡㻌㻛㻌㻣㻜㻡
[H-34] Clearing Paper Jams (Multi-purpose Tray Area)
Remove the jammed paper by pulling it gently in the direction of the arrow.
IMPORTANT
If the jammed paper cannot be removed easily
Do not try to remove it forcefully but proceed to Step 2.
Close the multi-purpose tray.
㻠㻥㻢㻌㻛㻌㻣㻜㻡
Pull out the paper drawer.
Lower the manual feed transport guide.
(1) Hold the tabs (A) on both sides.
(2) Push them down.
㻠㻥㻣㻌㻛㻌㻣㻜㻡
IMPORTANT
Do not touch the rubber pad (A).
Touching it may result in deterioration in print quality.
Remove the jammed paper by pulling it gently in the direction of the arrow.
IMPORTANT
If the jammed paper cannot be removed easily
Do not try to remove it forcefully but open the rear cover, and then remove the jammed paper.
"Clearing Paper Jams (Drawer Area)"
㻠㻥㻤㻌㻛㻌㻣㻜㻡
Return the manual feed transport guide to its original position.
Insert the paper drawer into the printer.
Push it into the printer firmly.
CAUTION
Precautions when inserting the paper drawer
Be careful not to catch your fingers.
Open and close the front cover.
ĺ The
(Paper Jam) indicator turns off, and the printer is ready to print.
IMPORTANT
If the
(Paper Jam) indicator does not turn off even after removing the paper
Paper may be jammed in another area. Check another area also and remove the paper.
Also, check if the paper drawer is inserted into the printer firmly.
㻠㻥㻥㻌㻛㻌㻣㻜㻡
[H-35] Clearing Paper Jams (Output Area)
Open the rear cover.
Open it completely.
Remove the jammed paper by pulling it gently in the direction of the arrow.
Open the paper output guide.
Open it by holding the green projection (A).
㻡㻜㻜㻌㻛㻌㻣㻜㻡
Remove the jammed paper by pulling it gently in the direction of the arrow.
Make sure that no paper is jammed inside the paper output guide, and then close it.
Close the rear cover.
Close it securely.
ĺ The
(Paper Jam) indicator turns off, and the printer is ready to print.
IMPORTANT
If the
(Paper Jam) indicator does not turn off even after removing the paper
Paper may be jammed in another area. Check another area also and remove the paper.
㻡㻜㻝㻌㻛㻌㻣㻜㻡
Also, check if the paper drawer is inserted into the printer firmly.
㻡㻜㻞㻌㻛㻌㻣㻜㻡
[H-36] The Alarm Indicator Is On or Blinking
When the
(Alarm) indicator is on or blinking, implement the following solutions.
The Alarm Indicator Is On
The Alarm Indicator Is Blinking
㻡㻜㻟㻌㻛㻌㻣㻜㻡
[H-37] The Alarm Indicator Is On
Implement the following solutions according to the message displayed in the Printer Status Window.
Service Call
Cause
Solution
If a fixing unit error is displayed, you need to request
A problem
service.
occurred in the
Follow the procedure in "If a Fixing Unit Error Is
fixing unit.
Displayed", and then contact your local authorized Canon
dealer to request service.
A problem
occurred in the
scanner.
Following the procedure in "If a Scanner Error or Service
Error Is Displayed", cycle the power of the printer.
A problem
occurred in the
printer.
NOTE
If the Printer Status Window is not displayed
"Printer Status Window"
If a Fixing Unit Error Is Displayed
Turn the printer off, then disconnect the cables from the printer.
(1) Turn the printer off.
㻡㻜㻠㻌㻛㻌㻣㻜㻡
(2) If the interface cables are connected, turn the computer off, and then disconnect the
interface cables from the printer.
(3) Unplug the power plug from the AC power outlet.
IMPORTANT
Do not turn on the printer again.
A fixing unit error is displayed. Do not turn on the printer after turning it off.
Contact your local authorized Canon dealer to request service.
NOTE
If you are not sure what the problem is
Contact your local authorized Canon dealer.
If a Scanner Error or Service Error Is Displayed
Turn the printer off.
㻡㻜㻡㻌㻛㻌㻣㻜㻡
Wait at least 10 seconds before turning on the printer.
If the message does not reappear, the printer is ready.
If the message reappears, you need to request service.
ĺ Follow the procedure below, and then contact your local authorized Canon dealer to
request service.
If a service error is displayed, note down the error code displayed in the Printer Status
Window.
㻡㻜㻢㻌㻛㻌㻣㻜㻡
Turn the printer off, then disconnect the cables from the printer.
(1) Turn the printer off.
(2) If the interface cables are connected, turn the computer off, and then disconnect the
interface cables from the printer.
(3) Unplug the power plug from the AC power outlet.
Contact your local authorized Canon dealer to request service.
If a service error is displayed, please report also the error code which you noted down in
Step 3.
NOTE
If you are not sure what the problem is
Contact your local authorized Canon dealer.
㻡㻜㻣㻌㻛㻌㻣㻜㻡
[H-38] The Alarm Indicator Is Blinking
Solve the problem following the message displayed in the Printer Status Window.
"A Message Appears in the Printer Status Window"
NOTE
If the Printer Status Window is not displayed
"Printer Status Window"
㻡㻜㻤㻌㻛㻌㻣㻜㻡
[H-39] Miscellaneous Problems
This section describes solutions for when the following problems occur.
An Error Message Is Displayed after the Printer Is Unpacked and Turned On for the First
Time
The Flap of the Printed Envelope Sticks
Nothing Is Printed on the Paper
Paper Is Output in a Certain Color with Nothing Printed on It
Multiple Sheets of Paper Are Fed at a Time
The Printout Is Different from What Is Displayed on Screen or The Printer Takes a Long
Time to Print
The Printer Takes a Long Time to Start the Next Print Job after Printing
The Printer Pauses during Printing, and then Printing Repeatedly Starts and Stops
CD-ROM Setup Does Not Appear Automatically (Windows Vista and Server 2008)
The Printer Driver Settings Cannot Be Changed
"Profiles" Cannot Be Selected or Edited
NOTE
If an application software is configured to start up automatically in Remote Desktop
Connection
Even if you exit the application software which automatically started up after printing from the
software, Remote Desktop may not be disconnected automatically.
If a problem that is not indicated in this section occurs or if none of the suggested measures solve the problem,
contact your local authorized Canon dealer.
㻡㻜㻥㻌㻛㻌㻣㻜㻡
An Error Message Is Displayed after the Printer Is Unpacked and Turned On for the First Time
Cause 1
The sealing tape is not pulled out of the toner cartridges.
Solution
Turn off the printer, and pull out the sealing tape from each of the four toner cartridges
inside the printer.
"Preparing the Toner Cartridges"
Cause 2
The packing material (sheet) is left in the output area.
Solution
Turn off the printer, and then remove the packing material (sheet).
Carrying the Printer to the Installation Site and Removing the Packing Materials
The Flap of the Printed Envelope Sticks
Cause 1
The envelope is inappropriate.
Solution
Replace the envelope with one that can be used and print again.
Usable Paper and Unusable Paper
Cause 2
The printer is being used in an environment with high humidity.
Solution
Perform the following procedure in the printer driver.
1. Display the [Finishing] sheet.
2. Click [Advanced Settings].
3. Set [Special Print Mode] to [Special Settings 1].
Normally, use the printer with [Special Print Mode] set to [Off]. Specify [Special Settings
1] only if the described problems occur.
Nothing Is Printed on the Paper
Cause
Multiple sheets of paper were fed at a time.
Solution 1 If you are using transparencies, labels, or coated paper, fan them thoroughly before loading
them.
Solution 2 Perform the following procedure in the printer driver.
1. Display the [Finishing] sheet.
2. Click [Advanced Settings].
3. Set [Special Print Mode] to [Special Settings 10].
Normally, use the printer with [Special Print Mode] set to [Off]. Specify [Special Settings
10] only if the described problems occur.
Paper Is Output in a Certain Color with Nothing Printed on It
Cause 1
The drum in any of the toner cartridges has deteriorated.
Solution
Replace the toner cartridge with a new one.
"Replacing Toner Cartridges"
Cause 2
A problem has occurred inside the printer.
Solution
When the
(Alarm) indicator is on, perform the solution using the procedure in "The
Alarm Indicator Is On".
Multiple Sheets of Paper Are Fed at a Time
㻡㻝㻜㻌㻛㻌㻣㻜㻡
Cause
You are using paper which tends to be fed at a time.
Solution 1 If you are using transparencies, labels, or coated paper, fan them thoroughly before loading
them.
Solution 2 Perform the following procedure in the printer driver.
1. Display the [Finishing] sheet.
2. Click [Advanced Settings].
3. Set [Special Print Mode] to [Special Settings 10].
Normally, use the printer with [Special Print Mode] set to [Off]. Specify [Special Settings
10] only if the described problems occur.
The Printout Is Different from What Is Displayed on Screen or The Printer Takes a Long Time to
Print
Cause
This problem may occur in some applications depending on the spooling type of the print
data.
Solution
Performing the following procedure in the printer driver may be able to solve the problem.
1. Display the [Finishing] sheet.
2. Click [Advanced Settings].
3. Change the [EMF Spooling] setting.
When [EMF Spooling] is set to [On], the Printer Status Window may not be
displayed automatically. In this case, display it manually.
(For details on methods for displaying the Printer Status Window, see "Printer
Status Window".)
The Printer Takes a Long Time to Start the Next Print Job after Printing
Cause
Solution
The fixing unit is being cooled down (especially after printing narrower paper) to maintain
print quality.
Please wait a moment. The printer cools down the fixing unit automatically.
Printing resumes after cooling down the fixing unit.
The Printer Pauses during Printing, and then Printing Repeatedly Starts and Stops
Cause
If the printer is used continuously for an extended period of time, the internal temperature
of the printer increases, activating a safety mechanism and pausing printing temporarily.
When performing 1- After continuously printing for approximately 6 minutes
at a room temperature of 27 °C (80.6 °F), the printer stops
sided printing on
for approximately one minute.
A4 size paper:
When performing 2- After continuously printing for approximately 3 minutes
at a room temperature of 25 °C (77 °F), the printer stops
sided printing on
for approximately one minute.
A4 size paper:
Solution
Please wait a moment. When the inside of the printer cools down, printing resumes.
If the internal temperature of the printer has not decreased sufficiently, the safety
mechanism is reactivated and printing is paused temporarily. When the inside temperature
cools down sufficiently, the printer resumes the normal printing speed. The time until the
safety mechanism activates or until the printer resumes the normal printing speed varies
depending on the printer usage conditions.
㻡㻝㻝㻌㻛㻌㻣㻜㻡
CD-ROM Setup Does Not Appear Automatically (Windows Vista and Server 2008)
Cause
Solution
CD-ROM Setup is not specified to appear automatically.
Perform the following procedure.
Windows Vista
1. Click [Play CDs or other media automatically] in [Control
Panel].
2. Select the [Use AutoPlay for all media and devices] check
box.
3. Set [Software and games] to [Install or run program].
Windows Server 2008
1. Double-click [AutoPlay] in [Control Panel].
2. Select the [Use AutoPlay for all media and devices] check
box.
3. Set [Software and games] to [Install or run program].
The Printer Driver Settings Cannot Be Changed
Cause
Solution
[Spooling at Host] is set to [Disabled].
Set [Spooling at Host] to [Auto].
Changing the Setting for Spooling at Host
"Profiles" Cannot Be Selected or Edited
Cause
Solution
Selecting or Editing "Profiles" is not allowed.
Change the settings for the [Profile] sheet.
Allow Profile Selection or Editing
㻡㻝㻞㻌㻛㻌㻣㻜㻡
[H-40] Changing the Setting for Spooling at Host
You can change the setting for [Spooling at Host] (whether the jobs are processed in the computer) using the following
procedure.
Open the [Printers and Faxes] or [Printers] folder.
Windows XP Professional and Server 2003
From the [Start] menu, select [Printers and Faxes].
Windows XP Home Edition
From the [Start] menu, select [Control Panel], and then click [Printers and
2WKHU+DUGZDUH@ĺ>3ULQWHUVDQG)D[HV@
Windows Vista
From the [Start] menu, select [Control Panel], and then click [Printer].
Windows Server 2008
From the [Start] menu, select [Control Panel], and then double-click
[Printers].
Right-click the icon for this printer, and then select [Properties] from the pop-up menu.
Display the [Device Settings] sheet.
Select [Auto] for [Spooling at Host].
NOTE
If the setting cannot be changed
You need administrative rights to change the setting.
Contact your system administrator.
㻡㻝㻟㻌㻛㻌㻣㻜㻡
Click [OK].
㻡㻝㻠㻌㻛㻌㻣㻜㻡
[H-41] Allow Profile Selection or Editing
If selecting or editing "Profiles" is not allowed, change the setting using the following procedure.
Open the [Printers and Faxes] or [Printers] folder.
Windows XP Professional and Server 2003
From the [Start] menu, select [Printers and Faxes].
Windows XP Home Edition
From the [Start] menu, select [Control Panel], and then click [Printers and
2WKHU+DUGZDUH@ĺ>3ULQWHUVDQG)D[HV@
Windows Vista
From the [Start] menu, select [Control Panel], and then click [Printer].
Windows Server 2008
From the [Start] menu, select [Control Panel], and then double-click
[Printers].
Right-click the icon for this printer, and then select [Properties] from the pop-up menu.
Display the [Profile] sheet.
Select the [Allow Profile Selection] and [Allow Setting Edition] check boxes.
NOTE
If the setting cannot be changed
You need administrative rights to change the setting.
Contact your system administrator.
㻡㻝㻡㻌㻛㻌㻣㻜㻡
Click [OK].
㻡㻝㻢㻌㻛㻌㻣㻜㻡
[I] Network Settings
Auto Setup (Recommended Method)
Performs the following operations which are required for printing all at once.
Manual Setup (Windows XP/Server 2003 Only)
Performs the following operations which are required for printing one at a time.
If you are using Windows Vista or Server 2008, you cannot print using a port
created by "Manual Setup". Be sure to install the printer driver using "Auto
Setup".
㻡㻝㻣㻌㻛㻌㻣㻜㻡
㻡㻝㻤㻌㻛㻌㻣㻜㻡
[I-02] Auto Setup (Recommended Method)
This section describes the procedure for installing the printer driver from the supplied CD-ROM (CD-ROM Setup) on a
computer connected to the printer with a LAN cable.
Step 1: Connecting a LAN Cable
Step 2: Installing the Printer Driver from CD-ROM
Step 3: After the Installation
IMPORTANT
If your hard disk does not have sufficient space to install the printer driver
A message indicating that your hard disk does not have sufficient space appears during
installation.
Cancel the installation, free up space on your hard disk, and then reinstall the software.
Step 1: Connecting a LAN Cable
NOTE
About the network environment
This printer supports 10BASE-T and 100BASE-TX connections.
About the LAN cable
This printer does not come with a LAN cable or a hub. Have cables or a hub ready
as needed.
Use a Category 5 twisted pair cable for the LAN.
If you want to connect the printer to a 100BASE-TX Ethernet network, all the
devices to be connected to the LAN (hub, LAN cable, and network board for
computer) must support 100BASE-TX.
Contact your local authorized Canon dealer for more details.
Attach the ferrite core to the LAN cable as shown in the figure.
㻡㻝㻥㻌㻛㻌㻣㻜㻡
Attach the ferrite core at 6 cm or less from the end of the connector connected to the
printer.
NOTE
About a ferrite core
A ferrite core is supplied with the printer.
Connect the LAN cable to the LAN connector of this printer.
Connect the other end of the LAN cable to the hub.
㻡㻞㻜㻌㻛㻌㻣㻜㻡
Press the power switch to turn the printer on.
Make sure that the LNK indicator (B) on the printer's network board is on.
If the printer is connected by 10BASE-T
If the LNK indicator (B) is on, the printer is connected properly.
If the printer is connected by 100BASE-TX
If the LNK indicator (B) and 100 indicator (A) are on, the printer is
connected properly.
NOTE
When all the indicators are off
"All the Indicators on the Network Board Are Off"
When the ERR indicator (C) is on or blinking
"The ERR Indicator on the Network Board Is On"
"The ERR Indicator on the Network Board Blinks at an Interval of Four Times"
"The ERR Indicator on the Network Board Is Constantly Blinking"
Step 2: Installing the Printer Driver from CD-ROM
㻡㻞㻝㻌㻛㻌㻣㻜㻡
NOTE
If Windows Firewall is enabled
If the IP address is not set for the printer, you need to configure Windows Firewall to unblock
communication during the installation process.
If you do not want to unblock Windows Firewall, set the IP address for the printer in advance.
"Setting the IP Address"
Turn on the computer and start Windows.
Log on as a user with administrative rights.
IMPORTANT
If you are not sure about your administrative rights
Contact your system administrator.
Insert the supplied CD-ROM "User Software" into the CD-ROM drive of your computer.
If the CD-ROM is already in the drive, eject the disk and reinsert it into the drive.
ĺ CD-ROM Setup appears.
It may take time to display CD-ROM Setup depending on your environment.
NOTE
If CD-ROM Setup does not appear
Display it using the following procedure.
(The CD-ROM drive name is indicated as "D:" in this manual. The CD-ROM drive name may
differ depending on the computer you are using.)
Windows XP and Server 2003
1. From the [Start] menu, select [Run].
2. Enter "D:\English\MInst.exe", and then click [OK].
Windows Vista and Server 2008
1. Enter "D:\English\MInst.exe" in [Start Search] under the [Start]
menu.
2. Press the [ENTER] key on the keyboard.
If the [AutoPlay] dialog box appears (Windows Vista and Server 2008)
Click [Run AUTORUN.EXE].
㻡㻞㻞㻌㻛㻌㻣㻜㻡
If the [User Account Control] dialog box appears (Windows Vista and Server 2008)
Click [Continue].
Click [Easy Installation].
The printer driver and the e-Manual are installed.
NOTE
If you do not want to install the e-Manual
Click [Custom Installation].
Click [Install].
NOTE
If you selected [Custom Installation] in Step 4
㻡㻞㻟㻌㻛㻌㻣㻜㻡
(1) Clear the [e-Manual] check box.
(2) Click [Install].
Read the contents of License Agreement, and then click [Yes].
Click [Next].
㻡㻞㻠㻌㻛㻌㻣㻜㻡
Select the method of installation.
(1) Select [Search for Network Printers to Install].
(2) Click [Next].
ĺ The TCP/IP port on the network is searched, and the printer is detected automatically.
NOTE
If Windows Firewall is enabled
The following dialog box appears.
If the IP address of the printer has been already set, click [No].
If you want to clear the block and detect the printers in which the IP address has not been set yet,
click [Yes].
Operation procedure varies depending on the content displayed in [Product Name] in
[Printer List].
If [LBP7210C] is displayed in [Product Name]
If [Unknown Device] is displayed in [Product Name]
NOTE
If no devices are displayed in [Printer List]
Perform the following procedure.
1. Make sure that the computer and printer are connected via the network.
2. Make sure that the printer is on.
3. Click [Auto Search Again].
(The printers on the network are searched for again.)
If any devices are not displayed by performing the above procedure, perform the following
procedure.
1. Click [Manual Search by IP Address].
㻡㻞㻡㻌㻛㻌㻣㻜㻡
2. Enter the IP address of the printer to be installed.
(The default IP address of the printer is "192.168.0.215".)
3. Click [OK].
If [LBP7210C] is displayed in [Product Name]
Add [LBP7210C] to [Printer List for Driver Installation].
(1) Select [LBP7210C].
(2) Click [Add].
NOTE
If "192.168.0.215" is displayed in [IP Address] in [Printer List]
The value is the default IP address of the printer. If you want to change the IP address, change it
after the installation.
"Setting the IP Address"
If you changed the IP address after the installation
Specify the port to be used again in the printer driver.
"Setting the IP Address"
Proceed to Step 10.
㻡㻞㻢㻌㻛㻌㻣㻜㻡
If [Unknown Device] is displayed in [Product Name]
Display the [Set IP Address] dialog box.
(1) Select [Unknown Device].
(2) Click [Set IP Address].
NOTE
If [Unknown Device] appears for multiple devices
Perform the following procedure.
1. Turn off all other devices except the printer or disconnect them from the network.
2. Click [Auto Search Again].
(The printers on the network are searched for again.)
3. After installing the printer, restore all existing devices to their original condition.
Set the IP address.
(1) Enter the IP address of the printer.
[Get automatically]:
Obtains an IP address using DHCP.
[Use the following IP address]: Allows you to set the IP address directly.
(Enter the IP address by separating the numbers with
a period (.), for example, AAA.BBB.CCC.DDD.)
(2) Click [OK].
NOTE
When using DHCP
A DHCP server must be started.
㻡㻞㻣㻌㻛㻌㻣㻜㻡
For more details on configuring the DHCP server, ask your network administrator.
Add [LBP7210C] to [Printer List for Driver Installation].
(1) Select [LBP7210C].
(2) Click [Add].
Proceed to Step 10.
Perform the following procedure.
(1) If you want to specify the settings for printer information such as the printer sharing
settings, select the [Set Printer Information] check box.
(2) Click [Next].
If you selected the [Set Printer Information] check box
Proceed to Step 11.
If you did not select the [Set Printer Information] check box
㻡㻞㻤㻌㻛㻌㻣㻜㻡
Proceed to Step 13.
NOTE
About the settings for printer information
You can specify the settings for printer information such as the printer sharing settings also in the
[Printers and Faxes] folder or the [Printers] folder after the installation.
Set the printer information.
[Printer Name]:
[Set as Default]:
Enter a new name if you want to change the printer name.
Select the check box if you want to use this printer as the default
printer.
[Use as Shared Printer]: Select the check box to use the computer on which the printer
driver is being installed as the print server.
For details on the print server environment (printer sharing),
see "Print Server Environment (Printer Sharing)".
[Shared Name]:
Change the shared name as needed.
If you selected the [Use as Shared Printer] check box
For a 32-bit operating system
If any client is using a 64-bit operating system, perform the following
procedure.
(1) Click [Drivers to Add].
(2) Select [Windows XP/Vista/Server 2003, 2008 (x64)].
(3) Click [OK].
For a 64-bit operating system
If any client is using a 32-bit operating system*, perform the following
procedure.
(1) Click [Drivers to Add].
(2) Select [Windows XP/Vista/Server 2003, 2008 (x86)].
㻡㻞㻥㻌㻛㻌㻣㻜㻡
(3) Click [OK].
* If a 64-bit operating system is running on the print server, the
download installation for the following client computers on which a
32-bit operating system is running is not supported due to the
Windows restriction.
Windows XP (on which no service pack or SP1 is
installed)
Windows Server 2003 (on which no service pack is
installed)
If you download and install the printer driver on any of the above 32bit operating systems, you may fail to install the driver and may not be
able to open the printing preferences dialog box.
Click [Next].
Click [Start].
NOTE
If you are using Windows Vista or Server 2008
The following screen appears. Click [Yes].
㻡㻟㻜㻌㻛㻌㻣㻜㻡
Click [Yes].
ĺ Installation of the printer driver starts.
It may take time to install the software depending on your environment.
Installation of the e-Manual starts automatically after the printer driver installation.
Wait until the following screen disappears.
It may take time to install the software depending on your environment.
NOTE
If you selected [Custom Installation] in Step 4
The e-Manual is not installed.
Check the installation results, and then click [Next].
㻡㻟㻝㻌㻛㻌㻣㻜㻡
NOTE
If the printer driver is not installed properly
"The Printer Driver Cannot Be Installed or Uninstalled"
Restart your computer.
(1) Select the [Restart Computer Now (Recommended)] check box.
(2) Click [Restart].
NOTE
Removing the CD-ROM
You can remove the CD-ROM from the CD-ROM drive after the installation is completed.
When viewing the e-Manual
"Viewing the e-Manual"
"Searching for Information"
㻡㻟㻞㻌㻛㻌㻣㻜㻡
Step 3: After the Installation
The following icons, folders, etc. are added to the following locations.
[Printers and Faxes] folder ([Printers] folder for Windows Vista and Server 2008)
Printer icon for this printer
Task tray
Printer Status Window icon
The icon does not appear if you did not restart your computer after the printer driver installation.
[All Programs] under the [Start] menu
[Canon Printer Uninstaller] - [Canon LBP7210C Uninstaller]
Desktop
[LBP7210C e-Manual]
The icon does not appear if you did not install the e-Manual.
[All Programs] under the [Start] menu
[Canon LBP7210C] - [LBP7210C e-Manual]
㻡㻟㻟㻌㻛㻌㻣㻜㻡
The icon does not appear if you did not install the e-Manual.
NOTE
Configuring DNS, WINS, and other advanced network settings
"Configuring the Protocol Settings"
Created port
Standard TCP/IP Port is created.
㻡㻟㻠㻌㻛㻌㻣㻜㻡
[I-03] Manual Setup (Windows XP/Server 2003 Only)
This section describes the procedure for installing the printer driver with "Manual Setup" * on a computer connected to the
printer with a LAN cable.
"Manual Setup" allows you to set the IP address, create a port, and install the printer driver manually one at a time.
*
If you are using Windows Vista or Server 2008, you cannot print using a port created by "Manual Setup".
Be sure to install the printer driver using "Auto Setup".
"Auto Setup (Recommended Method)"
Step 1: Connecting a LAN Cable
Step 2: Setting the IP Address
"Setting the IP Address"
Step 3: Creating a Port and Installing the Printer Driver
Step 4: After the Installation
Step 1: Connecting a LAN Cable
NOTE
About the network environment
This printer supports 10BASE-T and 100BASE-TX connections.
About the LAN cable
This printer does not come with a LAN cable or a hub. Have cables or a hub ready
as needed.
Use a Category 5 twisted pair cable for the LAN.
If you want to connect the printer to a 100BASE-TX Ethernet network, all the
devices to be connected to the LAN (hub, LAN cable, and network board for
computer) must support 100BASE-TX.
Contact your local authorized Canon dealer for more details.
㻡㻟㻡㻌㻛㻌㻣㻜㻡
Attach the ferrite core to the LAN cable as shown in the figure.
Attach the ferrite core at 6 cm or less from the end of the connector connected to the
printer.
NOTE
About a ferrite core
A ferrite core is supplied with the printer.
Connect the LAN cable to the LAN connector of this printer.
Connect the other end of the LAN cable to the hub.
㻡㻟㻢㻌㻛㻌㻣㻜㻡
Press the power switch to turn the printer on.
Make sure that the LNK indicator (B) on the printer's network board is on.
If the printer is connected by 10BASE-T
If the LNK indicator (B) is on, the printer is connected properly.
If the printer is connected by 100BASE-TX
If the LNK indicator (B) and 100 indicator (A) are on, the printer is
connected properly.
NOTE
When all the indicators are off
"All the Indicators on the Network Board Are Off"
When the ERR indicator (C) is on or blinking
"The ERR Indicator on the Network Board Is On"
"The ERR Indicator on the Network Board Blinks at an Interval of Four Times"
"The ERR Indicator on the Network Board Is Constantly Blinking"
Step 2: Setting the IP Address
㻡㻟㻣㻌㻛㻌㻣㻜㻡
For details on the procedure for setting the IP address, see "Setting the IP Address".
Step 3: Creating a Port and Installing the Printer Driver
Turn on the computer and start Windows.
Log on as a user with administrative rights.
IMPORTANT
If you are not sure about your administrative rights
Contact your system administrator.
Open the [Printers and Faxes] or [Printers] folder.
Windows XP Professional and Server 2003
From the [Start] menu, select [Printers and Faxes].
Windows XP Home Edition
From the [Start] menu, select [Control Panel], and then click [Printers and
2WKHU+DUGZDUH@ĺ>3ULQWHUVDQG)D[HV@
Display [Add Printer Wizard].
Windows Server 2003
Double-click [Add Printer].
Windows XP
Click [Add a printer].
㻡㻟㻤㻌㻛㻌㻣㻜㻡
Click [Next].
Specify the type of printer to be used.
Windows XP and Server 2003
(1) Select [Local printer attached to this computer].
(2) Clear the [Automatically detect and install my Plug and Play printer]
check box.
(3) Click [Next].
Create a port.
(1) Select [Create a new port].
(2) Select [Standard TCP/IP Port].
(3) Click [Next].
㻡㻟㻥㻌㻛㻌㻣㻜㻡
Click [Next].
Enter the IP address or name of the printer.
(1) Enter the IP address or name * of the printer in [Printer Name or IP Address].
* The DNS name to be registered on the DNS server (up to 78 characters)
(2) Click [Next].
IMPORTANT
If the printer cannot be detected
The following screen appears. Perform either of the following operations.
• Follow the on-screen instructions and search again for the printer.
• Specify the settings for [Device Type].
(1) Select [Standard], and then select [Canon Network Printing Device with P9100].
(2) Click [Next].
㻡㻠㻜㻌㻛㻌㻣㻜㻡
NOTE
If you are not sure about the value to enter
The value to be entered varies depending on how the IP address of the printer was set.
For more details, see "Settings for Adding a Port" or ask your network administrator.
Click [Finish].
Click [Have Disk].
Insert the supplied CD-ROM "User Software" into the CD-ROM drive of your computer,
and then click [Browse].
㻡㻠㻝㻌㻛㻌㻣㻜㻡
If CD-ROM Setup appears, click [Exit].
Open the folder in which the printer driver is included.
For Windows XP and Server 2003 (32-bit version)
Open the folders in the supplied CD-ROM: [English] - [32bit] - [Driver].
For Windows XP and Server 2003 (64-bit version)
Open the folders in the supplied CD-ROM: [English] - [x64] - [Driver].
Open the INF file.
(1) Select the INF file.
(2) Click [Open].
Click [OK].
Click [Next].
㻡㻠㻞㻌㻛㻌㻣㻜㻡
Specify the printer name.
(1) Enter a new name if you want to change the printer name.
(2) Click [Next].
NOTE
If another printer driver has already been installed
The message appears. Select [Yes] or [No].
Click [Next].
NOTE
㻡㻠㻟㻌㻛㻌㻣㻜㻡
To share this printer on a network
Perform the following procedure.
1. Select [Share name] and enter a name for the shared printer.
2. Click [Next].
3. The window for entering [Location] and [Comment] is displayed. Enter them as
needed.
4. Click [Next].
Select whether to print a test page.
1. Select whether to print a test page.
2. Click [Next].
Click [Finish].
ĺ The installation starts.
When printing a test page, a confirmation dialog box appears. Click [OK] to close the
dialog box.
NOTE
Removing the CD-ROM
You can remove the CD-ROM from the CD-ROM drive after the installation is completed.
㻡㻠㻠㻌㻛㻌㻣㻜㻡
Step 4: After the Installation
The following icons and folders are added to the following locations.
[Printers and Faxes] folder
Printer icon for this printer
Task tray
Printer Status Window icon
The icon does not appear if you did not restart your computer after the printer driver installation.
[All Programs] under the [Start] menu
[Canon Printer Uninstaller] - [Canon LBP7210C Uninstaller]
㻡㻠㻡㻌㻛㻌㻣㻜㻡
[I-04] Setting the IP Address
There are the following three methods for setting the IP address.
Setting the IP Address Using NetSpot Device Installer
Set the IP address using NetSpot Device Installer in the supplied CD-ROM.
Setting the IP Address Using the ARP/PING Command
If you are using an operating system equipped with Windows Firewall, set the IP address using the
ARP/PING command.
Setting the IP Address Using the Printer Status Window
If the printer driver is installed and the printer and computer are connected by a USB cable, set the IP
address using the Printer Status Window.
If you changed the IP address of the printer after installing the printer driver, reset the port to be used for the printer
driver.
After Changing the IP Address (Changing the Port)
Setting the IP Address Using NetSpot Device Installer
IMPORTANT
If Windows Firewall is enabled
It is recommended that you set the IP address using the ARP/PING command.
If you want to set the IP address using NetSpot Device Installer, you need to add
"NetSpot Device Installer" to Windows Firewall in advance. Perform either of the
following procedures.
• Adding "NetSpot Device Installer" to the [Exceptions] sheet in the [Windows
Firewall] dialog box
Readme of NetSpot Device Installer
To display Readme of NetSpot Device Installer, click [
] in [NetSpot
Device Installer for TCP/IP] in the [Additional Software Programs] screen in
CD-ROM Setup.
• Installing NetSpot Device Installer (You can add it to Windows Firewall during
the installation.)
"NetSpot Device Installer"
NOTE
About the screenshots of NetSpot Device Installer
The screenshots may be different from those actually you see on the screen.
How to install NetSpot Device Installer
This section describes the procedure for using NetSpot Device Installer without installing it.
For details on the procedures for installing NetSpot Device Installer, see "NetSpot Device
Installer".
㻡㻠㻢㻌㻛㻌㻣㻜㻡
Attach the ferrite core to the LAN cable as shown in the figure.
Attach the ferrite core at 6 cm or less from the end of the connector connected to the
printer.
NOTE
About a ferrite core
A ferrite core is supplied with the printer.
Connect the LAN cable to the LAN connector of this printer.
Connect the other end of the LAN cable to the hub.
㻡㻠㻣㻌㻛㻌㻣㻜㻡
Press the power switch to turn the printer on.
Make sure that the LNK indicator (B) on the printer's network board is on.
If the printer is connected by 10BASE-T
If the LNK indicator (B) is on, the printer is connected properly.
If the printer is connected by 100BASE-TX
If the LNK indicator (B) and 100 indicator (A) are on, the printer is
connected properly.
NOTE
㻡㻠㻤㻌㻛㻌㻣㻜㻡
When all the indicators are off
"All the Indicators on the Network Board Are Off"
When the ERR indicator (C) is on or blinking
"The ERR Indicator on the Network Board Is On"
"The ERR Indicator on the Network Board Blinks at an Interval of Four Times"
"The ERR Indicator on the Network Board Is Constantly Blinking"
Turn on the computer and start Windows.
Log on as a user with administrative rights.
IMPORTANT
If you are not sure about your administrative rights
Contact your system administrator.
Insert the supplied CD-ROM "User Software" into the CD-ROM drive of your computer.
If the CD-ROM is already in the drive, eject the disk and reinsert it into the drive.
ĺ CD-ROM Setup appears.
It may take time to display CD-ROM Setup depending on your environment.
NOTE
If CD-ROM Setup does not appear
Display it using the following procedure.
(The CD-ROM drive name is indicated as "D:" in this manual. The CD-ROM drive name may
differ depending on the computer you are using.)
Windows XP and Server 2003
1. From the [Start] menu, select [Run].
2. Enter "D:\English\MInst.exe", and then click [OK].
Windows Vista and Server 2008
1. Enter "D:\English\MInst.exe" in [Start Search] under the [Start]
menu.
2. Press the [ENTER] key on the keyboard.
If the [AutoPlay] dialog box appears (Windows Vista and Server 2008)
Click [Run AUTORUN.EXE].
If the [User Account Control] dialog box appears (Windows Vista and Server 2008)
㻡㻠㻥㻌㻛㻌㻣㻜㻡
Click [Continue].
Click [Additional Software Programs].
Click [Start] for [NetSpot Device Installer for TCP/IP].
ĺ NetSpot Device Installer runs, and the target printer search starts.
NOTE
If the [License Agreement] dialog box appears
Read the contents of License Agreement, and then click [Yes].
If the [User Account Control] dialog box appears (Windows Vista and Server 2008)
Click [Continue].
Set the IP address.
㻡㻡㻜㻌㻛㻌㻣㻜㻡
If [Status] is set to [Not Configured], and the device of which [Device
Name] is a MAC address is displayed
If any devices in which [IP Address] is set to [192.168.0.215] are
displayed
If your case falls within neither of the above cases
If [Status] is set to [Not Configured], and the device of which [Device Name] is a
MAC address is displayed
See Help of NetSpot Device Installer and specify the initial settings for the IP address.
Help is displayed by clicking [Help] in the [Help] menu.
NOTE
If you changed the IP address after installing the printer driver
Specify the port to be used again in the printer driver.
After Changing the IP Address (Changing the Port)
If any devices in which [IP Address] is set to [192.168.0.215] are displayed
Select the device.
Select [Protocol Settings] from the [Device] menu.
㻡㻡㻝㻌㻛㻌㻣㻜㻡
Set the IP address.
(1) Specify each setting.
(2) Click [OK].
[IP Address Setting with]: Select the method for setting the IP address.
[Manual Setting]: Allows you to set the IP address directly.
The IP address entered in [IP Address] is
set for the printer.
[Auto Detect]:
Obtains an IP address using RARP,
BOOTP, or DHCP.
[RARP]:
Obtains an IP address using RARP. (The
RARP daemon needs to be running.)
[BOOTP]:
Obtains an IP address using BOOTP. (The
BOOTP daemon needs to be running.)
[DHCP]:
Obtains an IP address using DHCP. (The
DHCP server needs to be running.)
[IP Address]:
Enter the IP address of the printer.
[Subnet Mask]:
Enter the subnet mask as needed.
[Gateway Address]:
Enter the gateway address as needed.
NOTE
When selecting [RARP]
㻡㻡㻞㻌㻛㻌㻣㻜㻡
You cannot enter any values in [IP Address].
When selecting [BOOTP] or [DHCP]
You cannot enter any values in [IP Address], [Subnet Mask], and [Gateway Address].
If RARP, BOOTP, or DHCP cannot be used
Select [Manual Setting].
When the message <The device has been reset.> appears, click [OK].
ĺ To perform a reset operation properly, wait for approximately 20 seconds or longer as
is after clicking [OK].
After completing the reset, the settings are enabled.
NOTE
If you changed the IP address after installing the printer driver
Specify the port to be used again in the printer driver.
After Changing the IP Address (Changing the Port)
If your case falls within neither of the above cases
A device on the network may have the same IP address as that set for the printer.
In this case, perform the following procedure.
1. Turn off the device that has the same IP address or remove the device from the network.
2. Repeat the procedure from the beginning.
3. After completing the settings for this printer, restore the devices to their original states.
If you cannot set the IP address using NetSpot Device Installer including the case where this procedure is not
possible, set the IP address using the ARP/PING command.
Setting the IP Address Using the ARP and PING Commands
Setting the IP Address Using the ARP and PING Commands
Attach the ferrite core to the LAN cable as shown in the figure.
Attach the ferrite core at 6 cm or less from the end of the connector connected to the
printer.
㻡㻡㻟㻌㻛㻌㻣㻜㻡
NOTE
About a ferrite core
A ferrite core is supplied with the printer.
Connect the LAN cable to the LAN connector of this printer.
Connect the other end of the LAN cable to the hub.
Press the power switch to turn the printer on.
㻡㻡㻠㻌㻛㻌㻣㻜㻡
Make sure that the LNK indicator (B) on the printer's network board is on.
If the printer is connected by 10BASE-T
If the LNK indicator (B) is on, the printer is connected properly.
If the printer is connected by 100BASE-TX
If the LNK indicator (B) and 100 indicator (A) are on, the printer is
connected properly.
NOTE
When all the indicators are off
"All the Indicators on the Network Board Are Off"
When the ERR indicator (C) is on or blinking
"The ERR Indicator on the Network Board Is On"
"The ERR Indicator on the Network Board Blinks at an Interval of Four Times"
"The ERR Indicator on the Network Board Is Constantly Blinking"
Turn on the computer and start Windows.
㻡㻡㻡㻌㻛㻌㻣㻜㻡
Log on as a user with administrative rights.
IMPORTANT
If you are not sure about your administrative rights
Contact your system administrator.
Run Command Prompt.
Windows XP, Server 2003, Vista, and Server 2008
)URPWKH>6WDUW@PHQXVHOHFW>$OO3URJUDPV@ĺ>$FFHVVRULHV@ĺ
[Command Prompt].
Enter "arp -s <IP address> <MAC address>", then press the [ENTER] key on your
keyboard.
<IP address>:
Enter the IP address to assign to the printer.
Specify the address with four numbers (from 0 to 255) separated with a
period (.).
<MAC address>: Enter the MAC address of the printer.
Separate the number every two digits with a hyphen (-).
Input Example: "arp -s 192.168.0.215 00-00-85-05-70-31"
NOTE
MAC address location
The MAC address is listed at (A) on the printer.
Enter "ping <IP address> -l 479", then press the [ENTER] key on your keyboard.
<IP address>: Enter the same IP address as the one entered in Step 9.
Enter a lowercase "L" for "-l".
Input Example: "ping 192.168.0.215 -l 479"
㻡㻡㻢㻌㻛㻌㻣㻜㻡
ĺ The IP address is set for the printer.
The subnet mask and gateway address are set to [0.0.0.0].
Enter "exit", then press the [ENTER] key on your keyboard.
ĺ Command Prompt closes.
NOTE
If you changed the IP address after installing the printer driver
Specify the port to be used again in the printer driver.
After Changing the IP Address (Changing the Port)
Setting the IP Address Using the Printer Status Window
Display the Printer Status Window.
Click [
] in the Windows task tray, and then select the printer name.
NOTE
When displaying the Printer Status Window from the printer driver
Click [
] (Display Printer Status Window) in locations such as in the [Page Setup] sheet.
)URPWKH>2SWLRQV@PHQXVHOHFW>'HYLFH6HWWLQJV@ĺ>1HWZRUN6HWWLQJV@
Set the IP address.
(1) Specify each setting.
㻡㻡㻣㻌㻛㻌㻣㻜㻡
(2) Click [OK].
[IP Address Setting with]: Select the method for setting the IP address.
[Manual Setting]: Allows you to set the IP address directly.
The IP address entered in [IP Address] is
set for the printer.
[Auto Detect]:
Obtains an IP address using RARP,
BOOTP, or DHCP.
[RARP]:
Obtains an IP address using RARP. (The
RARP daemon needs to be running.)
[BOOTP]:
Obtains an IP address using BOOTP. (The
BOOTP daemon needs to be running.)
[DHCP]:
Obtains an IP address using DHCP. (The
DHCP server needs to be running.)
[IP Address]:
Enter the IP address of the printer.
[Subnet Mask]:
Enter the subnet mask as needed.
[Gateway Address]:
Enter the gateway address as needed.
[Password]:
Enter the administrator password for the printer (the password
that is specified in the Remote UI).
If the password is not specified, it is not required to enter any
value.
NOTE
When selecting [RARP]
You cannot enter any values in [IP Address].
When selecting [BOOTP] or [DHCP]
You cannot enter any values in [IP Address], [Subnet Mask], and [Gateway Address].
If RARP, BOOTP, or DHCP cannot be used
Select [Manual Setting].
If you changed the IP address after installing the printer driver
Specify the port to be used again in the printer driver.
After Changing the IP Address (Changing the Port)
㻡㻡㻤㻌㻛㻌㻣㻜㻡
After Changing the IP Address (Changing the Port)
If you changed the IP address or name of the printer (the DNS name to be registered on the DNS server) after installing
the printer driver, you need to change the port to be used in the printer driver.
You cannot print unless you change the port.
IMPORTANT
If you are using Windows Vista or Server 2008
You cannot use Standard TCP/IP Port to be created here.
Uninstall the printer driver, and then install the printer driver again from CD-ROM Setup.
"Uninstalling the Printer Driver Using [Canon LBP7210C Uninstaller]"
"Auto Setup (Recommended Method)"
Open the [Printers and Faxes] or [Printers] folder.
Windows XP Professional and Server 2003
From the [Start] menu, select [Printers and Faxes].
Windows XP Home Edition
From the [Start] menu, select [Control Panel], and then click [Printers and
2WKHU+DUGZDUH@ĺ>3ULQWHUVDQG)D[HV@
Right-click the icon for this printer, and then select [Properties] from the pop-up menu.
Perform the following procedure.
(1) Display the [Ports] sheet.
(2) Click [Add Port].
㻡㻡㻥㻌㻛㻌㻣㻜㻡
Select the port type.
(1) Select [Standard TCP/IP Port].
(2) Click [New Port].
Click [Next].
Enter the new IP address or name of the printer.
(1) Enter the IP address or name * of the new printer in [Printer Name or IP Address].
* The DNS name to be registered on the DNS server (up to 78 characters)
(2) Click [Next].
㻡㻢㻜㻌㻛㻌㻣㻜㻡
IMPORTANT
If the printer cannot be detected
The following screen appears. Perform either of the following operations.
• Follow the on-screen instructions and search again for the printer.
• Specify the settings for [Device Type].
(1) Select [Standard], and then select [Canon Network Printing Device with P9100].
(2) Click [Next].
NOTE
If you are not sure about the value to enter
The value to be entered varies depending on how the IP address of the printer was set.
For more details, see "Settings for Adding a Port" or ask your network administrator.
Click [Finish].
㻡㻢㻝㻌㻛㻌㻣㻜㻡
Click [Close].
Click [Apply].
Click [OK].
㻡㻢㻞㻌㻛㻌㻣㻜㻡
NOTE
Deleting an unnecessary port
Select the port you want to delete on the [Ports] sheet, and then click [Delete Port].
㻡㻢㻟㻌㻛㻌㻣㻜㻡
[I-05] Configuring the Protocol Settings
You can configure the protocol settings using the following software.
Web browser (Remote UI)
You can specify the settings by accessing the printer from your web browser via the network.
FTP Client
You can specify the settings by accessing the FTP server of the printer using Command Prompt.
NetSpot Device Installer
You can configure the basic protocol settings using the Canon software, NetSpot Device Installer, in the
supplied CD-ROM.
If you want to configure the settings such as the DNS server settings, use the Remote UI or FTP Client.
This section describes the procedure for specifying the settings using a web browser (Remote UI).
NOTE
Specifying the settings using FTP Client
"FTP Client"
Specifying the settings using NetSpot Device Installer
"NetSpot Device Installer"
Display the Printer Status Window.
Click [
] in the Windows task tray, and then select the printer name.
NOTE
When displaying the Printer Status Window from the printer driver
Click [
] (Display Printer Status Window) in locations such as in the [Page Setup] sheet.
Select [Remote UI] from the [Options] menu.
㻡㻢㻠㻌㻛㻌㻣㻜㻡
ĺ The Remote UI is displayed.
NOTE
If you cannot select [Remote UI]
You cannot select [Remote UI] if the printer and computer cannot communicate via a network.
When starting the Remote UI directly from a web browser
"Remote UI"
Log in as Administrator.
(1) Enter a password in [Administrator Password].
(2) Click [Log In].
NOTE
If the administrator password is not set
It is not required to enter any value in [Administrator Password].
"Setting and Changing the Administrator Password"
Select [Network] from the [Device Manager] menu.
㻡㻢㻡㻌㻛㻌㻣㻜㻡
Click [Change] under [TCP/IP].
Configure the protocol settings.
Setting the IP Address
Configuring the DNS Settings
Configuring the WINS Settings
Configuring the FTP Settings
Configuring the SNTP Settings (Notifying the printer of the Time via an
SNTP Server)
Configuring the Multicast Discovery Settings
Setting the IP Address
㻡㻢㻢㻌㻛㻌㻣㻜㻡
Specify [IP Address], [Subnet Mask], and [Gateway Address].
[IP Address]:
Enter the IP address of the printer.
[Subnet Mask]:
Enter the subnet mask that is being used on the TCP/IP network.
[Gateway Address]: Enter the gateway address that is being used on the TCP/IP network.
NOTE
When using DHCP, BOOTP, or RARP
After the network board of the printer is reset, the values obtained from DHCP, BOOTP, and
RARP are displayed.
(If the values have been specified previously, they overwrite the obtained ones.)
If you changed the IP address
If you changed the IP address of the printer after installing the printer driver, reset the port to be
used for the printer driver.
For details on the procedure for resetting the port, see "Setting the IP Address".
Select [On] for the option to be used when setting the IP address, as needed.
㻡㻢㻣㻌㻛㻌㻣㻜㻡
As well as by assigning the IP address directly, you can set the IP address by using
DHCP, BOOTP, or RARP.
When restarting or resetting the printer, whether the options for which [On] is selected
are available is checked, and the IP address is assigned by the method that is determined
to be available the soonest. The options for which [Off] is specified are not checked.
If you can use none of these, assign the IP address set in [IP Address].
IMPORTANT
For details on the procedure for setting a port when using DHCP, BOOTP, or RARP
See "Settings for Adding a Port" or ask your network administrator.
NOTE
When using DHCP, BOOTP, or RARP
Because it takes one to two minutes to check whether DHCP, BOOTP, and RARP
are available, it is recommended that you set the unused protocol(s) to [Off].
Each server or daemon (the DHCP server, BOOTP daemon, or RARP daemon)
must be running on the network.
Even if you are using DHCP, BOOTP, or RARP, specify the settings for [IP
Address], [Subnet Mask], and [Gateway Address] manually. If you cannot obtain
information from the servers of DHCP, BOOTP, and RARP, the values specified
manually are used.
When using DHCP
If you cycle the power of the printer, you may not be able to print. This is because a different IP
address from the one that has been used is assigned.
When using DHCP, consult your network administrator and perform either of the following
settings.
Specifying the DNS Dynamic Update function
Configuring the DNS Settings
Specifying the settings so that the same IP address is always assigned when the
printer starts up
Proceed to Step 7 if you do not specify the settings for the other options.
Configuring the DNS Settings
Specify the settings for [DNS Settings].
㻡㻢㻤㻌㻛㻌㻣㻜㻡
[DNS Server
Address]:
[DNS Dynamic
Update]:
[DNS Host Name]:
[DNS Domain
Name]:
Enter the IP address of the DNS server.
If you want to use the DNS Dynamic Update function, set the option to
[On].
If you do not want to use the DNS Dynamic Update function, set the
option to [Off].
Enter the host name to be added to the DNS server.
Enter the name of the domain to which the printer belongs.
Input Example: "example.com"
In the following case, DNS is to be used.
When performing name resolution using the SNTP server name to set the SNTP client
function (When you specify the SNTP server name)
Configuring the SNTP Settings (Notifying the printer of the Time via an SNTP Server)
IMPORTANT
DNS Dynamic Update
DNS Dynamic Update is a function that adds the IP address of the device and the names specified
as the host name and domain name to the DNS server automatically.
This function can be used in the environment in which a Dynamic DNS server is being used.
When using the DNS Dynamic Update function
You need to set the IP address, host name, and domain name of the DNS server.
For details on the procedure for setting a port when using DNS
See "Settings for Adding a Port" or ask your network administrator.
Proceed to Step 7 if you do not specify the settings for the other options.
㻡㻢㻥㻌㻛㻌㻣㻜㻡
Configuring the WINS Settings
Specify the settings for [WINS Settings].
If you want to use WINS Resolution
1. Set [WINS Resolution] to [On].
2. Enter the IP address of the WINS server in [WINS Server Address].
3. Enter the host name to be added to the WINS server in [WINS Host
Name].
4. In [Scope ID], enter the Scope ID of the NetBIOS name that you want to
search for from the WINS server.
You can refine the search by separating the character string with "."
(period).
If you do not want to use WINS Resolution
Set [WINS Resolution] to [Off].
Proceed to Step 7 if you do not specify the settings for the other options.
Configuring the FTP Settings
Specify the setting for [FTP].
Set [FTP Settings] to [On] when using the FTP server.
Set [FTP Settings] to [Off] when not using the FTP server.
㻡㻣㻜㻌㻛㻌㻣㻜㻡
Proceed to Step 7 if you do not specify the settings for the other options.
Configuring the SNTP Settings (Notifying the printer of the Time via an SNTP
Server)
Specify the settings for [SNTP].
If the DNS server is configured
1. Enter the server name of the SNTP server in [SNTP Server Name].
2. Select [Time Zone].
3. To set daylight saving time, set [Daylight Saving Time] to [On].
If the DNS server is not configured
1. Enter the IP address of the SNTP server in [SNTP Server Name].
2. Select [Time Zone].
㻡㻣㻝㻌㻛㻌㻣㻜㻡
3. To set daylight saving time, set [Daylight Saving Time] to [On].
NOTE
If an SNTP server is not available
You can notify the printer of the time set on the computer using the following
procedure.
1. Display the Printer Status Window.
"Printer Status Window"
2. Select [Preferences (Administrators)] from the [Options] menu.
3. Select [Always] in [Monitor Printer Status], and then select the
[Notify the Printer of the Time] check box.
Time Zone: The standard time zones of the world are expressed globally in terms
of the difference in hours (± up to 12 hours) from GMT* (± 0 hours). A time zone
is a region throughout which this time difference is the same.
* The time at the Greenwich Observatory in England is called GMT (Greenwich
Mean Time).
Daylight Saving Time: In some countries and regions, time is advanced throughout
the summer season.
Proceed to Step 7 if you do not specify the settings for the other options.
Configuring the Multicast Discovery Settings
NOTE
Multicast discovery
This is a function that searches for certain devices using Service Location Protocol (SLP).
By using the multicast discovery function, you can search for only the devices whose values in
[Scope Name] are verified, using the service location protocol (SLP) from utility software, such as
NetSpot Device Installer.
Specify the settings for [Multicast Discovery Settings].
㻡㻣㻞㻌㻛㻌㻣㻜㻡
If you want to set the printer so that it responds to searches that use the multicast discovery
function
1. Set [Response] to [On].
2. In [Scope Name], enter the scope name to be used when searching for
certain devices from utility software, such as NetSpot Device Installer, by
multicast.
If you want to set the printer so that it does not respond to searches that use the multicast
discovery function
Set [Response] to [Off].
Proceed to Step 7 if you do not specify the settings for the other options.
Click [OK].
㻡㻣㻟㻌㻛㻌㻣㻜㻡
When the following screen appears, click [Reset].
ĺ After completing the reset of the printer's network board, the settings are effective.
The settings also become effective by restarting the printer. (Turn off the printer
once, wait at least 10 seconds, and then turn it on.)
㻡㻣㻠㻌㻛㻌㻣㻜㻡
[I-06] Setting Items
The following are the setting items which you can change by using a web browser (Remote UI), FTP Client, or NetSpot
Device Installer.
General Settings
TCP/IP Settings
NOTE
About the item names
In the following table, the characters shown in parentheses are exclusively for FTP Client.
For example, "Device Name (SYS_NAME)" is displayed differently as follows, depending on the
application.
• Web browser (Remote UI): [Device Name]
• NetSpot Device Installer: [Device Name]
• config file of FTP Client: [SYS_NAME]
About the annotations
The asterisk marks, "*1" and "*2" attached to the end of some option names, indicate the
following:
*1: Cannot be specified using NetSpot Device Installer. Specify these options using the Remote
UI or FTP Client.
*2: Can be specified using FTP Client only.
General Settings
Item
[Print Server Name]
(PS_NAME) * 1
Description
The name of the printer's
network board (print server) (1
The name of the device (0 to 32
(SYS_NAME)
characters)
(SYS_LOC)
[Administrator]
(SYS_CONTACT)
[Phone]
(SYS_CONTACT_TEL) * 1
CANONXXXXXX
to 15 characters)
[Device Name]
[Location]
Default Setting
(Blank)
The installation site of the
device
(Blank)
(0 to 32 characters)
The name of the administrator
of the device
(Blank)
(0 to 32 characters)
The telephone number of the
administrator of the device
(0 to 32 characters)
㻡㻣㻡㻌㻛㻌㻣㻜㻡
(Blank)
[Comments]
(SYS_CONTACT_COMMENT) * 1
(SERVICE_MAN_NAME) * 2
Comments from the
administrator of the device
(Blank)
(0 to 32 characters)
The name of the service person
(0 to 32 characters)
(Blank)
The telephone number of the
(SERVICE_TEL) * 2
service person
(Blank)
(0 to 32 characters)
Comments from the service
(SERVICE_COMMENT) * 2
person
(Blank)
(0 to 32 characters)
[Administrator Password]
The password of the device
(ROOT_PWD)
(0 to 15 characters)
(Blank)
The language displayed in the
[Display Language]
Remote UI (English, French,
(DISP_LANG) * 1
German, Italian, Spanish,
Default
Japanese, Default)
[Link]
The links displayed in [Support
(LINK_NAME1) * 1
Links] in the Remote UI (0 to
(LINK_NAME2) * 1
32 characters)
[URL]
The URL displayed in [Support
(LINK_URL1) * 1
Links] in the Remote UI (0 to
(LINK_URL2) * 1
128 characters)
[Comments]
The comments displayed in
(LINK_COMMENT1) * 1
[Support Links] in the Remote
(LINK_COMMENT2) * 1
UI (0 to 64 characters)
[Link]
(DOWNLOAD_SITE_NAME) * 1
(Blank)
(Blank)
(Blank)
The links displayed in [Support
Links] in the Remote UI (0 to
Download Service
32 characters)
The URL displayed in [Support
Links] in the Remote UI
[URL]
(DOWNLOAD_SITE_URL) * 1
The URL displayed when
[Download Site] in the [Device
http://www.canon.com/download/
Manager] - [Network] page in
the Remote UI is clicked
(0 to 128 characters)
[Comments]
(DOWNLOAD_SITE_COMMENT) * 1
The comments displayed in
[Support Links] in the Remote
[SNMP v. 1]
Access using the SNMP v. 1
(SNMP_V1_ACCESS_ENB) * 1
protocol
[Access Rights]
Update network firmware
UI (0 to 64 characters)
YES
The operation mode of the
SNMP v. 1 agent (Read-only or Read and Write
㻡㻣㻢㻌㻛㻌㻣㻜㻡
(SNMP_V1_ACCESS_MODE) * 1
Read and Write)
[Community Name]
The community name of SNMP
(PUB_COMMUNITY) * 1
(0 to 32 characters)
[SNMP v. 3]
Access using the SNMP v. 3
(SNMP_V3_ACCESS_ENB) * 1
protocol
[Restrict TCP/IP Printing]
Whether to restrict the users
(TCP_CONT_ENB) * 1
who can print
[Permit Specified Addresses]
Accept or reject print jobs from
[Reject Specified Addresses]
users specified in [IP
(TCP_CONT_MODE) * 1
Addresses] (Accept, Reject)
[IP Addresses]
The IP addresses rejected to
(TCP_CONT_LIST) * 1
perform TCP/IP printing
[Restrict SNMP Monitoring/Setting Changes]
(SNMP_CONT_ENB) * 1
public
NO
NO
Accept
(Blank)
Whether to restrict users who
can monitor or change the
NO
SNMP settings
Accept or reject monitoring and
[Permit Specified Addresses]
changing of settings using the
[Reject Specified Addresses]
SNMP protocol for users
(SNMP_CONT_MODE) * 1
specified in [IP Addresses]
Accept
(Accept, Reject)
[IP Addresses]
(SNMP_CONT_LIST) * 1
[Restrict Multicast Discovery]
(SLP_CONT_ENB) * 1
[Respond to Specified IP Addresses]
[Do Not Respond to Specified Addresses]
(SLP_CONT_MODE) * 1
The IP addresses rejected to
monitor/change the SNMP
(Blank)
setting
Whether to restrict the users
who can perform the multicast
NO
discovery
Accept or reject the response to
multicast discovery searches
performed by users specified in
Accept
[IP Addresses] (Accept, Reject)
[IP Addresses]
The IP addresses rejected to
(SLP_CONT_LIST) * 1
perform the multicast discovery
[Restrict MAC Address Access]
Whether to restrict the devices
(MAC_CONT_ENB)
that can access
[Permit Specified Addresses]
Accept or reject access by a
[Reject Specified Addresses]
device specified in [MAC
(MAC_CONT_MODE)
Addresses] (Accept, Reject)
[MAC Addresses]
The MAC addresses permitted
(MAC_CONT_LIST)
or rejected to access
[Access Logs]
Whether to obtain security
(SEC_LOG_ENB) * 1
access logs
㻡㻣㻣㻌㻛㻌㻣㻜㻡
(Blank)
NO
Accept
(Blank)
NO
Security access logs to obtain
0: No Access Log to Obtain
1: Rejected TCP/IP Print Jobs
2: Rejected SNMP
Monitoring/Setting Changes
3: Rejected TCP/IP Print Jobs
and Rejected SNMP
Monitoring/Setting Changes
[Log Types]
4: Rejected Multicast
(SEC_LOG_KIND) * 1
0
Discoveries
5: Rejected TCP/IP Print Jobs
and Rejected Multicast
Discoveries
6: Rejected SNMP
Monitoring/Setting Changes and
Rejected Multicast Discoveries
7: Access All the Logs
The network transmission speed
or transfer mode
[Ethernet Driver Setting]
(AUTO_SENSE,
(NETWORK_SPEED) * 1
10_HALF_DX, 10_FULL_DX,
AUTO_SENSE
100_HALF_DX,
100_FULL_DX)
TCP/IP Settings
Item
[Frame Type]
(TCP_FRAME_TYPE)
(G_ARP_ENB) * 2
[DHCP]
(DHCP_ENB)
[BOOTP]
(BOOTP_ENB)
[RARP]
(RARP_ENB)
[IP Address]
(INT_ADDR)
[Subnet Mask]
(NET_MASK)
[Gateway Address]
(DEF_ROUT)
Description
Default Setting
The frame type used by TCP/IP
Ethernet II
Whether to use the Gratuitous ARP function
YES
Whether to use DHCP for the IP address setting
NO
Whether to use BOOTP for the IP address setting
NO
Whether to use RARP for the IP address setting
NO
The IP address of the printer
192.168.0.215
Subnet mask
0.0.0.0
Gateway address
0.0.0.0
[DNS Server Address]
㻡㻣㻤㻌㻛㻌㻣㻜㻡
(DNS_ADDR) * 1
The IP address of the DNS server
0.0.0.0
Whether to register this device in DNS dynamically
NO
The host name of this device (0 to 63 characters)
(Blank)
[DNS Dynamic Update]
(DDNS_ENB) * 1
[DNS Host Name]
(HOST_NAME) * 1
[DNS Domain Name]
The name of the domain to which this device belongs (0 to 64
(DOMAIN_NAME) * 1
characters)
(Blank)
[WINS Resolution]
(WINS_ENB) * 1
Whether to use WINS Resolution
YES
The WINS server address
0.0.0.0
Registration of the WINS host name (0 to 15 characters)
(Blank)
[WINS Server Address]
(WINS_ADDR1) * 1
[WINS Host Name]
(WINS_HOSTNAME) * 1
[Scope ID]
The identifier for determining the communication range of the
(NBT_SCOPE_ID) * 1
printer and computer (0 to 220 characters)
(Blank)
[SNTP Server Name]
(SNTP_ADDR) * 1
The IP address or name of the SNTP server (0 to 64 characters)
(SNTP_CHECK_INTERVAL) The time interval for SNTP updates (10 min, 30 min, 1 hour, 3
*2
hours, 6 hours, 12 hours, or 24 hours)
(Blank)
1hour
[Multicast Discovery Settings]
Whether to respond to multicast discovery searches
YES
(SLP_ENB) * 1
[Scope Name]
The scope name to be used in multicast discovery (0 to 32
(SLP_SCOPE) * 1
characters)
(USE_IP_PORT_NAME) * 2
Whether to use the unicast communication mode
NO
Whether to use the FTP server
YES
Whether to restrict the FTP access from end-users
NO
default
[FTP Settings]
(FTP_ENB) * 1
[Restrict User FTP Access]
(FTP_LIMIT_GENUSR) * 1
[Time Zone]
(TIME_ZONE)
[Daylight Saving Time]
(DAYLIGHT_SAVING)
GMT
Time Zone
+ 0:00
Whether to set the daylight saving time
㻡㻣㻥㻌㻛㻌㻣㻜㻡
NO
[I-07] Initializing the Network Settings
If you want to reset the network settings for the printer to the default values, use any method from among Remote UI,
FTP Client, and NetSpot Device Installer.
Even if none of the above methods work, you can initialize the network settings by using the reset button on the printer.
Initializing the Network Settings Using the Remote UI
Initializing the Network Settings Using FTP Client
See "FTP Client".
Initializing the Network Settings Using NetSpot Device Installer
See "NetSpot Device Installer".
Initializing the Network Settings Using the Reset Button
IMPORTANT
Precautions when initializing the network settings
Make sure that the printer is not operating before initializing the network settings.
If you initialize the network settings while the printer is printing or receiving data, the received
data may not be printed properly, or may result in paper jams or damage to the printer.
Initializing the Network Settings Using the Remote UI
Display the Printer Status Window.
Click [
] in the Windows task tray, and then select the printer name.
NOTE
When displaying the Printer Status Window from the printer driver
Click [
] (Display Printer Status Window) in locations such as in the [Page Setup] sheet.
Select [Remote UI] from the [Options] menu.
㻡㻤㻜㻌㻛㻌㻣㻜㻡
ĺ The Remote UI is displayed.
NOTE
If you cannot select [Remote UI]
You cannot select [Remote UI] if the printer and computer cannot communicate via a network.
When starting the Remote UI directly from a web browser
"Remote UI"
Log in as Administrator.
(1) Enter a password in [Administrator Password].
(2) Click [Log In].
NOTE
If the administrator password is not set
It is not required to enter any value in [Administrator Password].
"Setting and Changing the Administrator Password"
㻡㻤㻝㻌㻛㻌㻣㻜㻡
Select [Network] from the [Device Manager] menu.
Click [Show Parameter List] under [Network Interface].
Click [Reset to Default Settings].
㻡㻤㻞㻌㻛㻌㻣㻜㻡
Click [Yes].
ĺ The network settings are initialized.
Initializing the Network Settings Using the Reset Button
Turn the printer off.
㻡㻤㻟㻌㻛㻌㻣㻜㻡
Turn on the printer while pressing the reset button (A).
Press the reset button with the tip of a ball-point pen etc.
㻡㻤㻠㻌㻛㻌㻣㻜㻡
[I-08] Settings for Adding a Port
Depending on the method for setting the IP address of the printer, the value to be entered in [Printer Name or IP Address]
on the following screen displayed in the process of port addition varies.
If you want to set the IP address to be assigned to the printer manually (If you know the IP address
to use)
Enter the IP address in [Printer Name or IP Address].
If you want to set the IP address using the DNS server, specify the DNS settings for the
printer. Then, enter the printer name (the DNS name to be registered on the DNS server)
within up to 78 characters in [Printer Name or IP Address].
For example, enter the printer name as "AAA.BBB.com" if you have specified the host
name as "AAA" and the domain name as "BBB.com". However, enter "AAA.CCC.com" if
you can obtain the domain name (CCC.com) simultaneously when you obtain the IP address
from DHCP etc.
If you want to set the IP address to be assigned to the printer using DHCP etc.
Specify the settings such as the DHCP settings so that the same IP address is always
assigned to the printer when you start up the printer. For more details, see "If you want to
set the IP address to be assigned to the printer manually" above.
If a different IP address is assigned to the printer each time the printer starts up, specify the
DNS settings for the printer first. Then, enter the printer name (the DNS name to be
registered on the DNS server) within up to 78 characters in [Printer Name or IP Address].
For example, enter the printer name as "AAA.BBB.com" if you have specified the host
name as "AAA" and the domain name as "BBB.com". However, enter "AAA.CCC.com" if
you can obtain the domain name (CCC.com) simultaneously when you obtain the IP address
from DHCP etc.
IMPORTANT
If you are using Windows Vista or Server 2008
You cannot use Standard TCP/IP Port created in the [Printers] folder.
(You can use only Standard TCP/IP Port created automatically by performing the procedure in
"Auto Setup (Recommended Method)".)
NOTE
㻡㻤㻡㻌㻛㻌㻣㻜㻡
About the DNS settings
See "Configuring the Protocol Settings".
㻡㻤㻢㻌㻛㻌㻣㻜㻡
[I-09] Changing the Network Transmission Speed or Transfer Mode
You can change the network transmission speed or transfer mode using the following software.
Web browser (Remote UI)
You can change the settings by accessing the printer from your web browser via the network.
FTP Client
You can change the settings by accessing the FTP server of the printer using Command Prompt.
This section describes the procedure for changing the settings using a web browser (Remote UI).
NOTE
About the network transmission speed and transfer mode
Usually, you do not need to change the setting, since the transmission speed and transfer mode of
the network are detected automatically.
If the printer cannot communicate with other devices on the network successfully, set the network
transmission speed or transfer mode manually.
When changing the settings using FTP Client
"FTP Client"
Display the Printer Status Window.
Click [
] in the Windows task tray, and then select the printer name.
NOTE
When displaying the Printer Status Window from the printer driver
Click [
] (Display Printer Status Window) in locations such as in the [Page Setup] sheet.
Select [Remote UI] from the [Options] menu.
ĺ The Remote UI is displayed.
㻡㻤㻣㻌㻛㻌㻣㻜㻡
NOTE
If you cannot select [Remote UI]
You cannot select [Remote UI] if the printer and computer cannot communicate via a network.
When starting the Remote UI directly from a web browser
"Remote UI"
Log in as Administrator.
(1) Enter a password in [Administrator Password].
(2) Click [Log In].
NOTE
If the administrator password is not set
It is not required to enter any value in [Administrator Password].
"Setting and Changing the Administrator Password"
Select [Network] from the [Device Manager] menu.
㻡㻤㻤㻌㻛㻌㻣㻜㻡
Click [Ethernet Driver Setting] under [Network Interface].
Change the setting for [Ethernet Driver Setting].
(1) Change the network transmission speed or transfer mode.
(2) Click [OK].
㻡㻤㻥㻌㻛㻌㻣㻜㻡
When the following screen appears, click [Reset].
ĺ After completing the reset of the printer's network board, the settings are effective.
The settings also become effective by restarting the printer. (Turn off the printer
once, wait at least 10 seconds, and then turn it on.)
㻡㻥㻜㻌㻛㻌㻣㻜㻡
[I-10] Changing the Port Name of the Printer
You can change the port name of the printer (the print server name) using the following software.
Web browser (Remote UI)
You can change the settings by accessing the printer from your web browser via the network.
FTP Client
You can change the settings by accessing the FTP server of the printer using Command Prompt.
This section describes the procedure for changing the settings using a web browser (Remote UI).
NOTE
When changing the settings using FTP Client
"FTP Client"
Display the Printer Status Window.
Click [
] in the Windows task tray, and then select the printer name.
NOTE
When displaying the Printer Status Window from the printer driver
Click [
] (Display Printer Status Window) in locations such as in the [Page Setup] sheet.
Select [Remote UI] from the [Options] menu.
ĺ The Remote UI is displayed.
NOTE
If you cannot select [Remote UI]
You cannot select [Remote UI] if the printer and computer cannot communicate via a network.
㻡㻥㻝㻌㻛㻌㻣㻜㻡
When starting the Remote UI directly from a web browser
"Remote UI"
Log in as Administrator.
(1) Enter a password in [Administrator Password].
(2) Click [Log In].
NOTE
If the administrator password is not set
It is not required to enter any value in [Administrator Password].
"Setting and Changing the Administrator Password"
Select [Network] from the [Device Manager] menu.
㻡㻥㻞㻌㻛㻌㻣㻜㻡
Click [Change] under [General].
Change the [Print Server Name] setting.
(1) Change the port name of the printer (the print server name).
(2) Click [OK].
㻡㻥㻟㻌㻛㻌㻣㻜㻡
[I-11] Checking and Specifying the Unicast Communication Mode
About the Unicast Communication Mode
The unicast communication mode makes communication by using the unicast method in sending status from the printer,
which is not normally performed by the broadcast communication mode.
If you want to use the printer in a network environment in which the broadcast communication mode is not used, you
need to switch the mode to the unicast communication mode.
If you want to use the unicast communication mode, set the printer settings to enter into the unicast communication mode
using FTP Client.
IMPORTANT
When using the Unicast Communication Mode
Because this affects the administration of your network environment, be sure to consult your
network administrator.
Setting the Printer to Enter into the Unicast Communication Mode
Run Command Prompt.
Windows XP, Server 2003, Vista, and Server 2008
)URPWKH>6WDUW@PHQXVHOHFW>$OO3URJUDPV@ĺ>$FFHVVRULHV@ĺ
[Command Prompt].
Enter "ftp <the IP address of the printer>", then press the [ENTER] key on your keyboard.
Input Example: "ftp 192.168.0.215"
NOTE
If you are not sure about the IP address of the printer
Refer to the Network Status Print printed in "Printing Status Print to Check the Printer Status" or
ask your network administrator.
Enter "root" as the user name, then press the [ENTER] key on your keyboard.
Enter the administrator password, then press the [ENTER] key on your keyboard.
If the administrator password has not been specified yet, do not enter any value, but press
the [ENTER] key on your keyboard.
㻡㻥㻠㻌㻛㻌㻣㻜㻡
Enter "get config<the file name>", and then press [ENTER] on your keyboard.
ĺ The config file is downloaded.
The characters entered for <the file name> become the name of the downloaded
config file.
NOTE
If the config file cannot be found
Search for the config file using the file search function of your operating system.
(The download directory for the config file varies depending on the operating system or settings.)
Open the downloaded config file in Notepad or a similar text editor.
Change "USE_IP_PORT_NAME" to "YES".
Save and close the config file.
㻡㻥㻡㻌㻛㻌㻣㻜㻡
Enter "put<the file name> CONFIG", and then press [ENTER] on your keyboard.
In <the file name>, enter the name of the config file that was entered when the file was
downloaded.
Enter "get reset", then press the [ENTER] key on your keyboard.
ĺ After completing the reset of the printer's network board, the settings are effective.
The settings also become effective by restarting the printer. (Turn off the printer
once, wait at least 10 seconds, and then turn it on.)
Enter "quit", then press the [ENTER] key on your keyboard.
Enter "exit", then press the [ENTER] key on your keyboard.
ĺ Command Prompt closes.
IMPORTANT
When returning to the normal mode (broadcast communication mode)
Change "USE_IP_PORT_NAME" to "NO".
NOTE
If the message <Network Board Error> appears
If the message <Network Board Error> appears in the Printer Status Window after setting the
unicast communication mode, refresh the display of the Printer Status Window.
㻡㻥㻢㻌㻛㻌㻣㻜㻡
[I-12] Checking the MAC Address
You can check the MAC address of the printer using the following methods.
Checking on the printer unit
The MAC address is indicated at (A) on the printer unit as shown in the following figure.
Checking by Network Status Print
The MAC address is indicated at (A) on Network Status Print as shown in the following figure.
NOTE
How to print Network Status Print
"Printing Status Print to Check the Printer Status"
Checking by the Remote UI
The MAC address is indicated at (A) in the [Network] page in [Device Manager] as shown in the following figure.
㻡㻥㻣㻌㻛㻌㻣㻜㻡
NOTE
About the Remote UI
See "Remote UI".
㻡㻥㻤㻌㻛㻌㻣㻜㻡
[I-13] Print Server Environment (Printer Sharing)
"Print Server Environment (Printer Sharing)"
㻡㻥㻥㻌㻛㻌㻣㻜㻡
[I-14] Configuring the Print Server
"Configuring the Print Server"
㻢㻜㻜㻌㻛㻌㻣㻜㻡
[I-15] Installation on Clients
"Installation on Clients"
㻢㻜㻝㻌㻛㻌㻣㻜㻡
[J] Managing and Configuring the Printer
㻢㻜㻞㻌㻛㻌㻣㻜㻡
[J-02] Printer Status Window
The Printer Status Window allows you to check the printer status (such as the operation status and job information),
control the printer operation, and so on.
Available Operations in the Printer Status Window
Functions on the Printer Status Window
Displaying the Printer Status Window
Available Operations in the Printer Status Window
You can perform the following operations and so on using the Printer Status Window.
Checking the settings and solutions if an error occurs or printing is not performed
"A Message Appears in the Printer Status Window"
Canceling a job
"Canceling a Job"
Checking the printer status and information (such as the user name and document name) about the
current print job
"Checking the Printer Status Using the Printer Status Window"
Performing utility functions including calibration and cleaning the fixing roller
"Calibrating the Printer"
"Correcting 'Out-of-Register Colors'"
"Cleaning the Inside of the Printer"
"Printing Status Print to Check the Printer Status"
Specifying the settings for the printer unit including registering paper sizes for drawers and setting
the IP address
"Loading Paper and Registering the Paper Size"
"Setting the Energy-saving Mode"
"Setting the IP Address"
Functions on the Printer Status Window
㻢㻜㻟㻌㻛㻌㻣㻜㻡
(1) Menu bar
[Job] menu:
[Options] menu:
[Help] menu:
(2) Tool bar
(Print queue):
You can cancel a job, resume a job which is paused during printing for some reason,
or display the print queue.
You can perform utility functions, specify the settings for the printer unit, and so on.
Use this menu to display Help and the version information.
Displays the print queue, a function of Windows.
For details on the print queue, see Windows Help.
(Refresh):
Obtains the printer status and refreshes the Printer Status Window display.
(Consumables Information): Displays the [Consumables Information] dialog box. You can check the status of the
toner cartridges.
(3) [Icon]:
Displays the printer status.
(4) [Message Area]:
Displays messages about the printer status.
(5) [Message Area] (Auxiliary): Displays additional information (situation explanation, solutions, etc.) if an error or
other such event occurs.
(6) [Animation Area]:
Displays the printer status using an animated graphic. Displays the printing progress
or error conditions depending on the printer status.
(7) [Job Information Area]:
Displays information about the job.
(8) [Progress Bar]:
Displays the printing progress of the current job. The bar gradually grows indicating
the printing progress.
(9) [Status Bar]:
Displays the device to which the printer is connected.
(10)
(Resolve Error):
You can resume a job when it is paused during printing for some reason.
(11)
(Cancel Job):
Cancels the current job. While another user's job is being printed, the [Cancel Job]
button is displayed in gray.
NOTE
For details on each option in the Printer Status Window
See Help.
"How to Use Help"
Displaying the Printer Status Window
There are the following two ways to display the Printer Status Window.
Click [
Click [
] in the Windows task tray, and then select the printer name.
] (Display Printer Status Window) in locations such as in the [Page Setup] sheet in the printer
driver.
㻢㻜㻠㻌㻛㻌㻣㻜㻡
NOTE
Displaying the Printer Status Window automatically
When the Printer Status Window is not displayed, the Printer Status Window icon is displayed
automatically under the following situations.
When an error has occurred while printing
When a toner cartridge needs to be replaced soon while printing
When a toner cartridge has reached the end of its life while printing
Clicking this icon can display the Printer Status Window.
The icon may not be displayed even under the above situations depending on the settings
for the [Preferences (Users)] or [Preferences (Administrators)] dialog box in the Printer
Status Window.
For details on the [Preferences (Users)] or [Preferences (Administrators)] dialog box, see
Help.
"How to Use Help"
㻢㻜㻡㻌㻛㻌㻣㻜㻡
[J-03] Remote UI
The Remote UI is software that allows you to manage the printer using a web browser.
By accessing the printer from the web browser via a network, you can check the printer status or job logs, and specify
various settings.
Features of the Remote UI
Remote UI System Requirements
Starting the Remote UI
Screen Layout of the Remote UI
Logging in as Administrator
Changing the Remote UI Display Language
Managing Print Jobs
Displaying or Changing Support Links
Features of the Remote UI
No specific software is needed.
The Remote UI can be operated in a Web browser. You do not need specific software to operate the Remote UI.
The printer status can be checked from a remote location.
You can check the current printer status, printer information, print job logs, etc. You can manage the printer from a
remote computer.
㻢㻜㻢㻌㻛㻌㻣㻜㻡
Central management of all the printer settings with the administrator password
Only the administrator can configure the settings or perform the operations related to the printer management by setting
the administrator password.
Remote UI System Requirements
• Web browser:
Internet Explorer 4.01 SP1 or later
Netscape Navigator 4.7 or later
• Operating system: An operating system on which the above Web browsers can run
• Display:
Resolution
800 x 600 pixels or more
Display colors
256 colors or more
Starting the Remote UI
There are the following two ways to start the Remote UI.
Starting the Remote UI from the Printer Status Window
Starting the Remote UI Directly from a Web Browser
㻢㻜㻣㻌㻛㻌㻣㻜㻡
Starting the Remote UI from the Printer Status Window
Display the Printer Status Window.
Click [
] in the Windows task tray, and then select the printer name.
NOTE
When displaying the Printer Status Window from the printer driver
Click [
] (Display Printer Status Window) in locations such as in the [Page Setup] sheet.
Select [Remote UI] from the [Options] menu.
ĺ The Remote UI is displayed.
NOTE
㻢㻜㻤㻌㻛㻌㻣㻜㻡
If you cannot select [Remote UI]
You cannot select [Remote UI] if the printer and computer cannot communicate via a network.
Starting the Remote UI Directly from a Web Browser
Start the web browser.
Enter "http:// <the IP address of the printer> /" in the address field, and then press the
[ENTER] key on your keyboard.
Input Example: "http://192.168.0.215/"
ĺ The Remote UI is displayed.
NOTE
If you are not sure about the IP address of the printer
Use either of the following methods to check it.
Refer to Network Status Print.
"Printing Status Print to Check the Printer Status"
Consult your network administrator.
If the host name of the printer is registered in the DNS server
You can enter ["hostname"."domain name"] instead of the IP address.
㻢㻜㻥㻌㻛㻌㻣㻜㻡
Input Example: "http://my_printer.xy_dept.company.com/"
If the Remote UI top page is not displayed in the Web browser
Make sure that the IP address or ["hostname"."domain name"] is correct.
If the Remote UI top page is not displayed even when the value is correctly entered, consult your
network administrator.
When using a proxy server
On the settings for the proxy server of the web browser, add the IP address of the printer to
[Exceptions] (the addresses that do not use the proxy server).
The settings vary depending on the network environment. Consult your network administrator.
About Cookies
Configure your Web browser to enable cookies.
Starting the Remote UI
If the Remote UI is running on multiple computers at a time, the latest settings are valid.
If you want to log in as Administrator, it is recommended that only one Remote UI should be
running at a time.
If the Remote UI is not displayed using the above procedure
Enter "http:// <the IP address of the printer> /cab/top.shtml" in the address field to redisplay the
Remote UI.
Screen Layout of the Remote UI
㻢㻝㻜㻌㻛㻌㻣㻜㻡
(1) Displays the Remote UI top page.
(2) Displays the hierarchy of the currently displayed page.
Clicking a displayed page name displays the page of which you clicked the name.
(3) When you log in as Administrator, enter the administrator password.
"Setting and Changing the Administrator Password"
(4) You can log in as Administrator by entering the administrator password, then clicking this button.
If you are using the Remote UI as Administrator, you can log out by clicking this button.
(5) Displays each setting page.
(6) If the page is scrolled down, moves the scroll box up to the top of the page.
(7) Updates the information in the currently displayed page to the latest one.
(8) Displays Help for the currently displayed page in a new window.
(9) Displays an image of the printer.
The displayed image varies depending on the availability of the paper source options.
Logging in as Administrator
By logging in as Administrator, you can perform all the operations and settings of the Remote UI.
Log in as Administrator.
(1) Enter a password in [Administrator Password].
(2) Click [Log In].
㻢㻝㻝㻌㻛㻌㻣㻜㻡
NOTE
If the administrator password is not set
It is not required to enter any value in [Administrator Password].
"Setting and Changing the Administrator Password"
When exiting the administrator mode
Click [Log Out].
Changing the Remote UI Display Language
Select English, French, German, Italian, Spanish, or Japanese for the Remote UI display language.
Log in as Administrator.
(1) Enter a password in [Administrator Password].
(2) Click [Log In].
㻢㻝㻞㻌㻛㻌㻣㻜㻡
NOTE
If the administrator password is not set
It is not required to enter any value in [Administrator Password].
"Setting and Changing the Administrator Password"
Select [Information] from the [Device Manager] menu.
Click [Change] under [Language].
㻢㻝㻟㻌㻛㻌㻣㻜㻡
Select [Display Language].
Click [OK].
㻢㻝㻠㻌㻛㻌㻣㻜㻡
Managing Print Jobs
Displaying and Deleting Print Jobs
Displaying Print Logs
Displaying and Deleting Print Jobs
You can check the job currently being printed or delete jobs.
From the [Job Manager] menu, select [Print Job].
ĺ The job currently being printed is displayed.
NOTE
About [Document Name]
A job file name of up to 20 characters can be displayed. If the number of characters exceeds 20,
the characters after the limited number are not displayed, or some characters are not displayed
properly.
Also, depending on the application, the application name may be added to the beginning of the
file name.
About [Interface Name]
If you print via USB, [Local] is displayed in [Interface Name]. If you print via the network,
nothing is displayed in the field.
If you want to delete the job, click [Delete].
㻢㻝㻡㻌㻛㻌㻣㻜㻡
NOTE
About the pages in process of printing
The pages in process of printing when [Delete] is clicked will be printed.
Displaying Print Logs
Allows you to check the job logs.
Select [Print Log] from the [Job Manager] menu.
NOTE
㻢㻝㻢㻌㻛㻌㻣㻜㻡
Print logs
Up to 32 jobs can be displayed.
When the number of jobs exceeds 32, the print logs are automatically deleted
starting from the oldest one.
The print logs are deleted when you turn off the printer.
About [Document Name]
A job file name of up to 20 characters can be displayed. If the number of characters exceeds 20,
the characters after the limited number are not displayed, or some characters are not displayed
properly.
Also, depending on the application, the application name may be added to the beginning of the
file name.
About [Interface Name]
If you print via USB, [Local] is displayed in [Interface Name]. If you print via the network,
nothing is displayed in the field.
Displaying or Changing Support Links
The links to the sites that provide information about the printer support are supplied in the Remote UI, and you can
access the sites from the Remote UI as needed. If you have logged in as Administrator, you can change the links.
Displaying a Support Page
Changing Support Links
Displaying a Support Page
Click a link you want to display.
NOTE
㻢㻝㻣㻌㻛㻌㻣㻜㻡
Displaying a support page from the [Support Links] page
(1) Select [Support Links].
(2) Click a link you want to display.
Changing Support Links
You can change support links or comments.
Log in as Administrator.
(1) Enter a password in [Administrator Password].
(2) Click [Log In].
NOTE
㻢㻝㻤㻌㻛㻌㻣㻜㻡
If the administrator password is not set
Leave the [Current Password] field blank.
"Setting and Changing the Administrator Password"
Select [Support Links].
Click [Edit].
Change the link.
(1) Specify each link as needed.
(2) Confirm the settings, then click [OK].
㻢㻝㻥㻌㻛㻌㻣㻜㻡
[Link]:
Enter the link name.
[URL]:
Enter the URL of the link.
[Comments]: Enter a comment for the link.
NOTE
About [Download Site]
The setting for [Download Site] are reflected to the link that is accessed by clicking [Download
Site] under [Firmware] in the [Device Manager] - [Network] page.
㻢㻞㻜㻌㻛㻌㻣㻜㻡
[J-04] FTP Client
FTP Client allows you to specify the settings for various information about the printer as well as configure the network
and security by accessing the FTP server on the printer using Command Prompt.
Also, you can upgrade the firmware.
Managing the Printer Using FTP Client
Initializing the Network Settings Using FTP Client
Managing the Printer Using FTP Client
Run Command Prompt.
Windows XP, Server 2003, Vista, and Server 2008
)URPWKH>6WDUW@PHQXVHOHFW>$OO3URJUDPV@ĺ>$FFHVVRULHV@ĺ
[Command Prompt].
Enter "ftp <the IP address of the printer>", then press the [ENTER] key on your keyboard.
Input Example: "ftp 192.168.0.215"
NOTE
If you are not sure about the IP address of the printer
Refer to the Network Status Print printed in "Printing Status Print to Check the Printer Status" or
ask your network administrator.
Enter "root" as the user name, then press the [ENTER] key on your keyboard.
NOTE
About the user name
You can log in by entering a name other than "root" (or leaving the field blank). In this case, you
can perform operations other than settings.
Enter the administrator password, then press the [ENTER] key on your keyboard.
If the administrator password has not been specified yet, do not enter any value, but press
the [ENTER] key on your keyboard.
Enter "get config<the file name>", and then press [ENTER] on your keyboard.
ĺ The config file is downloaded.
The characters entered for <the file name> become the name of the downloaded
㻢㻞㻝㻌㻛㻌㻣㻜㻡
config file.
NOTE
When upgrading the firmware
Enter "put<the update file of the firmware> FLASH", and then press the [ENTER] key on your
keyboard.
For details on the update file of the firmware, see "Updating the Network Board Firmware".
If the config file cannot be found
Search for the config file using the file search function of your operating system.
(The download directory for the config file varies depending on the operating system or settings.)
Edit the downloaded config file in Notepad or a similar text editor.
For details on descriptions of each option, see "Setting Items".
Enter "put<the file name> CONFIG", and then press [ENTER] on your keyboard.
In <the file name>, enter the name of the config file that was entered when the file was
downloaded.
Enter "get reset", then press the [ENTER] key on your keyboard.
ĺ After completing the reset of the printer's network board, the settings are effective.
The settings also become effective by restarting the printer. (Turn off the printer
once, wait at least 10 seconds, and then turn it on.)
Enter "quit", then press the [ENTER] key on your keyboard.
Enter "exit", then press the [ENTER] key on your keyboard.
ĺ Command Prompt closes.
Initializing the Network Settings Using FTP Client
IMPORTANT
Precautions when initializing the network settings
Make sure that the printer is not operating before initializing the network settings.
If you initialize the network settings while the printer is printing or receiving data, the received
data may not be printed properly, or may result in paper jams or damage to the printer.
㻢㻞㻞㻌㻛㻌㻣㻜㻡
Run Command Prompt.
Windows XP, Server 2003, Vista, and Server 2008
)URPWKH>6WDUW@PHQXVHOHFW>$OO3URJUDPV@ĺ>$FFHVVRULHV@ĺ
[Command Prompt].
Enter "ftp<the IP address of the printer>", then press the [ENTER] key on your keyboard.
Input Example: "ftp 192.168.0.215"
NOTE
If you are not sure about the IP address of the printer
Refer to the Network Status Print printed in "Printing Status Print to Check the Printer Status" or
ask your network administrator.
Enter "root" as the user name, then press the [ENTER] key on your keyboard.
NOTE
About the user name
You can log in by entering a name other than "root" (or leaving the field blank). In this case, you
can perform operations other than settings.
Enter the administrator password, then press the [ENTER] key on your keyboard.
If the administrator password has not been specified yet, do not enter any value, but press
the [ENTER] key on your keyboard.
Enter "get defaults", then press the [ENTER] key on your keyboard.
ĺ The defaults file (the list of the default values of the network settings) is downloaded.
NOTE
If the defaults file cannot be found
Search for the defaults file using the file search function of your operating system.
(The download directory for the defaults file varies depending on the operating system or
settings.)
Enter "put defaults CONFIG", then press the [ENTER] key on your keyboard.
㻢㻞㻟㻌㻛㻌㻣㻜㻡
Enter "get reset", then press the [ENTER] key on your keyboard.
ĺ After completing the reset of the printer's network board, the network settings are
initialized.
The network settings are initialized also by restarting the printer. (Turn off the
printer once, wait at least 10 seconds, and then turn it on.)
Enter "quit", then press the [ENTER] key on your keyboard.
Enter "exit", then press the [ENTER] key on your keyboard.
ĺ Command Prompt closes.
㻢㻞㻠㻌㻛㻌㻣㻜㻡
[J-05] NetSpot Device Installer
NetSpot Device Installer is the software to configure the basic protocol settings as well as display the statuses of various
printers on a network.
Install the software on your computer or run the software directly from the supplied CD-ROM.
Types of Devices That Can Be Configured
NetSpot Device Installer System Requirements
Installing NetSpot Device Installer
Running NetSpot Device Installer
Using NetSpot Device Installer
Initializing the Network Settings Using NetSpot Device Installer
Uninstalling NetSpot Device Installer
NOTE
About the screenshots of NetSpot Device Installer
The screenshots may be different from those actually you see on the screen.
Types of Devices That Can Be Configured
You can use NetSpot Device Installer to configure the default network protocol settings of a device connected to the
TCP/IP network.
You cannot configure the settings of a device connected to a network other than a TCP/IP network.
NetSpot Device Installer System Requirements
Operating system
Windows XP Professional or Home Edition
Windows XP Professional x64 Edition
Windows Server 2003
Windows Server 2003 x64 Editions
Windows Vista (32-bit or 64-bit version)
㻢㻞㻡㻌㻛㻌㻣㻜㻡
Windows Server 2008 (32-bit or 64-bit version)
Windows 7 (32-bit or 64-bit version)
For details on the latest NetSpot Device Installer, see the Canon Web site (http://www.canon.com/).
Computer
A computer on which any one of the above operating systems can run
Hard disk space
Free disk space of 20 MB or more (to install the software on the computer)
Protocol
TCP/IP
Protocol stack
TCP/IP protocol supplied with Windows
Installing NetSpot Device Installer
Use the following procedure to install NetSpot Device Installer.
You can use NetSpot Device Installer without installing it.
Running NetSpot Device Installer Directly from the Supplied CD-ROM
IMPORTANT
Precautions when installing NetSpot Device Installer
Close all the other applications before the installation.
A user without administrative rights cannot perform installation. To perform
installation, be sure to log on as a user with administrative rights.
Contact your system administrator if you are not sure about your administrative
rights.
If Windows Firewall is enabled
You cannot search for printers on a subnet that is different from that of the computer using
NetSpot Device Installer.
To search for a printer on a subnet that is different from the one that the computers using NetSpot
Device Installer are on, add NetSpot Device Installer to Windows Firewall during the installation.
Insert the supplied CD-ROM "User Software" into the CD-ROM drive of your computer.
When the following screen appears, click [Exit].
㻢㻞㻢㻌㻛㻌㻣㻜㻡
NOTE
If the [AutoPlay] dialog box appears (Windows Vista and Server 2008)
Select [Open folder to view files], and then proceed to Step 4.
Open [My Computer] or [Computer].
Windows XP and Server 2003
From the [Start] menu, select [My Computer].
Windows Vista and Server 2008
From the [Start] menu, select [Computer].
Right-click the CD-ROM icon, then select [Open] from the pop-up menu.
Double-click the [NetSpot_Device_Installer] folder.
㻢㻞㻣㻌㻛㻌㻣㻜㻡
Double-click the [Windows] folder.
Double-click [nsdisetup.exe].
NOTE
If the [User Account Control] dialog box appears (Windows Vista and Server 2008)
Click [Continue].
㻢㻞㻤㻌㻛㻌㻣㻜㻡
Read the contents of License Agreement, and then click [Yes].
Click [Browse], and then select the installation directory.
NOTE
When adding NetSpot Device Installer to the [Start] menu
Select the [Add to Start Menu] check box.
Click [OK].
ĺ The installation starts.
NOTE
㻢㻞㻥㻌㻛㻌㻣㻜㻡
If Windows Firewall is enabled
The following screen appears. Click [Yes].
If you click [No], you cannot search for the printers in which the IP address has not been set
yet or printers on a subnet that is different from that of the computer using NetSpot Device
Installer.
Click [OK].
Click [Cancel].
NOTE
About Plug-ins
You can expand the functions of NetSpot Device Installer by adding Plug-ins.
For more details on Plug-ins, see Readme of NetSpot Device Installer.
To display Readme of NetSpot Device Installer, click [
] in [NetSpot Device Installer for
TCP/IP] in the [Additional Software Programs] screen in CD-ROM Setup.
Running NetSpot Device Installer
You can run NetSpot Device Installer in either of the following two ways.
Running NetSpot Device Installer from a Computer
Running NetSpot Device Installer Directly from the Supplied CD-ROM
㻢㻟㻜㻌㻛㻌㻣㻜㻡
Running NetSpot Device Installer from a Computer
Run NetSpot Device Installer.
Windows XP, Server 2003, Vista, and Server 2008
)URPWKH>6WDUW@PHQXVHOHFW>$OO3URJUDPV@ĺ>1HW6SRW'HYLFH,QVWDOOHU@
ĺ>1HW6SRW'HYLFH,QVWDOOHU@
NOTE
If NetSpot Device Installer is not found in the [Start] menu
Double-click [nsdi.exe] in the folder in which NetSpot Device Installer is installed.
If the [User Account Control] dialog box appears (Windows Vista and Server 2008)
Click [Continue].
Running NetSpot Device Installer Directly from the Supplied CD-ROM
Insert the supplied CD-ROM "User Software" into the CD-ROM drive of your computer.
If the CD-ROM is already in the drive, eject the disk and reinsert it into the drive.
ĺ CD-ROM Setup appears.
It may take time to display CD-ROM Setup depending on your environment.
NOTE
If CD-ROM Setup does not appear
Display it using the following procedure.
(The CD-ROM drive name is indicated as "D:" in this manual. The CD-ROM drive name may
differ depending on the computer you are using.)
Windows XP and Server 2003
1. From the [Start] menu, select [Run].
2. Enter "D:\English\MInst.exe", and then click [OK].
Windows Vista and Server 2008
1. Enter "D:\English\MInst.exe" in [Start Search] under the [Start]
menu.
2. Press the [ENTER] key on the keyboard.
㻢㻟㻝㻌㻛㻌㻣㻜㻡
If the [AutoPlay] dialog box appears (Windows Vista and Server 2008)
Click [Run AUTORUN.EXE].
If the [User Account Control] dialog box appears (Windows Vista and Server 2008)
Click [Continue].
Click [Additional Software Programs].
Click [Start] for [NetSpot Device Installer for TCP/IP].
NOTE
If the [License Agreement] dialog box appears
Read the contents of License Agreement, and then click [Yes].
If the [User Account Control] dialog box appears (Windows Vista and Server 2008)
Click [Continue].
㻢㻟㻞㻌㻛㻌㻣㻜㻡
Using NetSpot Device Installer
NetSpot Device Installer allows you to configure the basic protocol settings as well as display the statuses of various
printers on a network.
For details on the procedure for setting the IP address using NetSpot Device Installer, see "Setting the IP Address".
For more details on other procedures for using NetSpot Device Installer, see Help.
Help is displayed by clicking [Help] in the [Help] menu.
Initializing the Network Settings Using NetSpot Device Installer
IMPORTANT
Precautions when initializing the network settings
Make sure that the printer is not operating before initializing the network settings.
If you initialize the network settings while the printer is printing or receiving data, the received
data may not be printed properly, or may result in paper jams or damage to the printer.
Select the printer for which you want to initialize the network settings.
From the [Device] menu, select [Restore to Default Settings].
㻢㻟㻟㻌㻛㻌㻣㻜㻡
Click [Yes].
Perform the following procedure.
If the message <The device has been reset.> appears
Click [OK].
To perform a reset operation properly, wait for approximately 20 seconds or longer as is
after clicking [OK].
ĺ After completing the reset of the printer's network board, the settings are effective.
If the message <Turn the device off and then on again.> appears
Click [OK], and then cycle the power of the printer.
ĺ The settings are effective after cycling the power of the printer.
Uninstalling NetSpot Device Installer
The process of removing software to restore the computer to the same state as before the software was installed is
referred to as uninstallation. Use the following procedure to uninstall NetSpot Device Installer.
Uninstall NetSpot Device Installer.
Windows XP, Server 2003, Vista, and Server 2008
)URPWKH>6WDUW@PHQXVHOHFW>$OO3URJUDPV@ĺ>1HW6SRW'HYLFH,QVWDOOHU@
ĺ>8QLQVWDOO1HW6SRW'HYLFH,QVWDOOHU@
㻢㻟㻠㻌㻛㻌㻣㻜㻡
ĺ Command Prompt appears, and the uninstallation starts.
The uninstallation is completed when Command Prompt closes.
NOTE
If NetSpot Device Installer is not found in the [Start] menu
Double-click [rmnsdi.bat] in the following location.
Windows XP and Server 2003
"\Documents and Settings\<the user name>\Local Settings\Application
Data\canon.com\nsdi" in the drive on which the system is installed
Windows Vista and Server 2008
"\Users\<the user name>\AppData\Local\canon.com\nsdi" in the drive on which the
system is installed
If NetSpot Device Installer cannot be uninstalled completely
See Readme in the folder in which NetSpot Device Installer is installed.
㻢㻟㻡㻌㻛㻌㻣㻜㻡
[J-06] Setting and Changing the Administrator Password
You can set the administrator password using the following software.
Web browser (Remote UI)
You can specify the settings by accessing the printer from your web browser via the network.
FTP Client
You can specify the settings by accessing the FTP server of the printer using Command Prompt.
NetSpot Device Installer
You can specify the settings using the Canon software, NetSpot Device Installer, in the supplied CD-ROM.
Only the administrator (user who know the password) can configure the settings or perform the operations related to the
printer management by setting the administrator password.
Also, the administrator password can be changed anytime.
This section describes the procedure for specifying the settings using a web browser (Remote UI).
Setting the Administrator Password
Changing the Administrator Password
NOTE
Specifying the settings using FTP Client
"FTP Client"
Specifying the settings using NetSpot Device Installer
"NetSpot Device Installer"
Setting the Administrator Password
Display the Printer Status Window.
Click [
] in the Windows task tray, and then select the printer name.
NOTE
When displaying the Printer Status Window from the printer driver
Click [
] (Display Printer Status Window) in locations such as in the [Page Setup] sheet.
Select [Remote UI] from the [Options] menu.
㻢㻟㻢㻌㻛㻌㻣㻜㻡
ĺ The Remote UI is displayed.
NOTE
If you cannot select [Remote UI]
You cannot select [Remote UI] if the printer and computer cannot communicate via a network.
When starting the Remote UI directly from a web browser
"Remote UI"
Click [Log In].
NOTE
About the default administrator password
The administrator password is not set by default. Log in to the Remote UI without entering a
password.
Select [Information] from the [Device Manager] menu.
㻢㻟㻣㻌㻛㻌㻣㻜㻡
Click [Change] under [Security].
Set the administrator password.
(1) Enter a desired password. Up to 15 characters can be entered.
(2) To confirm the password, enter the entered [New Password] again.
(3) Click [OK].
㻢㻟㻤㻌㻛㻌㻣㻜㻡
NOTE
Setting the administrator password for the first time
It is not required to enter any value in [Current Password].
Changing the Administrator Password
Display the Printer Status Window.
Click [
] in the Windows task tray, and then select the printer name.
NOTE
When displaying the Printer Status Window from the printer driver
Click [
] (Display Printer Status Window) in locations such as in the [Page Setup] sheet.
Select [Remote UI] from the [Options] menu.
㻢㻟㻥㻌㻛㻌㻣㻜㻡
ĺ The Remote UI is displayed.
NOTE
If you cannot select [Remote UI]
You cannot select [Remote UI] if the printer and computer cannot communicate via a network.
When starting the Remote UI directly from a web browser
"Remote UI"
Log in as Administrator.
(1) Enter a password in [Administrator Password].
(2) Click [Log In].
Select [Information] from the [Device Manager] menu.
㻢㻠㻜㻌㻛㻌㻣㻜㻡
Click [Change] under [Security].
Enter the password currently being used.
㻢㻠㻝㻌㻛㻌㻣㻜㻡
Set a new password.
(1) Enter a new desired password. Up to 15 characters can be entered.
(2) To confirm the password, enter the entered [New Password] again.
(3) Click [OK].
㻢㻠㻞㻌㻛㻌㻣㻜㻡
[J-07] Specifying and Changing the Device Name or Administrator Information
You can specify and change the device name or administrator information using the following software.
Web browser (Remote UI)
You can specify the settings by accessing the printer from your web browser via the network.
FTP Client
You can specify the settings by accessing the FTP server of the printer using Command Prompt.
NetSpot Device Installer
You can specify the settings using the Canon software, NetSpot Device Installer, in the supplied CD-ROM.
This section describes the procedure for specifying the settings using a web browser (Remote UI).
NOTE
Specifying the settings using FTP Client
"FTP Client"
Specifying the settings using NetSpot Device Installer
"NetSpot Device Installer"
Display the Printer Status Window.
Click [
] in the Windows task tray, and then select the printer name.
NOTE
When displaying the Printer Status Window from the printer driver
Click [
] (Display Printer Status Window) in locations such as in the [Page Setup] sheet.
Select [Remote UI] from the [Options] menu.
ĺ The Remote UI is displayed.
㻢㻠㻟㻌㻛㻌㻣㻜㻡
NOTE
If you cannot select [Remote UI]
You cannot select [Remote UI] if the printer and computer cannot communicate via a network.
When starting the Remote UI directly from a web browser
"Remote UI"
Log in as Administrator.
(1) Enter a password in [Administrator Password].
(2) Click [Log In].
NOTE
If the administrator password is not set
It is not required to enter any value in [Administrator Password].
"Setting and Changing the Administrator Password"
Select [Information] from the [Device Manager] menu.
㻢㻠㻠㻌㻛㻌㻣㻜㻡
Click [Change] under [Device Information].
Specify and change the device name or administrator information.
(1) Specify and change each setting.
(2) Click [OK].
㻢㻠㻡㻌㻛㻌㻣㻜㻡
[Device Name]: Enter the printer name.
[Location]:
Enter the location to install the printer.
[Administrator]: Enter the name of the printer administrator.
[Phone]:
Enter the telephone number of the printer administrator.
[Comments]:
Enter the comments of the printer administrator.
㻢㻠㻢㻌㻛㻌㻣㻜㻡
[J-08] Checking by the Remote UI
Displaying the Remote UI
Checking the Printer Settings
Displaying the Remote UI
Display the Printer Status Window.
Click [
] in the Windows task tray, and then select the printer name.
NOTE
When displaying the Printer Status Window from the printer driver
Click [
] (Display Printer Status Window) in locations such as in the [Page Setup] sheet.
Select [Remote UI] from the [Options] menu.
ĺ The Remote UI is displayed.
NOTE
If you cannot select [Remote UI]
You cannot select [Remote UI] if the printer and computer cannot communicate via a network.
When starting the Remote UI directly from a web browser
"Remote UI"
Checking the Printer Settings
㻢㻠㻣㻌㻛㻌㻣㻜㻡
By obtaining information from the printer, you can display the current printer status and printer information in the
Remote UI.
To check the printer settings, select [Information] or [Network] from the [Device Manager] menu.
[Information] Page
You can check the printer information, security settings, etc.
[Network] Page
You can check the network settings etc.
[Information] Page
㻢㻠㻤㻌㻛㻌㻣㻜㻡
㻢㻠㻥㻌㻛㻌㻣㻜㻡
(1) [Device Information]:
Displays general information about the printer.
How to change the settings
"Specifying and Changing the Device Name or Administrator Information"
(2) [Language]:
Displays the display language currently being used in the Remote UI.
How to change the settings
"Remote UI"
(3) [Security]:
Displays information about the security settings, such as the administrator password and the access
restrictions.
How to change the settings
"Setting and Changing the Administrator Password"
"Restricting the Users Who Can Print with IP Addresses"
"Restricting the Users Who Can Access with MAC Addresses"
"Restricting the Users Who Can Monitor and Change the Settings Using the SNMP Protocol"
"Restricting the Users Who Can Perform Multicast Discovery"
"Restricting the FTP Access from End-users"
(4) [Display Log]:
Clicking this button displays the [Security Access Log] page that allows you to display or save the obtained
security access logs.
You can also display the date and time that the print server obtained from the SNTP server, or update the
date and time by obtaining them from the SNTP server.
How to change the settings
"Obtaining and Checking the Security Access Logs"
NOTE
Changing the settings
You can change the settings only if you have logged in as Administrator.
[Network] Page
㻢㻡㻜㻌㻛㻌㻣㻜㻡
(1) [Network Interface]:
Displays information about the network interface etc.
How to change the settings
"Changing the Network Transmission Speed or Transfer Mode"
(2) [Firmware]:
Displays the name of the current network interface and its version.
How to update the network board firmware
"Updating the Network Board Firmware"
(3) [General]:
Displays the print server name (port name).
How to change the settings
"Changing the Port Name of the Printer"
(4) [Protocol]:
Displays the network protocol settings.
How to change the settings
"Configuring the Protocol Settings"
NOTE
Changing the settings
㻢㻡㻝㻌㻛㻌㻣㻜㻡
You can change the settings only if you have logged in as Administrator.
After changing the network settings, click [Reset] in the [Network] page to reset
the print server. If you do not reset the print server, the changed settings cannot be
enabled.
㻢㻡㻞㻌㻛㻌㻣㻜㻡
[J-09] Printing Status Print to Check the Printer Status
You can check the printer status or network settings by printing Status Print.
Printing Configuration Page Print
Printing Network Status Print
Printing Configuration Page Print
Configuration Page Print is used to print the settings of the printer unit, the total number of printed pages, and other
printer information.
NOTE
Load A4 size paper.
The Configuration Page Print is set to print on A4 size paper.
Be sure to load A4 size paper when printing the Configuration Page Print.
Load A4-size paper in the multi-purpose tray or paper drawer.
"Loading Standard Size Paper (Other Than Index Cards and Envelopes)"
Display the Printer Status Window.
Click [
] in the Windows task tray, and then select the printer name.
NOTE
When displaying the Printer Status Window from the printer driver
Click [
] (Display Printer Status Window) in locations such as in the [Page Setup] sheet.
)URPWKH>2SWLRQV@PHQXVHOHFW>8WLOLW\@ĺ>&RQILJXUDWLRQ3DJH3ULQW@
㻢㻡㻟㻌㻛㻌㻣㻜㻡
Click [OK].
ĺ Configuration Page Print is printed.
NOTE
Sample of Configuration Page Print
This is a sample of Configuration Page Print. The contents may differ from the Configuration
Page Print printed by your printer.
If Configuration Page Print is not printed properly
"Printing Does Not Work"
Printing Network Status Print
㻢㻡㻠㻌㻛㻌㻣㻜㻡
Network Status Print prints the TCP/IP settings including the IP address and information including security settings.
NOTE
Load A4 size paper.
The Network Status Print is designed to be printed on A4 size paper.
Be sure to load A4 size paper when printing the Network Status Print.
Load A4-size paper in the multi-purpose tray or paper drawer.
"Loading Standard Size Paper (Other Than Index Cards and Envelopes)"
Display the Printer Status Window.
Click [
] in the Windows task tray, and then select the printer name.
NOTE
When displaying the Printer Status Window from the printer driver
Click [
] (Display Printer Status Window) in locations such as in the [Page Setup] sheet.
)URPWKH>2SWLRQV@PHQXVHOHFW>8WLOLW\@ĺ>1HWZRUN6WDWXV3ULQW@
Click [OK].
㻢㻡㻡㻌㻛㻌㻣㻜㻡
ĺ Network Status Print is printed.
NOTE
Sample of Network Status Print
This is a sample of Network Status Print. The contents may differ from the Network Status
Print printed by your printer.
If Network Status Print is not printed properly
"Printing Does Not Work"
㻢㻡㻢㻌㻛㻌㻣㻜㻡
[J-10] Setting the Energy-saving Mode
You can reduce power consumption of the printer efficiently by using a sleep mode or by shutting down the printer when
it is not used for a certain time.
Sleep Mode
You can configure the printer to enter the sleep mode when data is not sent from the computer or when the
printer status remains as it is longer than the specified time.
Auto Shutdown
You can configure the printer to shut down when the specified time is elapsed after entering the sleep
mode.
IMPORTANT
Power consumption when the power is off (when the power switch is not pressed)
Even if the power of the printer is turned off, power is consumed only slightly while the power
plug is inserted into the AC power outlet. To cut the power consumption completely, unplug the
power plug from the AC power outlet.
Sleep Mode
You can specify the settings for sleep mode using the following procedure.
IMPORTANT
Printing immediately after the sleep mode is released
During the sleep mode, calibration or correction of "Out-of-Register Colors" is not performed
automatically.
If you cannot obtain appropriate printout results when printing immediately after the sleep mode
㻢㻡㻣㻌㻛㻌㻣㻜㻡
is released, perform calibration or correction of "Out-of-Register Colors" manually.
"Calibrating the Printer"
"Correcting 'Out-of-Register Colors'"
Display the Printer Status Window.
Click [
] in the Windows task tray, and then select the printer name.
NOTE
When displaying the Printer Status Window from the printer driver
Click [
] (Display Printer Status Window) in locations such as in the [Page Setup] sheet.
)URPWKH>2SWLRQV@PHQXVHOHFW>'HYLFH6HWWLQJV@ĺ>6OHHS6HWWLQJV@
Specify the settings for the sleep mode.
(1) Select the [Use Sleep Mode] check box.
(2) Specify the time until the printer enters the sleep mode for [Time to Enter Sleep
Mode].
NOTE
About the setting for the time to enter the sleep mode
You can select [5], [10], [15], [30], [60], [90], [120], [150], or [180] minutes for [Time to Enter
Sleep Mode]. The default value is [5] minutes.
You can configure the printer not to enter the sleep mode.
㻢㻡㻤㻌㻛㻌㻣㻜㻡
We recommend that you use this option in the default setting.
Click [OK].
NOTE
Situations where the sleep mode is released
When printing
When calibrating the printer
When correcting "Out-of-Register Colors"
When cleaning the printer
When the front cover is opened or closed
Auto Shutdown
You can specify the settings for auto shutdown using the following procedure.
NOTE
Precautions when sharing the printer
You cannot change the settings with the shared printer. Change the settings from the environment
in which a local printer is installed.
Turn on the computer and start Windows.
Log on as a user with administrative rights.
IMPORTANT
If you are not sure about your administrative rights
Contact your system administrator.
If a wizard or dialog box appears through the Plug and Play automatic setup
Click [Cancel], turn off the printer, and then use this procedure.
㻢㻡㻥㻌㻛㻌㻣㻜㻡
Insert the supplied CD-ROM "User Software" into the CD-ROM drive of your computer.
If the CD-ROM is already in the drive, eject the disk and reinsert it into the drive.
ĺ CD-ROM Setup appears.
It may take time to display CD-ROM Setup depending on your environment.
NOTE
If CD-ROM Setup does not appear
Display it using the following procedure.
(The CD-ROM drive name is indicated as "D:" in this manual. The CD-ROM drive name may
differ depending on the computer you are using.)
Windows XP and Server 2003
1. From the [Start] menu, select [Run].
2. Enter "D:EnglishMInst.exe", and then click [OK].
Windows Vista and Server 2008
1. Enter "D:EnglishMInst.exe" in [Start Search] under the [Start] menu.
2. Press the [ENTER] key on the keyboard.
If the [AutoPlay] dialog box appears (Windows Vista and Server 2008)
Click [Run AUTORUN.EXE].
If the [User Account Control] dialog box appears (Windows Vista and Server 2008)
Click [Continue].
Click [Additional Software Programs].
Click [Start] in [Auto Shutdown Tool].
㻢㻢㻜㻌㻛㻌㻣㻜㻡
Select a printer, and then click [Auto Shutdown Settings].
Specify the settings for auto shutdown.
(1) Select the [Auto Shutdown after Fixed Period] check box.
(2) Specify the time to shut down in [Auto Shutdown After].
(3) Click [OK].
NOTE
About the setting for the time to execute auto shutdown
When [Auto Shutdown After] is changed during sleep mode, the specified time to execute auto
shutdown is reset.
You can specify [Auto Shutdown After] for auto shutdown with 1 hour increments between [1hr]
and [8hr].
If you specify the setting for this option shorter than the default setting, this may shorten the
life of the toner cartridges (the default setting is "4" hours).
㻢㻢㻝㻌㻛㻌㻣㻜㻡
[J-11] Updating the Network Board Firmware
To update the firmware, specify the update file, and then update the printer's network board firmware.
Downloading the Firmware
Updating the Firmware
Downloading the Firmware
Display the Printer Status Window.
Click [
] in the Windows task tray, and then select the printer name.
NOTE
When displaying the Printer Status Window from the printer driver
Click [
] (Display Printer Status Window) in locations such as in the [Page Setup] sheet.
Select [Remote UI] from the [Options] menu.
ĺ The Remote UI is displayed.
NOTE
If you cannot select [Remote UI]
You cannot select [Remote UI] if the printer and computer cannot communicate via a network.
When starting the Remote UI directly from a web browser
"Remote UI"
Log in as Administrator.
㻢㻢㻞㻌㻛㻌㻣㻜㻡
(1) Enter a password in [Administrator Password].
(2) Click [Log In].
NOTE
If the administrator password is not set
It is not required to enter any value in [Administrator Password].
"Setting and Changing the Administrator Password"
Select [Network] from the [Device Manager] menu.
Display the download site.
(1) Check the name and version of the current firmware.
(2) Click [Download Site] under [Firmware].
㻢㻢㻟㻌㻛㻌㻣㻜㻡
ĺ The firmware download site is displayed.
NOTE
[Download Site] button link
You can change the link in the [Support Links] page.
"Remote UI"
Download the firmware from the firmware download site.
Updating the Firmware
IMPORTANT
Precautions when updating the firmware
Make sure that the printer is not operating before updating the firmware. Do not print during the
firmware update. Otherwise, the firmware cannot be updated properly.
Display the Printer Status Window.
Click [
] in the Windows task tray, and then select the printer name.
NOTE
When displaying the Printer Status Window from the printer driver
㻢㻢㻠㻌㻛㻌㻣㻜㻡
Click [
] (Display Printer Status Window) in locations such as in the [Page Setup] sheet.
Select [Remote UI] from the [Options] menu.
ĺ The Remote UI is displayed.
NOTE
If you cannot select [Remote UI]
You cannot select [Remote UI] if the printer and computer cannot communicate via a network.
When starting the Remote UI directly from a web browser
"Remote UI"
Log in as Administrator.
(1) Enter a password in [Administrator Password].
(2) Click [Log In].
NOTE
㻢㻢㻡㻌㻛㻌㻣㻜㻡
If the administrator password is not set
It is not required to enter any value in [Administrator Password].
"Setting and Changing the Administrator Password"
Select [Network] from the [Device Manager] menu.
Click [Update Firmware] under [Firmware].
Update the firmware.
(1) Click [Browse] to select the update file for the firmware or enter the path for the
saved update file.
(2) Click [Update].
㻢㻢㻢㻌㻛㻌㻣㻜㻡
ĺ The firmware is updated.
After updating the firmware, check if the default values are set properly in the
[Parameter List] page in the Remote UI or with the Network Status Print.
"Printing Status Print to Check the Printer Status"
IMPORTANT
If the firmware cannot be updated successfully
See the Readme file supplied with the firmware.
㻢㻢㻣㻌㻛㻌㻣㻜㻡
[J-12] Restricting the Users Who Can Print with IP Addresses
The following software allows you to restrict the users who can print with IP addresses.
Web browser (Remote UI)
You can specify the settings by accessing the printer from your web browser via the network.
FTP Client
You can specify the settings by accessing the FTP server of the printer using Command Prompt.
This section describes the procedure for specifying the settings using a web browser (Remote UI).
This function restricts print commands only, not access from the Remote UI.
NOTE
About a computer whose IP address is rejected to print
If you try to print from a computer whose IP address is rejected to print, the
message <Cannot Print> appears in the Printer Status Window.
If you are using a computer whose IP address is rejected to print, some options
cannot be executed from the [Options] menu in the Printer Status Window.
Specifying the settings using FTP Client
"FTP Client"
Display the Printer Status Window.
Click [
] in the Windows task tray, and then select the printer name.
NOTE
When displaying the Printer Status Window from the printer driver
Click [
] (Display Printer Status Window) in locations such as in the [Page Setup] sheet.
Select [Remote UI] from the [Options] menu.
㻢㻢㻤㻌㻛㻌㻣㻜㻡
ĺ The Remote UI is displayed.
NOTE
If you cannot select [Remote UI]
You cannot select [Remote UI] if the printer and computer cannot communicate via a network.
When starting the Remote UI directly from a web browser
"Remote UI"
Log in as Administrator.
(1) Enter a password in [Administrator Password].
(2) Click [Log In].
NOTE
If the administrator password is not set
It is not required to enter any value in [Administrator Password].
"Setting and Changing the Administrator Password"
㻢㻢㻥㻌㻛㻌㻣㻜㻡
Select [Information] from the [Device Manager] menu.
Click [Change] under [Security].
Select the [Restrict TCP/IP Printing] check box.
㻢㻣㻜㻌㻛㻌㻣㻜㻡
Select [Permit Specified Addresses] or [Reject Specified Addresses].
[Permit Specified Addresses]: Only users specified in [IP Addresses] can perform printing.
[Reject Specified Addresses]: Users specified in [IP Addresses] cannot perform printing.
Set the IP address.
(1) Enter the IP address of a computer of which you want to permit or reject to print.
Enter the IP address by separating the numbers with "." (period), for example,
AAA.BBB.CCC.DDD.
(2) Click [Add].
㻢㻣㻝㻌㻛㻌㻣㻜㻡
You can also enter IP addresses as follows.
Input example of the IP addresses
Method for entering IP addresses
If you want to enter the IP addresses of consecutive
numbers, place "-" (hyphen) between the address of the
AAA.BBB.CCC.15-AAA.BBB.CCC.18 smallest number and that of the largest number.
The example on the left is equivalent to entering addresses
from AAA.BBB.CCC.15 to AAA.BBB.CCC.18.
Entering "*" (asterisk) is equivalent to entering the numbers
AAA.BBB.CCC.*
from 0 to 255.
The example on the left is equivalent to entering addresses
from AAA.BBB.CCC.0 to AAA.BBB.CCC.255.
NOTE
The specifiable number of characters for the IP address
Up to 255 characters can be set.
The number of characters is counted as follows.
Example: "192.168.0.215" = 13 characters
Example: "192.168.0.215-192.168.0.218" = 27 characters
When deleting a set IP address
(1) Select an IP address you want to delete.
(2) Click [Delete].
㻢㻣㻞㻌㻛㻌㻣㻜㻡
Click [OK].
㻢㻣㻟㻌㻛㻌㻣㻜㻡
[J-13] Restricting the Users Who Can Monitor and Change the Settings Using the SNMP
Protocol
The following software allows you to restrict the users who can monitor and change the settings using the SNMP
protocol.
Web browser (Remote UI)
You can specify the settings by accessing the printer from your web browser via the network.
FTP Client
You can specify the settings by accessing the FTP server of the printer using Command Prompt.
This section describes the procedure for specifying the settings using a web browser (Remote UI).
NOTE
Specifying the settings using FTP Client
"FTP Client"
Display the Printer Status Window.
Click [
] in the Windows task tray, and then select the printer name.
NOTE
When displaying the Printer Status Window from the printer driver
Click [
] (Display Printer Status Window) in locations such as in the [Page Setup] sheet.
Select [Remote UI] from the [Options] menu.
ĺ The Remote UI is displayed.
NOTE
If you cannot select [Remote UI]
㻢㻣㻠㻌㻛㻌㻣㻜㻡
You cannot select [Remote UI] if the printer and computer cannot communicate via a network.
When starting the Remote UI directly from a web browser
"Remote UI"
Log in as Administrator.
(1) Enter a password in [Administrator Password].
(2) Click [Log In].
NOTE
If the administrator password is not set
It is not required to enter any value in [Administrator Password].
"Setting and Changing the Administrator Password"
Select [Information] from the [Device Manager] menu.
㻢㻣㻡㻌㻛㻌㻣㻜㻡
Click [Change] under [Security].
Configure the SNMP v. 1 protocol.
If you want to use the SNMP v. 1 protocol
1. Set [SNMP v. 1] to [On].
2. For [Access Rights], select in which mode the SNMP v. 1 agent can
operate, [Read-only] or [Read and Write].
3. Specify the community name of SNMP in [Community Name].
If you do not want to use the SNMP v. 1 protocol
Set [SNMP v. 1] to [Off].
IMPORTANT
If [Access Rights] is set to [Read-only]
Selecting [Read-only] disables overwriting, and you may not be able to use some functions of
㻢㻣㻢㻌㻛㻌㻣㻜㻡
Canon utility software or to use the software properly due to an error occurring.
If [SNMP v. 1] is set to [Off]
You may not be able to use the Canon utility software.
Consult your network administrator before selecting [Off].
Configure the SNMP v. 3 protocol.
If you want to use the SNMP v. 3 protocol
1. Set [SNMP v. 3] to [On].
2. Specify the authentication key or privacy key to be used in SNMP v. 3 in
[Authentication Key/Privacy Key].
3. Enter the administrator password for the Remote UI in [Administrator
Password].
If you do not want to use the SNMP v. 3 protocol
Set [SNMP v. 3] to [Off].
IMPORTANT
If the SNMP v. 3 protocol is specified using an application other than the Remote UI
The SNMP v. 3 protocol settings are not displayed in the Remote UI.
To display the settings again, reset the network settings to the default values.
"Initializing the Network Settings"
NOTE
About the user name to be used for the SNMP v. 3 protocol
The user name to be used for the SNMP v. 3 protocol is set to "initial".
If the administrator password for the Remote UI is not set
It is not required to enter any value in [Administrator Password].
㻢㻣㻣㻌㻛㻌㻣㻜㻡
Select the [Restrict SNMP Monitoring/Setting Changes] check box.
Select [Permit Specified Addresses] or [Reject Specified Addresses].
[Permit Specified
Addresses]:
[Reject Specified
Addresses]:
Only users specified in [IP Addresses] can monitor and change
the settings.
Users specified in [IP Addresses] cannot monitor and change
the settings.
Set the IP address.
(1) Enter the IP address of a computer of which you want to permit or reject to monitor
and change the settings using the SNMP protocol.
Enter the IP address by separating the numbers with "." (period), for example,
AAA.BBB.CCC.DDD.
(2) Click [Add].
㻢㻣㻤㻌㻛㻌㻣㻜㻡
You can also enter IP addresses as follows.
Input example of the IP addresses
Method for entering IP addresses
If you want to enter the IP addresses of consecutive
numbers, place "-" (hyphen) between the address of the
AAA.BBB.CCC.15-AAA.BBB.CCC.18 smallest number and that of the largest number.
The example on the left is equivalent to entering addresses
from AAA.BBB.CCC.15 to AAA.BBB.CCC.18.
Entering "*" (asterisk) is equivalent to entering the numbers
AAA.BBB.CCC.*
from 0 to 255.
The example on the left is equivalent to entering addresses
from AAA.BBB.CCC.0 to AAA.BBB.CCC.255.
NOTE
The specifiable number of characters for the IP address
Up to 255 characters can be set.
The number of characters is counted as follows.
Example: "192.168.0.215" = 13 characters
Example: "192.168.0.215-192.168.0.218" = 27 characters
When deleting a set IP address
(1) Select an IP address you want to delete.
(2) Click [Delete].
㻢㻣㻥㻌㻛㻌㻣㻜㻡
Click [OK].
㻢㻤㻜㻌㻛㻌㻣㻜㻡
[J-14] Restricting the Users Who Can Perform Multicast Discovery
The following software allows you to restrict the users who can perform multicast discovery.
Web browser (Remote UI)
You can specify the settings by accessing the printer from your web browser via the network.
FTP Client
You can specify the settings by accessing the FTP server of the printer using Command Prompt.
This section describes the procedure for specifying the settings using a web browser (Remote UI).
NOTE
Multicast discovery
This is a function that searches for certain devices using Service Location Protocol (SLP).
By using the multicast discovery function, you can search for only the devices whose values in
[Scope Name] are verified, using the service location protocol (SLP) from utility software, such as
NetSpot Device Installer.
Specifying the settings using FTP Client
"FTP Client"
Display the Printer Status Window.
Click [
] in the Windows task tray, and then select the printer name.
NOTE
When displaying the Printer Status Window from the printer driver
Click [
] (Display Printer Status Window) in locations such as in the [Page Setup] sheet.
Select [Remote UI] from the [Options] menu.
ĺ The Remote UI is displayed.
㻢㻤㻝㻌㻛㻌㻣㻜㻡
NOTE
If you cannot select [Remote UI]
You cannot select [Remote UI] if the printer and computer cannot communicate via a network.
When starting the Remote UI directly from a web browser
"Remote UI"
Log in as Administrator.
(1) Enter a password in [Administrator Password].
(2) Click [Log In].
NOTE
If the administrator password is not set
It is not required to enter any value in [Administrator Password].
"Setting and Changing the Administrator Password"
Select [Information] from the [Device Manager] menu.
㻢㻤㻞㻌㻛㻌㻣㻜㻡
Click [Change] under [Security].
Select the [Restrict Multicast Discovery] check box.
㻢㻤㻟㻌㻛㻌㻣㻜㻡
Select [Respond to Specified IP Addresses] or [Do Not Respond to Specified Addresses].
[Respond to Specified IP Only users specified in [IP Addresses] can respond to searches
Addresses]:
that used the multicast discovery function.
[Do Not Respond to
Users specified in [IP Addresses] cannot respond to searches that
Specified Addresses]:
used the multicast discovery function.
Set the IP address.
(1) Enter an IP address that can respond or cannot respond to searches that used the
multicast discovery.
Enter the IP address by separating the numbers with "." (period), for example,
AAA.BBB.CCC.DDD.
(2) Click [Add].
You can also enter IP addresses as follows.
Input example of the IP addresses
Method for entering IP addresses
㻢㻤㻠㻌㻛㻌㻣㻜㻡
If you want to enter the IP addresses of consecutive
numbers, place "-" (hyphen) between the address of the
AAA.BBB.CCC.15-AAA.BBB.CCC.18 smallest number and that of the largest number.
The example on the left is equivalent to entering addresses
from AAA.BBB.CCC.15 to AAA.BBB.CCC.18.
Entering "*" (asterisk) is equivalent to entering the numbers
AAA.BBB.CCC.*
from 0 to 255.
The example on the left is equivalent to entering addresses
from AAA.BBB.CCC.0 to AAA.BBB.CCC.255.
NOTE
The specifiable number of characters for the IP address
Up to 255 characters can be set.
The number of characters is counted as follows.
Example: "192.168.0.215" = 13 characters
Example: "192.168.0.215-192.168.0.218" = 27 characters
When deleting a set IP address
(1) Select an IP address you want to delete.
(2) Click [Delete].
Click [OK].
㻢㻤㻡㻌㻛㻌㻣㻜㻡
㻢㻤㻢㻌㻛㻌㻣㻜㻡
[J-15] Restricting the Users Who Can Access with MAC Addresses
The following software allows you to restrict the users who can access with MAC addresses.
Web browser (Remote UI)
You can specify the settings by accessing the printer from your web browser via the network.
FTP Client
You can specify the settings by accessing the FTP server of the printer using Command Prompt.
This section describes the procedure for specifying the settings using a web browser (Remote UI).
NOTE
If you access to print or perform some other operation from a computer whose MAC
address is rejected to access the printer
The message <Network Board Error> appears in the Printer Status Window.
Specifying the settings using FTP Client
"FTP Client"
Display the Printer Status Window.
Click [
] in the Windows task tray, and then select the printer name.
NOTE
When displaying the Printer Status Window from the printer driver
Click [
] (Display Printer Status Window) in locations such as in the [Page Setup] sheet.
Select [Remote UI] from the [Options] menu.
ĺ The Remote UI is displayed.
㻢㻤㻣㻌㻛㻌㻣㻜㻡
NOTE
If you cannot select [Remote UI]
You cannot select [Remote UI] if the printer and computer cannot communicate via a network.
When starting the Remote UI directly from a web browser
"Remote UI"
Log in as Administrator.
(1) Enter a password in [Administrator Password].
(2) Click [Log In].
NOTE
If the administrator password is not set
It is not required to enter any value in [Administrator Password].
"Setting and Changing the Administrator Password"
Select [Information] from the [Device Manager] menu.
㻢㻤㻤㻌㻛㻌㻣㻜㻡
Click [Change] under [Security].
Select the [Restrict MAC Address Access] check box.
㻢㻤㻥㻌㻛㻌㻣㻜㻡
Select [Permit Specified Addresses] or [Reject Specified Addresses].
IMPORTANT
When [Permit Specified Addresses] is selected
You cannot access from an unauthorized MAC address. Therefore, confirm the MAC address
when entering it.
If there is no corresponding MAC address, you cannot access the network. In this case, you can
access the network by initializing the network settings.
"Initializing the Network Settings"
Set the MAC address.
(1) Enter the MAC address of a device of which you want to permit or reject to access.
Enter twelve-digit alphanumeric characters as 0123456789ab without separating
them with "-" (hyphen) or ":" (colon).
(2) Click [Add].
㻢㻥㻜㻌㻛㻌㻣㻜㻡
NOTE
The number of MAC addresses that can be set
Up to 20 MAC addresses can be set.
When deleting a set MAC address
(1) Select a MAC address you want to delete.
(2) Click [Delete].
Click [OK].
㻢㻥㻝㻌㻛㻌㻣㻜㻡
㻢㻥㻞㻌㻛㻌㻣㻜㻡
[J-16] Restricting the FTP Access from End-users
You can restrict the FTP Client access from end-users using the following software.
Web browser (Remote UI)
You can specify the settings by accessing the printer from your web browser via the network.
FTP Client
You can specify the settings by accessing the FTP server of the printer using Command Prompt.
This section describes the procedure for specifying the settings using a web browser (Remote UI).
NOTE
Specifying the settings using FTP Client
"FTP Client"
Display the Printer Status Window.
Click [
] in the Windows task tray, and then select the printer name.
NOTE
When displaying the Printer Status Window from the printer driver
Click [
] (Display Printer Status Window) in locations such as in the [Page Setup] sheet.
Select [Remote UI] from the [Options] menu.
ĺ The Remote UI is displayed.
NOTE
If you cannot select [Remote UI]
You cannot select [Remote UI] if the printer and computer cannot communicate via a network.
㻢㻥㻟㻌㻛㻌㻣㻜㻡
When starting the Remote UI directly from a web browser
"Remote UI"
Log in as Administrator.
(1) Enter a password in [Administrator Password].
(2) Click [Log In].
NOTE
If the administrator password is not set
It is not required to enter any value in [Administrator Password].
"Setting and Changing the Administrator Password"
Select [Information] from the [Device Manager] menu.
㻢㻥㻠㻌㻛㻌㻣㻜㻡
Click [Change] under [Security].
Select the [Restrict User FTP Access] check box.
If the check box for this option is cleared, all the users can access using FTP Client.
Click [OK].
㻢㻥㻡㻌㻛㻌㻣㻜㻡
㻢㻥㻢㻌㻛㻌㻣㻜㻡
[J-17] Obtaining and Checking the Security Access Logs
You can obtain and check the security access logs (information about the date and time when the access was blocked, IP
address, port number, and restriction type) when access from a user restricted in [IP Address Range Settings] is blocked.
Obtaining the Security Access Logs
Checking the Security Access Logs
Obtaining the Security Access Logs
You can specify the settings to obtain the security access logs using the following software.
Web browser (Remote UI)
You can specify the settings by accessing the printer from your web browser via the network.
FTP Client
You can specify the settings by accessing the FTP server of the printer using Command Prompt.
This section describes the procedure for specifying the settings using a web browser (Remote UI).
NOTE
Specifying the settings using FTP Client
"FTP Client"
Display the Printer Status Window.
Click [
] in the Windows task tray, and then select the printer name.
NOTE
When displaying the Printer Status Window from the printer driver
Click [
] (Display Printer Status Window) in locations such as in the [Page Setup] sheet.
Select [Remote UI] from the [Options] menu.
㻢㻥㻣㻌㻛㻌㻣㻜㻡
ĺ The Remote UI is displayed.
NOTE
If you cannot select [Remote UI]
You cannot select [Remote UI] if the printer and computer cannot communicate via a network.
When starting the Remote UI directly from a web browser
"Remote UI"
Log in as Administrator.
(1) Enter a password in [Administrator Password].
(2) Click [Log In].
NOTE
If the administrator password is not set
It is not required to enter any value in [Administrator Password].
"Setting and Changing the Administrator Password"
㻢㻥㻤㻌㻛㻌㻣㻜㻡
Select [Information] from the [Device Manager] menu.
Click [Change] under [Security].
Select whether to obtain security access logs.
㻢㻥㻥㻌㻛㻌㻣㻜㻡
If [On] is selected for [Access Logs], select the type of log that you want to obtain.
[Rejected TCP/IP Print
Jobs]:
[Rejected SNMP
Monitoring/Setting
Changes]:
[Rejected Multicast
Discoveries]:
The security access log is recorded when access from a user who
is rejected to perform the TCP/IP printing is blocked.
The security access log is recorded when access from a user who
is rejected to monitor/change the SNMP setting is blocked.
The security access log is recorded when access from a user who
is rejected to perform the multicast discovery is blocked.
Click [OK].
㻣㻜㻜㻌㻛㻌㻣㻜㻡
IMPORTANT
The number of security access logs that can be obtained
Up to 100 logs can be obtained.
When the number of logs exceeds 100, the logs are deleted starting from the oldest one.
Checking the Security Access Logs
You can check the obtained security access logs using the Remote UI.
It also allows you to save or clear the security access logs.
Display the Printer Status Window.
Click [
] in the Windows task tray, and then select the printer name.
NOTE
When displaying the Printer Status Window from the printer driver
Click [
] (Display Printer Status Window) in locations such as in the [Page Setup] sheet.
Select [Remote UI] from the [Options] menu.
㻣㻜㻝㻌㻛㻌㻣㻜㻡
ĺ The Remote UI is displayed.
NOTE
If you cannot select [Remote UI]
You cannot select [Remote UI] if the printer and computer cannot communicate via a network.
When starting the Remote UI directly from a web browser
"Remote UI"
Log in as Administrator.
(1) Enter a password in [Administrator Password].
(2) Click [Log In].
NOTE
If the administrator password is not set
It is not required to enter any value in [Administrator Password].
"Setting and Changing the Administrator Password"
㻣㻜㻞㻌㻛㻌㻣㻜㻡
Select [Information] from the [Device Manager] menu.
Click [Display Log] under [Security Access Log Settings].
Check the security access logs or other information.
㻣㻜㻟㻌㻛㻌㻣㻜㻡
(1) [Update Now]:
Clicking this button obtains information about the date and time from the SNTP
server.
Reflects the obtained status to [Date and Time] and [SNTP Server Log] according to
success or failure of obtaining information.
For details on the SNTP settings, see "Configuring the Protocol Settings".
(2) [Date and Time]:
Displays the date and time obtained from the SNTP server.
The local time of the printer is displayed when the time and date could not be
obtained from the SNTP server for some reason, such as that the SNTP server address
is not specified.
(3) [SNTP Server Log]:
Displays the obtained status from the SNTP server.
When succeeded in
obtaining the status:
While in the process of
obtaining the status:
When failed to obtain the
status:
Synchronized with the SNTP server at <The date and
time when they were obtained>.
Next synchronization in <The date and time when they
are to be obtained next>.
Getting time from SNTP Server.
Failed to get time from SNTP Server.
(4) [Save]:
Saves the obtained security access log in text format.
(5) [Clear]:
Clears the obtained security access logs.
(6) [Security Access Log]:
Displays the obtained security access logs.
The date and time when the access was blocked, IP address, port number, and
restriction type* are displayed.
* "PRINT" (Rejected TCP/IP Print Jobs), "SNMP" (Rejected SNMP Monitoring or
Setting Changes), or "SLP" (Rejected Multicast Discoveries)
㻣㻜㻠㻌㻛㻌㻣㻜㻡
IMPORTANT
The number of security access logs that can be obtained
Up to 100 logs can be obtained.
When the number of logs exceeds 100, the logs are deleted starting from the oldest one.
㻣㻜㻡㻌㻛㻌㻣㻜㻡
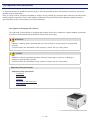
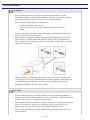

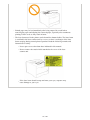

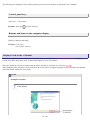
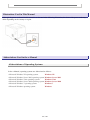
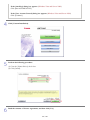
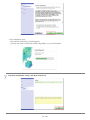
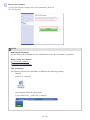
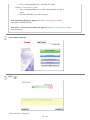
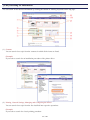
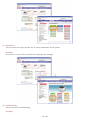
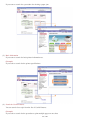
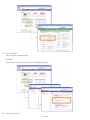
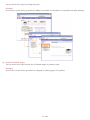
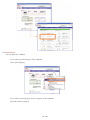
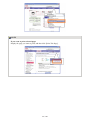
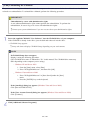
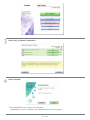
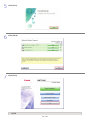

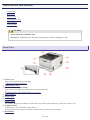
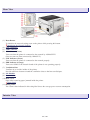
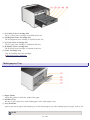
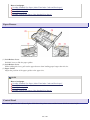
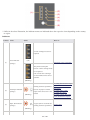
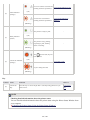

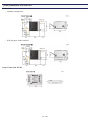
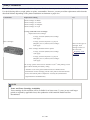
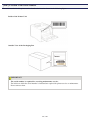
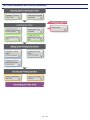

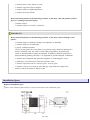

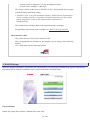

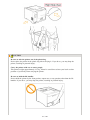
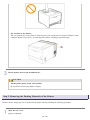
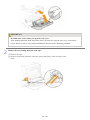
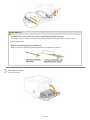
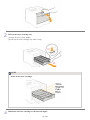
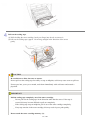
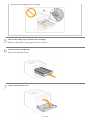
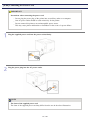
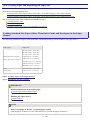
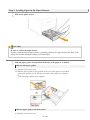
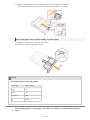

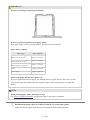
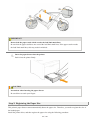
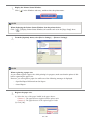

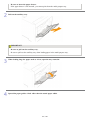
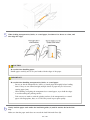

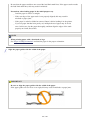

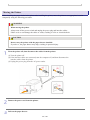

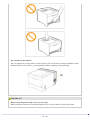
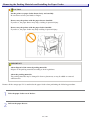
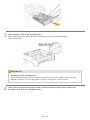
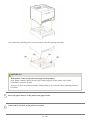
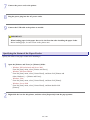
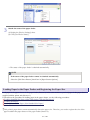
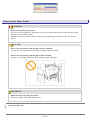

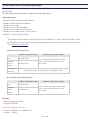
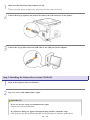
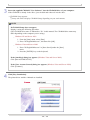
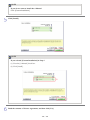
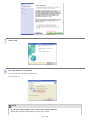
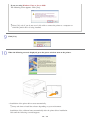
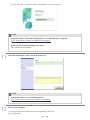
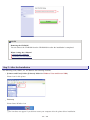
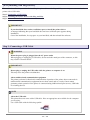
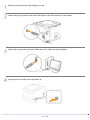
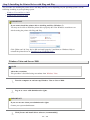
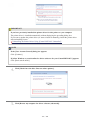
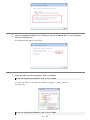
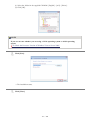

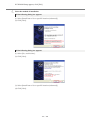
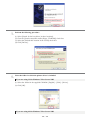
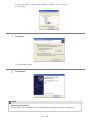
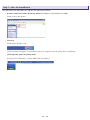
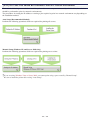
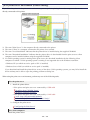

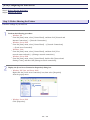
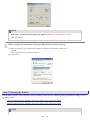
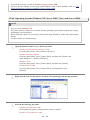

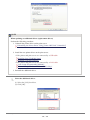

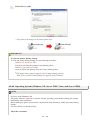
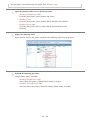
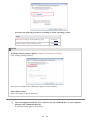
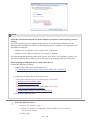
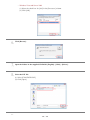
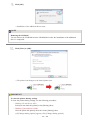

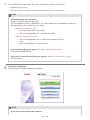
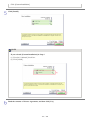
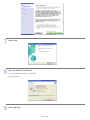
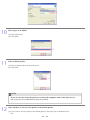
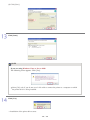
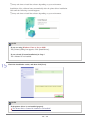
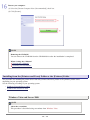
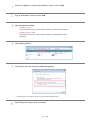
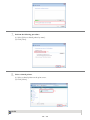
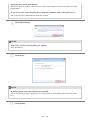
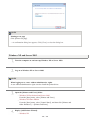
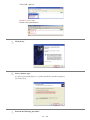
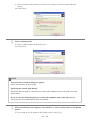
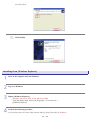
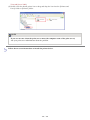
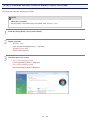
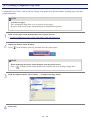
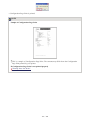
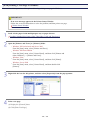
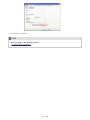
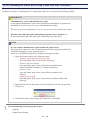
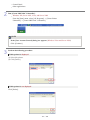
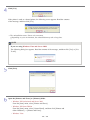
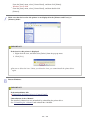
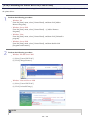
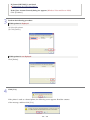
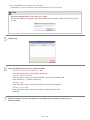
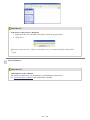
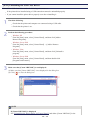
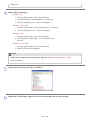
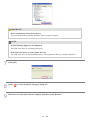
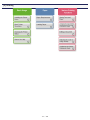
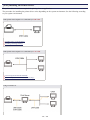

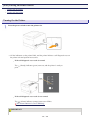
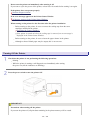

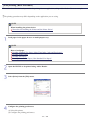
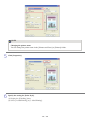
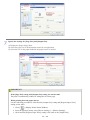
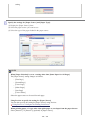

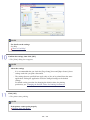
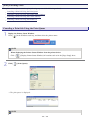
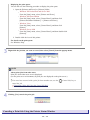
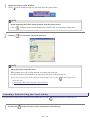
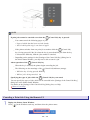
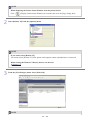
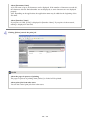
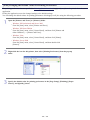
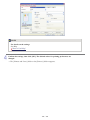

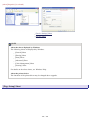
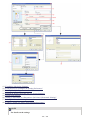
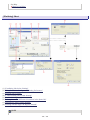
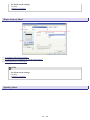
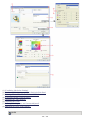
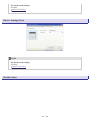

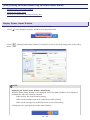
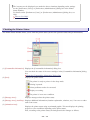
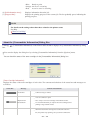
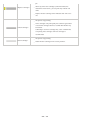

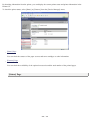
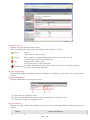
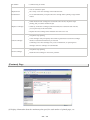
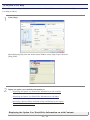
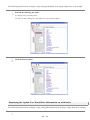
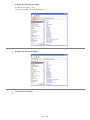
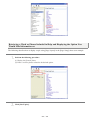
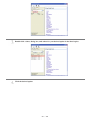
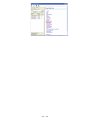
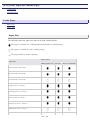
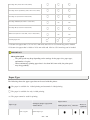
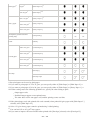
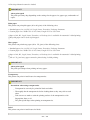
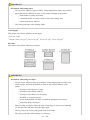
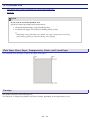

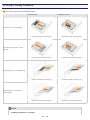

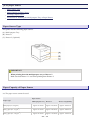
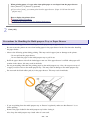
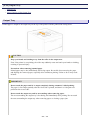
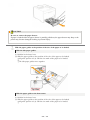
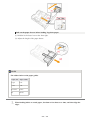

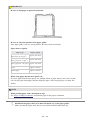
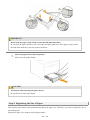
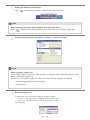


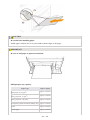
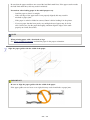
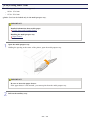
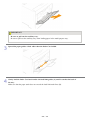
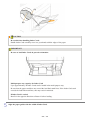
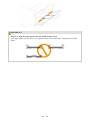
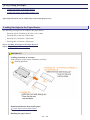

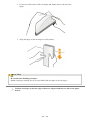
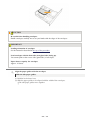
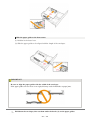
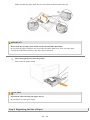
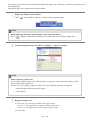
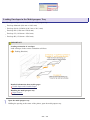
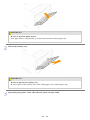
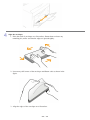
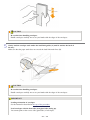
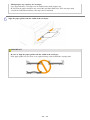
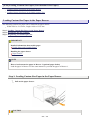
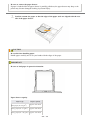
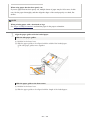
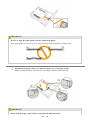
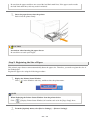
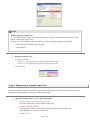
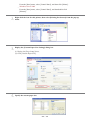
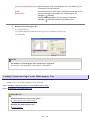
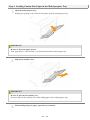
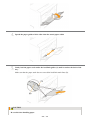
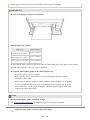
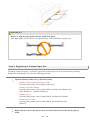
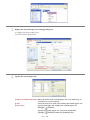
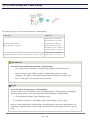
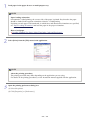
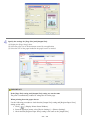
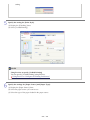
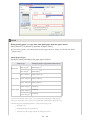

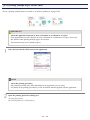
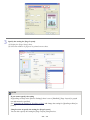
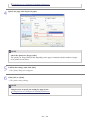
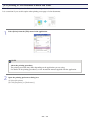
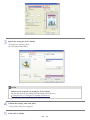

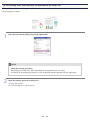
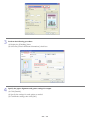

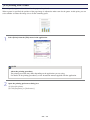
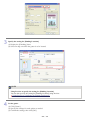


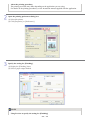


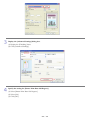
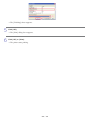
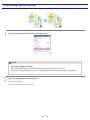

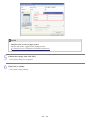
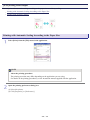
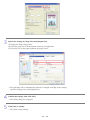
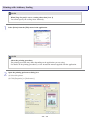
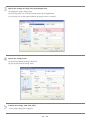

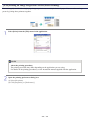
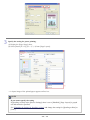

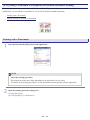
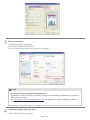
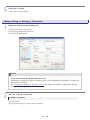
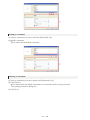
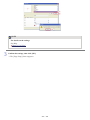
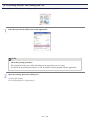
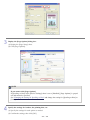
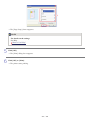
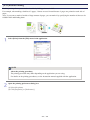
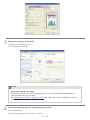
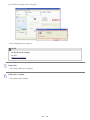

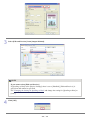
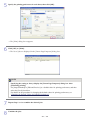
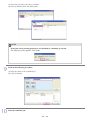
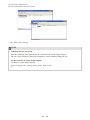
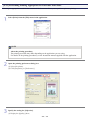

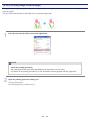
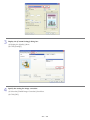
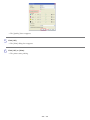
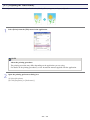

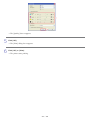
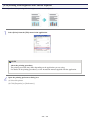
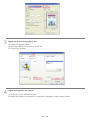
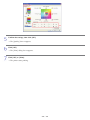
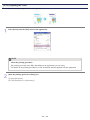
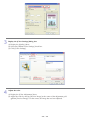
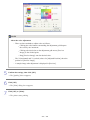
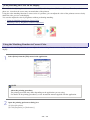

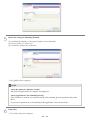
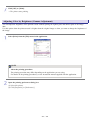
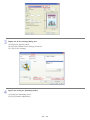
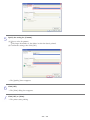
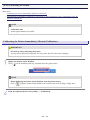
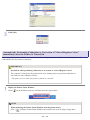
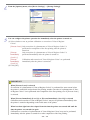

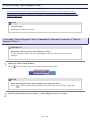
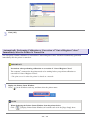
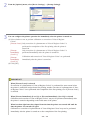

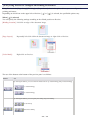
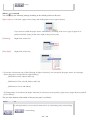
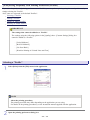
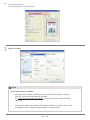
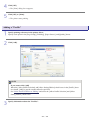
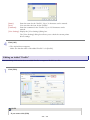
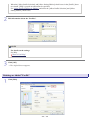
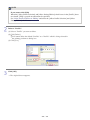
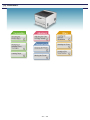


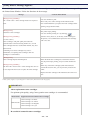
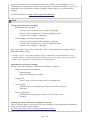
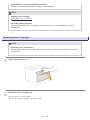
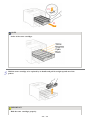
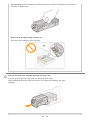
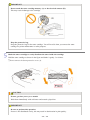
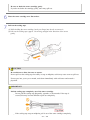
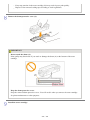
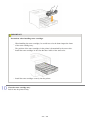
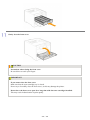
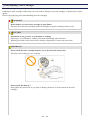
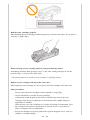


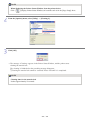
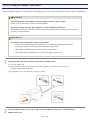
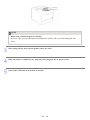
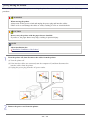
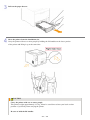
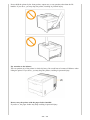
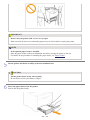
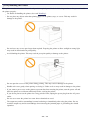

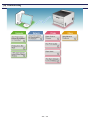
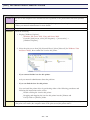
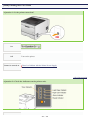

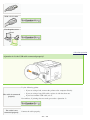
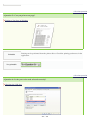
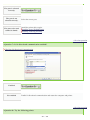
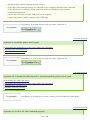
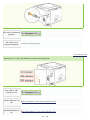
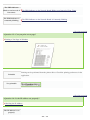
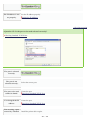
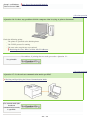
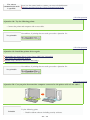
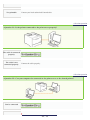
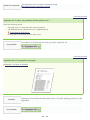
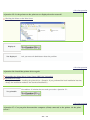
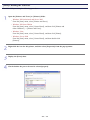
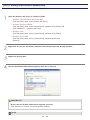


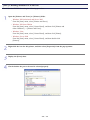
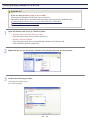
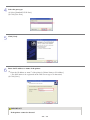
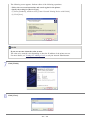
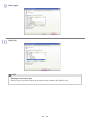
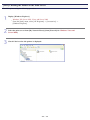
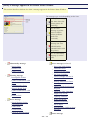
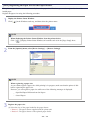

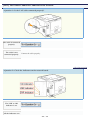
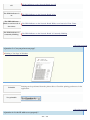
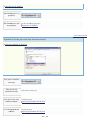
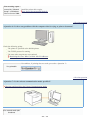
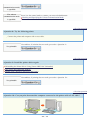

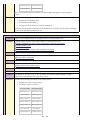

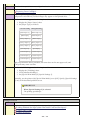


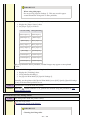

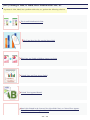

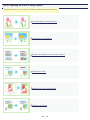

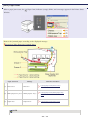

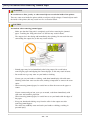
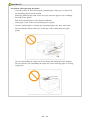

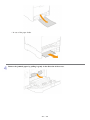
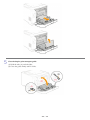
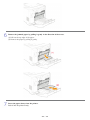
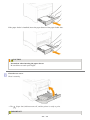

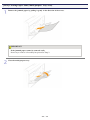
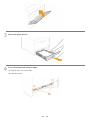
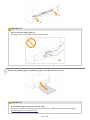
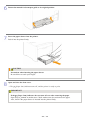
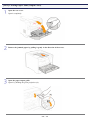
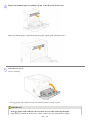

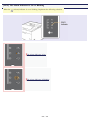
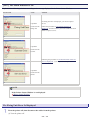
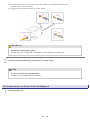
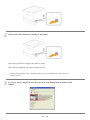
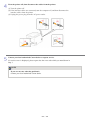
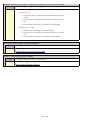
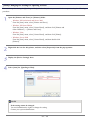


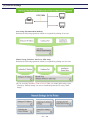
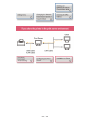
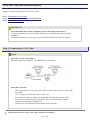
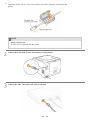
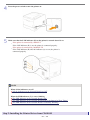
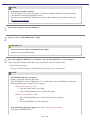
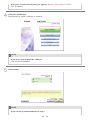
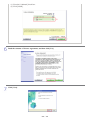
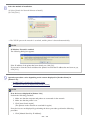
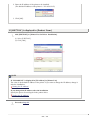
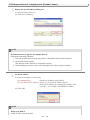
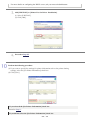
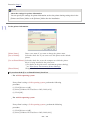
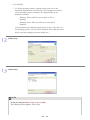
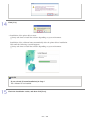
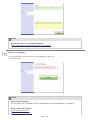
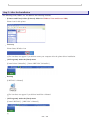
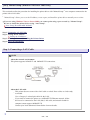

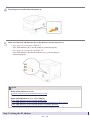
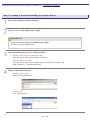
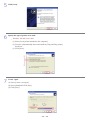
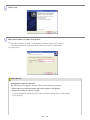
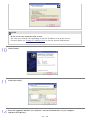

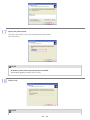
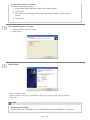
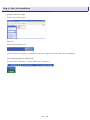
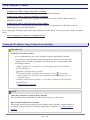
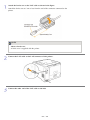
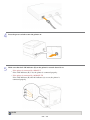
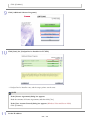
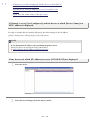
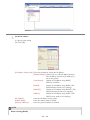
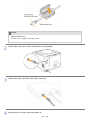
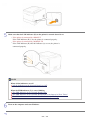
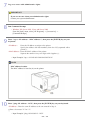
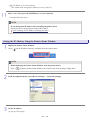
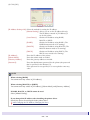
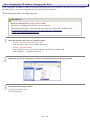
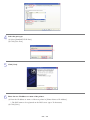
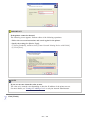
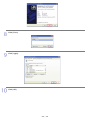
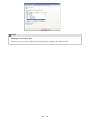
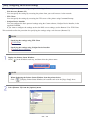
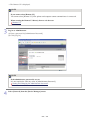
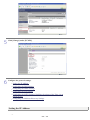
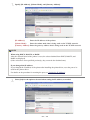
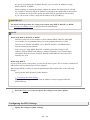
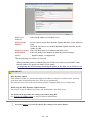
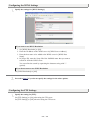
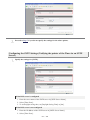

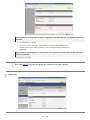
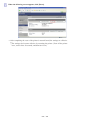
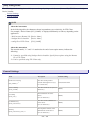
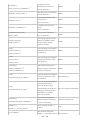
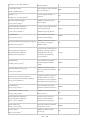
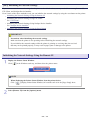
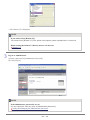

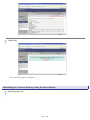
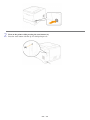
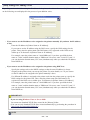


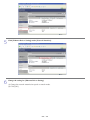
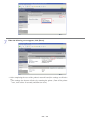
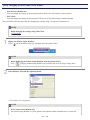
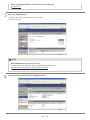
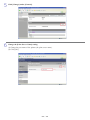
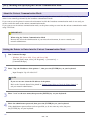
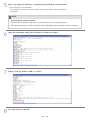
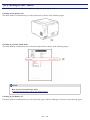
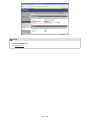
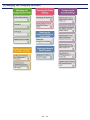
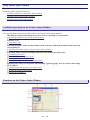
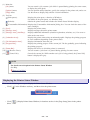
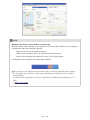
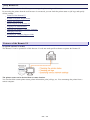
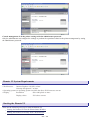
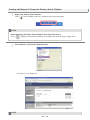

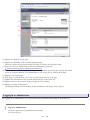
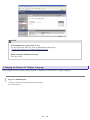
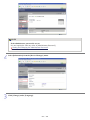
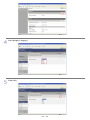
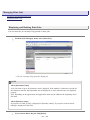
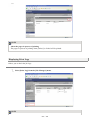
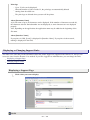
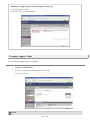
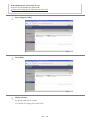
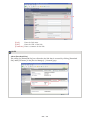
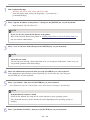
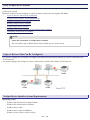
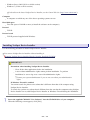
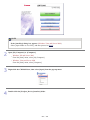
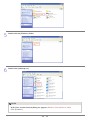
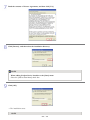
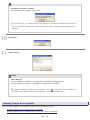
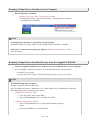

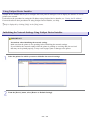
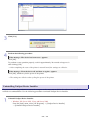

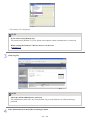
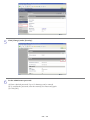
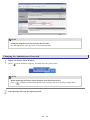

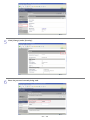
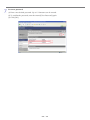
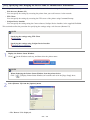
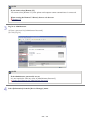
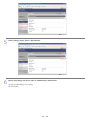
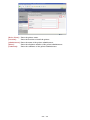
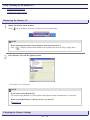
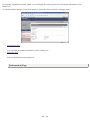
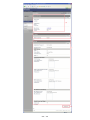


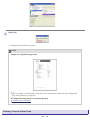
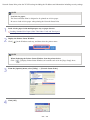
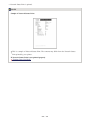
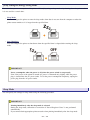
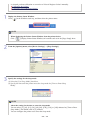
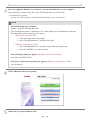
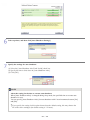
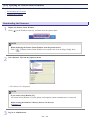
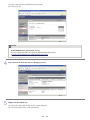
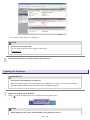
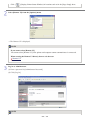
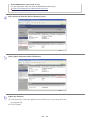

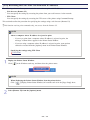

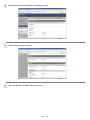
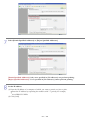
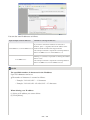
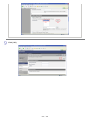
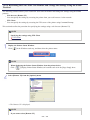
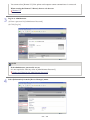
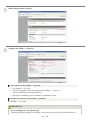
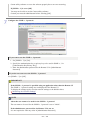
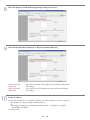
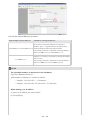
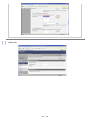
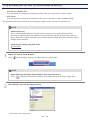
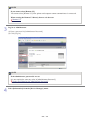
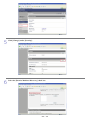
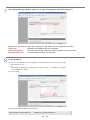
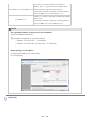
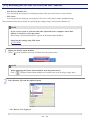
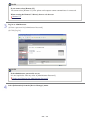
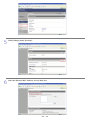
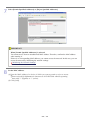
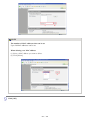

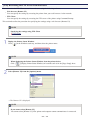
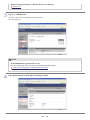
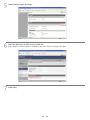

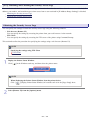
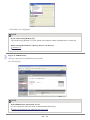
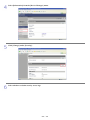
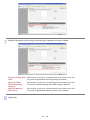
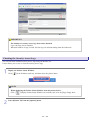

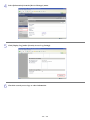
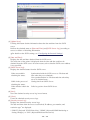

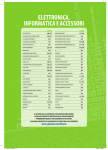

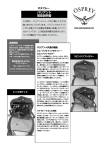
![[ CR-IR362型 ] ≫PDF](http://vs1.manualzilla.com/store/data/006663054_2-c93d78113eb9f67d2f843d16ae9fbd11-150x150.png)