1
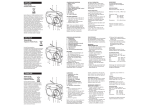
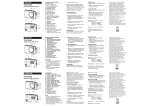
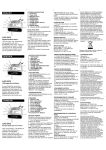
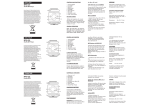
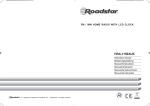
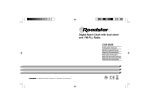
POWER SUPPLY
ENGLISH
CLR-450R
RADIO CONTROLLED CLOCK RADIO
WITH CALENDAR, TERMOMETER AND
FM PLL RADIO.
SET
MODE
UP
VOL.
DOWN
LIGHT
1. Open the battery cover on the rear.
2. Insert and connect 2 UM-4 (AAA) batteries
following the correct polarities.
3. Replace the battery cover.
Note: Check your batteries regularly. Old or
discharged batteries must be replaced to avoid
acid leaking that may damage your unit. If the
unit is not to be
used for a long time, remove the
batteries from their compartment.
(Battery is not included in the packing).
DISPLAY
1. Normally the LCD DISPLAY indicates the
CALENDAR, which shows the MONTH,
DATE, DAY, TEMPERATURE and TIME.
2. Press LIGHT/SNOOZE once and the
illumination will activate. The BACKLIGHT
will automatically turn OFF after 6 seconds.
DEUTSCH
CLR-450R
FUNKUHR RADIO MIT KALENDER,
TERMOMETER UND FM PLL RADIO.
SET
MODE
UP
VOL.
DOWN
LIGHT
SET
MODE
UP
VOL.
DOWN
5.
6.
7.
SETTING THE ALARM (RADIO)
1. In the normal Display mode, press MODE
twice and the display will show the RADIO
ALARM TIME. The "RDO" icon indicates
STROMVERSORGUNG
1. Den Deckel des Batteriefachs in der hinter
Seite abnehmen.
2. 2 UM-4 Batterien einlegen.
3. Den Deckel des Batteriefachs wieder
anbringen.
Anmerkung: Die Batterien regelmässig prüfen.
Alte oder entladene Batterien auswechseln,
um eine Beschädigung des Geräts durch
auslaufende Batterie zu vermeiden. Wenn das
Gerät langere Zeit nicht benutzt wird, die
Batterien aus dem Batteriefach herausnehmen.
(Batterien nicht mitgeliefert).
Weckzeit auf dem Display ange-zeigt wird.
2. Um di Minuten einzustellen, drücken Sie
SET nochmals. Die Minuten blinken.
Drücken Sie UP/DOWN um den Minuten
einzustellen.
3) Drücken Sie die SET-Taste und 12/24
blinken. Drücken Sie UP/DOWN um den 12/
24 einzustellen.
4) Drücken Sie die SET-Taste und YEAR
blinken. Drücken Sie UP/DOWN um den
Year einzustellen.
5) Um den Monat einzustellen, drücken Sie
SET-Taste, blinkt die Monatanzeige.
Drücken Sie UP/DOWN um den Monat
einzustellen.
6) Um das Datum einzustellen, drücken Sie
SET einmal, blinkt die Datumanzeige.
Drücken Sie UP/DOWN um das Datum
einzustellen.
7) Drücken Sie die SET-Taste und
LANGUAGE blinken. Drücken Sie UP/
DOWN um den Language einzustellen.
8) Um die Temperatur in ZENTIGRAD (°C)
oder FAHRENHEIT (°F) anzuzeigen,
drücken Sie SET-Tasten.
9) Drücken Sie SET nochmals um zur
normalen Anzeige zurückzukehren.
WECKER-EINSTELLEN (BUZZER)
1. Im normalen Anzeigemodus, drücken Sie
MODE einmal. In der Anzeige wird die
Alarmzeit angezeigt. Das symbol "AL"
erscheint um zu bestätigen, dass die
Alarmzeit angezeigt wird.
2. Um die Weckerzeit einzustellen, Drücken
Sie die SET-Taste und halten Sie sie
gedrückt. Die Stun-den blinken. Drücken
Sie UP/DOWN um die Stunden einzustellen.
3. Um di Minuten einzustellen, drücken Sie
SET nochmals. Die Minuten blinken.
Drücken Sie UP/DOWN um die Minuten
einzustellen.
4. Drücken Sie UP-Taste um den Alarm EIN
oderAUS.
REGLAGE DE L'AFFICHEUR LCD
1. Dans la modalité d'affichage normale, pour
régler l'horaire, tendres pressé SET jusqu'
au les chiffres des heures clignoteront.
Presser UP/DOWN pour régler les heures.
2. Pour régler les minutes, presser SET une
fois et les minutes clignoteront. Presser
UP/DOWN pour régler les minutes.
3. Pour régler 12/24, presser SET une fois et
12/24 clignoteront. Presser UP/DOWN
pour régler.
4. Pour régler l' an, presser SET une fois
encore et l' an clignotera. Presser UP/
DOWN pour régler l' an.
5. Pour régler le mois, presser SET une fois
encore et le mois clignotera. Presser UP/
DOWN pour régler le mois.
6. Pour régler la date, presser SET une fois
et la date clignotera. Presser UP/DOWN
pour régler la date.
7. Pour régler la langue, presser SET une fois
encore et la langue clignotera. Presser
UP/DOWN pour régler la langue.
8. Pour montrer la TEMPERATURE en degrés
CENTIGRADE (°C) ou FAHRENHEIT (°F),
presser SET à maintes reprises et la
température commutera entre °C et ° F.
8. Presser SET encore une fois pour
retourner à l'affichage normal.
PILES
HORLOGE RADIO PILOTEE AVEC
CALENDRIER, TERMOMETER ET RADIO
FM PLL.
4.
SETTING THE ALARM (BUZZER)
1. In the normal Display mode, press MODE
once and the display will show the
ALARM TIME. The "AL" icon indicates that
the display is showing the ALARM TIME.
2. To set the ALARM TIME, press SET Button
for 8 seconds and the OUR digits will
flash. Press UP/DOWN to adjust the HOUR
digits.
3. To set the ALARM MINUTE, press SET
once more and the MINUTE digits will flash.
Press UP/DOWN to adjust the MINUTE
digits.
4. Press the UP button to set the BEEP alarm
ON.
5. When the Time meets the PRESET ALARM
TIME, the alarm sound will be on.
8.
LCD-ANZEIGE EINSTELLEN
1. In normalem Anzeigemodus, Drücken Sie
die SET-Taste und halten Sie sie gedrückt.
Die Stunden blinken. Drücken Sie die UPDOWN-Taste, bis die gewünschte
CLR-450R
3.
will change from CENTIGRADE to
FAHRENHEIT alternatively .
9. Press the SET button to conclude the
setting.
SETTING THE LCD DISPLAY
1. In the normal Display mode, to set the TIME,
keep pressed SET Button until the HOUR
ANZEIGE
1. Normalerweise zeigt das Gerät das
Kalendar, mit Monat, Datum, Tag, Temperature und die Zeit an.
4. Drücken Sie LIGHT einmal um die
Hinterbeleuchtung zu aktivieren. Die
Hinterbeleuchtung schaltet nach 6
Sekunden aus.
FRANCAIS
2.
digits will flash. Press UP/DOWN to adjust
the HOUR digits.
To set the MINUTE, press SET once more
and the MINUTE digits will flash. Press UP/
DOWN to adjust the MINUTE digits.
To set the 12/24 mode, press SET once
more and the 12/24 digits will flash. Press
UP/DOWN to adjust the 12/24 digits.
To set the Year, press SET once more and
the Year digits will flash. Press UP/DOWN
to adjust the current year.
To set the MONTH, press SET
again again and the MONTH digits will
flash. Press UP/DOWN adjust the MONTH
digit.
To set the DAY, press SET again
one more time and the DAY DIGIT digit will
flash. Press UP/DOWN to adjust the
DAYdigit.
To set the LANGUAGE, press SET
again and the LANGUAGE will flash. Press
UP/DOWN to adjust the LANGUAGE
(Engliah, German, Italian, French, Spanish,
Dutch, Danish and Russian).
To change the TEMPERATURE from
CENTIGRADE (°C) to FAHRENHEIT (°F),
press SET once again and the temperature
1. Ouvrir le logement des piles sur l’arrière de
l’appareil
2. Introduire 2 piles de type UM-4 (pas incluses)
dans le logement en veillant à les bien placer
conformément au schéma indiqué à l'interieur du
logement (nous recommandons des piles Alcalines).
3. Fermer le logement.
LIGHT
Note: Contrôlez vos piles régulièrement. Les piles
trop vieilles ou déchargées devront être remplacées
afin d'éviter un endommagement résultant de fuites
d'acide. Si l'appareil ne doit pas être utilisé pendant
une longue période de temps, enlevez les piles du
logement.
AFFICHEUR
1. Normalement l'afficheur LCD montre le
calendrier avec le mois, la date le jour,
temperature et l'horaire.
2. Pour sélectionner le système d'affichage de
l'heure, presser la touche MODE en
séquence.
3. Presser LIGHT une fois et la rétroillumination s'activera. Elle s'éteindra
automatiquement après 6 secondes.
WECKER-EINSTELLEN (BUZZER)
1. Im normalen Anzeigemodus, drücken Sie
MODE zweimal. In der Anzeige wird die
Alarmzeit angezeigt. Das symbol "RDO"
erscheint um zu bestätigen, dass die
Alarmzeit angezeigt wird.
2. Um die Weckerzeit einzustellen, Drücken
Sie die SET-Taste und halten Sie sie
gedrückt. Die Stun-den blinken. Drücken
2.
3.
4.
5.
RADIO CONTROLLED CLOCK
1. In the normal Display mode, press UP
button for three seconds to turn ON the
RCC (Radio Controlled Clock) function
manually. Place the unit away from source
of interference such as mobile phones,
appliances, TV etc.Antenna icon with full
signal strength will appear on screen if the
reception of radio-controlled time
issuccessful. The radio-controlled
clockwill have a daily synchronization
Sie UP/DOWN um die Stunden einzustellen.
3. Um di Minuten einzustellen, drücken Sie SET
nochmals. Die Minuten blinken. Drücken
Sie UP/DOWN um die Minuten einzustellen.
4. Drücken Sie UP-Taste um den Alarm EIN
oderAUS.
FUNKUHR
Das Gerät beginnt mit der Synchronisierung
der Uhr nach der Installation oder dem
zurücksetzen von Batterie. Im normalen
Modus drücken Sie UP-Tasten, bis das
Symbol erscheint, um die Suche des
Funkuhrsignals zu verstärken. Wenn das
Symbol danach verschwindet, ist ein
Zeitfunksignal derzeit nicht verfügbar.
Probieren Sie es später mit anderen Orten.
Stellen Sie das Gerät abseits von
Interferenzquellen wie Mobiltelefonen,
Haushaltsgeräten, TV usw. auf.
Das Antennensymbol mit voller Signalstärke
erscheint auf dem Bildschirm, wenn die
Funkzeit erfolgreich empfangen wird. Die
Funkuhr wird täglich ungefähr zwischen
02:03 und 02:03 synchronisiert. Jeder
2.
REGLAGE DE L'ALARME
1. Dans la modalité d'affichage normale,
presser MODE une fois et l'afficheur
montrera l'horaire d'alarme. Le symbole AL
indique que l'horaire montré est celui de
l'alarme.
2. Pour régler l'horaire d'Alarme, presser SET
jusqu' au les chifres des heures
clignoteront. Presser UP/DOWN pour
régler les heures.
3. Pour régler les minutes de l'alarme,
presser SET une fois et les minutes
clignoteront. Presser UP/DOWN pour
régler les minutes.
4. Presser la touche UP pour insérer l'
alarme.
5. Quand on atteindra l' horaire alarme, le
réveil il jouera
REGLAGE DE L'ALARME AVEC RADIO
1. Dans la modalité d'affichage normale,
presser MODE deux fois et l'afficheur
that the display is showing the RADIO ON
ALARM.
To set the ALARM RADIO TIME, press SET
Button for 8 seconds and the OUR digits
will flash. Press UP/DOWN to adjust the
HOUR digits.
To set the ALARM MINUTE, press SET once
more and the MINUTE digits will flash.
Press UP/DOWN to adjust the MINUTE
digits.
Press the UP button to set the RADIO alarm
ON.
When the Time meets the PRESET RADIO
TIME, the Radio sound will be on.
3.
4.
5.
montrera l'horaire d'alarme. Le symbole
RDO indique que l'horaire montré est celui
de l'alarme.
Pour régler l'horaire d'Alarme, presser SET
jusqu' au les chifres des heures
clignoteront. Presser UP/DOWN pour
régler les heures.
Pour régler les minutes de l'alarme, presser
SET une fois et les minutes clignoteront.
Presser UP/DOWN pour régler les minutes.
Presser la touche UP pour insérer l' alarme.
Quand on atteindra l' horaire alarme, le
réveil il jouera
HORLOGE RADIO-CONTRÔLÉ
L’appareil commencera à synchroniser la
montre après l’installation de la batterie. En
modalité normale, presser UP tant que l’icône
sembles forcer la recherche du signal de
horloge radio-commandée. Si l’icône disparaît
après, le signal horaire radio n’est pas
disponible au moment. Plus tard essayer en
autres emplacements. Éloigner l’appareil des
sources d’interférence comme téléphones
mobile, téléviseurs, etc.
ataround 02:03 and 03:03 everyday. Each
reception cycle is minimum 2.5minutes and
maximum 10 minutes.
FM PLL RADIO
1. Keep pressed the RADIO/VOLUME button
until the Radio is switched ON.
2. Press the UP / DWN button to search the
station.
3. Press the MODE button to enter the
memory of Radio station, then press UP/
DOWN button to select the desired channel
number where you want to store the
station.
4. To select the desired channel, press the
SET button and select the desired channel
using UP/DOWN buttons.
Specifications subject to change without
notice.
Correct Disposal of
ThisProduct
(Waste Electrical
&Electronic
This marking shown on the product orits
literature, indicates that it should notbe
disposed with other householdwastes at
the end of its working life. Toprevent possible harm to theenvironment or human
health from uncontrolled waste disposal,
pleaseseparate this from other types
ofwastes and recycle it responsibly to
promote the sustainable reuse ofmaterial
sources. Household users should contact
eitherthe retailer where they pur-öchased
thisproduct, or their local government
office, for details of where and howthey can
take this item forenvironmentally safe
recycling. Business users should contact
theirsupplier and check the terms and
conditions of the purchase contract.This
product should not be mixed withother
commercial wastes for disposal.
Empfangszyklus beträgt minimal 2,5 Minuten
und maximal 10 Minuten.
FM PLL RADIO
Im normalen Anzeigemodus, drücken Sie
RADIO/VOL-Taste bis das Radio einschalten.
Drücken Sie die UP/DOWN-Taste zu suchen
der Radiosender.
Drücken Sie die MODE-Tastezu geben auf das
Gedächtnis und drücken Sie die UP / DOWN
Taste, um den gewünschten Kanal, wo Sie
den Sender speichern wählen.
So wählen Sie den gewünschten Kanal,
drücken Sie die SET-Taste und wählen Sie
den gewünschten Kanal mit UP / DOWN
Tasten.
Änderungen vorbehalten.
L’icône d’antenne avec signal plein de force
apparaîtra sur l’écran si la réception d’horaire
radio-commandé a du succès. La montre
radio-commandée aura une synchronisation
quotidienne vers les heures 02:03 et 03:03 de
chaque jour. Chaque cycle de réception est
minimum 2.5 minutes et maximums 10 minutes.
FM PLL RADIO
1. Presser sur le bouton RADIO/VOLUME
jusqu’au la Radio s’allume.
2. Presser sur le bouton UP/DWN pour
chercher la station radio.
3. Presser sur le bouton MODE pour entrer
dans le MENU de la mémoire, presser sur le
bouton UP/DOWN pour sélectionner le numéro
de canal que vous voulez mémoriser.
4. Pour sélectionner le canal désiré, presser
sur le bouton SET et sélectionner le canal
désiré avec le bouton UP/DOWN.
Spécifications sous réserve de modifications
Die Kennzeichnung auf dem
Produkt bzw.
auf der dazugehörigen Literatur gibt an,
dass es nach seiner Lebensdauer nicht
zusammen mit dem normalen
HaushaltsmüIl entsorgt werden darf.
Entsorgen Sie dieses Gerat bitte getrennt
von anderen Abfallen, um der Umwelt bzw.
der menschlichen Gesundheit nicht durch
unkontrollierte Müllbeseitigung zu
schaden. Recyceln Sie das Gerät, um die
nachhaltige Wiederverwertung von
stofflichen Ressourcen zu fördern.
Private Nutzer sollten den Händler, bei
dem das Produkt gekauft wurde, oder die
zuständigen Behörden kontaktieren, um in
Erfahrung zu bringen, wie sie das Gerät
auf
Comment éliminer ce produit (déchets d'équipements
électriques et électroniques)
Ce symbole sur le produit ou sa documentation indique qu'il ne doit pasêtre
éliminé en fin de vie avec lesautres déchets ménagers. L'éliminationincontrôlée
des déchets pouvant porter préjudice a
l'environ-nement ou ala santé humaine,
veuillez le séparerdes autres types de
déchets et lerecycler de façon responsable. Vous favoriserez ainsi la réutilisa-tion
durabledes ressources matérielles.Les
particuliers sont invites acontacter le distributeur leur ayantvendu le produit ou a se
rensei-gnera uprès de leur mairie pour
savoir ou etcomment ils peuvent se débarrasserde ce produit afin qu'il soit recyclé
enrespectant l'environ-nement. Les entreprises sont invitées aconta-cter leurs fournisseurs et aconsulter les cond-itions de
leur contratde vente. Ce produit ne doit pas
êtreéliminé avec les autres déchets
commerciaux.
BATTERIE
1. Aprire il vano batterie sul retro.
ITALIANO
CLR-450R
RADIOSVEGLIA CON OROLOGIO
RADIOCONTROLLATO E RADIO FM PLL.
2. Inserire due batterie (non incluse) del tipo
UM-4 (si raccomandano quelle alcaline).
Seguire le polarità indicate sul retro.
3. Richiudere il vano.
SET
MODE
UP
VOL.
DOWN
LIGHT
Nota: Controllate le batterie regolarmente. Le
batterie vecchie o scariche devono essere
sostituite perche possono perdere materiale acido che danneggia l'apparecchio.
DISPLAY
1. Normalmente il display LCD mostra il
calendario con il mese, la data, la temperatura, il giorno e l'orario.
2. Premere LIGHT una volta e la retroilluminazione si attiverà. Si spegnerà
automaticamente dopo 6 secondi.
IMPOSTAZIONE DEL DISPLAY LCD
1. Nella modalità di visualizzazione normale,
per regolare l'ora, tenere premuto SET fino
a che le cifre delle ore lampeggeranno.
Premere UP/DOWN per regolare le ore.
ESPANOL
CLR-450R
RADIODESPERTADOR CON RELOJ
RADIOCONTROLADO Y RADIO FM PLL.
SET
MODE
UP
VOL.
DOWN
ALIMENTACION BATERIE
1. Quitese la tapa dei compartimiento de pila
2. Introduzca 2 pilas UM-4 (AAA)
3. Pongase nuevamente la tapa.
Nota: Controlase periódicamente la pila.
Cambiase la pila que está vieja o descargada
para evitar daños provocados por eventuales
pérdidas de àcido. Si no se usará el aparato
por mucho tiempo quítense la pila del
compartimiento.
LIGHT
PANTALLA
1. Normalmente el display LCD muestra el
calendario con el més, la data, temperatura, el día y el horario.
2. Pulsar LIGHT una vez y la retro-iluminación
se activará. Se apagará automaticamente
después de 6 segundos.
AJUSTE DEL DISPLAY LCD
1. En la modalidad de visualización normal,
para ajustar la hora, tiernas comprimido el
pulsante SET y las horas relampaguearán.
Pulsar UP/DOWN para ajustar las horas.
2. Para ajustar los minutos, pulsar SET una
vez y los minutos relampaguearán. Pulsar
PORTUGUÊS
CLR-450R
RELÓGIO RADIO CONTROLADO COM
RÁDIO FM PLL.
SET
MODE
UP
VOL.
DOWN
LIGHT
Obrigado por adquirir esta nova geração de
relógio rádio Controlado. Projetado e formulado
com tecnologia e componentes de ponta, este
instrumento proporcionará leituras precisas e
confiáveis da temperatura e do horário
controlado por rádio. Leia este manual com
atenção para explorar todos os recursos e
funções do novo produto.
INSTALAÇÃO DAS PILHAS
Fonte de Alimentação: retire a tampa do
compartimento de pilhas, instale as dos pilhas
UM4 / AAA (não incluídas) de acordo com a
polaridade indicada e feche a tampa em
seguida.
Recoloque a tampa e aperte os parafusos.
ECRÃ
1. Normalmente o ecrã LCD mostra o calendario com o mês, a data e o dia, temperadura
e o horario.
2. Premir LIGHT uma vez para activar a retroiluminação. A retro-iluminação desligara-se
automaticamente depois de 6 segundos.
AJUSTE DO ECRÃ LCD
1. Na modalidade de visualização normal, para
2. Per regolare i minuti, premere SET una
volta e le cifre dei minuti lampeggeranno.
Premere UP/DOWN per regolare i minuti.
3. Per regolare 12/24, premere SET e 12/24
lampeggerà. Premere UP/DOWN per
regolare 12/24.
4. Per regolare l' anno, premere SET e l' anno
lampeggerà. Premere UP/DOWN per
regolare l' anno.
5. Per regolare il mese, premere SET e il mese
lampeggerà. Premere UP/DOWN per
regolare il mese.
6. Per regolare la data, premere SET una volta e
la data lampeggerà. Premere UP/DOWN per
regolare la data.
7. Per regolare la lingua, premere SET e la lingua
lampeggerà. Premere UP/DOWN per regolare
la lingua.
8. Per cambiate l' indicazione dei gradi da
Centigradi a Farenigh premere ancora una
volta il tasto SET.
8. Premere SET ancora una volta per
ritornare alla visualizzazione normale.
UP/DOWN para ajustar los minutos.
3. Para ajustar 12/24, pulsar SET una veces
y 12/24 relampagueará. Pulsar UP/DOWN
para ajustar el més.
4. Para ajustar l' año, pulsar SET una veces y
y l' año relampagueará. Pulsar UP/DOWN
para ajustar l' año.
5. Para ajustar el més, pulsar SET una veces
y el més relampagueará. Pulsar UP/
DOWN para ajustar el més.
6. Para ajustar la data, pulsar SET una vez y
la data relampagueará. Pulsar UP/DOWN
para ajustar la data.
7. Para ajustar la lengua, pulsar SET una
veces y la lengua relampagueará. Pulsar
UP/DOWN para ajustar la lengua.
AJUSTE DEL DESPERTADOR (ALARMA)
1. En la modalidad de visualización normal,
pulsar MODE una vez y aparece el horario
del despertador. El símbolo AL indica qué
el horario visualizado es el horario del
despertador.
2. Para ajustar el horario del despertador,
pulsar SET y las horas relampaguearán.
Pulsar UP/DOWN para ajustar las horas.
2.
3.
4.
5.
6.
7.
8.
ajustar a hora, tener premido SET até que
osdígitos dos horas piscarán. Premir UP/
DOWN para ajustar as horas.
Para ajustar os minutos, premir SET uma
vez e os minutos piscarán. Premir UP/
DOWN para ajustar os minutos.
Para ajustar os 12/24, premir SET uma vez
e os 12/24 piscarán. Premir UP/DOWN
para ajustar os 12/24.
Para ajustar os ano, premir SET uma vez e
os ano piscarán. Premir UP/DOWN para
ajustar os ano.
Para ajustar o mês, premir SET uma vezes
e o mês piscará. Premir UP/DOWN para
ajustar o mês.
Para ajustar a data, premir SET uma vez e
a data piscará. Premir UP/DOWN para
ajustar a data.
Para ajustar os linguagem, premir SET uma
vez e os linguagem piscarán. Premir UP/
DOWN para ajustar os linguagem.
Premir SET uma vez mais para retornar na
visualização normal.
AJUSTE DO ALARME
1. Na modalidade de visualização normal,
IMPOSTAZIONE DELL'ALARME
1. Nella modalità di visualizzazione normale,
premere MODE una volta e verrà mostrato
l'orario d'allarme. La scritta AL indica che
l'orario mostrato è quello dell'alarme.
2. Per regolare l'orario d'Allarme, tenere
premuto SET e le cifre delle ore dell'allarme lampeggeranno. Premere UP/DOWN
per regolare le ore.
3. Per regolare i minuti, premere SET una volta
e le cifre dei minuti dell'allarme lampeggeranno. Premere UP/DOWN per regolare
i minuti.
4. Premere il tasto UP per abilitare la funziona
allarme.
5. Premere SET ancora una volta per ritornare alla
visualizzazione normale.
Quando l'orario d'allarme arriva la sveglia
suonerà.
IMPOSTAZIONE DELL'ALARME RADIO
1. Nella modalità di visualizzazione normale,
premere MODE una volta e verrà mostrato
l'orario d'allarme. La scritta RDO indica che
l'orario mostrato è quello dell'alarme.
3. Para ajustar los minutos, pulsar SET una
vez y los minutos relampaguearán. Pulsar
UP/DOWN para ajustar los minutos.
4. Pulsar UP una vezpara habilitar la función
alarma
5. Pulsar SET una vez más para volvér a la
visualización normal.
Cuando el horario del despertador se
encuentra el despertador sonará.
AJUSTE DEL DESPERTADOR (RADIO)
1. En la modalidad de visualización normal,
pulsar MODE una vez y aparece el horario
del despertador. El símbolo RDO indica qué
el horario visualizado es el horario del
radio despertador.
2. Para ajustar el horario del despertador,
pulsar SET y las horas relampaguearán.
Pulsar UP/DOWN para ajustar las horas.
3. Para ajustar los minutos, pulsar SET una
vez y los minutos relampaguearán. Pulsar
UP/DOWN para ajustar los minutos.
4. Pulsar UP una vezpara habilitar la función
alarma
5. Pulsar SET una vez más para volvér a la
visualización normal.
2.
3.
4.
5.
premir MODE uma vez e aparece o horario
do alarme. O símbolo AL indica qué o
horario visualizado este o horario do
alarme.
Para ajustar o horario do alarme, premir
SETdeixe-os apertados até que osdígitos
dos horas piscarán. Premir UP/DOWN
para ajustar as horas.
Para ajustar os minutos, premir SET uma
vez e os minutos piscarán. Premir UP/
DOWN para ajustar os minutos.
Premir SET uma vez mais para retornar na
visualização normal.
Quando o horario do alarme chega o
alarme toca o alarme soará.
AJUSTE DO ALARME (RADIO)
1. Na modalidade de visualização normal,
premir MODE duas vezes e aparece o
horario do alarme. O símbolo RDO indica
qué o horario visualizado este o horario do
alarme Radio.
2. Para ajustar o horario do alarme, premir
SETdeixe-os apertados até que osdígitos
dos horas piscarán. Premir UP/DOWN
para ajustar as horas.
2. Per regolare l'orario d'Allarme, tenere
premuto SET e le cifre delle ore dell'allarme lampeggeranno. Premere UP/DOWN
per regolare le ore.
3. Per regolare i minuti, premere SET una volta
e le cifre dei minuti dell'allarme lampeggeranno. Premere UP/DOWN per regolare i
minuti.
4. Premere il tasto UP per abilitare la funzione
Radio.
5. Premere SET ancora una volta per ritornare alla
visualizzazione normale.
Quando l'orario d'allarme arriva la radio della
sveglia si attivera.
OROLOGIO RADIO-CONTROLLATO
L'apparecchio comincerà a sincronizzare
l'orologio dopo l'installazione della batteria. In
modalità normale, premere il tasto UP finché si
azioni l' RCC (Radio Controlled CLock) per
ricerca del segnale di orologio radiocontrollato. Se l'icona scompare dopo, il segnale radio
orario non è disponibile al momento. Provare
più tardi in altre ubicazioni. Allontanare
Cuando el horario del despertador se
encuentra la radio del despertador sonará.
RELOJ A RADIO CONTROL
El aparato sincronizará el reloj después de que
hayan sido colocados la pila o el adaptador o
de que haya sido puesto a cero. En el modo
normal, presione UP hasta que aparezca el
icono para reforzar la búsqueda de la señal del
reloj a radio control. Si el icono desaparece
después es porque la señal del reloj no está
disponible de momento. Inténtelo más tarde en
otro lugar. Coloque el aparato lejos de fuentes
de interferencias tales como teléfonos móviles,
electrodomésticos, televisiones, etc.
El icono de la antena con la potencia de señal
total aparecerá en la pantalla si la recepción de
la hora por radio control es correcta. El reloj a
radio control se sincronizará diariamente
alrededor de las 02:03 y las 03:03. Cada ciclo
de recepción dura como mínimo 2,5 minutos y
como máximo 10 minutos.
l'apparecchio da fonti di interferenza come
telefoni mobili, apparecchi TV, ecc.
L'Icona di antenna con pieno segnale di forza
apparirà sullo schermo se la ricezione di orario
radiocontrollato ha successo. L'orologio
radiocontrollato avrà una sincronizzazione
quotidiana a circa le 02:03 e 03:03 di ogni
giorno. Ogni ciclo di ricezione è minimo 2.5
minuti e massimo 10 minuti.
RADIO FM PLL
1. Mantenere premuto il tasto RADIO/VOLUME
fino ad entrare nel menu RADIO.
2. Premere UP/DOWN per cervcare la stazione
Radio preferita.
3) Premere il tasto MODE per entrare nel menu
memoria della Radioquindi prenere UP/
DOWN per scegliere il canale desiderato
dove si deridera memorizzare la stazione.
4. Per selezionare la Radio desiderata,
premere SET e selezionare tramite i tasti
UP/DOWN la radio desiderata.
Le caratteristiche ed il design possono essere
modificati senza preavviso.
RELÓGIO CONTROLADO POR RÁDIO
A unidade começará a sincronizar o relógio
após a instalação ou a redefinição das pilhas.
No modo normal, pressione UP até o ícone
aparecer, para iniciar a busca do sinal de
relógio controlado por rádio. Se o ícone
desaparecer em seguida, significa que o sinal
de horário via rádio não está disponível no
momento. Tente outros locais mais tarde.
Distancie a unidade de fontes de interferência,
como celulares, aparelhos elétricos,
televisores, etc.
O ícone de antena com intensidade de sinal
total aparecerá na tela se a recepção do
horário controlado por rádio for bem-sucedida.
O relógio controlado por rádio terá uma
sincronização diária aproximadamente às
02:03 e às 03:03 todos os dias. Cada ciclo de
II marchio riportato sul prodotto e sullasua
documentazione indica che ilprodotto non deve
essere smaltito canaltri rifiuti domestici al termine
del ciclo divita. Per evitare eventuali
danniall'ambiente o alla salute
causatidall'inopportuno smaltimento dei rifiuti,
siinvita l'utente a separare questo prodotto da
altri tipi di rifiuti e di riciclarloin maniera responsabile per favorire il riutilizzo sostenibile delle
risorse materia-li.Gli utenti domestici sono invitati
acontat-tare il rivenditore presso il quale estato
acquistato il prodotto a l'ufficio locale preposto
per tutte le informazioni relative alla raccolta
differenziata e alriciclaggio per questo tipo di
prodotto.Gli utenti aziendali sono invitati
acontattare il proprio fornitore e verificarei
termini e le condizioni del contratto diacquisto.
Questo prodotto non deve essere smaltito
unitamente ad altri rifiuti commerciali.
hasta a entrar en la modalidad RADIO.
2. comprimir UP/DOWN por cervcare la
estación Radio preferida.
3, comprimir la tecla MODE para entrar en la
modalidad memoria Radio. Comprimir UP/DOWN
para sintonizar el canal deseado dónde se
burlará memorizar la estación.
4. para seleccionar la Radio deseada,
comprimir SET y seleccionar por las teclas UP/
DOWN la radio deseada.
Las características y el diseño pueden ser
modificados sin preaviso.
RADIO FM PLL
1. mantener comprimido la tecla RADIO/
VOLUME
3. Para ajustar os minutos, premir SET uma
vez e os minutos piscarán. Premir UP/
DOWN para ajustar os minutos.
4. Premir SET uma vez mais para retornar na
visualização normal.
5. Quando o horario do alarme chega o alarme
toca o alarme soará.
Corretto smaltimento
delprodotto - (rifiuti elettrici
edelettronici)
recepção é de, no mínimo 2,5 minutos e, no
máximo, 10 minutos.
RADIO FM PLL
1. Pressione RADIO / VOLUME até que você
digite o menu RADIO.
2. Pressione UP / DOWN para pesquisa a
estação rádio.
3) Pressione o botão MODE para entrar no
menu de memória Radio então pressione UP /
DOWN para selecionar o canal desejado onde
você deride armazenar a estação.
4. Para selecionar a rádio, pressione SET e
selecione usando os botões UP / DOWN no
rádio que você deseja.
As características e sujeito de projeto para
mudar sem prévio aviso.
Eliminación correcta deeste
producto (materialelectrico y electrónico dedescarte)La
presencia de esta marca en elproducto o en el
materiál informativo quelo acompaña, indica que
al finalizar suvida útil no deberá eliminarse junto
con otros residuos domésticos. Para evitarlos
posibles daños al medio ambiente oa la salud
humane que representa laeliminación
incontrolada de residuos, separe este producto
de otros tipos deresiduos y reciclelo
correctamente parapromover la reutilización
sostenible derecursos materiales.Los usuarios
particulares puedencontactar con el
establecimiento dondeadquirieron el producto, o
con lasautoridades locales pertinentes,
parainformarse sobre cómo y dóndepueden
lIevario para que sea sometidoa un reciclaje
ecológico y seguro.Los usuarios comerci-ales
puedencontactar con su proveedor y consultarlas condiciones del contrato de compra.Este
produ-cto no debe eliminarsemezclado con
otros residuos comerciales.
Comment éliminer ceproduit
(déchets d'éuipements
électriqueset électroniqu-es)
Ce symbole sur le produit ou sa documentation indique qu'il ne doit pasêtre
éliminé en fin de vie avec lesautres déchets ménagers. L'éliminationincontrôlée
des déchets pouvant porter préjudice a
l'environ-nement ou ala santé humaine,
veuillez le séparerdes autres types de
déchets et lerecycler de façon responsable. Vous favoriserez ainsi la réutilisa-tion
durabledes ressources matérielles.Les
particuliers sont invites acontacter le distributeur leur ayantvendu le produit ou a se
rensei-gnera uprès de leur mairie pour
savoir ou etcomment ils peuvent se débarrasserde ce produit afin qu'il soit recyclé
enrespectant l'environ-nement. Les entreprises sont invitées aconta-cter leurs fournisseurs et aconsulter les cond-itions de
leur contratde vente. Ce produit ne doit pas
êtreéliminé avec les autres déchets
commerciaux.