1
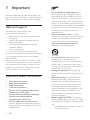
For product support, visit
www.philips.com/support
HTL3110B
User manual
EN: For further assistance, call the customer support service in your country.
• To obtain assistance in the U.S.A., Canada, Puerto Rico, or the U.S. Virgin Islands, contact Philips Customer
Care Center at 1-866-310-0744
• To obtain assistance in Mexico, contact Philips Customer Care Center at 01 800 839 1989;
Mexico city: 5887-9736
For Product recycling information, please visit - www.recycle.philips.com
Contents
1Important
2
2
2
4
4
2 Your SoundBar
4
4
5
6
6
Help and support
Important safety instructions
Care for your product
Care of the environment
Main unit
Remote control
Connectors
Wireless subwoofer
9Notice
16
16
Notice of compliance
3 Connect and set up
7
Pair up with the subwoofer
7
Placement
7
Connect to TV
7
Connect audio from TV and other devices8
4 Use your SoundBar
9
9
9
10
11
11
11
12
12
5 Update software
12
12
12
6 Wall mount
13
7 Product specifications
14
8Troubleshooting
15
Adjust the volume
Choose your sound
Play audio through Bluetooth
Connect Bluetooth via NFC
USB storage devices
Auto standby
Set display brightness
Apply factory settings
Check software version
Update software via USB
EN
1
1Important
••
Read and understand all instructions before you
use your product. If damage is caused by failure to
follow instructions, the warranty does not apply.
Help and support
For extensive online support, visit
www.philips.com/support to:
• download the user manual and the quick
start guide
• watch video tutorials (available only for
selected models)
• find answers to frequently answered
questions (FAQs)
• email us a question
• chat with our support representative.
Follow the instructions on the website to select
your language, and then enter your product
model number.
Alternatively, you can contact Consumer Care
in your country. Before you contact, note down
the model number and serial number of your
product. You can find this information on the
back or bottom of your product.
Important safety instructions
••
••
••
••
••
••
••
••
2
Read these instructions.
Keep these instructions.
Heed all warnings.
Follow all instructions.
Do not use this apparatus near water.
Clean only with dry cloth.
Do not block any ventilation openings.
Install in accordance with the
manufacturer's instructions.
Do not install near any heat sources
such as radiators, heat registers, stoves, or
other apparatus (including amplifiers) that
produce heat.
EN
••
••
••
••
••
••
Do not defeat the safety purpose of
the polarized or grounding-type plug. A
polarized plug has two blades with one
wider than the other. A grounding type
plug has two blades and a third grounding
prong. The wide blade or the third prong
are provided for your safety. If the provided
plug does not fit into your outlet, consult
an electrician for replacement of the
obsolete outlet.
Protect the power cord from being
walked on or pinched, particularly at plugs,
convenience receptacles, and the point
where they exit from the apparatus.
Only use attachments/accessories
specified by the manufacturer.
Use only with the cart, stand, tripod,
bracket or table specified by the
manufacturer or sold with the apparatus.
When a cart is used, use caution when
moving the cart/apparatus combination to
avoid injury from tip-over.
Unplug this apparatus during lightning
storm or when unused for long periods of
time.
Refer all servicing to qualified service
personnel. Servicing is required when
the apparatus has been damaged in any
way, such as power-supply cord or plug
is damaged, liquid has been spilled or
objects have fallen into the apparatus, the
apparatus has been exposed to rain or
moisture, does not operate normally, or
has been dropped.
Battery usage CAUTION - To prevent
battery leakage which may result in bodily
injury, property damage, or damage to the
unit:
• Install all batteries correctly, + and - as
marked on the unit.
•
•
•
•
••
••
••
••
• Do not mix batteries (old and new or
carbon and alkaline, etc.).
• Remove batteries when the unit is not
used for a long time.
• The batteries shall not be exposed to
excessive heat such as sunshine, fire or
the like.
• Perchlorate Material - special handling
may apply. See www.dtsc.ca.gov/
hazardouswaste/perchlorate.
The product/remote control may contain
a coin/button type battery, which can be
swallowed. Keep the battery out of reach
of children at all times! If swallowed, the
battery can cause serious injury or death.
Severe internal burns can occur within two
hours of ingestion.
If you suspect that a battery has been
swallowed or placed inside any part of the
body, seek immediate medical attention.
When you change the batteries, always
keep all new and used batteries out of
reach of children. Ensure that the battery
compartment is completely secure after
you replace the battery.
If the battery compartment cannot be
completely secured, discontinue use of the
product. Keep out of reach of children and
contact the manufacturer.
Apparatus shall not be exposed to
dripping or splashing.
Do not place any sources of danger on
the apparatus (for example. liquid filled
objects, lighted candles).
This apparatus may contain lead and
mercury. Dispose according to local, State
or Federal laws. For disposal or recycling
information, please contact your local
authorities. For additional assistance on
recycling options, please contact www.
mygreenelectronics.com or www.eiae.org
or www.recycle.philips.com.
Where the MAINS plug or an appliance
coupler is used as the disconnect device,
the disconnect device shall remain readily
operable.
••
•
Do not place this apparatus on the
furniture that is capable of being tilted by a
child and an adult leaning, pulling, standing
or climbing on it. A falling apparatus can
cause serious injury or even death.
This apparatus should not be placed in a
built-in installation such as a bookcase or
rack unless proper ventilation is provided.
Make sure to leave a space of 7.8 inches
(20cm) or more around this apparatus.
Class II equipment symbol
This symbol indicates that the unit has a double
insulation system.
This 'bolt of lightning' indicates uninsulated
material within your unit may cause an electrical
shock. For the safety of everyone in your
household, please do not remove product
covering.
The 'exclamation point' calls attention to
features for which you should read the enclosed
literature closely to prevent operating and
maintenance problems.
WARNING: To reduce the risk of fire or
electric shock, this apparatus should not be
exposed to rain or moisture and objects filled
with liquids, such as vases, should not be placed
on this apparatus.
CAUTION: To prevent electric shock, match
wide blade of plug to wide slot, fully insert.
EN
3
Care for your product
Use only microfiber cloth to clean the product.
Care of the environment
Your product is designed and manufactured
with high quality materials and components,
which can be recycled and reused. Please
visit www.recycle.philips.com for additional
information on a recycling center in your area.
Never dispose of your product with other
household waste. Please inform yourself about
the local rules on the separate collection of
electrical and electronic products and batteries.
The correct disposal of these products helps
prevent potentially negative consequences on
the environment and human health.
The batteries supplied do not contain the heavy
metals mercury and cadmium. Nevertheless,
in many areas batteries may not be disposed
of with your household waste. Please ensure
you dispose of batteries according to local
regulations.
For perchlorate material, special handling may
apply. Visit www.dtsc.ca.gov/hazardouswaste/
perchlorate.
2 Your SoundBar
Congratulations on your purchase, and
welcome to Philips! To fully benefit from
the support that Philips offers, register your
SoundBar at www.philips.com/welcome.
Main unit
This section includes an overview of the main
unit.
a b
a
c
d
e
(Standby-On/Standby indicator)
• Switch the SoundBar on or to standby.
• When the SoundBar is in standby, the
standby indicator turns red.
b SOURCE
Select an input source for the SoundBar.
c Display panel
d +/- (Volume)
Increase or decrease volume.
e NFC tag
Tap the NFC-enabled device on the tag for
Bluetooth connection.
4
EN
c
This section includes an overview of the
remote control.
/ (Previous/Next)
Skip to the previous or next track in USB
mode.
d
(Play/Pause)
• Start, pause or resume play in USB
mode.
a
e BASS +/Increase or decrease bass.
b
f Volume control
• +/-: Increase or decrease volume.
•
: Mute or restore volume.
Remote control
g SOUND
Select a sound mode.
c
d
e
h SURROUND ON/OFF
Select surround or stereo sound.
l
j DIM
Set the brightness of SoundBar display
panel.
f
g
h
i
j
a
i AUDIO SYNC +/Increase or decrease audio delay.
k
k NIGHT
Turn night mode on or off.
l TREBLE +/Increase or decrease treble.
(Standby-On)
• Switch the SoundBar on or to standby.
b Source buttons
HDMI ARC: Switch your source to HDMI
ARC connection.
: Switch to Bluetooth mode.
USB: Switch to USB mode.
AUX: Switch your audio source to the
AUX connection.
COAX: Switch your audio source to the
coaxial connection.
OPTICAL: Switch your audio source to
the optical connection.
EN
5
Connectors
Wireless subwoofer
This section includes an overview of the
connectors available on your SoundBar.
The SoundBar comes with a wireless subwoofer.
a
b c d
a
e f
• Audio input from a USB storage
device.
• Upgrade software of this product.
• Charge a USB device.
b DIGITAL IN-COAXIAL
Connect to a coaxial audio output on the
TV or a digital device.
c AUX IN (L/R)
Connect to an analog audio output on the
TV or an analog device.
d DIGITAL IN-OPTICAL
Connect to an optical audio output on the
TV or a digital device.
e DC IN
Connect to the power supply.
f HDMI OUT (ARC) - TO TV
Connect to the HDMI input on the TV.
6
EN
a CONNECT (connect)
Press to to enter the pairing mode for the
subwoofer.
b Subwoofer indicator
• When the power is turned on, the
indicator lights up.
• During wireless pairing between the
subwoofer and the main unit, the
indicator blinks white quickly.
• When the pairing succeeds, the
indicator lights up white.
• When the pairing fails, the indicator
blinks white slowly.
c AC MAINS~
Connect to the power supply.
3 Connect and set
up
This section helps you connect your SoundBar
to a TV and other devices, and then set it up.
For information about the basic connections of
your SoundBar and accessories, see the quick
start guide.
Placement
Place the subwoofer at least 1 meter (3 feet)
away from your SoundBar, and ten centimeters
away from the wall.
For best results, place your subwoofer as shown
below.
Note
•• For identification and supply ratings, see the type plate
at the back or bottom of the product.
•• Before you make or change any connections, make sure
that all devices are disconnected from the power outlet.
Pair up with the subwoofer
The wireless subwoofer automatically pairs
up with the SoundBar for wireless connection
when you turn on the SoundBar and the
subwoofer.
If no audio from the wireless subwoofer can be
heard, manually pair up the subwoofer.
1
2
3
4
Turn on the SoundBar and the subwoofer.
»» If the connection to the SoundBar is
lost, the indicator on the subwoofer
blinks white slowly.
Press the CONNECT (connect) button on
the subwoofer to enter the pairing mode.
»» The indicator on the subwoofer blinks
white quickly.
On the remote control, within six seconds
press twice, and BASS + once, then
hold down SURROUND ON.
»» If the pairing succeeds, the indicator on
the subwoofer lights up white.
Connect to TV
Connect your SoundBar to a TV. You can listen
to audio from TV programs through your
SoundBar. Use the best quality connection
available on your SoundBar and TV.
Connect to TV through HDMI (ARC)
Your SoundBar supports HDMI with Audio
Return Channel (ARC). If your TV is HDMI ARC
compliant, you can hear the TV audio through
your SoundBar by using a single HDMI cable.
»» If the pairing fails, the indicator on the
subwoofer blinks white slowly.
If the pairing fails, repeat the steps above.
EN
7
Option 1: Connect audio through a
digital optical cable
TV
Best quality audio
TV
1
2
Using a High Speed HDMI cable, connect
the HDMI OUT (ARC)-TO TV connector
on your SoundBar to the HDMI ARC
connector on the TV.
• The HDMI ARC connector on the TV
might be labeled differently. For details,
see the TV user manual.
On your TV, turn on HDMI-CEC
operations. For details, see the TV user
manual.
Note
•• If your TV is not HDMI ARC compliant, connect
an audio cable to hear the TV audio through your
SoundBar (see 'Connect audio from TV and other
devices' on page 8).
•• If your TV has a DVI connector, you can use an HDMI/
DVI adapter to connect to TV. However, some of the
features may not be available.
Connect audio from TV and
other devices
Play audio from TV or other devices through
your Soundbar speakers.
Use the best quality connection available on
your TV, Soundbar, and other devices.
Note
•• When your Soundbar and TV are connected through
HDMI ARC, an audio connection is not required. (see
'Connect to TV through HDMI (ARC)' on page 7)
8
EN
1
Using an optical cable, connect the
OPTICAL connector on your SoundBar to
the OPTICAL OUT connector on the TV
or other device.
• The digital optical connector might be
labeled SPDIF or SPDIF OUT.
Option 2: Connect audio through a
digital coaxial cable
Best quality audio
1
Using a coaxial cable, connect the
COAXIAL connector on your SoundBar
to the COAXIAL/DIGITAL OUT
connector on the TV or other device.
• The digital coaxial connector might be
labeled DIGITAL AUDIO OUT.
Option 3: Connect audio through
analog audio cables
Basic quality audio
1
Using an analog cable, connect the AUX
connectors on your SoundBar to the
AUDIO OUT connectors on the TV or
other device.
DVD
4 Use your
SoundBar
This section helps you use the SoundBar to play
audio from connected devices.
Before you start
• Make the necessary connections described
in the quick start guide and the user
manual.
• Switch the SoundBar to the correct source
for other devices.
Adjust the volume
1
Press +/- (Volume) to increase or decrease
a volume level.
• To mute sound, press (Mute).
• To restore the sound, press (Mute)
again or press +/- (Volume).
Choose your sound
This section helps you choose the ideal sound
for your video or music.
Sound mode
Select predefined sound modes to suit your
video or music.
1
Press SOUND to select a sound option
from the display panel.
• AUTO: Automatically select a sound
setting based on the sound stream.
• POWERFUL: Enjoy thrilling arcade
sounds, ideal for action-packed videos
and loud parties.
• BALANCED: Experience the original
sound of your movies and music,
without added sound effects.
EN
9
• BRIGHT: Spice up your dull movies
and music with added sound effects.
• CLEAR: Hear every detail in your
music and clear voices in your movies.
• WARM: Experience spoken words and
music vocals in comfort.
• PERSONAL: Personalize the sound
based on your preferences.
Surround sound mode
Experience an immersive audio experience with
surround sound modes.
1
Press SURROUND ON/OFF to turn
surround mode on or off.
• On: Create a surround listening
experience.
• Off: Two-channel stereo sound. Ideal
for listening to music.
Equalizer
Play audio through Bluetooth
Through Bluetooth, connect the SoundBar with
your Bluetooth device (such as an iPad, iPhone,
iPod touch, Android phone, or laptop), and then
you can listen to the audio files stored on the
device through your SoundBar speakers.
What you need
• A Bluetooth device which supports
Bluetooth profile A2DP, AVRCP and with
Bluetooth version as 3.0 + EDR.
• The maximum operational range between
the SoundBar and a Bluetooth device is
approximately 10 meters (30 feet).
1
2
Change the high frequency (treble) and low
frequency (bass) settings of the SoundBar.
1
Press TREBLE +/- or BASS +/- to change
the frequency.
Synchronize video and sound
3
If the audio and video are not synchronized,
delay the audio to match the video.
1
Press AUDIO SYNC +/- to synchronize
the audio with the video.
Night mode
For quiet listening, night mode decreases the
volume of loud sounds when audio is played.
Night mode is only available for Dolby Digital
soundtracks.
1
10
Press NIGHT to turn night mode on or
off.
EN
4
Press on the remote control to switch
the SoundBar to Bluetooth mode.
»» BT is displayed on the display panel,
blinking.
On the Bluetooth device, switch on
Bluetooth, search for and select PHILIPS
HTL3110B to start connection (see the
user manual of the Bluetooth device on
how to enable Bluetooth).
»» During connection, BT on the display
panel blinks.
Wait until you hear a beep sound from the
SoundBar.
»» When the Bluetooth connection
succeeds, BT is displayed on the display
panel.
»» If the connection fails, BT on the
display panel blinks continuously.
Select and play audio files or music on
your Bluetooth device.
• During play, if a call is coming, music
play is paused. Play resumes when the
call ends.
• If your Bluetooth device supports
AVRCP profile, on the remote control
you can press
/ to skip to a track,
or press
to pause/resume play.
5
To exit Bluetooth, select other source.
• When your switch back to Bluetooth
mode, Bluetooth connection remains
active.
Note
•• The music streaming may be interrupted by obstacles
between the device and SoundBar, such as wall, metallic
casing that covers the device, or other devices nearby
that operate in the same frequency.
•• If you want to connect your SoundBar with another
Bluetooth device, press and hold on the remote
control to disconnect the currently connected
Bluetooth device.
USB storage devices
Enjoy audio on a USB storage device, such as an
MP3 player and USB flash memory, etc.
What you need
• A USB storage device that is formatted for
FAT or NTFS file systems, and complies
with the Mass Storage Class.
• An MP3 or WMA file on a USB storage
device
1
Connect a USB storage device to this
product.
2
3
Connect Bluetooth via NFC
NFC (Near Field Communication) is a
technology that enables short-range wireless
communication between NFC-enabled devices,
such as mobile phones.
What you need
• A Bluetooth device with NFC function.
• For pairing, tap the NFC device on the
NFC tag of the SoundBar.
1
2
3
Enable NFC on the Bluetooth device (see
the device' s user manual for details).
Tap the NFC device on the NFC tag of
the SoundBar until you hear a beep sound
from the SoundBar.
»» When the Bluetooth connection
succeeds, BT is displayed on the display
panel.
Press USB on the remote control.
Use the remote control to control play.
Button
/
USB
Action
Start, pause or resume play.
Skip to the previous or next track.
During USB play, press repeatedly to
select a repeat or shuffle mode, or
turn off a play mode.
Note
•• This product may not be compatible with certain types
of USB storage device.
•• If you use a USB extension cable, USB HUB, or USB
multi-reader, the USB storage device may not be
recognized.
•• Digital camera PTP and MTP protocols are not
supported.
•• Do not remove the USB storage device while it is
being read.
•• DRM-protected music files (MP3, WMA) are not
supported.
•• Support a USB port: 5V , 1A.
»» If the connection fails, BT on the
display panel blinks continuously.
Select and play audio files or music on
your NFC device.
• To break the connection, tap again the
NFC device with the NFC tag on the
SoundBar.
Auto standby
When playing media from a connected device,
the SoundBar automatically switches to standby
after 29 minutes of button inactivity and no
audio/video play from a connected device.
EN
11
Set display brightness
5 Update software
You can press DIM repeatedly to select a
different brightness level of the display panel on
this product.
To get the best features and support, update
your product with the latest software.
Apply factory settings
What you need
• Connect this product to your TV through
HDMI.
You can reset this product to the default
settings programmed at the factory.
1
In any source mode, within three seconds
press - (Volume), BASS - and TREBLE -.
»» When the factory settings restore is
complete, the product automatically
switches off and restarts.
Check software version
In HDMI ARC source mode, press TREBLE -,
BASS - and - (Volume) on the remote control.
Update software via USB
1
2
Check the latest software version on
www.philips.com/support.
• Search for your model and click on
"Software and drivers".
Download the software into a USB storage
device.
aUnzip the download if zipped, and
make sure that the unzipped file is
named "HTL3110.BIN".
3
4
5
12
EN
bPut the "HTL3110.BIN" file in the
root directory.
Connect the USB storage device to the
(USB) connector on this product.
Switch this product to the HDMI ARC
source, and switch your TV to the HDMI
source.
On the remote control, within 6 seconds
press twice, and + (Volume) once, then
hold down SURROUND ON.
»» If an upgrade media is detected, on the
TV screen you are prompted to start
the update.
6
7
»» If an upgrade media is not detected,
an error message is displayed on the
TV screen. Make sure that the latest
software of this product is put in the
USB storage device.
Press
to start the update.
Wait until the update is completed.
»» If the update is complete, this product
automatically turns off and on again.
Caution
•• Do not turn off the power or remove the USB storage
device when the software update is in progress because
you might damage this player.
6 Wall mount
Note
•• Improper wall mounting may result in accident, injury or
damage. If you have any query, contact Consumer Care
in your country.
•• Before wall mounting, make sure the wall can support
the weight of your SoundBar.
•• Before wall mount, you need not remove the four
rubber feet at the bottom of the SoundBar, otherwise
the rubber feet cannot be fixed back.
Screw length/diameter
Depending on the type of wall mounting your
SoundBar, make sure that you use screws of a
suitable length and diameter.
3.5-4mm
4mm
> 25mm
See the illustration in the quick start guide on
how to wall mount the SoundBar.
1) Drill two holes on the wall.
2) Secure the dowels and screws in the holes.
3) Hang the SoundBar on the fastening screws.
EN
13
7Product
specifications
Note
•• Specifications and design are subject to change without
notice.
Amplifier
•
•
•
•
•
FTC total output power: 40W
• Left + Right:
25W (1%THD, 8ohm, 120Hz-20kHz)
• Subwoofer:
15W (1%THD, 4ohm, 30Hz-80Hz)
RMS Total output power:
120W RMS (+/- 0.5 dB, 10% THD)
Frequency response: 20 Hz-20 kHz / ±3 dB
Signal-to-noise ratio: > 65 dB (CCIR) /
(A-weighted)
Input sensitivity:
• AUX: 900 mV
Audio
•
S/PDIF Digital audio input:
• Coaxial: IEC 60958-3
• Optical: TOSLINK
USB
•
•
•
•
•
14
Compatibility: Hi-Speed USB (2.0)
Class support: USB Mass Storage Class
(MSC)
File system: FAT16, FAT32, NTFS
Supports MP3 and WMA file formats
Sampling frequency:
• MP3: 8 kHz, 11 kHz, 12 kHz, 16 kHz,
22 kHz, 24 kHz, 32 kHz, 44.1 kHz,
48 kHz
• WMA: 44.1 kHz, 48 kHz
EN
•
•
Constant bit rate:
• MP3: 8 kbps-320 kbps
• WMA: 32 kbps-192 kbps
Version:
• WMA: V7, V8, V9
Bluetooth
••
••
Bluetooth profiles: A2DP, AVRCP
Bluetooth version: 3.0 + EDR
Main unit
••
••
•
•
••
••
Power supply:
• Model (Philips branded AC power
adapter): DYS602-210309W; AS650210-AA309
• Input: 100-240 V~, 50/60 Hz 1.5 A
• Output: 21V , 3.09A
Standby power consumption: ≤ 0.5 W
Speaker impedance
• Woofer: 8 ohm
• tweeter: 16 ohm
Speaker drivers: 2 x (90mm/3.5" x
34mm/1.3") woofer + 2 x 31mm/1.2"
tweeter
Dimensions (WxHxD): 843 x 52 x 60 mm
Weight: 1.4 kg
Subwoofer
•
•
•
•
•
•
•
Power supply: 110-240 V~, 50-60 Hz
Power consumption: 20 W
Standby power consumption: ≤ 0.5 W
Impedance: 4 ohm
Speaker drivers: 1 x 134 mm (5.25") woofer
Dimensions (WxHxD):
226 x 251 x 306 mm
Weight: 3.9 kg
Remote control batteries
•
1 x AAA-R03-1.5 V
8Troubleshooting
Warning
•• Risk of electric shock. Never remove the casing of the
product.
To keep the warranty valid, never try to repair
the product yourself.
If you have problems using this product, check
the following points before you request service.
If you still have a problem, get support at
www.philips.com/support.
Main unit
The buttons on the SoundBar do not work.
• Disconnect the SoundBar from the power
supply for a few minutes, then reconnect.
Sound
No sound from SoundBar speakers.
• Connect the audio cable from your
SoundBar to your TV or other devices.
However, you do not need a separate
audio connection when the SoundBar and
TV are connected through HDMI ARC
connection.
• Reset your SoundBar to its factory settings.
• On the remote control, select the correct
audio input.
• Make sure that the SoundBar is not muted.
No sound from the wireless subwoofer.
• Wirelessly connect the subwoofer to
the SoundBar (see 'Pair up with the
subwoofer' on page 7).
Distorted sound or echo.
• If you play audio from the TV through the
SoundBar, make sure that the TV is muted.
Audio and video are not synchronized.
• Press AUDIO SYNC +/- to synchronize
the audio with the video.
Error message is displayed on the display
panel.
• When "ERROR" is displayed, it indicates
that an input audio format is not
supported.
• When "USB ERROR" is displayed, it
indicates that the connected USB device is
not supported.
• When "HDMI ARC" blinks, it indicates
that the connected TV is not HDMI ARC
compliant or an unsupported audio format
is detected.
Bluetooth
A device cannot connect with the SoundBar.
• The device does not support the
compatible profiles required for the
SoundBar.
• You have not enabled the Bluetooth
function of the device. See the user manual
of the device on how to enable the
function.
• The device is not correctly connected.
Connect the device correctly.
• The SoundBar is already connected with
another Bluetooth device. Disconnect the
connected device, then try again.
Quality of audio play from a connected
Bluetooth device is poor.
• The Bluetooth reception is poor. Move the
device closer to the SoundBar, or remove
any obstacle between the device and the
SoundBar.
The connected Bluetooth device connects and
disconnects constantly.
• The Bluetooth reception is poor. Move the
device closer to the SoundBar, or remove
any obstacle between the device and the
SoundBar.
• Turn off Wi-Fi function on the Bluetooth
device to avoid interference.
• For some Bluetooth, the Bluetooth
connection can be deactivated
automatically to save power. This does not
indicate any malfunction of the SoundBar.
EN
15
NFC
A device cannot connect with the SoundBar
via NFC.
• Make sure that the device is supported by
NFC.
• Make sure that NFC is enabled on the
device (see the device' s user manual for
details).
• For pairing, tap the NFC device on the
NFC tag of the SoundBar.
9Notice
This section contains the legal and trademark
notices.
Notice of compliance
The device complies with the FCC rules, Part
15. Operation is subject to the following two
conditions:
a This device may not cause harmful
interference, and
b This device must accept any interference
received, including interference that may
cause undesired operation.
FCC rules
This equipment has been tested and found
to comply with the limits for a Class B digital
device, pursuant to part 15 of the FCC Rules.
These limits are designed to provide reasonable
protection against harmful interference in a
residential installation. This equipment generates,
uses and can radiate radio frequency energy
and, if not installed and used in accordance
with the instruction manual, may cause harmful
interference to radio communications.
However, there is no guarantee that
interference will not occur in a particular
installation. If this equipment does cause harmful
interference to radio or television reception,
which can be determined by turning the
equipment off and on, the user is encouraged
to try to correct the interference by one or
more of the following measures:
• Relocate the receiving antenna.
• Increase the separation between
equipment and receiver.
• Connect the equipment into an outlet on
a circuit different from that to which the
receiver is connected.
• Consult the dealer or an experienced
radio/TV technician for help.
16
EN
FCC Radiation Exposure Statement:This
equipment complies with FCC radiation
exposure limits set forth for an uncontrolled
environment. This equipment should be installed
and operated with a minimum distance of
20cm between the radiator and your body.
This transmitter must not be co-located or
operated in conjunction with any other antenna
or transmitter.
Warning: Any changes or modifications made
to this device that are not expressly approved
by WOOX Innovations may void the user’s
authority to operate the equipment.
Model number: PHILIPS HTL3110B/F7
Trade Name: Philips
Responsible Party:P&F USA, Inc. PO Box 2248
Alpharetta, GA 30023-2248; 1-866-310-0744
Canada:
CAN ICES(B)/NMB-3(B)
This device complies with Industry Canada
licence-exempt RSS standard(s). Operation is
subject to the following Two conditions: (1) this
device may not cause harmful interference, and
(2) this device must accept any interference
received, including interference that may cause
undesired operation.
Play audio on a USB storage device
EN
17
ONE (1) YEAR LIMITED WARRANTY
WARRANTY COVERAGE:
This warranty obligation is limited to the terms set forth
below.
WHO IS COVERED:
This product is warranted to the original purchaser or the person receiving the product as a gift against defects in materials and
workmanship as based on the date of original purchase
(“Warranty Period”) from an Authorized Dealer. The original
sales receipt showing the product name and the purchase date
from an authorized retailer is considered such proof.
WHAT IS COVERED:
This warranty covers new products if a defect in material
or workmanship occurs and a valid claim is received within
the Warranty Period. At its option, the company will either (1)
repair the product at no charge, using new or refurbished
replacement parts, or (2) exchange the product with a product
that is new or which has been manufactured from new, or serviceable used parts and is at least functionally equivalent or most
comparable to the original product in current inventory,
or (3) refund the original purchase price of the product.
The company warrants replacement products or parts provided
under this warranty against defects in materials and workmanship
from the date of the replacement or repair for ninety (90) days
or for the remaining portion of the original product’s warranty,
whichever provides longer coverage for you. When a product or
part is exchanged, any replacement item becomes your property
and the replaced item becomes the company property. When a
refund is given, your product becomes the company property.
Note: Any product sold and identified as refurbished or
renewed carries a ninety (90) day limited warranty.
Replacement product can only be sent if all warranty
requirements are met. Failure to follow all requirements
can result in delay.
WHAT IS NOT COVERED - EXCLUSIONS AND LIMITATIONS:
This Limited Warranty applies only to the new products that
can be identified by the trademark, trade name, or logo affixed
to it. This Limited Warranty does not apply to any non-Philips
hardware product or any software, even if packaged or sold
with the product. Non-Philips manufacturers, suppliers, or
publishers may provide a separate warranty for their own
products packaged with the bundled product.
The company is not liable for any damage to or loss of any ,
programs data, or other information stored on any media
contained within the product, or any non-Philips product or part
not covered by this warranty. Recovery or reinstallation of
programs, data or other information is not covered under this
Limited Warranty.
or (d) if any serial number has been removed or defaced,
or (e) product, accessories or consumables sold “AS IS”
without warranty of any kind by including refurbished Philips
product sold “AS IS” by some retailers.
This Limited Warranty does not cover:
• Shipping charges to return defective product.
• Labor charges for installation or setup of the product, adjustment of customer controls on the product, and installation or
repair of antenna/signal source systems outside of the product.
• Product repair and/or part replacement because of improper
installation or maintenance, connections to improper voltage
supply, power line surge, lightning damage, retained images or
screen markings resulting from viewing fixed stationary content for extended periods, product cosmetic appearance items
due to normal wear and tear, unauthorized repair or other
cause not within the control of the company.
• Damage or claims for products not being available for use, or
for lost data or lost software.
• Damage from mishandled shipments or transit accidents when
returning product.
• A product that requires modification or adaptation to enable
it to operate in any country other than the country for which
it was designed, manufactured, approved and/or authorized, or
repair of products damaged by these modifications.
• A product used for commercial or institutional purposes
(including but not limited to rental purposes).
• Product lost in shipment and no signature verification receipt
can be provided.
• Failure to operate per Owner’s Manual.
TO OBTAIN ASSISTANCE IN THE U.S.A., CANADA,
PUERTO RICO, OR U.S. VIRGIN ISLANDS…
Contact Customer Care Center at:
1-866-310-0744
REPAIR OR REPLACEMENT AS PROVIDED UNDER THIS
WARRANTY IS THE EXCLUSIVE REMEDY FOR THE CONSUMER. PHILIPS SHALL NOT BE LIABLE FOR ANY INCIDENTAL OR CONSEQUENTIAL DAMAGES FOR BREACH OF
ANY EXPRESS OR IMPLIED WARRANTY ON THIS PRODUCT. EXCEPT TO THE EXTENT PROHIBITED BY APPLICABLE
LAW, ANY IMPLIED WARRANTY OF MERCHANTABILITY OR
FITNESS FOR A PARTICULAR PURPOSE ON THIS PRODUCT
IS LIMITED IN DURATION TO THE DURATION OF THIS
WARRANTY.
Some states do not allow the exclusions or limitation of incidental or consequential damages, or allow limitations on how long an
implied warranty lasts, so the above limitations or exclusions may
not apply to you.
This warranty does not apply (a) to damage caused by accident,
abuse, misuse, neglect, misapplication, or non-Philips product, (b)
to damage caused by service performed by anyone other than
an Authorized Service Location, (c) to a product or
a part that has been modified without written permission,
This warranty gives you specific legal rights. You may have other rights which vary from state/province to state/province.
P&F USA Inc. PO Box 2248 Alpharetta, GA 30023-2248
18
P&F USA, Inc.
PO Box 2248 Alpharetta, GA 30023-2248
Specifications are subject to change without notice
2014 © WOOX Innovations Limited. All rights reserved.
This product was brought to the market by WOOX Innovations Limited or one of its affiliates, further referred
to in this document as WOOX Innovations, and is the manufacturer of the product. P&F is the warrantor
in relation to the product with which this booklet was packaged. Philips and the Philips Shield Emblem are
registered trademarks of Koninklijke Philips N.V.
HTL3110B_F7_UM_V1.0