1
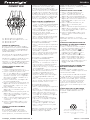
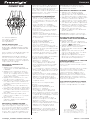
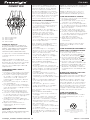
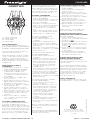
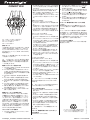
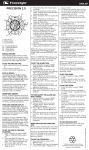
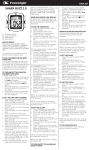
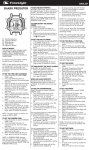
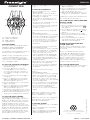
ENGLISH
S4
S3
format, the hour digits are identified
by “H”.
S1
S2
S1. Start/stop Button
S2. Lap/reset Button
S3. Mode Button
S4. Light Button
DISPLAY MODES
The watch has four display modes:
NORMAL TIME, STOPWATCH,
ALARM and TIME SETTING.
To change from one display mode to
another, press S3 button once.
NOTE: In any setting mode, if there
is no key manipulation for a few
minutes, the watch will automatically save the entered data and exit
the setting procedure.
TO SET THE TIME AND CALENDAR
1.Press S3 button to select TIME
SETTING mode.
2.Press S1 button to reset the
second digits to zero. This will
increase the time by 1 minute if
the original setting is at 30 to 59
seconds.
3.Press S2 button, the hour digits
will blink.
4.Press S1 button to set the hour
digits. Holding down the button
will speed up the process.
5.Press S2 button once, the minute
digits will blink.
6.Press S1 button to set the minute
digits. Holding down the button
will speed up the process.
7.Follow the same pattern to set the
month, date and day (of the week).
8.When finished making all the settings, press S3 button to confirm.
TO SET THE HOUR FORMAT
In TIME SETTING mode, when
adjusting the hour digits, the hour
digits are displayed in the 12-hour
format, then in the 24-hour format
and then again in the 12-hour
format. Therefore, please press S1
button so many times that the hour
digits are displayed in the required
format. In the 12-hour format, the
hour digits are identified by “A” for
00:00-12:00 and with “P” for 12:0000:00. Whereas in the 24-hour
TO USE THE STOPWATCH
1.Press S3 button to select STOPWATCH mode.
2.The stopwatch will then be displayed in its current state – reset,
running, or stopped.
3.To resume a counting, press S1
button to resume from where it
left off.
4.To start a new counting, reset the
stopwatch to zero first.
Press S1 button to stop counting,
then press S2 button to reset
counter to zero.
For the measurement of elapsed
time:
In STOPWATCH mode,
1.Press S1 button to start counting.
2.To stop counting, press S1 button
once. Press S1 button again to
resume from where if left off.
3.To reset to zero, press S1 button
to stop counting and then press
S2 button.
For the measurement of split time:
In STOPWATCH mode,
1.Press S1 button to start counting.
2.While the stopwatch is running,
press S2 button once to register
a lap. The split time of the
registered lap will be displayed.
The stopwatch is still running in
the background. To display the
currently accumulated time, press
S2 button again.
3.Repeat the last step until all the
laps have been registered.
4.To reset to zero, press S1 button
to stop counting and then press
S2 button.
NOTE: The alarm will automatically
be activated after being set.
TO TURN ON/OFF THE ALARM AND
HOURLY CHIME
In ALARM mode,
1.Press S1 button once to activate
the alarm. Alarm indicator (
)
will appear.
2.Press again to activate the hourly
chime. Chime indicator ( ) will
appear.
3.Press the third time to activate
both functions. Both of the indicators will appear.
4.Press the fourth time to deactivate both functions. Both of the
indicators will disappear.
WHEN AN ALARM OR HOURLY
CHIME GOES OFF
A tune will be emitted by the hour
when the hourly chime function is
activated.
A 20-second alarm tune will be
emitted at designated time when
the alarm is activated. To stop the
tune, press S1, S2 or S3 button.
By pressing S3 button, the watch
will activate a snooze function.
The alarm will go off again after 5
minutes but for only once.
TO USE THE BACKLIGHT
Press S4 button to turn on the backlight for approximately 3 seconds.
For the measurement of two
finishes:
In STOPWATCH mode,
1.Press S1 button to start counting.
2.While the stopwatch is running,
press S2 button to register and
display the time of the first runner. The stopwatch is still running
in the background.
3.Press S1 button to stop and register the time of the second runner.
4.Press S2 button to display the
time of the second runner.
5.To reset to zero, press S2 button
again.
NOTE: The stopwatch can count
up to a maximum of 23 hours, 59
minutes and 59.99 seconds.
NOTE: You can leave the stopwatch
running while switching over to
other operating modes.
TO SET THE ALARM
1.Press S3 button to select ALARM
mode.
2.Press S2 button once, the hour
digits will blink.
3.Press S1 button to set the hour
digits. Holding down the button
will speed up the process.
Freestyle_Condition-AG9167-R00.indd 2
To reduce carbon foot print, these
Freestyle instructions are printed with
soy inks on recycled paper.
Freestyle_Condition_AG9167-R00
CONDITION
4.Press S2 button once, the minute
digits will blink.
5.Press S1 button to set the minute
digits. Holding down the button
will speed up the process.
6.When finished making all the settings, press S2 button to confirm.
5/23/12 3:12:12 PM
ESPAÑOL
CONDITION
después y en formato 12 horas
nuevamente. Por lo tanto, pulse
el botón S1 las veces que sean
necesarias hasta que los dígitos de
la hora se muestren en el formato
deseado. En el formato de 12 horas,
los dígitos de la hora se identifican
con «A» para 00:00-12:00 y con «P»
para 12:00-00:00. En el formato de
24 horas, en cambio, los dígitos de
la hora se identifican con «H».
NOTA: Puede dejar la CUENTA
ATRÁS en marcha y cambiar a otros
modos operativos.
Freestyle_Condition_AG9167-R00
CÓMO AJUSTAR LA ALARMA
1.Pulse el botón S3 para seleccionar el modo de alarma.
2.Pulse el botón S2 una vez; los
dígitos de la hora parpadearán.
3.Pulse el botón S1 para ajustar los
dígitos de la hora. Si mantiene el
S4
S1
botón pulsado, el proceso será
CÓMO USAR EL CRONÓMETRO
más rápido.
1.Pulse el botón S3 para selec4.Pulse el botón S2 una vez; los
cionar el modo de CRONÓMETRO.
dígitos de los minutos parS3
S2
2.Aparecerá el cronómetro en el
padearán.
estado en que esté: en marcha, a 5.Pulse el botón S1 para ajustar los
cero o parado.
dígitos de los minutos. Si man3.Pulse el botón S1 para retomar la
tiene el botón pulsado, el proceso
cuenta ahí donde se quedó.
será más rápido.
4.Para iniciar una cuenta
6.Una vez finalizados todos estos
nueva, primero hay que poner el
ajustes, pulse el botón S2 para
cronómetro a cero.
confirmar.
Pulse el botón S1 para interrumpir la cuenta y después pulse el
NOTA: La alarma se activará
S1. Botón para iniciar/parar
botón S2 para volver a cero.
automáticamente una vez haya sido
S2. Botón de vuelta/puesta a cero
ajustada.
S3. Botón de modo
Para medir el tiempo transcurrido:
S4. Botón de luz
En modo CRONÓMETRO,
CÓMO ACTIVAR/DESACTIVAR LA
1.Pulse el botón S1 para empezar a ALARMA Y EL REPIQUE HORARIO
MODOS DE PANTALLA
contar.
En el modo de alarma:
El reloj cuenta con cuatro modos
2.Pulse el botón S1 para interrum- 1.Pulse el botón S1 una vez para
de pantalla: hora normal (NORMAL
pir la cuenta. Pulse el botón S1
activar la alarma. Aparecerá el
TIME), cronómetro (STOPWATCH ),
).
otra vez para retomar la cuenta
indicador de alarma (
alarma (ALARM) y ajuste de hora
2.Pulse otra vez para activar el
ahí donde se quedó.
(TIME SETTING).
repique horario. Aparecerá el
3.Pulse el botón S1 para interrumindicador de repique ( ).
pir la cuenta y después pulse el
Para pasar de un modo de pantalla
3.Pulse el botón una tercera vez
botón S2 para volver a cero.
a otro, pulse el botón S3 una vez.
para activar ambas funciones.
Aparecerán ambos indicadores.
Para medir el tiempo dividido:
NOTA: En cualquier modo de ajuste, En modo CRONÓMETRO,
4.Pulse el botón una cuarta vez
si no toca ningún botón en unos
para desactivar ambas funciones.
1.Pulse el botón S1 para empezar a
minutos, el reloj guardará automátiAmbos indicadores desaparecontar.
camente los datos introducidos y
cerán.
2.Mientras el cronómetro está en
saldrá del procedimiento de ajuste.
marcha, pulse el botón S2 para
CÓMO APAGAR LA ALARMA O EL
registrar una vuelta. Verá el
CÓMO PONER LA HORA Y EL
número de vuelta y el tiempo de la REPIQUE HORARIO CUANDO
CALENDARIO
SUENE
vuelta grabada.
1.Pulse el botón S3 para selecSi la función de repique horario
El cronómetro seguirá contando
cionar el modo de ajuste de hora.
está activada, cuando llegue la hora
por detrás. Para mostrar el
2.Pulse el botón S1 para restasonará una melodía.
tiempo acumulado hasta el
blecer los dígitos de los segundos
momento, pulse S2 otra vez.
a cero. Esta operación añadirá 1
Se emitirá una melodía de alarma
3.Repita el último paso hasta que
minuto a la hora si los segundos
de 20 segundos a la hora ajustada
se hayan guardado todas las
del ajuste original estaban en el
cuando se active la alarma. Para
vueltas.
intervalo 30 a 59.
4.Pulse el botón S1 para interrum- detener la melodía, pulse el botón
3.Pulse el botón S2; los dígitos de
S1, S2 o S3. Si pulsa el botón S3,
pir la cuenta y después pulse el
la hora parpadearán.
el reloj activará una función de
botón S2 para volver a cero.
4.Pulse el botón S1 para ajustar los
repetición. La alarma volverá a
dígitos de la hora. Si mantiene el
sonar tras cinco minutos pero solo
Para medir dos marcas:
botón pulsado, el proceso será
una vez.
En modo CRONÓMETRO,
más rápido.
1.Pulse el botón S1 para empezar a
5.Pulse el botón S2 una vez; los
CÓMO USAR LA LUZ DE FONDO
contar.
dígitos de los minutos parPulse el botón S4 para encender
2.Mientras el cronómetro está en
padearán.
marcha, pulse el botón S2 un vez la luz de fondo durante unos 3
6.Pulse el botón S1 para ajustar los
segundos.
para registrar una vuelta y ver
dígitos de los minutos. Si manel tiempo hecho por el primer
tiene el botón pulsado, el proceso
corredor. El cronómetro seguirá
será más rápido.
contando por detrás.
7.Siga el mismo patrón para ajustar 3.Pulse el botón S1 para parar y
el mes, la fecha y el día (de la
registrar el tiempo del segundo
semana).
corredor.
8.Una vez finalizados todos estos
4.Pulse el botón S2 para ver el
ajustes, pulse el botón S3 para
tiempo del segundo corredor.
confirmar.
5.Pulse el botón S2 otra vez para
volver a cero.
CÓMO AJUSTAR EL FORMATO
HORARIO
NOTA: El cronómetro puede contar
En el modo de ajuste de hora,
hasta un máximo de 23 horas, 59
Para reducir la huella del carbono,
al ajustar los dígitos de la hora
minutos y 59,99 segundos.
las instrucciones de Freestyle se han
estos se muestran en formato 12
imprimido con tinta de soja en papel
horas primero, en formato 24 horas
reciclado.
Freestyle_Condition-AG9167-R00.indd 4
5/23/12 3:12:13 PM
DEUTSCH
S4
S1
S3
S2
S1 - Start/Stop-Taste
S2 - Taste Rundenzeit/Rücksetzen
S3 - Taste “Modus”
S4 - Taste für Beleuchtung
ANZEIGEMÖGLICHKEITEN
Die Uhr verfügt über vier Anzeigemöglichkeiten: NORMALE ZEIT,
STOPPUHR, ALARM- und ZEITEINSTELLUNG.
Um von einem Anzeigemodus zu
einem anderen zu wechseln, drücken
Sie einmal auf den S3-Knopf.
ANMERKUNG: In jedem Einstellungsmodus speichert die Uhr
automatisch die eingegebenen Daten
und beendet den Einstellungsmodus, wenn für ein paar Minuten kein
anderer Knopf betätigt wurde.
ZUR EINSTELLUNG DER ZEIT UND
DES DATUMS
1.Drücken Sie auf den S3-Knopf,
um den Zeiteinstellungsmodus
auszuwählen.
2.Drücken Sie den S1-Knopf, um die
zweiten Ziffern auf Null zu stellen.
Das führt dazu, dass die Zeit um
1 Minute vorgestellt wird, wenn
die ursprüngliche Einstellung
zwischen 30 und 59 Sekunden ist.
3.Drücken Sie den S2-Knopf, die
Stunden blinken auf.
4.Drücken Sie auf den S1-Knopf, um
die Stunde einzustellen. Wenn Sie
den Knopf länger drücken, wird die
Einstellung beschleunigt.
5.Drücken Sie den S2-Knopf einmal,
die Minuten blinken auf.
6.Drücken Sie auf den S1-Knopf, um
die Minuten einzustellen. Wenn Sie
den Knopf länger drücken, wird die
Einstellung beschleunigt.
7.Gehen Sie auf die gleiche Weise
vor, um den Monat und den Tag
(der Woche) einzustellen.
8.Nachdem alle Einstellungen
beendet sind, drücken Sie zur
Bestätigung auf den S3-Knopf.
ZUR EINSTELLUNG DES
STUNDENFORMATS
Im ZEITEINSTELLUNGS-Modus
ZEITMESSUNG MIT DER STOPPUHR
1.Drücken Sie Taste S3 um den
Modus STOPPUHR zu wählen.
2.Die Stoppuhr wird dann im aktuellen Status - rücksetzen, zählend,
gestoppt - angezeigt.
3.Drücken Sie Taste S1 um ab der
letzten Messung weiter zu messen.
4.Um eine neue Zeitmessung zu
starten, setzen Sie die Stoppuhr
zuerst wieder auf “Null”.
Drücken Sie Taste S1 um die
Zeitmessung zu stoppen und dann
Taste S2 um den Zähler wieder auf
“Null” zurückzusetzen.
ANMERKUNG: Die Stoppuhr kann bis
maximal 23 Stunden, 59 Minuten und
59,99 Sekunden zählen.
HINWEIS: Sie können die Stoppuhr
weiter laufen lassen während Sie in
andere Modi umschalten.
ZUR EINSTELLUNG DES ALARMS
1.Drücken Sie den S3-Knopf, um den
ALARM-Modus auszuwählen.
2.Drücken Sie den S2-Knopf einmal,
die Stunden blinken auf.
3.Drücken Sie den S1-Knopf, um
die Stunden einzustellen. Wenn
Sie den Knopf länger drücken,
beschleunigt es die Einstellung.
4.Drücken Sie den S2-Knopf einmal,
die Minuten blinken auf.
5.Drücken Sie auf den S1-Knopf, um
die Minuten einzustellen. Wenn
Sie den Knopf länger drücken,
beschleunigt es die Einstellung.
6.Nachdem alle Einstellungen
beendet sind, drücken Sie zur
Bestätigung auf den S2-Knopf.
ANMERKUNG: Der Alarm wird nach
dem Einstellen automatisch aktiviert.
ZUM ANSTELLEN/ AUSSTELLEN
DES ALARMS UND DES STÜNDLICHEN TONS
Im ALARM-Modus,
1.Drücken Sie den S1-Knopf, wenn
der Alarm aktiviert ist. Der Alar) erscheint.
manzeiger (
2.Drücken Sie noch einmal, um den
stündlichen Ton zu aktivieren. Der
Tonanzeiger
( ) erscheint.
3.Drücken Sie ein drittes Mal, um
beide Funktionen zu aktivieren.
Beide Anzeiger erscheinen.
Messung der Zwischenzeit (Split
4.Drücken Sie zum vierten Mal, um
Time):
beide Funktionen zu deaktivieren.
Im Modus STOPPUHR,
Beide Anzeiger erlöschen.
1.Drücken Sie S1 um die Messung zu
starten.
WENN
EIN ALARM ODER EIN
2.Während die Stoppuhr zählt,
STÜNDLICHER TON LOSGEHT
drücken Sie Taste S2 einmal um
Ein Ton ertönt zu der Stunde, zu
die Rundenzeit aufzunehmen. Die
der die stündliche Ton-Funktion
Zwischenzeit der aktuellen Runde
aktiviert ist.
wird angezeigt.
Die Stoppuhr läuft im Hintergrund
Ein 20 Sekunden langer Ton ertönt
weiter. Drücken Sie nochmals
Taste S2 um die aktuelle, kumula- zur bestimmten Zeit, wenn der
Alarm aktiviert ist. Um diesen Ton zu
tive Rundenzeit anzuzeigen.
3.Wiederholen Sie den letzten Schritt beenden, drücken Sie auf die Knöpfe
bis alle Runden gemessen wurden. S1, S2 oder S3. Durch Drücken auf
den S3-Knopf wird an der Uhr eine
4.Um die Stoppuhr zurückzusetzen,
Schlummerfunktion aktiviert. Der
drücken Sie Taste S1 um die ZeitAlarm geht nach 5 Minuten wieder
messung zu stoppen und drücken
los, aber nur einmal.
anschließend S2.
Messung der abgelaufenen Zeit:
Im Modus STOPPUHR,
1.Drücken Sie S1 um die Messung zu
starten.
2.Drücken Sie S1 um die Zeitmessung zu stoppen. Drücken Sie
Taste S1 um ab der letzten Messung weiter zu messen.
3.Drücken Sie Taste S1 um die
Zeitmessung zu stoppen und dann
Taste S2 um den Zähler wieder auf
“Null” zurückzusetzen.
Messung von zwei Läufern:
Im STOPPUHR -Modus,
1.Drücken Sie Taste S1 um die
Zeitmessung zu starten.
2.Während die Stoppuhr zählt,
drücken Sie Taste S2 einmal um
die Rundenzeit des ersten Läufers
aufzunehmen. Die Stoppuhr läuft
im Hintergrund weiter.
3.Drücken Sie Taste S1 um die
Rundenzeit des zweiten Läufers
aufzunehmen.
4.Drücken Sie Taste S2 um die
Rundenzeit des zweiten Läufers
anzuzeigen.
5.Drücken Sie Taste S2 nochmals um
den Zähler auf „Null“ zurückzusetzen.
Freestyle_Condition-AG9167-R00.indd 6
HINTERGRUNDBELEUCHTUNG
Drücken Sie Taste S4 um die
Hintergrundbeleuchtung für etwa 3
Sekunden anzuschalten.
Diese Freestyle-Gebrauchsanweisung
wurde mit Tinte auf Sojabasis auf
Recycling-Papier gedruckt um den
Kohleausstoß zu reduzieren.
Freestyle_Condition_AG9167-R00
CONDITION
werden beim Einstellen der Stunden
diese im 12-Stunden-Format angezeigt, dann im 24-Stunden-Format
und dann wieder im 12-StundenFormat. Deshalb drücken Sie den S1Knopf so lange, damit die Stunden
im gewünschten Format angezeigt
werden. Im 12-Stunden-Format
werden die Stunden mit “A” für 00:0012:00 gekennzeichnet und mit “P” für
12:00-00:00. Wohingegen die Stunden
im 24-Stunden-Format durch “H”
gekennzeichnet werden.
5/23/12 3:12:13 PM
FRANÇAIS
CONDITION
horaire désiré s’affiche. En format 12
heures, “A” s’affichera pour identifier
la période entre 24:00 et 12:00 heures
et “P” s’affichera pour identifier la
période entre 12:00 et 24:00 heures. En
format 24 heures, “H” s’affichera pour
identifier toutes les heures.
REMARQUE: Vous pouvez laisser
le chronomètre en marche tout en
permutant sur un autre
REGLAGE DE L’HEURE DE L’ALARME
1.Appuyez sur le bouton S3 pour
sélectionner le mode ALARME.
2.Appuyez une fois sur le bouton S2 et
les chiffres des heures clignoteront.
3.Appuyez sur le bouton S1 pour régler
les heures. Maintenez le bouton
enfoncé pour accélérer la procédure.
4.Appuyez une fois sur le bouton S2 et
les chiffres des minutes clignoteront.
5.Appuyez sur le bouton S1 pour régler
les minutes. Maintenez le bouton
enfoncé pour accélérer la procédure.
6.Après avoir effectué tous les
réglages, appuyez sur le bouton S2
pour confirmer.
Freestyle_Condition_AG9167-R00
UTILISATION DU CHRONOMÈTRE
1.Appuyez sur le bouton S3 pour
choisir le mode CHRONOMÈTRE.
S4
S1
2.Le chronomètre s’affiche à son état
actuel (réinitialisé, en marche ou à
l’arrêt).
3.Pour reprendre un comptage,
S3
S2
appuyez sur S1. Le chronomètre
reprendra où vous l’avez précédemment arrêté.
4.Pour lancer un nouveau comptage,
réinitialisez tout d’abord le chronomètre à zéro.
REMARQUE: L’alarme s’activera au Appuyez sur le bouton S1 pour arrêter le chronomètre, puis maintenez tomatiquement après avoir été réglée.
appuyé le bouton S2 pour réinitialiser
ACTIVATION / DESACTIVATION DE
le chronomètre.
S1. Start/stop Button
L’ALARME ET DU CARILLON HORAIRE S2. Lap/reset Button
En mode ALARME,
Pour mesurer le temps écoulé:
S3. Mode Button
1.Appuyez une fois sur le bouton S1
En
mode
CHRONOMÈTRE,
S4. Light Button
pour activer l’alarme. L’indicateur de
1.Appuyez sur le bouton S1 pour
l’alarme (
lancer le chronomètre.
) apparaitra.
MODES D’AFFICHAGE
2.Pour
arrêter
le
chronomètre,
ap2.Appuyez
de nouveau sur le bouton
La montre offre quatre modes
puyez sur le bouton S1. Appuyez sur
pour activer le carillon horaire.
d’affichage : HEURE LOCALE, CHROle bouton S1 pour reprendre où vous
L’indicateur du carillon horaire ( )
NOMETRE, ALARME et REGLAGE DE
vous êtes arrêté.
apparaitra.
L’HEURE.
3.Pour réinitialiser à zéro, appuyez sur 3.Appuyez une troisième fois pour
le bouton S1 pour arrêter le comptactiver les deux fonctions. Les deux
Pour changer le mode d’affichage, apeur puis appuyez sur le bouton S2.
indicateurs apparaîtront.
puyez une fois sur le bouton S3.
4.Appuyez une quatrième fois pour
Pour
mesurer
un
temps
intermédiaire:
désactiver les deux fonctions. Les
REMARQUE: En mode de réglage, si
En mode CHRONOMÈTRE,
deux indicateurs disparaîtront.
aucune activité n’est détectée avant
1.Appuyez
sur
le
bouton
S1
pour
quelques minutes, la montre sauvegdémarrer le compteur.
LORSQUE L’ALARME OU LE CARILLON
ardera les données entrées et quittera
2.Alors que le chronomètre est en
HORAIRE RETENTIT
la procédure de réglage.
cours, appuyez sur le bouton S2
Une mélodie retentira toutes les
pour enregistrer un tour. Le temps
heures lorsque la fonction de carillon
REGLAGE DE L’HEURE ET DU
intermédiaire du tour enregistré
est activée.
CALENDRIER
s’affichera.
1.Appuyez sur le bouton S3 pour
Le chronomètre continue à tourner
Une sonnerie d’alarme de 20 secondes
sélectionner le mode REGLAGE DE
dans le fond. Pour afficher les temps retentira à l’heure réglée lorsque
L’HEURE.
accumulés, appuyez de nouveau sur l’alarme est activée. Pour arrêter la
2.Appuyez sur le bouton S1 pour réle bouton S2.
sonnerie d’alarme, appuyez sur le
initialiser les chiffres des secondes
3.Répétez la dernière étape jusqu’à ce bouton S1, S2 ou S3. Appuyez sur le
à zéro. Si le réglage initial est entre
que tous les tours soient enregistrés. bouton S3 pour activer la fonction de
30 et 59 secondes, cela augmentera
4.Appuyez sur le bouton S1 pour
rappel d’alarme. L’alarme retentira
l’heure d’une minute.
arrêter le compteur puis appuyez
de nouveau après 5 minutes mais une
3.Appuyez sur le bouton S2, les chifsur le bouton S2 pour réinitialiser le seule fois seulement.
fres des heures clignoteront.
compteur
à
zéro.
4.Appuyez sur le bouton S1 pour régler
UTILISATION DU RETRO ECLAIRAGE
les chiffres des heures. Maintenez
Pour mesurer les temps de deux
Appuyez sur le bouton S4 pour activer
le bouton enfoncé pour accélérer la
coureurs:
le rétro éclairage durant 3 secondes.
procédure.
En mode CHRONOMETRE,
5.Appuyez une fois sur le bouton S2,
les chiffres des minutes clignoteront. 1.Appuyez sur le bouton S1 pour
démarrer le compteur.
6.Appuyez sur le bouton S1 pour régler
2.Alors que le chronomètre est en
les chiffres des minutes. Maintenez
cours, appuyez sur le bouton S2
le bouton enfoncé pour accélérer la
pour enregistrer et afficher le temps
procédure.
intermédiaire du premier coureur. Le
7.Suivez la même procédure pour
compteur du chronographe continue
régler le mois, la date et le jour (de
à tourner dans le fond.
la semaine).
3.Appuyez
sur le bouton S1 pour
8.Après avoir effectué tous les
arrêter et enregistrer le temps du
réglages, appuyez sur le bouton S3
deuxième coureur.
pour confirmer.
4.Appuyez sur le bouton S2 pour afficher le temps du deuxième coureur.
REGLAGE DU FORMAT HORAIRE 5.Appuyez sur le bouton S2 pour
En mode REGLAGE DE L’HEURE, lorréinitialiser le compteur à zéro.
sque vous réglez les chiffres des heures, les heures sont affichées en mode
REMARQUE:
Le chronomètre peut
de format 12 heures, puis en format
Pour réduire l’émission de carbone
24 heures, et de nouveau en format 12 compter jusqu’à un temps maximum
dans l’atmosphère, ces instructions
de 23 heures, 59 minutes et 59,99
heures. Ainsi, vous devez appuyer sur
Freestyle sont imprimées avec des
secondes.
le bouton S1 jusqu’à ce que le format
encres de soja sur du papier recyclé.
Freestyle_Condition-AG9167-R00.indd 8
5/23/12 3:12:14 PM
ITALIANO
CONDITION
S4
S3
S1
S2
S1. Tasto Start/stop
S2. Tasto Lap/reset
S3. Tasto Mode
S4. Tasto Light
MODALITA’ DISPLAY
L’orologio ha quattro modalità di
display: NORMAL TIME (ORA NORMALE), STOPWATCH (CRONOMETRO), ALARM (SVEGLIA) e TIME
SETTING (IMPOSTAZIONE ORA).
dell’ora, queste appaiono nel formato 12 ore, poi nel formato 24 ore
e di nuovo in quello 12 ore. Quindi,
premere il tasto S1 in modo che le
cifre dell’ora appaiano nel formato
richiesto. Nel formato 12 ore, le cifre
dell’ora sono identificate da “A” per
00:00-12:00 e da “P” per 12:00-00:00.
Invece, nel formato 24 ore, le cifre
dell’ora sono identificate da “H”.
COME USARE IL CRONOMETRO
1.Premere il tasto S3 per selezionare
la modalità STOPWATCH.
2.Il cronometro verrà mostrato nel
suo stato attuale – azzerato, in
funzione o fermo.
3.Per riprendere un conteggio,
premere il tasto S1 per riprendere
da dove era stato interrotto.
4.Per iniziare un nuovo conteggio, bisogna prima azzerare il
cronometro.
Premere il tasto S1 per interrompere il conteggio, premere quindi il
tasto S2 per azzerare.
Come misurare il tempo trascorso:
Nella modalità STOPWATCH,
1.Premere il tasto S1 per iniziare il
conteggio.
2.Per interrompere il conteggio,
premere il tasto S1. Premere di
nuovo il tasto S1 per riprendere da
dove era stato interrotto.
3.Per azzerare, premere il tasto
S1 per interrompere il conteggio
quindi premere il tasto S2.
NOTA: Il cronometro può contare fino
ad un massimo di 23 ore, 59 minuti e
59.99 secondi.
NOTA: Si può lasciare scorrere il
tempo sul cronometro mentre si
passa ad altre modalità operative.
COME IMPOSTARE LA SVEGLIA
1.Premere il tasto S3 per selezionare
la modalità ALARM.
2.Premere una volta il tasto S2, la
cifra delle ore lampeggerà.
3.Premere il tasto S1 per impostare
le cifre dell’ora. Premere a lungo il
tasto farà avanzare la progressione
più velocemente.
4.Premere una volta il tasto S2, le
cifre dei minuti lampeggeranno.
5.Premere il tasto S1 per impostare
le cifre dei minuti. Premere a lungo
il tasto farà avanzare la progressione più velocemente.
6.Dopo aver terminato tutte le
impostazioni, premere S2 per
confermare.
NOTA: La sveglia si attiverà automaticamente dopo essere stata
impostata.
Freestyle_Condition_AG9167-R00
COME ATTIVARE/DISATTIVARE LA
SVEGLIA E LA SUONERIA ORARIA
Nella modalità ALARM,
1.Premere una volta il tasto S1
Per passare tra una modalità display
per attivare la sveglia. Apparirà
e un’altra, premere una volta il
l’indicatore della sveglia (
).
tasto S3.
2.Premere di nuovo per attivare la suoneria oraria. Apparirà
NOTA: In qualsiasi modalità di
Come misurare il tempo intermedio:
l’indicatore della suoneria ( ).
impostazione, se nessun tasto viene
Nella modalità STOPWATCH,
3.Premere una terza volta per
premuto per alcuni minuti, l’orologio 1.Premere il tasto S1 per iniziare il
attivare entrambe le funzioni. Apsalverà automaticamente i dati
conteggio.
pariranno entrambi gli indicatori.
inseriti e uscirà dalla procedura di
2.Mentre il tempo sul cronometro
4.Premere una quarta volta per
impostazione.
scorre, premere il tasto S2 per regdisattivare entrambe le funzioni.
istrare un giro. Il tempo intermedio
Scompariranno entrambi gli indiCOME IMPOSTARE L’ORA E IL
del giro registrato sarà mostrato
catori.
CALENDARIO
sul display.
1.Premere il tasto S3 per selezionare Il tempo continuerà a scorrere
QUANDO LA SVEGLIA O LA SUONla modalità IMPOSTAZIONE ORA.
sullo sfondo del cronometro. Per
ERIA ORARIA SI ATTIVA
2.Premere il tasto S1 per azzerare
visualizzare il tempo attuale acUn suono verrà emesso ad ogni ora
la cifra dei secondi. Questo farà
cumulato, premere di nuovo il tasto quando la suoneria oraria è attiva.
aumentare l’ora di 1 minuto se
S2.
l’impostazione originale è da 30 a
3.Ripetere l’ultimo passaggio fino
Quando la sveglia è attivata, viene
59 secondi.
a che tutti i giri non sono stati
emesso un allarme di 20 secondi
3.Premere il tasto S2, la cifra delle
registrati.
all’ora designata. Per interrompere
ore lampeggerà.
4.Per azzerare, premere il tasto
il suono, premere il tasto S1, S2 o
4.Premere il tasto S1 per impostare
S1 per interrompere il conteggio
S3. Premendo il tasto S3, l’orologio
le cifre dell’ora. Premere a lungo il
quindi premere il tasto S2.
attiverà una funzione snooze. La
tasto farà avanzare la progressione
sveglia si riattiverà di nuovo dopo 5
più velocemente.
Come misurare due tempi contempo- minuti, ma solo per una volta.
5.Premere una volta il tasto S2, le
raneamente:
cifre dei minuti lampeggeranno.
Nella modalità STOPWATCH,
COME UTILIZZARE LA
6.Premere il tasto S1 per impostare
1.Premere il tasto S1 per iniziare il
RETROILLUMINAZIONE
le cifre dei minuti. Premere a lungo
conteggio.
Premere il tasto S4 per accendere
il tasto farà avanzare la progres2.Mentre il tempo sul cronometro
la retroilluminazione per circa 3
sione più velocemente.
scorre, premere il tasto S2 per
secondi.
7.Seguire lo stesso procedimento
registrare e visualizzare il tempo
per impostare mese, data e giorno
della prima persona. Il tempo
(della settimana).
continuerà a scorrere sullo sfondo
8.Dopo aver terminato tutte le
del cronometro.
impostazioni, premere S3 per
3.Premere il tasto S1 per interconfermare.
rompere e registrare il tempo della
seconda persona.
COME IMPOSTARE IL FORMATO
4.Premere il tasto S4 per visualizzare
Per ridurre l’impatto ambientale,
DELL’ORA
il tempo della seconda persona.
queste istruzioni Freestyle sono
Nella modalità IMPOSTAZIONE ORA, 5.Per azzerare, premere di nuovo il
stampate con inchiostri di soia su
quando vengono regolate le cifre
carta riciclata .
tasto S2.
Freestyle_Condition-AG9167-R00.indd 10
5/23/12 3:12:14 PM
PORTUGUÊS
CONDITION
no formato desejado. No formato de
12 horas, os dígitos das horas são
identificados por “A” para 00:00-12:00
e com “P” para 12:00-00:00. Enquanto
no formato de 24 horas, os dígitos das
horas são identificados por “H”.
S4
S1
S3
S2
UTILIZAR O CRONÓMETRO
1. Prima o botão S3 para seleccionar o
modo CRONÓMETRO.
2. Será então visualizado o cronómetro
no seu estado actual – reajustar, a
funcionar ou parado.
3. Para parar a contagem, prima S1
para retomar a partir de onde parou.
4. Para iniciar uma nova contagem,
coloque primeiro o cronómetro a
zero.
Prima o botão S1 para parar a contagem e em seguida prima o botão
S2 para repor o contador a zero.
CONFIGURAR A HORA DO ALARME
1. Prima o botão S3 para seleccionar o
modo ALARME.
2. Prima o botão S3, os dígitos das
horas piscarão.
3. Prima o botão S1 para acertar os
dígitos da hora. Se mantiver o botão
premido acelerará o processo.
4. Prima uma vez o botão S2, os dígitos
dos minutos piscarão.
5. Prima o botão S1 para acertar os
dígitos dos minutos. Se mantiver o
botão premido acelerará o processo.
6. Após acabar de efectuar todos os
ajustes, prima o botão S2 para
confirmar.
NOTA: O alarme será activado automaticamente depois de ajustado.
Freestyle_Condition_AG9167-R00
LIGAR (ON)/ DESLIGAR (OFF) O
ALARME E O SINAL SONORO HORÁRIO
Para medir o tempo decorrido:
No modo ALARME,
S1 - Botão Start/stop
No modo CRONÓMETRO,
1. Prima o botão S1 para activar o
S2 - Botão Lap/reset
1. Prima o botão S1 para iniciar a
alarme. Será visualizado o indicador
S3 - Botão Mode
contagem.
do alarme [
].
S4 - Botão Light
2. Para parar a contagem, prima o
2. Prima de novo para activar a função
botão S1 uma vez. Prima o botão
de sinal sonoro horário. Será visuMODOS DE EXIBIÇÃO
S1 de novo para retomar a partir de
alizado o indicador de sinal sonoro
O relógio tem quatro modos de exionde parou.
horário [ ].
bição: HORA NORMAL, CRONÓMETRO, 3. Para repor a zero, prima o botão S1
3. Prima uma terceira vez para activar
ALARME e CONFIGURAÇÃO DA HORA.
para parar a contagem e em seguida
ambas as funções. Surgirão ambos
prima o botão S2.
os indicadores.
Para passar de um modo a outro car4. Prima uma quarta vez para desacregue no botão S3 uma vez.
Para a medição do tempo parcial:
tivar ambas as funções. Ambos os
No modo CRONÓMETRO,
indicadores desaparecerão.
NOTA: Em qualquer modo de configu1. Prima o botão S1 para iniciar a
ração, se não houver manuseamento
contagem.
QUANDO UM ALARME OU SINAL
de botões cerca de a few minutos, o
2. Enquanto o cronómetro estiver em
SONORO HORÁRIO DISPARA
relógio guardará automaticamente os
funcionamento, prima o botão S2
Será emitida uma melodia à hora
dados introduzidos e sairá do modo de
uma vez para registar uma volta.
indicada aquando da activação do sinal
configuração.
Será visualizado o tempo parcial
sonoro horário.
da volta registada. O cronómetro
PARA ACERTAR A HORA E
continua em funcionamento em
Será emitida uma melodia de alarme
CALENDÁRIO
segundo plano.
durante 20 segundos, na hora indicada
1. Prima o botão S3 para seleccionar o Para visualizar o tempo acumulado
aquando da activação do alarme. Para
modo CONFIGURAÇÃO DA HORA.
actual, prima de novo o botão S2.
parar a melodia, prima o botão S1, S2
2. Prima o botão S1 para reajustar
3. Repita o último passo até que todas
ou S3. Ao premir o botão S3, o relógio
os dígitos dos segundos. Isto
as voltas tenham sido registadas.
activará a função snooze. O alarme
aumentará a hora em 1 minuto, se
4. Para repor a zero, prima o botão S1
disparará de novo 5 minutos depois,
a configuração original for de 30 a
para parar a contagem e em seguida mas apenas uma vez.
59 segundos.
prima o botão S2.
3. Prima o botão S2, os dígitos das
USAR A CONTRALUZ
horas piscarão.
Para a medição de duas chegadas:
Carregue no botão S4 para ligar a luz
4. Prima o botão S1 para acertar os
No modo CRONÓMETRO,
de fundo durante cerca de 3 segundos.
dígitos da hora. Se mantiver o botão 1. Prima o botão S1 uma vez para
premido acelerará o processo.
iniciar a contagem.
5. Prima uma vez o botão S2, os dígitos 2. Enquanto o cronómetro estiver em
dos minutos piscarão.
funcionamento, prima o botão S2
6. Prima o botão S1 para acertar os
uma vez para registar e visualizar
dígitos dos minutos. Se mantiver o
o tempo do primeiro corredor. O
botão premido acelerará o processo.
cronómetro continua em funciona7. Siga os mesmos passos para acertar
mento em segundo plano.
o formato da mês, data e dia (da
3. Prima o botão S1 para parar e
semana).
registar o tempo do segundo
8. Após ter feito todas as configuracorredor.
ções, carregue em S3 para confir4. Prima o botão S2 para visualizar o
mar as definições.
tempo do segundo corredor.
5. Para repor a zero, prima o botão S2
AJUSTAR O FORMATO DA HORA
novamente.
No modo CONFIGURAÇÃO DA HORA,
ao ajustar os dígitos das horas, os
NOTA: O cronómetro pode contar até
dígitos das horas são apresentados no um máximo de 23 horas, 59 minutos e
formato de 12 horas, depois no formato 59,99 segundos.
de 24 horas e depois de novo no formaPara reduzir a emissão de carbono,
to de 12 horas. Portanto, prima o botão NOTA: Pode deixar o CRONÓMETRO a
estas instruções Freestyle foram
S1 as vezes necessárias para que os
funcionar enquanto passa para outros
impressas
com tinta de soja em papel
dígitos das horas sejam apresentados
modos de funcionamento.
reciclado.
Freestyle_Condition-AG9167-R00.indd 12
5/23/12 3:12:15 PM
日本語
S4
S3
S1
S2
S1. スタート/ストップボタン
S2. ラップ/リセットボタン
S3. モードボタン
S4. ライトボタン
表示モード
この時計には次の4つの表示モードがあ
ります。NORMAL TIME(ノーマルタイ
ム)、STOPWATCH(ストップウォッチ)
ALARM(アラーム)、TIME SETTING(
時刻設定)。
表示モードを変換するには、S3ボタンを
一回押してください。
注: いずれのモードでも、設定中に数分
間キーの操作が行われなかった場合は
自動的に入力データが保存され設定モ
ードが終了します。
時刻・カレンダーを合わせる
1.S3ボタンを押してTIME SETTINGモ
ードを選択します。
2.S1ボタンを押して秒刻を0にリセット
します。元の秒桁の設定が30から59
秒の場合はこれによって時間が1分繰
り上がります。
3.S2ボタンを押すと、時桁が点滅しま
す。
4.S1ボタンを押して時刻を設定します。
ボタンを長押しすると早く進みます。
5.S2ボタンを一回押すと、分桁が点滅し
ます。
6.S1ボタンを押して分刻を設定します。
ボタンを長押しすると早く進みます。
7.同じ作業を、
月・日・曜日についてそれ
ぞれ繰り返して行ってください。
8.全ての設定が終わったらS3ボタンを
押して決定します。
時間フォーマットを設定する
TIME SETTINGモードにします。時桁
の調節では、時桁が12時間フォーマッ
トで表示され、次に24時間フォーマット
で、
そしてもう一度12時間フォーマット
で表示されます。希望のフォーマットが
表示されているときにS1ボタンを数回
押してください。12時間フォーマットで
は、00:00-12:00の間に“A”の文字が表
示され、12:00-00:00の間に“P”の文字
が表示されます。24時間フォーマットで
は“H”の文字が表示されます。
ストップウォッチを使う
1.S3ボタンを押してストップウォッチモ
ードを選択します。
経過タイムの測定:
ストップウォッチモードにします、
1.S1ボタンを押すとカウントが始まりま
す。
2.測定をストップするにはS1ボタンを押
します。
もう一度S1を押すと、
ストップ
した時点から再び測定が始まります。
3.ゼロにリセットするには、S1を押して
測定をストップしてからS2を押します。
スプリットタイムの測定:
ストップウォッチモードにします、
1.S1ボタンを押すとカウントが始まりま
す。
2.ストップウォッチがカウントしている間
にS2ボタンを1回押してラップを登録
します。登録したラップのスプリットタ
イムが表示されます。
その時、
ストップウォッチは同時にカウ
ントを行っています。
その時点での合
計タイムを表示する場合は、S2ボタン
をもう一度押します。
3.全てのラップの登録が終わるまで、先
ほどのステップを繰り返してください。
4.ゼロにリセットするには、S1ボタンを
押して測定をストップしてからS2ボタ
ンを押します。
1.S1ボタンを一回押してアラームをオン
にします。
アラームのアイコン(
)
が表示されます。
2.もう一度ボタンを押すと毎時お知らせ
チャイムがオンになります。
チャイムの
アイコン(
)が表示されます。
3.もう一度ボタンを押すと両機能がオン
になります。両方のアイコンが表示さ
れます。
4.もう一度ボタンを押すと両機能がオフ
になります。両方のアイコンが非表示
になります。
アラーム・毎時お知らせチャイムが鳴
ったら
毎時お知らせチャイム機能がオンにな
っている場合は一時間ごとに音楽がな
ります。
アラームがオンの場合は、指定の時間に
20秒間アラーム音が鳴ります。音を止め
たい時は、S1、S2 、S3のいずれかのボタ
ンを押してください。S3ボタンを押すとス
ヌーズ機能がオンになります。
アラームは
5分後にもう一度だけ鳴ります。
バックライトを使う
S4ボタンを押すとバックライトが約3秒
間点灯します。
2つのタイムの測定:
STOPWATCHモードにします、
1.S1ボタンを押すとカウントが始まりま
す。
2.ストップウォッチがカウントしている間
にS2ボタンを押して最初のランナーの
タイムを登録・表示します。
その時、
ス
トップウォッチは同時にカウントを行っ
ています。
3.S1ボタンを押してストップし、
2人目の
ランナーのタイムを登録します。
4.S2ボタンを押すと2人目のランナーの
タイムが表示されます。
5.S2ボタンをもう一度押すとゼロにリセ
ットされます。
注: ストップウォッチでは最大23時間
59分59.99秒までカウントすることが
できます。
注: ストップウォッチの使用中に他のモ
ードに切り替えることができます。
アラームを合わせる
1.S3ボタンを押してALARMモードを選
択します。
2.S2ボタンを一回押すと、時桁が点滅し
ます。
3.S1ボタンを押して時刻を設定します。
ボタンを長押しすると早く進みます。
4.S2ボタンを一回押すと、分桁が点滅し
ます。
5.S1ボタンを押して分刻を設定します。
ボタンを長押しすると早く進みます。
6.全ての設定が終わったらS2ボタンを
押して設定を終了します。
注: 設定後アラームは自動的にオンに
なります。
アラーム・毎時お知らせチャイムオン/
オフの設定
ALARMモードにします。
Freestyle_Condition-AG9167-R00.indd 14
カーボンフットプリントの減少を目的と
してFreestyleの取扱説明書は大豆イ
ンキとリサイクル紙を使用しています
Freestyle_Condition_AG9167-R00
CONDITION
2.その時点でのストップウォッチの状態(
リセット/測定中/停止の状態)
が表示
されます。
3.ストップした時点から再びカウントを
開始するにはS1ボタンを押します。
4.新しく測定しなおす場合は、
ストップウ
ォッチをゼロに戻してください。
S1ボタンを押してカウントをストップし
てからS2ボタンを押してリセットしま
す。
5/23/12 3:12:15 PM