1
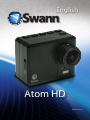
English
Atom HD
MSPORTM210612E
1
Stuff and Where It’s At: Contents
Stuff and Where It’s At: Contents
2
Introduction3
Where Stuff is At (The Layout)
4
Slots, Ports and Batteries
5
Pushing Buttons (a.k.a. an “Operating Guide”)
6
Taking it to the Depths (Waterproof Case)
7
Getting Started8
Your microSD Cards and You
10
You Got the Power: Charging the Battery
11
Resolution: Choosing It12
Showing your Quality14
Seeing how cool you are (Playback)
15
Playback on a Computer
16
HDMI & Composite Video Playback
17
Adjusting the Lens18
Options, Options: The Onscreen Menus
19
Mounting the Camera22
Shooting Your Troubles24
2
(Important) Legal Mumbo Jumbo
25
Technically Speaking (Specifications)
26
Introduction
You’ve gone and done it now. Really taken the cake. You’ve bought an
Atom HD 1080p Waterproof Sports Camera - the miniature, waterproof,
easy to use, full HD personal action video recorder from Swann. Kudos
to you! Can’t say we’re not envious.
You’ve nabbed yourself a camera that’s
perfect for capturing your insane antics
and displays of immense skill*.
It’s great for recording biking, skating,
skiing or snowboarding, surfing or
throwing yourself out of a perfectly
good aircraft. Or just about anything
else you can think of!
Strap it to your head, arms, legs, butt, bike, board, gear, rigging or
shoes. Or you can think outside the box.
Use it to capture video to show your
friends and share your videos online.
Don’t talk big. Show big. Prove you
did it with the Atom HD.
* The camera isn’t going to make you any more skilled. Sorry.
It ain’t magic, just miniaturized technology. You’ll have to provide the skill!
3
Where Stuff is At (The Layout)
Power / Record Buttons
All the controls you’re going
to need. We’ll deal
with them one at
a time later.
Battery
Compartment
Herein lies the
source of all
power!
Lens
A bit of high-quality
glass used to focus
all the stuff.
Light
One does not simply shoot
video at night, unless one has
light. Which this does. How
about that!
Port Cover
Beneath this
cover lies all
the ports and
microSD card
slots.
Indicator LEDs
The Atom HD can’t talk,
so it’s got these nifty
indicator LEDs to let you
know what’s up.
LCD Screen
Where you can see
all the things the
camera is up to.
4
Screw Thread Mount
It’s the same size as the tripod
mount on most camcorders and
digital SLRs. So, if you’ve got a cool
set of camera mounts, the AtomHD
will screw right on.
Slots, Ports and Batteries
Mini-HDMI Port
Pure awesomeness in one output.
microSD Card Slots
For inserting microSD cards
and nothing else.
USB Port
For charging, computers and
composite video output.
Opening the Battery
Compartment
Push the
locking tab
down
Slide the battery
compartment cover open
Don’t open the battery case
unless necessary or instructed
to do so.
The battery is located here.
This is a rechargeable lithium
polymer battery.
Handle with care.
Don’t attempt to charge it any way
other than INSIDE the camera.
Do NOT expose the battery to heat,
moisture or water.
Keep away from children.
Basically, don’t mess with it!
5
Pushing Buttons (a.k.a. an “Operating Guide”)
Power Button
Press and hold to turn the camera
ON or OFF.
Video Record
Initiates video
recording.
When in the menus,
this button acts as
the DOWN arrow.
Light
Turns the front
light ON and
OFF.
Playback
Initiates playback of
video or stills.
In the menus, this
Photo Capture
button acts as LEFT and Takes a still photograph.
RIGHT arrows. (It makes When in the menus, this
sense when you do it.) button acts as the UP
arrow.
Menu / Esc
This button has a few functions, depending
what the camera is up to.
• Press and hold to open the menu
system.
• When in the menus, pressing
momentarily will access the next menu
screen.
• When in the menus, press and hold to
exit the menu system (ESC).
6
Taking it to the Depths (Waterproof Case)
Through-Case Button Extension
You can continue to use the buttons as normal while the
camera is in the waterproof case.
Don’t use the buttons while the camera is actually
submerged, however - there’s a chance that, under pressure,
some water might slip in through the mechanism.
Locking Clasp
Pretty important - the
case won’t work at all
unless this is properly
locked and secured.
Seriously, we can’t stress
this enough.
If you’ve got any concern
about the integrity or the
case or the locking clasp,
don’t use it. Contact
Swann Technical Support
for help. The warranty
doesn’t cover damage
to the camera caused
use with damaged
accessories.
Lens Cover
For best results,
ensure that this
is kept clean and
scratch-free.
Tripod Mount
Like the camera’s tripod
thread, this will attach
the case to all manner of
photographic mounts.
The Stand Mount
For use with the included mounting
hardware - see page 22 for more
information about the mounting
hardware.
Before you head out, ensure that
everything is secure.
7
Getting Started
Right. So: you’ve got the Atom HD. It’s Friday afternoon, and you’re
headed out skating on Saturday morning and you want to get the
Atom HD setup and ready to rock and/or roll.
1. Charge the battery.
Short version: Plug the little end of the USB cable into the Atom HD,
and the big end into the included power adapter. Plug the power
adapter into a wall socket. Wait two to three hours. Bam!
Check out page 11 for the long version on getting yourself some power.
2. Jam a microSD card or two in it. Gently.
Short version: Ensure there’s nothing on the microSD card(s) you want
to keep, as we’ll be formatting it in a moment (that erases all the data
and preps it for recording video). The Atom HD shoots high-def video,
so grab yourself a decently big card - we reckon that 8GB is a realistic
minimum, with 16GB or 32GB cards recommended.
Check out page 10 for the long version regarding microSD cards.
3. Set up your Camera using the On-Screen Menus
Short version: Using the buttons on the top of the camera, open the
on-screen menus and set the important options. Failing to get these
right will negatively impact the quality of your videos, and/or the
duration that the Atom HD can record for.
We think the best course of action is to:
• Choose your recording format (PAL or NTSC) and appropriate light
frequency (50Hz or 60Hz). Typically, NTSC users should choose 60Hz
and PAL users should choose 50Hz.
• Format your microSD card.
• Set the Date and Time.
• Choose your Resolution (see page 12).
• Choose your Quality settings (check out page 14).
8
A few things you really have to get right:
Light Frequency & Video System
The Video System setting must be set
correctly for your location if you want
the highest quality playback possible.
The Light Frequency setting is very
important if you’re planning to shoot
under or around fluorescent lights - if
this is wrong, then they’ll ‘flicker’.
Choose NTSC / 60Hz if you’re in the USA, Canada, Mexico, or Japan.
Choose PAL / 50Hz if you’re in the UK, Europe, Africa, or Australia.
Format
To clean old data off the microSD card
and get it ready to record video, we
suggest formatting it in the Atom HD.
Make sure there’s no data on the
card you want to keep - you can’t
get it back!
Date and Time
The time is represented in the
following format: YYYY/MM/DD
We suggest getting this right before
you head out the first time. Unless
you do a complete reset of the unit
or completely drain the battery (it will
automatically shut down before this
happens) you shouldn’t have to set it
again.
9
Your microSD Cards and You
Choosing a microSD card:
The Atom HD will accept a microSD card up to 32GB in capacity.
You can store between 7 ~ 30 minutes worth of video per gigabyte
(GB). Check out for more information on recording times versus quality
settings.
We recommend using cards of at least 8GB to ensure that the Atom HD
won’t run out of storage space whilst you’re filming, 16GB or 32GB are
recommended for recording in 1080p at high quality.
Of course, if you only want to record ten minutes at a time, you could
get away with a much smaller card. But remember, when it runs out that’ll be all she wrote!
For reliable performance, we strongly suggest that you
use a card with a speed rating of “Class 4” or higher.
Look for these symbols:
4 6
D
D
Inserting a microSD card:
• Hold the Atom HD so that the LCD screen is facing you.
• Orient the microSD card so that the text is facing up.
• Gently push a microSD card into one of the slots. Be careful that it
goes in correctly - if it misses the slot or is inserted at an angle, it
could become jammed.
• The card will “click” into place once fully inserted.
• To remove the card, simply push it in. This will release the locking
mechanism, and the card will spring out. Be careful when removing
the microSD card - the little spring that pushes it out is quite
powerful.
This icon indicates that either no microSD card is installed
in the associated microSD card slot, or the camera is unable
to detect/write to the card. If you’ve installed a card and see
this icon, try formatting the card.
10
When the Atom HD detects a microSD card, this icon will be
displayed, with the associated microSD card slot number
displayed.
You Got the Power: Charging the Battery
The Atom HD charges via the mini USB socket on the rear panel.
•
Insert the mini-USB plug on the USB cable into the USB socket on
the rear of the Atom HD.
•
Connect one end of the USB adapter or cable to a USB port or USB
charger (up to 1000mA).
Under no circumstances ever connect the Atom HD to any power
source supplying anything other than 5V.
Charging Status Indicator LEDs
(a.k.a. “Them there glowin’ things!”)
While the Atom HD is charging, the red
LED on the rear panel will light up. It
will turn green when the Atom HD is
fully charged.
At least one LED will light up whenever
the Atom HD is connected to power.
The Atom HD takes about 3 hours to
charge.
The LEDs are here... right here.
11
Resolution: Choosing It
The Atom HD can record at three different resolutions: 720p (1280 x
720), 1080pS (anamorphic 1440 x 1080) and 1080p (1920 x 1080).
720
1080
720p
1280
1080p
1920
Why would you want to record at a lower resolution?
Believe it or not, there are actually a few really good reasons to record at
720p. Here are a couple, presented in reverse order of pretentiousness:
• 720p can record at higher frame rates than 1080p. This can be
useful to capture really fast action, or if you’re planning to playback
the footage in slow motion.
• 720p has a wider viewing angle. So, if you want the widest view
possible, use 720p. There’s a really complex explanation for why
this is the case - see the next page.
• Not everyone can playback 1080p - many TV’s (even some
marked “HD”) can’t playback 1080p - most systems that can will
claim “Full HD” or “1080p” somewhere on the unit or the packaging
(most likely both).
• 720p use less space than 1080p and are often less prone to
artefacting - so, if you’re trying to get the most possible out of
your memory card, then they can be good options. 1080p requires
approximately 10 ~ 15Mbps, whereas 720p uses 4.5 ~ 8.5mbps (it
varies by your Quality and Framerate settings). We’ll revisit this.
• Low res is (very) slightly more retro, and (ergo) cooler. (Hipsters only.)
12
Frame Rate
The Atom HD is capable of shooting at higher frame rates than
standard video. Standard video frame rates are 30fps for NTSC systems
and 25fps for PAL/SECAM systems.
Setting Resolution
720p
720pH
1080pS
1080p
1280 x 720
1280 x 720
1440 x 1080
1920 x 1080
Frame
Rate
PAL
25fps
50fps
25fps
25fps
Frame
Rate
NTSC
30fps
60fps
30fps
30fps
Approx. Bitrate (Mbps)
High / Medium / Low
8.5 / 6.6 / 4.5 Mbps
12.8 / 9.7 / 6.6 Mbps
13.0 / 11.0 / 9.0 Mbps
15.6 / 12.4 / 10.1 Mbps
Note about playing back high frame rate video:
Shooting at 50/60fps doesn’t automatically mean that it will be in 50%
slow motion when played back. However, it does mean that it has the
potential to be played back at 50% speed without noticable loss of
quality.
Use a program such as VLC Media Player and set the playback
speed to 50% to preview the slow motion clip shot at 50/60fps.
Viewing Angles
When the camera is in 720p mode,
the viewing angle will be a massive
127°
170 degrees - that’s literally almost
1080p
everything infront of the camera.
When in 1080p mode, the viewing
170°
angle is 127 degrees, which is still
720p
pretty wide but not as wide.
Tech Corner: Why the different viewing angle?
It happens because 1280 pixels (the horizontal resolution of 720p)
happens to be less than half the number of pixels in the image sensor,
so the imaging chip overscans for the required resolution and then
downscales on a 2:1 ratio. 1080p, on the other hand, uses a section of
pixels on the imaging sensor at a 1:1 ratio. TL;DR: It’s a kind of magic.
13
Showing your Quality
How much can I record to a microSD card?
Depends on a couple of things, really. The resolution, frame rate and
quality settings will all have profound effects on your data consumption.
Check out the table for a quick rundown:
Setting Resolution
Approx. Bitrate
(Mbps)
High / Medium / Low
Approx. Minutes of
Recording per GB
High / Medium / Low
720p
1280 x 720
8.5 / 6.6 / 4.5 Mbps
14min / 20min / 30min
720pH
1280 x 720
12.8 / 9.7 / 6.6 Mbps
9min / 13min / 20min
1080pS 1440 x 1080
13.0 / 11.0 / 9.0 Mbps
9min / 11min / 13min
1080p 1920 x 1080 15.6 / 12.4 / 10.1 Mbps
8min / 10min / 12min
As you can see, there’s a lot of variation here. 720p on low quality can
record almost four times as much video as 1080p on high quality.
So, say you’ve got a 32GB microSD card in the Atom HD (or two 16GB
cards) - how much can you actually record?
Even though a card claims to be “32GB”, you’ll actually only get
about 28 - 30GB of useable space. The overhead is lost to the file
allocation table (the FAT - it’s a bit like an index) which tells the camera
where to record data. So: we’re going to have to be a little vague,
because some microSD cards can actually hold more or less than
others that claim to be the same size!
• At 1080p on high quality, a 32GB card can record somewhere
between three and a half and four hours. This is way longer than
the battery will last, so you should be fine if you copy images off
regularly!
• At 720p on low quality, that same 32GB card will last for a massive
14 hours, or more. Great for times when you’ve access to a charger
but nothing to copy images to.
14
Seeing how cool you are (Playback)
There are two ways to playback videos from the Atom HD, depending
on your needs and access to equipment. The options are:
Playback via a Computer
Provided your computer meets the minimum specs to playback the
Atom HD’s videos (most modern computers will).
Playback via the mini-HDMI Port
The mini-HDMI port on the camera is great connecting to a high
definition television or monitor with HDMI inputs.
Playback via the Composite Video Out
The included USB to RCA cable can be used to connect the Atom HD
to an old-school television with RCA inputs. These are often labeled as
Video In, Composite In, AV, or similar.
The composite video out puts out a standard definition signal (480
lines for NTSC, 576 lines for PAL) - so, there is a noticable drop in
quality. Also, due to the analog nature of the technology, there’s the
chance of some noise or distortion. However, it’s a great way to quickly
review footage when you don’t have your full HD hundred-and-fifty
inch plasma panel handy.
File Type Information
Container: MP4 or MOV
Compression:
MPEG-4 AVC (Advanced Video Codec)
Bitrate: 4, 500kbps (720p, low) to 15, 500kbps (1080p, high)
Audio Bitrate:128kbps
Sample Rate:48KHz
15
Playback on a Computer
You can transfer data from the microSD card onto a computer for the
highest quality playback possible.
There are two options for downloading data to a computer:
USB Cable
• Turn the Atom HD off.
• Connect the Atom HD to your computer using the USB cable.
• Press and hold the power button for three seconds. The Atom HD
will ask Connect to PC? and offer you a choice.
• Choose YES to engage USB Mass Storage Device mode.
• The microSD card’s contents will be detected by the computer, and
will be accessible in the same way as a USB flash drive.
• The Atom HD will charge while connected as a USB drive.
Removing the microSD card
• Remove the port cover of the Atom HD. Push the microSD card
in to remove it. Be careful - the spring that pushes it out is pretty
powerful.
• Use a USB card reader connected to your computer to access the
files on the card. You may need an SD to microSD card converter, if
your card reader doesn’t support the microSD format.
The videos and still images captured by the Atom HD will be stored in
different folders, named xxxIMAGE or xxxVIDEO, respectively where
“xxx” are sequential numbers starting at 100.
Folder Format
Removable Disk DCIM
100IMAGE
FILE0001
101VIDEOFILE0002
102xxxxxxFILE0003
...etc...more files
MISC
(usually empty)
16
HDMI & Composite Video Playback
You’ll need A HD-TV or high resolution monitor with HDMI IN
and a mini-HDMI to HDMI cable.
•
•
•
•
•
•
•
•
•
•
•
Remove the port cover from the Atom HD.
Connect an HDMI cable to the mini-HDMI output on the side panel
of the Atom HD.
Connect the other end of the mini-HDMI cable to an HDMI input on
your television/monitor.
Set your television/monitor to the appropriate channel.
Turn the Atom HD on (press and hold the power button for about
three seconds).
Playback via Composite Video Out
Remove the port cover from the Atom HD.
Connect the included USB to RCA cable to the mini-USB port on
the side panel of the Atom HD.
Connect the Video Out plug (the yellow one) to a Video Input on
your television, monitor or recording device (as applicable). It will
most likely also be yellow.
If you want to hear the action, connect the white plug to your
Audio Input.
Set your television/monitor to the appropriate channel.
Turn the Atom HD on (press and hold the power button for about
three seconds).
17
Adjusting the Lens
The lens on the front of the camera can have its focus adjusted.
We set the focus for typical use before shipping the cameras out, so you
shouldn’t need to adjust anything. The focus is set from approximately
1m to infinity for non-underwater use.
If you want to record events very close to the lens (<1m away) or use
the camera underwater, then you’ll need to adjust the focus.
Focusing the Camera for use Underwater
The lens needs to be adjusted to compensate for the different way
light moves through water as opposed to air.
You’ll need to rotate the lends 95 degrees counter-clockwise, as shown
in the diagram.
95°
If you look closely
near the lens, there
are two markings. The
red marking at the 0
0°
degree point indicates
normal focus, whereas
the white mark at 95
degrees marks the
optimal
focus
for
underwater.
The outer adjustment ring on the lens has a small white mark, which,
by default, should align with the red mark at the 0 degree mark.
Note that these markings are for quick-reference only, and for the best
results, connect the Atom HD to a television and adjust the focus by
sight - there’s no substitute.
18
Options, Options: The Onscreen Menus
Photo Menu
Photo
Quality
Photo
Interval
Auto
Shooting
3M
2592 x 1728 pixels. Images require approxmimately
2MB each (500 or so per GB).
5M
2592 x 1944 pixels. Images require approximately
2 - 2.5MB each (400 or so per GB).
8M
3200 x 2400 pixels (interpolated). Images require
approximately 3 to 3.5MB each (285 or so per GB)
Off
The camera will take a single photograph at a time
when the button is pressed.
3 or 5
The camera will capture a quick burst of images
quite quickly. Can be useful if you want to catch
a split second event (say, a runner crossing a
finish line). Increasing the number of photos
taken increases the chance of capturing the right
moment.
Off
The camera will take photographs only when the
button is manually pressed.
Automatically takes a photo at the preset interval.
3, 5, 10, 30 or This is similar to (but different from) a time-lapse
video function, as the output will be individual
60 sec
image files.
Time Stamp
On or Off
Whether the time and date will be printed onto
your photos or not. The time/date stamp becomes
part of the image.
Video Menu
Video
Format
Quality
Video
Section
720p
720pH
1080pS
1080p
H, M, L
5, 10, 15, 20,
30mins
1280 x 720 @ 25fps (PAL) or 30fps (NTSC)
1280 x 720 @ 50fps (PAL) or 60fps (NTSC)
1440 x 1080 @ 25fps (PAL) or 30fps (NTSC)
1920 x 1080 @ 25fps (PAL) or 30fps (NTSC)
Choose from HIGH, MEDIUM or LOW quality.
Splits your videos into individual files between
5 minutes and 30 minutes long.
19
On / Off
Stamps the time and date onto your video
images. Once the time stamp is applied, it’s a
part of the video and cannot be removed.
Off, 1fps,
1fpm, 2fpm,
6fpm
Time lapse video will make everything seem
like it’s in super-dooper-mega-fast-forward.
1fps takes one frame per second, so a minute
of video will equate to about half an hour of
realtime. 1 frame per minute (1fpm) will give
one minute of video representing a little over
a day.
File Format
MPEG4, MOV
Choose the file format you want the camera
to output. As a general rule, MPEG4 is a good
option for PC users, whereas MOV files often
work better on Mac-based systems.
Microphone
On, Off
Whether the internal microphone is enabled.
When OFF, there will simply be no sound on
your recordings.
Time Stamp
Time Lapse
Rec
Settings Menu
Language
Date
Time
Auto
Screen Off
Auto
Power Off
20
Multiple
Options
Choose the language you’d like the camera’s
menu system to be displayed in. You can choose
from English, French, German, Spanish, Italian,
Dutch, Norwiegen, Russian
YYYY/MM/DD Sets the current date.
Sets the current time.
HH:MM
Off, 30s, 60s,
120s
To help reduce power consumption when the
camera is idle, you can choose to have the
screen auto-power-off when inactive.
When OFF, the screen will stay on as long as the
camera is turned on.
Off, 60s, 120s,
300s
To conserve battery life when the camera is idle,
you can set the auto-power-off time. You can
choose one, two or five minutes.
When OFF, the camera will stay ON until the
battery is depleted.
Motion
Off, Low,
Detection Medium, High
Image
Rotation
Image
Mirror
Off, 180°
When OFF, the camera will function normally.
When enabled, the camera can automatically
detect things moving about infront of it. There
are three levels of sensitivity. If you want to use
this function, experiment with the sensitivity a
bit - that way you’ll know what to expect.
You can use this function to rotate the video by
180 degrees. This is useful if for whatever reason
you’ve mounted the camera upside down.
Flips the image horizontally, like looking into a
Off, Mirrored mirror.
50Hz, 60Hz
Choose the appropriate lighting frequency for
your location. North American users should
choose 60Hz, whereas European, Australian
and UK users should choose 50Hz.
PAL, NTSC
Choose the appropriate VIDEO STANDARD for
your location. North American users should
choose NTSC, whereas European, Australian
and UK users should choose PAL.
On, Off
Turns the on-screen display on or off. If you’re
previewing images in realtime, turning the OSD
off makes the overall composition a little easier
to see.
LED
Indication
On, Off
Whether or not the LEDs on the front of the
camera will light up. It’s useful to have feedback
most of the time, but there are situations where
not drawing attention to the camera can be
advantageous.
Format
Card
Yes, No
Formats the microSD card for use in the camera.
Ensure there’s nothing on the card you want
to keep before doing this - you can’t get it back!
Default
Setting
Yes, No
Returns all settings to the factory default.
Firmware
Info
Light
Frequency
Video
System
OSD
Displays information about the current firmware
installed on the camera.
21
Mounting the Camera
Aiming the Camera:
The LCD screen on the rear of the camera will show you exactly what
the camera is looking at in real-time, so aiming is a breeze.
A couple of points to bear in mind:
• Remember that the viewing angle will change if you change
resolution - 720p has a significantly wider viewing angle than
1080p. If there are things near the edge of screen in 720p and you
swap to 1080p, then these things will no longer be visible.
• If you’re mounting the camera on a helmet or similar, remember to
align it relative to where your head will be when you’re actually in the
moment you want to capture. For example, cyclists who line up the
camera for facing forward might get a lovely shot of the road when
they’ve got their head down, working those pedals like a boss.
Permanent Mounts and Adhesive Pads
The two permanent mounting points (the Flat Mounting Plate and the
Curved Mounting Plate) can be permanently (well, semi-permanent,
the adhesive will wear out eventually and need to be replaced)
attached to your helmet/board/dashboard/or whatever you’d like.
Ensure that your applying these to a smooth, clean and non-porous
surface. Also ensure that the whole adhesive pad makes contact
with the surface you’re mounting to.
Long Extension
Camera
Clip
Short Extension
Curved
Mounting Plate
Flat
Mounting
Plate
22
Bar Mount
The bar mount can be used to attach the
camera to any bar or pole thin enough to fit
into the mounting clasp.
This is intended for mounting the camera
to the handlebars of a bicycle or motorbike,
but can be used to attach the camera to
anything with the right shape (that is,
round).
Attaching the mount:
• Undo the screw holding the clasp shut.
• Apply the mount to the bar you’d like to attach thing to.
• Tighten the screw to secure the mount in place.
• The camera simply clips into position in the upper part of the
mount. But you could figure that bit out, it’s kinda simple.
The Helmet Mount
Like the handlebar mount (which
can totally be attached to things
other than handlebars - don’t ask
who will let you, ask who’s going to
stop you) you can use the helmet
mount to attach the camera to any
slightly curved surface.
Off the top of our heads, we can’t really think of anything but a hemet,
but we’re sure you’re more creative.
• Peel the protective layer from the adhesive side of the included
anti-slip pad and apply carefully to the rear side of the helmet
mount.
• Insert the included strap through the two holes in the helmet
mount (as indicated by the red arrows, above) and then strap it
down. Strap it down good. (Seriously, make sure it’s secure. The
warranty doesn’t cover the camera falling off its mount. Sorry!)
23
Shooting Your Troubles
Q: It won’t turn on!
A: Try turning it on and off again. Has the camera been left on/recording
for a while for a while? Is the Atom HD charged? If not, check out “You
Got the Power: Charging the Battery” on page 11. Also, don’t try to
charge from a computer’s USB socket, because it probably won’t.
Q: I can’t play back footage on my computer.
A: Try using a different program, such as VLC Media Player (a favorite
around the Swann office).
It’s available free from www.videolan.org/vlc, and works with a huge
range of operating systems. You may need to drag and drop the file
onto the VLC (or appropriate program) window if the default file
association isn’t right.
Q: The audio sounds muffled.
A: Are you using the waterproof case? Unfortunately, sound doesn’t
travel so well through solid plastic.
That’s the downside about making it waterproof - it’s pretty soundproof, too. You can use this to your advantage - in many high wind
situations (anything 65mph [100km/h] or faster) it can actually make
the audio quality better.
If you’re not using the Atom HD in or around water, not using the
waterproof case will dramatically improve sound quality. However, the
camera won’t be as resiliant to bumps and knocks, so be careful!
Q: The audio sounds distorted/weird/too loud.
A: This can often happen if you attach the Atom HD to a vehicle,
skateboard, bicycle or anything else which vibrates when in use. Try
it with and without the water-proof case (unless you need it to be
waterproof ). Try using a different mounting option. Try attaching the
camera to your clothing using the hook & loop patches - cloth usually
muffles vibrations and might improve the audio quality. Finally,
remember that in certain situations you’re just not going to be able to
get any decent audio - for example, when the background noise level
is simply too high. It sucks but sometimes there’s nothing that can be
done: physics is a harsh mistress.
24
(Important) Legal Mumbo Jumbo
FCC Verification:
NOTE: This equipment has been tested and found to comply with the
limits for Class B digital device, pursuant to part 15 of the FCC Rules.
These limits are designed to provide reasonable protection against
harmful interference in a residential installation. This equipment
generates, uses and can radiate radio frequency energy and, if not
installed and used in accordance with the instructions, may cause
harmful interference to radio or television reception, which can
be determined by turning the equipment off and on, the user is
encouraged to try to correct the interference by one or more of the
following measures:
• Reorient or relocate the receiving antenna
• Increase the separation between the equipment and the receiver
• Connect the equipment into an outlet on a circuit different from
that to which the receiver is connected
• Consult the dealer or an experienced radio/TV technician for help
IMPORTANT NOTE: Prohibition against eavesdropping
Except for the operations of law enforcement officers conducted under
lawful authority, no person shall use, either directly or indirectly, a
device operated pursuant to the provisions of this Part for the purpose
of overhearing or recording the private conversations of others unless
such use is authorized by all of the parties engaging in the conversation.
WARNING: Modifications not approved by the party responsible for
compliance could void user’s authority to operate the equipment.
25
Technically Speaking (Specifications)
Sensor type
CMOS 5MP
170 degrees @ 720p
127 degrees @ 1080p
Viewing angle
Storage
consumption
based on 2GB
micro-SD
(approx)
Snapshot
3M
Snapshot
5M
Snapshot
8M
1000 (2592 x 1728)
800 (2592 x 1944)
570 (3200 x 2400)
High: 16 min / Medium: 20 min /
Low: 24 min
Storage
High: 18 min / Medium: 22 min /
1080pS
consumption
Low: 26 min
based on 2GB
High: 18 min / Medium: 26 min /
micro-SD
720pH
Low: 40 min
(approx)
High: 28 min / Medium: 40 min /
720p
Low: 60 min
File types: .MP4 / .MOV
Recording format
Codec Type: MPEG-4 AVC
1080p (1920x1080) @ 25fps (PAL) /
30fps (NTSC)
Video Record
Resolution
720p (1280x720) @ 25fps or 50fps
(PAL) / 30fps or 60fps (NTSC)
Snapshot
2592 x 1728
3M
Photo
Snapshot
2592 x 1944
Resolution
5M
Snapshot
3200 x 2400
8M
1080p
26
Digital Zoom
AV
AV
output
output
HDMI
USB Interface
Charging
Microphone
Power
Consumption
None
Composite NTSC/PAL via USB to RCA cable
mini-HDMI
USB 2.0 for data transfer
USB (via USB 2.0 Port)
Built In
Approx. [email protected] (varies by environment
and recording type(s)).
800mAh
90 min
Lithium Battery
Record Time
Storage
-4°F ~ 140°F / -20°C ~ 60°C
temperature
Operating
temperate range -4°F ~ 122°F / -20°C ~ 50°C
Operating humidity 15 ~ 85%RH (100%+ inside waterproof case)
range
Due to product improvements, specifications are subject to
change without notice.
For the latest version of this manual, visit:
www.swann.com
27
Helpdesk / Technical Support Details
Swann Technical Support
All Countries E-mail: [email protected]
Telephone Helpdesk:
USA toll free
AUSTRALIA toll free
1-800-627-2799
1300 138 324
(Su, 2pm-10pm US PT)
(M 9am-5pm AUS ET)
(M-Th, 6am-10pm US PT)
(Tu-F 1am-5pm AUS ET)
(F 6am-2pm US PT)
(Sa 1am-9am AUS ET)
NEW ZEALAND toll free
USA Exchange & Repairs
0800 479 266
1-800-627-2799 (Option 1)
INTERNATIONAL
(M-F, 9am-5pm US PT)
+61 3 8412 4610
Warranty Information
Swann Communications
USA Inc.
12636 Clark Street
Santa Fe Springs CA 90670
USA
Swann Communications
PTY. LTD. Unit 13, Citilink
Industrial Estate, Corner
Ingles & Turner Streets, Port
Melbourne, Victoria
Swann Communications LTD.
Stag Gates House
63/64 The Avenue
SO171XS
United Kingdom
Swann Communications warrants this product against defects in workmanship and
material for a period of one (1) year from its original purchase date. You must present
your receipt as proof of date of purchase for warranty validation. Any unit which proves
defective during the stated period will be repaired without charge for parts or labor or
replaced at the sole discretion of Swann. The end user is responsible for all freight charges
incurred to send the product to Swann’s repair centers. The end user is responsible for all
shipping costs incurred when shipping from and to any country other than the country
of origin.
The warranty does not cover any incidental, accidental or consequential damages arising
from the use of or the inability to use this product. Any costs associated with the fitting
or removal of this product by a tradesman or other person or any other costs associated
with its use are the responsibility of the end user. This warranty applies to the original
purchaser of the product only and is not transferable to any third party. Unauthorized end
user or third party modifications to any component or evidence of misuse or abuse of the
device will render all warranties void.
By law some countries do not allow limitations on certain exclusions in this warranty.
Where applicable by local laws, regulations and legal rights will take precedence.
For Australia: Our goods come with guarantees which cannot be excluded under
Australian Consumer Law. You are entitled to a replacement or refund for a major failure
and for compensation for any other reasonably foreseeable loss or damage. You are also
entitled to have the goods repaired or replaced if the goods fail to be of acceptable quality
and the failure does not amount to major failure.