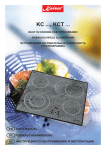
1
ES
ESTE PRODUCTO FUE CONCEBIDO PARA UN USO
DE TIPO DOMÉSTICO. EL CONSTRUCTOR DECLINA
CUALQUIER RESPONSABILIDAD EN EL CASO DE
DAÑOS EVENTUALES A COSAS O PERSONAS QUE
DERIVEN DE UNA INSTALACIÓN INCORRECTA O DE
UN USO IMPROPIO, ERRADO O ABSURDO.
Instalación
Todas las operaciones relativas a la instalación (conexión eléctrica) tienen que ser efectuadas por personal cualificado según las normas vigentes.
Para las instrucciones específicas véase la parte reservada al instalador.
TOUCH CONTROL (Fig. 2)
Encendido/apagado del Touch Control
Después de la conexión a la red eléctrica, se requerirá aproximadamente un segundo para que el touch
pueda funcionar.
Después del reset todos los displays y los LEDS centellean durante aproximadamente un segundo. Una
vez transcurrido este lapso todos los displays y los
LEDS se apagan y el touch queda en posición de
stand-by.
Para encender el touch se debe presionar la tecla de
encendido (1).
Los displays de las zonas de cocción muestran un
“0“. En caso de que una zona de cocción “queme”
(alta temperatura), en el display aparecerá “H“ y “0“
alternativamente.
Después del encendido el touch control permanece
activado durante 20 segundos. En caso de no seleccionarse ninguna zona de cocción, el touch control
retorna automáticamente al estado de standby.
El touch control se enciende presionando únicamente
la tecla de encendido (1).
En caso de presionarse la tecla de de encendido (1)
simultáneamente con otras teclas no se obtendrá
ningún efecto y el touch permanecerá en stand-by.
El touch control puede apagarse en cualquier momento mediante la tecla de encendido (1). Ello es
válido incluso en caso de que el mando haya sido
bloqueado mediante el dispositivo de seguridad para
niños.
La tecla de encendido (1) goza siempre de prioridad
en la función de apagado.
1 Encendido/apagado ON / OFF
2 Menos 3 Más +
4 Circuito Doble / Triple
5 Zona de cocción
6 Display de nivel de potencia
7 Piloto doble circuito
8 Segmento Luminoso Circuitos Múltiples
Apagado automático
Una vez encendido, el touch control se apaga de modo
automático después de 20 segundos de inactividad.
Después de haber seleccionado una zona de cocción,
el tiempo de apagado automático se subdivide en 10
segundos, transcurridos los cuales se deselecciona
la zona y, después de otros 10 segundos, el touch
control se apaga.
El fabricante declara que este producto cumple todos
los requisitos esenciales sobre el material eléctrico
de baja tensión prescritos en la directiva 2006/95/
CEE del 12 de diciembre del 2006 y de compatibilidad electromagnética prescrita por la directiva
2004/108/CEE del 15 de diciembre del 2004.
Instrucciones para el usuario
Instalación
Todas las operaciones relativas a la instalación (conexión eléctrica) tienen que ser efectuadas por personal cualificado según las normas vigentes.
Para las instrucciones específicas véase la parte reservada al instalador.
Utilización
ELEMENTOS CALENTADORES TOUCH CONTROL
Tecla de presión leve
Todas las operaciones pueden ser ejecutadas a través de teclas de presión leve (sensores de tipo capacitivo) puestas sobre la superficie frontal de la tarjeta;
a cada tecla corresponde un display. Cada actividad
es confirmada por una señal acústica.
Encendido/apagado de una zona de cocción
Con el touch control encendido, será posible selec-
cionar la zona de cocción presionando la tecla (5) de
la zona correspondiente.
El display (6) de la zona seleccionada se vuelve más
brillante, mientras que el resto de displays pierde luminosidad. Si el área “quema” se visualizarán alternativamente “H” y “0”.
Presionando la tecla MÁS (3) o MENOS (2), será posible seleccionar un nivel de potencia y la zona comenzará a calentar.
Una vez seleccionada la zona de cocción, podrá seleccionarse el nivel de potencia manteniendo presionada para ello la tecla MÁS (3); partiendo desde el
nivel 1 se incrementa en la medida de una unidad
cada 0,4 segundos. Al alcanzarse el nivel 9 no será
posible efectuar otros incrementos.
Si el nivel de potencia ha sido seleccionado mediante la tecla MENOS (2), el nivel inicial es el “9” (nivel
máximo). Manteniendo presionada la tecla, el nivel
activo decrece en la medida de una unidad cada 0,4
segundos. Una vez alcanzado el nivel 0 no será posible efectuar ulteriores decrementos. Sólo presionando nuevamente la tecla MENOS (2) o MÁS (3) será
posible modificar el nivel de potencia.
Apagado de una zona de cocción
Seleccionar la zona que se desea apagar mediante
la tecla (5) correspondiente. El display (6) de la zona
seleccionada se vuelve más brillante, mientras que
el resto de displays pierde luminosidad. Presionando
la tecla de selección de la zona correspondiente y
la tecla MENOS (2) de modo simultáneo, el nivel de
potencia de la zona se coloca a 0. Como alternativa la
tecla MENOS (2) puede utilizarse para reducir el nivel
de potencia hasta 0.
Si una zona de cocción “quema”, aparecerá una “H”
y un “0” alternativamente.
Apagado de todas las zonas de cocción
Presionando la tecla de encendido (1) podrá obtenerse en cualquier momento el apagado inmediato
de todas las zonas. En modalidad standby aparecerá
una “H“ en el display de todas las zonas de cocción
que “queman”. Todos los restantes displays estarán
apagados.
Nivel de potencia
La potencia de la zona de cocción dispone de 9 niveles que aparecen indicados con los símbolos de
“1“ a “9“ mediante los displays (6) de LED de siete
segmentos.
Precocinado automático.
Cuando se activa el precocinado automático, la potencia de la zonade cocinado se activa al 100 % por
un período de tiempo quedepende de la potencia de
cocinado seleccionada. Una vezfinalizado el tiempo
de precocinado, prevalece de nuevo la potenciade
cocinado preseleccionada.
Procedimiento para iniciar el precocinado automático:
Se enciende la placa y se selecciona una zona de
cocinado.
Después de ajustar la potencia de cocinado al nivel 9,
se debe presionar de nuevo la tecla MÁS (3).
A continuación, se dispone de 10 segundos para seleccionar la potencia de cocinado deseada por medio
de las teclas MENOS (2) y MÁS (3).
Si con posterioridad se selecciona un nivel de potencia diferente, la función de precocinado se mantiene,
adaptando el tiempo de precocinado al nuevo nivel
seleccionado.
Función Mantener Caliente
Esta función está disponible para todas las zonas de
cocción y sirve para mantener caliente la comida ya
cocinada. Se trata de un nivel de potencia situado
entre el nivel 0 y el nivel 1. Para activar esta función,
se deben seguir estos pasos:
1. Seleccionar la zona de cocción deseada
2. Seleccionar el nivel de potencia 1 mediante la tecla
MÁS (3)
3. Presionar la tecla MENOS (2). En el display aparecerá el símbolo “u” indicando que la función “Mantener Caliente” está activa.
Indicador de calor residual
Indica al usuario que el vidrio se encuentra a una
temperatura peligrosa en caso de contacto con el
área situada sobre la zona de cocción. La temperatura es determinada según un modelo matemático y en
caso de presencia de calor residual, ello es indicado
con una “H” por el correspondiente display de siete
segmentos.
El calentamiento y el enfriamiento se calculan sobre
la base de:
· El nivel de potencia seleccionado (entre “0“ y “9“)
· El período de activación.
Después de haber apagado la zona de cocción, el correspondiente display mostrará “H” hasta que la tem-
peratura de la zona haya descendido por debajo del
nivel crítico (≤ 60ºC) según el modelo matemático.
Función de apagado automático (lím. del tiempo
de funcionamiento)
En relación con el nivel de potencia, en caso de no efectuarse ninguna operación, cada zona de cocción se apaga
después de un tiempo máximo preestablecido.
Cada operación en la zona de cocción (mediante las
teclas MÁS (3) y MENOS (2) o doble zona) reinicializa
el tiempo máximo de operación de la zona devolviéndolo a su valor inicial.
Protección en caso de encendido involuntario
· En caso de que el control electrónico detecte la presión continua de un tecla por aprox. 10 s, se apagará
automáticamente. El control emite una señal acústica de error para advertir al usuario que los sensores
han detectado la presencia de un objeto. Los displays
muestran el código de error “ E R 0 3 “. Si la zona de
cocción “quema”, aparecerá una “H“ en el display
alternativamente con la señal de error.
· En caso de no activarse ninguna zona de cocción
dentro de los 20 segundos sucesivos al encendido del
Touch, el control retornará a la modalidad stand-by.
· Cuando el control se encuentra encendido la tecla
ON/OFF tiene prioridad respecto de todas las restantes teclas, a fin de que el control pueda ser apagado
en cualquier momento incluso en caso de presión
múltiple o continua de teclas.
· En modalidad stand-by una presión continua de teclas no producirá ningún efecto. En cualquier caso,
para poder encender nuevamente el control electrónico éste deberá haber detectado que ninguna tecla
se encuentre presionada.
Bloqueo de las teclas (dispositivo de seguridad
para los niños)
• Dispositivo de seguridad para niños:
Bloqueo de las teclas:
Para activar el dispositivo de seguridad para niños
después de haber encendido el Touch Control, se
deberá presionar la tecla MENOS (2) y, sin dejar de
presionarla, a continuación presionar la tecla de selección de zona de cocción:
·superior izquierda –> si la encimera tiene 3 zonas
de cocción
·inferior izquierda -> si la encimera tiene 4 zonas de
cocción
En todos los displays aparecerá una “L” que significa
LOCKED (dispositivo de seguridad para niños contra
encendido involuntario). En caso de que la zona de
cocción “queme” la “L” y la “H” se mostrarán alternativamente.
Esta operación deberá tener lugar dentro de los 10
segundos sucesivos; no deberá presionarse ninguna otra tecla además de aquéllas indicadas. En caso
contrario, la secuencia será interrumpida y la encimera no será bloqueada.
El control electrónico permanece bloqueado mientras
no sea desbloqueado por el usuario, incluso aunque
mientras tanto haya sido apagado y reencendido. Ni
siquiera una reinicialización del touch (después de
una caída de tensión) interrumpirá el bloqueo de las
teclas.
Eliminación del bloqueo de las teclas:
Después de encender el touch podrá ser desactivado el dispositivo de seguridad para niños. Para ello
es necesario proceder igual que para el bloqueo: se
deberá presionar la tecla MENOS (2) y, sin dejar de
presionarla, a continuación presionar la tecla de selección de zona de cocción:
·superior izquierda –> si la encimera tiene 3 zonas
de cocción
·inferior izquierda -> si la encimera tiene 4 zonas de
cocción
Si se ejecutan todas las operaciones en el orden
previsto, el bloqueo de las teclas será anulado y el
touch control volverá a modo Stand-by si pasados 10
segundos no se ha efectuado ninguna operación. En
caso contrario, la secuencia será considerada como
incompleta, el touch permanecerá bloqueado y se
apagará después de 60 segundos.
Encendiendo nuevamente el touch mediante la tecla
ON/OFF todos los displays mostrarán “0”, los puntos decimales centellearán y el touch quedará listo
para efectuar la cocción. En caso de que una zona
de cocción “queme”, el “0” y la “H” se mostrarán
alternativamente.
Control de los circuitos múltiples
Encimeras sin circuito doble o triple ver Fig. 2A
Encimera con zona triple (Fig. 2B)
La activación de una zona de cocción doble / triple
implica que se enciendan los 3 circuitos a la vez. La
activación / desactivación de cada circuito se realiza
con la tecla 4 y se indica mediante un segmento luminoso (8).
Señal acústica (zumbador)
Durante el uso las siguientes actividades son señaladas mediante un zumbador:
· Presión normal sobre las teclas con un sonido breve.
· Presión continua sobre las teclas durante más de 10
s con un sonido largo intermitente.
Función de Temporizador
La función temporizador es realizada en dos versiones:
· Temporizador autónomo entre 1 y 99 min: señal
sonora que indica conclusión del respectivo lapso.
Esta función se
encuentra disponible sólo mientras no se esté utilizando la
encimera.
· Temporizador para zonas cocción entre 1 y 99 min:
señal sonora que indica que el lapso previsto se ha
concluido; las cuatro zonas de cocción pueden ser
programadas de modo
independiente.
Temporizador autónomo:
· Si el touch está encendido y no hay ninguna
zona de cocción seleccionada, el temporizador autónomo puede ser utilizado presionando simultáneamente las teclas MENOS (2) y MÁS (3).
· Modificaciones del valor (0 – 99 min) pueden efectuarse con incrementos de un minuto procediendo
con una cualquiera de las teclas MÁS de 0 a 99 y con
la tecla MENOS de 99 a 0.
· Presionando de modo continuo la tecla MÁS o MENOS se obtendrá un incremento dinámico de la
velocidad de variación hasta alcanzar un valor
máximo, sin señales sonoras.
· Al soltar la tecla MÁS (o MENOS), la velocidad
de incremento (decremento) partirá nuevamente
desde el valor inicial.
· La programación del temporizador puede efectuarse tanto mediante presiones continuas de las teclas
MÁS y MENOS como mediante presiones intermitentes (con señal sonora). Una vez que el temporizador
ha sido programado comienza la cuenta regresiva.
El cumplimiento del lapso será notificado mediante una señal sonora y el centelleo del display
del temporizador.
La señal sonora cesará
· Automáticamente después de 2 minutos.
· Presionando una cualquiera de las teclas. El display
cesa de centellear y se apaga.
Apagar / modificar el temporizador
· El temporizador puede ser modificado o apagado en cualquier momento presionando las teclas MENOS (2) y MÁS (3) simultáneamente (con
señal sonora). El temporizador se apaga situando
el tiempo en “0” mediante la tecla MENOS.
Durante 10 segundos el temporizador permanece en
“0” y a continuación se apaga.
Programación del temporizador para las zonas de
cocción
Encendiendo el touch es posible programar
un temporizador independiente para cada zona de
cocción.
· Seleccionando la zona de cocción mediante la
tecla (4) de selección de zona, programando a continuación el nivel de potencia y, por último, presionando las teclas MENOS (2) y MÁS (3) simultáneamente,
será posible programar una cuenta regresiva a fin
de apagar la zona de cocción.
· Durante la programación del temporizador, el piloto
(6) de la zona de cocción seleccionada centelleará.
· El cumplimiento del lapso es notificado mediante
una señal
acústica y la aparición de “00” en el display, mientras
que el LED de la zona de cocción asignada al
temporizador comenzará a centellear. La zona de
cocción se apagará y aparecerá una “H” en caso de
que la zona “queme”.
Se interrumpirán la señal sonora y el centelleo del
display
· Automáticamente después de 2 minutos.
· Accionando una de las teclas.
El display del temporizador se apaga.
· Las funciones de base son análogas a aquéllas del temporizador autónomo.
Precauciones (Fig. 3)
- En el uso de los elementos calentadores se aconseja utilizar recipientes con fondo plano de diámetro
igual o ligeramente superior a aquel indicado por la
serigrafía.
- Evitar desbordamientos de líquido. Por lo tanto, a
ebullición completa o de todas formas una vez que
esté caliente el líquido, reducir la potencia.
- No dejar encendidas los elementos calentadores
vacíos o con ollas o cacerolas vacías.
- Si la superficie de la encimera se rompe, desconectar inmediatamente el aparato de la red para evitar la
posibilidad de sufrir un shock eléctrico.
- Para la limpieza de la encimera no debe usarse ningún limpiador a vapor.
- Este aparato no está destinado para ser usado por
personas (incluidos niños) cuyas capacidades físicas,
sensoriales o mentales estén reducidas, o carezcan
de experiencia o conocimiento, salvo si han tenido
supervisión o instrucciones relativas al uso del aparato por una persona responsable de su seguridad.
- Los niños deberían ser supervisados para asegurar
que no jueguen con el aparato.
Mantenimiento (Fig. 4)
Restos de hojas de aluminio, residuos de alimentos,
salpicaduras de grasa, azúcar o alimentos fuertemente sacaríficos deben ser inmediatamente removidos
del plano de cocción con un raspador para evitar daños posibles a la superficie del plano. Sucesivamente
limpiar con un producto adecuado y papel de cocina,
luego enjuagar con agua y secar con un paño limpio.
De ninguna manera usar esponjas o estropajos abrasivos; evitar también el uso de detergentes químicos
agresivos o quitamanchas.
Instrucciones para el instalador
Instalación
Las presentes instrucciones están dirigidas al instalador como guía para la instalación, regulación y
mantenimiento según las leyes y las normas vigentes. Las intervenciones tienen que ser efectuadas
siempre con el aparato desenchufado.
Colocación (Fig. 5)
1 Vista frontal
2 Lado frontal
El aparato ha sido estudiado para ser empotrado en
un tablero de trabajo como ilustrado en la figura. Preparar sobre todo el perímetro de la superficie con la
cinta impermeable en dotación.
Si una vez instalado el aparato la parte inferior es
accesible, se debe colocar un panel de protección (de
madera o similar) a la distancia indicada en la figura.
Conexión eléctrica
Antes de efectuar la conexión eléctrica comprobar que:
- las características de la instalación satisfagan lo indicado en la placa de características colocada sobre
el fondo de la superficie de cocción;
- que la instalación tenga una eficaz conexión de
tierra según las normas y las prescripciones de ley
vigentes. La puesta a tierra es obligatoria por ley.
En el caso de que el aparato no tenga el cable y/o enchufe utilizar material apto para la corriente indicada
en la placa de características y para la temperatura
de trabajo. El cable en ningún punto tendrá que llegar
a una temperatura superior de 50°C sobre la temperatura ambiente.
Instale en el cableado fijo un medio de desconexión
de la red eléctrica con una separación de contacto en
todos los polos que permita una desconexión completa en condiciones de sobretensión de categoría III,
de acuerdo con la normativa de cableado. El enchufe
o el interruptor omnipolar tienen que ser fácilmente
alcanzables con el aparato instalado.
Este aparato no está previsto para hacerlo funcionar
por medio de un temporizador externo o sistema de
control remoto separado.
El fabricante declina cualquier responsabilidad en el
caso de que lo dicho arriba y las usuales normas contra los infortunios no sean respetados.
Si el cable de alimentación se daña, hágalo sustituir por el fabricante, por un centro de asistencia
técnica autorizado o por un técnico de competencia similar, a fin de prevenir todo tipo de riesgos.
EN
THIS APPLIANCE IS DESIGNED FOR DOMESTIC USE
ONLY. THE MANUFACTURER SHALL NOT IN ANY
WAY BE HELD RESPONSIBLE FOR WHATEVER INJURIES OR DAMAGES ARE CAUSED BY INCORRECT
INSTALLATION OR BY UNSUITABLE, WRONG OR
ABSURD USE.
The manufacturer declares that this product meets
all basic requirements regarding low-voltage electrical equipment established in the 2006/95/EEC Directive of 12 December 2006 and electro-magnetic
compatibility established in 2004/108/EEC Directive
of 15 December 2004.
User’s Instructions
Installation
All operations relative to installation (electric connection) should be carried out by skilled personnel in
conformity with the rules in force.
As for the specific instructions see part pertaining to
installer.
Use
TOUCH CONTROL HEATING ELEMENTS
Touch sensitive keys
All operations can be performed using touch sensitive
keys (capacitive sensors) located on the front of the
control board; each key has a corresponding display.
All actions are confirmed by an audible signal.
TOUCH CONTROL (Fig. 2)
1 ON / OFF
2 Minus 3 Plus +
4 Double / Triple Circuit
5 Cooking zone
6 Setting level display
7 Dual circuit pilot light
8 Illuminated Segment Multiple Circuits
Installation
All operations relating to installation (electrical connection) must be carried out by qualified personnel in
line with current regulations.
See the part reserved for fitters for specific instructions.
Switching the Touch Control on/off
After mains voltage is applied, the touch control
initialises for approximately one second before it is
ready for use.
All displays and LEDs flash for approximately one second after resetting. Once this period is complete, all
displays and LEDs switch off and the touch control is
in standby mode.
Press the ON/OFF (1) button to switch the touch control on.
The cooking zone displays indicate “0“. If a cooking
zone is in “hot“ (high temperature) mode, the display
will alternately indicate “H“ and “0“.
After switching the touch control on, it will remain
active for 20 seconds. If no cooking zone is selected, the touch control automatically switches back to
standby mode.
The touch control can only be switched on by pressing the ON/OFF (1) button.
Pressing the ON/OFF (1) button at the same time as
other buttons will have no effect and the touch control will remain on standby.
The touch control can be switched off at any time
using the ON/OFF (1) button. This is even the case
when the control has been locked by the child safety
feature.
The ON/OFF (1) button always takes priority in the
switching off function.
Automatic off
Once switched on, the touch control automatically switches off after 20 seconds of inactivity. After
selecting a cooking zone, the automatic off time is
divided into 10 seconds, after which the zone is deselected and, after another 10 seconds, the touch
control switches off.
Switching a cooking zone on/off
If the touch control is switched on, the cooking zone
can be selected by pressing the button (5) of the corresponding zone.
The display (6) of the zone selected lights up, while
the remaining displays are dimmed. if the cooking
zone is “hot”, “H” and “0” are alternately displayed.
Press the PLUS (3) or MINUS (2) button to select a
setting and the zone will begin to heat up.
Once the cooking zone has been selected, the setting
can be selected by keeping the PLUS (3) button pressed down. The setting begins at level 1 and increases
by 1 level every 0.4 seconds. When setting “9” is reached, the setting will not be changed further.
If the setting level has been selected using the MINUS
(2) button, the start level is “9“ (maximum level). Keep
the button pressed down to lower the active level by
1 every 0.4 seconds. When setting “0” is reached,
there will be no further setting changed. The setting
can only be changed by pressing the MINUS (2) or
PLUS (3) button again.
Switching a cooking zone off
Select the zone to be switched off using the corresponding button (5). The display (6) of the zone selected lights up, while the remaining displays are
dimmed. Press both the selection button for the corresponding area and the MINUS key (2) at the same
time to set the power level of the area to 0. Alternatively, the MINUS button (2) can be used to reduce the
setting level to 0.
If a cooking zone is “hot”, “H” and “0” will be alternately displayed.
Switching all cooking zones off
Press the ON/OFF (1) button to immediately switch
off all zones at any time. In standby mode, an “H“
is displayed in all cooking zones that are “hot“. The
remaining displays will be switched off.
Setting level
The cooking zone can be set to 9 levels that are
indicated by the numbers “1“ to “9“ on the sevensegment LED displays (6).
Automatic Parboiling
When Automatic parboiling is activated, the power of
the cooking zone is switched to 100 % for a period
of time depending on the selected onboiling stage. As
soon as the parboiling time is over, the preselected
onboiling stage is valid again.
Procedure to start Automatic parboiling:
The control unit is switched on and a cooking zone
is selected.
After setting cooking stage to level “9”, press again
the PLUS (3) button.
As a next step, there is a 10 seconds period time to
select the desired cooking stage, by using MINUS (2)
and PLUS (3) buttons.
If a different setting level is then selected, the parboi-
ling function is maintained, and the parboiling time is
adapted to the new selected setting.
Keep Warm Function
This function is available for all cooking areas and
is used to keep food that has already been cooked
warm. It is a power level between level 0 and level 1.
To activate this function, follow these steps:
1. Select the desired cooking area.
2. Select power level 1 using the PLUS button (3)
3. Press the MINUS button (2). The symbol “u” will be
displayed, indicating that the “Keep Warm” function
has been activated.
Residual heat indicator
This informs the user that the glass is at a dangerous temperature in the event of touching the area
located around the cooking zone. The temperature is
determined by a mathematical model and any residual heat is indicated by a “H” on the corresponding
7-segment display.
Heating and cooling are calculated based on:
· The selected setting level (between “0“ and “9“)
· The ON/OFF time.
After switching off the cooking zone, the corresponding display will indicate “H” until the temperature
in the zone has dropped below the critical level (≤
60°C).
Automatic off function (operating time limitation)
In terms of the setting level, if no operation occurs
each cooking zone switches off after an established
maximum time.
Each operation in the cooking zone condition (using
the PLUS (3) and MINUS (2) or dual zone) restarts the
maximum operating time of the zone by resetting it
to its initial value.
Protection against unintended switching on
· If the electronic control detects a button being held
down for approx. 10 sec. it will switch off automatically. The control sends out an audible error signal
to warn the user that the sensors have detected the
presence of an object. The displays indicate error
code “ E R 0 3 “. If the cooking zone is in “hot” mode,
“H“ will be indicated alternately on the display with
the error signal.
· If no cooking zone is activated within 20 seconds
after switching on the touch control, it will return to
standby mode.
· When the control is switched on, the ON/OFF button
has priority over all other button and, therefore, the
control can be switched off at any time, even when
several buttons are pressed at the same time or a
button is kept held down.
· In standby mode, no effect will be caused by buttons
being kept held down. However, before the electronic
control can be switched back on, it has to detect that
no button is pressed down.
cimal points will flash and the touch control will be
ready for cooking. If a cooking zone is in “hot” mode,
“0” and “H” will be alternately displayed.
Control of multiple circuits
Hobs without double or triple circuit, see Fig. 2A
Hob with triple zone. (Fig. 2B)
When a dual / triple cooking zone is activated, the 3
circuits are switched on at the same time. The activation / deactivation of each circuit is done with button
4 and it is indicated with an illuminated segment (8).
Button lock (child safety feature)
• Child safety feature:
Button lock:
To activate the child safety device after turning on the
Touch Control, press and hold the MINUS (2) button.
Then press the button to select the cooking area:
·upper left –> if the hob has 3 cooking areas
·lower left –> if the hob has 4 cooking areas
An “L” standing for LOCKED (child safety feature preventing unintended switch on) will be indicated on all
displays. If a cooking zone is in “hot” mode, “L” and
“H” will be alternately displayed.
This operation must take place within a 10 successive seconds and no button other than those described
must be pressed. Otherwise, the sequence will be
interrupted and the hob will not be locked.
The electronic control remains locked until it unlocked by the user, even if it has been switched off and
back on meanwhile. Not even touch control resetting
(after a voltage drop) will interrupt the button lock.
Cancelling the button lock:
After switching the touch control on, the child safety
feature can be disabled. Follow the same procedure
as for locking: press and hold the MINUS (2) button,
then press the button to select the cooking area:
·upper left –> if the hob has 3 cooking areas
·lower left –> if the hob has 4 cooking areas
If all operations are completed in the correct order,
the button lock will be cancelled and the touch control will return to Stand-by mode if no other operation
is carried out within 10 seconds.Otherwise, the sequence will be considered incomplete and the touch
control will remain locked and will switch off after
60 seconds.
Switch the touch control back on using the ON/OFF
button and all displays will be indicate “0”, the de-
Sound signal (buzzer)
The following activities are indicated by a buzzer during use:
· Normal button pressing by a short sound.
· Buttons kept pressed down for more than 10 sec. by
a long, intermittent sound.
Timer function (optional)
The timer function is realized in two versions:
· Stand-alone timer 1..99 min: sound signal when the
time is over (= minute minder). This function is only
available when the cooktop is not in operation, i.e.
when there is no cooking.
· Cooking zone timer 1..99 min: sound signal when
the time is over, four cooking zones can be programmed independently.
Timer as minute minder (stand-alone):
· If the control is ON and no cooking zone selected,
the standalone-timer can be used by simultaneously
operating MINUS (2) and PLUS (3) keys.
· Adjustment range (0-99min), it can be set in 1-minute steps with any key, starting at 1 up to 99 (end
stop) with the minus-key starting at 99 down to 0
(end stop)
· Continuous activation of the plusor minus-key results in a dynamic increase of the adjustment speed
up to maximum value without sound signal.
· when the plus- or minus key is released in the
meantime, the adjustment speed starts again from
a (low) initial value.
· adjustment can be made with a continously activated plusor minus-key or by tip-operation (with sound
signal) After the timer is set the time runs down
according to the adjustment. When the time is over
there is a sound signal and the timer display blinks.
The sound signal will be stopped
· automatically after 2 minutes and/or by operating
any key. Then the blinking of the timer display stops
and the display extinguishes.
Switching-OFF/changing the timer
· The timer can be changed or switched-off anytime by
simultaneously operating MINUS (2) and PLUS (3) keys.
(with sound signal). The timer will be switched off by
counting down to “0” with the minus-key. For 10 seconds the timer display remains at “0“ before it will
be switched-off.
Timer programming on cooking zones
When the control is switched- ON an independent timer can be programmed for every cooking zone.
· By selecting a cooking zone with the cooking-zoneselectkey (4), then selecting the setting and, finally,
operating MINUS (2) and PLUS (3) keys simultaneously, the timer can be programmed as a switchoff function for a cooking zone.
· During timer programming, the pilot light (6) of the
selected cooking zone blinks.
· When the timer has run down, there is a sound signal and the timer display shows “00“ statically, the
assigned cooking zone timer LED blinks. The programmed cooking zone will be cut off and „H“ will be
displayed if the coking zone is hot.
The sound signal and the blinking of the timer LED
will be stopped
· automatically after 2 minutes
· by operating any key.
The timer display extinguishes.
· The basic behaviour follows the description of the
“minute minder” (stand-alone-timer).
Precautions (Fig. 3)
- When one makes use of heating elements, we advise receptacles with flat bottom having same diameter or lightly higher than that of the hot area.
- Avoid overflows of liquid, therefore when boiling has
happened, or in any case when liquid is heated, reduce the heat supply.
- Don’t leave the heating elements on without receptacles on the top or with void pots and pans.
- If the surface of the hob is damaged, immediately
disconnect the appliance from the mains to prevent
the possibility of electric shock.
- Never use a steam cleaner to clean the hob.
- This appliance hood is not designed to be used by
people (including children) with reduced physical,
sensorial or mental capacity, or who lack experience
or knowledge about it, unless they have had supervision or instructions on how to use the appliance by
someone who is responsible for their safety.
- Children must be supervised to ensure that they do
not play with the appliance.
Maintenance (Fig. 4)
By means of a scraper immediately remove any alluminium foil bits, food spills, grease splashes, sugar
marks and other high sugarcontent food from the
surface in order to avoid
damaging the hob.
Subsequently clean the surface with some towel and
appropriate product, rinse with water and dry by
means of a clean cloth. Under no circumstance should
sponges or abrasive cloths be used; also avoid using
aggressive chemical detergents such as oven sprays
and spot removers.
Installer’s Instructions
Installation
These Instructions are for the qualified technician, as a
guide to installation, adjustment and maintenance, according to the laws and standards in force. These operations must always be carried out when the appliance
has been disconnected from the electric system.
Positioning (Fig. 5)
1 Front view
2 Front side
The appliance can be fitted into a working area as
illustrated on the figure. Apply the seal supplied over
the whole perimeter of the working area.
I f once the appliance is installed there is access to
the lower part, a protection panel (wooden or something similar) ought to be placed at the distance indicated in the figure.
Electrical connection
Prior to carrying out the electrical connection, please
ensure that:
the plant charac- teristics are such as to follow what
is indicated on the matrix plate placed at the bottom
of the working area;
- that the plant is fitted with an efficient earth
connection, following the standards and law
provisions in force.
- The earth connection is compulsory in terms of
the law.
Should there be no cable and/or plug on the equipment, use suitable absorption material for the working temperature as well, as indicated on the matrix
plate. Under no circumstance must the cable reach
a temperature above 50°C of the ambient temperature.
Insert in the fixed wiring a mean for disconnection
from the supply mains having a contact separation in
all poles that provide full disconnection under overvoltage category III conditions, in accordance with
the wiring rules. The plug or omnipolar switch must
be easily reached on the installed equipment.
This appliance is not intended to be used via an external timer or a remote control system.
The manufacturers decline any responsibility in the
event of non-compliance with what is described
above and the accident prevention norms not being
respected and followed.
To avoid all risk, if the power cable becomes damaged, it must only be replaced by the manufacturer,
by an authorised service centre, or by a qualified
electrician.
FR
CE PRODUIT EST CONÇU EXCLUSIVEMENT POUR
UN USAGE DOMESTIQUE. LE CONSTRUCTEUR
DÉCLINE TOUTE RESPONSABILITÉ DANS LE CAS
DE DOMMAGES ET BLESSURES CAUSÉS PAR UNE
INSTALLATION INCORRECTE OU PAR UN USAGE
INAPPROPRIÉ, ERRONÉ OU ABSURDE.
Le fabricant déclare que ce produit répond aux normes relatives au matériel électrique basse tension
établies par la directive 2006/95/CEE du 12 décembre 2006 et à la compatibilité électromagnétique définie par la directive 2004/108/CEE du 15 décembre
2004.
Instructions pour l’usager
Installation
Toutes les opérations relatives à l’installation (raccordement électrique) doivent être faites par un
personnel qualifié, en conformité avec les normes en
vigueur.
En ce qui concerne les instructions spécifiques voir la
partie réservée à l’installateur.
Emploi
ÉLÉMENTS CHAUFFANTS TOUCH CONTROL
Touches à effleurement
Toutes les opérations peuvent être effectuées à l’aide
des touches à effleurement (capteurs capacitifs),
situés sur le panneau avant de la carte ; à chaque
touche correspond un display. Toute activité sera
confirmée par un signal sonore.
TOUCH CONTROL (Fig. 2)
1 Marche/arrêt ON / OFF
2 Moins 3 Plus +
4 Circuit double/triple
5 Foyer
6 Affichage du niveau de puissance
7 Voyant double circuit
8 Segment lumineux circuits multiples
Installation
Toutes les opérations relatives à l’installation (raccordement électrique) doivent être faites par du personnel qualifié, conformément aux normes en vigueur.
En ce qui concerne les instructions spécifiques voir la
partie réservée à l’installateur.
Marche/arrêt de la commande Touch Control
Après la mise sous tension, il faut environ 1 seconde
à la commande sensitive pour être prête à fonctionner.
Après la réinitialisation de tous les afficheurs, les DEL
clignotent pendant 1 seconde environ. Puis les afficheurs et les DEL s’éteignent et la commande sensitive se met en stand-by.
La commande sensitive s’active au moyen de la
touche Marche (1).
Les afficheurs des foyers indiquent « 0 ». Lorsque
l’un des foyers est « brûlant » (température élevée),
l’afficheur indique « H » puis « 0 » alternativement.
Après la mise en marche, la commande sensitive
reste active pendant 20 secondes. Si aucun foyer
n’est sélectionné, la commande sensitive se met automatiquement en stand-by.
La commande sensitive ne peut être activée qu’au
moyen de la touche Marche (1).
Le fait d’appuyer simultanément sur la touche Marche (1) et sur d’autres touches ne produit aucun effet,
la commande sensitive reste en stand-by.
La commande sensitive peut être désactivée à tout
moment au moyen de la touche Marche (1). Y compris lorsque la commande a été verrouillée avec le
dispositif de sécurité enfants.
La touche Marche (1) est toujours prioritaire dans la
fonction d’arrêt.
Arrêt automatique
La commande sensitive s’arrête automatiquement
après 20 secondes d’inactivité. Après avoir sélectionné un foyer, l’arrêt automatique s’effectue en deux
parties : 10 secondes après lesquelles le foyer est
désactivé, puis encore 10 secondes après lesquelles
la commande sensitive s’éteint.
Marche/arrêt d’un foyer
Lorsque la commande sensitive est activée, appuyer
sur la touche (5) correspondant au foyer à sélectionner.
L’afficheur (6) du foyer sélectionné s’éclaire davanta-
ge alors que les autres deviennent moins lumineux.
Si le foyer est « brûlant », l’afficheur indique alternativement « H » et « 0 ».
Pour sélectionner la puissance, appuyer sur la touche
PLUS (3) ou MOINS (2) ; le foyer commence à chauffer.
Une fois le foyer sélectionné, maintenir la pression
sur la touche PLUS (3) pour sélectionner la puissance
: à partir du niveau 1, la puissance augmente d’une
unité toutes les 0,4 secondes. Une fois le niveau 9
atteint, il est impossible d’augmenter la puissance.
Si le niveau de puissance a été choisi au moyen de
la touche MOINS (2), le niveau de départ est le « 9 »
(niveau maximum). Si la pression est maintenue sur
la touche, la puissance diminue d’une unité toutes les
0,4 secondes. Une fois le niveau 0 atteint, il est impossible de réduire la puissance. Il faut alors appuyer
à nouveau sur la touche MOINS (2) ou PLUS (3) pour
modifier le niveau de puissance.
Arrêt d’un foyer
Sélectionner le foyer à éteindre avec la touche (5)
correspondante. L’afficheur (6) du foyer sélectionné
s’éclaire davantage alors que les autres deviennent
moins lumineux. En appuyant simultanément sur la
touche de sélection de la zone correspondante et sur
la touche MOINS (2), le niveau de puissance de la
zone se situe sur 0. La touche MOINS (2) peut également permettre de réduire le niveau de puissance
à 0.
Lorsqu’un foyer est « brûlant », « H » et « 0 » s’affichent
alternativement.
d’étuvage sélectionné. Une fois le délai d’étuvage
écoulé, le niveau d’étuvage présélectionné est à
nouveau disponible.
Lancement de la fonction Étuvage automatique:
Allumer l’unité de commande et sélectionner une
zone de cuisson.
Après avoir réglé la puissance de cuisson sur le niveau 9, appuyer à nouveau sur la touche PLUS (3).
Vous disposez ensuite de 10 secondes pour sélectionner à l’aide des touches MOINS (2) et PLUS (3) la
puissance de cuisson voulue.
Si un niveau de puissance différent est sélectionné
par la suite, la fonction de précuisson est conservée,
la durée de cette dernière étant adaptée au dernier
niveau sélectionné.
Fonction « Garder chaud »
Cette fonction est disponible pour toutes les zones
de cuisson et sert à maintenir chauds les aliments
déjà cuisinés. Il s’agit d’un niveau de puissance situé
entre les niveaux 0 et 1. Pour activer cette fonction,
procéder comme suit :
1. Sélectionner la zone de cuisson voulue
2. À l’aide de la touche PLUS (3), sélectionner le niveau de puissance 1
3. Appuyer sur la touche MOINS (2). Le symbole « u
» apparaît sur l’écran d’affichage, indiquant que la
fonction « Garder chaud » est active.
Étuvage automatique
Indicateur de chaleur résiduelle
Il signale à l’utilisateur que le verre est chaud et
peut représenter un danger en cas de contact avec
la surface située autour du foyer. La température est
déterminée à partir d’un modèle mathématique. La
chaleur résiduelle est indiquée par la lettre « H » sur
l’afficheur à sept segments correspondant.
Le chauffage et le refroidissement sont calculés en
fonction :
De la puissance sélectionnée (de « 0 » à « 9 »)
De la durée d’activation.
Une fois le foyer éteint, l’afficheur correspondant indique « H » jusqu’à ce que la température du foyer
redescende en dessous du niveau critique (≤ 60°C)
sur la base du modèle mathématique.
Lorsque la fonction Étuvage automatique est activée, la puissance de la zone de cuisson es t à 100
% pendant une durée déterminée, selon le niveau
Arrêt automatique (durée limite de fonctionnement)
En fonction de la puissance choisie, chaque foyer
s’éteint après un temps établi si aucune opération
n’est exécutée.
Arrêt de tous les foyers
Pour obtenir l’arrêt immédiat de tous les foyers,
appuyer sur la touche Marche (1). En mode stand-by,
la lettre « H » s’affiche pour tous les foyers « brûlants
». Tous les autres afficheurs sont éteints.
Puissance
Il existe 9 niveaux de puissance pour chaque foyer :
ils sont indiqués par des repères gradués de « 1 » à
« 9 » sur les afficheurs (6) à DEL de sept segments.
Chaque intervention sur le foyer (avec les touches
PLUS (3) et MOINS (2) ou double zone) rétablit la
durée limite de fonctionnement du foyer à sa valeur
initiale.
que l’utilisateur le débloque, même si, entre temps,
il est arrêté et remis en marche. Même une réinitialisation de la commande sensitive (après une chute de
tension) ne débloque pas les touches.
Protection contre la mise en marche involontaire
Si le contrôle électronique détecte la pression continue d’une touche pendant près de 10 s, il s’arrête
automatiquement. Le contrôle émet un signal sonore
d’erreur pour avertir l’utilisateur de la présence d’un
objet sur les capteurs. Le code d’erreur « E R O 3 »
apparaît sur les afficheurs. Si le foyer est « brûlant »,
l’afficheur indique alternativement « H » et le signal
d’erreur.
· Si aucun foyer n’est activé pendant 20 secondes
après la mise en marche de la commande sensitive,
le contrôle revient en mode stand-by
· Lorsque le contrôle est actif, la touche ON/OFF est
prioritaire sur toutes les autres : le contrôle peut être
coupé à tout moment, même en cas de pression multiple ou continue sur des touches.
· En mode stand-by, l’activation continue des touches
ne produit aucun effet. Le contrôle électronique doit
s’assurer qu’aucune touche n’est active avant de
pouvoir être remis en marche.
Suppression du verrouillage des touches :
Après l’activation de la commande sensitive, la sécurité pour enfants peut être désactivée. Pour cela,
procédez de la même façon que pour le verrouillage
: appuyez sur la touche MOINS (2) puis, tout en la
maintenant enfoncée, appuyez sur la touche de sélection de zone de cuisson :
·supérieure gauche –> si la table de cuisson possède
3 zones de cuisson
·inférieure gauche –> si la table de cuisson possède
4 zones de cuisson
Si toutes les opérations sont exécutées dans l’ordre
prévu et aucune action n’a été réalisée pendant 10
secondes, le blocage des touches est annulé et le
Touch Control revient en mode Stand-by. Dans le cas
contraire, la séquence est considérée comme incomplète et la commande sensitive reste verrouillée. Elle
est coupée au bout de 60 secondes.
Si la commande sensitive est remise en marche par
le biais de la touche ON/OFF, tous les afficheurs indiquent « 0 », les points décimaux clignotent ; la commande sensitive est prête pour la cuisson. Si le foyer
est « brûlant », l’afficheur indique alternativement «
0 » et « H ».
Verrouillage des touches (sécurité enfants)
• Sécurité enfants :
Verrouillage des touches :
Pour activer le dispositif de sécurité enfants une fois
la commande Touch Control allumée, appuyez sur la
touche MOINS (2) puis, tout en la maintenant enfoncée, appuyez sur la touche de sélection de zone de
cuisson :
·supérieure gauche –> si la table de cuisson possède
3 zones de cuisson
·inférieure gauche –> si la table de cuisson possède
4 zones de cuisson
La lettre « L » pour LOCKED apparaîtra sur tous les
afficheurs (sécurité enfants contre l’allumage involontaire). Si le foyer est « brûlant », l’afficheur indique
alternativement « L » et « H ».
Cette opération s’effectue normalement dans les 10
secondes, aucune autre touche (en dehors de celles
qui viennent d’être indiquées) ne doit être activée.
Dans le cas contraire, la séquence est interrompue et
la table de cuisson est verrouillée.
Le contrôle électronique reste verrouillé jusqu’à ce
Contrôle des circuits multiples
Plaques sans circuit double ou triple, voir fig. 2A
Plaque avec zone triple (fig. 2B)
L’activation d’une zone de cuisson double/triple implique l’allumage des trois circuits à la fois. L’activation/
la désactivation de chaque circuit est réalisée avec la
touche 4 et indiquée par un segment lumineux (8).
Signal sonore (vibreur)
Pendant le fonctionnement, le vibreur signale les activités suivantes :
· Pression normale sur les touches (son bref).
· Pression continue sur les touches pendant plus de
10 secondes (son prolongé intermittent).
Fonction temporisation
La fonction temporisation existe en deux versions :
· minuteur autonome 1.99 min : signal sonore indiquant que le temps programmé est écoulé. Cette fonction est disponible uniquement pendant
l’utilisation de la table de cuisson.
· Minuteur pour foyers 1.99 min. : signal sonore indiquant que le temps de cuisson est écoulé ; les quatre
foyers peuvent être programmés indépendamment.
Minuteur autonome
· Si le contact est allumé et qu’aucune zone de cuisson n’est sélectionnée, il est possible d’utiliser la minuterie autonome en appuyant simultanément sur les
touches MOINS (2) et PLUS (3).
· Modifications de la valeur (0- 99 min) : elles peuvent
être réglées par paliers d’une minute avec n’importe
quelle touche PLUS de 0 à 99 et avec la touche
MOINS de 99 à 0.
· L’activation continue des touches PLUS ou MOINS
entraîne une incrémentation dynamique de la vitesse de variation jusqu’à une valeur maximale (pas de
signal sonore).
· Si la touche PLUS (ou MOINS) est relâchée, la vitesse d’incrémentation (diminution) repart de la valeur
initiale.
· La programmation du minuteur s’effectue par pression continue des touches PLUS et MOINS ou par
pressions
successives (signal sonore).
Le compte à rebours commence après la programmation du minuteur. L’écoulement de la durée programmée sera indiqué par un signal sonore et par le
clignotement de l’afficheur du minuteur.
Le signal sonore s’arrête
· automatiquement au bout de 2 minutes
· par pression d’une touche quelconque
L’afficheur cesse de clignoter et s’éteint.
Éteindre/régler le minuteur
· Le minuteur peut être réglé ou éteint à tout moment
en appuyant sur les touches TIMER et MOINS (signal
sonore).
Pour couper le minuteur, sélectionner “0” avec la
touche MOINS ou avec les touches TIMER et MOINS
simultanément qui placent immédiatement le minuteur sur “0”. Le minuteur reste sur “0” pendant 10
secondes avant de s’éteindre.
Programmation du minuteur pour chaque foyer
La commande sensitive permet de programmer un
minuteur indépendant pour chaque foyer.
· Sélectionner le foyer avec la touche de sélection ;
programmer la puissance ; enfin, appuyer sur la touche du minuteur pour régler la durée de fonctionne-
ment dufoyer. Autour de l’afficheur du minuteur, il y a
autant de LEDS que de foyers. Ils indiquent
les foyers pour lesquels le minuteur est activé.
· Quand le minuteur est sélectionné, l’afficheur correspondant clignote et les LEDS qui l’entourent
s’allument. Quand un foyer est sélectionné, les LEDS
du minuteur s’éteignent et l’afficheur ne clignote
plus.
· Si on modifie la sélection des foyers l’un après
l’autre, l’afficheur du minuteur indique la valeur du
minuteur associé à chaque foyer. Les minuteurs programmés pour chaque foyer restent actifs.
· Les autres caractéristiques du minuteur correspondent à celles du minuteur autonome. Pour augmenter
la valeur, utiliser la touche de sélection du minuteur.
· L’écoulement du délai programmé est indiqué par un
signal sonore et par les chiffres “00” sur l’afficheur :
la LED du foyer correspondant au minuteur clignote.
Le foyer s’éteint et “H” s’affiche si le foyer “brûle.
Le signal sonore et le clignotement de l’afficheur
s’interrompent
· automatiquement au bout de 2 minutes.
· par pression d’une touche quelconque.
L’afficheur du minuteur s’éteint.
· Les fonctions de base correspondent à celles du
minuteur autonome.
Précautions ( Fig. 3)
- Nous recommandons l’utilisation de recipients à
fond plat d’un diamètre égal ou légérement supérieur
à celui de la zone chaude;
- Eviter les débordements de liquide; réduire la
puissance une fois l’ebullition atteinte;
- Ne pas laisser fonctionner les éléments de chauffe
à vide ou avec un recipient vide.
- Si la surface de la plaque se casse, débrancher
immédiatement l’appareil du réseau électrique pour
éviter un éventuel choc électrique.
- Ne pas utiliser d’appareils à vapeur pour le nettoyage de la plaque.
- Cet appareil n’est pas destiné à être utilisé par des
personnes (y compris des enfants) dont les capacités
physiques, sensorielles ou mentales sont réduites, ou
qui ne possèdent pas d’expérience ou de
connaissance, sauf si elles ont été supervisées ou si
elles ont reçu des instructions relatives à l’utilisation
de l’appareil de la part d’une personne responsable
de leur sécurité.
- Les enfants devront être supervisés pour s’assurer
qu’ils ne jouent pas avec l’appareil.
Entretien (Fig. 4)
Enlevez aussitôt du plan de cuisson tout fragment de
papier en aluminium, tout résidu de nourriture, toute
éclaboussures de graisse, de sucre ou d’autres aliments fortement riches en saccharine à l’aide d’une
raclette à fin d’éviter d’endommager la surface du
plan. Ensuite, nettoyer avec un produit adéquat et du
papier absorbant, puis rincer à l’eau et sécher avec
un torchon propre. N’utiliser en aucun cas d’éponges
métalliques ou abrasives, éviter également d’utiliser
des détergents chimiques agressifs comme les produits de nettoyage pour fours.
Instructions pour l’installateur
Installation
Ces instructions sont faites pour le technicien spécialisé comme guide à l’installation, au réglage e à
l’entretien suivant les lois et les normes en vigueur.
Les interventions doivent toujours être effectuées
quand l’appareil est débranché.
Positionnement (Fig. 5)
1 Vue de face
2 Côté frontal
L’appareil est prévu pour être encastré dans une table de travail comme indiqué dans le dessin spécial.
Préparer la colle pour seller ci-jointe sur tout le périmètre du plan.
Si la partie inférieure est accessible une fois l’appareil
installé, il faut placer un panneau de protection (en
bois ou similaire) à la distance indiquée sur la figure.
Branchement électrique
Avant d’effectuer le branchement électrique,
s’assurer que:
- les caracteristiques de l’installation soient de nature à satisfaire toutes les indications portées sur la
plaque signalétique située sous l’appareil;
- que l’installation dispose d’un raccordement à la
terre secon les normes et les dispositions en vigueur.
La mise à terre est obligatoire aux termes de la loi.
Si l’appareil n’a pas de câble et /ou de prise correspondante, utiliser de la matière apte à l’absorption
indiquée sur la plaque signalétique et à la température de travail. Le câble ne devra jamais atteindre une
température supérieure de 50°C à celle ambiante.
Insérer dans le câblage un moyen de déconnexion
du réseau électrique apportant une séparation du
contact de tous les pôles et assurant ainsi une déconnexion complète du réseau selon les conditions
de surtension de catégorie III, conformément aux
normes de câblage.
Cet appareil n’est pas prévu pour fonctionner à l’aide
d’un temporisateur externe ou d’un système de commande à distance indépendant.
La prise ou l’interrupteur omnipolaire doivent être
facilement accessibles après la mise en place de
l’appareil.
Le Constructeur décline toute responsabilité au
cas où ces normes et les autre normes contre les
accidents ne seraient pas observées.
Si le câble d’alimentation électrique est endommagé, il doit être remplacé par le fabricant, par un
centre de service autorisé ou par un électricien
qualifié, afin de prévenir tous les dangers.
IT
QUESTO PRODOTTO È STATO CONCEPITO PER UN
IMPIEGO DI TIPO DOMESTICO. IL COSTRUTTORE
DECLINA OGNI RESPONSABILITÀ NEL CASO DI
EVENTUALI DANNI A COSE O PERSONE DERIVANTI
DA UNA NON CORRETTA INSTALLAZIONE O DA USO
IMPROPRIO, ERRONEO O ASSURDO.
Il costruttore dichiara che questo prodotto rispetta
tutti i requisiti essenziali relativi al materiale elettrico
di bassa tensione prescritti dalla direttiva 2006/95/
CEE del 12 dicembre 2006 e alla compatibilità elettromagnetica prescritti dalla direttiva 2004/108/CEE
del 15 dicembre 2004.
Istruzioni per l’utente
Installazione
Tutte le operazioni relative all’installazione (allacciamento elettrico) devono essere eseguite da personale
qualificato secondo le norme vigenti.
Per le istruzioni specifiche vedi la parte riservata
all’installatore.
Uso
ELEMENTI RISCALDANTI TOUCH CONTROL
Tasti a sfioramento
Tutte le operazioni possono essere compiute tramite
tasti a sfioramento (sensori di tipo capacitivo) posti
sulla faccia frontale della scheda; ad ogni tasto corrisponde un display. Ogni attività viene confermata
da un segnale acustico.
TOUCH CONTROL (Fig. 2)
1 Accensione/spegnimento ON / OFF
2 Meno 3 Più +
4 Circuito Doppio / Triplo
5 Zona cottura
6 Display del livello di potenza
7 Spia del doppio circuito
8 Segmento Luminoso Circuiti Multipli
Installazione
Tutte le operazioni relative all’installazione (allaccia-
mento elettrico) devono essere eseguite da personale
qualificato secondo le norme vigenti.
Per le istruzioni specifiche, vedere la parte riservata
all’installatore.
Accensione/spegnimento del Touch Control
Dopo l’accensione, il touch richiede circa 1 secondo
prima di essere pronto per il funzionamento.
Dopo il reset, tutti i display e i LED lampeggiano per
circa 1 secondo. Trascorso questo tempo, tutti i display e i LED si spengono e il touch rimane in posizione di stand-by.
Per accendere il touch, premere il tasto di accensione
(1).
I display delle zone cottura visualizzano uno “0“. Se
una zona cottura “scotta” (temperatura elevata), il
display visualizza “H“ e “0“ alternativamente.
Dopo l’accensione, il touch control rimane attivo per
20 secondi. Se non viene selezionata alcuna zona cottura, il touch control ritorna automaticamente nello
stato di stand-by.
Il touch control si accende unicamente premendo il
tasto di accensione (1).
La pressione del tasto di accensione (1) in concomitanza con altri tasti non produce alcun effetto e il
touch rimane in stand-by.
Il touch control può essere spento in qualsiasi momento tramite il tasto di accensione (1) . Ciò è valido
anche nel caso in cui il comando sia stato bloccato
con il dispositivo di sicurezza per bambini.
Il tasto di accensione (1) ha sempre la priorità nella
funzione di spegnimento.
Spegnimento automatico
Una volta acceso, il touch control si spegne automaticamente dopo 20 secondi di inattività. Dopo la
selezione di una zona cottura, il tempo di spegnimento automatico si suddivide in 10 secondi, trascorsi i
quali viene deselezionata la zona, e altri 10 secondi,
trascorsi i quali si spegne il touch control.
Accensione/spegnimento di una zona cottura
Con il touch control acceso, è possibile selezionare
la zona cottura premendo il tasto (5) della zona corrispondente.
Il display (6) della zona selezionata diventa più luminoso, mentre gli altri display perdono luminosità. Se
l’area “scotta”, vengono visualizzati alternativamente
“H” e “0”.
Premendo il tasto PIÙ o MENO (2), si può selezionare
un livello di potenza e la zona inizia a riscaldare.
Selezionata la zona cottura, la scelta del livello di potenza può essere effettuata tenendo premuto il tasto
PIÙ (3). Partendo dal livello 1, il livello viene incrementato di un’unità ogni 0,4 secondi. Raggiunto il livello
9, non è possibile effettuare ulteriori incrementi.
Se il livello di potenza viene selezionato con il tasto MENO (2), il livello iniziale è “9” (livello massimo).
Tenendo premuto il tasto, il livello attivo decresce di
una unità ogni 0,4 secondi. Raggiunto il livello 0, non
è possibile effettuare ulteriori decrementi. È possibile
cambiare il livello di potenza solo premendo nuovamente il tasto MENO (2) o PIÙ (3).
Procedura di avviamento la precottura automatica:
L’unità di controllo viene accesa e v iene selezionata
la zona di cottura.
Spegnimento di una zona cottura
Selezionare la zona da spegnere con il tasto (5) corrispondente. Il display (6) della zona selezionata diventa più luminoso, mentre gli altri display perdono
luminosità. Premendo simultaneamente il pulsante di
selezione della zona corrispondente e il tasto MENO
(2), il livello di potenza della zona si posiziona su 0. In
alternativa, il tasto MENO (2) può essere utilizzato per
decrementare il livello di potenza fino a 0.
Se una zona cottura “scotta”, appariranno alternativamente “H” e “0”.
Funzione Mantenere Caldo
Questa funzione è disponibile per tutte le zone di cottura e serve a mantenere caldo il cibo già cucinato.
Si tratta di un livello di potenza situato tra il livello 0
e il livello 1. Per attivare questa funzione, si devono
eseguire i seguenti passaggi:
1. Selezionare la zona di cottura desiderata
2. Selezionare il livello di potenza 1 con il tasto PIÙ (3)
3. Premere il tasto MENO (2). Sul display verrà visualizzato il simbolo “u”, il quale indica che la funzione
“Mantenere caldo” è attiva.
Spegnimento di tutte le zone cottura
Lo spegnimento immediato di tutte le zone può essere ottenuto in qualsiasi momento tramite il pulsante
di accensione (1). In modalità stand-by, appare sul
display una “H“ in corrispondenza di tutte le zone
cottura che “scottano”. Tutti gli altri display restano
spenti.
Indicatore di calore residuo
Serve per indicare all’utente che l’elevata temperatura del vetro può essere pericolosa nel caso di contatto con tutta l’area sovrastante la zona cottura. La
temperatura viene determinata seguendo un modello
matematico e un eventuale calore residuo viene indicato con una “H” dal corrispondente display a sette
segmenti.
Il riscaldamento e il raffreddamento sono calcolati in
relazione a:
· Livello di potenza selezionato (da “0“ a “9“)
· Periodo di attivazione.
Dopo aver spento la zona cottura, il corrispondente
display visualizza “H” fino a che la temperatura della
zona non scende al di sotto del livello critico (≤ 60°C)
secondo il modello matematico.
Livello di potenza
La potenza della zona cottura può essere impostata
su 9 livelli, indicati dai simboli da “1“ a “9“ sui display (6) a LED a sette segmenti.
Precottura automatica
Quando è attivata la funzione Precottura automatica,
l’alimentazione della zona di cottura viene accesa al
massimo per un periodo di tempo che dipende dal
livello di cottura selezionato. Il livello di cottura pres
elezionato torna in funzione non appena è trascorso il
tempo di precottura.
Dopo aver regolato la potenza di cottura sul livello 9,
occorre premere di nuovo il tasto PIÙ (3).
Si avranno quindi a disposizione 10 secondi per selezionare la potenza di cottura desiderata attraverso i
tasti MENO (2) e PIÙ (3).
Se successivamente si seleziona un livello di potenza
differente, la funzione di precottura viene mantenuta, adattando il tempo di precottura al nuovo livello
selezionato.
Funzione di spegnimento automatico (lim. del
tempo di funzionamento)
In relazione al livello di potenza, se non viene eseguita nessuna operazione, ogni zona cottura viene
spenta dopo un tempo massimo predefinito.
Ogni operazione sulla zona cottura (tramite i tasti
PIÙ (3) e MENO (2) o doppia zona) riporta il tempo
massimo di funzionamento della zona al suo valore
iniziale.
stato spento e riacceso. Nemmeno un reset del touch
(dopo una caduta di tensione) sarà in grado di rimuovere il blocco dei tasti.
Protezione in caso di accensione involontaria
Se il controllo elettronico rileva la pressione continua di un tasto per circa 10 sec, automaticamente
si spegne. Il controllo emette un segnale acustico di
errore per avvertire l’utente che i sensori hanno rilevato la presenza di un oggetto. I display visualizzano
il codice di errore “ E R 0 3 “. Se la zona di cottura
“scotta”, sul display appaiono alternativamente una
“H“ e il segnale di errore.
· Se non viene attivata nessuna zona cottura entro 20
secondi dall’accensione del Touch, il controllo ritorna
in modalità stand-by.
· Quando il controllo è acceso, il tasto ON/OFF ha
priorità su tutti gli altri tasti, cosicché il controllo può
essere spento in qualsiasi momento anche in caso di
attivazione multipla o continua di tasti.
· In modalità stand-by, una pressione continua di tasti
non ha alcun effetto. In ogni caso, prima che il controllo elettronico possa essere nuovamente acceso,
deve rilevare che non venga premuto alcun tasto.
Eliminazione del blocco dei tasti:
Dopo aver acceso il touch, il dispositivo di sicurezza
per bambini può essere disattivato. A tal fine, occorre
procedere nello stesso modo del blocco. Premere il
tasto MENO (2) e, tenendolo premuto, premere il tasto
di selezione della zona cottura:
in alto a sinistra -> se il piano cottura ha 3 zone
cottura
in basso a sinistra -> se il piano cottura ha 4 zone
cottura
Se si eseguono tutte le operazioni nell’ordine previsto, il blocco dei tasti verrà annullato e il touch control
tornerà in modalità Stand-by se, trascorsi 10 secondi,
non verrà effettuata alcuna operazione. In caso contrario, la sequenza viene considerata incompleta, il
touch resta bloccato e si spegne dopo 60 secondi.
Accendendo di nuovo il touch con il tasto ON/OFF,
tutti i display mostrano “0”, i punti decimali lampeggiano e il touch è pronto per effettuare la cottura. Se
la zona di cottura “scotta”, “0” e “H” vengono visualizzati alternativamente.
Blocco dei tasti (dispositivo di sicurezza per
bambini)
• Dispositivo di sicurezza per bambini:
Blocco dei tasti:
Per attivare il dispositivo di sicurezza per bambini,
dopo l’accensione del Touch Control, premere il tasto
MENO (2) e, tenendolo premuto, premere il tasto di
selezione della zona cottura:
in alto a sinistra–> se il piano cottura ha 3 zone cottura
in basso a sinistra -> se il piano cottura ha 4 zone
cottura
Su tutti i display appare una “L” che sta per LOCKED (dispositivo di sicurezza per bambini che evita
l’accensione accidentale). Se la zona di cottura “scotta”, “L” e “H” sono visualizzate alternativamente.
Lo svolgimento di questa operazione deve avvenire
entro 10 secondi; non deve essere premuto nessun
altro tasto al di fuori di quelli descritti sopra. In caso
contrario, la sequenza viene interrotta e il piano cottura non viene bloccato.
Il controllo elettronico rimane bloccato finché non
viene sbloccato dall’utente, anche se nel frattempo è
Controllo dei circuiti multipli
Piani cottura senza circuito doppio o triplo vedere
Fig. 2A
Piano cottura con zona tripla (Fig. 2B)
L’attivazione di una zona di cottura doppia / tripla
implica l’accensione contemporanea dei 3 circuiti.
L’attivazione / disattivazione di ciascun circuito si
effettua con il tasto 4 e viene indicata con un segmento luminoso (8).
Segnale acustico (cicalino)
Durante l’utilizzo, le seguenti attività vengono segnalate tramite un cicalino:
· Pressione normale dei tasti con un suono breve.
· Pressione continua dei tasti per più di 10 sec con un
suono lungo intermittente.
Funzione di Timer
La funzione timer è realizzata in due versioni:
· Timer autonomo 1..99 min: segnale sonoro quando
il tempo è scaduto.
Questa funzione è disponibile solo quando non si sta
utilizzando il piano cottura.
· Timer per zone cottura 1..99 min: segnale sonoro
quando il tempo è scaduto, le quattro zone cottura
possono essere programmate indipendentemente.
Timer autonomo:
· Se è acceso il touch e non è stata selezionata nessuna zona di cottura, si può utilizzare il temporizzatore autonomo premendo contemporaneamente i tasti
MENO (2) e PIÙ (3).
· Modifiche del valore (0-99min), possono essere
effettuate con incrementi di un minuto con qualsiasi
dei tasti PIU’ da 0 a 99 e
con il tasto MENO da 99 a 0.
· Un’attivazione continua del tasto PIU’ o MENO danno luogo a un incremento dinamico della velocità di
variazione fino ad un valore massimo, senza segnali
sonori.
· Se il tasto PIU’ (o MENO) viene rilasciato, la velocità
di incremento (decremento) inizia nuovamente dal
valore iniziale.
· L’impostazione del timer può essere fatta sia con
attivazioni continue dei tasti PIU’ e MENO sia con
attivazioni a tocchi successivi (con segnale sonoro).
Dopo che il timer è stato impostato inizia il conto
alla rovescia. Lo scadere del tempo verrà notificato
da un segnale sonoro e dal lampeggiare del display
del timer.
Il segnale sonoro si fermerà
· Automaticamente dopo 2 minuti
· Azionando un tasto qualsiasi
Il display smette di lampeggiare e si spegne.
Spegnere / modificare il timer
· Il timer può essere modificato o spento in qualsiasi
momento azionando i tasti MENO (2) e PIÙ (3) contemporaneamente (con segnale sonoro). Il timer si
spegne portando il tempo a “0” con il tasto MENO.
Per 10 secondi il timer rimane a “0” prima di spegnersi.
Programmazione del timer per le zone cottura
Accendendo il touch si può programmare un timer
indipendente per ogni zona cottura.
· Dopo aver selezionato la zona di cottura con il tasto
(4) di selezione della zona, aver programmato il livello della potenza e alla fine premuto i tasti MENO (2)
e PIÙ (3) contemporaneamente, sarà possibile programmare il conto alla rovescia per lo spegnimento
della zona di cottura.
· Durante la programmazione del temporizzatore, la
spia (6) della zona di cottura selezionata lampeggia.
· Lo scadere del tempo viene notificato da un segnale
acustico e da “00” sul display, il LED della zona cottura assegnata al timer lampeggia. La zona cottura
viene spenta e una “H” viene mostrata se la zona
“scotta”.
Il segnale sonoro e il lampeggiamento del display si
interromperanno
· Automaticamente dopo 2 minuti.
· Azionando uno dei tasti.
Il display del timer si spegne.
· Le funzionalità di base ricalcano la descrizione del
timer autonomo.
Precauzioni (Fig. 3)
- Nell’uso degli elementi riscaldanti si consigliano recipienti a fondo piatto con diametro uguale o leggermente superiore a quello indicato sul piano;
- evitare trabocchi di liquido; pertanto ad ebollizione
avvenuta o comunque a liquido riscaldato ridurre
l’erogazione di calore;
- non lasciare inseriti gli elementi riscaldanti a vuoto
o con pentole o tegami vuoti.
- In caso di rottura del piano di cottura, scollegare
immediatamente l’apparecchio dalla rete, onde evitare shock elettrici.
- Per la pulizia del piano di cottura non si dovrà usare
nessun pulitore a vapore.
- Questo apparecchio non dovrà essere usato da persone (incluso bambini) con capacità fisiche, sensoriali o mentali ridotte, o che non abbiano la sufficiente
esperienza o conoscenza. Potranno usarlo sotto sorveglianza o se istruite sul suo uso da una persona
responsabile della loro sicurezza.
- I bambini dovrebbero essere sorvegliati, per avere
la certezza che non giocano con l’apparecchio.
Manutenzione (Fig. 4)
Tracce di fogli di alluminio, residui di cibo spruzzi di
grasso, zucchero o cibi fortemente saccariferi devono
essere immediatamente rimossi dal piano di cottura
con un raschietto per evitare possibili danni alla superficie del piano.
Pulire con un prodotto idoneo e carta da cucina; risciacquare con acqua e asciugare usando un panno
pulito. Non adoperare assolutamente spugne o pagliette abrasive; evitare altresì l’uso di prodotti chimici aggressivi, tipo sgrassanti per forno.
Istruzioni per l’installatore
Installazione
Le presenti istruzioni sono rivolte all’installatore
qualificato quale guida all’installazione, regolazione
e manutenzione secondo le leggi e le normative in
vigore.
Gli interventi devono sempre essere effettuati ad
apparecchiatura disinserita elettricamente.
Posizionamento (Fig. 5)
1 Veduta frontale
2 Lato frontale
L’apparecchio è previsto per essere incassato in un
piano di lavoro come illustrato nell’apposita figura.
Predisporre su tutto il perimetro del piano il sigillante
a corredo.
Dopo aver installato l’apparecchiatura, se si può
accedere alla parte inferiore, si deve collocare un
pannello di protezione (in legno o simili) alla distanza
indicata nella figura.
Collegamento elettrico
Prima di effettuare l’allacciamento elettrico accertarsi che:
- le caratteristiche dell’impianto siano tali da
soddisfare quanto indicato sulla targa matricola
applicata sul fondo del piano;
- che l’impianto sia munito di un efficace
collegamento di terra secondo le norme e le
disposizioni di legge in vigore. La messa a terra
è obbligatoria a termini di legge.
Nel caso che l’apparecchiatura non sia munita di
cavo e/o di relativa spina utilizzare materiale idoneo
per l’assorbimento indicato in targa matricola e per la
temperatura di lavoro. Il cavo in nessun punto dovrà
raggiungere una temperatura superiore di 50 °C a
quella ambiente.
Installare nel cablaggio un dispositivo per la disconnessione dalla rete con una distanza di apertura dei
contatti che consenta la disconnessione completa
nelle condizioni della categoria di sovratensione III,
conformemente alle regole di installazione. La presa
o l’interruttore onnipolare devono essere facilmente
raggiungibili con l’apparecchiatura installata.
La presente apparecchiatura non è predisposta per
essere usata con un temporizzatore esterno o un sistema separato di controllo a distanza.
Il costruttore declina ogni responsabilità nel caso che
quanto sopra e le usuali norme antiinfortunistiche
non vengano rispettate.
Se il cavo di alimentazione è danneggiato, esso
deve essere sostituito dal costruttore o dal suo
servizio assistenza tecnica o comunque da una
persona con qualifica similare, in modo da prevenire ogni rischio.
PT
ESTE PRODUTO FOI CONCEBIDO PARA UMA UTILIZAÇÃO DOMÉSTICA. O FABRICANTE REJEITA
QUALQUER RESPONSABILIDADE EM CASO DE
EVENTUAIS DANOS A COISAS OU PESSOAS RESULTANTES DE UMA INSTALAÇÃO INCORRECTA OU DE
UTILIZAÇÃO INDEVIDA, ERRÓNEA OU INSENSATA.
O fabricante declara que este produto cumpre todos os requisitos essenciais respeitantes a material
eléctrico de baixa tensão estabelecidos na directiva
2006/95/CEE de 12 de Dezembro de 2006 e de compatibilidade electromagnética determinada pela directiva 2004/108/CEE de 15 de Dezembro de 2004.
Instruções para o utilizador
Instalação
Todas as operações relativas à instalação (conexão
eléctrica) terão de ser efectuadas por pessoal qualificado, segundo as normas em vigor.
Para instruções específicas, vejase a parte reservada
para o técnico instalador.
Utilização
ELEMENTOS AQUECEDORESTOUCH CONTROL
Teclas de pressão leve
Todas as operações podem ser realizadas através
das teclas de pressão leve (sensores de tipo capacitivo) situadas na face frontal da placa; a cada tecla
corresponde um display. Cada actividade é confirmada por um sinal acústico.
TOUCH CONTROL (Fig. 2)
1 Activar/desactivar ON / OFF
2 Menos 3 Mais +
4 Circuito Duplo/Triplo
5 Zona de confecção
6 Visor do nível de potência
8 Segmento Luminoso Circuitos Múltiplos
Instalação
Todas as operações relativas à instalação (ligação
eléctrica) terão de ser efectuadas por pessoal qualificado, segundo as normas em vigor.
Para instruções específicas, consultar a informação
reservada ao técnico instalador.
Activar/desactivar o Touch Control
Após a ligação à corrente eléctrica, o touch necessita
de cerca de um segundo para ficar pronto a funcionar.
Após reiniciar o funcionamento, todos os visores e
LEDs piscam durante cerca de 1 segundo. Decorrido
este tempo, todos os visores e LEDs se apagam e o
touch fica em posição de stand-by.
Para activar o touch pressionar a tecla activar (1).
Os visores das zonas de confecção mostram “0“. Se
uma zona de confecção “aquece”, o visor mostra “H”
e “0” alternadamente.
Após a activação, o touch control permanece activo
durante 20 segundos. Caso não seja seleccionada
nenhuma zona de confecção, o touch control volta
automaticamente ao estado de standby.
Para activar o touch control pressionar unicamente a
tecla activar (1).
Caso a tecla activar (1) seja pressionada simultaneamente com outras teclas a função não é efectuada e
o touch permanece em stand-by.
O touch control pode ser desactivado a qualquer momento pressionando a tecla activar (1). Esta característica também é válida caso os controlos tenham
sido bloqueados com o dispositivo de protecção para
crianças.
A tecla activar (1) tem sempre prioridade na função
de desligar.
Desactivação automática
Depois de activado, o touch control desliga-se automaticamente após 20 segundos de inactividade. Após a selecção de uma zona de confecção, o
tempo de desactivação automática subdivide-se em
10 segundos, após os quais a zona deixa de estar
seleccionada e 10 segundos depois o touch control
desliga-se.
Activação/desactivação de uma zona de confecção
Com o touch control activado, será possível seleccionar a zona de confecção pressionando a tecla (5) da
zona correspondente.
O visor (6) da zona seleccionada torna-se mais brilhante, enquanto os restantes visores perdem luminosidade. Se a zona “aquece”, será mostrado alternadamente um “H” e um “0”.
Ao pressionar a tecla MAIS (3) ou MENOS (2), é possível seleccionar um nível de potência e a zona começa
a aquecer.
Seleccionada a zona de confecção, a selecção do
nível de potência pode ser efectuada mantendo pressionada a tecla MAIS (3); partindo do nível 1, aumenta
uma unidade a cada 0,4 segundos. Quando é atingido
o nível 9 não é possível efectuar mais aumentos.
Se o nível de potência for seleccionado através da
tecla MENOS (2), o nível inicial é o “9” (nível máximo).
Mantendo a tecla pressionada, o nível activo diminui
uma unidade a cada 0,4 segundos. Quando o nível 0
é atingido, não é possível efectuar mais diminuições.
Só será possível modificar o nível de potência ao
pressionar novamente a tecla MENOS (2) ou MAIS
(3) .
Desactivação de uma zona de confecção
Seleccione a zona a desligar com a tecla (5) correspondente. O visor (6) da zona seleccionada torna-se
mais brilhante, enquanto os restantes visores perdem luminosidade. Pressionando a tecla de seleção
da zona correspondente e a tecla MENOS (2) simultaneamente, o nível de potência da zona coloca-se
em 0. Alternativamente a tecla MENOS (2) pode ser
utilizada para reduzir o nível de potência até 0.
Se uma zona de confecção “aquece”, é mostrado um
“H” e um “0” alternadamente.
Desactivação de todas as zonas de confecção
A desactivação imediata de todas as zonas pode ser
obtida a qualquer momento através da tecla de activar (1). No modo stand-by, aparece um “H” no visor
de todas as zonas de confecção que “aquecem”. Todos os outros visores estarão apagados.
Nível de potência
A potência da zona de confecção pode ser programada em 9 níveis que são indicados pelos símbolos de
“1” a “9” através dos visores (6) com LEDs de sete
segmentos.
Fervura parcial automática
Quando Fervura parcial automática é activada, a
potência da zona de cocção é alterada para 100%
durante um período de tempo dependendo da fase de
ebulição seleccionada. Assim que o tempo de fervura
parcial tiver terminado, a fase de ebulição préseleccionada é válida novamente.
Procedimento para iniciar a Fervura parcial automática:
A unidade de controlo é ligada e uma zona de cocção
é seleccionada.
Após ajustar a potência de cozimento para o nível 9,
deve pressionar-se novamente a tecla MAIS (3).
Em seguida, tem-se 10 segundos para selecionar a
potência de cozimento desejada com as teclas MENOS (2) e MAIS (3).
Se posteriormente se selecionar um nível de potência diferente, a função de pré-cozinhado mantém-se,
adaptando o tempo de pré-cozimento ao novo nível
selecionado.
Função Manter Quente
Esta função está disponível para todas as zonas de
cozimento e serve para manter quente a comida já
cozinhada. Trata-se de um nível de potência situado
entre o nível 0 e o nível 1. Para ativar esta função,
devem seguir-se estes passos:
1. Selecionar a zona de cozimento desejada
2. Selecionar o nível de potência 1 com a tecla MAIS
(3)
3. Pressionar a tecla MENOS (2). No visor aparecerá o
símbolo “u” indicando que a função “Manter Quente”
está ativa.
Indicador de calor residual
Serve para indicar ao utilizador que o vidro está a
uma temperatura perigosa em caso de contacto com
a área próxima da zona de confecção. A temperatura
é determinada segundo um modelo matemático e
caso exista um eventual calor residual é mostrado
um “H” no visor de sete segmentos correspondente.
O aquecimento e o arrefecimento são calculados
com base em:
· Nível de potência seleccionado (de “0“ a “9“)
· O período de activação.
Depois de desligada a zona de confecção, o visor correspondente mostra “H” até que a temperatura da
zona desça abaixo do nível crítico (≤ 60°C) segundo
o modelo matemático.
Função de desactivação automática (lim. do tempo de funcionamento)
Em relação ao nível de potência, caso não seja efectuada qualquer operação, cada zona de confecção é
desligada após um tempo máximo predefinido.
Cada operação na zona de confecção (através das
teclas MAIS (3) e MENOS (2) ou zona dupla reinicia
o tempo máximo de operação da zona voltando ao
seu valor inicial.
Protecção em caso de activação involuntária
· Caso o controlo electrónico detecte a pressão contínua de uma tecla durante cerca de 10 segundos, irá
desligar-se automaticamente. O controlo emite um
sinal acústico de erro de forma a alertar o utilizador que os sensores detectaram a presença de um
objecto. Os visores mostram o código de erro “ E R
0 3 “. Se a zona de confecção “aquece”, no visor é
mostrado alternadamente um “H” e o sinal de erro.
· Se nenhuma zona de confecção for activada no espaço de 20 segundos desde a activação do Touch, o
controlo regressa ao modo standby.
· Quando o controlo está ligado, a tecla ON/OFF tem
prioridade sobre todas as outras teclas, de modo a
que o controlo possa ser desligado a qualquer momento mesmo em caso de pressão múltipla ou contínua das teclas.
· No modo stand-by, a pressão contínua das teclas
não terá qualquer efeito. De qualquer forma, antes
que o controlo electrónico possa ser novamente activado, o sistema não poderá detectar que alguma
tecla esteja a ser pressionada.
Bloqueio das teclas (protecção para crianças)
• Dispositivo de protecção para crianças:
Bloqueio das teclas:
Para activar o dispositivo de protecção para crianças
depois de ter activado o Touch Control, deve premirse a tecla MENOS (2) e, mantendo-a premida, premir
em seguida a tecla de selecção da zona de confecção:
·superior esquerda –> se a placa tiver 3 zonas de
confecção
·inferior esquerda –> se a placa tiver 4 zonas de
confecção
Em todos os visores será mostrado um “L”, que significa LOCKED (protecção para crianças contra activação involuntária). Se a zona de confecção “aque-
ce”, são mostradas alternadamente as indicações
“L” e “H”.
Esta operação deve ser realizada no espaço de 10
segundos; não deve ser pressionada nenhuma outra
tecla para além das referidas anteriormente. Caso
contrário, a sequência será interrompida e a zona de
confecção não será bloqueada.
O controlo electrónico permanece bloqueado até ser
desbloqueado pelo utilizador, mesmo que entretanto
tenha sido desactivado e reactivado. Nem mesmo o
reinício do touch (após uma quebra de tensão) irá
cancelar o bloqueio das teclas.
Eliminação do bloqueio das teclas:
Depois de ligar o touch, a protecção para crianças
pode ser desactivada. Para isso, é necessário proceder da mesma forma que para o bloqueio: deve
premir-se a tecla MENOS (2) e, mantendo-a premida,
premir em seguida a tecla de selecção da zona de
confecção:
·superior esquerda –> se a placa tiver 3 zonas de
confecção
·inferior esquerda –> se a placa tiver 4 zonas de
confecção
Se se realizarem todas as operações pela ordem prevista, o bloqueio das teclas será anulado e o “Touch
control” voltará ao modo “Stand-by” se passados 10
segundos não se tiver efetuado nenhuma operação.
Caso contrário, a sequência será considerada incompleta, o touch permanecerá bloqueado e será desactivado após 60 segundos.
Activando de novo o touch com a tecla ON/OFF, em
todos os visores será mostrado “0”, os pontos decimais começarão a piscar e o touch ficará pronto a
efectuar a confecção. Caso uma zona de confecção
“aqueça”, são mostradas as indicações “L” e “H” alternadamente.
Controlo dos circuitos múltiplos
Placas sem circuito monofásico ou trifásico ver Fig. 2A
Placa com zona tripla (Fig. 2B)
A activação de uma zona de cozedura dupla/tripla
implica que se acendam os 3 circuitos ao mesmo
tempo. A activação/desactivação de cada circuito
realiza-se com a tecla 4 e é indicada através de um
segmento luminoso (8).
Sinal acústico (besouro)
Durante a utilização, as seguintes operações são as-
sinaladas através do besouro:
· Pressão normal das teclas com um som breve.
· Pressão contínua das teclas durante mais de 10
seg. com um som longo intermitente.
Função Temporizador
A função Temporizador está disponível em duas versões:
· Temporizador autónomo 1..99 min: sinal sonoro
quando o tempo tiver decorrido. Esta função só está
disponível quando não se estiver a utilizar a zona de
cozedura.
· Temporizador para zonas de cozedura 1..99 min: sinal sonoro quando o tempo tiver decorrido; as quatro
zonas de cozedura podem ser programadas independentemente.
Temporizador autónomo:
· Se o touch estiver desligado e nenhuma zona de cozedura selecionada, o temporizador autónomo pode
ser utilizado premindo simultaneamente as teclas
MENOS (2) e MAIS (3).
· Alterações do valor (0-99min) podem ser efectuadas com aumentos de um minuto, através de qualquer uma das teclas MAIS de 0 a 99 e com a tecla
MENOS de 99 a 0.
· Uma activação contínua da tecla MAIS ou MENOS
dá origem a um aumento dinâmico da velocidade de
variação até um valor máximo, sem sinais sonoros.
· Soltando a tecla MAIS (ou MENOS), a velocidade de
aumento (diminuição) começa novamente a partir do
valor inicial.
· A programação do temporizador pode ser efectuada quer com activações contínuas das teclas MAIS e
MENOS quer com activações por toques sucessivos
(com sinal sonoro). Depois de programado o temporizador, tem início a contagem decrescente. Quando
o tempo tiver decorrido, ouve-se um sinal sonoro e o
visor do temporizador começa a piscar.
O sinal sonoro pára
· Automaticamente após 2 minutos
· Accionando qualquer tecla
O visor pára de piscar e apaga-se.
Desactivar / modificar o temporizador
· O temporizador pode ser modificado ou desactivado
a qualquer momento accionando as teclas MENOS
(2) e MAIS
(3) simultáneamente (com sinal sonoro). O temporizador é desactivado colocando o tempo a “0” com a
tecla MENOS permanece a “0” durante 10 segundos
antes de se desligar.
Programação do temporizador para as zonas de cozedura
Ligando o touch, é possível programar um temporizador independente para cada zona de cozedura.
· Seleccionando a zona de cozedura com a tecla (4)
de selecção da zona, definindo posteriormente o nível
de potencia e, por fim, premindo simultaneamente as
teclas MENOS (2) e MAIS (3), é possível programar
uma contagem decrescente para desligar a zona de
cozedura.
· Durante a programação do temporizador, a luz piloto
(6) da zona de cozedura selecionada piscará.
· Quando o tempo tiver decorrido, ouve-se um sinal
sonoro e no visor aparece “00”, o LED da zona de
cozedura atribuída ao temporizador começa a piscar.
A zona de cozedura é desactivada e aparece um “H”
se a zona “aquecer”.
O sinal sonoro e o visor intermitente serão interrompidos
· Automaticamente após 2 minutos.
· Accionando uma das teclas.
O visor do temporizador apaga-se.
· As funcionalidades de base
Precauções (Fig. 3)
- Quando se usam os elementos aquecedores aconselhamos recipientes com fundo redondo e chato, de
diâmetro igual ou ligeiramente superior ao indicado
na superfície de aquecimento.
- Evite derramar líquidos sobre a superfície de aquecimento e portanto quando se atinge a fervura diminua o calor da superfície de aquecimento.
- Não deixe os elementos aquecedores ligados sem
nenhum recipiente em cima ou com recipiente vazios.
- Em caso de rotura na superfície da placa, desligue
imediatamente o aparelho da tomada para evitar o
risco de choque eléctrico.
- Para a limpeza da placa, não utilize nunca dispositivos de limpeza a vapor.
- Este aparelho não está destinado a ser utilizado
por pessoas (incluindo crianças) cujas capacidades
físicas, sensoriais ou mentais estejam reduzidas ou
que careçam de experiência ou de conhecimentos,
salvo no caso de terem recebido supervisionamento
ou instruções relativas à utilização do aparelho por
uma pessoa responsável pela sua segurança.
- As crianças devem ser supervisionadas para assegurar que não brinquem com o aparelho.
Manutenção (Fig. 4)
Quaisquer restos de folha de alumínio, de objectos
de plástica, de açúcar ou de comida muito açucarada
terão de ser removidos imediatamente da zona quente onde se cozinhou, por meio de uma raspadeira,
afim de evitar possíveis danos à superfície da chapa
de cozimento. De nenhuma maneira se deverà utilizar uma esponja ou esfregão abrasivo. Evitar igualmente a utilização de detersivos químicos agressivos
como Fornospray ou produtos para tirar nódoas.
Instruções para o instalador
Instalação
Estas instruções são dedicadas particularmente para
o instalador qualificado, para serem utilizadas como
guia à instalação, regulação e manutenção, segundo
as leis e normas em vigor. As intervenções terão de
ser sempre efectuadas quando o aparelho estiver
desligado da corrente eléctrica.
Posicionamento (Fig. 5)
1 Vista frontal
2 Lado frontal
O aparelho foi projectado par ser montado num plano
de trabalho como está ilustrado na figura correspondente.
Vedar todo o perímetro da superfície de trabalho, com
o vedador fornecido com o aparelho.
Se uma vez instalado o aparelho, a parte inferior ficar
acessível, deve colocar-se um painel de protecção
(de madeira ou similar) à distância indicada na figura.
Conexão eléctrica
Antes de efectuar a conexão eléctrica, será preciso
assegurar que:
- as características da instalação sigam o que está
indicado sobre a chapa da matriz aplicada no fundo
da chapa de cozimento.
- a instalação esteja munida de uma conexão à terra eficaz, segundo as normas e disposições das leis
em vigor. A conexão à terra é obrigatória nos termos
da lei. No caso que o aparelho não esteja munido de
cabo e/ou da relativa tomada, utilize o material apropriado para absorver o que está indicado na chapa da
matriz, para uma devida temperatura de cozimento.
O tubo não deverá nunca atingir a temperatura de
50°C acima da temperatura ambiente.
Introduzir na cablagem fixa uma forma de desligar
da fonte de alimentação com uma separação de
contacto em todos os pólos que permitem desligar
totalmente conforme as condições de categoria III de
sobretensão, de acordo com as regras de ligação. A
tomada ou o interruptor onipolar deverão ser posicionados para uma fácil manipulação do aparelho
instalado.
Este aparelho não está preparado para poder funcionar por meio de um temporizador externo ou sistema
de controlo remoto separado.
O construtor declina qualquer responsabilidade no
caso que não tenham sido respeitadas todas as disposições aqui em cima, assim como as normas para
a prevenção de acidentes.
Se o cabo de alimentação estiver danificado, deve
ser substituído pelo fabricante ou pelo serviço de
assistência técnica ou, em todo o caso, por uma
pessoa qualificada, de modo a prevenir qualquer
perigo.
DE
DIESES PRODUKT IST ALS HAUSHALTSGERÄT GEDACHT. FÜR PERSONEN- ODER SACHSCHÄDEN,
DIE AUF FALSCHE INSTALLATION BZW. UNGEEIGNETEN GEBRAUCH ODER MISSBRAUCH ZURÜCKZUFÜHREN SIND, ÜBERNIMMT DER HERSTELLER
KEINERLEI VERANTWORTUNG.
Der Hersteller erklärt, dass dieses Produkt alle notwendigen Anforderungen der Richtlinie 2006/95/EWG
vom 12. Dezember 2006 für elektrische Niederspannungsbetriebsmittel und der Richtlinie 2004/108/
EWG vom 15. Dezember 2004 über elektromagnetische Verträglichkeit erfüllt.
Anweisungen für den Benutzer
Installation
Alle Operationen hinsichtlich der Installation (elektrischer Anschluß) müssen vom zugelassenen Fachpersonal gemäß den geltenden Bestimmungen
ausgeführt werden.
Für die spezifischen Anweisungen siehe die dem Installateur vorbehaltene Seite.
Anwendung
HEIZELEMENTETOUCH CONTROL
Berührungstasten
Alle Funktionen können über Berührungstasten (kapazitive Sensoren) auf der Frontpartie der Bedienungsblende eingeschaltet werden; jeder Taste entspricht eine Anzeige. Jede Betätigung wird von einem
Signalton quittiert. Ein- und Ausschalten
TOUCH CONTROL (Abb. 2)
1 Ein/Aus-Taste ON/OFF
2 Minus 3 Plus +
4 Zwei-/Dreikreis-Kochzone
5 Kochzone
6 Leistungsanzeige
7 Anzeige für Doppelkreis-Kochzone
8 Leuchtsegment für Mehrkreis-Kochzonen
Installation
Alle Installationsarbeiten (Elektroanschluss) müssen
von zugelassenem Fachpersonal gemäß den geltenden Bestimmungen ausgeführt werden.
Für spezifische Anweisungen siehe die dem Installateur vorbehaltene Seite.
EIN/AUS-Schalten der Touch Control
Nach Anschluss an die Netzspannung dauert die
Initialisierung der Touch-Control-Steuerung ca. 1 Sekunde, bevor sie betriebsbereit ist.
Nach einem Reset blinken alle Anzeigen und LEDs
ca. eine Sekunde lang. Nach dieser Zeit werden alle
Anzeigen und LEDs ausgeschaltet und die Steuerung
schaltet auf Stand-by.
Die Steuerung kann nun durch Betätigen der EIN/
AUS-Taste in den Ein-Zustand geschaltet werden.
Auf den Kochzonenanzeigen erscheint dann „0“. Sollte eine der Kochzonen heiß sein (hohe Temperatur),
blinken auf der Anzeige abwechselnd „H“ und „0“.
Die Steuerung bleibt nach dem Einschalten 20 Sekunden lang aktiv. Sollt in dieser Zeit keine Kochzone
ausgewählt werden, schaltet die Steuerung automatisch auf Stand-by zurück.
Die Touch-Control-Steuerung kann nur durch Betätigen der EIN/AUS-Taste (1) in den Ein-Zustand geschaltet werden.
Sollte eine beliebige andere Taste zusammen mit
der EIN/AUS-Taste (1) betätigt werden, bleibt die
Steuerung auf Stand-by.
Durch Betätigung der EIN/AUS-Taste (1) kann die
Steuerung jederzeit wieder ausgeschaltet werden.
Dies gilt selbst dann, wenn die Steuerung durch Aktivierung der Kindersicherung gesperrt ist.
Die EIN/AUS-Taste (1) hat hinsichtlich der AusschaltFunktion immer Vorrang.
Automatische Abschaltung
Im Ein-Zustand schaltet sich die Touch-ControlSteuerung nach 20 Sekunden selbsttätig aus, wenn
in dieser Zeit keine Kochzone aktiviert oder keine
Auswahltaste betätigt wird. Nach der Auswahl einer
Kochzone setzt sich diese automatische Abschaltzeit
aus 10 Sekunden, nach denen sich die Kochzone
ausschaltet, und weiteren 10 Sekunden, nach denen
sich die Steuerung ausschaltet, zusammen.
Einschalten/Ausschalten einer Kochzone
Wenn die Touch-Control-Steuerung eingeschaltet ist,
wird eine Kochzone durch Drücken der entsprechenden Taste (5) ausgewählt.
Die Anzeige (6) der entsprechenden Kochzone wird
dann heller, während die anderen Anzeigen dunkler
werden. Sollte eine der Kochzonen heiß sein, werden
abwechselnd „H“ und „0“ angezeigt.
Durch Betätigen der PLUS- (3) oder MINUS-Taste (2)
wird eine Leistungsstufe eingestellt und die Kochzone beginnt sich zu erwärmen.
Nach der Auswahl einer Kochzone kann die Leistungsstufe durch Gedrückthalten der PLUS-Taste (3),
beginnend mit Stufe 1, eingestellt werden, wobei sich
die Leistung alle 0,4 Sekunden um eine Stufe erhöht.
Nach Erreichen der Leistungsstufe 9 ist keine weitere
Erhöhung mehr möglich.
Wird die Auswahl der Leistungsstufe mit der MINUS-Taste (2) vorgenommen, ist die erste Stufe „9“
(maximale Leistung). Wird die Taste gedrückt gehalten, verringert sich die Leistung alle 0,4 Sekunden
um eine Stufe. Bei Erreichen der Leistungsstufe 0
ist keine weitere Verringerung der Leistung mehr
möglich. Um eine neue Leistungsstufe einzustellen,
muss dann wieder die Taste MINUS (2) bzw. PLUS (3)
betätigt werden.
Ausschalten einer Kochzone
Zum Ausschalten einer einzelnen Kochzone muss die
entsprechende Taste (5) betätigt werden. Die Anzeige (6) der entsprechenden Kochzone wird dann heller, während die anderen Anzeigen dunkler werden.
Durch gleichzeitiges Drücken der Auswahltaste des
entsprechenden Bereichs und der MINUS-Taste (2)
stellt sich die Leistung des Bereichs auf 0. Alternativ
dazu kann auch die MINUS-Taste (2) ununterbrochen
gedrückt werden, bis die Leistungsstufe erreicht 0 ist.
Sollte eine der Kochzonen heiß sein, werden abwechselnd „H“ und „0“ angezeigt.
Ausschalten aller Kochzonen
Das sofortige Ausschalten aller Kochzonen ist jederzeit durch Betätigung der EIN/AUS-Taste (1) möglich.
Im Stand-by-Zustand erscheint ein „H“ in der Anzeige aller Kochzonen, die noch heiß sind. Die anderen
Kochzonenanzeigen sind dunkel.
Leistungsstufen
Jede Kochzone hat 9 Leistungsstufen, die jeweils mit
den Zahlen „1“ bis „9“ in der jeweiligen aus sieben
Segmenten bestehenden LED-Anzeige (6) angezeigt
werden.
Automatisches Hoch kochen
Wird das Automatische Hochkochen aktiviert, wird
die Leistung
der entsprechenden Kochzone für einen bestimmten
Zeitraum auf
100% gestellt, der von der ausgewählten Kochstufe
abhängt. Nach
Abschluss der Hochkochzeit wird automatisch wieder die
vorgewählte Kochstufe wirksam.
Starten des Automatis chen Hochkochens:
Schalten Sie das Gerät ein und wählen eine Kochzone.
Nach dem Einstellen der Kochstufe 9 drücken Sie erneut die PLUS-Taste (3).
Danach haben Sie 10 Sekunden Zeit, um mithilfe der
MINUS- (2) und PLUS- (3) Tasten die gewünschte Kochstufe einzustellen.
Wenn später eine andere Stufe eingestellt wird, bleibt die Vorkochfunktion erhalten und die Vorkochzeit
wird an die neu eingestellte Stufe angepasst.
Warmhaltefunktion
Diese Funktion ist für alle Kochbereiche möglich und
dient zum Warmhalten bereits gekochter Speisen.
Die Leistungsstufe liegt zwischen 0 und 1. Gehen Sie
zum Aktivieren dieser Funktion wie folgt vor:
1. Den gewünschten Kochbereich auswählen.
2. Mit der PLUS-Taste (3) die Leistungsstufe 1 einstellen.
3. Die MINUS-Taste (2) drücken. Auf dem Display
erscheint nun das Zeichen „u“, das anzeigt, dass die
Warmhaltefunktion eingeschaltet ist.
Restwärmeanzeige
Der Benutzer wird auf eine eventuell gefährliche
Berührtemperatur der Glaskeramikoberfläche einer
Kochzone hingewiesen. Die Temperatur wird über ein
mathematisches Modell berechnet, und verbliebene
Restwärme wird mittels eines „H“ auf dem entsprechenden 7-Segment-Display angezeigt.
Das Aufheizen und Abkühlen wird in Abhängigkeit der
gewählten Leistungsstufe (von „0“ bis „9“) und der
Betriebszeit berechnet.
Nach dem Abschalten einer Kochzone zeigt die entsprechende Anzeige ein „H“, bis die Temperatur rechnerisch unter ein bestimmtes Niveau abgesunken
ist (≤ 60ºC).
Abschaltautomatik (Betriebsdauerbegrenzung)
Abhängig von der ausgewählten Leistungsstufe wird
jede Kochzone individuell nach einer bestimmten
maximalen Betriebsdauer abgeschaltet, falls innerhalb dieser Zeit keine Benutzung erfolgt ist.
Jede Veränderung der jeweiligen Kochzone (über die
Tasten PLUS (3) und MINUS (2) bzw. DoppelkreisKochzone) führt zur Rückstellung der maximalen Betriebszeit auf ihren Ausgangswert.
Schutz gegen unbeabsichtigtes Einschalten
Bei Erkennung der Dauerbetätigung einer Taste während etwa 10 Sekunden schaltet sich die
Steuerung automatisch ab. Es ertönt dann als Fehlermeldung ein akustisches Signal, um dem Benutzer
anzuzeigen, dass die Sensoren die Gegenwart eines
Gegenstands erkannt haben. Auf den Anzeigen erscheint der Fehlercode „E R 0 3“. Wenn eine der Kochzonen noch heiß ist, wird abwechslend ein „H“ und
die Fehlermeldung angezeigt.
· Wird innerhalb von 20 Sekunden nach dem Einschalten keine Kochzone aktiviert, so schaltet die
Steuerung zurück auf Stand-by.
· Die Ein/Aus-Taste hat im eingeschaltetem Zustand
Vorrang vor allen anderen Tasten, so dass auch bei
Mehrfach- oder Dauerbetätigung von Tasten die
Steuerung jederzeit ausgeschaltet werden kann.
· In Stand-by hat eine Dauerbetätigung der Tasten
keine Auswirkung. Allerdings müssen alle Tasten
wieder als unbetätigt erkannt werden, bevor sich die
Steuerung erneut einschalten lässt.
Tastenverriegelung (Kindersicherung)
nfalls wird die Eingabe als nicht vollständig abgebrochen und die Kochstelle wird nicht verriegelt.
Die Elektronik bleibt bis zur Entriegelung durch den
Benutzer im verriegelten Zustand, auch wenn die
Steuerung zwischenzeitlich aus- und wieder eingeschaltet wird. Auch ein Reset der Steuerung (nach
einem Spannungsabfall) unterbricht die Verriegelung
nicht.
Entriegelung:
Nach dem Einschalten der Steuerung kann die Kindersicherung deaktiviert werden. Der Vorgang erfolgt wie beim Sperren: Drücken und halten Sie die
MINUS-Taste (2), während Sie zusätzlich die Kochzonenwahltaste betätigen:
oben links –> wenn das Kochfeld drei Kochzonen hat
unten links –> wenn das Kochfeld vier Kochzonen hat
Bei Ausführung des Vorgang in dieser Reihenfolge
wird die Tastensperre aufgehoben und die Touch
Control Funktion geht wieder in den Ruhemodus
(Stand-by), wenn 10 Sekunden lang keine Taste betätigt wird. Ansonsten ist die Eingabe unvollständig
und die Steuerung bleibt im verriegelten Zustand und
schaltet nach 60 Sekunden ab.
Nach erneutem Einschalten der Steuerung mit der
EIN/AUS-Taste erscheint auf allen Anzeigen eine 0,
die Dezimalpunkte der Anzeigen blinken und die
Steuerung ist für den Kochvorgang einsatzbereit. Sollte eine Kochzone noch heiß sein, werden „0“ und
„H“ abwechselnd angezeigt.
Bedienung der Mehrkreis-Kochzonen
Kochfelder ohne Zwei- oder Dreikreis-Kochzone. Siehe Abb. 2A
• Kindersicherung:
Tastenverriegelung:
Zur Aktivierung der Kindersicherung muss nach dem
Einschalten der Touch-Control-Steuerung die MINUSTaste (2) gedrückt und gehalten werden, während
zusätzlich die Kochzonenwahltaste betätigt wird:
oben links –> wenn das Kochfeld drei Kochzonen hat
unten links –> wenn das Kochfeld vier Kochzonen hat
Auf allen Anzeigen erscheint dann ein „L“ für LOCKED (Kindersicherung gegen unbeabsichtigtes Einschalten). Sollte eine Kochzone noch heiß sein, werden „L“ und „H“ abwechselnd angezeigt.
Dieser Bedienungsablauf muss innerhalb von 10 Sekunden stattfinden und es darf keine andere Taste
als die oben beschriebenen gedrückt werden. Ander-
Kochfeld mit Dreikreis-Kochzone (Abb. 2B)
Durch Aktivierung einer Zweikreis-/Dreikreis-Kochzone werden alle 3 Kreise gleichzeitig eingeschaltet.
Durch Drücken der Taste 4 kann jeder Kreis ein- oder
ausgeschaltet werden. Die Anzeige erfolgt über ein
Leuchtsegment (8).
Akustisches Signal (Summer)
Während des Betriebs werden folgende akustische
Summer-Signale ausgegeben:
· Kurzer Summer-Ton bei Normalbetätigung der Tasten
· Längerer, unterbrochener Summer-Ton bei Dauerbetätigung der Tasten während mehr als 10 Sekunden
Timer-Funktion (optional)
Die Timer-Funktion ist in zwei Ausführungen realisiert:
· Stand Alone-Timer 1..99 min:
akustisches Signal bei Zeitablauf (=„Eieruhr“). Diese Funktion stehtnur im ausgeschalteten Betrieb zur
Verfügung, also solange auf dem Kochfeld nicht gekocht wird.
· Kochstellen-Timer 1..99 min: akustisches Signal bei
Zeitablauf, vier abzuschaltende Kochstelle sind frei
programmierbar.
Timer als Eieruhr (Stand-Alone):
∙ Wenn das Touchpanel eingeschaltet ist und keine
Kochzone ausgewählt wurde, kann die automatische
Zeitschaltuhr durch gleichzeitiges Drücken der Tasten MINUS (2) und PLUS (3) verwendet werden.
· Einstellbereich (0-99min), Einstellmöglichkeit in 1er
Schritten über eine beliebige Taste beginnend mit 1
aufwärts bis 99 (Endanschlag) oder Minus-Taste beginnend mit 99 abwärts bis 0 (Endanschlag)
· Bei kontinuierlicher Betätigung der Plus- oder
Minus-Taste erfolgt eine dynamische Erhöhung der
Verstellgeschwindigkeit bis zu einem Maximalwert
ohne Signalton.
· Nach einem zwischenzeitlichen Loslassen der Plusoder MinusTaste beginnt die Verstellgeschwindigkeit wieder von
einem (niedrigen) Anfangswert.
· Einstellung erfolgt durch dauernd gedrückt halten
der Plus- oder Minus-Taste oder im Tipp-Betrieb (mit
Signalton) Nach der Timer- Einstellung beginnt läuft
die Zeit ab der zuletzt vorgenommenen
Einstellung an zurückzuz.hlen. Nach dem Ablauf der
Zeit erfolgt ein akustisches Signal und die Timeranzeige blinkt.
Das akustische Signal wird
· automatisch nach 2 Minuten und/ Oder
· durch Betätigung einer beliebigen Taste beendet.
Danach wird das Blinken der Timeranzeige beendet
und die Anzeige erlischt.
Ausschalten/Verändern des Timers
· Der Timer kann jederzeit durch Betätigen Gleichzeitig MINUS (2) und PLUS (3) Taste (mit Signalton)
verändert oder
abgeschaltet werden. Abgeschaltet wird der Timer,
indem man ihn über die Minus-Taste auf “0“ herabzählt. Die Timeranzeige bleibt für 10s auf Null stehen, bevor dieser abgeschaltet wird.
Timerprogrammierung auf Kochstellen
Wird die Steuerung eingeschaltet, kann für jede Kochstelle ein unabhängiger Timer programmiert werden.
· Durch Auswählen der Kochzone mit der Auswahltaste (4) und anschließendes Einstellen der Leistungsstufe sowie gleichzeitiges Drücken der Tasten
MINUS (2) und PLUS (3) kann ein Countdown zum
Ausschalten der jeweiligen Kochzone eingestellt
werden.
· Während des Einstellens der Zeitschaltuhr blinkt die
Kontrollleuchte (6) der ausgewählten Kochzone.
· Nach Ablauf des Timers erfolgt ein akustisches
Signal die Timeranzeige zeigt statisch “00.“ , die zugehörige Timer-Kochstellen-LED blinkt. Die programmierte Kochstelle wird abgeschaltet und es wird ein
“H“, wenn sie heiß ist.
Das akustische Signal und das blinken der TimerKochstellen LED wird
· automatisch nach 2 Minuten und/oder
· durch Betätigung einer beliebigen Taste beendet.
Die Timeranzeige erlischt.
· Das Grundverhalten des Timers entspricht dem unter “Eieruhr ( S t a n d - A l o n e – T i m e r ) “ beschriebenen Verhalten.
Vorsichtsmaßnahmen: (Abb. 3)
- Für den Gebrauch der Heizelemente empfehlen sich
Töpfe mit geradem Boden und gleichem oder nur wenig größerem Durchmesser;
- Vermeiden Sie das Überlaufen von Flüssigkeiten, indem Sie nach Erreichen des Siedepunkts oder Erhitzen der Flüssigkeit die Wärmezufuhr zurückschalten;
- lassen Sie die Heizelemente nicht ohne Topf oder
mit leeren Töpfen eingeschaltet.
- Zur Vermeidung eines Elektroschocks muss das
Gerät beim Platzen des Kochfelds sofort vom Netz
getrennt werden.
- Das Kochfeld darf nicht mit Dampf gereinigt werden.
- Dieses Gerät darf nicht von Personen (oder Kindern)
mit eingeschränkten körperlichen, sensoriellen oder
geistigen Fähigkeiten bzw. mit mangelnden Kenntnissen und unzureichender Erfahrung bedient werden, es sei denn, es geschieht dies unter der Aufsicht
oder nach entsprechender Vertrautmachung mit dem
Gerät durch die für deren Sicherheit verantwortliche
Person.
- Kinder unter Aufsicht halten, damit sie nicht am
Gerät herumspielen.
Instandhaltung (Abb. 4)
Spuren von Aluminiumfolie, Essensresten, Fettspritzern, Zucker oder stark zuckerhaltigen Speisen
müssen sofort mit einem Schaber von der Kochfläche entfernt werden um mögliche Schäden an der
Fläche zu vermeiden. Mit einem entsprechenden
Reinigungsmittel und Küchenpapier säubern, dann
mit klarem Wasser nachspülen und abschließend mit
einem Lappen trocken wischen. Keine
Putzschwämme oder Scheuerkissen zum Einsatz
bringen; abzuraten ist ferner von der Verwendung
von starken Chemikalien und Fleckenentfernern.
Anweisungen für den Installateur
Installation
Die angegebenen Anweisungen sind an den zugelassenen Installateur als Richtlinie für die Installation,
Regelung und Instandhaltung, gemäß den geltenden
Gesetzen und Normen, gerichtet. Die Eingriffe dürfen nur bei ausgeschaltetem Apparat vorgenommen
werden.
Aufstellung (Abb. 5)
1 Vorderansicht
2 Vorderseite
Der Apparat ist für den Einbau in eine Arbeitsplatte
vorgesehen. Siehe Abbildung. Auf den ganzen Perimeter der Platte die mitgelieferte Dichtmasse verteilen.
Wenn der untere Bereich des Geräts nach dem Einbau
zugänglich ist, muss ein Schutzpanel (aus Holz oder
Ähnlichem) mit dem auf der Abbildung angegebenen
Abstand angebracht werden.
Elektrischer Anschluß
Vor dem Anschluß an das elektrische Netz sich davon
überzeugen, daß:
- die Eigenschaften der Anlage mit denen auf
dem unter der Ofenplatte angebrachten
Leistungsschild übereinstimmen;
- die Anlage mit einem wirksamen Erdanschluß
gemäß den geltenden Normen und
Gesetzbestimmungen versehen ist. Der
Erdanschluß ist gemäß Gesetz verbindlich.
Falls der Apparat nicht mit einem Kabel und/ oder mit
einem entsprechenden Stecker ausgerüstet ist, muß
gleichwertiges
Material zur Stromentnahme, wie auf dem Leistungsschild angegeben, und für die Arbeitstemperatur verwendet werden. Das Kabel darf an keiner
Stelle eine Temperatur von mehr als 50°C über der
Raumtemperatur erreichen.
Am angebrachten Stromkabel eine Trennvorrichtung
installieren, die an allen Polen über eine Kontakttrennung verfügt und die Trennung vom Netz sowie
bei Überspannungskategorie III eine vollständige
Abschaltung gemäß den Verkabelungsvorschriften gewährleistet. Die Steckdose oder der allpolige
Schalter müssen bei dem installierten Apparat leicht
zu erreichen sein.
Dieses Gerät ist nicht für den Gebrauch mit einer
externen Zeitschaltuhr oder einem gesonderten Fernbedienungssystem vorgesehen.
Der Hersteller lehnt jede Verantwortung ab falls oben
genannte Ausführungen und die üblichen Unfallnormen nicht eingehalten werden.
Falls das Netzkabel beschädigt ist, muss es durch
den Hersteller oder seinen technischen Kundendienst oder in jedem Fall durch eine entsprechend qualifizierte Fachkraft ersetzt werden, um
jedes Risiko auszuschließen.
NL
DIT PRODUCT IS ALS HUISHOUDELIJK APPARAAT
BEDACHT. VOOR BESCHADIGINGEN AAN SPULLEN
OF PERSONEN DIE AAN VERKEERDE INSTALLATIE,
MISBRUIK, VERKEERD OF ABSURD GEBRUIK ZIJN
TE WIJTEN, NEEMT DE FABRIKANT GEEN VERANTWOORDELIJKHEID OP ZICH.
De fabrikant verklaart dat dit product voldoet aan alle
essentiële eisen voor elektrisch laagspanningsmateriaal, volgens richtlijn 2006/95/EEG van 12 december
2006 en aan de elektromagnetische verenigbaarheid
volgens richtlijn 2004/108/EEG van 15 december
2004.
Instructies voor de gebruiker
Installatie
Alle handelingen met betrekking tot de installatie
(elektrische verbinding) moeten worden uitgevoerd
door gekwalificeerd personeel volgens de geldende
normen. Zie voor de specifieke instructies het gedeelte gereserveerd voor de installateur.
Gebruik
VERWARMINGSELEMENTEN TOUCH CONTROL
Drukgevoelige toetsen
Alle handelingen kunnen worden uitgevoerd met
drukgevoelige toetsen (capacitieve sensoren) die op
het frontpaneel van de fiche staan; met elke toets
komt een display overeen. Elke handeling wordt met
een “biep” bevestigd.
TIPTOETSBEDIENING (Afb. 2)
1 Aan/uit
2 Min 3 Plus +
4 Dubbel circuit/Driedubbel circuit
5 Kookzone
6 Display vermogensniveau
7 Lampje dubbel circuit
8 Indicatielampje Meervoudige circuits
Installatie
Alle handelingen met betrekking tot de installatie
(elektrische aansluiting) moeten worden uitgevoerd
door gekwalificeerd personeel volgens de geldende
normen.
Zie voor de specifieke instructies het gedeelte voorbehouden aan de installateur.
Aan/uit van de tiptoetsbediening
Na inschakeling is de tiptoetsbediening na ongeveer
1 seconde klaar voor gebruik.
Na de reset knipperen alle displays en LEDS gedurende ongeveer 1 seconde. Daarna gaan alle displays
en LEDS uit en staat de tiptoetsbediening in de standby stand.
De tiptoetsbediening kan met de aan/uit toets (1)
worden ingeschakeld.
De displays van de kookzones tonen een “0“. Als een
kookzone “warm is”, toont het display afwisselend
een “H“ en een “0“.
Na inschakeling blijft de tiptoetsbediening 20 seconden actief. Indien geen kookzone wordt geselecteerd,
keert de tiptoetsbediening automatisch in de standby status terug.
De tiptoetsbediening gaat pas aan, als alleen de aan/
uit toets (1) wordt ingeschakeld.
Als de aan/uit toets (1) tegelijkertijd met andere toetsen wordt ingedrukt, heeft dit geen enkel resultaat en
de tiptoetsbediening blijft in de stand-by stand.
De tiptoetsbediening kan op elk moment met de aan/
uit toets (1) worden uitgeschakeld. Dit geldt ook als de
bediening met de kinderbeveiliging is geblokkeerd.
De aan/uit toets (1) heeft altijd voorrang bij de uitschakelfunctie.
Automatische uitschakeling
Eenmaal ingeschakeld gaat de tiptoetsbediening automatisch uit na 20 seconden van inactiviteit. Na de
selectie van een kookzone wordt de automatische
uitschakeltijd opgedeeld in 10 seconden waarna de
selectie van de zone ongedaan gemaakt wordt en 10
seconden daarna gaat de tiptoetsbediening uit.
Aan/uit van een kookzone
Met ingeschakelde tiptoetsbediening kan de kookzone worden geselecteerd door op de toets (5) van de
overeenstemmende zone te drukken.
Het display (6) van de geselecteerde zone licht fel
op, terwijl de overige displays zwakker oplichten. Als
de zone “warm is” worden afwisselend “H” en “0”
getoond.
Door op de PLUS- (3) of MIN toets (2) te drukken kan
een vermogensniveau worden geselecteerd en de
zone begint warm te worden.
Zodra de kookzone is geselecteerd, kan het vermogensniveau worden gekozen door de PLUS toets (3)
ingedrukt te houden. Het niveau begint bij 1 en neemt iedere 0,4 seconden met één eenheid toe. Als het
niveau 9 is bereikt, zijn er geen verhogingen meer
mogelijk.
Als het vermogensniveau is geselecteerd met de MIN
toets (2), is het beginniveau “9” (maximumniveau).
Als de toets ingedrukt wordt gehouden, neemt het
actieve niveau iedere 0,4 seconden met één eenheid
af. Als het niveau 0 is bereikt, zijn er geen verdere
verlagingen meer mogelijk. Alleen door opnieuw te
drukken op de MIN (2) of PLUS toets (3) kan het vermogensniveau worden gewijzigd.
Uitschakelen van een kookzone
Selecteer de uit te schakelen zone met de overeenstemmende toets (5). Het display (6) van de geselecteerde zone licht fel op, terwijl de overige displays
zwakker oplichten. Door tegelijkertijd op de selectietoets van de betreffende zone en op de toets MIN (2)
te drukken, wordt het kookniveau van de zone op 0
ingesteld. Als alternatief kan de MIN toets (2) worden gebruikt om het vermogensniveau tot 0 te laten
afnemen.
Als een kookzone “warm is”, verschijnen afwisselend
een “H” en een “0”.
Uitschakelen van alle kookzones
Alle zones kunnen op elk moment tegelijkertijd worden uitgeschakeld met de aan/uit toets (1). In de
stand-by modus verschijnt een “H“ op het display
van alle kookzones die “warm zijn”. Alle andere displays zijn uit.
Vermogensniveau
Het vermogen van de kookzone kan op 9 niveaus
worden ingesteld die worden aangegeven door de
symbolen van “1“ tot “9“ met behulp van de zevensegment LED-displays (6).
Automatisch blancheren
Als automatisch blancheren is geactiveerd, staat de
kookzone op 100% tijdens de geselecteerde aanloopperiode. Na afloop van het blancheren is de eerder geselecteerde aanloopperiode weer van kracht.
Procedure voor automatisch blancheren:
De TC staat aan en er is een kookzone geselecteerd.
Druk nadat u het kookniveau op niveau 9 hebt ingesteld nogmaals op de toets PLUS (3).
U hebt vervolgens 10 seconden om het gewenste
kookniveau te selecteren met behulp van de toetsen
MIN (2) en PLUS (3).
Als u later een ander kookniveau selecteert, blijft de voorkookfunctie ingeschakeld en wordt de
voorkooktijd aangepast aan het nieuwe geselecteerde niveau.
Warmhoud-functie
U kunt deze functie gebruiken voor alle kookzones
om gekookt voedsel warm te houden. Het kookniveau
ligt tussen niveau 0 en niveau 1. Ga als volgt te werk
om deze functie in te schakelen:
1. Selecteer de gewenste kookzone
2. Selecteer kookniveau 1 met behulp van de toets
MIN (3)
3. Druk op de toets MIN (2). Op het display wordt
het symbool “u” weergegeven dat aangeeft
dat de “Warmhoud”-functie is ingeschakeld.
Restwarmte-indicator
Waarschuwt de gebruiker dat het glas een gevaarlijke temperatuur heeft bij aanraking van het hele
gebied boven de kookzone. De temperatuur wordt
bepaald volgens een wiskundig model en eventuele
restwarmte wordt met een “H” aangeduid door het
desbetreffende zeven-segment display.
De verwarming en de afkoeling worden berekend
met betrekking tot:
· het geselecteerde vermogensniveau (van “0“ tot “9“)
· de werkingstijd.
Nadat de kookzone is uitgeschakeld, toont het desbetreffende display een “H” totdat de temperatuur
van de zone volgens het wiskundig model tot onder
het kritieke niveau daalt (≤ 60 °C).
Automatische uitschakeling (limiet van de werkingsduur)
Afhankelijk van het vermogensniveau wordt elke
kookzone na een vooraf ingestelde maximale duur
uitgeschakeld, als er op geen enkele knop wordt gedrukt.
Elke verrichting met betrekking tot een kookzone
(met de toetsen PLUS (3) en MIN (2), of dubbele zone)
zorgt ervoor dat de maximale werkingsduur terug
van bij het begin aftelt.
Beveiliging in geval van een onbedoelde inschakeling
· Als de elektronische controle gedurende ongeveer
10 s een continu inschakeling van een toets detecteert, gaat hij automatisch uit. De controle geeft een
geluidssignaal dat de gebruiker waarschuwt dat de
sensoren de aanwezigheid van een voorwerp hebben
waargenomen. De displays tonen de foutmelding“ E
R 0 3 “. .Als de kookzone “warm is”, verschijnt een
“H” op het display afgewisseld door het foutsignaal.
· Als binnen 20 seconden na de inschakeling van de
tiptoetsbediening geen enkele kookzone wordt ingeschakeld, keert de controle terug naar de stand-by
stand.
· Als de controle is ingeschakeld heeft de ON/OFF
toets voorrang op alle andere toetsen, zodat de controle op elke willekeurig moment kan worden uitgeschakeld, ook als meerdere toetsen worden ingedrukt
of een toets continu wordt ingedrukt.
· In de stand-by modus heeft een continue activering
van de toetsen geen enkel effect. Voordat de elektronische controle echter weer kan worden ingeschakeld, moet hij vaststellen dat geen enkele toets
geactiveerd is.
Toetsenblokkering (kinderbeveiliging)
De elektronische controle blijft geblokkeerd totdat hij
door de gebruiker ongedaan wordt gemaakt, ook als
hij in de tussentijd uit en weer in is geschakeld. Ook
een reset van de tiptoetsbediening (na een stroomonderbreking) heft de toetsenblokkering niet op.
Opheffen van de toetsenblokkering:
Na inschakeling van de tiptoetsbediening kan de kinderbeveiliging worden uitgeschakeld. Ga hiertoe op
dezelfde wijze te werk als voor de blokkering: houd
de MIN-toets (2) ingedrukt en druk vervolgens, zonder deze toets los te laten, op de selectietoets van
de kookzone:
·linksboven –> indien het kookvlak bestaat uit 3
kookzones
·linksonder –> indien het kookvlak bestaat uit 4
kookzones
Als u alle stappen in de juiste volgorde uitvoert, wordt
de toetsenvergrendeling opgeheven en gaat touch
control terug op stand-by als er binnen 10 seconden
geen bewerking plaatsvindt. Zo niet, wordt de reeks
als onvoltooid beschouwd. De tiptoetsbediening blijft
geblokkeerd en gaat na 60 seconden uit.
Als de tiptoetsbediening weer met de ON/OFF toets
wordt ingeschakeld, tonen alle displays een “0”, de
decimaaltekens knipperen en de tiptoetsbediening is
klaar voor het koken. Als een kookzone “warm is”,
worden afwisselend de “0” en de “H” getoond.
• Kinderbeveiliging:
Toetsenblokkering:
Om de kinderbeveiliging te activeren nadat u de tiptoetsbediening hebt ingeschakeld, houdt u de MINtoets (2) ingedrukt en drukt u vervolgens, zonder
deze toets los te laten, op de selectietoets van de
kookzone:
·linksboven –> indien het kookvlak bestaat uit 3
kookzones
·linksonder –> indien het kookvlak bestaat uit 4
kookzones
Op alle displays verschijnt er een “L” die staat voor
LOCKED (kinderbeveiliging voor een onbedoelde inschakeling). Als de kookzone “warm is” worden de “L”
en de “H” afwisselend weergegeven.
Deze handeling moet binnen 10 seconden worden
uitgevoerd en geen enkele van de hierboven beschreven toetsen mag geactiveerd zijn. Zo niet, dan
wordt de reeks onderbroken en is het kookvlak niet
vergrendeld.
Regeling van meervoudige circuits
Kookplaat zonder dubbel circuit of driedubbel circuit,
zie fig. 2A
Kookplaat met driedubbele zone (fig. 2B)
Als een dubbele/driedubbele kookzone wordt geactiveerd, betekent dit dat de 3 circuits tegelijk worden
ingeschakeld. Elk circuit wordt met toets 4 geactiveerd/gedeactiveerd en dit wordt met een indicatielampje (8) aangeduid.
Geluidssignaal (zoemer)
Tijdens het gebruik worden de volgende handelingen
met een zoemer gesignaleerd:
· normale activering van de toetsen met een kort geluidssignaal.
· continue activering gedurende meer dan 10 s met
een langdurig onderbroken geluidssignaal.
Timerfunctie (optie)
De timerfunctie bestaat in twee uitvoeringen:
· Autonome timer 1..99 min: geluidssignaal als de tijd
is verstreken. Deze functie is alleen beschikbaar als
het kookvlak in gebruik is.
· Timer voor kookzones 1..99 min: geluidssignaal als
de tijd is verstreken, de vier kookzones kunnen onafhankelijk van elkaar worden geprogrammeerd.
Autonome timer:
∙ Als de touch ingeschakeld is en er geen enkele
kookzone geselecteerd is, kan de autonome timer
gebruikt worden door tegelijkertijd de toetsen MIN (2)
en PLUS (3) in te drukken.
· De waarden (0-99min) kunnen worden gewijzigd
met een toename van een minuut met elke willekeurige PLUS-toets van 0 tot 99 en met de MIN-toets
van 99 tot 0.
· Als continu op de PLUS- of MINtoets wordt gedrukt,
neemt de wijzigingssnelheid zonder geluidssignalen
toe tot een maximale waarde.
· Als de PLUS- (of MIN) toets wordt losgelaten, begint
de toe- of afnamesnelheid weer bij de beginwaarde.
· De timer kan zowel met voortdurende activering van
de PLUSen MIN-toetsen als met achtereenvolgende
tipbedieningen worden ingesteld (met geluidssignaal).
Nadat de timer is ingesteld begint de terugtelling. Het
verstrijken van de tijd wordt aangegeven door een
geluidssignaal en door het knipperen van het display
van de timer.
Het geluidssignaal stopt
· automatisch na 2 minuten
· door op een willekeurige toets te drukken
Het display stopt met knipperen en wordt uitgeschakeld.
Uitschakelen / wijzigen van de timer
· De timer kan op elk moment worden gewijzigd of
uitgeschakeld door op de PLUS- en MIN-toetsen Tegelijkertijd te drukken (met geluidssignaal). De timer
wordt uitgeschakeld door de tijd op “0” te zetten met
de MINtoets. Gedurende 6 seconden blijft de timer op
“0” staan, voordat hij wordt uitgeschakeld.
· Programmeren van de timer voor de kookzones
Door de tiptoetsbediening in te schakelen kan een
onafhankelijke timer voor elke kookzone worden
geprogrammeerd.
∙ Als u met de zoneselectietoets (4) de kookzone selecteert, vervolgens het vermogen programmeert, en
tenslotte de toetsen MIN (2) en PLUS (3) tegelijkertijd
indrukt, kunt u een afteller programmeren waarmee
de kookzone kan worden uitgezet.
∙ Tijdens het programmeren van de timer glinstert het
lampje (6) van de geselecteerde kookzone.
· Het verstrijken van de tijd wordt aangegeven door
een geluidssignaal en door het symbool “00” op het
display, de LED van de kookzone die aan de timer
is toegewezen knippert. De kookzone wordt uitgeschakeld en er wordt een “H” getoond als de zone
“warm is”.
Het geluidssignaal en het knipperen van het display
worden onderbroken
· automatisch na 2 minuten.
· door op één van de toetsen te drukken.
Het display van de timer gaat uit.
· De basisfuncties komen overeen met de beschrijving van de autonome timer.
Voorzorgsmaatregelen: (Afb. 3)
- Bij het gebruik van de elementen wordt aangeraden
om gebruik te maken van pannen met een platte bodem, waarvan de diameter gelijk is of iets groter dan
is aangegeven op de plaat;
- Overkoken van vloeistof vermijden; daarom bij het
aan de kook raken of hoe dan ook bij verwarmde
vloeistoffen de toevoer van warmte verminderen;
- de elementen niet ingeschakeld laten zonder pan of
met een lege pan of braadpan.
- Indien het oppervlak van de kookplaat beschadigd
raakt, moet u de stroomtoevoer van het apparaat
onmiddellijk uitschakelen om elektrische schokken
te vermijden.
- Gebruik geen stoomreinigers op de kookplaat.
- Dit apparaat is niet geschikt voor personen (inclusief kinderen) wiens fysieke, sensorische of mentale
vermogens beperkt zijn of die onvoldoende ervaring
of kennis hebben, tenzij zij uitleg of gebruiksinstructies voor het apparaat hebben gekregen van een persoon die verantwoordelijk is voor hun veiligheid.
- Laat kinderen nooit alleen om zeker te zijn dat ze
niet met het apparaat spelen.
Onderhoud (Afb. 4)
Stukken van bladaluminium, overblijfsels van
levensmiddelen, scheuten van vet, suiker, of sterk
suikerhoudende spijzen moeten met een schraper
van de kookvlakte onmiddellijk verwijderd worden
om mogelijke beschadiging van de bladoppervlakte
te voorkomen. Reinig de kookplaat na gebruik met
een geschikt product en keukenpapier; spoel vervolgens met water en droog de plaat af met een schone
doek.
Gebruik nooit sponzen of schuursponzen; vermijd
gebruik van agressieve chemische detergenten of
ontvlekker.
Instructies voor de installateur
Installatie
De onderstaande instructies zijn bedoeld voor de
gekwalificeerde installateur, die de installatie, regeling en het onderhoud uitvoert volgens de geldende
wetten en normen. Reparaties moeten altijd worden
uitgevoerd terwijjl de stroomvoorziening van het
apparaat is onderbroken.
Plaatsing (Afb. 5)
1 Vooraanzicht
2 Zijaanzicht
Het apparaat is voorzien om te worden verzonken in een
keukenblad zoals geillustreerd in de betreffende figuur.
Dicht de ruimte tussen het keukenblad en de plaat
rondom af met de bijgeleverde kit.
Bevestig na het monteren van het apparaat een beveiligingspaneel (hout of soortgelijk materiaal) in het
apparaat en houd u daarbij aan de in de afbeelding
aangeduide afstand.
Elektrische aansluiting
Alvorens de elektrische aansluiting te verrichten
verzekert men zich ervan dat:
- de karakteristieken van het stroomvoorzienende
apparaat voldoen aan hetgeen is vermeld op de
registratieplaat onderop de kookplaat;
- dat het stroomvoorzienende apparaat voorzien is
van een effectieve aardeverbinding volgens de wettelijk voorgeschreven normen en beschikkingen. Het
aarden is verplicht volgens de wet.
In het geval dat het apparaat niet is uitgerust met een
kabel en/of stekker, dient gebruik gemaakt te worden van materiaal, geschikt voor de stroomvoering
en de werktemperatuur, zoals aangegeven op de registratieplaat. De kabel mag op geen enkel punt een
temperatuur bereiken die hoger is dan 50°C boven
de omgevingstemperatuur. Plaats in de elektrische
installatie een apparaat waarmee de voeding onderbroken kan worden en waarvan de contactpunten
ver genoeg uit elkaar staan om in geval van overspanning volgens categorie III volledige uitschakeling
te waarborgen in overeenstemming met de bedradingsrichtlijnen. De stekker of schakelaar moet gemakkelijk bereikbaar zijn als de apparatuur eenmaal
geinstalleerd is.
Dit apparaat is niet bedoeld voor gebruik met een externe timer of een apart afstandsbedieningssysteem.
De fabrikant wijst iedere verantwoordelijkheid af in
geval dat het bovenstaande en de gebruikelijke
preventieve normen niet worden gerespecteerd.
Als de voedingskabel beschadigd is, moet deze
door de fabrikant of door de technische dienst
worden vervangen of in elk geval door een persoon met een soortgelijke kwalificatie, zodat elk
gevaar wordt vermeden.
RU
ПРИБОР ПРЕДНАЗНАЧЕН ТОЛЬКО
ДЛЯ БЫТОВОГО ИСПОЛЬЗОВАНИЯ.
ФИРМА-ИЗГОТОВИТЕЛЬ НЕ НЕСЕТ
НИКАКОЙ ОТВЕТСТВЕННОСТИ ЗА
УЩЕРБ,
НАНЕСЕННЫЙ
ЛЮДЯМ
ИЛИ ИМУЩЕСТВУ, ВОЗНИКАЮЩИЙ
В
РЕЗУЛЬТАТЕ
НЕПРАВИЛЬНОЙ
УСТАНОВКИ ИЛИ НЕПРАВИЛЬНОГО
ИСПОЛЬЗОВАНИЯ УСТРОЙСТВА, А
ТАКЖЕ ПРИ ИСПОЛЬЗОВАНИИ ДЛЯ
ЦЕЛЕЙ, НЕОГОВОРЕННЫХ ДАННОЙ
ИНСТРУКЦИЕЙ.
Производитель заявляет, что данный продукт
отвечает всем необходимым требованиям
к
электротехническому
оборудованию
низкого напряжения в соответствии с
Директивой 2006/95/EC от 12 декабря 2006
года и Директивой об электромагнитной
совместимости EMC 2004/108/EC от 15
декабря 2004 года.
Инструкции для пользователя
Монтаж
Все операции по монтажу (электрические
подключения)
должны
производиться
только квалифицированным персоналом
и в соответствии с существующими
нормативами.
В Разделе “Для монтажника” приведены все
подробности монтажа.
Применение
ЭЛЕМЕНТЫ НАГРЕВАНИЯ TOUCH
CONTROL (управление прикосновением)
Клавиша легкого нажатия
Клавиши легкого нажатия (или сенсоры типа
емкостных датчиков) предназначены для
выполнения любой операции и расположены
на фронтальной части карточки, причем
для
каждой
карточки
предусмотрен
соответствующий дисплей. Выполнение
любого действия подтверждается звуковым
сигналом.
СЕНСОРНОЕ УПРАВЛЕНИЕ (Рис. 2)
1 Включение/выключение — «ВКЛ/ВЫКЛ»
2 Кнопка «МИНУС» 3 Кнопка «ПЛЮС» +
4 Двойной/Тройной контур
5 Выбор варочной зоны
6 Дисплей уровня мощности
7 Индикатор включения двойной зоны
нагрева
8 Подсвеченный сегмент Несколько контуров
Монтаж
Все работы по монтажу (подключение
к
эл.
сети)
должны
проводиться
квалифицированным
персоналом
в
соответствии с действующими нормами.
Инструкции по монтажу приведены в
соответствующем разделе.
Включение и выключение сенсорного
управления
После подключения к электросети сенсорное
управление инициализируется примерно в
течение 1 с.
При включении все дисплеи и индикаторы
мигают в течение приблизительно одной
секунды. После того как все дисплеи и
индикаторы погаснут, функции сенсорного
управления
станут
доступными
для
использования.
Для включения сенсорного управления
нажмите кнопку включения (1).
На дисплеях варочных зон появится значение
«0». Если какая-либо из варочных зон горячая,
на дисплее будут попеременно отображаться
«Н» и «0».
Сенсорное управление остается активным в
течение 20 секунд после включения. Если в
течение этого времени не происходит выбора
зоны нагревания, сенсорное управление
автоматически переходит в режим ожидания.
Сенсорное управление включается при
нажатии только на одну кнопку включения
(1).
Если одновременно с кнопкой включения (1)
производится нажатие на какую-либо другую
кнопку, сенсорное управление остается в
режиме ожидания.
Выключение
сенсорного
управления
производится с помощью той же кнопки.
Это можно сделать даже в тех случаях, когда
управление заблокировано от детей.
Кнопка включения (1) имеет приоритет при
выключении.
Автоматическое выключение
После включения устройства сенсорное
управление автоматически выключается
через 20 секунд в случае отсутствия какойлибо активности пользователя. Через 10
секунд после того как выбрана варочная зона,
выбор зоны отменяется, а еще через 10 секунд
выключается сенсорное управление.
Включение/выключение варочной зоны
При включенном сенсорном управлении
можно выбрать любую варочную зону
нажатием кнопки выбора соответствующей
зоны (5).
Дисплей выбранной зоны (6) загорается
сильнее, а остальные дисплеи гаснут.
Если зона нагревается, то поочередно
отображаются символы «H» и «0».
Нажимая кнопки «ПЛЮС» (3) и «МИНУС»
(2), можно выбрать необходимый уровень
мощности, и зона начнет нагреваться.
Выбрав варочную зону, можно настроить
уровень
мощности,
нажимая
кнопку
«ПЛЮС» (3); начиная с уровня 1 увеличение
на один шаг будет происходить каждые 0,4 с.
Уровень 9 является максимальным уровнем
мощности.
При настройке уровня мощности при помощи
кнопки «МИНУС» (2) первоначальный
уровень будет равен 9 (максимальный
уровень). Если удерживать эту кнопку
нажатой, уровень мощности будет снижаться
на один каждые 0,4 секунды. Уровень 0
является минимальным уровнем мощности.
Для регулирования уровня мощности
необходимо снова нажать кнопку «ПЛЮС»
(2) или «МИНУС» (3).
Выключение варочной зоны
Выберите
зону,
которую
необходимо
отключить, при помощи соответствующей
кнопки (5). Дисплей выбранной зоны (6)
загорится сильнее, а остальные дисплеи
погаснут. При одновременном нажатии
клавиши выбора соответствующей зоны и
клавиши МИНУС (2), уровень мощности зоны
установится на 0. В качестве альтернативы
можно использовать кнопку «МИНУС» (2),
чтобы снизить уровень мощности до «0».
Если какая-либо из варочных зон горячая,
на дисплее будут попеременно отображаться
«Н» и «0».
Выключение всех варочных зон
Нажав кнопку включения (1) можно сразу
выключить все варочные зоны. В режиме
ожидания на дисплее всех горячих варочных
зон отображается символ «Н». Все остальные
дисплеи будут отключены.
Уровень мощности
Для
настройки
мощности
варочных
зон предусмотрены 9 уровней, которые
обозначаются цифрами от 1 до 9 на
7-сегментных светодиодных дисплеях (6).
Автоматическое пропаривание
Если
активировано
автоматическое
пропаривание, мощность зоны приготовления
включена на 100 % в течение периода,
который зависит от стадии кипения.
После окончания времени пропаривания вн
овь включается стадия кипения.
Процедура
начала
автоматического
пропаривания:
Блок
уп
равления
включается,
и
выбираетсязона приготовления.
Установив уровень мощности на 9, нажмите
клавишу ПЛЮС (3).
После этого в течение 10 секунд необходимо
выбрать нужную мощность нагревания с
помощью клавиш МИНУС (2) и ПЛЮС (3).
Если впоследствии вы выберете другой
уровень мощности, функция предварительной
варки продолжает действовать и приводит
время предварительной варки в соответствие
с выбранным уровнем.
Функция поддержания температуры
Эта функция доступна для всех зон
нагревания и предназначена для поддержания
температуры уже приготовленных блюд.
Речь идет от мощности уровня 0-1. Чтобы
активировать эту функцию, необходимо
выполнить следующие действия:
1.Выбрать нужную зону нагревания
2.Выбрать уровень мощности 1 при помощи
клавиши ПЛЮС (3)
3.Нажать клавишу МИНУС (2). На дисплее
появится значок “u”, указывающий на то,
что функция «Поддерживать температуру»
активирована.
Индикатор остаточного тепла
Этот индикатор предупреждает пользователя
об опасности прикосновения к керамической
поверхности варочной зоны, имеющей
высокую температуру. Значение температуры
определяется исходя из математической
модели, и в случае наличия остаточного тепла
на соответствующем 7-сегментном дисплее
отображается символ «Н».
Степень нагрева и охлаждения рассчитывается
на основе следующих параметров:
· выбранный уровень мощности (от 0 до 9);
· время работы.
После выключения варочной зоны на дисплее
будет отображаться символ «Н», пока
расчетная температура зоны не опустится до
безопасного уровня (≤60°С) в соответствии с
математической моделью.
Функция автоматического отключения
(ограничение времени работы)
В зависимости от установленного уровня
мощности каждая варочная зона отключается
по истечении определенного времени, если в
течение заданного промежутка времени эта
зона не регулировалось.
Каждое изменение состояния зоны при
помощи кнопок «ПЛЮС» (3), «МИНУС» (2)
и кнопки включения двойной зоны нагрева
приводит к тому, что предельное время
работы начинает отсчитываться заново.
Защита от случайного включения
·При длительном нажатии на кнопку (дольше
10 с) нагрев будет автоматически отключен.
Если на сенсорной кнопке находится какойлибо предмет, устройство издаст звуковой
сигнал ошибки. При этом на дисплее
отобразится код ошибки «E R 0 3». Если
зона горячая, на дисплее будут попеременно
отображаться код ошибки и символ «Н».
· В случае если в течение 20 секунд после
включения сенсорного управления не будет
активирована ни одна из варочных зон,
плита автоматически переключится в режим
ожидания.
· При включенном сенсорном управлении
кнопка включения имеет приоритет над
всеми остальными кнопками. Это позволяет
выключить плиту в любой момент, даже в
случае одновременного или длительного
нажатия нескольких кнопок.
· В режиме ожидания при длительном нажатии
кнопок не происходит никаких изменений. В
любом случае для того чтобы снова включить
электронное управление, убедитесь, чтобы ни
одна кнопка не была нажата.
Блокировка кнопок (защита от детей)
• Функция защиты от детей:
Блокировка кнопок
Для активации функции защиты от детей
после включения сенсорного управления
необходимо нажать кнопку «Минус» (2)
и, удерживая ее, нажать кнопку выбора
варочной зоны:
·левую верхнюю –> если у плиты 3 варочные
зоны
·левую нижнюю -> если у плиты 4 варочные
зоны
На всех дисплеях отобразится символ «L»,
обозначающий блокировку (блокировка от
случайного включения). Если какая-либо зона
горячая, будут попеременно отображаться
символы «L» и «Н».
Время
одновременного
нажатия
не
должно превышать 10 секунд. При этом
нельзя нажимать никаких кнопок, кроме
описанных выше. В противном случае
последовательность действий будет прервана
и плита не заблокируется.
Электронное управление будет заблокировано
даже при выключении и последующем
включении до момента снятия блокировки
пользователем. Повторное включение плиты
(после отключения питания) не снимает
блокировки управления.
Снятие блокировки кнопок управления
После включения сенсорного управления
функция защиты от детей может быть
деактивирована. Для этого необходимо
проделать те же шаги, что и для блокировки:
нажать кнопку «Минус» (2) и,
удерживая ее, нажать кнопку выбора варочной
зоны:
·левую верхнюю –> если у плиты 3 варочные
зоны
·левую нижнюю -> если у плиты 4 варочные
зоны
Если выполнять все операции в нужном
порядке,
блокировка
клавиш
будет
снята, и Touch Control вернется в режим
ожидания, если в течение 10 секунд не будет
произведено никаких операций. В противном
случае процесс снятия блокировки будет
прерван как незавершенный, блокировка
останется активной, и сенсорное управление
отключится через 60 секунд.
При последующем включении сенсорного
управления при помощи кнопки включения
на всех дисплеях отобразится значение
«0», десятичные точки начнут мигать, а
плита будет готова для использования. Если
какая-либо зона горячая, на дисплее будут
попеременно отображаться значения «0» и
«Н».
Управление несколькими контурами
Конфорки без двойного или тройного контура,
см. рис. 2А
Конфорка с тройной зоной. (Рис. 2B)
При активации двойной/тройной зоны
приготовления 3 контура включаются
одновременно.
Включение/отключение
каждого контура осуществляется кнопкой 4 и
подтверждается подсвеченным сегментом (8).
Звуковой сигнал (зуммер)
При использования плиты звуковые сигналы
раздаются в следующих случаях:
·кратковременное нажатие кнопок —
короткий сигнал;
·длительное нажатие кнопки (более 10
секунд) — длинный прерывистый сигнал.
Функция таймера
Функция таймера может осуществляться в
двух видах:
· Независимый таймер в диапазоне от 1 до 99
мин: звуковой сигнал, который указывает на
окончание заданного периода времени. Эта
функция применима только в то время, пока
не используется плита.
· Таймер для зон варки в диапазоне от 1
до 99 минут: звуковой сигнал, который
указывает на окончание заданного периода
времени. Каждая из четырех зон варки может
программироваться независимо.
Независимый таймер:
· Если управление включено и не выбрана
зона приготовления, то можно использовать
автономный таймер, одновременно нажимая
кнопки “–” (2) и “+” (3).
· Изменения значения (0 – 99 мин)
осуществляются посредством
поминутного изменения с помощью любой из
клавиш: БОЛЬШЕ с 0 до 99 и МЕНЬШЕ с 99
до 0.
· При непрерывном нажатии на клавиши
БОЛЬШЕ или МЕНЬШЕ
мы будем динамически увеличивать скорость
изменения до достижения максимального
значения, без звуковых сигналов.
· При отпускании клавиши БОЛЬШЕ (или
МЕНЬШЕ), скорость увеличения (снижения)
будет отсчитываться, начиная с исходного
значения.
· Можно программировать таймер как
непрерывным нажатием на клавиши БОЛЬШЕ
и МЕНЬШЕ, так и последовательными
короткими
нажатиями
(со
звуковым
сигналом).
После программирования таймера начинается
отсчет времени по убыванию. По истечении
заданного периода времени прозвучит
звуковой сигнал, а дисплей таймера будет
мигать.
Остановка звукового сигнала
· Автоматически через две минуты.
· При нажатии любой клавиши.
Дисплей перестанет мигать и выключится.
Выключение / изменение заданного периода
времени таймера
· В любой момент можно изменить заданное
время таймера или выключить его, нажав
одновременно нажимая кнопки “–” (2)
и “+” (3) (со звуковым сигналом). Таймер
выключится, и отсчет времени вернется к “0”
нажатием клавиши МЕНЬШЕ.
В течение 10 секунд таймер будет на “0”,
после чего он выключится.
Программирование таймера для зон варки
Включив
Touch
Control,
можно
программировать независимый
таймер для каждой зоны варки.
· Таймер можно запрограммировать на
выключение зоны приготовления, выбрав
зону приготовления кнопкой выбора зоны (4),
затем в ыбрав настройку и, наконец,
одновременно нажимая кнопки “–” (2) и “+”
(3).
· Во время программирования таймера мигает
контрольный индикатор (6) выбранной зоны
приготовления.
· По истечении заданного периода времени
Вы услышите звуковой сигнал, на дисплее
п оявится обозначение “00”, а диод LED той
зоны варки, которая работает с таймером,
начнет мигать.
Зона варки выключится, а на дисплее
появится обозначение “H” в том случае, если
зона «горит».
Звуковой сигнал и мигание дисплея
прекратятся.
· Автоматически через две минуты.
· При нажатии любой клавиши.
Дисплей таймера выключится
· Основные функции совпадают с функциями
независимого
таймера.
Меры предосторожности (Рис. 3)
- Мы советуем Вам использовать посуду с
плоским дном для приготовления пищи с
помощью элементов нагревания,
причем диаметр их дна должен быть равным
или несколько превышать диаметр, указанный
на сериграфии.
- Следить за тем, чтобы жидкость не
проливалась на плиту.
Поэтому уменьшите мощность нагревания
при кипении или после того, как жидкость
достигла нужную Вам температуру.
- Не оставляйте включенными элементы
нагревания без их использования по
назначению, и не ставьте на них пустые
кастрюли или любую посуду.
- При разломе поверхности плиты, следует
немедленно отключить аппарат от сети
питания во избежание электрического шока.
Запрещается
использовать
паровые
аппараты для очистки поверхности плиты.
- Данный аппарат не предназначен для его
использования людьми (включая детей) с
ограниченными физическими, сенсорными
или умственными способностями, или теми
лицами, у кого нет достаточного опыта или
знаний, за исключением тех случаев, когда
ответственный за безопасность проверил их
действия и выдал им все соответствующие
инструкции по использованию аппарата.
- Необходимо следить за тем, чтобы дети не
играли с данным аппаратом.
Уход (Рис. 4)
При попадании на конфорки остатка
алюминиевой фольги, остатков пищи,
жирных пятен или брызг жира, сахара или
очень сахаристых продуктов, следует их
немедленно удалить с варочной поверхности
посредством специального скребка во
избежание царапания варочной поверхности.
После
этого
промыть
поверхность
специальным продуктом с использованием
бумажного полотенца, затем сполоснуть
водой и высушить чистой тряпочкой.
Категорически запрещается использовать
абразивные губки или щетки, а также
запрещается пользоваться агрессивными
химическими чистящими средствами или
пятновыводителями.
Инструкции для монтажника
Монтаж
Настоящие инструкции предназначены для
использования
в период монтажа и для монтажника, это
руководство для
монтажа, регулировки и ухода за плитой в
соответствие с
существующими нормативами. Не забывайте
о том, что
необходимо отключить плиту для выполнения
каких-либо
операций.
Установка (Рис. 5)
1 Вид спереди
2 Передняя часть
Данный аппарат предназначен для установки
в соответствующей зоне так, как это указано
на Рисунке.
Очень важно подготовить для установки весь
периметр
поверхности
с
использованием
водонепроницаемой пленки,
входящей в комплект поставки.
После установки устройства имеется доступ
к его нижней части, защитную панель
(деревянную или из подобного материала)
следует
расположить
на
расстоянии,
указанном на рисунке.
Электрические подключения
Перед подключением к сети питания,
убедитесь в том, что:
- Характеристики установки совпадают с
характеристиками,
приведенными
на
установочной пластине, находящейся на дне
панели для варки;
- Для установки предусмотрено достаточно
мощное заземление, в соответствии с
нормативами и требованиями действующего
законодательства. Заземление предусмотрено
в установленных нормативах.
В том случае, если для аппарата не
предусмотрен шнур и - или розетка
включения, необходимо использовать
материал,
пригодный
для
значений
электрического тока, приведенных на
установочной пластине с характеристиками,
и для данной рабочей температуры.
Запрещается использовать шнур в случае
его перегревания при превышении 50°C
температуры окружающей среды.
Подключите к стационарной электропроводке
защитное
устройство
отключения
от
питающей сети с полным разрывом цепи,
чтобы обеспечить полное отключение от
электроснабжения при превышении номинала
напряжения сети согласно требованиям
класса III и в соответствии с требованиями
Правил устройства электроустановок. Розетка
или многополюсный переключатель должны
быть просты и доступны для подключения
установленного аппарата.
Данное устройство не предназначено для
использования с внешним таймером или с
пультом дистанционного управления.
Конструктор
снимает
с
себя
всю
ответственность в том случае, если все
вышеуказанные требования и обычные
нормы
предосторожности
не
будут
соблюдены.
В случае повреждения шнура питания,
обратитесь к фабриканту для его замены,
или обратитесь в уполномоченный центр
технической помощи, или же обратитесь
к техническому специалисту любого
центра с подобными полномочиями, для
предотвращения возникновения любого
вида рисков.
Fig.2 - Abb.2 - Afb. 2 - Рис. 2 - Rys. 2 - Kuva 2. - 图2 - 2. ábra - Εικ. 2.
Fig.3 - Abb.3 - Afb. 3 - Рис. 3
Rys. 3 - Kuva 3. - 图3 - 3. ábra - Εικ. 3.
Fig.4 - Abb.4 - Afb. 4 - Рис. 4 - Rys. 4 - Kuva 4. - 图4 - 4. ábra - Εικ. 4.
A
B
C
D
E
298 520 270494 74
590
520
560
490
74
700
350
680
330
74
700
520
560
490
74
Fig.5 - Abb.5 - Afb. 5 - Рис. 5 - Rys. 5 - Kuva 5. - 图5 - 5. ábra - Εικ. 5.
Fig.6 - Abb.6 - Afb. 6 - Рис. 6 - Rys. 6 - Kuva 6. - 图6 - 6. ábra - Εικ. 6.
60811925.03.10.2012
CATA ELECTRODOMÉSTICOS, S.L.
C. Ter, 2 - 08570 TORELLÓ (Barcelona) SPAIN
Tel. +34 938 594 100 - Fax +34 938 594 101
www.cnagroup.es - e-mail: [email protected]
Atención al Cliente: 902 410 450 - [email protected]
SAT Central Portugal: 214 349 771 - [email protected]