1
Nederlands
Gebruikershandleiding panini grill
Deutsch
Gebrauchsanweisung Panini Grill
Français
Mode d'emploi grill panini
English
Instruction manual panini grill
Italiano
Istruzioni per l’uso panini grill
Español
Manual del usuario grill de bocadillos tostados
v 170413-08
ASW113
ASW113S
ASW113R
Gefeliciteerd met de aankoop van deze Panini Grill waarmee u een gezond en smakelijk stukje vlees, vis
of complete panini’s kunt grillen. De grill is voorzien van bakplaten in de behuizing en in het deksel voor
een gelijkmatige boven- en onderwarmte. De bakplaten zijn gemakkelijk te reinigen.
Veiligheidsvoorschriften - Algemeen
• Lees de gebruiksaanwijzing goed door en bewaar deze zorgvuldig.
• Gebruik dit apparaat alleen zoals beschreven in deze gebruiksaanwijzing.
• Dit apparaat mag niet gebruikt worden door kinderen en personen die door een lichamelijke,
zintuiglijke of geestelijke beperking, of gebrek aan ervaring en kennis het apparaat niet veilig kunnen
gebruiken, tenzij ze instructies hebben gehad over het gebruik van het apparaat door een persoon die
verantwoordelijkis voor hun veiligheid.
•Kinderen moeten in de gaten gehouden worden om er zeker van te zijn dat ze niet met het apparaat
spelen.
• Laat reparaties uitvoeren door een gekwalificeerde monteur. Probeer nooit zelf het apparaat te repareren.
Veiligheidsvoorschriften - Elektriciteit en warmte
•
•
•
•
•
•
•
•
•
•
•
•
Bepaalde delen van het apparaat kunnen heet worden.
Raak deze niet aan om te voorkomen dat u zich verbrandt.
Controleer of de netspanning overeenkomt met de aangegeven netspanning op het typeplaatje van het
apparaat, voordat u het apparaat gebruikt.
Controleer regelmatig of het snoer van het apparaat nog intact is. Gebruik het apparaat niet als het snoer
beschadigingen vertoont. Laat een beschadigd snoer vervangen door een gekwalificeerde servicedienst.
Sluit het apparaat alleen aan op een geaard stopcontact.
Als u de stekker uit het stopcontact neemt, trek dan aan de stekker zelf, niet aan het snoer.
Haal altijd de stekker uit het stopcontact wanneer u het apparaat niet gebruikt.
Zorg er bij gebruik van een verlengsnoer voor dat dit volledig uitgerold wordt.
Gebruik uitsluitend een goedgekeurd verlengsnoer.
Het apparaat moet zijn warmte kwijt kunnen om brandgevaar te voorkomen. Zorg er dus voor dat het
apparaat voldoende vrij is en niet in contact kan komen met brandbaar materiaal. Het apparaat mag
niet worden bedekt.
Gebruik het apparaat niet in de buurt van ontvlambare materialen.
Zorg ervoor dat het apparaat, het snoer en de stekker niet in aanraking komen met hittebronnen, zoals
een hete kookplaat of open vuur.
Zorg ervoor dat het apparaat, het snoer en de stekker niet in aanraking komen met water of een
andere vloeistof.
Bepaalde delen van het apparaat kunnen heet worden. Raak deze niet aan om te voorkomen dat u
zich verbrandt.
Veiligheidsvoorschriften - Gebruik
•
•
•
•
•
•
•
•
•
•
•
•
•
•
Gebruik het apparaat nooit buitenshuis.
Gebruik het apparaat nooit in vochtige ruimten.
Plaats het apparaat op een vlakke, stabiele en hittebestendige ondergrond, op een plaats waar het niet
kan vallen.
Zorg ervoor dat uw handen droog zijn als u het apparaat, het snoer of de stekker aanraakt.
Schakel het apparaat uit en verwijder de stekker uit het stopcontact als u tijdens het gebruik storingen
ondervindt, het apparaat gaat reinigen of klaar bent met het gebruik.
Laat het apparaat nooit onbeheerd achter als het in gebruik is.
Verplaats het apparaat nooit als het is ingeschakeld of nog warm is. Schakel het apparaat eerst uit en
verplaats het pas als het is afgekoeld.
Zorg voor voldoende vrije ruimte rondom het apparaat (minimaal 10 cm) en boven het apparaat
(minimaal 30 cm).
Tijdens gebruik worden delen van het apparaat heet. Gebruik daarom altijd de handgreep om het
deksel te openen en te sluiten.
Plaats geen zware voorwerpen op het deksel om het apparaat dicht te houden.
Voorkom dat er tijdens of direct na gebruik water op de hete bakplaten komt. Hierdoor kan een bakplaat vervormen.
Pak het apparaat niet op wanneer het in het water is gevallen. Trek direct de stekker uit het stopcontact. Gebruik het apparaat niet meer.
Maak het apparaat na gebruik grondig schoon (zie ‘Reiniging en onderhoud’).
Gebruik het apparaat niet in de nabijheid van een vogelkooi. Bij het verwarmen van de antiaanbaklaag
3
Nederlands
Gebruikershandleiding
Gebruikershandleiding
Nederlands
op de bakplaten kan een stof vrijkomen die hinderlijk is voor vogels.
• Het toestel mag niet in werking worden gesteld door middel van een externe tijdschakelaar, of door een afzonderlijk systeem met afstandsbediening.
Werking - Algemeen
7
Het apparaat is alleen bedoeld
voor huishoudelijke doeleinden,
niet voor professioneel gebruik.
1
6
3
5
1. Indicatielampje “opwarmen”
2. Opvangbakje
(los verplaatsbaar)
3. Dekselvergrendeling
4. Snoer en stekker
4
5. Bakplaten
6. Deksel
7. Handgreep
werking - Voor het eerste gebruik
1. 2. 3. 2
Figuur 1
Verwijder de verpakking.
Reinig alle accessoires om eventuele resten van het fabricageproces te verwijderen (zie ‘Reiniging en
onderhoud’).
Steek de stekker in het stopcontact en laat de grill gedurende 10 minuten verwarmen. Zo verwijdert u
de eventuele verpakkingsgeur uit het apparaat.
• •
De eerste keer dat u het apparaat in gebruik neemt, kan er lichte rookontwikkeling en een specifieke geur ontstaan. Dit is normaal en zal vanzelf verdwijnen. Zorg voor voldoende ventilatie.
Houd vogels uit de buurt van het apparaat als het apparaat in werking is. Bij het verwarmen van de
antiaanbaklaag op de bakplaat kan een stof vrijkomen die hinderlijk is voor vogels.
werking - Voorbereiden
1. 2. 3. 4. Plaats de grill op een vlak stabiel en hittebestendig oppervlak.
Plaats het opvangbakje (2) aan de voorkant van de grill tussen de voorpoten.
Sluit het (6) deksel.
Steek de stekker (4) in het stopcontact. Het rode lampje (1) gaat branden en het apparaat begint met
het verwarmen van de bakplaten (5).
Als de bakplaten op temperatuur zijn, gaat het rode lampje uit. Dit duurt ongeveer 2 minuten.
werking - Grillen
1. Open het deksel.
2. Leg het voedsel dat u wilt grillen op de onderste bakplaat.
Gebruik de dekselvergrendeling (3) van het apparaat niet om de pruducten samen te persen. Het gewicht van de bovenplaat zorgt al voor een gelijkmatige druk.
NB Om voedsel van verschillende dikten te kunnen verwerken, heeft het deksel speling zodat het zich
gemakkelijk aan de dikte van het voedsel aanpast.
3. Sluit het deksel.
4. Grill het voedsel tot het gaar is. De benodigde baktijd verschilt per product.
4
Gebruikershandleiding
NB Gebruik geen vorken, messen of andere scherpe voorwerpen! Hiermee kunt u de antiaanbaklaag
beschadigen. Schade aan de bakplaat en door scherpe voorwerpen valt niet onder de garantie!
6. Trek als u klaar bent de stekker uit het stopcontact. Eet smakelijk!
REINIGING EN ONDERHOUD
Reinig het apparaat na ieder gebruik.
1. Haal de stekker uit het stopcontact en laat het apparaat volledig afkoelen.
2. Verwijder voedselresten van de onderste bakplaat met wat keukenpapier wanneer het apparaat nog
warm is.
3. De bovenste bakplaat is makkelijker schoon te maken wanneer het afgekoeld is.
4. Reinig het opvangbakje met een sopje.
5. Reinig de behuizing en het deksel met een vochtige doek.
• Zorg ervoor dat het apparaat niet is aangesloten op het stopcontact als u het gaat schoonmaken.
• Gebruik geen agressieve of schurende schoonmaakmiddelen of scherpe voorwerpen (zoals
messen of harde borstels) bij het reinigen.
• Dompel het apparaat, het snoer en de stekker van het apparaat nooit onder in water of een andere
vloeistof.
REINIGING EN ONDERHOUD - Opbergen
1. Sluit het apparaat en duw de dekselvergrendeling aan de rechterkant dicht.
2. Plaats het apparaat op een vlakke en stevige ondergrond in verticale positie met de handgreep
omhoog of gewoon zoals het apparaat gebruikt wordt.
Milieu
•Werp verpakkingsmateriaal zoals plastic en dozen in de daarvoor bestemde containers.
•Dit product aan het eind van de gebruiksduur niet inleveren als normaal huishoudelijkafval, maar
bij een inzamelpunt voor hergebruik van elektrische en elektronische apparatuur. Let op het
symbool op het product, de gebruiksaanwijzing of de verpakking.
•De materialen kunnen hergebruikt worden zoals aangegeven. Door uw hulp bij hergebruik, de
verwerking van de materialen of ander vormen van de benutting van oude apparatuur levert u een
belangrijke bijdrage aan de bescherming van ons milieu.
•Informeer bij de gemeente naar het juiste inzamelpunt bij u in de buurt.
Technische gegevens
Type: Vermogen: Netspanning: ASW113 - ASW113S -ASW113R
1000W
220-240V ~50/60Hz
Garantiebepalingen
De importeur geeft onder de volgende voorwaarden 60 maanden na aankoopdatum garantie op deze
apparatuur tegen defecten die zijn ontstaan door fabricage- en/of materiaalfouten.
1. In de genoemde garantieperiode zullen geen kosten worden berekend voor arbeidsloon en materiaal.
De onder garantie uitgevoerde reparatie verlengt de garantietermijn niet.
2. Defecte onderdelen of bij remplace (omruiling) de defecte apparaten zelf, worden automatisch
eigendom van de importeur.
3. Elke aanspraak op garantie dient vergezeld te gaan van het aankoopbewijs van de firma.
4.Aanspraken op garantie moeten worden gedaan bij de dealer waar het apparaat is gekocht of bij de
importeur.
5. De garantie is uitsluitend geldig voor de eerste koper en niet overdraagbaar.
6. De garantie is niet geldig voor schade die is ontstaan door: a. ongevallen, verkeerd gebruik, slijtage en/of verwaarlozing; b. foutieve installatie en/of gebruik op een manier die in strijd is met de geldende wettelijke,
technische of veiligheidsnormen; c. aansluiting op een andere netspanning dan die op het typeplaatje staat vermeld; d. een ongeautoriseerde wijziging; 5
Nederlands
5. Open het deksel en haal het voedsel van de bakplaat.
Gebruikershandleiding
Nederlands
e. een reparatie die is uitgevoerd door derden; f. een onzorgvuldige transportwijze zonder geschikte verpakking respectievelijk bescherming.
7. Op deze garantiebepalingen zal geen aanspraak gemaakt kunnen worden bij: a. verliezen die zich tijdens het transport voordoen; b. het verwijderen of wijzigen van het serienummer van het apparaat.
8. Uitgezonderd van garantie zijn snoeren, lampen en glazen onderdelen.
9. De garantie geeft geen enkel recht op vergoeding van eventuele schade, buiten de vervanging
respectievelijk reparatie van de defecte onderdelen. De importeur kan nooit aansprakelijk gesteld
worden voor eventuele vervolgschade of enigerlei andere consequenties die door of in relatie met de
door hem geleverde apparatuur zijn ontstaan.
10.Om aanspraak te maken op garantie kunt u zich wenden tot uw winkelier. Bestron biedt ook de
mogelijkheid om het apparaat rechtstreeks ter reparatie aan te bieden aan de Bestron Service Dienst.
Stuur echter nooit zomaar iets op. Het pakket kan dan namelijk geweigerd worden en eventuele kosten
zijn voor uw rekening. Neem contact op met de Service Dienst en zij zullen u vertellen hoe u het
apparaat moet inpakken en verzenden.
11. Het apparaat is niet voor professioneel gebruik geschikt.
Service
Mocht zich onverhoopt een storing voordoen, dan kunt u zich in verbinding stellen met de BESTRONservicedienst:
NEDERLAND:BELGIE:
BESTRON NEDERLAND BV
WILLEMEN SERVICE BVBA
BESTRON SERVICE
BESTRON SERVICE
Moeskampweg 20
Lambrechtshoekenlaan 337-339
5222 AW ’s-Hertogenbosch
2170 Merksem - Antwerpen
Tel: 073 - 623 11 21
Tel: 03 - 321 78 48
Fax: 073 - 621 23 96
Fax: 03 - 321 28 50
Email: [email protected]
Email: [email protected]
Internet: www.bestron.com
Internet: www.wilservice.be
CE-conformiteitsverklaring
Dit product voldoet aan de bepalingen in de volgende Europese richtlijnen op het gebied van veiligheid:
• EMC-richtlijn • Laagspanningsrichtlijn 2004/108/EC
2006/95/EC
R. Neyman
Quality control
6
Gebruikershandleiding
Grillspiesjes
Ingrediënten:
• 350 g schnitzelvlees
• 2 grote uien
• 2 paprika’s
• 50 g bacon
• olie
Hamburger
Ingrediënten:
• 2 bekertjes zure room (2 X 150 g)
• 6 lenteuitjes
• 6 el paneermeel
• 2 tl worcestersaus
• 2 tl peper
• 800 g rundergehakt
• 8 broodjes (hamburgerbroodjes)
• Sla
• 2 tomaat
• 1 uien (zoetige ui)
• 4 tl mosterd
• 2 el mayonaise
• 2 el tomatenketchup
Voor de marinade:
• 125ml water
• 4 el wijn, rood
• 1 el azijn
• 1 teentje knoflook
• 1 snufje tijm
• peper
• zout
Bereiding:
Het vlees in blokjes snijden. De uien in vieren delen.
Paprika en bacon in plakjes snijden. Alle ingrediënten
afwisselend aan de spiesjes rijgen. De spiesjes ca.
een uur in de marinade leggen. Eruit halen, laten
uitlekken. Met olie bestrijken en ca. 10 min. op de
Panini grill grillen.
Sandwiches
Ingrediënten:
• 4 plakjes toastbrood, grote sneetjes
• 2 porties kipfilet, heel fijn in dunne reepjes
gesneden
• 2 uien, in fijne ringen gesneden
• 1 knoflookteentje, fijngehakt
• zout en peper
• 1 tl paprikapoeder
• 2 el saus (knoflooksaus uit een potje)
• 1 handvol rucola, grof gehakt
• 2 tl 5-kruidenpoeder, Chinees
Bereiding:
Kipfiletreepjes goed op de Panini grill grillen en
kruiden. Uien en knoflook goudbruin braden
en zouten. 2 geroosterde sneetjes toastbrood
rijkelijk met rucola beleggen, daarover de uien,
de kipfiletreepjes, knoflooksaus en nogmaals
rucola erover leggen. Telkens een tweede sneetje
toastbrood als deksel erop leggen en alles ca. 4-6
min. op de Panini grill leggen.
Kipspiesjes om te grillen
Ingrediënten:
• 2 kipfilets
• saus (teriyakisaus)
• een beetje wijn, wit
Bereiding:
Eerst de marinade maken – ca. 5 el teriyakisaus
met een beetje droge witte wijn vermengen. De
kipfilets in dunne plakjes snijden en minimaal 2 uur
in de saus laten marineren. Daarna waaiervorming
aan de spiesjes rijgen en op de Panini grill leggen
– tussendoor telkens weer met de resterende
marinade bestrijken.
7
Bereiding:
Uien in mooie ringen snijden, tomaten in plakjes
snijden en in een schaal doen. Lenteuitjes fijnhakken.
Het groene gedeelte voor 50% mee snijden. Het
gehakt, de lenteuitjes, zure room, worcestersaus
en de peper goed met elkaar vermengen. Uit het
gehaktmengsel platte burgers vormen. Het beste is
om eerst balletjes te vormen die u vervolgens op een
snijplank plat drukt. Het vlees indien mogelijk dun
maken. Mosterd, mayonaise en ketchup vermengen.
Dit is de saus voor later. De uien, tomaten en de saus
mee opdienen. Op de Panini grill het vlees aan beide
kanten mooi bruin laten worden. Kort voor het einde
van het grillen de broodjes op de grill erbij leggen.
Dan worden de broodjes ook nog mooi knapperig.
Groentespiesje om te grillen
Ingrediënten:
• grote paddenstoelen, naar keuze
• 1 paprika, rood
• 20 cherrytomaatjes
• 20 kleine uien, zoete of 1 rode, pittige grotere ui,
kleingesneden
• 1 ananas, in blokjes gesneden (ca. 1 ½ tot 2 cm)
• 3 el olijfolie
• 1 el balsamico
• zout naar smaak
• peper, versgemalen
• 1 el broodkruim
• 3 teentjes knoflook, geplet
• dragon, vers of gedroogd
• 1 paprika, geel
• 1 paprika, groen
• een beetje rode peper, gemalen
Bereiding:
Paddenstoelen, uien, tomaten en paprika
schoonmaken, naar behoefte in hapklare stukjes
snijden en vervolgens in een grotere schaal doen.
Rijkelijk olijfolie erover gieten en tevens een paar
scheutjes balsamico. Met een beetje zout, royaal
versgemalen zwarte peper en een beetje gemalen
rode peper op smaak brengen. Vervolgens de
knoflook, de dragon en de broodkruim er spaarzaam
overheen strooien. Goed doormengen. Eventueel
met een scheutje olijfolie en één of twee scheutjes
Nederlands
Recepten
Gebruikershandleiding
Nederlands
balsamico de smaak nog wat aanpassen. Laat de
ingrediënten nu ongeveer 30 minuten doortrekken
en rijg vervolgens aan de spiesjes. De ananas niet
aan de marinade toevoegen. De overige marinade
in een klein kopje gieten. De spiesjes ongeveer 10
minuten op de Panini grill doen en met de resterende
marinade bedruipen.
Italiaanse sandwich
Ingrediënten:
• 2 sneetjes toastbrood per sandwich
• 1 el olijfolie
• ½ kleine ui
• ½ kleine paprika, rood
• 3 ansjovis of als alternatief:
• 2 tomaten, gedroogd, in olie (tot 3 tomaten)
• 50 g mozzarella
• 6 olijven, zwart
• 1 el peterselie, gehakt
• ½ tl tijm, gehakt
Bereiding:
Toastbrood met olijfolie bedruipen. Uien in ringen,
paprika in fijne reepjes snijden. Indien er in plaats
van de ansjovis gedroogde tomaten worden gebruikt
moeten deze in reepjes worden gesneden. Mozzarella
in plakjes snijden. Voorbereide ingrediënten met de
olijven over het sneetje toastbrood verdelen en met
peterselie en tijm bestrooien en aansluitend in de
Panini grill gedurende 4-6 minuten grillen.
Chicken Pesto Panini’s
Ingrediënten:
• 1 focaccia-brood, in vieren verdeeld
• ½ kopje basilicumpesto uit een potje
• 200 g gekookt kipfilet in dunne plakjes gesneden
• 200 g groene paprika in kleine blokjes gesneden
• 150 g rode ui in ringen gesneden
• 250 g geraspte Goudse kaas
Bereiding:
Verwarm uw Panini grill voor. Snijd elk kwart
focaccia-brood voor de helft door en bestrijk elke
helft met de pesto. Beleg telkens de ene helft met
de ingrediënten zoals kipfilet, paprika, ui en de kaas.
Leg de andere vier helften er nu bovenop en grill
de panini’s in de voorverwarmde grill gedurende
ca. 5 min. of totdat ze goudbruin zijn en de kaas is
gesmolten.
Marc`s panini
Ingrediënten:
• 1 Focaccia-brood, in vieren gedeeld of 4 ciabattabroodjes
• 1 tomaat
• 1 komkommer
• 4 plakjes kaas, goed smeltend
• 4 plakjes ham, gekookt of salami
• kruidenboter
• zout en peper
• kruiden naar smaak
Bereiding:
Het panini-brood in de lengte doorsnijden en met
8
de kruidenboter bestrijken. De ham of de salami
over de onderste helften verdelen. De komkommer
en de tomaat in plakjes snijden en eveneens op de
baguette leggen, op smaak brengen en met verse
kruiden bestrooien. De kaas erop leggen en met
het bovenste gedeelte van de panini afdekken. Grill
de panini’s in de voorverwarmde grill gedurende
ca. 5 min. of totdat ze goudbruin zijn en de kaas is
gesmolten.
Koreaans vuurvlees
Ingrediënten:
• 1 kg varkensvlees (uit de nek) in ca. 1 cm dikke
plakken
• 1 prei
• 3 teentjes knoflook
• 5 el sojasaus
• 5 el olie, (zonnebloemolie)
• 2 el azijn, (wijnazijn)
• 1 citroen, uitgeperst
• 7 tl 5-kruidenpoeder (Chinees)
• 2 tl cayennepeper
Bereiding:
De knoflook klein hakken resp. pletten. Deze met alle
vloeibare ingrediënten en specerijen tot een saus
vermengen en goed door elkaar roeren. Dan de prei
in ringen snijden. Nu hebt u een schaal (het beste
met een afsluitbaar deksel) nodig, waarin het vlees
kan worden gemarineerd. Met het deksel afsluiten
(of de schaal op een andere manier afdekken) en
in de koelkast zetten. Daar 1-3 dagen laten staan,
halverwege de schaal omdraaien (of de plakken
vlees omkeren), zodat de marinade ook gelijkmatig
wordt verdeeld. Na het marineren de stukken vlees
op de voorverwarmde Panini grill leggen en naar
smaak garen.
Thaise vis
Ingrediënten:
• 1 kg visfilet (bijv. roodbaars, heek, pangasius…)
• (De vis kan vers of diepgevroren zijn, moet dan
echter worden ontdooid.)
• 1 el komijn
• 2 el oestersaus
• 100 ml olie (bijv. sesam-, zonnebloem- of
arachideolie)
• 1 tl kerriepasta, groen
• ½ citroen, het sap hiervan
• zout
• suiker
Bereiding:
De filets worden nu gezouten en heel licht gesuikerd.
In een glas met schroefdeksel of in een shaker
worden de olie, oestersaus, komijn, het citroensap
en de kerriepasta met elkaar vermengd. Hoe langer
en krachtiger er wordt geschud, hoe langer de
emulsieachtige toestand van de marinade intact blijft
(beter voor het marineren). De marinade op het vlees
aanbrengen en minimaal 2 uur in de koelkast laten
trekken. Aansluitend op de voorverwarmde Panini
grill leggen en aan elke kant ca. 3-4 minuten garen.
Gebrauchsanweisung
Wir gratulieren Ihnen zum Kauf dieses Panini Grills, mit dem Sie Fleisch, Fisch oder ganze Panini’s
schmackhaft und gesund zubereiten können. Der Grill hat im Gehäuse und im Deckel jeweils eine Grillplatte,
sodass die Ober- und Unterhitze gleichmäßig verteilt werden. Die Grillplatten lassen sich einfach reinigen.
•
•
•
•
•
Lesen Sie sich diese Bedienungsanleitung aufmerksam durch und bewahren Sie sie sorgfältig auf.
Verwenden Sie das Gerät nur wie in dieser Bedienungsanleitung beschrieben.
Kinder oder Personen, denen es an Wissen oder Erfahrung im Umgang mit dem Gerät mangelt, oder die
in ihren körperlichen, sensorischen oder geistigen Fähigkeiten eingeschränkt sind, dürfen das Gerät nicht
ohne Aufsicht oder Anleitung durch eine für ihre Sicherheit verantwortliche Person benutzen.
Kinder müssen beaufsichtigt werden, damit sie nicht mit dem Gerät spielen.
Lassen Sie Reparaturen von einem qualifizierten Mechaniker ausführen. Versuchen Sie nie, das
Gerät selbst zu reparieren.
Sicherheitsbestimmungen - Elektrizität und Wärme
Bestimmte Teile des Geräts können heiß werden.
Um Verbrennungen zu vermeiden, sollten Sie diese nicht berühren.
• Prüfen Sie vor Verwendung des Geräts, ob die Netzspannung mit der auf dem Typenschild des Geräts
angegebenen Stromstärke übereinstimmt.
• Überprüfen Sie regelmäßig, ob das Gerätekabel noch intakt ist. Benutzen Sie das Gerät nicht, wenn
das Kabel beschädigt ist. Lassen Sie ein beschädigtes Kabel von einem qualifizierten Wartungsdienst
ersetzen.
• Ziehen Sie immer den Stecker aus der Steckdose, wenn Sie das Gerät nicht benutzen.
• Schließen Sie das Gerät nur an eine geerdete Steckdose an.
• Ziehen Sie beim Entfernen des Steckers aus der Steckdose am Stecker und nicht am Kabel.
• Bei Benutzung eines Verlängerungskabels muss das Kabel immer ganz ausgerollt werden.
• Verwenden Sie ausschließlich zugelassene Verlängerungskabel.
• Um Brandgefahr zu verhindern, muss das Gerät seine Wärme abgeben können. Sorgen Sie also
dafür, dass das Gerät ausreichend frei steht und nicht in Kontakt mit brennbarem Material kommen
kann. Das Gerät darf nicht abgedeckt werden.
• Benutzen Sie das Gerät nicht in der Nähe von entzündlichen Materialien.
• Sorgen Sie dafür, dass das Gerät, das Kabel und der Stecker nicht mit Hitzequellen wie heißen
Kochplatten oder offenem Feuer in Berührung kommen.
• Sorgen Sie dafür, dass das Gerät, das Kabel und der Stecker nicht mit Wasser oder anderen
Flüssigkeiten in Berührung kommen.
• Bestimmte Teile des Geräts können heiß werden. Um Verbrennungen zu vermeiden, sollten Sie diese
nicht berühren.
Sicherheitsbestimmungen - Benutzung
• Benutzen Sie das Gerät nie im Freien.
• Benutzen Sie das Gerät nie in feuchten Räumen.
• Stellen Sie das Gerät auf einen ebenen, stabilen hitzbeständigen Untergrund an einer Stelle, wo es
nicht herunterfallen kann.
• Sorgen Sie dafür, dass Ihre Hände trocken sind, wenn Sie das Gerät, das Kabel oder den Stecker
berühren.
• Schalten Sie das Gerät aus und ziehen Sie den Stecker aus der Steckdose, wenn bei der Benutzung
Störungen auftreten, Sie das Gerät reinigen oder es nicht mehr benutzen.
• Lassen Sie das Gerät bei der Benutzung niemals unbeaufsichtigt.
• Verschieben Sie das Gerät keinesfalls in eingeschaltetem Zustand oder wenn es noch warm ist.
Schalten Sie das Gerät zuerst aus und lassen Sie es stehen, bis es abgekühlt ist.
• Sorgen Sie dafür, dass um das Gerät herum (mindestens 10 cm) und über dem Gerät (mindestens 30
cm) ausreichend Platz ist.
• Teile des Geräts können während der Benutzung heiß werden. Verwenden Sie zum Öffnen und
Schließen des Deckels darum immer den Handgriff.
• Legen Sie keine schweren Gegenstände auf den Deckel, um das Gerät geschlossen zu halten.
• Vermeiden Sie, dass während oder direkt nach der Benutzung Wasser auf die heißen Grillplatten
gelangt. Die Grillplatten können sich dadurch verformen.
• Nehmen Sie das Gerät nicht auf, wenn es ins Wasser gefallen ist. Ziehen Sie sofort den Stecker aus
der Steckdose. Benutzen Sie das Gerät nicht mehr.
• Reinigen Sie das Gerät nach der Benutzung gründlich (siehe „Reinigung und Wartung“).
9
Deutsch
Sicherheitsbestimmungen - Allgemein
Gebrauchsanweisung
• Benutzen Sie das Gerät nicht in der Nähe eines Vogelkäfigs. Bei der Erwärmung der auf den Backflächen
befindlichen Antihaftschicht kann ein Stoff freigesetzt werden, der für Vögel unangenehm ist.
• Verwenden Sie das Gerät nicht mit externen Zeitschaltuhren o.ä.
verwendung - Allgemein
Das Gerät ist nur für den Hausgebrauch
vorgesehen und nicht für die
professionelle Verwendung.
7
1
6
3
Deutsch
5
1. 2. 3. 4. 5. 6. 7. Kontrollleuchte “aufwärmen”
Fettfangschale (abnehmbar)
Sichere Deckelverriegelung
System
Kabel mit Stecker
Grillplatte
Deckel
Griff
2
4
VOR DEM ERSTEN GEBRAUCH 1. 2. 3. Abbildung 1
Entfernen Sie die Verpackung.
Reinigen Sie alle Zubehörteile, um eventuelle Reste des Herstellungsprozesses zu entfernen (siehe
„Reinigung und Wartung“).
Stecken Sie den Stecker in die Steckdose und lassen Sie den Grill 10 Minuten aufheizen. So entfernen
Sie den eventuell vorhandenen Verpackungsgeruch aus dem Gerät.
• •
Bei der ersten Verwendung des Geräts können eine leichte Rauchentwicklung sowie ein spezieller
Geruch entstehen. Das ist normal und geht von selbst wieder weg. Sorgen Sie für ausreichende
Belüftung.
Halten Sie Vögel vom Gerät fern, wenn dieses in Betrieb ist. Bei der Erwärmung der Antihaftschicht
auf der Grillplatte kann ein Stoff freigesetzt werden, der für Vögel unangenehm ist.
verwendung- Gebrauch
1. 2. 3. 4. Stellen Sie den Grill auf eine flache, stabile und hitzebeständige Oberfläche.
Bringen Sie die Fettfangschale (2) an der Vorderseite des Grills zwischen die Füßen anliegend an.
Schließen Sie den Deckel (6).
Stecken Sie den Stecker (4) in die Steckdose. Die rote Lampe (1) leuchtet und das Gerät beginnt mit
dem Erwärmen der Grillplatten (5).
Wenn die Grillplatten die richtige Temperatur erreicht haben, erlischt die rote Lampe. Das dauert ungefähr
2 Minuten.
verwendung- Grillen
1. Öffnen Sie den Deckel.
2. Legen Sie das Grillgut auf die untere Grillplatte.
Gebrauchen Sie den seitlichen Verschluss (3) des Gerätes nicht, um Druck auf die Produkte
auszuüben. Das Gewicht der oberen Platte ist für einen gleichenmäßigen Druck ausreichend.
Hinweis Der Deckel hat ein wenig Spiel, sodass er sich leicht an die Dicke des Grillguts anpasst. Es
können also Nahrungsmittel verschiedener Dicke zubereitet werden.
3. Schließen Sie den Deckel.
4. Grillen Sie das Grillgut, bis es gar ist. Die erforderliche Grillzeit ist je nach Produkt verschieden.
10
Gebrauchsanweisung
5. Öffnen Sie den Deckel und nehmen Sie das Grillgut von der Grillplatte.
Hinweis Verwenden Sie nie Gabeln, Messer oder andere scharfe Gegenstände! Hierdurch können Sie die Antihaftbeschichtung der Platten beschädigen. Beschädigung durch scharfe gegenstände der platten fällt nicht unter die garantie!
6. Ziehen Sie den Stecker aus der Steckdose, wenn Sie fertig sind. Guten Appetit!
Reinigen Sie das Gerät nach jeder Verwendung.
1. Ziehen Sie den Stecker aus der Steckdose und lassen Sie das Gerät vollständig abkühlen.
2. Entfernen Sie Speisereste von der unteren Platte mit einen Küchenpapier solange das Gerät noch
warm ist.
3. Die obere Platte ist einfacher zu reinigen, wenn das Gerät abgekühlt ist
4. Reinigen Sie die Abtropfschale mit einem Tuch.
5. Reinigen Sie das Gehäuse und den Deckel mit einem feuchten Tuch.
• Sorgen Sie dafür, dass das Gerät bei der Reinigung nicht an die Steckdose angeschlossen ist.
• Verwenden Sie zur Reinigung keine aggressiven Reinigungs- oder Scheuermittel oder scharfen
Gegenstände (wie Messer oder harte Bürsten).
• Tauchen Sie das Gerät, das Kabel und den Stecker des Geräts nie in Wasser oder andere
Flüssigkeiten.
REINIGUNG UND Wartung - Aufräumen
1. Klappen Sie das Gerät zusammen und schieben Sie den Verschluss an der rechten Seite zu.
2. Stellen Sie das Gerät aufrecht mit dem Griff nach oben auf eine ebene, gerade Oberfläche.
Umwelt
•Werfen Sie Verpackungsmaterial wie Kunststoff und Kartons in die dafür vorgesehenen Container.
•Geben Sie dieses Produkt am Ende der Nutzungsdauer nicht als normalen Haushaltsabfall ab,
sondern bei einem Sammelpunkt für die Wiederverwendung elektrischer und elektronischer
Geräte. Achten Sie auf das Symbol auf dem Produkt, der Gebrauchsanweisung oder der
Verpackung.
•Die Materialien können wie angegeben wiederverwendet werden. Durch Ihre Hilfe bei der
Wiederverwendung, der Verarbeitung der Materialien oder anderen Formen der Benutzung alter
Geräte liefern Sie einen wichtigen Beitrag zum Schutz unserer Umwelt.
•Erkundigen Sie sich bei den Stadtverwaltungen nach dem richtigen Sammelpunkt in Ihrer Nähe.
Technische Daten
Typ: Leistung: Netzspannung: ASW113 - ASW113S -ASW113R
1000W
220-240V ~50/60Hz
Garantiebestimmungen
Der Importeur gewährt für dieses Gerät unter den folgenden Bedingungen 60 Monate Garantie ab
Kaufdatum auf Schäden, die aufgrund von Herstellungs- und/ oder Materialfehlern entstanden sind.
1. Innerhalb der genannten Garantiefrist werden keine Kosten für Arbeitslohn und Material berechnet. Die
Garantiefrist wird durch die unter Garantie ausgeführte Reparatur nicht verlängert.
2. Schadhafte Teile oder, im Falle eines Umtauschs, die schadhaften Geräte selbst werden automatisch
Eigentum des Importeurs.
3. Bei jedem Garantieanspruch muss ein Kaufbeleg der Firma vorgelegt werden.
4. Garantieansprüche müssen entweder beim Händler, bei dem das Gerät gekauft wurde, geltend
gemacht werden oder beim Importeur.
5. Die Garantie gilt nur für den ersten Käufer und ist nicht übertragbar.
6. Die Garantie gilt nicht für Schäden, die entstanden sind durch:
a. Unfälle, verkehrte Benutzung, Abnutzung und/oder Verwahrlosung
b. falsche Montage und/oder Benutzung, die gegen die einschlägigen gesetzlichen und technischen
Normen oder gegen Sicherheitsnormen verstößt
c. Anschluss an eine andere Netzspannung als die auf dem Typenschild angegebene
11
Deutsch
REINIGUNG UND Wartung
Gebrauchsanweisung
Deutsch
d. eine ungenehmigte Veränderung
e. eine Reparatur, die durch Dritte ausgeführt wurde
f. nachlässigen Transport ohne geeignete Verpackung bzw. ohne geeigneten Schutz
7. Auf diese Garantiebestimmungen kann kein Anspruch erhoben werden im Falle von:
a. Verlusten, die während des Transports auftreten
b. Entfernung oder Änderung der Geräteseriennummer
8. Ausgenommen von der Garantie sind Kabel, Lampen und Glasteile.
9. Außer einem Ersatz bzw. einer Reparatur der schadhaften Teile räumt die Garantie kein Recht
auf Erstattung eines eventuellen Schadens ein. Der Importeur kann in keinem Fall für eventuelle
Folgeschäden oder irgendwelche anderen Folgen haftbar gemacht werden, die durch das von ihm
gelieferte oder in Verbindung mit dem von ihm gelieferten Gerät entstanden sind.
10. Um Garantieleistungen in Anspruch zu nehmen, wenden Sie sicht direkt an Ihren Händler. Bestron
bietet auch die Möglichkeit direkt mit dem Werkskundendienst abzuwickeln. Voraussetzung hierfür
ist, dass Sie sich zunächst telefonisch, per Fax oder Mail an den Werkskundendienst wenden. Bitte
schicken Sie keine Geräte unaufgefordert. Insbesondere dürfen Pakete niemals unfrei eingesendet
werden. Sprechen Sie daher zuerst mit uns. Wir sagen Ihnen wie Sie Ihr Gerät an uns einsenden
sollen.
11. Das Gerät eignet sich nicht für die professionelle Verwendung.
Kundendienst
Sollte unerwartet eine Störung auftreten dann können Sie sich mit dem BESTRON-Kundendienst in
Verbindung setzen:
DEUTSCHLAND:
SERVICE CENTER FRENZ
BESTRON SERVICE
Kleikstraße 94-96
52134 Herzogenrath
Tel: 02406 97 999 15
Fax: 02406 97 999 13
E-mail: [email protected]
Internet: www.bestron.com
CE-Konformitätserklärung
Dieses Produkt entspricht auf dem Gebiet der Sicherheit den Bestimmungen der folgenden europäischen
Richtlinien:
• EMC-Richtlinie • Niederspannungsrichtlinie 2004/108/EC
2006/95/EC.
R. Neyman
Qualitätskontrolle
12
Gebrauchsanweisung
Rezepten
Grill – Spieße
Zutaten:
• 350 g Schnitzelfleisch
• 2 große Zwiebel(n)
• 50 g Schinkenspeck
• Öl
Für die Marinade:
• 125 ml Wasser
• 4 EL Wein, rot
• 1 EL Essig
• 1 Zehen Knoblauch
• 1 Prise Thymian
• Pfeffer
• Salz
Zubereitung:
Das Fleisch in Würfel schneiden. Die Zwiebeln
vierteln. Paprika und Schinkenspeck in Scheiben
schneiden. Alle Zutaten abwechselnd auf Spieße
ziehen. Die Spieße etwa eine Stunde in die Marinade
legen. Herausnehmen, abtropfen lassen. Mit Öl
einpinseln und etwa 10 Min. auf dem Paninigrill
grillen.
Hühnerspieße zum Grillen
Zutaten:
• 2 Hähnchenbrustfilet
• Sauce (Teriyakisauce)
• etwas Wein, weiß
Zubereitung:
Zuerst die Marinade herstellen - ca. 5 El Teriyakisauce
mit etwas trockenem Weißwein verrühren. Die
Hähnchenbrustfilets in dünne Scheiben schneiden
und mindestens 2 Stunden in der Soße marinieren
lassen. Danach fächerförmig auf die Spieße stecken
und rauf auf den Panini Grill - zwischendurch immer
wieder mit der übrigen Marinade bepinseln.
Hamburger
Zutaten:
• 2 Becher saure Sahne (2 X 150 g)
• 6 Frühlingszwiebel(n)
• 6 EL Semmelbrösel
• 2 TL Worcestershiresauce
• 2 TL Pfeffer
• 800 g Hackfleisch vom Rind
• 8 Brötchen (Hamburgerbrötchen)
• Salat
• 2 Tomate(n)
• 1 Zwiebel(n) (Gemüsezwiebel)
• 4 TL Senf
• 2 EL Mayonnaise
• 2 EL Tomatenketchup
Zubereitung:
Zwiebel in schöne Ringe schneiden, Tomaten in
Scheiben schneiden und in eine Schüssel geben.
Frühlingszwiebeln fein hacken. Das Grüne zu 50%
mitschneiden Das Hackfleisch, Frühlingszwiebeln,
saure Sahne, Worcestershire-Sauce und den
Pfeffergut
durchmengen.
Aus
der
13
Gemüsespieß zum Grillen
Zutaten:
• große Pilze, nach Wahl
• 1 Paprikaschote(n), rot
• 20 Kirschtomate(n)
• 20 kleine Zwiebel(n), süße oder 1 rote, scharfe,
größere Zwiebel, kleingeschnitten
• 1 Ananas, in Quadrate geschnitten (ca. 1
• 1/2 bis 2 cm)
• 3 EL Olivenöl
• 1 EL Balsamico
• Salz nach Bedarf
• Pfeffer frisch gemahlen
• 1 EL Mehl (Weckmehl)
• 3 Zehen Knoblauch, zerdrückt
• Estragon, frisch oder getrocknet
• 1 Paprikaschote(n), gelb
• 1 Paprikaschote(n), grün
• etwas Chilischote(n), gemahlen
Zubereitung:
Pilze, Zwiebeln, Tomaten und Paprikaschoten
putzen, nach Bedarf in mundgerechte Stücke
teilen und anschließend in eine größere Schüssel
geben. Reichlich Olivenöl darüber gießen, ebenso
ein paar Spritzer Balsamico. Mit etwas Salz,
reichlich frisch gemahlenen schwarzen Pfeffer
und etwas gemahlenem Chilipfeffer würzen. Dann
den Knoblauch, den Estragon und das Weckmehl
sparsam darüber streuen. Gut durchmischen. Evtl.
mit einem Schuss Olivenöl und ein oder zwei Spritzer
Balsamico nachwürzen. Lassen Sie die Zutaten nun
etwas 30 Minuten durchziehen und dann auf die
Spieße geben. Geben Sie die Ananas nicht mit in
die Marinade. Die restliche Marinade in eine kleine
Tasse abfüllen. Geben Sie die Spieße für etwa 10
Minuten auf den Panini Grill und beträufeln Sie sie
mit der restlichen Marinade.
Sandwiches
Zutaten:
• 4 Scheiben Toastbrot, große Scheiben
• 2 Port. Hähnchenfilet, ganz fein in dünne Streifen geschnitten
• 2 Zwiebel(n), in feine Ringe geschnitten
• 1 Knoblauchzehe(n), fein gehackt
• Salz und Pfeffer
• 1 TL Paprikapulver
• 2 EL Sauce (Knoblauchsauce aus dem Glas )
• 1 Handvoll Rucola, grob gehackt
• 2 TL Gewürzmischung, chinesische
Deutsch
Hackfleischmischung flache Burger formen. Am
besten erst Kugeln machen und diese dann auf
einem Schneidebrett flach drücken. Das Fleisch
sollte möglichst dünn werden. Senf, Mayonnaise
und Ketchup vermischen. Das ist die spätere Sauce.
Die Zwiebeln, Tomaten und die Sauce mit auf den
Esstisch. Auf dem Panini Grill das Fleisch von
beiden Seiten schön braun werden lassen. Kurz vor
Grillende die Brötchen mit auf den Grill legen. Dann
werden die Brötchen auch noch schön knusprig.
Gebrauchsanweisung
Zubereitung:
Hähnchenfiletstreifen auf dem Paninigrill kräftig
grillen und würzen. Zwiebeln und Knoblauch goldgelb
braten und salzen. 2 geröstete Toastscheiben mit
reichlich Rucola belegen, dann die Zwiebeln, die
Hähnchenfiletstreifen, Knoblauchsauce und nochmal
Rucola darauf geben. Je ein zweites Toastbrot als
Deckel drauf anschließend alles für ca 4-6 Min auf
den Paninigrill geben.
Deutsch
Italien – Sandwich
Zutaten:
• 2 Toastbrotscheiben pro Sandwich
• 1 EL Olivenöl
• ½ kleine Zwiebel(n)
• ½ kleine Paprikaschote(n), rot
• 3 Anchovis oder alternativ:
• 2 Tomate(n), getrocknet, in Öl (bis 3 Tomaten)
• 50 g Mozzarella
• 6 Oliven, schwarz
• 1 EL Petersilie, gehackt
• ½ TL Thymian, gehackt
Zubereitung:
Das Panini Brot längs aufschneiden und mit der
Kräuterbutter bestreichen. Den Schinken oder
die Salami auf die unteren Hälften verteilen. Die
Gurke und die Tomate in Scheiben schneiden und
ebenfalls auf das Baguette legen, würzen und mit
frischen Kräutern bestreuen. Den Käse auflegen
und mit dem Paninioberteil bedecken. Grillen Sie die
Paninis im vorgeheizten Grill für ca. 5 Min oder bis
sie goldbraun sind und der Käse geschmolzen ist.
Koreanisches Feuerfleisch
Zutaten:
• 1 kg Schweinefleisch, in ca. 1 cm dicken Scheiben
• 1 Stangen Lauch
• 3 Zehen Knoblauch
• 5 EL Sojasauce
• 5 EL Öl, (Sonnenblumenöl)
• 2 EL Essig, (Weinessig)
• 1 Zitrone(n), ausgepresste
• 7 TL Gewürzmischung (Chinawürzer)
• 2 TL Cayennepfeffer
Zubereitung:
Toastbrot mit Olivenöl beträufeln. Zwiebel in Ringe,
Paprikaschote in feine Streifen schneiden. Falls
man statt der Anchovisfilets getrocknete Tomaten
verwendet, diese in Streifen schneiden. Mozzarella
in Scheiben schneiden. Vorbereitete Zutaten mit den
Oliven auf dem Toastbrot verteilen und mit Petersilie
und Thymian bestreuen anschließend im Panini Grill
für 4-6 Minuten grillen.
Chicken Pesto Paninis
Zutaten:
• 1 Focaccia Brot, geviertelt
• ½ Tasse Basilikumpesto aus dem Glas
• 200 g gekochte Hühnerbrust in dünnen Scheiben geschnitten
• 200 g grüne Paprikaschote in kleine Würfel
geschnitten
• 150 g rote Zwiebel in Ringe geschnitten
• 250 g geriebener Gouda Käse
Zubereitung:
Heizen Sie Ihre Panini Grill vor. Schneiden Sie
jedes Viertel Focaccia Brot zur Hälfte durch und
bestreichen Sie jede Hälfte mit dem Pesto. Belegen
Sie je eine mit den Zutataten wie Hünhnerbrust,
Paprika, Zwiebel und dem Käse. Legen Sie die
anderen 4 Hälften nun oben auf und grillen Sie die
Paninis im vorgeheizten Grill für ca. 5 Min oder bis
sie goldbraun sind und der Käse geschmolzen ist.
Marc`s Panini
Zutaten:
• 1 Focaccia Brot, geviertelt oder 4 Ciabatta Brötchen
• 1 Tomate(n)
• 1 Gurke(n)
• 4 Scheiben Käse, gut schmelzender
• 4 Scheiben Schinken, gekochten oder Salami
• Kräuterbutter
• Salz und Pfeffer
• Kräuter nach Belieben
14
Zubereitung:
Den Knoblauch klein hacken bzw. zerdrücken.
Diesen mit allen flüssigen Zutaten und Gewürzen zu
einer Soße zusammenmischen und gut verrühren.
Dann den Lauch in Ringe schneiden. Nun wird eine
Schüssel (am besten mit verschließbarem Deckel)
benötigt, in der das Fleisch mariniert werden kann.
Deckel schließen (oder die Schüssel anderweitig
abdecken), und in den Kühlschrank stellen. Dort
1-3 Tag stehen lassen, nach der Hälfte der Zeit die
Schüssel umdrehen (oder die Fleisch-Scheiben
wenden), damit die Marinade auch gleichmäßig
verteilt wird. Nach dem Marinieren die Fleischstücke
auf den vorgeheizten Panini Grill legen und nach
belieben garen.
Thailändischer – Fisch
Zutaten:
• 1 kg Fischfilet (z.B. Rotbarsch, Seehecht,
Pangasius...)
• 1 EL Kreuzkümmel
• 2 EL Austernsauce
• 100 ml Öl (z.B. Sesam-, Sonnenblumen- oder
Erdnussöl)
• 1 TL Currypaste, grüne
• ½ Zitrone(n), der Saft davon
• Salz und Zucker
Zubereitung:
Der Fisch kann frisch oder tiefgekühlt sein,
muss dann jedoch aufgetaut werden. Die Filets
werden nun gesalzen und ganz leicht gezuckert.
In einem Schraubglas oder Shaker werden Öl,
Austernsauce, Kreuzkümmel, Zitronensaft und
Currypaste miteinander vermengt. Je länger und
intensiver geschüttelt wird, desto länger bleibt der
emulsionsartige Zustand der Marinade vorhanden
(Vorteil für das Marinieren). Die Marinade auf den
Fisch auftragen und mindestens 2 Stunden im
Kühlschrank ziehen lassen. Anschließend auf den
vorgeheizten Panini Grill legen und von jeder Seite
ca. 3-4 Minuten garen.
Mode d’emploi
Nous vous félicitons de votre achat ! Votre Grill Panini vous permettra de griller de façon saine et
savoureuse un morceau de viande, du poisson ou un panini. Votre grill est équipé de plaques de cuisson
tant dans le boîtier que dans le couvercle, pour une chaleur supérieure et inférieure constante. Les
plaques de cuisson se nettoient facilement.
Consignes de sécurité - Généralités
• Lisez soigneusement le mode d’emploi et conservez-le précieusement.
• Utilisez cet appareil uniquement suivant les instructions décrites dans le mode d’emploi.
• Cet appareil ne peut être utilisé par des enfants ou des personnes avec des capacités physiques,
mentales ou sensorielles limitées, manquant d’expérience ou de connaissance; à moins qu’elles
n’aient eu des instructions et ne soient encadrées par des personnes responsables de leur sécurité.
• Cet appareil n’est pas un jouet. En présence d’enfants, il est important de s’assurer qu’ils ne jouent
pas avec l’appareil.
• Faites effectuer les réparations par un technicien qualifié. Ne tentez jamais de réparer vous-même
l’appareil.
Consignes de sécurité - Électricité et chaleur
Certaines parties de l’appareil peuvent s’échauffer fortement.
Évitez de les toucher pour ne pas vous brûler.
• Avant d’utiliser cet appareil, assurez-vous que la tension du réseau correspond à la tension du réseau
indiquée sur la plaquette type de l’appareil.
• Si vous utilisez une rallonge, assurez-vous qu’elle est complètement déroulée.
• Branchez l’appareil uniquement sur une prise raccordée à la terre.
• Lorsque vous débranchez la fiche, saisissez la fiche elle-même ; ne tirez pas sur le cordon.
• Débranchez toujours l’appareil lorsque vous ne l’utilisez pas.
• Si vous utilisez une rallonge, assurez-vous qu’elle est complètement déroulée.
• Utilisez uniquement une rallonge agréée.
• Pour éviter tout risque d’incendie, l’appareil doit pouvoir évacuer la chaleur produite. Laissez donc
suffisamment d’espace autour de l’appareil et évitez tout contact avec des matériaux inflammables.
L’appareil ne doit jamais être recouvert.
• N’utilisez pas l’appareil à proximité de matières inflammables.
• Assurez-vous que ni l’appareil, ni le cordon, ni la fiche n’entre en contact avec une source de chaleur
telle qu’une plaque électrique chaude ou une flamme.
• Assurez-vous que ni l’appareil, ni le cordon, ni la fiche n’entre en contact avec de l’eau ou tout autre
liquide.
• Certaines parties de cet appareil peuvent s’échauffer fortement. Évitez de les toucher pour ne pas
vous brûler.
Consignes de sécurité - Pendant l’utilisation
•
•
•
•
•
•
•
•
•
•
•
•
•
N’utilisez jamais l’appareil à l’extérieur.
N’utilisez jamais l’appareil dans une pièce humide.
Installez l’appareil sur une surface plane et stable, résistante à la chaleur, à un endroit où il ne risque
pas de tomber.
Assurez-vous que vos mains sont sèches avant de toucher l’appareil, le cordon ou la fiche.
Éteignez l’appareil et débranchez la fiche en cas de problème durant l’utilisation, pour le nettoyage, et
dès que vous avez fini de l’utiliser.
Ne laissez jamais l’appareil sans surveillance pendant qu’il est en marche.
Ne déplacez jamais l’appareil pendant qu’il est en marche, ni s’il est encore chaud. Éteignez-le d’abord, laissez-le bien refroidir, et déplacez-le ensuite.
Veillez à laisser un espace libre suffisant autour de l’appareil (minimum 10 cm) et au dessus de
l’appareil (minimum 30 cm).
Certaines parties de cet appareil peuvent s’échauffer fortement pendant l’utilisation. Ouvrez et fermez
donc toujours l’appareil uniquement à l’aide de la poignée.
Ne posez jamais un poids sur le couvercle pour maintenir l’appareil fermé.
Évitez de mouiller les plaques durant l’utilisation, ou juste après, quand elles sont chaudes. Vous
pourriez endommager une plaque de cuisson.
Si l’appareil est tombé à l’eau, ne le rattrapez pas. Débranchez immédiatement la fiche. Cessez
d’utiliser l’appareil.
Nettoyez soigneusement l’appareil après l’utilisation (voir ‘Nettoyage et entretien’).
15
Français
Mode d’emploi
• N’utilisez pas l’appareil trop près d’une source de volière. Lorsque les plaques de cuisson s’échauffent,
leur revêtement antiadhésif peut dégager une substancenocive pour les oiseaux.
• Cet appareil ne doit pas être utilisé avec un timer externe ou une télécommande.
Fonctionnement - Généralités
7
L’appareil est destiné uniquement
à l’utilisation domestique, et non
à l’usage professionnel.
1
6
3
5
Français
1. Lampe témoin “réchauffage”
2. Lèchefrite (amovible)
3. Loquet de fermeture
4. Cordon et fiche
4
5. Plaques
6. Couvervle
7. Poignée
fonctionement - Avant la première utilisation 1. 2. 3. 2
Figure 1
Enlevez l’emballage.
Nettoyez tous les accessoires pour enlever tout reste éventuel du processus de fabrication (voir
‘Nettoyage et entretien’).
Branchez la fiche et laissez le grill préchauffer pendant 10 minutes. Ceci élimine l’odeur de l’emballage
qui pourrait être restée présente dans l’appareil.
• •
Lorsque vous utilisez l’appareil pour la première fois, une légère fumée peut se développer,
accompagnée d’une odeur caractéristique. C’est un phénomène normal qui disparaît de lui-même.
La ventilation doit toujours être suffisante.
Gardez les oiseaux à prudente distance de l’appareil quand il est en marche. Lorsque la plaque de
cuisson s’échauffe, le revêtement antiadhésif peut dégager une substance nocive pour les
oiseaux.
Fonctionnement - Mise en place
1. Installez l’appareil sur une surface plane et stable, résistante à la chaleur.
2. Mettez en place la lèchefrite (2), à l’avant du grill, contre les pieds.
3. Refermez le couvercle (6).
4. Branchez la fiche (4). Le témoin lumineux rouge (1) s’allume ; l’appareil commence à chauffer les
plaques (5).
Quand les plaques ont atteint la température voulue, le témoin lumineux rouge s’éteint.Ceci prend environ
5 minutes.
Fonctionnement - Grillades
1. Ouvrez le couvercle.
2. Posez les aliments à griller sur la plaque inférieure.
Ne pas utiliser le couvercle de sécurité pour presser le produit. Le poids du couvercle fournira une
pression équivalente.
Remarque Le couvercle a du jeu pour lui permettre de se refermer sur des aliments d’épaisseurs
différentes, en s’y adaptant.
16
Mode d’emploi
3. Refermez le couvercle.
4. Grillez les aliments jusqu’à ce qu’ils soient prêts. La durée nécessaire dépend de l’aliment.
5. Ouvrez le couvercle et retirez les aliments de la plaque.
Remarque N’utilisez pas de couteau, fourchette ou autre d’ustensile tranchant! Vous pourriez
endommager le revetement antiadhesif. La garantie ne pourra pas etre invoquee lorsque le revetement antiadhesif est endommage par des objects coupant.
6. Débranchez la fiche dès que vous avez fini d’utiliser l’appareil. Bon appétit!
NETTOYAGE ET ENTRETIEN
Nettoyez l’appareil chaque fois que vous l’avez utilisé.
1. Débranchez la fiche et laissez refroidir complètement l’appareil.
2. Enlever les aliments de la plaque de cuisson encore chaude avec du sopalin
3. La plaque de cuisson haute est plus facile à nettoyer quand elle est refroidie
4. Nettoyer le plateau d’égouttage avec un peu de savon
5. Nettoyer l’appareil et le couvercle avec un chiffon humide
L’appareil ne doit pas être branché sur le réseau électrique pendant que vous le nettoyez.
N’utilisez pas de détergents agressifs ou décapants ni d’objets tranchants (tels que couteaux ou
brosses dures) pour le nettoyage.
N’immergez jamais l’appareil, le cordon ni la fiche dans l’eau ou tout autre liquide.
Nettoyage et entretien - Rangement
1. Fermer l’appareil et verrouiller le bouton de fermeture sur le côté droit
2. Placer l’appareil sur une surface plane et dure à la verticale avec la poignée sur le dessus ou bien
normalement comme lorsque vous utilisez l’appareil
Environnement
•Jetez le matériel d’emballage, tel que le plastique et les boîtes, dans les conteneurs prévus à cet
effet.
•Lorsque l’appareil est usé, ne le mettez pas aux ordures ménagères, mais portez-le dans un
centre de collecte agréé pour les appareils électriques et électroniques. Attention au symbole
figurant sur le produit, le mode d’emploi ou l’emballage.
•Les matériaux peuvent être recyclés selon les indications. Votre collaboration au recyclage des
appareils et/ou au retraitement des matériaux, sous quelle forme que ce soit, est une contribution
précieuse à la sauvegarde de notre environnement.
• Les autorités de votre commune vous renseigneront sur le centre de collecte le plus proche
Données techniques
Type: Puissance: Tension réseau: ASW113 - ASW113S -ASW113R
1000W
220-240V ~50/60Hz
Conditions de garantie
À compter de la date d’achat de cet appareil, l’importateur donne, aux conditions suivantes, 60 mois de
garantie couvrant tous les défauts consécutifs à des défauts de pièce et main d’œuvre.
1. Pendant la période de garantie aucun frais ne sera facturé pour les pièces et la main d’œuvre. Les
réparations effectuées sous garantie ne prolongent pas le délai de garantie.
2. En cas d’échange, les pièces défectueuses ou les appareils défectueux deviennent automatiquement
la propriété de l’importateur.
3. Toute demande de garantie doit être assortie de la preuve d’achat de l’entreprise.
4. Toute demande de garantie doit être faite auprès du revendeur où l’appareil a été acheté ou auprès de
l’importateur.
5. La garantie est uniquement valable pour le premier acheteur et ne peut être transférée.
6. La garantie ne couvre pas les dommages causés par:
a. les accidents, l’utilisation impropre, l’usure et / ou la négligence ;
b. l’installation incorrecte et/ou une utilisation contraire aux normes de sécurité, aux normes
techniques ou aux dispositions légales en vigueur ;
17
Français
• •
•
Mode d’emploi
c. le branchement sur un réseau d’une tension autre que celle figurant sur la plaquette type ;
d. toute modification non autorisée ;
e. toute réparation effectuée par des tiers ;
f. le transport sans précautions suffisantes, telles que la protection et l’emballage appropriés.
7. Les présentes conditions de garantie ne peuvent pas être invoquées dans les cas suivants:
a. pertes survenues pendant le transport;
b. effacement ou modification du numéro de série de l’appareil.
8. Les cordons, ampoules et pièces en verre ne sont pas couverts par la garantie.
9. La garantie ne donne aucun droit d’indemnisation pour des dommages éventuels, autres que le
remplacement ou la réparation de pièces défectueuses. L’importateur ne peut être tenu responsable
d’aucun dommage indirect, ni d’aucune conséquence quelle qu’elle soit, causé par ou ayant un
quelconque rapport avec l’appareil qu’il a fourni.
10. Pour pouvoir faire appel à la garantie, vous pouvez vous adresser à votre revendeur. Bestron offre
aussi la possibilité de faire réparer l’appareil directement par le service après-vente de Bestron.
Toutefois, n’envoyez jamais rien sans avoir reçu d’instructions au préalable. Le colis pourrait en effet
être refusé et les frais éventuels seraient à votre charge. Prenez contact avec le service après-vente
qui vous expliquera comment vous devez emballer et expédier l’appareil.
11. L’appareil n’est pas destiné à l’usage professionnel.
Maintenance
Si, par malheur, une panne se produisait, veuillez contacter le service de maintenance de BESTRON:
Français
BELGIQUE: FRANCE:
WILLEMEN SERVICE
Si le produit ne fonctionne pas comme
BESTRON SERVICE il faut, contactez le distributeur ou un
Te Boelaerlei 27 centre de service autorisé.
2140 Borgerhout- Antwerpen Tél.: 03 - 321 78 48 Télecopie: 03 - 321 28 50
Email: [email protected]
Internet: www.bestron.com
Déclaration de conformité CE
Le présent produit répond aux dispositions des directives européennes suivantes en matière de sécurité.
• Directive EMC • Directive sur la basse tension 2004/108/EC
2006/95/EC
R. Neyman
Contrôle de la qualité
18
Mode d’emploi
Recettes
Brochettes à griller
Ingrédients:
• 350 g de viande pour escalope
• 2 gros oignons
• 2 poivrons
• 50 g de poitrine de porc
• Huile
Pour la marinade :
• 125 ml d’eau
• 4 cuil. à s. de vin rouge
• 1 cuil. à s. de vinaigre
• 1 gousse d’ail
• 1 branche de thym
• poivre
• sel
Préparation:
Couper la viande en dés. Couper les oignons en quatre.
Couper le poivron et la poitrine de porc en tranches.
Enfiler tous les ingrédients alternativement sur les
piques. Laisser mariner les brochettes pendant environ
une heure. Retirer et faire égoutter. Badigeonner d’huile
et faire griller sur le Panini grill pendant 10 minutes.
Brochettes de dinde à griller
Ingrédients:
• 2 Filets de dinde
• Sauce (Teriyaki)
• Vin blanc
Préparation:
Réaliser d’abord la marinade : mélanger environ 5
cuillères à soupe de sauce Teriyaki avec du vin blanc.
Couper les filets de dinde en fines tranches et laisser
mariner au moins pendant deux heures. Puis enfiler les
morceaux sur les piques en les disposant comme les
branches d’un éventail et faire griller directement tout en
badigeonnant régulièrement de la marinade restante.
Hamburger
Ingrédients:
• 2 pots de crème fraîche (2 X 150 g)
• 6 oignons grelots
• 6 cuil. à s. de chapelure
• 2 cuil. à c. de Worcester sauce
• 2 cuil. à c. de poivre
• 800 g de boeuf haché
• 8 petits pains (pains à hamburger)
• Salade
• 2 tomates
• 1 oignon (oignon doux)
• 4 cuil. à c. de moutarde
• 2 cuil. à s. de mayonnaise
• 2 cuil. à soupe de ketchup
Préparation:
Couper l’oignon en grosses rondelles, les tomates en
tranches et réserver dans un saladier. Emincer finement
les oignons grelots, y compris la moitié du vert Bien
mélanger la viande hachée, les oignons grelots, la crème
fraîche, la sauce Worcestershire et le poivre. Constituer
des steaks hachés à partir de ce mélange. Pour ce faire,
19
Brochettes de légumes à griller
Ingrédients:
• Champignons de moyenne ou grande taille, selon
les goûts
• 1 poivron rouge
• 20 tomates cerises
• 20 petits oignons doux ou 1 gros oignon rouge,
finement haché
• 1 ananas frais coupé en quartiers (de 1,5 à 2 cm d’épaisseur)
• 3 cuil. à s. d’huile d‘olive
• 1 cuil. à s. de vinaigre balsamique
• Sel à discrétion
• Poivre fraîchement moulu
• 1 cuil. à s. de chapelure
• 3 gousses d’ail écrasées
• Estragon frais ou sec
• 1 poivron jaune
• 1 poivron vert
• Piment moulu
Préparation:
Nettoyer les champignons, les oignons, les tomates et
les poivrons. Couper au besoin en morceaux adaptés.
Réserver dans un grand saladier. Arroser abondamment
d’huile d’olive, ajouter quelques gouttes de vinaigre
balsamique. Assaisonner avec du sel, du poivre
noir fraîchement moulu et un peu de piment moulu.
Saupoudrer le tout d’ail, d’estragon et de chapelure.
Bien mélanger. Eventuellement, ré-assaisonner avec
un peu d’huile d’olive et quelques gouttes de vinaigre
balsamique. Laisser reposer les ingrédients pendant 30
minutes, puis les enfiler sur les piques. Ne pas intégrer
l’ananas à la marinage. Conserver la marinade restante
dans une petite tasse. Faire griller les brochettes
pendant environ 10 minutes sur le Panini grill et verser
le reste de marinade.
Sandwiches
Ingrédients:
• 4 tranches de pain de mie (grandes tranches)
• 2 portions de filet de dinde coupée en très fines
tranches
• 2 oignons coupés en fines rondelles
• 1 gousse d’ail finement hachée
• Sel et poivre
• 1 cuil. à c. de paprika
• 2 cuil. à s. de sauce à l’ail (en bocal)
• 1 poignée de roquette hachée grossièrement
• 2 cuil. à c. de mélange d’épices chinois
Français
former d’abord une boule, puis l’aplatir sur une planche
à découper. Les steaks doivent être aussi fins que
possible. Mélanger la moutarde, la mayonnaise et le
ketchup. Cette sauce sera utilisée pour les hamburgers.
Placer les rondelles d’oignons, les tranches de tomates
et la sauce sur la table. Faire griller la viande sur le
Panini grill en faisant bien brunir les deux côtés. Toaster
les petits pains sur le grill avant de faire griller la viande.
Ainsi ils seront encore croustillants avant de servir.
Mode d’emploi
Préparation:
Faire griller les tranches de filet de dinde sur le Panini
grill à feu vif et assaisonner. Faire dorer les oignons
et l’ail puis saler. Garnir deux tranches de pain de mie
d’une bonne poignée de roquette, puis ajouter les
oignons, les tranches de filet de dinde, la sauce à l’ail, et
une nouvelle couche de roquette. Couvrir le tout d’une
tranche de pain de mie et faire griller sur le Panini grill
pendant 4 à 6 minutes.
Sandwich italien
Ingrédients:
• 2 tranches de pain de mie par sandwich
• 1 cuil. à s. d’huile d‘olive
• ½ petit oignon
• ½ petit poivron rouge
• 3 anchois ou
• 2 tomates séchées dans l‘huile (3 tomates max.)
• 50 g de mozzarella
• 6 olives noires
• 1 cuil. à s. de persil haché
• ½ cuil. à s. de thym haché
Français
Préparation:
Badigeonner les tranches de pain de mie d’huile
d’olive. Couper l’oignon en rondelles, le poivron en fines
lamelles. Si l’on utilise des tomates séchées à la place
des anchois, couper les tomates en fines tranches.
Couper la mozzarella en tranches. Garnir la tranche
de pain des ingrédients préparés et ajouter les olives.
Parsemer de persil et de thym. Faire griller dans le
Panini grill pendant 4 à 6 minutes.
Panini au poulet et pesto
Ingrédients:
• 1 pain « focaccia » coupé en quatre
• ½ tasse de pesto au basilic (bocal)
• 200 g de poitrine de dinde cuite coupée en fines tranches
• 200 g de poivron vert coupé en petits dés
• 150 g d’oignon rouge coupé en rondelles
• 250 g de fromage de Gouda râpé
Préparation:
Faire chauffer votre Panini grill. Couper en deux dans
le sens de la longueur chaque morceau de foccacia et
badigeonner chaque moitié de pesto. Garnir de chacun
des ingrédients, c.-à-d. de dinde, poivron, oignon et
fromage. Poser les quatre autres moitiés de pain et faire
griller les panini dans le grill préchauffé pendant environ
5 minutes ou jusqu’à ce qu’ils soient dorés et le fromage
fondu.
Panini de Marc
Ingrédients:
• 1 pain « focaccia » coupé en quatre, ou 4 petits
pains « Ciabatta »
• 1 tomate
• 1 concombre
• 4 tranches de fromage fondant
• 4 tranches de jambon cuit ou de salami
• Beurre persillé
• Sel et poivre
• Fines herbes selon les goûts
20
Préparation:
Couper le pain dans le sens de la longueur et le
badigeonner de beurre persillé. Garnir la moitié
inférieure de jambon et de salami. Couper le concombre
et les tomates en tranches et disposer également
sur la baguette. Assaisonner et saupoudrer de fines
herbes fraîches. Garnir de fromage et couvrir avec la
partie supérieure du panini. Passer au grill dans le four
préchauffé pendant environ 5 minutes ou jusqu’à ce que
les panini soient dorés et le fromage fondu.
Barbecue coréen (« viande au feu »)
Ingrédients:
• 1 kg de viande de porc (échine de porc) coupée en tranches d’environ 1 cm d’épaisseur
• 1 poireau
• 3 gousses d’ail
• 5 cuil. à s. de sauce soja
• 5 cuil. à s. d’huile (huile de tournesol)
• 2 cuil. à s. de vinaigre (vinaigre de vin)
• 1 citron pressé
• 7 cuil. à c. de mélange d’épices (épices chinois)
• 2 cuil. à c. de poivre de Cayenne
Préparation:
Hacher menu ou écraser l’ail. Mélanger à l’ensemble
des ingrédients liquides et des épices pour obtenir
une sauce et bien émulsionner. Couper le poireau en
rondelles et ajouter à la sauce. Mettre le tout dans un
saladier (si possible avec couvercle étanche) pour faire
mariner la viande. Refermer le couvercle (ou couvrir le
saladier d’une autre manière) et réserver au réfrigérateur.
Laisser mariner pendant 1 à 3 jours en veillant à
retourner le saladier (ou à remuer les morceaux de
viande) à mi-parcours pour que la marinade soit répartie
uniformément. Après les avoir fait mariner, disposer les
morceaux de viande sur le Panini grill préchauffé et faire
cuire selon les goûts.
Poisson à la thaïlandaise
Ingrédients:
• 1 kg de filet de poisson (par ex., dorade, merluche, pangasius...)
• 1 cuil. à s. de cumin
• 2 cuil. à s. de sauce aux huîtres
• 100 ml d’huile (par ex., huile de sésame, de
tournesol ou d’arachide)
• 1 cuil. à s. de pâte de curry verte
• Le jus d’un demi-citron
• Sel et Sucre
Préparation:
Le poisson peut être frais ou congelé – dans ce
dernier cas, le décongeler préalablement. Saler et
sucrer légèrement les filets. Mélanger, dans un bocal
ou un shaker, l’huile, la sauce aux huîtres, le cumin, le
jus de citron et la pâte de curry. Plus le mélange sera
secoué, plus l’émulsion de la marinade durera (un
avantage certain pour faire mariner le poisson). Etaler
la marinade sur le poisson et réserver au réfrigérateur
pendant au moins 2 heures. Disposer enfin sur le Panini
grill préchauffé et faire cuire chaque côté pendant 3 à 4
minutes.
User’s instructions
Congratulations on your purchase of this Panini Grill with which you can grill a healthy and tasty piece of
meat, fish or complete panini’s. The grill has grill plates in the housing and in the lid for even heating from
above and below. The grill plates are easy to clean.
Safety instructions - General
•
•
•
•
•
Please read these instructions carefully, and retain them for future reference.
Use this appliance solely in accordance with these instructions.
This appliance is not intended for use by persons (including children) with reduced physical,sensory or
mental capabilities, or lack of experience and knowledge, unless they have been given supervision or
instruction concerning use of the appliance by a person responsible for their safety.
Children should be supervised to ensure that they do not play with the appliance.
Have any repairs carried out solely by a qualified electrician. Never try to repair the appliance yourself.
Safety instructions - Electricity and heat
Certain parts of the appliance may get hot.
Do not touch these parts to prevent burning yourself.
• Make sure that the mains voltage is the same as that indicated on the type plate on the appliance
before use.
• Regularly check the appliance’s power cord to make sure it is not damaged. Do not use the appliance
if the power cord is damaged. Have a damaged power cord replaced by a qualified service department.
• Always plug the appliance into an earthed wall socket.
• Always remove the plug from the wall socket by pulling on the plug, not the power cord.
• Always remove the plug from the wall socket when the appliance is not in use.
• When using an extension lead always make sure that the entire cable is unwound from the reel.
• Use only approved extension leads.
• The appliance needs space to allow heat to escape, thereby avoiding the risk of fire. Make sure that
the appliance has sufficient space around it, and does not come into contact with flammable materials.
The appliance must not be covered.
• Never use the appliance in the vicinity of flammable materials.
• Make sure that the appliance, the power cord or the plug do not come into contact with heat sources,
such as a hot hob or naked flame.
• Make sure that the appliance, the power cord and plug do not come into contact with water or other
liquids.
• Certain parts of the appliance can become hot. Do not touch these, as you could burn yourself.
Safety instructions - During use
•
•
•
•
•
•
•
•
•
•
•
•
•
•
•
Never use the appliance outdoors.
Never use the appliance in humid rooms.
Place the appliance on a flat, stable and heat-resistant surface where it cannot fall.
Make sure that your hands are dry when you touch the appliance, the power cord or the plug.
Switch off the appliance and remove the plug from the wall socket in the event of a malfunction during
use, and before cleaning the appliance or storing it after use.
Never leave the appliance unattended when in use.
Never move the appliance when it is switched on or is still hot. Switch off the appliance, and wait until it
has cooled down before moving it.
Make sure there is sufficient free space around the appliance (at least 10 cm), as well as above the
appliance (at least 30 cm).
Parts of the appliance will become hot during use. Therefore always hold the handle to open and close
the lid.
Do not put heavy objects on the lid to keep the appliance closed.
Make sure that water does not come into contact with the hot grill plates during or shortly after use.
This can cause a grill plate to buckle.
Do not touch the appliance if it has fallen into water. Remove the plug from the plug socket
immediately. Do not use the appliance anymore.
Clean the appliance thoroughly after use (see “Cleaning and maintenance”).
Never use the appliance in the vicinity of a bird cage. Fumes released from the non-stick coating when
the baking plates are hot can cause stress to birds.
This appliance may not be used through an external timer or by means of a remote control.
21
English
User’s instructions
Operation - General
7
The appliance is intended only
for domestic use,
not for professional use.
1
6
3
5
1. “Heating” pilot light
2. Drip tray (removable)
3. Safe lid locking system
4. Power cord and plug
4
5. Grills plates
6. Lid
7. Handle
operation - Before use for the first time
1. 2. 3. 2
Figure 1
Remove the packaging.
Clean all the accessories to remove any residues that may be left from the manufacturing process (see
“Cleaning and maintenance”).
Put the plug into the wall socket and allow the grill to heat up for 10 minutes. This will remove any
packaging odor from the appliance.
• •
The appliance may emit a little smoke and a characteristic smell when you switch it on for the first
time. This is normal, and will soon stop. Make sure the appliance has sufficient ventilation.
Keep house birds away from the appliance when it is in use; fumes released from the non-stick
coating when the baking plate is hot can cause stress to birds.
English
operation - Preparations
1. 2. 3. 4. Place the grill on a level, stable and heat-resistant surface.
Place the drip tray (2) at the front of the grill between the front feet.
Close the lid (6).
Put the plug (4) in the wall socket. The red light (1) will light and the appliance starts preheating the grill
plates (5).
Once the grill plates have reached cooking temperature the red lamp will go out. This takes approximately
2 minutes.
operation - Grilling
1. Open the lid.
2. Lay the food that you want to grill on the lower grill plate.
Do not use the safety clip (3) of the appliance for squeezing the product. The weight of the top cover
will provide an equal pressure
Note
To be able to handle food with different thicknesses, there is play in the cover so that it can easily
adjust to the thickness of the food.
3. Close the lid.
4. Grill the food until it is cooked. The cooking time required is different for each product.
5. Open the lid and remove the food from the grill plate.
Note Do not use a fork, knife or other sharp object! You can damage the non stick coat with it. Warranty 22
User’s instructions
becomes void when damaging the baking plate with sharp objects!
6. Remove the plug from the wall socket once you have finished using the appliance. Bon appetit!
Cleaning and maintenance
Clean the appliance after each use.
1. Remove the plug from the wall socket and allow the appliance to cool down completely.
2. Remove the food remaining from the under baking plate with a kitchen paper while it is still hot.
3. The upper baking plate is easier to clean when it is cooled down.
4. Clean the drip tray with a bit of soap.
5. Clean the housing and the top cover with a moistures cloth.
Cleaning and maintenance - Stow away
1. Close the appliance and lock the clip at the right site.
2. Place the appliance at a flat and solid ground in vertical position with the handle up or just normal as
you use the appliance.
• •
•
Make sure the plug has been removed from the wall socket before cleaning the appliance.
Never use corrosive or scouring cleaning products or sharp objects (such as a knife or a hard brush) to clean the appliance.
Never immerse the appliance, the power cord or the plug in water or any other liquid.
The Environment
•Dispose of packaging material, such as plastic and boxes, in the appropriate waste containers.
•When this product reaches the end of its useful life do not dispose of it by putting it in a dustbin;
hand it in at a collection point for the reuse of electrical and electronic equipment. Please refer to
the symbols on the product, the user’s instructions or the packaging.
•The materials can be re-used as indicated. Your help in the re-use, recycling or other means of
making use of old electrical equipment will make an important contribution to the protection of the
environment.
•Contact your municipality for the address of the appropriate collection point in your neighbourhood.
technical details
Type: Output: Power supply: ASW113 - ASW113S -ASW113R
1000W
220-240V ~50/60Hz
Guarantee terms
The importer guarantees the appliance against defects caused by manufacturing and/or material faults for
60 months from the date of purchase, subject to the following conditions.
1. No charges will be made for labour costs or materials during the warranty period. Any repairs carried
out during the warranty period do not extend the warranty period.
2. The importer automatically becomes the owner of any faulty parts that he replaces or a faulty
appliance (in the event of replacement of the appliance).
3. All claims submitted under warranty must be accompanied by the original bill of sale.
4. Claims under warranty must be submitted to the dealer where the appliance was purchased or to the
importer.
5. The warranty is issued solely to the first purchaser and cannot be transferred.
6. The warranty does not cover damage caused by:
a. Accidents, incorrect use, wear and/or neglect.
b. Faulty installation and/or use in a manner contravening the prevailing legal, technical or safety
regulations.
c. Connection to a mains voltage other than the voltage specified on the type plate.
d. Unauthorized modifications.
e. Repairs carried out by third parties.
f. Careless transport, i.e. without suitable packaging materials or protection.
7. No claims may be made under this warranty for:
a. Losses incurred during transport.
b. The removal or changing of the appliance’s serial number.
23
English
User’s instructions
8. The guarantee does not cover power cords, lamps or glass parts.
9. No claims can be submitted under this warranty for damage other than the repair or replacement of
faulty parts. The importer can never be held responsible for any consequential loss or damage or any
other consequences, resulting either directly or indirectly from the appliance supplied by the importer.
10. In case of claims under guarantee you can contact your dealer where the appliance is purchased.
Bestron offers you also the possibility to send the appliance directly to our Service Department. Do not
send your appliance without consulting us. The package may be refused and any any costs will be for
your account. Please contact the Service Department and they will tell you how to pack and send the
appliance.
11. This appliance is not suitable for professional use.
Service
If a fault should occur please contact the BESTRON service department:
THE NETHERLANDS:
BESTRON NEDERLAND BV
Bestron Service
Moeskampweg 20
5222 AW ’s-Hertogenbosch
Tel: +31 (0) 73 - 623 11 21
Fax: +31 (0) 73 - 621 23 96
Email: [email protected]
Internet: www.bestron.com
CE Declaration of Conformity
This product conforms to the essential requirements of the following EU safety directives:
• EMC Directive • Low Voltage Directive 2004/108/EC
2006/95/EC
English
R. Neyman
Quality control
24
User’s instructions
Recipes
Grill – Kebab
Ingredients:
• 350 g escalope
• 2 large onions
• 50 g bacon
• 2 peppers
• oil
For the marinade:
• 125 ml water
• 4 Tbsp red wine
• 1 Tbsp vinegar
• 1 clove garlic
• 1 pinch thyme
• pepper
• salt
and then press them flat against a bread board.
The meat should be quite thin. Mix the mustard,
mayonnaise and ketchup together. This is the
sauce for later. Place the onions, tomatoes and the
sauce on the dining table. Brown the meat on both
sides on the Panini grill. Shortly before the end of
grilling them, place the bread buns on the grill. This
will make the bread crispy too.
Preparation:
Cut the meat into cubes. Quarter the onions. Slice
the pepper and bacon. Place all the ingredients
onto a skewer in alternate order. Leave the
skewers to marinate for about an hour. Remove
and leave to drain. Drizzle with oil and grill on the
Panini grill for about 10 mins.
Chicken kebabs to grill
Ingredients:
• 2 chicken breast fillets
• sauce (Teriyaki sauce)
• a little white wine
Preparation:
Clean the mushrooms, onions, tomatoes and
peppers, cut into bite-sized pieces as needed and
then place in a large bowl. Drizzle over olive oil,
and a couple of splashes of Balsamic vinegar.
Season with a little salt, freshly ground black
pepper and a little ground chilli pepper. Then
sprinkle over the garlic, tarragon and the bread
flour. Mix well. If needed, add a little more olive oil
and one or two splashes of Balsamic. Leave the
ingredients to marinate for about 30 minutes and
then place on the skewer. Do not put the pineapple
in the marinade. Place the rest of the marinade into
small cups. Place the kebabs on the Panini grill for
about 10 minutes and drizzle over the remaining
marinade.
Preparation:
First make the marinade - mix about 5 Tbsp of
Teriyaki sauce with a little dry white wine. Slice
the chicken breast fillets thinly and leave them
to marinate in the sauce for at least 2 hours.
Afterwards, place them on the skewers in a fan
shape and onto the Panini Grill – continue to
drizzle them with the remaining marinade.
Hamburger
Ingredients:
• 2 cups sour cream (2 x 150g)
• 6 spring onions
• 6 Tbsp breadcrumbs
• 2 Tsp Worcestershire sauce
• 2 Tsp pepper
• 800 g minced beef
• 8 hamburger buns
• lettuce
• 2 tomatoes
• 1 onion (Spanish onion)
• 4 Tsp mustard
• 2 Tbsp mayonnaise
• 2 Tbsp tomato ketchup
Sandwiches
Ingredients:
• 4 slices thick sliced bread
• 2 portions chicken fillet sliced very thinly
• 2 onions finely sliced into rings
• 1 clove of garlic, finely chopped
• salt and pepper
• 1 Tsp paprika
• 2 Tbsp sauce (garlic sauce from a jar)
• 1 hand full rocket, roughly chopped
• 2 Tsp Chinese mixed herbs
Preparation:
Slice the onions into rings, slice the tomatoes and
place in a bowl. Finely chop the spring onions. Add
50% of the green part. Mix well the minced beef,
spring onions, sour cream, Worcestershire sauce
and the pepper. Form burgers from the minced
beef mixture. The best thing is to make balls first
Preparation:
Sprinkle the chicken fillet slices with herbs and
cook them thoroughly on the Panini Grill. Salt and
fry the garlic and onions until golden yellow. Cover
25
English
Vegetable kebabs to grill
Ingredients:
• medium large mushrooms, as desired
• 1 red pepper
• 20 cherry tomatoes
• 20 small sweet onions, or 1 red, strong, large
onion, finely chopped
• 1 fresh pineapple, cut into squares (about 1 1/2 to 2 cm)
• 3 Tbsp olive oil
• 1 Tbsp Balsamic vinegar
• salt as needed
• freshly ground pepper
• 1 Tbsp flour (bread flour)
• 3 cloves garlic, crushed
• tarragon, fresh or dried
• 1 yellow pepper
• 1 green pepper
• a little ground chilli
User’s instructions
2 toasted slices of bread with rocket, then the
onions, the chicken fillet slices, garlic sauce and a
little more rocket. Place another slice of bread on
top and grill everything for about 4-6 mins on the
Panini Grill.
other half of the Panini. Grill the Paninis in the
preheated
grill for about 5 mins or until golden brown
and the cheese has melted.
Korean Fire Meat
Ingredients:
• 1 kg pork sliced into slices of about 1cm thick
• 1 leek
• 3 cloves garlic
• 5 Tbsp Soya sauce
• 5 Tbsp oil (sunflower oil)
• 2 Tbsp vinegar (wine vinegar)
• 1 squeezed lemon
• 7 Tsp Chinese mixed herbs
• 2 Tsp Cayenne pepper
Italian – Sandwich
Ingredients:
• 2 slices of bread per sandwich
• 1 Tbsp olive oil
• ½ small onion
• ½ small red pepper
• 3 anchovies or alternatively:
• 2 sun-dried tomatoes in oil (up to 3 tomatoes)
• 50 g mozzarella
• 6 black olives
• 1 Tbsp chopped parsley
• ½ Tsp chopped thyme
Preparation:
Finely chop or crush the garlic. Mix this together
with all the liquid ingredients and herbs to make
a sauce. Slice the leek into rings. Now you need
a bowl (at best with a lid) to marinate the meat in.
Close the lid (or cover the bowl) and place in the
fridge. Leave it to marinate for 1-3 days, after ½ the
time has passed stir with a spoon (or turn the meat
slices) so that the marinade is evenly distributed.
After marinating, place the meat pieces on the
preheated
Panini grill and cook as desired.
Preparation:
Drizzle the bread with olive oil. Slice the onion into
rings and the pepper into thin strips. If you are
using sun-dried tomatoes instead of anchovy fillets,
cut these into thin strips. Slice the mozzarella.
Spread the prepared ingredients with the olives
onto the bread and sprinkle with parsley and
thyme, then grill in the Panini grill for 4-6 minutes.
English
Chicken Pesto Paninis
Ingredients:
• 1 Focaccia bread, quartered
• ½ cup of basil pesto from a jar
• 200 g of cooked chicken breast thinly sliced
• 200 g of green pepper finely cubed
• 150 g red onion sliced into rings
• 250 g grated gouda cheese
Thai - Fish
Ingredients:
• 1 kg fish fillets (e.g. redfish, hake, shark catfish,
etc.)
• 1 Tbsp cumin
• 2 Tbsp oyster sauce
• 100 ml oil (e.g. sesame, sunflower or nut oil)
• 1 Tsp green curry paste
• ½ lemon juice
• salt
• sugar
Preparation:
Pre-heat your Panini grill.
Slice every Foccacia quarter in half and spread
each side with the pesto. Then add the ingredients
such as the chicken breast, pepper, onion and the
cheese. Cover with the other half of the bread and
grill the paninis in the pre-heated grill for about 5
mins or until golden brown and the cheese has
melted.
Preparation:
The fish can be fresh or frozen, but must then
be thawed. Now salt the fillets and lightly sugar
them. Mix the oil, oyster sauce, cumin, lemon juice
and curry paste in a screw-top jar or shaker. The
longer and more intensively it’s shaken, the longer
the emulsion-type state of the marinade will be
maintained (an advantage for marinating). Pour
the marinade over the fish and leave to marinate in
the fridge for at least 2 hours. Then, place on the
pre-heated Panini grill and grill each side for about
3-4 minutes.
Marc`s Panini
Ingredients:
• 1 Foccacia bread, quartered, or 4 Ciabatta rolls
• 1 tomato
• 1 cucumber
• 4 slices melting cheese
• 4 slices ham or salami
• herb butter
• salt and pepper
• herbs as desired
Preparation:
Slice the Panini bread lengthwise and spread with
the herb butter. Place the ham or the salami on the
bottom half. Slice the cucumber and tomato and
place on the bread, season and sprinkle with fresh
herbs. Add the slices of cheese and cover with the
26
Istruzioni per l’uso
Congratulazioni per l’acquisto di questa bistecchiera elettrica multifunzione Panini Grill, con la quale sarà
possibile cuocere e grigliare carne e pesce e preparare panini e toast anche farciti, il tutto in maniera sana
e genuina. La bistecchiera elettrica è dotata di due piastre di cottura, inserite rispettivamente nella base
e nel coperchio, che permettono una diffusione uniforme del calore nella parte superiore e inferiore del
prodotto. Le piastre di cottura possono essere pulite in modo semplice e rapido.
Prescrizioni di sicurezza - Generalità
•
•
•
•
•
Leggere attentamente le presenti istruzioni per l’uso e conservarle con cura.
Utilizzare l’apparecchio esclusivamente secondo le modalità descritte nelle presenti istruzioni.
Questo apparecchio non può essere utilizzato da bambini e da persone che, a causa di una limitazione
fisica, sensoriale o mentale, o per mancanza di esperienza e conoscenza, non siano in grado di
utilizzare l’apparecchio in modo sicuro, a meno che non abbiano ricevuto delle istruzioni sull’uso
dell’apparecchio da una persona che sia responsabile della loro sicurezza.
I bambini vanno sorvegliati per accertarsi che non si mettano a giocare con l’apparecchio.
Fare eseguire le riparazioni da personale qualificato. Non tentare mai di riparare da soli l’apparecchio.
Prescrizioni di sicurezza - Elettricità e calore
•
•
•
•
•
•
•
•
•
•
•
•
Alcune parti dell’apparecchio possono diventare calde.
Per evitare di bruciarsi non toccarle.
Prima di utilizzare l’apparecchio, controllare che la tensione di rete corrisponda alla tensione di
esercizio indicata sulla targhetta di identificazione dell’apparecchio.
Verificare regolarmente l’integrità del cavo dell’apparecchio. Non utilizzare l’apparecchio qualora il cavo risultasse danneggiato. Per sostituire il cavo danneggiato, rivolgersi a un servizio di assistenza qualificato.
Collegare l’apparecchio esclusivamente a una presa di rete provvista di messa a terra.
Quando si disinserisce la spina dalla presa, esercitare la trazione sulla spina stessa e non sul cavo.
Estrarre sempre la spina dalla presa di corrente quando l’apparecchio non è in uso.
Qualora si utilizzi un cavo di prolunga, assicurarsi di svolgerlo per tutta la sua lunghezza.
Utilizzare esclusivamente prolunghe omologate e dotate di marchio di qualità.
L’apparecchio deve essere in grado di dissipare il proprio calore onde evitare eventuali rischi di incendio. Assicurarsi pertanto che l’apparecchio sia sufficientemente libero da ostacoli e che non possa venire in contatto con materiali incendiabili. L’apparecchio non deve essere mai coperto.
Non utilizzare l’apparecchio in prossimità di materiali infiammabili.
Assicurarsi che l’apparecchio, il cavo e la spina non entrino in contatto con fonti di calore, quali per es.
piani di cottura caldi o fiamme libere.
Assicurarsi che l’apparecchio, il cavo e la spina non entrino in contatto con acqua o con altri liquidi.
Alcune parti dell’apparecchio possono surriscaldarsi. Evitare di entrare in contatto con tali
elementi per non correre rischi di ustione. Il simbolo di avvertenza raffigurato qui di fianco
indica tale condizione.
•
•
•
•
•
•
•
•
•
•
•
•
Non utilizzare mai l’apparecchio in ambienti esterni.
Evitare di utilizzare l’apparecchio in ambienti umidi.
Posizionare l’apparecchio su di una superficie stabile, piana e resistente al calore, in un punto da cui
esso non possa cadere o ribaltarsi.
Assicurarsi di avere le mani asciutte prima di toccare l’apparecchio, il cavo o la spina.
Spegnere l’apparecchio e disinserire la spina dalla presa di corrente se durante l’uso si verificano
malfunzionamenti, quando si pulisce l’apparecchio o si è terminato di utilizzarlo.
Sorvegliare sempre l’apparecchio mentre questo è in funzione.
Evitare di trasportare l’apparecchio quando è acceso o ancora caldo. Spegnere l’apparecchio e
trasportarlo soltanto quando si è completamente raffreddato.
Assicurarsi che le zone presenti attorno all’apparecchio (spazio minimo: 10cm) e al di sopra
dell’apparecchio (spazio minimo: 30cm) risultino sufficientemente libere da ostacoli.
Durante l’utilizzo, alcune parti dell’apparecchio sono soggette a surriscaldamento. Assicurarsi pertanto
di aprire e di chiudere il coperchio del prodotto agendo sempre sull’apposita maniglia.
Non collocare oggetti pesanti sul coperchio dell’elettrodomestico per mantenerlo chiuso.
Assicurarsi che durante o immediatamente dopo l’utilizzo dell’elettrodomestico non venga versata
acqua sulle piastre di cottura: ciò potrebbe infatti provocare una deformazione delle piastre di cottura.
Non tentare di recuperare l’apparecchio qualora esso sia caduto in acqua. In tal caso, estrarre subito
la spina dalla presa, e non utilizzare più l’apparecchio.
27
Italiano
Prescrizioni di sicurezza - Durante l’uso
Istruzioni per l’uso
•
•
Dopo l’uso, pulire a fondo l’apparecchio (vedere la sezione “Pulizia e manutenzione”).
Evitare di utilizzare l’apparecchio in prossimità di gabbie in cui sono contenuti uccelli. Durante il
riscaldamento dello strato antiaderente delle piastre di cottura può sprigionarsi una sostanza nociva
per i volatili.
Funzionamento - Avvertenze general
7
l’apparecchio è inteso soltanto
per consumo interno,
non per uso professionale.
1
6
3
1. 2. 3. 4. 5. 6. 7. Spia luminosa “riscaldamento”
Vaschetta di raccolta per
sughi e grassi di cottura
(separata e posizionabile)
Gancio per l’apertura e la
chiusura delle piastre
Cavo con spia
4
Piastre di cottura
Coperchio
Maniglia
5
2
Figura 1
Funzionamento - Operazioni preliminari al primo utilizzo
1. 2. 3. Rimuovere l’imballaggio.
Pulire accuratamente tutti gli accessori per eliminare gli eventuali residui di produzione (vedere il
capitolo “Pulizia e manutenzione”).
Collegare la spina alla presa di rete e lasciare riscaldare la bistecchiera elettrica per 10 minuti. In tal
modo sarà possibile eliminare gli eventuali odori dovuti agli imballaggi.
• •
La prima volta che si utilizza l’apparecchio, può verificarsi una leggera emissione di fumo accompagnata da un odore particolare. Si tratta di un fenomeno normale che scomparirà
automaticamente. Predisporre una sufficiente ventilazione.
Evitare che i volatili si avvicinino all’apparecchio mentre questo è in funzione. Durante il riscaldamento dello strato antiaderente della piastra di cottura può sprigionarsi una sostanza nociva per i volatili.
funzionamento - Operazioni preliminari
Italiano
1. 2. 3. 4. Posizionare la bistecchiera su di una superficie piana, stabile e resistente al calore.
Collocare la vaschetta di raccolta (2) sotto la parte anteriore della bistecchiera in modo da farla poggiare contro il lato anteriore della base.
Richiudere il coperchio (6).
Inserire la spina nella (4) presa di rete. La spia rossa (1) si attiverà e l’elettrodomestico inizierà la fase
di riscaldamento delle piastre di cottura (5).
Quando le piastre di cottura avranno raggiunto la giusta temperatura, la spia rossa verrà disattivata. Per
tale processo occorrono ca. 2 minuti.
funzionamento - Grigliate
1. Aprire il coperchio.
2. Collocare il cibo da grigliare sulla piastra di cottura inferiore.
Non utilizzare il bloccaggio del coperchio dell’apparecchio per compattare i prodotti. Il peso della teglia
superiore assicura già una pressione uniforme.
28
Istruzioni per l’uso
Nota
3. 4. 5. Per consentire la preparazione di cibi di vario spessore, il coperchio è dotato di un meccanismo
che ne permette il facile adeguamento alla grandezza della pietanza da cuocere.
Richiudere il coperchio.
Grigliare il cibo fino alla sua completa cottura. Il tempo di cottura necessario varia a seconda del tipo di
cibo prescelto.
Aprire il coperchio e togliere il cibo dalla piastra di cottura.
Nota
Assicurarsi di non utilizzare mai forchette, coltelli od oggetti taglienti o acuminati.Così facendo,
potreste danneggiare il rivestimento antiaderente. I danni alle teglie da forno dovuti a oggetti
appuntiti non sono coperti dalla garanzia!
6. Una volta terminata la cottura, estrarre la spina dalla presa. Buon appetito!
Pulizia e manutenzione
Pulire l’elettrodomestico dopo ogni utilizzo.
1. E strarre la spina dalla presa e lasciare raffreddare completamente l’apparecchio.
2. Rimuovere i residui di cibo dalla teglia da forno inferiore con della carta da cucina quando
l’apparecchio è ancora caldo.
3. La teglia da forno superiore è più facile da pulire quando l’apparecchio si è raffreddato.
4. Pulire il recipiente di raccolta con dell’acqua insaponata.
5. Pulire il contenitore e il coperchio con un panno umido.
• •
•
Assicurarsi che l’apparecchio non sia collegato all’alimentazione di rete mentre lo si pulisce.
Non utilizzare detergenti aggressivi o abrasivi né utensili taglienti o acuminati (come coltelli o
spazzole dure) per eseguire la pulizia.
Non immergere mai l’apparecchio, il cavo e la spina in acqua o in altri liquidi.
Pulizia e manutenzione - Conservaizone
1. Chiudere l’apparecchio e premere la fascetta sul lato destro.
2. Posizionare l’apparecchio su una superficie piana e stabile in posizione verticale con la leva in su, o
semplicemente come viene utilizzato l’apparecchio.
Tutela dell’ambiente
•Gettare il materiale di imballaggio, come plastica e cartone, negli appositi contenitori.
•Una volta raggiunta la durata massima del prodotto, non smaltirlo alla stregua dei rifiuti generali,
ma portarlo presso un punto di raccolta per il riciclo di apparecchiature elettriche ed elettroniche.
Prestare attenzione al simbolo sul prodotto, alle istruzioni per l’uso o all’imballaggio.
•I materiali possono essere riutilizzati come indicato. Grazie al riciclaggio, la trasformazione di
materiali o altri metodi di utilizzo di vecchie apparecchiature contribuiscono in modo essenziale alla
salvaguardia dell’ambiente.
• Rivolgersi al proprio comune per informazioni sul punto di raccolta più vicino.
Specifiche tecniche
Tipo: Potenza: Tensione di rete: ASW113 - ASW113S -ASW113R
1000W
220-240V ~50/60Hz
Condizioni di garanzia
Di seguito sono riportate le condizioni alle quali l’importatore fornisce la garanzia per il presente
apparecchio per un periodo di 60 mesi a decorrere dalla data d’acquisto, a copertura dei difetti di materiale
e/o di fabbricazione.
1. Durante la validità di tale periodo di garanzia non verrà addebitato alcun costo di manodopera o di
materiale. Le riparazioni effettuate nel corso di validità della garanzia non prolungano la durata della
stessa.
2. Le parti difettose o, in caso di sostituzione (cambio), l’apparecchio difettoso stesso divengono
automaticamente proprietà dell’importatore.
3. Qualsiasi ricorso alla garanzia dovrà essere accompagnato dalla prova d’acquisto dell’azienda
rivenditrice.
29
Italiano
Istruzioni per l’uso
4. I ricorsi alla garanzia devono essere eseguiti presso il rivenditore ove l’apparecchio è stato acquistato
o presso l’importatore.
5. La garanzia è valida esclusivamente per il primo acquirente e non è trasferibile.
6. La garanzia non si applica ai danni derivanti da:
a. incidenti, uso improprio, usura e/o negligenza;
b. erronea installazione e/o utilizzo in contrasto con le disposizioni normative, tecniche o di sicurezza
vigenti;
c. collegamento del prodotto a una tensione di rete diversa da quella indicata nella targhetta di
identificazione;
d. modifiche non autorizzate;
e. riparazioni eseguite da terzi;
f. trasporto eseguito in modo improprio privo dell’imballaggio o delle protezioni idonee.
7. Le presenti condizioni di garanzia non si applicano inoltre in caso di:
a. perdite che si verificano durante il trasporto;
b. rimozione o modifica del numero di serie dell’apparecchio.
8. Sono esclusi dalla garanzia i cavi, le spie luminose, le lampade e i componenti in vetro.
9. La garanzia non riconosce alcun diritto al risarcimento di eventuali danni al di là della mera
sostituzione o riparazione delle parti difettose. In nessun caso l’importatore potrà essere ritenuto
responsabile per eventuali danni consequenziali o per conseguenze di altro tipo verificatesi a causa
delle apparecchiature da questi fornite o a esse correlate.
10. Per reclamare la garanzia, potete rivolgervi al vostro negoziante. Bestron offre anche la possibilità
di far riparare l’apparecchio direttamente dal Centro assistenza Bestron. Tuttavia, non spedite mai
l’apparecchio senza aver fatto le dovute considerazioni. Il pacco può infatti essere respinto e le
eventuali spese sono a vostro carico. Contattate il Centro assistenza e vi diranno come imballare e
spedire l’apparecchio.
11. L’apparecchio non è concepito per l’uso professionale.
Servizio
Qualora dovesse verificarsi un guasto è possibile mettersi in contatto con il servizio clienti BESTRON:
PAESI BASSI:
Bestron NEDERLAND BV
Bestron Service
Moeskampweg, 20
5222 AW ’s-Hertogenbosch
Tel: +31(0) 73 - 623 11 21
Fax: +31(0) 73 - 621 23 96
E-mail: [email protected]
Internet: www.bestron.com
Dichiarazione di conformità CE
Questo prodotto soddisfa i requisiti e le seguenti norme europee nel campo della sicurezza:
• Direttiva EMC 2004/108/EC
• Direttiva sulla bassa tensione 2006/95/EC
Italiano
R. Neyman
Controllo qualità
30
Istruzioni per l’uso
Ricette
Spiedini alla piastra
Ingredienti:
• 350 g di scaloppine
• 2 grandi cipolle
• 50 g di prosciutto speck
• Olio
• 2 peperoni
Per la marinata:
• 125 ml d’acqua
• 4 cucchiai di vino rosso
• 1 cucchiaio di aceto
• 1 spicchio d’aglio
• 1 pizzico di timo
• di pepe
• di sale
migliore è di formare dapprima delle sfere per poi
premerle sul tagliere. La carne dovrebbe essere il
più sottile possibile. Mescolare senape, maionese e
ketchup. Questa sarà la salsa successiva. Portare in
tavola anche cipolle, pomodori e salsa. Dorare bene
la carne sui due lati sulla piastra Paninigrill. Mettere
sulla piastra anche i panini poco prima del termine
della cottura. Così anche i panini saranno ancora
ben croccanti.
Spiedini di pollo alla piastra
Ingredienti:
• 2 filetti di petto di pollo
• salsa (Teriyaki)
• un po’ di vino bianco
Preparazione:
Preparare dapprima la marinata emulsionando circa
5 cucchiai di salsa Teriyaki con un vino bianco un po’
secco. Tagliare i filetti di petto di pollo a fettine sottili
e lasciarle marinare per almeno 2 ore nella salsa.
Infilarle poi a ventaglio sugli spiedini e collocarli sulla
piastra Paninigrill, spennellandoli di tanto in tanto
con il resto della marinata.
Hamburger
Ingredienti:
• 2 vasetti di panna acida (2 da 150 g)
• 6 cipollotti
• 6 cucchiai di pangrattato
• 2 cucchiaini di salsa Worcestershire
• 2 cucchiaini di pepe
• 800 g di macinato di manzo
• 8 panini (da hamburger)
• Insalata
• 2 pomodori
• 1 cipolla (rossa)
• 4 cucchiaini di senape
• 2 cucchiai di maionese
• 2 cucchiai di ketchup
Preparazione:
Tagliare le cipolle ad anelli, i pomodori a fette
e versare in una ciotola. Tritare finemente i
cipollotti. Tagliare anche la metà della parte verde.
Amalgamare bene macinato, cipollotti, panna acida,
salsa Worcestershire e pepe. Con l’impasto di
macinato modellare degli hamburger piani. Il metodo
31
Preparazione:
Pulire funghi, cipolle, pomodori e peperoni
all’occorrenza tagliare a bocconcini e versare
quindi in una grande ciotola. Cospargere con
abbondante olio di oliva e aggiungere due spruzzi
di aceto balsamico. Insaporire con un po’ di sale,
abbondante pepe nero appena macinato e un po’
di peperoncino macinato. Cospargere poi con poco
aglio, dragoncello e pangrattato. Mescolare bene.
Insaporire ancora, all’occorrenza, con un goccio
di olio d’oliva o due spruzzi di aceto balsamico.
Lasciar riposare gli ingredienti per circa 30 minuti e
poi versare sugli spiedini. Non immergere l’ananas
nella marinata. Versare il resto della marinata in
una piccola tazza. Collocare gli spiedini per circa
10 minuti sulla piastra Paninigrill e cospargerli con il
resto della marinata.
Sandwich
Ingredienti:
• 4 fette grandi di pan carrè
• 2 porz. di filetto di pollo tagliato a fettine molto
sottili
• 2 cipolle tagliate ad anelli sottili
• 1 spicchio d’aglio tritato finemente
• Sale e pepe
• 1 cucchiaio di peperoncino in polvere
• 2 cucchiai di salsa (salsa all’aglio dal barattolo)
• 1 manciata di rucola tritata grossolanamente
• 2 cucchiaini di spezie cinesi miste
Italiano
Preparazione:
Tagliare la carne a cubetti. Tagliare le cipolle in quarti.
Tagliare a strisce peperone e prosciutto speck.
Infilare negli spiedini tutti gli ingredienti alternandoli.
Lasciare gli spiedini per circa un’ora nella marinata.
Toglierli e lasciarli scolare. Spennellare con olio e
cuocerli sulla piastra Paninigrill per circa 10 minuti.
Spiedini di verdure alla piastra
Ingredienti:
• funghi a scelta di media grandezza
• 1 peperone rosso
• 20 pomodori ciliegini
• 20 cipolline dolci o 1 grande cipolla rossa
piccante
• tagliata finemente
• 1 ananas fresco tagliato in quadrati (da 1,5 a 2 cm)
• 3 cucchiai di olio di oliva
• 1 cucchiaio di aceto balsamico
• Sale quanto basta
• Pepe appena macinato
• 1 cucchiaio di farina (pangrattato di panini)
• 3 spicchi d’aglio schiacciati
• Dragoncello fresco o secco
• 1 peperone giallo
• 1 peperone verde
• Un po’ di peperoncino macinato
Istruzioni per l’uso
Preparazione:
Grigliare bene le fettine di filetto di pollo sulla piastra
Paninigrill e insaporire. Indorare cipolle e aglio e
aggiungere il sale. Coprire 2 fette tostate di pan carrè
con abbondante rucola, poi aggiungere le cipolle, le
fettine di filetto di pollo, la salsa all’aglio e di nuovo
la rucola a coprire. Coprire con una seconda fetta di
pan carrè e mettere il tutto sulla piastra Paninigrill
per circa 4-6 minuti.
Sandwich all’italiana
Ingredienti:
• 2 fette di pan carrè per ogni sandwich
• 1 cucchiaio di olio di oliva
• ½ cipolla piccola
• ½ peperone rosso piccolo
• 3 acciughe o in alternativa:
• 2 pomodori secchi sott’olio (fino a 3 pomodori)
• 50 g di mozzarella
• 6 olive nere
• 1 cucchiaio di prezzemolo tritato
• ½ cucchiaino di timo tritato
Preparazione:
Cospargere il pan carrè con olio d’oliva. Tagliare
le cipolle ad anelli e i peperoni a strisce sottili. Se
si utilizzano i pomodori secchi al posto dei filetti di
acciughe, tagliarli a strisce. Tagliare la mozzarella
a strisce. Disporre gli ingredienti preparati sul pan
carrè con le olive e cospargere con prezzemolo e
timo, quindi cuocere sulla piastra Paninigrill per 4-6
minuti.
Panini al pesto di pollo
Ingredienti:
• 1 pane focaccia tagliato in quattro parti
• ½ tazza di pesto al basilico dal barattolo
• 200 g di petto di pollo cotto tagliato a fettine sottili
• 200 g di peperone verde tagliato a cubetti
• 150 g di cipolla rossa tagliata ad anelli
• 250 g di formaggio Gouda grattugiato
Italiano
Preparazione:
Riscaldare la piastra Paninigrill. Tagliare a metà ogni
quarto di focaccia e cospargere le due metà con il
pesto. Coprire una metà con gli ingredienti, ovvero
petto di pollo, peperone, cipolla e formaggio. Coprire
con l’altra metà e cuocere i panini sulla piastra
preriscaldata per circa 5 minuti oppure fino a quando
non avranno un colore dorato e il formaggio non sarà
fuso.
Panini Marc’s
Ingredienti:
• 1 pane focaccia tagliato in quattro parti o 4
• ciabattine
• 1 pomodoro
• 1 cetriolo
• 4 fette di formaggio fondente
• 4 fette di prosciutto cotto o salame
• Burro alle erbe
• Sale e pepe
• Erbe a piacere
32
Preparazione:
Tagliare il pane nel senso della lunghezza e
cospargere con il burro alle erbe. Disporre il
prosciutto o il salame sulla metà inferiore. Tagliare
il cetriolo e il pomodoro a strisce e disporli sulla
baguette, insaporire e cospargere di erbette
fresche. Disporre il formaggio e coprire con la parte
superiore del panino. Cuocere i panini sulla piastra
preriscaldata per circa 5 minuti oppure fino a quando
non avranno un colore dorato e il formaggio non sarà
fuso.
Carne grigliata alla coreana
Ingredienti:
• 1 kg di carne di maiale (lombo di maiale) in fettine spesse circa 1 cm
• 1 gambo di porro
• 3 spicchi d’aglio
• 5 cucchiai di salsa alla soia
• 5 cucchiai di olio (olio di semi di girasole)
• 2 cucchiai di aceto (aceto di vino)
• 1 limone spremuto
• 7 cucchiaini di spezie miste (cinesi)
• 2 cucchiaini di pepe di caienna
Preparazione:
Tritare finemente o schiacciare l’aglio. Mescolare
a tutti gli ingredienti liquidi e alle spezie fino ad
ottenere una salsa ed emulsionare bene. Tagliare
quindi il porro ad anelli. Ora occorre una ciotola
(meglio se con coperchio di chiusura) in cui marinare
la carne. hiudere il coperchio (o coprire la ciotola in
altro modo) e mettere in frigorifero. Lasciare in frigo
da 1 a 3 giorni, a metà del tempo capovolgere la
ciotola (o girare le fettine di carne) in modo tale che
la marinata si distribuisca in modo uniforme. Dopo
aver marinato i pezzi di carne, collocarli sulla piastra
Paninigrill preriscaldata e cuocere a piacere.
Pesce alla tailandese
Ingredienti:
• 1 kg di filetti di pesce (ad es. scorfano, merluzzo, pangasio ...)
• 1 cucchiaio di cumino
• 2 cucchiai di salsa alle ostriche
• 100 ml d’olio (ad es. olio di semi di sesamo, di
semi di girasole o di arachidi)
• 1 cucchiaio di pasta di curry verde
• ½ limone spremuto
• Sale e zucchero
Preparazione:
Il pesce può essere fresco o congelato, nel
secondo caso va scongelato. Salare e zuccherare
leggermente i filetti. In un barattolo in vetro con
chiusura a vite o uno shaker emulsionare olio,
salsa alle ostriche, cumino, succo di limone e pasta
al urry. Più a lungo e con forza si agita, tanto più
a lungo dura lo stato di emulsione della marinata
(a vantaggio della marinata). Versare la marinata
sul pesce e lasciar riposare per almeno 2 ore in
frigorifero. Collocare quindi sulla piastra Paninigrill
preriscaldata e cuocere sui due lati per circa 3-4
minuti.
Manual del usuario
Le felicitamos por la compra de este grill, que le permite preparar pescados y carnes ricos y sanos,
e incluso paninis completos. Las placas de asado montadas en la carcasa del grill aseguran una
temperatura uniforme en las partes superior e inferior del aparato. Las placas de asado son fáciles de
limpiar.
Normas de seguridad - General
•
•
•
•
•
Lea detenidamente las instrucciones de uso y guárdelas donde no pueda perderlas.
Utilice este aparato únicamente en la forma que se describe en las instrucciones.
Este aparato no puede ser utilizado por niños ni por personas que, debido a alguna limitación física,
sensorial o mental, o por falta de experiencia y conocimientos, no puedan manejarlo de forma
suficientemente segura, a menos que hayan recibido instrucciones sobre el uso del aparato de una
persona que se haga responsable de su seguridad.
Es preciso vigilar que los niños no jueguen con el aparato.
Haga reparar el aparato únicamente por personal cualificado. No intente nunca repararlo usted mismo.
Normas de seguridad - Electricidad y calor
•
•
•
•
•
•
•
•
•
•
•
•
Algunas partes del aparato pueden calentarse.
No las toque, para evitar quemaduras.
Antes de utilizar el aparato, verifique que el voltaje de la red corresponda al voltaje indicado en la placa.
Verifique regularmente que el cable del aparato esté en buenas condiciones. No lo use si el cable está
averiado. Haga sustituir el cable deteriorado por personal de servicio cualificado.
Conecte el aparato únicamente a una toma con conexión a tierra.
Al retirar el enchufe de la toma, asegúrese de tirar del enchufe y no del cable.
Retire siempre el enchufe de la toma de alimentación cuando no lo esté utilizando.
Si usa un cable de extensión, asegúrese de que éste está desenrollado completamente.
Use únicamente un cable de extensión que tenga la debida aprobación.
Es indispensable que el aparato pueda liberar el calor que produce para evitar riesgos de incendio.
Asegúrese de que el aparato esté completamente libre y de que no haga contacto con materiales
inflamables. No cubra nunca el hornillo.
No use este aparato cerca de materiales inflamables.
Procure que ni el aparato, ni el cable, ni el enchufe estén en contacto con fuentes de calor, por
ejemplo, con una placa caliente de la estufa o una llama.
Asegúrese de que ni el aparato, ni el cable, ni el enchufe están en contacto con el agua o cualquier
otro líquido.
Algunas partes del aparato pueden calentarse. No las toque para evitar quemaduras. El
•
•
•
•
•
•
•
•
•
•
•
•
•
•
•
No use nunca este aparato fuera del hogar.
No lo utilice nunca en lugares húmedos.
Colóquelo sobre una superficie plana, estable y resistente al calor, en un lugar donde no pueda caerse.
Asegúrese de tener las manos secas cuando manipule el aparato, el cable o el enchufe.
Apague el aparato y retire el enchufe de la toma de corriente si se presentan fallos durante el uso,
cuando quiera limpiarlo, o después de usarlo.
No deje aparato sin vigilancia mientras que funcione.
No mueva nunca el aparato mientras que esté caliente o encendido. Debe apagarlo primero y sólo
podrá desplazarlo cuando se haya enfriado.
Asegúrese de que hay suficiente espacio libre alrededor (mínimo 10 cm) y encima del aparato
(mínimo 30 cm).
Algunas partes del aparato se calientan demasiado durante el uso. Por tal motivo use siempre la
empuñadura para abrir y cerrar la tapa.
No coloque objetos pesados sobre la tapa para mantener cerrado el aparato.
Evite que caiga agua sobre las placas de asado calientes mientras el aparato está en uso o
inmediatamente después de usarlo. Esto puede causar la deformación de una placa de asado.
No recoja el aparato si éste ha caído en el agua. Retire inmediatamente el enchufe de la toma de
pared. No vuelva a utilizarlo más.
Limpie muy bien el aparato después de usarlo (véase el capítulo ‘Limpieza y mantenimiento’).
No use el aparato cerca a la jaula de los pájaros. Al calentarse la capa antiadherente, la placa de
asado puede desprender una sustancia que afecta a los pájaros.
El aparato no se puede poner en funcionamiento mediante un cronómetro externo ni con otro sistema
separado con control remoto.
33
Español
Normas de seguridad - Uso
Manual del usuario
Funcionamiento - Generalidades
7
Este aparato está concebido únicamente
para uso doméstico, no
para uso profesional.
1
6
3
5
1. Piloto indicador “calentar”
2. Bandeja de recogida
(movible)
3. Mecanismo para abrir
y cerrar la tapa
4. Cable con enchufe
4
5. Placas de asado
6. Tapa
7. Agarradera
funcionamiento - Antes del primer uso
1. 2. 3. 2
Figura 1
Quite el embalaje.
Limpie todos los accesorios para eliminar cualquier posible resto de fabricación (véase ‘Limpieza y
mantenimiento’).
Introduzca el enchufe en la toma de corriente y deje que el grill se caliente durante 10 minutos. De
este modo elimina del aparato cualquier posible olor del embalaje.
• •
Cuando se utiliza el aparato por primera vez, éste puede producir un poco de humo y desprender
un olor particular. Esto es normal y tanto el humo como el olor desaparecerán automáticamente.
Procure tener suficiente ventilación.
Procure que no se acerque ningún pájaro al aparato, mientras que éste esté funcionando. Al
calentarse la capa antiadherente de la plancha puede desprender una sustancia que afecta a los
pájaros.
funcionamiento - Preparación
1. 2. 3. 4. Coloque el grill sobre una superficie plana, estable y resistente al calor.
Coloque la bandeja de recogida (2) delante del grill, pegada a las patas frontales.
Cierre la tapa (6).
Introduzca el enchufe (4) en la toma de pared. El testigo indicador de color rojo (1) se enciende y el
aparato empieza a calentar las placas de asado (5).
Cuando las placas de asado han alcanzado la temperatura correcta, se apaga el testigo indicador de color
rojo. Esto toma aproximadamente 2 minutos.
funcionamiento - Asar
1. Abra la tapa.
2. Coloque los alimentos que desea preparar sobre la plancha de asado inferior.
No utilice el cierre de la tapa del aparato para comprimir los productos. El peso de la bandeja superior
es suficiente para repartir uniformemente la presión.
Español
Nota Para poder procesar alimentos de variados espesores, la tapa tiene juego. De esta forma puede
adaptarse fácilmente al espesor de los alimentos.
3. 4. 5. Cierre la tapa.
Ase los alimentos hasta que estén hechos. El tiempo de asado necesario varía por producto.
Abra la tapa y saque los alimentos de la placa de asado. Use para ello una espátula de plástico o de
madera resistente al calor para no dañar la capa antiadherente.
34
Manual del usuario
Nota ¡No use tenedores ni cuchillos, ni otros objetos afilados! Así podría dañar la capa antiadherente.
¡La garantía mp cubre daños en las bandejas de horno causados por objetos afilados!
6. Cuando haya terminado, retire el enchufe de la toma de corriente. ¡Buen apetito!
Limpieza y mantenimiento
Limpie el aparato después de cada uso.
1. Retire el enchufe de la fuente de alimentación y deje enfriar el aparato completamente.
2. Elimine los restos de alimentos de la bandeja inferior con papel de cocina mientras el aparato todavía
esté un poco caliente.
3. La bandeja superior se limpia más fácilmente cuando se ha enfriado.
4. Limpie el recipiente donde se colocan los alimentos con agua jabonosa.
5. Limpie la carcasa y la tapa con un paño húmedo.
• Asegúrese de que el aparato no está conectado a la red de alimentación eléctrica cuando vaya a
limpiarlo.
• No use limpiadores fuertes ni abrasivos, ni objetos con filo (como cuchillos o cepillos con cerdas
duras) para limpiar el aparato.
• No sumerja nunca el aparato, ni el cable, ni el enchufe en agua o en otro líquido.
Limpieza y mantenimiento - Recogida
1. Cierre el aparato y empuje el clip del lado derecho para que quede bien cerrado.
2. Coloque el aparato en posición vertical sobre una superficie lisa y estable, con la palanca hacia arriba,
o en la posición normal de uso del aparato.
Medio ambiente
•Tire el material de embalaje, como plástico y cajas, en los contenedores destinados para ello.
•No tire este producto al final de su vida útil con los residuos domésticos normales, en su lugar
llévelo a un centro de recolección para reutilización de aparatos eléctricos y electrónicos. Tenga en
cuenta el símbolo que aparece en el aparato, el manual de instrucciones o el embalaje.
•Los materiales pueden reutilizarse como se ha indicado. Su ayuda para reutilización,
procesamiento de materiales u otras formas de utilización de aparatos viejos es una contribución
importante a la conservación de nuestro medio ambiente.
• Infórmese con las autoridades sobre los puntos de recolección en su localidad.
Ficha técnica
Tipo: Potencia: Tensión de la red: ASW113 - ASW113S -ASW113R
1000W
220-240V ~50/60Hz
Bajo las siguientes condiciones, y durante un período de 60 meses contado a partir de la fecha de
compra, el importador otorgará garantía de este aparato por defectos ocasionados por deficiencias en la
fabricación o en los materiales.
1. Durante el período de garantía mencionado no se cobrarán los costes de la mano de obra ni el
material. Una reparación que tenga lugar durante el período de garantía no prolonga dicho período.
2. En caso de reemplazo, las piezas defectuosas o los aparatos defectuosos mismos pasarán
automáticamente a propiedad del importador.
3. Toda reclamación por garantía deberá ir acompañada de la factura de compra de la empresa.
4. Toda reclamación por garantía deberá hacerse al distribuidor donde ha sido comprado el aparato o al
importador.
5. La garantía es válida únicamente para el comprador y no es susceptible de transferencia.
6. La garantía no cubre los daños ocasionados por:
a. accidentes, mala utilización, desgaste y/o descuido;
b. mala instalación y/o uso en contradicción con las normas técnicas o de seguridad legales
vigentes;
c. conexión a una red eléctrica cuyo voltaje no corresponde al voltaje indicado en la placa;
d. una modificación no autorizada;
e. una reparación ejecutada por terceros;
35
Español
Disposiciones de garantía
Manual del usuario
f. negligencia en el transporte del aparato sin el embalaje o protección adecuados.
7. No podrá apelarse a estas disposiciones de garantía en los siguientes casos:
a. pérdida ocurrida durante el transporte;
b. remoción o modificación del número de serie del aparato.
8. La garantía no cubre los cables, las bombillas, ni las partes de cristal.
9.La garantía no concede derecho a reclamar indemnización alguna por daños, diferente a la sustitución
o reparación, respectivamente, de las partes defectuosas. El importador no podrá ser responsabilizado
por daños consecuenciales o por cualquier otra clase de efectos causados por el aparato suministrado
por él o que guarden relación con el mismo.
10. Para hacer valer la garantía. Puede acudir a la tienda donde compró el producto. Bestron también
ofrece la posibilidad de entregar el aparato directamente al servicio técnico Bestron para su
reparación. Pero no podrá enviarlo de cualquier manera. El paquete podría ser rechazado y los costes
asociados correrían de su cuenta. Póngase en contacto con el servicio técnico, donde le indicarán
cómo debe embalar y enviar el aparato.
11. Este aparato no es apto para uso profesional.
Servicio
Si se presenta un fallo inesperado, puede ponerse en contacto con el departamento de servicios de
BESTRON:
PAÍSES BAJOS:
BESTRON NEDERLAND BV
Bestron Service
Moeskampweg 20
5222 AW ’s-Hertogenbosch
Tel: +31(0) 73 - 623 11 21
Fax: +31(0) 73 - 621 23 96
Email: [email protected]
Internet: www.bestron.com
Certificación de conformidad (CE)
Este producto satisface las disposiciones de las siguientes directivas de la Unión Europea en el marco de
la seguridad:
• Directiva de compatibilidad electromagnética
• Directiva de bajo voltaje R. Neyman
Control de calidad
Español
36
2004/108/EC
2006/95/EC
Manual del usuario
Recetas
Pinchos a la parrilla
Ingredientes:
• 350 g Carne en filetes
• 2Cebollas grandes
• 50 g Tocino
• Aceite
• 2 Pimientos
Para la marinada:
• 125 ml Agua
• 4 cucharadas Vino tinto
• 1 cucharada Vinagre
• 1 diente Ajo
• 1 ramillete Tomillo
• Pimienta y Sal
la nata agria, la salsa Worcestershire y la pimienta.
Moldear la mezcla para hacer hamburguesas con
forma aplanada. El método más sencillo es hacer
primero bolas y luego aplastarlas sobre una tabla
de cortar hasta que tengan la forma ideal. La carne
debería quedar tan fina como sea posible. Mezclar
la mostaza, la mayonesa y el ketchup. Esa mezcla
será la salsa. Servir la cebolla, el tomate y la salsa
conjuntamente en la mesa. Dorar la carne por
ambos lados en el grill hasta que esté en su punto.
Un poco antes de retirar la carne, colocar también
los panecillos sobre el grill. Así se pondrán también
crujientes.
Pinchos de pollo a la parrilla
Ingredientes:
• 2 Filetes de pechuga de pollo
• Salsa (salta teriyaki)
• Un poco Vino blanco
Preparación:
Preparar primero la marinada: mezclar 5 cucharadas
soperas de salsa teriyaki con un chorrito de vino
blanco seco. Cortar en lonchas finas los filetes de
pechuga de pollo y dejarlos marinar en la salsa
al menos 2 horas. A continuación ensartarlos,
colocándolos con forma más o menos cúbica en los
pinchos y asarlos sobre el grill. Pintarlos de vez en
cuando con lo que haya sobrado de la marinada.
Hamburguesa
Ingredientes:
• 2 envases Nata agria (envases de 150 g)
• 6 Cebolletas
• 6 cucharadas Pan rallado
• 2 cucharaditas Salsa Worcestershire
• 2 cucharaditas Pimienta
• 800 g Carne de vacuno picada
• 8 Panecillos (para hamburguesa)
• Lechuga
• 2 Tomates
• 1 Cebolla (cebolla amarilla si es posible)
• 4 cucharaditas Mostaza
• 2 cucharadas Mayonesa
• 2 cucharadas Ketchup
Preparación:
Cortar las cebollas en aros hermosos, los tomates en
rodajas y poner todo en un mismo recipiente. Picar
las cebolletas finamente. Cortar la lechuga. Mezclar
y remover bien la carne picada con las cebolletas,
37
Sándwiches
Ingredientes:
• 4 rebanadas Pan de molde en rebanadas grandes
• 2 porciones Filetes de pollo, cortados en tiras muy finas
• 2 Cebollas, cortadas en aros delgados
• 1 Diente de ajo, muy picado
• Sal y pimienta
• 1 cucharadita Pimentón
• 2 cucharadas Salsa (salsa de ajo, de la que se
vende ya preparada)
• 1 puñado Rúcula, picadas groseramente
• 2 cucharaditas Mezcla de especias chinas
Preparación:
Hacer en el grill las tiras de pechuga de pollo a
fuego fuerte y sazonarlas con las especias. Dorar en
una sartén las cebollas y el ajo y salarlos. Cubrir 2
rebanadas de pan de molde con rúcula en cantidad.
Después poner sobre la rúcula la cebolla, las tiras
de pollo, la salsa de ajo y finalmente otra capa de
rúcula. Cubrir los sándwiches con las otras dos
rebanadas y seguidamente dejar que se hagan en el
grill para panini por espacio de 4 a 6 minutos.
Pinchos vegetales a la parrilla
Ingredientes:
• Un puñado Setas, las que usted prefiera, de
tamaño mediano
• 1 Pimiento rojo
• 20 Tomates cherry
• 20 Cebollitas dulces, o una cebolla roja, grande y picante, muy picada
• 1 Piña fresca, cortada en dados (de 1,5-2 cm de tamaño)
• 3 cucharadas Aceite de oliva
• 1 cucharada Vinagre balsámico
• Sal, al gusto
• Pimienta recién molida
• 1 cucharada Pan rallado
• 3 dientes Ajo, machacados
• Estragón, fresco o seco
• 1 Pimiento amarillo
• 1 Pimiento verde
• Una pizca Guindillas molidas
Preparación:
Español
Preparación:
Cortar la carne en dados. Cortar las cebollas en
cuartos. Cortar en lonchas el tocino y trocear
el pimiento. Ensartar los ingredientes en los
pinchos, alternándolos. Dejar marinar los pinchos
aproximadamente una hora. Retirarlos de la
marinada y dejarlos escurrir. Pintarlos con un poco de
aceite y asarlos unos 10 minutos aproximadamente
sobre el grill.
Manual del usuario
Lavar y limpiar las setas, las cebollas, el tomate y
los pimientos, cortarlos en bocaditos y ponerlos
todos en un recipiente grande. Aliñar con abundante
aceite de oliva y un par de golpes de vinagre
balsámico. Salpimentar con un poco de sal,
pimienta recién molida abundante y añadir un poco
de guindilla molida. A continuación, espolvorear el
ajo machacado, el estragón y la harina sobre la
mezcla, sin echar demasiado. Mezclar bien todos
los ingredientes, si es necesario se puede añadir un
poco de aceite de oliva y vinagre balsámico. Dejar
reposar los ingredientes unos 30 minutos, después
preparar con ellos los pinchos. Reservar la piña para
los pinchos sin mezclarla con el resto de ingredientes
en el aliño. Recoger el aliño sobrante en una taza.
Asar los pinchos durante unos 10 minutos sobre el
grill, aprovechando el aliño sobrante para mojarlos
de vez en cuando.
Sándwiches a la italiana
Ingredientes:
• 2 Rebanadas de pan de molde para cada
sándwich
• 1 cucharada Aceite de oliva
• ½ Cebolla pequeña
• ½ Pimiento rojo pequeño
• 3 Anchoas o como alternativa:
• 2 Tomates secos conservados en aceite (3 si son muy pequeños)
• 50 g Mozzarella
• 6 Aceitunas negras
• 1 cucharada Perejil picado
• ½ cucharadita Tomillo picado
Preparación:
Untar las rebanadas de pan con el aceite de oliva.
Cortar las cebollas en aros y los pimientos en tiras
finas, en juliana. Si se prefiere utilizar tomates en
lugar de anchoas, cortarlos también en tiras finas.
Cortar la mozzarella en lonchas. Distribuir los
ingredientes ya preparados junto con las aceitunas
sobre el pan y espolvorear sobre ellos el perejil y el
tomillo; a continuación dejar que se hagan en el grill
por espacio de 4 a 6 minutos.
Español
Panini de pollo al pesto
Ingredientes:
• 1 pan de focaccia (pan plano, con forma de
hogaza), cortado en cuartos
• ½ taza de salsa pesto de albahaca, se vende ya preparada
• 200 g de pechuga de pollo cocida, cortada en
lonchas finas
• 200 g de pimientos verdes cortados en pequeños dados
• 150 g de cebolla roja, cortada en aros
• 250 g de queso Gouda rallado
Preparación:
Precalentar el grill para panini. Cortar cada cuarto
de la focaccia por la mitad, como para hacer un
bocadillo, untar cada mitad con salsa pesto. Cubrir
las cuatro porciones inferiores del pan con los
siguientes ingredientes: pechuga de pollo cocida,
38
pimiento, cebolla y queso. Taparlas con las otras
cuatro mitades y poner estos paninis en el grill
precalentado unos 5 minutos o hasta que estén
dorados y el queso esté fundido
Panini al estilo de Marc
Ingredientes:
• 1 Pan de focaccia cortado en cuartos o 4
panecillos de chapata
• 1 Tomate
• 1 Pepino
• 4 lonchas Queso, que funda bien
• 4 lonchas Jamón cocido o salami
• Mantequilla a las hierbas
• Sal y pimienta
• Hierbas al gusto
Preparación:
Cortar los panecillos a lo largo y untarlos con la
mantequilla. Repartir el queso o salami sobre la
parte inferior de los panecillos. Cortar el tomate y el
pepino en rodajas y repartirlas de manera uniforme
sobre los panecillos; salpimentar y espolvorearlo
todo con las hierbas. Colocar el queso sobre los
demás ingredientes y finalmente cubrir todo con la
parte superior de los panecillos. Asar los paninis en
el grill ya precalentado durante unos 5 minutos o
hasta que estén dorados y el queso esté fundido.
Carne al fuego a la coreana
Ingredientes:
• 1 kg Carne de cerdo (cabeza de lomo) cortada en filetes gruesos de 1 cm aproximadamente
• 1 tallo Puerro
• 3 dientes Ajo
• 5 cucharadas Salsa de soja
• 5 cucharadas Aceite de girasol
• 2 cucharadas Vinagre de vino
• 1 Limón, exprimido
• 7 cucharaditas Mezcla de especias (especias
chinas)
• 2 cucharaditas Pimienta de cayena
Preparación:
Picar muy finamente o machacar el ajo en un
mortero. Mezclarlo bien con la salsa de soja, el
aceite, el vinagre, el zumo de limón, las especias
y la pimienta, hasta obtener una salsa. Cortar el
puerro en aros. Será necesario un recipiente para
dejar marinar la carne, mejor si dispone de una tapa
para cerrarlo. Cerrar el recipiente con la carne y la
marinada (si tiene tapa) o taparlo de alguna otra
manera. Dejar marinar la carne en el frigorífico por
espacio de 1 a 3 días. Pasada la mitad del tiempo,
darle la vuelta al recipiente (o a la carne) para repartir
el aliño de manera uniforme. Una vez marinada,
colocar la carne en el grill para panini precalentado y
dejar que se ase hasta que esté al gusto.
Pescado a la tailandesa
Ingredientes:
• 1 kg Filetes de pescado (p. ej. merluza, gallineta,
panga...)
• 1 cucharada Comino
Manual del usuario
•
•
•
•
•
2 cucharadas Salsa de ostras
100 ml Aceite (p. ej. aceite de sésamo, de
cacahuete o de girasol)
1 cucharadita Pasta de curry verde
½ Limón, exprimido
Sal y Azúcar
Español
Preparación:
El pescado puede ser fresco o congelado, este
último ha de dejarse descongelar antes de preparar
la receta. Aderezar los filetes de pescado con sal y
una pizca de azúcar. Poner en un frasco de cristal
con tapa (mejor si es de rosca) o un recipiente
semejante a una coctelera el aceite, la salsa de
ostras, el comino, el zumo de limón y la pasta de
curry, todo mezclado. Cerrar el frasco y agitar
la mezcla para emulsionarla y preparar el aliño.
Cuanto más tiempo y más fuerte se agite, más
ligada quedará y mejor será el aliño. Aliñar los
filetes de pescado con la mezcla y dejarlos reposar
en el frigorífico por espacio de al menos 2 horas.
Pasado ese tiempo, disponer los filetes sobre el grill
ya precalentado y dejar que se hagan unos 3 o 4
minutos por cada lado.
39
ASW113 - ASW113R
ASW113S
v 170413-08

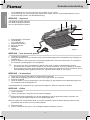

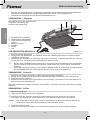


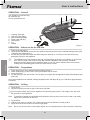


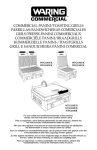

![R-667_[Cover 6 Lang].indd](http://vs1.manualzilla.com/store/data/006727403_1-5220347b6f638070bf9887a0cf28031c-150x150.png)