1
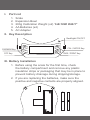
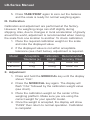
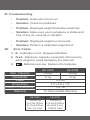
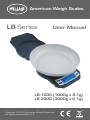
American Weigh Scales
LB-Series
User Manual
LB-1000 (1000g x 0.1g)
LB-3000 (3000g x 0.1g)
Copyright © 2010 American Weigh Scales, Inc.
All rights reserved. Rev. 2.1
LB-Series Manual
Thank you for purchasing the American Weigh
LB-Series compact bench scale. Please read all operating
instructions carefully before use. Scales are precision
measuring devices and should always be handled with
proper care. To ensure years of reliable service, keep these
simple tips in mind:
•
•
•
•
•
•
•
•
•
•
Do not exceed the scale’s maximum capacity.
Overloading your scale can permanently damage it!
Avoid exposure to extreme heat or cold. Scales
perform best at normal room temperature. If
temperatures have changed dramatically, calibration
and adjustment may be necessary.
Allow your scale to warm up for 30-60 seconds before
performing calibration and adjustment(if available).
Store your scale in a clean, dry location. Dust, dirt,
and moisture can accumulate on the weighing
sensors and electronics causing inaccuracy or
malfunction.
Avoid using your scale in close proximity to strong
radio wave emitting devices such as computers, cash
registers, and cordless phones.
Always weigh on a flat and level surface, free from
vibrations and drafts. The corner of a room is usually
the most stable.
Gently apply all items to be weighed. Do not drop
items onto the weighing platform.
Avoid dropping your scale. The warranty does not
cover damage due to rough treatment or overload.
Check the batteries first if you are having any trouble
with your scale. This simple step can remedy most
scale issues.
Do not disassemble your scale. This product contains
no user serviceable parts.
I. Part List
1.
2.
3.
4.
5.
Scale
Expansion Bowl
200g Calibration Weight (x2) *LB-1000 ONLY*
AA Batteries (x4)
AC Adapter
II. Key Description
Backlight ON/OFF
ON/MEM Key
ON
MEM
CAL
MODE
OFF
TARE
PRINT
OFF Key
CAL / MODE Key
TARE / PRINT Key
III. Battery Installation
1. Before using the scale for the first time, check
the battery compartment and remove any plastic
insulation strips or packaging that may be in place to
prevent battery drainage during shipping/storage.
2. If you are replacing the batteries, make sure the
positive and negative contacts are properly aligned.
-
+
-
+
+
-
-
+
LB-Series Manual
IV.Operation
1. Place the scale on a flat, level surface and press the
ON/MEM key to turn the scale on.
2. Once the start-up process completes and the scale
goes to zero you are ready to weigh.
3. Place the quantity to be weighed onto the weighing
platform.
4. Wait a couple seconds for the display to stabilize
before taking a weight reading.
V. Changing the Unit of Measure
1. Press the MODE/CAL key to change the scales
displayed unit of measure.
2. If the scale is turned off then back on, it will default
to the last unit used.
• LB-1000 & LB-3000 Units: g (gram)
ozt (troy ounce) dwt (pennyweight)
oz (ounce)
VI.Using the Tare Feature
You can use this scale’s tare feature to subtract the weight
of an empty container or vessel for net weight determination.
NOTE: The weight of the container will subtract from the
available capacity.
1. Place the empty container or vessel on the weighing
platform.
2. Press the TARE/PRINT key once. The display will
then reset to zero. If the container is removed, it’s
weight will be displayed as a negative number.
3. You may now fill the container with the quantity to
be weighed. The display will show the net weight of
the contents.
4. To return to normal weight display (gross weight),
remove any items from the weighing platform and
press the TARE/PRINT key again to re-zero the
scale.
VII.
Counting Feature
1. To enter parts counting mode, press CAL/MODE to
scroll through the weighing modes until “C” appears
on the bottom left of the display. The minimum
sample quantity is 5 and will be displayed as “S=5”
2. Continue to press the CAL/MODE key to select the
desired parts sample quantity: 5, 10, 20, 50 pieces.
After “50” is displayed the scale will cycle back to
g (grams).
3. With the sample quantity value still displayed on
the LCD, place the sample quantity on the platform.
Allow the sample to stabilize for 3~5 seconds then
press TARE/PRINT. The sample quantity is now set.
4. You can now add any number of the item on the
scale and a count will be displayed.
VIII. Memory Function
1. With the balance on, press the TARE/PRINT key to
ensure the balance is zeroed.
2. Place an item on the scale and press ON/MEM
when the display is stable. This action adds the
displayed weight into the memory buffer which is
normally set to zero. The display will show “0.0”
again.
3. Repeat step 2 above as many times as you need,
until you are ready to see the cummulative result.
4. To view the cummulative weight, press ON/MEM.
The total is displayed and memory cleared.
LB-Series Manual
5. Press TARE/PRINT again to zero out the balance
and the scale is ready for normal weighing again.
IX.Calibration
Calibration and adjustment are performed at the factory.
However, the weighing range can shift slightly during
shipping. Also, due to changes in local acceleration of gravity
around the world, adjustment is recommended when moving
the scale from one location to another. To check calibration:
1. Place the required calibration weight on the scale
and note the displayed value.
2. If the displayed value is not within acceptable
tolerance (see chart below), adjustment is required.
Model
LB-1000
Acceptable
Tolerance (±)
0.2g
Calibration
Weight
400g
Recommended
Accuracy Class
OIML M2
LB-3000
0.2g
1000g
OIML M2
X. Adjustment
1. Press and hold the MODE/CAL key until the display
shows “CAL”.
2. Press the MODE/CAL key again. The display will
flash “CAL” followed by the calibration weight value
(see chart).
3. Place the calibration weight on the center of the
weighing platform. Make sure you are using the
correct weight for your specific model.
4. Once the weight is accepted, the display will show
“PASS” then return to normal operation. Calibration
is complete!
XI.Troubleshooting
•
Problem: Scale will not turn on
•
Solution: Check the batteries
•
Problem: Displayed weight fluctuates randomly
•
Solution: Make sure your workspace is stable and free of any air currents or vibration
•
Problem: Displayed weight is inaccurate
Solution: Perform a calibration adjustment
•
XII.
Error Codes
1. E - Calibration error. Repeat calibration.
2. O-Ld - Maximum capacity exceeded. Remove the
extra weight to avoid damaging the load cell.
3.
- Batteries are low. Replace the batteries.
Max. Capacity
Readability
Power
Dimensions
Platform Dimensions
Warranty
LB-1000
1000g
0.1g
LB-3000
3000g
0.1g
4 x AA
7.3 x 5.5 x 1.5”
5.2” Ø
10 Year Limited Warranty
LB-1000
LB-3000
1000x0.1g
35.27x0.005oz
32.15x0.005ozt
643.1x0.1dwt
3000x0.1g
105.82x0.005oz
96.45x0.01ozt
1929x0.1dwt