1
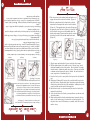
AIC-204EM
AIC-204EM
1
Bienvenida
© 2006 Aroma Housewares Company. All rights reserved.
Aroma Housewares
Co.
6469 Flanders Drive
San Diego, CA
92121
U.S.A.
1-800-276-6286
www.AromaCo.com
Felicitaciones por adquirir una máquina para hacer helados a la antigua
de Aroma. Este aparato conveniente y fácil de usar hace todos sus postres
congelados favoritos justo como a usted le agradan. ¡Disfrute de helados,
yogurt congelado, sorbetes y nieves hechos a la medida de su gusto!
El origen del helado data de las épocas antiguas, aunque la primera
máquina tradicional hecha a mano para preparar helado se desarrolló en
los Estados Unidos en el siglo XIX. Con la adición de leche y el
desarrollo de la refrigeración moderna, el helado se ha convertido en la
sensación generalizada del presente, con miles de variedades disponibles
para la gente en todo el mundo.
Published By:
Whatever your preference, the Aroma Old-Fashioned Ice Cream maker is
a fun, fast, and easy way to enjoy the timeless tradition of fresh
homemade ice cream.
Con la máquina para hacer helados a la antigua de Aroma, celebrar la
gran tradición estadounidense del helado resulta rápido, fácil y delicioso.
¡Para los niños, preparar recetas de chocolate, vainilla o fresa es rápido,
con variaciones muy sencillas, sólo añada su caramelo, galleta o glasé
favorito y obtenga un sabor totalmente nuevo! La manivela motorizada
hace todo el trabajo por usted con el toque de un botón, o se pueden turnar
con la manivela para divertirse a la antigua.
Use the recipes included in this manual, make timeless family recipes, or
experiment to create your own unique flavors. For healthier options, try
low-fat, sugar-free, or non-dairy ice cream varieties.
With the Aroma Old-Fashioned Ice Cream maker, celebrating the great
American tradition of ice cream is quick, easy and delicious. For the
kids, whipping up chocolate, vanilla, or strawberry recipes is a snap, with
variations made easy - crumble up your favorite candy, cookie or topping
and stir it in for a whole new flavor! The motorized crank does the work
for you at the touch of a button, or you can take turns with the handcrank for some good old-fashioned fun.
Utilice las recetas incluidas en este manual, prepare recetas familiares
tradicionales o experimente con la creación de sus propios sabores únicos.
Para variedades más saludables, también hay opciones bajas en calorías,
sin azúcar y helados sin lácteos.
Cualquiera que sea su preferencia, la máquina para hacer helados a la
antigua de Aroma es una forma divertida, rápida y fácil de disfrutar la
tradición eterna del helado recién hecho.
The origin of ice cream dates back into ancient history, but the very first
traditional hand-cranked ice cream churner was developed in America in
the nineteenth century. With the addition of milk and the development
of modern refrigeration, ice cream has become the widespread sensation
that it is today with thousands of varieties available to people everywhere
in the world.
Publicada Por:
Aroma Housewares
Co.
6469 Flanders Drive
San Diego, CA
92121
U.S.A.
1-800-276-6286
www.AromaCo.com
Congratulations on your purchase of the Aroma Old-Fashioned Ice Cream
Maker! This convenient, easy-to-use appliance makes all of your favorite
frozen treats, just the way you like them. Enjoy ice cream, frozen yogurt,
sorbet, and gelato custom-made to your taste!
Welcome
© 2006 Aroma Housewares Company. Todos los derechos reservados.
1
2
SAVE THESE INSTRUCTIONS
1. Read all instructions.
2. Do not touch hot surfaces. Use handles or knobs.
3. To protect against electrical shock, do not immerse cords, plugs or the
electric motor in water or other liquids.
4. Close supervision is necessary when any appliance is used by or near
children.
5. Unplug from outlet when not in use, before cleaning, and before putting on
or taking off parts.
6. Avoid contacting moving parts. Keep fingers, hair, clothing, as well as
utensils away during operation.
7. Do not operate any appliance with a damaged cord or plug or after the
appliance malfunctions, or has been damaged in any manner. Return
appliance to the nearest authorized service facility for examination, repair
or adjustment.
8. The use of accessory attachments not recommended by the appliance
manufacturer may cause injuries.
9. Do not use outdoors.
10. Do not let cord hang over edge of table or counter, or touch hot surfaces.
11. Do not use the appliance for other than intended use.
12. Do not place this appliance on or near a hot gas or electric burner, or in a
heated oven.
13. To disconnect power, press switch to OFF position and then remove plug
from wall outlet.
14. Never operate ice cream maker dry. Always have ice cream mixture in the
container while plugged in.
15. Do not use hot oil or liquids in ice cream maker. (Always chill mixtures
before churning.)
Basic safety precautions should always be followed when using
electrical appliances including the following:
Important Safeguards
Instrucciones Importantes
Al usar aparatos eléctricos siempre deberán observarse las precauciones
básicas de seguridad, incluyendo las siguientes:
1. Por favor lea todas las instrucciones.
2. No toque las superficies calientes. Utilice los mangos y las perillas.
3. Para protegerse y evitar un choque eléctrico, asegúrese que no puedan
entrar en contacto con agua u otro líquido los cordones, las clavijas, ni el
motor eléctrico.
4. Es necesario ejercer una estrecha vigilancia cuando se use el aparato cerca
de niños. Este aparato no está hecho para ser usado por niños.
5. Desconecte el aparato de la toma eléctrica cuando no esté en uso, antes de
limpiarlo y antes de ponerle o quitarle partes.
6. Evite el contacto con las partes que estén en movimiento. Mantenga los
dedos, el cabello, la ropa, así como espátulas y otros utensilios alejados
durante el funcionamiento del aparato.
7. No ponga a funcionar este aparato si el cordón eléctrico o la clavija de
enchufe se dañan o después de que el aparato funcione mal o si se ha dañado
de alguna manera. Regrese el aparato a la agencia de servicio autorizada más
cercana, para su revisión, reparación o ajuste.
8. El uso de accesorios eléctricos no recomendados por el fabricante del
aparato puede provocar incendios, electrochoques, o lesiones personales.
9. No se use en exteriores.
10. No deje que el cordón cuelgue del borde de la mesa ni del mostrador, ni
que toque superficies calientes..
11. No utilice el aparato para otro uso que no sea el indicado.
12. No coloque el aparato sobre o cerca de un quemador de gas o eléctrico ni
dentro de un horno caliente.
13. Para desconectar el aparato, presione el interruptor a la posición de
apagado, "OFF" y luego saque la clavija del enchufe de la pared.
14. Nunca ponga a funcionar la máquina de hacer helado, estando en seco su
recipiente interior. Siempre que esté conectada tenga mezcla de helado dentro
del recipiente.
15. No ponga aceite caliente ni otros líquidos calientes dentro del aparato.
Siempre enfríe la mezcla antes de batir.
GUARDE BIEN ESTAS INSTRUCCIONES
2
3
Instrucciones de Cable Corto
This a ppl ianc e is fo r h ous eho ld us e onl y.
To reduce the risk of electric shock, this plug is intended to fit into a
polarized outlet only one way. If the plug does not fit fully into the outlet,
reverse the plug. If it still does not fit, contact a qualified electrician. Do not
attempt to modify the plug in any way.
1. Se proporciona un cordón eléctrico corto para reducir los riesgos de que
alguien se tropiece o enrede en un cordón más largo.
2. Se puede usar un cordón de extensión con cuidado. Si se usa un cordón de
extensión:
a. Asegúrese de que la capacidad eléctrica nominal del cordón de extensión
sea por lo menos igual o mayor que la corriente eléctrica nominal del aparato.
b. Asegúrese de que el cordón de extensión no cuelga del mostrador o mesa
donde pudiera ser tirado por un niño o donde alguien se pudiera tropezar.
This appliance has a polarized plug (one blade is wider than the other);
follow the instructions below:
Polarized Plug
¡NO DEJE QUE EL CABLE CUELGUE!
ЅMANTОNGASE
LEJOS DE LOS
NIЦOS!
1. A short power-supply cord is provided to reduce risk resulting from
becoming entangled in or tripping over a longer cord.
2. Longer extension cords are available and may be used if care is exercised in
their use.
3. If a longer extension cord is used:
a. The marked electrical rating of the extension cord should be at least as
great as the electrical rating of the appliance.
b. The longer cord should be arranged so that it will not drape over the
counter top or tabletop where it can be pulled by children or tripped
over unintentionally.
Enchufe Polarizado
Si este aparato tiene enchufe polarizado:
Para reducir el riesgo de descarga electrica, este artefacto electrodoméstico
tiene un enchufe polarizado (una clavija es más ancha que la otra). Como una
característica de seguridad, este enchufe encajaráen un tomacorriente
polarizado solamente de una manera. Si no entra totalmente en el
tomacorriente, de vuelta el enchufe. Si tampoco entra, comuníquese con un
electrista competente. No intente de modificar el enchufe, es muy peligroso.
Short Cord Instructions
ES T E AP ARAT O ES PARA U S O DO MES T ICO .
3
4
Identificacion de las Refacciones
8
9
10
1
1.
2.
3.
4.
5.
6.
7.
8.
9.
10.
6
7
5
Hand Crank
Electric Motor
Latch
Power Cord
Wooden Bucket
Canister Lid
Canister Lid Cap
Ice Cream Canister
Plastic Stirrer
Dasher
4
3
2
1. Manivela manual
2. Motor eléctrico
3. Cerrojo
4. Cordón eléctrico
5. Cubeta de madera
6. Tapadera del bote
(garrafa)
7. Tapón de la tapadera del
bote (garrafa)
8. Bote (garrafa) para el
helado
9. Varilla agitadora
10. Agitadora
2
3
4
5
7
6
1
Parts Identification
8
9
10
4
5
Como Usar Su Aparato
Figure 2
Antes de usar el congelador para helado de garrafa por primera vez:
1. Lea todas las instrucciones y las medidas de seguridad importante.
2. Retire todos los materiales de empaque y asegúrese de que los artículos
se reciban en buenas condiciones.
3. Rompa todas las bolsas de plástico, ya que pueden representar un riesgo para
los niños.
4. Lave en agua tibia con jabón la cubierta, la garrafa del congelador y todos los
accesorios.
5. Enjuague y seque perfectamente todas las partes.
6. Agregue agua dentro de la cubeta de madera (a llenarla hasta 2/3
aproximadamente) y déjela durante una hora y media. Esto dará tiempo
para que la madera se hinche, de manera que durante el proceso de
congelamiento no haya fugas de la mezcla de sal y hielo.
• No utilice limpiadores abrasivos ni fibras para lavar.
• Nunca sumerja en agua ni en otro líquido, la base ni el cordón eléctrico.
Mode de Usarse:
1. Seleccione su receta favorita y prepare los ingredientes de acuerdo con las
instrucciones de la receta.
2. Agregue la mezcla fría del helado dentro del bote frío para el helado (sólo
hasta llenar 2/3 de su capacidad, ya que la mezcla se expandirá durante el
proceso de congelamiento).
3. Inserte la agitadora y asegúrese que su parte inferior quede fija en el centro
de la parte inferior del bote. (Dibujo 1)
4. Coloque la tapadera sobre el bote. (Dibujo 2)
Dibujo 1
Figure 1
1. Select your favorite recipe, prepare ingredients per recipe instructions.
2. Pour chilled ice cream mixture into chilled ice cream canister (fill no
more than 2/3 full as mixture will expand during freezing process).
3. Insert the dasher and make sure the bottom of dasher is fixed in the
center of the bottom of the canister. (Figure 1)
4. Place the lid on the canister. (Figure 2)
How to Use:
• Do not use abrasive cleaners or scouring pads.
• Do not immerse the base, cord or plug in water at any time.
1. Read all instructions and important safeguards.
2. Remove all packaging materials and make sure items have been received in
good condition.
3. Tear up all plastic bags, as they can pose a risk to children.
4. Wash the lid, freezer canister and all accessories in warm soapy water.
5. Rinse and dry all parts thoroughly.
6. Wipe electric motor with a damp cloth.
7. Pour water (about 2/3 full) into the wooden bucket and leave in the sink
or water-safe area for one and a half hours. This will give the wood a
chance to expand so that the salt/ice mixture will not leak out during the
freezing process.
Before First Use:
Dibujo 2
How To Use
5
6
How To Use
5. Place the canister in the wooden bucket and make sure it
engages the cone in the center of the bucket. (Figure 4)
6. Slide the rectangular end of the hand crank or electric
motor into the rectangular hole on the rim of the bucket
(Figure 5a). The opposite end of the crank will drop into
the open end, where the latch is (Figure 5c). Gently lift the
latch so that the wire goes over the rounded end of the
hand crank or motor. You may need to rotate the canister
by hand so that the lid fits into the motor/hand crank.
(Figure 5b)
7. Conecte el cordón eléctrico en el tomacorriente si está usando el motor
eléctrico.
8. Llene la cubeta de madera con una capa de hielo (6 tazas aproximadamente).
Asegúrese que el hielo que usted ponga en la cubeta esté quebrado en piezas
pequeñas y gruesas. Tal vez necesite usar un mazo o un martillo para romper
el hielo en pedazos pequeños y gruesos. Para cada bote del helado, se espera
usar 1 o 2 bolsas medianas de hielo.
9. Agregue una capa de sal de piedra encima del hielo (1/4 taza
aproximadamente).
10. Repite los tramites 10 y 11 hasta que el hielo y sal llegue al nivel del agujero
de drenaje.
11. Agregue agua frío a la cubeta hasta que el parte superior del agua se iguale
con el agujero de drenaje.
12. Conforme el hielo se derrita de 2 a 3 pulgadas, agregue más hielo y sal de
piedra.
13. Gire la manivela o ponga a funcionar el motor. Mientras el bote dé vueltas,
revuelva y mezcle juntos la sal y el hielo. Utilice el agitador de plástico cada
10 ó 15 minutos, o más a menudo si es necesario, mientras esté en uso la
máquina para hacer helado.
Dibujo 5a
Dibujo 5b
Dibujo 5c
Figure 5a
Figure 5b
Figure 4
Figure 5c
7. Plug the power cord into outlet if you are using the electric motor.
8. Fill the wooden bucket with a small layer of ice (about 6 cups), evenly
distributed around the base of the canister. Be sure that the ice you put
into the bucket is broken into small, coarse pieces. You may use a mallet
or hammer to break into smaller pieces if needed. For each batch of ice
cream, expect to use 1-2 medium bags of ice.
9. Cover the first layer of ice evenly with a thin layer of rock salt (about 1/2
cup).
10. Repeat steps 10 through 11, layering the ice and salt until it reaches the
top of the canister. Stop when the top of the mixture reaches the bottom
of the drainage hole on the side of the wood bucket. Adding more ice will
cause the mixture to leak out of the drainage hole.
11. Add cold water to the ice-salt mixture until the water level reaches the
bottom of the drain hole.
12. As the ice melts down 2 to 3 inches, you may add more ice and more rock
salt to the mixture.
13. Begin cranking with the hand crank mechanism or turn on the electric
motor. As the canister turns, stir and mix the salt and ice together. Use
the plastic stirrer every 10-15 minutes, or as needed, while the ice cream
maker is in use.
6. Deslice el extremo rectangular de la manivela manual o el
motor eléctrico en el agujero rectangular del borde de la
cubeta (Dibujo 5a). El extremo opuesto de la manivela caerá
dentro del extremo abierto, donde está el cerrojo (Dibujo 5c).
Suavemente levante el cerrojo a fin de que el cerrojo de
alambre pase sobre el extremo redondeado de la manivela
manual o del motor (tal vez necesite rotar el bote con la mano
para que la tapadera quede ajustada al motor y/o a la
manivela) . (Dibujo 5b)
Dibujo 4
5. Coloque el bote en la cubeta de madera y asegúrese de que el
cono encaje en el centro de la cubeta. (Ver Dibujo 4)
Como Usar Su Aparato
6
7
Como Usar Su Aparato
• The churning process should take about 40 minutes.
packet of sweetener = 2 tsp. sugar
packets = 1/4 cup
packets = 1/3 cup
packets = 1/2 cup
14. Desconecte y retire el motor una vez que el helado se haya batido durante 40 minutos
aproximadamente o cuando el motor se detenga (si el motor se detiene
prematuramente, apáguelo, rompa cualquier obstrucción de hielo que haya con el
agitador de plástico e inicie de nuevo).
15. Con una mano sobre la tapadera del bote, retire el motor o la manivela manual de la
cubeta de madera. Tenga cuidado - el bote suele flotar en la mezcla de sal, hielo, y
agua.
16. Quite el hielo y la sal de la parte superior del bote del helado. Limpie
cuidadosamente a fin de remover la sal y el agua antes de levantar la cubierta.
17. Saque la agitadora y con una espátula de madera y retírele el exceso de helado.
18. Pase el helado a un receipiente para congelar y congélelo o sírvalo directamente del
bote (garrafa).
1
6
8
12
• Artificial sweeteners may be substituted for sugar. Use the following
proportions for reference:
• For ice cream recipes that require pre-cooking, it is recommended that you
make the mixture a day ahead. The mixture will then be able to cool
completely and expand. Pre-chilling any ice cream recipe is suggested for
achieving the best results.
Consejos Útiles
• To avoid ice cream seeping out of the canister, do not lay the canister flat
when storing in a freezer.
• Para las recetas de helados que requieren algo de cocimiento previo, se
recomienda que la mezcla se haga con un día de anticipación. Así la mezcla
podrá enfriarse y expandirse completamente. Se sugiere enfriar previamente
todas las mezclas de las recetas de helados, con el fin de lograr los mejores
resultados.
• El proceso de congelamiento se debe durar aproximadamente 40 minutos.
• Be sure to chill mixture prior to adding to canister.
• Many ice cream recipes call for raw eggs. To eliminate salmonella from your
egg mixture, heat it to a temperature of 160°F, but do not boil it. This will
make the ice cream safe to eat. You may also use pasteurized eggs in place of
raw eggs.
• For each batch of ice cream, expect to use 7-14 lbs. of ice. (1-2 medium size
bags)
• Se usa aproximadamente 7-14 libras de hielo para cada bote del helado.
• El azúcar se puede substituir por edulcorantes artificiales. Utilice las siguientes
equivalencias como referencia:
1 sobrecito de edulcorante = 2 cucharas de azúcar
6 sobrecitos = 1 4 de taza
8 sobrecitos = 1/3 de taza
12 sobrecitos = 1/2 de taza
Helpful Tips
14. Unplug and remove motor or hand crank once ice cream has churned
about 40 minutes, or once the motor has stopped (if the motor has stopped
prematurely, turn it off, break up any ice blockages with the plastic
stirrer and start again).
15. With one hand on the canister lid, remove the motor or hand crank from
the wooden bucket. Be careful as canister will have a tendency to float in
the ice water mixture.
16. Clear the ice and salt away from the top of the ice cream canister. Wipe
carefully to remove the salt and water before removing the cover.
17. Take the dasher out and scrape off excess ice cream with a spatula.
18. Transfer to a freezable container and freeze, or serve straight from the
canister.
• Para evitar que el helado se escurra fuera del bote, no lo coloque
horizontalmente cuando lo guarde en un congelador.
• No tape el agujero de drenaje a un lado de la cubeta de madera. Éste es para
drenar el exceso de agua salada y deberá mantenerse abierto siempre.
• Asegúrese de que haya enfriado la mezcla antes de vaciarla en el bote.
• Muchas recetas requieren huevos crudos. Para eliminar la bacteria salmonelosis,
caléntelos hasta una temperatura de 160°F, pero no los ponga a hervir. Así se
hace seguro comer la mezcla. También se puede usar huevos pasterizados.
How To Use
7
The salt-water
mixture leaked
out of the
wooden bucket.
8
the mixture, which will give your ice cream a grainy
texture.
• Pay close attention to the amount of rock salt used
during the making of your ice cream. Adding too much
salt can cause the mixture to freeze too quickly, which
may lead to the formation of ice crystals in your ice
cream. Read the instructions in the section titled “How
to Use” for more details.
Before using the ice cream maker, it is necessary to soak the
wooden bucket in water for at least an hour and a half. This
allows the wood to expand and prevents leaks. To do so, simply
fill up the bucket (about 2/3 full) and let it sit in the sink or
other water-safe area for an hour and a half. Pour out the water
and the bucket is ready to use!
Guía para la Resolución de Problemas
El helado
queda
demasiado
suave o
derretido.
El helado casero usualmente tiene una consistencia muy suave.
Si prefiera una consistencia más dura:
•
•
•
•
The texture of A hard or grainy ice cream texture may be due to one of
my ice cream is the following causes:
•
Be sure that once you start churning your ice cream,
too hard or
you DO NOT stop. Stopping for any length of time
grainy.
while churning can cause large ice crystals to form in
•
•
•
La consistencia
del helado es
muy espesa o
grumosa.
•
•
•
•
•
•
mixing canister. Place in the freezer to harden.
Another option is to leave the canister in the wooden
bucket, remove dasher, add cap and add more ice to the
salt-ice mixture. Cover with a towel and let it sit until
the ice cream is firm.
For fluffier ice cream, once the electric motor has
finished churning, you may remove it and use the hand
crank to churn the ice cream to the desired consistency.
The richer the cream you use, the richer the ice cream
will be. Heavy whipping cream is suggested for the
creamiest, smoothest ice cream. Milk can also be
substituted for cream but will alter the texture and
taste of the ice cream. You might also consider using a
combination of milk and cream for healthier ice cream.
Recipes that call for alcohol may inhibit the freezing
process. If you are using an ice cream recipe that calls
for alcohol, vanilla or peppermint extract (which
contain alcohol), it is best to add it during the last few
minutes of the freezing cycle.
Pay close attention to the amount of rock salt used
during the making of your ice cream. Using too little
salt may inhibit the freezing of your ice cream
mixture. Read the instructions in the section titled
“How to Use” for more details.
My ice cream Home-made ice cream traditionally has the consistency of
thick milkshake. If you prefer a firmer consistency, you
turned out soft acan:
or runny.
•
Remove the dasher and place the lid and lid cap on the
Agua se escapó
de la cubeta de
madera.
Troubleshooting
Remueve la agitadora y coloque la tapadera del bote y el tapón
de la tapadera del bote. Póngalo en un recipiente para congelar
y refrigérelo durante una o dos horas.
Deje el bote en la cubeta de madera. Remueve la agitadora, y
coloquela tapadera del bote y el tapón de la tapadera del bote
sobre el bote. Agregue más hielo, cobre, y deje durante una o
dos horas.
También puede incorporar la unidad de la manivela manual y
girarla hasta que el helado tenga la consistencia deseada.
Mientras más espesa sea la crema que usted use, el helado será
más cremoso. Se sugiere usar doble crema batida, a fin de
obtener el helado más suave y cremoso. También se puede
utilizar leche en lugar de crema, pero la textura y el sabor del
helado pueden cambiar. Asi mismo, puede considerar usar una
combinación de leche y crema para obtener un helado más
saludable.
Tome nota de que al usar alcohol o extracto de vainilla, es mejor
agregarlo al final. El alcohol que contiene el extracto de
vainilla retardará la velocidad de endurecimiento del helado. Es
mejor agregar el alcohol o el extracto de vainilla a la mezcla
cuando la máquina para hacer helado haya girado ya por lo
menos unos 20 minutos.
Tenga cuidado con las proporciones de sal y hielo en la cubeta de
madera. No agregar bastante sal se puede impedir el
congelamiento del helado. Lea las instrucciones en la sección
“Como Usar Su Aparato”.
Una vez que haya empezado batir la mezcla, no se debe
parar. Parar durante el proceso de congelamiento se puede
causar que formen cristales grandes de hielo dentro de la
mezcla.
Tenga cuidado con las proporciones de sal y hielo en
la cubeta de madera. Agregar demasiada sal se puede
ocasionar que la mezcla se enfríe muy rápido y cristales de
hielo se pueden formar en la mezcla. Lea las instrucciones
en la sección “Como Usar Su Aparato.”
Las recetas que no requieren cocimiento se hacen mejor con
una batidora o licuadora eléctricas, que suavizan la mezcla
y aumentan su volumen.
Antes de usar el congelador para helado, agregue agua
dentro de la cubeta de madera (a llenarla hasta 2/3
aproximadamente) y déjela durante una hora y media.
Esto dará tiempo para que la madera se hinche, de
manera que durante el proceso de congelamiento no haya
fugas de la mezcla de sal y hielo.
8
9
Troubleshooting
Jamming of the canister or dasher can be due to one of
the following causes:
•
•
Actual ice cream will always taste less sweet than the
mixture. You may adjust the amount of sugar in the
recipe to suit your taste, keeping in mind that after the
freezing process, the sweetness of the ice cream will be
lessened.
Because home-made ice cream lacks many of the
preservatives that come in store-bought ice cream, it does
not store as well. Usually home-made ice cream will last
about one week when stored in a freezer
•
To keep ice cream its freshest, place it in an
airtight plastic container before storing it in
the freezer.
Guía para la Resolución de Problemas
My ice cream
mixture tasted
fine, but after
freezing it my ice
cream does not
taste the same.
My ice cream
went bad when I
stored it in the
freezer.
El motor se
detuvo
prematuramen
te durante el
proceso de
congelamiento.
•
Problemas con el motor o la agitadora pueden ser
causados por estas razones:
• En caso de que la máquina para hacer helado se pare
antes de que el batido haya llegado a su término (40
minutos aproximadamente), verifique si no se han
atorado pedazos grandes de hielo contra el bote.
Remueva el hielo que se encuentre atorado.
• La máquina para hacer helado se apagará
automáticamente si los ingredientes dentro del bote están
muy espesos para que la paleta de la agitadora pueda dar
vuelta. La máquina para hacer helado funcionará
normalmente de nuevo una vez que los ingredientes
espesos sean retirados del bote.
• Si hayan pedazos grandes en la mezcla, como nueces o
pedacitos de chocolate, se pueden atorar contra el bote.
Si la receta pide pedazos duros o grandes, se sugiere
agregarlos después de batir la mezcla. También se puede
romperlos en pedacitos más pequeños para evitar
obstrucciones en el bote.
• Parar durante el batido se puede causar que la mezcla
se endurezca sobre el interior del bote. Esto restringe el
movimiento de la agitadora y se puede ocasionar mal
funciones.
•
Ice may have caused a blockage in the wooden
bucket. Turn off the motor and make sure that the
ice in the bucket is broken up into small, coarse
pieces. The plastic stirrer provided can be used to
break up any blockages that may occur.
If the mixture has become too thick, the dasher may
become stuck. The mixture in the canister should
never become thicker than the consistency of softserve ice cream.
If there are hard pieces in the mixture, such as nuts
or chocolate chips, they may cause the dasher to
become lodged in the canister. It is best to add any
such ingredients to your ice cream after the churning
process is complete. Another suggestion is to use
finely chopped ingredients, such as grated chocolate
in place of chocolate chips.
Be sure that once you start churning your ice cream,
you DO NOT stop. Stopping can cause the ice cream
to harden around the edge of the canister, which will
restrict the movement of the dasher and may cause it
to become stuck.
If the dasher becomes stuck, check to see if the
mixture has frozen around the inside edges of the
mixing canister. If it has, use a plastic spoon or
spatula to scrape the edges of the canister. The
dasher should function normally once the edges have
been cleared.
Después de batirlo, el helado nunca será tan dulce como
El sabor del
la mezcla. Si prefiera usted un helado más dulce, puede
helado no es
probar la mezcla, a fin de ajustar la cantidad de azúcar
tan dulce como que
vaya a agregar. Tenga en cuenta que el helado real,
la mezcla
final, tendrá un sabor menos dulce que la mezcla.
original.
El helado no se
conserva bien o
por mucho
tiempo.
•
A causa de que el helado casero no contiene los
preservativos que están en otros tipos de helado,
usualmente solo se espera que el helado casero dure una
semana en el congelador.
• Para guardarlo lo más fresco posible, póngalo en un
envase hermético antes de colocarlo en el congelador.
The canister or
dasher
jammed/stopped
turning during
the churning
process.
9
10
__________________________________________
Como Limpiar El Aparato
__________________________________________
__________________________________________
__________________________________________
__________________________________________
Desconecte siempre la unidad y deje que se enfríe completamente antes de
limpiarla.
1. Limpie el motor de accionamiento con una toalla ligeramente húmeda para
remover desechos.
3. Lave con agua y jabón y seque perfectamente el bote, la tapadera del bote y la
agitadora. No vuelva a colocar la tapadera hasta que el bote para el helado
esté completamente seco.
__________________________________________
2. Limpie perfectamente la cubeta de madera con una esponja con jabón, a fin
de quitar los residuos del agua salada. Enjuague y seque para asegurarse de
que la sal no corroa las partes metálicas.
__________________________________________
__________________________________________
__________________________________________
__________________________________________
Notes:
• No utilice limpiadores abrasivos ni fibras para lavar.
• Este aparato y los accesorios NO deben lavarse en máquinas lavavajillas.
• No congele el bote (garrafa) cuando esté húmedo.
Notas:
__________________________________________
• Do not use harsh abrasive cleaners.
• This appliance and accessories are NOT dishwasher safe.
• Do not freeze canister when wet.
3. Wash canister, lid, dasher and stirrer with soapy water and dry thoroughly.
Do not replace the lid until the ice cream canister is completely dry.
__________________________________________
__________________________________________
__________________________________________
__________________________________________
__________________________________________
Always unplug unit and allow to completely cool before cleaning.
__________________________________________
1. Wipe electric motor with a slightly damp cloth to remove debris.
__________________________________________
2. Clean wooden bucket with a soapy sponge thoroughly to remove the salt-water
residue. Rinse and dry to ensure the salt does not corrode the metal parts.
__________________________________________
__________________________________________
How To Clean
10
11
Recetas
Helado de chocolate simple
15 cucharadas de cacao (en polvo)
3 latas grandes de leche condensada
6 tazas de leche
Mix the sugar, cornstarch and salt in a large saucepan. Over medium heat,
slowly stir in the milk, stirring constantly. Very slowly, add the beaten
eggs and continue to stir. Reduce heat to low and cook until mixture
thickens slightly. Slowly add vanilla, half and half, and heavy cream.
Pour into a large glass bowl and refrigerate for 2-4 hours or until mixture
has chilled. Remove from refrigerator. Pour mixture into the mixing
canister and follow directions in the "How to Use" section, pages 4 to 7. Do
not fill the mixing canister more than 2/3 full, as the mixture will expand
during freezing.
Mezcle la leche y la leche condensada en un tazón grande. Disuelve el cacao
en un poco de agua caliente. Una vez que está disuelto, agregue el cacao a la
mezcla de leche y revuelve hasta que esté completamente mezclada. Vacíela
en el bote de mezclar y siga las instrucciones de la sección “Modo de Usarse”,
de las páginas 4 a la 7. Sólo llene el bote hasta 2/3 de su capacidad, ya que la
mezcla se expandirá durante el proceso de congelamiento.
2 cups granulated sugar
1 1/2 Tbsp cornstarch
1/4 tsp salt
1 1/2 tbsp vanilla
7 cups milk
5 eggs, beaten
2 3/4 cups heavy cream
1 1/2 cups half and half
Helado de vainilla
2 tazas de azúcar granulada
1 1/2 cucharaditas de maicena
1/4 cucharadas de sal
1 1/2 cucharadita de vainilla
7 tazas de leche
5 huevos batidos
2 3/4 tazas de doble crema
1 1/2 tazas de mitad crema y mitad leche (half and half)
Vanilla Ice Cream
Mezcle el azúcar, la maicena y la sal en una cacerola grande. A fuego
mediano, agregue lentamente la leche, revolviendo constantemente. Muy
lentamente, añada los huevos batidos y continúe revolviendo. Reduzca el
fuego y cocine hasta que la mezcla espese ligeramente. Lentamente agregue
la vainilla, de mitad crema y mitad leche y la doble crema. Vacíela en un
tazón grande de vidrio y refrigere de 2 a 4 horas o hasta que la mezcla se
haya enfriado. Sáquela del refrigerador. Vacíe la mezcla en el bote
(garrafa) de mezclar y siga las instrucciones de la sección “Modo de Usarse”,
de las páginas 4 a la 7. Sólo llene el bote hasta 2/3 de su capacidad, ya que
la mezcla se expandirá durante el proceso de congelamiento.
In a large mixing bowl, combine milk and condensed milk. Dissolve the
cocoa in a bit of hot water. Once dissolved, stir cocoa into the milk mixture
until completely blended. Pour the entire contents of the bowl into the
mixing canister and follow directions in the “How To Use” section, pages 4 to
7. Do not fill the mixing canister more than 2/3 full, as the mixture will
expand during freezing.
15 Tbsp cocoa
3 large cans of condensed milk
6 cups milk
Quick & Easy Chocolate Ice Cream
Recipes
11
12
Recetas
Helado de chocolate
Combine all ingredients in mixing canister. Stir well until both sugar and
instant coffee powder are dissolved. Freeze as instructed. Do not fill the
mixing canister more than 2/3 full, as the mixture will expand during
freezing.
4 1/2 cups half and half
2 1/4 cup sugar
4 1/2 tablespoons instant coffee powder
6 cups cream
Coffee Ice Cream
Mix the sugar, cornstarch and salt in a large saucepan. Over medium heat,
slowly stir in the milk, stirring constantly until the mixture begins to
simmer. Very slowly, add the beaten eggs and continue to stir. Reduce heat
to low and cook until mixture thickens slightly. Slowly stir in the melted
chocolate and whisk until all chocolate is combined and mixture is smooth.
Slowly add vanilla, half and half, and heavy cream. Pour into a large glass
bowl, cover and refrigerate for 2-4 hours or until mixture has chilled. Pour
mixture into the mixing canister and follow directions in the "How to Use"
section, pages 4 to 7. Do not fill the mixing canister more than 2/3 full, as
the mixture will expand during freezing.
2 2/3 cup granulated sugar
2 tsp cornstarch
1/2 tsp Salt
6 cups milk
4 eggs, beaten
6 squares semi-sweet chocolate, melted
1 1/3 cups half and half
2 cups whipping cream
2 Tbsp vanilla extract
2 2/3 tazas de azúcar granulada
2 cucharadas de maicena
1/2 cucharadas de sal
6 tazas de leche
4 huevos batidos
6 cuadros de chocolate semidulce
1 1/3 tazas mitad crema y mitad leche (half and half)
2 tazas de crema batida
1 cucharada de extracto de vainilla
Mezcle el azúcar, la maicena y la sal en una cacerola grande. A fuego
mediano, agregue lentamente la leche, revolviendo constantemente hasta que
la mezcla comience a hervir. Muy lentamente, añada los huevos batidos y
continúe revolviendo. Reduzca el fuego y cocine la mezcla hasta que espese
ligeramente. Vaya agregando poco a poco y lentamente la vainilla, la 1 2/3
tazas de mitad crema y mitad leche y la doble crema. Vacíela en un tazón
grande de vidrio, tápelo y refrigere de 2 a 4 horas o hasta que la mezcla se
haya enfriado. Vacíe la mezcla en el bote (garrafa) de mezclar y siga las
instrucciones de la sección “Modo de Usarse”, de las páginas 4 a la 7. Sólo
llene el bote hasta 2/3 de su capacidad, ya que la mezcla se expandirá
durante el proceso de congelamiento.
Helado de café
4 1/2 tazas mitad crema y mitad leche (half and half)
2 1/4 tazas de azúcar
4 1/2 cucharadas de polvo de café instantáneo
6 tazas de crema
Mezcle todos los ingredientes en el bote de mezclar hasta que el azúcar y el
polvo de café instantáneo son completamente disueltos. Siga las
instrucciones de la sección “Modo de Usarse”, de las páginas 4 a la 7. Sólo
llene el bote hasta 2/3 de su capacidad, ya que la mezcla se expandirá
durante el proceso de congelamiento.
Chocolate Ice Cream
Recipes
12
13
Recetas
Helado camino empedrado
1 3/4 tazas de azúcar granulada
1/2 cucharadita de sal
2 tazas de leche
6 cuadros de chocolate semidulce
2 tazas mitad crema y mitad leche (halsf and half)
6 tazas de crema batida
1 cucharada de extracto de vainilla
2 tazas de malvaviscos miniatura
1 1/2 tazas de pedacitos de chocolate (chocolate chips)
1 tazas de nueces picadas
Place the cherries and the chocolate shavings in separate bowls. Cover and
chill until cold. Whisk the eggs in a mixing bowl until light and fluffy, 1 to
2 minutes. Slowly mix in sugar, whisking until completely blended. Slowly
add cream and milk and whisk until blended. Pour mixture into mixing
canister and follow directions in the “How To Use” section, pages 4 to 7. Do
not fill the mixing canister more than 2/3 full, as the mixture will expand
during freezing.
3/4 cup chocolate shavings
3/4 cup fresh cherries, pitted and halved
6 large eggs
2 1/4 cup sugar
6 cups heavy cream
3 cup milk
Mezcle la leche y el chocolate en una cacerola grande. A fuego mediano
agregue el chocolate, revolviendo hasta que se derrita completamente.
Retire del fuego y añada lentamente el azúcar y la sal, mezclando bien hasta
que se disuelvan. Revuelva el resto de los ingredientes, con la excepción de
las malvaviscos, pedacitos de chocolate, y las nueces picados, tape y refrigere
durante 30 minutos aproximadamente o hasta que la mezcla se haya
enfriado. Vacíe la mezcla en el bote (garrafa) de mezclar y siga las
instrucciones de la sección “Modo de Usarse”, de las páginas 4 a la 7. Sólo
llene el bote hasta 2/3 de su capacidad, ya que la mezcla se expandirá
durante el proceso de congelamiento. Agregue los malvasicos miniaturas,
los pedacitos de chocolate, y las nueces picados después de que haya
terminado el proceso de congelamiento y los mezcle bien.
Cherries and Chocolate Ice Cream
Mix the milk and chocolate in a large saucepan. Over medium heat, stir
until the chocolate is completely melted. Remove from heat and slowly add
sugar and salt, mixing well, until dissolved. Stir in the remaining
ingredients except the marshmallows, pecans, & chocolate chips then cover
and refrigerate for about 30 minutes or until mixture has chilled. Pour
mixture into the mixing canister and follow directions in the "How to Use"
section, pages 4 to 7. Do not fill the mixing canister more than 2/3 full, as the
mixture will expand during freezing. Add marshmallows, pecans, and
chocolate chips after the ice cream has finished churning and stir in evenly.
Helado de cerezas y chocolate
3/4 taza de chocolate rallado
3/4 taza de cerezas frescas (sin huesos y divididos en dos)
6 huevos grandes
2 1/4 tazas de azúcar
3 tazas de leche
1 3/4 cup granulated sugar
1/2 tsp Salt
2 cups milk
6 squares semi-sweet chocolate
2 cups half and half
6 cups whipping cream
1 Tbsp vanilla extract
2 cups mini marshmallows
1 1/2 cups chocolate chips
1 cups chopped pecans
Refrigere las cerezas y el chocolate rallado hasta que se hayan enfriados.
Bata los huevos hasta que son muy ligeros (1 o 2 minutos). Vaya agregando
poco a poco ya lentamente el azúcar hasta que esté completamente mezclado.
Agregue lentamente la crema y la leche y bata hasta que estén mezclados.
Vacíela en el bote de mezclar y siga las instrucciones de la sección “Modo de
Usarse”, de las páginas 4 a la 7. Sólo llene el bote hasta 2/3 de su capacidad,
ya que la mezcla se expandirá durante el proceso de congelamiento.
Rocky Road Ice Cream
Recipes
13
14
Recetas
Mix the sugar, cornstarch and salt in a large saucepan. Over medium heat,
slowly stir in the milk, stirring constantly. Very slowly, add the beaten eggs
and continue to stir. Reduce heat to low and cook until mixture thickens
slightly. Slowly stir in peanut butter and whisk until all peanut butter is
combined and mixture is smooth. Slowly add vanilla, half and half, and
heavy cream. Pour into a large glass bowl and refrigerate for 2-4 hours or
until mixture has chilled. Pour mixture into the mixing canister and follow
directions in the "How to Use" section, pages 4 to 7. Do not fill the mixing
canister more than 2/3 full, as the mixture will expand during freezing. Stir
in chocolate chips once ice ceam is finished churning and stir evenly.
2 2/3 cups granulated sugar
2 Tbsp cornstarch
1/2 tsp salt
1 1/2 tsp vanilla
6 cups milk
4 eggs, beaten
2 cups heavy cream
1 1/3 cups half and half
1 1/2 cup chocolate chips
1 cup peanut butter or 1 cup peanut butter chips, melted
Peanut Butter Chocolate Chip Ice Cream
Place the cookie dough and the chocolate chips in separate bowls. Cover and
chill until cold. Whisk the eggs in a mixing bowl 1-2 minutes, until light
and fluffy. Slowly mix in sugar, whisking until completely blended. Slowly
add cream and milk and whisk until blended. Pour mixture into mixing
canister and follow directions in the “How To Use” section, pages 4 to 7. Do
not fill the mixing canister more than 2/3 full, as the mixture will expand
during freezing. When mixture has finished churning, add cookie dough and
chocolate chips (optional) and stir in evenly.
1 cup chocolate chip cookie dough, crumbled into small pieces
1 cup mini chocolate chips (optional)
6 large eggs
2 1/4 cups sugar
6 cups heavy cream
3 cup milk
Cookie Dough Ice Cream
Recipes
Helado de pasta de galleta (Cookie Dough)
1 taza de pasta de galleta
1 taza de pedacitos de chocolate
6 huevos grandes
2 1/4 tazas de azúcar
3 tazas de leche
Refrigere el pasta de galleta y el chocolate hasta que se hayan enfriados.
Bata los huevos hasta que sean muy ligeros (1 o 2 minutos). Vaya agregando
poco a poco ya lentamente el azúcar hasta que esté completamente mezclado.
Agregue lentamente la crema y la leche y bata hasta que estén mezclados.
Vacíela en el bote de mezclar y siga las instrucciones de la sección “Modo de
Usarse”, de las páginas 4 a la 7. Sólo llene el bote hasta 2/3 de su capacidad,
ya que la mezcla se expandirá durante el proceso de congelamiento. Después
de mezclar el helado, desmigaje la pasta de galleta y mezcle en el helado.
Coloque la mezcla en el congelador hasta que esté firme.
Helado de mantequilla de cacahuate y pedacitos de chocolate
(Chocolate Chips)
2 2/3 tazas de azúcar granulada
1 cucharadita de maicena
1/2 cucharada de sal
1 1/2 cucharadas de vainilla
7 tazas de leche
4 huevos batidos
2 tazas de doble crema
1 1/3 tazas de mitad de crema y mitad de leche (half and half)
1 1/2 tazas de pedacitos de chocolate (chocolate chips)
1 taza de mantequilla de cacahuate o 1 taza de pedacitos de mantequilla de
cacahuate (peanut butter chips), derretidos
Mezcle el azúcar, la maicena y la sal en una cacerola grande. A fuego
mediano vacíe lentamente la leche, revolviendo constantemente. Muy
lentamente, agregue los huevos batidos y continúe revolviendo. Baje el fuego
y cocine hasta que la mezcla espese ligeramente. Revolviendo lentamente
incorpore la mantequilla de cacahuate y bata rápidamente hasta que toda la
mantequilla de cacahuate quede combinada y la mezcla quede suave.
Lentamente añada la vainilla, la 1 1/2 tazas de mitad crema y mitad leche y
la doble crema. Vacíela en un tazón grande de vidrio y refrigere de 2 a 4
horas o hasta que la mezcla se haya enfriado. Vacíe la mezcla en el bote
(garrafa) de mezclar y siga las instrucciones de la sección “Modo de Usarse”,
de las páginas 4 a la 7. Sólo llene el bote hasta 2/3 de su capacidad. Agregue
los pedacitos de chocolate cuando el proceso de congelamiento ha terminado.
14
15
Garantía Limitada
Aroma Housewares Company garantiza que este producto no tenga defectos en
sus materiales y fabricación durante un período de un año a partir de la fecha
comprobada de compra dentro de la parte continental de los Estados Unidos.
AROMA HOUSEWARES COMPANY
6469 Flanders Drive
San Diego, California 92121
1-800-276-6286
M-F, 8:30 AM - 5:00 PM, Pacific Time
Website: www.AromaCo.com
Dentro de este período de garantía, Aroma Housewares Company reparará o
reemplazará, a su opción, las partes defectuosas sin ningún costo, siempre y
cuando el producto sea devuelto, con el flete prepagado, con comprobación de
compra y $15.00 dólares para cargos de envío y manejo a favor de Aroma
Housewares Company. Antes de devolver un producto, sírvase llamar al
número telefónico gratuito que está más abajo para obtener un número de
autorización de devolución. Espere entre 2-4 semanas para recibir el aparato
nuevamente.
Esta garantía no cubre la instalación incorrecta, el uso indebido, maltrato o
negligencia por parte del usuario. La garantía también es inválida en caso de
que el aparato sea desarmado o se le dé mantenimiento en un centro de servicio
no autorizado.
This warranty gives you specific legal rights which may vary from state to state
and does not cover areas outside the United States.
This warranty does not cover improper installation, misuse, abuse or neglect on
the part of the owner. Warranty is also invalid in any case that the product is
taken apart or serviced by an unauthorized service station.
Esta garantía le da derechos legales específicos los cuales podrán variar de un
estado a otro y no cubre áreas fuera de los Estados Unidos.
Within this warranty period, Aroma Housewares Company will repair or
replace, at its option, defective parts at no charge, provided the product is
returned, freight prepaid with proof of purchase and U.S. $15.00 for shipping
and handling charges payable to Aroma Housewares Company. Before
returning an item, please call the toll free number below for return
authorization number. Allow 2-4 weeks for return shipping.
AROMA HOUSEWARES COMPANY
6469 Flanders Drive
San Diego, California 92121
1-800-276-6286
L-V, 8:30 AM - 5:00 PM, Tiempo del Pacífico
Sitio Web: www.AromaCo.com
Aroma Housewares Company warrants this product free from defects in
material and workmanship for one year from provable date of purchase in the
continental United States.
Limited Warranty
15