1
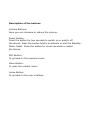
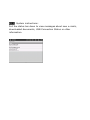
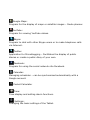
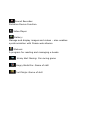
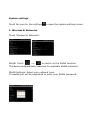
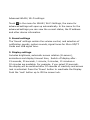
User Manual
Congratulations for buying the Viewpia TB-110.
Thank you very much for your trust and your decision to buy our product!
As we constantly update and improve our pad there may be small differences
between the printed manual and your pad in some cases. You have
the option of downloading the current version of the manual and firmware updates
from our website.
Table of Contents
Safety instructions
3
Device overview
4
Description of the buttons
5
Language settings
6
Power monitoring
and charging the batteries
7
Screen lock
7
Connecting with computer and data transfer
7
Functions of the buttons on the
user interface
8
Programme menu
10
System settings
13
1. Wireless & Networks
13
2. Sound settings
14
3. Display settings
14
4. Location & safety
15
5. Application
15
6. Accounts & synchr.
15
7. Data protection
15
8. Memory
16
9. Language & keyboard
16
10. Date & time
16
11. Telephone info
16
Internet
17
Open Source Code & GNU General Public License
18
Technical Data
19
This user manual contains important safety instructions and
information for proper use of the device. Please follow the
instructions in this manual carefully.
A Please keep the device away from places with high temperatures,
high humidity or dust.
B In particular please avoid leaving the device in the car during
summer if the doors are closed.
C Avoid shocks and do not let the device fall, as otherwise it may
cause damage to the device.
D The Standby Time of the batteries may vary due to different
environmental influences.
E We are not responsible for data losses that are caused by damage
to the product, repairs or any other reasons.
F Do not open the housing of the device. Doing this will void your
warranty claims.
G Do not use alcohol, thinners or petrol to clean the display
– use only a dry cloth.
Device overview
1. Manu button
10. Speakers
2. Volume+ Button
11. Earphone
3. Volume- Button
12. Power button
4. Home button
5. Micro SD/SDHC Card Slot
6.Mic
7. USB Port
8. OTG Port: USB from your external HDD
9. DC-in
Description of the buttons
Volume Buttons:
Here you can increase or reduce the volume.
Power Button:
Press the button for two seconds to switch on or switch off
the device. Press the button briefly to activate or end the StandbyMode. Reset: Press the button for seven seconds to restart
the device.
ESC Button:
To go back to the previous menu
Menu Button:
To open the context menu
Home Button:
To go back to the user interface
Language setting
This Viewpia TB-110 is delivered with English as a default language.
To change the language setting, please do the following:
- Press on the programme menu symbol
on the right side of the screen.
-
Select ‘Settings’
.
Scroll to the end of the list.
Select ‘Language & keyboard’.
Select ‘Select language’.
Type your preferred language.
Press the ‘Home’ button to return to the home screen.
Power monitoring and charging the batteries
The battery charge symbol in on the status bar indicates
the charging status of the batteries.
If the power goes down, the device
shuts itself off automatically.
If less power is shown, use the power adapter or a computer
via USB to charge the device.
The charging time for the battery is approximately four hours.
Screen lock
If the device is not used for specified time or the ‘Power’ button
is pressed briefly, the screen is switched off and display lock
is activated.
By pressing the ‘Power’ button briefly the screen will be reactivated.
For locking the screen press the ‘Lock’ button in the specified
direction.
Connecting to the computer and data transfer
This Tablet is equipped with a High-Speed USB2.0 Interface.
After you connect the device to a computer, it appears in
the status display
.
Pull the status bar down and press ‘USB Connection’ to activate
the USB Memory. When using the device for data transfer,
you cannot access the Micro SD/TF Card from the Tablet!
Functions of the buttons on the user interface:
Home Button:
To go back to the start screen.
Menu Button:
To open the context menu.
/
Volume Buttons:
To increase or reduce the volume.
Back Button:
To go back to the previous menu / previous page.
Program Menu Button:
To display the programs and applications.
Change Window Button:
The device has five desktops. You can press this button
or push your finger on the touchscreen to the side to navigate
between different desktops.
WIFI / WLAN Signal Icon
System instructions:
Pull the status bar down to view messages about new e-mails,
downloaded documents, USB Connection Status or other
information.
Program menu
ApkInstaller:
Program for installing and uninstalling Apps that were not
downloaded from the Android Market.
Market:
Load Apps (programs) from the Android Market. You can download
and install apps, games and other applications. Many are free.
Explorer:
Open the Explorer to access Micro SD TF Cards, USB sticks and
other storage media. The Explorer is a practical manager for
documents and all types of data.
Internet browser
Front& back 2.0MP camera
E-mail:
Program for retrieving, processing and sending e-mails.
G-mail:
Program for retrieving, processing and sending e-mails through
Google account.
Google Talk:
Program to chat with other Google users.
Google Maps:
Program for the display of maps or satellite images – Route planner.
YouTube:
Program for viewing YouTube videos.
Skype:
Program to chat with other Skype users or to make telephone calls
via Internet.
Twitter:
Application for Microblogging – Facilitates the display of public
diaries or create a public diary of your own.
Facebook:
Program for using the social network site Facebook.
Calendar:
Managing schedules – can be synchronised automatically with a
Google account.
Pocket Calculator
Time:
Time display and setting alarm functions.
Settings:
Changing the basic settings of the Tablet.
Sound Recorder:
Dictation Device Function.
Video Player
Gallery:
Manage and display images and videos – also enables
synchronisation with Picasa web albums.
Shelves:
A program for reading and managing e-books.
Krazy Kart Racing: Car racing game
Angry Birds Rio: Game of skill
Fruit Ninja: Game of skill
System settings
Touch the icon for the settings
to open the system settings menu:
1. Wireless & Networks
Touch ‘Wireless & Networks’.
WLAN: Touch
=>
to switch on the WLAN function.
The device automatically searches for available WLAN networks.
WLAN Settings: Select your network here.
If needed you will be requested to enter your WLAN password:
Advanced WLAN / Wi-Fi settings:
Touch
in the menu for WLAN / Wi-Fi Settings, the menu for
advanced settings will open up automatically. In the menu for the
advanced settings you can view the current status, the IP address
and other device information.
2. Sound settings
The ‘Sound’ settings contain the volume control, and selection of
notification sounds, system sounds, signal tones for Micro SD/TF
Cards and USB signal tone.
3. Display settings
Includes brightness, automatic screen rotation (G-sensor),
animations and display timeout time, Switch off display after:
15 seconds, 30 seconds, 1 minute, 2 minutes, 10 minutes or
30 minutes are available. For example, if you select 30 seconds,
the display will be switched after 30 seconds of inactivity and screen
lock is activated. Press the ‘Power’ button to reactivate the Display.
Push the ‘Lock’ button up to lift the screen lock.
4. Location & safety
Here you can activate the automatic recognition of the location.
You can also set security passwords which will prevent unauthorised
access to your Tablet.
5. Application
Here you can manage your apps and define if apps from sources
other than the Android Market are allowed to be installed.
6. Accounts & synchr.
General synchronisation settings:
1. Background data
2. Automatic synchronisation
Account management: Management of user accounts
7. Data protection
Secure my data: Here you can define if different settings
should be stored on Google servers.
Touch ‘Reset to default’ to reset the device to factory settings.
All settings, self-installed apps and data stored on internal memory
can be deleted.
8. Memory
Here the current memory use is displayed.
Touch ‘Remove SD Card’ to remove the Micro SD/TF Card
during use.
9. Language and keyboard
Set the system language and input method.
10. Date and time
If your network does not support automatic setting of time,
you can set the time, time zone and date manually after
deactivating automatic settings.
11. Telephone info
Here you can view device internal values such as operating system
version, battery status, signal strength of the mobile network etc.
Main functions
Internet
Touch
Icon to surf the net.
Google is the default start page.
Touch the input field to display the keyboard:
Touch
after entering a website address to open the website.
Note: The Android keyboard has few options for settings such as:
keyboard language, numbers and icons etc.
The Internet browser can open four websites simultaneously;
Touch
and the menu will be displayed as follows:
Touch ‘New Window’ and a new website will be displayed.
‘Most visited’ and ‘History’ can be found under ‘Bookmarks’.
Click to navigate between two open windows.
Four different windows are possible simultaneously.
Touch ‘Refresh’ to refresh the current web page.
A step forward, opposite of Back Icon.
’Add bookmarks’, ‘Search on the page’, ‘Select text’ ‘Page
information’, ‘Page info’, ‘Forward link’ ‘Downloads’, ‘Settings’.
Technical Data
Viewpia TB-110
9.7" / 24.7 cm Tablet-PC
CPU
Rockchip 2918 1.2 GHz
Operating System
Android 4.0
RAM
1GB DDR3
Internal Memory
8 GB NAND Flash
Memory Expansion
Micro SD/SDHC up to 32GB
Display
4:3 Capacitive 10-point Multi-Touch-Display
Resolution
1024 x 768 Pixel
G-SENSOR
MMA8452Q
Camera
Front 2.0MP,Back 2.0MP
Battery
4000 mA/H 7.4V rechargeable Li-ion Battery
MIC
Yes
Internet & Skype Phone-Function
WIFI
802.11b/g/n (high sensitivity)
I/O ports
1x DC In, 1x headphone, 1x TF Card-Slot,
2x USB 2.0, 1 host, 1 OTG
Video-Formats
H.264, VP8, RV, WMV, AVS, H.263, MPEG4 etc 1080P,
YouTube, 720P, HTML5, Flash 10.3
Office
Word / Excel / PDF / PPT, Microsoft Wordpad,
Microsoft SpreadExcel
The software is not on the device and
must be downloaded by the user.
Images
JPG, BMP, PNG etc.