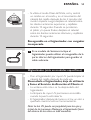
1
HealthyWhite
Rechargeable
Sonic Toothbrush
1
HealthyWhite Rechargeable Sonic toothbrush
English 4
Deutsch 22
Español 43
Français 63
Italiano 83
Nederlands 103
Português 124
4
English
Introduction
Congratulations on your purchase and welcome to
Philips! To fully benefit from the support that Philips
offers, register your product at
www.philips.com/welcome.
Important
Read this user manual carefully before
you use the appliance and save it for
future reference.
Danger
-- Keep the charger and/or sanitiser
away from water. Do not place or
store it over or near water contained
in a bathtub, washbasin, sink etc. Do
not immerse the charger and/or
sanitiser in water or any other liquid.
After cleaning, make sure the charger
and/or sanitiser is completely dry
before you connect it to the mains.
Warning
-- The mains cord cannot be replaced.
If the mains cord is damaged, discard
the charger and/or sanitiser.
-- Always have the charger and/or
sanitiser replaced with one of the
original type in order to avoid a hazard.
English
5
-- Do not use the charger and/or
sanitiser outdoors or near heated
surfaces. Do not operate the sanitiser
where aerosol (spray) products are
being used or where oxygen is being
administered.
-- If the appliance is damaged in any
way (brush head, toothbrush handle,
charger and/or sanitiser), stop
using it. This appliance contains no
serviceable parts. If the appliance
is damaged, contact the Consumer
Care Centre in your country (see
chapter ‘Guarantee and support).
-- This appliance can be used by children
aged from 8 years and above and
by persons with reduced physical,
sensory or mental capabilities or
lack of experience and knowledge
if they have been given supervision
or instruction concerning use of the
appliance in a safe way and if they
understand the hazards involved.
Cleaning and user maintenance shall
not be made by children unless they
are older than 8 and supervised. Keep
the appliance and its cord out of reach
of children aged less than 8 years.
6
English
-- Children shall not play with the
appliance.
-- Discontinue use of the sanitiser if the
UV light bulb remains on when the
door is open. UV light can be harmful
to the human eye and skin. Keep the
sanitiser out of the reach of children
at all times.
Caution
-- Do not clean the brush head, the
handle, the charger, the charger cover
and/or the sanitiser in the dishwasher.
-- If you have had oral or gum surgery
in the previous 2 months, consult
your dentist before you use the
toothbrush.
-- Consult your dentist if excessive bleeding
occurs after using this toothbrush or if
bleeding continues to occur after 1 week
of use. Also consult your dentist if you
experience discomfort or pain when
you use the Sonicare.
-- The Sonicare toothbrush complies with
the safety standards for electromagnetic
devices. If you have a pacemaker or
other implanted device, contact your
physician or the device manufacturer of
the implanted device prior to use.
English
7
-- If you have medical concerns, consult
your doctor before you use the
Sonicare.
-- This appliance has only been designed
for cleaning teeth, gums and tongue.
Do not use it for any other purpose.
Stop using the appliance and contact
your doctor if you experience any
discomfort or pain.
-- The Sonicare toothbrush is a
personal care device and is not
intended for use on multiple patients
in a dental practice or institution.
-- Stop using a brush head with crushed
or bent bristles. Replace the brush
head every 3 months or sooner if
signs of wear appear.
-- Do not use other brush heads than
the ones recommended by the
manufacturer.
-- If your toothpaste contains peroxide,
baking soda or bicarbonate (common
in whitening toothpastes), thoroughly
clean the brush head with soap and
water after each use. This prevents
possible cracking of the plastic.
8
English
-- Do not insert objects into the air
openings of the sanitiser or block
these air openings by placing it on
a soft surface or in a position or
location where objects will block
these openings (examples of objects:
magazine, tissue paper and hair.
-- The UV light bulb is hot during and
immediately after the sanitising cycle.
Do not touch the UV light bulb when
it is hot.
-- Do not operate the sanitiser without
the protective screen in place to
avoid contact with a hot bulb.
-- If the sanitiser has been used for 3
consecutive UV clean cycles (i.e. 3
times in a row), switch it off for at
least 30 minutes before ou start
another UV clean cycle.
Electromagnetic fields (EMF)
This Philips appliance complies with all applicable
standards and regulations regarding exposure to
electromagnetic fields.
English
9
General description (Fig. 1)
1
2
3
4
5
6
7
8
Hygienic travel cap
Brush head
Handle with soft grip
Power on/off button
Brushing modes
Charge light indicator
-- Deluxe charge indicator (specific types only)
-- Standard charge indicator (specific types only)
Travel charger
UV sanitiser with integrated charger and cord
wrap
-- Not shown: UV light bulb
-- Not shown: Sanitiser drip tray
-- Not shown: Protective screen for UV light bulb
Note:The contents of the box vary based on the type
purchased
Preparing for use
Attaching the brush head
1 Align the front of the brush head with the
front of the handle.
2 Firmly press the brush head down onto the
metal shaft until it stops.
Charging the appliance
1 Put the plug of the charger in a wall socket.
2 Place the handle on the charger.
,, The battery charge indicator next to the battery
symbol flashes to indicate that the toothbrush is
charging.
10
English
Battery charge indicator
The battery charge indicator shows the approximate
remaining battery charge.
Deluxe charge indicator (specific types only):
-- Solid green: 50-100%
-- Flashing green: 10-49%
-- Flashing yellow: less than 10%
Standard charge indicator (specific types only):
-- Solid green: 50-100%
-- Flashing green: less than 50%
Note:When the battery of the Sonicare is low, you hear
3 beeps after the completion of the brushing cycle and
the battery charge indicator flashes for 30 seconds.
Note:To keep the battery fully charged, you may keep
the Sonicare on the charger when it is not in use. It
takes 24 hours to fully charge the battery.
Using the appliance
Brushing instructions
1 Wet the bristles and apply a small amount of
toothpaste.
2 Place the toothbrush bristles against the teeth
at a slight angle towards the gumline.
3 Press the power on/off button to switch on the
Sonicare.
4 Apply light pressure to maximise Sonicare’s
effectiveness and let the Sonicare toothbrush
do the brushing for you. Do not scrub.
5 Gently move the brush head slowly across the
teeth in a small back and forth motion so the
longer bristles reach between your teeth. Continue
this motion throughout your brushing cycle.
English 11
Note:To make sure you brush evenly throughout the
mouth, divide your mouth into 4 sections using the
Quadpacer feature (see chapter ‘Features’).
6 Brush each section for 30 seconds for a total
brushing time of 2 minutes. Start with section
1 (outside top teeth) and then brush section
2 (inside top teeth). Continue with section
3 (outside bottom teeth) and finally brush
section 4 (inside bottom teeth).
7 After you have completed the brushing
cycle, you can spend additional time brushing
the chewing surfaces of your teeth and areas
where staining occurs.You may also brush your
tongue, with the toothbrush switched on or
off, as you prefer.
The Sonicare is safe to use on:
-- Braces (brush heads wear out sooner when used
on braces)
-- Dental restorations (fillings, crowns, veneers)
Note:You can switch the toothbrush on or off at any
time by pressing and holding the power on/off button
for 2 seconds.
Clean and White mode brushing
instructions
The Clean and White mode combines 2 minutes
of Clean mode for a whole mouth clean, with an
additional 30 seconds of White mode to focus on
the visible front teeth.
1 Brush the first 2 minutes as instructed in steps
1-6 above.
2 After the 2 minutes of Clean mode, the White
mode begins with a change in brushing sound
and motion. This is your signal to start brushing
the upper front teeth for 15 seconds.
12
English
3 At the next beep and pause, move to the
bottom front teeth for the final 15 seconds of
brushing.
Brushing modes
Sonicare automatically starts in the default Clean
mode. To select a different brushing mode:
1 Press the on/off button to toggle between
modes.
,, The green LED indicates the selected mode.
Note:You can only toggle between modes when the
toothbrush is switched on.
Clean mode
Standard mode for superior teeth cleaning.
Sensitive mode (specific types only)
Gentle yet thorough cleaning for sensitive gums
and teeth.
Clean and White mode
2 minutes of Clean mode, with an additional
30 seconds of White mode to focus on your
visible front teeth.
Note:When Sonicare is used in clinical studies, the
default 2-minute Clean mode must be selected. However,
in whitening/stain reduction studies, the Clean and
White mode must be selected.The handle must be fully
charged and the Easy-start feature must be deactivated.
English 13
Features
Easy-start
-- This Sonicare model comes with the Easy-start
feature activated.
-- The Easy-start feature gently increases power
over the first 14 brushings to let you get used to
brushing with the Sonicare.
Note: Each of the first 14 brushings must be at least
1 minute in length to move through the Easy-start
ramp-up cycle properly.
Note:When the Clean and White mode is selected, the
Easy-start feature is inactive.
Deactivating or activating the Easy-start
feature
1 Attach your brush head to the handle.
2 Place the handle on the plugged-in charger.
-- To deactivate Easy-start:
Press and hold the power on/off button for
2 seconds. You hear 1 beep to indicate that the
Easy-start feature has been deactivated.
-- To activate Easy-start:
Press and hold the power on/off button for
2 seconds. You hear 2 beeps to indicate that the
Easy-start feature has been activated.
Note: Using the Easy-start feature beyond the initial
ramp-up period is not recommended and reduces
Sonicare’s effectiveness in removing plaque.
14
English
Smartimer
The Smartimer indicates that your brushing cycle
is complete by automatically switching off the
toothbrush at the end of the brushing cycle.
Dentists recommend brushing at leas 2 minutes
twice a day.
If you want to pause or stop brushing during your
2-minute cycle, press and hold the power on/off
button for 2 seconds. Press the power on/off button
again and the Smartimer picks up where you left off.
The Smartimer automatically resets to the beginning
of a 2-minute cycle if:
-- brushing is paused for 30 seconds or longer.
-- the handle is placed on the charger.
Quadpacer (specific types only)
-- The Quadpacer is an interval timer that has a
short beep and pause to remind you to brush the
4 sections of your mouth evenly and thoroughly.
-- When you use the two-minute Clean or Sensitive
mode, you hear a short beep and a pause in
brushing action at 30, 60 and 90 second intervals.
-- When you use the Clean and White mode, you
hear and feel a change in the brush head sound
and motion after 2 minutes of Clean mode. Then
move the brush head to the visible top front teeth
and brush them for 15 seconds. At the final beep
and pause, move to the visible bottom teeth and
brush them for 15 seconds.
English 15
Cord wrap on sanitiser with integrated
charger
1 If your Sonicare type includes the sanitiser, you
can use the cord wrap feature in the bottom of
the sanitiser to store excess cord.
Sanitising (specific types only)
-- With the UV sanitiser you can clean your brush
head after every use.
Unplug the sanitiser, discontinue use and call
Consumer Care if:
-- The window is broken or missing from the sanitiser.
-- The UV light bulb remains on when the door is open.
-- The sanitiser gives off smoke or a burning smell
while it is operating.
Note: UV light can be harmful to the human eye and skin.
Keep the sanitiser out of reach of children at all times.
1 After brushing, rinse the brush head and shake
off excess water.
Do not place the travel cap on the brush head
during sanitisation.
2 Place your finger in the door recess on top of
the sanitiser and pull open the door.
16
English
3 Place the brush head on one of the 2 pegs in the
sanitiser with the bristles facing the light bulb.
Note: Only clean Sonicare snap-on brush heads in the
sanitiser.
Note: Do not clean Sonicare for Kids brush heads in
the sanitiser.
4 Put the plug in a wall socket.
5 Close the door and press the green power on/
off button once to select the UV clean cycle.
Note:You can only switch on the sanitiser if the door is
closed properly.
Note:The sanitiser stops if you open the door during
the sanitising cycle.
Note:The sanitiser cycle runs for 10 minutes and then
automatically switches off.
,, The sanitiser is in operation when the blue light
glows through the window.
,, When the sanitising cycle is complete, the
sanitiser automatically shuts off.
Cleaning
Do not clean the brush head, handle, charger or
UV sanitiser in the dishwasher.
Toothbrush handle
1 Remove the brush head and rinse the metal
shaft area with warm water.
Do not push on the rubber seal on the metal shaft
with sharp objects, as this may cause damage.
English 17
2 Use a damp cloth to wipe the entire surface of
the handle.
Brush head
1 Rinse the brush head and bristles after each use.
2 Remove the brush head from the handle and
rinse the brush head connection at least once a
week with warm water.
Charger
1 Unplug the charger before cleaning.
2 Use a damp cloth to wipe the surface of the
charger.
UV sanitiser (specific types only)
Do not immerse the sanitiser in water or rinse it
under the tap.
Do not clean the sanitiser when the UV light bulb
is hot.
For optimal effectiveness, it is recommended to
clean the sanitiser every week.
1 Unplug the sanitiser.
2 Pull the drip tray straight out. Rinse the drip
tray and wipe it clean with a damp cloth.
3 Clean all interior surfaces with a damp cloth.
18
English
4 Remove the protective screen in front of the
UV light bulb.
To remove the screen, grasp the edges next to the
snaps, gently squeeze and pull out the protective screen.
5 Remove the UV light bulb.
To remove the light bulb, grasp it and pull it out of
the metal clasp.
6 Clean the protective screen and the UV light
bulb with a damp cloth.
7 Reinsert the UV light bulb.
To reinsert the light bulb, align the bottom of the
light bulb with the metal clasp and push the bulb
into the clasp.
8 Reinsert the protective screen.
To reinsert the screen, align the pegs on the screen
with the slots on the reflective surface near the UV
light bulb. Push the screen straight into the slots on
the sanitiser.
Storage
If you are not going to use the appliance for an
extended period of time, remove the mains plug from
the wall socket. Then clean the appliance and store
it in a cool and dry place away from direct sunlight.
You can use the cord wrap feature on the sanitiser
(specific types only) to store the mains cord neatly.
You can store brush heads on the pegs at the back
of the charger.
English 19
Replacement
Brush head
Replace Sonicare brush heads every 3 months to
achieve optimal results.
Only use genuine Philips Sonicare replacement brush
heads that are suitable for this model.
UV light bulb
Replacement UV bulbs are available through the
Philips Consumer Care Centre in your country.
Ordering accessories
To buy accessories or spare parts, visit
www.shop.philips.com/service or go to your
Philips dealer. You can also contact the Philips
Consumer Care Centre in your country (see the
worldwide guarantee leaflet for contact details).
Environment
-- Do not throw away the appliance or the UV light
bulb (bulb contains mercury) with the normal
household waste at the end of its life, but hand
it in at an official collection point for recycling. By
doing this, you help to preserve the environment.
20
English
-- The built-in rechargeable battery of the Sonicare
contains substances that may pollute the
environment. Always remove the battery before
you discard and hand in the appliance at an official
collection point. Dispose of the battery at an
official collection point for batteries. If you have
trouble removing the battery, you can also take
the appliance to a Philips service centre. The staff
of this centre will remove the battery for you and
will dispose of it in an environmentally safe way.
Removing the rechargeable battery
This process is not reversible.
To remove the rechargeable battery, you need a
flat-head (standard) screwdriver. Observe basic
safety precautions when you follow the procedure
described below. Be sure to protect your eyes, hands,
fingers, and the surface on which you work.
1 Remove the toothbrush from the charger,
switch it on and let it operate until it stops.
Continue to switch on the Sonicare until the
battery is completely empty.
2 Insert a flathead (standard) screwdriver into
the slot located at the bottom of the handle.
Turn the screwdriver anticlockwise to release
the bottom cap.
3 Place the handle on a solid surface with the
buttons facing up and lightly tap the housing
2.5cm from the bottom edge with a hammer.
English 21
4 Hold the handle upside down and push
down on the shaft to release the internal
components of the handle.
5 Insert the screwdriver under the circuit board,
next to the battery connections, and twist to
break the connections. Remove the circuit board
and pry the battery from the plastic carrier.
Guarantee and support
If you need information or support, please visit
www.philips.com/support or read the separate
worldwide guarantee leaflet.
Guarantee restrictions
The terms of the international guarantee do not
cover the following:
-- Brush heads
-- Damage caused by use of unauthorised
replacement parts.
-- Damage caused by misuse, abuse, neglect,
alterations or unauthorised repair.
-- Normal wear and tear, including chips, scratches,
abrasions, discolouration or fading.
-- UV light bulb
22
Deutsch
Einführung
Herzlichen Glückwunsch zu Ihrem Kauf
und willkommen bei Philips! Um das
Kundendienstangebot von Philips vollständig nutzen
zu können, sollten Sie Ihr Produkt unter
www.philips.com/welcome registrieren.
Wichtig
Lesen Sie diese Bedienungsanleitung
vor dem Gebrauch des Geräts
aufmerksam durch, und bewahren Sie
sie für eine spätere Verwendung auf.
Gefahr
-- Halten Sie das Ladegerät und/oder
die UV-Reinigungsstation von Wasser
fern. Stellen Sie sie nicht über oder
nahe einer mit Wasser gefüllten
Badewanne bzw. einem Waschbecken
ab. Tauchen Sie Ladegerät und/oder
Reinigungsstation nicht in Wasser
oder andere Flüssigkeiten. Schließen
Sie das Ladegerät und/oder die
Reinigungsstation nach dem Reinigen
erst wieder an das Stromnetz an,
wenn sie vollkommen trocken sind.
Deutsch 23
Warnhinweis
-- Das Netzkabel kann nicht ausgetauscht
werden. Wenn das Netzkabel beschädigt
ist, entsorgen Sie das Ladegerät und/
oder die UV-Reinigungsstation.
-- Tauschen Sie das Ladegerät bzw. die
UV-Reinigungsstation immer durch
ein Original-Ersatzgerät aus, um
Gefährdungen zu vermeiden.
-- Verwenden Sie das Ladegerät bzw. die
Reinigungsstation nicht im Freien oder
in der Nähe von heißen Oberflächen.
Bedienen Sie die Reinigungsstation
nicht an Orten, an denen
Sprühprodukte verwendet werden
oder Sauerstoff verabreicht wird.
-- Benutzen Sie das Gerät nicht, wenn
es beschädigt ist (Bürstenkopf,
Handstück, Ladegerät und/oder
Reinigungsstation). Die Geräteteile
lassen sich nicht vom Benutzer
warten/reparieren. Ist das Gerät
defekt, wenden Sie sich bitte an das
Philips Service-Center in Ihrem Land
(siehe “Garantie und Kundendienst”).
-- Dieses Gerät kann von Kindern
ab 8 Jahren und Personen mit
verringerten physischen, sensorischen
24
Deutsch
oder psychischen Fähigkeiten oder
Mangel an Erfahrung und Kenntnis
verwendet werden, wenn sie bei der
Verwendung beaufsichtigt werden
oder Anweisung zum sicheren
Gebrauch des Geräts erhalten
und die Gefahren verstanden
haben. Reinigung und Pflege des
Geräts dürfen nicht von Kindern
durchgeführt werden, außer Sie sind
älter als 8 Jahre und beaufsichtigt.
Bewahren Sie das Gerät und das
Kabel außerhalb der Reichweite von
Kindern unter 8 Jahren auf.
-- Kinder dürfen nicht mit dem Gerät
spielen.
-- Benutzen Sie die UV-Reinigungsstation
nicht, wenn die UV-Lampe bei offener
Klappe noch leuchtet. UV-Licht kann
schädlich für das menschliche Auge und
die Haut sein. Halten Sie die UV-Reinigungsstation immer von Kindern fern.
Achtung
-- Reinigen Sie den Bürstenkopf, das
Handstück, das Reise-Ladegerät, die
Hülle für das Ladegerät und/oder
die UV-Reinigungsstation nicht in der
Spülmaschine.
Deutsch 25
-- Wenn in den vergangenen
2 Monaten ein chirurgischer Eingriff
an Ihren Zähnen oder am Zahnfleisch
vorgenommen wurde, sollten Sie
vor Benutzung der Zahnbürste Ihren
Zahnarzt konsultieren.
-- Wenden Sie sich an Ihren Zahnarzt,
wenn nach der Verwendung
dieser Zahnbürste übermäßiges
Zahnfleischbluten auftritt oder wenn
dieses nach einer Woche immer
noch anhält. Konsultieren Sie Ihren
Zahnarzt auch, wenn Sie beim
Gebrauch von Sonicare Unbehagen
oder Schmerz verspüren.
-- Die Sonicare-Zahnbürste entspricht
den Sicherheitsstandards für
elektromagnetische Geräte. Wenn Sie
als Träger eines Herzschrittmachers
oder eines anderen Implantats Fragen
zur Verwendung des Geräts haben,
setzen Sie sich bitte mit Ihrem Arzt oder
dem Hersteller des Schrittmachers
oder Implantats in Verbindung.
-- Sollten Sie Bedenken wegen Ihrer
Gesundheit haben, konsultieren Sie
vor Benutzung der Sonicare Ihren Arzt.
26
Deutsch
-- Dieses Gerät ist ausschließlich zum
Reinigen von Zähnen, Zahnfleisch
und Zunge vorgesehen und sollte
nicht für andere Zwecke benutzt
werden. Sollten Sie bei Gebrauch des
Geräts Unbehagen oder Schmerzen
verspüren, benutzen Sie es nicht
weiter, und konsultieren Sie Ihren Arzt.
-- Die Sonicare Zahnbürste ist ein Gerät
zur individuellen Mundpflege und nicht
für die Verwendung durch mehrere
Patienten in einer Zahnarztpraxis oder
Zahnklinik geeignet.
-- Benutzen Sie keinen Bürstenkopf
mit abgeknickten oder zerdrückten
Borsten. Tauschen Sie den Bürstenkopf
spätestens nach 3 Monaten oder
sobald Abnutzungserscheinungen zu
erkennen sind aus.
-- Benutzen Sie nur die vom Hersteller
für diese Zahnbürste empfohlenen
Bürstenköpfe.
-- Bei Verwendung peroxid-, natronoder bikarbonathaltiger Zahnpasta
(üblich in Weißmacher-Zahnpasta)
sollten Sie den Bürstenkopf nach
jedem Gebrauch gründlich mit einem
milden Reinigungsmittel und Wasser
Deutsch 27
reinigen. Dadurch werden Risse im
Kunststoff verhindert.
-- Führen Sie keine Objekte in die
Luftauslässe der Reinigungsstation ein,
und blockieren Sie diese Luftauslässe
nicht, indem Sie das Gerät auf eine
weiche Oberfläche stellen oder in
eine Position bzw. an einen Ort,
wo Objekte (z. B. Zeitschriften,
Kosmetiktücher und Haare) diese
Öffnungen blockieren können.
-- Während und direkt nach dem Reinigungsvorgang ist die UV-Lampe heiß.
Berühren Sie die heiße UV-Lampe nicht.
-- Verwenden Sie die UV-Reinigungsstation nicht ohne den aufgesetzten
Schutzschirm, um einen Kontakt mit
der heißen Lampe zu vermeiden.
-- Wenn die Reinigungsstation 3 UVReinigungszyklen hintereinander
durchlaufen hat, schalten Sie sie
mindestens 30 Minuten lang aus,
bevor Sie einen weiteren UVReinigungszyklus starten.
Elektromagnetische Felder
Dieses Philips Gerät erfüllt sämtliche Normen
und Regelungen bezüglich der Exposition in
elektromagnetischen Feldern.
28
Deutsch
Allgemeine Beschreibung (Abb. 1)
1
2
3
4
5
6
7
8
Hygienische Schutzkappe
Bürstenkopf
Handstück mit weicher Grifffläche
Ein-/Ausschalter
Putzmodi
Ladeanzeige
-- Deluxe-Ladestandsanzeige (nur bestimmte
Gerätetypen)
-- Standard-Ladestandsanzeige (nur bestimmte
Gerätetypen)
Reiseladegerät
UV-Reinigungsstation mit integriertem Ladegerät
und Kabelaufwicklung
-- Nicht abgebildet: UV-Lampe
-- Nicht abgebildet: Abtropfschale der
UV-Reinigungsstation
-- Nicht abgebildet: Schutzschirm für UV-Lampe
Hinweis: Abhängig vom gekauften Modell kann der
Packungsinhalt variieren.
Für den Gebrauch vorbereiten
Den Bürstenkopf befestigen
1 Richten Sie die Vorderseite des Bürstenkopfs
an der Vorderseite des Handstücks aus.
2 Drücken Sie den Bürstenkopf auf den
Metallschaft, bis er fest sitzt.
Deutsch 29
Das Gerät laden
1 Stecken Sie den Stecker des Ladegeräts in die
Steckdose.
2 Stellen Sie das Handstück in das Ladegerät.
,, Die Akkuladestandsanzeige neben dem
Batteriesymbol blinkt und zeigt damit an, dass
die Zahnbürste geladen wird.
Akkuladestandsanzeige
Über die Akkuladestandsanzeige sehen Sie die circa
noch verbleibende Akkuladung.
Deluxe-Ladestandsanzeige (nur bestimmte
Gerätetypen):
-- Kontinuierlich grün leuchtendes Licht: 50 - 100 %
-- Blinkendes grünes Licht: 10 - 49 %
-- Blinkendes gelbes Licht: Weniger als 10 %
Standard-Ladestandsanzeige (nur bestimmte
Gerätetypen).
-- Kontinuierlich grün leuchtendes Licht: 50 - 100 %
-- Blinkendes grünes Licht: Weniger als 50 %
Hinweis:Wenn der Akku der Sonicare fast leer ist,
hören Sie nach Ablauf des Putzzyklus 3 Signaltöne, und
die Akkuladestandsanzeige blinkt 30 Sekunden lang.
Hinweis: Damit der Akku immer vollständig geladen
ist, können Sie die Sonicare auf dem Ladegerät lassen,
wenn sie nicht verwendet wird. Es dauert 24 Stunden,
den Akku vollständig aufzuladen.
30
Deutsch
Das Gerät benutzen
Putzanleitung
1 Befeuchten Sie die Borsten, und tragen Sie
etwas Zahnpasta auf.
2 Setzen Sie die Borsten der Zahnbürste in
einem leichten Winkel zum Zahnfleischsaum
auf die Zähne.
3 Drücken Sie zum Einschalten der Sonicare den
Ein-/Ausschalter.
4 Für eine optimale Zahnpflege putzen Sie
die Zähne mit nur leichtem Druck (nicht
schrubben) und überlassen der Zahnbürste die
eigentliche Arbeit.
5 Führen Sie den Bürstenkopf langsam in kleinen
Vorwärts- und Rückwärtsbewegungen so über
die Zähne, dass die längeren Borsten in die
Zahnzwischenräume gelangen.Verfahren Sie auf
diese Weise bis zum Ende des Putzvorgangs.
Hinweis: Damit alle Zähne gleichmäßig geputzt werden,
teilen Sie Ihren Mund mit der Quadpacer-Funktion in
vier Abschnitte auf (siehe “Produktmerkmale”).
6 Bürsten Sie jeden Abschnitt 30 Sekunden
lang bei einer Gesamtputzzeit von 2 Minuten.
Beginnen Sie mit Abschnitt 1 (Oberkiefer
außen), und bürsten Sie dann Abschnitt 2
(Oberkiefer innen). Setzen Sie das Putzen
in Abschnitt 3 (Unterkiefer außen) fort,
und putzen Sie abschließend Abschnitt 4
(Unterkiefer innen).
Deutsch 31
7 Nach Ablauf des Putzzyklus können Sie
zusätzlich die Kauflächen der Zähne und
Bereiche mit Verfärbungen putzen. Sie können
auch die Zunge ganz nach Belieben mit einoder ausgeschalteter Zahnbürste putzen.
Die Sonicare ist sicher für den Gebrauch bei:
-- Zahnspangen (die Bürstenköpfe nutzen sich beim
Putzen von Zahnspangen schneller ab)
-- Zahnersatz (Füllungen, Kronen, Verblendschalen)
Hinweis: Sie können die Zahnbürste jederzeit einoder ausschalten, indem Sie den Ein-/Ausschalter
2 Sekunden lang drücken.
Putzanleitung für den Clean- & WhiteModus
Der Clean & White-Modus umfasst einen
2 minütigen Clean-Modus für die Reinigung des
gesamten Mundraums und zusätzlich einen 30
Sekunden dauernden White-Modus zur gründlichen
Reinigung der sichtbaren Vorderzähne.
1 Putzen Sie Ihre Zähne in den ersten 2 Minuten,
wie in den Schritten 1 – 6 beschrieben.
2 Nach 2 Minuten im Clean-Modus setzt der
White-Modus ein. Dies erkennen Sie an
den veränderten Bürstenbewegungen und
am Ton der Zahnbürste. Jetzt können Sie
weitere 15 Sekunden lang die Vorderzähne im
Oberkiefer putzen.
3 Wechseln Sie beim nächsten Signal und bei
der nächsten Pause zu den Vorderzähnen im
Unterkiefer, und putzen Sie diese während der
letzten 15 Sekunden.
32
Deutsch
Putzmodi
Die Sonicare startet automatisch im Standard-CleanModus. Gehen Sie folgendermaßen vor, um einen
anderen Putzmodus zu wählen:
1 Drücken Sie den Ein-/Ausschalter, um zwischen
den einzelnen Modi zu wechseln.
,, Die grüne LED-Anzeige gibt den ausgewählten
Modus an.
Hinweis: Sie können nur bei eingeschalteter Zahnbürste
zwischen den verschiedenen Modi wechseln.
Clean-Modus
Standardmodus für überragende Zahnreinigung.
Sensitive-Modus (nur bestimmte
Gerätetypen)
Sanfte und doch gründliche Reinigung für
empfindliches Zahnfleisch und Zähne.
Clean- & White-Modus
2-minütiger Clean-Modus plus 30 Sekunden WhiteModus für die sichtbaren Vorderzähne.
Hinweis:Wird die Sonicare in klinischen Studien
eingesetzt, muss der standardmäßig eingestellte
2-minütige Clean-Modus angewandt werden. Für
Studien über Weißmacher/das Entfernen von
Verfärbungen ist der Clean- & White-Modus zu wählen.
Das Handstück sollte voll aufgeladen und die EasyStart-Funktion deaktiviert sein.
Deutsch 33
Eigenschaften
Easy-Start
-- Bei diesem Sonicare Modell ist die Easy-StartFunktion aktiviert.
-- Mit der Easy-Start-Funktion wird die Intensität
über die ersten 14 Anwendungen schrittweise
erhöht, damit Sie sich leichter an das Putzen mit
der Sonicare gewöhnen.
Hinweis: Jeder der ersten 14 Putzzyklen muss
mindestens eine Minute dauern, damit der jeweilige
Zyklus von der Easy-Start-Funktion berücksichtigt wird.
Hinweis:Wenn der Clean- & White-Modus eingestellt
wird, ist die Easy-Start-Funktion deaktiviert.
Die Easy-Start-Funktion deaktivieren bzw.
aktivieren
1 Setzen Sie den Bürstenkopf auf das Handstück.
2 Stellen Sie das Handstück in das an das
Stromnetz angeschlossene Ladegerät.
-- So deaktivieren Sie Easy-Start:
Halten Sie den Ein-/Ausschalter 2 Sekunden
gedrückt. Sie hören einen Signalton, sobald die
Easy-Start-Funktion deaktiviert ist.
-- So aktivieren Sie Easy-Start:
Halten Sie den Ein-/Ausschalter 2 Sekunden
gedrückt. Sie hören zwei Signaltöne, sobald die
Easy-Start-Funktion aktiviert ist.
Hinweis: Die Easy-Start-Funktion sollte nur in der
ersten Gewöhnungsphase genutzt werden, da sie die
Effizienz der Plaque-Entfernung mit der Sonicare
reduziert.
34
Deutsch
Smartimer
Der Smartimer zeigt an, dass der Putzzyklus
beendet ist, indem die Zahnbürste nach beendetem
Putzzyklus automatisch ausgeschaltet wird.
Zahnärzte empfehlen, die Zähne zweimal täglich
2 Minuten lang zu putzen.
Wenn Sie den 2-minütigen Putzzyklus unterbrechen
möchten, halten Sie den Ein-/Ausschalter 2 Sekunden
lang gedrückt. Drücken Sie den Ein-/Ausschalter
erneut, und der Smartimer nimmt den Putzzyklus
dort wieder auf, wo Sie ihn unterbrochen haben.
Der Smartimer wird automatisch wieder auf Null
gestellt, wenn Sie:
-- den Putzzyklus mindestens 30 Sekunden lang
unterbrechen.
-- das Handstück auf das Ladegerät stellen.
Quadpacer (nur bestimmte Gerätetypen)
-- Der Quadpacer ist ein Intervalltimer mit einem
kurzen akustischen Signal gefolgt von einer Pause,
damit die 4 Abschnitte des Mundes gründlich und
gleichmäßig geputzt werden.
-- Wenn Sie den 2-minütigen Clean- oder SensitiveModus verwenden, hören Sie einen kurzen
Signalton, und der Putzvorgang wird nach 30,
60 und 90 Sekunden jeweils kurz unterbrochen.
-- Im Clean- & White-Modus hören und spüren Sie
nach 2 Minuten im Clean-Modus, wie sich Ton und
Bewegung des Bürstenkopfes verändern. Bringen
Sie den Bürstenkopf nun zu den sichtbaren
Vorderzähnen im Oberkiefer, und putzen Sie
diese 15 Sekunden lang. Gehen Sie nach dem
abschließenden Signalton und der Putzpause zu
den sichtbaren Vorderzähnen im Unterkiefer, und
putzen Sie auch diese 15 Sekunden lang.
Deutsch 35
Kabelaufwicklung auf Reinigungsstation mit
integriertem Ladegerät
1 Wenn Ihr Sonicare-Modell die
Reinigungsstation beinhaltet, können
Sie die Kabelaufwicklung unten an
der Reinigungsstation verwenden, um
überschüssiges Kabel zu verstauen.
Keimfrei Reinigen (nur bestimmte
Gerätetypen)
-- Die UV-Reinigungsstation macht mit jedem
Gebrauch eine Vielzahl von Keimen auf dem
Bürstenkopf unschädlich.
In folgenden Fällen trennen Sie die
Reinigungsstation von der Stromversorgung,
verwenden Sie sie nicht mehr, und wenden
Sie sich an den Kundendienst:
-- Das Fenster der Reinigungsstation ist zerbrochen
oder fehlt.
-- Die UV-Lampe leuchtet weiterhin, wenn die
Klappe geöffnet ist.
-- Die Reinigungsstation verströmt bei Betrieb Rauch
oder Brandgeruch.
Hinweis: UV-Licht kann für das menschliche Auge und
die Haut schädlich sein. Die Reinigungsstation sollte
stets außer Reichweite von Kindern gehalten werden.
1 Spülen Sie den Bürstenkopf nach Gebrauch aus
und schütteln Sie überschüssiges Wasser ab.
Während der Reinigung darf sich die Schutzkappe
nicht auf dem Bürstenkopf befinden.
36
Deutsch
2 Fassen Sie mit dem Finger in die Griffmulde
oben an der UV-Reinigungsstation, und öffnen
Sie die Klappe.
3 Setzen Sie den Bürstenkopf auf einen der
beiden Stifte in der UV-Reinigungsstation.
Die Borsten sollten dabei in Richtung der
Lampe zeigen.
Hinweis: Reinigen Sie ausschließlich aufsteckbare
Sonicare-Bürstenköpfe in der Reinigungsstation.
Hinweis: Reinigen Sie keine Bürstenköpfe der Sonicare
For Kids in der Reinigungsstation.
4 Stecken Sie den Netzstecker in eine Steckdose.
5 Schließen Sie die Klappe, und drücken Sie den
grünen Ein-/Ausschalter für den Start des
UV-Reinigungsvorgangs einmal.
Hinweis: Die Reinigungsstation lässt sich nur bei
geschlossener Klappe einschalten.
Hinweis: Die UV-Reinigungsstation hält den Vorgang an,
wenn Sie die Klappe während der Reinigung öffnen.
Hinweis: Der Reinigungszyklus dauert 10 Minuten,
danach schaltet sich das Gerät automatisch aus.
,, Die UV-Reinigungsstation ist in Betrieb, wenn
das blaue Licht durch das Fenster scheint.
,, Sobald der Reinigungszyklus abgeschlossen ist,
schaltet sich die Reinigungsstation automatisch aus.
Deutsch 37
Pflege
Reinigen Sie den Bürstenkopf, das Handstück, das
Ladegerät und die UV-Reinigungsstation nicht im
Geschirrspüler.
Handstück der Zahnbürste
1 Nehmen Sie den Bürstenkopf ab, und spülen
Sie den Metallschaft mit warmem Wasser ab.
Drücken Sie nicht mit scharfkantigen
Gegenständen auf die Gummidichtung um den
Metallschaft, da diese dadurch beschädigt werden
kann.
2 Wischen Sie die Oberfläche des Handstücks
mit einem feuchten Tuch ab.
Bürstenkopf
1 Spülen Sie Bürstenkopf und Borsten nach
jedem Gebrauch unter fließendem Wasser ab.
2 Nehmen Sie einmal pro Woche den
Bürstenkopf vom Handstück, und spülen Sie
die Verbindung zwischen Bürstenkopf und
Handstück mit warmem Wasser ab.
Ladegerät
1 Trennen Sie vor dem Reinigen den Netzstecker
des Ladegeräts von der Steckdose.
2 Wischen Sie die Oberfläche des Ladegeräts mit
einem feuchten Tuch ab.
38
Deutsch
UV-Reinigungsstation (nur bestimmte
Gerätetypen)
Tauchen Sie die Reinigungsstation niemals in
Wasser. Spülen Sie sie auch nicht unter fließendem
Wasser ab.
Reinigen Sie die UV-Reinigungsstation nicht, wenn
die UV-Lampe noch heiß ist.
Für eine optimale Wirksamkeit sollte die
UV-Reinigungsstation jede Woche gereinigt werden.
1 Ziehen Sie den Netzstecker der
UV-Reinigungsstation.
2 Ziehen Sie die Abtropfschale gerade heraus.
Spülen Sie die Abtropfschale ab, und wischen
Sie sie mit einem feuchten Tuch nach.
3 Reinigen Sie alle Oberflächen im Inneren mit
einem feuchten Tuch.
4 Nehmen Sie den Schutzschirm vor der
UV-Lampe heraus.
Um den Schutzschirm zu entfernen, greifen Sie
die Ecken der Schnappvorrichtungen, drücken
Sie sie behutsam zusammen, und ziehen Sie den
Schutzschirm heraus.
5 Nehmen Sie die UV-Lampe heraus.
Halten Sie die Lampe fest und ziehen Sie sie aus der
Metallklammer.
6 Reinigen Sie den Schutzschirm und die
UV-Lampe mit einem feuchten Tuch.
7 Setzen Sie die UV-Lampe wieder ein.
Richten Sie dazu die Unterseite der Lampe mit der
Metallklammer aus und drücken Sie die Lampe in die
Klammer.
Deutsch 39
8 Setzen Sie den Schutzschirm wieder ein.
Um den Schutzschirm wieder einzusetzen, richten
Sie die Stifte des Schirms an den Schlitzen der
reflektierenden Oberfläche in der Nähe der UVLampe aus. Drücken Sie den Schutzschirm in die
Schlitze der UV-Reinigungsstation.
Aufbewahrung
Wenn Sie das Gerät längere Zeit nicht benutzen,
sollten Sie den Netzstecker ziehen, das Gerät
reinigen und an einem kühlen, trockenen Ort
ohne direkte Sonneneinstrahlung aufbewahren.
Das Kabel kann in der Kabelaufwicklung an
der Reinigungsstation aufbewahrt werden (nur
bestimmte Gerätetypen).
Bürstenköpfe können auf den Stiften auf der
Rückseite des Ladegeräts aufbewahrt werden.
Ersatz
Bürstenkopf
Um optimale Ergebnisse zu erzielen, tauschen Sie
Sonicare Bürstenköpfe spätestens nach 3 Monaten aus.
Verwenden Sie nur für dieses Modell vorgesehene
Philips Sonicare Ersatzbürstenköpfe.
UV-Lampe
Ersatz-UV-Lampen erhalten Sie über das Philips
Service-Center in Ihrem Land.
40
Deutsch
Zubehör bestellen
Um Zubehörteile oder Ersatzteile zu kaufen,
besuchen Sie www.shop.philips.com/service,
oder gehen Sie zu Ihrem Philips Händler. Sie können
auch das Philips Service-Center in Ihrem Land
kontaktieren (die Kontaktdetails finden Sie in der
internationalen Garantieschrift).
Umwelt
-- Werfen Sie weder die UV-Lampe (die Lampe
enthält Quecksilber) noch das Gerät am Ende
seiner Lebensdauer in den normalen Hausmüll,
sondern bringen Sie die Teile zum Recycling zu
einer offiziellen Sammelstelle.
-- Der integrierte Akku der Sonicare enthält
Substanzen, die die Umwelt gefährden können.
Entfernen Sie den Akku, bevor Sie das Gerät
an einer offiziellen Recyclingstelle abgeben.
Geben Sie den gebrauchten Akku bei einer
Batteriesammelstelle ab. Falls Sie beim Entfernen
des Akkus Probleme haben, können Sie das
Gerät auch an ein Philips Service-Center geben.
Dort wird der Akku herausgenommen und
umweltgerecht entsorgt.
Deutsch 41
Den Akku entfernen
Dieser Vorgang lässt sich nicht rückgängig machen.
Um den Akku herauszunehmen, benötigen Sie einen
flachen (Standard-)Schraubendreher. Beachten Sie
bei der Durchführung des unten beschriebenen
Vorgangs die allgemeinen Sicherheitsvorkehrungen.
Schützen Sie Ihre Augen, Hände, Finger sowie die
Oberfläche, auf der Sie arbeiten.
1 Nehmen Sie die Zahnbürste aus dem
Ladegerät, schalten Sie sie ein, und lassen
Sie sie laufen, bis sie zum Stillstand kommt.
Schalten Sie die Sonicare immer wieder ein, bis
der Akku völlig leer ist.
2 Stecken Sie einen (Standard)-Schraubendreher
in den Schlitz an der Unterseite des
Handstücks. Drehen Sie den Schraubendreher
gegen den Uhrzeigersinn, um die
Bodenabdeckung zu lösen.
3 Legen Sie das Handstück auf eine feste
Oberfläche mit den Tasten nach oben. Klopfen
Sie leicht mit einem Hammer 2,5 cm vom
unteren Rand auf das Gehäuse.
4 Halten Sie das Handstück kopfüber,
und drücken Sie auf den Schaft, um die
Komponenten im Handstück zu lösen.
5 Stecken Sie den Schraubendreher neben
den Akkuverbindungen unter die Platine,
und drehen Sie ihn, bis die Verbindungen
zerbrechen. Nehmen Sie die Platine heraus, und
lösen Sie den Akku aus der Plastikhalterung.
42
Deutsch
Garantie und Support
Für Unterstützung und weitere Informationen
besuchen Sie die Philips Website unter
www.philips.com/support, oder lesen Sie die
internationale Garantieschrift.
Garantieeinschränkungen
Die folgenden Geräteteile/Schäden unterliegen
nicht den Bedingungen der internationalen Garantie:
-- Bürstenköpfe
-- Schäden, die durch den Gebrauch von nicht
zugelassenen Ersatzteilen verursacht werden.
-- Schäden durch Missbrauch, falsche Benutzung,
Fahrlässigkeit, Manipulation oder Reparatur durch
Unbefugte.
-- Normale Abnutzungserscheinungen wie
abgeschlagene Stellen, Kratzer, Abschürfungen,
Verfärbungen oder Verblassen.
-- UV-Lampe
Español 43
Introducción
Enhorabuena por la compra de este producto y
bienvenido a Philips. Para sacar el mayor partido
de la asistencia que Philips le ofrece, registre su
producto en www.philips.com/welcome.
Importante
Antes de usar el aparato, lea atentamente
este manual de usuario y consérvelo por
si necesitara consultarlo en el futuro.
Peligro
-- Mantenga el cargador y/o el
higienizador alejados del agua. No
los coloque ni guarde por encima o
cerca del agua contenida en bañeras,
lavabos, fregaderos, etc. No sumerja
el cargador ni el higienizador en
agua ni en otros líquidos. Después
de limpiarlos, asegúrese de que el
cargador y/o el higienizador estén
completamente secos antes de
enchufarlos a la red eléctrica.
Advertencia
-- El cable de alimentación no se puede
sustituir. Si está dañado, deseche el
cargador y/o el higienizador.
44
Español
-- Sustituya siempre el cargador y/o el
higienizador por otros del modelo
original para evitar situaciones de
peligro.
-- No utilice el cargador ni el higienizador
al aire libre ni cerca de superficies
calientes. No utilice el higienizador en
lugares donde se utilicen aerosoles
(spray) o donde se administre oxígeno.
-- Deje de utilizar el aparato si tiene
algún daño (en el cabezal del cepillo,
en el mango, en el cargador o en el
higienizador). Este aparato contiene
piezas que no son reemplazables. Si
el aparato está dañado, póngase en
contacto con el Servicio de Atención al
Cliente de Philips en su país (consulte
el capítulo “Garantía y asistencia”).
-- Este aparato puede ser usado por niños
a partir de 8 años y por personas con
su capacidad física, psíquica o sensorial
reducida y por quienes no tengan
los conocimientos y la experiencia
necesarios, si han sido supervisados o
instruidos acerca del uso del aparato de
forma segura y siempre que sepan los
riesgos que conlleva su uso. Los niños
no deben llevar a cabo la limpieza ni el
Español 45
mantenimiento a menos que tengan
más de 8 años o sean supervisados.
Mantenga el aparato y el cable fuera del
alcance de los niños menores de 8 años.
-- No permita que los niños jueguen
con el aparato.
-- Deje de utilizar el higienizador si la
lámpara de rayos UV permanece
encendida cuando la puerta está
abierta. La luz UV puede ser perjudicial
para los ojos y la piel de las personas.
Mantenga el higienizador fuera del
alcance de los niños en todo momento.
Precaución
-- No lave el cabezal del cepillo, el mango,
el cargador, la cubierta del cargador ni
el higienizador en el lavavajillas.
-- Consulte a su dentista antes de
utilizar este cepillo dental si ha sufrido
cirugía oral o de las encías en los
2 últimos meses.
-- Consulte a su dentista si se produce
un sangrado excesivo después de usar
este cepillo dental, o si el sangrado
continúa produciéndose después de
1 semana de uso. Consulte también a
su dentista si experimenta molestias o
dolor al utilizar el Sonicare.
46
Español
-- El cepillo dental Sonicare cumple
las normas de seguridad para
dispositivos electromagnéticos. Si tiene
un marcapasos u otro dispositivo
implantado, consulte a su médico o al
fabricante de dichos dispositivos antes
de utilizar el aparato.
-- Si tiene alguna duda médica, consulte
a su médico antes de utilizar su Sonicare.
-- Este aparato está diseñado para
limpiar sólo los dientes, las encías
y la lengua. No lo utilice con otra
finalidad. Deje de utilizar este aparato
y consulte a su médico si experimenta
algún tipo de dolor o molestia.
-- El cepillo dental Sonicare es un aparato
de higiene personal y no ha sido
concebido para su uso en múltiples
pacientes de clínicas o instituciones.
-- No utilice un cabezal de cepillo si
tiene las cerdas aplastadas o curvadas.
Sustituya el cabezal del cepillo cada
3 meses o antes si aparecen signos
de desgaste.
-- No utilice otros cabezales que no sean
los recomendados por el fabricante.
Español 47
-- Si su dentífrico contiene peróxido,
bicarbonato sódico u otro bicarbonato
(frecuentes en los dentífricos
blanqueadores), limpie bien el cabezal
con agua y jabón después de cada uso.
Esto evitará la aparición de posibles
grietas en el plástico.
-- No introduzca objetos en las rejillas
de aire del higienizador ni las bloquee
colocando el higienizador en una
superficie blanda o en una posición
en la que haya objetos que bloqueen
estas rejillas (ejemplos de objetos:
revistas, papel de cocina y pelo).
-- La lámpara de rayos UV está caliente
durante e inmediatamente después
del ciclo de higienización. No toque
la lámpara de rayos UV cuando esté
caliente.
-- Para evitar el contacto con la lámpara
caliente, no utilice el higienizador si la
pantalla protectora no está colocada
en su sitio.
-- Si el higienizador se ha utilizado para
realizar tres ciclos de limpieza por
rayos UV consecutivos (es decir, tres
veces seguidas), apáguelo durante al
menos 30 minutos antes de iniciar un
nuevo ciclo de limpieza por rayos UV.
48
Español
Campos electromagnéticos (CEM)
Este aparato de Philips cumple los estándares y las
normativas aplicables sobre exposición a campos
electromagnéticos.
Descripción general (fig. 1)
1
2
3
4
5
6
7
8
Capuchón higiénico
Cabezal del cepillo
Mango con empuñadura suave
Botón de encendido/apagado
Modos de cepillado
Piloto indicador de carga
-- Indicador de carga de lujo (sólo en modelos
específicos)
-- Indicador de carga estándar (sólo en modelos
específicos)
Cargador de viaje
Higienizador por rayos UV con cargador y
recogecable incorporados
-- No se muestra: lámpara de rayos UV
-- No se muestra: bandeja antigoteo del
higienizador
-- No se muestra: pantalla protectora para la
lámpara de rayos UV
Nota: El contenido de la caja varía en función del
modelo que adquiera
Preparación para su uso
Cómo fijar el cabezal del cepillo
1 Alinee la parte frontal del cabezal con la parte
frontal del mango.
Español 49
2 Presione firmemente hacia abajo el cabezal del
cepillo sobre el eje metálico hasta que encaje.
Carga del aparato
1 Enchufe la clavija del cargador a una toma de
corriente.
2 Coloque el mango en el cargador.
,, El indicador de carga de la batería situado junto
al símbolo de la batería parpadea para indicar
que el cepillo dental se está cargando.
Indicador de carga de la batería
El indicador de carga de la batería muestra la carga
aproximada disponible en la batería.
Indicador de carga de lujo (sólo en modelos
específicos):
-- Verde permanente: 50-100%
-- Verde parpadeante: 10-49%
-- Amarillo parpadeante: menos del 10%
Indicador de carga estándar (sólo en modelos
específicos):
-- Verde permanente: 50-100%
-- Amarillo parpadeante: menos del 50%
Nota: Si la carga de la batería del Sonicare está
baja, oirá 3 pitidos después de completar un ciclo
de cepillado y el indicador de carga de la batería
parpadeará durante 30 segundos.
Nota: Para mantener la batería totalmente cargada,
puede dejar el Sonicare en el cargador cuando no lo
esté utilizando. Se necesitan al menos 24 horas para
cargar completamente la batería.
50
Español
Uso del aparato
Instrucciones de cepillado
1 Moje las cerdas y aplique una pequeña cantidad
de pasta de dientes.
2 Coloque las cerdas del cepillo sobre los
dientes, formando un ligero ángulo con la línea
de las encías.
3 Pulse el botón de encendido/apagado para
encender su Sonicare.
4 Ejerza una ligera presión para maximizar
la eficacia de Sonicare y deje que éste se
encargue del cepillado. No frote.
5 Desplace suavemente el cabezal del cepillo por
todos los dientes con un pequeño movimiento
hacia delante y hacia atrás, de forma que
las cerdas más largas lleguen a los espacios
interdentales. Continúe con este movimiento
durante el ciclo de cepillado.
Nota: Para asegurar el cepillado uniforme de toda
la boca, divida la cavidad bucal en 4 secciones
mediante la función Quadpacer (consulte el capítulo
“Características”).
6 Cepille cada sección durante 30 segundos
durante un tiempo total de cepillado de
2 minutos. Comience por la sección 1 (cara
externa dientes superiores) y continúe con
la sección 2 (cara interna dientes superiores).
Luego cepille la sección 3 (cara externa dientes
inferiores) y termine con la sección 4 (cara
interna dientes inferiores).
Español 51
7 Después de completar el ciclo de cepillado,
puede dedicar un tiempo adicional al cepillado
de la superficie de masticación de los dientes
y las zonas donde se forman manchas. También
puede cepillarse la lengua con el cepillo
encendido o apagado, como prefiera.
Puede utilizar Sonicare de forma segura en:
-- Aparatos correctores (los cabezales se gastan antes
cuando se utilizan sobre aparatos correctores)
-- Restauraciones dentales (empastes, coronas, carillas)
Nota: Puede encender o apagar el cepillo dental en
cualquier momento manteniendo pulsado el botón de
encendido/apagado durante 2 segundos.
Instrucciones de cepillado en el modo Clean
& White
El modo Clean & White combina 2 minutos de
modo Limpieza para una limpieza completa de
la boca, con 30 segundos adicionales del modo
Blanqueado para insistir en los dientes anteriores.
1 Cepíllese los dientes los primeros 2 minutos
como se indica en los pasos del 1 al 6 anteriores.
2 Después de los 2 minutos del modo Limpieza,
el modo Blanqueado comienza con un cambio
en el sonido y en el movimiento del cepillado.
Esa es la señal para comenzar el cepillado
de los dientes anteriores superiores durante
15 segundos.
3 Tras el pitido y la pausa siguientes, cambie a
los dientes anteriores inferiores durante los
últimos 15 segundos del cepillado.
52
Español
Modos de cepillado
Su Sonicare se enciende automáticamente en el
modo Clean predeterminado. Para seleccionar un
modo de cepillado distinto:
1 Pulse el botón de encendido/apagado para
alternar entre los distintos modos.
,, El piloto LED verde indica el modo seleccionado.
Nota: Solo puede alternar entre los modos cuando el
cepillo dental está encendido.
Modo Clean (Limpieza)
Modo estándar para una limpieza superior de los
dientes.
Modo Sensitive (Suave; sólo en modelos
específicos)
Limpieza suave y en profundidad para dientes y
encías sensibles.
Modo Clean & White (Limpieza y
Blanqueado)
2 minutos de modo Limpieza, con 30 segundos
adicionales en modo Blanqueado para insistir en los
dientes anteriores.
Nota: Cuando se utiliza Sonicare en estudios clínicos, se
debe seleccionar el modo Limpieza predeterminado de
2 minutos. Sin embargo, en los estudios de blanqueado/
reducción de manchas, se debe seleccionar el modo
Clean & White. El mango debe estar totalmente
cargado y la función Easy-start debe estar desactivada.
Español 53
Características
Easy-start
-- Este modelo de Sonicare viene con la función
Easy-start activada.
-- La función Easy-start aumenta paulatinamente la
potencia a lo largo de los primeros 14 cepillados
para que pueda acostumbrarse al cepillado con
Sonicare.
Nota: Los 14 primeros cepillados deben tener
una duración de al menos 1 minuto para realizar
adecuadamente el ciclo ascendente de Easy-start.
Nota: Si se selecciona el modo Clean & White, la
función Easy-start no estará activada.
Cómo desactivar o activar la función
Easy-start
1 Fije el cabezal del cepillo al mango.
2 Coloque el mango en el cargador enchufado.
-- Para desactivar la función Easy-start:
Mantenga pulsado el botón de encendido/apagado
durante 2 segundos. Oirá 1 pitido que indica que se
ha desactivado la función Easy-start.
-- Para activar la función Easy-start:
Mantenga pulsado el botón de encendido/apagado
durante 2 segundos. Oirá 2 pitidos que indican que
se ha activado la función Easy-start.
Nota: No se recomienda utilizar la función Easy-start
más allá del periodo inicial de regulación, ya que reduce
la eficacia de Sonicare en la eliminación de la placa.
54
Español
Smartimer
El temporizador Smartimer indica que el ciclo
de cepillado se ha completado, apagando
automáticamente el cepillo dental al finalizar el ciclo.
Los profesionales dentales recomiendan cepillarse al
menos durante 2 minutos 2 veces al día.
Si desea interrumpir el cepillado en el transcurso
del ciclo de 2 minutos, mantenga pulsado durante
2 segundos el botón de encendido/apagado. Pulse
de nuevo este botón y la función Smartimer
continuará desde donde se detuvo.
Smartimer se volverá a ajustar automáticamente al
inicio de un ciclo de 2 minutos si:
-- se interrumpe el cepillado durante 30 segundos
o más.
-- el mango está colocado en el cargador.
Quadpacer (solo en modelos específicos)
-- Quadpacer es un temporizador de intervalos
que utiliza un pitido corto y una pausa para
ayudarle a cepillarse las 4 secciones de la boca
uniformemente y en profundidad.
-- Si utiliza el modo Limpieza de 2 minutos o el
modo Suave, oirá un pitido corto y notará una
pausa en el transcurso del cepillado a intervalos
de 30, 60 y 90 segundos.
Español 55
-- Si utiliza el modo Clean & White, oirá y sentirá
un cambio en el sonido y en el movimiento del
cabezal del cepillo después de los 2 minutos del
modo Limpieza. Luego, desplace el cabezal sobre
los dientes anteriores superiores y cepíllelos
durante 15 segundos. Cuando se produzcan
el pitido y la pausa finales, desplace el cabezal
sobre los dientes anteriores inferiores y cepíllelos
durante 15 segundos.
Recogecable en el higienizador con cargador
incorporado
1 Si su modelo de Sonicare incluye el
higienizador, puede utilizar el recogecable de la
parte inferior del higienizador para guardar el
cable sobrante.
Higienizador (sólo en modelos específicos)
-- Con el higienizador por rayos UV puede limpiar el
cabezal del cepillo después de cada uso.
Desenchufe el higienizador, deje de utilizarlo
y llame al Servicio de Atención al Cliente si:
-- La ventana está rota o se ha desprendido del
higienizador.
-- La lámpara de rayos UV permanece encendida
cuando la puerta está abierta.
-- El higienizador desprende humo o si hay un olor a
quemado mientras está en funcionamiento.
Nota: La luz UV puede ser perjudicial para los ojos y
la piel de las personas. Mantenga el higienizador fuera
del alcance de los niños en todo momento.
56
Español
1 Después del cepillado, enjuague el cabezal del
cepillo y sacúdalo para eliminar el exceso de agua.
No coloque el capuchón en el cabezal del cepillo
durante la higienización.
2 Coloque el dedo en el orificio de la puerta
situado en la parte superior del higienizador y
tire para abrir la puerta.
3 Coloque el cabezal del cepillo en uno de los
2 soportes del higienizador con las cerdas
orientadas hacia la lámpara.
Nota: Limpie en el higienizador únicamente cabezales
de cepillo fáciles de encajar Sonicare.
Nota: No limpie cabezales de cepillo Sonicare For Kids
en el higienizador.
4 Enchufe la clavija a la toma de corriente.
5 Cierre la puerta y pulse el botón verde de
encendido/apagado una vez para seleccionar el
ciclo de limpieza de rayos UV.
Nota: El higienizador solo se puede encender si la
puerta está bien cerrada.
Nota: El higienizador se apaga si se abre la puerta
durante el ciclo de higienización.
Nota: El ciclo del higienizador dura 10 minutos y luego
se apaga automáticamente.
,, Cuando el higienizador está en funcionamiento,
se ve una luz azul a través de la ventana.
,, Cuando se ha completado el ciclo de
higienización, el higienizador se apaga
automáticamente.
Español 57
Limpieza
No limpie el cabezal del cepillo, el mango, el
cargador o el higienizador por rayos UV en el
lavavajillas.
Mango del cepillo
1 Quite el cabezal del cepillo y enjuague la zona
del eje metálico con agua caliente.
No empuje la junta de goma del eje metálico con
ningún objeto afilado, ya que podría dañarla.
2 Utilice un paño húmedo para limpiar la
superficie del mango.
Cabezal del cepillo
1 Enjuague siempre el cabezal y las cerdas
después de cada uso.
2 Quite el cabezal del cepillo del mango y
enjuague la conexión del cabezal del cepillo al
menos una vez a la semana con agua caliente.
Cargador
1 Desenchufe el cargador antes de limpiarlo.
2 Utilice un paño húmedo para limpiar la
superficie del cargador.
58
Español
Higienizador por rayos UV (solo en modelos
específicos)
No sumerja el higienizador en agua ni lo enjuague
bajo el grifo.
No limpie el higienizador cuando la lámpara de
rayos UV está caliente.
Para una mayor eficacia, le aconsejamos que limpie
el higienizador una vez a la semana.
1 Desenchufe el higienizador.
2 Extraiga la bandeja antigoteo. Enjuáguela y
límpiela con un paño húmedo.
3 Limpie todas las superficies interiores con un
paño húmedo.
4 Extraiga la pantalla protectora situada delante
de la lámpara de rayos UV.
Para quitar la pantalla protectora, agarre los bordes
cerca de los botones de presión, apriete suavemente
y extráigala.
5 Quite la lámpara de rayos UV.
Para quitar la lámpara de rayos UV, agárrela y
sáquela del casquillo metálico.
6 Limpie la pantalla protectora y la lámpara de
rayos UV con un paño húmedo.
7 Vuelva a colocar la lámpara de rayos UV.
Para volver a colocar la lámpara, alinee la parte
inferior de la misma con el casquillo metálico y
empújela para introducirla en el mismo.
8 Vuelva a colocar la pantalla protectora.
Para volver a colocar la pantalla, alinee los salientes
de la pantalla con las ranuras de la superficie
reflectora junto a la lámpara de rayos UV. Presione
la pantalla en las ranuras del higienizador.
Español 59
Almacenamiento
Si no va a utilizar el aparato durante mucho tiempo,
desenchúfelo de la toma de corriente. Luego limpie
el aparato y guárdelo en un lugar fresco y seco,
alejado de la luz directa del sol. Puede utilizar el
recogecable del higienizador (solo en modelos
específicos) para guardar cómodamente el cable de
alimentación.
Puede guardar los cabezales del cepillo en los
soportes de la parte posterior del cargador.
Sustitución
Cabezal del cepillo
Sustituya los cabezales de Sonicare cada 3 meses
para conseguir unos resultados óptimos.
Utilice solo los cabezales de repuesto Sonicare
originales de Philips adecuados para este modelo.
Lámpara de rayos UV
Las lámparas de rayos UV están disponibles en el
Servicio de Atención al Cliente de Philips en su país.
Solicitud de accesorios
Para comprar accesorios o piezas de repuesto, visite
www.shop.philips.com/service o acuda a su
distribuidor de Philips. También puede ponerse en
contacto con el Servicio de Atención al Cliente de
Philips en su país (consulte el folleto de garantía
mundial para encontrar los datos de contacto).
60
Español
Medio ambiente
-- Al final de su vida útil, no tire el aparato ni la
lámpara de rayos UV (contiene mercurio) junto
con la basura normal del hogar. Llévelo a un punto
de recogida oficial para su reciclado. De esta
manera, ayudará a conservar el medio ambiente.
-- La batería recargable incorporada del Sonicare
contiene sustancias que pueden contaminar el
medio ambiente. Quite siempre la batería antes
de deshacerse del aparato y de llevarlo a un
punto de recogida oficial. Deposite la batería en
un lugar de recogida oficial. Si no puede quitar la
batería, puede llevar el aparato a un servicio de
asistencia técnica de Philips, donde la extraerán y
se desharán de ella de forma no perjudicial para el
medio ambiente.
Cómo extraer la batería recargable
Este proceso no es reversible.
Para extraer la batería recargable se necesita un
destornillador plano normal. Tenga en cuenta las
medidas de seguridad básicas cuando siga los
procedimientos descritos a continuación. Asegúrese
de proteger sus ojos, manos, dedos y la superficie en
la que trabaja.
1 Quite el cepillo del cargador, enciéndalo
y déjelo funcionar hasta que se pare.
Siga encendiendo el cepillo Sonicare hasta que
la batería se agote por completo.
Español 61
2 Introduzca un destornillador plano normal en
la ranura situada en la parte inferior del mango
y gírelo en sentido contrario al de las agujas
del reloj para liberar la tapa inferior.
3 Coloque el mango en una superficie sólida con
los botones orientados hacia arriba y dé un
ligero golpe en la carcasa a 2,5 cm del borde
inferior con un martillo.
4 Sujete el mango boca abajo y presione en el eje
para sacar los componentes del mango.
5 Introduzca el destornillador debajo del circuito,
junto a las conexiones de la batería y gírelo
para romper las conexiones. Quite el circuito y
separe la batería de la carcasa de plástico.
62
Español
Garantía y asistencia
Si necesita asistencia o información, visite
www.philips.com/support o lea el folleto de
garantía mundial independiente.
Restricciones de la garantía
La garantía internacional no cubre los siguientes
daños:
-- Cabezales del cepillo
-- Deterioros causados por el uso de piezas de
repuesto no autorizadas.
-- Deterioros causados por el uso inapropiado,
abusos, negligencias, alteraciones o reparaciones
no autorizadas.
-- Desgaste normal, incluyendo arañazos,
desportilladuras, abrasiones, desteñidos o pérdida
de color.
-- Lámpara de rayos UV
Français 63
Introduction
Félicitations pour votre achat et bienvenue dans
l’univers Philips ! Pour profiter pleinement de
l’assistance Philips, enregistrez votre produit sur le
site à l’adresse suivante : www.philips.com/welcome.
Important
Lisez attentivement ce mode d’emploi
avant d’utiliser l’appareil et conservez-le
pour un usage ultérieur.
Danger
-- Évitez tout contact du chargeur et/
ou de l’assainisseur avec l’eau. Ne les
placez pas et ne les rangez pas sur
ou près d’une baignoire, d’un lavabo
ou d’un évier. Ne les plongez pas
dans l’eau ni dans tout autre liquide.
Après le nettoyage, assurez-vous
que le chargeur et/ou l’assainisseur
sont parfaitement secs avant de les
brancher sur le secteur.
Avertissement
-- Il est impossible de remplacer
le cordon d’alimentation. En cas
de dommages, le chargeur et/ou
l’assainisseur devra/devront être mis
au rebut.
64
Français
-- Remplacez systématiquement le
chargeur et/ou l’assainisseur par un
chargeur/assainisseur de même type
pour éviter tout accident.
-- N’utilisez pas le chargeur et/ou
l’assainisseur en extérieur ou à
proximité d’une surface chauffée. Ne
faites jamais fonctionner l’assainisseur
dans des endroits où des produits
aérosols (en spray) sont utilisés ou dans
des lieux où de l’oxygène est administré.
-- Si l’appareil (tête de brosse, manche de
la brosse, chargeur et/ou assainisseur)
est endommagé, cessez de l’utiliser.
L’appareil ne contient aucune pièce
réparable. S’il est endommagé,
contactez le Service Consommateurs
de votre pays (voir le chapitre
« Garantie et assistance »).
-- Cet appareil peut être utilisé
par des enfants âgés de 8 ans
ou plus, des personnes dont les
capacités physiques, sensorielles ou
intellectuelles sont réduites ou des
personnes manquant d’expérience
et de connaissances, à condition que
ces enfants ou personnes soient
sous surveillance ou qu’ils aient reçu
Français 65
des instructions quant à l’utilisation
sécurisée de l’appareil et qu’ils
aient pris connaissance des dangers
encourus. Le nettoyage et l’entretien
ne doivent pas être réalisés par des
enfants sauf s’ils sont âgés de plus
de 8 ans et sous surveillance. Tenez
l’appareil et son cordon hors de
portée des enfants de moins de 8 ans.
-- Les enfants ne doivent pas jouer avec
l’appareil.
-- Cessez d’utiliser l’assainisseur si la
lampe UV reste allumée alors que
l’appareil est ouvert. Les UV peuvent
être dangereux pour les yeux et la
peau. Tenez toujours l’assainisseur
hors de portée des enfants.
Attention
-- Ne mettez pas la tête de brosse,
le manche, le chargeur de voyage,
le couvercle du chargeur ou
l’assainisseur au lave-vaisselle.
-- Si vous avez reçu des soins buccodentaires, notamment au niveau des
gencives, au cours des deux derniers
mois, consultez votre dentiste avant
d’utiliser cette brosse à dents.
66
Français
-- Consultez votre dentiste si vos
gencives saignent de manière excessive
après utilisation de cette brosse à
dents ou si le saignement persiste
après une semaine d’utilisation.
Consultez également votre dentiste si
l’utilisation de Sonicare entraîne des
douleurs ou un inconfort.
-- La brosse à dents Sonicare est conforme
aux normes de sécurité relatives
aux appareils électromagnétiques. Si
vous avez des questions concernant
l’utilisation de la brosse à dents Sonicare
avec un stimulateur cardiaque ou tout
autre dispositif implanté, contactez votre
médecin traitant ou le fabricant de ce
dispositif avant utilisation.
-- Si vous avez des problèmes de
santé, consultez votre médecin avant
d’utiliser la brosse à dents Sonicare.
-- Cet appareil a été conçu
exclusivement pour le brossage des
dents, des gencives et de la langue. Ne
l’utilisez jamais à d’autres fins. Si son
utilisation devait s’avérer inconfortable
ou douloureuse, cessez d’utiliser
l’appareil et consultez votre médecin.
Français 67
-- La brosse à dents Sonicare est
un appareil de soins personnel et
n’est pas destinée à être utilisée sur
plusieurs patients dans les cabinets ou
établissements dentaires.
-- Cessez d’utiliser une tête de brosse
dont les poils sont écrasés ou tordus.
Remplacez la tête de brosse tous les
3 mois ou plus tôt si vous constatez
des signes d’usure.
-- N’utilisez pas d’autres têtes de brosse
que celles recommandées par le
fabricant.
-- Si votre dentifrice contient du
peroxyde, du bicarbonate de soude ou
du bicarbonate (couramment utilisés
dans les dentifrices blanchissants),
nettoyez bien la tête de brosse avec
de l’eau et du savon après chaque
utilisation afin de prévenir toute fissure
éventuelle du plastique.
-- N’insérez pas d’objets dans les
orifices d’entrée et de sortie d’air de
l’assainisseur ou ne bloquez pas ceuxci en plaçant l’appareil sur une surface
molle ou dans une position ou un
endroit où des objets pourraient
68
Français
bloquer ces orifices (exemples
d’objets : magazines, papier de soie et
cheveux).
-- Ne touchez pas la lampe UV pendant
et juste après le cycle d’assainissement,
lorsqu’elle est chaude.
-- N’utilisez pas l’assainisseur sans
l’écran de protection pour éviter tout
contact avec la lampe, car elle peut
être chaude.
-- Si l’assainisseur a été utilisé pour
3 cycles de nettoyage UV consécutifs
(c’est-à-dire 3 fois à la suite),
éteignez-le au moins pendant
30 minutes avant de lancer un
nouveau cycle de nettoyage UV.
Champs électromagnétiques (CEM)
Cet appareil Philips est conforme à toutes les
normes et à tous les règlements applicables relatifs à
l’exposition aux champs électromagnétiques.
Français 69
Description générale (fig. 1)
1
2
3
4
5
6
7
8
Capuchon de protection hygiénique
Tête de brosse
Manche confort
Bouton marche/arrêt
Modes de brossage
Voyant de charge
-- Témoin de charge Deluxe (certains modèles
uniquement)
-- Témoin de charge Standard (certains modèles
uniquement)
Chargeur de voyage
Assainisseur UV avec chargeur intégré et rangecordon
-- Non illustré : lampe UV
-- Non illustré : plateau égouttoir de l’assainisseur
-- Non illustré : écran de protection pour
lampe UV
Remarque : Le contenu de la boîte varie selon le
modèle acheté.
Avant utilisation
Fixation de la tête de brosse
1 Alignez la partie inférieure de la tête de brosse
avec la partie supérieure du manche.
2 Insérez le manche métallique au maximum dans
la tête de brosse.
70
Français
Charge de l’appareil
1 Branchez le chargeur sur une prise secteur.
2 Placez le manche sur le chargeur.
,, Le témoin de charge de la batterie à côté du
symbole de batterie clignote, indiquant que la
brosse à dents est en cours de charge.
Témoin de charge de la batterie
Le témoin de charge de la batterie affiche le temps
de charge restant approximatif.
Témoin de charge Deluxe (certains modèles
uniquement) :
-- Vert continu : 50-100 %
-- Vert clignotant : 10-49 %
-- Jaune clignotant : moins de 10 %
Témoin de charge Standard (certains modèles
uniquement) :
-- Vert continu : 50-100 %
-- Vert clignotant : moins de 50 %
Remarque : Lorsque le niveau de charge de la batterie
de la Sonicare est faible, la brosse à dents émet
3 signaux sonores une fois le cycle de brossage terminé
et le témoin de charge se met à clignoter pendant
30 secondes.
Remarque : Pour que la batterie reste chargée en
permanence, nous vous recommandons de laisser
la brosse Sonicare sur le chargeur lorsque vous ne
l’utilisez pas. Il faut environ 24 heures pour charger
entièrement la batterie.
Français 71
Utilisation de l’appareil
Instructions de brossage
1 Humidifiez les poils de la tête de brosse, puis
appliquez une petite quantité de dentifrice.
2 Mettez les poils de la tête de brosse sur vos
dents, en les inclinant légèrement vers la
gencive.
3 Allumez la brosse à dents Sonicare en appuyant
sur le bouton marche/arrêt.
4 Exercez une légère pression pour optimiser
l’efficacité de la brosse à dents Sonicare et
laissez l’appareil brosser vos dents. Ne frottez
pas.
5 Déplacez lentement la tête de brosse le long
de vos dents avec un léger mouvement de
va-et-vient, de sorte que les poils les plus longs
atteignent les espaces interdentaires. Continuez
ainsi jusqu’à la fin du cycle de brossage.
Remarque : Pour assurer un brossage
uniforme, divisez votre bouche en 4 sections
à l’aide de la fonction Quadpacer (voir le
chapitre « Caractéristiques »).
6 Brossez chaque section pendant 30 secondes,
jusqu’à ce que les 2 minutes de brossage soient
écoulées. Commencez par la section 1 (dents
de la mâchoire supérieure à l’extérieur), puis
passez à la section 2 (dents de la mâchoire
supérieure à l’intérieur). Poursuivez en
brossant la section 3 (dents de la mâchoire
inférieure à l’extérieur) et terminez par la
section 4 (dents de la mâchoire inférieure à
l’intérieur).
72
Français
7 Une fois le cycle de brossage terminé, vous
pouvez consacrer du temps supplémentaire au
brossage de la surface de mastication des dents
et insister sur les zones propices aux taches.
Vous pouvez également brosser votre langue
avec la brosse à dents en marche ou arrêtée.
La brosse à dents Sonicare peut être utilisée dans les
cas suivants :
-- les appareils orthodontiques (les têtes de brosse
s’usent toutefois plus rapidement) ;
-- les problèmes dentaires (plombages, couronnes,
bridges).
Remarque :Vous pouvez allumer ou éteindre la brosse
à dents à tout moment en appuyant sur le bouton
marche/arrêt pendant 2 secondes.
Instructions de brossage pour le mode
Propreté et Blancheur
Le mode Propreté et Blancheur se compose d’un
mode Propreté de 2 minutes, pour le nettoyage
de toute la bouche, et d’un mode Blancheur de
30 secondes supplémentaires, pour un nettoyage
approfondi des dents visibles.
1 Commencez par les 2 minutes de brossage,
comme indiqué aux étapes 1-6 ci-dessus.
2 Une fois le mode Propreté de 2 minutes
terminé, le mode Blancheur commence, associé
à un son et à un mouvement de brossage
différents.Vous pouvez alors commencer à
brosser les dents visibles de votre mâchoire
supérieure pendant 15 secondes.
3 Au signal sonore suivant et à la prochaine
interruption, passez aux dents visibles de la
mâchoire inférieure et procédez au brossage
final pendant 15 secondes.
Français 73
Modes de brossage
La brosse à dents Sonicare est paramétrée pour
démarrer automatiquement en mode Propreté. Pour
sélectionner un autre mode de brossage :
1 Appuyez sur le bouton marche/arrêt pour
changer de mode.
,, Le témoin vert indique le mode sélectionné.
Remarque :Vous pouvez changer de mode uniquement
lorsque la brosse à dents est allumée.
Mode Propreté
Mode standard pour un nettoyage complet et en
profondeur des dents et des gencives.
Mode Sensible (certains modèles
uniquement)
Balayage plus doux pour les dents et les gencives
sensibles.
Mode Propreté et Blancheur
Mode Propreté pendant 2 minutes, puis
mode Blancheur pendant 30 secondes pour un
nettoyage approfondi des dents visibles.
Remarque : Dans le cadre d’études cliniques, il
est conseillé de sélectionner le mode Propreté de
2 minutes.Toutefois, dans le cadre d’études sur la
réduction des taches et le blanchiment, le mode
Propreté et Blancheur doit être sélectionné. Le manche
doit être entièrement chargé et la fonction Easy-start
désactivée.
74
Français
Caractéristiques
Fonction Easy-start
-- La fonction Easy-start est, par défaut, activée sur
ce modèle Sonicare.
-- Cette fonction, qui augmente progressivement la
puissance lors des 14 premiers brossages, vous
permet de vous habituer au brossage Sonicare.
Remarque : Au cours des 14 premières utilisations,
chaque cycle de brossage doit durer au moins une
minute pour que la fonction Easy-start se déroule
correctement.
Remarque : Si le mode Propreté et Blancheur est
sélectionné, la fonction Easy-start est désactivée.
Désactivation ou activation de la
fonction Easy-start
1 Fixez la tête de brosse au manche.
2 Placez le manche sur le chargeur préalablement
branché.
-- Pour désactiver la fonction Easy-start :
Appuyez sur le bouton marche/arrêt et maintenezle enfoncé pendant deux secondes. Un signal
sonore vous indique que la fonction Easy-start est
désactivée.
-- Pour activer la fonction Easy-start :
Appuyez sur le bouton marche/arrêt et maintenezle enfoncé pendant deux secondes. Deux signaux
sonores vous indiquent que la fonction Easy-start est
activée.
Remarque : Il est recommandé de ne pas dépasser la
période initiale d’utilisation de la fonction Easy-start,
sous peine de réduire l’efficacité de la brosse à dents
Sonicare dans l’élimination de la plaque dentaire.
Français 75
Fonction Smartimer
La fonction Smartimer indique que le cycle de
brossage est terminé en éteignant automatiquement
la brosse à dents à la fin du cycle.
Les dentistes recommandent de se brosser les dents
2 fois par jour pendant au moins 2 minutes.
Pour interrompre ou arrêter le cycle de brossage de
2 minutes, appuyez sur le bouton marche/arrêt pendant
2 secondes. Si vous appuyez de nouveau sur ce bouton,
la fonction Smartimer reprend là où elle s’était arrêtée.
La fonction Smartimer est automatiquement
réinitialisée au début du cycle de 2 minutes si :
-- le brossage est interrompu pendant 30 secondes
ou plus ;
-- le manche est placé sur le chargeur.
Minuteur Quadpacer (sur certains modèles
uniquement)
-- La fonction Quadpacer est un minuteur à intervalles
réguliers qui émet un bref signal sonore et suspend
le cycle de manière à nettoyer de façon homogène
et efficace les 4 quadrants de votre bouche.
-- Lorsque vous utilisez le mode Sensible ou
Propreté de 2 minutes, un bref signal sonore est
émis et le brossage s’interrompt par intervalle de
30, 60 et 90 secondes.
-- Lorsque vous utilisez le mode Propreté et Blancheur,
vous remarquez un son et un mouvement différents
de la tête de brosse, une fois le mode Propreté
de 2 minutes terminé. Déplacez ensuite la tête de
brosse au niveau des dents visibles de la mâchoire
supérieure et brossez-les pendant 15 secondes.
Lors de la dernière interruption et du dernier signal
sonore, passez aux dents visibles de la mâchoire
inférieure et brossez-les pendant 15 secondes.
76
Français
Range-cordon sur assainisseur avec chargeur
intégré
1 Si votre modèle Sonicare inclut l’assainisseur,
vous pouvez enrouler le cordon autour du
range-cordon situé à la base de l’assainisseur
pour en ajuster la longueur.
Assainisseur (sur certains modèles
uniquement)
-- L’assainisseur UV permet de nettoyer les têtes de
brosse après chaque utilisation.
Débranchez l’assainisseur, cessez de l’utiliser
et appelez le Service Consommateurs si :
-- La vitre est cassée ou n’a pas été fournie avec
l’assainisseur.
-- La lampe UV reste allumée alors que l’appareil est
ouvert.
-- De la fumée ou une odeur de brûlé s’échappe de
l’assainisseur en fonctionnement.
Remarque : Les UV peuvent être dangereux pour les
yeux et la peau.Tenez toujours l’assainisseur hors de
portée des enfants.
1 Après chaque utilisation, rincez la tête de
brosse et secouez-la pour en retirer l’eau.
Ne mettez pas le capuchon de protection sur la
tête de brosse lors de l’assainissement.
2 Insérez un doigt dans le logement du portillon,
en haut de l’assainisseur, puis tirez pour ouvrir.
Français 77
3 Placez la tête de brosse sur l’un des 2 supports
de l’assainisseur de sorte que les poils soient
face à la lampe.
Remarque : Nettoyez uniquement les têtes de brosse à
clipser Sonicare dans l’assainisseur.
Remarque : Ne nettoyez pas les têtes de brosse
Sonicare for Kids (Pour Enfants) dans l’assainisseur.
4 Branchez la fiche sur une prise secteur.
5 Fermez l’appareil et appuyez une fois sur le
bouton vert marche/arrêt pour sélectionner le
cycle de nettoyage UV.
Remarque :Vous ne pouvez allumer l’assainisseur
qu’une fois le portillon correctement fermé.
Remarque : L’assainisseur cesse de fonctionner si vous
ouvrez l’appareil pendant le cycle d’assainissement.
Remarque : Le cycle de l’assainisseur dure 10 minutes,
après quoi l’appareil s’éteint automatiquement.
,, L’assainisseur est en cours de fonctionnement
lorsque le voyant bleu au niveau de la fenêtre est
allumé.
,, Une fois le cycle d’assainissement terminé,
l’assainisseur s’éteint automatiquement.
78
Français
Nettoyage
Ne nettoyez pas la tête de brosse, le manche, le
chargeur ou l’assainisseur UV au lave-vaisselle.
Manche de la brosse à dents
1 Retirez la tête de brosse et rincez le manche
métallique à l’eau chaude.
N’appuyez pas sur l’anneau en caoutchouc du
manche métallique avec des objets pointus, sous
peine de l’endommager.
2 Essuyez la surface du manche à l’aide d’un
chiffon humide.
Tête de brosse
1 Rincez la tête de brosse et les poils après
chaque utilisation.
2 Retirez la tête de brosse du manche et rincez
la base de la tête de brosse au moins une fois
par semaine à l’eau chaude.
Chargeur
1 Débranchez le chargeur avant de procéder au
nettoyage.
2 Essuyez la surface du chargeur à l’aide d’un
chiffon humide.
Français 79
Assainisseur UV (sur certains modèles
uniquement)
Ne plongez jamais l’assainisseur dans l’eau et ne le
rincez pas sous le robinet.
Ne nettoyez pas l’assainisseur lorsque la lampe UV
est chaude.
Pour une efficacité optimale, il est recommandé de
nettoyer l’assainisseur une fois par semaine.
1 Débranchez l’assainisseur.
2 Retirez le plateau égouttoir et rincez-le à l’aide
d’un chiffon humide.
3 Nettoyez toutes les surfaces intérieures à l’aide
d’un chiffon humide.
4 Retirez l’écran de protection placé devant la
lampe UV.
Pour retirer l’écran, saisissez les bords situés près
des fermoirs, appuyez légèrement et tirez l’écran de
protection.
5 Retirez la lampe UV.
Pour retirer la lampe, saisissez-la et sortez-la de sa
fixation métallique.
6 Nettoyez l’écran de protection et la lampe UV
à l’aide d’un chiffon humide.
7 Réinsérez la lampe UV.
Pour réinsérer la lampe, alignez le bas de l’ampoule
avec la fixation métallique et enfoncez l’ampoule
dans la fixation.
8 Réinsérez l’écran de protection.
Pour réinsérer l’écran, alignez les taquets de fixation
de l’écran avec les fentes de la surface du réflecteur
située près de la lampe UV. Appuyez sur l’écran de
sorte qu’il s’enclenche dans les fentes de l’assainisseur.
80
Français
Rangement
Si vous ne comptez pas utiliser l’appareil pendant
une période prolongée, débranchez le cordon
d’alimentation de la prise secteur, nettoyez l’appareil
et rangez-le dans un endroit frais et sec, à l’abri de
la lumière. Vous pouvez utiliser le range-cordon sur
l’assainisseur (certains modèles uniquement) pour
ranger correctement le cordon d’alimentation.
Vous pouvez ranger les têtes de brosse sur les
supports situés à l’arrière du chargeur.
Remplacement
Tête de brosse
Pour obtenir des résultats optimaux, remplacez les
têtes de brosse Sonicare au moins tous les 3 mois.
Utilisez uniquement des têtes de brosse de rechange
Philips destinées à ce modèle.
Lampe UV
Des ampoules UV de rechange sont disponibles via
le Service Consommateurs Philips de votre pays.
Commande d’accessoires
Pour acheter des accessoires ou des pièces de
rechange, visitez le site Web
www.shop.philips.com/service ou rendez-vous
chez votre revendeur Philips. Vous pouvez également
contacter le Service Consommateurs Philips de
votre pays (voir le dépliant de garantie internationale
pour les coordonnées).
Français 81
Environnement
-- Lorsqu’ils ne fonctionneront plus, ne jetez pas
l’appareil ni la lampe UV (celle-ci contient du
mercure) avec les ordures ménagères. Déposezles dans un lieu prévu à cet effet, où ils pourront
être recyclés. Vous contribuerez ainsi à la
protection de l’environnement.
-- La batterie rechargeable intégrée à cette brosse
à dents Sonicare contient des substances qui
peuvent nuire à l’environnement. Veillez à toujours
retirer la batterie avant de mettre l’appareil au
rebut ou de le déposer à un endroit assigné à
cet effet. Déposez la batterie usagée à un endroit
assigné à cet effet. Si vous n’arrivez pas à retirer
la batterie, vous pouvez apporter l’appareil dans
un Centre Service Agréé Philips qui prendra
toute l’opération en charge dans le respect de
l’environnement.
Retrait de la batterie rechargeable
Ce processus est irréversible.
Pour retirer la batterie rechargeable, munissez-vous
d’un tournevis à tête plate (standard). Respectez
les mesures de sécurité élémentaires lorsque
vous suivez la procédure ci-dessous. Veillez à vous
protéger les yeux, les mains et les doigts, ainsi que la
surface sur laquelle vous travaillez.
1 Retirez la brosse à dents du chargeur, mettez-la
sous tension et laissez-la fonctionner jusqu’à
son arrêt complet. Renouvelez l’opération
jusqu’à ce que la batterie soit complètement
déchargée.
82
Français
2 Insérez un tournevis plat (standard) dans la
fente située en bas du manche. Tournez dans
le sens inverse des aiguilles d’une montre pour
desserrer le couvercle inférieur.
3 Placez le manche sur une surface solide et
tapez légèrement sur le compartiment à
environ 2,5 cm du bord inférieur avec un
marteau.
4 Tenez le manche à l’envers et tirez sur l’axe
pour retirer les composants internes du
manche.
5 Insérez le tournevis sous le circuit imprimé,
à proximité des connexions de la batterie, et
tournez pour rompre ces connexions. Retirez
le circuit imprimé et séparez la batterie du
boîtier en plastique.
Garantie et assistance
Si vous avez besoin d’une assistance ou
d’informations supplémentaires, consultez le site
Web www.philips.com/support ou lisez le
dépliant séparé sur la garantie internationale.
Limites de la garantie
La garantie internationale ne couvre pas les éléments
suivants :
-- Têtes de brosse
-- les dommages causés par l’utilisation de pièces de
rechange non autorisées ;
-- les dommages causés par une mauvaise utilisation,
une négligence ou des altérations ;
-- les marques d’usure dues à un usage normal,
comme les rayures, abrasions et décolorations.
-- Lampe UV
Italiano 83
Introduzione
Congratulazioni per l’acquisto e benvenuti in Philips!
Per trarre il massimo vantaggio dall’assistenza Philips,
registrate il vostro prodotto su www.philips.com/
welcome.
Importante
Prima di utilizzare l’apparecchio, leggete
attentamente il presente manuale e
conservatelo per eventuali riferimenti
futuri.
Pericolo
-- Tenete il caricabatterie e/o l’igienizzatore
lontani dall’acqua. Non appoggiateli né
riponeteli vicino a vasche, lavandini, lavabi
ecc. Non immergete il caricabatterie e/o
l’igienizzatore in acqua o in altre sostanze liquide. Dopo la pulizia, assicuratevi
che il caricabatterie e/o l’igienizzatore
siano completamente asciutti prima di
collegarli alla presa di corrente.
Avviso
-- Il cavo di alimentazione non può
essere sostituito. Nel caso fosse
danneggiato, gettate il caricabatterie
e/o l’igienizzatore.
84
Italiano
-- Sostituite il caricabatterie e/o
l’igienizzatore esclusivamente con
un adattatore e/o un igienizzatore
originale al fine di evitare situazioni
pericolose.
-- Non utilizzate il caricabatterie e/o
l’igienizzatore all’aria aperta o in
prossimità di superfici calde. Non
mettete l’igienizzatore in funzione
dove vengono usati prodotti spray o
dove viene somministrato ossigeno.
-- In caso di danni (testina, impugnatura,
caricabatterie e/o igienizzatore), non
utilizzate in nessun caso l’apparecchio.
Questo apparecchio non contiene parti
riparabili. In caso di danni dell’apparecchio, contattate il centro assistenza
clienti del vostro paese (vedere il capitolo “Garanzia e assistenza”).
-- Quest’apparecchio può essere usato
da bambini a partire da 8 anni di età
e da persone con capacità fisiche,
sensoriali o mentali ridotte o prive
di esperienza o conoscenze adatte a
condizione che tali persone abbiano
ricevuto assistenza o formazione per
utilizzare l’apparecchio in maniera
sicura e capiscano i potenziali pericoli
Italiano 85
associati a tale uso. La manutenzione
e la pulizia non devono essere
eseguite da bambini se non di età
superiore a 8 anni e in presenza di
un adulto. Tenete l’apparecchio e il
relativo cavo fuori dalla portata di
bambini di età inferiore a 8 anni.
-- Evitate che i bambini giochino con
l’apparecchio.
-- Non utilizzate l’igienizzatore se la
lampadina a raggi UV rimane accesa
nonostante lo sportello sia aperto. I
raggi UV potrebbero essere nocivi per
gli occhi e la pelle. Tenete l’igienizzatore
lontano dalla portata dei bambini.
Attenzione
-- Non pulite la testina, il manico,
il caricabatterie, il coperchio del
caricabatterie e/o l’igienizzatore nella
lavastoviglie.
-- Se nel corso degli ultimi 2 mesi vi
siete sottoposti a interventi su denti o
gengive, chiedete il parere del vostro
dentista prima di utilizzare lo spazzolino.
-- Rivolgetevi al vostro dentista nel caso
di eccessivo sanguinamento dopo
l’uso dell’apparecchio o qualora tale
sanguinamento continui dopo una
86
Italiano
settimana di uso. Rivolgetevi al vostro
dentista anche se avvertite disagio o
dolore quando usate Sonicare.
-- Lo spazzolino Sonicare è conforme
alle norme di sicurezza in materia di
dispositivi elettromagnetici. Se siete
portatori di pacemaker o di altro
dispositivo impiantato, consultate il
vostro medico o il produttore del
dispositivo prima dell’uso.
-- In caso di problemi orali, consultate il
medico prima di utilizzare Sonicare.
-- Questo apparecchio è destinato
esclusivamente alla pulizia di denti e
gengive. Non utilizzatelo per scopi
diversi da quelli previsti. Qualora
avvertiate dolore durante l’utilizzo,
contattate il vostro medico.
-- Lo spazzolino Sonicare è un
apparecchio assolutamente personale
e non deve essere utilizzato da più
persone o presso studi dentistici.
-- Non utilizzate l’apparecchio in
presenza di setole rovinate o piegate.
Sostituite la testina ogni 3 mesi o
prima in presenza di segni di usura.
-- Utilizzate esclusivamente le testine
consigliate dal produttore.
Italiano 87
-- Se il dentifricio utilizzato contiene
perossido, bicarbonato di sodio
o bicarbonato (impiegati di solito
per i dentifrici sbiancanti), pulite
accuratamente la testina con acqua e
sapone dopo ogni uso, onde evitare
di danneggiare la parte in plastica.
-- Non inserite oggetti nelle prese d’aria
dell’igienizzatore e non bloccatele
posizionando l’igienizzatore su una
superficie morbida o in una posizione
o un luogo in cui eventuali oggetti
possono bloccare le prese (ad esempio
riviste, fazzoletti di carta e capelli).
-- La lampadina a raggi UV diventa
incandescente durante e subito
dopo il ciclo di igienizzazione. Non
toccate la lampadina a raggi UV se
incandescente.
-- Non mettete l’igienizzatore in funzione
senza lo schermo protettivo per
evitare il contatto con una lampadina.
-- Se avete utilizzato l’igienizzatore per
3 cicli di pulizia consecutivi (cioè
3 volte di fila), spegnetelo per almeno
30 minuti prima di iniziare un altro
ciclo di pulizia.
88
Italiano
Campi elettromagnetici (EMF)
Questo apparecchio Philips è conforme a tutti gli
standard e alle norme relativi all’esposizione ai campi
elettromagnetici.
Descrizione generale (fig. 1)
1
2
3
4
5
6
7
8
Cappuccio igienico da viaggio
Testina
Impugnatura morbida
Pulsante on/off
Modalità di utilizzo
Indicatore di ricarica batterie
-- Indicatore di ricarica deluxe (solo alcuni
modelli)
-- Indicatore di ricarica standard (solo alcuni
modelli)
Caricabatterie da viaggio
Igienizzatore UV con caricabatterie integrato e
avvolgicavo
-- Non illustrato: lampadina a raggi UV
-- Non illustrato: vassoio antigoccia igienizzatore
-- Non illustrato: schermo protettivo per
lampadina a raggi UV
Nota: il contenuto della scatola potrebbe variare a
seconda del modello acquistato.
Italiano 89
Predisposizione dell’apparecchio
Inserimento della spazzola
1 Allineate la parte anteriore della testina al lato
frontale dell’impugnatura.
2 Premete saldamente la testina sulla parte
metallica fino all’arresto.
Ricarica dell’apparecchio
1 Collegate la spina del caricabatterie in una
presa di corrente.
2 Posizionate la base sul caricabatterie.
,, L’indicatore di ricarica della batteria posto
accanto alla batteria lampeggia per segnalare che
la ricarica è in corso.
Indicatore di ricarica della batteria
L’indicatore di ricarica della batteria mostra il livello
di carica residuo della batteria.
Indicatore di ricarica deluxe (solo alcuni modelli):
-- Spia verde fissa: 50-100%
-- Spia verde lampeggiante: 10-49%
-- Spia gialla lampeggiante: inferiore al 10%
Indicatore di ricarica standard (solo alcuni modelli):
-- Spia verde fissa: 50-100%
-- Spia verde lampeggiante: inferiore al 50%
Nota: quando la batteria del Sonicare è quasi scarica,
vengono emessi 3 segnali acustici dopo la conclusione
del ciclo di pulizia e l’indicatore di ricarica della
batteria lampeggia per 30 secondi.
Nota: per mantenere la batteria sempre
completamente carica, potete tenere Sonicare sul
caricabatterie quando non viene utilizzato. Sono
necessarie 24 ore per la carica completa.
90
Italiano
Modalità d’uso dell’apparecchio
Istruzioni d’uso
1 Bagnate le setole e applicate una piccola
quantità di dentifricio.
2 Appoggiate le setole contro i denti con una
leggera angolazione rispetto alla gengiva.
3 Premete il pulsante on/off per accendere lo
spazzolino Sonicare.
4 Per ottimizzare l’efficacia, esercitate solo una
leggera pressione e lasciate che lo spazzolino
lavori per voi senza dover spazzolare.
5 Muovete delicatamente lo spazzolino avanti
e indietro, in modo che le setole più lunghe
raggiungano lo spazio interdentale. Procedete
in questo modo per tutto il ciclo.
Nota: Per assicurare una corretta pulizia di tutti i denti,
dividete la bocca in 4 sezioni utilizzando la funzione
Quadpacer (vedere capitolo “Caratteristiche”).
6 Spazzolate ciascuna sezione per 30 secondi
per un tempo totale di 2 minuti. Iniziate dalla
prima sezione (parte superiore esterna) e
proseguite con la seconda (parte superiore
interna). Passate quindi alla terza sezione (parte
inferiore esterna) e infine alla quarta (parte
inferiore interna).
Italiano 91
7 Al termine del ciclo di pulizia, potete dedicare
alcuni secondi alla superficie orizzontale dei
denti e alle zone macchiate. Potete inoltre
spazzolare la lingua con lo spazzolino acceso o
spento, a seconda delle vostre preferenze.
Sonicare può essere utilizzato su:
-- Apparecchi dentali (le testine si consumano più
rapidamente)
-- Impianti odontoiatrici (otturazioni, corone,
coperture)
Nota: potete spegnere/accendere lo spazzolino in
qualunque momento; è sufficiente tenere premuto il
pulsante on/off per 2 secondi.
Istruzioni d’uso in modalità pulizia e
sbiancamento
La modalità pulizia e sbiancamento combina
2 minuti della modalità pulizia per una pulizia
completa della bocca, con ulteriori 30 secondi
di modalità sbiancamento per concentrarsi sui
denti anteriori.
1 Per i primi 2 minuti, attenetevi alle istruzioni
delle operazioni da 1 a 6 sopra descritte.
2 Dopo i primi 2 minuti in modalità pulizia,
la modalità sbiancamento inizia con una
variazione nel suono e nel movimento della
testina. A questo punto, cominciate a spazzolare
i denti superiori anteriori per 15 secondi.
3 La necessità di variare l’operazione sarà
segnalata da un bip e una pausa: a questo punto
passate ai denti inferiori anteriori per i
15 secondi finali.
92
Italiano
Modalità di utilizzo
Lo spazzolino Sonicare viene avviato
automaticamente nella modalità di pulizia predefinita.
Per selezionare una modalità differente:
1 Premete il pulsante on/off per variare le
modalità.
,, Il LED verde indica la modalità selezionata.
Nota: è possibile passare da una modalità all’altra
soltanto quando lo spazzolino è acceso.
Modalità pulizia
Modalità standard per una pulizia accurata.
Modalità denti sensibili (solo alcuni modelli)
Pulizia delicata ma efficace per denti e gengive
sensibili.
Modalità pulizia e sbiancamento
2 minuti in modalità pulizia e 30 secondi in modalità
sbiancamento per un’azione più decisa sui denti
anteriori maggiormente visibili.
Nota: quando Sonicare viene impiegato per studi clinici,
è necessario selezionare la modalità pulizia predefinita
da 2 minuti. Mentre per studi sullo sbiancamento e la
riduzione delle macchie, è necessario selezionare la
modalità pulizia e sbiancamento. L’impugnatura deve
essere completamente carica e la funzione Easy-start
disattivata.
Italiano 93
Caratteristiche
Easy-start
-- Questo modello Sonicare è dotato della funzione
Easy-start attivata.
-- La funzione Easy-start aumenta leggermente la
potenza per i primi 14 cicli di pulizia per agevolare
la familiarizzazione con l’uso di Sonicare.
Nota: ciascuna delle prime 14 sessioni deve durare
almeno 1 minuto, affinché la funzione Easy-start
(aumento graduale della potenza) la registri e passi
alla fase successiva.
Nota: Quando si seleziona la modalità pulizia e
sbiancamento, la funzione Easy-start è disattivata.
Disattivazione/attivazione della funzione
Easy-start
1 Inserite la testina sul manico.
2 Posizionate il manico sul caricabatterie
collegato alla presa di corrente.
-- Per disattivare la funzione Easy-Start:
Tenete premuto il pulsante on/off per 2 secondi.
Verrà emesso 1 segnale acustico per indicare la
disattivazione della funzione Easy-start.
-- Per attivare la funzione Easy-Start:
Tenete premuto il pulsante on/off per 2 secondi.
Verranno emessi 2 segnali acustici per indicare
l’attivazione della funzione Easy-start.
Nota: si sconsiglia di utilizzare la funzione Easy-start
dopo il periodo iniziale in quanto potrebbe ridurre
l’efficacia dello spazzolino Sonicare nella rimozione
della placca.
94
Italiano
Smartimer
La funzione Smartimer spegne automaticamente
lo spazzolino per indicare che il ciclo di pulizia è
completo.
I dentisti consigliano la pulizia dei denti almeno due
volte al giorno per almeno 2 minuti.
Per interrompere o sospendere la pulizia durante un
ciclo di 2 minuti, tenete premuto il pulsante on/off
per 2 secondi. Premendo nuovamente il pulsante
on/off, il dispositivo Smartimer riprenderà il ciclo da
dove era stato interrotto.
La funzione Smartimer si azzera automaticamente e
avvia un ciclo completo di 2 minuti se:
-- la pulizia viene messa in pausa per 30 secondi o
per un tempo superiore.
-- l’impugnatura viene posizionata sul caricabatterie.
Quadpacer (solo per alcuni modelli)
-- La funzione Quadpacer è un timer a intervalli che
emette un breve segnale acustico e interrompe il
funzionamento per indicare di pulire le 4 sezioni
della bocca in modo preciso e accurato.
-- Utilizzando la modalità pulizia o la modalità denti
sensibili per due minuti, dopo gli intervalli di 30,
60 e 90 secondi viene emesso un breve segnale
acustico e il funzionamento effettua una pausa.
-- Utilizzando la modalità pulizia e sbiancamento,
dopo due minuti in fase pulizia sentirete una
variazione nel suono e nel movimento della
testina. A questo punto, cominciate a spazzolare
i denti superiori anteriori per 15 secondi. Il bip
finale e la successiva pausa di funzionamento
segnalerà il momento di passare ai denti inferiori
per altri 15 secondi.
Italiano 95
Avvolgicavo o igienizzatore con
caricabatterie integrato
1 Se il proprio modello Sonicare include
l’igienizzatore, è possibile utilizzare la modalità
avvolgicavo sulla base dell’igienizzatore per
riporre il cavo in eccesso.
Igienizzazione (solo alcuni modelli)
-- Grazie all’igienizzatore UV, potete pulire la testina
dopo ogni utilizzo.
Scollegate l’igienizzatore, interrompete l’uso
e rivolgetevi al centro assistenza clienti se:
-- La finestrella è rotta o mancante all’interno
dell’igienizzatore.
-- La lampadina a raggi UV rimane accesa
nonostante lo sportello sia aperto.
-- L’igienizzatore emette fumo o odore di bruciato
durante il funzionamento.
Nota: i raggi UV potrebbero essere nocivi per gli occhi
e la pelle.Tenete l’igienizzatore lontano dalla portata
dei bambini.
1 Dopo un ciclo di pulizia, sciacquate la testina
ed eliminate l’acqua in eccesso.
Non posizionate il cappuccio da viaggio sulla
testina durante l’igienizzazione.
2 Inserite un dito nell’apertura dello sportello
sulla parte superiore dell’igienizzatore, quindi
aprite lo sportello stesso.
96
Italiano
3 Posizionate la testina su uno dei 2 ganci
dell’igienizzatore con le setole rivolte verso la
lampadina.
Nota: l’igienizzatore può essere utilizzato solo con
testine Sonicare.
Nota: non pulite le testine Sonicare for Kids
nell’igienizzatore.
4 Inserite la spina nella presa di corrente.
5 Chiudete lo sportello e premete una volta il
pulsante on/off verde per selezionare il ciclo di
pulizia UV.
Nota: potete accendere l’igienizzatore solo quando lo
sportello è ben chiuso.
Nota: L’igienizzatore si arresta quando viene aperto lo
sportello durante il ciclo di igienizzazione.
Nota: il ciclo di igienizzazione dura 10 minuti, trascorsi
i quali l’igienizzatore si spegne automaticamente.
,, L’igienizzatore è in funzione quando la luce blu è
visibile attraverso la finestrella.
,, Una volta concluso il ciclo di igienizzazione,
l’igienizzatore si spegne automaticamente.
Italiano 97
Pulizia
non pulite la testina dello spazzolino, l’impugnatura,
il caricabatterie o l’igienizzatore UV in lavastoviglie.
Impugnatura dello spazzolino
1 Rimuovete la testina e sciacquate le parte
metallica con acqua calda.
Non utilizzate oggetti appuntiti sulla guarnizione
in gomma intorno alla parte metallica onde evitare
danneggiamenti.
2 Passate un panno morbido sull’intera superficie
del manico.
Testina
1 Risciacquate la testina e le setole dopo l’uso.
2 Rimuovete la testina dall’impugnatura e
sciacquate in acqua calda l’attacco della testina
almeno una volta a settimana.
Caricabatterie
1 Scollegate il caricabatterie prima di pulirlo.
2 Passate un panno morbido sull’intera superficie
del caricabatterie.
98
Italiano
Igienizzatore UV (solo alcuni modelli)
non immergete mai l’apparecchio in acqua e non
risciacquatelo sotto l’acqua corrente.
Non pulite l’igienizzatore quando la lampadina UV
è incandescente.
Per la massima efficacia, si consiglia di pulire
l’igienizzatore ogni settimana.
1 Scollegate l’igienizzatore dalla presa di
corrente.
2 Estraete il vassoio antigoccia. Sciacquatelo e
pulitelo con un panno umido.
3 Pulite tutte le superfici interne con un panno
umido.
4 Rimuovete lo schermo protettivo posto dinanzi
alla lampadina UV.
Per rimuovere lo schermo protettivo, afferrate le estremità vicino ai ganci, premetele delicatamente e tirate.
5 Rimuovete la lampadina UV.
Per rimuovere la lampadina, afferratela e estraetela
dal gancio metallico.
6 Pulite lo schermo protettivo e la lampadina UV
con un panno morbido.
7 Reinserite la lampadina UV.
Per reinserire la lampadina, allineate la base della
lampadina con il gancio metallico, quindi esercitare
pressione per inserirla nel gancio.
Italiano 99
8 Reinserite lo schermo protettivo.
Per reinserire lo schermo protettivo, allineate i
fermi su quest’ultimo con le fessure sulla superficie
riflettente in prossimità della lampadina UV. Premete
lo schermo direttamente all’interno delle fessure
dell’igienizzatore.
Conservazione
Se pensate di non utilizzare l’apparecchio per un
lungo periodo, rimuovete il cavo di alimentazione
dalla presa di corrente. Pulite l’apparecchio e
riponetelo in un luogo fresco e asciutto lontano dai
raggi diretti del sole. Potete utilizzare la funzione
avvolgicavo dell’igienizzatore (solo modelli specifici)
per riporre facilmente il cavo.
Potete riporre le testine sui ganci sul retro del
caricabatterie.
Sostituzione
Testina
Per ottenere risultati ottimali, sostituite la testina del
Sonicare ogni 3 mesi.
Utilizzare solo testine di ricambio Philips Sonicare
adatte per questo modello.
Lampadina a raggi UV
Le lampadine a raggi UV di ricambio sono disponibili
presso il Centro Assistenza Clienti Philips del vostro
paese.
100 Italiano
Ordinazione degli accessori
Per acquistare accessori o parti di ricambio, visitate
il sito www.shop.philips.com/service oppure
recatevi presso il vostro rivenditore Philips. Potete
contattare anche il centro assistenza Philips del
vostro paese (per i dettagli di contatto, consultate
l’opuscolo della garanzia internazionale).
Tutela dell’ambiente
-- Per contribuire alla tutela dell’ambiente, non
smaltite l’apparecchio o la lampadina a raggi UV
(che contiene mercurio) con i normali rifiuti
domestici, ma consegnateli a un centro di raccolta
autorizzato per il riciclaggio. In tal modo, potrete
contribuire a mantenere l’ambiente pulito.
-- La batteria ricaricabile integrata dello spazzolino
Sonicare contiene delle sostanze che possono
inquinare l’ambiente. Rimuovete sempre la batteria
prima dello smaltimento e portate l’apparecchio
presso un centro di raccolta ufficiale. Smaltite
la batteria presso un centro di raccolta ufficiale
per le batterie. Se avete difficoltà a rimuovere la
batteria, potete portare l’apparecchio presso un
centro autorizzato Philips. Il personale del centro
rimuoverà la batteria e la smaltirà nel rispetto
dell’ambiente.
Italiano 101
Rimozione della batteria ricaricabile
Questa operazione non è reversibile.
Per rimuovere la batteria ricaricabile, è necessario
un cacciavite a testa piatta (standard). Osservate le
precauzioni di sicurezza di base durante l’esecuzione
della procedura indicata sotto. Proteggete occhi,
mani, dita e la superficie su cui lavorate.
1 Rimuovete lo spazzolino dal caricabatterie,
accendetelo e lasciatelo in funzione fino
all’arresto. Tenete acceso lo spazzolino Sonicare
finché la batteria non sarà completamente
scarica.
2 Inserite un cacciavite a testa piatta (standard)
nella scanalatura sulla base del manico. Ruotate
il cacciavite in senso antiorario per rilasciare il
cappuccio inferiore.
3 Posizionate l’impugnatura su una superficie
solida e colpite leggermente con un martello il
rivestimento a 2,5 cm dal margine inferiore.
4 Tenete l’impugnatura al contrario e premete
la parte metallica per rilasciare i componenti
interni.
5 Inserite il cacciavite sotto il circuito stampato,
accanto ai collegamenti della batteria, e ruotate
il cacciavite per rompere i collegamenti.
Rimuovete il circuito stampato ed estraete la
batteria dal supporto in plastica.
102 Italiano
Garanzia e assistenza
Per assistenza o informazioni, visitate il sito Web
all’indirizzo www.philips.com/support oppure
leggete l’opuscolo della garanzia internazionale.
Limitazioni della garanzia
I seguenti componenti sono esclusi dalla garanzia
internazionale:
-- Testine
-- Danni causati dall’uso di parti di ricambio non
autorizzate.
-- Danni dovuti a un uso improprio, abuso,
trascuratezza, alterazioni o riparazioni non
autorizzate.
-- La normale usura, incluso scheggiature, graffi,
abrasioni, scoloritura o alterazione dei colori.
-- Lampadina a raggi UV
Nederlands 103
Introductie
Gefeliciteerd met uw aankoop en welkom bij Philips!
Als u volledig wilt profiteren van de ondersteuning
die Philips biedt, registreer uw product dan op
www.philips.com/welcome.
Belangrijk
Lees deze gebruiksaanwijzing
zorgvuldig door voordat u het
apparaat gaat gebruiken. Bewaar de
gebruiksaanwijzing om deze zo nodig
later te kunnen raadplegen.
Gevaar
-- Houd de oplader en/of de UV-reiniger
uit de buurt van water. Plaats of bewaar
deze niet in de buurt van of boven een
bad, wasbak, gootsteen enz. Dompel
de oplader en/of de UV-reiniger nooit
in water of een andere vloeistof. Zorg
ervoor dat de oplader en/of de UVreiniger na het schoonmaken helemaal
droog is voordat u deze op het
stopcontact aansluit.
Waarschuwing
-- Het netsnoer kan niet worden
vervangen. Dank de oplader en/of
de UV-reiniger af als het netsnoer
beschadigd is.
104 Nederlands
-- Zorg er voor dat u de oplader en/
of UV-reiniger vervangt door een
oplader en/of UV-reiniger van het
oorspronkelijke type om gevaar te
voorkomen.
-- Gebruik de oplader en/of UV-reiniger
niet buitenshuis of in de buurt van
hete oppervlakken. Gebruik de UVreiniger niet in omgevingen waar
spuitbussen worden gebruikt of
zuurstof wordt toegediend.
-- Gebruik het apparaat niet langer
als het op enige wijze beschadigd
is (opzetborstel, handvat van de
tandenborstel, oplader en/of UVreiniger). Dit apparaat bevat geen
repareerbare onderdelen. Als het
apparaat beschadigd is, neem dan
contact op met het Consumer Care
Centre in uw land (zie hoofdstuk
‘Garantie en ondersteuning’).
-- Dit apparaat kan worden gebruikt
door kinderen vanaf 8 jaar en
door personen met verminderde
lichamelijke, zintuiglijke of geestelijke
capaciteiten of weinig ervaring en
kennis, mits zij toezicht of instructie
hebben ontvangen aangaande veilig
Nederlands 105
gebruik van het apparaat, en zij de
gevaren van het gebruik begrijpen.
Reiniging en onderhoud mogen alleen
door kinderen worden uitgevoerd
die ouder zijn dan 8 en alleen onder
toezicht. Houd het apparaat en het
snoer buiten bereik van kinderen die
jonger zijn dan 8 jaar oud.
-- Kinderen mogen niet met het
apparaat spelen.
-- Gebruik de UV-reiniger niet meer
als de UV-lamp blijft branden als
het deurtje open staat. UV-licht
kan schade aan ogen en huid
veroorzaken. Houd de UV-reiniger
altijd buiten het bereik van kinderen.
Let op
-- Maak de opzetborstel, het handvat,
de oplader, de opladerkap en/of
de UV-reiniger niet schoon in de
vaatwasmachine.
-- Raadpleeg uw tandarts voordat u de
tandenborstel gebruikt als u in de
afgelopen 2 maanden een chirurgische
behandeling aan uw mond of uw
tandvlees hebt ondergaan.
106 Nederlands
-- Neem contact op met uw
tandarts als er na het gebruik
van deze tandenborstel ernstige
tandvleesbloeding optreedt of als het
tandvlees nog steeds gaat bloeden
nadat u het apparaat 1 week hebt
gebruikt. Raadpleeg tevens uw tandarts
als u ongemak of pijn ondervindt
wanneer u de Sonicare gebruikt.
-- De Sonicare-tandenborstel voldoet
aan de veiligheidseisen voor
elektromagnetische apparaten. Als u
een pacemaker of ander geïmplanteerd
apparaat hebt, neem dan contact op
met uw arts of de fabrikant van het
geïmplanteerde apparaat voor u de
tandenborstel gaat gebruiken.
-- Raadpleeg uw arts voordat u de
Sonicare gebruikt als u medische
klachten hebt.
-- Dit apparaat is alleen bedoeld voor
het reinigen van tanden, tandvlees en
de tong. Gebruik het niet voor andere
doeleinden. Gebruik het apparaat niet
langer en neem contact op met uw
arts als u pijn of ongemak ondervindt
tijdens gebruik van het apparaat.
Nederlands 107
-- De Sonicare-tandenborstel is
bedoeld voor thuisgebruik en is
niet bedoeld om door meerdere
personen te worden gebruikt in een
tandartsenpraktijk of een instelling.
-- Gebruik de opzetborstel niet langer
als de borstelharen verbogen of
geknakt zijn. Vervang de opzetborstel
om de 3 maanden of eerder indien er
tekenen van slijtage optreden.
-- Gebruik dit apparaat uitsluitend met
de door de fabrikant aanbevolen
opzetborstels.
-- Als uw tandpasta peroxide dan wel
zuiveringszout of natriumbicarbonaat
bevat (veelvoorkomend in witmakende
tandpasta’s) moet u de opzetborstel
na ieder gebruik grondig schoonmaken
met zeep en water. Hiermee voorkomt
u dat er barsten in het plastic ontstaan.
-- Stop geen voorwerpen in de
luchtopeningen van de UV-reiniger
en voorkom dat deze luchtopeningen
worden geblokkeerd doordat de
UV-reiniger op een zacht oppervlak
is geplaatst of op een plek waar
voorwerpen deze openingen
108 Nederlands
kunnen blokkeren (voorbeelden van
dergelijke voorwerpen: tijdschrift,
tissues en haar).
-- Tijdens de UV-reinigingscyclus en
direct erna is de UV-lamp heet. Raak
de UV-lamp niet aan als deze heet is.
-- Gebruik de UV-reiniger niet zonder
het afdekscherm. Zo voorkomt u
contact met een hete lamp.
-- Als de UV-reiniger 3 opeenvolgende
UV-reinigingscycli is gebruikt (d.w.z.
3 keer achter elkaar), schakel het
apparaat dan ten minste 30 minuten
uit voordat u een volgende UVreinigingscyclus start.
Elektromagnetische velden (EMV)
Dit Philips-apparaat voldoet aan alle toepasbare
richtlijnen en voorschriften met betrekking tot
blootstelling aan elektromagnetische velden.
Nederlands 109
Algemene beschrijving (fig. 1)
1
2
3
4
5
6
7
8
Hygiënisch beschermkapje
Opzetborstel
Handvat met zacht greepgedeelte
Aan/uit-knop
Poetsmodi
Oplaadlampje
-- Luxe oplaadlampje (alleen bepaalde typen)
-- Standaardoplaadlampje (alleen bepaalde
typen)
Reisoplader
UV-reiniger met ingebouwde oplader en
snoerwikkelaar
-- Niet afgebeeld: UV-lamp
-- Niet afgebeeld: lekbakje voor UV-reiniger
-- Niet afgebeeld: afdekscherm voor UV-lamp
Opmerking: De inhoud van de doos kan per type
verschillen
Klaarmaken voor gebruik
De opzetborstel bevestigen
1 Houd de opzetborstel zo vast dat de voorzijde
zich op één lijn bevindt met de voorzijde van
het handvat.
2 Druk de opzetborstel op de metalen aandrijfas
tot deze niet verder kan.
110 Nederlands
Het apparaat opladen
1 Steek de stekker van de oplader in het
stopcontact.
2 Plaats het handvat op de oplader.
,, Het oplaadlampje naast het batterijsymbool
knippert om aan te geven dat de tandenborstel
wordt opgeladen.
Oplaadlampje
Aan het oplaadlampje kunt u zien hoe vol of leeg de
accu is.
Luxe oplaadlampje (alleen bepaalde typen):
-- Groen: 50-100%
-- Knippert groen: 10-49%
-- Knippert geel: minder dan 10%
Standaardoplaadlampje (alleen bepaalde typen):
-- Groen: 50-100%
-- Knippert groen: minder dan 50%
Opmerking: Als de accu van de Sonicare bijna leeg is,
hoort u aan het eind van de poetsbeurt 3 piepjes en
knippert het oplaadlampje gedurende 30 seconden.
Opmerking: Om de accu altijd volledig opgeladen te
houden, plaatst u de Sonicare op de oplader als u deze
niet gebruikt. Het duurt 24 uur om de accu volledig op
te laden.
Nederlands 111
Het apparaat gebruiken
Poetsinstructies
1 Maak de borstelharen nat en doe er een kleine
hoeveelheid tandpasta op.
2 Plaats de borstelharen van de tandenborstel
onder een lichte hoek richting tandvleesrand
tegen de tanden.
3 Druk op de aan/uitknop om de Sonicare in te
schakelen.
4 U krijgt de beste poetsresultaten met de
Sonicare als u slechts lichte druk uitoefent en
niet schrobt. Laat de Sonicare het werk doen.
5 Beweeg de opzetborstel langzaam kleine
stukjes heen en weer over de tanden zodat de
langere haren tussen de tanden komen. Ga de
volledige poetsbeurt zo door.
Opmerking: Om ervoor te zorgen dat u overal even
goed poetst, moet u uw mond in 4 kwadranten
verdelen en de Quadpacer gebruiken (zie hoofdstuk
‘Functies’).
6 Poets elk kwadrant gedurende 30 seconden
om zo een poetsbeurt van 2 minuten
te voltooien. Begin met kwadrant 1 (de
buitenkant van de boventanden) en poets
vervolgens kwadrant 2 (de binnenkant van
de boventanden). Ga door met kwadrant 3
(de buitenkant van de ondertanden) en poets
ten slotte kwadrant 4 (de binnenkant van de
ondertanden).
112 Nederlands
7 Nadat u de poetsbeurt hebt voltooid, kunt u
nog wat extra tijd besteden aan het poetsen
van de kauwvlakken van uw kiezen en plaatsen
waar vlekken voorkomen. U kunt ook uw
tong poetsen met de tandenborstel in- of
uitgeschakeld, afhankelijk van uw voorkeur.
De Sonicare is veilig te gebruiken op:
-- Beugels (opzetborstels slijten sneller als deze voor
een gebit met een beugel worden gebruikt)
-- Tandheelkundige restauraties (vullingen, kronen,
facings)
Opmerking: U kunt de tandenborstel op elk gewenst
moment in- of uitschakelen door de aan/uitknop
2 seconden lang ingedrukt te houden.
Poetsinstructies voor de Clean & Whitemodus
De Clean & White-modus bestaat uit 2 minuten
poetsen van uw volledige gebit in de Clean-modus
plus 30 seconden in de White-modus voor extra
reiniging van de zichtbare voortanden.
1 Poets de eerste 2 minuten zoals wordt
uitgelegd in de voorgaande stappen 1-6.
2 Na 2 minuten in de Clean-modus begint de
White-modus en worden het poetsgeluid en
de poetsbewegingen anders. Dat is voor u het
teken om de boventanden 15 seconden lang te
poetsen.
3 Na het volgende piepje en een onderbreking
poetst u gedurende 15 seconden de
ondertanden.
Nederlands 113
Poetsmodi
De Sonicare start automatisch in de standaard
Clean-modus. Een andere poetsmodus selecteren:
1 Druk op de aan/uitknop om tussen de modi te
schakelen.
,, Het groene lampje geeft aan welke modus is
geselecteerd.
Opmerking: U kunt alleen tussen modi schakelen als de
tandenborstel is ingeschakeld.
Clean-modus
Standaardmodus voor het optimaal reinigen van het
gebit.
Sensitive-modus (alleen bepaald typen)
Modus voor het voorzichtig maar grondig reinigen
van gevoelig tandvlees en gevoelige tanden.
Clean & White-modus
2 minuten in de Clean-modus plus 30 seconden
in de White-modus voor extra reiniging van de
zichtbare voortanden.
Opmerking:Wanneer de Sonicare wordt gebruikt voor
klinisch onderzoek, moet de standaard Clean-modus
van 2 minuten worden gekozen. Bij onderzoeken
naar witmakende tandpasta’s en het verwijderen van
vlekken, moet de Clean & White-modus echter zijn
geselecteerd. Het handvat moet volledig zijn opgeladen
en de Easy-start-functie moet zijn uitgeschakeld.
114 Nederlands
Kenmerken
Easy-start
-- Bij dit Sonicare-model is de Easy-start-functie
standaard ingeschakeld.
-- Tijdens de eerste 14 poetsbeurten voert de Easystart-functie de poetskracht geleidelijk op om u te
laten wennen aan het poetsen met de Sonicare.
Opmerking: De eerste 14 poetsbeurten moeten
allemaal minimaal 1 minuut duren om de Easy-startfunctie goed te laten werken.
Opmerking: Als de Clean & White-modus is
geselecteerd, is de Easy-start-functie niet actief.
Easy-start uitschakelen of inschakelen
1 Bevestig de opzetborstel op het handvat.
2 Plaats het handvat op de op netspanning
aangesloten oplader.
-- Easy-start uitschakelen:
Houd de aan/uitknop 2 seconden ingedrukt. U hoort
1 piepje dat aangeeft dat de Easy-start-functie is
uitgeschakeld.
-- Easy-start inschakelen:
Houd de aan/uitknop 2 seconden ingedrukt. U hoort
2 piepjes die aangeven dat de Easy-start-functie is
ingeschakeld.
Opmerking: Gebruik van de Easy-start-functie na de
eerste gewenningsperiode wordt afgeraden, omdat de
Sonicare hierdoor minder effectief plak zal verwijderen.
Nederlands 115
Smartimer
De Smartimer geeft aan dat de poetsbeurt is
voltooid door de tandenborstel aan het eind van de
poetsbeurt automatisch uit te schakelen.
Tandartsen raden aan om twee keer per dag
minimaal 2 minuten te poetsen.
Als u de poetsbeurt van 2 minuten wilt onderbreken
of wilt stoppen met poetsen, houdt u de aan/uitknop
2 seconden ingedrukt. Als u vervolgens nogmaals
op de aan/uitknop drukt, gaat de Smartimer weer
verder waar hij gestopt was toen u het apparaat
uitschakelde.
De Smartimer wordt automatisch ingesteld op het
begin van de cyclus van 2 minuten als:
-- u de poetsbeurt langer dan 30 seconden
onderbreekt.
-- u het handvat op de oplader plaatst.
Quadpacer (alleen bij bepaalde typen)
-- De Quadpacer is een timer die een kort piepje
laat horen en voor een korte onderbreking van
de poetsbeurt zorgt om u eraan te herinneren elk
van de 4 kwadranten in uw mond even lang en
grondig te poetsen.
-- Als u de Clean-modus of de Sensitive-modus
van twee minuten gebruikt, hoort u na 30, 60
en 90 seconden een kort piepje en worden de
poetsbewegingen onderbroken.
-- Als u de Clean & White-modus gebruikt,
worden na 2 minuten het poetsgeluid en de
poetsbewegingen anders. Dat is voor u het teken
om uw zichtbare boventanden 15 seconden lang
te poetsen. Na het laatste piepje en de laatste
onderbreking, poetst u gedurende 15 seconden
uw zichtbare ondertanden.
116 Nederlands
Snoerwikkelaar van UV-reiniger met
ingebouwde oplader
1 Als uw type Sonicare wordt geleverd met
een UV-reiniger, dan kunt u het overtollige
netsnoer om de snoerwikkelaar in het
onderste deel van de UV-reiniger wikkelen.
UV-reinigen (alleen bepaalde typen)
-- Met de UV-reiniger kunt u uw opzetborstel na
elke poetsbeurt reinigen.
Trek de stekker van de UV-reiniger uit het
stopcontact, gebruik deze niet langer en bel
Consumer Care wanneer:
-- Het venster van de UV-reiniger is beschadigd of
ontbreekt.
-- De UV-lamp blijft branden als het deurtje open
staat.
-- Er rook uit de UV-reiniger komt of de UV-reiniger
een brandlucht verspreid wanneer deze in
werking is.
Opmerking: UV-licht kan schade aan ogen en huid
veroorzaken. Houd de UV-reiniger altijd buiten het
bereik van kinderen.
1 Spoel de opzetborstel na het poetsen schoon
en schud het overtollige water eraf.
Plaats tijdens het UV-reinigen nooit het
beschermkapje op de opzetborstel.
Nederlands 117
2 Plaats uw vinger in de uitsparing van het
deurtje aan de bovenkant van de UV-reiniger
en trek het deurtje open.
3 Plaats de opzetborstel op een van de 2 pinnen
in de UV-reiniger met de borstelharen in de
richting van de lamp.
Opmerking: Gebruik de UV-reiniger alleen voor het
schoonmaken van Sonicare-opzetborstels.
Opmerking: Gebruik de UV-reiniger niet voor het
schoonmaken van Sonicare For Kids-opzetborstels.
4 Steek de stekker in een stopcontact.
5 Sluit het deurtje en druk één keer op de
groene aan/uitknop om de UV-reinigingscyclus
te selecteren.
Opmerking: U kunt de UV-reiniger alleen inschakelen
als het deurtje volledig is gesloten.
Opmerking: De UV-reiniger stopt als u het deurtje
tijdens de reinigingscyclus opent.
Opmerking: De UV-reinigingscyclus duurt 10 minuten,
waarna de UV-reiniger automatisch uitschakelt.
,, De UV-reiniger is in werking wanneer het
blauwe licht door het venster schijnt.
,, Wanneer de reinigingscyclus is voltooid, schakelt
de UV-reiniger automatisch uit.
118 Nederlands
Schoonmaken
Maak de opzetborstel, het handvat, de oplader en
de UV-reiniger niet schoon in de vaatwasmachine.
Handvat van tandenborstel
1 Verwijder de opzetborstel en spoel de metalen
aandrijfas af met warm water.
Gebruik geen scherpe voorwerpen om op de
rubberen afdichting op de metalen aandrijfas te
duwen, omdat dit schade kan veroorzaken.
2 Maak het gehele oppervlak van het handvat
schoon met een vochtige doek.
Opzetborstel
1 Spoel de borstel en de borstelharen na iedere
poetsbeurt onder de kraan af.
2 Verwijder minimaal één keer per week de
opzetborstel van het handvat en spoel het
aansluitpunt van de borstel met warm water
schoon.
Oplader
1 Haal de stekker uit het stopcontact voordat u
de oplader gaat schoonmaken.
2 Maak het oppervlak van de oplader schoon
met een vochtige doek.
Nederlands 119
UV-reiniger (alleen bepaalde typen)
Dompel de UV-reiniger niet in water en spoel het
ook niet af onder de kraan.
Maak de UV-reiniger nooit schoon wanneer de
UV-lamp heet is.
Voor een optimale werking van de UV-reiniger
raden wij u aan deze wekelijks schoon te maken.
1 Haal de stekker van de UV-reiniger uit het
stopcontact.
2 Trek de lekbak recht naar buiten. Spoel de
lekbak af en veeg deze schoon met een
vochtige doek.
3 Maak alle oppervlakken aan de binnenkant
schoon met een vochtige doek.
4 Verwijder het afdekscherm dat zich voor de
UV-lamp bevindt.
U verwijdert het scherm door de randjes naast de
vergrendelingen beet te pakken, zachtjes te knijpen
en het afdekscherm dan naar buiten te trekken.
5 Verwijder de UV-lamp.
Verwijder de lamp door deze vast te pakken en uit
de metalen klem te trekken.
6 Maak het afdekscherm en de UV-lamp schoon
met een vochtige doek.
7 Plaats de UV-lamp terug.
Plaats de lamp terug door de onderkant op gelijke
hoogte te houden met de metalen klem en de lamp
in de klem te drukken.
120 Nederlands
8 Plaats het afdekscherm terug.
Om het afdekscherm terug te plaatsen, houdt u de
pinnen van het scherm op gelijke hoogte met de
openingen in het reflectievlak naast de UV-lamp. Duw
het scherm recht in de openingen van de UV-reiniger.
Opbergen
Gaat u het apparaat langere tijd niet gebruiken, haal
dan de stekker uit het stopcontact. Maak het apparaat
vervolgens schoon en bewaar het op een koele
en droge plaats buiten direct zonlicht. U kunt de
snoerwikkelaar van de UV-reiniger (alleen bepaalde
typen) gebruiken om het netsnoer netjes op te bergen.
U kunt de opzetborstels opbergen door ze op de
pinnen op de achterkant van de oplader te plaatsen.
Vervanging
Opzetborstel
Vervang de Sonicare-opzetborstels om de
3 maanden voor optimale resultaten.
Gebruik alleen originele Philips Sonicareopzetborstels die geschikt zijn voor dit model.
UV-lamp
Vervangende UV-lampen zijn verkrijgbaar via het
Philips Consumer Care Centre in uw land.
Nederlands 121
Accessoires bestellen
Ga naar www.shop.philips.com/service om
accessoires en reserveonderdelen te kopen of ga
naar uw Philips-dealer. U kunt ook contact opnemen
met het Philips Consumer Care Centre in uw land
(zie het ‘worldwide guarantee’-vouwblad voor
contactgegevens).
Milieu
-- Gooi het apparaat en de UV-lamp (de lamp bevat
kwik) aan het einde van de levensduur niet weg
met het normale huisvuil, maar lever ze in op een
door de overheid aangewezen inzamelpunt om
ze te laten recyclen. Op die manier levert u een
bijdrage aan een schonere leefomgeving.
-- De ingebouwde accu van de Sonicare bevat
stoffen die schadelijk kunnen zijn voor het milieu.
Verwijder altijd de accu voordat u het apparaat
afdankt en inlevert op een door de overheid
aangewezen inzamelpunt. Lever de accu in op
een officieel inzamelpunt voor batterijen. Als u
problemen ondervindt bij het verwijderen van
de accu, kunt u met het apparaat ook naar een
Philips-servicecentrum gaan. Medewerkers van
dit centrum verwijderen dan de accu voor u en
zorgen ervoor dat deze op milieuvriendelijke wijze
wordt verwerkt.
122 Nederlands
De accu verwijderen
U kunt de accu niet opnieuw in het apparaat
plaatsen nadat u deze hebt verwijderd.
Om de accu te verwijderen, hebt u een gewone
platte schroevendraaier nodig. Neem de benodigde
veiligheidsmaatregelen wanneer u de handelingen
hieronder uitvoert. Bescherm uw ogen, handen,
vingers en het oppervlak waarop u werkt.
1 Neem de tandenborstel uit de oplader, schakel
de tandenborstel in en laat de tandenborstel
werken totdat deze stopt. Blijf de Sonicare
inschakelen tot de accu volledig leeg is.
2 Steek een gewone platte schroevendraaier
in de sleuf in de onderkant van het handvat.
Draai de schroevendraaier linksom om het
afdekplaatje aan de onderkant te verwijderen.
3 Plaats het handvat op een stevige oppervlak
met de knopjes naar boven en tik voorzichtig
met een hamer op de behuizing op circa
2,5 cm afstand van de onderkant.
4 Houd het handvat ondersteboven en duw het
omlaag op de aandrijfas zodat de onderdelen in
het handvat naar buiten komen.
5 Steek de schroevendraaier onder de printplaat
naast de accuaansluitingen en beweeg de
schroevendraaier heen en weer om de
aansluitingen af te breken.Verwijder de
printplaat en wrik de accu los uit de plastic
houder.
Nederlands 123
Garantie en ondersteuning
Als u informatie of ondersteuning nodig hebt,
bezoek dan www.philips.com/support of lees
het ‘worldwide guarantee’-vouwblad.
Garantiebeperkingen
De volgende zaken vallen niet onder de
voorwaarden van de internationale garantie:
-- Opzetborstels
-- Beschadiging veroorzaakt door gebruik van
ongeautoriseerde reserveonderdelen.
-- Schade als gevolg van verkeerd gebruik, misbruik,
verwaarlozing, wijzigingen of ongeautoriseerde
reparaties.
-- Gewone slijtage, inclusief kerfjes, krasjes,
schuurplekken, verkleuring of verbleking.
-- UV-lamp
124 Português
Introdução
Parabéns pela sua compra e seja bem-vindo à
Philips! Para tirar todo o partido da assistência
fornecida pela Philips, registe o seu produto em
www.philips.com/welcome.
Importante
Leia cuidadosamente este manual do
utilizador antes de utilizar o aparelho e
guarde-o para consultas futuras.
Perigo
-- Mantenha o carregador e o
Higienizador UV afastados da água. Não
os coloque nem os guarde sobre ou
próximo de banheiras, lavatórios, lavaloiças, etc. com água. Nunca mergulhe
o carregador e/ou o Higienizador UV
em água ou em qualquer outro líquido.
Depois da limpeza, certifique-se de que
o carregador e o Higienizador UV estão
completamente secos antes de os ligar
à corrente.
Aviso
-- O fio de alimentação não pode ser
substituído. Se o fio de alimentação
for danificado, desfaça-se do
carregador e/ou do Higienizador UV.
Português 125
-- Solicite sempre a substituição do
carregador e/ou do Higienizador UV
por equipamentos novos para evitar
perigos.
-- Não utilize o carregador e/ou o
higienizador no exterior nem próximo
de superfícies aquecidas. Não utilize
o higienizador em locais onde sejam
utilizados aerossóis (spray) nem onde
seja administrado oxigénio.
-- Se o aparelho estiver danificado de
alguma forma (cabeça da escova, pega
da escova, carregador e/ou higienizador),
interrompa a sua utilização. Este
aparelho não contém peças que possam
ser reparadas. Se o aparelho estiver
danificado, contacte o Centro de Apoio
ao Cliente do seu país (consulte o
capítulo “Garantia e assistência”).
-- Este aparelho pode ser utilizado
por crianças com idade igual ou
superior a 8 anos e por pessoas
com capacidades físicas, sensoriais ou
mentais reduzidas, ou com falta de
experiência e conhecimento, caso
sejam supervisionadas ou recebam
instruções relativas à utilização segura
do aparelho e se forem alertadas para
126 Português
os perigos envolvidos. A limpeza e a
manutenção do utilizador não podem
ser efectuadas por crianças, a não ser
que tenham idade superior a 8 anos
e sejam supervisionadas. Mantenha o
aparelho e o cabo fora do alcance de
crianças com idade inferior a 8 anos.
-- As crianças não podem brincar com
o aparelho.
-- Deixe de utilizar o Higienizador UV
se a lâmpada UV permanecer acesa
quando a porta está aberta. A luz UV
pode ser prejudicial aos olhos e à pele.
Mantenha sempre o Higienizador UV
fora do alcance de crianças.
Cuidado
-- Não lave a cabeça da escova, a pega, o
carregador, a tampa do carregador e o
Higienizador na máquina de lavar louça.
-- Se tiver sido submetido a uma cirurgia
da boca ou das gengivas nos últimos
2 meses, consulte o seu dentista antes
de utilizar a escova de dentes.
-- Consulte o seu dentista se sangrar
excessivamente depois de utilizar
esta escova de dentes ou se as
hemorragias persistirem após
1 semana de utilização. Consulte o seu
Português 127
dentista também se sentir desconforto
ou dor quando utiliza a Sonicare.
-- A escova Sonicare cumpre todas
as normas de segurança para
dispositivos electromagnéticos.
Se tiver um pacemaker ou outro
dispositivo implantado, consulte o seu
médico ou o fabricante do dispositivo
do dispositivo antes da utilização.
-- Se tiver preocupações médicas,
consulte o seu médico antes de
utilizar a Sonicare.
-- Este aparelho destina-se unicamente
à lavagem dos dentes, gengivas e
língua. Não o utilize para nenhum
outro fim. Interrompa a utilização do
aparelho e contacte o seu médico
caso sinta algum desconforto ou dor.
-- A escova Sonicare é um dispositivo
de uso pessoal, pelo que não deve
ser usada em vários pacientes em
consultórios ou clínicas dentárias.
-- Interrompa a utilização da cabeça
da escova se esta apresentar cerdas
esmagadas ou inclinadas. Substitua
a cabeça da escova de três em três
meses, ou mais cedo no caso de
existirem sinais de desgaste.
128 Português
-- Não utilize outras cabeças a não ser as
que são recomendadas pelo fabricante.
-- Se a sua pasta de dentes contiver
peróxido ou bicarbonato de sódio
(comum nas pastas de dentes
branqueadoras), limpe cuidadosamente
a cabeça da escova com sabão e água
após cada utilização. Previne assim
possíveis fendas no plástico.
-- Não insira objectos nas aberturas de
ar do higienizador nem bloqueie estas
aberturas colocando-o numa superfície
macia ou numa posição ou localização
onde haja objectos a bloquear estas
aberturas (exemplos de objectos:
revista, lenços de papel e cabelo).
-- A lâmpada UV está quente durante
e imediatamente após o ciclo do
Higienizador UV. Não toque na lâmpada
UV enquanto esta estiver quente.
-- Não trabalhe com o purificador sem a
estrutura de protecção colocada para
evitar o contacto com lâmpadas quentes.
-- Se o higienizador for utilizado
em 3 ciclos de limpeza por UV
consecutivos (ou seja, 3 vezes
seguidas), desligue-o durante, no
mínimo, 30 minutos antes de iniciar
outro ciclo de limpeza por UV.
Português 129
Campos electromagnéticos (CEM)
Este aparelho Philips cumpre todas as normas e
regulamentos aplicáveis relativos à exposição a
campos electromagnéticos.
Descrição geral (fig. 1)
1
2
3
4
5
6
7
8
Tampa de protecção
Cabeça da escova
Pega com toque suave
Botão ligar/desligar
Modos de escovagem
Indicador de carga
-- Indicador de carga Deluxe (apenas em
modelos específicos)
-- Indicador de carga padrão (apenas em
modelos específicos)
Carregador de viagem
Higienizador UV com carregador integrado e
enrolador do fio
-- Não ilustrado: Lâmpada UV
-- Não ilustrado: Tabuleiro do Higienizador UV
-- Não ilustrado: Estrutura de protecção da
lâmpada UV
Nota: Os conteúdos da caixa variam com base no tipo
de escova adquirido
Preparar para a utilização
Colocação da cabeça da escova
1 Alinhe a parte da frente da cabeça da escova
com a parte da frente da pega.
2 Pressione firmemente a cabeça da escova
contra a ponta metálica até a encaixar.
130 Português
Carregar o aparelho
1 Introduza a ficha do carregador numa tomada
eléctrica.
2 Coloque a pega no carregador.
,, O indicador de carga da bateria (junto ao
símbolo da bateria) apresenta-se intermitente
para indicar que a escova de dentes está em
carregamento.
Indicador de carga da bateria
O indicador de carga da bateria indica a carga
restante da bateria (valor aproximado).
Indicador de carga Deluxe (apenas em modelos
específicos)
-- Verde: 50-100%
-- Verde intermitente: 10-49%
-- Amarelo intermitente: inferior a 10%
Indicador de carga padrão (apenas em modelos
específicos)
-- Verde: 50-100%
-- Verde intermitente: inferior a 50%
Nota: Quando a carga da bateria da Sonicare estiver
fraca, irá ouvir 3 sinais sonoros depois de concluído o
ciclo de escovagem; o indicador de carga da bateria
apresentar-se-á intermitente durante 30 segundos.
Nota: Para manter a bateria totalmente carregada,
pode manter a Sonicare no carregador quando
esta não estiver a ser utilizada. Demora 24 horas a
carregar completamente a bateria.
Português 131
Utilizar o aparelho
Instruções de escovagem
1 Molhe as cerdas e aplique uma pequena
quantidade de pasta dos dentes.
2 Coloque as cerdas contra os dentes
ligeiramente inclinadas em relação à linha das
gengivas.
3 Prima uma vez o botão ligar/desligar para ligar
a Sonicare.
4 Aplique uma ligeira pressão para maximizar a
eficácia da Sonicare e deixe que a escova faça
as escovagens por si. Não esfregue.
5 Desloque suavemente a cabeça da escova pelos
dentes num pequeno movimento para trás e
para a frente, de modo a que as cerdas mais
compridas alcancem os espaços interdentários.
Continue este movimento durante o ciclo de
escovagem.
Nota: Para se certificar de que escova toda a boca
uniformemente, divida a boca em 4 secções, utilizando
a função Quadpacer (consulte o capítulo “Funções”).
6 Escove cada secção durante 30 segundos para
um período de escovagem total de 2 minutos.
Comece com a secção 1 (dentes superiores
exteriores) e, em seguida, escove a secção 2
(dentes superiores interiores). Continue com a
secção 3 (dentes inferiores exteriores) e, por
fim, a secção 4 (dentes inferiores interiores).
132 Português
7 Depois de ter completado o ciclo de
escovagem, pode passar mais tempo a escovar
a superfície dos dentes e as áreas onde
ocorrem manchas. Também pode escovar a
língua, com a escova ligada ou desligada, como
preferir.
Pode utilizar a Sonicare de forma segura em:
-- Aparelhos dentários (as cabeças da escova
desgastam-se mais depressa quando utilizadas em
aparelhos dentários)
-- Restaurações dentárias (chumbos, coroas,
revestimentos)
Nota: Pode ligar ou desligar a escova de dentes a
qualquer altura premindo e mantendo premido o botão
de ligar/desligar durante 2 segundos.
Instruções para o modo de escovagem
Clean and White
O modo Clean and White combina 2 minutos no
modo Clean para uma limpeza geral da boca e
30 segundos adicionais no modo White para se
concentrar nos dentes da frente visíveis.
1 Escove nos primeiros dois minutos, seguindo
os passos 1-6 acima descritos.
2 Depois de 2 minutos no modo Clean, uma
alteração no som e no movimento de
escovagem indica o início do modo White. Este
é o sinal para iniciar a escovagem dos dentes
superiores da frente durante 15 segundos.
3 Quando surgir o próximo sinal sonoro e uma
pausa, passe para os dentes inferiores da frente
durante os últimos 15 segundos de escovagem.
Português 133
Modos de escovagem
A Sonicare inicia automaticamente o modo
Clean predefinido. Para seleccionar um modo de
escovagem diferente:
1 Prima o botão de ligar/desligar para alternar
entre modos.
,, O LED verde indica o modo seleccionado.
Nota: É possível alternar entre modos apenas quando
a escova de dentes está ligada.
Modo Clean
Modo predefinido para uma limpeza superior dos
dentes.
Modo Sensitive (apenas em modelos
específicos)
Limpeza suave mas profunda para dentes e gengivas
sensíveis.
Modo Clean and White
2 minutos no modo Clean, seguidos de 30 segundos
adicionais no modo White, para se concentrar nos
dentes da frente visíveis.
Nota: Quando a Sonicare é usada em ensaios clínicos,
deve seleccionar-se o modo Clean de 2 minutos
predefinido. Contudo, em estudos de branqueamento/
redução de manchas, deve seleccionar-se o modo Clean
and White. A pega deve encontrar-se completamente
carregada e a funcionalidade Easy-start deverá estar
desactivada.
134 Português
Funções
Easy-start
-- Este modelo Sonicare é fornecido com a função
Easy-start activada.
-- A funcionalidade Easy-start aumenta gradualmente
a potência durante as 14 primeiras escovagens
para que possa habituar-se à escovagem da
Sonicare.
Nota: Cada uma das primeiras 14 escovagens
deve demorar, no mínimo, 1 minuto para passar
correctamente para o ciclo de arranque do Easy-start.
Nota: Quando é seleccionado o modo Clean and White,
a funcionalidade Easy-start encontra-se desactivada.
Activação ou desactivação da função Easystart
1 Coloque a cabeça da escova na pega.
2 Coloque a pega no carregador ligado à
corrente.
-- Para desactivar a função Easy-start:
Prima e mantenha premido o botão de ligar/desligar
durante 2 segundos. Irá ouvir 1 sinal sonoro,
indicando que a função Easy-start foi desactivada.
-- Para activar a função Easy-start:
Prima e mantenha premido o botão de ligar/desligar
durante 2 segundos. Irá ouvir 2 sinais sonoros,
indicando que a função Easy-start foi activada.
Nota: Não se aconselha a utilização da função Easystart para além do período de arranque inicial porque
isso reduz a eficácia da Sonicare na remoção da placa
bacteriana.
Português 135
Smartimer
O Smartimer indica que o ciclo de escovagem está
completo, desligando automaticamente a escova de
dentes no final do ciclo de escovagem.
~Os dentistas recomendam pelo menos duas
escovagens de 2 minutos por dia.
Se pretende pausar ou parar a escovagem durante
o ciclo de 2 minutos, prima e mantenha premido o
botão de ligar/desligar durante 2 segundos. Prima
novamente o botão ligar/desligar e o Smartimer
retoma a partir do ponto onde interrompeu.
O Smartimer é automaticamente reiniciado para o
início de um ciclo de 2 minutos se:
-- a escovagem for interrompida durante
30 segundos ou mais.
-- a pega for colocada no carregador.
Quadpacer (apenas em modelos específicos)
-- O Quadpacer é um temporizador de intervalo
que inclui um breve sinal sonoro e uma pausa
para o relembrar de que deve escovar as
4 secções da boca de forma uniforme e cuidadosa.
-- Ao usar os modos Clean ou Sensitive de
2 minutos, irá ouvir um breve sinal sonoro e sentir
uma pausa na escovagem nos intervalos de 30,
60 e 90 segundos.
-- Após 2 minutos de utilização no modo Clean and
White, ouve e sente uma alteração no som e
movimento da cabeça da escova. Mova a cabeça
da escova para os dentes superiores da frente
visíveis e escove-os durante 15 segundos. No
último sinal sonoro e última pausa, mova para os
dentes inferiores da frente visíveis e escove-os
durante 15 segundos.
136 Português
Enrolador de fio no higienizador com
carregador integrado
1 Se o seu tipo de escova Sonicare incluir o
higienizador, pode utilizar a funcionalidade
do enrolador de fio na parte inferior do
higienizador para armazenar fio em excesso.
Higienizador (apenas modelos específicos)
-- Com o higienizador UV pode limpar a cabeça da
escova após cada utilização.
Desligue o higienizador, pare a sua utilização
e ligue para o Apoio ao Cliente, se:
-- a janela estiver partida ou não se encontrar no
higienizador.
-- a lâmpada UV permanecer acesa quando a porta
está aberta.
-- o higienizador libertar fumo ou um cheiro a
queimado enquanto está em funcionamento.
Nota: A luz UV pode ser nociva para o olho e a pele
humana. Mantenha higienizador sempre fora do
alcance de crianças.
1 Depois da escovagem, enxagúe a cabeça da
escova e sacuda o excesso de água.
Não coloque a tampa protectora na cabeça da
escova durante o ciclo do Higienizador UV.
2 Coloque o dedo na reentrância da porta
na parte superior do higienizador e puxe para
abrir a porta.
Português 137
3 Coloque a cabeça da escova num dos
2 encaixes no higienizador com as cerdas
voltadas para a lâmpada.
Nota: Limpe apenas cabeças da escova de encaixe
Sonicare no higienizador.
Nota: Não limpe cabeças da escova Sonicare for Kids
no higienizador.
4 Introduza a ficha numa tomada eléctrica.
5 Feche a porta e prima o botão verde de ligar/
desligar uma vez para seleccionar o ciclo de
limpeza UV.
Nota: Só pode ligar o higienizador se a porta estiver
fechada correctamente.
Nota: O higienizador pára caso abra a porta durante o
ciclo de desinfecção.
Nota: O ciclo do Higienizador UV funciona durante
10 minutos, desligando-se depois automaticamente.
,, O higienizador está em funcionamento quando a
luz azul brilha através da janela.
,, Quando o ciclo de desinfecção estiver concluído,
o higienizador desliga-se automaticamente.
138 Português
Limpeza
Não lave a cabeça da escova, a pega, o carregador
nem higienizador UV na máquina de lavar loiça.
Pega da escova de dentes
1 Retire a cabeça da escova e enxagúe a
extremidade metálica com água morna.
Não pressione o vedante de borracha na
extremidade metálica com objectos afiados pois
pode danificá-lo.
2 Utilize um pano húmido para limpar toda a
superfície da pega.
Cabeça da escova
1 Enxagúe a cabeça da escova e as cerdas após
cada utilização.
2 Retire a cabeça da escova da pega e enxagúe
a ligação da cabeça da escova pelo menos uma
vez por semana com água morna.
Carregador
1 Desligue a ficha do carregador antes de
proceder à limpeza.
2 Utilize um pano húmido para limpar a
superfície do carregador.
Português 139
Higienizador UV (apenas modelos
específicos)
Não mergulhe o higienizador em água, nem o
enxagúe em água corrente.
Não limpe o Higienizador UV enquanto a lâmpada
UV estiver quente.
Para obter a melhor eficácia, recomendamos a
limpeza semanal do higienizador.
1 Desligue o Higienizador UV da corrente.
2 Puxe o tabuleiro de recolha para fora. Passe-o
por água e limpe-o com um pano húmido.
3 Limpe todas as superfícies interiores com um
pano húmido.
4 Retire a estrutura de protecção em frente à
lâmpada UV.
Para remover a estrutura, segure nas extremidades
junto aos encaixes, aperte suavemente e puxe a
estrutura de protecção para fora.
5 Retire a lâmpada UV.
Para retirar a lâmpada, agarre-a e puxe-a para fora
da abraçadeira metálica.
6 Limpe a estrutura de protecção e a lâmpada
UV com um pano húmido.
7 Volte a colocar a lâmpada UV.
Para voltar a colocar a lâmpada, alinhe a base da
lâmpada com a abraçadeira metálica e empurre-a
para o sítio.
140 Português
8 Volte a colocar a estrutura de protecção.
Para voltar a inserir a estrutura, alinhe os encaixes
da mesma com as ranhuras na superfície reflectora
junto à lâmpada UV. Empurre a estrutura
directamente para dentro das ranhuras no
higienizador.
Arrumação
Se não pretender utilizar o aparelho por um longo
período de tempo, retire a ficha de alimentação
da tomada eléctrica. Em seguida, limpe o aparelho
e guarde-o num local fresco e seco, afastado da
luz directa do sol. Pode utilizar a funcionalidade do
enrolador do fio no higienizador (apenas modelos
específicos) para guardar devidamente o fio de
alimentação.
Pode guardar as cabeças da escova nos encaixes na
parte de trás do carregador.
Substituição
Cabeça da escova
Substitua as cabeças da escova Sonicare de 3 em 3
meses para obter os melhores resultados.
Utilize apenas cabeças de substituição originais
Philips Sonicare adequadas a este modelo.
Lâmpada UV
As lâmpadas UV de substituição estão disponíveis
através do Centro de Apoio ao Cliente da Philips no
seu país.
Português 141
Encomendar acessórios
Para comprar acessórios ou peças sobressalentes,
visite www.shop.philips.com/service ou vá ao
seu revendedor Philips. Também pode contactar o
Centro de Apoio ao Cliente da Philips no seu país
(consulte os detalhes de contacto no folheto da
garantia mundial).
Meio ambiente
-- Não deite fora o aparelho ou a lâmpada UV
(a lâmpada contém mercúrio) junto com o
lixo doméstico normal no final da sua vida útil;
entregue-o num ponto de recolha oficial para
reciclagem. Ao fazê-lo, ajuda a preservar o
ambiente.
-- A bateria recarregável incorporada da Sonicare
contém substâncias que podem poluir o
ambiente. Retire sempre a bateria antes de
eliminar o aparelho, entregando-o num ponto de
recolha oficial. Elimine a bateria num ponto de
recolha oficial para baterias. Se tiver problemas
na remoção da bateria, pode também levar o
aparelho a um centro de assistência Philips, que
poderá remover a bateria por si e eliminá-la de
forma segura para o ambiente.
142 Português
Retirar a bateria recarregável
Este processo é irreversível.
Para retirar a bateria recarregável, é necessária
uma chave de fendas plana (normal). Respeite as
precauções básicas de segurança quando seguir o
procedimento descrito em baixo. Proteja os olhos, as
mãos, os dedos e a sua superfície de trabalho.
1 Retire a escova de dentes do carregador, liguea e deixe-a funcionar até parar. Continue a ligar
a Sonicare até esgotar por completo a bateria.
2 Introduza uma chave de parafusos plana
(normal) na ranhura localizada na parte
inferior da pega. Rode a chave de parafusos
para a esquerda para libertar a tampa da parte
inferior.
3 Coloque a pega numa superfície sólida
com os botões voltados para cima e toque
ligeiramente na estrutura com um martelo, a
2,5 cm do rebordo inferior.
4 Mantenha a pega virada ao contrário e
pressione o eixo para libertar os componentes
internos da pega.
5 Introduza a chave de parafusos por debaixo
da placa do circuito, próximo das ligações da
bateria, e rode a chave de forma a quebrar
essas ligações. Retire a placa do circuito e
levante a bateria do compartimento de plástico.
Português 143
Garantia e assistência
Se precisar de informações ou assistência, visite
www.philips.com/support ou leia o folheto da
garantia mundial em separado.
Restrições à garantia
As seguintes situações não estão abrangidas pelos
regulamentos da garantia internacional:
-- Cabeças da escova
-- Danos causados pela utilização de peças de
substituição não autorizadas.
-- Danos causados por utilização indevida, abuso,
negligência, alterações ou reparação não
autorizada.
-- Desgaste normal, incluindo falhas, riscos, erosão,
descoloração ou desvanecimento.
-- Lâmpada UV
www.philips.com/Sonicare
©2013 Koninklijke Philips Electronics NV (KPENV).
All rights reserved. PHILIPS and Philips shield are
registered trademarks of KPENV.
Sonicare and the Sonicare logo are trademarks
of Philips Oral Healthcare, Inc. and KPENV.
Protected by U.S. and international patents.
Other patents pending. Reg. U.S. Pat. & Tm. Off.
4235.020.7315.1