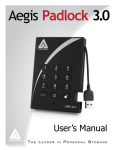
Download Apricorn Aegis Padlock 120GB
Transcript
Aegis Padlock SSD
User
Guide
Remember to save your PIN in a safe
place. If lost or forgotten, there is no way
to access the drive.
If you are having difficulty please refer
to the complete user’s manual which is
loaded on your Aegis Padlock drive and is
also available at Apricorn’s website at:
www.apricorn.com/support
Table of Contents
About the Aegis Padlock SSD 4
4
Aegis Padlock SSD - Connections 5
5
5
6
Aegis Padlock Keypad Panel 7
First Time Use 7
Locking the Drive 8
Unlocking the Drive 8
Admin Mode 8
Changing the Admin PIN 8
Adding a new User PIN 9
Deleting the User PINs 9
Changing the User PIN 9
Package contents Before you begin Connecting the Aegis Padlock Connecting with the USB Y-Cable Setting the Unattended Auto Lock Feature 10
Aegis Padlock Brute Force Protection 11
Setting a Self-Destruct PIN 12
Performing a Complete Re-Set 12
13
Hibernating or Logging off from the OS
14
Aegis Padlock Setup for Mac OS 15
Troubleshooting 16
Technical Support 18
18
Initializing and formatting the Aegis Padlock after a reset Warranty and RMA information Copyright © Apricorn, Inc 2013. All rights reserved.
Windows is a registered trademark of Microsoft Corporation.
All other trademarks and copyrights referred to are the property of their
respective owners.
Distribution of modified versions of this document is prohibited without
the explicit permission of the copyright holder.
Distribution of the work or derivative work in any standard (paper) book
form for commercial purposes is prohibited unless prior permission is
obtained from the copyright holder.
DOCUMENTATION IS PROVIDED AS IS AND ALL EXPRESS OR
IMPLIED CONDITIONS, REPRESENTATIONS AND WARRANTIES,
INCLUDING ANY IMPLIED WARRANTY OF MERCHANTABILITY,
FITNESS FOR A PARTICULAR PURPOSE OR NON-INFRINGEMENT,
ARE DISCLAIMED, EXCEPT TO THE EXTENT THAT SUCH
DISCLAIMERS ARE HELD TO BE LEGALLY INVALID
About the Aegis Padlock SSD
Looking for the highest level of
security for your data while utilizing
the fastest USB 3.0 speeds?
Sporting an easy-to-use keypad
design that is impervious to dust
and grit, with a software free setup
and operation, the Aegis Padlock
SSD Edition enables you to access
the drive simply and easily with
your own unique PIN. And with
a super fast integrated USB 3.0
cable, you can access your data
faster than ever before.
Package contents
•
•
•
•
Aegis Padlock SSD with
integrated USB 3.0 cable
Travel pouch
USB Y-cable
Quick Start Guide
Aegis Padlock SSD
Quick Start Guide
3
1
2
3
2
1
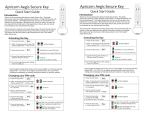
UNLOCK button
LOCK button
LED Indicator lights
When you first plug in the SSD
Padlock, the unit will do a self-test
to verify all security components
are working properly. The LEDs
will go through 3 test stages
RED, GREEN, and BLUE. This
will be followed by three GREEN
flashes on a successful test. Any
test failure will leave the unit in an
interoperable state with the RED
LED flashing.
First Time Use
Before the Padlock can be used, the Admin PIN MUST be set. The LED will display
Solid BLUE and Solid GREEN to indicate the Padlock is waiting for a PIN to be set.
To Set-up the Admin PIN:
1.
Press UNLOCK + 9. The LED will change to Solid BLUE and Blinking GREEN.
2.
Enter the new Admin PIN and press UNLOCK key. If accepted the GREEN LED
will flash for 3 short blinks, then return to Solid BLUE and Blinking GREEN.
3.
Re-enter the Admin PIN and press the UNLOCK key. If accepted the GREEN
LED will be Solid for 3 seconds.
4.
LED will then turn BLUE and remain in Admin mode for 30 seconds or if the
LOCK key is pressed, will return the drive to a standby state.
5.
The Admin PIN is now set and will allow access to the drive or the Admin features.
6.
To UNLOCK the drive, enter the new PIN and press UNLOCK.
*Note:
PINs must be a minimum length of 7 maximum 16 digits.
Cannot contain all consecutive numbers (2345678 or 9876543)
Cannot contain all same number (1111111)
4
Aegis Padlock SSD - Connections
Before you begin
Be sure to review the following information before you begin to use the
Aegis Padlock.
Attention: Use only the included cables with your Aegis Padlock.
You might damage the drive if you use a cable not included with the
Aegis Padlock.
The Aegis Padlock is designed for portable use without an AC power
adapter and in most cases will be able to power on a single USB port.
In the event that the Aegis Padlock is unable to power on a single USB
connection, use the included USB Y-cable.
Connecting the Aegis Padlock
1. Attach the integrated USB cable of the Aegis Padlock drive to an
available USB port on your computer, as shown below.
NOTE: While the Aegis Padlock will work with any USB port, for the
fastest speeds connect to a USB 3.0 port on your computer.
2. At least one of the Aegis Padlock LEDs should turn on, indicating that
the Aegis Padlock is receiving power.
If none of the LEDs turn
on or the drive locks when
writing to the disk, use the
included USB Y-cable.
Refer to directions on the
following page
5
Connecting with the USB Y-Cable
If none of the Aegis Padlock LEDs power on a single USB connection, use
the included USB Y-cable.
1. Attach the Aegis Padlock’s integrated USB cable to the female connector
of the USB Y-cable.
2. Connect the two male USB connectors to two available USB ports on
your computer.
3. At least one of the Aegis Padlock LEDs should turn on, indicating that the
Aegis Padlock is powered.
6
Aegis Padlock Keypad Panel
3
1
UNLOCK button
2
LOCK button
3
2
1
LED Indicator lights
When you first plug in the SSD
Padlock, the unit will do a self-test
to verify all security components
are working properly. The LEDs
will go through 3 test stages
RED, GREEN, and BLUE. This
will be followed by three GREEN
flashes on a successful test. Any
test failure will leave the unit in an
interoperable state with the RED
LED flashing.
First Time Use
Before the Padlock can be used, the Admin PIN MUST be set. The LED will display
Solid BLUE and Solid GREEN to indicate the Padlock is waiting for a PIN to be set.
To Set-up the Admin PIN:
1.
Press UNLOCK + 9. The LED will change to Solid BLUE and Blinking GREEN.
2.
Enter the new Admin PIN and press UNLOCK key. If accepted the GREEN LED
will flash for 3 short blinks, then return to Solid BLUE and Blinking GREEN.
3.
Re-enter the Admin PIN and press the UNLOCK key. If accepted the GREEN
LED will be Solid for 3 seconds.
4.
LED will then turn BLUE and remain in Admin mode for 30 seconds or if the
LOCK key is pressed, will return the drive to a standby state.
5.
The Admin PIN is now set and will allow access to the drive or the Admin features.
6.
To UNLOCK the drive, exit Admin by pressing the LOCK button. Then enter the
new PIN and press UNLOCK.
*Note: PINs must be a minimum length of 7 maximum 16 digits.
Cannot contain all consecutive numbers (2345678 or 9876543)
Cannot contain all same number (1111111)
7
Locking the Drive
To lock the drive, press the LOCK button.
If data is still being written to the drive, the Padlock will wait until all data has been written to
the drive and then it will lock automatically.
Note: The Aegis Padlock will not be recognized by the operating system in the standby state.
Unlocking the Drive
To unlock the drive:
Enter either a User PIN or Admin PIN and press the UNLOCK button.
Note: The Aegis Padlock cannot be recognized by the operating system in the standby state.
Admin Mode
To enter the Admin Mode, do the following:
1.
Attach the USB cable to an available USB port on your computer. The Padlock goes
into the Standby Mode after the self-check, and the LED turns RED.
2.
Press and hold UNLOCK + 0 for five seconds until the LED flashes RED.
This indicates that you can enter the Admin PIN.
3.
Enter the Admin PIN and press the UNLOCK button.
4.
The drive is in Admin Mode when the LED has changed to BLUE.
Changing the Admin PIN
You can change the Admin PIN by doing the following:
1.
Enter Admin Mode (UNLOCK + 0 for five seconds. Enter Admin PIN and press UNLOCK).
2.
Press and hold UNLOCK + 9 until the LED turns to Solid BLUE and Blinking GREEN.
3.
Enter the new PIN and press UNLOCK (The PIN must be a minimum of 7 digits and a
maximum of 16 digits). The LED flashes GREEN three times, then returns to Solid BLUE
and Blinking GREEN.
4.
Re-enter the new Admin PIN and press UNLOCK. The LED stays solid GREEN for
two seconds and then solid BLUE indicating that the Admin PIN has been changed
successfully.
8
Adding a new User PIN
1.
Enter the Admin Mode (UNLOCK + 0 for five seconds. Enter Admin PIN and press UNLOCK).
2.
Press and hold UNLOCK + 1 until the LED turns to Solid BLUE and Blinking GREEN.
3.
Enter a User PIN and press UNLOCK (a minimum of 7 digits and a maximum of 16 digits).
The LED flashes GREEN three times, then returns to Solid BLUE and Blinking GREEN.
4.
Re-enter the new User PIN and press UNLOCK. If the LED stays solid GREEN for two
seconds and then solid BLUE, the User PIN was successfully added.
Deleting the User PINs
You can delete ALL User PINs by doing the following:
1.
Enter the Admin Mode (UNLOCK + 0 for five seconds. Enter Admin PIN and press UNLOCK).
2.
Press and hold 7 + 8 + UNLOCK for five seconds until the LED flashes GREEN three
times and then changes to BLUE / RED alternating.
3.
Press and hold 7 + 8 + UNLOCK a second time for five seconds until the LED goes on
solid GREEN for two seconds and then back to solid BLUE, this indicates that the User
PINs were deleted successfully.
Changing the User PIN
You can change the User PIN by doing the following:
1.
Unlock the drive by inputting your User PIN and pressing the UNLOCK button.
2.
Press and hold UNLOCK + 1 until the LED flashes RED.
3.
Enter your current PIN and press UNLOCK.
The LED will be Solid BLUE and Solid GREEN.
4.
Enter the new PIN and press UNLOCK (The PIN must be a minimum of 7 digits and
a maximum of 16 digits). The LED will flash GREEN three times, then returns to Solid
BLUE and Blinking GREEN.
5.
Re-enter the new User PIN and press UNLOCK. The LED stays solid GREEN
indicating that the User PIN has been changed successfully.
9
Setting the Unattended Auto Lock Feature
To protect against unauthorized access if the drive is unlocked and unattended, the Aegis
Padlock can be set to automatically lock after a pre-set amount of time. In its default state,
the Aegis Padlock Unattended Auto Lock feature is turned off. The Unattended Auto Lock
can be set to activate after 5, 10 or 20 minutes.
To set the Unattended Auto Lock please uses the following steps:
1.
Enter the Admin mode by pressing and holding UNLOCK + 0 for five seconds until
the LED flashes RED. This indicates that you can enter the Admin PIN.
2.
Enter the Admin PIN and press UNLOCK. The drive is in Admin Mode when the LED
has changed to solid BLUE.
3.
Once in Admin mode, press UNLOCK + 6. The LED should start flashing RED and
BLUE intermittently.
4.
Press one of the numbers below that corresponds to amount of time you would like
the drive to lock after no activity:
1=5 minutes
2=10 minutes
3=20 minutes
0=OFF
The Default is OFF for this feature.
5.
After you have input the number, the LED should flash GREEN 3 times to indicate
that you have successfully set the Unattended Auto Lock feature.
10
Aegis Padlock Brute Force Protection
What is Brute Force Attack?
A brute force attack is a method of defeating a cryptographic scheme by systematically
trying a large number of possibilities; for example, a large number of the possible keys in
a key space in order to decrypt a message. In most schemes, the theoretical possibility
of a brute force attack is recognized, but it is set up in such a way that it would be
computationally infeasible to carry out.
Accordingly, one definition of “breaking” a cryptographic scheme is to find a method faster
than a brute force attack.
Brute Force Feature
After FIVE tries entering the incorrect user or admin PIN attempts, the keypad will not
respond and LED will turn off. The drive will need to be unplugged from the USB port and
re-plugged.
If the user, unsuccessfully tries to UNLOCK the drive on the 10th try the keypad will lock
and the LED will begin blinking RED quickly. Even after unplugging and re-plugging in the
unit, the drive will remain locked and the LED will continue to blink rapidly.
Here are the steps to allow the user to unlock the keypad for 10 more attempts to
unlock this drive.
1.
Unplug the device from the computer
2.
Push and hold the number five key and plug-in the drive
3.
The LED will be blinking alternating RED and GREEN rapidly
4.
Enter the PIN 5278879 and press UNLOCK.
5.
The keypad will unlock and will be in the standby state with the LED solid RED, this will
allow only 10 more attempts
6.
After a total of 20 Attempts the drive will remain locked with the LED flashing RED
quickly. You must now go through the reset process and reformat the drive to be able
to use the drive again.
11
Setting a Self-Destruct PIN
1.
Enter the Admin mode by pressing and holding UNLOCK + 0 for five seconds until
the LED flashes RED. This indicates that you can enter the Admin PIN.
2.
Enter the Admin PIN and press UNLOCK. The drive is in Admin Mode when the LED
has changed to BLUE.
3.
Once in Admin mode, press UNLOCK + 3. LED will be alternating BLUE / RED.
4.
Input in the PIN that you would like to use as the Self Destruct PIN and press
UNLOCK.
5.
If the Self Destruct PIN is accepted the LED flashes GREEN.
6.
Immediately re-enter the new PIN and press UNLOCK. If the LED stays solid
GREEN for two seconds and then goes to solid BLUE, the Self Destruct PIN was
added successfully.
7.
To delete the Self Destruct PIN, you will need to delete all of the User PINs.
Disconnect and re-connect the drive, then refer to the instructions on the previous
page - Deleting User PINs.
Performing a Complete Re-Set
To perform a complete reset of the drive, do the following:
1.
Press and hold the LOCK button while you attach the Aegis Padlock to an available
USB port on your computer. The LED will flash RED, GREEN and BLUE alternately.
2.
Release the LOCK button.
3.
Press and hold LOCK + UNLOCK + 2 for 10 seconds until the LED turns Solid
GREEN for two seconds, followed by Solid BLUE and Solid GREEN. You have
successfully reset the Aegis Padlock.
12
Initializing and formatting the Aegis Padlock
after a complete reset
A complete reset of the Aegis Padlock will erase all information and partition settings.
You will need to initialize and format the Aegis Padlock.
To initialize your Aegis Padlock, do the following:
1.
After a complete reset, attach the Aegis Padlock to the computer.
2.
Press UNLOCK + 9. The LED will change to Solid BLUE / Blinking GREEN.
3.
Enter the new Admin PIN and press UNLOCK key. If accepted the LED will
flash 3 short blinks of the GREEN LED, then return to Solid BLUE and Blinking
GREEN.
4.
Re-enter the Admin PIN and press the UNLOCK key. If accepted the GREEN
LED will be Solid for 3 seconds.
5.
LED will then turn BLUE and remain in Admin mode for 30 seconds or if the
LOCK key is pressed, will return the drive to a standby state.
6.
The Admin PIN is now set and will allow access to the drive or the Admin
features.
7.
To UNLOCK the drive, enter the new PIN and press UNLOCK.
8.
Windows 7 and earlier: Right-click My Computer, and then click Manage from
the Windows desktop.
9.
In the Computer Manage window, click Disk Management. In the Disk
Management window, the Aegis Padlock is recognized as an unknown device
that is uninitialized and unallocated.
Windows 8: Right click left corner of desktop and select Disk Management.
10. Do the following to make the drive recognized as a basic drive.
•
If the Initialize and Convert Disk Wizard window opens, click Cancel, then
initialize the disk manually using the following steps.
a. Right-click Unknown Disk, and then select Initialize Disk.
b. In the Initialize Disk window, click OK.
11. Right-click in the blank area under the Unallocated section, and then select New
Partition. The Welcome to the New Partition Wizard window opens.
12. Click Next.
13. Select Primary partition and click Next.
14. If you need only one partition, accept the default partition size and click Next.
15. Click Next.
16. Create a volume label, select Perform a quick format, and then click Next.
17. Click Finish.
18. Wait until the format process is complete. The Aegis Padlock will be recognized
and it is available for use.
13
Hibernating, Suspending, or Logging
off from the Operating System
Be sure to save and close all the files on your Aegis Padlock before
hibernating, suspending, or logging off from the Windows operating
system.
It is recommended that you lock the Aegis Padlock manually before
hibernating, suspending, or logging off from your system.
To log off the Aegis Padlock, double-click Safely Remove Hardware on the
Windows desktop and remove the Aegis Padlock from your computer.
Attention: To ensure the data integrity of your Aegis Padlock, be
sure to lock or log off your Aegis Padlock if you are:
• away from your computer
• using the switching user function by sharing a computer with
others
14
Aegis Padlock Setup for Mac OS
®
Your Aegis Padlock is preformatted in NTFS for Windows. To reformat the drive to a
Mac compatible format please read the below.
Once the drive is unlocked, open Disk Utility from Applications/Utilities/Disk Utilities.
To format the Aegis Padlock:
1.
2.
3.
4.
5.
Select the Aegis Padlock from the list of drives and volumes. Each drive in the
list will display its capacity, manufacturer, and product name, such as 232.9
Apricorn Padlock.
Click the ‘Erase’ tab.
Enter a name for the drive. The default name is Untitled. The drive’s name will
eventually appear on the desktop.
Select a volume format to use. The Volume Format dropdown menu lists the
available drive formats that the Mac supports. The recommended format type is
‘Mac OS Extended (Journaled).’
Click the ‘Erase’ button. Disk Utility will unmount the volume from the desktop,
erase it, and then remount it on the desktop.
15
Troubleshooting
This section contains troubleshooting information for the Aegis Padlock. If
you encounter any of the following problems when using the Aegis
Padlock, refer to the corresponding answers.
Q: What can I do if I forget the User PIN?
A: Use your Admin PIN to enter Admin Mode, and then create another
User PIN in Admin Mode.
Q: What can I do if I forget the Admin PIN?
A: There is no other way to retrieve the Admin PIN except a complete
reset of the Aegis Padlock. After a complete reset, all data will be lost and
you will need to initialize, allocate and format the Aegis Padlock manually.
Q: Why did the operating system not recognize the Aegis Padlock
after I enter the User Mode and completely reset the computer?
A: You need to initialize, allocate and format the Aegis Padlock manually.
For more information, refer to Initializing and formatting the Aegis
Padlock after a complete reset in this manual.
Q: How do I use the Aegis Padlock without a PIN?
A: As a full disk encryption product, the Aegis Padlock can never be
used without a PIN.
Q: What encryption algorithm is used in this product?
A: The Aegis Padlock SSD uses AES 256-bit algorithm.
Q: Why could I not initialize, partition or format the Aegis Padlock?
A: Ensure that you have administrator privileges. You will need Admin
privileges to use the Disk Management Utility.
Q: The LED is blinking RED and I can’t enter a code. Why?
A: Somebody has tried to access the drive and the code has been
entered 10 times incorrectly (see Brute Force section of this manual).
Q: The drive seems warm to the touch, is this normal?
A: Yes. The SSD in the case runs hotter than a standard drive. The
cooling features use the case to dissipate the heat.
16
Q: What kind of speed can be expected out of this drive?
A: USB speed will be affected by a variety of factors (USB type – 1, 2 or
3, Host controller, Driver version, hard drive read/write speeds, Operating
System). On average, if using a USB 3.0 port, speeds should be from
80+ MB/s for a newer rotating drive and 250+ MB/s for a newer SSD
version. If you are experiencing lower than expected speeds, check to
make sure you have the latest host controller driver available. If you are
getting considerably less, make sure that you are plugged into a USB 3
port. USB 3 ports use a blue center contact.
Q: Is there any way to recover my data if I forget the PIN?
A: If an Admin PIN has been previously set, the Admin PIN can be used
to unlock the drive and recover the data. If you forget the PIN and do not
have an Admin PIN, the drive can be re-set so it can be used again, but
the data cannot be recovered.
Q: How does this Padlock drive differ from other Apricorn Padlocks?
A: The Padlock SSD is designed to meet a higher security that is
approved for government and military use. Longer and more complex
PINs, more ruggedized design and a built-in self-test are just some of the
features that make this design unique.
Q: Why do the LEDs blink Blue, Red and Green after I plug the drive in?
A: When you first plug the drive in, it does a self-test on the encryption
components of the drive. If any component fails the test, the LED will
stop on RED and the drive will not function.
Q: What is FIPS 140-2?
A: This is a government standard to accredit cryptographic modules. The
government regulates certain industries that collect, store and/or transfer
sensitive data to use security that meets this standard. For a general
explanation: http://en.wikipedia.org/wiki/FIPS_140-2
Q: Why does the LED indicate an error when I try to change the PIN?
A: PIN requirements for this drive are must meet a minimum security
level. There are several combinations that are not allowed, such as, all
repeating numbers, sequential number going up or down. The PIN must
also be a minimum of 7 digits and cannot be longer than 16 digits.
Q: What are the ECCN and HST codes used for shipping this device
outside the US?
A: ECCN: 5A992A and HTS code 8473.50.3000
17
Technical Support
Apricorn provides the following helpful resources for you:
1. Apricorn’s Website (http://www.apricorn.com)
This gives you the ability to check for up-to-date information
2. E-mail us at [email protected]
3. Or call the Technical Support Department at 1-800-458-5448
Apricorn’s Technical Support Specialists are available from 8:00
a.m. to 5:00 p.m., Pacific Standard Time Monday through Friday
Warranty and RMA information
One Year Limited Warranty:
Apricorn offers a 3-year limited warranty on the Aegis Padlock against defects in materials
and workmanship under normal use. The warranty period is effective from the date of
purchase either directly from Apricorn or an authorized reseller.
Disclaimer and terms of the warranties:
THE WARRANTY BECOMES EFFECTIVE ON THE DATE OF PURCHASE AND MUST BE VERIFIED
WITH YOUR SALES RECEIPT OR INVOICE DISPLAYING THE DATE OF PRODUCT PURCHASE.
APRICORN WILL, AT NO ADDITIONAL CHARGE, REPAIR OR REPLACE DEFECTIVE PARTS
WITH NEW PARTS OR SERVICEABLE USED PARTS THAT ARE EQUIVALENT TO NEW IN
PERFORMANCE. ALL EXCHANGED PARTS AND PRODUCTS REPLACED UNDER THIS
WARRANTY WILL BECOME THE PROPERTY OF APRICORN.
THIS WARRANTY DOES NOT EXTEND TO ANY PRODUCT NOT PURCHASED DIRECTLY FROM
APRICORN OR AN AUTHORIZED RESELLER OR TO ANY PRODUCT THAT HAS BEEN DAMAGED
OR RENDERED DEFECTIVE: 1. AS A RESULT OF ACCIDENT, MISUSE, NEGLECT, ABUSE
OR FAILURE AND/OR INABILITY TO FOLLOW THE WRITTEN INSTRUCTIONS PROVIDED IN
THIS INSTRUCTION GUIDE: 2. BY THE USE OF PARTS NOT MANUFACTURED OR SOLD
BY APRICORN; 3. BY MODIFICATION OF THE PRODUCT; OR 4. AS A RESULT OF SERVICE,
ALTERNATION OR REPAIR BY ANYONE OTHER THAN APRICORN AND SHALL BE VOID. THIS
WARRANTY DOES NOT COVER NORMAL WEAR AND TEAR.
NO OTHER WARRANTY, EITHER EXPRESS OR IMPLIED, INCLUDING ANY WARRANTY OR
MERCHANTABILITY AND FITNESS FOR A PARTICULAR PURPOSE, HAS BEEN OR WILL BE
MADE BY OR ON BEHALF OF APRICORN OR BY OPERATION OF LAW WITH RESPECT TO THE
PRODUCT OR ITS INSTALLATION, USE, OPERATION, REPLACEMENT OR REPAIR.
APRICORN SHALL NOT BE LIABLE BY VIRTUE OF THIS WARRANTY, OR OTHERWISE, FOR
ANY INCIDENTAL, SPECIAL OR CONSEQUENTIAL DAMAGE INCLUDING ANY LOSS OF
DATA RESULTING FROM THE USE OR OPERATION OF THE PRODUCT, WHETHER OR NOT
APRICORN WAS APPRISED OF THE POSSIBILITY OF SUCH DAMAGES.
18
© Apricorn, Inc. 2013. All rights reserved.
12191 Kirkham Road
Poway, CA, U.S.A. 92064
1-858-513-2000 www.apricorn.com


