1
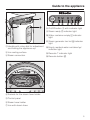
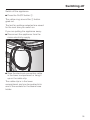
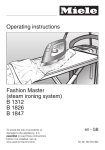
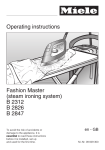
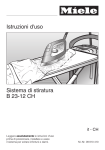
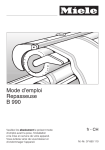
Operating instructions
Fashion Master
(steam ironing system)
B 1312
B 1826
B 1847
To avoid the risk of accidents or
damage to the appliance, it is
essential to read these instructions
before it is installed, set up
and used for the first time.
en - GB
M.-Nr. 09 370 090
Contents
Guide to the appliance . . . . . . . . . . . . . . . . . . . . . . . . . . . . . . . . . . . . . . . . . . . . . 4
Warning and Safety instructions . . . . . . . . . . . . . . . . . . . . . . . . . . . . . . . . . . . . . 6
Caring for our environment . . . . . . . . . . . . . . . . . . . . . . . . . . . . . . . . . . . . . . . . 12
Disposal of your old appliance . . . . . . . . . . . . . . . . . . . . . . . . . . . . . . . . . . . . . . . 12
Moving the Fashion Master. . . . . . . . . . . . . . . . . . . . . . . . . . . . . . . . . . . . . . . . . 13
Assembling . . . . . . . . . . . . . . . . . . . . . . . . . . . . . . . . . . . . . . . . . . . . . . . . . . . . . 14
Adjusting the height . . . . . . . . . . . . . . . . . . . . . . . . . . . . . . . . . . . . . . . . . . . . . . . . 16
Connection . . . . . . . . . . . . . . . . . . . . . . . . . . . . . . . . . . . . . . . . . . . . . . . . . . . . . . 17
Before using for the first time. . . . . . . . . . . . . . . . . . . . . . . . . . . . . . . . . . . . . . . 20
Water hardness . . . . . . . . . . . . . . . . . . . . . . . . . . . . . . . . . . . . . . . . . . . . . . . . . . . 20
Setting the water hardness level . . . . . . . . . . . . . . . . . . . . . . . . . . . . . . . . . . . . . . 22
Checking the programmed water hardness level . . . . . . . . . . . . . . . . . . . . . . . . . 22
Switching on. . . . . . . . . . . . . . . . . . . . . . . . . . . . . . . . . . . . . . . . . . . . . . . . . . . . . 23
Switching on the Fashion Master . . . . . . . . . . . . . . . . . . . . . . . . . . . . . . . . . . . . . . 23
Filling the water container . . . . . . . . . . . . . . . . . . . . . . . . . . . . . . . . . . . . . . . . . . . 23
Water quality . . . . . . . . . . . . . . . . . . . . . . . . . . . . . . . . . . . . . . . . . . . . . . . . . . . 25
CoolDown function. . . . . . . . . . . . . . . . . . . . . . . . . . . . . . . . . . . . . . . . . . . . . . . . . 25
Auto-Off function . . . . . . . . . . . . . . . . . . . . . . . . . . . . . . . . . . . . . . . . . . . . . . . . . . 25
Selecting the temperature for ironing . . . . . . . . . . . . . . . . . . . . . . . . . . . . . . . . . . 26
Ironing . . . . . . . . . . . . . . . . . . . . . . . . . . . . . . . . . . . . . . . . . . . . . . . . . . . . . . . . . . 28
Iron. . . . . . . . . . . . . . . . . . . . . . . . . . . . . . . . . . . . . . . . . . . . . . . . . . . . . . . . . . . . . 28
Ironing with steam. . . . . . . . . . . . . . . . . . . . . . . . . . . . . . . . . . . . . . . . . . . . . . . 29
Ironing without steam . . . . . . . . . . . . . . . . . . . . . . . . . . . . . . . . . . . . . . . . . . . . 29
Ironing with the non-stick sole plate . . . . . . . . . . . . . . . . . . . . . . . . . . . . . . . . . 30
Removing the non-stick sole plate . . . . . . . . . . . . . . . . . . . . . . . . . . . . . . . . . . 30
Fan . . . . . . . . . . . . . . . . . . . . . . . . . . . . . . . . . . . . . . . . . . . . . . . . . . . . . . . . . . . . . 31
Suction function . . . . . . . . . . . . . . . . . . . . . . . . . . . . . . . . . . . . . . . . . . . . . . . . 31
Blow function . . . . . . . . . . . . . . . . . . . . . . . . . . . . . . . . . . . . . . . . . . . . . . . . . . 31
Automatic switch on/off. . . . . . . . . . . . . . . . . . . . . . . . . . . . . . . . . . . . . . . . . . . 31
Memory function . . . . . . . . . . . . . . . . . . . . . . . . . . . . . . . . . . . . . . . . . . . . . . . . 31
Heated ironing surface . . . . . . . . . . . . . . . . . . . . . . . . . . . . . . . . . . . . . . . . . . . . . 31
Steamer . . . . . . . . . . . . . . . . . . . . . . . . . . . . . . . . . . . . . . . . . . . . . . . . . . . . . . . . . 32
Steamer (B 1847 only) . . . . . . . . . . . . . . . . . . . . . . . . . . . . . . . . . . . . . . . . . . . . . . 32
Brush attachment . . . . . . . . . . . . . . . . . . . . . . . . . . . . . . . . . . . . . . . . . . . . . . . 34
2
Contents
Switching off . . . . . . . . . . . . . . . . . . . . . . . . . . . . . . . . . . . . . . . . . . . . . . . . . . . . 35
Storage . . . . . . . . . . . . . . . . . . . . . . . . . . . . . . . . . . . . . . . . . . . . . . . . . . . . . . . . . 36
Cleaning and care . . . . . . . . . . . . . . . . . . . . . . . . . . . . . . . . . . . . . . . . . . . . . . . . 39
Cleaning the casing . . . . . . . . . . . . . . . . . . . . . . . . . . . . . . . . . . . . . . . . . . . . . . . . 39
Automatic rinse . . . . . . . . . . . . . . . . . . . . . . . . . . . . . . . . . . . . . . . . . . . . . . . . . . . 39
Emptying the residual water container . . . . . . . . . . . . . . . . . . . . . . . . . . . . . . . 39
Automatic descaling . . . . . . . . . . . . . . . . . . . . . . . . . . . . . . . . . . . . . . . . . . . . . . . 40
Descale advanced warning . . . . . . . . . . . . . . . . . . . . . . . . . . . . . . . . . . . . . . . 40
Starting the descaling process. . . . . . . . . . . . . . . . . . . . . . . . . . . . . . . . . . . . . 41
Cleaning the ironing table cover . . . . . . . . . . . . . . . . . . . . . . . . . . . . . . . . . . . . . . 43
Replacing the ironing table cover . . . . . . . . . . . . . . . . . . . . . . . . . . . . . . . . . . . . . 43
Cleaning the sole plate of the iron . . . . . . . . . . . . . . . . . . . . . . . . . . . . . . . . . . . . . 44
Cleaning the water filter . . . . . . . . . . . . . . . . . . . . . . . . . . . . . . . . . . . . . . . . . . . . . 45
Optional accessories . . . . . . . . . . . . . . . . . . . . . . . . . . . . . . . . . . . . . . . . . . . . . . 47
Accessories . . . . . . . . . . . . . . . . . . . . . . . . . . . . . . . . . . . . . . . . . . . . . . . . . . . . . . 47
Non-stick sole plate . . . . . . . . . . . . . . . . . . . . . . . . . . . . . . . . . . . . . . . . . . . . . 47
Ironing table cover . . . . . . . . . . . . . . . . . . . . . . . . . . . . . . . . . . . . . . . . . . . . . . 47
Steamer. . . . . . . . . . . . . . . . . . . . . . . . . . . . . . . . . . . . . . . . . . . . . . . . . . . . . . . 47
Cleaning products . . . . . . . . . . . . . . . . . . . . . . . . . . . . . . . . . . . . . . . . . . . . . . . . . 48
Descaling tablets for the Fashion Master . . . . . . . . . . . . . . . . . . . . . . . . . . . . . 48
E-cloth (microfibre cloth) . . . . . . . . . . . . . . . . . . . . . . . . . . . . . . . . . . . . . . . . . 48
Problem solving guide . . . . . . . . . . . . . . . . . . . . . . . . . . . . . . . . . . . . . . . . . . . . 49
Problem solving guide . . . . . . . . . . . . . . . . . . . . . . . . . . . . . . . . . . . . . . . . . . . . . . 49
After sales service . . . . . . . . . . . . . . . . . . . . . . . . . . . . . . . . . . . . . . . . . . . . . . . . 60
Guarantee . . . . . . . . . . . . . . . . . . . . . . . . . . . . . . . . . . . . . . . . . . . . . . . . . . . . . . . 60
Electrical connection . . . . . . . . . . . . . . . . . . . . . . . . . . . . . . . . . . . . . . . . . . . . . . 61
Technical data . . . . . . . . . . . . . . . . . . . . . . . . . . . . . . . . . . . . . . . . . . . . . . . . . . . 62
3
Guide to the appliance
a Ironing table
i X-frame for the ironing table
b Iron with steam hose
j Iron resting surface
c Steam hose holder
k Mains connection cable
d Handle
f Tower
l Lower storage compartment for the
mains connection cable, steamer*,
non-stick sole plate and holder for
the mains connection cable.
g Residual water container
m Rollers
h Upper storage compartment for the
iron and the steam hose holder
n Release mechanism
e Water container
Those features marked * depend on
model, and may vary or not be
available on your model.
4
Guide to the appliance
h On/Off button s with indicator light
i Steam ready * indicator light
j Water container empty k indicator
light
k Steam generator too hot l indicator
light
a Handle with rotary dial for adjustment
and folding the appliance up
b Iron resting surface
c Steam connection
l Empty residual water container 2
indicator light
m Descale k indicator light
n Descale button j
d Sockets for the steam hose holder
e Control panel
f Steam hose holder
g Iron with steam hose
5
Warning and Safety instructions
This appliance complies with all relevant safety requirements.
Inappropriate use can, however, lead to personal injury and
damage to property.
To avoid the risk of accidents and damage to the appliance,
please read these instructions carefully before using it for the first
time. They contain important information about its safety, use and
maintenance. Keep these instructions in a safe place and ensure
that new users are familiar with the content. Pass them on to any
future owner.
Correct application
~ This appliance is not designed for commercial use. It is intended
for use in domestic households and similar working and residential
environments.
~ The appliance must be used only for ironing textiles which are
suitable for ironing according to the care label.
~ The appliance is intended for domestic use only as described in
these operating instructions.
Any other usage is not supported by the manufacturer and could be
dangerous. Miele cannot be held liable for damage resulting from
incorrect or improper use or operation.
~ The appliance can only be used by people with reduced
physical, sensory or mental capabilities, or lack of experience and
knowledge, if they are supervised whilst using it, or have been
shown how to use it in a safe way and understand the hazards
involved.
~ The appliance is not intended for outdoor use.
6
Warning and Safety instructions
Safety with children
~ Children 14 years and older may only use the appliance if they
have been shown how to use it in a safe way and understand the
hazards involved.
~ Children under 14 years of age must be kept away from the
appliance unless they are constantly supervised.
~ The appliance is not a toy! To prevent the risk of injury, do not
allow children to play with it or use the controls. Please supervise
children whilst you are using the appliance.
~ Danger of suffocation. Packaging, e.g. polystyrene and plastic
wrappings, must be kept out of the reach of babies and young
children. Dispose of or recycle all packaging safely as soon as
possible.
Technical safety
~ Before setting up the appliance, check it for any externally visible
damage. Do not use a damaged appliance. It could be dangerous.
~ Before connecting the appliance, make sure that the connection
data on the data plate (voltage and frequency) match the mains
electricity supply.
If in any doubt, consult a qualified electrician.
~ Always remove and unwind the mains connection cable
completely from the lower storage compartment.
~ If the connection cable is damaged it must be replaced with a
special cable of the same type available from Miele. For safety
reasons this must only be fitted by Miele Service or a Miele
approved service technician.
7
Warning and Safety instructions
~ Do not use the appliance if the ironing table cover is damaged.
A damaged ironing table cover could be dangerous.
Do not use the appliance without an ironing table cover.
The ironing table cover must be replaced with an original Miele
cover.
~ The electrical safety of this appliance can only be guaranteed
when correctly earthed. It is most important that this basic safety
requirement is observed and regularly tested, and where there is
any doubt the household wiring system should be inspected by a
qualified electrician. The manufacturer cannot be held liable for
damage or injury caused by an inadequate earthing system (e.g.
electric shock).
~ Do not connect the appliance to the mains electricity supply by a
multi-socket adapter or an extension lead. These do not guarantee
the required safety of the appliance (e.g. danger of overheating).
~ This appliance complies with all relevant safety requirements.
Unauthorised repairs could result in unforeseen dangers for the
user, for which Miele cannot accept liability. Repairs should only be
undertaken by a Miele approved service technician, otherwise any
subsequent damage will not be covered by the guarantee.
~ Faulty components must only be replaced by genuine Miele
original parts. Only when these parts are fitted can the safety
standards of the appliance be guaranteed.
~ During installation, maintenance and repair work, the appliance
must be disconnected from the mains electricity supply.
~ Do not damage, remove or bypass the safety features, fixtures
and control elements of this appliance.
~ Any removable outer panels must be fitted in place, and all
moving or electrical parts shielded before it is switched on.
8
Warning and Safety instructions
~ The appliance must not be used in a non-stationary location (e.g.
on a ship).
~ In areas which may be subject to infestation by cockroaches or
other vermin, pay particular attention to keeping the appliance and
its surroundings in a clean condition at all times. Any damage which
may be caused by cockroaches or other vermin will not be covered
by the guarantee.
Correct use
, Caution. Danger of burning. The steam emitted, the iron sole
plate and the steamer jets are very hot.
~ This appliance is intended for domestic use only and is not to be
used for commercial purposes.
~ Do not use a pressure washer or hose to clean the appliance.
~ Only clean the appliance when it has cooled down.
~ Danger of squashing and trapping your fingers. Do not place
your fingers between moving parts when assembling, dismantling or
adjusting the height of the appliance.
~ The appliance must be set up on an even surface and may only
be used in a horizontal position.
~ The steam ironing system must be assembled when ironing,
however the steamer can be used when the system is dismantled.
~ Ensure that the electrical connection cable does not present a
trip hazard when unwound.
~ When the appliance is heated up there is an acute danger of
burning from contact with the sole plate of the iron or the steamer
jets.
9
Warning and Safety instructions
~ Do not use demineralised water (e.g. distilled) on its own to fill the
water container as this could cause the appliance to malfunction.
~ Always place the iron with the steam function switched off on the
iron resting surface so that the sole plate does not protrude over the
edges.
Placing it otherwise could be a fire hazard.
~ Take care not to burn yourself. If the iron remains on the resting
surface for any length of time, the surface will become hot. Avoid
direct contact with it. Only touch the handle.
~ Danger of burning. Do not direct the steam or the steam jets at
people, animals or electrical appliances of any kind.
~ Danger of burning. Do not use the steamer on clothing while it is
being worn, as the clothing will intensify burning of skin.
~ Switch the appliance off before disconnecting it from the mains
electricity supply.
~ Do not leave the appliance unattended when it is ready for use.
Switch it off and then disconnect it from the mains electricity supply.
~ Do not pull on the cable to remove the plug. Pull on the plug.
~ Do not touch the electrical connection cable or the steam hose
with the sole plate of the heated iron. This could result in damage.
~ The iron and the steamer must not be connected to the
appliance during the descaling process. The appliance can be left
unattended during this process.
~ The iron must not be stowed in its storage compartment when it is
connected as this could result in damage to the appliance.
~ Do not use the residual water container to store accessories or
other similar items. It should be used only to collect residual water.
10
Warning and Safety instructions
~ Do not plug any objects into any of the apertures on the steam
ironing system. If an aperture is blocked, do not use the system.
~ Do not hang items of laundry on the appliance when folded as
this could cause it to tip over.
~ Do not store the appliance near petrol, benzine or other easily
flammable substances. Fire and explosion risk.
~ Only use the appliance in buildings with an ambient temperature
of between 10°C and 40°C. Freezing temperatures, excessive heat
and humidity will affect the functionality of the system.
~ Do not store the appliance in a room where there is a risk of frost
occurring. Frozen water can cause damage to the water container,
steam generator and steam hose.
Using accessories
~ Accessory parts may only be fitted when expressly approved by
Miele. If spare parts or accessories from other manufacturers are
used, this will invalidate the guarantee, and Miele cannot accept
liability.
Miele cannot be held liable for damage caused by
non-compliance with these Warning and Safety instructions
11
Caring for our environment
Disposal of the packing
material
The transport and protective packing
has been selected from materials which
are environmentally friendly for disposal
and should be recycled.
Ensure that any plastic wrappings,
bags etc. are kept out of the reach of
babies and young children. Danger of
suffocation!
Disposal of your old appliance
Electrical and electronic appliances
often contain materials which, if
handled or disposed of incorrectly,
could be potentially hazardous to
human health and to the environment.
They are, however, essential for the
correct functioning of your appliance.
Please do not therefore dispose of it
with your household waste.
Please dispose of it at your local
community waste collection / recycling
centre or contact your dealer for
advice. Ensure that it presents no
danger to children while being stored
for disposal.
12
Moving the Fashion Master
The appliance is fitted with two rollers,
so it can be pulled or pushed across an
even surface when folded up.
^ Hold on to it by the handle and tip it
gently towards you until the wheels
are free.
Two people are required to carry the
Fashion Master up or downstairs. It
should always be carried with the
ironing table underneath.
Obstacles such as carpet edges, door
sills or single steps can also be easily
negotiated.
^ Use the hand holds on the underside
of the appliance.
,Do not lift and carry the Fashion
Master by the ironing table.
The locking mechanism on the tower
could release and cause injury or
damage if the table unfolded.
13
Assembling
^ Take the Fashion Master to the place
where it is to be set up.
The ironing table is held independently
in this position.
^ Pull upwards on the release
mechanism with one hand. Hold the
tower tightly by the handle with the
other hand.
^ Pull the ironing table upwards with
both hands into a horizontal position
until you hear a click.
The locking mechanism on the tower
will be released and the X-frame will
fold down at the same time.
^ Ensure that the ironing table has
clicked into place on both sides of
the tower, otherwise you will not be
able to adjust the height.
^ Hold onto the release mechanism
and guide the ironing table into a
position of approx. 45°.
14
Assembling
The Fashion Master is now assembled
in its lowest working position - a height
of approx. 83 cm.
15
Assembling
Adjusting the height
You can adjust the Fashion Master to
suit your working height.
Take care not to trap the electrical
connection cable in the mechanism.
Ensure that the ironing table has
clicked into place on both sides of
the tower otherwise you will not be
able to adjust the height.
^ At the same time pull the handle on
the tower upwards with the other
hand.
or:
^ Press the handle on the tower down
at the same time.
Do not push down on the ironing
table when doing this.
^ Use one of the rotary dials on the
side of the tower handle. Turn the dial
as far as it will go in the q direction
and hold it there.
^ When you have reached your desired
working height, release the rotary dial
and it will spring back into the middle
position.
We recommend that you adjust the
working position to approx. hip height
for optimum comfort.
The ironing table is held in the selected
position.
For additional stability the ironing table
clicks into place audibly under extra
pressure, doubly securing your
selected working position.
The highest working position is approx.
102 cm.
16
Connection
The Fashion Master system is supplied
for connection to a 230 volt, 50 Hz
mains electricity supply and is fitted
with a moulded BS 1363 plug.
^ Open the lower storage compartment
by opening the lid downwards.
^ Remove the electrical connection
cable completely from the
compartment.
^ Insert the plug in a wall socket.
^ Guide the electrical connection cable
through the grove provided and
close the lower storage compartment
again. Ensure that the cable does not
become trapped between the lid and
the casing or between the rollers and
the tower.
^ Open the upper storage
compartment lid.
^ Take out the iron and the steam hose
holder.
17
Connection
^ Close the storage compartment lid
again.
^ Connect the iron by plugging the
steam hose into the steam
connection.
Pull back the sliding mechanism on
the steam hose plug and release it
when it is plugged in.
^ Plug the steam hose holder into one
of the sockets provided.
Please note: Use the socket on the side
on which you are ironing.
The appliance can be used by right- or
left-handed people. Operation is
optimised for both sides.
^ Open the lid of the steam connection
by lifting it upwards.
18
^ Guide the rubber ring on the steam
hose into the steam hose holder as
shown.
Ensure the steam hose fits securely
and that it is not twisted.
Connection
^ To avoid damaging or fading the
ironing table cover, always place the
iron on the resting surface during
pauses in ironing.
Condensation can form on the resting
surface. However, this does not affect
the functioning of the steam ironing
system.
When putting the iron down on the
iron resting surface, the steam *
button must be unlocked.
,The iron must not be placed
upright on the resting surface as it
could tip and fall.
Always place the iron down so that it
is resting on the entire sole plate.
,Danger of burning. If the iron
remains on the resting surface for
any length of time, the surface will
become hot. Avoid direct contact
with it. Only touch the handle.
19
Before using for the first time
It is helpful to get to know the
FashionMaster before using it for the
first time so that you will be able to
make use of all the functions.
^ Remove the packaging (e.g. the
protective film from the tower, etc).
When using for the first time, you might
notice a slight odour during the
heating-up phase. This will dissipate
with further use.
During operation pumping, boiling and
knocking noises may be heard.
These are normal noises which occur
during operation.
Water hardness
To ensure problem-free functioning and
so that the descaling reminder appears
at the right time, it is important to adjust
the appliance to the local water
hardness level. The water hardness
level indicates how much calcium is
dissolved in the water. The higher the
calcium content, the harder the water,
and the harder the water, the more
often the appliance will need to be
descaled.
Your local water board will be able to
tell you the hardness level of your
water. This information can often be
found on the internet on the home page
of the relevant water board.
Set the water hardness according to
the table. The water hardness set is
shown by the flash frequency of the k
indicator light.
20
°dH
German
scale
mmol/l
°f
Flash
frequency
1-4
0.2 - 0.7
2-7
Once
5-7
0.9 - 1.3
9 - 13
Twice
8 - 11
1.4 - 2.0
14 - 20
3 times
12 - 15
2.2 - 2.7
22 - 27
4 times
16 - 20
2.9 - 3.6
29 - 36
5 times
21 - 25
3.8 - 4.5
38 -45
6 times
26 - 30
4.7 - 5.4
47 - 54
7 times
31 - 36
5.6 - 6.5
56 - 65
8 times
37 - 45
6.7 - 8.1
67 - 81
9 times
46 - 70
8.3 - 12.6
83 - 126
10 times
Before using for the first time
If you cannot find out the water
hardness level, you can use the test
strip provided:
If your water hardness is different from
this, you must adjust it to the
corresponding value.
Where the water hardness fluctuates
e.g. between 6.7 - 9.0 mmol/l (37 - 50
°dH), always programme it to the higher
value (9.0 mmol/l / 50 °dH in this
example).
In the event of a fault, it will help the
service technician if you know the
hardness of your local water supply.
Enter the water hardness below:
^ Dip the strip in your drinking water for
approximately a second, then shake
off any excess water. The result will
be evident after about a minute.
mmol or °dH
Set the water hardness according to
the table. The water hardness set is
shown by the flash frequency of the k
indicator light.
Hardness range on the test
strip
Flash
frequency
4 green squares
< 0.5 mmol/l
or 3°dH
Once
1 red square
> 0.7 mmol/l
or 4°dH
Twice
2 red squares
> 1.3 mmol/l
or 7°dH
3 times
3 red squares
> 2.5 mmol/l
or 14°dH
5 times
4 red squares
> 3.8 mmol/l
or 21°dH
10 times
The FashionMaster is set to the highest
level of water hardness (12.6 mmol/l /
70°dH) as a factory default. If your
water hardness corresponds to this,
you do not need to do anything. See
"Switching on".
21
Before using for the first time
Setting the water hardness
level
Water hardness is programmed using
the control panel on the tower.
^ Briefly press the j button to select
the number of flashes which equates
to your water hardness level.
Each press of the button moves you
up a level. When the highest water
hardness value is reached, the
setting starts from the beginning
again.
Please set the correct water hardness
level, as otherwise this invalidates the
guarantee.
The programming procedure can be
cancelled at any time by pressing
the On/Off button s. The procedure
can then be re-started from the
beginning again.
Example:
Water hardness = 4.0 mmol/l (22°dH).
– The k indicator light will flash rapidly
10 times at intervals (factory default
setting).
– Press the j button 6 times.
Programme the water hardness as
follows:
– The k indicator light flashes rapidly 6
times.
^ If the appliance is on, switch it off
using the s button.
^ Switch the appliance off with the s
button.
^ Press and hold the j button and at
the same time switch the appliance
on using the s button. Hold in the j
button until the k indicator lights up
yellow.
Checking the programmed
water hardness level
If this does not happen, start the
procedure again from the beginning.
The k indicator light flashes rapidly 10
times at intervals and the k indicator
light flashes slowly on and off (factory
default).
The water hardness set is shown by the
flash frequency of the k indicator light
(see table for water hardness).
^ If the appliance is on, switch it off
using the s button.
^ Press and hold the j button and at
the same time switch the appliance
on using the s button. Hold in the j
button until the k indicator lights up
yellow.
The k indicator light will flash the
number of times which corresponds to
the water hardness level which has
been set (see table).
^ Switch the appliance off with the s
button.
22
Switching on
Switching on the Fashion
Master
Filling the water container
If the water container is empty or not
inserted into the system, the k indicator
light comes on.
^ Press the On/Off button s.
The ring around the s button lights up
yellow.
The Fashion Master starts heating up.
Steam can escape from the iron during
the heating-up phase.
During operation pumping, boiling and
knocking noises may be heard.
These are normal noises which occur
during operation.
When the appliance is ready and steam
is available, the * indicator light comes
on.
^ Remove the water container. Hold the
container by the integral handle, then
pull it out and upwards to remove it.
The water container can drip a little
when it is being removed until the
container valve closes. Removing the
water container slowly can prevent it
from dripping.
23
Switching on
If you refill and replace the water
container as soon as the indicator light
k lights up, there is no delay. The *
indicator light indicates readiness immediately.
While the k indicator light is on, the
steam system is not active.
The iron remains functional.
Energy-saving tip: You can save energy
by ironing without steam by removing
the water container, so that the steam
generator is not heated.
^ Turn the screw cap on the back of
the water container anti-clockwise
and lift it off.
^ Tilt the water container into a
horizontal position and fill it with fresh
tap water (approx. 25°C to 35°C). In
this position even very low taps can
be used to fill the water container. It
is not possible to overfill the water
container.
The water container can be removed
and refilled at any time during the
ironing process. The amount of water
required will depend on how much
laundry is being ironed.
^ Replace the screw cap and turn
clockwise as far as it will go it.
^ Replace the water container.
The k indicator light will go out after a
short time.
The steam will be ready for use again
more rapidly if the water container is
refilled promptly.
24
Empty the water container if the system
is not going to be used for a long
period.
Switching on
Water quality
CoolDown function
Use only fresh tap water.
If the iron is not moved for more than 3
minutes, the heating switches off.
After some time steam is no longer
available and the * indicator light goes
out.
The iron will automatically start heating
up again as soon as the iron is moved.
The time taken for steam to be available
again depends on the length of time the
heating was switched off.
Filtered tap water may also be used.
For water hardness of more than 2.5
mmol/l / 14°dH you can use tap water
mixed in 1:1 ratio with distilled water.
This halves the water hardness. Set the
halved water hardness to the
corresponding flash frequency.
Example:
Tap water with 10.8 mmol/l (60°dH) in a
1:1 mixture with distilled water results in
water hardness of 5.4 mmol/l (30°dH).
The corresponding flash frequency of
the k indicator light is 7 times,
according to the table. (see "Setting the
water hardness level").
Do not use demineralised water
(e.g. distilled) on its own to fill the
water container. This can cause the
appliance to malfunction.
Do not use condensate, e.g. from
other appliances such as air
conditioning units, tumble dryers,
etc, or rain water.
The * indicator light comes on when
the appliance is ready to show that
steam is available.
Do not leave the system unattended
with the iron or steamer connected.
Always switch the appliance off and
disconnect it from the electricity
supply before leaving it.
Auto-Off function
If the iron or steamer is not used for a
total of more than 14 minutes, the whole
appliance switches off automatically.
The system is switched back on again
by pressing the s button.
Do not use any additives, e.g.
perfumes, ironing water, starch,
carbonated water, etc.
25
Switching on
Selecting the temperature for
ironing
Material
Minimum iron/
Synthetics
Woollens/
Silks
Linen /
Cottons
Dot
symbol
ß
ßß
ßßß
Temperature
range
Low
temperature
Medium
temperature
High
temperature
^ Use the temperature selector to set
the temperature required.
The temperature selector on the iron is
used for setting the ironing
temperature.
The temperature settings are indicated
by dots around the selector. These dots
correspond to the international symbols
for ironing.
The yellow indicator light comes on
while the iron is heating up.
26
The indicator lights up yellow while the
iron is heating up. When the set
temperature is reached, the indicator
light goes out. The iron is ready.
Steam can be used in the temperature
ranges between ßß and ßßß.
Please note that the steam must be
ready * for steam ironing.
Steam readiness is indicated when the
* indicator light lights up on the control
panel.
In the ß temperature range, the
temperature of the iron sole plate is
too low for steam ironing.
Do not use the steam button on the
iron.
This will result in "spitting" from the
steam jets.
After increasing the temperature to
at least ßß you must wait until the
heating-up phase is completed
before using the steam button.
Switching on
Tip: Sorting the laundry
Sort your laundry according to heat
sensitivity for efficient ironing.
Iron the most sensitive fabrics, such as
synthetics first, Then iron silk, wool,
cotton and linen at increasing
temperatures.
Please also observe the advice and
symbols on the care labels in your
garments.
27
Ironing
Iron
B 1826 and B 1847:
Your Fashion Master has one of the
following irons, depending on model:
B 1312:
a Steam button *
b Sliding switch for constant steam
a Steam button *
b Sliding switch for constant steam
c Suction button p
d Blow button o
28
c Power output selection button m
d Blow/suction button n
Ironing
Ironing with steam
The burst of steam is controlled by the
* button.
The fan starts up when the * button is
pressed.
The fan will continue running for a short
while after using steam.
For short bursts of steam:
^ Press the * button briefly and
release it again.
For constant steam:
^ Press the * button and at the same
time slide switch b backwards.
Condensate can form in the steam hose
during pauses in ironing. This is
expelled by operating the steam button.
To avoid wet spots on your laundry, do
not direct the first burst of steam after a
pause onto the garment.
Ironing without steam
If you want to iron dry, you can save
energy by removing the water container
so that the steam generator is not
heated.
Now release the * button. Steam will
be continuously released.
^ To stop using steam continuously,
unlock the * button by pushing the
b sliding switch forwards again.
Steam output will stop.
When putting the iron down on the
iron resting surface, the steam *
button must be unlocked.
^ If the k indicator light comes on, fill
the water container (see "Filling the
water container").
When using the steam function for a
long time, make sure the room is
sufficiently ventilated, as high air
humidity can develop.
29
Ironing
Ironing with the non-stick sole plate
In the lower compartment there is a
non-stick sole plate which simply clips
onto the iron.
,Danger of burning. The sole
plate becomes very hot when in use.
Avoid direct contact with it.
It also reduces or eliminates the
formation of shiny patches on dark
textiles.
Always try it out on an unobtrusive part
of the fabric first.
Removing the non-stick sole plate
,Danger of burning. The sole
plate becomes very hot when in use.
Avoid direct contact with it.
^ Place the iron tip first in the non-stick
sole plate.
^ Pull back the tab on the bottom of the
non-stick sole plate, hold onto it and
push the iron onto the non-stick sole
plate.
^ Then release the tab. This will clip
onto the iron.
^ Wait for about 1 minute until the
non-stick sole plate has heated up,
before starting to iron.
With the non-stick sole plate, you can
generally iron appliqués, printed or
flocked textiles etc, without turning the
garment inside out.
30
^ Pull back the tab on the bottom of the
non-stick sole plate and take the iron
out.
,The non-stick sole plate remains
very hot after use. Avoid direct
contact. Hold it by the tab.
Do not store the non-stick sole plate in
its storage compartment until it has
cooled down.
Ironing
Fan
Suction function
The fan on the ironing table is
controlled with the o, p or n, m
buttons.
The suction function assists steam
permeation of textiles, avoids the
formation of condensation on the
ironing table and holds the item so that
it does not slip off the ironing table.
B 1312 only:
The blow function is activated by the o
button.
The suction function is activated by the
p button.
B1826 and B 1847 only:
You can switch between the blow and
suction functions with a single press on
the n button.
You can switch between the two power
output levels with a single press on the
m button.
Power setting 1 = 1 fan active
Power setting 2 = 2 fans active
Blow function
The blow function creates a cushion of
air between the textile and the ironing
table and helps prevent seams being
pressed into the garment. It also assists
with ironing frills, sequins, etc and
allows you to iron without flattening the
fabric.
Automatic switch on/off
Automatic switch on/off ensures that the
fan starts at exactly the right time when
using steam.
After a short running-on time the fan
stops automatically, because the fan is
not needed during pauses in ironing,
e.g. when the textiles are being folded.
Memory function
The memory function saves the
last-used fan direction and power
setting.
Heated ironing surface
The fan/s are located on the underside
of the ironing table.
When the appliance is switched on, the
ironing surface will heat up
automatically, helping to reduce the
formation of condensation on the
ironing table.
31
Steamer
Steamer (B 1847 only)
The B 1847 Fashion Master is equipped
with a steamer in addition to the iron.
The steamer can be plugged into the
steam connection as an alternative to
the iron.
^ Remove the steamer from the lower
compartment.
^ Disconnect the iron from the steam
connection in the tower. Pull back the
sliding mechanism on the steam
hose plug and withdraw the plug. Do
not pull on the steam hose.
^ Plug the steam hose of the steamer
into the steam connection.
Pull back the sliding mechanism on
the steam hose plug and release it
when it is plugged in.
The steamer* can also be used with
models B 1312 and B 1826
(*optional accessory).
The steamer a facilitates the ironing of
hanging textiles, e.g. dresses and
jackets.
It is fitted with a removable brush
attachment b for raising and
straightening the fibres.
The steamer is lighter than the iron and
also has no hot sole plate, eliminating
the risk of shiny patches due to
unintentional contact with the textiles.
The steamer can also be used when
the appliance is dismantled.
32
You can change between the iron
and the steamer at any time during
ironing without switching off the
system.
After switching between the iron and
steamer there is a pause before the
steam is ready to ensure that the iron or
steamer is sufficiently heated up.
The steamer is ready for use when the
* indicator light on the tower control
panel lights up and signals that the
steam is ready.
Steamer
a
,Danger of burning. Do not direct
the steam or the steam jets at
people, animals or electrical
appliances of any kind.
The distance between the steamer
and the textile is dependent on the
sensitivity of the fabric and can vary
between textiles.
Always test this first on an
unobtrusive part of the fabric.
Condensate can form in the steam hose
during pauses in ironing. This is
expelled by operating the steam button.
To avoid wet spots on your laundry, do
not direct the first burst of steam after a
pause onto the garment.
,Danger of burning. Do not use
the steamer on clothing while it is
being worn, as the clothing will
intensify burning of skin.
The burst of steam is controlled by
button a on the steamer.
For short bursts of steam:
^ Press the button briefly and release it
again.
For constant steam:
^ Press and hold the button.
Always steam the textile in the direction
of the fibres.
33
Steamer
Brush attachment
The steamer comes with a brush
attachment which can be clipped onto
the head.
The steamer can be held directly on the
textile with the brush attached.
Always try it out on an unobtrusive
part of the fabric first.
The brush attachment helps to raise
and straighten the fibres.
^ Guide the brush attachment into the
notches on the opposite side and
click these into place.
^ Hold the brush attachment in front of
the steamer so that the lugs on one
side fit into the notches on the
steamer and click them into place.
34
^ To remove the brush attachment, pull
it by the raised section off the
steamer.
Switching off
Switch off the appliance.
^ Press the On/Off button s.
The yellow ring around the s button
goes out.
The last fan settings selected are saved
for the next time you switch on.
If you are putting the appliance away:
^ Disconnect the appliance from the
mains electricity supply.
^ Stow the electrical connection cable
in the lower compartment or hang it
up on the cable clip.
The cable clip is in the lower
compartment and can be pushed into
one of the sockets for the steam hose
holder.
35
Storage
^ Place the iron on the resting surface
to cool down.
Once the iron has cooled down you can
fold the Fashion Master away.
The ironing table must be put back in
the lowest working position in order to
fold the appliance away.
Ensure that the residual water container
is correctly inserted and clicked into
place and take care not to trap the
electrical connection cable in the
mechanism.
^ At the same time push the tower
handle downwards to lower the
ironing table into the lowest working
position.
Do not push down on the ironing
table.
^ Release the rotary dial and it will
spring back into the middle position.
^ To prevent this, use one of the rotary
dials on the side of the tower handle.
Turn the dial as far as it will go in
the q direction and hold it there.
36
Storage
Make sure that the ironing table is in
its lowest working position when
releasing it. There must also be
nothing on the ironing table.
^ Guide the ironing table downwards or
allow it to slide down by itself.
The ironing table is held independently
in this position.
^ Turn one of the rotary dials as far as it
will go towards ).
The ironing table is now released.
^ Release the rotary dial and it will
spring back into the middle position.
^ Push the ironing table upwards by
the tapered end into an upright
position until it clicks into position on
the tower.
37
Storage
^ Once the iron has cooled down on
the resting surface, stow the iron and
the steam hose holder in the upper
storage compartment
^ Stow the steamer (for B 1847) in the
lower storage compartment.
Do not stow the iron or steamer if
they are still connected.
Empty the water container if the system
is not going to be used for a long
period.
^ Push the bottom of the X-frame which
is still protruding in until it clicks into
position.
^ The Fashion Master can now be put
away.
^ Disconnect the iron or steamer from
the steam connection in the tower.
Pull back the sliding mechanism on
the steam hose plug and withdraw
the plug. Do not pull on the steam
hose.
Caution: the plug can still be warm
immediately after use.
A small amount of water can escape
from the steam hose.
38
Do not store the appliance in a room
where there is a risk of frost
occurring. Frozen water can cause
damage to the water container,
steam generator and steam hose.
Cleaning and care
Cleaning the casing
,Disconnect the appliance from
the electricity supply before any
cleaning and maintenance work on
the casing.
The 2 indicator light comes on.
Emptying the residual water
container
The residual water container may be
hot after rinsing.
Do not use any abrasive cleaning
agents.
Depending on the level of soiling, the
casing can be wiped with a wet or dry
E-cloth (see "Optional accessories").
Automatic rinse
The automatic rinse function clears the
steam generator of mineral deposits
from the evaporated water.
After a water throughput of approx. 3
litres, the water from the steam
generator is drained off into the residual
water container when the Fashion
Master is next switched on.
The rinsing process lasts a couple of
minutes. During the rinsing process the
indicator light on the iron does not light
up and the iron does not heat up when
the steam ironing system has been
switched on.
^ If the k indicator light comes on, fill
the water container.
^ If the 2 indicator light comes on,
empty and replace the residual water
container.
^ Set the appliance to its highest
working position (see "Adjusting the
height") to allow access for removing
the residual water container.
Only remove the residual water
container when prompted by the 2
indicator light.
^ Remove, empty, clean and dry the
residual water container.
The residual water container can be
cleaned in the dishwasher or by hand,
using hot water with a little washing-up
liquid.
The contents of the steam generator will
drain off into the residual water
container. Some steam will escape
during this process.
39
Cleaning and care
Automatic descaling
Make sure that the metal contact
discs at the top of the residual water
container are cleaned and dried
properly. These metal discs send a
signal to the appliance when the
residual water container is full or if it
is not in the appliance. The discs will
not convey these signals if they are
dirty or damp.
^ Insert the residual water container
after a short interval (approx. 15
seconds) so that it clicks into place.
The 2 indicator light goes out.
The Fashion Master is now ready to use
again.
When the * light comes on, you can
use steam again.
The appliance should be descaled
regularly to ensure that it functions
correctly. The appliance has an automatic descaling function to assist you.
Frequency and requirement for
descaling is dependent upon the water
hardness level set. Descaling is
required more frequently with hard
water than with soft water.
Only use the Miele descaling tablets
supplied with the appliance. They
were specially developed for the
Miele Fashion Master to optimise the
descaling process. Other descaling
agents could damage the
appliance.
You will need one descaling tablet for
each descaling process.
Additional descaling tablets are
available from Miele or online (see
"Optional accessories").
The ironer or steamer must not be
connected during descaling. The
appliance can be left unattended
during descaling (providing the iron
or steamer is not connected).
Descale advanced warning
When there are approx. 2 operating
hours remaining before the next
descaling, the k indicator light begins
to flash red. The light will flash more
rapidly as the time counts down, until it
stays on permanently.
40
Cleaning and care
Descaling can be started at any time
whilst the red k indicator light is
flashing by pressing the j button.
If the k indicator light is permanently
on, the remaining operating hours have
expired.
You can still finish your ironing,
however, the appliance must carry out
descaling next time it is switched on,
before any more ironing is done.
^ Disconnect the steam hose of the
iron or the steamer from the steam
connection.
The descaling process can be
interrupted by switching the appliance
off with the s button. When it is
switched back on, the descaling
process will resume from the stage at
which it was interrupted.
Starting the descaling process
^ Press the On/Off button s to switch
on the appliance.
The ring around the s button lights up
yellow.
^ Set the appliance to the highest
working position, to allow access for
removing the residual water container
during the descaling process.
^ Press the j button for a few seconds
to start the descaling process.
Do not connect the iron or the steamer
during descaling. This would interrupt
the descaling process by switching off
the appliance. If it is switched on again
without the iron or steamer attached,
the descaling process is continued.
If the residual water container is not
inserted or is full, the 2 indicator light
comes on.
The residual water container can
become hot during the descaling
process. Only remove and empty
the residual water container, when
prompted to do so by the 2
indicator light.
Otherwise hot water could spill out
and cause injuries and/or damage to
the appliance.
To prevent unwanted removal of the
container, set the appliance to its
lowest working position. The
appliance must be put back into its
highest working position to remove
the residual water container.
The k indicator now lights up yellow.
^ Set the appliance to its highest
working position (see "Adjusting the
height") to allow access for removing
the residual water container.
^ Remove and empty the residual
water container.
^ Replace the residual water container.
The 2 indicator light will go out.
Later on in the descaling process
the residual water container must
not be removed unless the 2
indicator light comes on. Otherwise
hot water could spill out and cause
injuries and/or damage to the
appliance.
41
Cleaning and care
If the appliance is still hot from the last
use, the l indicator light comes on.
The descaling process is automatically
resumed when the appliance has
cooled down and the l indicator light
has gone out.
The k and 2 indicator lights go out.
The k indicator light comes on.
Water is now pumped into the steam
generator to rinse it out. The water is
then drained away completely into the
residual water container. The 2
indicator light comes on again.
^ Remove the water container and fill it
up to the k mark with fresh tap water
(approx. 25°C to 35°C). Add a Miele
descaling tablet (see "Optional
accessories") to the water container.
^ Replace the water container.
The k indicator light goes out.
After about 10 minutes (the time it takes
for the tablet to dissolve), the descaling
process begins. Water is pumped into
the steam generator at various times
during the descaling process and is
drained away again into the residual
water container.
After an activation period of about an
hour all the water from the steam
generator is drained away into the
residual water container.
The residual water container may be
hot after rinsing.
^ Remove and empty the residual
water container.
^ Rinse out and dry the residual water
container thoroughly.
The residual water container can be
cleaned in the dishwasher or by hand,
using hot water with a little washing-up
liquid.
The indicator lights will alert you if you
need to empty the residual water
container or fill the water container.
^ Replace the residual water container.
The k and 2 indicator lights now come
on.
The k indicator light goes out as well
and the appliance switches off.
^ Remove the water container and
rinse it thoroughly making sure there
are no limescale deposits left in it.
Switch on using the s button. The
appliance is now ready to use again.
^ Fill the water container up to the k
mark with fresh tap water and
replace it in the appliance.
^ Remove and empty the residual
water container.
^ Replace the residual water container.
42
The 2 indicator light will go out now.
Cleaning and care
Cleaning the ironing table
cover
Replacing the ironing table
cover
If the ironing table cover is soiled, it can
be removed for washing.
Do not use the appliance if the ironing
table cover is damaged.
,Do not operate the appliance
without an ironing table cover.
,When removing the ironing table
cover, always ensure the appliance
is switched off and disconnected
from the electricity supply. Wait until
the ironing table has cooled down.
^ Undo the fastening of the ironing
table cover at the tapered end of the
ironing table.
^ Remove the cover in the direction of
the tower. The felt underlayer remains
on the ironing table.
^ Wash and dry the cover in
accordance with the instructions on
the care label.
^ Put the cover back on from the tower
end first and draw it down towards
the tapered end.
^ Pull the cover taut using the cord and
ensure that it is secure.
^ Close the fastening of the cover and
push it into the space at the tip of the
ironing table.
The appliance is ready for use again.
,Do not operate the appliance
without an ironing table cover.
The ironing table cover must be
replaced with an original Miele
replacement.
,When changing the ironing table
cover, always ensure the appliance
is switched off and disconnected
from the electricity supply.
Wait until the ironing table has
cooled down.
^ Undo the fastening of the ironing
table cover at the tapered end of the
ironing table.
^ Remove the cover in the direction of
the tower. The felt underlayer remains
on the ironing table.
^ Put the new cover on from the tower
end first and draw it down towards
the tapered end.
^ Pull the cover taut using the cord and
ensure that it is secure.
^ Close the fastening of the cover and
push it into the space at the tip of the
ironing table.
The appliance is ready for use again.
43
Cleaning and care
Cleaning the sole plate of the
iron
,Caution. Danger of burning. The
sole plate of the iron remains hot for
some time after ironing. Allow it to
cool down before starting to clean it.
^ Switch the appliance off and
disconnect it from the electricity
supply before cleaning the iron sole
plate.
Depending on the level of soiling, the
sole plate can be wiped with a wet or
dry E-cloth (see "Optional
accessories").
To avoid damaging the shiny surface
of the sole plate, do not use:
– abrasive cleaning agents, e.g.
powder cleaners and cream
cleaners, chrome polish,
– hard, abrasive brushes or sponges,
e.g. pot scourers, or sponges which
have been previously used with
abrasive cleaning agents,
– sharp or pointed objects.
44
Cleaning and care
Cleaning the water filter
The water filter prevents foreign objects
in the water from getting into the
appliance and causing damage.
If the water filter is dirty or blocked, it
can be cleaned.
A dirty water filter can cause more
frequent pumping noises from the water
feed pump.
^ Switch the appliance off and
disconnect it from the electricity
supply before cleaning the water
filter.
^ Undo the screw on the water filter
cover and lift the cover upwards and
off.
In the cover there are tools for removing
both the seal and the water filter.
^ Remove the water container. Hold the
container by the integral handle, then
pull it out and upwards to remove it.
^ Remove the seal on the right-hand
socket with the appropriate tool.
45
Cleaning and care
^ Replace the water filter, ensuring that
the filter seal is underneath.
^ Replace the seal in the right-hand
socket.
^ Attach the appropriate tool in the
cover onto the water filter in the
right-hand socket and remove it.
^ Replace the cover and tighten the
screw.
^ Replace the water container.
The appliance is ready for use again.
Do not use the appliance if the water
filter is not in place as this will cause
a fault to be indicated. See "Problem
solving guide".
^ Remove the water filter from the tool.
^ Clean the water filter thoroughly
under running water.
46
The water filter must be replaced if it is
worn or damaged. Only use genuine
original Miele replacement parts. These
are available from Miele (see back
cover for contact details) or from your
Miele dealer.
Optional accessories
Miele appliances are built to the highest
standards to achieve the best possible
results for as long as possible. To help
you get the most out of your appliance
Miele also offers a comprehensive
range of accessories and care
products.
The following products are just a few
examples from our full range which is
available to order online at:
Ironing table cover
Miele ironing table covers are
hard-wearing and highly absorbant.
The separate needle felt under layer is
steam-permeable and pleasantly
cushioned.
Both can be used for any Miele Fashion
Master, regardless of model.
– Basic ironing table cover
Colour: mottled grey
The basic ironing table cover consists
of 65% polyester and 35% cotton and
can be washed as necessary at 40°C.
or from Miele (see back cover for
contact details) or from your Miele
dealer.
Accessories
Non-stick sole plate
With the non-stick sole plate, you can
generally iron appliqués, printed or
flocked textiles etc, without turning the
garment inside out. It also reduces or
eliminates the formation of shiny
patches on dark textiles. The non-stick
sole plate can be used on the iron of
any Miele Fashion Master, regardless of
model.
– Aramid ironing table cover
This ironing table cover has particularly
good heat resistance and durability due
to the aramid fibres.
Colour: anthracite
The aramid ironing table cover consists
of 100% aramid and can be washed as
necessary at 40°C.
Steamer
The steamer facilitates the smoothing of
hanging textiles, e.g. dresses and
jackets. It comes with a brush
attachment for raising and straightening
the fibres.
The steamer can be used with any
Miele Fashion Master, regardless of
model.
47
Optional accessories
Cleaning products
The Miele CareCollection has products
which have been specially developed
to clean your appliance gently and
thoroughly.
Descaling tablets for the Fashion
Master
Miele descaling tablets guarantee an
optimum result when descaling your
Miele Fashion Master.
One tablet is required for each
descaling process.
E-cloth (microfibre cloth)
Removes fingerprints and light soiling
without damaging the surface.
48
Problem solving guide
With the help of the following notes, minor faults in the performance of the
appliance, some of which may result from incorrect operation, can be put right
without contacting the Service Department.
,Repair work to electrical appliances should only be carried out by a
suitably qualified person in strict accordance with current local and national
safety regulations. Repairs and other work by unqualified persons could be
dangerous. The manufacturer cannot be held liable for unauthorised work.
Problem solving guide
Problem
Possible cause
Remedy
The appliance will not
operate.
There is no power to Check whether
the appliance.
- the mains plug is plugged in
and switched on.
- the fuse or circuit breaker has
tripped.
The appliance will not
operate following a
power cut.
The appliance is
switched off.
The height adjustment
mechanism on the
ironing table is not
functioning.
The ironing table is Click the ironing table into place
not clicked into
on both sides of the tower (see
place on both sides "Assembling").
of the tower.
Switch the appliance on with the
On/Off button s.
If the power cut occurred during
an automatic rinse, the process
will be repeated when the
appliance is switched on again.
If the power cut occurred during
automatic descaling, the
process will be resumed from
the stage in which it was
interrupted, when the appliance
is switched on again.
49
Problem solving guide
Problem
The appliance will not
fold away.
The ironing table will
not click into place
during assembly or
dismantling for
storage.
Possible cause
Remedy
The ironing table is
not in its lowest
working position.
Adjust the ironing table to its
lowest working position (see
"Storage")
The residual water
container is not
correctly inserted
and clicked into
place.
Insert the residual water
container fully into the tower until
it clicks into place.
Then adjust the ironing table to
its lowest working position (see
"Storage")
The ironing table is
displaced because
the tower was not in
the lowest position.
Press and hold the release
button on the tower and at the
same time turn the rotary height
adjustment dial as far as it will
go towards q and hold it steady.
Push the tower into its lowest
working position and then let go
of the rotary dial and then the
release button.
Now the ironing table can either
be folded away or brought into
the working position.
If the ironing table still will not
click into place, contact Miele.
50
Problem solving guide
Problem
Possible cause
Remedy
Water is leaking from
the steam ironing
system at the height of
the water container
when it is being
transported.
Water droplets can Dry the area underneath the
collect in the area
water container in the tower with
under the water
a cloth.
container as a result
of frequent removal
and replacement of
the water container.
The iron or steamer
does not heat up.
The appliance is
switched off.
Switch the appliance on with the
On/Off button s.
The steam hose is
not plugged in
properly.
Remove the steam hose and
plug it into the steam connection
again (see "Connection").
The iron has not
Move the iron or operate the
been used for some steam button *.
time.
The temperature set
on the temperature
selector has been
reached.
Wait a while until the iron heats
up again.
Or, if possible, select a higher
temperature.
The appliance is
rinsing.
Wait until the rinsing process has
been completed (see “Automatic
rinse”).
The indicator lights
are showing that
there is a fault.
Remedy the fault as explained
on the following pages.
The appliance is
damaged.
Call Miele Service.
51
Problem solving guide
Problem
Possible cause
Remedy
The ironing table is not Steam has not been Operate the steam button *, to
heating.
used for a while.
activate the ironing table
heating.
The iron always heats
to a high temperature.
The steamer is
connected to the
tower.
The ironing table does not heat
up when the steamer is
connected.
The appliance is
damaged.
Call Miele Service
There is a fault with
the appliance.
Call Miele Service.
The ironing table cover There is a fault with
is damp.
the appliance.
Remove the ironing table cover
and allow it to dry.
Replace the ironing table cover
(see "Replacing the ironing
table cover").
If the ironing cover seems damp
again, call Miele Service.
52
Problem solving guide
Problem
Possible cause
The fan is not running. No steam is
required.
The steam is not
ready.
Remedy
The fan only runs when the
steam function on the iron is
operated.
Wait until the * indicator light
signals that steam is ready.
The water container Fill the water container with fresh
is empty or missing. tap water and insert it into the
appliance.
Descaling cannot be
started, although the
indicator light k is
flashing or lit up.
The steamer is
connected.
The fan only runs when the iron is
connected.
Connect the iron.
There is a fault with
the appliance.
Call Miele Service.
The iron or steamer
are plugged in.
Disconnect the iron or the
steamer from the steam
connection.
The j button was
Press the j button for longer.
not pressed for long
enough.
There is a fault with
the appliance.
Call Miele Service.
53
Problem solving guide
Problem
Possible cause
The appliance
The iron or the
switches off during the steamer was
descaling process.
connected during
the descaling
process.
Remedy
Disconnect the iron or the
steamer from the steam
connection. Switch the
appliance on again.
The k indicator light is The water container Remove the water container, fill
on.
or contents have not and replace it.
been recognised.
Rinsing or descaling could still
be taking place. Wait until the
process has finished.
Programming of the water
hardness level has not yet been
completed. Complete this
process.
If the indicator light is still on, call
Miele Service.
The k indicator light is The water container Insert the water container again.
on during the
or contents have not
Fill the water container with a
descaling process.
been recognised.
little more water and replace it.
If the indicator light is still on, call
Miele Service.
The l indicator light is The steam
constantly lit up.
generator has
overheated.
Allow the steam ironing system
to cool down. The steam ironing
system is ready to use again
when the l indicator light has
gone out.
If the indicator light is still on, call
Miele Service.
54
Problem solving guide
Problem
The 2 indicator light
is on constantly.
Possible cause
Remedy
The empty residual
Empty the residual water
water container has container completely and dry it
not been recognised. out. Insert the residual water
container after a short interval
(approx. 15 seconds) so that it
clicks into place.
Clean and dry the metal
contacts on the residual water
container and replace the
container.
If the indicator light is still on, call
Miele Service.
The steam function
The appliance has
on the iron or steamer not been switched
does not work.
on.
Connect the appliance to the
mains electricity supply and
switch it on with the On/Off
button s .
The iron or steamer
are not connected.
Connect the steam hose to the
steam connection on the tower.
The water container
is empty or missing.
Fill the water container with fresh
tap water, replace it and wait for
the * indicator light to signal that
steam is ready.
The steam is not
ready.
Wait until the * indicator light to
signals that steam is ready.
The indicator lights
are showing that
there is a fault.
Remedy the fault as explained
on the following pages.
If still no steam is produced, call
Miele Service.
55
Problem solving guide
Problem
When using the steam
button * on the iron,
drops of water or white
deposits escape from
the steam jets.
Possible cause
Remedy
The temperature
Set the temperature to at least
selected on the iron ßß (see "Selecting the
temperature for ironing").
is too low.
The appliance is not
ready to steam and
the iron has not yet
reached the
selected
temperature.
Wait for the * indicator light to
signal that the steam is ready
and the selected iron
temperature has been reached
(see "Selecting the temperature
for ironing").
Condensation has
formed in the steam
hose due to a pause
in ironing.
To avoid wet spots on your
laundry, do not direct the first
burst of steam after a pause onto
the garment.
The * indicator light
flashes once and the k
indicator light is also
lit up.
The appliance was
switched off during
the descaling
process or there
was a power cut.
After power has been restored
and the appliance switched on,
wait a moment. The appliance
will resume the descaling
process from the point at which
the power failed or the process
was interrupted.
The * indicator light
flashes twice and the
k indicator light is
also lit up.
The descaling
Switch the appliance off and
process was not
then back on again.
carried out properly.
If the indicator light continues to
flash, call Miele Service.
The * indicator light
flashes three times
and the k indicator
light is also lit up.
There is a fault with
the appliance.
56
Call Miele Service.
Problem solving guide
Problem
The * indicator light
flashes four times and
the k indicator light is
also lit up.
Possible cause
Remedy
The empty or
missing water
container is not
recognised by the
appliance.
Switch off the appliance. Fill the
water container with fresh tap
water and replace it. Do not use
distilled water. Switch the
appliance back on again.
The water container The l indicator light is lit up.
When the steam generator cools
is not inserted
properly causing air down, it empties automatically.
The steam generator is then
to be sucked in.
automatically refilled so it is
The water feed
ready to steam again.
pump is being
activated but is not
running.
The water filter is
blocked or missing.
Clean and replace the water
filter (see "Cleaning the water
filter").
If the indicator light continues to
flash, call Miele Service.
There is a fault with
The * indicator light
flashes five times and the appliance.
the k indicator light is
also lit up.
Switch the appliance off and
then back on again.
If the indicator light continues to
flash, call Miele Service.
57
Problem solving guide
Problem
The * indicator light
flashes six times and
the k indicator light is
also lit up.
Possible cause
Remedy
The steam
generator is
contaminated with
water which is too
hard or too salty.
Start the descaling process by
pressing the j button.
In this case the descaling
requirement is not indicated by
the k light (see "Cleaning and
care").
To avoid this problem in the
future, set the water hardness
level at least a stage higher; for
example, if it is set to 4, increase
it to 5 or more (see "Setting the
water hardness level").
There is a fault with
the appliance.
Switch the appliance off and
then back on again.
If the indicator light continues to
flash, call Miele Service.
The * indicator light
flashes seven times
and the k indicator
light is also lit up.
58
There is a fault with
the appliance.
Switch the appliance off and
then back on again.
If the indicator light continues to
flash, call Miele Service.
Problem solving guide
Problem
The * indicator light
flashes eight times
and the k indicator
light is also lit up.
Possible cause
The residual water
container has not
been recognised.
Remedy
– Switch off the appliance.
– Wash and dry the metal
contacts on the residual water
container.
– Switch the appliance on again
and reset it as follows:
– Insert the residual water
container, filled with water, for
at least 15 seconds.
– Remove the residual water
container again and empty it.
– Replace the empty residual
water container after at least
15 seconds.
The appliance is ready to use
again and resumes the process
which was started before the
fault.
Switch the appliance off and
then back on again.
The appliance keeps
switching off or the *
indicator light flashes
nine times and the k
indicator light is also
lit up.
There is a fault with
the appliance.
If the indicator light continues to
flash, call Miele Service.
The descaling
process was
interrupted by the
appliance switching
off. The iron or
steamer is
connected when the
appliance is
switched on again.
Switch the appliance off and
disconnect the iron or steamer
from the steam connection.
Switch the appliance back on
again. The descaling process
will resume.
59
After sales service
In the event of a fault that you cannot
easily remedy, please contact
– your Miele Dealer
or
– Miele (see back cover for contact
details).
Please note that telephone calls may
be monitored and recorded for
training purposes (UK only).
When contacting Miele, please quote
the Model and Serial number of your
appliance, both of which are given on
the data plate which is located in the
tower behind the water container.
60
Guarantee
For information on the appliance
guarantee specific to your country
please contact Miele. See back cover
for contact details.
In the UK, your appliance is guaranteed
for 2 years from the date of purchase.
However, you must activate your cover
by calling 0845 365 6640 or registering
online at www.miele.co.uk.
Electrical connection
,All electrical work must be
carried out by a suitably qualified
and competent person in
accordance with current local and
national safety regulations (BS 7671
in the UK).
This appliance is supplied with a
connection cable and moulded plug
(BS 1363) for connection to a 230 V
mains supply.
The appliance must only be operated
with the voltage, frequency and fuse
rating shown on the data plate (located
in the tower behind the water
container). Please ensure these match
the household mains supply.
We recommend connecting the
appliance to the power supply via a
suitable plug and socket which must be
easily accessible for servicing and
maintenance work.
The appliance must not be connected
to the inverter of an autonomous power
supply, e.g. a solar power system.
When switching the appliance on, a
surge in the power could trigger the
safety cut-out mechanism. This could
damage the electronic unit.
The appliance must not be used with
so-called energy saving devices.
These reduce the energy supply to the
appliance which could then become
too warm.
If mains connection cable may only be
replaced by an original Miele spare
part.
WARNING
THIS APPLIANCE MUST BE
EARTHED
Do not connect the appliance to the
mains electricity supply by a
multi-socket adapter or an extension
lead.
These do not guarantee the required
safety of the appliance, (e.g. danger of
overheating).
For extra safety and protection we
recommend connecting the appliance
by a 30 mA residual current device
(RCD).
If the electrical connection cable is
faulty this must only be replaced by a
suitably qualified and competent
person.
61
Technical data
Dimensions when dismantled (H x W x D)
1281 x 471 x 382mm
Dimensions when assembled (H x W x D)
963 x 1460 x 471mm
Weight
29 kg for B 1312 and B 1826
30 kg for B 1847
Voltage
See data plate
Connected load
See data plate
Fuse rating
³ 10A
Steam pressure
3.5 bar for B 1312
4.0 bar for B 1826 and B 1847
Steam output
100 g/min
Capacity of water container
1.25 l
Electrical connection cable length
2.50 m
Steam hose length
1.80 m
Ironing table height
830 - 1020 mm
Ironing table length
1200 mm
Ironing table width
400 mm
Product safety standard
according to EN 60335-1,
EN 60335-2-3, EN 60335-2-85
Test certificates awarded
See data plate
62
63
Alteration rights reserved/1412
M.-Nr. 09 370 090 / 00