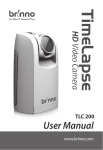
Download Brinno TLC200 Pro
Transcript
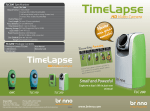
TLC200 Pro
User Manual
Never miss a shot
SEE the UNSEEN
HDR Time Lapse Video camera
TLC200 Pro
User Manual
01
WELCOME
TO
BRINNO
FA M I LY !
THE
Welcome to
Brinno!!!
Share your
awesome Time
Lapse videos with
other Brinno fans
on our facebook
page !!!
facebook.com/BrinnoInc
www.brinno.com/support/register.html
contact us: [email protected]
more information: www.brinno.com
03
Optional Accessories
Weather Resistant Housing
(ATH120)
Brinno Reader
(ABR100)
Bike Cam Holder
(ABH100)
Shutter Line
(ATS110)
Camera Wall Mount
(AWM100)
Motion Sensor
(ATM110)
Pan Lapse
(ART100)
Pouch
(ATP100)
Micro Scope
Adapter(AMH100)
Brinno Lens
(BCS 18-55 & BCS 24-70)
CONTENT
09 Package Contents
10 Before You Begin Taking Photos
10
11
12
13
15
16
17
18
19
20
Parts of the Camera
Display Icons
How Our Power Saving Technology Works
First Steps
Mode
Time Lapse Mode & Setting a Time Interval
To Begin Recording
To Stop Recording
Storage status
Focus Mode
21 Basic settings
21
22
23
24
25
26
27
27
Setting the Time Lapse Frame Rate
White Balance Mode
Image Quality
Scene
Timer
HDR Range
Exposure
Custom Image
28 More Settings
28
28
29
29
30
30
31
Time Stamp
Low Light Recording
Set Date & Time
LED Indicator
Band Filter
Firmware Version
Reset
32 Reference
32
33
34
35
36
37
38
39
CS-mount lens
Extensional accessories
External Power
Micro USB connector-File transfer
Micro USB connector-Webcam
What Settings Should I Use
Scene Setting & What Size SD Card Should I Use
Battery Life
42 Specification
OK
START
on
Settings
SD Storage
Set the
Time Interval
Focus
Time Lapse Frame Rate
1 FPS/ 5 FPS/ 10 FPS/ 15 FPS/ 20 FPS/ 30 FPS
ASAP
1 Sec
2 Sec
3 Sec
5 Sec
10 Sec
20 Sec
White Balance Mode
Auto/5000 Day/ 7000 Shad/ 6000 Clou
4000 Fl-C/ 3300 FL-W/ 2800 Inc
Image Quality
Best/Better/Good
Scene
30 Sec
1 Min
5 Min
10 Min
1 Hr
Custom
Daylight/Twilight/Night/Moon/Star
Timer
You can set start and stop time.
HDR Range
High/Medium/Low
Exposure
Custom Image
MENU
TIME
Saturation
Contrast
OK
START
Sharpness
on
EXIT
If the screen goes to sleep, press OK to wake up.
OK
START
EXIT
Subject to change without notice, please refer to
brinno.com/support for latest information.
Package Contents
4
1
5
6
2
3
1
2
3
4
5
6
7
SD
AA
AA
AA
AA
7
8
HDR Time Lapse Camera (TLC200 Pro)
4 AA Batteries
SD Card
Lens cover
BCS 019 Lens (comes mounted on the camera)
Lens cover
Screwdriver
8 Screw
09
Before You Begin Taking Photos
Parts of the Camera
6
7
1
8
2
9
10
3
11
4
12
13
5
1
2
3
4
5
6
7
10
BCS 019 Lens (Page 32)
SD Card Slot
Connector for Accessories (Page. 33)
Connector for Micro USB cable (Page. 34~36)
Battery Door
Strap Eyelet
LED indicator
8 LCD Screen
9 MENU ( ) Button
10 TIME ( ) Button
11 OK/ START Button
12 Power Switch
13 Tripod Screw Hole
Display Icons
Set Up screen
1
T.Lapse
ASAP
2
OK
2013/03/01
22:58:32
3
4
Preview screen
5
At Set Up screen
1 Capture mode
T.Lapse: Time Lapse mode
Shutter: Stop Motion mode
Motion: Motion Activated mode
2 Time interval
Select a pre-set time interval or customize yourself.
3 System date and time
4 Battery level
Icon
6
7
READY
8
Description
(green)
Battery fully charged.
(green)
Battery partially charged.
(yellow)
(red)
Low battery.
Replace as soon as possible.
Out of battery.
Replace battery immediately.
At Preview screen
BATTERY
EMPTY
5 Scene mode
6 White Balance mode
7 Preview image capture window
Status icon
9
8 Battery Empty
SD
Please replace battery immediately.
FULL
10
9 SD Card Full
Please download files to clear SD card space.
11
SD
ERROR
10
SD
NO CARD
11
SD Card Error
Please replace SD card.
No Card
Please Insert SD card.
11
How Our Power Saving
Technology Works
Set up screen
Preview screen
T.Lapse
1 Sec
Turn off LCD
720P
10 sec.
50 sec.
OK
2013/03/21
22:58:32
READY
At The Set Up Screen
After 10 seconds without activity on the set up screen,
the camera will go to Preview screen automatically. You
can press the MENU or TIME button to go back to the
set up screen.
At Preview Screen
After 50 seconds without activity on the set up or preview screen, the LCD screen will turn off automatically
to save power. You can press the OK button to wake up
camera.
12
First Steps
Initial Step-1 Installing the Batteries
1
2
3
1. Open battery door.
2. Insert 4 AA batteries.
3. Close battery door.
Be sure the battery cover is locked into place.
Initial Step-2 Installing SD Card
1
2
3
1. Open SD card cover.
2. Insert SD card until it clicks into place.
3. Close SD card cover.
13
First Steps
Initial Step-3 Turning on the Camera
1
2
3
1 Sec
SD
READING..
on
T.Lapse
OK
2013/03/01
22:58:32
1. Rotate the Power switch to the ON position.
2. Process screen
It may display other information on screen, please refer to page 7.
3. Set Up screen
Initial Step-4 Setting the Time and Date
1
2
Setting
OK
3
More
Date & Time
Set Date
& Time
2013/ 03 /01
22 : 58 : 32
OK
OK : Next
1. Press the MENU button to go to Setting -> MORE
2. At MORE Setting, select Set Date & Time, and press
OK.
3. At the highlight field, press MENU ( ) to decrease
value, press TIME ( ) to increase value, press OK
to confirm and go to the next field. When finished
press OK to exit set up.
14
Mode
Start Screen
T.Lapse
ASAP
OK
2013/03/01
22:58:32
MENU
TIME
MENU
Settings
TIME
Set the Time Interval
Settings
(Refer to
Page21-31)
SD Storage
Display the SD
card capacity
(Refer to
Page19)
Setting the
Time Interval
(Refer to
Page16)
Focus
Enlarge the preview
image, so you can easily
adjust the lens focus.
(Refer to Page20)
15
Mode
Time Lapse Mode
In Time Lapse Mode, the camera will take one photo at
the time interval you selected. When you are finished
recording, the camera will convert those photos into a
time lapse video!
Before you begin recording, you can change the “Time
Lapse Frame Rate”. For more information please refer
to page 16.
Output file format: AVI. (Without audio)
Resolution: 720P
Time Lapse video length: The maximum size of each
single AVI file ranges between 8,192 to 20,480 frames,
depending on the time interval setting.
1. Setting a Time Interval:
1-1
1-2
TIME
TIME
2 Sec
10 Min
OK
OK
TIME
CUSTOM
22 : 58 : 32
OK
OK : Next
T.Lapse
1 Sec
OK
2013/03/01
22:58:32
Set up screen
1-1 Press TIME button to enter time interval set up.
1-2 Press MENU ( ) and TIME ( ) to select a pre-set
time interval or customize it by yourself. When
complete, press the OK Button to confirm and
return to the Set up screen.
Time Interval range: from below 1 second to 24 hours.
16
Mode
2. To Begin Recording
2-1
2-2
T.Lapse
1 Sec
10 sec.
OK
2013/03/01
22:58:32
READY
Set up screen
Preview screen
• REC
Recording
2-3
Recording period
2-1 After selecting the time interval, press OK to proceed to the Preview Screen.
2-2 On the Preview screen, hold the OK button for 2
seconds to start recording. Preview Screen will
show REC at the bottom bar.
2-3 During the recording period, the LCD panel will
turn off to save power.
17
Mode
3. To Stop Recording
3-1
Processing
Preview screen
3-2
SD
3-1
3-2
18
When recording, hold the OK button until the
LCD panel turns on and shows the text “Processing”, this means the camera is processing the
AVI and closing the file. When the processing is
completed it will display the text “Ready”. This
indicates the recording session is finished.
Remove the SD card from the camera, and insert
it into your computer or laptop to enjoy your
amazing Time Lapse Videos!
Storage Status
In this mode, the LCD will display the SD card capacity,
so you will know how much free space remains on the
SD card.
SD Storage
S i z e =4GB
Used =27%
F r e e =73%
OK
19
Focus Mode
In this mode, the camera will enlarge the preview image, making it easier to focus the lens.
1
Focus
2
3-1
Page 5
OK
Page 5
3-2
Adjust the lens focus
4
5
1. Select and enter “Focus” mode.
2. See the enlarged preview image.
3. Use the screwdriver to loosen the screw on the (BCS
019) lens. Adjust the lens focus.
4. Once finished, use the screwdriver to tighten the
screw.
5. Press “OK” to exit focus mode.
20
Basic settings
Setting the
Time Lapse Playback Frame Rate:
You can change the videos FPS (frames per second)
playback with this setting.
1
2
Setting
Frame Rate
Time Lapse
Frame Rate
15 FPS
20 FPS
30 FPS
OK
OK
10FPS
(Frames Per
Second) means:
10 frames are
played in 1
second.
1. Press MENU button to enter “Setting” mode.
2. Select and enter “Time Lapse Frame Rate”.
3. What frame rate should I use?
Generally, 10 FPS is suitable for Time Lapse video, but
depending on your needs you can use 1 - 30 FPS.
1 FPS: If the video plays at 1 frame per second, the
video will not look smooth, and the video length
will be longer.
30 FPS: If the video plays at 30 frames per second,
the video will look smooth, and the video length
will be shorter.
Option
1 FPS
Video playback speed
Very slow
Shooting subject
Slide show
5 FPS
Slow
Stop motion, Face time
lapse
10 FPS
15 FPS
20 FPS
Medium
Biking
Medium
Flowers growing,
Educational endeavors
30 FPS
Fast
Parties, Sunrises,
Sunsets, Natural settings.
21
Basic settings
White Balance Mode
1
2
Setting
White
Balance
Mode
OK
WB Mode
Auto
5000 Day
7000 Shad
OK
At the default setting of Auto (AWB), the camera automatically adjusts white balance so that a white subject
will appear white regardless of the color of the light
source. It may however be necessary to match white
balance to the light source under mixed lighting or
when photographing a subject that is a solid color.
Option
AWB
Description
Color
Temperature
Auto
The camera will adjust the Approx.
white balance automatically 4000 to 7000K
Day
balance automatically
Approx. 5000K
Shade
Use when shooting in the
shade
Approx. 7000K
Cloudy
Use when shooting on a
cloudy day
Approx. 6000K
Fluorescent Use when shooting under
Approx. 4000K
Light-Cool fluorescent light Cool White
Fluorescent Use when shooting under
Approx. 3300K
Light-Warm fluorescent light Warm White
Tungsten Use when shooting under
Light Tungsten light
22
Approx. 2800K
Basic settings
Image Quality
1
2
Setting
Quality
Best
Better
Good
Image
Quality
OK
OK
The Image Quality setting lets you choose a different
image quality to fit your needs, and the image quality
will determine the number of frames that can be stored
on the SD Card:
Option
Best
Better
Good
Single frame
size
Description
Low compression
rate produces
200~ 400
maximum image
Kb
data for highest
quality images
150~ 300
General usage
Kb
High compression
rate produce less
70~ 150
image data, best
Kb
for long capture
periods
4 GB SD card
capability
14,000
photos
20,000
photos
30,000
photos
23
Basic settings
Scene
1
2
Setting
Scene
Scene
Daylight
Twilight
Night
OK
OK
Scene
Moon
Star
OK
Select the scene that best fits your photographic needs.
Option
Description
Daylight For any photography situation in Daytime .
Special setting for Sunrise & Sunset
Twilight photography. Time Interval ASAP mode: 1
Night
Moon
Star
24
seconds per picture.
Special setting for Nighttime photography.
Low ISO setting, long exposure time.
Time Interval ASAP mode: 2 seconds per
picture.
Special setting for Moon photography.
Low ISO setting, extra long exposure time
up to 2 sec. Time Interval ASAP mode: 4
seconds per picture.
Special setting for Star photography. Low
ISO setting, super extra long exposure
time up to 4 sec. Time Interval ASAP mode:
8 seconds per picture.
Basic settings
Timer
1
2
Setting
3
Timer
0000-0000
Exit
Cancel
OK
Timer
OK
Timer
0000 - 0000
OK : Next
The Timer will allow you to pre-set a recording period. ( eg. 8 am – 5 pm )
1. Set the start recording time (A area), then set the stop
recording time (B area). The time is set in 15 minutes increments. Press MENU to lower the number, press TIME to
increase the number and press OK to next column.
Or you may select Cancel to disable Timer setting.
e.g.
0600 - 1600 morning to afternoon
0000 - 0000
1600 - 2330 afternoon to night
A
B
2345 - 0500 overnight
2. After setting up the time, go back to the set up screen
then press the OK button to move to the preview screen.
Hold the OK button for 2 seconds to start recording. The
LCD panel will show REC then turn off to save power. The
camera will automatically activate at the start recording
time you selected.
T.Lapse
1 Sec
2 sec.
OK
2013/03/01
22:58:32
READY
Set up screen
Preview screen
• REC
Recording
Recording period
ONCE YOU ACTIVATE TIMER, YOUR TIME LAPSE CAMERA
WILL ONLY WORK AT THE TIMER SETTING PERIOD.
25
Basic settings
HDR Range
1
2
Setting
HDF Range
HDR
Range
High
Medium
Low
OK
OK
HDR (High Dynamic Range ) setting let’s you choose
the required HDR setting:
Option
High
Medium
Low
26
Description (For example)
Suggested setting for sunrise or sunset.
For any standard shooting situation.
For portraits.
Basic settings
Exposure
1
2
Setting
Exposure
Exposure
OK
In the Exposure setting menu, press MENU ( ) to
increase (+) exposure time or select TIME ( ) to decrease (-) the exposure time. Press OK to exit.
Custom Image
1
Setting
Custom
Image
OK
2
Custom
Custom
Custom
Saturation
Contrast
Sharpness
OK
OK
OK
Control Saturation, Contrast, Sharpness. Select and
enter each setting, using MENU ( ) and TIME ( ) to
adjust the effect. Then press OK to exit.
27
More settings
Time Stamp
1
2
More
Time
Stamp
Time Stamp
ON
OFF
OK
OK
You can choose if you want the time stamp to show at
bottom of your video.
1. Select Time Stamp.
2. Select ON or OFF.
Low Light Recording
1
2
More
Low Light
Recording
OK
Low Light
ON
OFF
OK
You can choose to set up your camera to record videos
in a low light environment or not. (< 5 Lux).
1. Select Low Light Recording.
2. ON: Allows your camera to record video in a low
light environment.
OFF: Your camera will go to sleep in a low light environment.
28
More settings
Set Date & Time
1
2
More
Date & Time
Set Date
& Time
2013/ 03 /01
22 : 58 : 32
OK
OK : Next
Set the correct date and time for your camera.
1. Select Set Date & Time.
2. In the highlight field, press MENU ( - ) to decrease
the number, press TIME ( + ) to increase the number, press OK to confirm and go to the next field.
When finished, press OK to exit set up.
LED Indicator
1
2
More
LED
Indicator
OK
LED Display
ON
OFF
OK
You can choose whether or not the LED indicator will
flash while capturing each frame.
1. Select LED Indicator.
2. ON: When the camera is capturing a frame, the LED
indicator will flash once.
OFF: During capture period the LED indicator will
not flash at all.
29
More settings
Band Filter
1
2
Setting
Flicker Set
None
50 Hz
60 Hz
Band
Filter
OK
OK
Select the correct fluorescent lighting frequency to
match your indoor lighting frequency.
1. Select Band Filter.
2. None: For outdoor environment.
50 Hz: Europe
60 Hz: USA
We suggest you use None when the scene is outdoors.
Firmware Version
1
2
More
Firmware
Firmware
Version
x.xx.x
OK
OK
Displays the current version of firmware installed on
the camera.
1. Select Firmware Version.
2. Displays the current version of firmware for 30 seconds. Press the OK button to exit firmware.
30
More settings
Reset
1
2
More
Reset
Reset
ON
OFF
OK
OK
You can reset your camera back to the default settings.
1. Select Reset.
2. Select YES and press the OK button to reset your
camera.
Function
Setting
Capture mode
Time Lapse
Time Interval
2 seconds
Time Lapse Frame Rate
White Balance Mode
Image Quality
10 FPS
Auto
Better
Scene
Daylight
HDR Range
Medium
Time Stamp
ON
Low Light Recording
ON
LED Indicator
ON
Band Filter
None
31
Reference
CS-mount lens
The TLC200 Pro comes with an interchangeable CSMount lens, so you can change the CS-Mount lens by
yourself to fit your shooting needs.
1
2
off
Turn off Camera
Take off Lens
3
Default Lens
Brinno Lens
Replace with other CS Lens
32
Reference
Extensional accessories
This extension connector is used for optional Brinno
Time Lapse accessories:
Shutter Line (ATS110): For creating Stop Motion film
and Face Time Lapse video
Motion Sensor (ATM110): For motion activated use,
turns your time lapse camera into a motion activated
camera!
Motion Sensor
(ATM110)
Shutter Line
(ATS110)
33
Reference
External Power
For long term use, you can attach an external power
supply (DC 5V) through the Micro USB connector.
DC 5V
34
Reference
Micro USB connector
A. File transfer
You can connect the TLC200 Pro to your computer in order
to transfer the time lapse video from the SD card to the
computer.
OS requirement: Windows XP and above.
LCD Display
Micro USB
35
Reference
Micro USB connector
B. Webcam
With the TLC200 Pro connected to your computer you
can install free webcam software. The TLC200 Pro can
then be used as a webcam for your computer!
Suggested software: please check on Brinno.com
OS requirement: Windows XP and above.
LCD Display
36
What setting should I use
Subject
Description
Recording kids, pets
Daily Life all parts of daily life
Party
Recording family
parties, public events,
and happy time all
around
Recording your trips,
Traveling short and long
Plant
Recording Flowers
growing, or
gardening over a
period of time
Time
Interval
Playback
Frame Rate
1~ 30
seconds
10~30
1~10
seconds
10~30
2 sec~ 1 min
10~30
1~30 min
15~30
Recording a building
Construction being built or any
30 min~ 1 hr
construction project
15~30
Recording a bike ride
or trip
10~30
Biking
1 sec
Face time You’re the leading
character in your time Shutter line
lapse
lapse videos
5
37
Scene Setting
Daylight Twilight
Night
Moon
Star
The longest
exposure time
(Sec.)
1/15
0.5
1
2
4
The shortest
time interval
(Sec.)
0.2~1
1
2
4
8
What Size SD Card Should I Use
SD card size
Stored photos
4 GB SD Card
30,000
8 GB SD Card
60,000
16 GB SD Card
120,000
32 GB SD Card
240,000
Based on a selected image quality setting of “Good”
38
Battery Life
Scene: Day mode
Days
ASAP
Captured frames to
battery low
168,000
1 SEC
200,000
2.3
2 SEC
244,000
5.6
5 SEC
204,000
11.5
10 SEC
145,000
17.0
20 SEC
108,000
25.0
30 SEC
84,500
29.0
1 MIN
51,000
35.0
5 MIN
12,300
42.0
10 MIN
6,300
43.0
1 HR
1070
4 HR
269
24 HR
45
Time interval
1
44.0
45.0
Scene: Twilight mode
Days
ASAP
Captured frames to
battery low
93,690
2 SEC
67,400
1.6
Time interval
1
5 SEC
55,500
3.2
10 SEC
51,300
5.9
20 SEC
51,000
11.5
30 SEC
45,000
15.0
1 MIN
33,700
23.0
5 MIN
10,900
38.0
10 MIN
5,900
41.0
1 HR
1,060
4 HR
269
24 HR
45
44.0
45.0
39
Battery Life
Scene: Night mode
Time interval
Captured frames to
battery low
Days
ASAP
49,420
1.1
5 SEC
39,000
2.3
10 SEC
30,000
3.5
20 SEC
28,100
6.5
30 SEC
26,200
9.0
1 MIN
21,800
15.0
5 MIN
9,300
32.0
10 MIN
5,400
37.0
1 HR
1,040
43.0
4 HR
268
24 HR
44
44.0
Scene: Moon mode
Time interval
40
Captured frames to
battery low
Days
ASAP
26,000
1.2
7 SEC
18,300
1.5
10 SEC
18,800
2.2
20 SEC
16,000
3.5
30 SEC
15,500
5.0
1 MIN
13,800
9.0
5 MIN
7,400
25.0
10 MIN
4,700
32.0
1 HR
1000
42.0
4 HR
266
24 HR
44
44.0
Battery Life
Scene: Star mode
Days
ASAP
Captured frames to
battery low
13,200
20 SEC
9,900
2.1
30 SEC
8,800
3.0
1 MIN
8,200
5.7
5 MIN
5,400
19.0
10 MIN
3,800
27.0
1 HR
970
40.0
4 HR
262
44.0
24 HR
44
45.0
Time interval
1.2
41
Specification
CAMERA
Model TLC200 Pro
LCD Screen 1.44" TFT LCD
Lens Rotating Angle 120°
Waterproof
Optional, (Use with the TLC200Pro Weather Resistant Housing (ATH120))
CAPTURE MODE
Time Lapse Auto generation of Time Lapse video
Stop Motion Optional, (Use with the Shutter Line (ATS110))
Motion Activated Optional, (Use with the Motion Sensor (ATM110))
SENSOR
Type 1/3" HDR sensor
Dynamic Range 115db
Resolution 1.3 Mega pixel
Pixel size 4.2um
Sensitivity 3650mV/lux-sec (Ultra good low light quality)
OPTICS LENS (BCS 019)
Type CS Mount (Aspherical Glass Lens)
Aperture F2.0
Field of View 112°
Focal Length 19 mm ( 35mm equivalent)
Focus Distance Manual: 1cm to ∞ (factory setting: 40 cm)
RECORDING
Time Lapse Video Format: AVI
Resolution: 1280x 720
Still Image Format: JPEG (only for using Shutter Line)
Resolution: 1280x 720
Memory Storage SD Card ( Supported up to 32 GB)
TIME INTERVAL
Custom From less than 1 second to 24 hours
POWER
Power source Battery: 4 AA Batteries
DC IN: 5V (Micro USB connector)
DIMENSION
Size (DxWxH) 64x 52x 107 mm
Weight 140 g (without batteries)
Color Black
42
7F, No. 75, Zhou Zi St., Taipei City 11493, Taiwan
Phone:
40 +886-2-8751-0306 Fax: +886-2-8751-0549
Email: [email protected]
301-0040-00
EN A3


