1
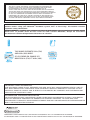
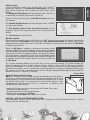
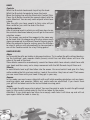
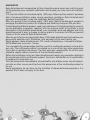
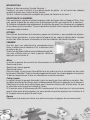
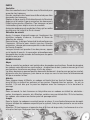
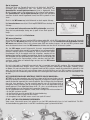
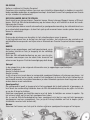
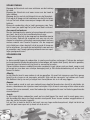
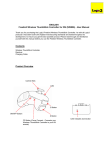
INSTRUCTION
INSTRUCTION BOOKLET
BOOKLET
MODE
MODE D’EMPLOI
D’EMPLOI
THIS SEAL IS YOUR ASSURANCE THAT NINTENDO HAS REVIEWED THIS
PRODUCT AND THAT IT HAS MET OUR STANDARDS FOR EXCELLENCE
IN WORKMANSHIP, RELIABILITY AND ENTERTAINMENT VALUE.
ALWAYS LOOK FOR THIS SEAL WHEN BUYING GAMES AND ACCESSORIES
TO ENSURE COMPLETE COMPATIBILITY WITH YOUR NINTENDO PRODUCT.
CE SCEAU EST VOTRE ASSURANCE QUE NINTENDO A APPROUVÉ CE PRODUIT
ET QU’IL EST CONFORME AUX NORMES D’EXCELLENCE EN MATIÈRE DE
FABRICATION, DE FIABILITÉ ET SURTOUT, DE QUALITÉ. RECHERCHEZ CE
SCEAU LORSQUE VOUS ACHETEZ DES JEUX OU DES ACCESSOIRES POUR
ASSURER UNE TOTALE COMPATIBILITÉ AVEC VOS PRODUITS NINTENDO.
WARNING: Please carefully read the separate Health and Safety Precautions Booklet included with this
product before using your Nintendo® Hardware system, Disc or Accessory. The booklet contains
important safety information.
AVERTISSEMENT : veuillez vous reporter au livret de précautions sur la santé et la sécurité séparé
fourni avec ce produit avant de vous servir de votre console Nintendo®, disque ou accessoire.
Ce document contient d’importantes directives de sécurité.
THIS GAME SUPPORTS 50Hz (576i)
AND 60Hz (480i) MODE.
CE JEU PREND EN CHARGE LES
MODES 50 Hz (576i) ET 60 Hz (480i).
IMPORTANT LEGAL INFORMATION
THIS NINTENDO GAME IS NOT DESIGNED FOR USE WITH ANY UNAUTHORISED DEVICE. USE OF
ANY SUCH DEVICE WILL INVALIDATE YOUR NINTENDO PRODUCT WARRANTY. COPYING OF ANY
NINTENDO GAME IS ILLEGAL AND IS STRICTLY PROHIBITED BY DOMESTIC AND INTERNATIONAL
INTELLECTUAL PROPERTY LAWS.
IINFORMATIONS JURIDIQUES IMPORTANTES
CE JEU NINTENDO N’EST PAS DESTINE A ETRE UTILISE AVEC UN DISPOSITIF ILLEGAL. L’UTILISATION
D’UN TEL DISPOSITIF ANNULERA LA GARANTIE DU PRODUIT NINTENDO. LA COPIE DES JEUX
NINTENDO EST ILLEGALE ET STRICTEMENT INTERDITE PAR LES LOIS NATIONALES ET INTERNATIONALES
SUR LA PROPRIETE INTELLECTUELLE.
TRADEMARKS ARE PROPERTY OF THEIR RESPECTIVE OWNERS. Wii IS A TRADEMARK OF NINTENDO.
LES MARQUES SONT LA PROPRIÉTÉ DE LEURS PROPRIÉTAIRES RESPECTIFS. Wii EST UNE MARQUE DE NINTENDO.
English
Getting Started
Insert the Cocoto Surprise Disc into the Disc Slot. The WiiTM
console will switch on. The Health and Safety Screen, as shown
here, will be displayed. After reading the details press the A
Button.
The Health and Safety Screen will be displayed even if the Disc is
inserted after turning the Wii console’s power on.
Point at the Disc Channel from the Wii Menu Screen and press
the A Button.
The Channel Preview Screen will be displayed. Point at START
and press the A Button.
The Wii RemoteTM Wrist Strap Information Screen will be
displayed. Tighten the strap around your wrist, then press the A
Button.
The Title Screen will be displayed.
Wii Menu Update
Please note that when first loading the Disc into the WiiTM console, the console will check if you have the
latest version of the Wii Menu, and if necessary a Wii Menu Update Screen will appear. Select OK to
proceed with the update. Please note that the Wii console must have the latest version of the Wii Menu
in order to play the Disc.
When the Wii Menu is updated, unauthorised hardware and/or
software modifications may be detected and unauthorised content
may be removed causing the immediate or delayed inoperability of
your console. Failure to accept the update may render this game,
and future games, unplayable. Please note that Nintendo cannot
guarantee that unauthorised software or accessories will continue
to function with the Wii console after this or future updates of
the Wii Menu.
The in-game language depends on the one that is set on your Wii console. This game includes ten
different language versions: English, German, French, Spanish, Italian, Dutch, Portuguese, Swedish,
Danish and Norwegian. If your Wii console is already set to one of them, the same language will be
displayed in the game. You can change the in-game language by changing the language setting of your
Wii console. For further instructions about how to change language settings please refer to the Wii
Operations Manual – Channels & Settings.
Control Stick
NunchukTM Neutral Position Reset
NOTE: If the Control Stick is moved out of neutral position when the power is
turned on, or when connecting to the Wii Remote, that position will be set as
neutral position, causing incorrect game control during game play. To reset
the Control Stick, allow it to return to the normal neutral position, then
simultaneously hold down the A, B, Plus (+) and Minus (–) Buttons on the
Wii Remote for three seconds.
To prevent this from occurring, do not move the Control Stick when:
• Turning on the Wii console
• Plugging the Nunchuk into the Wii Remote
• Starting Channels from the Wii Menu
• Returning to the Wii Menu from games or Channels.
CAUTION – USE THE Wii REMOTE WRIST STRAP
For information on how to use the Wii Remote Wrist Strap refer to the Wii Operations Manual – System
Setup (Using the Wii Remote).
1
60 Hz (480i) Mode
Many people don’t know what the difference between 50 Hz and 60 Hz is, but since most
modern TV models support 60 Hz it’s definitely worth finding out if your TV is compatible.
In basic terms, Hz (hertz) is related to the number of frames per second (fps) appearing on
your screen.
Modes
50 Hz produces 25 fps and 60 Hz produces close to 30 fps, which may not sound like a big
difference, but the increase in quality from 25 to around 30 fps is quite noticeable on- Supported
screen. With 60 Hz you get a smoother game screen with less flicker and the game running at optimal
speed, all of which produces a great gaming experience.
The default setting of the Wii console is 50 Hz (576i) Mode. To change this, activate 60 Hz (480i) Mode
by selecting this TV TYPE in the Wii Settings. However, certain (mainly older) TV sets are unable to
display games in 60 Hz (480i) Mode, and therefore a small number of players could experience
difficulties using this display mode on their TVs. To find out if your TV set features 60 Hz (480i) Mode,
consult your TV instruction manual or contact the manufacturer.
If, after changing the setting to 60 Hz (480i) Mode, the screen appears blank or distorted, it will likely be
the case that your TV does not support 60 Hz (480i) Mode. To revert to the default setting, press RESET
on the Wii console while holding the down direction on the : Control Pad, and the Wii system will
restart in 50 Hz (576i) Mode. For additional information on how to set the TV TYPE, please refer to the
Wii Operations Manual – Channels & Settings.
Also, when you connect the Wii RGB cable (RVL-013) (sold separately) to a TV which has an RGB
terminal and PAL60 compatibility, or you connect the Wii Component AV cable (RVL-011) (sold
separately) to a TV which has component video inputs, you can enjoy an intensely sharp picture onscreen.
EDTV / HDTV (480p) Mode – Progressive Scan
EDTV / HDTV (480p) is a progressive display mode that allows players to view and enjoy
their game in the best possible quality. This means an intensely sharp picture, the game
running at optimal speed with minimised flicker, all of which produces a great gaming
experience.
However, it may be the case that this mode cannot be displayed, depending on the
combination of TV and cable that you use. To find out if your TV supports the Progressive
Scan display needed for the EDTV / HDTV (480p) Mode, consult your TV instruction manual or contact
the respective manufacturer for details. Please make sure to use the Wii Component AV cable (RVL-011)
(sold separately) and to enable Progressive Scan on your display device when selecting this mode.
The default setting of the Wii is 50 Hz (576i) Mode. To activate EDTV / HDTV (480p) Mode, please
select this TV TYPE in the Wii Settings. For additional information on how to set the TV TYPE, please
refer to the Wii Operations Manual – Channels & Settings.
2
INTRODUCTION
Hello and welcome to Cocoto Surprise!
Cocoto and his friends have invited you to a toy fishing trip: they have hidden gifts with lots
of toys throughout their universe. Your objective is to collect all the toys from Cocoto and
his friends!
ROOM SELECTION
First of all you must choose a room: Cocoto’s, Neuro’s, Baggy’s or Shiny’s. Point at the corresponding door with the Wii Remote and then press the A Button.
Your room will automatically save your toy collection, the levels you have completed
successfully and the coins you own. You can resume the game at any time by selecting the
room again.
OPTIONS
Press the + Button to display the options in the room selection screen.
In the options screen you can select the language of the game, adjust the volume of the music
and sound effects and see the list of people who created Cocoto Surprise.
ROOM
Once you have selected the saved game of your choice
you will enter the room where you have access to the
entire game content.
Point at one of the shiny objects with the Wii Remote
to display its name on the upper left. Confirm by pressing the A Button.
Mirror
The mirror allows you to check the following information about your saved game:
Number of toys
Number of levels completed successfully
Number of coins
In this screen you can also scroll through the toys you collected or clear the room. Attention!
Clearing the room deletes your toys, the levels you have won and your coins, which means
you will have to start again from the beginning or select another room.
Toy box
The toy box gives you access to all the toys you have bought or caught. Make them scroll
by pointing at the arrows with the Wii Remote and then pressing the A Button.
Select a toy in the same way to see it more closely and play with it. The screen tells you
what you can do with the toy.
If you point at a toy with the Wii Remote which you haven’t yet caught (question mark icon),
you can buy it by pressing the A Button if you have collected enough coins during the game.
Desk
Select the desk to launch a game and try to win new toys.
3
GAME
Controls
Whirl the Nunchuk backwards to pull up the hook.
Whirl the Nunchuk forwards to lower the hook.
Move the fishing line with the Nunchuk’s Control Stick.
Press the A Button to catch the nearest object with the
hook. Attention! You can only catch objects which have
a hook.
Take the gifts you have caught to Fairy who will put
them aside for you until the end of the level.
World selection
After 4 training levels in which you will learn how to use
the controls mentioned above you will get to the world
selection screen.
In this screen you control the magnet in the same way
as the hook. Use it to choose one of the four stones: each
stone corresponds to a different Cocoto Surprise world.
When the magnet is close to a stone, press the A Button
to select it and you will automatically be transported to
one of the Cocoto worlds for a toy fishing game!
GAME WORLDS
Abyss
In this world the gifts are hidden in big constructions. Try to collect the gifts without destroying the buildings: each wooden block (brown) which has not fallen down will turn into
coins at the end of the level.
Stone blocks cannot be moved easily: search for those which have a hook, catch them with
your hook and then carry out a sharp movement with the Wii Remote to pull them out.
Atlantis
In each Atlantis level a gift has fallen into the ocean. You must catch it and give it to Fairy
while avoiding the fish and sea urchins. Look at the urchins: they have a hook! That means
you can move them with your hook if they get in your way.
Heaven
In this mode you must cross a labyrinth with a gift while avoiding obstacles such as doors,
revolving doors and enemies. Watch out, some walls are electrified! If you touch them
your gift will be taken back to the last activated crossing point.
Jungle
In the Jungle the gifts never stay in place! You must be quick in order to catch the gifts swept
away by the current, pulled away by the fish or taken by the moles.
Attention! If your hook gets too close to an empty mole hole it will close up and will not
open again while the hook is close by.
4
GUARANTEES
Neko Entertainment incorporated all their interactive game know-how into this product to guarantee your complete satisfaction and to give you many hours of entertainment.
If at any time within one hundred eighty (180) days following the product's purchase
date it becomes defective under normal operating conditions, Neko Entertainment
promises to exchange it under the conditions defined hereafter.
After this period of one hundred eighty (180) days, Neko Entertainment accepts to
exchange the defective product for shipping and handling charge of €20 per item.
To exchange the defective product, send your software in its original packaging (excluding the protective wrapping), together with the original proof of purchase, a brief
description of the problem encountered, your complete name and address and if the
guarantee period is over, a cheque or money order in the amount of €20 per product
made out to the order of Neko Entertainment.
After the period of one hundred eighty days (180), Neko Entertainment will replace your
game while quantities last. Otherwise, your payment will be sent back to you.
Postal address: Neko Entertainment –38, rue de la République - Immeuble le Major 93100 Montreuil sous bois - France.
The user explicitly acknowledges that the use of the multimedia product is done at his
own risk. The multimedia product is supplied as is and without any other guarantees
than what is specified here-above. The User assumes responsibility for all the costs
related to repairs and/or correction of the multimedia product.
Within the limitations set by law, Neko Entertainment rejects any guarantee relating to
the market value of the multimedia product, the User's satisfaction or its qualification
to respond to a particular use.
The User assumes all risks related to a loss of profits, loss of data, errors, loss of commercial data or other issues resulting from the possession of the multimedia product or
its use.
Some legislations do not allow for the limitation of aforementioned guarantees, it is
possible that it does not apply to the User.
5
Commencer à jouer
Insérez le disque Cocoto Surprise dans la fente de chargement
pour allumer la console WiiTM. L’écran d’avertissement sur la
santé et la sécurité s’affiche alors. Appuyez sur le bouton A après
avoir lu les informations sur cet écran. L’écran d’avertissement
sur la santé et la sécurité s’affiche même si vous avez inséré le
disque après avoir allumé la console Wii.
Pointez la chaîne disques sur le menu Wii et appuyez sur le
bouton A.
L’écran de présentation de la chaîne s’affiche. Pointez
DEMARRER et appuyez sur le bouton A.
L’écran d’avertissement sur la dragonne s’affiche. Ajustez bien la
dragonne autour de votre poignet puis appuyez sur le bouton A.
L’écran titre s’affiche alors.
Mise à jour du menu Wii
Veuillez noter que lorsque vous chargez le disque dans la console Wii pour la première fois, la console
vérifie si la version du menu Wii la plus récente est installée. Si ce n’est pas le cas, l’écran de mise à
jour du menu Wii s’affiche. Choisissez OK pour continuer. Veuillez noter que la version du menu Wii de
votre console Wii doit être à jour pour lire le disque.
Lors de la mise à jour du menu Wii, toute modification technique
non autorisée est susceptible d’être détectée, effaçant tout
contenu non autorisé et mettant votre console hors d’usage.
Refuser d’effectuer cette mise à jour peut également rendre ce
jeu ou d’autres jeux inutilisables. Veuillez noter que Nintendo ne
peut garantir que des accessoires ou des logiciels non autorisés
continueront de fonctionner correctement sur cette console Wii
après cette mise à jour du menu Wii ou des mises à jour
ultérieures.
La langue utilisée pour le jeu dépend de celle de la console Wii. Vous pouvez choisir de jouer dans une
des dix langues suivantes : Anglais, Français, Allemand, Espagnol, Italien, Néerlandais, Portugais,
Suédois, Danois et Norvégien. Si votre console Wii est déjà réglée sur une des langues mentionnées cidessus, la même langue sera utilisée pour le jeu. Pour changer la langue du jeu, modifiez les paramètres
de langue de votre console Wii. Reportez-vous au mode d’emploi Wii – Chaînes et paramètres pour de
plus amples informations.
Stick directionnel
Réinitialisation de la position neutre du NunchukTM
NOTE : si le Stick directionnel n’est pas en position neutre lorsque vous
allumez la console ou connectez le Nunchuk à la télécommande Wii, cette
position deviendra la nouvelle position neutre et entraînera des problèmes de
contrôle durant vos parties. Pour réinitialiser la position neutre, veillez à ce
que le Stick directionnel soit bien droit, puis maintenez simultanément
enfoncés les boutons A, B, + et – sur la télécommande Wii pendant trois
secondes.
Pour éviter que cela ne se produise, ne touchez pas le Stick directionnel
lorsque :
• vous allumez la console Wii
• vous connectez le Nunchuk à la télécommande Wii
• vous démarrez une chaîne à l’aide du menu Wii
• vous retournez au menu Wii en quittant un jeu ou une chaîne.
ATTENTION : UTILISEZ LA DRAGONNE POUR TÉLÉCOMMANDE Wii
Pour plus d’informations sur l’utilisation de la dragonne pour télécommande Wii, veuillez vous référer au
mode d’emploi Wii – Installation de la console (section Utiliser la télécommande Wii).
6
Français
Mode 60 Hz (480i)
Nombreux sont ceux qui ne connaissent pas la différence entre le 50 Hz et le 60 Hz, mais
comme la plupart des téléviseurs modernes prennent en charge le 60 Hz, cela vaut la
peine de vérifier si votre téléviseur est compatible. En quelques mots, les Hertz (Hz)
expriment le nombre d’images par seconde affichées sur votre écran.
En 50 Hz, l’écran affiche 25 images par seconde, contre 30 en 60 Hz : la différence peut
paraître minime, mais l’image gagne indéniablement en qualité quand on passe de 25 à
environ 30 images par seconde. En 60 Hz, l’image est plus lisse, moins clignotante et le jeu fonctionne
à une vitesse optimale, ce qui vous permet de bénéficier d’une expérience de jeu unique.
La console Wii est en mode 50 Hz (576i) par défaut. Pour activer le mode 60 Hz (480i), sélectionnez
TYPE DE TELEVISEUR dans les paramètres Wii. Cependant, certains téléviseurs, principalement les
plus anciens, ne peuvent pas afficher les jeux en mode 60 Hz (480i) et certains joueurs peuvent donc
avoir des difficultés à utiliser ce mode d’affichage sur leur téléviseur. Pour savoir si votre téléviseur est
compatible avec le mode 60 Hz (480i), consultez son mode d’emploi ou contactez le fabricant.
Si, une fois le mode 60 Hz (480i) activé, votre écran n’affiche aucune image ou si l’image est déformée,
il est probable que votre téléviseur ne prenne pas en charge le mode 60 Hz (480i). Pour revenir au
réglage par défaut, appuyez sur RESET sur la console Wii tout en maintenant bas enfoncé sur la
manette : pour que la console Wii redémarre en mode 50 Hz (576i). Reportez-vous au mode d’emploi Wii
– Chaînes et paramètres pour de plus amples informations sur ce réglage.
De plus, lorsque vous branchez le câble RVB Wii (RVL-013) (vendu séparément) sur un téléviseur qui
dispose d’une entrée RVB et d’une compatibilité PAL60, ou que vous branchez le câble composante AV
Wii (RVL-011) (vendu séparément) sur un téléviseur qui dispose d’une entrée vidéo composante, vous
pouvez profiter d’une image bien plus nette.
Mode EDTV/HDTV (480p) – Progressive Scan
EDTV/HDTV (480p) est un mode d’affichage à balayage progressif qui permet d’obtenir la
meilleure qualité d’image possible. Avec ce mode, l’image est plus précise et moins
clignotante, et le jeu fonctionne à une vitesse optimale, ce qui vous permet de bénéficier
d’une expérience de jeu unique.
Dans certains cas, ce mode ne peut pas être affiché, cela dépend de la combinaison
téléviseur-câble que vous utilisez. Pour savoir si votre téléviseur est compatible avec
l’affichage Progressive Scan nécessaire pour le mode EDTV/HDTV (480p), consultez son mode d’emploi
ou contactez le fabricant pour plus de détails. Assurez-vous que vous utilisez le câble composante AV Wii
(RVL-011) (vendu séparément) et paramétrez votre téléviseur pour le Progressive Scan lorsque vous
choisissez ce mode.
La console Wii est en mode 50 Hz (576i) par défaut. Pour activer le mode EDTV/HDTV (480p), veuillez
sélectionner TYPE DE TELEVISEUR dans les paramètres Wii. Reportez-vous au mode d’emploi Wii –
Chaînes et paramètres pour de plus amples informations sur ce réglage.
7
INTRODUCTION
Bonjour et bienvenue dans Cocoto Surprise !
Cocoto et ses amis t’invitent à une grande partie de pêche : ils ont caché des cadeaux
remplis de jouets aux 4 coins de leur univers.
Ton but : obtenir la collection complète des jouets de Cocoto et ses amis !
SELECTION DE LA CHAMBRE
Pour commencer, choisis une chambre parmi celles de Cocoto, Neuro, Baggy et Shiny. Pour
cela, pointe la porte de ton choix avec la télécommande Wii, puis appuie sur le bouton A.
Ta chambre sauvegarde automatiquement ta collection de jouets, les niveaux que tu as gagnés
et les pièces que tu possèdes. Tu peux reprendre ta partie à tout moment en sélectionnant
à nouveau cette chambre.
OPTIONS
Dans l’écran de sélection de la chambre, appuie sur le bouton + pour accéder aux options.
Dans l’écran des options, tu peux choisir la langue du jeu, régler le volume de la musique
et celui des effets sonores et consulter la liste des créateurs de Cocoto Surprise.
CHAMBRE
Une fois que tu as sélectionné la sauvegarde de ton
choix, tu entres dans la chambre. D’ici, tu as accès à tout
le contenu du jeu.
Pointe l’un des objets brillants avec la télécommande Wii :
son nom s’affiche alors en haut à gauche. Valide en
appuyant sur le bouton A.
Miroir
Le miroir te permet de consulter les informations sur ta sauvegarde :
Nombre de jouets
Nombre de niveaux gagnés
Nombre de pièces
Dans cet écran, tu peux aussi faire défiler tous les jouets que tu as récupérés ou bien vider
la chambre. Attention ! Vider la chambre supprime tes jouets, tes niveaux gagnés et tes pièces.
Tu devras recommencer à zéro ou sélectionner une autre chambre.
Coffre à jouets
Le coffre à jouets te permet d’accéder à tous les jouets que tu as pêchés ou achetés. Faisles défiler en pointant les flèches avec la télécommande Wii puis en appuyant sur le bouton A.
Sélectionne un jouet de la même façon pour l’observer de plus près et jouer avec. Ce que
tu peux faire avec le jouet est indiqué à l’écran.
Si tu pointes avec la télécommande Wii l’emplacement d’un jouet que tu n’as pas encore
gagné (icône point d’interrogation), tu peux acheter le jouet en appuyant sur le bouton A si
tu as gagné assez de pièces durant le jeu.
Bureau
Sélectionne le bureau pour lancer une partie et essayer de gagner de nouveaux jouets.
8
PARTIE
Contrôles
Fais des moulinets vers l’arrière avec le Nunchuk pour
remonter ton hameçon.
Fais des moulinets vers l’avant avec le Nunchuk pour faire
descendre ton hameçon.
Déplace ta ligne avec le Stick directionnel du Nunchuk.
Appuie sur le bouton A pour accrocher ton hameçon à
l’objet le plus proche. Attention ! Ton hameçon ne peut
s'accrocher qu'aux objets munis de crochets.
Amène les cadeaux que tu as pêchés à Fairy, qui les mettra
de côté pour toi jusqu’à la fin du niveau.
Sélection du monde
Après 4 niveaux d'apprentissage qui t'expliquent les
contrôles indiqués ci-dessus, tu arrives à l’écran de
sélection du monde.
Dans cet écran, tu diriges l'aimant de la même façon que
l’hameçon. Utilise-le pour choisir une des 4 pierres
précieuses : chaque pierre correspond à un des mondes
de Cocoto Surprise.
Lorsque l'aimant est proche d’une des pierres, appuie
sur le bouton A pour la : tu seras alors automatiquement
transporté dans un des mondes de Cocoto pour une partie
de pêche aux jouets !
MONDES DE JEU
Abyss
Dans ce monde, les cadeaux sont cachés dans de grandes constructions. Essaie de récupérer
les cadeaux sans détruire les constructions : chaque bloc de bois (couleur marron) qui n’est
pas tombé se transforme en pièces à la fin du niveau.
Les blocs de pierre ne peuvent pas être bousculés facilement : cherche ceux qui ont un crochet,
attrape-le avec ton hameçon, puis donne un coup sec vers le haut avec ta télécommande
Wii pour arracher le bloc.
Atlantis
Dans chaque niveau d'Atlantis, un cadeau est tombé tout au fond de l’océan : remonte-le
jusqu’à Fairy en évitant les poissons et les oursins. Regarde bien les oursins : ils ont un
crochet ! Ça veut dire que tu peux les déplacer avec ton hameçon s'ils te bouchent le
passage.
Heaven
Dans ce monde, tu dois traverser un labyrinthe avec un cadeau en évitant les obstacles :
portes, tourniquets, ennemis, etc. Attention, certains murs sont électrifiés ! Si tu les touches,
ton cadeau sera ramené au dernier point de passage activé.
Jungle
Dans la Jungle, les cadeaux ne restent jamais en place : il vous faudra faire preuve de rapidité pour attraper les cadeaux emportés par le courant, tirés par des poissons ou aux mains
de taupes.
Attention ! Si ton hameçon s'approche trop d’un trou de taupe vide, il se fermera et ne s’ouvrira plus tant que l'hameçon sera trop près.
9
GARANTIES
Neko Entertainment a apporté à ce produit tout son savoir-faire en matière de loisirs
interactifs pour vous garantir une entière satisfaction et de nombreuses heures
de divertissement.
Si toutefois, dans les cent quatre-vingt (180) jours suivant la date d’achat du
produit, celui-ci s’avérait défectueux dans les conditions normales d’utilisation,
Neko Entertainment s’engage à procéder à un échange aux conditions définies ciaprès.
Passé ce délai de cent quatre-vingt (180) jours, Neko Entertainment accepte de
vous échanger le produit défectueux moyennant une participation forfaire de 20€
par produit.
Pour que le produit défectueux puisse être échangé, envoyez votre logiciel dans
son emballage d’origine accompagné de l’original de la preuve d’achat, d’une
brève description du défaut rencontré, de vos coordonnées complètes et si la période de garanties est dépassée, d’un chèque ou d’un mandat postal de 20€ par
produit libellé à l’ordre de Neko Entertainment.
Passé le délai de cent quatre-vingt (180) jours, Neko Entertainment vous remplacera votre jeu que dans la limite des stocks disponibles. A défaut, votre paiement
vous sera retourné.
L’utilisateur reconnaît expressément que l’utilisation du produit multimédia est à
ses propres risques. Le produit multimédia est fourni en l’état et sans garantie
autre que celle prévue plus haut. L’Utilisateur assume tous les frais de réparation
et/ou correction du produit multimédia.
Dans les limites imposées par la loi, Neko Entertainment rejette toute garantie relative à la valeur marchande du produit multimédia, la satisfaction de l’Utilisateur
ou son aptitude à répondre à une utilisation particulière.
L’Utilisateur assume tous les risques liés à une perte de profits, une perte de données,
des erreurs, une perte d’informations commerciales ou autre résultant de la
possession du produit multimédia ou de son utilisation.
Certaines législations ne permettant pas la limitation de garantie ci-dessus mentionnée, il est possible que celle-ci ne s’applique pas à l’Utilisateur.
Neko Entertainment – 38, rue de la République - Immeuble le Major - 93100
Montreuil sous bois - France
10
Om te beginnen
Schuif de disk van Cocoto Surprise in de disksleuf. Het WiiTMsysteem gaat automatisch aan. Als eerste verschijnt het
gezondheids- en veiligheidsscherm dat hier is afgebeeld. Druk
op de A-knop nadat je de informatie in dit scherm hebt gelezen.
Het gezondheids- en veiligheidsscherm wordt ook getoond
wanneer de disk wordt ingevoerd terwijl het Wii-systeem al aan
staat.
Richt in het Wii-menu op het diskkanaal en druk op de A-knop.
Het kanaalscherm verschijnt. Richt op BEGINNEN en druk op de
A-knop.
Het scherm met informatie over het Wii-polsbandje verschijnt.
Zorg dat het polsbandje stevig om je pols zit en druk op de Aknop.
Wii-menu bijwerken
Als je de disk voor het eerst met het Wii-systeem gebruikt, zal de Wii controleren of je over de nieuwste
versie van het Wii-menu beschikt. Als dit niet het geval is, zal het scherm voor het bijwerken van het
Wii-menu verschijnen. Kies in dit scherm voor OKÉ om verder te gaan. Let op: het Wii-systeem moet
over de nieuwste versie van het Wii-menu beschikken om de disk af te kunnen spelen.
Nederlands
Vervolgens verschijnt het titelscherm.
Als het Wii-menu wordt bijgewerkt, kunnen ongeoorloofde
technische modificaties worden vastgesteld en kan ongeoorloofde
content worden gewist waardoor je Wii-systeem niet meer
functioneert. Als je de update niet laat uitvoeren, worden dit en
toekomstige spellen mogelijk onspeelbaar. Houd er rekening mee
dat Nintendo niet kan garanderen dat software en accessoires die
zonder licentie zijn vervaardigd, zullen werken met het Wiisysteem, nadat deze of toekomstige versies van het Wii-menu
zijn geïnstalleerd.
De taal in het spel is afhankelijk van de taal die is ingesteld voor het Wii-systeem. Dit spel ondersteunt
tien verschillende talen: Engels, Duits, Frans, Spaans, Italiaans, Nederlands, Portugees, Zweeds, Deens
en Noors. Als een van deze talen is ingesteld voor het Wii-systeem, wordt die automatisch gebruikt in het
spel. Je kunt de taal in het spel wijzigen door de taalinstelling van het Wii-systeem te veranderen.
Raadpleeg de Wii-handleiding voor kanalen en instellingen voor meer informatie over het veranderen van
de taal.
Richtingsstick
HET CORRIGEREN VAN DE NEUTRALE POSITIE VAN DE NUNCHUKTM
LET OP: als bij het aanzetten van het Wii-systeem of bij het aansluiten van de
Nunchuk op de Wii-afstandsbediening, tegen de richtingsstick wordt geduwd,
wordt die positie ingesteld als neutrale positie. De richtingsstick functioneert
dan niet naar behoren. Om de neutrale positie van de richtingsstick te
corrigeren moet je zorgen dat de richtingsstick niet in een bepaalde richting
wordt geduwd. Druk tegelijkertijd op de A-, B-, plus- en minknop op de Wiiafstandsbediening, en houd die drie seconden ingedrukt.
Om te voorkomen dat dit gebeurt, moet je de richtingsstick niet aanraken als:
• Je het Wii-systeem aanzet
• Je de Nunchuk aansluit op de Wii-afstandsbediening
• Je een kanaal opent vanuit het Wii-menu
• Je terugkeert naar het Wii-menu vanuit een spel of kanaal
ET OP – HET Wii-POLSBANDJE GEBRUIKEN
Voor meer informatie over het gebruik van het Wii-polsbandje lees je het hoofdstuk ‘De Wiiafstandsbediening gebruiken’ in de Wii-handleiding voor systeeminstallatie.
11
60Hz (480i)
Veel mensen weten niet wat het verschil is tussen 50Hz en 60Hz, maar aangezien de
meeste moderne tv’s weergave van beelden met een 60Hz-frequentie ondersteunen, is
het absoluut de moeite waard om erachter te komen of dit ook voor jouw tv geldt. Simpel
gezegd, heeft de hoeveelheid Hz (Hertz) te maken met het aantal beelden dat per seconde
op je scherm verschijnt.
50Hz levert 25 fps (‘frames per second’, oftewel beelden per seconde) op, terwijl 60Hz
bijna 30 fps oplevert. Dat lijkt misschien geen groot verschil, maar het verschil in beeldkwaliteit tussen
25 en 30 fps is zeer goed merkbaar. Met 60Hz krijg je een rustiger beeld te zien met minder trillingen, en
draait het spel op de optimale snelheid. Dit alles draagt bij aan een uitstekende spelervaring.
Het standaard ingestelde tv-type op de Wii is 50Hz (576i). Je kunt dit veranderen in 60Hz (480i) onder
TV-TYPE in de Wii-instellingen. Bepaalde, voornamelijk oudere tv’s kunnen geen 60Hz (480i)-signaal
weergeven. Een beperkt aantal gebruikers kan daardoor mogelijk problemen ondervinden wanneer ze dit
tv-type willen gebruiken op hun tv. Raadpleeg de handleiding van de tv of neem contact op met de
fabrikant, om te weten te komen of de tv de 60Hz (480i)-stand ondersteunt.
Heb je het tv-type veranderd in 60Hz (480i) en krijg je een leeg of gestoord scherm te zien, dan is het
waarschijnlijk niet compatibel met de 60Hz (480i)-stand. Om terug te keren naar de standaardinstelling
moet je op het Wii-systeem de RESET-knop indrukken, terwijl je omlaag op de richtingsknop van de Wiiafstandsbediening houdt ingedrukt. Het Wii-systeem zal dan opnieuw opstarten in de 50Hz (576i)stand. Raadpleeg de Wii-handleiding voor kanalen en instellingen, voor meer informatie over het instellen
van het tv-type.
Ook als je het RGB-snoer voor Wii (RVL-013, los verkrijgbaar) aansluit op een tv die is voorzien van een
SCART-aansluiting en compatibel is met PAL60, of als je het componentsnoer voor Wii (RVL-011, los
verkrijgbaar) aansluit op een tv die is voorzien van een component-videoaansluiting, zul je een rustiger
beeld zien met minder trillingen.
EDTV/HDTV (480p) – Progressive Scan
EDTV/HDTV (480p) is een weergavestand waarin de gebruiker het spel met de hoogst
mogelijke beeldkwaliteit kan spelen. Dit betekent dat het spel op de optimale snelheid
draait en dat de beelden zeer scherp zijn, met het hoogst mogelijke aantal beelden per
seconde, en dat ze weinig tot geen trillingen vertonen. Dit zorgt voor de optimale
spelervaring.
Het kan voorkomen dat dit signaal niet kan worden weergegeven, afhankelijk van de tv en het snoer dat
wordt gebruikt. Raadpleeg de handleiding van de tv of neem contact op met de fabrikant, om te weten te
komen of de tv het progressieve signaal ondersteunt dat nodig is voor weergave van EDTV/HDTV
(480p). Zorg dat het componentsnoer voor Wii (RVL-011, los verkrijgbaar) wordt gebruikt en Progressive
Scan is ingeschakeld op de tv, wanneer je het tv-type instelt op deze stand.
Het standaard ingestelde tv-type op de Wii is 50Hz (576i). Je kunt dit veranderen in EDTV/HDTV (480p)
onder TV-TYPE in de Wii-instellingen. Raadpleeg de Wii-handleiding voor kanalen en instellingen, voor
meer informatie over het instellen van het tv-type.
12
INLEIDING
Hallo en welkom bij Cocoto Surprise!
Cocoto en zijn vrienden hebben jou voor een vistochtje uitgenodigd: ze hebben in verschillende werelden cadeautjes en speelgoed verstopt. Jouw taak is om al het speelgoed van Cocoto
en zijn vrienden te verzamelen!
KIES EEN KAMER OM IN TE SPELEN
Eerst moet je een kamer kiezen: Cocoto’s kamer, Neuro’s kamer, Baggy’s kamer of Shiny’s
kamer. Richt de Wii-afstandsbediening op de kamer die je wilt hebben en druk ter bevestiging op de A-knop.
In jouw gekozen kamer wordt automatisch je speelgoedverzameling, de voltooide levels en
je muntentotaal opgeslagen. Je kunt het spel op elk moment weer verder spelen door jouw
kamer te selecteren.
OPTIES
Druk op de plusknop om de opties in het selectiescherm weer te geven.
In het optiescherm kun je de taal van het spel instellen, het volume van de muziek en de
geluidseffecten aanpassen en kijken wie er allemaal aan Cocoto Surprise hebben meegewerkt.
KAMER
Nadat je een opgeslagen spel hebt geselecteerd, ga je
de kamer binnen en heb je toegang tot de volledige
spelwereld.
Richt de Wii-afstandsbediening op een van de glinsterende voorwerpen om de naam links bovenin het
scherm weer te geven. Druk ter bevestiging op de A-knop.
Spiegel
In de spiegel kun je de volgende informatie over je opgeslagen spel bekijken:
Aantal speelgoed
Aantal voltooide levels
Aantal munten
In dit scherm kun je ook door je verzamelde speelgoed bladeren of je kamer opruimen. Let
op! Door je kamer op te ruimen, wordt al het speelgoed, de levels die je hebt voltooid en je
verzamelde munten verwijderd waardoor je weer helemaal opnieuw moet beginnen of een
andere kamer moet selecteren.
Speelgoedkist
De speelgoedkist geeft je toegang tot al het speelgoed dat je hebt gekocht of gevangen. Je
kunt door de verzameling bladeren door de Wii-afstandsbediening op de pijlen te richten
en op de A-knop te drukken.
Selecteer speelgoed op dezelfde manier om het beter te bekijken en ermee te spelen. Op
het scherm staat wat je met het speelgoed kunt doen.
Als je met de Wii-afstandsbediening naar speelgoed wijst dat je nog niet hebt gevangen
(aangegeven met een vraagteken), kun je op de A-knop drukken om het te kopen (als je
voldoende munten hebt tenminste).
Bureau
Selecteer het bureau om het spel te starten en nieuw speelgoed te vangen of te kopen.
13
SPELBESTURING
Beweeg de Nunchuk snel naar achteren om de haak op
te halen.
Beweeg de Nunchuk snel naar voren om de haak te
laten zakken.
Beweeg de lijn met de richtingsstick van de Nunchuk.
Druk op de A-knop om het voorwerp van de lijn te halen.
Let op! Je kunt alleen voorwerpen vangen die een haak
hebben.
Breng de cadeautjes die je hebt gevangen naar Fairy
die ze voor jou apart legt tot je het level hebt voltooid.
Een wereld selecteren
Na vier trainingslevels waarin je bovenstaande besturingen leert, kom je bij het wereldselectiescherm.
In dit scherm bestuur je de magneet op dezelfde manier
als de haak. Gebruik de magneet om een van de vier
stenen te selecteren: elke steen correspondeert met een
andere wereld van Cocoto Surprise. Als de magneet
zich vlakbij een steen bevindt, druk je op de A-knop om
het te selecteren. Je wordt dan automatisch naar een van
de werelden van Cocoto getransporteerd voor een spelletje speelgoedvissen!
SPELWERELDEN
Abyss
In deze wereld liggen de cadeautjes in grote constructies verborgen. Probeer de cadeautjes te verzamelen zonder de gebouwen te vernietigen: elk houten blok (bruin) dat niet is gevallen,
verandert aan het einde van het level in een aantal munten.
Stenen blokken kunnen makkelijk worden verplaatst: zoek stenen met een haak, vang ze met
je hengel en voer dan een scherpe beweging met je Wii-afstandsbediening uit om de buit
binnen te halen.
Atlantis
In elk Atlantis-level is een cadeau in de zee gevallen. Jij moet het vangen en aan Fairy geven
terwijl je de vissen en de zee-egels ontwijkt. Kijk naar de zee-egels: ze hebben een haak!
Dat betekent dat je ze met je hengel kunt verwijderen als ze in de weg liggen.
Heaven
In deze modus moet je met een cadeautje een doolhof doorkruizen terwijl je obstakels als
deuren, draaideuren en vijanden moet vermijden. Kijk uit want sommige muren staan onder
stroom! Als je ze aanraakt, word het cadeautje teruggebracht naar het laatste geactiveerde
oversteekpunt.
Jungle
In de Jungle blijven cadeautjes nooit op hun plek liggen! Je moet snel te werk gaan voordat de cadeautjes door de vloed worden overspoeld, door vissen worden weggetrokken of
door de mollen worden ingepikt.
Let op! Als je haak te dicht in de buurt van een lege mollenhoop komt, klapt het dicht en
gaat het pas weer open als je haak uit de buurt is.
14
GARANTIE
Neko Entertainment heeft voor dit product al zijn kennis inzake interactiviteit aangewend,
opdat u volkomen tevreden bent en heel wat uren plezier beleeft met het product.
Indien het product binnen de honderdtachtig (180) dagen volgend op de aankoopdatum evenwel gebrekkig mocht blijken bij een normaal gebruik, verbindt Neko Entertainment
er zich toe het product te ruilen aan de hierna volgende voorwaarden.
Na de termijn van honderdtachtig (180) dagen, ruilt Neko Entertainment het gebrekkige
product met een forfaitaire deelname van 20€ per product.
Opdat het gebrekkige product geruild kan worden, moet u de software in zijn originele
verpakking (zonder beschermende folie) terugsturen, vergezeld van het originele
aankoopbewijs, een beknopte beschrijving van het defect, al uw gegevens en de
vermelding of de garantieperiode al dan niet verlopen is, een cheque of postoverschrijving van 20€ per product op naam van Neko Entertainment.
Na de termijn van honderdtachtig (180) dagen, vervangt Neko Entertainment uw spel
zolang de voorraad strekt. Is het spel niet langer beschikbaar, dan krijgt u uw betaling
terug.
Adres: Neko Entertainment –38, rue de la République - Immeuble le Major - 93100
Montreuil sous bois – Frankrijk
De gebruiker erkent uitdrukkelijk dat hij het multimediaproduct op eigen risico gebruikt.
Het multimediaproduct wordt geleverd in zijn huidige staat en zonder enige andere dan
de hierboven beschreven garantie. De gebruiker staat in voor alle kosten verbonden
met de reparatie en/of correctie van het multimediaproduct.
Binnen de wettelijke limieten, weigert Neko Entertainment elke garantie met betrekking
tot de handelswaarde van het multimediaproduct, de tevredenheid van de gebruiker
of zijn aanleg om tegemoet te komen aan een bijzonder gebruik.
De gebruiker aanvaardt alle risico’s verbonden met een winstderving, een verlies van
gegevens, fouten, een verlies van commerciële informatie of andere gevolgen van het
bezit van het multimediaproduct of het gebruik ervan.
Gezien sommige wetgevingen de eerder genoemde garantievoorwaarde niet toelaten,
kan het zijn dat deze niet van toepassing is op de gebruiker.
15
NOTES
______________________________________________________________________
______________________________________________________________________
______________________________________________________________________
______________________________________________________________________
______________________________________________________________________
______________________________________________________________________
______________________________________________________________________
______________________________________________________________________
______________________________________________________________________
______________________________________________________________________
______________________________________________________________________
______________________________________________________________________
______________________________________________________________________
______________________________________________________________________
______________________________________________________________________
______________________________________________________________________
______________________________________________________________________
______________________________________________________________________
______________________________________________________________________
______________________________________________________________________
______________________________________________________________________
______________________________________________________________________
______________________________________________________________________
______________________________________________________________________
______________________________________________________________________
______________________________________________________________________
______________________________________________________________________
______________________________________________________________________
______________________________________________________________________
______________________________________________________________________
______________________________________________________________________
______________________________________________________________________
______________________________________________________________________
______________________________________________________________________
______________________________________________________________________
______________________________________________________________________
______________________________________________________________________
______________________________________________________________________
______________________________________________________________________
______________________________________________________________________
______________________________________________________________________
______________________________________________________________________
______________________________________________________________________
______________________________________________________________________
______________________________________________________________________
______________________________________________________________________
______________________________________________________________________
______________________________________________________________________
16
The PEGI age rating system:
Age Rating
categories:
Les
catégories
de tranche
d’âge:
Note: There are some local variations!
Note: Il peut y avoir quelques variations en fonction du pays!
Content
Descriptors:
Description
du contenu:
The ‘Online’ logo indicates that a game allows the player to have access to online game play
against other players.
Le logo « Online » indique qu’un titre vous permet de jouer avec d’autres personnes en ligne.
For further information about the Pan European Game Information
(PEGI) rating system please visit:
Pour de plus amples informations concernant l’évaluation du système
d’information de jeu Pan Européen (PEGI), vous pouvez consulter:
Para obtener más información sobre el sistema de calificación de
juegos (PEGI), por favor visite:
Per ulteriori informazioni sul sistema europeo di valutazione delle
informazioni del gioco (PEGI) vi preghiamo di visitare:
Für weitere Informationen über das europäische Spiel-Informationen
Bewertungs-System (PEGI) besuchen Sie bitte:
http://www.pegi.info
RVL-SCTP-EUR
NEKO ENTERTAINMENT
38 RUE DE LA RÉPUBLIQUE
93100 MONTREUIL
FRANCE
PRINTED IN FRANCE
IMPRIME EN FRANCE