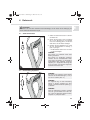
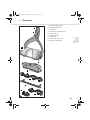
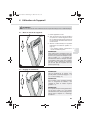
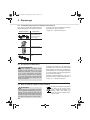
1
M668.book Seite 1 Donnerstag, 22. März 2012 10:57 10 Bedienungsanleitung DE Doppelbürstkehrer Operating Manual GB Double-brush sweeper Mode d'emploi FR Balai électrique double brosse Bedieningshandleiding NL Dubbele borstelveger Manual de instrucciones ES Escoba eléctrica doble Istruzioni per l'uso Scopa elettrica doppia IT Kullanim Klavuzu TR Çift frçal süpürge Roya-15528 • A5 (ohne AS) • 22.03.2012 M668.book Seite 2 Donnerstag, 22. März 2012 10:57 10 2 Bedieningshandleiding ........................................................ 58 - 75 Manual de instrucciones ..................................................... 76 - 93 Istruzioni per l'uso ............................................................... 94 - 111 GB 40 - 57 FR Mode d‘emploi ...................................................................... NL 22 - 39 ES Operating Manual ................................................................ IT 4 - 21 TR Bedienungsanleitung .......................................................... DE M668.book Seite 3 Donnerstag, 22. März 2012 10:57 10 Kullanim Klavuzu ................................................................. 112 - 129 3 M668.book Seite 4 Donnerstag, 22. März 2012 10:57 10 Inhaltsverzeichnis Inhaltsverzeichnis Technische Daten ............................................................................................. 5 Kennzeichnungen ............................................................................................. 5 1 Übersicht ................................................................................ 6 2 Sicherheitshinweise .............................................................. 8 2.1 2.2 2.3 2.4 2.5 2.6 zur Bedienungsanleitung ............................................................................. zu bestimmten Personengruppen ................................................................ zur Stromversorgung ................................................................................... zum mitgelieferten Akkupack ....................................................................... zu den Bürstwalzen ...................................................................................... zur bestimmungsgemäßen Verwendung ..................................................... 8 8 8 9 9 9 3 Vor dem ersten Gebrauch .................................................. 10 3.1 3.2 3.3 3.4 Auspacken ................................................................................................. Stiel und Handgriff montieren .................................................................... Akkupack einsetzen ................................................................................... Akkupack laden .......................................................................................... 10 10 11 12 4 Gebrauch ............................................................................. 13 4.1 Gerät einschalten ....................................................................................... 13 4.2 Kehrleistung anpassen .............................................................................. 13 5 Nach dem Gebrauch ........................................................... 14 5.1 5.2 5.3 5.4 Ausschalten ............................................................................................... Transportieren und Verstauen ................................................................... Staubbehälter leeren .................................................................................. Bürstwalzen reinigen .................................................................................. 14 14 15 16 6 Problembehebung ............................................................... 19 6.1 6.3 6.2 6.4 falls das Gerät nicht arbeitet, wie es soll .................................................... falls das Gerät defekt ist ............................................................................ Zubehör- und Ersatzteile nachbestellen .................................................... Gerät und Akkupack entsorgen ................................................................. 19 20 20 20 7 Garantie ................................................................................ 21 7.1 Garantiebedingungen ................................................................................ 21 7.2 Im Garantiefall ............................................................................................ 21 4 M668.book Seite 5 Donnerstag, 22. März 2012 10:57 10 Vielen Dank! Vielen Dank! Technische Daten DE Es freut uns, dass Sie sich für den Doppelbürstkehrer Duplex entschieden haben! Wir danken Ihnen für den Kauf und das entgegengebrachte Vertrauen. Geräteart : Doppelbürstkehrer Modell : Duplex Modellnummer : M668 (-0/-1/.../-8/-9) Netzteil Eingang : 100...240 V~, 50/60 Hz Netzteil Ausgang : 10 V DC, 200 mA Akkupack : Ni-MH, 6 V DC, 1300 mAh Ladezeit : ca. 16 Stunden Betriebsdauer : ca. 20...60 Minuten (je nach Schalterstellung/Untergrund) Gewicht (ohne Zubehör) : ca. 2,0 kg Kennzeichnungen : Nur für den Hausgebrauch : entspricht den europäischen Richtlinien : Schutzklasse II (Schutzisolierung) : Nicht im Hausmüll entsorgen Technische und gestalterische Änderungen im Zuge stetiger Produktverbesserungen vorbehalten. © Royal Appliance International GmbH 5 M668.book Seite 6 Donnerstag, 22. März 2012 10:57 10 1 Übersicht 1 Übersicht 1 9 10 1 Dreifach-Schiebeschalter - Stellung „0“: ausgeschaltet - Stellung „I“: für Hartböden 2* - Stellung „II“: für Teppiche 2* Öse zum Aufhängen (optional*) 3 4 8 3 Handgriff 4 Stiel 5 Akkupack 6 Akkupack-Entriegelungstasten 7 Bedienungsanleitung 8 Netzteiladapter 9 Netzteil 10 Stecker *das heißt je nach Modell und Ausführung im Lieferumfang enthalten 7 6 6 5 1 6 M668.book Seite 7 Donnerstag, 22. März 2012 10:57 10 1 2 1 Ladekontrollleuchte 2 Akkufach 3 Bürstfuß 4 Staubbehälter-Entriegelungstaste 5 Staubbehälter 6 hintere Bürstwalze 7 Keilriemenabdeckung 8 schmale, vordere Bürstwalze 9 breite, vordere Bürstwalze DE 1 Übersicht 3 4 5 6 7 8 9 2 7 M668.book Seite 8 Donnerstag, 22. März 2012 10:57 10 2 Sicherheitshinweise 2.1 2 zur Bedienungsanleitung Sicherheitshinweise WARNUNG: Warnt vor Gefahren für Ihre Gesundheit und zeigt mögliche Verletzungsrisiken auf. ACHTUNG: Weist auf mögliche Gefährdungen für das Gerät oder andere Gegenstände hin. HINWEIS: Hebt Tipps und Informationen hervor. 2.2 Bewahren Sie die Anleitung gut auf. Falls Sie das Gerät an Dritte weitergeben, geben Sie auch die Bedienungsanleitung mit. Die Nichtbeachtung dieser Anleitung kann zu schweren Verletzungen oder Schäden am Gerät führen. Für Schäden, die aufgrund der Nichtbeachtung dieser Bedienungsanleitung entstehen, übernehmen wir keine Haftung. zu bestimmten Personengruppen Diese Geräte können von Kindern ab 8 Jahren und darüber und von Personen mit verringerten physischen, sensorischen oder mentalen Fähigkeiten oder Mangel an Erfahrung und/oder Wissen benutzt werden, wenn sie beaufsichtigt werden oder bezüglich des sicheren Gebrauchs des Gerätes unterwiesen wurden und die daraus resultierenden Gefahren verstanden haben. Bewahren Sie das Gerät für diesen Personenkreis unzugänglich auf. Reinigung und Benutzer-Wartung dürfen nicht durch Kinder ohne Beaufsichtigung durchgeführt werden. 2.3 Lesen Sie die Bedienungsanleitung vollständig durch, bevor Sie mit dem Gerät arbeiten. Das Gerät selbst ist kein Spielzeug. Kinder dürfen nicht mit dem Gerät spielen. Kinder dürfen sich unter anderem weder auf das Gerät stellen oder setzen. Aus Sicherheitsgründen raten wir als Hersteller dringend, dass Kinder, gleich welchen Alters, nicht mit dem Gerät umgehen. Kinder, gleich welchen Alters, können die Gefahren, die von diesem Gerät ausgehen, definitiv nicht kennen oder verstehen. Verpackungsmaterialien dürfen nicht zum Spielen verwendet werden. Es besteht Erstickungsgefahr. zur Stromversorgung Der Akkupack wird mit elektrischem Strom aufgeladen. Dabei besteht grundsätzlich die Gefahr eines elektrischen Schlags. Achten Sie daher besonders auf Folgendes: Achten Sie darauf, dass das Netzteilkabel nicht geknickt, eingeklemmt oder überfahren wird oder mit Hitzequellen in Berührung kommen kann. Fassen Sie das Netzteil niemals mit nassen Händen an. Tauchen Sie das Gerät, sein Netzteil oder den Akkupack niemals in Wasser oder andere Flüssigkeiten und halten Sie jegliche Feuchtigkeit fern. Laden Sie das Gerät nur, wenn die auf dem Netzteil angegebene elektrische Spannung mit der Spannung Ihrer Steckdose übereinstimmt. Kontrollieren Sie das Netzteilkabel vor dem Benutzen des Netzteils auf eventuelle Beschädigungen. Wenn Sie das Netzteil aus der Steckdose herausziehen wollen, ziehen Sie immer direkt am Netzteil. Ziehen Sie niemals am Netzteilkabel. Missbrauchen Sie das Netzteilkabel nicht zum Tragen des Netzteils. 8 Stellen Sie sicher, dass das Netzteil aus der Steckdose gezogen ist, bevor Sie den Akkupack einsetzen oder ausbauen sowie bevor Sie das Gerät reinigen oder warten. M668.book Seite 9 Donnerstag, 22. März 2012 10:57 10 2.4 zum mitgelieferten Akkupack Bei falschem Umgang mit Akkus besteht Verletzungs- und Explosionsgefahr. Verwenden Sie ausschließlich das mitgelieferte Netzteil zum Aufladen des Akkupacks. Laden Sie den Akkupack keinesfalls mit einem anderen Netzteil. Nutzen Sie das mitgelieferte Netzteil wiederum ausschließlich zum Aufladen des Akkupacks dieses Geräts. Bevor Sie damit beginnen, den Akkupack ein- oder auszubauen, stellen Sie sicher, dass das Netzteil aus der Steckdose gezogen ist. Nehmen Sie den Akkupack niemals auseinander und setzen Sie ihn niemals hohen Temperaturen aus. Bei unsachgemäßem Umgang kann Flüssigkeit aus dem Akkupack austreten. Vermeiden Sie Kontakt mit der Flüssigkeit. 2.5 Setzen Sie nur den mitgelieferten oder durch Nachbestellung erworbenen OriginalAkkupack in das Gerät ein. Verwenden Sie diesen Akkupack ausschließlich für dieses Gerät. Versuchen Sie nicht, den Akkupack zu öffnen. Falls die Akkus im Inneren des Akkupacks ihr Lebensende erreicht haben, muss stets der gesamte Akkupack ersetzt werden. Entsorgen Sie den Akkupack nach Gebrauchsende ausschließlich wie beschrieben, ZKapitel 6.4, „Gerät und Akkupack entsorgen“. zu den Bürstwalzen Das Gerät besitzt angetriebene Bürstwalzen. Diese können im ungünstigsten Fall Verletzungen hervorrufen. Achten Sie daher besonders auf Folgendes: Stellen Sie sicher, dass das Gerät ausgeschaltet ist, das Netzteil nicht angeschlossen ist und der Akkupack herausgenommen ist, bevor Sie damit beginnen, das Gerät zu reinigen oder zu warten. 2.6 Sollte es erforderlich sein, den Akkupack auszutauschen, wenden Sie sich für Ersatz an einen Fachhändler oder den Royal Appliance Kundendienst. Ersetzen Sie den Akkupack nicht durch andere Akkus oder Batterien. Achten Sie darauf, dass zu keiner Zeit Körperteile unter die Bürstwalzen gelangen können. Kehren Sie nicht in der Nähe von Kabeln, Leitungen und langen Fransen. Zum einen besteht die Gefahr, dass die Kabelisolierung beschädigt wird. Zum anderen können sich diese Gegenstände in den Bürstwalzen verheddern und das Gerät so schädigen. zur bestimmungsgemäßen Verwendung Das Gerät darf ausschließlich im Haushalt eingesetzt werden, um geringe Schmutzmengen von trockenen Böden aufzukehren. Es ist für eine gewerbliche Nutzung nicht geeignet. Jede weitere Verwendung gilt als nicht bestimmungsgemäß und ist untersagt. Verboten ist insbesondere: Einsatz, Aufbewahrung oder Aufladen des Geräts im Freien. Selbstständiges Umbauen oder Reparieren. Verboten ist zudem der Einsatz ... - ... an Menschen, Tieren oder Pflanzen. - ... in der Nähe von glühenden, glimmenden, brennenden, spitzen oder scharfkantigen Gegenständen. - ... zum Aufnehmen von Flüssigkeiten. - ... mit angeschlossenem Netzteil. - ... zum Aufnehmen von Schmutzmengen, die übliche Schmutzmengen in Menge oder Partikelgröße überschreiten. 9 DE 2 Sicherheitshinweise M668.book Seite 10 Donnerstag, 22. März 2012 10:57 10 3 Vor dem ersten Gebrauch 3.1 3 Auspacken Vor dem ersten Gebrauch 1. Packen Sie das Gerät samt Zubehör aus. ACHTUNG: Heben Sie die Verpackung für die Lagerung des Geräts oder für einen sicheren Versand des Gerätes auf. Versenden Sie das Gerät stets in der Originalverpackung, damit es keinen Schaden nimmt. 3.2 2. Überprüfen Sie den Inhalt auf Unversehrtheit und Vollständigkeit (Abb. 1). HINWEIS: Falls Sie einen Transportschaden bemerken, wenden Sie sich an Ihren Händler. Stiel und Handgriff montieren HINWEIS: Das obere und das untere Ende des Stiels sind baugleich. 1. Stecken Sie den Handgriff in den Stiel (Abb. 3) und drücken Sie dabei kräftig, bis der Handgriff hör- und spürbar einrastet. HINWEIS: Erst dann können Sie sicher sein, dass die elektrischen Kontakte im Inneren des Handgriffs in die des Stiels greifen. HINWEIS: click! 1 3 Falls Sie den Handgriff wieder herausziehen wollen, müssen Sie das kleine Quadrat am Stiel (Abb. 3/1) mit einem kleinen stumpfen Gegenstand kräftig hineindrücken und dabei am Handgriff ziehen. 2. Stecken Sie den Stiel in die Konsole am Bürstfuß (Abb. 4) und drücken Sie dabei kräftig, bis click! 1 - das kleine Quadrat am Stiel verschwunden ist und - der Stiel hör- und spürbar einrastet. HINWEIS: Erst dann können Sie sicher sein, dass die elektrischen Kontakte im Inneren des Stiels in die der Konsole greifen. HINWEIS: 4 10 Falls Sie den Stiel wieder herausziehen wollen, müssen Sie die Entriegelung an der Konsole (Abb. 4/1) kräftig hineindrücken und dabei am Stiel ziehen. M668.book Seite 11 Donnerstag, 22. März 2012 10:57 10 3 Vor dem ersten Gebrauch Akkupack einsetzen DE 3.3 ACHTUNG: Setzen Sie lediglich den mitgelieferten oder durch Nachbestellung erworbenen OriginalAkkupack in das Gerät ein. HINWEIS: Solange Sie den Akkupack mit dem Kontakt voran in das Gerät einsetzen, ist die weitere Einlegerichtung egal. 1. Stecken Sie den Akkupack mit dem Kontakt voran in das Akkufach (Abb. 5). 5 2. Drücken Sie den Akkupack in das Akkufach (Abb. 6). Er rastet hör- und spürbar ein. HINWEIS: Falls Sie den Akkupack wieder ausbauen möchten, müssen Sie nur die beiden Entnahmetasten an den Seiten des Akkupacks drücken (Abb. 5) und den Akkupack aus dem Akkufach nehmen. 6 11 M668.book Seite 12 Donnerstag, 22. März 2012 10:57 10 3 Vor dem ersten Gebrauch 3.4 Akkupack laden WARNUNG: Verletzungsgefahr durch unsachgemäßes Aufladen! Verwenden Sie ausschließlich das mitgelieferte Netzteil zum Aufladen. ACHTUNG: Achten Sie auf einen vollständigen ersten Lade- und Entladezyklus. Anderenfalls verkürzt sich die Lebensdauer des Akkupacks. HINWEIS: Der Akkupack wird ungeladen geliefert. Bevor Sie mit dem Gerät arbeiten können, muss der Akkupack geladen werden. Der erste Ladevorgang dauert ca. 16 Stunden. HINWEIS: Sie können den Akkupack nur im eingebauten Zustand laden. Achten Sie darauf, dass das Gerät ausgeschaltet ist. Bei eingeschaltetem Gerät kann der Akkupack nicht geladen werden. 7 1. Stellen Sie sicher, dass das Gerät ausgeschaltet ist (Stellung „0“). 2. Stecken Sie den Netzteiladapter bei eingesetztem Akkupack in die Buchse auf der Rückseite des Geräts (Abb. 7). 3. Stecken Sie das Netzteil in eine Steckdose (Abb. 8), an der die auf dem Typenschild des Netzteils angegebene Spannung anliegt. Die Ladekontrollleuchte beginnt rot zu leuchten (Abb. 9). 8 4. Lassen Sie den Akkupack ca. 16 Stunden aufladen, bis die Ladekontrollleuchte erlischt (Abb. 9). 5. Wenn die Ladekontrollleuchte nicht mehr leuchtet, ziehen Sie das Netzteil zuerst aus der Steckdose und dann aus dem Gerät bzw. dem Akkupack. HINWEIS: Laden Sie das Gerät nach dem Gebrauch erst wieder, wenn sich die Bürstwalze trotz korrekt eingesetztem Akkupack nicht mehr dreht. Jeder weitere vollständige Ladevorgang dauert ca. 16 Stunden. Je nach Restladung kann es auch deutlich kürzer sein. 9 12 M668.book Seite 13 Donnerstag, 22. März 2012 10:57 10 4 Gebrauch Gebrauch ACHTUNG: Informieren Sie sich beim Hersteller Ihres Bodenbelags, ob sich dieser für die Reinigung mit einem elektrischen Bürstkehrer eignet. 4.1 Gerät einschalten 1. Stellen Sie das Gerät auf den zu kehrenden Boden ab. 0 2. Ziehen Sie den Stiel zu sich und winkeln Sie so den Bürstfuß ab. Der Bürstfuß muss nun unabhängig davon, wie Sie den Stiel halten, auf dem Boden aufliegen. 3. Schalten Sie den Bürstkehrer ein, indem Sie den Schiebeschalter in Stellung „I“ (Abb. 10) bringen. I - Die Bürstwalzen drehen sich mit mittlerer Geschwindigkeit. HINWEIS: Zum Kehren von Hartböden sollte diese Stellung ausreichen. Zum Kehren von kurzflorigen Teppichen schieben Sie den Schiebeschalter weiter nach unten in die Stellung „II“. Das Gerät ist ausschließlich dafür ausgelegt, kurzflorige Teppiche (d. h. Teppichflor nicht länger als 5 mm) zu kehren. Auf längerem Teppichflor funktioniert das Gerät nicht. 10 4.2 Kehrleistung anpassen HINWEIS: I Sie können bei laufendem Gerät beliebig zwischen den Schalterstellungen „I“ und „II“ hin und her schalten (Abb. 11). HINWEIS: Um möglichst lang mit einer Akkuladung kehren zu können empfiehlt sich, wenn möglich, mit mittlerer Drehzahl (Stellung „I“) zu arbeiten. II HINWEIS: Falls die Akkuleistung merklich nachlässt oder sich gar die Bürsten nicht mehr drehen, muss der Akkupack geladen werden, ZKapitel 3.4, „Akkupack laden“. 11 13 DE 4 M668.book Seite 14 Donnerstag, 22. März 2012 10:57 10 5 Nach dem Gebrauch 5.1 5 Ausschalten Nach dem Gebrauch 1. Bringen Sie den Schiebeschalter in Stellung „0“ (Abb. 12). 2. Stellen Sie den Stiel rechtwinklig zum Bürstfuß an, bis dieser einrastet und das Gerät von allein stehen bleibt. 0 3. Bei Bedarf leeren Sie den Staubbehälter, ZKapitel 5.3, „Staubbehälter leeren“. I 12 5.2 Transportieren und Verstauen Tragen Sie den Bürstkehrer stets am Handgriff (Abb. 13). ACHTUNG: Stellen Sie das Gerät nie direkt neben Wärmequellen ab (z. B. Heizung, Ofen). Vermeiden Sie direkte Sonneneinstrahlung. Die Hitze kann das Gerät beschädigen. * Vor dem Verstauen leeren Sie den Staubehälter (ZKapitel 5.3, „Staubbehälter leeren“) und entnehmen Sie den Akkupack (ZKapitel 3.3, „Akkupack einsetzen“). Lagern Sie das Gerät stets kühl, trocken und für Kinder unzugänglich. 13 14 Falls vorhanden, können Sie das Gerät mit der optionalen Öse (Abb. 13/*) an einen Haken (Tragfähigkeit > 3 kg) hängen. M668.book Seite 15 Donnerstag, 22. März 2012 10:57 10 5.3 Staubbehälter leeren Leeren Sie den Staubbehälter für beste Reinigungsergebnisse regelmäßig, am besten nach jedem Reinigungsgang, wie folgt: 1. Stellen Sie sicher, dass das Gerät ausgeschaltet ist. 2. Drücken Sie die Staubbehälter-Entriegelungstaste (Abb. 14) und halten Sie diese gedrückt. HINWEIS: Halten Sie die Entriegelungstaste so lange gedrückt, bis Sie den Staubbehälter tief in einen Mülleimer entleeren können. So verhindern Sie, dass vorzeitig Schmutz herausfällt. 14 3. Heben Sie den Staubbehälter nach oben aus dem Bürstfuß und halten Sie die Entriegelungstaste weiterhin gedrückt (Abb. 15). 4. Halten Sie den Staubbehälter tief in einen Mülleimer (Abb. 15). HINWEIS: Sie können den Inhalt des Staubbehälters über den Hausmüll entsorgen, sofern dieser keinen für den Hausmüll verbotenen Schmutz enthält. 5. Nun können Sie die Entriegelungstaste loslassen (Abb. 16). Der Schmutz rieselt in den Mülleimer. 15 6. Klopfen Sie den Staubbehälter vorsichtig aus. 7. Sollte dies nicht genügen, wischen Sie den Staubbehälter mit einem trockenen Tuch aus. 8. Setzen Sie den geleerten und gereinigten Staubbehälter wieder in den Bürstfuß. Drücken Sie dabei die Entriegelungstaste (Abb. 14). 9. Lassen Sie die Entriegelungstaste los und prüfen Sie den Staubbehälter auf festen Sitz und Halt. 16 15 DE 5 Nach dem Gebrauch M668.book Seite 16 Donnerstag, 22. März 2012 10:57 10 5 Nach dem Gebrauch 5.4 Bürstwalzen reinigen WARNUNG: Verletzungsgefahr durch anlaufende Bürstwalzen! Bevor Sie beginnen, die Bürstwalzen auszubauen, schalten Sie das Gerät aus und bauen Sie den Akkupack aus. HINWEIS: Die Vorgehensweise für die Reinigung der breiten, vorderen Bürstwalze und der schmalen vorderen Bürstwalze ist identisch. Wir beschreiben das Vorgehen exemplarisch am Beispiel der breiten Bürstwalze. 17 1. Schalten Sie das Gerät aus, ZKapitel 5.1, „Ausschalten“. 2. Bauen Sie den Akkupack aus, ZKapitel 3.3, „Akkupack einsetzen“. 3. Legen Sie das Gerät so ab, dass die Unterseite des Bürstfußes nach oben zeigt und die Bürstwalzen sichtbar sind (Abb. 17). 4. Drehen Sie die Entriegelung der Bürstwalze kräftig in Richtung (Abb. 17). 5. Ziehen Sie die Bürstwalze zur Seite heraus (Abb. 18). 18 6. Entfernen Sie anhaftende Haare, Flusen und dergleichen von Hand oder vorsichtig mit einer Schere (Abb. 19). ACHTUNG: Falls Sie eine Schere verwenden müssen, achten Sie darauf, dass Sie keine Borsten abschneiden oder die Bürstwalze anderweitig beschädigen. 19 16 M668.book Seite 17 Donnerstag, 22. März 2012 10:57 10 7. Führen Sie die Bürstwalze wieder in ihren Schacht (Abb. 20). 20 8. Drehen Sie die Bürstwalze nach dem Einsetzen so lange, bis sich das Büschel frei bewegen kann (Abb. 21). HINWEIS: Anderenfalls wäre die komplette vordere Bürstwalze blockiert. 21 9. Falls sich das letzte Büschel frei bewegen lässt (Abb. 21), verriegeln Sie die Entriegelung der Bürstwalze, indem Sie sie in Richtung (Abb. 22) drehen. HINWEIS: Bei Bedarf gehen Sie zum Reinigen der schmalen, vorderen Bürstwalze genauso vor (Schritte 1...9). 22 17 DE 5 Nach dem Gebrauch M668.book Seite 18 Donnerstag, 22. März 2012 10:57 10 5 Nach dem Gebrauch Gehen Sie zum Reinigen der hinteren Bürstwalze wie folgt vor: 1. Falls noch nicht geschehen: - Schalten Sie das Gerät aus, ZKapitel 5.1, „Ausschalten“. - Bauen Sie den Akkupack aus, ZKapitel 3.3, „Akkupack einsetzen“. - Legen Sie das Gerät so ab, dass die Unterseite des Bürstfußes nach oben zeigt und die Bürstwalzen sichtbar sind. 2. Entriegeln Sie die Keilriemenabdeckung (Abb. 23) und nehmen Sie diese ab. 23 3. Nehmen Sie die hintere Bürstwalze aus ihrer Konsole (Abb. 24). 4. Entfernen Sie anhaftende Haare, Flusen und dergleichen von Hand oder vorsichtig mit einer Schere. ACHTUNG: Falls Sie eine Schere verwenden müssen, achten Sie darauf, dass Sie keine Borsten abschneiden oder die Bürstwalze anderweitig beschädigen. 5. Führen Sie die hintere Bürstwalze wieder in ihre Konsole. 6. Achten Sie dabei auf Folgendes: 24 - Setzen Sie die Bürstwalze schräg an, so dass diese zuerst korrekt auf die Antriebswelle aufgesetzt wird. - Senken Sie die Bürstwalze dann so ab, dass das Schild der Bürstwalze genau in die Halterung greift (Abb. 24). HINWEIS: Anderenfalls wird die hintere Bürstwalze überhaupt nicht oder nicht korrekt angetrieben und bleibt somit wirkungslos. 7. Setzen Sie die Keilriemenabdeckung an und drücken Sie die beiden Verriegelungen kräftig herunter, bis sie hör- und spürbar einrasten. 25 18 M668.book Seite 19 Donnerstag, 22. März 2012 10:57 10 6 Problembehebung falls das Gerät nicht arbeitet, wie es soll Problembehebung DE 6.1 6 Überprüfen Sie anhand nachfolgender Tabelle, ob Sie das Problem selbst beseitigen können. Problem Das Gerät lässt sich nicht einschalten. mögliche Ursache / Lösung Der Stiel und/oder der Handgriff sind nicht korrekt montiert. Drücken Sie den Stiel bzw. den Handgriff wie beschrieben kräftig in seine Aufnahme, ZKapitel 3.2, „Stiel und Handgriff montieren“. Der Akkupack ist nicht oder nicht korrekt eingesetzt. Setzen Sie den Akkupack wie beschrieben ein, ZKapitel 3.3, „Akkupack einsetzen“. Der Akkupack ist zwar eingesetzt, aber nicht geladen. Laden Sie den Akkupack wie beschrieben, ZKapitel 3.4, „Akkupack laden“. Das Gerät lässt sich zwar einschalten, aber eine oder mehrere Bürstwalzen drehen sich nicht. Eine oder mehrere Bürstwalzen sind blockiert oder nach dem Reinigen nicht wieder korrekt eingesetzt. Reinigen und montieren Sie die Bürstwalzen wie beschrieben, ZKapitel 5.4, „Bürstwalzen reinigen“. Das Gerät funktioniert einwandfrei, dennoch ist das Reinigungsergebnis nicht zufriedenstellend. Die eingestellte Kehrleistung ist unangemessen. Passen Sie die Kehrleistung wie beschrieben an den zu kehrenden Untergrund an, ZKapitel 4.2, „Kehrleistung anpassen“. Das Gerät lässt sich zwar einschalten, geht aber kurze Zeit später von allein aus. Der Akkupack hat sein Lebensende erreicht. 1. Bestellen Sie einen neuen Akkupack, ZKapitel 6.2, „Zubehör- und Ersatzteile nachbestellen“. Der Staubbehälter ist überfüllt. Leeren Sie den Staubbehälter wie beschrieben, ZKapitel 5.3, „Staubbehälter leeren“. 2. Setzen Sie den neuen Akkupack ein, ZKapitel 3.3, „Akkupack einsetzen“. 3. Entsorgen Sie den ausgedienten Akkupack, ZKapitel 6.4, „Gerät und Akkupack entsorgen“. HINWEIS: Sollten Sie das Problem mit Hilfe dieser Tabelle nicht beheben können, wenden Sie sich an unsere Service-Hotline und schildern Sie uns das Problem. Unser Servicepersonal ist speziell für diesen Fall geschult und kann die Problemursache unter Ihrer Mithilfe gezielt einkreisen und mit Ihnen zusammen beheben. So vermeiden Sie die Unannehmlichkeiten eines eventuellen Versands und Ihr Gerät steht Ihnen rasch wieder zur Verfügung. Beheben Sie Störungen ganz leicht selbst. SERVICE-HOTLINE 0180 501 50 50* Mo.– Fr., 8 – 20 Uhr www.dirt-devil.de/service *0,14 €/Min. aus dem deutschen Festnetz (deutscher Mobilfunkhöchstpreis 0,42 €/Min.) 19 M668.book Seite 20 Donnerstag, 22. März 2012 10:57 10 6 Problembehebung 6.2 Zubehör- und Ersatzteile nachbestellen Folgende Zubehör- sowie Ersatzteile können nachbestellt werden: Artikelnr. Beschreibung 0668001 2-teiliges Bürstwalzenset (1 schmale, 1 breite, vordere Bürstwalze) 0668002 1 Netzteil 0668003 1 Akkupack 0668004 1 hintere Bürstwalze Um Zubehör- sowie Ersatzteile nachzubestellen, kontaktieren Sie uns: per Telefon unter: 01805 15 85 08* per E-Mail: [email protected] im Onlineshop: www.dirtdevil.de oder bei den Firmen: Service-Versand Ina Riedmüller Frankenstraße 34 89233 Neu-Ulm Deutschland Tel.: +49 (0) 180 - 515 85 08 * Fax: + 49 (0) 7307 - 41 56 [email protected] Staubsauger-Center Feuerbach KG Corneliusstraße 75 40215 Düsseldorf Deutschland Tel.: +49 (0) 180 - 515 85 08 * Fax: + 49 (0) 211 - 37 04 97 [email protected] www.dirtdevil-service.de *0,14 €/Minute aus dem deutschen Festnetz (deutscher Mobilfunkhöchstpreis 0,42 €/Minute) 6.3 falls das Gerät defekt ist WARNUNG: Verletzungsgefahr! Verwenden Sie niemals ein defektes Gerät oder ein defektes Netzteil! Wenn das Netzteil oder sein Kabel beschädigt ist, muss es durch den Hersteller oder seinen Kundendienst oder eine ähnlich qualifizierte Person ersetzt werden, um Gefährdungen zu vermeiden. 6.4 Versenden Sie das defekte Gerät mit entleertem Staubbehälter dazu an die Adresse auf ZSeite 130, „International Service“. Gerät und Akkupack entsorgen ACHTUNG: Gefahr von Umweltschäden! Das Gerät enthält Akkus, die nicht in den Hausmüll gelangen dürfen. Geben Sie das Gerät sowie den ausgebauten Akkupack separat zur Entsorgung an die entsprechenden Sammelstellen. 20 Falls das Gerät heruntergefallen ist oder anderweitig beschädigt wurde und offensichtliche Anzeichen von Beschädigung aufweist, geben Sie das defekte Gerät zur Reparatur an einen Fachhändler oder den Royal Appliance Kundendienst. Das Gerät sowie sein Akkupack dürfen nicht über den Hausmüll entsorgt werden! Geben Sie das Gerät sowie den ausgebauten Akkupack separat zur Entsorgung an die entsprechenden Sammelstellen. M668.book Seite 21 Donnerstag, 22. März 2012 10:57 10 7 Garantie Garantiebedingungen Garantie Wir übernehmen für das von uns vertriebene Gerät eine Garantie von 24 Monaten ab Kaufdatum. Innerhalb dieser Garantiezeit beseitigen wir nach unserer Wahl durch Reparatur oder Austausch des Gerätes oder des Zubehörs (Schäden an Zubehörteilen führen nicht automatisch zum Umtausch des kompletten Gerätes) unentgeltlich alle Mängel, die auf Material- oder Herstellungsfehlern beruhen. Von der Garantie sind Schäden ausgenommen, die auf unsachgemäßen Gebrauch (Betrieb mit falscher Stromart/-spannung, Anschluss an ungeeignete Stromquellen, Bruch usw.) zurückzuführen sind, normaler Verschleiß und Mängel, die den Wert oder die Gebrauchstauglichkeit des Gerätes nur unerheblich beeinflussen. 7.2 Bei Eingriffen durch eine nicht von uns autorisierte Stelle oder bei Verwendung anderer als original Royal Appliance Ersatzteile erlischt die Garantie. Verschleißteile fallen nicht unter die Garantie und sind deshalb kostenpflichtig! Die Garantie tritt nur in Kraft, wenn das Kaufdatum durch Stempel und Unterschrift des Händlers auf der Garantiekarte bestätigt ist oder eine Rechnungskopie dem eingeschickten Gerät beiliegt. Garantieleistungen bewirken weder eine Verlängerung der Garantiezeit, noch beginnt dadurch ein Anspruch auf eine neue Garantie! Im Garantiefall Versenden Sie das Gerät im Garantiefall mit entleertem Staubbehälter und mit einer kurzen Fehlerbeschreibung in Blockschrift. Versehen Sie das Anschreiben mit dem Vermerk „Zur Garantie“. Senden Sie es zusammen mit der Garantiekarte oder einer Rechnungskopie an folgende Adresse: Royal Appliance International GmbH Abt. Kundenservice Jagenbergstraße 19 41468 Neuss Deutschland Tel.: +49 (0) 180 - 501 50 50* Fax: +49 (0) 2131 - 60 90 60 95 www.dirtdevil.de [email protected] Beheben Sie Störungen ganz leicht selbst. SERVICE-HOTLINE 0180 501 50 50* Mo.– Fr., 8 – 20 Uhr www.dirt-devil.de/service *0,14 €/Min. aus dem deutschen Festnetz (deutscher Mobilfunkhöchstpreis 0,42 €/Min.) 21 DE 7.1 7 M668.book Seite 22 Donnerstag, 22. März 2012 10:57 10 Table of contents Table of contents Technical data ................................................................................................. 23 Labels ............................................................................................................. 23 1 Overview .............................................................................. 24 2 Safety instructions .............................................................. 26 2.1 2.2 2.3 2.4 2.5 2.6 About the operating manual ....................................................................... About certain groups of persons ................................................................ About the power supply ............................................................................. About the battery pack supplied ................................................................. About the brush rollers ............................................................................... About appropriate use ................................................................................ 26 26 26 27 27 27 3 Before first use .................................................................... 28 3.1 3.2 3.3 3.4 Unpacking .................................................................................................. Attaching the tube and handle ................................................................... Inserting the battery pack ........................................................................... Charging the battery pack .......................................................................... 28 28 29 30 4 Use ........................................................................................ 31 4.1 Switching on the appliance ........................................................................ 31 4.2 Adjusting the sweeping performance ......................................................... 31 5 After use ............................................................................... 32 5.1 5.2 5.3 5.4 Switching off ............................................................................................... Transportation and storage ........................................................................ Emptying the dust container ...................................................................... Cleaning the brush rollers .......................................................................... 32 32 33 34 6 Troubleshooting .................................................................. 37 6.1 6.3 6.2 6.4 If the appliance does not work as it should ................................................ If the appliance is defective ........................................................................ Ordering accessories and spare parts ....................................................... Disposing of the appliance and battery pack ............................................. 37 38 38 38 7 Warranty ............................................................................... 39 7.1 Warranty conditions ................................................................................... 39 7.2 In case of a warranty claim ........................................................................ 39 22 M668.book Seite 23 Donnerstag, 22. März 2012 10:57 10 Thank you! Thank you! Technical data Type of appliance : Double-brush sweeper Model : Duplex Model number : M668 (-0/-1/.../-8/-9) GB We are pleased that you have chosen the double-brush sweeper Duplex! Thanks for your purchase and your confidence in us. Power supply unit : 100...240 V~, input 50/60 Hz Power supply unit : 10 V DC, output 200 mA Battery pack : Ni-MH, 6 V DC, 1300 mAh Charging time : approx. 16 h Operating duration : approx. 20...60 minutes (depending on switch position/type of flooring) Weight (without accessories) : approx. 2.0 kg Labels : Only for household use : Satisfies the European directives : Protection class II (Protective insulation) : Do not dispose of with household waste Technical and design specifications may be changed in the course of continuous product improvement. © Royal Appliance International GmbH 23 M668.book Seite 24 Donnerstag, 22. März 2012 10:57 10 1 Overview 1 Overview 1 9 10 1 Three-position slide switch - Position ‘0’: switched off - Position ‘I’: for hard floors 2* - Position ‘II’: for carpets 2* Eyelet for hanging up (optional*) 3 4 8 3 Handle 4 Handle 5 Battery pack 6 Battery pack release catches 7 Operating manual 8 Mains adapter 9 Power supply unit 10 Plug *included in the scope of delivery depending on model and features 7 6 6 5 1 24 M668.book Seite 25 Donnerstag, 22. März 2012 10:57 10 1 2 1 Charging indicator light 2 Battery compartment 3 Brush base 4 Dust container release button 5 Dust container 6 Rear brush roller 7 V-belt cover 8 Narrow, front brush roller 9 Wide, front brush roller GB 1 Overview 3 4 5 6 7 8 9 2 25 M668.book Seite 26 Donnerstag, 22. März 2012 10:57 10 2 Safety instructions 2.1 2 About the operating manual Safety instructions WARNING: Warning concerning health hazards describing possible risks of injury. ATTENTION: Warning concerning possible dangers to the appliance or other objects. NOTE: Highlights tips and information. 2.2 Keep the operating manual in a safe place. If you pass the appliance on to someone else, give them the operating manual as well. Non-compliance with these instructions can lead to serious injuries or damage to the appliance. We assume no liability for damage that occurs as a result of non-compliance with this operating manual. About certain groups of persons These appliances can be used by children of eight years and upwards and persons with impaired physical, sensory or mental abilities, or insufficient experience or knowledge, providing they are supervised or have been instructed in the proper use of the appliance and understand the risks involved. Keep the appliance out of reach of people of these groups. Children must not carry out cleaning work or maintenance unless they are supervised. 2.3 Read this operating manual completely before using the appliance. The appliance is not a toy. Children are not permitted to play with the appliance. Children must not be allowed to stand or sit on the appliance. As the manufacturer, we strongly advise against children of any age using the appliance for safety reasons. Children of all ages will not fully recognise or understand the risks this appliance poses. Packing material must not be used to play with. There is danger of suffocation. About the power supply The battery pack is charged with electricity. There is always a risk of electric shock. So please observe the following in particular: Take care that the power supply unit's cord is not bent, pinched, rolled over and does not come into contact with heat sources. Never touch the power supply unit with wet hands. Never immerse the appliance, its power supply unit or the battery pack in water or other liquids and keep it away from all damp. Only charge the appliance if the voltage indicated on the power supply unit matches the voltage of your socket. Always check the power supply unit’s cord for possible damage before using it. If you want to pull the power supply unit out of the socket, always pull directly on the plug. Never pull the power supply unit's cord. Do not carry the power supply unit by its cord. Ensure that the power supply unit has been pulled from the socket before inserting or removing the battery pack, as well as before cleaning or maintaining the appliance. 26 M668.book Seite 27 Donnerstag, 22. März 2012 10:57 10 2 Safety instructions About the battery pack supplied Wrong handling of the batteries can cause injury and explosion. Only use the power supply unit supplied with the appliance to charge the battery pack. Never charge the battery pack with another power supply unit. Use the power supply unit supplied solely to charge the battery pack of this appliance. Before removing the battery pack, ensure that the power supply unit has been removed from the socket. Never take the battery pack apart and never expose it to high temperatures. If not handled correctly, liquid could escape from the battery pack. Avoid any contact with the fluid. 2.5 Only insert the battery pack supplied or an original battery pack that you have subsequently ordered into the appliance. Use this battery pack for this appliance only. Do not try to open the battery pack. If the batteries inside the battery pack have reached the end of their life, then the entire battery pack must always be replaced. Only dispose of the battery pack as described after their operational life, ZChapter 6.4, ‘Disposing of the appliance and battery pack’. About the brush rollers The appliance has driven brush rollers. In unfavourable circumstances they could cause injury. So please observe the following in particular: Ensure that the appliance is switched off, the power supply unit is not connected and the battery pack has been removed before beginning to clean or maintain the appliance. 2.6 If the battery pack needs replacing, contact a specialist dealer or Royal Appliance Customer Services. Do not replace the battery pack with other batteries. Ensure that parts of your body can never get under the brush rollers. Do not brush close to cables, pipes and long fringes. The cable insulation could get damaged. Or these objects could get caught in the brush rollers and damage the appliance. About appropriate use The appliance is only permitted to be used in households to sweep up small quantities of dirt from dry floors. It is not suitable for industrial or commercial use. Any other use is considered inappropriate and is prohibited. It is especially forbidden: To use, store or charge the appliance outdoors. To alter or repair the appliance yourself. Also forbidden is use: - ... on people, animals or plants; - ... close to hot, smouldering, burning, pointed or sharp objects; - ... to clean up liquids; - ... whilst the power supply unit is connected; - ... to clean up quantities of dirt exceeding the usual accrual of dirt and particles. 27 GB 2.4 M668.book Seite 28 Donnerstag, 22. März 2012 10:57 10 3 Before first use 3.1 3 Unpacking Before first use 1. Unpack the appliance and all its accessories. ATTENTION: Keep the packaging for storing the appliance, or for it to be transported safely. Always transport or ship the appliance in its original packaging to avoid damage. 2. Check the contents for completeness and possible damage (Fig. 1). NOTE: Contact your dealer if you have found damage resulting from transport. 3.2 Attaching the tube and handle NOTE: The upper and lower end of the tube are identical in construction. 1. Insert the handle into the tube (Fig. 3) and push forcefully until you can hear and feel the handle click into place. NOTE: Only then can you be sure that the electric contacts inside the handle engage in the tube. NOTE: click! 1 3 If you want to take the handle back out, then you have to push the small square on the tube (Fig. 3/1) powerfully with a small blunt object and pull on the handle at the same time. 2. Insert the tube into the holder on the brush base (Fig. 4) and push powerfully until click! 1 - the small square on the tube has disappeared; and - you can feel and hear the tube click into place. NOTE: Only then can you be sure that the electric contacts inside the tube engage in the holder. NOTE: 4 28 If you want to pull the tube back out, then you have to push in the release catch on the holder (Fig. 4/1) forcefully and pull on the tube at the same time. M668.book Seite 29 Donnerstag, 22. März 2012 10:57 10 3 Before first use 3.3 Inserting the battery pack ATTENTION: Only insert into the appliance the battery pack supplied or an original battery pack that you have subsequently ordered. As long as you insert the battery pack with the contact first into the appliance, it is not important which way around you insert it. 1. Insert the battery pack with the contact first into the battery compartment (Fig. 5). 5 2. Push the battery pack into the battery compartment (Fig. 6). You will feel and hear it snap into place. NOTE: If you want to remove the battery pack again, you have to push in the two release buttons on the side of the battery pack (Fig. 5) and remove the battery pack from the battery compartment. 6 29 GB NOTE: M668.book Seite 30 Donnerstag, 22. März 2012 10:57 10 3 Before first use 3.4 Charging the battery pack WARNING: Danger of injury due to incorrect charging! Only use the power supply unit supplied with the appliance for charging. ATTENTION: Make sure you charge the batteries fully and then discharge them fully before using for the first time. Otherwise the battery pack’s service life would be reduced. NOTE: The battery pack is not charged when delivered. The battery pack must be charged before working with the appliance. The first charge takes about 16 hours. NOTE: You can only charge the battery pack when it is installed. Make sure that that appliance is switched off. If the appliance is switched on, the battery pack cannot be charged. 7 1. Make sure that that appliance is switched off (position ‘0’). 2. Insert the power supply unit into the socket on the back of the appliance (Fig. 7). 3. Connect the power supply unit to a socket (Fig. 8) that carries the same voltage as that indicated on the power supply unit's type plate. The charging indicator light begins to shine red (Fig. 9). 4. Charge the battery pack for approx. 16 hours, until the charging indicator light goes out (Fig. 9). 8 5. If the charging indicator light is no longer illuminated, first pull the power supply unit out of the socket and then out of the appliance or battery pack. NOTE: Only recharge the appliance after use if the brush roller will no longer turn even though the battery pack is inserted properly. Subsequent full charging cycles will take approx. 16 hours. Depending on the remaining charge, it could be much shorter. 9 30 M668.book Seite 31 Donnerstag, 22. März 2012 10:57 10 4 Use 4 Use ATTENTION: Check with the manufacturer of your flooring to see whether it is suited to being cleaned with an electric brush sweeper. 4.1 Switching on the appliance 0 2. Pull the tube towards you, thereby bending down the brush base. The brush base should now be on the floor however you hold the tube. 3. Switch on the brush sweeper by moving the slider switch to the ‘I’ position (Fig. 10). I - The brush rollers rotate at the medium speed. NOTE: This should be sufficient for sweeping hard floors. To sweep short-pile carpets, push the slider switch further down to position ‘II’. The appliance is designed to sweep shortpile carpets (e.g. carpet pile no longer than 5 mm) alone. The appliance does not work on longer carpet piles. 10 4.2 Adjusting the sweeping performance NOTE: I When the appliance is running you can switch between switch settings ‘I’ and ‘II’ as much as you like (Fig. 11). NOTE: We recommend using the medium setting (I) so that you can use a battery charge for as long as possible. II NOTE: If the battery power has reduced markedly or the brushes will no longer rotate, the battery pack has to be charged ZChapter 3.4, ‘Charging the battery pack’. 11 31 GB 1. Place the appliance down on the floor. M668.book Seite 32 Donnerstag, 22. März 2012 10:57 10 5 After use 5.1 5 Switching off After use 1. Put the slide switch to position ‘0’ (Fig. 12). 2. Move the tube until it is at right angles with the brush base and clicks into place and the appliance can stand on its own. 0 3. Empty the dust container if required ZChapter 5.3, ‘Emptying the dust container’. I 12 5.2 Transportation and storage Always carry the brush sweeper by its handle (Fig. 13). ATTENTION: Never store the appliance next to heat sources (e.g. stoves or radiators). Avoid exposing it to direct sunlight. Heat can damage the appliance. * Before storage, empty the dust container (ZChapter 5.3, ‘Emptying the dust container’) and remove the battery pack (ZChapter 3.3, ‘Inserting the battery pack’). Always store the appliance in a cool, dry place and out of reach of children. 13 32 If there is one, you can hang the appliance on the eyelet (Fig. 13/*) by a hook (bearing capacity > 3 kg). M668.book Seite 33 Donnerstag, 22. März 2012 10:57 10 5 After use 5.3 Emptying the dust container Regularly empty the dust container for the best cleaning results. Even better is after every time you use it. 2. Press the dust container release catch (Fig. 14) and hold it down. NOTE: Hold down the release catch until you can empty the dust container into the bottom of a bin. This prevents dirt from falling out prematurely. 14 3. Lift the dust container up and out of the brush base and continue to hold down the release catch (Fig. 15). 4. Hold the dust container at the bottom of a dustbin (Fig. 15). NOTE: You can dispose of the content of the dust container with your domestic waste providing it does not contain anything that must be disposed of separately. 5. You can now release the release catch (Fig. 16). The dirt falls into the bin. 6. Carefully tap out the remaining dust. 7. If this is not enough, wipe out the dust container with a dry cloth. 15 8. Insert the empty and clean dust container back into the brush base. Push the release button (Fig. 14). 9. Let go of the release catch and check the dust container is securely in place. 16 33 GB 1. Make sure that that appliance is switched off. M668.book Seite 34 Donnerstag, 22. März 2012 10:57 10 5 After use 5.4 Cleaning the brush rollers WARNING: Danger of injury caused by brush rollers starting up! Before beginning to remove the brush rollers, turn off the appliance and remove the battery pack. NOTE: The procedure for cleaning the wide, front brush roller and the narrow front brush roller is identical. We will describe the procedure using the wide brush roller as an example. 17 1. Switch off the appliance, ZChapter 5.1, ‘Switching off’. 2. Remove the battery pack ZChapter 3.3, ‘Inserting the battery pack’. 3. Put down the appliance so that the bottom of the brush roller is pointing up and the brush rollers are visible (Fig. 17). 4. Rotate the release catch of the brush roller powerfully in the (Fig. 17) direction. 5. Pull out the brush roller to the side (Fig. 18). 18 6. Remove any adhering hair, fluff and the like by hand or carefully with scissors (Fig. 19). ATTENTION: If you have to use scissors, ensure that you do not cut off any bristles or damage the brush roller in any other way. 19 34 M668.book Seite 35 Donnerstag, 22. März 2012 10:57 10 5 After use GB 7. Guide the brush roller back into its shaft (Fig. 20). 20 8. After inserting the brush roller, rotate it until the bunch can move freely (Fig. 21). NOTE: Otherwise the entire front brush roller would be blocked. 21 9. If the last bunch can move freely (Fig. 21), lock the release catch of the brush roller by rotating it in the (Fig. 22) direction. NOTE: If required, proceed in exactly the same way to clean the narrow, front brush roller (steps 1...9). 22 35 M668.book Seite 36 Donnerstag, 22. März 2012 10:57 10 5 After use Proceed as follows to clean the rear brush roller: 1. If you have not done so already: - Switch off the appliance ZChapter 5.1, ‘Switching off’. - Remove the battery pack ZChapter 3.3, ‘Inserting the battery pack’. - Put down the appliance so that the bottom of the brush roller is pointing up and the brush rollers are visible. 2. Unlock the V-belt cover (Fig. 23) and take it off. 23 3. Take the back brush roller out of its holder (Fig. 24). 4. Remove any adhering hair, fluff and the like by hand or carefully with scissors. ATTENTION: If you have to use scissors, ensure that you do not cut off any bristles or damage the brush roller in any other way. 5. Guide the rear brush roller back into its holder. 6. Observe the following when doing so: 24 - Align the brush roller at an angle so that it is first correctly put onto the drive shaft. - Then lower the brush roller so that the plate of the brush roller engages perfectly with the holder (Fig. 24). NOTE: Otherwise the rear brush roller will not be driven at all or not be driven correctly, thus rendering it ineffective. 7. Put on the V-belt cover and push down both locks forcefully until you can feel and hear them click into place. 25 36 M668.book Seite 37 Donnerstag, 22. März 2012 10:57 10 6 Troubleshooting 6.1 6 If the appliance does not work as it should Troubleshooting See if you can solve the problem yourself by following the steps in the table below. The appliance will not switch on. Possible cause / solution The tube and/or the handle are not installed correctly. Push the tube or the handle powerfully into the holder as described ZChapter 3.2, ‘Attaching the tube and handle’. The battery pack has not been inserted or has been inserted incorrectly. Insert the battery pack as shown, ZChapter 3.3, ‘Inserting the battery pack’. The battery pack has been inserted, though is not charged. Charge the battery pack as described, ZChapter 3.4, ‘Charging the battery pack’. The appliance will switch on but one or several brush rollers will not turn. One or several brush rollers are blocked or were not inserted correctly after cleaning. Clean and mount the brush rollers as described ZChapter 5.4, ‘Cleaning the brush rollers’. The appliance works perfectly, however, the cleaning result is unsatisfactory. The sweeping performance set is inappropriate. Adjust the sweeping performance to the ground to be swept as described ZChapter 4.2, ‘Adjusting the sweeping performance’. The appliance will switch on, but turns itself off just after. The battery pack has reached the end of its life. 1. Order a new battery pack ZChapter 6.2, ‘Ordering accessories and spare parts’. The dust container is full. Empty the dust container as described ZChapter 5.3, ‘Emptying the dust container’. 2. Insert the new battery pack ZChapter 3.3, ‘Inserting the battery pack’. 3. Dispose of the worn out battery pack ZChapter 6.4, ‘Disposing of the appliance and battery pack’. NOTE: If you cannot solve the problem using this table, contact our customer service department (ZPage 130, ‘International Service’) and describe the problem to us. Our staff are specially trained for such cases and can help you get to the bottom of the matter in a targeted manner, and solve the problem. In this way, any inconvenience of having to send your appliance to us can be avoided, and you can use it again quicker. 37 GB Problem M668.book Seite 38 Donnerstag, 22. März 2012 10:57 10 6 Troubleshooting 6.2 Ordering accessories and spare parts You can order the following accessories and spare parts: Item no. 6.3 Description 0668001 2-part brush roller set (1 narrow, 1 wide, front brush roller) 0668002 1 power supply unit 0668003 1 battery pack 0668004 1 rear brush roller Danger of injury! Never use a defective appliance or power supply unit! If the power supply unit or its cord is damaged, it must be replaced by the manufacturer, his customer services department or a similarly qualified person to avoid danger. If the appliance has been dropped or damaged in another way and has obvious signs of damage, give it to an authorised dealer or Royal Appliance Customer Services to be repaired. Send the defective appliance with the dust container empty to the address on ZPage 130, ‘International Service’. Disposing of the appliance and battery pack ATTENTION: Danger of pollution! The appliance contains rechargeable batteries that must not end up in the domestic waste. Take the appliance and the removed battery pack separately to be disposed of at the corresponding collection points. 38 ZPage 130, ‘International Service’ If the appliance is defective WARNING: 6.4 Contact us to order accessory and spare parts: The device and its battery pack are not permitted to be disposed of with domestic waste! Take the appliance and the removed battery pack separately to be disposed of at the corresponding collection points. M668.book Seite 39 Donnerstag, 22. März 2012 10:57 10 7 Warranty Warranty conditions Warranty We offer a warranty of 24 months from the date of purchase for the appliances we sell. Within this warranty period, we will correct all defects free of charge that are due to material or manufacturing faults, either by repair work or replacing the appliance or accessories, at our discretion (damage to accessory parts does not automatically lead to the entire appliance being replaced). The warranty does not cover damage due to improper use (operating on the wrong power type/voltage, connecting to unsuitable power sources, breakage, etc.), normal wear and defects that only insignificantly affect the value or the serviceability of the appliance. 7.2 Intervention by unauthorised parties or the use of parts other than Original Royal Appliance spare parts cause the warranty to become null and void. Consumable parts are not included in the warranty and therefore must be purchased by the customer! The warranty is only valid if the date of purchase has been acknowledged by the dealer's stamp and signature on the warranty card or if a copy of the invoice is included with the appliance that has been sent in. Warranty work does not extend the warranty period nor does it constitute a claim for a new warranty! In case of a warranty claim To make a claim under warranty, send us the appliance with its dust container empty and a short description of the defect in block capitals. Head your accompanying letter with the comment ‘warranty claim’. Send it to the following address, including the warranty card or a copy of the receipt: ZPage 130, ‘International Service’ 39 GB 7.1 7 M668.book Seite 40 Donnerstag, 22. März 2012 10:57 10 Sommaire Caractéristiques techniques ............................................................................ 41 Labels ............................................................................................................. 41 Sommaire 1 Vue d’ensemble ................................................................... 42 2 Consignes de sécurité ........................................................ 44 2.1 2.2 2.3 2.4 2.5 2.6 Mode d'emploi ............................................................................................ Groupes particuliers de personnes ............................................................ Alimentation électrique ............................................................................... Batterie de piles fournie ............................................................................. Rouleaux brosses ...................................................................................... Utilisation conforme à la destination .......................................................... 44 44 44 45 45 45 3 Avant la première utilisation .............................................. 46 3.1 3.2 3.3 3.4 Déballage ................................................................................................... Monter le manche et la poignée ................................................................. Mettre en place la batterie ......................................................................... Recharger la batterie ................................................................................. 46 46 47 48 4 Utilisation de l'appareil ....................................................... 49 4.1 Mise en marche de l'appareil ..................................................................... 49 4.2 Réglage du rendement .............................................................................. 49 5 Après utilisation .................................................................. 50 5.1 5.2 5.3 5.4 Éteindre l'appareil ...................................................................................... Transport et rangement ............................................................................. Vidage du bac à poussières ....................................................................... Nettoyage des rouleaux brosses ............................................................... 50 50 51 52 6 Dépannage ........................................................................... 55 6.1 6.3 6.2 6.4 Si l'appareil ne fonctionne pas comme il devrait ........................................ Si l'appareil est défectueux ........................................................................ Commande de pièces de rechange et accessoires ................................... Mise au rebut de l'appareil et de la batterie ............................................... 55 56 56 56 7 Garantie ................................................................................ 57 7.1 Conditions de garantie ............................................................................... 57 7.2 En cas de recours à la garantie ................................................................. 57 40 M668.book Seite 41 Donnerstag, 22. März 2012 10:57 10 Merci beaucoup ! Merci beaucoup ! Caractéristiques techniques Type d'appareil : Balai électrique double brosse Modèle : Duplex Numéro de modèle: M668 (-0/-1/.../-8/-9) Courant d'entrée du bloc secteur : 100...240 V~, 50/60 Hz Courant de sortie : 10 V c.c., du bloc secteur 200 mA Batterie de piles re-: Ni-MH, 6 V c.c., chargeables 1300 mAh FR Nous sommes heureux de vous compter parmi les utilisateurs du balai double brosse Duplex ! Nous vous remercions de cet achat et de votre confiance. Durée de charge- : 16 heures environ ment Autonomie : quelques 20 à 60 minutes (suivant la position de l'interrupteur à coulisse et le type de sol) Poids (sans acces- : 2,0 kg environ soires) Labels : Réservé à usage domestique exclusivement : Conforme aux directives européennes : Classe de protection II (isolation protectrice) : Ne pas jeter avec les ordures ménagères Sous réserve de modifications d'ordre technique ou conceptuel liées à l'évolution du produit. © Royal Appliance International GmbH 41 M668.book Seite 42 Donnerstag, 22. März 2012 10:57 10 1 Vue d’ensemble 1 Vue d’ensemble 1 9 10 1 Interrupteur à coulisse à trois positions - Position « 0 » : éteint. - Position « I » : pour sols durs 2* - Position « II » : pour tapis 2* Œillet d'accrochage (option*) 3 3 Poignée 4 Manche 5 Batterie de piles rechargeables 6 Touches de déverrouillage de la batterie de piles 7 Mode d'emploi 8 Adaptateur au bloc secteur 9 Bloc secteur 4 8 10 Fiches de branchement secteur * compris dans le matériel fourni à la livraison en fonction du modèle et de l'exécution 7 6 6 5 1 42 M668.book Seite 43 Donnerstag, 22. März 2012 10:57 10 1 Vue d’ensemble 1 2 1 Voyant lumineux de contrôle de charge 2 Compartiment de la batterie 3 Pied du balai 4 Touche de déverrouillage du bac à poussières 5 Bac à poussières 6 Rouleau brosse arrière 7 Capot de courroie trapézoïdale 8 Rouleau brosse avant court 9 Rouleau brosse avant long FR 3 4 5 6 7 8 9 2 43 M668.book Seite 44 Donnerstag, 22. März 2012 10:57 10 2 Consignes de sécurité 2.1 2 Mode d'emploi Consignes de sécurité AVERTISSEMENT: Nous vous avertissons des dangers pouvant mettre en péril votre santé et vous informons sur les éventuels risques de blessures. ATTENTION: Nous attirons votre attention sur les risques pour l'appareil ou pour tout autre objet. REMARQUE: Les astuces et les informations sont bien mises en évidence. 2.2 Le nettoyage et l'entretien de l'appareil ne doivent pas être exécutés par des enfants si ceux-ci ne sont pas sous surveillance. Le non respect de ce mode d'emploi peut entraîner des blessures graves ou endommager irréparablement l'appareil. Nous déclinons toute responsabilité pour des dommages résultant du non respect de ce mode d'emploi. L'appareil lui-même n'est pas un jouet. Les enfants ne doivent pas jouer avec cet appareil. Les enfants ne doivent pas se mettre debout ni s'asseoir sur l'appareil. Le matériel d'emballage ne doit pas être employé comme jouet. Il existe un risque d'asphyxie. Pour des raisons de sécurité, le fabricant conseille instamment de ne pas laisser les enfants, indépendamment de leur âge, manipuler l'appareil. Les enfants, quelque soit leur âge, ne peuvent pas percevoir ni comprendre les dangers qui résultent de l'emploi de cet appareil. Alimentation électrique Les piles rechargeables se rechargent avec du courant électrique. Il y a donc toujours un risque d'électrocution. Respectez par conséquent ce qui suit : Ne touchez jamais le bloc secteur avec des mains mouillées. Ne plongez jamais l'appareil, le bloc secteur ni la batterie de piles dans de l'eau ni autre liquide, et protégez-les contre l'humidité. Pour débrancher le bloc secteur, tirez toujours sur la fiche. Ne tirez jamais sur le cordon du bloc secteur. Ne transportez pas le bloc secteur par son cordon d'alimentation. 44 Conservez précieusement ce mode d'emploi. Remettez toujours le mode d'emploi à toute personne se servant de l'appareil. Groupes particuliers de personnes Ces appareils peuvent être utilisés par des enfants d'au moins 8 ans et par des personnes aux capacités physiques, sensorielles ou mentales réduites ou disposant de peu d'expérience et/ou de connaissances. Toutes ces personnes doivent cependant avoir été rendues attentives à l'emploi de cet appareil en toute sécurité et des dangers qu'implique son utilisation. Rangez l'appareil hors de portée des personnes répondant à ces critères. 2.3 Veuillez lire intégralement ce mode d'emploi avant de vous servir de l'appareil. Assurez-vous que le cordon d'alimentation n'est pas plié, coincé, écrasé ni en contact avec une source de chaleur. Ne chargez l'appareil que si la tension du bloc secteur correspond bien à celle de la prise murale. Vérifiez si le cordon du bloc secteur est endommagé avant de vous servir du bloc secteur. Vérifiez que le bloc secteur est bien débranché avant de mettre en place ou d'enlever la batterie de piles et avant de nettoyer ou d'entretenir l'appareil. M668.book Seite 45 Donnerstag, 22. März 2012 10:57 10 2 Consignes de sécurité Batterie de piles fournie En cas d'utilisation abusive des piles rechargeables, il existe un risque de blessures et d'explosion. Utilisez pour charger la batterie le bloc secteur fourni à la livraison, à l'exclusion de tout autre. Ne rechargez jamais la batterie avec un autre bloc secteur. Utilisez le bloc secteur fourni à la livraison uniquement pour charger la batterie de cet appareil. Vérifiez que le bloc secteur est bien débranché de la prise murale avant de poser ou d'enlever la batterie de piles. Ne démontez jamais la batterie de piles, ne l'exposez jamais à des températures élevées. Du liquide peut s'écouler de la batterie en cas de manipulation incorrecte. Évitez tout contact avec ce liquide. 2.5 Utilisez uniquement la batterie de piles fournie ou une batterie d'origine achetée, à l'exclusion de toute autre. Utilisez cette batterie de piles uniquement pour cet appareil. N’essayez pas d’ouvrir la batterie de piles. Si les piles formant la batterie sont arrivées en fin de vie, la batterie de piles complète doit être remplacée. Éliminez la batterie de piles en fin de période d'utilisation uniquement selon les instructions, ZChapitre 6.4, « Mise au rebut de l'appareil et de la batterie ». Rouleaux brosses L'appareil est muni de rouleaux brosses entraînés. Dans le plus défavorable des cas, ceux-ci peuvent provoquer des blessures. Respectez par conséquent ce qui suit : Avant de commencer à nettoyer ou à entretenir l'appareil, vérifiez toujours qu'il est éteint, que le bloc secteur est débranché et que la batterie de piles a été enlevée. 2.6 S'il s'avère nécessaire de remplacer la batterie de piles, contactez votre revendeur agréé ou le service après-vente de Royal Appliance. Ne remplacez pas la batterie par d'autres piles ou batteries. Soyez vous-mêmes attentif à ce qu'aucune partie du corps ne se trouve sous les rouleaux-brosses. Ne balayez pas près des câbles, conduites et longues franges. Vous risquez d'une part d'endommager l'isolation du câble. D'autre part, ces objets risquent de s'emmêler dans les rouleaux brosses et d'abîmer ainsi l'appareil. Utilisation conforme à la destination Cet appareil est exclusivement réservé à un usage domestique, pour balayer des sols secs et les débarrasser d'une saleté légère. Toute utilisation à titre professionnel est strictement interdite. Toute autre utilisation est considérée comme non conforme et est interdite. Cette interdiction concerne en particulier : L'emploi, l'entreposage ou la mise en charge de l'appareil à l'extérieur. Les transformations et les réparations faites par vous-même. Emploi également interdit ... - ... sur des personnes, des animaux ou des plantes. - ... à proximité d'objets incandescents, brûlants, en cours de combustion, pointus ou dont les arêtes sont vives. - ... pour absorber des liquides. - ... avec le bloc secteur branché. - ... pour le nettoyage de quantités de salissures qui dépassent les quantités ou la taille habituelle des particules de poussière. 45 FR 2.4 M668.book Seite 46 Donnerstag, 22. März 2012 10:57 10 3 Avant la première utilisation 3.1 3 Déballage Avant la première utilisation 1. Déballez l'appareil et les accessoires. ATTENTION: Conservez l'emballage pour ranger l'appareil ou pour expédier celui-ci de manière sûre. Expédiez l'appareil uniquement dans son emballage d'origine afin d'éviter tout dommage. 3.2 2. Vérifiez si le contenu est bien complet et ne présente aucun dommage (Fig. 1). REMARQUE: Si vous constatez des défauts ou des dommages dus au transport, contactez immédiatement votre revendeur. Monter le manche et la poignée REMARQUE: Les extrémités supérieure et inférieure du manche sont de construction identique. 1. Enfoncez la poignée dans le manche (Fig. 3) en poussant fermement jusqu'à ce qu'un déclic devienne perceptible. REMARQUE: Alors seulement vous pouvez être sûr que les contacts électriques incorporés à l'intérieur de la poignée sont en contact avec ceux du manche. click! 1 3 click! REMARQUE: Pour enlever la poignée, il faut enfoncer fermement le petit carré sur le manche (Fig. 3/ 1) à l'aide d'un petit outil émoussé tout en tirant la poignée. 2. Enfoncez le manche dans la console sur le pied du balai (Fig. 4) en poussant fermement jusqu'à - ce que le petit carré sur le manche ait disparu et - que le manche se soit mis en place de manière audible et nette. REMARQUE: 1 Alors seulement vous pouvez être sûr que les contacts électriques incorporés à l'intérieur du manche sont en contact avec ceux de la console. REMARQUE: 4 46 Pour enlever le manche, il faut appuyer fermement sur le verrou de la console (Fig. 4/ 1) tout en tirant le manche. M668.book Seite 47 Donnerstag, 22. März 2012 10:57 10 3 Avant la première utilisation 3.3 Mettre en place la batterie ATTENTION: Utilisez uniquement la batterie de piles fournie ou une batterie d'origine achetée, à l'exclusion de toute autre. REMARQUE: Le sens de pose de la batterie est indifférent à condition de toujours poser la batterie, les contacts à l'avant. FR 1. Posez la batterie de piles rechargeables dans le compartiment de batterie, contacts à l'avant (Fig. 5). 5 2. Enfoncez la batterie de piles dans le compartiment (Fig. 6). Vous l'entendez se mettre en place avec un déclic. REMARQUE: Pour enlever la batterie de piles, il faut d'abord appuyer sur les deux boutons de sortie sur les côtés de la batterie (Fig. 5). 6 47 M668.book Seite 48 Donnerstag, 22. März 2012 10:57 10 3 Avant la première utilisation 3.4 Recharger la batterie AVERTISSEMENT: Un rechargement non conforme peut causer des blessures ! Utilisez pour le chargement des piles de la batterie uniquement le bloc secteur fourni à la livraison. ATTENTION: Prenez garde à ce que le cycle initial de recharge et décharge soit complet. Sinon la durée de vie des piles rechargeables sera réduite. REMARQUE: La batterie est fournie, piles rechargeables non chargées. Avant de pouvoir utiliser l'appareil, vous devez charger les piles rechargeables. La première mise en charge dure environ 16 heures. REMARQUE: 7 Les piles rechargeables ne peuvent être chargées que si elles sont en place dans l'appareil. Vérifiez que l'appareil est bien éteint. Si l'appareil n'est pas éteint, les piles rechargeables ne se rechargent pas. 1. Vérifiez que l'appareil est éteint (position de l'interrupteur « 0 »). 2. Branchez l'adaptateur du bloc secteur dans la douille à l'arrière de l'appareil, la batterie de piles étant en place (Fig. 7). 3. Branchez le bloc secteur sur une prise (Fig. 8) dont la tension électrique correspond à celle indiquée sur la plaque signalétique du bloc secteur. Le voyant lumineux de contrôle de charge rouge s'allume (Fig. 9). 8 4. Chargez les piles durant environ 16 heures, jusqu'à ce que le voyant lumineux de contrôle de charge s'éteigne (Fig. 9). 5. Lorsque le voyant de contrôle de charge s'éteint, débranchez le cordon du bloc secteur d'abord de la prise puis ensuite de l'appareil. REMARQUE: 9 48 Rechargez l'appareil seulement si le rouleau brosse ne tourne plus correctement alors que la batterie de piles est correctement posée. Les mises en charge ultérieures durent environ 16 heures. Elles peuvent être plus courtes, suivant la charge restante. M668.book Seite 49 Donnerstag, 22. März 2012 10:57 10 4 Utilisation de l'appareil 4 Utilisation de l'appareil ATTENTION: Demandez au fabricant de votre revêtement de sol s'il peut être nettoyé avec un balai électrique. 4.1 Mise en marche de l'appareil 1. Posez l'appareil sur le sol. 0 2. Tirez le manche vers vous de manière à ce qu'il forme un certain angle avec le balai. Le balai doit toujours être à plat sur le sol, peu importe la manière dont vous tenez le manche. I - Les rouleaux brosses commencent à tourner à vitesse moyenne. REMARQUE: Cette position suffit normalement pour nettoyer des sols durs. Pour nettoyer des tapis à poils courts, poussez l'interrupteur coulissant en position « II ». Cet appareil est exclusivement destiné à nettoyer des tapis et moquettes à poils courts (soit ne dépassant pas 5 mm). L'appareil ne fonctionne pas sur des tapis et moquettes dont les poils sont plus longs. 10 4.2 Réglage du rendement REMARQUE: I Tant que l'appareil est en marche, vous pouvez passer à volonté du réglage « I » à « II » et vice-versa(Fig. 11). REMARQUE: Pour travailler le plus longtemps possible avec un chargement de batterie, il est conseillé de rester en vitesse moyenne (position « I »). II 11 REMARQUE: Si la capacité des piles rechargeables diminue de façon notoire, ou si les brosses s'arrêtent de tourner, il faut recharger la batterie de piles, ZChapitre 3.4, « Recharger la batterie ». 49 FR 3. Allumez le balai électrique en poussant l'interrupteur à coulisse en position « I » (Fig. 10) . M668.book Seite 50 Donnerstag, 22. März 2012 10:57 10 5 Après utilisation 5.1 5 Éteindre l'appareil Après utilisation 1. Poussez l'interrupteur à coulisse en position « 0 » (Fig. 12). 2. Poussez le manche en position verticale par rapport au pied jusqu'à ce qu'il s'enclenche et l'appareil s'arrête. 0 3. Videz le bac à poussière chaque fois que nécessaire (ZChapitre 5.3, « Vidage du bac à poussières »). I 12 5.2 Transport et rangement Le balai électrique doit toujours être transporté par sa poignée (Fig. 13). ATTENTION: Ne posez jamais l'appareil à proximité immédiate d'une source de chaleur (par exemple un chauffage ou un four). Évitez de l'exposer directement aux rayons du soleil. La chaleur peut endommager l'appareil. * 13 Avant de ranger l'appareil, videz le bac à poussières (ZChapitre 5.3, « Vidage du bac à poussières ») et enlevez la batterie de piles (ZChapitre 3.3, « Mettre en place la batterie »). Rangez toujours l'appareil à un emplacement frais et sec qui soit hors de portée des enfants. Le cas échéant, il est possible d'accrocher l'appareil par l'œillet (Fig. 13/*) en option (capacité > 3 kg). 50 M668.book Seite 51 Donnerstag, 22. März 2012 10:57 10 5 Après utilisation 5.3 Vidage du bac à poussières Pour un nettoyage parfait, videz le bac à poussières régulièrement, au mieux après chaque séance, en procédant de la manière suivante : 1. Assurez-vous que l'appareil est éteint. 2. Appuyez sur la touche de déverrouillage du bac à poussières (Fig. 14) en la gardant enfoncée. REMARQUE: 14 3. Enlevez le bac à poussières du pied du balai par le haut en gardant la touche de déverrouillage enfoncée (Fig. 15). 4. Videz le bac à poussière bien au fond dans la poubelle (Fig. 15). REMARQUE: Le bac à poussières peut être vidé dans la poubelle d'ordures ménagères sous réserve de ne pas contenir de substances interdites aux ordures ménagères. 5. Relâchez la touche de déverrouillage (Fig. 16). Les poussières se déversent dans la poubelle. 15 6. Tapotez légèrement pour faire tomber les restes de poussière. 7. Si besoin, essuyez le bac à poussières avec un chiffon sec. 8. Reposez le bac à poussières vidé et nettoyé dans le balai électrique. Appuyez ce faisant sur la touche de déverrouillage (Fig. 14). 9. Relâchez la touche de déverrouillage pour vérifier que le bac à poussières est fermement en place. 16 51 FR Gardez la touche de déverrouillage enfoncée tant que vous n'avez pas pu vider le bac à poussières dans une poubelle. Vous éviterez ainsi de perdre de la poussière en cours de route. M668.book Seite 52 Donnerstag, 22. März 2012 10:57 10 5 Après utilisation 5.4 Nettoyage des rouleaux brosses AVERTISSEMENT: Risque de blessures au démarrage des rouleaux brosses ! Avant de procéder à la dépose des rouleaux brosses, éteignez l'appareil et enlevez la batterie de piles. REMARQUE: La procédure à suivre pour nettoyer le rouleau brosse long avant est identique à celle pour le rouleau brosse avant court. La description qui suit prend à titre d'exemple le rouleau brosse long. 17 1. Éteignez l'appareil, ZChapitre « Éteindre l'appareil ». 5.1, 2. Enlevez la batterie de piles, ZChapitre 3.3, « Mettre en place la batterie ». 3. Couchez l'appareil de manière à ce que la face inférieure du balai soit tournée vers le haut en montrant les rouleaux brosses (Fig. 17). 4. Tournez le verrou du rouleau brosse dans le sens (Fig. 17). 5. Sortez le rouleau brosse en l'enlevant par le côté (Fig. 18). 18 6. Supprimez à la main, ou avec des ciseaux en faisant attention, les cheveux, poils et autres (Fig. 19). ATTENTION: Si vous devez employer des ciseaux, veillez à ne pas couper les brosses, ni endommager le rouleau brosse. 19 52 M668.book Seite 53 Donnerstag, 22. März 2012 10:57 10 5 Après utilisation 7. Reposez le rouleau brosse dans son logement (Fig. 20). 8. Après la pose, faites tourner le rouleau brosse jusqu'à ce qu'il tourne librement (Fig. 21). REMARQUE: Sinon, le rouleau brosse avant complet risque d'être bloqué. 21 9. Une fois que toutes les brosses tournent librement (Fig. 21), verrouillez le rouleau brosse en le tournant dans le sens (Fig. 22). REMARQUE: Procédez de la même manière pour nettoyer le rouleau brosse avant court si besoin (étapes de 1 à 9). 22 53 FR 20 M668.book Seite 54 Donnerstag, 22. März 2012 10:57 10 5 Après utilisation Pour nettoyer le rouleau brosse arrière, procédez comme suit : 1. Au cas où cela n'aurait pas été fait : - Éteignez l'appareil, ZChapitre 5.1, « Éteindre l'appareil ». - Enlevez la batterie de piles, ZChapitre 3.3, « Mettre en place la batterie ». - Couchez l'appareil de manière à ce que la face inférieure du balai soit tournée vers le haut en montrant les rouleaux brosses. 2. Déverrouillez et enlevez le capot de la courroie trapézoïdale (Fig. 23). 23 3. Sortez le rouleau brosse arrière de sa console (Fig. 24). 4. Supprimez à la main, ou avec des ciseaux en faisant attention, les cheveux, poils et autres. ATTENTION: Si vous devez employer des ciseaux, veillez à ne pas couper les brosses, ni endommager le rouleau brosse. 5. Reposez le rouleau brosse arrière dans sa console. 6. Respectez ce faisant ce qui suit : 24 - Posez le rouleau brosse en l'inclinant de manière à le poser correctement sur l'arbre d'entraînement. - Abaissez le rouleau brosse jusqu'à ce que la lame du rouleau brosse s'engage dans le loquet (Fig. 24). REMARQUE: Si la pose est mal faite, le rouleau brosse arrière ne tournera pas, ou pas correctement, et restera donc inefficace. 7. Reposez le capot de la courroie trapézoïdale avant d'appuyer fermement sur les deux fermetures qui doivent s'enclencher de manière audible. 25 54 M668.book Seite 55 Donnerstag, 22. März 2012 10:57 10 6 Dépannage 6.1 6 Si l'appareil ne fonctionne pas comme il devrait Dépannage Vérifiez, en vous aidant du tableau ci-dessous, si vous pouvez remédier vous-même à l'anomalie. Problème Impossible de mettre en marche l'appareil. Cause possible / solutions Le manche et/ou la poignée ne sont pas montés correctement. Poussez le manche ou la poignée fermement dans son logement, comme décrit ZChapitre 3.2, « Monter le manche et la poignée ». La batterie de piles n'a pas été mise en place ou a mal été mise en place. Placez la batterie de piles correctement comme décrit, ZChapitre 3.3, « Mettre en place la batterie ». L'appareil se met bien en marche, mais un ou plusieurs rouleaux brosses ne tournent pas. Un ou plusieurs rouleaux brosses sont bloqués ou n'ont pas été remis en place correctement après nettoyage. Nettoyez et reposez les rouleaux brosses comme il est décrit, ZChapitre 5.4, « Nettoyage des rouleaux brosses ». L'appareil fonctionne de manière impeccable, mais le résultat est médiocre. La puissance de balayage a été mal réglée. Réglez la puissance de balayage pour le sol qui doit être nettoyé comme décrit, ZChapitre 4.2, « Réglage du rendement ». L'appareil s'allume bien, mais s'éteint de lui-même peu de temps après. Le bac à poussières est trop plein. Videz le bac à poussières comme décrit, ZChapitre 5.3, « Vidage du bac à poussières ». La batterie de piles a atteint sa fin de vie. 1. Commandez une nouvelle batterie de piles, ZChapitre 6.2, « Commande de pièces de rechange et accessoires ». 2. Placez la nouvelle batterie de piles, ZChapitre 3.3, « Mettre en place la batterie ». 3. Mettez au rebut la batterie de piles usagée, ZChapitre 6.4, « Mise au rebut de l'appareil et de la batterie ». REMARQUE: Si vous ne pouvez pas remédier vous-même à l'anomalie au moyen de ce tableau, adressezvous à notre service après-vente (ZPage 130, « International Service ») pour nous exposer le problème. Notre personnel S.A.V. est spécialement formé pour répondre à vos attentes et peut, avec votre collaboration, cerner la cause du problème pour le résoudre. Vous vous épargnerez ainsi les désagréments résultant d'un éventuel envoi et votre appareil sera rapidement à nouveau opérationnel. 55 FR La batterie de piles est bien mise en place, mais n'est pas chargée. Rechargez les piles en suivant les instructions, ZChapitre 3.4, « Recharger la batterie ». M668.book Seite 56 Donnerstag, 22. März 2012 10:57 10 6 Dépannage 6.2 Commande de pièces de rechange et accessoires Vous pouvez commander ultérieurement les pièces détachées et les accessoires suivants : Numéro d'article Description 0668001 Kit de deux rouleaux-brosses (rouleau brosse avant, 1 court, 1 long) 0668002 1 bloc secteur 0668003 1 batterie de piles 0668004 1 rouleau brosse arrière 6.3 Risque de blessures ! N'utilisez jamais l'appareil s'il est défectueux ou si le bloc secteur est défectueux ! Si le bloc secteur ou son cordon d'alimentation est endommagé, faites-le remplacer par le fabricant, son service après-vente ou toute personne ayant des compétences similaires, ceci afin d'éviter tout danger. Si l'appareil est tombé ou a été endommagé de quelque autre manière et s'il présente des signes évidents de dommages, remettez l'appareil défectueux à un commerçant spécialisé ou au service après-vente de Royal Appliance afin qu'il puisse être réparé. Expédiez l'appareil défectueux avec bac à poussières vidé à l'adresse mentionnée à la ZPage 130, « International Service ». Mise au rebut de l'appareil et de la batterie ATTENTION: Prenez garde de ne pas polluer l'environnement ! L'appareil est équipé de piles rechargeables qu'il est interdit de jeter dans les ordures ménagères. Rapportez l'appareil et la batterie, après l'avoir retirée, aux points de collecte chargés de leur mise au rebut. 56 ZPage 130, « International Service » Si l'appareil est défectueux AVERTISSEMENT: 6.4 Contactez-nous pour commander des pièces de rechange ou des accessoires : Ne pas jeter l'appareil ni sa batterie de piles avec les ordures ménagères ! Rapportez l'appareil et la batterie, après l'avoir retirée, aux points de collecte chargés de leur mise au rebut. M668.book Seite 57 Donnerstag, 22. März 2012 10:57 10 7 Garantie Conditions de garantie Garantie Nous assurons une garantie de 24 mois sur votre appareil à compter de la date d'achat. Pendant la garantie, nous nous réservons le droit de réparer ou de remplacer l'appareil ou ses accessoires gratuitement (des accessoires endommagés n'impliquent pas forcément le remplacement de l'appareil) afin de remédier à tout défaut lié au matériel ou à la fabrication. Tout dommage résultant d'une utilisation non conforme (emploi d'une tension ou d'un courant erroné, branchement à une prise non adaptée ou lorsque l'appareil est cassé, etc.) est exclu de la garantie, de même que l'usure et les défauts liés à l'usage normal de l'appareil qui n'influencent pas le bon fonctionnement de l'appareil. 7.2 En cas d'intervention d'une personne ou d'un service non habilité ou lors de l'utilisation de pièces détachées ne provenant pas de Royal Appliance, les droits de garantie deviennent caducs. Les pièces sujettes à usure sont exclues de la garantie et leur remplacement est payant ! La garantie s'applique uniquement lorsque la date d'achat, le tampon du revendeur et sa signature figurent sur le bon de garantie ou si une copie de la facture sont joints à l'appareil. Les prestations de garantie n'impliquent en aucune façon le prolongement de la durée de garantie ni un droit à une nouvelle garantie ! FR 7.1 7 En cas de recours à la garantie En cas de recours à la garantie, expédiez l'appareil après avoir pris soin de vider le bac à poussières et en décrivant brièvement en caractères d'imprimerie l'anomalie. Mentionnez « Zur Garantie » (« Appareil sous garantie ») sur l'étiquette d'envoi. N'oubliez pas d'y joindre le bon de garantie ainsi qu'une copie du ticket de caisse ou de la facture et envoyez le tout à l'adresse suivante : ZPage 130, « International Service » 57 M668.book Seite 130 Donnerstag, 22. März 2012 10:57 10 International Service D International Service DE Royal Appliance International GmbH Abt. Kundenservice Jagenbergstraße 19 41468 Neuss DEUTSCHLAND AT Zmugg Elektronik Service und Vertriebges. M.b.H. Fabriksgasse 27 8020 Graz ÖSTERREICH BE Z.E.S. Goes B.V. T.a.v. afd. Service Pearyweg 1 4462 GT Goes NEDERLAND Tel.: +49 (0) 180 - 501 50 50* Tel. +43 - 316 - 77 21 20 Tel: +31 - 113 - 24 07 00 Tel. Ersatzteile: +49 (0) 1805 15 85 08* Fax +43 - 316 - 77 21 20 10 Fax: +31 - 113 - 24 07 50 Fax: +49 (0) 2131 - 60 90 60 95 Tel. Ersatzteile: +43 - 316 - 77 21 20 14 Fax Ersatzteile: +43 - 316 - 77 21 20 15 [email protected] www.dirtdevil.de [email protected] [email protected] Ersatzteile: [email protected] *0,14 €/Minute aus dem deutschen Festnetz (deutscher Mobilfunkhöchstpreis 0,42 €/Minute) CH Bluepoint-Service SAGL Via Cantonale 14 6917 Barbengo SWITZERLAND ES Recambios online: www.recambiosyaccesoriosonline.es [email protected] Tel. +41 (0)91 980 49 73 Reparaciones y recambios: ELECTRONICA LATINA, S.L. Paseo Virgen del Puerto 13, 28005 Madrid Tel.: 91 366 52 02 Tel.: 91 366 52 03 E-Mail: [email protected] www.bluepoint-service.ch ES ES [email protected] ES FR Reparaciones y recambios: M.J. TORIBIO Calle Tahona, 4, 28223 - Pozuelo de Alarcón - Madrid Reparaciones y recambios: SAT EIXAMPLE Calabria, 277/279 08029 - Barcelona OPM France Nant’Est entreprise 33 rue du bois Briand 44316 Nantes cdx 3 FRANCE Tel.: 91 715 60 52 Tel.: 93 430 69 50 Tel. +33 - 2 - 40 49 64 25 Fax +33 - 2 - 40 93 96 22 [email protected] [email protected] www.opm-france.com IT RICAMBI ELETTRODOMESTICI Corso L. Zanussi, 11 33080 Porcia (PN) ITALIA NL Z.E.S. Goes B.V. T.a.v. afd. Service Pearyweg 1 4462 GT Goes NEDERLAND tel: 0434/550833 [email protected] Tel: +31 - 113 - 24 07 00 Fax: +31 - 113 - 24 07 50 [email protected] 130 M668.book Seite 131 Donnerstag, 22. März 2012 10:57 10 DE GB FR NL ES IT TR NUR GÜLTIG MIT RECHNUNGSKOPIE! VALID ONLY INCLUDING A COPY OF THE PURCHASE SLIP! VALABLE UNIQUEMENT AVEC UNE COPIE DE LA FACTURE! ALLEEN GELDIG MET KOPIE VAN DE REKENING! ¡VÁLIDO SÓLO CON COPIA DE FACTURA! VALIDO SOLO SE CORREDATO DA UNA COPIA DELLA FATTURA! SADECE FATURA SURET LE GEÇERLDR! Garantiekarte • Warranty Card • Card de garantie • Garantiekaart Certificado de garantía • Tagliando di garanzia • Garanti Kart Name • Name • Nom • Naam • Nombres y apellidos • Nome • sim Straße und Hausnummer • Street and house number • Rue et numéro de maison • Straat en huisnummer • Calle y número • Via e numero civico • Sokak ve ev no PLZ und Ort • Zip code and town • Numéro postal et lieu • Postcode en plaats • C.P. y ciudad • CAP e località • Posta kodu ve yer E-Mail • email • Courriel • E-mail • Correo electrónico • e-mail • E-Posta Telefon mit Vorwahl • Phone number with area code • Téléphone avec indicatif • Telefoon met kengetal • Teléfono con prefijo • Telefono con prefisso • ehirleraras kodla telefon ______________________________________________________________________________ Fehlerbeschreibung • Description of the malfunction • Description du problème Omschrijving van de fout • Descripción del fallo • Descrizione del difetto • Hata tanm: ______________________________________________________________________________ Bitte diesen Abschnitt ausschneiden und dem Gerät beilegen. • Please detach this part and send it in with the appliance. Veuillez détacher cette partie et la joindre à l'appareil. • Dit deel a.u.b. uitknippen en bij het apparaat leggen. Por favor, recorte este resguardo y añádelo al aparato. • Per cortesia ritagliare questa sezione e allegarla all'apparecchio. Lütfen bu bölümü kesin ve cihazn yanna ekleyin. M668.book Seite 132 Donnerstag, 22. März 2012 10:57 10 Royal Appliance International GmbH Jagenbergstraße 19 41468 Neuss Germany [email protected] www.dirtdevil.de +49 (0) 1805 - 10 90 19* +49 (0) 2131 - 60 90 60 95 DE * 0,14 €/Minute aus dem deutschen Festnetz, deutscher Mobilfunkhöchstpreis 0,42 €/Minute; Die Gebühren für Telefonate aus dem Ausland (also außerhalb von Deutschland) richten sich nach den Preisen der jeweiligen ausländischen Anbieter und der jeweils aktuellen Tarife. GB * € 0.14 per minute from German landlines, maximum German mobile phone tariff € 0.42 per minute. The cost of calls from abroad—outside Germany—depend upon the current prices of the respective foreign telephone company. FR *0,14 € par minute depuis le réseau fixe allemand, 0,42 € par minute au maximum depuis le réseau mobile allemand; Les coûts des appels depuis l'étranger (donc hors de l'Allemagne) dépendent des prix fixés par les opérateurs étrangers et des tarifs actuellement en vigueur. NL * 0,14 €/minuut vanuit het Duitse vaste telefoonnet, vanuit het Duitse mobiele netwerk max. 0,42 €/minuut; De kosten voor telefoongesprekken vanuit het buitenland (dus buiten Duitsland) richten zich naar de prijzen van de betreffende buitenlandse aanbieders en de betreffende actuele tarieven. ES * 0,14 €/minuto desde la red fija alemana, precio máximo alemán para telefonía móvil 0,42 €/minuto; Las tasas para las llamadas telefónicas desde el extranjero (fuera de Alemania) se orientan a los precios de cada servidor extranjero y a las correspondientes tarifas actuales. IT * 0,14 €/minuto da rete fissa tedesca, prezzo massimo per la telefonia mobile tedesca 0,42 €/minuto; Le tariffe delle chiamate dall'estero (ovvero da fuori Germania) dipendono dai prezzi degli operatori telefonici stranieri e dalle tariffe di volta in volta in vigore. TR * Almanya'da sabit hatlardan 0,14 €/dakika; Alman mobil telefon azami fiyat 0,42 €/dakika; Yurtdndan (yani Almanya dndan) yaplan aramalarn ücretleri ilgili yurtd operatörün fiyatlarna ve her defasnda güncel tarifelerine göre belirlenir.