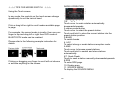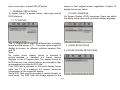
1
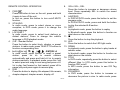
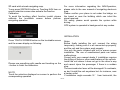
NAVIGATION MULTIMEDIA RECEIVER INSTRUCTION MANUALS Thank you for buying this product, please read through these operating instructions, so you will know how to operate your model properly. After you have finished reading the instructions, put them away in a safe place for future reference. CONTENTS ACCESSORIES ...................................................................................................................................................2 PRECAUTIONS ...................................................................................................................................................3 FRONT PANEL .....................................................................................................................................................5 MODES SWITCH .................................................................................................................................................7 SYSTEM SETUP ..................................................................................................................................................9 REMOTE CONTROL ......................................................................................................................................... 11 BASIC OPERATION ...........................................................................................................................................13 RADIO OPERATION ..........................................................................................................................................14 BLUETOOTH OPERATION ...............................................................................................................................17 DVD/VCD/CD OPERATION ...............................................................................................................................19 DVD SETUP .......................................................................................................................................................21 MP3 OPERATION ..............................................................................................................................................25 NAVIGATION OPERATION ................................................................................................................................26 INSTALLATION ..................................................................................................................................................27 CABLE CONNECTION ......................................................................................................................................29 SPECIFICATION ................................................................................................................................................30 TROUBLE SHOOTING ......................................................................................................................................31 Note: Due to continuous product improvement, specifications and design are subject to change without prior notice. IMPORTANT: Please adjust screen to make the touching effect function best when you initiate the unit for the first time. GB-1 ACCESSORIES Mounting Bracket (Half Sleeve) X1 Removable Trim Ring equipped on the unit X1 Mounting Screw M5 X1 Rubber X1 Remote Control X1 Mount Strap X1 Wire connector X1 User manual X1 AV in cable X1 Screws(M5X6) X4 Screws(M24) X1 Release key X2 Washer X1 Desiccant X1 GPS antenna X1 GB-2 PRECAUTIONS 1. Be sure to connect the color coded leads according to the diagram. Incorrect connections may cause the unit to malfunction or damage the vehicles electrical system. 2. Be sure to connect the speaker (-) leads to the speaker (-) terminal. Never connect the left and right channel speaker cables each other or to the vehicle body. 3.Make sure all the connections are completely correct before turning on your unit. 4. When replacing the fuse(s), the replacement must be of the same amperage as shown on the fuse holder. 5. Do not block vents or radiator panels. Doing so many cause heat to build up inside and may result in fire. 6 .After completing the installation and beginning to play the unit (including replacing the battery),please press RESET button on the front panel with pointed object (such as ballpoint pen) to set the unit to initial status. Replacing the Fuse Make sure the amperage matches the specified value when replacing the fuses. If the fuse is blown, check the power connection and replace with a new one. If the same problem occurs, lt would be subjected to the malfunction in-house. In such cases, please consult the nearest service dealer. WARNING: Never use the fuse with the rated amperage more than that supplied to your unit, otherwise the unit maybe damaged. GB-3 To enjoy optimum sound and images while playing, handle the discs as follows: ——Handle the disc by its edge to keep the disc clean, and do not touch the surface. PRECAUTIONS This unit can play the following discs only: ——do not use your disc with paste residue or ink attached. ——does not use disc with labels or stickers attached, which may leave a sticky residue while beginning to peel off. (Shown as the picture) Do not attempt to modify the unit, modifying the unit may cause an accident. Stop the vehicle before carrying out any operation that could interfere with your driving. ——clean the discs with an optional cleaning cloth. Wipe each disc from the center out. Do not work in extremely high or low temperature. Be sure the temperature inside the vehicle is between +60 °C and -10°C before turning on your unit. GB-4 FRONT PANEL OPERATION FRONT PANEL 1. MIC 2. Press this button to open the front panel. 3. VOL/SEL Adjust the volume by turning the knob clockwise or counterclockwise. Press this button briefly to display select TILT item then adjust the viewing angle by rotating the VOL button. 4. POWER/MUTE Press the button to turn on the unit, press and hold the button for 1s to turn off the unit. When the unit is switched on, press the button to shut off the sound output. Press it again to resume previous sound level. 5. SRC/NAV Press this button to select one of the following sources. Press and hold the button to start the navigation operation. 6. LCD display 7. DISC Loading Slot 8/9. I<< / >>I In radio mode, press one of these buttons to seek a station automatically. Hold down one of the buttons to seek a station manually. In DVD/USB/CARD mode press the buttons to select the previous or next file. Hold down the button for 2s to fast forward or fast backward. GB-5 18.OPEN Press to open or close the TFT display. 19. Anti-theft led indicator It will flash when the detachable control panel is removed. 20. RESET Using a sharp object such as a pencil to reset the unit. 21. TFT display 22. TILT /∧/∨ Press ∧ / ∨ button to adjust the angle of TFT display. 23. MENU In DVD mode, press the button to display the DVD SETUP menu. Press and hold to display the SYSTEM SETUP menu. In other modes, press the button to display the SYSTEM SETUP menu. 24. GPS SD CARD slot 10. AUX Connect the AV cable (supplied) to your external AV device, and then press the SRC button to switch to AV1 mode. 11. SD slot Insert an SD/MMC card, the unit will play the files from SD/MMC card automatically. NOTE: Once the SD/MMC card could not eject after pressing, just pull it out manually. 12. USB port Insert USB device, the unit will play the files from USB automatically. 13. IR window To receive the infrared signal from the remote control. 14. EJ Press the button to eject a disc when it is loaded into the unit. Press and hold this button to force ejecting a disc when the system becomes frozen accidentally. 15. PTY In radio mode, press the button to select one of the program types. 16. TA In radio mode, press this button to turn on or off the TA mode. 17. AF/DISP In radio mode, press this button to turn on or off the AF mode. Press and hold the button to display the current time, soft version, current sources and medias (Disc, USB, SD) available. GB-6 ☆ ☆☆TIPS FOR MODES SWITCH RADIO OPERATION ☆☆☆ Using the Touch screen In any mode, the controls on the touch screen change dynamically to suit the task at hand. 1/9. </> Touch once: to seek a station automatically downwards/upwards. 2.station preset button Touch once: to select the preset station. Touch and hold: to store the current station into the preset station position. 3.BAND To switch bands. 4. LOC To select strong or weak stations reception mode. 5.AMS Touch once: to browse preset stations. Touch and hold: to search and store stations automatically. 6/7. Seek-/Seek+ Touch to seek a station manually downwards/upwards. 8.RDS To enter RDS page. 10. Display area 11. SOURCE MENU To display the SOURCE MENU. Flick or drag left or right to scroll modes available page to page. For example, the current mode is inradio, then use your finger to tap and drag left or right then DVD mode or BLUETOOTH mode can be reached. Please refer to the following example instruction for details. Flicking or dragging your finger to scroll will not choose or activate anything on the screen. GB-7 MULTI-- PLAYER OPERATION RDS OPERATION In DVD mode, the touch screen displays as following after touch at random position top right/left area. 1. REG To turn on or off the REG function. 2.PTY To switch the RDS program types by ◀ / ▶ . 3.TA to turn on /off TA function 4.AF to turn on /off AF function 5.PTY to search program type 6/7. Seek-/Seek+ Touch to seek a station manually downwards/upwards. 8.RADIO To switch to radio operation page. 1. PLAY/PAUSE To start the playback and touch again to resume the playback. 2. STOP To stop playing, touch twice to stop completely. 3/4. PREV/NEXT To select previous/next tracks. 5. SETUP To display the DVD SETUP screen. Note: In DVD playback mode, touch on the left middle position twice and TITLE MENU will display; touch on the right middle position twice and ROOT MENU will display; touch on the middle/top right position once(DVD mode) or the track sequential position once and the numeric keyboard will be displayed. REG(Regional) ON:active the REG function,the unit automatically keeps receiving the related RDS station. OFF:deactive the REG function All the functions can be performed by touching on the screen directly. GB-8 SYSTEM SETUP In FIG.1, the user can adjust the value of BASS, TREBLE and SUB WOOFER by tapping on + / - on the touch screen. Touch on the top left position to enter source interface. The unit will return to previous mode display screen if any operation is not performed in 5 seconds. In AUDIO setting, the user can adjust the sound output effect leftwards or rightwards by tapping ▶ ◀ button; the sound output effect front wards or rearwards by tapping ▲▼ button. 3.Video Press on the VIDEO button and the screen will display as following: Touch on SET button on the above pic..The user can start the system setting. 1.SETUP Touch on the SET button and the screen will display as following: In this setting, the user can adjust the value of CONTRAST, BRIGHTNESS AND COLOR by tapping on the items at the left/right end of each value bar. According to the specific condition, the user can adjust the light effect on screen by tapping BRIGHT, NORMAL and SOFT modes. 2.Audio Touch on the AUDIO button and the screen will display as following GB-9 TIME SETTING Tapping on TIME button to turn to time adjust page. LOUD ON: To turn on the LOUNNESS function. OFF: To turn off the LOUDNESS function. RADIO REGION To select the right region as per the user locates. TOUCHSCREEN TIME MODE Set the time display mode(12H/24H). TIME DISPLAY ON: To display the time OFF: To turn off the time display mode. Tapping on TOUCHSCREEN button to turn to time TOUCHSCREEN adjust mode. Touch Adjust When the display position on the screen and the touch position on the touch panel not matched, or initiating the productat first time, the adjustment becomes necessary. TIME ADJUSTMENT To adjust the time by tapping ▲▼ button; BEEP ON: To turn on the BEEP function. OFF: To turn off the BEEP function. Accurately touch the X mark provided in the screen for more than 2 seconds until the adjust succeed is displayed. GB-10 REMOTE CONTROL REMOTE CONTROL Installing the battery Slide the tray out on the back of the remote control and insert the battery with the plus (+) and minus (-) poles pointing in the proper direction. Use and care of the remote control Point the remote control in the direction of the front panel to operate to use it. Notes: Using batteries improperly can cause them to explode. Take note of the following points: * Keep the battery out of the reach of children. Should the battery be swallowed, immediately consult a doctor. * Use one CR2025 (3V) lithium battery. * Remove the battery if the remote control is not to be used for a month or longer. * Do not short-circuit, disassemble or heat batteries. * Do not dispose of batteries into fire or flames. * Dispose of spent batteries properly. * Do not let it fall onto the floor, where it may become jammed under the brake or accelerator pedals. GB-11 8. REMOTE CONTROL OPERATION 1. 2. 3. 4. 5. 6. PWR Press this button to turn on the unit, press and hold it again to turn off the unit. In unit on, press this button to turn on/off MUTE function. ST/AUDIO In radio mode, press to select stereo or mono reception; In DVD mode, press it to change the audio language. LOC/SUB-T In radio mode, press to select local stations or distant stations; Press to change the subtitle language in DVD playback mode. (0-9)Number Button Press the button to select track, chapter, or preset stations. In radio mode, press TA/AF/PTY buttons to function corresponding item. I<</>>I][<< >>] ▼/ ▲ / / /ENTER/ >II In radio mode, press I<</>>I to recall a preset station; press << >> to search stations automatically and press and hold << >> to search stations manually. In playback mode, press I<< / >>I to select previous song or next song and press << / >> to play fast forward or fast rewind; press >II to pause play and press again to resume play. OSD Press the button to display title elapsed, title remain, chapter elapsed, chapter remain, display off. 9. 10. 11. 12. 13. 14. 15. 7. GB-12 VOL+/VOL-, SEL Press the button to increase or decrease volume level. Press repeatedly SEL to switch the sound characteristics. A-B/PROG In DVD/VCD/CD mode, press the button to set the program order. In DVD/VCD/CD mode, press and hold the button to play the selected A-B section. RPT/* In playback mode, press the button to replay. In Bluetooth mode, press this button to function as what does on the mobile. ■ Press the button to stop the playback. LED Press the button to switch the LED light mode. RDM/# In playback mode, press the button to play tracks at random order. In bluetooth mode, press this button to function as what does on the mobile. TITLE In DVD mode, repeatedly press the button to select different titles. In VCD mode, press this button to function PBC on/off. In MP3 mode, press the button to see ID3 Tag information. ZOOM/REG In DVD mode, press the button to increase or decrease the picture in size. In radio mode, press 16. 17. 18. 19. 20. 21. 22. 23. and hold this button to turn REG on or off. SETUP In playback mode, press to display system setting picture, the user can select some relative constant parameters. In other mode, press this button to enter system setup page. II> (Slow forward or slow reward) In playback mode, press the button to select slow forward or slow reward. MENU Press the button to return to the root menu of the disc in DVD playback mode. CLEAR Press the button to activate CLEAR function, it can clear the erroneous number what you import. LOUD Press the button to activate LOUD function. EQ Press the button to select the corresponding preset modes to adjust the sound quality. AMS/INTRO In radio mode, press to scan each stored station, long press to store the station into the memory. In bluetooth mode, press this button to function as what does on the mobile. BAND/P/N In radio mode, press the button to select bands. In DVD, VCD mode, press the button to select PAL, AUTO or NTSC system. In bluetooth mode, press this button to function as what does on the mobile. 24. GOTO In DVD/VCD/CD mode, press to set the playback time. In MP3 mode, press this button to select the desired track by number buttons on the remote control. 25. ANGLE Press to change the viewing angle in DVD playback mode. 26. MODE/NAV Press the button to select your desired mode. Press and hold this button to start the navigation operation. BASIC OPERATION 1. Reset the Unit Operating the unit for the first time or after replacing the car battery, you must reset the unit. Press RESET button on the head unit with a pointed object (such as a ball-point pen) to set the unit to the initial status. This function can only be operated by the head unit. 2. Turning the Unit On/Off Press PWR/ button on the remote control to turn on the unit. In unit ON, when insert a disc, the unit will automatically start playing. Press and hold it to turn off the unit completely. In unit OFF, when insert a disc, the unit will turn on automatically. Press PWR/MUTE button on the head unit also GB-13 performs the same operation. 3. Volume Control Press VOL+ button on the remote control to increase the sound level and press VOL- button on the remote control to decrease the sound level. Rotate VOL button on the head unit also performs the same operation. 4. Turning Loudness On/Off Briefly press LOUD button on the remote control to activate loud function. Press it again to shut down LOUD function. 5. EQ Setting While listening to the popular music, classic music or rock music, you can select the corresponding preset modes to adjust the sound quality perfectly by using EQ button on the remote control.. Repeatedly pressing EQ button to choose the following modes in turn: POP—CLASS -- ROCK – OFF 6. Auto switch to video When playing DVD in driving car, there is “YOU CANNOT USE THIS FUNCTION WHILE DRIVING” display in TFT. Just braking car, the TFT can switch to video automatically. 7. Auto switch when revering the car The unit can switch to the radar of revering the car automatically, when revering the car. So you can reverse the car easily and the sound will be shut off if the unit is playing. RADIO OPERATION Select radio mode If the radio mode is selected, the screen displays as follow. 1. Band Select In radio mode, repeatedly press BAND button on the remote control to select a band in the following order: Note: Press BAND on the touch screen or on the panel also performs the same operation. 2. Tuning 2.1 Automatic Tuning There are three ways to tune in a station downwards automatically as below: press << button on the remote control; press I<<button on the panel; touch on < button on the touch screen. GB-14 It is a function for storing up to 6 stations. Follow the two steps: Select the desired band; hold down AMS button, the stations with good reception are stored automatically. There are three ways to tune in a station upwards automatically as below: press >> button on the remote control; press >>I button on the panel; touch on > button on the touch screen. 2.1 Manual Tuning There are three ways to tune in a station downwards manually as below: press and hold << button on the remote control; press and hold I<< button on the panel; touch on < button on the touch screen. There are three ways to tune in a station upwards automatically as below: press and hold >> button on the remote control; press and hold >>I button on the panel; touch and hold on > button on the touch screen. 4.2 Manual store To turn in a station to be stored in the preset memory, press and hold any one of the preset buttons (1-6) to store on. *If a new station will be stored in a preset memory which already has a station, the current station will be cleared and replaced by the new station. 3. Recalling a preset station A total of 30 preset stations (18-FM, 12-MW) are available in memory. Press I<< / >>I button on the remote control OR press AMS button to recall a preset station. The display shows the preset number and frequency of the stored station; touch one of these to select a corresponding station. Note: Press any one of the station preset buttons on the remote control also to select the preset stations. 4. Store stations 4.1 Auto store 5.DX/LOC Selector In radio mode, press LOC button on the remote control to select strong or weak station reception. 5.1 LOC When LOC displays on the touch screen, only strong signal stations will be tuned. 5.2 DX When there is no LOC displays on the touch screen, both strong and weak stations can be received. Note: The initial mode is DX mode. 6. MO/ST Selector In FM of radio mode, you can press ST button on the remote control to select Mono mode or Stereo mode. 7. EXACT STATION SELECTION 7.1 Press number buttons (1-6) on the remote control to GB-15 select the six preset stations. 7.2 To select the exact station, press GOTO button on the remote control then enter the exact frequency numbers. RDS (RADIO DATA SYSTEM) OPERATION The RDS allows you to receive a variety of information such as traffic information, station names, and to retune automatically to a stronger transmitter that is broadcasting the same program. Tips The RDS digital data includes the followings: PI Program Identification PS Program Service Name AF List of Alternative Frequencies TP Traffic Program TA Traffic Announcement PTY Program Type EON Enhanced Other Networks Turn on/off the AF function * Press AF button to switch on/off AF function. *The tuner will search for a station with RDS information * The tuner will retune frequencies when ever the reception signals getting worse. Receiving Traffic information 1. Press the TA button to switch on TA mode. 2. The unit search for traffic information station automatically. When a traffic information station is tuned in, the TP mark display on touchable screen. If you do not want to listen to the traffic information being received, press TA button to skip that traffic information message. The TA function will remain in the ON position. And the unit will be back to previous mode. 3. Press it again to switch off TA mode. * Traffic information is heard only when it is being broadcast. In other mode, Traffic announcement can interrupt the source sound output when broadcast. After broadcasted, the unit will automatically return to the original source play before the traffic information broadcast began. PTY (Program Type) Tuning The PTY function allows you to search for stations with a particular Program Type. Touch Page1 button on the radio display screen to switch to the RDS screen. 1. Press PTY button on touchable screen or on the remote control to select a program type. After selecting the program type for 3 seconds, the unit will search for a station in the selected program type. *If the PTY station is found, the tuner will be stopped searching. *If the PTY station is not found,” No Pty” will be display on the screen. GB-16 All types for your selection are listed in table as below:: NEWS CURRENT AFFAIR INFORMATION VARIED POP MUSIC FINANCE CHILDREN COUNTRY NATIONAL ROCK MUSIC OLDIES SPORTS EDUCATION M.O.R. MUSIC LIGHT CLASSIC SERIOUS CLASSIC OTHER MUSIC WEATHER SOCIAL AFFAIR RELIGION PHONE IN FOLK DOCUMENTARY TRAVEL TEST LEISURE JAZZ MUSIC ALARM DRAMA CULTURE SCIENCE place a hands-free call by using a Bluetooth compatible with the mobile phone. *When you place a call, speak loudly and clearly. *Shut the windows before calling. *It is normal that some unnatural voice may be heard during your calling which may be caused by the conditions of the signals or the one who uses the mobile phone. *Due to some special mobile phone, you may not be able to use a hands-free phone. CONNECTING An emergency broadcasting (ALARM) will broadcast automatically and produce the beep sound when it is received. The sound output through other source will be muted. BLUETOOTH OPERATION Select the BLUETOOTH mode To select the BLUETOOTH mode, the users can make it done by the following ways: 1. Press on SRC/NAV button on the front panel to switch to BLUETOOTH mode; 2. Press on SRC button on the remote control to switch to BLUETOOTH mode; 3. Tap on the BLUETOOTH ICON at the MAIN MENU on the screen. HANDS-FREE PHONE The unit is compatible with Bluetooth international standard wireless communication technology. You can *The Bluetooth setting is required for a mobile phone. Read the Owner’s Manual of the mobile phone. *After paired, the unit can connect with the mobile phone automatically.(in valid range) * If the mobile phone and the device are disconnected accidentally, the screen will display Disconnect, just press LINK button on the screen to reconnect (refer to Bluetooth setup). NOTE: *Press button on the remote control also GB-17 performs dial(receiving) a call or hang up a call function *The incoming call will interrupt the sound output through other source, and switch to the hands-free phone screen automatically when it is received. After the call is ended, the unit will be back to the previous mode. * The hands-free phone sounds output through the built-in speakers. When calling, press Audio Transfer button on the screen to switch the mode to receive a call by using mobile phone, and press it again to return to hands-free mode. USER INTERFACE OPERATION 1. MAIN PAGE After selecting the bluetooth mode, MAIN PAGE will display as FIG.1. The user can dial up in this mode, input the number required by pressing number button on the remote control or on the screen then press button on remote control or on the screen to dial up. The telephone number you dialed is appeared on the DISPLAY COLUMN. 2. PHONE BOOK Tap on PHONE BOOK button on the screen shown above, the screen will display as following FIG.2. There are three items: DIALED CALLS, RECEIVED CALLS and MISSED CALLS. A maximum of 15 numbers can be stored in each call history. A maximum of 5 numbers will be displayed in each page. Tap on ▲▼ button to turn to previous/next page.(FIG.3)You can place a call by selecting a number from a list of each item. Receiving a Call when a call is coming, the received call sound rings ,and the coming call number is shown in the display. Press button on the screen to starts the call. End a Call or reject a call Press button on the screen or on the remote control to end or reject the call. 3. SETUP PAGE Tap on SETUP PAGE button on the screen shown in FIG.1, the screen will display as following FIG.4. 3.1 AUTO-ANSWER ON: Tap on this button then the coming call will be answer automatically. OFF: Tap on this button then the coming call will not be answer automatically. 3.2 CONNECT AUTO: Tap on this button then the unit and the device GB-18 *If the disc does not eject, press MODE button to switch to the radio mode, and press and hold EJ button for 3 seconds. will be reconnected automatically. MANUAL: Tap on this button then the unit and the device will be reconnected manually. 3.3 PAIR Tap on this button to pair up the unit and the device. 3.4 RESET Tap on this button to reset the bluetooth setup. 4. BLUETOOTH AUDIO FUNCTION Tap on A2DP PAGE button on the screen shown in FIG.1, the screen will display as following FIG.5. Quick track selection fast forward/fast reward playback During playback mode, press >>I or I<< on the remote control to select next/previous chapter or track. *Press >>I or I<< button on the unit also perform the same operation. Press the >> or << button on the remote control to perform fast rewind or fast forward. Repeatedly press the button, the options switch as follows order: Audio information of a bluetooth, compatible with mobile phone, portable player, etc., is transferred by wireless technology. Refer to CONNECT details to connect bluetooth audio devices. NOTE:*Video playback is not supported. *Using remote control also performs the same. DVD/VCD/CD OPERATION Loading a DVD Press the [OPEN] button to access the disc slot behind the PANEL. Insert a disc into the Disc slot. The disc will be pulled into the unit automatically, and the unit switches to the DVD mode. *You can eject a disc by pressing EJ button on the unit. Press the >>I or I<< button on the unit for long time will perform the same function. Stop the playback Press ■ button to stop playing, then press ENTER button to play the current chapter or track, press stop button twice to stop playing completely, then press ENTER button to play the beg-inning of disc. Pause the Playback Press II button to pause the playback. Playing Tracks in Random Order During DVD/VCD/CD playback, when pressing RDM button, ‘RANDOM’ will appear on the display, the unit plays any track at random and the number selection is GB-19 de-available. Press it again to return to normal playing. Repeat Playing In playback mode, press RPT on the remote control to perform replaying function when you need to repeat the chapter you like. During DVD playback, the replay option change in following order: CHAPTER→TITLE→ OFF During VCD/CD playback, the replay option change in following order: TRACK→OFF Slow motion playback In DVD mode, press II> repeatedly to slow forward or slow reward, as follows: 1/2→1/4→1/8→1/16→1/2→1/4→1/8→1/16→Normal Play In VCD mode, press repeatedly to slow forward in following order: 1/2→1/4→1/8→1/16→Normal Play This function is operated by using the remote control. Increase or decrease the size of the picture During DVD/VCD playback, press ZOOM button to increase or decrease the picture size. There are 6 sizes, and press the button repeatedly to change the size in following order: 2X→3X→4X→1/2→1/3→1/4→ OFF This function is operated by using the remote control. Programmed playback In VCD/CD mode, press the PGM button on the remote control and the program menu will be displayed. Press the number buttons to select the track number. Use the direction buttons to move the cursor to START and press ENTER to start programmed playback. Move the cursor to EXIT and press ENTER to exit the programmed playback. Move the cursor to REW and press ENTER to go to the last page; move the cursor to NEXT and press ENTER to go to the next page. During this process, press PGM on the remoter control to cancel the programmed playback. Note: * This function can only be operated by using the remote control. Changing the subtitle language (Multi-subtitle) With DVDs featuring multi-subtitle recordings, you can press SUB-T to switch between subtitle languages during playback. Selection options switch as follows: This function is operated by using the remote control. Notes: * This function only operates with DVDs featuring multi-subtitle recordings. Changing the audio language GB-20 DVDs can provide audio playback with different language. With DVDs featuring multi-audio recordings, you can press AUDIO button to switch between language and audio systems during playback. Selection options switch as follows: This function is operated by using the remote control. Notes: This function only operates with DVDs featuring multi-audio recordings. Selecting different title (DVD mode) For DVD disc, you can press TITLE on the remote control to return the top menu of the disc, and you can select different chapter or title upward or downward by using ▲ or ▼. This function is operated by using the remote control. Selecting root menu (DVD mode) For DVD disc, you can press MENU to select different root menus, and then press ▲ ▼ ◀ ▶ /[ENTER] buttons to enter the sub-menus. With pressing buttons, and the number buttons, and then ENTER button to select and enter what you desired. SETUP MENU In DVD/VCD/CD mode, presses SETUP, the screen will display system setting picture, and the user can select some relative constant parameters. The user also can set it as needed by moving the cursor and using buttons, and then presses ENTER to execute the selecting or entering item. This function is operated by using the remote control. Notes: * The selections are the preferred options that will be chosen if they are available on a disc. If the inserted disc does not have the preferred option then the discs own preference will be used. * Regarding SETUP MENU, please refer to the following pages for more details. * Some functions vary depending on the types of models or formats of the disc. Selecting an acoustic output mode In VCD mode, press the AUDIO button on the remote control repeatedly to select an audio mode in the following order: MONO LEFT → MONO RIGHT → MIX-MONO → STEREO DVD SETUP When you press SETUP button on the remote control in DVD mode, the setup menu will be displayed. It includes General Setting, Audio Setup, Video Setup, Preference Setup, Password Setup and Exit Setup menu. 1.Within the setup menu, you can use ▲▼ ◀ ▶ buttons on the remote control to move the cursor, and then press the ENTER/PLAY button to make your selection. Press [◀] can return to the previous menu. 2. To exit setup menu, you can select the EXIT SETUP GB-21 screen in their original format, regardless of which TV display format you select. item in sub-menu or press SETUP button. 1. GENERAL SETUP PAGE To display Setup TV screen format, video type and all DVD functions. 1.2 OSD LANGUAGE On Screen Display (OSD) Language: Users can select the whole setup menu and on-screen display language. 1.1 TV DISPLAY The TV Display which select the different ratio of display format and the screen of TV. There are various types of display on screen for different matches between Disc and TV. Note: No matter which display format is selected, a picture recorded in standard 4:3 format always displays in the 4:3 aspect ratio. The display format of DVD titles may vary; please refer to the information that accompanies your specific DVD title. If the DVD title is recorded in 16:9 wide display format while the TV is a standard 4:3 screen, horizontal compression of the image will display. Some DVD titles may be recorded in special formats. In such cases, the DVD titles will always appear on the 2. AUDIO SETUP PAGE 2.1 DOLBY DIGITAL SETUP PAGE GB-22 3.2 SUBTITLE SUBTITLE: Sets the preferred subtitle language as the default when playing DVD. (If DVD supports these languages) Users can switch the binaural mode among STEREO, L-MONO, R-MONO and MIX-MONO. 2.1.2 D.R.C Select the provided option to change the Dynamic range setting. 3. PREFERENCE SETUP PAGE The preference setting is active only when disc has been stopped completely, and the setting is effective on next time power on till exchanging the saved setting. 3.1 AUDIO AUDIO: Sets the preferred audio language as the default when playing DVD. (IF DVD supports these languages) 3.3 DISC MENU DISC MENU: Sets the preferred menu language as the default when playing DVD. (If DVD supports these languages) GB-23 3.4 PARENTAL PARENTAL: The parental control function works in conjunction with the different censorship classes assigned to DVDs. These classes help to control the types of DVDs that the family watches, There are up to 8 censorship classes for DVDs. SYSTEM SETUP Note: The PARENTAL is changeable when4.1 PASSWORD MODE set to OFF. After setting the level of parental control, please set the password as ON to perform the lock of changing. 4. PASSWORD SETUP PAGE 4.1 PASSWORD MODE PASSWORD MODE: Sets the function operation to be ON for locking the parental function, and OFF for changing the parental level. There will be old password confirmation when ON/OFF interchange. The initial password is 136900 4.2 PASSWORD CHANGE PASSWORD CHANGE: you can change the password, please type 6 numerals as new password. 3.5 DEFAULT DEFAULT: Resets to all the manufacturer's original settings for this DVD player Press ENTER to perform the reset. GB-24 5. EXIT SETUP MENU MP3 OPERATION SETTING THE TV SCREEN SIZE Multi-aspect ratio suits to different TV screen size. Function supported by DVD discs. There are many functions available on DVD discs and the functions vary per player and per manufacturer. Playing a disc, an SD/MMC card or a USB device containing MP3 files Connect a USB device or press OPEN button to release the front panel, insert a disc into the disc slot or SD/MMC card into the card slot. The unit will automatically switch on when a disc, card or USB device is inserted. The screen will display as follow: During MP3 playback, press the >>I or I<< button on the remote control or on the panel or touch on >I / I< button on the screen to select the next/previous track. GB-25 Repeat playing When playing MP3 files, press the RPT button repeatedly on the remote control to select repeat mode: REPEAT ONE, OFF. While in REPEAT ONE mode, it will play one track repeatedly. The defaulted mode is REPEAT ALL mode, the unit will play all tracks repeatedly. The number buttons Selecting any track directly by using Number button(0-9).For example, if you want to play the 23rd track, just press button 2 and then press button 3 and the corresponding track will be played. Note: * This function can be operated using the remote control or touch top right corner of screen to be functioned. * If you make a mistake, press CLEAR button to clear. Stop playing When playing MP3 files, press ■ button on the remote control OR on the bottom of the screen to stop playback. PAUSE PLAYING When playing MP3 files, press >II on the remote control or on the bottom of the screen to pause playing and press again to resume play SKIP FORWARD / BACKWARD PLAY. Press >> or << on the remote control or press and hold >>I or I<< on the panel to performed fast rewind or fast forward: 2X→4X→8X→16X→32X→ ISO FILE OPERATION When playing the media with folders, the unit will play the first track in the first folder automatically. Press the >>I or I<< on the remote control or PREV/NEXT buttons on the screen to move the cursor to current folder then press ENTER button on the remote control to be back to folder list. Note: The unit will play the tracks in next folder after playing the previous folder. Eject a disc Press EJ button on the unit or on the remote control to eject a disc. NAVIGATION OPERATION The GPS system can navigate with voice, when you do not drive on your preset line, the system will reset the line automatically to get the destination. Press OPEN button on the unit to open the TFT screen, the SD card slot is on this position (shown as illustration). It supports SD card with memorized navigation map only. Press SRC button on the unit or on remote control repeatedly to access the navigation mode after insert GB-26 SD card witch stored navigating map. *Long press SRC/NAV button or Touching NAV item on source selection screen also activate the function Calibration To avoid the touching effect function invalid, please calibrate the touchable screen before perform navigating operation For more information regarding the NAV.Operation, please refer to the user manual of navigating electronic map. Please confirm your place is not under the bridge, on the tunnel or near the building which can infect the signal received. For safety, please avoid operate the system while driving. GPS system is operated in background at any modes. INSTALLATION Press TOUCH SCREEN button on the touchable screen and the screen display as following: Please use something with needle end touching on the + button to finish the calibration. NO TE Touch the selection displayed on screen to perform the corresponding operation Notes Before finally installing the unit, connect the wiring temporarily, making sure it is all connected up properly, and the unit and the system work properly. Use only the parts included with unit to ensure proper installation. The use of unauthorized parts can cause malfunctions. Consult with your nearest dealer if installation requires the drilling of holes or other modifications of the vehicle. Install the unit where it does not get in the driver's way and cannot injure the passenger if there is a sudden stop. The semiconductor laser will be damaged if it overheats, so don't install the unit anywhere hot--for instance, near a heater outlet. If installation angle exceeds 30° from horizontal, the GB-27 unit might not give its optimum performance. The cords must not cover up the area shown in the figure below. This is necessary to allow the amplifiers to radiate freely. Install the Unit 1. Install the mounting bracket into the dashboard of the car. And adjust the mounting bracket to horizontal 2. Fix the mounting bracket into place by pressing its tags outwards 3. Slide the main unit slowly inside the mounting bracket until the tags on either sides of the bracket lock into the respective holes on the sides of the main unit. 4. Install the removable trim ring Detach the unit 1. Detach the removable trim ring 2.Insert the keys supplied to the unit at both sides of the unit (shown as illustrated) until they click. Pulling the keys makes it possible to remove the unit from the dashboard. GB-28 CABLE CONNECTION Note: 1. The reverse video line should be available while connected to +12 V. 2. The tel mute line should be available while connected to B-. 3. The parking break line should be available while connected to the car break. A wrong connection can be easily detected by our technical service for a repair request under the warranty. GB-29 SPECIFICATION GENERAL Power requirement -----------------------------------------------------------------------------------------12VDC (10.8~16V) Grounding system -------------------------------------------------------------------------------------------------negative type Max: current consumption ------------------------------------------------------------------------------------------------- 15 A Max: power output -------------------------------------------------------------------------------------------------------- 40Wx4 load impedance -------------------------------------------------------------------------------------------------------- 4Ω(4-8Ω) Dimensions------------------------------------------------------------------------------------------------------178X50X166MM Weight-----------------------------------------------------------------------------------------------------------------------2.65KG DVD PLAYER S/N ratio -------------------------------------------------------------------------------------------------more than 70dB (1 kHz) Dynamic range -----------------------------------------------------------------------------------------more than 80dB (1 kHz) Distortion -----------------------------------------------------------------------------------------------------------less than 0.2% Video output------------------------------------------------------------------------------------------------- 1.0Vp--p+0.2V/75Ω Audio output (RCA) ------------------------------------------------------------------------------------- 2.0Vrms+0.3V 10KΩ FM TUNER Frequency range -----------------------------------------------------------------------------------------------87.5~108.0MHz Usable sensitivity -------------------------------------------------------------------------------------------------------------10dB S/N ratio ------------------------------------------------------------------------------------------------------------- 55dB (mono) Distortion ---------------------------------------------------------------------------------------------------------------0.5 %( mono) Stereo separation ------------------------------------------------------------------------------------------ 30dB (65dBu, 1 kHz) MW TUNER Frequency range ------------------------------------------------------------------------------------------------ 522~1620 kHz Usable sensitivity ------------------------------------------------------------------------------------------------------------ 30dB Signal-to-noise ratio -------------------------------------------------------------------------------------------------------- 50dB GB-30 TROUBLESHOOTING Common problems Symptom Power isn’t switched ON. The unit doesn’t operate Cause Remedy Leads and connectors are incorrectly Ensure that all connections are connected. correct A fuse of power cable has blown. Replace the old fuse with a new one with the same capacity; try to determine the cause of the problem. Outside factors are causing the unit to Reset the unit by pressing RESET operate incorrectly. with the tip of a pen. Operation with the remote Battery power is low. Load new batteries. control isn’t possible. Some operations are prohibited with certain Check using another disc. discs Playback is not possible. The disc is dirty. Clean the disc. The loaded disc is a type this unit cannot Check the disc type with the play. Technical Specifications. Non compatible video system disc is Change to a disc compatible to your loaded. video system. There is no sound. The speaker connections are incorrect. Check speaker connections (or the connection with an amplifier if used). With some discs, 96 kHz output is Switch the output setting to 48 kHz. prohibited the unit is performing as F.FWD or F.REV There is no sound during F.FWD, playback F.REW playback. This operation is not possible. The prohibited mark is The operation is not available displayed and operation is The operation is not compatible with the This operation is not possible. not possible. disc. GB-31 The pictures stops (pauses) and the unit cannot be operated. There is no sound. The player skips audio or video. The picture is deformed. Reading of data has become impossible After pressing STOP once, start during playback. playback once more. Volume level is low. Raise the volume level This unit is not firmly installed. Check that the unit is installed firmly The disc is dirty or damaged. Clean the disc or change it. The aspect setting is incorrect for the Select the appropriate aspect display. setting for your display. Problem during DVD playback Symptom Playback is not possible. Cause The DVD has a different region code from this unit. Dialog language (and subtitle The DVD playing does not have multiple language) can not be selected. language recordings. Remedy Replace the disc with one featuring the same region code as this unit. You cannot select among multiple languages if they aren’t recorded on the disc. You can only select between options Select using the disc menu. indicated in the disc menu. No subtitle is displayed. The DVD playing does not have Subtitles are not displayed if they subtitles. are not recorded on the disc. You can only select between options Select using the disc menu. indicated in the disc menu. Playback is not with the audio The DVD playing does not have audio or Switching to a selected language is language and subtitle language subtitles in the language selected in the not possible if the language selected settings selected in SET UP SET UP MENU. in the SET UP MENU is not MENU. recorded on the disc. GB-32 The picture is extremely The disc features a signal to prohibit Since this unit is compatible with the unclear/distorted and dark copying (some discs may have this). copy guard analogy copy protect during playback. system, when playing a disc that has a signal prohibiting copying, the picture may suffer from horizontal stripes or other imperfections when viewed on some displays. This does not mean this unit is malfunctioning; If at any time in the future you should need to dispose of this product, please note that waste electrical product should not be disposed of with household waste. Please recycle where facilities exist. Check with Your Local Authority or retailer for recycling advice. (Waste Electrical and Electronic Equipment Directive. GB-33 English Hereby, Macrom , declares that this M-DVD7701 is in compliance with the essential requirements and other relevant provisions of Directive 1999/5/EC. Finnish Macrom vakuuttaa täten että M-DVD7701 tyyppinen laite on direktiivin 1999/5/EY oleellisten vaatimusten ja sitä koskevien direktiivin muiden ehtojen mukainen. Dutch Hierbij verklaart Macrom dat het toestel M-DVD7701 in overeenstemming is met de essentiële eisen en de andere relevante bepalingen van richtlijn 1999/5/EG Bij deze verklaart Macrom dat deze M-DVD7701 voldoet aan de essentiële eisen en aan de overige relevante bepalingen van Richtlijn 1999/5/EC. French Par la présente Macrom déclare que l'appareil M-DVD7701 est conforme aux exigences essentielles et aux autres dispositions pertinentes de la directive 1999/5/CE Par la présente, Macrom déclare que ce M-DVD7701 est conforme aux exigences essentielles et aux autres dispositions de la directive 1999/5/CE qui lui sont applicables Swedish Härmed intygar Macrom att denna M-DVD7701 står I överensstämmelse med de väsentliga egenskapskrav och övriga relevanta bestämmelser som framgår av direktiv 1999/5/EG. Danish Undertegnede Macrom erklærer herved, at følgende udstyr M-DVD7701 overholder de væsentlige krav og øvrige relevante krav i direktiv 1999/5/EF German Hiermit erklärt Macrom, dass sich dieser/diese/dieses M-DVD7701 in Übereinstimmung mit den grundlegenden Anforderungen und den anderen relevanten Vorschriften der Richtlinie 1999/5/EG befindet". (BMWi) Hiermit erklärt Macrom die Übereinstimmung des Gerätes M-DVD7701 mit den grundlegenden Anforderungen und den anderen relevanten Festlegungen der Richtlinie 1999/5/EG. (Wien) Greek ΜΕ ΤΗΝ ΠΑΡΟΥΣΑ Macrom ΔΗΛΩΝΕΙ ΟΤΙ M-DVD7701 ΣΥΜΜΟΡΦΩΝΕΤΑΙ ΠΡΟΣ ΤΙΣ ΟΥΣΙΩΔΕΙΣ ΑΠΑΙΤΗΣΕΙΣ ΚΑΙ ΤΙΣ ΛΟΙΠΕΣ ΣΧΕΤΙΚΕΣ ΔΙΑΤΑΞΕΙΣ ΤΗΣ ΟΔΗΓΙΑΣ 1999/5/ΕΚ Italian Con la presente Macrom dichiara che questo M-DVD7701 è conforme ai requisiti essenziali ed alle altre disposizioni pertinenti stabilite dalla direttiva 1999/5/CE. Spanish Por medio de la presente Macrom declara que el M-DVD7701 cumple con los requisitos esenciales y cualesquiera otras disposiciones aplicables o exigibles de la Directiva 1999/5/CE Portuguese Macrom declara que este M-DVD7701 está conforme com os requisitos essenciais e outras disposições da Directiva 1999/5/CE. GB-34 The BLUETOOTH ® world mark and logos are registered trademarks owned by the Bluetooth SIG, Inc. and any use of such marks by ALDINET S.p.A. is under license. The MACROM brand is a registered trade mark of MACROM SA and any use of such marks by ALDINET S.p.A. is under license. Declaration of Conformity