1
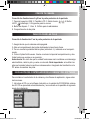
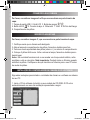
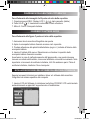
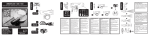
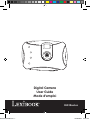
DJ010series IM.indd 1
Digital Camera
User Guide
Mode d’emploi
DJ010series
13/02/2007 18:41:35
DJ010series IM.indd 2
13/02/2007 18:41:35
A
1
2
3
4
B
5
6
7
8
9
C
DJ010series IM.indd 3
13/02/2007 18:41:35
FRANÇAIS
PRESENTATION DE VOTRE APPAREIL PHOTO
Veuillez vous référer aux images A & B illustrées au dos de la page de
couverture.
1. Couvercle de la prise USB 2. Affichage LCD 3.
Bouton de suppression
4. Bouton HI/LO/
5. Attache de courroie 6. Bouton d’obturateur
7. Viseur 8. Emplacement pour trépied 9. Compartiment des piles
MISE EN PLACE DES PILES NEUVES
Veuillez vous référer à l’image C illustrée à l’arrière de la page de couverture.
1. Assurez-vous que l’appareil photo soit éteint.
2. Ouvrez le compartiment des piles en faisant glisser le couvercle.
3. Respectez la polarité des piles (symboles +/-) à l’intérieur du compartiment.
4. Insérez 2 piles neuves de type AAA. Replacez et fermez le couvercle en le faisant
glisser en position.
Avertissement: Si l’unité dysfonctionne ou reçoit un choc électrique, enlevez les
piles et insérez-les de nouveau. Remarque importante: Tous les fichiers s’effacent
lorsque les piles sont remplacées. Assurez-vous de transférer les fichiers sur votre
PC avant cette manipulation.
INSTALLER LE PILOTE ET LE LOGICIEL DE L’APPAREIL PHOTO
Suivez ces instructions pour installer le pilote et le logiciel d’application de l’appareil
photo sur votre PC.
1. Insérez le CD du logiciel (inclus) dans le lecteur de CD-ROM. Le CD s’initialisera
automatiquement et le menu d’installation suivant apparaîtra:
Cliquez sur “Install driver”, puis suivez les instructions pour installer le pilote. Vous
devrez redémarrer votre ordinateur après l’installation du pilote.
DJ010series IM.indd 4
13/02/2007 18:41:36
FRANÇAIS
Remarque: Si le CD ne démarre pas automatiquement, cliquez sur Démarrer
Exécuter, écrivez “D:\setup.exe” dans la boîte de dialogue d’exécution (où D:\ est
votre lecteur CD-ROM).
2. Procédez de la même manière pour installer le logiciel PhotoImpression et Funhouse. Le logiciel PhotoImpression et Funhouse offre de nombreuses applications
pour éditer et imprimer vos photos.
Remarques: - Vous devez installer le pilote avant de transférer des photos à partir
de l’appareil photo.
- Vous devez cliquer sur “Browse CD” – “User guide” pour lire le guide d’utilisation
concernant le logiciel PhotoImpression et Funhouse. Si vous ne pouvez pas lire les
fichiers, vous devrez tout d’abord installer Acrobat Reader.
MISE EN MARCHE ET ARRET DE L’APPAREIL PHOTO
Appuyez sur le bouton d’obturateur [6] durant 5 secondes pour mettre l’appareil
photo en marche.
Remarque: L’appareil photo s’éteindra automatiquement après 60 secondes
d’inactivité.
SELECTION DE LA RESOLUTION DES PHOTOS
Il y a 2 modes de résolution :
Haute résolution : photos de 1280*960 pixels. L’appareil photo peut stocker environ
25 photos.
Basse résolution : photos de 640*480 pixels. L’appareil photo peut stocker environ
100 photos.
Appuyez sur le bouton HI/LO/
[4] pour sélectionner HI (haute) ou LO (basse)
résolution qui s’affichera dans le coin supérieur gauche de l’écran LCD.
PRISE DE PHOTOS
Appuyez sur l’obturateur [6] pour prendre une photo. Vous entendrez un “bip”
sonore après chaque prise de photo. Le nombre de photos encore disponible en
mémoire s’affiche sur l’écran LCD.
DJ010series IM.indd 5
13/02/2007 18:41:37
FRANÇAIS
SUPPRESSION DE FICHIERS
Supprimer la dernière photo prise
Appuyez sur le bouton
[3] pour sélectionner l’icône
inférieure de la poubelle affichée sur l’écran LCD. Appuyez sur
le bouton d’obturateur [6] dans les 5 secondes qui suivent pour
supprimer la dernière photo prise.
Supprimer tous les fichiers
Appuyez deux fois sur le bouton
[3] pour sélectionner
l’icône supérieure de la poubelle affichée sur l’écran LCD.
Appuyez sur le bouton d’obturateur [6] dans les 5 secondes qui
suivent pour supprimer toutes les photos stockées dans l’appareil photo.
Remarque: Si vous appuyez sur le bouton
par erreur, attendez simplement
5 secondes pour annuler cette opération.
Prise de photos continue
Ce mode vous permet de prendre une succession de photos rapides que l’appareil
photo sauvegardera sous la forme d’un court clip vidéo en format AVI.
Appuyez et maintenez le bouton HI/LO/
[4] pour sélectionner l’icône
sur
l’écran LCD. Gardez le bouton d’obturateur [6] appuyé pour prendre plusieurs
photos de manière continue et automatiquement.
TELECHARGEMENT DE VOS PHOTOS
1. Connectez l’appareil photo à votre ordinateur avec le câble USB fourni. Vous
entendrez un petit bip sonore et l’écran LCD s’allumera lorsque l’appareil photo sera
connecté au PC.
2. Ouvrez le logiciel PhotoImpression. Sur le côté gauche de la fenêtre ouverte,
cliquez sur “Get photo”.
3. Dans la partie inférieure de l’écran, cliquez sur “Camera/scanner”, puis dans
“Sélectionnez la source”, sélectionnez “Dual Camera”. Pour terminer, cliquez sur
“acquérir” (icône scan/appareil photo).
4. Vos photos seront affichées au bas de l’écran.
Remarque: Pour plus d’informations sur PhotoImpression, veuillez vous référer au
guide d’utilisation inclus dans le CD du logiciel.
DJ010series IM.indd 6
13/02/2007 18:41:37
Connecté à votre PC, votre appareil photo peut être utilisé comme webcam. Dans
« Poste de travail », cliquez deux fois sur un nouveau pilote appelé “Dual Camera”.
Vous serez alors en mode webcam.
FRANÇAIS
MODE PC CAM
Conférence vidéo
1. Réglez votre appareil photo numérique sur le mode PC Cam.
2. Installez le logiciel de conférence vidéo Microsoft NetMeeting sur votre ordinateur.
3. Entrez l’adresse IP de l’ordinateur que vous désirez contacter dans la barre
d’adresse.
4. Sélectionnez les options tool/accept/transfer. Lorsque le correspondant accepte
votre appel, vous pourrez alors tenir une conférence vidéo.
Chat MSN
1. Assurez-vous que votre appareil photo numérique soit éteint.
2. Appuyez et maintenez le bouton d’alimentation/obturateur [7]. Branchez le câble
USB au port USB de votre PC.
3. Connectez-vous à MSN.
4. Connectez l’appareil photo numérique à votre ordinateur en utilisant le câble
USB.
5. Sur l’interface MSN, sélectionnez Action/Start pour démarrer une conversation
MSN.
6. Sélectionnez la personne avec qui vous désirez communiquer et appuyez sur OK.
COQUES INTERCHANGEABLES
Votre appareil photo offre 2 coques interchangeables. Pour enlever et insérer une
coque, utilisez un outil pointu pour détacher chaque coin de l’appareil photo. Enclenchez la nouvelle coque.
DJ010series IM.indd 7
13/02/2007 18:41:37
FRANÇAIS
GARANTIE
Ce produit est couvert par notre garantie de deux ans. Pour toute mise en œuvre de
la garantie ou de service après-vente, vous devez vous adresser à votre revendeur
muni de votre preuve d’achat. Notre garantie couvre les vices de matériel ou de
montage imputables au constructeur à l’exclusion de toute détérioration provenant
du non-respect de la notice d’utilisation ou de toute intervention intempestive sur
l’article (telle que démontage, exposition à la chaleur ou à l’humidité…). Note :
Veuillez garder ce mode d’emploi, il contient d’importantes informations. Le contenu
de ce mode d’emploi peut changer sans préavis. Aucune partie de ce mode d’emploi
ne doit être reproduite sans le consentement écrit du fabricant.
LEXIBOOK S.A, 2, avenue de Scandinavie, 91953 Courtaboeuf Cedex France
Assistance technique : 0892 23 27 26 (0,34 € TTC/Min), www.lexibook.com
Please
1. USB
5. Stra
compa
Please
1. Mak
2. Ope
3. Note
4. Inse
place.
Warnin
battery
batterie
Follow
your PC
1. Inse
and the
Informations sur la protection de l’environnement
Tout appareil électrique usé est une matière recyclable et ne devrait pas faire partie des ordures ménagères! Nous vous
demandons de bien vouloir nous soutenir en contribuant activement au ménagement des ressources et à la protection de
l’environnement en déposant cet appareil dans sites de collecte (si existants).
DJ010series IM.indd 8
Click o
reboot
13/02/2007 18:41:38
ENGLISH
GETTING TO KNOW YOUR CAMERA
Please refer to images A & B located at the back of the cover page.
1. USB socket cover 2. LCD display 3.
delete button 4. HI/LO/
5. Strap mount 6. Shutter button 7. Viewfinder 8. Brace hole 9. Battery
compartment
button
INSERTING NEW BATTERIES
Please refer to image C located at the back of the cover page.
1. Make sure the camera is off.
2. Open the battery compartment by sliding the cover off.
3. Note the polarity of the batteries (+/- signs) inside of the battery compartment.
4. Insert 2 new AAA batteries. Replace and close the battery cover by sliding it into
place.
Warning: If the unit malfunctions or receives an electrostatic shock, remove the
battery and insert it again. Important note: all files will be lost when replacing the
batteries. Make sure you transfer the files to your PC before changing the batteries.
INSTALLING THE CAMERA DRIVER AND SOFTWARE
Follow these instructions to install the camera driver and application software on
your PC system.
1. Insert the CD Software (included) in your CD-ROM drive. The CD will auto run,
and the following installation menu will appear:
Click on “Install driver”, and then follow the instructions to install it. You will need to
reboot your computer after the driver installation.
DJ010series IM.indd 9
13/02/2007 18:41:38
ENGLISH
Note: If the CD does not auto run, click Start Run, type in “D:\setup.exe” in the
Run dialog text box (where D:\ is your CD-ROM drive).
2. Proceed similarly to install the PhotoImpression and Funhouse software. PhotoImpression and Funhouse software offer many applications for photo editing and
printing.
Notes: - You must install the driver before downloading pictures from the camera.
- You can click on “Browse CD” – “User guide” to read the user guides of the PhotoImpression and Funhouse software. If you cannot read the files, you will have to
install Acrobat Reader first.
TURNING THE CAMERA ON AND OFF
Press the Shutter button [6] for 5 seconds to turn the camera ON.
Note: The camera will auto power off after 60 seconds of inactivity.
SELECTING THE PHOTO RESOLUTION
There are 2 resolution modes:
High resolution: pictures of 1280*960 pixels. The camera can store about 25
pictures in this mode.
Low resolution: pictures of 640*480 pixels. The camera can store about 100 pictures
in this mode.
Press the HI/LO/
button [4] to select HI (high) or LO (low) resolution on the upper
left corner of the LCD screen.
TAKING PHOTOS
Press the Shutter button [6] to take a photo. You will hear a ‘beep’ sound after each
photo taken. The number of pictures you can still take in memory in shown on the
LCD screen.
DELETING FILES
Deleting the last picture taken
Press the
button [3] to select the lower trash can icon
10
DJ010series IM.indd 10
13/02/2007 18:41:38
ENGLISH
as shown on the LCD screen. Press the Shutter button [6]
within 5 seconds to delete the last picture taken.
Deleting all files
Press the
button [3] twice to select the upper trash can icon as shown
on the LCD screen. Press the Shutter button [6] within 5 seconds to delete all the
pictures stored in the camera.
Note: if you press the
button by mistake, just wait 5 seconds to cancel this
operation.
Continuous Picture Shots
This mode allows you to take a succession of quick shots which the camera will
save as short video clips in AVI format.
Press and hold the HI/LO/
button [4] to select the
icon on the LCD screen.
Keep the Shutter button [6] pressed to take several photos continuously and automatically.
DOWNLOADING YOUR PHOTOS
1. Connect the camera to your computer via the USB cable provided. You will hear
a small beep sound and the LCD screen will turn on when the camera is connected
to your PC.
2. Open the PhotoImpression software. On the left side of the opening screen, click
on “Get photo”.
3. On the bottom part of the screen, click on “Camera/scanner”, then in “Select
source” select “Dual Camera”. Finally, click on “acquire” (scan/camera icon).
4. Your photos will be displayed on the bottom part of the screen.
Note: for more information on PhotoImpression, please refer to the user guide
included in the software CD.
PC CAM MODE
Connected to your PC, your camera can be used as a webcam. In “My Computer”,
double click on a new drive called “Dual Camera”. You will be in webcam mode.
Video Conference
1. Set your digital video camera to PC Cam mode.
2. Run the video conference software Microsoft NetMeeting on your computer.
DJ010series IM.indd 11
11
13/02/2007 18:41:39
ENGLISH
3. Input the IP address of the computer you wish to dial in the address bar.
4. Select tool/accept/transfer options. When the other parties have accepted your
call, you can now hold a video conference.
MSN Chat
1. Make sure the digital video camera is OFF.
2. Press and hold the Power/Shutter button [7]. Plug the USB jack into the USB port
of your PC.
3. Sign in MSN.
4. Connect the digital video camera to your computer using the USB cable.
5. On the MSN interface, select Action/Start a video conversation.
6. Select the person you want to chat with, and press OK.
INTERCHANGEABLE COVERS
Your digital camera comes with 2 interchangeable covers. To remove and insert a
cover, use a sharp instrument to unsnap the cover on each corner of the camera.
Snap in a new cover.
WARRANTY
NOTE: Please keep this instruction manual, it contains important information. This
product is covered by our two-year warranty. To make use of the warranty or the
after-sales service, please contact your retailer and supply proof of purchase. Our
warranty covers material or installation-related defects attributable to the
manufacturer, with the exception of wear caused by failure to respect the
instructions for use or any unauthorised work on the equipment (such as
dismantling, exposure to heat or damp, etc.).
LEXIBOOK UK ltd, Unit 10 Petersfield Industrial Estate, Bedford Road, Petersfield,
Hampshire, GU32 3QA, United
Kingdom, Freephone helpline: 0808 100 3015, http://www.lexibook.com
Environmental Protection
Unwanted electrical appliances can be recycled and should not be discarded along with regular household waste! Please
actively support the conservation of resources and help protect the environment by returning this appliance to a collection
centre (if available).
12
DJ010series IM.indd 12
13/02/2007 18:41:39
ESPAÑOL
CONOCE TU CÁMARA
Consulta las ilustraciones A y B en la parte posterior de la portada.
1. Tapa del conector USB 2. Pantalla LCD 3. Botón borrar
4. Botón
HI/LO
(alta/baja) 5. Enganche para la correa
6. Botón de disparo 7. Visor 8. Orificio para la abrazadera
9. Compartimento de las pilas
PARA COLOCAR LAS PILAS
Consulta la ilustración C en la parte posterior de la portada.
1. Asegúrate de que la cámara esté apagada.
2. Abre el compartimento de la pila deslizando la tapa hacia fuera.
3. Ten en cuenta la polaridad de las pilas (símbolos +/-) indicada en el compartimento.
4. Coloca 2 pilas AAA nuevas. Vuelve a colocar la tapa del compartimento y deslízala hasta que encaje en su posición.
Advertencia: En caso de que la unidad funcionase mal o recibiese una descarga
electrostática, retira la pila y vuelve a colocarla. Nota importante: al sustituir las
pilas se borrarán todos los archivos almacenados. Asegúrate de transferirlos a tu
PC antes de cambiar las pilas.
INSTALACIÓN DEL CONTROLADOR DE LA CÁMARA Y DEL SOFTWARE
Para instalar el controlador de la cámara y el software de aplicación, sigue estas
instrucciones.
1. Introduce el CD con el software (incluido) en la unidad de CD-ROM del ordenador. El CD se ejecutará automáticamente y se mostrará en la pantalla el siguiente
menú de instalación:
DJ010series IM.indd 13
13
13/02/2007 18:41:39
ESPAÑOL
Pulsa con el ratón en “Install driver” y sigue luego las instrucciones para instalarlo.
Necesitarás reiniciar tu ordenador después de instalar el controlador.
Nota: Si el CD no se ejecuta automáticamente, selecciona Inicio Ejecutar e
introduce “D:\setup.exe” en el campo de texto del diálogo (sustituye “D:\” por la
unidad de CD-ROM de tu ordenador).
2. Sigue el mismo procedimiento para instalar los programas PhotoImpression y
Funhouse. Los programas PhotoImpression y Funhouse ofrecen muchas aplicaciones para editar e imprimir fotografías.
Notas: - Debes instalar el controlador de la cámara antes de intentar transferir
fotografías entre la cámara y el ordenador.
- Puedes pulsar con el ratón en “Browse CD” – “User guide” para leer los manuales
de los programas PhotoImpression y Funhouse. Si no puedes abrir los archivos,
necesitarás instalar antes el Acrobat Reader.
APAGADO Y ENCENDIDO DE LA CÁMARA
Pulsa el botón de disparo [6] durante 5 segundos para encender la cámara.
Nota: La cámara se desconecta automáticamente transcurridos 60 segundos de
inactividad.
SELECCIÓN DE LA RESOLUCIÓN DE LAS FOTOGRAFÍAS
Hay 2 modos de resolución:
Alta resolución: fotografías de 1280*960 píxeles. En este modo, la cámara puede
almacenar unas 25 fotografías.
Baja resolución: fotografías de 640*480 píxeles. En este modo, la cámara puede
almacenar unas 100 fotografías.
Pulsa el botón HI/LO/
(alta/baja) [4] para seleccionar HI (alta) o LO (baja)
resolución en la esquina superior izquierda de la pantalla LCD.
PARA TOMAR FOTOGRAFÍAS
Pulsa el botón de disparo [6] para tomar una fotografía. Oirás un pitido después de
que se haya capturado la fotografía. El número de fotografías que caben todavía en
la memoria se te mostrará en la pantalla LCD.
14
DJ010series IM.indd 14
13/02/2007 18:41:39
ESPAÑOL
BORRADO DE ARCHIVOS
Para borrar la última fotografía tomada
Pulsa el botón
[3] para seleccionar el icono inferior de
papelera que se muestra en la pantalla LCD. Pulsa el botón de
disparo [6] antes de que transcurran 5 segundos para borrar la
última fotografía tomada.
Para borrar todos los archivos
Pulsa el botón
[3] dos veces para seleccionar el icono
superior de papelera que se muestra en la pantalla LCD. Pulsa
el botón de disparo [6] antes de que transcurran 5 segundos
para borrar todas las fotografías tomadas.
Nota: si pulsas el botón
por error, simplemente espera 5 segundos y la
operación se cancelará automáticamente.
Toma continúa de fotografías
Este modo te permite tomar una sucesión rápida de tomas que la cámara
almacenará como un pequeño clip de video en formato AVI.
Mantén pulsado el botón HI/LO/
[4] para seleccionar el icono
en la pantalla
LCD. Pulsa el botón de disparo [6] para tomar varias fotografías de manera continúa
y automática.
PARA PASAR TUS FOTOGRAFÍAS AL ORDENADOR
1. Conecta la cámara a tu ordenador utilizando el cable USB que se suministra.
Oirás un pequeño pitido y la pantalla LCD se encenderá cuando la cámara se
conecte con tu PC.
2. Abre el programa PhotoImpression. Pulsa sobre “Get Photo”, en la parte
izquierda de la pantalla de inicio.
3. Pulsa sobre “Camera/scanner”, en la parte inferior de la pantalla, y luego, en
“Select source”, elige “Dual Camera”. Por último, pulsa con el ratón en “acquire”
(icono escáner/cámara).
Nota: para obtener más información sobre PhotoImpression, consulta el manual de
usuario que se incluye en el CD con el software.
DJ010series IM.indd 15
15
13/02/2007 18:41:40
ESPAÑOL
MODO PC CAM
Tu cámara puede utilizarse como webcam cuando la conectas al PC. En “Mi PC”,
pulsa dos veces con el ratón en una nueva unidad que aparecerá, llamada “Dual
Camera”. Ya estás en modo webcam.
Videoconferencia
1. Pon tu cámara digital en modo PC Cam.
2. Ejecuta el programa de videoconferencia Microsoft NetMeeting en tu ordenador.
3. Introduce en la barra de dirección la dirección IP del ordenador con el que te
quieres comunicar.
4. Selecciona las opciones tool/accept/transfer. Cuando el otro usuario haya aceptado tu llamada, podrás mantener una videoconferencia.
Chat MSN
1. Asegúrate de que la cámara digital esté apagada.
2. Mantén pulsado el botón de disparo [6]. Enchufa el conector USB en el puerto
USB de tu PC.
3. Accede a tu cuenta de MSN.
4. Conecta la cámara digital a tu ordenador utilizando el cable USB.
5. En el interfaz MSN, selecciona Action/Start para comenzar una conversación.
6. Selecciona la persona con la que quieras conectar y pulsa OK.
CARÁTULAS INTERCAMBIABLES
Tu cámara digital se suministra con 2 carátulas intercambiables. Para retirar una
carátula utiliza un instrumento afilado para desencajarla de cada esquina de la
cámara. Encaja la nueva carátula.
16
DJ010series IM.indd 16
13/02/2007 18:41:40
ador.
e
acep-
erto
Este producto está cubierto por nuestra garantía de dos años. Para hacer uso de
esta garantía o del servicio post-venta, debe de dirigirse al lugar de compra provisto
con la prueba de haber realizado la misma. Nuestra garantía cubre los vicios de
material o del montaje imputable al fabricante con la exclusión de cualquier deterioro proveniente del no respeto del modo de uso o de la intervención inadecuada
sobre el artículo (tales como desmontaje, exposición al calor o a la humedad…).
Se recomienda conservar el embalaje para cualquier referencia futura. Guarde
este manual de instrucciones en un lugar seguro, ya que contiene información
importante. El contenido de este manual está sujeto a cambios sin previo aviso. No
podrá reproducirse ninguna parte de este manual, en ninguna forma, sin la previa
autorización por escrito del fabricante.
Lexibook Ibérica S.L, C/ de las Hileras 4, 4° dpcho 14, 28013 Madrid, España
ESPAÑOL
PC”,
ual
GARANTÍA
Servicio consumidores: 91 548 89 32. http://www.lexibook.com
ón.
una
a
Advertencia para la protección del medio ambiente
¡Los aparatos eléctricos desechados son reciclables y no deben ser eliminados en la basura doméstica! Por ello pedimos que
nos ayude a contribuir activamente en el ahorro de recursos y en la protección del medio ambiente entregando este aparato en
los centros de colección (si existen).
DJ010series IM.indd 17
17
13/02/2007 18:41:40
PORTUGUÊS
CONHECER A SUA CÂMARA
Por favor, consulte as imagens A e B que se encontram na parte traseira da
capa.
1. Tampa da saída USB 2. Ecrã LCD 3. Botão de apagar
4. Botão HI/LO/
5. Fixador da alça 6. Obturador 7. Visor 8. Orifício da ilharga
9. Compartimento das pilhas
INSERIR PILHAS NOVAS
Por favor, consulte a imagem C, que se encontra na parte traseira da capa.
1. Certifique-se de que a câmara está desligada.
2. Abra a tampa do compartimento das pilhas, fazendo-a deslizar para fora.
3. Tenha em conta a polaridade das pilhas (sinais +/-) no interior do compartimento.
4. Coloque 2 pilhas AAA novas. Volte a colocar a tampa, fazendo-a deslizar para o
devido lugar.
Aviso: Se a unidade funcionar mal ou se receber um choque electrostático, retire
as pilhas e volte a colocá-las. Nota importante: Perderá todos os ficheiros quando
substituir as pilhas. Certifique-se de que transfere os ficheiros para o seu PC antes
de mudar de pilhas.
INSTALAÇÃO DO CONTROLADOR DA CÂMARA E DO SOFTWARE
Siga estas instruções para instalar o controlador da câmara e o software no sistema
do seu PC.
1. Insira o CD do software (incluído) na sua unidade de CD-ROM. O CD entra
automaticamente no menu de instalação apresentado a seguir:
18
DJ010series IM.indd 18
13/02/2007 18:41:40
PORTUGUÊS
Clique em “Install driver”, e siga as instruções para o instalar. Precisa de reiniciar o
seu computador após instalar o controlador.
Nota: Se o CD não entrar automaticamente no menu de instalação, clique em
Iniciar Executar, escreva “D:\setup.exe” na caixa de texto de Executar (em que
D:\ é a sua unidade de CD-ROM).
2. Proceda do mesmo modo para instalar o software PhotoImpression e o Funhouse. O software PhotoImpression e o Funhouse oferecem muitas aplicações para
a edição e impressão de fotos.
Notas: - Tem de instalar o controlador antes de descarregar as imagens da câmara
para o computador.
- Pode clicar em “Browse CD” para ler os ficheiros de informação do software PhotoImpression e Funhouse. Se não conseguir ler os ficheiros, tem de instalar primeiro
o Acrobat Reader.
LIGAR E DESLIGAR A CÂMARA
Prima o obturador [6] durante 5 segundos para ligar a câmara.
Nota: A câmara desliga-se automaticamente após 60 segundos de inactividade.
ESCOLHER A RESOLUÇÃO DAS FOTOS
Existem dois modos de resolução:
Alta resolução: imagens de 1280*960 pixels. A câmara pode guardar cerca de 25
imagens neste modo.
Baixa resolução: imagens de 640*480 pixels. A câmara pode guardar cerca de 100
imagens neste modo.
Prima o botão HI/LO/
[4] para escolher HI (alta) ou LO (baixa) resolução no
canto superior esquerdo do ecrã LCD.
TIRAR FOTOGRAFIAS
Prima o obturador [6] para tirar uma fotografia. Irá ouvir um “beep” após tirar cada
fotografia. O número de imagens que ainda pode guardar na memória é apresentado no ecrã LCD.
DJ010series IM.indd 19
19
13/02/2007 18:41:41
PORTUGUÊS
APAGAR FICHEIROS
Apagar a última fotografia tirada
Prima o botão
[3] para escolher o ícone inferior do
caixote do lixo, conforme apresentado no ecrã LCD. Prima o
obturador [6] no espaço de 5 segundos para apagar a última
foto tirada.
Apagar todos os ficheiros
Prima o botão
[3] duas vezes para escolher o ícone
superior do caixote do lixo, conforme apresentado no ecrã LCD. Prima o obturador
[6] no espaço de 5 segundos para apagar todas as fotos guardadas na câmara.
Nota: Se premir o botão
por engano, basta esperar 5 segundos para
cancelar esta operação.
Tirar fotos continuamente
Este modo permite-lhe tirar fotografias em sucessão, que a câmara guarda como
pequenos vídeos no formato AVI.
Prima e mantenha premido o botão HI/LO/
[4] para escolher o ícone
no ecrã
LCD. Mantenha o obturador [6] premido para tirar várias fotos contínua e
automaticamente.
DESCARREGAR AS SUAS FOTOS
1. Ligue a câmara ao seu computador através do cabo USB fornecido. Irá ouvir um
pequeno “beep” e o ecrã LCD liga-se quando a câmara for ligada ao seu PC.
2. Ligue o software PhotoImpression. Do lado esquerdo do ecrã inicial, clique em
“Get photo”.
3. Na parte inferior do ecrã, clique em “Camera/scanner”, depois em “Select
source”, escolha “Dual Camera”. Finalmente, clique em “acquire” (ícone de digitalizar/câmara).
Nota: para mais informações acerca do PhotoImpression, queira consultar o manual
do utilizador existente no CD do software.
20
DJ010series IM.indd 20
13/02/2007 18:41:41
PORTUGUÊS
MODO WEBCAM
Ligada ao seu PC, a sua câmara pode ser usada como webcam. Em “Meu
Computador”, clique duas vezes numa nova unidade de disco chamada “Dual
Camera”. Entrará no modo webcam.
Videoconferência
1. Coloque a sua câmara de vídeo digital no modo de webcam para PC.
2. Execute o software de conferência de vídeo Microsoft NetMeeting no seu
computador.
3. Insira o endereço de IP do computador a que deseja ligar na barra de endereços.
4. Escolha ferramentas / aceitar / opções de transferência. Quando as outras
pessoas aceitarem a sua chamada, pode fazer uma videoconferência.
Conversar no Messenger
1. Certifique-se de que a sua câmara de vídeo digital está desligada.
2. Prima e mantenha premido o botão da energia/obturador [7]. Ligue a ficha USB à
porta USB do seu PC.
3. Entre no Messenger.
4. Ligue a sua câmara de vídeo digital ao seu computador com o cabo USB.
5. No Messenger, escolha Acções/Iniciar uma chamada de vídeo.
6. Escolha a pessoa com quem deseja conversar e prima OK.
CAPAS SUBSTITUÍVEIS
A sua câmara digital vem com 2 capas substituíveis. Para retirar uma e inserir a
outra, utilize um acessório afiado para retirar a patilha em cada canto da câmara.
Coloque a capa nova.
DJ010series IM.indd 21
21
13/02/2007 18:41:41
PORTUGUÊS
GARANTIA
Este produto está coberto pela nossa garantia de dois anos. Para qualquer
reclamação de garantia ou serviço após venda, é favor contactar o seu fornecedor
local com a sua prova de compra. A nossa garantia cobre todos os defeitos de
fabrico ou de montagem imputáveis ao fabricante mas não cobre a deterioração
pelo não respeito do Manual de Instruções ou mau manuseamento do produto
(tal como exposição ao calor ou humidade ou desmantelamento do produto).
Recomenda-se que guarde a caixa para uma futura referência. Guarde este manual
de instruções num local seguro, pois contém informações importantes. O conteúdo
deste manual está sujeito a alterações sem aviso. Nenhuma parte deste manual
pode ser reproduzida de nenhuma maneira sem o consentimento expresso por
escrito do fabricante.
LEXIBOOK Electronica Lda, Quinta dos Loios, Praceta José Domingos dos Santos,
6B-8ª, 2835-343 Lavradio-Barreiro, Portugal Apoio Técnico: 212 06 1 348,
http://www.lexibook.com
Indicações para a protecção do meio ambiente
Aparelhos eléctricos antigos são materiais que não pertencem ao lixo doméstico! Por isso pedimos para que nos apoie,
contribuindo activamente na poupança de recursos e na protecção do ambiente ao entregar este aparelho nos pontos de
recolha, caso existam.
22
DJ010series IM.indd 22
13/02/2007 18:41:41
ITALIANO
PANORAMICA DELLA MACCHINA FOTOGRAFICA
Fare riferimento alle immagini A e B poste sul retro della copertina.
1. Copertura presa USB 2. Display LCD 3.
tasto cancella (delete)
4. Tasto HI/LO/
5. Inserimento cordoncino 6. Tasto otturatore
7. Mirino 8. Foro 9. Scomparto batterie
INSERIMENTO BATTERIE NUOVE
Fare riferimento alla figura C posta sul retro della copertina.
1. Assicurarsi che la macchina fotografica sia spenta.
2. Aprire lo scomparto batterie facendo scorrere via il coperchio.
3. Prestare attenzione alle polarità delle batterie (segni +/-) indicate all’interno dello
scomparto batterie.
4. Inserire 2 batterie AAA nuove. Riposizionare e chiudere il coperchio dello
scomparto batterie facendolo scorrere.
Avvertenza: in caso di malfunzionamento dell’apparecchio o se questo dovesse
ricevere uno shock elettrostatico, rimuovere la batteria e inserirla nuovamente. Nota
importante: al momento di sostituire le batterie, tutti i file andranno persi. Prima di
sostituire le batterie, trasferire i file sul computer.
INSTALLAZIONE DEI DRIVE E DEL SOFTWARE DELLA MACCHINA FOTOGRAFICA
Seguire le presenti istruzioni per installare i driver e il software della macchina
fotografica nel sistema operativo del computer.
1. Inserire il CD del Software (in dotazione) nel lettore CD-ROM. Il CD verrà lanciato
automaticamente e apparirà il seguente menu d’installazione:
DJ010series IM.indd 23
23
13/02/2007 18:41:41
ITALIANO
Cliccare su “Install driver”, quindi seguire le istruzioni per l’installazione. Una volta
terminata l’installazione dei driver, sarà necessario riavviare il computer.
Nota: se il CD non viene lanciato automaticamente, cliccare su Start Esegui, e
digitare “D:\setup.exe” nella finestra di dialogo (laddove D:\ sia il vostro drive
CD-ROM).
2. Procedere allo stesso modo per installare il software di PhotoImpression e Funhouse. I software PhotoImpression e Funhouse offrono numerose applicazioni per il
fotoritocco e la stampa.
Note:
- Bisogna installare i driver prima di scaricare fotografie dalla macchina fotografica.
- Cliccare su “Browse CD” – “User guide” per leggere le guide all’uso dei software
PhotoImpression e Funhouse. Se non vi è possibile leggere i file, è necessario
installare Acrobat Reader.
ACCENSIONE E SPEGNIMENTO DELLA MACCHINA FOTOGRAFICA
Premere il tasto Shutter [6] per 5 secondi per accendere la macchina fotografica.
Nota: la macchina fotografica si spegnerà automaticamente dopo 60 secondi di
inattività.
IMPOSTAZIONE DELLA RISOLUZIONE DELLE FOTO
Vi sono due possibili modalità di risoluzione:
Alta risoluzione: foto di 1280*960 pixel. In questa modalità, la macchina fotografica
può memorizzare circa 25 fotografie.
Bassa risoluzione: foto di 640*480 pixel. In questa modalità, la macchina fotografica
può memorizzare circa 100 fotografie.
Premere il tasto HI/LO/ [4] per selezionare una risoluzione HI (alta) o LO (bassa)
nell’angolo superiore sinistro dello schermo LCD.
SCATTARE FOTOGRAFIE
Per scattare una fotografia, premere il tasto Shutter [6]. Dopo ogni scatto si sente
un “bip”. Sullo schermo LCD appare il numero di fotografie che è ancora possibile
memorizzare.
24
DJ010series IM.indd 24
13/02/2007 18:41:42
ITALIANO
CANCELLAZIONE DEI FILE
Cancellazione dell’ultima fotografia scattata
Premere il tasto
[3] per selezionare l’icona del cestino
posta nella parte inferiore dello schermo LCD. Premere il tasto
Shutter [6] per 5 secondi per cancellare l’ultima fotografia
scattata.
Cancellazione di tutti i file
Premere due volte il tasto
[3] per selezionare l’icona
del cestino che appare sulla parte superiore dello schermo LCD.
Premere il tasto Shutter [6] per 5 secondi per cancellare tutte le
fotografie memorizzate nella macchina fotografica.
Nota: se si preme il tasto
per errore, attendere 5 secondi per annullare
questa operazione.
Sequenza fotografica
Questa modalità permette di scattare una rapida sequenza di immagini che la
macchina fotografica salverà sotto forma di brevi videoclip in formato AVI.
Tenere premuto il tasto HI/LO/
[4] per selezionare l’icona
sullo schermo
LCD. Tenere premuto il tasto Shutter [6] per scattare numerose foto in maniera
continua e automatica.
SCARICARE LE FOTO
1. Collegare la macchina fotografica al computer servendosi del cavo USB in
dotazione. Quando la macchina fotografica è collegata al computer, si sente un
suono e lo schermo LCD si accende.
2. Lanciare il software PhotoImpression. Nella schermata di apertura, a sinistra,
cliccare su “Get photo” (seleziona foto).
3. Cliccare su “Camera/scanner”, nella parte inferiore dello schermo, quindi in
“Select source” (seleziona sorgente) selezionare “Dual Camera”. Infine, cliccare
su “acquire” (icona scan/macchina fotografica). Nota: per maggiori informazioni su
PhotoImpression, fare riferimento alla guida per l’uso inclusa nel CD del software.
DJ010series IM.indd 25
25
13/02/2007 18:41:42
ITALIANO
MODALITÀ PC CAM
Collegata al PC, la macchina fotografica può essere utilizzata come una webcam. In
“Risorse del Computer”, fare doppio clic su un nuovo drive chiamato “Dual Camera”.
Ci si troverà in modalità webcam.
Video Conferenza
1. Impostare la videocamera digitale in modalità PC Cam.
2. Lanciare il software per video conferenze Microsoft NetMeeting sul computer.
3. Digitare l’indirizzo IP del computer che si desidera chiamare nella barra degli
indirizzi.
4. Selezionare le opzioni tool/accept/transfer (strumenti/accetta/trasferisci). Quando
gli altri hanno accettato la chiamata, si può iniziare una video conferenza.
Chat MSN
1. Assicurarsi che la videocamera digitale sia spenta.
2. Tenere premuto il tasto Power/Shutter [7]. Inserire la spina USB nella porta USB
del PC.
3. Entrare in MSN.
4. Collegare la videocamera digitale al computer servendosi del cavo USB.
5. Nell’interfaccia di MSN, selezionare Azioni/Video/Avvia una videochiamata
6. Selezionare la persona con cui si desidera parlare e cliccare su OK.
COVER INTERCAMBIABILI
La macchina fotografica digitale presenta 2 cover in dotazione. Per togliere e
inserire una cover, servirsi di uno strumento appuntito per staccare la cover stessa
da ciascun angolo della macchina fotografica. Inserire una nuova cover.
26
DJ010series IM.indd 26
13/02/2007 18:41:42
Questo prodotto è coperto dalla nostra garanzia di due anni. Per usufruire della
garanzia o del servizio post-vendita, rivolgersi al rivenditore muniti della relativa
prova d’acquisto. La garanzia copre i difetti del materiale o del montaggio imputabili
al costruttore, a esclusione dei danni dovuti all’inosservanza del manuale d’uso
o a ogni intervento improprio sul prodotto (smontaggio, esposizione al calore o
all’umidità…). NOTA: conservare il presente libretto d’istruzioni in quanto contiene
informazioni importanti. Si raccomanda di conservare la confezione per qualsiasi
riferimento futuro. I contenuti di questo manuale sono soggetti a cambiamenti
senza obbligo di preavviso. È proibita la riproduzione completa o parziale e con
ogni mezzo di questo manuale, senza l’espresso consenso scritto del produttore.
Lexibook Italia S.r.l, Via Eustachi, 45, 20129 Milano, Italia
Servizio consumatori : 022040 4959 (Prezzo di una chiamata locale).
http://www.lexibook.com
ITALIANO
GARANZIA
Avvertenze per la tutela dell’ambiente
Gli apparecchi elettrici vecchi sono materiali pregiati, non rientrano nei normali rifiuti domestici! Preghiamo quindi i gentili
clienti di contribuire alla salvaguardia dell’ambiente e delle risorse e di consegnare il presente apparecchio ai centri di raccolta
competenti, qualora siano presenti sul territorio.
DJ010series IM.indd 27
27
13/02/2007 18:41:42
DEUTSCH
ERSTE SCHRITTE MIT DER KAMERA
Siehe Abbildungen A & B auf der Rückseite des Deckblatts.
1. USB Abdeckung 2. LCD-Anzeige 3.
Taste Löschen 4. Taste
HI/LO
5. Gurtbefestigung 6. Blendentaste 7. Sucher 8. Öffnung Halter 9. Batteriefach
NEUE BATTERIEN EINSETZEN
Siehe Abbildung C auf der Rückseite des Deckblatts.
1. Die Kamera muss ausgeschaltet sein.
2. Die Batteriefachabdeckung durch Aufschieben öffnen.
3. Bitte die Polaritätsmarkierungen (+/-) im Batteriefach beachten.
4. 2 neue AAA-Batterien einlegen. Batteriefachabdeckung wieder einsetzen und
durch Einschieben schließen.
Warnung: Bei Fehlfunktion oder statischer Aufladung bitte die Batterie
herausnehmen und erneut einlegen. Wichtiger Hinweis: Wenn die Batterien
ausgetauscht werden, werden alle Dateien gelöscht. Überspiele die Dateien auf
deinen PC, bevor die Batterien ausgetauscht werden.
KAMERTREIBER UND SOFTWARE-INSTALLATION
Befolge diese Anleitungen, um den Kameratreiber und die Programm-Software auf
deinem PC zu installieren.
1. Lege die Software-CD (beiliegend) in das CD-ROM-Laufwerk ein. Die CD startet
automatisch und das Installationsmenü wird eingeblendet.
28
DJ010series IM.indd 28
13/02/2007 18:41:43
DEUTSCH
Klicke auf “Install driver” und befolge die Installationsanweisungen: Nach der
Treiberinstallation muss der Computer neu gestartet werden.
Hinweis: Sollte die CD nicht automatisch starten, klickst du auf Start Ausführen
und gibst im Dialogfeld “D:\setup.exe” ein (wobei D:\ dein CD-ROM-Laufwerk ist).
2. Installiere dann die PhotoImpression- und Funhouse-Software. Die
PhotoImpression- und Funhouse-Software bieten viele Anwendungen für die
Bildbearbeitung und den Ausdruck.
Hinweise: - Die Treiber müssen installiert werden, bevor Bilder von der Kamera
herunter geladen werden können.
- Klicke “Browse CD” – “User guide” an, um die Bedienungsanleitungen der
PhotoImpression- und Funhouse-Software zu lesen. Sollest du die Dateien nicht
lesen können, musst du zuerst Acrobat Reader installieren.
SO SCHALTEST DU KAMERA EIN UND AUS
Halte die Blendentaste [6] 5 Sekunden gedrückt, um die Kamera EINZUSCHALTEN.
Hinweis: Die Kamera schaltet sich automatisch ab, wenn sie innerhalb von 60
Sekunden nicht bedient wird.
SO WÄHLST DU DIE BILDAUFLÖSUNG AUS
Es gibt 2 Bildauflösungen:
Hohe Auflösung: Bilder mit 1280 x 960 Pixel. In dieser Betriebsart können ca. 25
Bilder in der Kamera gespeichert werden.
Niedrige Auflösung: Bilder mit 640 x 480 Pixel. In dieser Betriebsart können ca. 100
Bilder in der Kamera gespeichert werden.
Halten die Taste HI/LO/
[4] gedrückt, um HI (hoch) oder LO (niedrige) Auflösung entsprechend der Einblendung in der linken oberen Ecke der LCD-Anzeige
auszuwählen.
SO MACHST DU FOTOS
Drücke die Blendentaste [6], um ein Foto zu machen. Nach jeder Aufnahme horst du
akustisches Signal. Die Anzahl der Bilder, die du noch speichern kannst, wird an der
LCD-Anzeige eingeblendet.
DJ010series IM.indd 29
29
13/02/2007 18:41:43
DEUTSCH
SO LÖSCHST DU DATEIEN
So löschst du die letzte Aufnahme
Halten die Taste
[3] gedrückt, um das untere Lösch-Symbol an der LCDAnzeige auszuwählen. Halte die Blendentaste [6] 5 Sekunden gedrückt, um das
zuletzt aufgenommene Foto zu löschen.
So löschst du alle Dateien
Halten die Taste
[3] gedrückt, um das obere Lösch-Symbol an der LCDAnzeige auszuwählen. Halte die Blendentaste [6] 5 Sekunden gedrückt, um all
aufgenommenen Fotos zu löschen.
Hinweis: Wenn du die Taste
unabsichtlich gedrückt hast, wartest du 5
Sekunden; auf diese Weise wird der Vorgang rückgängig gemacht.
Fortlaufende Bildaufnahmen
In dieser Betriebsart kannst du in schneller Folge Fotos machen, die die Kamera als
kurzen Videoclip im AVI-Format wiedergibt.
Halte die Taste HI/LO/
[4] gedrückt, um das Symbol
an der LCD-Anzeige
auszuwählen. Halte die Blendentaste [6] gedrückt, um nacheinander und automatisch mehrere Fotos aufzunehmen.
SO LÄDST DU DEINE FOTOS HERUNTER
1. Verbinde deine Kamera mit dem beiliegenden USB-Kabel mit dem Computer. Du
hörst ein kurzes akustisches Signal und der LCD-Bildschirm schaltet sich ein, wenn
die Kamera mit dem Computer verbunden wird.
2. Öffne die PhotoImpression-Software. Klicke auf der linken Seite der Anzeige auf
“Fotografieren” (Get Photo).
3. Unten an der Anzeige klickst du auf “Kamera/Scanner” und unter “Quelle auswählen” (Select source) auf “Dual Camera”. Klicke dann auf übernehmen (Scan/Kamera-Symbol).
Hinweis: Weitere Informationen zu PhotoImpression entnimmst du bitte der Bedienungsanleitung auf der Software-CD.
30
DJ010series IM.indd 30
13/02/2007 18:41:43
DEUTSCH
PC CAM MODUS
Verbinde die Kamera mit deinem PC und benutze Sie als Webcam. Klicke unter
“Arbeitsplatz” zweimal auf das neue Laufwerk “Dual Camera ”. Nun befindest du
dich im Webcam-Modus.
Videokonferenz
1. Schalte deine Digital-Videokamera in den PC Cam-Modus.
2. Starte die Videokonferenz-Software Microsoft NetMeeting auf deinem Computer.
3. Gib die IP-Adresse des Computers, den du anwählen möchtest, in das Adressfeld
ein.
4. Wähle Werkzeug/annehmen/übertragen aus. Wenn die anderen Teilnehmer
deinen Anruf angenommen haben, kannst du eine Videokonferenz abhalten.
MSN-Chat
1. Schalte die Digital-Videokamera AUS.
2. Halte die Netz-/Blendentaste [7] gedrückt. Verbinde das USB-Kabel mit dem
USB-Anschluss an deinem PC.
3. Melde dich bei MSN an.
4. Verbinde deine Digitalkamera mit dem USB-Kabel mit dem Computer.
5. Wähle an der MSN-Schnittstelle Aktion/Start aus, um das Videogespräch zu
beginnen.
6. Wähle die Person aus, mit der du chatten möchtest und klicke auf OK.
ABNEHMBARE GEHÄUSE
Deine Digitalkamera ist mit 2 Wechselgehäusen ausgestattet. Entferne das
Gehäuse, indem du einen spitzen Gegenstand an den Ecken des Kameragehäuses
einführst und das Gehäuse abnimmst. Lass das neue Gehäuse einrasten.
DJ010series IM.indd 31
31
13/02/2007 18:41:43
DEUTSCH
GARANTIE
Die Garantiezeit für dieses Gerät beläuft sich auf 2 Jahre. Um die Garantie oder den
Kundendienst in Anspruch zu nehmen, setzen Sie sich bitte mit Ihrem Händler oder
Lieferanten in Verbindung oder senden Sie das Gerät an die unten
angegebene Adresse ein. Fügen Sie Ihren Kaufbeleg bei. Unsere Garantie bezieht
sich auf Material- und Verarbeitungsfehler des Herstellers, nicht jedoch auf
Verschleiß, Nichteinhaltung der Anleitungen, unautorisierte Arbeiten am Gerät und
dessen Bestandteilen (Demontage, Hitze, Dampf usw.). Hinweis: Wir empfehlen,
dass Sie die Originalverpackung für spätere Zwecke aufbewahren. Bewahren Sie
diese Bedienungsanleitung an einem sicheren Ort auf, da sie wichtige Informationen
enthält. Haftungsausschluss Wir verbessern unsere Produkte, deren Farben und
Produktdetails ständig, daher kann Ihr Produkt leicht von der Abbildung auf der
Verpackung abweichen. http://www.lexibook.com
Hinweise zum Umweltschutz
Elektronische Geräte können aufbereitet werden und dürfen nicht im Haushaltsmüll entsorgt werden. Bitte unterstützen Sie
die Wiederaufbereitung und schützen Sie die Umwelt, indem Sie Altgeräte entsprechend der Umweltschutzbestimmungen
entsorgen bzw. abgeben.
32
DJ010series IM.indd 32
13/02/2007 18:41:43
NEDERLANDS
JOUW FOTOTOESTEL LEREN KENNEN
Gelieve te verwijzen naar de afbeeldingen A & B op de keerzijde van de
voorpagina.
1. Deksel voor USBcontact 2. LCD-scherm 3.
uitwistoets 4. HI/LO/
toets 5. Riembevestiging 6. Ontspannerknop 7. Zoekvenster 8. Steunopening
9. Batterijvak
NIEUWE BATTERIJEN INSTEKEN
Gelieve te verwijzen naar afbeelding C op de keerzijde van de voorpagina.
1. Zorg ervoor dat je fototoestel uit staat.
2. Open het batterijvak door het deksel weg te schuiven.
3. Noteer de polariteit van de batterijen (+/- symbolen) binnenin het batterijvak.
4. Steek 2 nieuwe AAA batterijen in. Plaats het deksel terug en sluit het batterijvak
door het deksel vast te schuiven.
Waarschuwing: Indien het toestel niet meer werkt of een electrostatische schok
ondergaat, moet je de batterijen uitnemen en opnieuw insteken. Belangrijke
opmerking: alle bestanden zullen uitgewist worden bij het vervangen van de
batterijen. Zorg ervoor dat je eerst alle bestanden naar jouw PC overbrengt alvorens
de batterijen te vervangen.
INSTALLEREN VAN DE DRIVER EN SOFTWARE VOOR HET FOTOTOESTEL
Volg deze instructies om de driver en de software voor het fototoestel op jouw
PC-systeem te installeren.
1. Steek de CD software (bijgeleverd) in jouw CD-ROM drive. De CD zal automatisch opstarten en het onderstaande installatiemenu zal op het scherm verschijnen:
DJ010series IM.indd 33
33
13/02/2007 18:41:44
NEDERLANDS
Klik op “Install driver” en volg nadien de instructies om het te installeren. Je zal jouw
computer moeten rebooten na de installatie van de driver.
Opmerking: Indien de CD niet automatisch start, klik je op Start Run, typ “D:\
setup.exe” in het tekstdialoogvenster Run (waar D:\ jouw CD-ROM drive is).
2. Ga op dezelfde manier tewerk voor het installeren van de PhotoImpression en
Funhouse software. PhotoImpression en Funhouse software bieden verschillende
toepassingen aan voor het editten en afdrukken van foto’s.
Opmerkingen: - Je moet eerst de driver installeren alvorens je foto’s van het
fototoestel downloadt.
- Je kan op “Browse CD” – “User guide” drukken om de gebruikershandleidingen
voor PhotoImpression en Funhouse software te lezen. Indien je deze dossiers niet
kan lezen, moet je eerst Acrobat Reader installeren.
HET FOTOTOESTEL AAN- EN UITZETTEN
Druk gedurende 5 seconden op de ontspannerknop [6] om het fototoestel AAN te
zetten.
Opmerking: Het fototoestel zal na 60 seconden inactiviteit automatisch uitschakelen.
DE FOTORESOLUTIE SELECTEREN
Er zijn 2 resolutiemodes:
Hoge resolutie: foto’s met 1280*960 pixels. Het fototoestel kan ongeveer 25 foto’s in
deze modus bewaren.
Lage resolutie: foto’s met 640*480 pixels. Het fototoestel kan ongeveer 100 foto’s in
deze modus bewaren.
Druk op de HI/LO/
toets [4] om HI (hoge) of LO (lage) resolutie te selecteren in
de linkerhoek bovenaan van het LCD-scherm.
FOTO’S NEMEN
Druk op de ontspannerknop [6] om een foto te nemen. Je zal een “bieptoon” horen
na het nemen van een foto. Het aantal foto’s die je nog kan nemen in het geheugen,
zal op het LCD-scherm worden weergegeven.
34
DJ010series IM.indd 34
13/02/2007 18:41:44
NEDERLANDS
UITWISSEN VAN BESTANDEN
Uitwissen van de laatst genomen foto
Druk op de
toets [3] om het symbool voor de onderste
prullenmand te kiezen zoals afgebeeld op het LCD-scherm.
Druk binnen de 5 seconden op de ontspannerknop [6] om de
laatst genomen foto uit te wissen.
Uitwissen van alle bestanden
Druk tweemaal op de
toets [3] om het symbool voor de
bovenste prullenmand te kiezen zoals afgebeeld op het LCDscherm. Druk binnen de 5 seconden op de ontspannerknop [6]
om alle foto’s die in het fototoestel werden opgeslagen, uit te wissen.
Opmerking: indien je per toeval op de
toets drukt, moet je gewoon 5 seconden wachten om deze functie te annuleren.
Continu foto’s nemen
Deze modus geeft je de mogelijkheid om achtereenvolgens snelle kiekjes te maken
met het fototoestel, die zullen worden bewaard als korte videoclips in AVI-formaat.
Hou de HI/LO/
toets [4] ingedrukt om het
symbool op het LCD-scherm
te selecteren. Hou de ontspannerknop [6] ingedrukt om continu en automatisch
verschillende foto’s te nemen.
JOUW FOTO’S DOWNLOADEN
1. Verbind het fototoestel met jouw computer via de bijgeleverde USB-kabel. Je zal
een korte bieptoon horen en het LCD-scherm zal branden van zodra het fototoestel
met jouw PC is verbonden.
2. Open de PhotoImpression software. Aan de linkerzijde van het openingsscherm,
klik je op “Foto opvragen”.
3. Onderaan het scherm, klik je op “Fototoestel/scanner”, nadien selecteer je in
“Selecteer bron” “Dual Camera”. Ten laatste, klik je op “verkrijgen” (scan/fototoestel
symbool).
Opmerking: voor meer informatie omtrent PhotoImpression, gelieve te verwijzen
naar de gebruikershandleiding die bij deze software CD werd bijgeleverd.
DJ010series IM.indd 35
35
13/02/2007 18:41:44
NEDERLANDS
PC CAM MODUS
Wanneer jouw fototoestel verbonden is met jouw PC, kan het gebruikt worden als
webcam. In “Mijn Computer”, klik je tweemaal op een nieuwe drive, “Dual Camera”
genoemd. Je bevindt je nu in de webcam modus.
Videoconferentie
1. Stel jouw digitale videocamera in de PC Cam modus.
2. Laat de videoconferentie software Microsoft NetMeeting op jouw computer
werken.
3. Voer het IP-adres van de computer die je wil opbellen, in de adressenbalk in.
4. Selecteer tool/aaanvaarden/transfer opties. Wanneer de andere partijen jouw
oproep hebben aanvaard, kan je nu een videoconferentie houden.
MSN Chat
1. Zorg ervoor dat jouw digitale videocamera UIT staat.
2. Hou de Stroom/Ontspanner-knop [7] ingedrukt. Steek de USBstekker in de
USB-poort van jouw PC.
3. Log in MSN.
4. Verbind de digitale videocamera met jouw computer via de USB-kabel.
5. Op de MSN interface, selecteer je Actie/Start om een videoconversatie te
beginnen.
6. Kies de persoon waarmee je wil chatten en druk daarna op OK.
ONDERLING VERWISSELBARE VOORPLATEN
Jouw digitaal fototoestel beschikt over 2 onderling verwisselbare voorplaten. Om
een voorplaat te verwijderen en in te steken, gebruik je een scherp voorwerp om
de voorplaat in elke hoek van het fototoestel los te klikken. Druk er nu een nieuwe
voorplaat op.
36
DJ010series IM.indd 36
13/02/2007 18:41:44
Dit product heeft een garantie van 2 jaar. Om de garantie of naverkoopdienst te
gebruiken, gelieve contact op te nemen met je verkoper met een aankoopbewijs of
zend het toestel terug naar ondervermeld adres met een aankoopbewijs. Onze
garantie dekt schade aan materialen of installatie-betreffende schade met
betrekking tot de fabrikant, met uitzondering van slijtage veroorzaakt door het niet
navolgen van de richtlijnen voor het gebruik van dit toestel of door nietgeautoriseerde herstellingen aan het toestel (zoals demontage, blootstelling aan
hitte of vochtigheid, enz.). Opmerking: Het is aangeraden alle
verpakkingsmaterialen te bewaren als referentiemateriaal voor later. Bewaar deze
gebruikshandleiding op een veilige plaats daar het belangrijke informatie bevat.
Omwille van ons voortdurend streven naar verbetering, is het mogelijk dat kleuren
en details van het product lichtjes verschillen van deze die op de verpakking zijn
afgebeeld. http://www.lexibook.com
NEDERLANDS
GARANTIE
Marvel, Spider-Man, and the distinctive likenesses thereof are trademarks of Marvel
Characters, Inc., and are used with permission. Copyright© 2007 Marvel Characters,
Inc. All rights reserved. www.marvel.com
©2007 Mattel, Inc. ©2007 Lexibook®
Milieubescherming
Niet langer bruikbare electrische apparaten kunnen gerecycleerd worden en mogen niet weggegooid worden met het gewone
huisvuil! Gelieve actief de bescherming van bronnen te ondersteunen en deel te nemen in de bescherming van het milieu door
dit toestel terug te zenden naar een verzamelcentrum (indien aanwezig).
DJ010series IM.indd 37
DJ010seriesIM0077
37
13/02/2007 18:41:44