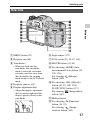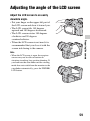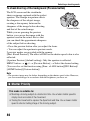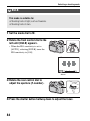
1
4-438-654-12(1)
Interchangeable Lens
Digital Camera
α Handbook
A-mount
SLT-A99/SLT-A99V
©2012 Sony Corporation
Table of contents
Introduction of functions ................................................... 9
Before use
Notes on using your camera ............................................ 12
Checking the supplied items ............................................ 15
Identifying parts ............................................................... 16
Front side .................................................................... 16
Rear side ..................................................................... 17
Top side ...................................................................... 19
Sides ........................................................................... 21
Bottom ........................................................................ 23
Shoe adaptor ............................................................... 24
List of icons on the screen ............................................... 25
List of icons on the LCD screen ................................. 25
List of icons on the display panel ............................... 29
Functions list
Functions that can be operated with the buttons/dial
..................................................................................... 30
How to use the Quick Navi screen ............................. 31
How to use the silent multi-controller ........................ 32
Selecting a function with the Fn (Function) button ......... 34
Functions that can be selected with the Fn (Function) button
..................................................................................... 35
The functions selected with the MENU button ............... 37
Using the In-Camera Guide ............................................. 48
Preparing the camera
Charging the battery pack ................................................ 49
Inserting the battery pack/memory card (sold separately)
..................................................................................... 51
Compatible memory cards ......................................... 54
Attaching a lens ............................................................... 55
Setting the date and time ................................................. 57
Setting up the date/time again .................................... 58
Adjusting the angle of the LCD screen ........................... 59
Shooting a clear image without camera shake ................ 60
Camera shake warning indicator ................................ 60
2
Using the SteadyShot function ................................... 60
Holding the camera properly ...................................... 61
Removing the Eyepiece cup ............................................ 62
Shooting and viewing images
Shooting still images ....................................................... 63
Recording movies ............................................................ 65
Playing back images ........................................................ 66
Switching between still images and movies ............... 66
Deleting images ............................................................... 67
Selecting a shooting mode
Selecting a shooting mode ............................................... 68
Selecting the desired mode by rotating the mode dial
............................................................................ 69
Auto Mode ..................................................... 69
Scene Selection .................................................. 71
Sweep Panorama ................................................ 73
Tele-zoom Cont. Priority AE ........................... 76
Program Auto ......................................................... 77
Aperture Priority ................................................... 78
Shutter Priority ....................................................... 80
Manual Exposure ................................................... 82
BULB .................................................................... 84
Functions available for each shooting mode ................... 86
Switching the recording information display
Switching the recording information display (DISP) ...... 87
Selecting the screen mode .......................................... 87
Histogram ................................................................... 89
Monitoring the subject through the lens without effects
displayed ........................................................... 89
Adjusting the focus
Adjusting the focus .......................................................... 91
Autofocus ................................................................... 91
Focus-lock .................................................................. 94
AF area ....................................................................... 95
Object Tracking .......................................................... 95
Restricting the autofocus range (AF Range Control)
............................................................................ 98
3
Adjusting the focus except for the shutter button (AF On)
.......................................................................... 100
AF illuminator .......................................................... 100
AF Micro Adj. .......................................................... 101
Manual focus ............................................................ 101
Enhancing the outline of in-focus ranges (Peaking)
.......................................................................... 102
Focus Magnifier ....................................................... 103
Direct manual focus (DMF) ..................................... 104
AF/MF control ......................................................... 105
Adjusting the brightness of the image
Exposure compensation ................................................. 106
AE Lock ......................................................................... 108
Metering Mode .............................................................. 109
Using the drive mode
Selecting the drive mode .................................. 110
Shooting single shot ................................................. 110
Cont. Shooting .......................................................... 111
Self-timer .................................................................. 111
Bracket: Cont./Single Bracket .................................. 112
WB bracket ............................................................... 113
DRO Bracket ............................................................ 114
Remote Cdr. ............................................................. 114
Advanced shooting
Using the flash (sold separately) ................................... 115
Wireless flash ........................................................... 116
Slow Sync ................................................................. 117
Using a flash equipped with a flash sync terminal cord
.......................................................................... 118
Flash modes available .................................................... 119
Flash Compensation ...................................................... 120
Flash control .................................................................. 121
FEL lock ........................................................................ 122
Setting ISO .................................................................... 124
Multi frame noise reduction ..................................... 124
Compensating for the brightness and contrast automatically
(D-Range) ................................................................. 126
4
D-RangeOptimizer ................................................... 126
Auto HDR ................................................................ 127
Setting the image processing ......................................... 129
Picture Effect ............................................................ 129
Creative Style ........................................................... 130
Adjusting the color tones (White balance) .................... 133
C.Temp./Filter .......................................................... 134
Custom white balance .............................................. 135
Setting image size .......................................................... 137
Image Size ................................................................ 137
Panorama: Size ......................................................... 137
Setting the aspect ratio and image quality ..................... 139
Aspect Ratio ............................................................. 139
Quality ...................................................................... 139
Detecting faces .............................................................. 141
Face Registration ...................................................... 142
Auto Port. Framing ................................................... 143
Smile Shutter ................................................................. 145
Zooming ........................................................................ 147
Zooming in in one step (Smart teleconverter) .......... 147
Zooming in holding the current resolution of the image
(Clear Image Zoom) ........................................ 147
Reducing the noise in an image ..................................... 150
Long Exposure NR ................................................... 150
High ISO NR ............................................................ 150
Setting the color space ................................................... 151
Movie recording setup
Movie recording setup ................................................... 152
Changing the tracking sensitivity of autofocus during
movie recording .............................................. 153
Recording movies with the shutter speed and aperture
adjusted ........................................................... 153
File Format ............................................................... 155
Record Setting .......................................................... 155
Audio Rec Level ...................................................... 157
Audio Level Display ................................................ 157
Checking the audio using headphones ..................... 158
Audio Output Timing ............................................... 158
5
Audio Recording ...................................................... 159
Advanced playback
Using the playback functions ........................................ 160
Selecting the memory card used to be played back
.......................................................................... 160
Switching between still images and movies (View
Mode) .............................................................. 160
Enlarging images ...................................................... 160
Switching to the display of the image list ................ 161
Rotating an image .................................................... 162
Slide Show ............................................................... 163
Playback Display ...................................................... 164
The screen displayed for playback mode ...................... 165
Switching the screen during playback ...................... 165
List of icons on the histogram display ..................... 165
Protecting images (Protect) ........................................... 167
Specifying printing ........................................................ 168
Specifying DPOF ..................................................... 168
Date Imprint ............................................................. 168
Copying images ............................................................. 169
Deleting images (Delete) ............................................... 170
Delete (Multiple Img.) ............................................. 170
Deleting all images or movies visible in the current view
mode................................................................. 171
Viewing images on a TV screen .................................... 172
HDMI Info. Display ................................................. 173
Using “BRAVIA” Sync ........................................... 174
Setup of the camera
Setting the other functions of the camera ...................... 175
Release w/o Lens ...................................................... 175
Grid Line .................................................................. 175
Auto Review ............................................................. 175
Func. of AEL button ................................................ 176
ISO Button, AF/MF button, Preview Button ........... 176
Custom button .......................................................... 177
Electronic Front Curtain Shutter .............................. 177
LCD Brightness ........................................................ 177
Viewfinder Bright. ................................................... 178
6
Power Save ............................................................... 178
FINDER/LCD Setting .............................................. 179
APS-C Size Capture ................................................. 179
PAL/NTSC Selector (only for the 1080 50i-compatible
device) ............................................................. 180
Lens compensation ........................................................ 181
Lens Comp.: Peripheral Shading .............................. 181
Lens Comp.: Chromatic Aberration ......................... 181
Lens Comp.: Distortion ............................................ 181
Setting the method for recording on a memory card ..... 182
Recording Mode ....................................................... 182
Format ...................................................................... 183
File Number ............................................................. 183
Folder Name ............................................................. 183
Select REC Folder .................................................... 184
New Folder ............................................................... 184
Recover Image DB ................................................... 185
Upload Settings ........................................................ 185
Recording location information using the GPS feature
(SLT-A99V only) ..................................................... 187
GPS Assist Data ....................................................... 188
GPS Auto Time Cor. ................................................ 188
Registering your own settings ....................................... 190
Resetting to the default .................................................. 191
Confirming the software version ................................... 198
Viewing images on a computer
Using the software ......................................................... 199
Using “Image Data Converter” ................................ 199
Using “PlayMemories Home” .................................. 199
Using “Remote Camera Control” ............................. 200
Recommended computer environment (Windows)
.......................................................................... 201
Recommended computer environment (Mac) .......... 201
Installing the software (Windows) ........................... 202
Installing the software (Mac) ................................... 203
Connecting the camera to the computer ........................ 204
Setting the USB connection ..................................... 204
7
Setting the LUN (Logical Unit Number) (USB LUN
Setting) ............................................................ 204
Connecting to the computer ..................................... 205
Importing images to the computer (Windows) ........ 205
Importing images to the computer (Mac) ................. 206
Disconnecting the camera from the computer ......... 207
Creating a movie disc .................................................... 208
Selecting the method for creating a disc of movies
.......................................................................... 208
Creating a high definition image quality (HD) disc
(AVCHD recording disc) ................................ 209
Creating a standard definition image quality (STD) disc
.......................................................................... 210
Discs you can use with “PlayMemories Home” ...... 211
Creating a disc with a device other than a computer
.......................................................................... 211
Troubleshooting/Others
Troubleshooting ............................................................. 212
Warning messages ......................................................... 221
Cleaning the camera and a lens ..................................... 223
Cleaning the image sensor ............................................. 224
Precautions .................................................................... 227
To use your camera abroad — Power sources .............. 230
AVCHD format ............................................................. 231
GPS (SLT-A99V only) .................................................. 232
Memory card ................................................................. 234
Battery pack/Battery charger ......................................... 236
The License ................................................................... 238
Index ........................................................... 239
8
Introduction of functions
This section introduces some frequently-used shooting functions and
characteristic functions.
See the pages in parentheses for details.
Shooting functions used frequently
Exposure compensation (106)
You can compensate the exposure to adjust the brightness of the entire
screen.
Even when the exposure mode is set to M, the exposure can be
compensated if the ISO sensitivity is set to [AUTO].
ISO sensitivity (124)/Multi frame noise reduction (124)
You can set the sensitivity to light.
The ISO sensitivity can be adjusted between ISO 50 and ISO 25600.
When you select
(Multi Frame Noise Reduct.), you can select larger
ISO numbers than the maximum ISO sensitivity.
White balance (133)
You can adjust the color tones.
You can select an option to suit a light source, or perform a fine adjustment
by combining the color temperature with the color filter.
Drive mode (110)
You can use an appropriate drive mode to suit your purposes, such as
single-shot advanced, continuous advanced, bracket, or shooting with a
Wireless Remote Commander.
Original characteristic functions
AF Range Control (98)
You can restrict the autofocus range to prevent unintended subjects from
being focused on.
9
Introduction of functions
DRO/Auto HDR (126)
D-Range Optimizer: By dividing the image into small areas, the camera
analyses the contrast of light and shadow between the subject and the
background, producing the image with the optimal brightness and
gradation.
Auto HDR: Shoots 3 images with different exposures, and then overlays
these images to create an image with rich gradation.
Creative Style (130)
You can select the desired style from among 13 styles.
You can also adjust certain factors of the images, such as the exposure, by
using the selected style as the base.
Hand-held Twilight (72)
You can shoot night scenes with less noise and blur without using a tripod.
Movie recording with manual adjustments (153)
You can adjust the exposure in P, A, S, M mode during movie recording.
How to operate or customize the camera
Screen information (87)
When you look into the viewfinder, the viewfinder mode is activated, and
when you take your face away from the viewfinder, the viewing mode
returns to the LCD screen mode. You can change the screen mode by
pressing the DISP button.
Quick Navi (31)
In viewfinder mode, you can quickly switch the LCD screen to the Quick
Navi screen by pressing the Fn button. You can set the items with an
intuitive operation.
Silent multi-controller (32)
Using the silent multi-controller that is designed to reduce the sound of dial
rotation, you can set certain items silently, such as focus mode, or recording
level.
10
Introduction of functions
Customization (42, 177)
The camera is equipped with a custom button that can be assigned a desired
function.You can also assign functions to other buttons, such as the AEL
button, or the ISO button.
11
Before use
Notes on using your camera
Screen language
You can select the language displayed
on the screen using the menu (page 47).
Shooting procedure
This camera has 2 modes for monitoring
subjects: the LCD screen mode using the
LCD screen, and the viewfinder mode
using the viewfinder.
Notes on the functions available with
the camera
• To check whether it is a 1080 60icompatible device or 1080 50icompatible device, check for the
following marks on the bottom of the
camera.
1080 60i-compatible device:60i
1080 50i-compatible device:50i
• This camera is compatible with 1080 60p
or 50p-format movies. Unlike standard
recording modes up to now, which record
in an interlacing method, this camera
records using a progressive method. This
increases the resolution, and provides a
smoother, more realistic image.
Shooting with a DT lens
This camera is equipped with a 35 mm,
full-frame CMOS sensor, however, the
image size is automatically set to that of the
APS-C size setting, and the image size is
smaller when a DT lens (“DT” is attached
to the product name) is used (page 137).
No compensation for contents of the
recording
The contents of the recording cannot be
compensated for if recording or playback is
not possible due to a malfunction of your
camera or a memory card, etc.
Back up recommendation
To avoid the potential risk of data loss,
always copy (back up) data to other
medium.
12
Notes on the LCD screen, electronic
viewfinder, lens, and image sensor
• The LCD screen and electronic
viewfinder are manufactured using
extremely high-precision technology so
over 99.99% of the pixels are operational
for effective use. However, there may be
some tiny black points and/or bright
points (white, red, blue or green in color)
that constantly appear on the LCD screen
and electronic viewfinder. These points
are normal in the manufacturing process
and do not affect the images in any way.
• Do not hold the camera by the LCD
screen.
• Do not expose the camera to sunlight or
shoot sunward for a long time. The
internal mechanism may be damaged. If
sunlight is focused on a nearby object, it
may cause a fire.
• There is a magnet on the back and around
the rotating shaft of the hinge part of the
LCD screen. Do not bring anything that
is easily affected by a magnet, such as
floppy disks or credit cards, near the
LCD screen.
• Images may trail across on the screen in a
cold location. This is not a malfunction.
When turning on the camera in a cold
location, the screen may become
temporarily dark. When the camera
warms up, the screen will function
normally.
• The recorded image may be different
from the image you monitored before
recording.
Notes on long-time recording
• When you continue to shoot for a long
time, the temperature of the camera rises.
If the temperature reaches above a certain
level, the
icon appears on the screen
and the camera turns itself off
automatically. If the power is turned off,
leave the camera for 10 minutes or longer
to allow the temperature inside the
camera to decrease to a safe level.
• Under high ambient temperatures, the
temperature of the camera rises quickly.
Notes on using your camera
• When the temperature of the camera
rises, the image quality may deteriorate.
It is recommended that you wait until the
temperature of the camera drops before
continuing to shoot.
• The surface of the camera may get warm.
This is not a malfunction.
Notes on importing AVCHD movies to
a computer
Notes when playing movies on other
devices
• This camera uses MPEG-4 AVC/H.264
High Profile for AVCHD format
recording. Movies recorded in AVCHD
format with this camera cannot be played
with the following devices.
– Other devices compatible with
AVCHD format that does not support
High Profile
– Devices incompatible with the
AVCHD format
This camera also uses MPEG-4 AVC/
H.264 Main Profile for MP4 format
recording. For this reason, movies
recorded in MP4 format with this camera
cannot be played on devices other than
those that support MPEG-4 AVC/H.264.
• Discs recorded with HD image quality
(high definition) can be played back only
on AVCHD format-compatible devices.
DVD-based players or recorders cannot
play back HD image quality discs, as
they are incompatible with the AVCHD
format. Also, DVD-based players or
recorders may fail to eject HD image
quality discs.
• 1080 60p/50p movies can be played back
on compatible devices only.
• To determine whether your camera
supports GPS function, check the model
name of your camera.
GPS-compatible: SLT-A99V
GPS-incompatible: SLT-A99
• Use GPS in accordance with regulations
of countries and regions where you use it.
• If you do not record the location
information, set [GPS On/Off] to [Off]
(page 187).
• In an airplane, make sure to turn off the
camera following cabin announcements.
Warning on copyright
Television programs, films, videotapes, and
other materials may be copyrighted.
Unauthorized recording of such materials
may be contrary to the provisions of the
copyright laws.
The pictures used in this manual
The photographs used as examples of
pictures in this manual are reproduced
images, and are not actual images shot
using this camera.
On the data specifications described
in this manual
The data on performance and specifications
is defined under the following conditions,
except as described in this manual: at an
ordinary ambient temperature of 25ºC
(77°F), and using a battery pack that has
been fully charged for about 1 hour after
the CHARGE lamp has turned off.
Notes on shooting with the
viewfinder
This camera is equipped with an XGA
Organic Electro-Luminescence viewfinder
with high resolution and high contrast. This
viewfinder achieves a wide viewing angle
and a long eye relief. This camera is
designed to provide an easily viewable
viewfinder by appropriately balancing
various elements.
• The image may be slightly distorted near
the corners of the viewfinder. This is not
a malfunction. When you want to check
13
Before use
When importing AVCHD movies to a
computer, for Windows computers, use the
“PlayMemories Home” software on the
CD-ROM (supplied).
On GPS-compatible devices (SLTA99V only)
Notes on using your camera
every detail of the entire composition,
you can also use the LCD screen.
• If you pan the camera while looking into
the viewfinder or move your eyes around,
the image in the viewfinder may be
distorted or the color of the image may
change. This is a characteristic of the lens
or display device and is not a
malfunction. When you shoot an image,
we recommend that you look at the
center area of the viewfinder.
14
Before use
Checking the supplied items
Consult your Sony dealer or local authorized Sony service facility if all the
accessories are not supplied.
The number in parentheses indicates the number of pieces.
• Camera (1)
• BC-VM10A Battery charger (1)
* Multiple power cords may be supplied
with your camera. Use the appropriate
one that matches your country/region.
• Rechargeable battery pack NPFM500H (1)
• Body cap (1) (Attached on the
camera)
• Shoe Cap (1) (Attached on the
camera)
• Eyepiece cup (1) (Attached on
the camera)
• CD-ROM (1)
– Application Software for α
camera
– α Handbook (This manual)
• Instruction Manual (1)
• Shoe adaptor (1)/Connector
protect cap (1) (Attached on the
Shoe adaptor)
• USB cable (1)
15
Before use
• Power cord (mains lead) (1)* (not
supplied in the U.S.A. and
Canada)
• Shoulder strap (1)
Identifying parts
See the pages in parentheses for details of operation.
Front side
A AF illuminator (100)/Self-timer
lamp (111)
B Shutter button (63)
C Power switch (57)
D Front control dial
E Remote sensor (114)
F Lens contacts*
G Mounting index (55)
H Mirror*
I Preview button (42, 80, 176)
J Mount
K Custom button (42, 122, 177)
16
L Lens release button (56)
M Silent multi-controller (32)
* Do not directly touch these
parts.
Identifying parts
Rear side
Before use
A MENU button (37)
F Light sensor (177)
B Eyepiece cup (62)
G LCD screen (25, 59, 87, 165)
C Viewfinder*
H MOVIE button (42, 65)
• When you look into the
viewfinder, the viewfinder
mode is activated, and when
you take your face away from
the viewfinder, the viewing
mode returns to the LCD screen
mode.
D Eyepiece sensors (62)
E Diopter-adjustment dial
• Adjust the diopter-adjustment
dial to your eyesight until the
display appears clearly in the
viewfinder.
I For shooting: AF/MF (Auto
focus/manual focus) button (42,
105, 176)
For viewing:
(Enlarge)
button (160)
J For shooting: AEL (AE lock)
button (41, 83, 108, 176)/
SLOW SYNC button (117)
For viewing:
(Image index)
button (161)
K Multi-selector
L For shooting: Fn (Function)
button (34, 35)
For viewing:
(Image
rotation) button (162)
17
Identifying parts
M DISP (Display) button (87,
165)
N
(Smart teleconverter)
button (42, 147)/Zoom button
(147)/Focus Magnifier button
(103)
O For shooting: AF RANGE
button (98)
For viewing: (Delete) button
(67)
When the Fn screen or menu
screen is displayed: In-Camera
Guide button (48)
P Access lamp (53)
Q
(Playback) button (66)
* Do not directly touch this
part.
18
Identifying parts
Top side
Before use
A Microphone* (159)
I
B Mode dial lock release button
J ISO button (41, 124, 176)
(68)
K Display panel illumination
C Mode dial (68)
D Multi interface shoe** (24,
115)
• Some of the accessories may
not be inserted fully and
protrude backward from the
Multi interface shoe. However,
the accessory reaches the front
end of the shoe, the connection
is completed.
E FINDER/LCD button (179)
F Display panel (29)
G
(Drive) button (110)
H WB (White balance) button
(133)
(Exposure) button (106)
button (29)
L
Image sensor position
mark (94)
M Rear control dial
* Do not cover this part
during movie recording.
Doing so may cause noise
or lower the volume.
** For details on compatible
accessories of the Multi
interface shoe, visit the
Sony web site in your area,
or consult your Sony
dealer or local authorized
Sony service facility.
19
Identifying parts
Accessories for the
Accessory Shoe can also
be used.
Operations with other
manufactures’
accessories are not
guaranteed.
20
Identifying parts
Sides
Before use
A Hooks for shoulder strap
• Attach both ends of the strap
onto the camera.
that the cord of the Remote
Commander faces forward.
D Speaker
E DC IN terminal
• When connecting the ACPW10AM AC Adaptor (sold
separately) to the camera, turn
the camera off, then plug the
connector of the AC Adaptor to
the DC IN terminal on the
camera.
F m (Microphone) jack
B
• When an external microphone
is connected, the microphone is
turned on automatically. If the
external microphone is a plugin-power type, the power of the
microphone is supplied by the
camera.
(Flash sync) terminal (118)
C REMOTE terminal
• When connecting the RML1AM Remote Commander
(sold separately) to the camera,
insert the plug of the Remote
Commander into the REMOTE
terminal, aligning the guide of
the plug with the guide of the
REMOTE terminal. Make sure
G i (Headphones) jack (158)
H HDMI terminal (172)
I
(USB) terminal (205)
J Memory card cover (51)
21
Identifying parts
K SLOT1 (Memory card slot 1)
(51)
• Available to either SD cards or
“Memory Stick PRO Duo”
media
L SLOT2 (Memory card slot 2)
(51)
• Available to SD cards only
22
Identifying parts
Bottom
Before use
A Guide holes for the Vertical
Grip
• These holes are used when you
connect the Vertical Grip (sold
separately) to the camera. Be
sure to keep dust or debris from
getting inside the holes.
B Connector for the Vertical Grip
C Connector cover for the
Vertical Grip
D Tripod receptacle
• Use a tripod with a screw length
of less than 5.5 mm (7/32 inch).
You will be unable to firmly
secure the camera to tripods
with a screw length of 5.5 mm
(7/32 inch) or longer, and
attempting to do so may
damage the camera.
E Battery insertion slot (51)
F Battery cover (51)
23
Identifying parts
Shoe adaptor
Remove the Shoe Cap attached to the camera and attach the Shoe adaptor
to the camera so that you can attach accessories compatible with a
conventional Accessory Shoe (Auto-lock Accessory shoe).
A Auto-lock Accessory shoe
3
Tighten the Lock knob.
B Lock knob
How to attach the Lock knob
1
2
24
Remove the Connector protect
cap from the shoe.
Loosen the Lock knob and
insert the Shoe adaptor into the
shoe.
• Do not force the knob to turn after it
locks.
• When you attach the Shoe adaptor to
the camera, insert the Shoe adaptor all
the way in.
• After you remove the Shoe adaptor
from the camera, attach the Connector
protect cap to the Shoe adaptor for
storing the cap.
List of icons on the screen
List of icons on the LCD screen
The status of the LCD screen is set to “for the viewfinder mode (using the
viewfinder for monitoring)” in the default settings.
Pressing the DISP button changes the screen status to “for the LCD screen
mode.” You can also display the digital level gauge or histogram (page 87).
In Auto Mode or Scene Selection mode
For the LCD screen mode
In Tele-zoom Cont. Priority AE/P/A/S/M/
Sweep Panorama mode
For playback (Basic information
display)
25
Before use
For the viewfinder mode
List of icons on the screen
A
Display
Display
Indication
Frame rate of movies
(155)
Indication
Exposure mode (68)
Image size of movies
(155)
P P*
ASM
Remaining battery (53)
100%
Flash charge in progress
(115)
APS-C Size Capture
(179)
Register number (190)
Setting Effect OFF (89)
Scene Recognition icons
(70)
No audio recording of
movies (159)
Wind Noise Reduction
(159)
Memory card (51, 234)/
Upload (185)
SteadyShot/Camera
shake warning (60)
GPS triangulating status
(187) (SLT-A99V only)
100
Remaining number of
recordable images
SteadyShot error (220)
Aspect ratio of still
images (139)
Overheating warning (12)
Database file full (222)/
Database file error (222)
24M 10M Image size of still images
4.6M 20M (137)
8.7M 3.9M
10M 4.6M
2.0M 8.7M
3.9M 1.7M
Image quality of still
images (139)
26
AE lock (108)/FEL lock
(122)
View Mode (160)
100-0003
Folder - file number
(206)
-
Protect (167)
DPOF
DPOF set (168)
List of icons on the screen
Display
Indication
Display
Indication
Picture Effect (129)
Remaining battery
warning (53)
B
Display
Indication
Drive mode (110)
Before use
Auto Portrait Framing
(143)
C
Flash mode (115)/Redeye reduction (40)
Display
EV scale (83, 106, 113)
Focus mode (91)
Exposure compensation
(106)/Metered Manual
(83)
AF area (95)
Flash compensation (120)
REC 0:12
Recording time of the
movie (m:s)
Object tracking (95)
AWB
Indication
z
Focus (63, 93)
Face Detection (141)/
Smile Shutter (145)
1/250
Shutter speed (80)
F3.5
Aperture (78)
Metering mode (109)
ISO400
ISO AUTO
ISO sensitivity (124)
White balance (Auto,
Preset, Custom, Color
temperature, Color filter)
(133)
7500K
A5 G5
D-Range Optimizer
(126)/Auto HDR (127)
Creative Style (130)/
Contrast, Saturation,
Sharpness
AE lock (108)/FEL lock
(122)
GPS information (SLTA99V only)
35° 37’
32”N
139° 44’
31”W
Latitude and longitude
display (SLT-A99V only)
Auto HDR image
warning (127)
Picture Effect error (130)
+3 +3
Histogram (89)
+3
2012-1-1
10:37PM
Date of recording
27
List of icons on the screen
Display
Indication
3/7
File number/Number of
images in the view mode
D
Display
Indication
Spot metering area (109)
AF area (95)
Assist area (92)
Digital level gauge (88)
Histogram (89)
Smart teleconverter (147)
Smart Zoom/Clear Image
Zoom/Digital Zoom
Shutter speed indicator
(88)
Aperture indicator (88)
AF Range Control (98)
z Tracking Tracking focus (95)
focus
Audio level (157)
28
List of icons on the screen
List of icons on the display panel
Shutter speed (80)/
Aperture (78)
Exposure (106)/Flash
compensation (120)
ISO sensitivity (124)
White balance (133)
Drive mode (110)
Image quality (139)
Remaining battery
(53)
Remaining number of
recordable images*
Before use
You can adjust the shutter speed,
aperture, exposure compensation, flash
compensation, ISO sensitivity, white
balance, drive mode and image quality by
checking the display panel on the top of
the camera.
* Even when the remaining number of recordable images is more than 9,999, “9999”
is displayed on the display panel.
To turn on the backlight of the display panel
Press the display panel illumination
button on the top. Pressing again turns off
the backlight.
Display panel illumination button
29
Functions list
Functions that can be operated with
the buttons/dial
You can set up or operate various functions with these buttons/dial.
For the location of the buttons/dial, see “Identifying parts” (page 16).
button (110)
WB button (133)
Selects the drive mode.
Adjusts the white balance.
button (106)
Compensates the exposure.
ISO button (124)
Adjusts the ISO sensitivity.
Mode dial (68)
Switches the exposure mode. Rotate the dial while
pressing the mode dial lock release button.
FINDER/LCD button (179)
Switches the display between the LCD screen and the
viewfinder.
Display panel illumination Turns on the backlight of the display panel.
button (29)
MENU button (37)
Displays the menu screen for setting up the menu item.
MOVIE button (42, 65)
Records movies.
AEL button (108)/SLOW
SYNC button (117)/
button (161)
Fixes the exposure of the entire screen./Shoots with the
flash with a slower shutter speed./Displays multiple
images on the screen simultaneously.
AF/MF button (105)/
button (160)
Switches the autofocus and manual focus temporarily./
Scales an image up when viewing images.
Fn button (31, 34, 35)/
button (162)
Displays the setup screen of the function that is set using
the Fn button. In viewfinder mode, switches to the
Quick Navi screen./Rotates images.
DISP button (87, 165)
Switches the recording information display of the
viewfinder or the LCD screen.
button (147)/Zoom
button (147)/Focus
Magnifier button (103)
Zooms in to the center of an image./Zooms in holding
the current resolution of the image./Allows you to check
the focus by enlarging the image before shooting.
button (66)
Plays back images.
AF RANGE button (98)/In- Limits the available operating range of autofocus./
Camera Guide button (48)/ Displays a In-Camera Guide./Deletes images.
button (67)
Preview button (80)
Checks blurring of the background.
Custom button (42, 122,
177)
Assigns a frequently-used function to the button. The
FEL lock function is assigned in the default settings.
30
Functions that can be operated with the buttons/dial
Silent multi-controller
(32)
Adjusts the setting silently.
How to use the Quick Navi screen
Using the Quick Navi screen, you can change settings directly on the
recording information display when the screen mode is set to [For
viewfinder] (Quick Navi).
Functions list
1 Press the DISP button to set the screen mode to [For
viewfinder] (page 87).
2 Press the Fn button to switch to the Quick Navi screen.
In Auto Mode or Scene Selection mode
In Tele-zoom Cont. Priority AE/P/A/S/M/Sweep Panorama mode
3 Select the desired item with v/V/b/B on the multi-selector.
31
Functions that can be operated with the buttons/dial
4 Set the item with the front or rear control dial.
• Select an option with the front control dial and adjust it with the rear control
dial.
• Pressing the center of the multi-selector turns on the designated screen used
to set up the selected item.
• Pressing the Fn button again turns off the Quick Navi screen and the screen
goes back to the original one.
Functions available on the Quick Navi screen
Auto Mode/Scene Selection/Tele-zoom Cont. Priority AE/Select
Recording Media/Quality/SteadyShot (for still images)/Drive Mode/Flash
Mode/Focus Mode/AF area/Object Tracking/Smile/Face Detect./Metering
Mode/White Balance/DRO/Auto HDR/Creative Style/Picture Effect/Auto
Port. Framing/Exposure Comp./Flash Comp./ISO
Notes
• Gray items on the Quick Navi screen are not available.
• When using Creative Style (page 130), some of the setup tasks can be accomplished
only on a designated screen.
How to use the silent multi-controller
You can set an item without changing the screen using the silent multicontroller. Since the dial is designed to reduce the sound of the dialing
operation, you can reduce the sound of the dialing operation during movie
recording.
You can assign separate functions to the dial for still image shooting and
movie recording (page 33).
1 Press the button so that the setup
screen appears.
• [Focus Mode] is assigned to the button
for still image shooting, and [Audio
Rec Level] is assigned to the same
button for movie recording in the
default settings.
32
Functions that can be operated with the buttons/dial
2 Rotate the dial to select the
desired setting.
Functions list
Current setting
3 Press the button to execute.
To assign other functions to the Silent Multi-Controller
Pressing and holding the button opens the
screen used for assigning functions to the
Silent Multi-Controller.
Rotate the dial to select a function. You
can also select a function from: MENU
button t
3t[
Silent
Controller] or MENU button t
1t
[
Silent Controller].
Current function
Functions available
Still image: Focus Mode/AF area/Select AF area/Exposure Comp./
Metering Mode/ISO
Movie: Audio Rec Level/Focus Mode/AF area/Select AF area/Exposure
Comp./Metering Mode/ISO/Shutter speed/Aperture
33
Selecting a function with the Fn
(Function) button
This button is used for setting up or executing functions used frequently in
shooting, except for functions from the Quick Navi screen.
1 Press the DISP button to set the screen mode to other than [For
viewfinder] (page 87).
2 Press the Fn button.
3 Select the desired item with v/V/b/B on the multi-selector,
then press the center z to execute.
The setup screen appears.
4 Following the operation guide,
select and execute the desired
function.
Operation guide
To set up the camera directly from the recording information
screen
Turn the front control dial without pressing the center z in step 3. You can
set up the camera directly from the recording information screen.
Additionally, some functions can be fine-tuned using the rear control dial.
34
Functions that can be selected with
the Fn (Function) button
The functions that can be selected with the Fn button are as follows:
Auto Mode (69)
Selects the automatic shooting mode.
(Intelligent Auto/Superior Auto)
Movie (153)
Selects the exposure mode for movie recording to suit your
subject or your effect.
(P/A/S/M)
Tele-zoom Cont.
Priority AE (76)
Sets the speed for continuous shooting.
(T10/T8)
Drive Mode (110)
Sets the drive mode such as continuous shooting.
(Single Shooting/Cont. Shooting/Self-timer/Bracket: Cont./
Single Bracket/WB bracket/DRO Bracket/Remote Cdr.)
Flash Mode (115)
Sets the flash mode of a flash (sold separately).
(Flash Off/Autoflash/Fill-flash/Rear Sync./Wireless)
Focus Mode (91)
Selects the focus mode.
(Single-shot AF/Automatic AF/Continuous AF/Depth Map
Assist Continuous AF/DMF/Manual Focus)
AF area (95)
Selects the area of focus.
(Wide/Zone/Spot/Local)
Object Tracking (95)
Keeps the focus on a subject while tracking it.
(Off/On/On(Tracking focus w/ shutter))
Smile/Face Detect.
(141, 145)
Automatically captures people’s face(s) with the optimal
focus and exposure./Shoots when a smile is detected.
(Face Detection Off/Face Detection On (Regist. Faces)/Face
Detection On/Smile Shutter)
Auto Port. Framing
(143)
Analyzes the scene when capturing a face and saves another
image with a more impressive composition.
(Auto/Off)
ISO (124)
Sets the sensitivity to light. The larger the number, the faster
the shutter speed.
(Multi Frame Noise Reduct./ISO AUTO/ISO 50 to 25600)
Metering Mode (109) Selects the method for measuring brightness.
(Multi segment/Center weighted/Spot)
35
Functions list
Scene Selection (71) Selects an appropriate mode from among the Scene Selection
preset settings to suit shooting conditions.
(Portrait/Sports Action/Macro/Landscape/Sunset/Night
Scene/Hand-held Twilight/Night Portrait)
Functions that can be selected with the Fn (Function) button
Flash Comp. (120)
Adjusts the amount of flash light.
(+3.0EV to –3.0EV)
White Balance (133)
Adjusts the color tone of images.
(Auto WB/Daylight/Shade/Cloudy/Incandescent/Fluor.:
Warm White/Fluor.: Cool White/Fluor.: Day White/Fluor.:
Daylight/Flash/C.Temp./Filter/Custom 1–3)
DRO/Auto HDR (126) Compensates for the brightness and contrast automatically.
(Off/D-Range Opt./Auto HDR)
Creative Style (130)
Selects your desired image processing.
(Standard/Vivid/Neutral/Clear/Deep/Light/Portrait/
Landscape/Sunset/Night Scene/Autumn leaves/Black &
White/Sepia/Style Box1–6)
Picture Effect (129)
Shoots with the desired effect filter to achieve more
impressive expression.
(Off/Toy Camera/Pop Color/Posterization/Retro Photo/Soft
High-key/Partial Color/High Contrast Mono./Soft Focus/
HDR Painting/Rich-tone Mono./Miniature)
36
The functions selected with the MENU
button
You can set up the basic settings for the camera as a whole or execute
functions such as shooting, playback, or other operations.
Press the MENU button, then set up the desired item with v/V/b/B on the
multi-selector, then press the center of the multi-selector.
Select a page of the menu
Select an item on the menu
Functions list
Still shooting menu
Image Size (137)
Selects the size of still images.
(L/M/S)
Aspect Ratio (139)
Selects the aspect ratio for still images.
(3:2/16:9)
Quality (139)
Sets the image quality for still images.
(RAW/RAW & JPEG/Extra fine/Fine/Standard)
Panorama: Size
(137)
Selects the size of panoramic images.
(Standard/Wide)
Panorama: Direction Sets the shooting direction for panoramic images.
(75)
(Right/Left/Up/Down)
Clear Image Zoom
(149)
Zooms an image with higher quality than Digital Zoom.
(On/Off)
Digital Zoom (149)
Zooms an image with higher magnification than Clear Image
Zoom.
(On/Off)
Long Exposure NR
(150)
Sets noise reduction processing for shots in which shutter
speed will be 1 second or longer.
(On/Off)
37
The functions selected with the MENU button
High ISO NR (150)
Sets noise reduction processing for high-sensitivity shooting.
(Normal/Low/Off)
Flash control (121)
Sets the method for determining the intensity of flash output.
(ADI flash/Pre-flash TTL)
AF Illuminator (100)
Sets the AF illuminator, which sheds light on a dark scene to
aid focusing.
(Auto/Off)
SteadyShot (60)
Sets SteadyShot for still image shooting.
(On/Off)
AF drive speed
Selects the focusing speed in autofocus mode. When [Slow]
is selected in macro shooting, focusing is easier achieved.
(Fast/Slow)
Color Space (151)
Changes the range of reproducible colors.
(sRGB/AdobeRGB)
Silent Controller
(33)
Assigns the desired function to the silent multi-controller for
still image shooting.
(Focus Mode/AF area/Select AF area/Exposure Comp./ISO/
Metering Mode)
Exposure step
Selects the size of the increment step for shutter speed,
aperture, and exposure.
(0.5 EV/0.3 EV)
Priority setup
Sets whether or not to release the shutter even when the focus
is not confirmed in autofocus mode.
(AF/Release)
AF w/ shutter
Sets whether or not to activate the autofocus by pressing the
shutter button halfway down. This is convenient when you
want to adjust the focus and exposure separately.
(On/Off)
AEL w/ shutter
Sets whether or not to adjust the exposure by pressing the
shutter button halfway down. This is convenient when you
want to adjust the focus and exposure separately.
(On/Off)
Memory (190)
Registers combinations of frequently used modes and settings
and allows easy recall of those combinations with the mode
dial.
(1/2/3)
38
The functions selected with the MENU button
Movie shooting menu
File Format (155)
Selects the movie file format.
(AVCHD/MP4)
Record Setting (155) Selects the quality and size of the recorded movie frame.
(60i 24M(FX)/50i 24M(FX)/60i 17M(FH)/50i 17M(FH)/60p
28M(PS)/50p 28M(PS)/24p 24M(FX)/25p 24M(FX)/24p
17M(FH)/25p 17M(FH)/1440×1080 12M/VGA 3M)
SteadyShot (60)
AF Tracking Duration Sets the tracking sensitivity of the autofocus feature for
(153)
movie recording.
(High/Mid/Low)
Auto Slow Shutter
(154)
Sets whether or not to automatically adjust the shutter speed
to a slower setting during movie recording, when the subject
is in a dark situation.
(On/Off)
Silent Controller Assigns the desired function to the silent multi-controller for
(32, 33)
movie recording.
(Audio Rec Level/Focus Mode/AF area/Select AF area/
Exposure Comp./ISO/Metering Mode/Shutter Speed/
Aperture)
Audio Recording
(159)
Sets whether or not to record audio when shooting a movie.
(On/Off)
Wind Noise Reduct.
(159)
Reduces wind noise during movie recording.
(On/Off)
Audio Rec Level
(157)
Adjusts the audio recording level.
(0 to 31)
Audio Level Display
(157)
Sets whether or not to display the audio level.
(On/Off)
Audio Output Timing Provides measures to reduce echo for movie recording.
(158)
(Live/Lip Sync)
39
Functions list
Sets SteadyShot for movie recording.
(On/Off)
The functions selected with the MENU button
Custom menu
Eye-Start AF
Sets whether or not to use auto focus when you look through
the viewfinder.
(On/Off)
FINDER/LCD Setting
(179)
Sets the method for switching between the viewfinder and
LCD screen.
(Auto/Manual)
Red Eye Reduction
Reduces the red-eye phenomenon during flash use.
(On/Off)
Release w/o Lens
(175)
Sets whether shutter can open when lens is not attached.
(Enable/Disable)
S. Auto Cont.
Shooting (70)
Sets whether or not to shoot continuously in Superior Auto
mode.
(Auto/Off)
S. Auto Image
Extract. (70)
Sets whether or not to save all the images that were shot
continuously in Superior Auto mode.
(Auto/Off)
Grid Line (175)
Sets a grid line display to enable alignment to a structural
outline.
(Rule of 3rds Grid/Square Grid/Diag. + Square Grid/Off)
Auto Review (175)
Displays the captured image after shooting it automatically.
You can set the duration of time the image is to be displayed.
(10 Sec/5 Sec/2 Sec/Off)
DISP Button(Monitor) Allows you to select the available screen display modes of
(87)
the LCD screen that can be selected by pressing the DISP
button.
(Graphic Display/Display All Info./No Disp. Info./Level/
Histogram/For viewfinder)
DISP Button(Finder)
(87)
40
Allows you to select the available screen display modes of
the viewfinder that can be selected by pressing the DISP
button.
(Graphic Display/Display All Info./No Disp. Info./Level/
Histogram)
The functions selected with the MENU button
Selects the function to be used with the AF RANGE button.
(AF Range Control/In-Camera Guide)
AF Range Control
Assist
Sets whether or not to show the status that the subject is
located within the focus range on the screen using the assist
area when the AF Range Control function is activated
(available only when an AF-D compatible lens is attached).
(On/Off)
Peaking Level (102)
Enhances the outline of in-focus ranges with a specific color.
(High/Mid/Low/Off)
Peaking Color (103)
Sets the color used for the peaking function.
(Red/Yellow/White)
Live View Display
(89)
Sets whether or not to display the effect of a function on the
screen, such as the effect of the exposure compensation
value.
(Setting Effect ON/Setting Effect OFF)
Func. of AEL button
(176)
Assigns the desired function to the AEL button.
(Exposure Comp./Drive Mode/Flash Mode/Focus Mode/AF
area/Smile/Face Detect./Auto Port. Framing/ISO/Metering
Mode/Flash Comp./White Balance/DRO/Auto HDR/Creative
Style/Picture Effect/Image Size/Quality/AEL hold/AEL
toggle/ AEL hold/ AEL toggle/FEL Lock hold/FEL
Lock toggle/Object Tracking/AF/MF Control Hold/AF/MF
Control Toggle/AF lock/AF On/Aperture Preview/Shot.
Result Preview/Focus Magnifier/Memory)
ISO Button (176)
Assigns the desired function to the ISO button.
(Exposure Comp./Drive Mode/Flash Mode/Focus Mode/AF
area/Smile/Face Detect./Auto Port. Framing/ISO/Metering
Mode/Flash Comp./White Balance/DRO/Auto HDR/Creative
Style/Picture Effect/Image Size/Quality/AEL hold/AEL
toggle/ AEL hold/ AEL toggle/FEL Lock hold/FEL
Lock toggle/Object Tracking/AF/MF Control Hold/AF/MF
Control Toggle/AF lock/AF On/Aperture Preview/Shot.
Result Preview/Focus Magnifier/Memory)
41
Functions list
AF RANGE Button
(98)
The functions selected with the MENU button
AF/MF button (176)
Assigns the desired function to the AF/MF button.
(Exposure Comp./Drive Mode/Flash Mode/Focus Mode/AF
area/Smile/Face Detect./Auto Port. Framing/ISO/Metering
Mode/Flash Comp./White Balance/DRO/Auto HDR/Creative
Style/Picture Effect/Image Size/Quality/AEL hold/AEL
toggle/ AEL hold/ AEL toggle/FEL Lock hold/FEL
Lock toggle/Object Tracking/AF/MF Control Hold/AF/MF
Control Toggle/AF lock/AF On/Aperture Preview/Shot.
Result Preview/Focus Magnifier/Memory)
Custom button (177)
Assigns the desired function to the custom button.
(Exposure Comp./Drive Mode/Flash Mode/Focus Mode/AF
area/Smile/Face Detect./Auto Port. Framing/ISO/Metering
Mode/Flash Comp./White Balance/DRO/Auto HDR/Creative
Style/Picture Effect/Image Size/Quality/AEL hold/AEL
toggle/ AEL hold/ AEL toggle/FEL Lock hold/FEL
Lock toggle/Object Tracking/AF/MF Control Hold/AF/MF
Control Toggle/AF lock/AF On/Aperture Preview/Shot.
Result Preview/Focus Magnifier/Memory)
Preview Button (176) Assigns the desired function to the preview button.
(Exposure Comp./Drive Mode/Flash Mode/Focus Mode/AF
area/Smile/Face Detect./Auto Port. Framing/ISO/Metering
Mode/Flash Comp./White Balance/DRO/Auto HDR/Creative
Style/Picture Effect/Image Size/Quality/AEL hold/AEL
toggle/ AEL hold/ AEL toggle/FEL Lock hold/FEL
Lock toggle/Object Tracking/AF/MF Control Hold/AF/MF
Control Toggle/AF lock/AF On/Aperture Preview/Shot.
Result Preview/Focus Magnifier/Memory)
Smart Telecon.
Button (103, 147)
Selects the function to be used with the
(Smart Telecon./Focus Magnifier/Zoom)
Focus Hold Button
Sets the function of the focus hold button of the lens. When
you select [Preview Button], the function selected with
[Preview Button] is assigned.
(Focus Hold/Preview Button)
MOVIE Button
Selects the appropriate mode for the MOVIE button.
(Always/Movie Mode Only)
Ctrl dial setup
Sets the functions of the front and rear control dials when the
exposure mode is set to M. Dials can be used for adjusting
shutter speed and aperture.
(
SS
F/no./
F/no.
SS)
42
button.
The functions selected with the MENU button
Dial exp.comp (107) Compensates the exposure with the front or rear control dial.
(Off/
Front dial/
Rear dial)
Exp.comp.set
Sets whether or not to compensate the exposure within the
flash light range.
(Ambient&flash/Ambient only)
Bracket order
Selects the order in exposure bracket and white balance
bracket shooting.
(0 t – t +/– t 0 t +)
Lens Comp.: Chro.
Aber. (181)
Reduces the color deviation at the corners of the screen
caused by the lens attached.
(Auto/Off)
Lens Comp.:
Distortion (181)
Compensates for distortion on the screen caused by the lens
attached.
(Auto/Off)
Front Curtain Shutter Sets whether or not to use the electronic front curtain shutter
(177)
function.
(On/Off)
Face Priority
Tracking (97)
Sets whether to preferentially-track a certain face or not when
the camera detects that face during object tracking.
(On/Off)
Face Registration
(142)
Registers or changes the person to be given priority in the
focus.
(New Registration/Order Exchanging/Delete/Delete All)
Playback menu
Still/Movie Select
(160)
Allows you to determine how to group the playback images
(View mode).
(Folder View(Still)/Folder View(MP4)/AVCHD View)
Delete (170)
Deletes images.
(Multiple Img./All in Folder/All AVCHD view files)
Slide Show (163)
Shows a slide show.
(Repeat/Interval/Image Type)
43
Functions list
Lens Comp.: Shading Compensates for the shaded corners of the screen caused by
(181)
the lens attached.
(Auto/Off)
The functions selected with the MENU button
Image Index (161)
Sets the number of images displayed on one page of the
image index screen.
(4 Images/9 Images)
Protect (167)
Protects or cancels protection for an image.
(Multiple Img./Cancel All Images/Cancel All Movies(MP4)/
Cancel All AVCHD view files)
Specify Printing
(168)
Specifies or unspecifies the images for DPOF.
(DPOF Setup/Date Imprint)
Select Playback
Media (160)
Selects the memory card slot to be used for playback.
(Slot 1/Slot 2)
Copy (169)
Duplicates images in a memory card.
Volume Settings
Sets the volume for movie playback.
(0 to 7)
Playback Display
(164)
Sets how to play back an image recorded in portrait.
(Auto Rotate/Manual Rotate)
Memory Card Tool menu
Select Recording
Media (52)
Selects the memory card slot to be used for recording.
(Slot 1/Slot 2)
Recording Mode
(182)
Selects the recording method to record on memory cards.
(Standard/Simult. Rec (Still)/Simult. Rec (Movie)/Sim. Rec
(Still/Movie)/Sort(JPEG/RAW)/Sort(Still/Movie))
Format (183)
Formats the memory card.
File Number (183)
Sets the method used to assign file numbers to still images
and MP4 movies.
(Series/Reset)
Folder Name (183)
Sets the folder format for still images.
(Standard Form/Date Form)
Select REC Folder
(184)
Changes the selected folder for storing still images and MP4
movies.
New Folder (184)
Creates a new folder for storing still images and MP4 movies.
44
The functions selected with the MENU button
Recover Image DB
(185)
Recovers the image database file and enables recording and
playback.
Display Card Space
Displays the remaining recording time of movies and the
recordable number of still images on the memory card.
Clock setup menu
Area Setting (58)
Functions list
Date/Time Setup (58) Sets date and time, and daylight savings.
Sets the location of where the camera is used.
Setup menu
Menu start
Sets the default position of the cursor on the menu to the top
item or the last-selected item.
(Top/Previous)
Delete confirm.
Sets [Delete] or [Cancel] as the default setting for the delete
confirmation screen.
(“Delete” first/“Cancel” first)
Mode Dial Guide
Displays an explanation of each shooting mode and also
allows you to select another shooting mode.
(On/Off)
LCD Brightness (177) Sets the brightness of the LCD screen.
(Auto/Manual/Sunny Weather)
Viewfinder Bright.
(178)
Sets the brightness of the viewfinder.
(Auto/Manual)
Viewfinder Color
Temp.
Sets the color temperature of the screen in the viewfinder.
Setting it toward + makes the color cooler, and toward –
makes the color warmer.
(+2 to 0 to –2)
GPS Settings (187)
(SLT-A99V only)
Sets the GPS functions.
Power Save (178)
Sets the response level to be used to activate the power save
mode.
(Max/Standard)
45
The functions selected with the MENU button
Power Saving Start
Time (179)
Sets the interval after which power save mode engages.
(30 Min/5 Min/1 Min/20 Sec/10 Sec)
HDMI Resolution
(172)
Sets the resolution when the camera is connected to an HDMI
TV.
(Auto/1080p/1080i)
CTRL FOR HDMI
(174)
Operates the camera from a TV that supports “BRAVIA”
Sync.
(On/Off)
HDMI Info. Display
(173)
Displays images on the screen of an HDMI TV connected
without displaying recording information.
(On/Off)
Upload Settings*
(185)
Sets whether to use the upload function of the camera with an
Eye-Fi card.
(On/Off)
USB Connection
(204)
Sets the USB connection method, appropriate to the
computer or USB device.
(Auto/Mass Storage/MTP/PC Remote)
USB LUN Setting
(204)
Allows the computer to recognize both the memory cards
during a USB connection.
(Multi/Single)
Audio signals
Sets whether or not to use the beep sound when the focus is
achieved or the self-timer is working.
(On/Off)
PAL/NTSC Selector
(Only for 1080 50icompatible models)
(180)
Plays back movies recorded with the camera on an NTSC
system TV.
(PAL/NTSC)
APS-C Size Capture
(179)
Sets whether or not to record with an APS-C size-equivalent
area.
(On/Auto)
AF Micro Adj. (101)
Allows you to make fine adjustments to the position of the
focus.
(AF Adjustment Setting/amount/Clear)
* Appears when an Eye-Fi card is inserted in the memory card SLOT1 in the camera.
46
The functions selected with the MENU button
Version (198)
Language
Displays the camera software version.
Selects the language.
Cleaning Mode (224) Starts the cleaning mode to clean the image sensor.
Demo Mode
Sets the demonstration playback of a movie to on or off.
(On/Off)
Initialize (191)
Restores the settings to their defaults.
(Reset Default/Rec mode reset/Custom reset)
Functions list
47
Using the In-Camera Guide
The AF RANGE button is equipped with
both an In-Camera Guide feature and a
delete feature.
When you press the AF RANGE button
on the Fn screen or menu screen, a help
guide explaining the currently selected
function or setting appears automatically.
MENU button t
Guide]
48
AF RANGE button
3 t [AF RANGE Button] t [In-Camera
Preparing the camera
Charging the battery pack
When using the camera for the first time, be sure to charge the NPFM500H “InfoLITHIUM” battery pack (supplied).
The “InfoLITHIUM” battery pack can be charged even when it has not
been fully depleted.
It can also be used when it has not been fully charged.
The battery pack is discharged little by little without using it. To avoid
missing the opportunity to shoot, charge it before use.
1 Insert the battery pack onto the
Preparing the camera
battery charger.
Push the battery pack until it clicks.
49
Charging the battery pack
2 Connect the battery charger to the
For the U.S.A and Canada
Plug
wall outlet (wall socket).
Light on: Charging
Light off: Charge completed
Charging time
About 175 minutes
• When charging a fully depleted battery
pack at a temperature of 25°C (77°F).
• The CHARGE lamp turns off when
charging is completed.
CHARGE lamp
For countries/regions other than the
U.S.A. and Canada
CHARGE lamp
To a wall outlet
(wall socket)
Notes
• The charging time differs depending on the remaining capacity of the battery pack or
charging conditions.
• We recommend charging the battery pack in an ambient temperature of between
10°C to 30°C (50°F to 86°F). You may not be able to efficiently charge the battery
pack outside of this temperature range.
• Connect the battery charger to the nearest wall outlet (wall socket).
50
Inserting the battery pack/memory
card (sold separately)
This camera is equipped with 2 memory card slots; SLOT1 can be used
with “Memory Stick PRO Duo” media or SD cards, but SLOT2 can be used
only with SD cards.
1 While sliding the battery cover
open lever, open the cover.
Preparing the camera
2 Firmly insert the battery pack all
the way while pressing the lock
lever with the tip of the battery.
Lock lever
3 Close the cover.
4 While sliding the memory card
cover, open the cover.
51
Inserting the battery pack/memory card (sold separately)
5 Insert a memory card.
Memory card slot 1
• With the notched corner facing as
illustrated, insert the memory card until
it clicks into place.
Memory card slot 2
Ensure the notched corner faces
correctly.
6 Close the cover.
To select the memory card to be used for recording
[Slot 1] is selected in the default settings. Use slot 1 when you do not want
to change the setting and intend to use only a single memory card.
MENU button t
1 t [Select Recording Media] t Select the
desired slot
• You can also set [Select Recording Media] from the Quick Navi screen
(page 31).
To record an image on both memory cards at the same time
You can record the same images on both memory cards at the same time or
sort images onto the different memory cards by the type of image
(page 182).
MENU button t
1 t [Recording Mode] t Select the desired setting
52
Inserting the battery pack/memory card (sold separately)
To remove the memory card
Check that the access lamp (page 18) is not lit, then open the memory card
cover, and push the memory card once.
To check the remaining battery level
The supplied battery pack is a lithium-ion battery pack that has functions
for exchanging information related to operating conditions with your
camera. The remaining battery time in percent figures is displayed
according to the operating conditions of your camera.
“Battery
exhausted.”
High
Low
You cannot shoot
any more pictures.
You can use 2 battery packs installed in the Vertical Grip (sold separately)
by attaching it to the camera. Including the battery pack installed in the
camera, this provides a total of 3 battery packs that are switched
automatically.
You can check the status of these battery packs on the screen.
The remaining battery level of the battery pack inserted in the
camera
The remaining battery level of the battery packs inserted in
the Vertical Grip
For details on the Vertical Grip, refer to the operating instructions supplied
with the Vertical Grip.
To remove the battery pack from the camera
Turn off the camera. Slide the lock lever
in the direction of the arrow after
confirming that the vibration of the
camera has stopped and both the LCD
screen and access lamp are turned off,
then remove the battery pack. Be careful
not to drop the battery pack.
Lock lever
53
Preparing the camera
Battery level
Inserting the battery pack/memory card (sold separately)
Compatible memory cards
The following memory cards are compatible with this camera. However, all
memory cards are not guaranteed to work with this camera.
Types of memory card
Memory Stick PRO Duo
Still
images
Movies
*1
Movies
In this manual
(Simult. Rec)
–
Memory Stick PRO-HG Duo
SD memory card
*2
*3
SDHC memory card
*
2
*3
SDXC memory card
*2
*3
Memory Stick
PRO Duo
SD card
• MultiMediaCard cannot be used.
*1 “Memory Stick PRO Duo” media that match the Mark2
*2 SD cards that match the Class 4 or faster
*3 SD cards that match the Class 10 or faster, or the UHS-I (UHS Speed Class1)
interface
Notes
• “Memory Stick PRO Duo” media cannot be used with slot 2.
• Images recorded on an SDXC memory card cannot be imported to or played on
computers or AV devices that are not compatible with exFAT. Make sure that the
device is compatible with exFAT before connecting it to the camera. If you connect
your camera to an incompatible device, you may be prompted to format the card.
Never format the card in response to this prompt, as doing so will erase all data on
the card. (exFAT is the file system used on SDXC memory cards.)
54
Attaching a lens
1 Remove the body cap from the
Front lens cap
camera and the rear lens cap
from the rear of the lens.
• When changing the lens, quickly
change the lens away from dusty
locations so as to keep dust or debris
from getting inside the camera.
• When shooting, remove the front lens
cap from the front of the lens.
Body cap
Preparing the camera
Rear lens cap
2 Mount the lens by aligning the
orange index marks (mounting
indexes) on the lens and camera.
Orange index marks
3 Turn the lens clockwise until it
clicks into the locked position.
Be sure to put the lens on straight.
Notes
• When attaching a lens, do not press the lens release button.
• Do not use force when attaching a lens.
• E-mount lenses are not compatible with this camera.
• When a DT lens is attached or [APS-C Size Capture] is set to [On] in the
Setup
menu, a live view image is displayed in full screen view on the LCD screen with the
angle of view of the APS-C size. The live view image in the viewfinder is also
displayed entirely and you can check the composition or effect using the whole
screen.
55
Attaching a lens
• When you want to shoot full-frame images, use a lens designed for a full-frame
camera.
• When you use a lens for which a tripod socket is provided, attach the lens onto the
tripod using the tripod socket provided to help balance the weight of the lens.
• When carrying the camera with a lens attached, hold both the camera and the lens
firmly.
• Do not hold the part of the lens that is extended for the zoom or focus adjustment.
To remove the lens
1 Press the lens release button all
the way in and turn the lens
counterclockwise until it stops.
Lens release button
2 Attach the caps to the front and
rear of the lens and the body cap
to the camera.
• Before you attach them, remove dust
from them.
Note on changing the lens
When changing the lens, if dust or debris gets inside the camera and
adheres to the surface of the image sensor (the part that converts the light to
an electric signal), it may appear as dark spots on the image, depending on
the shooting environment.
The camera is equipped with an anti-dust function to prevent dust from
landing on the image sensor. However, quickly change the lens away from
dusty locations when attaching/removing a lens.
56
Setting the date and time
When you turn the camera on for the first time or after you initialize the
functions, the date/time setup screen appears.
1 Set the power switch to ON to turn
the camera on.
The screen used for setting date and time
appears.
• To turn the camera off, set it to OFF.
the LCD screen, then press the
center of the multi-selector.
3 Select your area with b/B on the multi-selector, then press the
center of the multi-selector.
4 Select each item with b/B and
set the numeric value with v/V.
[Daylight Svg.:]: Turns on or off the
daylight saving time setting.
[Date Format:]: Selects the format to
display date.
• Midnight is indicated as 12:00 AM, and
noon as 12:00 PM.
57
Preparing the camera
2 Verify that [Enter] is selected on
Setting the date and time
5 Repeat step 4 to set other items, then press the center of the
multi-selector.
6 Verify that [Enter] is selected, then press the center of the
multi-selector.
To cancel the date/time setting operation
Press the MENU button.
Setting up the date/time again
When you turn the camera on for the first time, the date/time setup screen
appears automatically. The next time, set up the date and time from the
menu.
MENU button t
1 t [Date/
Time Setup] or [Area Setting]
(page 45)
Maintaining the date and time setting
This camera has an internal rechargeable battery for maintaining the date
and time and other settings regardless of whether the power is on or off, or
the battery is installed or not (page 227).
58
Adjusting the angle of the LCD screen
Adjust the LCD screen to an easily
viewable angle.
Preparing the camera
• Put your finger on the upper-left part of
the LCD screen and draw it toward you.
• The LCD screen tilts 140 degrees
upward and 180 degrees downward.
• The LCD screen rotates 180 degrees
clockwise and 90 degrees
counterclockwise.
• When the LCD screen is not used, it is
recommended that you close it with the
screen side facing to the camera.
Note
• When the LCD screen is open, the eyepiece
sensors may not be able to function in
situations involving low-position shooting. If
you look into the viewfinder and the viewing
mode does not switch from the monitor to the
viewfinder automatically, press the FINDER/
LCD button.
59
Shooting a clear image without camera
shake
“Camera shake” refers to unwanted movement of the camera that occurs
after the shutter button has been pressed, resulting in a blurred image.
To reduce camera shake follow the instructions below.
Camera shake warning indicator
In situations where the camera may be
subject to camera-shake, the
(Camera shake warning) indicator
flashes. In this case, use a tripod or the
flash.
(Camera shake warning)
indicator
Note
• The camera shake warning indicator does not appear in the following situations:
– The exposure mode is set to M/S, or during movie recording.
– When the viewing mode is set to [No Disp. Info.], [Level], or [Histogram]
(page 87).
Using the SteadyShot function
The SteadyShot function is available with this camera to reduce camera
shake. The SteadyShot function can be set separately for still image
shooting and for movie recording.
The SteadyShot function is set to [On] for still image shooting and [Off] for
movie recording in the default settings.
MENU button t
desired setting
3 or
1 t [SteadyShot] t Select the
• You can also set the SteadyShot function used for still image shooting
from the Quick Navi screen (page 31).
60
Shooting a clear image without camera shake
Notes
• The SteadyShot function may not work optimally when the power has just been
turned on, right after you point the camera towards a subject, or when the shutter
button has been pressed all the way down without stopping halfway.
• When using a tripod, deactivate the SteadyShot function because there is a potential
for malfunction of the SteadyShot function.
Holding the camera properly
Stabilize your upper body and take a position that keeps the
camera from moving.
In viewfinder mode
(vertical position)
In LCD screen mode
Preparing the camera
In viewfinder mode
Point 1
One hand holds the grip of the camera, and the other hand supports the lens.
Point 2
Take a secure stance with your feet shoulder-width apart.
Point 3
Lightly tuck your elbows against your body.
When shooting in a kneeling position, steady your upper body by placing
your elbow on your knee.
61
Removing the Eyepiece cup
When attaching the FDA-A1AM Angle Finder (sold separately) to the
camera, remove the Eyepiece cup.
Carefully slide the Eyepiece cup off
by pushing on each side of the
Eyepiece cup.
• Put your fingers under the Eyepiece cup,
and slide it upward.
Note
• When an FDA-A1AM Angle Finder (sold separately) is attached to the camera,
switch the display between the viewfinder and the LCD screen by setting [FINDER/
LCD Setting] in the
Custom menu to [Manual] and pressing the FINDER/LCD
button. Setting [Eye-Start AF] to [Off] is recommended because the eyepiece
sensors located below the viewfinder may be activated.
62
Shooting and viewing images
Shooting still images
The “Auto Mode” allows you to easily shoot any subject under any
conditions because the camera makes appropriate judgments on the
situation to adjust the settings.
1 Set the mode dial to
(Auto
Mode).
• Rotate the mode dial while pressing the
mode dial lock button on the center of
the mode dial.
2 Hold the camera, monitoring your
Shooting and viewing images
shot with the viewfinder.
AF area
3 When using a zoom lens, turn the
zoom ring, then decide on your
shot.
Zoom ring
4 Press the shutter button halfway
down to focus.
When the focus is confirmed, z or
(Focus indicator) lights up (page 93).
63
Shooting still images
5 Press the shutter button fully
down to shoot.
64
Recording movies
1 Press the MOVIE button to start
MOVIE button
recording.
2 Press the MOVIE button again to stop recording.
Notes
• The sound of the camera and the lens in operation may be recorded while recording a
movie. Using the silent multi-controller, you can reduce the sound of the dialing
operation for adjustments you need to make (page 33). You can disable sound
recording by setting [Audio Recording] to [Off] (page 159).
• The continuous recording time of a movie may be shorter, depending on the ambient
temperature or the status of the camera. See “Notes on continuous movie recording.”
• When the
icon appears, the temperature of the camera is too high. Turn the
camera off and wait until the temperature of the camera drops.
65
Shooting and viewing images
• Movie recording can be started from
any exposure mode.
• The camera continues to adjust the
focus using [Continuous AF] when it is
in autofocus mode (page 91).
• The shutter speed and aperture are
adjusted automatically. If you want to
set them to particular values, set them
after the mode dial is set to
(Movie) (page 153).
Playing back images
1 Press the
button.
button
2 Select an image with b/B on the multi-selector.
• To play back movies, press the center of the multi-selector.
During movie playback
Multi-selector/Rear control dial
operation/DISP button
To pause/resume
z
To fast-forward
B
To fast-rewind
b
To slow-forward
Rotate the rear control dial to the right
during pause.
To slow-reverse
Rotate the rear control dial to the left
during pause.
• The movie is played back frame-byframe.
To adjust sound volume
V t v/V
To display the information
DISP (Display) button
Note
• Movies recorded with other devices may not be played back on this camera.
Switching between still images and movies
To play back still images, set [Still/Movie Select] to [Folder View(Still)],
and to play back movies, set [Still/Movie Select] to [Folder View(MP4)] or
[AVCHD View] according to the file format.
MENU button t
desired mode
66
1 t [Still/Movie Select] t Select the
Deleting images
Prior to deleting the image, be sure to make a copy or decide whether you
no longer wish to keep the image or not. Make a copy of any images you
may want to keep before deleting them from the camera
1 Display the image you want to
delete and press the
button.
button
2 Select [Delete] with v on the multi-selector, then press the
Shooting and viewing images
center of the multi-selector.
Note
• Protected images cannot be deleted.
67
Selecting a shooting mode
Selecting a shooting mode
Rotate the mode dial while pressing
the mode dial lock button on the
center of the mode dial.
The following shooting modes are provided with the camera:
(Auto Mode)
(69)
Allows you to easily shoot any subject under any conditions
because the camera makes appropriate judgements on the
situation to adjust the settings.
(Program Auto)
(77)
Allows you to shoot with the exposure adjusted automatically
(both the shutter speed and the aperture value). The other
settings can be adjusted manually.
(Aperture
Priority) (78)
Allows you to shoot after adjusting the aperture value
manually using the front or rear control dial.
(Shutter Priority)
(80)
Allows you to shoot after adjusting the shutter speed
manually using the front or rear control dial.
(Manual
Exposure) (82)
Allows you to shoot after adjusting the exposure manually
(both the shutter speed and the aperture value) using the front
or rear control dial.
1/2/3 (190)
Calls up setting pre-registered in [Memory] in the
shooting menu.
(Scene
Selection) (71)
Allows you to easily shoot any subject under any conditions
as the camera makes appropriate settings automatically.
(Sweep
Panorama) (73)
Allows you to shoot panoramic images by combining
multiple images.
(Tele-zoom
Cont. Priority AE)
(76)
Allows continuous shooting while the shutter button is fully
depressed. The camera records the images continuously at a
maximum of about 10 or 8 images per second.
(Movie) (65,
152)
Still
Allows you to shoot movies with the exposure adjusted
manually (both the shutter speed and the aperture value).
• Press the Fn button when you want to change the function of the selected
mode (pages 31, 34).
68
Selecting a shooting mode
Selecting the desired mode by rotating the mode dial
When you rotate the mode dial, you can display an explanation of the
shooting mode and change the function of the selected mode.
1 MENU button t
1 t [Mode Dial Guide] t [On]
2 Select the desired shooting mode with the mode dial.
An explanation of the selected mode is displayed.
3 Press the center of the multi-selector.
4 Select the desired mode with v/V on the multi-selector.
1 Set the mode dial to
(Auto Mode) (page 68).
• To change the mode, press the Fn button, then select another mode.
2 Point the camera towards the subject, then adjust the focus and
shoot the subject.
(Intelligent
Auto)
The camera makes appropriate judgement on the situation to
adjust the settings.
(Superior
The camera recognizes and evaluates the shooting condition,
and appropriate settings are set automatically. The camera
saves 1 appropriate image by combining or separating
images, as necessary.
Auto)
69
Selecting a shooting mode
Auto Mode
Selecting a shooting mode
Scene recognition
When the camera recognizes the subject
and adjusts itself for shooting conditions,
the following information appears on the
screen: icon for recognized scene, the
number of images to be shot. In Superior
Auto mode, the appropriate shooting
function for the scene type recognized is
also indicated.
Scene recognized by the camera:
(Night Scene),
(Hand-held Twilight),
(Landscape),
(Backlight Portrait),
(Portrait),
(Tripod Night Scene),
(Backlight),
(Macro),
(Night
Portrait),
(Spotlight), (Low
Brightness),
(Baby)
Shooting function: Cont. Shooting, Slow
Sync., Auto HDR, Daylight Sync., Slow
Shutter, Hand-held Twilight
Icon for recognized scene
Shooting function
Number of images to be shot
To set the continuous shooting in Superior Auto mode
MENU button t
setting
1 t [S. Auto Cont. Shooting] t Select the desired
To select the storage method to be used for recorded images in
Superior Auto mode
In continuous shooting, you can select a storage method that allows the
camera either to store 1 appropriate image from among the continuously
shot images or store all the images.
MENU button t
1 t [S. Auto Image Extract.] t Select the desired
setting
Notes
• Even when you set [S. Auto Image Extract.] to [Off] with [Hand-held Twilight]
selected from recognized scene mode, 1 combined image is saved.
• When [Quality] is set to [RAW] or [RAW & JPEG], performance will be affected.
70
Selecting a shooting mode
Scene Selection
This mode is suitable for
z Shooting with preset settings according to the scene
1 Set the mode dial to
(Scene Selection) (page 68).
• To change the scene, press the Fn button, then select another scene.
2 Adjust the focus and shoot the subject.
Blurs away backgrounds and sharpens
the subject. Expresses skin tones softly.
• To blur the background more, set the
lens to the telephoto position.
• You can shoot a vivid image by
focusing on the eye that is closer to
the lens.
• Use the lens hood to shoot backlit subjects.
• Use the red-eye reduction function if the eyes of your
subject turn red from the flash (page 40).
(Sports Action)
Shoots a moving subject at a fast
shutter speed so that the subject looks
as if it is standing still. The camera
shoots images continuously while the
shutter button is pressed.
• Press and hold the shutter button
halfway down until the right moment.
(Macro)
Shoots close-ups of the subjects such as
flowers, foods.
• You can shoot a closer subject using
a macro lens (sold separately).
• Set the flash mode to [Flash Off]
when you shoot a subject within 1 m
(3.3 feet).
• When shooting in macro mode, the SteadyShot function
will not be fully effective. Use a tripod to achieve better
results.
• The shortest focal distance does not change.
Selecting a shooting mode
(Portrait)
71
Selecting a shooting mode
(Landscape)
Shoots the entire range of scenery in
sharp focus with vivid colors.
• To accentuate the openness of the
scenery, set the lens to wide angle.
(Sunset)
Shoots the red of the sunrise or sunset
beautifully.
(Night Scene)
(Hand-held
Twilight)
(Night Portrait)
72
Shoots night scenes at a distance
without losing the dark atmosphere of
the surroundings.
• The shutter speed is slower, so using
a tripod is recommended.
• The picture may not be taken
properly when shooting a night scene in total darkness.
Shoots night scenes with less noise and
blur without using a tripod. A burst of
shots are taken, and image processing
is applied to reduce subject blur,
camera shake, and noise.
• Reducing blur is less effective even
in [Hand-held Twilight] when shooting:
– Subjects with erratic movement
– Subjects too close to the camera
– Subjects with a repeating pattern such as tiles, and
subjects with little contrast such as sky, sandy beach, or
lawn
– Subjects with constant change such as waves or water
falls
• In the case of [Hand-held Twilight], block noise may occur
when using a light source that flickers, such as fluorescent
lighting.
Shoots portraits in night scenes. Attach
and fire the flash.
• The shutter speed is slower, so using
a tripod is recommended.
Selecting a shooting mode
Shooting technique
• When you want finer images, set the mode dial to P, A, S, or M and use
the creative style function (page 130). In such cases, you can adjust the
exposure, ISO, etc.
Notes
• Since the camera judges the settings automatically, many features will be
unavailable, such as exposure compensation, ISO setting.
• The flash is set to [Autoflash] or [Flash Off] for each Scene Selection mode. You can
change these settings (pages 115, 119).
Sweep Panorama
1 Set the mode dial to
(Sweep Panorama).
2 Point the camera at the subject for which you want to adjust the
brightness and focus, and press the shutter button halfway
down.
3 Point the camera at the edge of
the composition, while pressing
the shutter button halfway down.
This part will not be taken
4 Press the shutter button fully down.
73
Selecting a shooting mode
This mode is suitable for
z Shooting expansive scenery, or high-rise buildings with dynamic composition.
Selecting a shooting mode
5 Pan or tilt the camera to the end,
following the guidance on the
screen.
Guidance bar
Notes
• If you cannot pan or tilt the camera across the entire subject within the given time, a
gray area occurs in the composed image. If this happens, move the camera fast to
record a full panoramic image.
• Since several images are stitched together, the stitched part will not be recorded
smoothly. While shooting, do not tilt the camera back and forth or right and left
while moving the camera across the scene.
• Under low light conditions, panoramic images may be blurred or not be recorded.
• Under lights that flicker such as fluorescent light, the brightness or color of the
combined image is not always the same.
• When the panoramic shot overall and the angle in which you fixed the focus and
exposure with AE/AF lock are extremely different in brightness, color and focus, the
shooting will not be successful. If this happens, change the lock angle and shoot
again.
• Sweep Panorama recording is not suitable when shooting:
– Moving subjects.
– Subjects too close to the camera.
– Subjects with a repeating pattern such as tiles, and subjects with little contrast such
as sky, sandy beach, or lawn.
– Subjects with constant change such as waves or water falls.
– Subjects with the sun or electric lights, etc. that are much brighter than
surroundings.
• Sweep Panorama recording may be discontinued in the following situations:
– You pan or tilt the camera too fast or too slow.
– There is too much camera shake.
• The camera continues shooting in Sweep Panorama recording, and the shutter keeps
clicking until the end of the shooting.
• [Auto Port. Framing] and the zoom feature of the camera cannot be used.
74
Selecting a shooting mode
Tips for Sweep Panorama shooting
Pan or tilt the camera in an arc with a
Vertical
constant velocity and in the same
direction
direction as the indication on the screen.
[Sweep Panorama] is better suited for
still subjects, rather than moving ones.
Horizontal direction
Radius as short as
possible
To change the image size
You can select the image size: MENU button t
Size].
1 t [Panorama:
To set the pan or tilt direction
You can set the direction in which to pan or tilt the camera.
MENU button t
1 t [Panorama: Direction] t Select the desired
setting
To scroll panoramic images (Scroll Playback)
Select a panoramic image, then press the center of the multi-selector.
• Pressing it again pauses the playback. You can scroll a panoramic image
by pressing v/V/b/B during pause.
75
Selecting a shooting mode
• In Sweep Panorama, it is recommended that you use a wide-angle lens.
• When you use a lens that has a long focal length, pan or tilt the camera
more slowly than when you use a wide-angle lens.
• Determine the scene and press the shutter button halfway, so that you can
lock the focus, exposure, and white balance.
• If greatly varied shapes or scenery are concentrated along a screen edge,
the image composition may fail. In such cases, adjust the frame
composition so that the section is in the center of the image, then shoot
again.
Selecting a shooting mode
Tele-zoom Cont. Priority AE
You can record images in high-speed continuous shooting by capturing the
narrow center area of an image.
This mode is suitable for
z Shooting a fast-moving subject continuously to capture a moment.
z Shooting a child’s expressions, changing continuously from moment to
moment.
1 Set the mode dial to
(Tele-zoom Cont. Priority AE)
(page 68).
• To change the mode, press the Fn button, then select another mode.
2 Adjust the focus and shoot the subjects.
• The camera continues to shoot while the shutter button is pressed fully
down.
(Tele-zoom
Cont. Priority AE)
Records the images continuously at a maximum of about 10
images per second with approx. ×2.3 zooming at full-frame
shooting, or with approx. ×1.5 zooming at APS-C size
shooting.
(Tele-zoom
Cont. Priority AE)
Records the images continuously at a maximum of about 8
images per second with approx. ×1.5 zooming at full-frame
shooting. Records the images with the full angle of view at
APS-C size shooting.
Shooting techniques
• When [Focus Mode] is set to other than [Single-shot AF], the aperture
value is set to F3.5 (when the maximum aperture value of the lens is
larger than F3.5, it is set to the maximum aperture value). However, the
ISO sensitivity can be adjusted. The focus and the exposure continue to
be adjusted during shooting.
76
Selecting a shooting mode
• In manual focus mode or when [Focus Mode] is set to [Single-shot AF],
you can adjust the ISO sensitivity and the aperture. When [Single-shot
AF] is selected, the focus is fixed at the first image.
Notes
• When the zoom scale is ×2.3, the image size is set to S size and when the zoom scale
is ×1.5, the image size can be set to M or S size.
• The shutter speed is slower, depending on the ISO or aperture setting. As a result, the
speed of continuous shooting may be slower.
• The Face Detection function is turned off.
• When [Auto HDR] is selected, the DRO process is performed temporarily according
to the DRO setting.
• You cannot set [Quality] to [RAW] or [RAW & JPEG] when
is selected.
Program Auto
1 Set the mode dial to P.
2 Set the shooting functions to your desired settings (pages 91 to
151).
3 Adjust the focus and shoot the subject.
77
Selecting a shooting mode
This mode is suitable for
z Using the automatic exposure, while keeping the custom settings for ISO
sensitivity, Creative Style, D-Range optimizer, etc.
Selecting a shooting mode
Program Shift
You can temporarily change the shutter
speed and aperture value combination
with the correct exposure determined by
the camera maintained.
Rotate the front or rear control dial to
select your desired combination while the
focus is achieved.
The exposure mode indication changes to
“P*.”
Aperture Priority
This mode is suitable for
z Putting the subject in sharp focus and blur everything in front of and beyond the
subject. Opening the aperture narrows the range that is in focus. (Depth of field
becomes shallower.)
z Shooting the depth of the scenery. Narrowing down the aperture widens the
range that is in focus. (Depth of field becomes deeper.)
1 Set the mode dial to A.
78
Selecting a shooting mode
2 Select the aperture value (Fnumber) with the front or rear
control dial.
Aperture (F-number)
Shutter speed
Selecting a shooting mode
• Smaller F-number: The foreground and
background of the subject are blurred.
Larger F-number: The subject and its
foreground and background are all in
focus.
• You cannot check the blurring of an
image on the LCD screen or in the
viewfinder. Check the recorded image
and adjust the aperture.
• When the camera judges that the proper
exposure is not obtained with the
selected aperture value, the shutter
speed flashes. In such cases, adjust the
aperture again.
3 Adjust the focus and shoot the subject.
The shutter speed is automatically adjusted to obtain correct exposure.
Shooting techniques
• The shutter speed may become slower depending on the aperture value.
When the shutter speed is slower, use a tripod.
• To blur the background more, use a telephoto lens or a lens that is
equipped with a smaller aperture value (bright lens).
• You can check the approximate blurring of the image before recording
using the preview button.
79
Selecting a shooting mode
To check blurring of the background (Preview button)
The LCD screen and the viewfinder
shows an image captured with the widest
aperture. The change in aperture affects
the sharpness of the subject image,
creating a discrepancy between the
sharpness of the image before shooting
Preview button
and that of the actual image.
While you are pressing the preview
button, you can see the image with the
aperture used in the actual shot so that
you can check the approximate sharpness
of the subject before shooting.
• Press the preview button after you adjust the focus.
• You can adjust the aperture in preview mode.
2 preview modes are provided with the camera:
[Shot. Result Preview]: The effect of DRO or the shutter speed value is also
reflected.
[Aperture Preview] (default setting): Only the aperture is reflected.
MENU button t
4 t [Preview Button] t Select the desired setting
(You can also set the function using [Func. of AEL button]/[ISO Button]/
[AF/MF button]/[Custom button])
Note
• The preview image may be darker, depending on the shutter speed value. However,
you can record images in accordance with the brightness you have set.
Shutter Priority
This mode is suitable for
z Shooting a moving subject at a moment in time. Use a faster shutter speed to
crisply shoot an instant of the movement.
z Tracing the movement to express the dynamism and flow. Use a slower shutter
speed to shoot a trailing image of the moving subject.
80
Selecting a shooting mode
1 Set the mode dial to S.
2 Select the shutter speed with the
front or rear control dial.
• When the camera judges that the proper
exposure is not obtained with the
selected shutter speed, the aperture
value flashes. In such cases, adjust the
shutter speed again.
3 Adjust the focus and shoot the subject.
The aperture is automatically adjusted to obtain correct exposure.
Shooting techniques
• When the shutter speed is slower, use a tripod.
• When shooting an indoor sport, select a higher ISO sensitivity.
Notes
• The
(Camera shake warning) indicator does not appear in Shutter Priority
mode.
• The higher the ISO sensitivity, the more conspicuous the noise.
• When the shutter speed is 1 second or longer, noise reduction (Long Exposure NR)
will be done for the same amount of time that the shutter was open after shooting.
You cannot do any further shooting during the reduction.
81
Selecting a shooting mode
Aperture (F-number)
Shutter speed
Selecting a shooting mode
Manual Exposure
This mode is suitable for
z Shooting with the desired exposure setting by adjusting both the shutter speed
and aperture.
1 Set the mode dial to M.
2 Rotate the front control dial to
adjust the shutter speed, and
rotate the rear control dial to
adjust the aperture.
• This camera allows you to set the ISO
sensitivity to [AUTO] in manual
exposure mode. When the ISO
sensitivity is set to [AUTO], the ISO
sensitivity is adjusted to obtain the
correct exposure, according to the
shutter speed and aperture value
combination.
• When the ISO sensitivity is set to
[AUTO] and the camera judges that the
proper exposure has not been obtained
with the selected value, the ISO
sensitivity flashes. In such cases, adjust
the shutter speed or aperture again.
82
ISO sensitivity
Aperture (F-number)
Shutter speed
Selecting a shooting mode
3 Shoot the image after the
LCD screen
exposure is set.
• When the ISO sensitivity is set to other
than [AUTO], check the exposure value
using Metered Manual*.
Toward +: Images become brighter.
Toward –: Images become darker.
* When the camera is in M mode, it will
show an under or over compensation
value based on the correct exposure. It
is displayed as a number on the LCD
screen, and it is displayed on the EV
scale in the viewfinder.
The screen in the viewfinder
Metered Manual
(Camera shake warning) indicator does not appear in manual exposure
Manual shift
You can change the shutter speed and aperture value combination without
changing the exposure you set.
Rotate the front or rear control dial while
pressing the AEL button to select the
shutter speed and aperture value
combination.
AEL button
83
Selecting a shooting mode
Note
• The
mode.
Metered Manual
Selecting a shooting mode
BULB
This mode is suitable for
z Shooting trails of light, such as fireworks.
z Shooting trails of stars.
1 Set the mode dial to M.
2 Rotate the front control dial to the
left until [BULB] appears.
• When the ISO sensitivity is set to
[AUTO], selecting [BULB] turns the
ISO sensitivity to [100].
BULB
3 Rotate the rear control dial to
adjust the aperture (F-number).
4 Press the shutter button halfway down to adjust the focus.
84
Selecting a shooting mode
5 Press and hold the shutter button for the duration of the
shooting.
As long as the shutter button is pressed, the shutter remains open.
Shooting techniques
Notes
• When using a tripod, turn off the SteadyShot function (page 60).
• The longer the exposure time, the more conspicuous the noise on the image.
• After shooting, noise reduction (Long Exposure NR) will be done for the same
amount of time that the shutter was open. You cannot do any further shooting during
the reduction. To prioritize the timing of the shot rather than the image quality, set
[Long Exposure NR] to [Off] (page 150).
• When the Smile Shutter or Auto HDR function is activated, or when [Picture Effect]
is set to [HDR Painting] or [Rich-tone Mono.], you cannot set the shutter speed to
[BULB].
• If the Smile Shutter, Auto HDR function, or the [HDR Painting] or [Rich-tone
Mono.] setting of [Picture Effect] is used with the shutter speed set to [BULB], the
shutter speed is temporarily set to 30 seconds.
• It is recommended that you start BULB shooting after the temperature of the camera
drops to prevent the quality of the image from deteriorating.
85
Selecting a shooting mode
• Use a tripod.
• Set the focus to infinity in manual focus mode when shooting fireworks,
etc. When the infinity position of the lens is not known, first adjust the
focus on fireworks that is set off in the same general area, then shoot
them.
• Use the Wireless Remote Commander (sold separately) (page 114).
Pressing the SHUTTER button on the Wireless Remote Commander
triggers BULB shooting and pressing it again stops BULB shooting. You
do not need to press and hold the SHUTTER button on the Wireless
Remote Commander.
• If you use a Remote Commander (sold separately) that is equipped with a
shutter button lock function, you can leave the shutter open using the
Remote Commander.
Functions available for each shooting
mode
The functions you can use depend on the selected shooting mode.
In the table below, indicates the function available. – indicates the
function not available.
The functions you cannot use are displayed in gray on the screen.
Shoot Mode
Exposure
Comp.
(106)
/
–
Cont.
Self-timer
Shooting
(111)
(111)
Face
Smile
Detection Shutter
(141)
(145)
Auto Port.
Framing
(143)
(69)
–
(71)
–
–
–
–
–
–
–
–
–
–
–
–
–
–
–
–
–
–
(73)
–
–
–
–
–
/
–
–
–
–
–
–
–
(76)
(77)
(78)
(80)
(82)
(65, 152)
–*
*
* When the exposure mode is set to M, the exposure can be compensated
only when the ISO sensitivity is set to [AUTO].
86
Switching the recording information display
Switching the recording information
display (DISP)
Each time you press the DISP button, the
recording information display changes as
follows in the default settings.
DISP button
For viewfinder
No Disp. Info.
Level
Histogram
Selecting the screen mode
You can select the desired screen mode. When you switch the screen by
pressing the DISP button, only selected screens are displayed. You can set
the available screens to be displayed on the LCD screen and the viewfinder
separately.
1 MENU button t
2 t [DISP Button(Monitor)] or [DISP
Button(Finder)]
2 Select the desired display with v/V/b/B on the multi-selector,
then press the center of the multi-selector.
3 Press the MENU button.
87
Switching the recording information display
• You can display all the information on the screen or the Graphic Display
that shows the shutter speed and aperture value as graphs.
Switching the recording information display (DISP)
Graphic Display
The Graphic Display shows the shutter
speed and aperture value as graphs, and
clearly illustrates how the exposure
works. The pointers on the shutter
speed indicator (A) and aperture
indicator (B) indicate the current value.
A
Display All Info.
Displays all the information on the screen.
No Disp. Info.
Does not display the information on the screen.
Level
The digital level gauge indicates
whether the camera is level in both the
horizontal and front-back directions.
When the camera is level in one
direction, the indicator turns to green.
• The error of the digital level gauge is
larger if you tilt the camera too far
forward or backward.
• A tilt of ±1° may be indicated even if
the camera is almost level.
B
Horizontal direction
Front-back
direction
Histogram
Displays a histogram (page 89).
For viewfinder*
You can set the status of the LCD screen to one suitable for
used with the viewfinder (page 25).
* This option can be set only when [DISP Button(Monitor)] is selected.
88
Switching the recording information display (DISP)
Histogram
Number of pixels
The histogram displays the luminance
distribution that shows how many pixels
of a particular brightness exist in the
picture.
The exposure compensation will change
the histogram accordingly.
Both ends of the histogram show a highkey or low-key portion. You cannot
restore these area with a computer later.
Adjust the exposure if necessary and
shoot again.
Dark
Light
Monitoring the subject through the lens without effects
displayed
You can monitor the subject through the lens without effects, such as the
exposure compensation, white balance, Creative Style, Picture Effect etc.,
displayed.
89
Switching the recording information display
Notes
• The histogram does not indicate the final recorded image. It indicates the condition
of the image just monitored on the screen. The histogram will differ based on
aperture setting, etc.
• The histogram differs between shooting and playback in the following situations:
– When firing the flash.
– When the subject has low intensity, such as night scenery.
Switching the recording information display (DISP)
MENU button t
OFF]
3 t [Live View Display] t [Setting Effect
• When [Setting Effect OFF] is selected, the Live View image in M mode
is always displayed with the appropriate brightness.
Note
• [Setting Effect OFF] cannot be selected when the exposure mode is set to Auto
Mode, Sweep Panorama, Movie or Scene Selection.
90
Adjusting the focus
Adjusting the focus
There are 2 methods for adjusting the focus: autofocus and manual focus.
Depending on the lens, the method for switching between the auto focus
and manual focus is different.
The type of lens
The lens is
equipped with a
focus mode switch
The switch to be
used
Lens
The lens is not
Camera
equipped with a
focus mode switch
To switch to auto
focus
Set the focus mode
switch on the lens to
AF. (Set [Focus
Mode] on the camera
to other than
[Manual Focus].)
Set [Focus Mode] on
the camera to other
than [Manual Focus].
To switch to manual
focus
Set the focus mode
switch on the lens to
MF.*
Set [Focus Mode] on
the camera to
[Manual Focus].
* When SSM lenses or SAM lenses compatible with DMF are used, you
can change the focus mode from the camera, even if the focus mode
switch on the lens is set to AF.
Autofocus
1 If the lens is equipped with the
focus mode switch, set it to AF.
2 Fn button t
(Focus Mode) t other than
(Manual Focus)
(DMF) or
91
Adjusting the focus
For details on lenses compatible with [Depth Map Assist Continuous AF]
and the assist area of the AF Range Control feature, visit the Sony web site
in your area, or consult your Sony dealer or local authorized Sony service
facility.
Adjusting the focus
3 Press the shutter button halfway
down to check the focus and shoot
the image.
• When the focus is confirmed, the focus
indicator changes to z or
(page 93).
• The AF area where the focus has been
confirmed turns green.
(Single-shot
AF)
AF area
Focus indicator
The camera focuses and the focus is locked when you press
the shutter button halfway down.
(Automatic AF) The Focus Mode is switched between Single-shot AF and
Continuous AF according to the movement of the subject.
When you press and hold the shutter button halfway down, if
the subject is motionless, the focus is locked and if the
subject is in motion, the camera continues to focus.
(Continuous
The camera continues to focus while the shutter button is
pressed and held halfway down.
• The audio signals will not sound when the subject is in
focus.
• Focus-lock cannot be used.
(Depth Map
Assist Continuous
AF)
Assist area
In addition to the Continuous AF
function, the camera continues to focus
on a subject using the assist area. This
option can be selected only when a
compatible lens is attached.
• The AF assist function works after the
camera focuses on a subject using the
19 AF areas. You cannot use only the Focus indicator
assist area to focus.
AF)
Shooting techniques
• Use [Single-shot AF] when the subject is motionless.
• Use [Continuous AF] or [Depth Map Assist Continuous AF] when the
subject is in motion.
• When you want to focus on a subject that moves from side to side and/or
up and down among the 19 AF areas, use [Depth Map Assist Continuous
AF].
92
Adjusting the focus
• To select the AF area used for focusing, set up [AF area] (page 95).
• To change the focusing speed, set up [AF drive speed] (page 38).
Notes
• While the camera is focusing automatically, some lenses do not allow you to touch
the rotating focusing ring.
• The assist area of the [Depth Map Assist Continuous AF] function may not work
properly in the following cases:
– Under insufficient light.
– When the drive mode is set to Hi of [Cont. Shooting] or bracket.
– When the exposure mode is set to Tele-zoom Continuous Priority AE or [Sports
Action] in Scene Selection.
Focus indicator
Focus indicator
Status
z lit
Focus locked. Ready to shoot.
lit
lit
Still focusing. You cannot release the shutter.
Cannot focus. The shutter is locked.
Subjects that may require special focusing
Using the autofocus, it is hard to focus on the following subjects. In such
cases, use the focus lock shooting feature (page 94) or manual focus
(page 101).
• A subject that is low in contrast, such as blue sky or a white wall.
• Two subjects at different distances overlapping in the AF area.
• A subject that is composed of repeating patterns, such as the facade of a
building.
• A subject that is very bright or glittering, such as the sun, the body of an
automobile, or the surface of water.
• Ambient light is not sufficient.
93
Adjusting the focus
z flashing
Focus is confirmed. Focal point moves following a moving
subject. Ready to shoot.
Adjusting the focus
To measure the exact distance to the subject
The
mark located on the top of the
camera shows the location of the image
sensor*. When you measure the exact
distance between the camera and the
subject, refer to the position of the
horizontal line.
* The image sensor is the part of the
camera that converts the light to an
electric signal.
Note
• If the subject is closer than the minimum shooting distance of the attached lens, the
focus cannot be confirmed. Make sure you put enough distance between the subject
and the camera.
Focus-lock
1 Place the subject within the AF
area and press the shutter button
halfway down.
The focus is locked.
• Set [Focus Mode] to [Single-shot AF].
2 Keep the shutter button halfway
down, and put the subject back in
the original position to recompose the shot.
3 Press the shutter button fully down to take the picture.
94
Adjusting the focus
AF area
Select the desired AF area to suit the
shooting conditions or your preference.
The AF area where the focus has been
confirmed turns green and the other AF
areas disappear.
AF area
Fn button t
(AF area) t Select the desired setting
The camera determines which of the 19 AF areas is used in
focusing.
(Zone)
Choose the zone for which you want to activate the focus
from among left, right, or center zone with the multi-selector.
The camera determines which of the AF areas in the selected
zone is used in focusing.
(Spot)
The camera uses the AF area located in the center area
exclusively.
(Local)
Choose the area for which you want to activate the focus
from among 19 AF areas with the multi-selector.
Notes
• [AF area] is fixed to [Wide] and you cannot select other settings when the exposure
mode is set to Auto Mode or Scene Selection, or when the Object Tracking function
is being used or the Smile Shutter is activated.
• The AF area may not be illuminated during continuous shooting or when the shutter
button is pressed all the way down without pause.
• The camera selects the assist area automatically. Even if you set it to [Local], you
cannot select the desired assist area.
Object Tracking
Keeps tracking a moving subject. In the default settings, when [Focus
Mode] is set to [Continuous AF] or [Depth Map Assist Continuous AF],
[On(Tracking focus w/ shutter)] will function.
95
Adjusting the focus
(Wide)
Adjusting the focus
1 Set [Focus Mode] to [Continuous AF] or [Depth Map Assist
Continuous AF] (page 91).
2 Fn button t
(Object Tracking) t [On(Tracking focus w/
shutter)]
3 Press the shutter button halfway
down so that the camera
automatically locks onto a target
and tracks the subject.
The camera continues to focus while the
shutter button is pressed and held
halfway down. When the focus is
achieved, the target frame turns to green.
Target frame
4 Press the shutter button to shoot the subject.
When the AF area is set to [Wide], the camera starts tracking the subject from
the area that the camera decided automatically.
The camera focus on the subject using all the areas during tracking.
• The camera can start tracking the subject from the selected area when [AF
area] is set to [Local] or [Zone].
Shooting techniques
• To capture persons, you can detect and track the person's face using the
following settings: [Object Tracking] is set to [On(Tracking focus w/
shutter)], [AF area] is set to [Wide], and [Smile/Face Detect.] is set to
[Face Detection On].
• When the subject is small on the Live View screen, you can track the
subject certainly by limiting the area used to focus on the subject using
the following settings: [Object Tracking] is set to [On(Tracking focus w/
shutter)], [AF area] is set to [Local] or [Zone].
96
Adjusting the focus
To change the mode
Fn button t
(Object Tracking) t [On] or [Off].
(On)
Press the center of the multi-selector on the recording
information display so that a target frame appears. Align the
target frame with the subject to be tracked, and press the
center of the multi-selector.The camera starts tracking the
subject.
When the focus is achieved, the target frame turns to green.
To cancel the tracking feature, press the center again.
(Off)
Deactivates the Object Tracking function.
To preferentially-track the face
You can select whether to preferentially-track a certain face or not when the
camera detects that face during object tracking.
MENU button t
6 t [Face Priority Tracking] t [On]
When the face is not visible on the screen, the camera tracks the body, and
when the face is visible, the camera tracks the face. If the targeted person
disappears from the screen while the camera is tracking, and then returns to
the screen, the camera focuses on that face again.
• If the camera tracks a face using the Object Tracking function with Smile
Shutter turned on, the face becomes the target of the smile detection
feature.
97
Adjusting the focus
Notes
• Tracking may be difficult in the following situations:
– The subject is moving too quickly.
– The subject is too small, or too large.
– The contrast between the subject and the background is poor.
– The subject is under dark lighting.
– The ambient light changes.
• The Object Tracking function cannot be used when the exposure mode is set to
Sweep Panorama, Tele-zoom Continuous Priority AE or [Hand-held Twilight] in
Scene Selection, or smart teleconverter is used, the manual focus function is
selected.
• The camera stops tracking a subject when the subject moves off of the screen.
• [On(Tracking focus w/ shutter)] can be set only when [Focus Mode] is set to
[Continuous AF] or [Depth Map Assist Continuous AF].
• If you start the Object Tracking function, the AF area is set to [Wide] automatically.
Adjusting the focus
• If you set the detected face as a target, even when [Face Priority
Tracking] is set to [Off], the camera tracks the body when the face is not
visible. If the targeted person disappears from the screen while the
camera is tracking, and then returns to the screen, the camera focuses on
that face again.
Restricting the autofocus range (AF Range Control)
You can restrict the autofocus range. This function allows the camera to
focus on subject without interference from objects in the back-ground and
fore-ground objects.
1 Press the AF RANGE (AF Range
Control) button.
AF RANGE button
2 Set the maximum shooting
distance with the front control dial
and the minimum shooting
distance with the rear control
dial.
• The AF area and assist area* that
overlap with the subject located within
the AF range you set turn to yellow.
* The assist area appears only when a
compatible lens is used.
Focus position of the lens
The setup AF range
Shooting distance value
98
Adjusting the focus
3 Press the AF RANGE button again to lock the distance.
• The limit range indicator remains displayed.
• The AF area and assist area that overlap with the subject located within the
AF range you set turn to yellow.
To cancel the AF Range Control function
Press the AF RANGE button again.
Shooting techniques
• Adjust the AF range to position V (the focus position of the lens) within
the range after you focus on the subject you want to shoot.
• Adjust the AF range to set the subject to be within or outside the range by
checking the yellow points of the AF area and assist area.
99
Adjusting the focus
Notes
• This function cannot be used with the manual focus or movie recording.
• If you change the lens, the AF range you have set will be reset.
• When a lens equipped with a focus range limiter function is attached, do not use this
function with the AF Range Control function on the camera. Use either of the
function.
• The shooting distance value is not displayed with a lens that does not have a distance
encoder feature.
• The shooting distance value is provided as a guide.
• The AF range and shooting distance value may not be the same as the actual focus
position of the lens.
• The actual AF range may not be the same as that of the yellow points of the AF area
and assist area.
• If the focus is not achieved, the AF area and assist area may not turn yellow.
• The AF area or assist area may not quickly or easily turn to yellow under insufficient
light or when the contrast of the subject is low, such as a solid color flat surface. In
such cases, use the contoured part of the subject, etc. to focus on the subject.
• You cannot use this function with the direct manual focus function, except when the
lens is equipped with a motor (SSM, SAM lenses*).
* Some SAM lenses may not be compatible with the direct manual focus function.
Refer to the operating instructions of the lens.
• The initial movement that sets the value to infinity may be performed when you use
this function with the AF/MF control function, except when the lens is equipped
with a motor (SSM, SAM lenses*).
Adjusting the focus
* Some SAM lenses may not be compatible with the AF/MF control function. Refer
to the operating instructions of the lens.
• For details on lenses compatible with the AF assist function, visit the Sony web site
in your area, or consult your Sony dealer or local authorized Sony service facility.
Adjusting the focus except for the shutter button (AF On)
You can adjust the focus using other buttons instead of the shutter button.
The setting for autofocus is set to the mode selected with [Focus Mode].
MENU button t
4 t Select the desired button* t [AF On]
* Select the setting among [Func. of AEL button], [ISO Button], [AF/MF
button], [Custom button], or [Preview Button].
Shooting technique
• If you do not want to use the shutter button to focus, make the following
settings in addition to the [AF On] setting.
– Set [AF w/ shutter] to [Off].
– Set [AEL w/ shutter] to your preference.
AF illuminator
You can set the AF illuminator to focus on a subject under dark lighting.
MENU button t
setting
2 t [AF Illuminator] t Select the desired
Notes
• AF illuminator does not operate when [Focus Mode] is set to [Continuous AF] or
[Depth Map Assist Continuous AF] or the subject is moving in [Automatic AF].
(The
or
indicator lights.)
• AF illuminator does not operate when [AF area] is set to [Local] or [Zone], and the
center area is not selected.
• The AF illuminator may not operate with focal lengths of 300 mm or longer.
• When a flash (sold separately) that is equipped with an AF illuminator is attached,
the AF illuminator of the flash is used.
• AF illuminator does not operate when the Smile Shutter function is used.
100
Adjusting the focus
AF Micro Adj.
You can finely adjust the focus of each lens.
Perform this operation only when needed. Note that you may not be able to
properly focus on a subject if you have made a poor adjustment.
MENU button t
3 t [AF Micro Adj.] t [On] t [amount] t
Select the desired value
• The larger the value, the farther the focusing position from the camera;
the smaller the value, the nearer the focusing position to the camera.
Manual focus
When it is difficult to get the proper focus in autofocus mode, you can
adjust the focus manually.
1 Set the focus mode switch on the
lens to MF.
101
Adjusting the focus
Notes
• We recommend that you decide the value under actual shooting conditions.
• When you attach a lens that is registered on the camera, the registered value is
displayed. If “–” is displayed as the value, then a total of 30 lenses have been
registered and no new lens can be registered. When you want to register a new lens,
attach a lens for which you can delete its registered value, and set that value to “±0,”
or reset the values of all the lenses with [Clear].
• If you perform AF fine adjustment with a lens of other manufacturers, the
adjustment values of Sony, Minolta, and Konica Minolta lenses may be affected. Do
not use this function with any lens from the manufactures that are not mentioned
here.
• You cannot individually perform AF fine adjustment when using the Sony, Minolta,
and Konica Minolta lenses that have the same specifications.
Adjusting the focus
2 If the lens does not have a focus mode switch, Fn button t
(Focus Mode) t
(Manual Focus)
• When [Focus Mode] is assigned to the silent multi-controller, you can use
the silent multi-controller instead (page 32).
3 Rotate the focusing ring of the
lens to achieve a sharp focus.
Focusing
ring
Notes
• When the Wide AF area is used, the center area is used for focusing; when the Zone
AF area is used, an object representing the selected area is used; and when the Local
AF area is used, an area that is selected with the multi-selector is used.
• When using a tele converter (sold separately), etc., rotation of the focusing ring may
not be smooth.
• The correct focus in the viewfinder is not achieved if the diopter is not adjusted
properly in viewfinder mode (page 17).
• Make sure to set the focus mode switch on the lens to MF for manual focus. Do not
rotate the focusing ring without setting to MF. Rotating the focusing ring forcibly
without switching to MF may damage the focusing ring (Except for lenses that are
equipped with the Direct manual focus function.).
Enhancing the outline of in-focus ranges (Peaking)
You can enhance the outline of in-focus ranges with a specific color in
manual focus. This is convenient to finely focus on a subject in macro
shooting or portrait shooting.
You can set the peaking level and the peaking color.
MENU button t
setting
3 t [Peaking Level] t Select the desired
Notes
• Since the camera judges that sharp areas are in focus, the peaking level is different,
depending on the subject, shooting situation, or on the lens used.
102
Adjusting the focus
• The outline of in-focus ranges is not enhanced when the camera is connected using
an HDMI cable.
To set the color of the peaking function
You can set the color used for the peaking function.
MENU button t
3 t [Peaking Color] t Select the desired setting
Note
• This item cannot be set when [Peaking Level] is set to [Off].
Focus Magnifier
You can check the focus by enlarging the image before shooting.
1 MENU button t
4 t [Smart Telecon. Button] t [Focus
Magnifier]
2 Press the Focus Magnifier button.
103
Adjusting the focus
Focus Magnifier button
Adjusting the focus
3 Press the Focus Magnifier button
again to enlarge the image and
select the portion you want to
enlarge with v/V/b/B on the
multi-selector.
• Each time you press the Focus
Magnifier button, the zoom scaling
changes as follows:
Full-frame size: Approx. ×5.9 t
Approx. ×11.7
APS-C size: Approx. ×3.8 t Approx.
×7.7
4 Confirm and adjust the focus.
• Rotate the focusing ring to adjust the focus in manual focus mode.
• If you press the center of the multi-selector, the enlarged portion returns to
the center.
• The Focus Magnifier function is canceled if you press the shutter button
halfway down.
5 Press the shutter button fully down to shoot the image.
• You can record images when an image is enlarged, however the recorded
image is for full display.
• The Focus Magnifier function will be released after shooting.
Direct manual focus (DMF)
You can make fine adjustments after adjusting the focus in auto focus
(Direct manual focus).
You can quickly focus on a subject rather than using the manual focus from
the beginning. This is convenient in cases such as macro shooting.
1 Fn button t
104
(Focus Mode) t
(DMF)
Adjusting the focus
2 Press the shutter button halfway down to lock the focus.
3 Turn the focusing ring to fine-tune the focus while pressing the
shutter button halfway down.
Note
• Some SAM lenses are not compatible with the Direct manual focus function. Refer
to the operating instructions of your lens to find out if your lens is compatible with it.
The Direct manual focus function on the lens
When the lens is equipped with the Direct manual focus function and the
focus mode is set to [Single-shot AF] or [Automatic AF], you can finely
adjust the focus with the focusing ring after focus is lock (For example, the
DT 16-50mm F2.8 SSM).
AF/MF control
Press the AF/MF button.
AF/MF button
In auto focus mode: The focus mode is
switched temporarily to the manual
focus. Press and hold the AF/MF button
and adjust the focus by rotating the
focusing ring.
In manual focus mode: The focus mode is Focusing ring
switched temporarily to the auto focus
and the focus is locked.
• You can maintain the selected mode without pressing and holding the AF/
MF button when [AF/MF button] is set in the
Custom menu
(page 176).
105
Adjusting the focus
You can switch between auto focus and manual focus without changing the
camera composition (AF/MF control).
Adjusting the brightness of the image
Exposure compensation
Normally, the exposure is selected automatically (Automatic exposure).
Based on the exposure acquired by the automatic exposure, you can
perform exposure compensation. You can make the entire image brighter
by shifting to the + side. The entire image becomes darker when you shift it
to the – side (Exposure compensation).
1 Press the
button.
2 Adjust the exposure with b/B on
button
Display of the LCD screen
the multi-selector.
Toward + (over): Brightens an image.
Toward – (under): Darkens an image.
• In viewfinder mode, confirm the
exposure using the EV scale.
Compensated exposure
Display of the viewfinder
Compensated exposure
3 Adjust the focus and shoot the subject.
Shooting techniques
• Adjust the compensation level by checking the recorded image.
• Using bracket shooting, you can shoot multiple images with the exposure
shifted to the plus or minus sides (page 112).
106
Exposure compensation
Notes
• This item cannot be set when the exposure mode is set to Auto Mode or Scene
Selection.
• When the exposure mode is set to M, the exposure can be compensated only when
the ISO sensitivity is set to [AUTO].
To compensate the exposure with the front or rear control dial
You can compensate the exposure with the front control dial or rear control
dial without pressing the
button.
MENU button t
5 t [Dial exp.comp] t Select the desired setting
Notes
• If you assign the exposure compensation function to the front or rear control dial, the
originally-assigned function can be operated with the other control dial.
• When the exposure mode is set to M and the ISO sensitivity is set to [AUTO], [Dial
exp.comp] is invalid.
To change the influence of exposure compensation
You can set whether to compensate the exposure within the flash light
range or for ambient light only.
MENU button t
5 t [Exp.comp.set] t Select the desired setting
Adjusting the brightness of the image
107
AE Lock
When shooting into the sun or by a window, and the exposure may not be
appropriate for the subject, use the light meter where the subject is bright
enough and lock the exposure before shooting. To reduce the brightness of
the subject, point the camera towards a spot that is brighter than the subject
and use the light meter to lock the exposure of the entire image. To make
the subject brighter, point the camera towards a spot that is darker than the
subject and use the light meter to lock the exposure of the entire image.
This section describes how to shoot a brighter image of the subject using
the (Spot).
1 Fn button t
(Metering Mode) t
(Spot)
2 Adjust the focus on the portion you want to lock the exposure.
3 Press the AEL button to lock the
AEL button
exposure.
(AE lock icon) appears.
• The exposure value is based on the
locked exposure in the spot metering
circle. That value is displayed on the
EV scale.
4 While pressing the AEL button, focus on the subject, and shoot
the subject.
• If you continue to shoot with the same exposure value, press and hold the
AEL button after the shooting. The setting is canceled when the button is
released.
108
Metering Mode
Fn button t
(Metering Mode) t Select the desired mode
(Multi segment)
This mode measures light on each area after dividing the total
area into multiple areas and determines the proper exposure
of the entire screen.
(Center weighted) While emphasizing the central area of the screen, this mode
measures the average brightness of the entire screen.
(Spot)
This mode measures light only in the spot metering circle
located in the center area.
Shooting techniques
• Use [Multi segment] metering for general shooting.
• When there is a high contrast subject in the AF area, measure the light of
the subject you want to shoot with the optimal exposure using the spot
metering function and take advantage of an AE lock shooting (page 108).
Note
• When the exposure mode is set to Auto Mode or Scene Selection, or when the zoom
feature of the camera is used, [Metering Mode] is fixed to [Multi segment] and you
cannot select other modes.
Adjusting the brightness of the image
109
Using the drive mode
Selecting the drive mode
You can use an appropriate drive mode to suit your purposes, such as
single-shot advanced, continuous advanced, or bracket.
button t Select the desired
button
mode
(Single
Shooting) (110)
This mode is for normal shooting.
(Cont. Shooting) The camera records the images continuously.
(111)
(Self-timer) (111) The 10-second self-timer is convenient when the
photographer wants to be in a photo and the 2-second selftimer is convenient to reduce the camera shake.
(Bracket:
Cont.) (112)
You can shoot the specified number of images, each with
different degrees of exposure.
(Single
Bracket) (112)
You can shoot the specified number of images, shot by shot,
each with different degrees of exposure.
(WB
bracket) (113)
Based on the selected white balance, and the color
temperature/color filter, 3 images are recorded with the white
balance shifted.
(DRO
Bracket) (114)
You can shoot 3 images with the value of D-Range Optimizer
shifted.
(Remote Cdr.)
(114)
You can shoot still images using the SHUTTER or 2SEC (the
shutter is released after 2 seconds) buttons on the RMTDSLR1/RMT-DSLR2 Wireless Remote Commander (sold
separately), or shoot movies using the START/STOP button
(only provided with the RMT-DSLR2).
Shooting single shot
(Drive) button t
(Single Shooting)
Note
• When the exposure mode is set to [Sports Action] in Scene Selection, you cannot
shoot single shot.
110
Selecting the drive mode
Cont. Shooting
1
(Drive) button t
(Cont. Shooting) t Select the
desired speed with b/B on the multi-selector
2 Adjust the focus and shoot the subject.
• When you press and hold the shutter button, the recording continues.
Shooting technique
• To shoot continuously faster, set the exposure mode to Tele-zoom
Continuous Priority AE (page 76).
Notes
• When
is selected, the image recorded between the frames is displayed.
• You cannot shoot continuously when using Scene Selection modes other than
[Sports Action].
Self-timer
1
• The number right next to
selected.
is the number of seconds that is currently
2 Adjust the focus and shoot the subject.
• When the self-timer is activated, audio signals and the self-timer lamp
indicate the condition. The self-timer lamp flashes quickly and the audio
signal sounds quickly right before the shooting.
To cancel the self-timer
Press the
(Drive) button.
111
Using the drive mode
(Drive) button t
(Self-timer) t Select the desired
setting with b/B on the multi-selector
Selecting the drive mode
Bracket: Cont./Single Bracket
Base exposure
– direction
+ direction
Bracket shooting allows you to shoot several images, each with different
degrees of exposure. Specify the value of deviation (steps) from the base
exposure, and the camera shoots 3 or 5 images while automatically shifting
the exposure.
1
(Drive) button t
(Bracket: Cont.) or
(Single
Bracket) t Select the desired bracket step and the number of
images with b/B on the multi-selector
2 Adjust the focus and shoot the subject.
The base exposure is set at the first shot in the bracket.
• Press and hold the shutter button until recording stops when [Bracket:
Cont.] is selected.
• Press the shutter button shot by shot when [Single Bracket] is selected.
Notes
• When the exposure mode is set to M and the ISO sensitivity is set to other than
[AUTO], the exposure is shifted by adjusting the shutter speed. When the ISO
sensitivity is set to [AUTO], the exposure is shifted by adjusting the ISO sensitivity.
• When you adjust the exposure, the exposure is shifted based on the compensated
value.
• The bracket cannot be used when the exposure mode is set to Auto Mode, Sweep
Panorama, Tele-zoom Continuous Priority AE, or Scene Selection.
• When the flash is fired, flash bracket, which shifts the amount of flash light, is
selected, even if [Bracket: Cont.] is selected. To shoot, press the shutter button shot
by shot.
112
Selecting the drive mode
The EV scale in bracket shooting
Ambient light* bracket
0.3 steps, 3 shots
Exposure compensation 0
Flash bracket
0.7 steps, 3 shots
Flash compensation –1.0
Viewfinder
LCD screen (When
[DISP Button(Monitor)]
is set to [For
Shown in the top row.
viewfinder])
Shown in the bottom row.
* Ambient light: Any light other than the flash light that shines on the scene
for an extended period of time, such as natural light, a light bulb, or a
fluorescent light.
• In bracket shooting, the same number of indices as the number of
recordable images is displayed on the EV scale.
• When the bracket shooting starts, the indices that indicate already
recorded images start to disappear one by one.
WB bracket
1
• When Lo is selected, it is shifted by 10 MK–1*, and when Hi is selected, it is
shifted by 20 MK–1.
2 Adjust the focus and shoot the subject.
* MK–1: a unit to indicate the color conversion quality in color temperature filters (The
same value as “Mired.”).
113
Using the drive mode
(Drive) button t
(WB bracket) t Select the
desired setting with b/B on the multi-selector
Selecting the drive mode
DRO Bracket
1
(Drive) button t
(DRO Bracket) t Select the
desired setting with b/B on the multi-selector
• When Lo is selected, the image is recorded with DROLv1, Lv2, and Lv3,
and when Hi is selected, the image is recorded with DROLv1, Lv3, and
Lv5.
2 Adjust the focus and shoot the subject.
Remote Cdr.
1
(Drive) button t
(Remote Cdr.)
2 Focus on the subject, point the transmitter of the Wireless
Remote Commander to the remote sensor, and shoot the
image.
Notes
• The RMT-DSLR1 Wireless Remote Commander (sold separately) cannot be used
for movie recording. Use the RMT-DSLR2 (sold separately).
• You can check the START/STOP operation of the RMT-DSLR2 by the light of the
self-timer lamp on the camera.
• When [MOVIE Button] is set to [Movie Mode Only], the START/STOP button on
the Remote Commander can be available only when the mode dial is set to Movie
(only for the RMT-DSLR2).
• Refer also to the operating instructions supplied with the Wireless Remote
Commander.
114
Advanced shooting
Using the flash (sold separately)
In a dark location, using the flash allows you to shoot the subject brightly,
and it also helps to prevent camera shake. When shooting into the sun, you
can use the flash to shoot a bright image of the backlit subject.
For details on how to use the flash, refer to the operating instructions
supplied with the flash.
1 Remove the Shoe Cap and attach
the flash (sold separately).
• Firmly push the flash into the Multi
interface shoe in the direction of the
arrow until it stops. Confirm that it is
locked.
• When you use a flash compatible with
the Auto-lock Accessory shoe, attach
the Shoe adaptor to the camera
(page 24).
2 Turn the flash on and after the
flash charging is completed,
shoot the subject.
3 Fn button t
(Flash charging) indicator
(Flash Mode) t Select the desired setting
• For further information on the flash modes available for each shooting
mode, see page 119.
Note
• The lens may block the light of the flash and a shadow may appear on the bottom of
the image. Remove the lens hood.
115
Advanced shooting
Flashing: The flash is being charged.
Lit: The flash has been charged.
• When you press the shutter button
halfway down under dark lighting in
auto focus mode, the AF illuminator of
the flash may be emitted.
Using the flash (sold separately)
(Flash Off)
Does not fire.
(Autoflash)
Fires in dark environments or when shooting towards bright
light.
(Fill-flash)
(Rear Sync.)
(Wireless)
Fires every time you trigger the shutter.
Fires right before the exposure is completed every time you
trigger the shutter.
Rather than attaching a flash on the camera, you can create
more contrast, resulting in a more three-dimensional picture.
Shooting techniques
• When using the flash, shoot the subject at a distance of 1 m (3.3 feet) or
greater.
• When shooting indoors or shooting nightscapes, you can use slow sync to
shoot a brighter image of people and backgrounds.
• You can use rear sync to shoot a natural image of the trail of a moving
subject such as a moving bicycle or a walking person.
• When using the HVL-F60M/HVL-F58AM/HVL-F43AM Flash (sold
separately), you can shoot with the High-speed sync feature at any shutter
speed. For details, refer to the operating instructions supplied with the
flash.
Wireless flash
1 Remove the Shoe Cap and attach the HVL-F60M/HVL-F58AM/
HVL-F43AM/HVL-F20AM flash to the camera (page 115).
• When you attach an HVL-F58AM, HVL-F43AM or HVL-F20AM, attach
the Shoe adaptor to the camera beforehand (page 24).
2 Set the flash to “wireless controller.”
3 Fn button t
116
(Flash Mode) t
(Wireless)
Using the flash (sold separately)
4 Place the flash that has been set to wireless away from the
camera.
5 If you perform a test fire of the flash, press the AEL button.
Note
• Change the channel of the flash when another photographer is using a wireless flash
nearby and his/her flash light causes your flash to fire. To change the channel of the
flash, refer to the operating instructions supplied with it.
Setup of the AEL button
When using a wireless flash, it is recommended that you set [Func. of AEL
button] to [AEL hold] in the
Custom menu (page 176).
Wireless flash with lighting ratio control
You can use the wireless lighting ratio control in combination with the
multiple flashes. For details, refer to the operating instructions supplied
with the flash (HVL-F60M, HVL-F58AM, HVL-F43AM).
Slow Sync
If you use the slow sync shooting feature with a slower shutter speed, you
can capture a clear image of both the subject and the background. This is
convenient when you shoot a portrait at night with a dark background.
Advanced shooting
Shoot with the SLOW SYNC button
pressed.
The
icon lights up on the screen,
indicating that the exposure is locked.
SLOW SYNC button
117
Using the flash (sold separately)
Notes
• When the exposure mode is set to S or M, slow sync shooting is not available using
the SLOW SYNC button.
• When a function other than the AEL function is selected in [Func. of AEL button],
slow sync shooting is not available using the SLOW SYNC button. When the AEL
function is selected in [ISO Button], [AF/MF button], [Custom button], or [Preview
Button], slow sync shooting is available using these buttons.
Using a flash equipped with a flash sync terminal cord
Open the cover of the (flash sync)
terminal and plug the cord in.
(flash sync) terminal
• You can use a flash equipped with a flash sync terminal of the opposite
polarity.
Notes
• Select the manual exposure mode (settings other than ISO AUTO are recommended)
and set the shutter speed to 1/250 second. If the shutter speed recommended on the
flash is slower than that, use the recommended speed or an even slower speed.
• If you cannot confirm your composition in dark situations, change the [Live View
Display] setting so that the image is always displayed with the appropriate
brightness (page 89).
• Use a flash with a flash sync voltage of 400 V or less.
• Before you connect the flash sync cord to the (flash sync) terminal, turn off the
power of the connected flash. If the power is on, it may flash when you connect the
cord.
• The flash will always be full emission. Flash compensation (page 120) cannot be
used.
• Using auto white balance is not recommended. Use custom white balance to gain
more precise white balance.
• The flash indicator is not displayed when the (flash sync) terminal is plugged in.
118
Flash modes available
The flash modes you can select depend on the shooting mode and functions
selected.
In the table below, indicates the function selectable. – indicates the
function not selectable.
The flash modes you cannot select are displayed in gray on the screen.
Shoot Mode
/
(69)
(Flash
Off)
(Autoflash)
(Fillflash)
–
–
–
–
–
–
–
–
–
–
–
–
–
–
–
–
–
–
–
–
–
–
(73)
/
–
–
(77)
–
–
(78)
–
–
(80)
–
–
(82)
–
–
(65, 152)
–
–
–
–
–
–
–
–
–
–
–
–
–
Advanced shooting
–
(76)
(Wireless)
–
–
(71)
(Rear
Sync.)
119
Flash Compensation
When shooting with the flash, you can adjust the amount of flash light
alone, without changing the exposure compensation. You can only change
the exposure of a main subject that is within the flash range.
Fn button t
(Flash Comp.) t Select the desired setting
Toward +: Makes the flash level higher.
Toward –: Makes the flash level lower.
Notes
• This item cannot be set when the exposure mode is set to Auto Mode, Sweep
Panorama, or Scene Selection.
• The higher flash effect may not be visible due to the limited amount of flash light, if
the subject is outside the maximum range of the flash. If the subject is very close, the
lower flash effect may not be visible.
Exposure compensation and flash compensation
Exposure compensation changes the shutter speed, aperture, and ISO sensitivity (when
[AUTO] is selected) to perform the compensation.
Flash compensation only changes the amount of flash light.
120
Flash control
MENU button t
setting
2 t [Flash control] t Select the desired
ADI flash
This method controls the lighting of the flash, factoring in the
focus distance information and light metering data from the
pre-flash. This method enables an accurate flash
compensation with virtually no effect from the reflection off
the subject.
Pre-flash TTL
This method controls the amount of flash light depending on
the data only from pre-flash light metering. This method is
susceptible to the reflection off the subject.
ADI: Advanced Distance Integration
TTL: Through the lens
• When [ADI flash] is selected, using a lens that has a distance encoder
feature can provide more accurate flash compensation by utilizing
distance information.
121
Advanced shooting
Notes
• When the distance between the subject and the flash cannot be determined (wireless
flash shooting using a flash, shooting with an off-camera flash using a cable,
shooting with a macro twin flash, etc.), the camera automatically selects Pre-flash
TTL mode.
• Select [Pre-flash TTL] in the following cases, as the camera cannot perform flash
compensations with ADI flash.
– A wide panel is attached to the HVL-F36AM flash.
– A diffuser is used for flash shooting.
– A filter with an exposure factor, such as an ND filter, is used.
– A close-up lens is used.
• ADI flash is only available in combination with a lens that is provided with a
distance encoder. To determine if the lens is equipped with a distance encoder, refer
to the operating instructions supplied with the lens.
• This item cannot be set when the exposure mode is set to Sweep Panorama, or [Night
Scene]/[Hand-held Twilight] in Scene Selection.
FEL lock
In normal flash shooting, the amount of flash light is automatically adjusted
to get the optimum exposure. You can lock the amount of flash light
beforehand.
FEL: Flash Exposure Level
1 Put the subject for which you want
to lock the FEL in the center area
of the screen and focus on it.
2 Press the custom button to lock
Custom button
the amount of flash light.
• The flash pre-fills the flash light.
•
(FEL lock) mark lights.
3 Recompose the shot and shoot
the subject.
• To cancel the FEL lock function, press
the custom button again.
Flashes compatible with the FEL lock function
• The HVL-F60M and HVL-F43AM can be used with the Clip-on LCD
monitor, an off-camera using a cable or be used for wireless (controller/
remote) shooting.
• The HVL-F58AM and HVL-F20AM can be used with the Clip-on LCD
monitor or an off-camera using a cable.
Notes
• This function cannot be set when a flash is not attached.
122
FEL lock
• An error message appears if you attempt to set a flash not compatible with the FEL
lock function.
•
is indicated when you have locked both the AE and FEL.
To change the function of the custom button
You can set the button to hold the locked level while the button is held
down ([FEL Lock hold]) or assign another function.
MENU button t
setting
4 t [Custom button] t Select the desired
Advanced shooting
123
Setting ISO
Sensitivity to light is expressed by the ISO number (recommended
exposure index). The larger the number, the higher the sensitivity.
1 Press the ISO button to display
ISO button
the ISO screen.
2 Select the desired setting with v/V on the multi-selector.
• The larger the number, the higher the noise level.
• If you want to select [Multi Frame Noise Reduct.], display the setup screen
with B, and select the desired value with v/V.
• The number changes in increments of 1/3 of a step using the rear control
dial as with the multi-selector, and it changes in increments of 1 step using
the front control dial.
Notes
• The recordable range of the brightness of a subject (dynamic range) is slightly
narrower for areas where ISO is less than 100.
• When the exposure mode is set to Auto Mode, Sweep Panorama, or Scene Selection,
ISO is fixed to [AUTO] and you cannot select other ISO numbers.
• When the exposure mode is set to P/A/S/M and ISO is set to [AUTO], ISO is
automatically set between ISO 100 and ISO 6400.
To change the automatic adjustment range in [AUTO]
When [AUTO] is selected, press B, select [ISO AUTO Maximum] or [ISO
AUTO Minimum], then select the desired range.
Multi frame noise reduction
The camera automatically shoots multiple images continuously, combines
the images, reduces the noise, and records 1 image. In multi frame noise
124
Setting ISO
reduction, you can select larger ISO numbers than the maximum ISO
sensitivity.
The image recorded is 1 combined image.
1 Press the ISO button to display
ISO button
the ISO screen.
2 Select
(Multi Frame Noise Reduct.) with v/V on the multi-
selector.
Notes
• When [Quality] is set to [RAW] or [RAW & JPEG], this function cannot be used.
• The flash, D-Range optimizer, and [Auto HDR] cannot be used.
Advanced shooting
125
Compensating for the brightness and
contrast automatically (D-Range)
Fn button t
(Off)
(DRO/Auto HDR) t Select the desired setting
Disables the DRO/Auto HDR functions.
(D-Range Opt.) By dividing the image into small areas, the camera analyses
the contrast of light and shadow between the subject and the
background, producing the image with the optimal brightness
and gradation.
(Auto HDR)
Shoots 3 images with different exposures, and then overlays
the correctly exposed image, the bright areas of an under
exposed image and the dark areas of an over exposed image
to create an image with rich gradation.
2 images are recorded: an image with the correct exposure
and an overlaid image.
D-RangeOptimizer
1 Fn button t
(DRO/Auto HDR) t
(D-Range Opt.)
2 Select an optimal level with b/B on the multi-selector.
(D-Range
Optimizer: Auto)
(Level)*
* Lv_ displayed with
Corrects the brightness automatically.
Optimizes the gradations of a recorded image in each area of
the image. Select the optimal level between Lv1 (weak) and
Lv5 (strong).
is the step currently selected.
Notes
• The setting is fixed to [Off] when the exposure mode is set to Sweep Panorama, or
when [Multi Frame Noise Reduct.] or [Picture Effect] is used.
• The setting is fixed to [Off] when [Sunset], [Night Scene], [Night Portrait], or
[Hand-held Twilight] is selected in Scene Selection. The setting is fixed to [Auto]
when other modes are selected in Scene Selection.
126
Compensating for the brightness and contrast automatically (D-Range)
• When shooting with the D-Range optimizer, the image may be noisy. Select the
proper level by checking the recorded image, especially when you enhance the
effect.
Auto HDR
1 Fn button t
(DRO/Auto HDR) t
(Auto HDR)
2 Select an optimal level with b/B on the multi-selector.
(Auto HDR:
Exposure Diff. Auto)
Corrects the exposure difference automatically.
(Exposure
Difference Level)*
Sets the exposure difference, based on the contrast of the
subject. Select the optimal level between 1.0Ev (weak) and
6.0Ev (strong).
For example: When 2.0Ev is selected, 3 images are overlaid:
an image with –1.0Ev, an image with the correct exposure,
and an image with +1.0Ev.
* _Ev displayed with
is the step currently selected.
Shooting technique
Notes
• You cannot use this function on RAW images.
• When the exposure mode is set to Auto Mode, Sweep Panorama, Tele-zoom
Continuous Priority AE or Scene Selection, or when [Multi Frame Noise Reduct.] is
selected, you cannot select [Auto HDR].
• You cannot start the next shoot until the capture process is completed after you
shoot.
• You may not obtain a desired effect depending on the luminance difference of a
subject and the shooting conditions.
• When the flash is used, this function has little effect.
127
Advanced shooting
• Since the shutter is released 3 times for 1 shot, be careful about the
following:
– Use this function when the subject is motionless or does not blink.
– Do not recompose.
Compensating for the brightness and contrast automatically (D-Range)
• When the contrast of the scene is low or when camera shake or subject blur is
occurred, you may not obtain good HDR images. If the camera has detected a
problem,
is displayed on the recorded image to inform you of this situation.
Shoot again, as necessary, paying attention to the contrast or blur.
128
Setting the image processing
Picture Effect
Select the desired effect filter to achieve more impressive and artistic
expression.
Fn button t
(Picture Effect) t Select the desired setting
• When a mode that has a fine adjustment option is selected, select the
desired setting with b/B on the multi-selector.
(Off)
Disables the Picture Effect function.
(Toy Camera)
Creates the look of a Toy Camera photo with shaded corners
and pronounced colors. You can set the color tone with b/B.
(Pop Color)
Creates a vivid look by emphasizing color tones.
(Posterization)
Creates a high contrast, abstract look by heavily emphasizing
primary colors, or in black and white. You can select primary
colors or black and white with b/B.
(Retro Photo)
Creates the look of an aged photo with sepia color tones and
faded contrast.
(Soft High-key)
Creates an image with the indicated atmosphere: bright,
transparent, ethereal, tender, soft.
(Partial Color)
(High Contrast
Mono.)
Creates an image which retains 1 specific color, but converts
others to black and white. You can select a color with b/B.
Creates a high-contrast image in black and white.
Creates an image filled with a soft lighting effect. You can set
the intensity of the effect with b/B.
(HDR Painting)
Creates the look of a painting, enhancing the colors and
details. The camera releases the shutter 3 times. You can set
the effect intensity with b/B.
(Rich-tone
Mono.)
(Miniature)
Creates an image in black and white with rich gradation and
reproduction of details. The camera releases the shutter 3
times.
Creates an image which enhances the subject vividly, with
the background defocused considerably. This effect may
often be found in pictures of miniature models. You can
select the area to be in focus with b/B. The focus on other
areas is greatly reduced.
129
Advanced shooting
(Soft Focus)
Setting the image processing
Notes
• When a zoom feature other than optical zoom is used, the [Toy Camera] and
[Miniature] effects are not available.
• When [Partial Color] is selected, images may not retain the selected color,
depending on the subject or shooting condition.
• When the exposure mode is set to Auto Mode, Sweep Panorama, or Tele-zoom
Continuous Priority AE, or when [Quality] is set to [RAW] or [RAW & JPEG],
Picture Effect cannot be used.
• When [HDR Painting], [Miniature], [Rich-tone Mono.] or [Soft Focus] is selected,
you cannot confirm the effect before shooting. You cannot also set the drive mode.
• When the contrast of the scene is low or when significant camera shake or subject
blur has occurred with [HDR Painting] or [Rich-tone Mono.] selected, you may not
obtain good HDR images. If the camera detects such situation,
appears on the
recorded image to inform you of this situation. Shoot again, as necessary,
recomposing or paying attention to the blur.
Creative Style
You can select the style to be used to perform image processing from
among 13 styles, and you can also adjust the contrast, saturation, and
sharpness for each Creative Style.
You can also adjust the exposure (shutter speed and aperture), unlike Scene
Selection where the camera adjusts the exposure.
1 Fn button t
(Creative Style)
• 13 Creative Styles and 6 style boxes (as
, the number is displayed on the
left of the icon) are displayed. You can
register your adjustment in a style box.
Creative Style/Style box
130
Setting the image processing
2 Select the desired Creative Style
or style box with v/V on the
multi-selector.
• When selecting a style box, move the
cursor to the right with B, then select
the desired Creative Style.
• Using the style box, you can recall the
style settings that were registered with
finely-controlled settings.
Displayed only when a style box is
selected.
3 When you want to adjust
(Contrast), (Saturation), or
(Sharpness), select the desired
item with b/B, then adjust the
value with v/V.
For shooting various scenes with rich gradation and beautiful
colors.
(Vivid)
The saturation and contrast are heightened for shooting
striking images of colorful scenes and subjects such as
flowers, spring greenery, blue sky, or ocean views.
(Neutral)
The saturation and sharpness are lowered for capturing
images in a quiet tone. This is also suitable for capturing
image material to be modified with a computer.
(Clear)
For capturing images in a clear tone with limpid colors in the
highlighted area, suitable for capturing radiant light.
(Deep)
For capturing images with deep and dense color expressions,
suited to capturing the solid presence of the subject.
(Light)
For capturing images with bright and uncomplicated color
expressions, suited to capturing refreshingly light ambience.
(Portrait)
For shooting the skin color in a soft tone, ideally suited to
shooting portraits.
(Landscape)
The saturation, contrast, and sharpness are heightened for
shooting vivid and crisp scenery. Distant landscapes also
stand out more.
(Sunset)
For shooting the beautiful red of the setting sun.
131
Advanced shooting
(Standard)
Setting the image processing
(Night Scene)
The contrast is attenuated for capturing a nightscape that is
more faithful to the real view.
(Autumn leaves) For capturing autumn scenes, vividly highlighting the red and
yellow of coloring leaves.
(Black & White)
For shooting images in black and white monotone.
(Sepia)
For capturing images in sepia monotone.
(Contrast),
style box.
(Saturation), and
(Sharpness) can be adjusted for each
(Contrast)
The higher the value selected, the more the difference of light
and shadow is accentuated, thus making an impact on an
image.
(Saturation)
The higher the value selected, the more vivid the color. When
a lower value is selected, the color of the image is restrained
and subdued.
(Sharpness)
Adjusts the sharpness. The higher the value selected, the
more the contours are accentuated, and the lower the value
selected, the more the contours are softened.
Notes
• When the exposure mode is set to Auto Mode or Scene Selection, or the Picture
Effect mode is selected, [Creative Style] is fixed to [Standard] and you cannot select
other settings.
• When [Black & White] or [Sepia] is selected, you cannot adjust the saturation.
132
Adjusting the color tones (White
balance)
The color tone of the subject changes depending on the characteristics of
the light source. The table below shows how the color tone changes based
on various light sources, compared with a subject that appears white under
the sunlight.
Daylight
Cloudy
Fluorescent
Incandescent
White
Bluish
Green-tinged
Reddish
Weather/
lighting
Characteristics
of light
Use this feature when the color tone of the image did not come out as you
expected, or when you want to change the color tone on purpose for
photographic expression.
Notes
• When the exposure mode is set to Auto Mode or Scene Selection, [White Balance] is
fixed to [Auto WB] and you cannot select other modes.
• If the only light source available is a mercury lamp or a sodium lamp, the camera
will not be able to acquire the accurate white balance because of the characteristics
of the light source. Use the flash in such cases.
WB button
133
Advanced shooting
WB button t Select the desired
setting
Adjusting the color tones (White balance)
AWB (Auto WB)
The camera automatically detects a light source and adjusts
the color tones.
(Daylight)
If you select an option to suit a specific light source, the color
tones are adjusted for the light source (preset white balance).
(Shade)
(Cloudy)
(Incandescent)
• Press B on the multi-selector so that the fine
adjustment screen appears and you can adjust the
color tone with v/V/b/B, as necessary (page 134).
(Fluor.: Warm
White)
(Fluor.: Cool
White)
(Fluor.: Day
White)
(Fluor.:
Daylight)
(Flash)
Shooting technique
• Use the white balance bracket function if you cannot get the desired color
in the selected option (page 113).
C.Temp./Filter
You can select the desired color temperature and perform a fine adjustment
by combining the color temperature with the color filter.
1 WB button t
(C.Temp./Filter)
t B on the multi-selector
2 Set the color temperature with v/V.
134
WB button
Adjusting the color tones (White balance)
3 Press B to display the fine
adjustment screen and
compensate the color to your
preference with v/V/b/B.
Color Temperature: Fine-tunes color in
the B (blue) direction with b and the A
(amber) direction with B.
Color Filter: Fine-tunes color in the G
(green) direction with v and the M
(magenta) direction with V.
Note
• Since color meters are designed for film cameras, the values differ under fluorescent/
sodium lamp/mercury lamps. We recommend that you use the custom white balance
or perform a test shooting.
Custom white balance
In a scene where the ambient light consists of multiple types of light source,
use of custom white balance is recommended in order to accurately
reproduce the whiteness. Up to 3 settings can be registered.
1 WB button t [
WB button
2 Hold the camera so that the white area fully covers the AF area
located in the center, and then press the shutter button down.
The shutter clicks and the calibrated values (Color Temperature and Color
filter) are displayed.
135
Advanced shooting
SET] t press
the center of the multi-selector
Adjusting the color tones (White balance)
3 Select a register number with b/B on the multi-selector, then
press the center of the multi-selector.
The monitor returns to the recording information display with the memorized
custom white balance setting retained.
• The custom white balance setting registered in this operation is effective
until a new setting is registered.
Note
• The message “Custom WB error” indicates that the value is beyond the expected
range, when the flash is used on a subject in close proximity or a subject with a
bright color is in the frame. If you register this value, the
indicator turns yellow
on the recording information display. You can shoot at this point, but it is
recommended that you set the white balance again to get a more accurate white
balance value.
To recall the custom white balance setting
WB button t Select the desired register number
• Press B on the multi-selector to display the fine adjustment screen and
compensate the color to your preference.
Note
• If the flash is used when the shutter button is pressed, a custom white balance is
registered with the flash light taken into account. Take pictures with the flash in later
shootings.
136
Setting image size
Image Size
MENU button t
1 t [Image Size] t Select the desired size
[Aspect Ratio]: [3:2]
Image size
Usage guidelines
L:24M
6000 × 4000 pixels
For shooting at the highest image
quality
M:10M
3936 × 2624 pixels
For prints up to A3+ size
S:4.6M
2640 × 1760 pixels
For prints up to A5 size
[Aspect Ratio]: [16:9]
Image size
Usage guidelines
L:20M
6000 × 3376 pixels
M:8.7M
3936 × 2216 pixels
S:3.9M
2640 × 1488 pixels
For viewing on a high-definition
TV
[APS-C Size Capture]: [On]
[Aspect Ratio]: [3:2]
[Aspect Ratio]: [16:9]
L:10M
3936 × 2624 pixels
L:8.7M
3936 × 2216 pixels
M
M:4.6M
2640 × 1760 pixels
M:3.9M
2640 × 1488 pixels
S
S:2.0M
1728 × 1152 pixels
S:1.7M
1728 × 976 pixels
Notes
• When you select a RAW image with [Quality], the image size of the RAW image
corresponds to L. This size is not displayed on the screen.
• When a DT lens is attached, the image size used for APS-C is automatically
selected.
• The images recorded with [Image Size] set to [S:2.0M] in APS-C size shooting
cannot be magnified.
Panorama: Size
You can set the image size of panoramic images. The image size varies
depending on the setting of the shooting direction (page 75).
137
Advanced shooting
L
Setting image size
MENU button t
size
1 t [Panorama: Size] t Select the desired
Standard
[Panorama: Direction] is set to [Up] [Down]: 3872 × 2160
[Panorama: Direction] is set to [Right] [Left]: 8192 × 1856
Wide
[Panorama: Direction] is set to [Up] [Down]: 5536 × 2160
[Panorama: Direction] is set to [Right] [Left]: 12416 × 1856
138
Setting the aspect ratio and image
quality
Aspect Ratio
MENU button t
ratio
1 t [Aspect Ratio] t Select the desired
3:2
A normal ratio.
16:9
An HDTV ratio.
Note
• This item cannot be set when the exposure mode is set to Sweep Panorama.
Quality
MENU button t
(RAW)
1 t [Quality] t Select the desired setting
File format: RAW (Records using the RAW compression
format.)
This format does not perform any digital processing on the
images. Select this format to process images on a computer
for professional purposes.
• The image size is fixed to the maximum size. The image
size is not displayed on the screen.
File format: RAW (Records using the RAW compression
format.) + JPEG
A RAW image and a JPEG image are created at the same
time. This is suitable when you need 2 image files, a JPEG
for viewing, and a RAW for editing.
(Extra fine)
File format: JPEG
The image is compressed in the JPEG format when recorded.
The compression rate is higher and the file size is smaller in
the following order: [Extra fine], [Fine], and [Standard].
(Fine)
(Standard)
Note
• This item cannot be set when the exposure mode is set to Sweep Panorama.
About RAW images
• You need the “Image Data Converter” software included on the CD-ROM (supplied)
in order to open a RAW image recorded on this camera. With this software, a RAW
139
Advanced shooting
(RAW &
JPEG)
Setting the aspect ratio and image quality
image can be opened and converted to a common format, such as JPEG or TIFF, and
its white balance, color saturation, contrast, etc., can be readjusted.
– The RAW format image cannot be printed using a DPOF (print) designated
printer.
– You cannot set [Auto HDR] or [Picture Effect] on RAW format images.
• RAW images shot with the camera have a resolution of 14 bits per 1 pixel. However,
this is limited to 12 bits in the following situations:
– Long Exposure NR
– BULB shooting
– Continuos shooting (including multiple shooting, such as continuous shooting in
Superior Auto mode)
140
Detecting faces
The camera detects faces, adjusts the focus, exposure, performs image
processing, and adjusts flash settings.
Fn button t
setting
(Smile/Face Detect.) t Select the desired
(Face Detection Turns off Face Detection.
Off)
(Face Detection
On (Regist. Faces))
(Face Detection
On)
Enables Face Detection and prioritizes recognized faces that
have been registered in [Face Registration] (page 142).
Enables Face Detection, but does not prioritize recognized
faces.
(Smile Shutter) Detects and shoots a smile automatically.
The Face Detection frame
When the camera detects faces, gray Face
Detection frames appear. When the
camera judges that autofocus is possible,
the Face Detection frames turn white.
When you press the shutter button
halfway down, the Face Detection frames
turn green.
• If a face is not positioned inside the AF area available when you press the
shutter button halfway down, the AF area that is used for focusing turns
green.
• When the camera detects multiple faces, the camera automatically selects
a priority face and the single Face Detection frame turns white. A
magenta frame appears on a face that is registered with [Face
Registration].
Shooting technique
• Compose to overlay the Face Detection frame and the AF area.
141
Advanced shooting
Face Detection
frames (gray)
Face Detection frames (white)
Detecting faces
Notes
• When the exposure mode is Sweep Panorama or Tele-zoom Continuous Priority AE,
the Face Detection function cannot be used.
• Up to 8 faces can be detected.
• The camera may not detect any faces, or may detect some other object, depending on
the shooting conditions.
Face Registration
The camera detects faces for which information has been registered in
advance.
1 MENU button t
6 t [Face Registration] t [New
Registration]
2 Align the guide frame with the face to be registered, and press
the shutter button.
3 Select [Enter] with v on the multi-selector, then press the
center of the multi-selector.
• Up to 8 faces can be registered.
• Shoot the face from the front in a brightly lit place. The face may not be
registered correctly if it is obscured by a hat, a mask, sunglasses, etc.
To change the priority of faces previously registered
If you have registered multiple faces, the priority for each face is
automatically set in the order of registration. You can change the priority
order.
MENU button t
6 t [Face Registration] t [Order Exchanging] t
Select a face for which you want to change the priority and the priority
level
To delete a registered face
You can delete a registered face.
MENU button t
6 t [Face Registration] t [Delete] t Select the
face you want to delete
142
Detecting faces
• When you select [Delete All], you can delete all registered faces at one
time.
Notes
• Even if you select [Delete], the data on registered faces remain stored in the camera.
If you also want to delete this data from the camera, select [Delete All].
• The registered face is not deleted even if you use [Initialize].
Auto Port. Framing
Fn button t
setting
(Auto Port. Framing) t Select the desired
The default setting is [Off].
Notes
• The Auto Port. Framing function cannot be used when the exposure mode is set to
Sweep Panorama, or Tele-zoom Continuous Priority AE, Movie, or [Hand-held
Twilight], [Sports Action] in Scene Selection.
• The trimmed image may not be the best possible composition, depending on the
shooting conditions.
• When [Quality] is set to [RAW] or [RAW & JPEG], this function cannot be used.
143
Advanced shooting
When the camera detects and shoots a face, the captured image is
automatically trimmed into a suitable composition. Both the original and
the trimmed images are saved.
The trimmed image is recorded with the same image size as that of the
original image.
•
turns to green when the trimming feature is available in Live View
mode.
• The frame that shows the trimmed area is indicated on the auto review
screen after the shot.
Detecting faces
• This feature cannot be used with the following functions: continuous shooting,
continuous bracket, [Multi Frame Noise Reduct.], [Auto HDR], the zoom feature of
the camera, manual focus, or [Soft Focus], [HDR Painting], [Rich-tone Mono.],
[Miniature] in Picture Effect.
144
Smile Shutter
When the camera detects a smile, the shutter is released automatically.
1 Fn button t
(Smile/Face Detect.) t [Smile Shutter On:
Normal Smile] t Select the desired Smile Detection
Sensitivity mode with b/B on the multi-selector
You can set the sensitivity of the Smile Shutter function for detecting smiles
to one of the following 3 options:
(On: Slight Smile),
(On: Normal
Smile), and
(On: Big Smile).
• When the Smile Shutter is activated, the Smile Detection Sensitivity
indicator appears on the screen.
2 Wait for a smile to be detected.
Face Detection frame
(orange)
Smile Detection Sensitivity indicator
Advanced shooting
The camera detects a smile and the focus
is confirmed. When the smile level
exceeds the b point on the indicator, the
camera records images automatically.
• When the camera detects the target
faces, orange Face Detection frames
appear around the faces. The Face
Detection frames turn green when these
subjects come into focus.
• When [Auto Port. Framing] is set to
[Auto], the image will be automatically
trimmed to provide a suitable
composition.
3 To stop shooting, Fn button t
(Smile/Face Detect.) t
Select an item other than [Smile Shutter].
Shooting techniques
• To focus on the smile, overlay the Face Detection frame and AF area.
• Do not cover the eyes with bangs, etc. The subject should be smiling.
• Do not obscure the face with a hat, a mask, sunglasses, etc.
145
Smile Shutter
• Try to orient the face in front of the camera and keep it as level as
possible.
• Hold a clear smile with an open mouth. The smile is easier to detect when
the teeth are showing.
• If you press the shutter button while the Smile Shutter function is
activated, the camera shoots the image, and then returns to Smile Shutter.
Notes
• The Smile Shutter function cannot be used when the exposure mode is set to Sweep
Panorama, Tele-zoom Continuous Priority AE, Movie, or [Hand-held Twilight] in
Scene Selection, or the manual focus is selected.
• The drive mode is automatically set to [Single Shooting] or [Remote Cdr.].
• The AF illuminator does not work with the Smile Shutter function.
• If the camera does not detect a smile, change the settings for Smile Detection
Sensitivity.
• Smiles may not be detected correctly, depending on the shooting conditions.
• If the camera tracks a face using the Object Tracking function with Smile Shutter
turned on, the face becomes the target of the smile detection feature (page 95).
146
Zooming
You can magnify images with a higher scale than the optical zoom.
Zooming in in one step (Smart teleconverter)
You can zoom in to the center of an image using the smart teleconverter
and record the image.
Press the
button.
• Each time you press the
button, the
zoom scaling changes as follows:
Approx. ×1.4 t Approx. ×2 t Off
button
The image size is as follows, based on the zoom scaling.
Zoom scaling
Image size
Approx. ×1.4
M or S
Approx. ×2
S
Zooming in holding the current resolution of the image
(Clear Image Zoom)
The Clear Image Zoom feature allows the camera to zoom in holding the
current resolution of the image.
You can scale up the zoom by using the Smart Zoom or Digital Zoom
feature.
147
Advanced shooting
Notes
• The smart teleconverter is unavailable
– When the exposure mode is set to Sweep Panorama.
– [Quality] is set to [RAW] or [RAW & JPEG].
• If [Focus Magnifier] or [Zoom] has been assigned, change the setting back to [Smart
Telecon.] (pages 103, 147).
• When the smart teleconverter is available, [Metering Mode] is set to [Multi
segment].
• You cannot use the smart teleconverter function with movies.
Zooming
1 MENU button t
2 Press the
4 t [Smart Telecon. Button] t [Zoom]
button.
3 Magnify the image up to the desired zoom factor with b/B on
the multi-selector.
• You can magnify the image at wider intervals with v/V.
The zoom features available with this camera
The icon displayed on the screen changes as follows according to the zoom
scale.
Zoom scale
(low)
Zoom scale
(high)
A
: The zoom feature of the camera is not used (×1.0 is indicated).
B
Smart Zoom: You can magnify images by trimming them slightly.
(Available only when [Image Size] is set to M or S.)
C
Clear Image Zoom: You can magnify images using a high-quality
image process.
D
Digital Zoom: You can magnify images using an image process.
Setting
Zooms images by
trimming them in the
available range (without
deterioration of image
quality).
Clear Image Zoom: Off
Digital Zoom: Off
148
Image
size
Zoom scale with optical zoom
(Upper row: Full-frame size shooting/lower
row: APS-C size shooting)
L
–
M
About 1.5×
About 1.5×
S
About 2.3×
About 2.3×
Zooming
Setting
Gives priority to image
quality when zooming
images.
Clear Image Zoom: On
Digital Zoom: Off
Image
size
Zoom scale with optical zoom
(Upper row: Full-frame size shooting/lower
row: APS-C size shooting)
L
About 2×
M
About 3×
S
About 4.5×
About 2×
About 3×
About 4.6×
Gives priority to higher
magnification when
zooming images.
Clear Image Zoom: On
Digital Zoom: On
L
About 4×
M
About 6.1×
S
About 9.1×
About 4×
About 6×
About 9.1×
To change the setting of [Clear Image Zoom]
The default setting is [On].
MENU button t
2 t [Clear Image Zoom] t Select the desired
setting
To change the setting of [Digital Zoom]
The default setting is [Off]. If you want to use higher magnification
regardless of the deterioration of the image, set it to [On].
MENU button t
2 t [Digital Zoom] t Select the desired setting
149
Advanced shooting
Notes
• The zoom feature of the camera is unavailable
– When the exposure mode is set to Sweep Panorama.
– [Quality] is set to [RAW] or [RAW & JPEG].
• The [Clear Image Zoom] is unavailable
– When the exposure mode is set to Tele-zoom Continuous Priority AE.
– The drive mode is set to Continuous Shooting or continuous bracket shooting.
• You cannot use the Smart Zoom or [Clear Image Zoom] function with movies.
• When the electronic zoom is available, [Metering Mode] is set to [Multi segment].
Reducing the noise in an image
Long Exposure NR
When you set the shutter speed to 1 second or longer (Long exposure
shooting), noise reduction is turned on for the same duration that the shutter
is open. This is to reduce the grainy noise typical in a long exposure. When
noise reduction is in progress, a message appears and you cannot take
another picture. Select [On] to prioritize the image quality. Select [Off] to
prioritize the timing of shooting.
MENU button t
desired setting
2 t [Long Exposure NR] t Select the
Notes
• When the exposure mode is set to Sweep Panorama or Tele-zoom Continuous
Priority AE, or continuous shooting, continuous bracketing, [Sports Action] or
[Hand-held Twilight] in Scene Selection, or ISO is set to [Multi Frame Noise
Reduct.], noise reduction is not performed even when it is set to [On].
• When the exposure mode is set to Auto Mode or Scene Selection, you cannot turn
off noise reduction.
• Even when the shutter speed is set to 1 second or longer, noise reduction may not
work, depending on the shooting conditions.
High ISO NR
The camera effectively reduces the noise that becomes more noticeable
especially when the ISO sensitivity is higher.
Normally, set it to [Normal]. You can also select [Low] or [Off].
MENU button t
setting
2 t [High ISO NR] t Select the desired
Notes
• When the exposure mode is set to Auto Mode, Sweep Panorama, or Scene Selection,
this item cannot be set.
• Noise reduction is not performed on RAW images.
150
Setting the color space
The way colors are represented with combinations of numbers or the range
of color reproduction is called “color space.” You can change the color
space, depending on your purpose.
MENU button t
setting
3 t [Color Space] t Select the desired
sRGB
This is the standard color space of the digital camera. Use
sRGB in normal shooting, such as when you intend to print
out the images without any modification.
AdobeRGB
This has a wide range of color reproduction. When a large
part of the subject is vivid green or red, Adobe RGB is
effective.
• The file name of the image starts with “_DSC.”
Notes
• Adobe RGB is for applications or printers that support color management and
DCF2.0 option color space. Using some applications or printers that do not support
them may result in or print images that do not faithfully reproduce the color.
• When displaying images that were recorded with Adobe RGB on non-Adobe RGBcompliant devices, the images are displayed with low saturation.
Advanced shooting
151
Movie recording setup
Movie recording setup
This section describes movie recording with advanced operations.
Shooting techniques
• Start recording after you adjust the focus.
• The following settings that were set during still image shooting can be
used:
ISO/White Balance/Creative Style/Exposure compensation/AF area/
Metering Mode/Face Detection/Object Tracking/D-Range optimizer/
Lens Comp.: Shading/Lens Comp.: Chro. Aber./Lens Comp.: Distortion/
Picture Effect
• ISO, exposure compensation, Object Tracking, or AF area can be
adjusted during movie recording.
• If you assign [AF lock] to the AEL button, ISO button, AF/MF button,
custom button, or preview button, you can lock the focus by pressing
these buttons in autofocus mode.
• You can zoom in or out during movie recording using the digital zoom
(page 147).
• You can output the image without the recording information displayed
during movie recording when [HDMI Info. Display] is set to [Off]
(page 173).
Notes
• In movie recording, the shooting range (the angle of view) is narrower than that of
still image shooting when the SteadyShot function is set to [On]. To shoot using the
same angle of view as a 16:9 still image, set the SteadyShot function to [Off]
(page 60).
• When the [For viewfinder] screen is displayed on the LCD screen, the LCD screen is
switched to the [Display All Info.] screen at the moment movie recording starts.
• Do not shoot a strong light source, such as the sun. The internal mechanism of the
camera may be damaged.
• When you import AVCHD movies to a computer, use “PlayMemories Home”
(page 199).
• When you continue to shoot for a long time, the temperature of the camera rises and
the image quality may deteriorate.
• Since the shutter speed and aperture are automatically adjusted, the shutter speed
will be higher and the movement of the subject may not be smooth under bright
152
Movie recording setup
conditions. Selecting manual focus and adjusting the shutter speed or aperture may
make the movement smoother (page 101).
• A value for the ISO sensitivity between ISO 100 and ISO 6400 can be selected when
you record movies. If you start movie recording with a value of ISO 6400 or larger
selected, the ISO sensitivity is switched to ISO 6400. If you start movie recording
with a value of ISO 100 or smaller selected, the ISO sensitivity is switched to ISO
100. When you finish recording your movie, the ISO sensitivity setting is returned to
the previous value.
• When ISO is set to [Multi Frame Noise Reduct.], [AUTO] is temporarily selected.
• You cannot select [Soft Focus], [HDR Painting], [Rich-tone Mono.], or [Miniature]
in Picture Effect. When movie recording starts, Picture Effect is temporarily set to
[Off].
Changing the tracking sensitivity of autofocus during
movie recording
When you record fast moving subjects, select [High], and when several
subjects are moving or crossing back and forth, select [Low].
MENU button t
desired setting
1 t [AF Tracking Duration] t Select the
Recording movies with the shutter speed and aperture
adjusted
You can record movies with the shutter speed and aperture adjusted,
controlling the background defocus or fluidity as intended.
(Focus Mode) t
(Manual Focus)
(page 101).
2 Set the mode dial to
(Movie) (page 68).
• To change the mode, press the Fn button, then select another mode.
3 Adjust the shutter speed and aperture value with the front or
rear control dial.
• When [Shutter speed] or [Aperture] is assigned to the silent multicontroller, adjustment is also available with the silent multi-controller
(page 32).
153
Movie recording setup
1 Fn button t
Movie recording setup
4 Adjust the focus, then press the MOVIE button to start
recording.
(77)
(Program Auto) Allows you to shoot with the exposure adjusted automatically
(both the shutter speed and the aperture value). The other
settings can be adjusted manually, and your setting values
can be saved.
(Aperture
Priority) (78)
Allows you to shoot after adjusting the aperture value
manually using the front or rear control dial.
(Shutter
Priority) (80)
Allows you to shoot after adjusting the shutter speed
manually using the front or rear control dial.
(Manual
Exposure) (82)
Allows you to shoot after adjusting the exposure manually
(both the shutter speed and the aperture value) using the front
or rear control dial.
Auto Slow Shutter
Setting [Auto Slow Shutter] to [On] reduces the noise on even dark
portions.
If you set [Auto Slow Shutter] to [Off], the image is darker than when it is
set to [On], but you can shoot movies with less camera shake and smoother
frames.
MENU button t
1 t [Auto Slow Shutter] t Select the desired
mode
Note
• This function is available only when both the exposure mode is set to other than M/S
and the ISO sensitivity is set to [AUTO].
154
Movie recording setup
File Format
MENU button t
format
1 t [File Format] t Select the desired
AVCHD
Records 60i/50i movies, 24p/25p movies or 60p/50p movies
in AVCHD format. This file format is suitable for viewing
the movie on a high-definition TV.
You can create a Blu-ray disc, an AVCHD recording disc, or
a DVD-Video disc using the supplied software
“PlayMemories Home.”
• 60i/50i movies are recorded at either 60 fields/second or at
50 fields/second, respectively. Both 60i and 50i movies
utilize the interlace scanning system, Dolby Digital audio,
and the AVCHD format.
• 24p/25p movies are recorded at either 24 frames/second or
at 25 frames/second, respectively. Both 24p and 25p
movies utilize the progressive scanning system, Dolby
Digital audio, and the AVCHD format.
• 60p/50p movies are recorded at either 60 frames/second, or
at 50 frames/second, respectively. Both 60p and 50p
movies utilize the progressive scanning system and Dolby
Digital audio, and the AVCHD format.
MP4
Records mp4 (AVC) movies. This format is suitable for
WEB uploads, e-mail attachments, etc.
• Movies are recorded in MPEG-4 format at about 30 frames/
second, utilizing the progressive scanning system, AAC
audio, and the mp4 format.
• You cannot create a disc from the movies recorded in this
format using the supplied software “PlayMemories Home.”
The higher the average bit-rate, the higher the image quality.
MENU button t
size
1 t [Record Setting] t Select the desired
155
Movie recording setup
Record Setting
Movie recording setup
[File Format]: [AVCHD]
Record Setting
Bit-rate
Recording
60i 24M(FX)*
50i 24M(FX)**
Maximum
24 Mbps
Records high image quality movies of 1920 × 1080
(60i/50i).
60i 17M(FH)*
50i 17M(FH)**
Approx.
Records standard image quality movies of 1920 ×
average 17 1080 (60i/50i).
Mbps
60p 28M(PS)*
50p 28M(PS)**
Maximum
28 Mbps
Records highest image quality movies of 1920 ×
1080 (60p/50p).
24p 24M(FX)*
25p 24M(FX)**
Maximum
24 Mbps
Records high image quality moves of 1920 × 1080
(24p/25p). This produces a cinema-like
atmosphere.
24p 17M(FH)*
25p 17M(FH)**
Approx.
Records standard image quality movies of 1920 ×
average 17 1080 (24p/25p). This produces a cinema-like
Mbps
atmosphere.
[File Format]: [MP4]
Record Setting
Average
bit-rate
Recording
1440×1080 12M
Approx. 12 Records movies of 1440 × 1080.
Mbps
VGA 3M
Approx. 3
Mbps
Records movies of VGA size.
* 1080 60i-compatible device
** 1080 50i-compatible device
Notes
• Movies recorded with the [60p 28M(PS)]/[50p 28M(PS)], [60i 24M(FX)]/[50i
24M(FX)] or [24p 24M(FX)]/[25p 24M(FX)] setting in [Record Setting] are
converted by “PlayMemories Home” in order to create an AVCHD recording disc.
This conversion can take a long time. Also, you cannot create a disc with the original
image quality. If you want to keep the original image quality, you must store your
movies on a Blu-ray disc.
• To watch 60p/50p or 24p/25p movies on a TV, you need a TV that is compatible
with 60p/50p or 24p/25p. If you use a non-compatible TV, the movies are converted
to 60i/50i and output to the TV.
156
Movie recording setup
Audio Rec Level
You can adjust the audio recording level by monitoring the level meter.
MENU button t
2 t [Audio Rec Level] t Select the
desired level with b/B on the multi-selector
+ side: The audio recording level is increased.
– side: The audio recording level is decreased.
Reset: To set the recording level to the default.
Shooting techniques
• We recommend that you use headphones to check the level when
adjusting the setting.
• Set a lower level to naturally capture continuous loud sound. To capture
quieter sound at an easy-to-hear level, increase this setting.
Notes
• The limiter is always working regardless of the Audio Rec Level setting.
• This function is available only when the exposure mode is set to Movie.
• Audio recording level adjustment is available for the internal microphone and the m
(Microphone) jack.
Audio Level Display
Audio level
MENU button t
desired setting
2 t [Audio Level Display] t Select the
157
Movie recording setup
You can select whether or not to display
the audio level on the screen.
Movie recording setup
Notes
• The audio level is not displayed in the following cases:
– [Audio Recording] is set to [Off].
– The screen mode is set to [No Disp. Info.].
• Set the exposure mode to Movie. Before recording, the audio level can be displayed
only when it is set to Movie.
Checking the audio using headphones
1 Connect headphones to the i
(headphones) jack.
i (Headphones) jack
2 Set the mode dial to
(Movie).
You can monitor the sound when recording or playing back movies.
Audio Output Timing
When using headphones, you can change the echo compensation settings
during movie recording.
MENU button t
desired setting
2 t [Audio Output Timing] t Select the
Live
Outputs audio without delay in movie recording. Select this
setting when you are concerned about the delay of the
monitor sound you are recording.
Lip Sync
Outputs audio synchronized with the video in movie
recording. Prevents the sound from being out of
synchronization with the video.
158
Movie recording setup
Audio Recording
When you record movies, the operating noise of the camera or lens may be
recorded. You can record movies without audio.
MENU button t
2 t [Audio Recording] t [Off]
To reduce wind noise
You can reduce wind noise by cutting bass sound input from the built-in
microphone.
MENU button t
2 t [Wind Noise Reduct.] t [On]
Notes
• Setting this item to [On] may cause some bass sound to be recorded with too low a
volume. Set it to [Off] when the wind is not blowing.
• When an external microphone (sold separately) is used, this item does not function.
To record movies without the operating sounds of the dials
Using the silent multi-controller, you can change settings without using the
front or rear control dial (page 32).
MENU button t
1t[
Silent Controller] t Select the desired
setting
When the focus mode is set to manual focus, you can disable recording of
the operating noise of the lens for the autofocus (page 101).
Movie recording setup
159
Advanced playback
Using the playback functions
Selecting the memory card used to be played back
MENU button t
desired slot
2 t [Select Playback Media] t Select the
Note
• When there is no memory card inserted in the selected slot, no images are played
back. Select the slot where the memory card is being inserted.
Switching between still images and movies (View Mode)
Selects whether still images or movies are to be played back.
MENU button t
desired setting
1 t [Still/Movie Select] t Select the
Folder View(Still)
Displays still images by folder.
Folder View(MP4)
Displays movies (MP4) by folder.
AVCHD View
Displays only AVCHD movies.
Enlarging images
A still image can be enlarged for closer examination. This is convenient to
check the focus condition of a recorded image.
1 Display the image you want to
enlarge, then press the
160
button.
button
Using the playback functions
2 Zoom the image in or out with the
rear control dial.
• Rotating the front control dial switches
the image at the same display
magnification. When you shoot
multiple images with the same
composition, you can compare their
focus conditions.
3 Select the portion you want to enlarge with v/V/b/B on the
multi-selector.
To cancel the enlarged playback
Press the center of the multi-selector so that the image returns to the normal
size.
Switching to the display of the image list
You can display multiple images on the screen simultaneously during
playback.
1 Press the
button.
button
The image index screen is displayed.
161
Advanced playback
Note
• The images recorded with [Image Size] set to [S:2.0M] in APS-C size shooting
cannot be magnified.
Using the playback functions
2 Press the DISP button repeatedly
to select the number of images
displayed on one page of the
image index screen.
DISP button
• The screen changes between 4 images
and 9 images
To return to the single-image screen
Press the center of the multi-selector when you select the desired image.
To display the desired folder
Select the left bar on the image index
screen with the multi-selector, then select
the desired folder with v/V. Pressing the
center of the multi-selector when the left
bar is selected switches between still
images and movies (page 160).
Rotating an image
1 Display the image you want to
rotate, then press the
button.
button
2 Press the center of the multi-selector.
The image is rotated counter-clockwise. When you want to do another
rotation, repeat step 2.
• Once you rotate the image, the image is played back in the rotated position,
even after you turn off the power.
162
Using the playback functions
To return to the normal playback screen
Press the
button again.
Notes
• You cannot rotate movies.
• When you copy rotated images to a computer, “PlayMemories Home” contained on
the CD-ROM (supplied) can display the rotated images correctly. However, the
images may not be rotated depending on the software.
Slide Show
MENU button t
1 t [Slide Show]t [Enter]
Plays back recorded images in order (Slide Show). The slide show
automatically stops after all the images have been played back.
• You can view the previous/next image with b/B on the multi-selector.
• You cannot pause the slide show.
To end in the middle of the slide show
Press the center of the multi-selector.
Advanced playback
To choose the interval between the images in slide show
MENU button t
1 t [Slide Show] t [Interval] t Select the
desired number of seconds
To play back repeatedly
MENU button t
1 t [Slide Show] t [Repeat] t [On]
To play back 3D-images
If you connect the camera to a 3D-compatible TV using an HDMI cable
(sold separately), you can play back 3D-images. Also refer to the operating
instructions supplied with the TV.
MENU button t
1 t [Slide Show] t [Image Type] t [Display 3D
Only]
Note
• This camera cannot record 3D-images.
163
Using the playback functions
Playback Display
You can set the playback orientation of images recorded in portrait
orientation.
MENU button t
desired setting
164
2 t [Playback Display] t Select the
The screen displayed for playback
mode
Switching the screen during playback
Each time you press the DISP button, the screen changes as follows.
With recording data
Without recording
data
Histogram*
* When the image has a high-key or low-key portion, that portion is flashed on the
histogram display (Luminance limit warning).
List of icons on the histogram display
A
Display
Display
Indication
Memory card (51, 234)
View mode (160)
100-0003
Folder - file number
(206)
Indication
24M 10M Image size of still images
4.6M 20M (137)
8.7M 3.9M
10M 4.6M
2.0M 8.7M
3.9M 1.7M
Aspect ratio of still
images (139)
165
Advanced playback
For detailed information with “With recording data” selected in the screen
mode, see page 25.
The screen displayed for playback mode
Display
Indication
Display
Image quality of still
images (139)
-
Protect (167)
DPOF
DPOF set (168)
Remaining battery
warning (53)
Remaining battery (53)
Picture Effect (129)
AWB
D-Range Optimizer
(126)/Auto HDR/Auto
HDR image warning
(127)
Database file full (222)/
Database file error (222)
Overheating warning (12)
Display
Indication
Histogram (89)
Exposure mode (68)
P
ASM
1/125
Shutter speed (80)
F3.5
Aperture (78)
ISO200
ISO sensitivity (124)
–0.3
Exposure compensation
(106)
–0.3
Flash compensation (120)
Metering mode (109)
35mm
Focal length
Creative Style (130)
166
White balance (Auto,
Preset, Color
temperature, Color filter,
Custom) (133)
5500K A1
M1
100%
B
Indication
2012-1-1
10:37PM
Date of recording
3/7
File number/Number of
images in the view mode
Protecting images (Protect)
You can protect images against accidental erasure.
1 MENU button t
1 t [Protect] t [Multiple Img.]
2 Select the image you want to
protect with b/B on the multiselector, then press the center of
the multi-selector.
A mark is put in the check box.
• To cancel a selection, press the center
again.
3 To protect other images, repeat step 2.
• You can select all the images in the folder by selecting the bar on the left of
the image index screen.
5 Select [OK] with v, then press the center of the multi-selector.
To cancel the protection of all the images or movies
You can cancel the protection of all the images or movies in the folder
currently displayed.
MENU button t
1 t [Protect] t [Cancel All Images], [Cancel All
Movies(MP4)] or [Cancel All AVCHD view files]
167
Advanced playback
4 Press the MENU button.
Specifying printing
Specifying DPOF
Using the camera, you can specify the still images before you print images
at a shop or with your printer. Follow the procedure below.
DPOF specifications are left with images after printing. It is recommended
that you unspecify them after printing.
1 MENU button t
1 t [Specify Printing] t [DPOF Setup]
t [Multiple Img.]
2 Select the image with b/B on the multi-selector, then press the
center of the multi-selector.
3 Place a
mark by pressing the center of the multi-selector.
• To unspecify DPOF, select the image again, then press the center of the
multi-selector.
4 Press the MENU button.
5 Select [OK] with v, then press the center of the multi-selector.
Notes
• You cannot specify DPOF on RAW data files.
• You cannot specify the number of images to be printed.
Date Imprint
You can date images when printing them. The position of the date (inside
or outside the image, character size, etc.) depends on your printer.
MENU button t
[On]
1 t [Specify Printing] t [Date Imprint] t
Note
• This function may not be available, depending on the printer.
168
Copying images
You can copy images from a memory card inserted in the slot selected with
[Select Playback Media] to a memory card inserted in the other slot. The
copy process can be done per type of the image (still images/movies)
(page 160).
MENU button t
2 t [Copy]
Note
• It may take some time to copy a lot of images. Use a sufficiently charged battery
pack.
Advanced playback
169
Deleting images (Delete)
You can delete only unnecessary images, or all the images.
Once you have deleted an image, you cannot restore it. Check whether to
delete the image or not beforehand.
Note
• Protected images cannot be deleted.
Delete (Multiple Img.)
1 MENU button t
1 t [Delete] t [Multiple Img.]
2 Select the images you want to
delete with the multi-selector,
then press the center of the multiselector.
A mark is put in the check box.
• To cancel a selection, press the center
again.
Total number
3 To delete other images, repeat step 2.
• You can select all the images in the folder by selecting the bar on the left of
the image index screen.
4 Press the MENU button.
5 Select [OK] with v, then press the center of the multi-selector.
170
Deleting images (Delete)
Deleting all images or movies visible in the current view
mode
You can delete all still images or movies visible in the current display view
mode.
1 MENU button t
1 t [Delete] t [All in Folder] or [All
AVCHD view files]
2 Select [Delete] with v on the multi-selector, then press the
center of the multi-selector.
To display the desired folder
Select the bar on the left of the image index screen with the multi-selector,
then select the desired folder with v/V.
Advanced playback
171
Viewing images on a TV screen
To view images recorded on the camera on a TV set, an HDMI cable (sold
separately) and an HD TV equipped with an HDMI connector are required.
1 Turn off both your camera and the
TV, and connect the camera to the
TV.
1 To the HDMI
connector
HDMI cable
(sold separately)
2 To the
HDMI terminal
2 Turn on the TV and switch the input.
• See also the operating instructions supplied with the TV.
3 Turn on the camera, and press the
button.
Images shot with the camera appear on
the TV screen.
Select the desired image with b/B on the
multi-selector.
• The LCD screen on the camera does
not turn on.
Multi-selector
button
Notes
• Use an HDMI cable with the HDMI logo.
• Use an HDMI mini connector on one end (for the camera), and a connector suitable
for connection to your TV on the other end.
172
Viewing images on a TV screen
• When images cannot be displayed properly, set [HDMI Resolution] in the
Setup
menu to [1080p] or [1080i], according to your TV.
• Some devices may not work properly.
• Do not connect the output connector of the device with the HDMI terminal on the
camera. This may cause a malfunction.
On “PhotoTV HD”
This camera is compatible with the “PhotoTV HD” standard.
By connecting Sony’s PhotoTV HD-compatible devices using an HDMI
cable, a whole new world of photos can be enjoyed in breathtaking Full HD
quality.
“PhotoTV HD” allows for a highly-detailed, photo-like expression of
subtle textures and colors.
HDMI Info. Display
When a TV using an HDMI cable (sold separately) is connected, you can
display images on the TV screen without recording information, and
simultaneously display images on the LCD screen of the camera with
recording information.
Advanced playback
1 MENU button t
2 t [HDMI Info. Display] t [Off]
2 Connect the camera to a TV (page 172).
Live view images are displayed on the TV screen without recording
information.
Live view images are displayed on the LCD screen of the camera with
recording information.
173
Viewing images on a TV screen
Using “BRAVIA” Sync
By connecting the camera to a TV that supports “BRAVIA” Sync using an
HDMI cable, you can operate the camera with the TV Remote Control.
1 Connect a TV that supports “BRAVIA” Sync to the camera
(page 172).
The input is automatically switched and the image shot with the camera
appears on the TV screen.
2 Press the SYNC MENU button on the TV Remote Control.
3 Operate with the buttons on the TV Remote Control.
The items for SYNC MENU
Slide Show
Plays back images automatically.
Single-image
playback
Returns to the single-image screen.
Image Index
Switches to the image index screen.
Still/Movie Select
Selects still images or movies to be played back.
Delete
Deletes images.
Notes
• The operations available are restricted when the camera is connected to a TV using
an HDMI cable.
• Only TVs that support “BRAVIA” Sync can provide these operations. The SYNC
MENU operations differ depending on the TV connected. For details, refer to the
operating instructions supplied with the TV.
• If the camera performs unnecessary operations in response to the TV Remote
Control when the camera is connected to another manufacturer’s TV using an HDMI
connection, set [CTRL FOR HDMI] in the
Setup menu to [Off].
174
Setup of the camera
Setting the other functions of the
camera
Release w/o Lens
You can release the shutter when no lens is attached. Select this when you
attach the camera on an astronomical telescope, etc.
MENU button t
1 t [Release w/o Lens] t [Enable]
Note
• Correct metering cannot be achieved when you use lenses that do not provide a lens
contact, such as the lens of an astronomical telescope. In such cases, adjust the
exposure manually by checking it on the recorded image.
Grid Line
The grid line is an auxiliary line for shooting composition. You can set the
grid line to on/off or select the type of grid line. The available range of
movie recording is also displayed.
MENU button t
2 t [Grid Line] t Select the desired setting
You can check the recorded image on the screen right after the shooting.
You can change the displayed time.
MENU button t
setting
2 t [Auto Review] t Select the desired
Notes
• In auto review, the image will not be displayed in the vertical position even if
[Playback Display] is set to [Auto Rotate] (page 164).
• In auto review, the camera may display an image to which an image process, such as
[Lens Comp.: Distortion], has not been performed, then display the same image to
which an image process has been performed.
175
Setup of the camera
Auto Review
Setting the other functions of the camera
Func. of AEL button
The function of the AEL button can be selected from the following 2
functions (page 109):
– Holding the locked exposure value by pressing the AEL button while
the button is held down ([AEL hold]).
– Holding the locked exposure value by pressing the AEL button until the
button is pressed again ([AEL toggle]).
When [ AEL hold] or [ AEL toggle] is selected, the exposure is locked
in spot metering mode.
MENU button t
desired setting
4 t [Func. of AEL button] t Select the
Notes
• While the exposure value is locked,
appears on the LCD screen and in the
viewfinder. Be careful not to reset the setting.
• The “hold” and “toggle” settings affect the manual shift (page 83) in the manual
mode.
• The metering value set with [AEL toggle] is released after the camera returns from
the power save mode or is used to play back images.
To assign another function to the AEL button
You can assign one of the following functions to the AEL button in
addition to the AEL function:
Exposure Comp./Drive Mode/Flash Mode/Focus Mode/AF area/Smile/
Face Detect./Auto Port. Framing/ISO/Metering Mode/Flash Comp./White
Balance/DRO/Auto HDR/Creative Style/Picture Effect/Image Size/
Quality/Memory/FEL Lock hold/FEL Lock toggle/Object Tracking/AF/
MF Control Hold/AF/MF Control Toggle/AF lock/AF On/Aperture
Preview/Shot. Result Preview/Focus Magnifier
ISO Button, AF/MF button, Preview Button
You can also assign another function to the ISO button, AF/MF button or
preview button. The functions available are the same as those of [Func. of
AEL button] (page 176).
176
Setting the other functions of the camera
MENU button t
4 t [ISO Button], [AF/MF button] or
[Preview Button] t Select the desired setting
Custom button
The FEL lock function is assigned to the custom button in the default
settings (page 122). You can also assign another function to the custom
button. The functions available are the same as those of [Func. of AEL
button].
MENU button t
setting
4 t [Custom button] t Select the desired
Electronic Front Curtain Shutter
The electronic front curtain shutter function shortens the time lag between
shutter releases.
MENU button t
desired setting
6 t [Front Curtain Shutter] t Select the
LCD Brightness
The brightness of the LCD screen is automatically adjusted to the
surrounding lighting conditions using the light sensor (page 17).
You can set the brightness of the LCD screen manually, or select a suitable
setting for a sunny day outdoors.
MENU button t
setting
1 t [LCD Brightness] t Select the desired
177
Setup of the camera
Notes
• When you shoot at high shutter speeds with a large diameter lens attached, the
ghosting of a blurred area may occur, depending on the subject or shooting
conditions. In such cases, set this item to [Off].
• When a Minolta/Konica Minolta lens is used, set this item to [Off].
• When you select a faster shutter speed, the brightness of the screen may be unequal,
depending on the situation. In such cases, set this item to [Off].
Setting the other functions of the camera
Notes
• When it is set to [Auto], do not cover the light sensor with your hand or other object.
• When using the camera with the AC-PW10AM AC Adaptor (sold separately), the
brightness of the LCD screen is always set to the brightest setting even if you select
[Auto].
• Since the [Sunny Weather] setting is too bright to use indoors, set it to [Auto] or
[Manual] indoors.
Viewfinder Bright.
The brightness of the viewfinder is automatically adjusted to the lighting
conditions of the subject.
You can set the brightness of the viewfinder manually.
MENU button t
1 t [Viewfinder Bright.] t [Manual] t
Select the desired setting
Power Save
You can shorten the waiting time until the camera turns to the power save
mode when it is not being operated to prevent the battery from being
consumed. If you operate the camera, for example, pressing the shutter
button halfway down, the camera returns to the shooting mode. If you do
not operate the camera for a given period of time, the brightness of the LCD
screen is reduced.
MENU button t
setting
2 t [Power Save] t Select the desired
Note
• When the AC-PW10AM AC Adaptor (sold separately) is used, this item cannot be
set to [Max].
178
Setting the other functions of the camera
To change the waiting time until the camera turns to the power
save mode
You can set different time intervals for the camera to switch to power save
mode.
MENU button t
2 t [Power Saving Start Time] t Select the
desired time
Notes
• The camera does not turn to power save mode when the camera is connected to a TV
or the drive mode is set to [Remote Cdr.].
• If you set this item to [Max], [Power Saving Start Time] is set to [10 Sec].
FINDER/LCD Setting
You can disable the automatic switching of the LCD screen and the
viewfinder and enable only the FINDER/LCD button to switch them.
MENU button t
1 t [FINDER/LCD Setting] t [Manual]
APS-C Size Capture
MENU button t
desired setting
3 t [APS-C Size Capture] t Select the
Note
• When [APS-C Size Capture] is set to [On], the image size is automatically changed
(page 137).
179
Setup of the camera
This camera complies with the 35 mm full-frame standard, however, you
can also shoot with the APS-C size. When this item is set to [On], the
camera records with the APS-C size even if there is a lens attached to the
camera. When a DT lens is attached, APS-C size is selected automatically.
Setting the other functions of the camera
PAL/NTSC Selector (only for the 1080 50i-compatible
device)
When [PAL/NTSC Selector] is set to the NTSC-system before shooting,
movies recorded with the camera can be played back on an NTSC-system
TV.
MENU button t
desired setting
3 t [PAL/NTSC Selector] t Select the
Notes
• This function is provided with 1080 50i-compatible devices only. It is not provided
with 1080 60i-compatible devices. The 1080 50i-compatible devices have a “50i”
mark on the bottom of the camera.
• If you insert a memory card that has previously been formatted with the PAL system,
a message telling you that you must re-format the card appears. When you record
using the NTSC system, re-format the memory card or use another memory card.
• When the NTSC mode is selected, the “Running on NTSC.” message always
appears on the start-up screen each time you turn the camera on.
180
Lens compensation
You can automatically compensate the following characteristics: light falloff at the edges, chromatic aberration, and distortion (only for automatic
compensation compliant lenses). For further information on automatic
compensation compliant lenses, visit the Sony web site in your area, or
consult your Sony dealer or local authorized Sony service facility.
Lens Comp.: Peripheral Shading
Compensates for the shaded corners of the screen caused by certain lens
characteristics. This item is set to [Auto] in the default settings.
MENU button t
desired setting
6 t [Lens Comp.: Shading] t Select the
Lens Comp.: Chromatic Aberration
Reduces the color deviation at the corners of the screen caused by certain
lens characteristics. This item is set to [Auto] in the default settings.
6 t [Lens Comp.: Chro. Aber.] t Select the
Lens Comp.: Distortion
Compensates for the distortion of the screen caused by certain lens
characteristics. This item is set to [Off] in the default settings.
MENU button t
desired setting
6 t [Lens Comp.: Distortion] t Select the
181
Setup of the camera
MENU button t
desired setting
Setting the method for recording on a
memory card
Recording Mode
You can record the same images on 2 memory cards at the same time, or
sort images onto different memory card, based on the type of image.
[Standard] is selected in the default settings.
MENU button t
desired setting
1 t [Recording Mode] t Select the
Standard
Records images only on the memory card inserted in the slot
selected with [Select Recording Media] (page 52).
Simult. Rec (Still)
Records still images on both of the memory cards inserted in
the 2 slots, regardless of the [Select Recording Media]
setting, and records movies on the memory card inserted in
the slot selected with [Select Recording Media]. Still images
using the same file number will be recorded in the folders
that have the same folder number on both memory cards.
Simult. Rec (Movie)
Records movies on both of the memory cards inserted in the
2 slots, regardless of the [Select Recording Media] setting,
and records still images on the memory card inserted in the
slot selected with [Select Recording Media]. MP4 movies
using the same file number will be recorded in the folders
that have the same folder number on both memory cards.
Sim. Rec (Still/
Movie)
Records still images/movies on both of the memory cards.
Sort(JPEG/RAW)
Records JPEG data on the memory card inserted in the slot
selected with [Select Recording Media], and records RAW
data on the other memory card.
Sort(Still/Movie)
Records still images on the memory card inserted in the slot
selected with [Select Recording Media], and records movies
on the other memory card.
Notes
• One of the following memory cards is required to record movies simultaneously:
– SD cards that match the UHS-I (UHS Speed Class1) interface
– SD cards that match the Class 10 speed or higher
– “Memory Stick PRO Duo” media
182
Setting the method for recording on a memory card
• Simultaneous recording may take a long time to record images.
• When the simultaneous recording feature or [Sort(JPEG/RAW)] is selected, if an
image is not recorded, for example, there is no memory card inserted in one of the
two slots, the image cannot be recorded on both memory cards.
Format
Note that formatting irrevocably erases all data on a memory card,
including protected images.
MENU button t
[Enter]
1 t [Format] t Select the desired slot t
Notes
• During the format, the access lamp lights up. Do not eject the memory card while the
lamp is lit.
• Format the memory card using the camera. If you format it on a computer, the
memory card may not be usable with the camera, depending on the format type used.
• Formatting may take several minutes depending on the memory card.
• When the remaining battery time is 1 percent or less, you cannot format memory
cards.
1 t [File Number] t Select the desired
Series
The camera does not reset numbers and assigns numbers to
files in sequence until the number reaches “9999.”
Reset
The camera resets numbers when a file is recorded in a new
folder and assigns numbers to files from “0001.” When the
recording folder contains a file, a number one higher than the
largest number is assigned.
Note
• If you execute [Reset Default], the file number is reset.
Folder Name
The recorded still images are stored in automatically-created folders in the
DCIM folder of the memory card.
183
Setup of the camera
File Number
MENU button t
setting
Setting the method for recording on a memory card
MENU button t
setting
1 t [Folder Name] t Select the desired
Standard Form
The folder name format is as follows: folder number +
MSDCF.
Example: 100MSDCF
Date Form
The folder name format is as follows: folder number + Y (the
last digit)/MM/DD.
Example: 10020405 (Folder name: 100, date: 2012/04/05)
Note
• The MP4 movie folder form is fixed as “folder number + ANV01.”
Select REC Folder
When a standard form folder is selected and there are 2 or more folders,
you can select the folder in which recorded images are stored.
MENU button t
desired folder
1 t [Select REC Folder] t Select the
Notes
• You cannot select the folder when you select the setting [Date Form].
• When simultaneous or sort recording is selected, you may only select a folder that
has the same folder name on both memory cards. If there are no folders that have the
same folder name, you can create a folder with [New Folder].
New Folder
You can create a folder in a memory card for recording images.
A new folder is created with a folder number one greater than the largest
folder number currently used, and the folder becomes the current recording
folder. A folder for still images and a folder for MP4 movies are created at
the same time.
MENU button t
1 t [New Folder]
Notes
• If you set [Recording Mode] to other than [Standard] and start recording, a new
folder is created on both memory cards with a folder number one greater than the
largest folder number currently used.
184
Setting the method for recording on a memory card
• If you set [Recording Mode] to other than [Standard] and start recording, a new
folder may be created automatically.
• When you insert a memory card that has been used with other equipment into the
camera and shoot images, a new folder may be created automatically.
• Up to 4,000 images can be stored in a folder. When the folder capacity is exceeded, a
new folder is created automatically.
Recover Image DB
When inconsistencies are found in the image database file, caused by
processing images on computers, etc., images on the memory card will not
be played back in this form. If this happens, the camera repairs the file.
MENU button t
2 t [Recover Image DB] t Select the
desired slot t [Enter]
Note
• Use a sufficiently charged battery. Low battery power during repairing can cause
damage to data.
Upload Settings
MENU button t
3 t [Upload Settings] t [On]
The status indicators in communication
Standby. No images are to be sent.
Upload standby.
Connecting.
Uploading.
Error.
Notes
• The status indicators in communication are displayed only when [Recording Mode]
is set to [Standard].
185
Setup of the camera
You can use the upload function with an Eye-Fi card (commercially
available). This item appears when an Eye-Fi card is inserted in a memory
card slot 1 of the camera.
Setting the method for recording on a memory card
• Before using an Eye-Fi card, set up the wireless LAN access point and forwarding
destination. For details, refer to the operating manual supplied with the Eye-Fi card.
• Eye-Fi cards are sold in the U.S.A, Canada, Japan, and some countries in the EU (as
of June in 2012).
• For more information, please contact the manufacturer or vendor directly.
• Eye-Fi cards can be used only in the countries/regions where they were purchased.
Use Eye-Fi cards in accordance with the law of the countries/regions where you
purchased the card.
• Eye-Fi cards include a wireless LAN function. Do not insert any Eye-Fi cards in the
camera when it is prohibited to do so, such as on an airplane. If there is an Eye-Fi
card inserted in the camera, set [Upload Settings] to [Off].
is displayed on the
screen when [Upload Settings] is set to [Off].
• When you use a brand-new Eye-Fi card for the first time, copy the install file of EyeFi manager recorded on the card to your computer before formatting the card.
• Use an Eye-Fi card after updating the firmware to the latest version. For details, refer
to the manual that comes with the Eye-Fi card.
• The power save function of the camera does not work while it is uploading images.
• If
(error) is displayed, remove the memory card and reinsert it, or turn off then
turn on the power again. If
appears again, the Eye-Fi card may be damaged.
• Wi-Fi network communication may be influenced by other communication devices.
If the communication status is poor, move closer to the access point of the Wi-Fi
network.
• For details on the file types that can be uploaded, refer to the operating instructions
supplied with the Eye-Fi card.
• If you upload an image that was recorded with [GPS On/Off] set to [On], the
location information of the image may be made available to a third party. To prevent
this, set [GPS On/Off] to [Off] (page 187) (SLT-A99V only).
• This product does not support the Eye-Fi “Endless Memory Mode.” Make sure that
Eye-Fi cards that you insert into this product have “Endless Memory Mode” turned
off.
186
Recording location information using
the GPS feature (SLT-A99V only)
If the camera has acquired location information using the built-in GPS
feature, this information is recorded in the images or movies at that
location.
Using the supplied software “PlayMemories Home,” you can import
images recorded with location information to a computer and enjoy
viewing them with a map which shows their shooting location. See
“PlayMemories Home Help Guide” for details.
MENU button t
2 t [GPS Settings] t [GPS On/Off] t [On]
The indicator changes according to the strength of GPS signal reception.
GPS indicators
GPS reception status
No indicator
[GPS On/Off] is set to [Off].
Your camera cannot record the location information. Use your
camera in an open area.
Calculating the location information. Wait until the location
information is recordable.
The current location information is recordable.
To receive a GPS signal
• Proper triangulation is not possible indoors or near tall buildings.
Use your camera in an open area outside, and turn on your camera again.
• It may take several tens of seconds to several minutes to acquire the
location information. You can shorten the positioning time by using GPS
assist data.
Notes
• Right after you turn the camera on, it may take several tens of seconds to several
minutes to acquire the location information. If you shoot images with the location
information not acquired, the information is not recorded. To record the correct
information, wait until the camera can receive radio signals from GPS satellites.
• During take off and landing of an airplane, turn off the camera, as you will be
instructed to do by the on-board announcement.
• Use GPS in accordance with the regulations of the place or situation.
187
Setup of the camera
There is a problem with the GPS feature. Turn the camera off and
on.
Recording location information using the GPS feature (SLT-A99V only)
• For detailed notes on the GPS feature, see page 232.
GPS Assist Data
The time for the GPS acquiring location information can be shortened by
taking in GPS assist data. If the camera connects to the computer with the
supplied “PlayMemories Home” software installed, the GPS assist data can
be updated automatically.
To check the state of GPS assist data
MENU button t
2 t [GPS Settings] t [Use GPS Assist Data]
Notes
• The computer is required to connect to the Internet when updating data.
• If the term of validity of assist data has run out, the time until you can record
location information cannot be shortened. It is recommended that you update the
assist data regularly. The expiration date of the assist data is about 30 days.
• If [Date/Time Setup] is not set, or set time is shifted greatly, the time for the GPS
acquiring location information cannot be shortened.
• The assist data service may be closed for various reasons.
To update the GPS assist data by inserting a memory card into the
computer
Start up [GPS Support Tool] from the main screen of the “PlayMemories
Home,” select the memory card drive from your computer, and then update
the GPS assist data. Insert the memory card that has been updated into the
camera.
GPS Auto Time Cor.
Your camera maintains correct clock time by using GPS to acquire time
information during starting up. The time is corrected when the power is
turned off.
MENU button t
t [On]
2 t [GPS Settings] t [GPS Auto Time Cor.]
Notes
• [GPS Auto Time Cor.] is invalid if [GPS On/Off] is set to [Off].
188
Recording location information using the GPS feature (SLT-A99V only)
• You must set [Date/Time Setup] on the camera before using it.
• There may be discrepancies of a few seconds.
• Depending on the area, it may not function correctly.
Setup of the camera
189
Registering your own settings
You can register 3 combinations of frequently used modes and settings in
the memory. You can recall the registered settings with the mode dial.
1 Put the camera on the setting you want to register.
2 MENU button t
4 t [Memory]
3 Select the number you want to register with b/B on the multiselector, then press the center of the multi-selector.
You can change the settings after you have registered them.
Items that can be registered
Exposure mode, aperture, shutter speed, drive mode, focus mode, ISO,
white balance, exposure compensation, metering mode, DRO/Auto HDR,
Creative Style, flash mode, flash compensation, Face Detection, Smile
Detection Sensitivity, object tracking, Picture Effect, the position of the
local AF area, and all of the
Still shooting menu items (page 37),
Movie shooting menu items (page 39)
To recall the saved settings
Set the mode dial to the desired number 1/2/3 you want to recall.
To change the saved settings
After recalling the setting, put the camera on the setting you want to
register, then register the setting on the same number again.
Notes
• You cannot register the Program Shift and Manual Shift settings.
• The actual setting will not correspond to the positions of the dials on the camera.
Refer to the information displayed on the LCD screen when you take pictures.
190
Resetting to the default
You can reset the main functions of the camera.
MENU button t
t [OK]
4 t [Initialize] t Select the desired setting
: The items to be reset.
– : The items not to be reset.
Shooting functions
Items
Reset to
Exposure
compensation (106)
±0.0
Reset
Default
Rec mode
reset
Custom
reset
–
Drive mode (110)
Single Shooting
–
Flash Mode (115)
Fill-flash (differs
depending on the
exposure mode)
–
Focus Mode (91)
Single-shot AF
–
AF area (95)
Wide
–
–
Smile/Face Detect.
(141, 145)
On (Regist. Faces)
–
Auto Port. Framing
(143)
Off
ISO (124)
AUTO
–
–
Metering Mode (109) Multi segment
–
Flash Comp. (120)
–
±0.0
Setup of the camera
Object Tracking (95) Off (differs
depending on [Focus
Mode])
White Balance (133) AWB (Auto white
balance)
–
C.Temp./Filter (134) 5500K, Color Filter 0
–
Custom white
balance (135)
5500K
–
DRO/Auto HDR
(126)
D-Range Optimizer:
Auto
–
Creative Style (130)
1/Standard
–
191
Resetting to the default
Picture Effect (129)
Off
–
Scene Selection (71)
Portrait
–
Movie (153)
P
–
Auto Mode (69)
Intelligent Auto
–
Tele-zoom Cont.
Priority AE (76)
T10
–
Still shooting menu
Items
Reset to
Reset
Default
Rec mode
reset
Custom
reset
Image Size (137)
L:24M
–
Aspect Ratio (139)
3:2
–
Quality (139)
Fine
–
Panorama: Size (137) Standard
–
Panorama: Direction
(75)
Right
–
Clear Image Zoom
(149)
On
Digital Zoom (149)
Off
Long Exposure NR
(150)
On
High ISO NR (150)
Normal
Flash control (121)
ADI flash
–
–
–
–
–
AF Illuminator (100) Auto
–
SteadyShot (60)
On
–
AF drive speed (38)
Fast
–
Color Space (151)
sRGB
–
Silent Controller
(33)
Focus Mode
Exposure step (38)
0.3 EV
–
Priority setup (38)
AF
–
AF w/ shutter (38)
On
–
AEL w/ shutter (38)
On
–
192
–
Resetting to the default
Movie shooting menu
Items
Reset to
File Format (155)
AVCHD
Reset
Default
Rec mode
reset
–
Record Setting (155) 60i 17M(FH), 50i
17M(FH)
SteadyShot (60)
Off
AF Tracking
Duration (153)
Mid
Auto Slow Shutter
(154)
On
–
–
–
–
Silent Controller Audio Rec Level
–
(33)
Audio Recording
(159)
On
Wind Noise Reduct.
(159)
Off
Custom
reset
–
–
Audio Level Display On
(157)
–
Audio Output Timing Live
(158)
–
Items
Reset to
Eye-Start AF (40)
Off
FINDER/LCD
Setting (179)
Auto
Red Eye Reduction
(40)
Off
Release w/o Lens
(175)
Disable
S. Auto Cont.
Shooting (70)
Auto
S. Auto Image
Extract. (70)
Auto
Reset
Default
Rec mode
reset
Custom
reset
–
–
–
–
–
–
Grid Line (175)
Off
–
Auto Review (175)
2 Sec
–
193
Setup of the camera
Custom menu
Resetting to the default
DISP
For viewfinder/No
Button(Monitor) (87) Disp. Info./Level/
Histogram
–
DISP Button(Finder) No Disp. Info./Level/
(87)
Histogram
–
AF RANGE Button
(41, 98)
AF Range Control
–
AF Range Control
Assist (41)
On
Peaking Level (102)
Off
–
Peaking Color (103)
White
–
Live View Display
(89)
Setting Effect ON
Func. of AEL button
(176)
AEL hold
–
–
–
ISO Button (176)
ISO
–
AF/MF button (176)
AF/MF Control Hold
–
Custom button (177)
FEL Lock toggle
–
Preview Button (176) Aperture Preview
–
Smart Telecon.
Button (103, 147)
Smart Telecon.
–
Focus Hold Button
(42)
Focus Hold
MOVIE Button (42)
Always
Ctrl dial setup (42)
Dial exp.comp (107)
SS
–
–
F/no.
Off
–
–
Exp.comp.set (43)
Ambient&flash
–
Bracket order (43)
0t–t+
–
Lens Comp.: Shading Auto
(181)
–
Lens Comp.: Chro.
Aber. (181)
Auto
–
Lens Comp.:
Distortion (181)
Off
Front Curtain Shutter On
(177)
194
–
–
Resetting to the default
Face Priority
Tracking (97)
On
–
Playback menu
Items
Reset to
Still/Movie Select
(160)
Folder View(Still)
Reset
Default
Rec mode
reset
Custom
reset
–
–
Slide Show – Repeat Off
(163)
–
–
Slide Show – Interval 3 sec
(163)
–
–
Slide Show – Image
Type (163)
–
–
–
–
–
–
–
–
Volume Settings (44) 4
–
–
Playback Display
(164)
–
–
All
Image Index (161)
4 Images
Specify Printing –
Date Imprint (168)
Off
Select Playback
Media (160)
Slot 1
Auto Rotate
Items
Reset to
Select Recording
Media (52)
Slot 1
Recording Mode
(182)
Standard
Reset
Default
Rec mode
reset
Custom
reset
–
–
–
–
File Number (183)
Series
–
–
Folder Name (183)
Standard Form
–
–
Clock setup menu
Items
Reset to
Reset
Default
Rec mode
reset
Custom
reset
Date/Time Setup (58) –
–
–
Area Setting (58)
–
–
–
195
Setup of the camera
Memory Card Tool menu
Resetting to the default
Setup menu
Reset
Default
Rec mode
reset
Custom
reset
Items
Reset to
Menu start (45)
Top
–
–
Delete confirm. (45)
“Cancel” first
–
–
Mode Dial Guide
(45)
Off
–
–
LCD Brightness
(177)
Auto
–
–
Viewfinder Bright.
(178)
Auto
–
–
Viewfinder Color
Temp. (45)
0
–
–
GPS Settings – GPS
On/Off (187) (SLTA99V only)
Off
–
–
GPS Settings – GPS –
Auto Time Cor. (188)
(SLT-A99V only)
–
–
Power Save (178)
Standard
–
–
Power Saving Start
Time (179)
1 Min
–
–
HDMI Resolution
(46)
Auto
–
–
CTRL FOR HDMI
(46)
On
–
–
HDMI Info. Display
(173)
On
–
–
Upload Settings
(185)
On
–
–
USB Connection
(204)
Auto
–
–
USB LUN Setting
(204)
Multi
–
–
–
–
–
–
Audio signals (46)
On
APS-C Size Capture
(179)
Auto
196
Resetting to the default
AF Micro Adj. – AF
Adjustment Setting
(101)
Off*
Demo Mode (47)
Off
–
–
–
–
Others
Items
Reset to
Recording
information display
(LCD screen) (87)
For viewfinder
Recording
information display
(Viewfinder) (87)
Level
Playback display
(165)
Single-image screen
(with recording
information)
Reset
Default
Rec mode
reset
Custom
reset
–
–
–
–
–
–
* Even if you reset the setting, the values adjusted are not reset.
Setup of the camera
197
Confirming the software version
Displays the software version of your camera. Confirm the version when a
firmware update is released.
If you mount a lens compatible with the lens version up feature, the version
of the lens is indicated.
MENU button t
4 t [Version]
Note
• An update can be performed only when the battery level is
(3 remaining
battery icons) or more. We recommend that you use a sufficiently charged battery
pack or the AC-PW10AM AC Adaptor (sold separately).
198
Viewing images on a computer
Using the software
Following applications are contained on the CD-ROM (supplied) to allow
more versatile use of images shot with your camera.
• “Image Data Converter”
• “PlayMemories Home”
• “Remote Camera Control”
For detailed notes on installation, also see pages 202, 203.
Using “Image Data Converter”
To use “Image Data Converter,” refer to Help.
Click [Start] t [All Programs] t [Image Data Converter] t [Help] t
[Image Data Converter Ver.4].
“Image Data Converter” support page (English only)
http://www.sony.co.jp/ids-se/
Using “PlayMemories Home”
With “PlayMemories Home” you can do things such as the following:
• Set images shot with the camera and display them on the computer.
• Organize images on the computer on a calendar by shooting date to view
them.
• Retouch (red-eye reduction, etc.), print, send still images as e-mail
attachments, and change the shooting date.
• Edit images on the computer, such as trimming, resizing.
199
Viewing images on a computer
With “Image Data Converter” you can do things such as the following:
• Open and edit images recorded in RAW format with various corrections,
such as tone curve, and sharpness.
• Adjust images with white balance, exposure, and creative style, etc.
• Save the images displayed and edited on a computer.
You can either save the image as RAW format or save it in the general
file format.
• Display and compare RAW/JPEG images recorded with this camera.
• Rate the images on a scale of 5.
• Set color labels.
Using the software
• Print or save still images with the date.
• Create Blu-ray discs or DVD discs from AVCHD movies imported to a
computer. (An Internet connection environment is required when a Bluray disc/DVD disc is created for the first time.)
Notes
• “PlayMemories Home” is not compatible with Mac computers. When you play back
images on Mac computers, use the appropriate application software supplied with
the Mac computer.
• Movies recorded with the [60p 28M(PS)]/[50p 28M(PS)], [60i 24M(FX)]/[50i
24M(FX)] or [24p 24M(FX)]/[25p 24M(FX)] setting in [Record Setting] are
converted by “PlayMemories Home” in order to create an AVCHD recording disc.
This conversion can take a long time. Also, you cannot create a disc with the original
image quality. If you want to keep the original image quality, you must store your
movies on a Blu-ray disc.
To use “PlayMemories Home,” refer to “PlayMemories Home Help
Guide.”
Double-click the shortcut of
(PlayMemories Home Help Guide) on the
desktop. Or, click [Start] t [All Programs] t [PlayMemories Home] t
[PlayMemories Home Help Guide].
“PlayMemories Home” support page (English only)
http://www.sony.co.jp/pmh-se/
Using “Remote Camera Control”
Connect the camera to your computer. With “Remote Camera Control” you
can:
• Set up the camera or record an image from the computer.
• Record an image directly to the computer.
• Perform an Interval Timer Shooting.
Set up the following before use: MENU button t
3 t [USB
Connection] t [PC Remote]
To use “Remote Camera Control,” refer to Help.
Click [Start] t [All Programs] t [Remote Camera Control] t [Help]
t [Remote Camera Control Ver.3].
200
Using the software
Note
• In Interval Timer Shooting, the drive mode is set to [Single Shooting]. If the focus is
not achieved, the shutter is not released (except when the manual focus is selected or
[Priority setup] in the
Still shooting menu is set to [Release]).
Recommended computer environment (Windows)
The following computer environment is recommended when using the
supplied software and importing images via a USB connection.
Microsoft Windows XP* SP3/Windows Vista** SP2/
Windows 7 SP1
“PlayMemories
Home”
CPU: Intel Pentium III 800 MHz or faster
(For playing/editing the High Definition movies: Intel Core
Duo 1.66 GHz or faster/Intel Core 2 Duo 1.66 GHz or faster,
Intel Core 2 Duo 2.26 GHz or faster (AVC HD (FX/FH)),
Intel Core 2 Duo 2.40 GHz or faster (AVC HD (PS)))
Memory: Windows XP 512MB or more (1 GB or more is
recommended), Windows Vista/Windows 7 1 GB or more
Hard Disk: Disk space required for installationapproximately 500 MB
Display: Screen resolution-1024 × 768 dots or more
“Image Data
Converter Ver.4”/
“Remote Camera
Control Ver.3”
CPU/Memory: Pentium 4 or faster/1 GB or more
Display: 1024 × 768 dots or more
* 64-bit editions and Starter (Edition) are not supported. Windows Image
Mastering API (IMAPI) Ver.2.0 or later is required to use the function
for creating discs.
** Starter (Edition) is not supported.
Recommended computer environment (Mac)
The following computer environment is recommended when using the
supplied software and importing images via a USB connection.
OS (pre-installed)
USB Connection: Mac OS X v10.3 – v10.8
“Image Data Converter Ver.4” “Remote Camera
Control Ver.3”: Mac OS X v10.5 – v10.8
“Image Data
Converter Ver.4”/
‘Remote Camera
Control Ver.3”
CPU: Intel Core Solo/Core Duo/Core 2 Duo or faster
Memory: 1 GB or more is recommended.
Display: 1024 × 768 dots or more
201
Viewing images on a computer
OS (pre-installed)
Using the software
Notes
• Operation is not assured in an environment based on an upgrade of the operating
systems described above or in a multi-boot environment.
• If you connect 2 or more USB devices to a single computer at the same time, some
devices, including the camera, may not operate, depending on the types of USB
devices you are using.
• Connecting the camera using a USB interface that is compatible with Hi-Speed USB
(USB 2.0 compliant) allows advanced transfer (high speed transfer), as the camera is
compatible with Hi-Speed USB (USB 2.0 compliant).
• When your computer resumes activity from suspend or sleep mode, communication
between the camera and your computer may not recover at the same time.
Installing the software (Windows)
Log on as Administrator.
1 Turn on your computer, and insert the CD-ROM (supplied) into
the CD-ROM drive.
The installation menu screen appears.
• If it does not appear, double-click [Computer] (For Windows XP: [My
Computer]) t
(PMHOME) t [Install.exe].
• If the AutoPlay screen appears, select “Run Install.exe” and follow the
instructions that appear on the screen to proceed with the installation.
2 Click [Install].
Make sure that “Image Data Converter” and “PlayMemories Home” are
checked and follow the instructions on the screen.
• Connect the camera to the computer by following the instructions on the
screen (page 205).
• When the restarting confirmation message appears, restart the computer
following the instructions on the screen.
• DirectX may be installed depending on the system environment of your
computer.
202
Using the software
3 Remove the CD-ROM after the installation is complete.
The following software is installed and shortcut icons appear on the desktop.
“Image Data Converter”
“Remote Camera Control”
“PlayMemories Home”
“PlayMemories Home Help Guide”
Note
• If “PMB” (Picture Motion Browser) supplied with a camera that was purchased
before 2011 has already been installed on the computer, “PMB” will be overwritten
by “PlayMemories Home,” and you may be unable to use some functions of “PMB.”
Installing the software (Mac)
Log on as Administrator.
1 Turn on your Mac computer, and insert the CD-ROM (supplied)
into the CD-ROM drive.
3 Copy the [IDC_INST.pkg] and [RCC_INST.pkg] files in the
[MAC] folder to the hard disk icon.
4 Double-click the [IDC_INST.pkg] and [RCC_INST.pkg] files in
the copy-to folder.
Follow the instructions on the screen to complete the installation.
203
Viewing images on a computer
2 Double-click the CD-ROM icon.
Connecting the camera to the
computer
Setting the USB connection
Selects the method used for a USB connection when the camera is
connected to a computer or a USB device with a USB cable.
MENU button t
setting
3 t [USB Connection] t Select the desired
Auto
Establishes a Mass Storage or MTP connection
automatically, in accordance with a computer or other USB
devices to be connected. Windows 7 computers are
connected in MTP, and its unique functions are enabled to
use.
Mass Storage
Establishes a Mass Storage connection between the camera, a
computer, and other USB devices. Standard mode.
MTP
Establishes an MTP connection between the camera, a
computer, and other USB devices. Windows 7 computers are
connected in MTP, and its unique functions are enabled to
use. In the case of other computers (Windows Vista/XP, Mac
OS X), the AutoPlay Wizard appears, and the still images in
the recording folder on the camera are imported to the
computer.
PC Remote
Controls the camera from the computer using “Remote
Camera Control” on the CD-ROM (supplied), such as
shooting, storing images on the computer.
Notes
• When this item is set to [Auto], it may take some time to establish a connection.
• If Device Stage* is not displayed with Windows 7, set this item to [Auto].
* Device Stage is a menu screen used to manage connected devices, such as a camera
(Function of Windows 7).
Setting the LUN (Logical Unit Number) (USB LUN Setting)
In USB communication with the computer, you can select the available slot
between both the slots and slot 1.
204
Connecting the camera to the computer
MENU button t
desired setting
3 t [USB LUN Setting] t Select the
Multi
Displays both the images in the memory card slot 1 and the
memory card slot 2 on the screen of the computer.
Single
Displays only the images in the memory card slot 1 on the
screen of the computer.
Connecting to the computer
1 Insert a sufficiently charged battery pack into the camera, or
connect the camera to a wall outlet (wall socket) using the ACPW10AM AC Adaptor (sold separately).
2 Turn on the camera and the computer.
3 Check that [USB Connection] in
1 To a USB terminal of the
computer.
computer
• When a USB connection is established
for the first time, your computer
automatically runs a program to
recognize the camera. Wait for a while.
USB cable (supplied)
Viewing images on a computer
4 Connect the camera to your
3 is set to [Mass Storage].
2 To the USB terminal
Importing images to the computer (Windows)
“PlayMemories Home” allows you to easily import images.
For details on “PlayMemories Home” functions, see the “PlayMemories
Home Help Guide.”
205
Connecting the camera to the computer
Importing images to the computer without using “PlayMemories
Home”
When the AutoPlay Wizard appears after making a USB connection
between the camera and a computer, click [Open folder to view files] t
[OK] t [DCIM] or [MP_ROOT] t copy the desired images to the
computer.
File name
Folder
The type of file
DCIM folder
JPEG file
DSC0ssss.JPG
JPEG file (Adobe RGB)
_DSCssss.JPG
MP_ROOT folder
File name
RAW file
DSC0ssss.ARW
RAW file (Adobe RGB)
_DSCssss.ARW
MP4 file (1440 × 1080 12M)
MAH0ssss.MP4
MP4 file (VGA 3M)
MAQ0ssss.MP4
• ssss (file number) stands for any number within the range of 0001 to
9999.
• When [Quality] is set to [RAW & JPEG], the numerical portions of the
name of a RAW data file and its corresponding JPEG file are the same.
Notes
• For operations such as importing AVCHD movies to the computer, use
“PlayMemories Home.”
• If you want to import movies with GPS location information to a computer, use
“PlayMemories Home” (SLT-A99V only).
• When the camera is connected to the computer, if you operate AVCHD movies or
folders from the connected computer, images may be damaged or cannot be played.
Do not delete or copy AVCHD movies on the memory card from the computer. Sony
is not held liable for consequences resulting from such operations via the computer.
Importing images to the computer (Mac)
1 Connect the camera to your Mac computer first. Double-click
the newly recognized icon on the desktop t the folder where
the images you want to import are stored.
206
Connecting the camera to the computer
2 Drag and drop the image files to the hard disk icon.
The image files are copied to the hard disk.
3 Double-click the hard disk icon t the desired image file in the
folder containing the copied files.
The image is displayed.
The software for Mac computers
For details on other software for Mac computers, access the following
URL:
http://www.sony.co.jp/imsoft/Mac/
Disconnecting the camera from the computer
Perform the procedures from step 1 to 2 below before:
• Disconnecting the USB cable.
• Removing the memory card.
• Turning off the camera.
Windows Vista
on the task bar.
• For Windows 7, click
.
2 Click
, then click
Disconnect icon
(Safely remove USB Mass Storage Device).
Notes
• Drag and drop the icon of the memory card or the drive icon to the “Trash” icon
beforehand when you use a Mac computer, and the camera is disconnected from the
computer.
• With Windows 7, the disconnect icon may not be displayed. In such cases, you can
disconnect without following the above procedure.
• Do not disconnect the USB cable when the access lamp is lit. The data may be
damaged.
207
Viewing images on a computer
1 Double-click the disconnect icon
Creating a movie disc
You can create a disc from AVCHD movies recorded on the camera.
Selecting the method for creating a disc of movies
You can create a disc from AVCHD movies that have been recorded with
this camera.
Depending on the disc type, playable devices may vary. Select the method
that suits your disc player.
There are two ways to create a movie disc. Use “PlayMemories Home” on
your computer or create a disc with devices other than a computer such as a
recorder.
Disc type/usage
Record setting available
PS
FX
FH
Blu-ray disc playback
devices
(Sony Blu-ray disc player,
PlayStation®3, etc.)
To keep high-definition
image quality (HD)
To keep high-definition
image quality (HD)
(AVCHD recording
disc)
To keep standard
definition image quality
(STD)
Player
–*
–*
–*
AVCHD format playback
devices
(Sony Blu-ray disc player,
PlayStation®3, etc.)
–*
Ordinary DVD playback
devices
(DVD player, computer
that can play DVDs, etc.)
–*
* Movies recorded with the [60p 28M(PS)]/[50p 28M(PS)], [60i 24M(FX)]/[50i
24M(FX)] or [24p 24M(FX)]/[25p 24M(FX)] setting in [Record Setting] are
converted by “PlayMemories Home” in order to create an AVCHD recording disc.
This conversion can take a long time. Also, you cannot create a disc with the original
image quality. If you want to keep the original image quality, you must store your
movies on a Blu-ray disc (page 210).
208
Creating a movie disc
Note
• You cannot create discs of movies that were recorded with [PAL/NTSC Selector] set
to [NTSC] using “PlayMemories Home.” Create discs with a device other than a
computer (page 211). (Only for 1080i 50i-compatible models)
Creating a high definition image quality (HD) disc
(AVCHD recording disc)
You can create a high definition image quality (HD) AVCHD recording
disc from AVCHD movies imported to a computer using the supplied
software “PlayMemories Home.”
1 Start up [PlayMemories Home] and click
(Create Discs).
2 Select [AVCHD (HD)] from the drop-down list used for selecting
a disc.
3 Select the AVCHD movies you want to write.
• You can also add movies by a drag and drop operation.
5 Create the disc following the instruction on the screen.
Notes
• Install “PlayMemories Home” beforehand.
• Still images and MP4 movie files cannot be recorded on the AVCHD recording disc.
• It may take a long time to create a disc.
Playing back AVCHD recording disc on a computer
You can play back the discs using “PlayMemories Home.” Select the DVD
drive that hold the disc and click [Player for AVCHD] on “PlayMemories
Home.”
See “PlayMemories Home Help Guide” for details.
Note
• Movies may not be played smoothly depending on the computer environment.
209
Viewing images on a computer
4 Click [Add].
Creating a movie disc
Creating a Blu-ray disc
You can create a Blu-ray disc with AVCHD movies previously imported to
a computer. Your computer must support the creation of Blu-ray discs.
BD-R (non-rewritable) and BD-RE (rewritable) media can be used to create
Blu-ray discs. You cannot add contents to either type of disc once it has
been created.
To create Blu-ray discs with “PlayMemories Home,” you have to install
proprietary add-on software. For details, access the following URL:
http://support.d-imaging.sony.co.jp/BDUW/
An Internet connection environment is required to install the software.
See “PlayMemories Home Help Guide” for details.
Note
• When movies recorded with the [60p 28M(PS)]/[50p 28M(PS)] setting are copied to
a Blu-ray disc using “PlayMemories Home,” those movies can be played back only
on devices that are compatible with the AVCHD Ver 2.0 format.
Creating a standard definition image quality (STD) disc
1 Start up [PlayMemories Home] and click
(Create Discs).
2 Select [DVD-Video (STD)] from the drop-down list used for
selecting a disc.
3 Select the AVCHD movies you want to write.
4 Click [Add].
• You can also add movies by a drag and drop operation.
5 Create the disc following the instruction on the screen.
Notes
• Install “PlayMemories Home” beforehand.
• MP4 movie files cannot be recorded on a disc.
• It will take a longer time to create a disc because AVCHD movies are converted to
standard definition image quality (STD) movies.
210
Creating a movie disc
• An Internet connection environment is required when creating a DVD-Video (STD)
disc for the first time.
Discs you can use with “PlayMemories Home”
You can use 12 cm discs of following type with “PlayMemories Home.”
For Blu-ray disc, see page 210.
Disc type
Features
DVD-R/DVD+R/DVD+R DL
Unrewritable
DVD-RW/DVD+RW
Rewritable
• Always maintain your PlayStation®3 to use the latest version of the
PlayStation®3 system software.
• The PlayStation®3 may not be available in some countries/regions.
Creating a disc with a device other than a computer
You can create a disc with a Blu-ray disc recorder etc.
The disc type you can create depends on the device used.
Device
Disc type
HDD recorder, etc.: To
create a DVD with
standard image quality
(STD)
High-definition Standard
image quality
definition
(HD)
image quality
(STD)
Standard definition image quality
(STD)
Notes
• For details on how to create a disc, refer to the operating instructions of the device
you use.
• To copy movies recorded with the [60p 28M(PS)]/[50p 28M(PS)] setting to a Bluray disc, a device compatible with the AVCHD Ver 2.0 format is required. To play
back the created Blu-ray disc, a device compatible with the AVCHD Ver 2.0 format
is required.
211
Viewing images on a computer
Blu-ray disc recorder: To
create a Blu-ray disc or
DVD with standard image
quality (STD)
Troubleshooting/Others
Troubleshooting
If you experience trouble with your camera, try the following solutions.
1
Check the items on pages 212 to 220.
2
Remove the battery pack, and insert the battery pack again after
about 1 minute, and turn on the power.
3
Reset the settings (page 191).
4
Consult your Sony dealer or local authorized Sony service facility.
Battery pack and power
The battery pack cannot be installed.
• As you insert the battery pack, use the tip of the battery pack to push the
lock lever (page 51).
• You can use an NP-FM500H battery pack only. Make sure that the battery
is NP-FM500H.
The remaining battery level indicator shows incorrect level or power runs
out quickly despite the indicator showing sufficient battery level. The
camera will not turn on.
• This phenomenon occurs when you use the camera in an extremely hot or
cold location (page 227).
• The battery pack is discharged. Install a charged battery pack (page 49).
• The battery pack is dead (page 237). Replace it with a new one.
• Install the battery pack correctly (page 51).
The power turns off suddenly.
• If you do not operate the camera for given period of time, the camera turns
to power saving mode and nearly shuts down. To cancel the power save,
operate the camera, such as pressing the shutter button halfway down
(page 178).
212
Troubleshooting
The CHARGE lamp flashes when charging the battery pack.
• You can use an NP-FM500H battery pack only. Make sure that the battery
is NP-FM500H.
• If you charge a battery pack that has not been used for a long time, the
CHARGE lamp may flash.
• The CHARGE lamp flashes in 2 ways, fast (about 0.15-second intervals)
and slow (about 1.5-second intervals). If it is flashing fast, remove the
battery pack and reattach the same battery pack securely. If the CHARGE
lamp flashes fast again, it suggests that there is something wrong with the
battery pack. Slow flashing indicates that charging is suspended because the
ambient temperature is outside the suitable range for charging the battery
pack. Charging will resume and the CHARGE lamp will be lit when the
ambient temperature returns to within the suitable temperature.
The optimal temperature for charging the battery pack is between 10°C and
30°C (50°F and 86°F).
Shooting images
Nothing is displayed on the LCD screen in viewfinder mode when the
power is turned on.
• [FINDER/LCD Setting] is set to [Manual]. Press the FINDER/LCD button
(page 179).
The image is not clear in the viewfinder.
No images in the viewfinder.
• [FINDER/LCD Setting] is set to [Manual]. Press the FINDER/LCD button
(page 179).
• Move your eye a little closer to the viewfinder.
The shutter does not release.
• You are using a memory card with a write-protect switch, and the switch is
set to the LOCK position. Set the switch to the recording position.
• Check the free capacity of the memory card.
213
Troubleshooting/Others
• Adjust the diopter scale properly using the diopter-adjustment dial
(page 17).
Troubleshooting
• In autofocus mode, the shutter cannot be released when the subject is out of
focus.
• The lens is not attached properly. Attach the lens properly (page 55).
• When the camera is attached to another device, such as an astronomical
telescope, set [Release w/o Lens] to [Enable] (page 175).
• The subject may require special focusing (page 93). Use the focus-lock or
manual focus function (pages 94, 101).
Recording takes a long time.
• The noise reduction function is turned on (page 150). This is not a
malfunction.
• You are shooting in RAW mode (page 139). Since the RAW data file is
large, the RAW mode shooting may take time.
• The Auto HDR is processing an image (page 127).
The same image is shot several times.
• The drive mode is set to [Cont. Shooting] or [Bracket: Cont.]. Set it to
[Single Shooting] (page 110).
• The exposure mode is set to Tele-zoom Continuous Priority AE (page 76).
• The exposure mode is set to Superior Auto and [S. Auto Image Extract.] is
set to [Off] (page 70).
The image is out of focus.
• The subject is too close. Check the minimum focal distance of the lens.
• You are shooting in manual focus mode. Set [Focus Mode] to other than
[DMF], [Manual Focus] (page 91).
• When the focus mode switch is equipped with the lens, set it to AF.
• Ambient light is insufficient.
Eye-Start AF does not work.
• Set [Eye-Start AF] to [On] (page 40).
• Press the shutter button halfway down.
The date and time are recorded incorrectly.
• Set the correct date and time (page 58).
• The area selected with [Area Setting] is different from the actual area. Set
up [Area Setting] again (page 58).
214
Troubleshooting
The aperture value and/or shutter speed flashes when you press the
shutter button halfway down.
• Since the subject is too bright or too dark, it is beyond the available range of
the camera. Adjust the setting again.
The image is whitish (Flare).
Blurring of light appears on the image (Ghosting).
• The picture was taken under a strong light source, and excessive light has
entered the lens. Attach a lens hood.
The corners of the picture are too dark.
• If any filter or hood is used, take it off and try shooting again. Depending on
the thickness of the filter and improper attachment of the hood, the filter or
the hood may partially appear in the image. The optical properties of some
lenses may cause the periphery of the image to appear too dark (insufficient
light). You may compensate for this phenomenon with [Lens Comp.:
Shading] (page 181).
The eyes of the subject come out red.
• Activate the red eye reduction function (page 40).
• Get close to the subject, and shoot the subject within the flash range using
the flash. Check the flash range in “Specifications.”
Dots appear and remain on the LCD screen.
The image is blurred.
• The picture was taken in a dark location without the flash, resulting in
camera shake. The use of a tripod or the flash is recommended (page 115).
The EV scale b B is flashing on the LCD screen or in the viewfinder.
• The subject is too bright or too dark for the metering range of the camera.
The sound is not recorded properly.
• If you set the recording level to the minimum, the sound is not recorded.
• If you set the recording level to the maximum, the sound tends to include
cracking noises.
215
Troubleshooting/Others
• This is not a malfunction. These dots are not recorded (page 12).
Troubleshooting
Viewing images
Your camera cannot play back images.
• The folder/file name has been changed on your computer (page 205).
• When an image file has been processed by a computer or when the image
file was recorded using a model other than that of your camera, playback on
your camera is not guaranteed.
• Use “PlayMemories Home” to play images stored on a PC with this camera.
• The camera is in USB mode. Disconnect the camera from the computer
(page 207).
Deleting images
Your camera cannot delete an image.
• Cancel the protection (page 167).
You have deleted an image by mistake.
• Once you have deleted an image, you cannot restore it. We recommend that
you protect images that you do not want to delete (page 167).
GPS (SLT-A99V only)
The camera is not receiving a GPS signal.
• Set [GPS On/Off] to [On] (page 187).
• Your camera may not be able to receive radio signals from GPS satellites
because of obstructions.
• To triangulate the location information correctly, bring your camera to an
open area, and turn on the camera again.
• When you attach accessories (sold separately) to the camera, the GPS signal
from GPS satellites may not be as strong as before you attached the
accessory.
Excessive error in location information.
• The margin of error can be up to several-hundred meters depending on
surrounding buildings, weak GPS signals, etc.
It takes time to triangulate although GPS assist data has been taken in.
• [Date/Time Setup] is not set, or set time is shifted greatly. Set the date and
time correctly (page 58).
216
Troubleshooting
• The term of validity of assist data has expired. Update the GPS assist data
(page 188).
• As the positions of GPS satellites vary constantly, it may take longer to
determine the location or the receiver may not be able to determine the
location at all, depending on the location and time you use the camera.
• “GPS” is a system for determining geographic location by triangulating
radio signals from GPS satellites. Avoid using the camera in places where
radio signals are blocked or reflected, such as a shadowy place surrounded
by buildings or trees, etc. Use the camera in open sky environments.
The location information has not been recorded.
• Use “PlayMemories Home” to import the movies with GPS location
information to your computer.
Computers
You do not know if the OS of your computer is compatible with the
camera.
• Check “Recommended computer environment” (page 201).
Your computer does not recognize your camera.
You cannot copy images.
• Make the USB connection by properly connecting the camera with your
computer (page 205).
• Follow the designated copy procedure for your OS (pages 205, 206).
• When you shoot images with a memory card formatted by a computer, you
may not be able to copy the images to a computer. Shoot using a memory
card formatted by your camera (page 183).
217
Troubleshooting/Others
• Check that the camera is turned on.
• When the battery level is low, install the charged battery pack (page 49), or
use the AC Adaptor (sold separately).
• Use the USB cable (supplied) (page 205).
• Disconnect the USB cable, and connect it again firmly.
• Disconnect all equipment other than the camera, the keyboard and the
mouse from the USB jacks of your computer.
• Connect the camera directly to your computer without passing through a
USB hub or other devices (page 205).
Troubleshooting
The image cannot be played back on a computer.
• If you are using “PlayMemories Home,” refer to the “PlayMemories Home
Help Guide.”
• Consult the computer or software manufacturer.
After making a USB connection, “PlayMemories Home” does not start
automatically.
• Make the USB connection after the computer is turned on (page 205).
Memory card
Cannot insert a memory card.
• Insertion direction of the memory card is wrong. Insert it in the correct
direction (page 51).
Cannot record on a memory card.
• The memory card is full. Delete unnecessary images (pages 67, 170).
• An incompatible memory card is inserted (pages 54, 234).
• Select the slot in which the memory card is installed using [Select
Recording Media] (page 52).
Cannot play back files on a memory card.
• Check the setting of [Select Playback Media] (page 160).
You have formatted a memory card by mistake.
• All the data on the memory card are deleted by formatting. You cannot
restore it.
Printing
Cannot print images.
• RAW images cannot be printed. To print RAW images, first convert them
to JPEG images using “Image Data Converter” on the supplied CD-ROM.
218
Troubleshooting
The color of the image is strange.
• When you print the images recorded in Adobe RGB mode using sRGB
printers that are not compatible with Adobe RGB (DCF2.0/Exif2.21), the
images are printed at a lower intensity level (page 151).
Images are printed with both edges cut off.
• Depending on your printer, the left, right, top, and bottom edges of the
image may be cut off. Especially when you print an image shot with the
aspect ratio set to [16:9], the lateral end of the image may be cut off.
• When printing images on your printer, cancel the trimming or borderless
settings. Consult the printer manufacturer as to whether the printer provides
these functions or not.
• When having images printed at a digital print shop, ask the shop whether
they can print the images without cutting off both edges.
Cannot print images with the date.
• Using “PlayMemories Home,” you can print images with date (page 199).
• When you print images at a shop, images can be printed with the date if you
ask them to do so.
Others
The lens gets fogged.
The message “Set Area/Date/Time.” appears when you turn on the
camera.
• The camera has been left unused for sometime with a low battery or no
battery pack. Charge the battery pack and set the date again (pages 58, 227).
If the date setting is lost every time the battery pack is charged, consult your
Sony dealer or local authorized Sony service facility.
The number of recordable images does not decrease or decreases 2 at a
time.
• This is because the compression rate and the image size after compression
change depending on the image when you shoot a JPEG image (page 139).
219
Troubleshooting/Others
• Moisture condensation has occurred. Turn off the camera and leave it for
about 1 hour before using it (page 227).
Troubleshooting
The setting is reset without the resetting operation.
• The battery pack was removed when the power switch was set to ON. When
removing the battery pack, make sure the camera is turned off and the
access lamp is not lit (pages 18, 53).
The camera does not work properly.
• Turn off the camera. Remove the battery pack and insert it again. If the
camera is warm, remove the battery pack, and allow it to cool down before
trying this corrective procedure.
• If an AC Adaptor (sold separately) is used, disconnect the power plug.
Connect the power plug and turn on the camera again. If the camera does
not work after trying these solutions, consult your Sony dealer or local
authorized Sony service facility.
appears on the screen.
• The SteadyShot function does not work. You can continue to shoot but the
SteadyShot function will not work. Turn the camera off and on. If the
SteadyShot scale continues to appear, consult your Sony dealer or local
authorized Sony service facility.
“--E-” appears on the screen.
• Remove the memory card, and insert it again. If this procedure does not turn
off the indication, format the memory card.
220
Warning
messages
If the following messages appear,
follow the instructions below.
Set Area/Date/Time.
• Set the area, date, and time. If
you have not used the camera for
a long time, charge the internal
rechargeable battery (pages 58,
227).
Power insufficient.
• You tried to perform [Cleaning
Mode] when the battery level is
insufficient. Charge the battery
pack or use the AC Adaptor
(sold separately).
Unable to use memory card.
Format?
Memory Card Error
• An incompatible memory card is
inserted or the format has failed.
• The inserted memory card
cannot be used in your camera.
• The memory card is damaged.
• The terminal section of the
memory card is dirty.
Memory card locked.
• You are using a memory card
with a write-protect switch, and
the switch is set to the LOCK
position. Set the switch to the
recording position.
Processing...
• When Long exposure noise
reduction or High ISO noise
reduction will be done for the
same amount of time that the
shutter was open. You cannot do
any further shooting during this
reduction.
Unable to display.
• Images recorded with other
cameras or images modified with
a computer may not be
displayed.
Check the lens attachment. If the
lens is not supported, you can
permit use of the lens in the
custom menu.
• The lens is not attached properly,
or the lens is not attached.
• When attaching the camera to an
astronomical telescope or
something similar, set [Release
w/o Lens] to [Enable].
221
Troubleshooting/Others
• The memory card was formatted
on a computer and the file format
was modified.
Select [Enter], then format the
memory card. You can use the
memory card again, however, all
previous data in the memory card
is erased. It may take a some time
to complete the format.
If the message still appears,
change the memory card.
Reinsert memory card.
Warning messages
Unable to print.
• You tried to mark RAW images
with a DPOF mark.
Internal temp. high. Allow it to
cool.
• The camera has become hot
because you have been shooting
continuously.
Turn the power off. Cool the
camera and wait until the camera
is ready to shoot again.
• Because you have been
recording for a long time, the
temperature inside the camera
has increased to an unacceptable
level. Stop recording.
Recording is unavailable in this
movie format.
• Set [File Format] to [MP4].
• The number of images exceeds
that for which date management
in a database file by the camera
is possible.
• Unable to register to the database
file. Import all the images to a
computer using “PlayMemories
Home” and recover the memory
card.
222
Camera Error
System Error
• Turn the power off, remove the
battery pack, then re-insert it. If
the message appears frequently,
consult your Sony dealer or local
authorized Sony service facility.
Image Database File error. Recover?
• You cannot record or play back
AVCHD movies because the
Image Database File is damaged.
Follow the on-screen
instructions to recover data.
Unable to magnify.
Unable to rotate image.
• Images recorded with other cameras
may not be magnified or rotated.
Cannot create more folders.
• The folder with a name beginning
with “999” exists on the memory
card. You cannot create any
folders if this is the case.
Cleaning the camera and a lens
Cleaning the camera
• Do not touch the inside of the camera, such as lens contacts, or the mirror.
Since dust on the mirror or around the mirror may affect the images or the
performance of the camera, blow the dust away using a commercially
available blower*. For details on cleaning the image sensor, see page 224.
* Do not use a spray blower. Using one may cause a malfunction.
• Clean the camera surface with a soft cloth slightly moistened with water,
then wipe the surface with a dry cloth. To avoid damaging the finish or
casing, follow the instructions below.
– Do not use chemical products such as thinner, benzine, alcohol,
disposable cloths, insect repellent, sunscreen or insecticide, etc.
– Do not touch the camera with the above on your hand.
– Do not leave the camera in contact with rubber or vinyl for a long time.
Cleaning the lens
223
Troubleshooting/Others
• Do not use a cleaning solution containing organic solvents, such as
thinner, or benzine.
• When cleaning the lens surface, remove dust using a commercially
available blower. In case of dust that sticks to the surface, wipe it off with
a soft cloth or tissue paper slightly moistened with lens cleaning solution.
Wipe in a spiral pattern from the center to the outside. Do not spray lens
cleaning solution directly onto the lens surface.
Cleaning the image sensor
If dust or debris enters the camera and adheres to the image sensor (the part
that converts the light to an electric signal), it may appear as dark spots on
the photo image, depending on the shooting environment. If there is dust on
the image sensor, follow the steps below to clean the sensor.
Notes
• Cleaning cannot be performed when the battery level is 50% or less.
• The camera starts beeping if the battery level becomes low during cleaning. Stop
cleaning immediately and turn the camera off. The use of an AC-PW10AM AC
Adaptor (sold separately) is recommended.
• The cleaning should be completed quickly.
• Do not use a spray blower because it may scatter water droplets inside the camera
body.
Cleaning the image sensor automatically using the
cleaning mode of the camera
1 Confirm that the battery is fully charged (page 53).
2 MENU button t
4 t [Cleaning Mode]
3 Select [Enter] with v on the multi-selector, and press the
center of the multi-selector.
The image sensor vibrates for a short time, and eliminates dust from the
sensor.
4 Turn off the camera.
Cleaning the image sensor using a blower
If further cleaning is needed after using the cleaning mode, the image
sensor can be cleaned with the blower by following the steps below.
224
Cleaning the image sensor
1 Perform the cleaning operation described in steps 1 to 3 of
“Cleaning the image sensor automatically using the cleaning
mode of the camera.”
2 Detach the lens (page 56).
3 Push the mirror lock lever with a
finger to lift up the mirror.
• Be careful not to touch the surface of
the mirror.
Mirror lock lever
4 Use the blower to clean the image
Troubleshooting/Others
sensor surface and the
surrounding area.
• Do not touch the image sensor with the
tip of the blower and do not put the tip
of a blower into the cavity beyond the
mount.
• Hold the camera’s face downward to
prevent the dust from resettling in the
camera. Complete the cleaning quickly.
• Also clean the back of the mirror using
a blower.
225
Cleaning the image sensor
5 After the cleaning is finished,
lower the mirror with a finger
until it clicks.
• Lower the frame of the mirror back
down with a finger. Be careful not to
touch the surface of the mirror.
• Lower the mirror down until it locks
firmly.
Put either of the sides down.
6 Attach the lens and turn the camera off.
• Confirm that the mirror is locked down firmly when you attach the lens.
Notes
• After the cleaning is finished, confirm that the mirror is locked down firmly when
you attach the lens. Failure to lock the mirror may result in lens scratching or other
troubles. Also, if the mirror is not locked down firmly, the autofocus does not work
during shooting.
• You cannot shoot while the mirror is lifted up.
226
Precautions
Do not use/store the camera in
the following places
On storing
Be sure to attach the front lens cap
or body cap when not using the
camera. When attaching the body
cap, remove all the dust from the
cap before placing it on the camera.
On operating temperatures
Your camera is designed for use
under the temperatures between 0°C
On moisture condensation
If the camera is brought directly from
a cold to a warm location, moisture
may condense inside or outside the
camera. This moisture condensation
may cause a malfunction of the
camera.
How to prevent moisture
condensation
When bringing the camera from a
cold place to a warm place, seal the
camera in a plastic bag and allow it to
adapt to conditions at the new
location over about 1 hour.
If moisture condensation occurs
Turn off the camera and wait about an
hour for the moisture to evaporate.
Note that if you attempt to shoot with
moisture remaining inside the lens,
you will be unable to record clear
images.
On the internal rechargeable
battery
This camera has an internal
rechargeable battery for maintaining
the date and time and other settings
regardless of whether the power is on
or off, or the battery pack is charged
or discharged.
This rechargeable battery is
continually charged as long as you
are using the camera. However, if you
use the camera for only short periods,
227
Troubleshooting/Others
• In an extremely hot, dry or humid
place
In places such as in a car parked in
the sun, the camera body may
become deformed and this may
cause a malfunction.
• Storing under direct sunlight or
near a heater
The camera body may become
discolored or deformed, and this
may cause a malfunction.
• In a location subject to rocking
vibration
• Near strong magnetic place
• In sandy or dusty places
Be careful not to let sand or dust get
into the camera. This may cause the
camera to malfunction, and in some
cases this malfunction cannot be
repaired.
• Humid places
Mold may grow on the lens in such
places.
and 40°C (32°F and 104°F). Shooting
in extremely cold or hot places that
exceed this range is not
recommended.
Precautions
it gradually discharges. If you do not
use the camera at all for about 3
months it becomes completely
discharged. In this case, be sure to
charge this rechargeable battery
before using the camera.
However, even if this rechargeable
battery is not charged, you can still
use the camera as long as you do not
record the date and time. If the
camera resets the settings to the
defaults each time you charge the
battery, the internal rechargeable
battery may be dead. Consult your
Sony dealer or local authorized Sony
service facility.
Charging method of the internal
rechargeable battery
Insert a charged battery pack in the
camera, or connect the camera to a
wall outlet (wall socket) using the AC
Adaptor (sold separately), and leave
the camera for 24 hours or more with
the power off.
On using the lenses and
accessories
It is recommended that you use Sony
lenses/accessories (including Konica
Minolta products) designed to suit the
characteristics of this camera. Using
the products of other manufacturers
may cause the camera not to operate
to its capability, or result in accidents
and malfunctions of the camera.
228
On memory cards
Do not attach a label, etc. on a
memory card or a card adaptor. This
may cause a malfunction.
Note on disposal/transfer of
the camera
When you dispose of or transfer the
camera, perform the following
operations to protect personal
information:
• [Initialize] t [Reset Default]
(page 191)
• Delete all the face registration data
(page 142).
On recording/playback
• When you use a memory card with
this camera for the first time, it is
recommended to format the card
using the camera for stable
performance of the memory card
before shooting. Note that
formatting permanently erases all
data on the memory card, and is
unrecoverable. Save precious data
on a computer, etc.
• If you repeatedly record/delete
images, fragmentation of data may
occur on the memory card. Movies
may not be able to be saved or
recorded. In such a case, save your
images to a computer or other
storage location, then format the
memory card (page 183).
• Before you record one-time events,
make a trial recording to make sure
that the camera is working
correctly.
Precautions
Troubleshooting/Others
• This camera is designed to be dustand moisture-resistant but not to be
waterproof and splash-proof. When
using the camera in the rain, be
careful not to get the camera and
lens wet. Clean the camera after use
if the camera becomes dirty. With
water, sand, dust, salt, etc., left on
the camera, the camera may cause a
malfunction.
• Do not look at the sun or a strong
light through a removed lens or the
viewfinder. This may cause
irrecoverable damage to your eyes.
Or it may cause a malfunction of
your camera.
• Do not use the camera near a
location that generates strong radio
waves or emits radiation. The
camera may not be able to record or
play back properly.
• Using the camera in sandy or dusty
locations may cause malfunctions.
• If moisture condensation occurs,
remove it before using the camera
(page 227).
• Do not shake or strike the camera.
In addition to malfunctions and an
inability to record images, this may
render the memory card unusable,
or cause image data breakdown,
damage or loss.
• Keep the camera, supplied
accessories, etc., out of the reach of
children. A memory card, etc., may
be swallowed. If such a problem
occurs, consult a doctor
immediately.
229
To use your
camera abroad —
Power sources
You can use your camera and the
battery charger and the ACPW10AM AC Adaptor (sold
separately) in any country or region
where the power supply is within 100
V to 240 V AC, 50/60 Hz.
Note
• Do not use an electronic
transformer (travel converter), as
this may cause a malfunction.
On TV color systems
When you view images on a TV
screen, the camera and TV must use
the same TV color system.
NTSC system
Bahama Islands, Bolivia, Canada,
Central America, Chile, Colombia,
Ecuador, Jamaica, Japan, Korea,
Mexico, Peru, Surinam, Taiwan, the
Philippines, the U.S.A., Venezuela,
etc.
PAL system
Australia, Austria, Belgium, China,
Croatia, Czech Republic, Denmark,
Finland, Germany, Holland, Hong
Kong, Hungary, Indonesia, Italy,
Kuwait, Malaysia, New Zealand,
Norway, Poland, Portugal, Rumania,
Singapore, Slovak Republic, Spain,
Sweden, Switzerland, Thailand,
230
Turkey, United Kingdom, Viet Nam,
etc.
PAL-M system
Brazil
PAL-N system
Argentina, Paraguay, Uruguay
SECAM system
Bulgaria, France, Greece, Guiana,
Iran, Iraq, Monaco, Russia, Ukraine,
etc.
AVCHD format
The AVCHD format is a high
definition digital video camera format
used to record a high definition (HD)
signal of either the 1080i
specification*1 or the 720p
specification*2 using efficient data
compression coding technology. The
MPEG-4 AVC/H.264 format is
adopted to compress video data, and
the Dolby Digital or Linear PCM
system is used to compress audio
data.
The MPEG-4 AVC/H.264 format is
capable of compressing images at
higher efficiency than that of the
conventional image compressing
format. The MPEG-4 AVC/H.264
format enables a high definition video
signal shot on a digital video camera
recorder to be recorded on 8 cm DVD
discs, hard disk drive, flash memory,
memory card, etc.
1080/50i, 1920 × 1080/50p,
1920 × 1080/25p
Audio signal: Dolby Digital 2ch
Recording media: Memory card
*1 1080i specification
A high definition specification which
utilizes 1,080 effective scanning lines
and the interlace system.
*2 720p specification
A high definition specification which
utilizes 720 effective scanning lines
and the progressive system.
*3 Data recorded in AVCHD format
other than the above mentioned
cannot be played on your camera.
Troubleshooting/Others
Recording and playback on
your camera
Based on the AVCHD format, your
camera records with the high
definition image quality (HD)
mentioned below.
Video signal*3:
1080 60i-compatible device
MPEG-4 AVC/H.264 1920 ×
1080/60i, 1920 × 1080/60p,
1920 × 1080/24p
1080 50i-compatible device
MPEG-4 AVC/H.264 1920 ×
231
GPS (SLT-A99V
only)
This system allows you to pinpoint
your exact location on the earth. The
GPS satellites are located in 6 orbits,
20,000 km above the earth. The GPS
system consists of 24 or more GPS
satellites. A GPS receiver receives
radio signals from the satellites, and
calculates the current location of the
receiver based on the orbital
information (almanac data) and travel
time of the signals, etc.
Determining a location is called
“triangulation.” A GPS receiver can
determine the location’s latitude and
longitude by receiving signals from 3
or more satellites.
• As the positions of GPS satellites
vary constantly, it may take longer
to determine the location or the
receiver may not be able to
determine the location at all,
depending on the location and time
you use the camera.
• “GPS” is a system for determining
geographic location by
triangulating radio signals from
GPS satellites. Avoid using the
GPS feature on your camera in
places where radio signals are
blocked or reflected, such as a
shadowy place surrounded by
buildings or trees, etc. Use the
camera in open sky environments.
• You may not be able to record
location information at locations or
in situations where radio signals
232
from the GPS satellites do not reach
the camera as follows.
– In tunnels, indoors or under the
shade of buildings.
– Between tall buildings or at
narrow streets surrounded by
buildings.
– In underground locations,
locations surrounded by dense
trees, under an elevated bridge, or
in locations where magnetic fields
are generated, such as near high
voltage cables.
– Near devices that generate radio
signals of the same frequency
band as the camera: near 1.5 GHz
band mobile telephones, etc.
• If you publish or share images that
were recorded with [GPS On/Off]
set to [On] on the Internet, the
location information of the images
may be exposed to third parties. In
such cases, set [GPS On/Off] to
[Off] before shooting (page 187).
On triangulating errors
• If you move to another location
right after turning on the camera, it
may take a longer time for the
camera to start triangulating,
compared to when you stay in the
same place.
• Error caused by the position of GPS
satellites
The camera automatically
triangulates your current location
when the camera receives radio
signals from 3 or more GPS
satellites. The triangulating error
allowed by the GPS satellites is
about 30 m (98 feet). Depending on
GPS (SLT-A99V only)
the environment of the location, the
triangulating error can be greater. In
this case, your actual location may
not match the location on the map
based on the GPS information.
Meanwhile, the GPS satellites are
controlled by the United States
Department of Defense, and the
degree of accuracy may be changed
intentionally.
• Error during the triangulation
process
The camera acquires location
information every about 15 seconds
during triangulation. There is a
slight time lag between when the
location information is acquired
and when the location information
is recorded on an image, therefore,
the actual recording location may
not match exactly the location on
the map based on the GPS
information.
On the restriction of use of
GPS on an airplane
Troubleshooting/Others
During take off and landing of an
airplane, turn off the camera, as you
will be instructed to do by the onboard announcement.
On the other restriction
Use GPS in accordance with the
regulations of the place or situation.
On the geographic coordinate
system
The “WGS-84” geographic
coordinate system is used.
233
Memory card
Notes on using memory
cards
• Do not strike, bend or drop the
memory card.
• Do not use or store the memory
card under the following
conditions:
– High temperature locations such
as the hot interior of a car parked
in direct sunlight.
– Locations exposed to direct
sunlight.
– Humid locations or locations with
corrosive substances present.
• The memory card may be hot just
after it has been used for a long
time. Be careful when you handle
it.
• When the access lamp is lit, do not
remove the memory card or the
battery pack, or turn off the power.
The data may be corrupted.
• Data may be damaged if you place
the memory card near stronglymagnetized material or use the
memory card in a static-prone or
electrically noisy environment.
• We recommend backing up
important data, such as to a hard
disk of a computer.
• When you carry or store the
memory card, put it in the case
supplied with it.
• Do not expose the memory card to
water.
234
• Do not touch the terminal section of
the memory card with your hand or
a metal object.
• When the write-protect switch of a
memory card is set to the LOCK
position, you cannot perform
operations, such as recording or
deleting images.
• The memory cards formatted with a
computer are not guaranteed to
operate with this camera. Be sure to
format the memory cards using the
camera.
• Data read/write speeds differ
depending on the combination of
the memory cards and the
equipment used.
• Do not press down hard when you
write down on the memo area.
• Do not attach a label on the
memory cards themselves.
• Do not disassemble or modify the
memory cards.
• Do not leave the memory cards
within the reach of small children.
They might accidentally swallow it.
Notes on the “Memory
Stick” media used with
the camera
The types of “Memory Stick” media
that can be used with this camera are
as follows. However, proper
operation cannot be guaranteed for all
“Memory Stick PRO Duo” media
functions.
Memory card
“Memory Stick PRO Duo”
media*1*2*3
“Memory Stick PRO-HG Duo”
media*1*2
Compatible with your camera
“Memory Stick Duo” media
Not compatible with your camera
“Memory Stick” media and “Memory
Stick PRO” media
Not compatible with your camera
Notes on using “Memory Stick
Micro” media (sold
separately)
• This product is compatible with
“Memory Stick Micro” media
(“M2”). “M2” is an abbreviation for
“Memory Stick Micro” media.
• To use a “Memory Stick Micro”
media with the camera, be sure to
insert the “Memory Stick Micro”
media into an “M2” Adaptor as
large as Duo size. If you insert a
“Memory Stick Micro” media into
the camera without an “M2”
Adaptor as large as Duo size, you
might not be able to remove it from
the camera.
• Do not leave the “Memory Stick
Micro” media within the reach of
small children. They might
accidentally swallow it.
Troubleshooting/Others
*1 This is equipped with MagicGate
function. MagicGate is copyright
protection technology that uses
encryption technology. Data
recording/playback that requires
MagicGate functions cannot be
performed with this camera.
*2 Supports high-speed data transfer
using a parallel interface.
*3 When using “Memory Stick PRO
Duo” media to record movies,
only those marked with Mark2
can be used.
235
Battery pack/
Battery charger
• The charging time differs
depending on the remaining
capacity of the battery pack or
charging conditions.
• We recommend charging the
battery pack in an ambient
temperature of between 10 to 30°C
(50 to 86°F). You may not be able
to efficiently charge the battery
pack outside of this temperature
range.
• Connect the battery charger to the
nearest wall outlet (wall socket).
• Do not try to charge the battery
pack again right after it has been
charged, or when it has not been
used after being charged. Doing so
will affect the performance of the
battery pack.
• Do not charge any battery pack
other than the “InfoLITHIUM” M
series battery pack in the battery
charger (supplied) with your
camera. Batteries other than the
specified kind may leak, overheat,
or explode if you attempt to charge
them, posing a risk of injury from
electrocution and burns.
• When the CHARGE lamp flashes,
this may indicate a battery error or
that a battery pack other than the
specified type has been installed.
Check that the battery pack is the
specified type. If the battery pack is
the specified type, remove the
battery pack, replace it with a new
236
one or another one and check if the
battery charger operates correctly.
If the battery charger operates
correctly, a battery error may have
occurred.
• If the battery charger is dirty,
charging may not be performed
successfully. Clean the battery
charger with dry cloth, etc.
Notes on using the
battery pack
• Use only an NP-FM500H battery
pack. Note that the NP-FM55H,
NP-FM50 and NP-FM30 cannot be
used.
• The displayed battery power level
may not be correct under certain
circumstances.
• Do not expose the battery pack to
water. The battery pack is not
water-resistant.
• Do not leave the battery pack in
extremely hot places, such as in a
car or under direct sunlight.
Effective use of the battery
pack
• Battery performance decreases in
low temperature environments. So,
the time that the battery pack can be
used is shorter in cold places and
the speed of continuous shooting
slows down. We recommend that
you put the battery pack in a pocket
close to your body to warm it up,
and insert it in your camera
immediately before you start
shooting.
Battery pack/Battery charger
• The battery pack will run out
quickly if you use the flash
frequently, use continuous shooting
often, turn the camera on and off
frequently, or set the LCD screen
brighter.
Battery life
• The battery life is limited. Battery
capacity decreases little by little as
you use it more and more, and as
time passes. If the battery operating
time seems shortened considerably,
a probable cause is that the battery
pack has reached the end of its life.
Buy a new battery pack.
• The battery life varies according to
how it is stored and the operating
conditions and environment in
which each battery pack is used.
How to store the battery pack
Troubleshooting/Others
In order to prolong battery life, you
should charge the battery and fully
use it up at least once a year. When
storing the battery pack, be sure to
keep it in a dry, cool place.
237
The License
Notes on the License
This camera comes with software that
are used based on license agreements
with their owners of copyright. Based
on requests by the owners of
copyright of these software
applications, we have an obligation to
inform you of the following. Please
read the following sections.
Read licenses (in English) in the
“License” folder on the CD-ROM.
THIS PRODUCT IS LICENSED
UNDER THE AVC PATENT
PORTFOLIO LICENSE FOR THE
PERSONAL AND NONCOMMERCIAL USE OF A
CONSUMER TO
(i) ENCODE VIDEO IN
COMPLIANCE WITH THE AVC
STANDARD (“AVC VIDEO”)
AND/OR
(ii) DECODE AVC VIDEO THAT
WAS ENCODED BY A
CONSUMER ENGAGED IN A
PERSONAL AND NONCOMMERCIAL ACTIVITY AND/
OR WAS OBTAINED FROM A
VIDEO PROVIDER LICENSED TO
PROVIDE AVC VIDEO.
NO LICENSE IS GRANTED OR
SHALL BE IMPLIED FOR ANY
OTHER USE.
ADDITIONAL INFORMATION
MAY BE OBTAINED FROM
MPEG LA, L.L.C.
SEE
HTTP://WWW.MPEGLA.COM
238
On GNU GPL/LGPL applied
software
The software that is eligible for the
following GNU General Public
License (hereinafter referred to as
“GPL”) or GNU Lesser General
Public License (hereinafter referred
to as “LGPL”) are included in the
camera.
This informs you that you have a
right to have access to, modify, and
redistribute source code for these
software programs under the
conditions of the supplied GPL/
LGPL.
Source code is provided on the web.
Use the following URL to download
it.
http://www.sony.net/Products/Linux/
We would prefer you do not contact
us about the contents of source code.
Read licenses (in English) in the
“License” folder on the CD-ROM.
To view the PDF, Adobe Reader is
needed. If it is not installed on your
computer, you can download it from
the Adobe Systems web page:
http://www.adobe.com/
Index
Index
A
B
Battery pack ................. 49, 51, 236
Bracket ..................................... 112
Bracket order.............................. 43
Bracket: Cont. .......................... 112
“BRAVIA” Sync...................... 174
BULB shooting .......................... 84
239
Index
A................................................. 78
ADI flash.................................. 121
Adobe RGB.............................. 151
AE Lock ................................... 108
AEL.......................................... 108
AEL w/ shutter........................... 38
AF area....................................... 95
AF drive speed ........................... 38
AF Illuminator ......................... 100
AF Micro Adj........................... 101
AF On ...................................... 100
AF RANGE................................ 98
AF RANGE Button.............. 41, 98
AF range control ........................ 98
AF Range Control Assist ........... 41
AF Tracking Duration.............. 153
AF w/ shutter ............................. 38
AF/MF button .................. 105, 176
AF/MF control ......................... 105
AF-A .......................................... 92
AF-C .......................................... 92
AF-D .......................................... 92
AF-S........................................... 92
Ambient light ..................... 43, 113
Anti-dust function .............. 56, 224
Aperture ..................................... 78
Aperture Preview ....................... 80
Aperture Priority ........................ 78
APS-C Size Capture................. 179
Area Setting................................ 58
Aspect Ratio ............................. 139
Assist area .................................. 92
Audio Level Display ................ 157
Audio Output Timing............... 158
Audio Rec Level ...................... 157
Audio Recording ...................... 159
Audio signals.............................. 46
AUTO......................................... 63
Auto HDR ................................ 127
Auto Mode ................................. 69
Auto Port. Framing .................. 143
Auto Review ............................ 175
Auto Slow Shutter .................... 154
Auto WB .................................. 133
Autoflash .................................. 115
Autofocus ........................... 91, 105
Auto-lock Accessory shoe ......... 24
Automatic AF............................. 92
AVCHD ................................... 155
AVCHD View.......................... 160
Index
C
Center weighted........................109
Charging battery pack.................49
Cleaning....................................223
Cleaning Mode .........................224
Clear Image Zoom ....................148
Cloudy (White balance)............133
Color filter (White balance)......134
Color Space ..............................151
Color temperature (White balance)
..............................................134
Compression ratio.....................139
Computer ..........................199, 204
Continuous AF............................92
Continuous shooting ...........76, 111
Contrast.....................................132
Copy .........................................169
Creative Style ...........................130
Ctrl dial setup .............................42
CTRL FOR HDMI .............46, 174
Custom (White balance) ...........135
Custom button ....................42, 177
D
Date Imprint..............................168
Date/Time Setup .........................57
Daylight (White balance) .........133
DC IN terminal ...........................21
Default ......................................191
Delete..................................67, 170
Delete confirm. ...........................45
Demo Mode ................................47
240
Depth Map Assist Continuous AF
............................................... 92
Dial exp.comp.......................... 107
Digital level gauge ..................... 88
Digital Zoom............................ 147
Diopter-adjustment .................... 17
Direct manual focus ................. 104
Disc creation ............................ 208
DISP................................... 87, 165
DISP Button(Finder)............ 40, 87
DISP Button(Monitor) ......... 40, 87
Display All Info. ........................ 87
Display Card Space.................... 45
Display panel ............................. 29
Display panel illumination button
............................................... 29
DMF......................................... 104
DPOF Setup ............................. 168
D-Range Optimizer.................. 126
Drive mode .............................. 110
DRO Bracket ........................... 114
DRO/Auto HDR ...................... 126
E
Enlarged image ........................ 160
EV scale ..................... 83, 106, 113
Exp.comp.set.............................. 43
Exposure compensation ........... 106
Exposure mode .......................... 68
Exposure step............................. 38
Extra fine ................................. 139
Eye-Fi ...................................... 185
Index
Eyepiece cup .............................. 62
Eyepiece sensor.................... 17, 62
Eye-Start AF .............................. 40
F
G
GPS .................................. 187, 232
GPS Assist Data ....................... 188
GPS Auto Time Cor................. 188
GPS Settings ............................ 187
Graphic Display ......................... 88
Grid Line .................................. 175
H
Hand-held Twilight .................... 71
HDMI ....................................... 172
HDMI Info. Display ................. 173
HDMI Resolution............... 46, 173
HDR Painting ........................... 129
High Contrast Mono................. 129
High ISO NR............................ 150
High-speed sync ....................... 116
Histogram................................... 89
241
Index
Face Detection ......................... 141
Face Priority Tracking ............... 97
Face Registration ..................... 142
FEL lock .................................. 122
File Format (Movie)................. 155
File Number ............................. 183
Fill-flash................................... 115
FINDER/LCD Setting.............. 179
FINE......................................... 139
Fine .......................................... 139
Flash (White balance) .............. 133
Flash bracket ............................ 112
Flash compensation.................. 120
Flash control ............................ 121
Flash Exposure Level lock....... 122
Flash Mode ...................... 115, 119
Flash Off .................................. 115
Flash sync terminal .................. 118
Fluor.: Cool White (White balance)
............................................. 133
Fluor.: Day White (White balance)
............................................. 133
Fluor.: Daylight (White balance)
............................................. 133
Fluor.: Warm White (White
balance)................................ 133
Fn ......................................... 34, 35
Focus .......................................... 91
Focus Hold ................................. 42
Focus Hold Button ..................... 42
Focus indicator ........................... 93
Focus Magnifier ....................... 103
Focus Mode........................ 91, 101
Focus-lock .................................. 94
Folder Name............................. 183
Folder View.............................. 160
Format ...................................... 183
Front Curtain Shutter ............... 177
Func. of AEL button ................ 176
Function button .......................... 34
Index
I
M
Image Data Converter...............199
Image Index ..............................161
Image quality ............................139
Image sensor .......................94, 224
Image Size ................................137
In-Camera Guide ........................48
Incandescent (White balance)...133
Initialize ....................................191
Install ................................202, 203
Intelligent Auto...........................69
ISO Button................................176
ISO sensitivity ..................124, 176
M................................................ 82
Macro ......................................... 71
Manual Exposure ....................... 82
Manual focus ................... 101, 105
Manual shift ............................... 83
Mass Storage............................ 204
Memory.................................... 190
Memory card........ 51, 54, 182, 234
Memory recall.......................... 190
MENU........................................ 37
Menu .......................................... 37
Menu start .................................. 45
Metering Mode ........................ 109
MF.................................... 101, 105
Microphone jack ........................ 21
Miniature.................................. 129
Mode Dial Guide ....................... 45
Moisture condensation............. 227
MOVIE .............................. 65, 152
Movie ......................... 65, 152, 153
Movie Audio Recording .......... 159
MOVIE Button ............ 42, 65, 153
Movie File Format ................... 155
Movie Record Setting .............. 155
Movie recording................. 65, 152
MP4.......................................... 155
MTP ......................................... 204
Multi frame noise reduction..... 124
Multi interface shoe ............. 19, 24
Multi segment .......................... 109
Multi-selector............................. 17
J
JPEG .........................................139
L
Landscape ...................................71
Language ..............................12, 47
LCD Brightness ........................177
LCD screen .............25, 59, 87, 165
Lens ............................................55
Lens Comp.: Chromatic Aberration
..............................................181
Lens Comp.: Distortion ............181
Lens Comp.: Peripheral Shading
..............................................181
Live View Display......................89
Local (AF area)...........................95
Long Exposure NR ...................150
242
Index
N
Preview............................... 80, 176
Preview Button......................... 176
Print .......................................... 168
Priority setup .............................. 38
Program Auto ............................. 77
Protect ...................................... 167
O
Q
Object Tracking ......................... 95
Overexposure ........................... 165
Quality...................................... 139
Quick Navi ................................. 31
P
R
P ................................................. 77
PAL/NTSC Selector ................ 180
Panorama: Direction .................. 75
Panorama: Size ........................ 137
Partial Color ............................. 129
PC Remote ............................... 204
Peaking..................................... 102
Peaking Color .......................... 103
Peaking Level .......................... 102
Picture Effect ........................... 129
Playback Display ..................... 164
PlayMemories Home ............... 199
Pop Color ................................. 129
Portrait ....................................... 71
Posterization............................. 129
Power Save .............................. 178
Power Saving Start Time ......... 179
Pre-flash TTL........................... 121
Preset white balance................. 134
Pressing halfway down .............. 63
RAW ........................................ 139
RAW+J..................................... 139
Rear sync.................................. 115
Record Setting (Movie)............ 155
Recording Mode....................... 182
Recording movies .............. 65, 152
Recover Image DB................... 185
Red Eye Reduction..................... 40
Reducing camera shake.............. 60
Release w/o Lens ..................... 175
Remaining battery level ............. 53
REMOTE ................................... 21
Remote Camera Control........... 200
Remote Commander .......... 21, 114
REMOTE terminal ..................... 21
Reset......................................... 191
Retro Photo .............................. 129
Rich-tone Mono. ...................... 129
Rotate ....................................... 162
243
Index
New Folder .............................. 184
Night Portrait ............................. 71
Night Scene................................ 71
No Disp. Info. ............................ 87
Noise reduction ................ 124, 150
Index
S
S ..................................................80
S. Auto Cont. Shooting...............70
S. Auto Image Extract. ...............70
Saturation..................................132
Scene Selection...........................71
SCN ............................................71
Scroll Playback ...........................75
Select Playback Media .............160
Select REC Folder ....................184
Select Recording Media .............52
Self-timer ..................................111
Set the clock ...............................57
Shade (White balance)..............133
Sharpness ..................................132
Shoe adaptor ...............................24
Shooting......................................63
Shooting mode............................68
Shot. Result Preview ..................80
Shoulder strap .............................21
Shutter Priority ...........................80
Shutter speed ..............................80
Silent Controller .........................33
Silent multi-controller ................32
Single Bracket ..........................112
Single Shooting ........................110
Single-shot AF............................92
Slide Show................................163
SLOW SYNC ...........................117
Slow Sync .................................117
Smart teleconverter...................147
Smart Zoom ..............................147
244
Smile Detection Sensitivity
indicator ............................... 145
Smile Shutter ........................... 145
Soft Focus ................................ 129
Soft High-key........................... 129
Software ................................... 199
Specify Printing ....................... 168
Sports Action ............................. 71
Spot (AF area)............................ 95
Spot (Metering Mode) ............. 109
sRGB........................................ 151
Standard ................................... 139
STD.......................................... 139
SteadyShot function................... 60
Still/Movie Select .................... 160
Strap ........................................... 21
Style box .................................. 130
Sunset......................................... 71
Superior Auto............................. 69
Sweep Panorama........................ 73
T
T10 ............................................. 76
T8 ............................................... 76
Tele-zoom Cont. Priority AE..... 76
Toy Camera ............................. 129
Tracking focus ........................... 95
TV ............................................ 172
U
Underexposure ......................... 165
Upload Settings........................ 185
Index
USB.......................................... 204
USB Connection ...................... 204
USB LUN Setting .................... 204
V
Version..................................... 198
View Mode .............................. 160
Viewfinder ................................. 17
Viewfinder Bright. ................... 178
Viewing image ................... 66, 160
Viewing images on a TV screen
............................................. 172
Volume Settings................... 44, 66
W
WB ........................................... 133
WB bracket .............................. 113
White Balance.......................... 133
Wide (AF area) .......................... 95
Wind Noise Reduct. ................. 159
Wireless (Flash Mode)............. 115
Wireless Remote Commander
............................................. 114
X
X.FINE..................................... 139
Z
Index
Zone (AF area)........................... 95
Zoom .......................... 63, 147, 160
245